Blog

  • How to Get Rid of Squirrels in Your Roof: A Safe Guide

    How to Get Rid of Squirrels in Your Roof: A Safe Guide

    Hearing scratching, scurrying, or thumping noises coming from above your ceiling can be incredibly stressful. It disrupts your sleep, damages your peace of mind, and signals a potential structural threat to your home. If you are asking, “How do you get rid of squirrels in your roof,“ you are not alone; thousands of US homeowners face this exact challenge every year, especially during the cooler months when these agile rodents seek warmth and shelter.

    This guide provides a comprehensive, step-by-step approach to resolving this issue safely, legally, and effectively. We will cover identification, humane eviction techniques, exclusion strategies, and prevention methods to ensure your attic remains squirrel-free for good.

    Why Are Squirrels in My Attic?

    Before attempting removal, it is crucial to understand why they are there. Squirrels do not enter homes out of malice; they enter out of survival instinct.

    The Search for Shelter and Warmth

    During autumn and winter, outdoor temperatures drop, and natural food sources become scarce. Attics offer an ideal environment: they are dry, insulated, and protected from predators like hawks and foxes. According to wildlife experts, a single female squirrel can cause significant damage by tearing up insulation to build nests for her young.

    Easy Access Points

    Squirrels are excellent climbers. They can scale brick, wood, and vinyl siding with ease. Common entry points include:

    • Damaged roof vents.
    • Gaps around chimneys.
    • Loose fascia boards.
    • Overhanging tree branches that touch the roofline.

    Understanding these motivations helps you target your solution more effectively. You aren’t just removing an animal; you are securing your home against a persistent survivor.
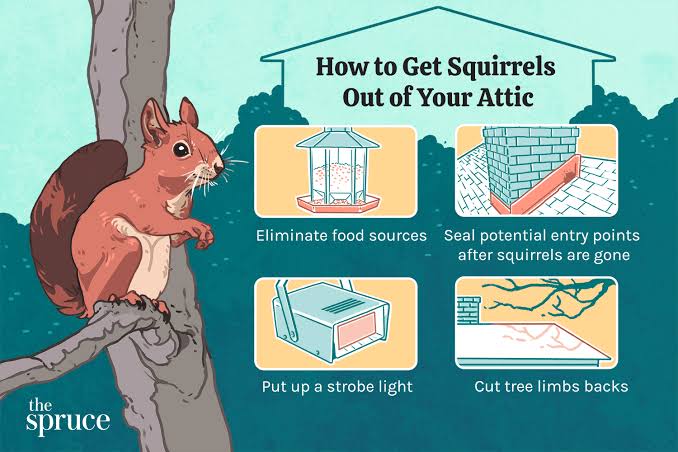
    How Do You Get Rid Of Squirrels In Your Roof

    Step 1: Confirm the Presence and Identify the Species

    Not all noises in the attic are squirrels. Raccoons, rats, and even birds can create similar disturbances. Misidentification can lead to ineffective treatment or legal issues, as some wildlife species are protected by law.

    Signs of Squirrel Infestation

    • Noise Pattern: Squirrels are diurnal (active during the day). If you hear loud scampering primarily at dawn and dusk, it is likely squirrels. Nocturnal noises suggest raccoons or rats.
    • Droppings: Squirrel droppings are small, oblong, and often found in clusters near entry points. They are larger than mouse droppings but smaller than rat feces.
    • Chew Marks: Look for gnawed wood, wires, or insulation materials. Squirrels have incisors that grow continuously, requiring them to chew constantly to keep them filed down.

    Expert Note: Always wear gloves and a mask when inspecting droppings or insulation. Squirrel waste can carry diseases such as leptospirosis and salmonella. For detailed information on zoonotic diseases associated with wildlife, refer to the Centers for Disease Control and Prevention guidelines or general wildlife health resources on Wikipedia.

    Step 2: Humane Eviction Methods

    Once confirmed, the goal is to encourage the squirrels to leave voluntarily. Never seal entry points while animals are still inside. This traps them, leading to death, decomposition smells, and aggressive behavior as they try to escape.

    Method 1: One-Way Exclusion Devices

    This is the most effective and humane professional method.

    1. Identify Active Entries: Watch your roof at dawn to see where squirrels exit.
    2. Install the Device: Place a one-way exclusion funnel or net over the primary entry hole. These devices allow squirrels to push their way out but prevent them from re-entering.
    3. Seal Secondary Holes: Close all other potential entry points with steel wool or hardware cloth, leaving only the main exit open with the device.
    4. Wait: Give it 3–5 days. Check daily to ensure all animals have exited.

    Method 2: Natural Repellents

    While less reliable than exclusion devices, repellents can work for minor cases or as a deterrent.

    • Predator Urine: Fox or coyote urine granules can be placed near entry points. The scent signals danger.
    • Strong Scents: Soak rags in apple cider vinegar, peppermint oil, or ammonia and place them in the attic. Squirrels have sensitive noses and dislike these strong odors.
    • Note: Repellents need frequent reapplication and may lose effectiveness as squirrels become habituated.

    Method 3: Light and Noise Deterrence

    Squirrels prefer dark, quiet spaces.

    • Place a bright LED work light in the attic.
    • Play a radio tuned to a talk station at moderate volume.
    • Combine this with scent repellents for a multi-sensory deterrent effect.

    Step 3: Seal and Fortify Your Home

    After confirming the attic is empty, immediate action is required to prevent re-entry. Squirrels can squeeze through holes as small as 1.5 inches.

    Materials That Work

    MaterialEffectivenessDurabilityBest Use Case
    Hardware Cloth (Wire Mesh)HighHighCovering vents, chimneys, and large gaps.
    Steel WoolMediumLowStuffing into small cracks before sealing.
    Expanding FoamLowLowOnly as a filler behind metal mesh; squirrels can chew through foam alone.
    Metal FlashingHighHighRepairing damaged roof edges or fascia.

    Step-by-Step Sealing Process

    1. Inspect the Exterior: Walk around your house. Look for gaps in soffits, eaves, and rooflines.
    2. Trim Trees: Cut back any tree branches within 6–8 feet of your roof. This removes the “bridge” squirrels use to access your home.
    3. Install Chimney Caps: Ensure your chimney has a sturdy, mesh-covered cap.
    4. Secure Vents: Replace plastic vent covers with metal ones or cover existing vents with hardware cloth (ensure airflow is not restricted).
    5. Seal Gaps: Use caulk for tiny cracks and steel wool packed tightly into larger holes, then cover with metal flashing or mesh.

    Step 4: Cleanup and Sanitization

    Squirrel infestations leave behind more than just noise. They leave urine, feces, and nesting materials that can harbor pathogens and attract insects.

    • Remove Nesting Material: Wear an N95 mask and heavy-duty gloves. Bag all insulation and nesting debris in heavy-duty trash bags.
    • Disinfect: Spray affected areas with an enzymatic cleaner designed to break down organic waste and eliminate odors. Bleach is not always effective on porous surfaces like wood beams.
    • Replace Insulation: If insulation is heavily soiled, it is best to remove and replace it. Contaminated insulation loses its R-value and poses health risks.

    Frequently Asked Questions (FAQ)

    1. Is it legal to trap and relocate squirrels?

    Laws vary significantly by state and municipality in the US. In many states, relocating wildlife is illegal without a permit because it can spread disease and disrupt local ecosystems. Always check with your local Department of Natural Resources (DNR) or Fish and Wildlife agency before trapping. Humane exclusion is generally the preferred and legal method.

    2. Can squirrels chew through metal?

    Squirrels cannot chew through thick metal like hardware cloth or steel flashing. However, they can easily chew through aluminum foil, thin plastic, wood, vinyl, and even soft lead flashing. Always use galvanized steel mesh (at least 1/4 inch gauge) for exclusion.

    3. How long does it take to get rid of squirrels?

    Using one-way exclusion devices, the process typically takes 3 to 7 days. If using repellents alone, it may take weeks and is less guaranteed. The key is patience and ensuring all animals, including babies, have left before sealing entries.

    4. What if there are baby squirrels in the attic?

    If it is spring or early summer, there may be dependent babies. Mothers will not abandon their young. If you exclude the mother, the babies will die inside, causing severe odor and maggot issues. In this case, wait until the babies are old enough to follow the mother (usually 6–8 weeks) or consult a professional wildlife rehabilitator who can safely reunite them.

    5. Will mothballs keep squirrels away?

    Mothballs contain naphthalene or paradichlorobenzene, which are toxic pesticides. While the smell may deter squirrels initially, using them in attics is dangerous for humans and pets due to toxic fumes. Furthermore, their use indoors is often illegal. Stick to safer, natural repellents like peppermint oil or predator urine.

    Conclusion

    Dealing with squirrels in your roof is a manageable problem if approached with patience and the right strategy. By understanding how do you get rid of squirrels in your roof through humane exclusion, proper sealing, and sanitation, you protect both your home’s integrity and the welfare of the wildlife.

    Remember, the most critical step is prevention. Once the squirrels are gone, invest time in trimming trees and sealing entry points. This proactive approach saves you money and stress in the long run.

    If you found this guide helpful, please share it on social media to help friends and neighbors tackle their own wildlife challenges. A squirrel-free home is a peaceful home!
  • What Is The Angle Of A 5 12 Pitch Roof?

    What Is The Angle Of A 5 12 Pitch Roof?

    Have you ever looked at a blueprint or listened to a contractor discuss roofing specs and felt confused by terms like “5/12 pitch”? You are not alone. Many homeowners struggle to visualize what these ratios mean in real life, especially when trying to plan for solar panels, skylights, or aesthetic renovations. Understanding what is the angle of a 5 12 pitch roof is crucial for making informed decisions about your home’s exterior, drainage efficiency, and overall architectural style.

    In this guide, we will break down the math, explain the practical implications, and help you determine if this specific roof slope is right for your project.

    The Exact Answer: Converting 5/12 Pitch to Degrees

    Let’s get straight to the point. If you are asking what is the angle of a 5 12 pitch roof, the precise answer is approximately 22.62 degrees.

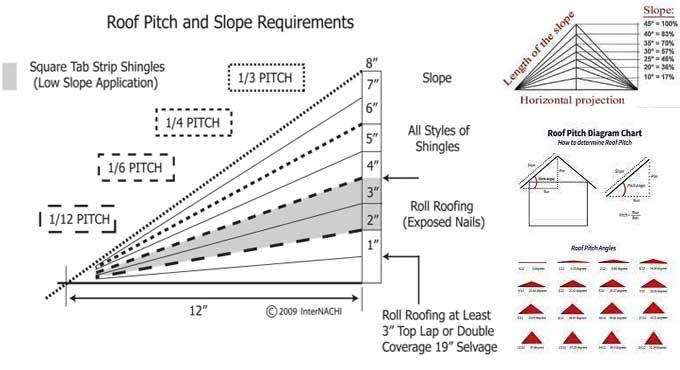
    In the construction industry, roof pitch is rarely expressed in degrees initially. Instead, it is described as a ratio of vertical rise to horizontal run. A “5/12 pitch” means that for every 12 inches of horizontal distance (the run), the roof rises 5 inches vertically (the rise).

    Why Isn’t It Just Called 22.6 Degrees?

    While degrees are standard in geometry and engineering, carpenters and roofers in the United States prefer the rise-over-run method because it is easier to measure on-site using a tape measure and a level. However, knowing the degree equivalent is vital for:

    • Ordering prefabricated trusses.
    • Calculating solar panel tilt angles.
    • Ensuring compliance with local building codes that may specify maximum slopes in degrees.

    To calculate this yourself, you use basic trigonometry. The formula involves the arctangent function: Angle=arctan⁡(RiseRun)Angle=arctan(RunRise​) Angle=arctan⁡(512)≈22.619∘Angle=arctan(125​)≈22.619∘

    For most practical purposes, rounding this to 22.6 degrees is sufficiently accurate.

    Understanding the Geometry: Rise, Run, and Rafter Length

    To truly grasp the concept, we need to look beyond just the angle. A 5/12 pitch creates a specific triangle that dictates the length of your rafters and the amount of material you will need.

    The Pythagorean Theorem in Roofing

    When framing a roof, you need to know the length of the rafter (the hypotenuse of the triangle). Using the Pythagorean theorem (a2+b2=c2a2+b2=c2):

    • Rise (a): 5 inches
    • Run (b): 12 inches
    • Rafter Length (c): 52+122=25+144=169=1352+122​=25+144​=169​=13 inches

    This creates a convenient “5-12-13” triangle. This means for every foot of horizontal run, your rafter will be 13 inches long. This ratio is helpful for contractors estimating lumber costs quickly without complex calculators.

    Visualizing the Slope

    A 22.6-degree angle is considered a low-to-moderate slope. It is not flat, but it is also not steep.

    • Flat Roofs: 0/12 to 2/12 (0°–9.5°)
    • Low Slope: 3/12 to 4/12 (14°–18.4°)
    • Conventional Slope: 5/12 to 9/12 (22.6°–36.9°)
    • Steep Slope: 10/12 and above (39.8°+)

    As you can see, a 5/12 pitch sits comfortably at the lower end of the “conventional” category. It is steep enough to shed water effectively but gentle enough to walk on with relative safety during maintenance.

    What Is The Angle Of A 5 12 Pitch Roof

    Is a 5/12 Roof Pitch Good for Your Home?

    Choosing a roof pitch is not just about aesthetics; it impacts functionality, cost, and longevity. Here is a breakdown of the pros and cons specific to a 5/12 slope.

    Advantages of a 5/12 Pitch

    1. Cost-Effective Construction: Because the slope is moderate, it requires less structural support than steeper roofs. Framing is simpler, and workers can install shingles more quickly and safely, reducing labor costs.
    2. Walkability: Safety is a major concern for homeowners who need to clean gutters or inspect chimneys. A 22.6-degree angle is generally considered safe to walk on with proper footwear, unlike steeper pitches which require harnesses and scaffolding.
    3. Material Versatility: Most standard roofing materials, including asphalt shingles, metal panels, and clay tiles, are approved for use on a 5/12 pitch. You are not limited to specialized membrane systems required for flat roofs.
    4. Attic Space: While not as spacious as a 9/12 or 12/12 pitch, a 5/12 roof still provides usable attic space for storage or HVAC equipment, unlike low-slope roofs which often leave little room above the ceiling joists.

    Disadvantages to Consider

    1. Water Drainage: While adequate for most climates, a 5/12 pitch does not shed water as rapidly as steeper roofs. In areas with heavy snowfall, snow may accumulate rather than slide off, potentially leading to ice dams if insulation and ventilation are not properly managed.
    2. Aesthetic Limitations: For certain architectural styles, such as Victorian or Tudor, a 5/12 pitch may appear too flat and lack the dramatic silhouette associated with those designs.
    3. Debris Accumulation: Leaves and pine needles are more likely to stick to a moderate slope compared to a steep one, requiring more frequent gutter cleaning.
    Feature5/12 Pitch (22.6°)8/12 Pitch (33.7°)
    WalkabilityEasy/ModerateDifficult/Dangerous
    Material CostLowerHigher (more surface area)
    Snow SheddingModerateExcellent
    Attic VolumeModerateHigh
    Wind ResistanceGoodBetter (less uplift surface)

    How to Measure Your Roof Pitch Accurately

    If you are unsure whether your existing roof is a 5/12 pitch, you can verify it with a simple DIY test. You will need a 12-inch level and a tape measure.

    1. Safety First: Ensure you are on a stable ladder or securely on the roof. Never attempt this in wet or windy conditions.
    2. Place the Level: Hold the level horizontally against the bottom edge of a rafter or on the roof surface itself. Ensure the bubble is centered, indicating it is perfectly level.
    3. Measure the Rise: At the 12-inch mark on the level, measure the vertical distance from the bottom of the level to the roof surface.
    4. Read the Result: If the vertical distance is exactly 5 inches, you have a 5/12 pitch. If it is 4 inches, it is a 4/12 pitch, and so on.

    For more detailed technical definitions on roof framing, you can refer to general construction standards outlined on Wikipedia’s Roof page.

    Frequently Asked Questions (FAQ)

    1. Can I install solar panels on a 5/12 pitch roof?

    Yes, absolutely. A 5/12 pitch (22.6 degrees) is actually quite close to the optimal tilt angle for solar panels in many parts of the United States, which typically ranges between 20 and 35 degrees depending on latitude. This means you may not even need expensive tilting mounts, allowing for a flush, sleek installation that maximizes energy production.

    2. What is the minimum pitch for asphalt shingles?

    Most manufacturers require a minimum pitch of 2/12 or 4/12 for standard asphalt shingles, depending on the underlayment used. A 5/12 pitch is well above this minimum threshold, making it an excellent choice for asphalt shingles without needing special adhesive strips or double-layer underlayment required for lower slopes.

    3. Does a 5/12 roof handle snow well?

    It handles moderate snow well, but it is not ideal for regions with extremely heavy, wet snowfall. On a 22.6-degree slope, snow may stick rather than slide. If you live in a high-snow area, ensure your roof structure is rated for the additional load, and consider installing heat cables to prevent ice dams at the eaves.

    4. How much more material do I need for a 5/12 roof compared to a flat roof?

    Because of the slope, the surface area of a 5/12 roof is greater than the footprint of the house. Specifically, the multiplier for a 5/12 pitch is approximately 1.083. This means you need about 8.3% more roofing material than the square footage of your floor plan. For example, a 1,000 sq. ft. floor plan would require roughly 1,083 sq. ft. of roofing material.

    5. Is a 5/12 pitch suitable for metal roofing?

    Yes, metal roofing performs exceptionally well on a 5/12 pitch. Metal panels are smooth and shed water efficiently, even at lower slopes. In fact, standing seam metal roofs can often be installed on pitches as low as 1/12, so a 5/12 pitch provides a significant safety margin for water tightness and durability.

    Conclusion

    Understanding what is the angle of a 5 12 pitch roof empowers you to make smarter decisions about your home improvement projects. At 22.6 degrees, this pitch offers a sweet spot between affordability, safety, and functionality. It is steep enough to protect your home from water damage and compatible with almost all roofing materials, yet gentle enough to keep construction costs down and maintenance accessible.

    Whether you are building a new home, replacing an old roof, or installing solar panels, a 5/12 pitch is a reliable, time-tested choice for modern American housing.

    Found this guide helpful? Share it with your friends on Facebook or Pinterest who might be planning their next roofing project!

  • Metal vs. Shingle Roof Cost: The Real Truth

    Metal vs. Shingle Roof Cost: The Real Truth

    Standing on your porch and looking up at an aging roof can feel overwhelming. You know it’s time for a replacement, but the price tags attached to different materials can be staggering. Many homeowners immediately ask, “Does a metal roof cost more than a shingle roof?“ The short answer is yes, the initial installation of a metal roof is significantly higher. However, that sticker shock often hides a deeper financial reality involving longevity, maintenance, and energy savings. In this guide, we will break down the true costs so you can make a decision that protects both your home and your wallet.

    Understanding the Upfront Price Tag

    When comparing metal roofing vs. asphalt shingles, the most immediate difference is the installation cost. This is where the “sticker shock” occurs.

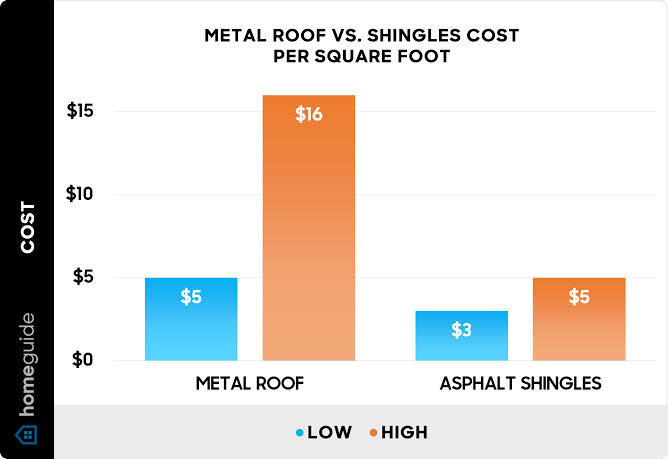
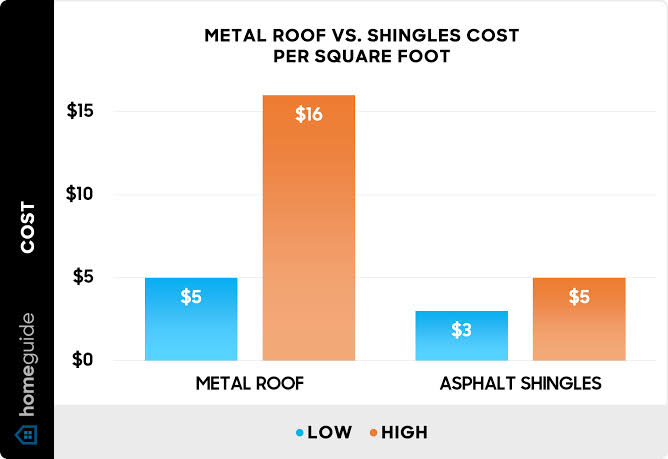
    Asphalt shingles are the most common roofing material in the United States, largely because they are affordable and widely available. A standard architectural shingle roof typically costs between $3.50 and $5.50 per square foot installed. For an average 2,000-square-foot home, you might pay between $7,000 and $11,000.

    In contrast, metal roofing systems vary widely based on the type of metal (steel, aluminum, copper, or zinc). Standing seam metal roofs, which are considered premium, generally range from $9.00 to $14.00 per square foot installed. For that same 2,000-square-foot home, the cost could jump to $18,000–$28,000.

    Why is there such a disparity?

    • Material Costs: Metal is a commodity with fluctuating prices, whereas asphalt is a petroleum byproduct that remains relatively cheap to produce.
    • Labor Intensity: Installing metal requires specialized skills, precise measuring, and often more time than nailing down shingle bundles.
    • Complexity: Metal roofs often require custom flashing and trim work that asphalt systems do not.

    Long-Term Value: The Lifespan Factor

    To truly answer whether a metal roof costs more, you must look beyond the day of installation. You need to calculate the cost per year of service.

    Asphalt shingles have a limited lifespan. Even high-quality architectural shingles typically last 15 to 25 years, depending on your climate. In hot, sunny states like Arizona or Texas, UV radiation can degrade shingles faster. In humid regions, algae and moss can shorten their life. This means that over the course of 50 years, you will likely replace an asphalt roof two or three times.

    Metal roofs, however, are built to last. A properly installed standing seam metal roof can last 40 to 70 years. Some copper roofs have been known to last over 100 years.

    Let’s do the math:

    • Asphalt Scenario: You pay $10,000 today. In 20 years, you pay another $12,000 (adjusted for inflation). In 40 years, you pay another $14,000. Total 50-year cost: ~$36,000.
    • Metal Scenario: You pay $22,000 today. You do not replace it for 50+ years. Total 50-year cost: $22,000.

    In this realistic scenario, the metal roof actually costs less over the lifetime of the home, despite the higher upfront fee.

    Does A Metal Roof Cost More Than A Shingle Roof

    Maintenance and Repair Costs

    Another hidden cost factor is maintenance. Asphalt shingles are prone to specific issues that require regular attention:

    • Wind Damage: High winds can lift shingle tabs, leading to leaks.
    • Granule Loss: Over time, the protective granules wash away, exposing the asphalt to UV damage.
    • Cracking: Thermal expansion and contraction can cause shingles to crack in extreme temperatures.

    Metal roofs are incredibly durable. They are resistant to fire, mildew, insects, and rot. While they can dent from large hail, they rarely leak if installed correctly. Most metal roofs come with warranties ranging from 30 to 50 years, whereas shingle warranties often pro-rate after the first decade, leaving you with little coverage when you need it most.

    For more detailed information on the durability of various roofing materials, you can refer to general construction standards outlined on Wikipedia.

    Energy Efficiency and Savings

    One of the most compelling arguments for metal roofing is energy efficiency. Metal roofs reflect solar radiant heat rather than absorbing it. This can reduce cooling costs by 10% to 25%.

    If you live in a warm climate, this savings adds up quickly. Many metal roofs also come with special reflective pigments (cool-roof technology) that meet Energy Star standards. Asphalt shingles, particularly dark ones, absorb heat, transferring it into your attic and forcing your HVAC system to work harder.

    While the energy savings alone may not offset the entire cost difference, they contribute to the overall return on investment (ROI). Additionally, some insurance companies offer discounts of 5% to 15% on homeowners’ insurance premiums for metal roofs due to their fire and wind resistance.

    Resale Value and Curb Appeal

    Does a new roof increase your home’s value? Absolutely. But the type of roof matters.

    Real estate experts note that a metal roof can increase a home’s resale value by 1% to 6%. More importantly, it is a strong selling point. Buyers recognize that they won’t need to worry about roof replacements for decades. It signals a well-maintained, durable home.

    Asphalt shingles are expected. They don’t necessarily boost value; they just maintain it. A new asphalt roof helps sell a home by removing a negotiation hurdle, but it rarely commands a premium price. A metal roof, however, can be a unique feature that sets your property apart in a competitive market.

    Comparison Table: Metal vs. Shingle

    FeatureAsphalt ShinglesMetal Roofing
    Upfront CostLow ($3.50–$5.50/sq. ft.)High ($9.00–$14.00/sq. ft.)
    Lifespan15–25 Years40–70+ Years
    MaintenanceModerate to HighLow
    Energy EfficiencyLow (Absorbs Heat)High (Reflects Heat)
    Weather ResistanceModerateExcellent (Wind/Fire)
    RecyclabilityLow (Landfill waste)High (100% Recyclable)
    Best ForBudget-conscious, Short-term ownersLong-term owners, Eco-conscious

    Frequently Asked Questions (FAQ)

    1. Is it worth paying extra for a metal roof?

    Yes, if you plan to stay in your home for more than 10–15 years. The longevity, lower maintenance, and energy savings make it a financially sound investment over time. If you plan to sell within five years, asphalt may be more practical.

    2. Can I install a metal roof over existing shingles?

    In many cases, yes. This is called a “retrofit” or “overlay.” It can save money on tear-off and disposal costs. However, you must check local building codes and ensure your roof structure can support the additional weight. Always consult a professional roofer before proceeding.

    3. Do metal roofs make noise when it rains?

    This is a common myth. Modern metal roofs are installed with solid sheathing and insulation, just like asphalt roofs. When properly installed, a metal roof is no louder than a shingle roof during rainstorms. In fact, many homeowners find the sound soothing.

    4. Will a metal roof affect my cell phone or Wi-Fi signal?

    Generally, no. While metal can interfere with radio waves, residential roofing does not create a Faraday cage effect that blocks signals inside your home. Your Wi-Fi router and cell phones will function normally. Any minor interference is usually negligible compared to other building materials.

    5. How does hail affect metal roofs compared to shingles?

    Metal roofs are highly resistant to hail. While severe hail (golf ball size or larger) might cause cosmetic dents, it rarely punctures the metal. Asphalt shingles, on the other hand, can crack or lose granules from hail impact, leading to premature aging and potential leaks.

    Conclusion

    So, does a metal roof cost more than a shingle roof? Upfront, absolutely. You will write a bigger check on day one. But when you view your roof as a long-term asset rather than a short-term expense, the perspective shifts. Metal offers unparalleled durability, energy efficiency, and peace of mind that asphalt simply cannot match.

    If you have the budget and plan to stay in your home, metal is the superior choice. If you are flipping a house or working with a tight immediate budget, asphalt remains a reliable, cost-effective option.

    Found this guide helpful? Share it with your friends on Facebook or Pinterest who are also debating their next roofing project! Helping others make informed decisions is just one click away.

  • How Long Does It Take To Put On A Roof?

    How Long Does It Take To Put On A Roof?

    Have you ever stared at your ceiling during a rainstorm, wondering if your current roof will hold up another winter? Or perhaps you are planning a home renovation and need to coordinate schedules with contractors, family members, and neighbors. Understanding how long does it take to put on a roof is crucial for minimizing disruption to your daily life and ensuring your project stays on budget.

    Most homeowners are surprised to learn that a full roof replacement isn’t always a week-long ordeal. In many cases, it can be completed in just a few days. However, the exact timeline depends on a complex mix of materials, weather, and structural integrity. Let’s dive into the details so you can plan with confidence.

    What Is the Average Timeline for a Standard Roof Replacement?

    For the average single-family home in the United States, a complete roof replacement typically takes between 1 to 3 days. This estimate assumes favorable weather conditions and a standard crew size of 4–6 professionals.

    However, “average” is a broad term. The size of your home and the complexity of your roofline play massive roles. A simple gable roof on a 1,500-square-foot ranch-style home might be finished in a single day by an experienced team. Conversely, a multi-story Victorian home with multiple chimneys, skylights, and valleys could take up to a week.

    According to industry standards, professional roofing crews can install approximately 100 to 150 squares (a square equals 100 square feet) of asphalt shingles per day. If your roof is 20 squares (2,000 sq. ft.), you are looking at roughly two days of active labor, excluding setup and cleanup time.

    How Do Different Roofing Materials Affect Installation Time?

    Not all roofs are created equal. The material you choose significantly impacts the installation duration. Here is a breakdown of common roofing materials and their typical installation timelines:

    1. Asphalt Shingles

    • Timeframe: 1–3 Days
    • Why: Asphalt shingles are the most popular roofing material in the US due to their ease of installation. They are lightweight, flexible, and come in pre-cut strips. Most roofing crews are highly specialized in this material, allowing for rapid deployment.

    2. Metal Roofing

    • Timeframe: 3–7 Days
    • Why: Metal roofs require precise measurements and cutting. While standing-seam metal roofs are durable and energy-efficient, the installation process is more labor-intensive. Panels must be aligned perfectly to prevent leaks, and flashing details around penetrations (like vents and pipes) take longer to seal properly.

    3. Clay or Concrete Tiles

    • Timeframe: 5–10 Days
    • Why: Tile roofs are heavy and fragile. Installers must move carefully to avoid breaking tiles. Additionally, the underlying structure often requires reinforcement to support the weight, which adds prep time. The interlocking nature of tiles also means the installation process is slower than nailing down shingles.

    4. Slate Roofing

    • Timeframe: 7–14 Days
    • Why: Slate is a premium, natural stone product. Each slate tile is individually nailed, and the work requires specialized craftsmanship. Because slate is brittle and heavy, the pace of work is deliberately slow to ensure safety and quality.
    MaterialAvg. Installation TimeDifficulty LevelBest For
    Asphalt Shingles1–3 DaysLowBudget-conscious, quick turnaround
    Metal3–7 DaysMediumDurability, modern aesthetics
    Clay/Concrete Tile5–10 DaysHighHot climates, Mediterranean style
    Slate7–14 DaysVery HighHistoric homes, luxury estates
    How Long Does It Take To Put On A Roof

    What Factors Can Delay Your Roofing Project?

    Even with the best-laid plans, unexpected issues can arise. Understanding these variables helps you set realistic expectations.

    Weather Conditions

    Roofing is an outdoor job, making it entirely dependent on the weather. Rain, high winds, or extreme heat can halt work immediately.

    • Rain: Wet decks cannot be covered with new underlayment or shingles, as moisture trapped underneath leads to mold and rot.
    • Wind: High winds make it dangerous for workers to be on the roof and can blow away loose materials.
    • Heat: Extreme temperatures can make asphalt shingles too soft to handle properly, requiring crews to work slower or shift hours to early morning.

    Structural Damage

    Once the old roof is removed, the true condition of the roof deck (the wooden base) is revealed. It is common to find rotted wood, water damage, or insect infestation.

    • Repair Time: Replacing damaged decking adds time. If 10% of your deck needs repair, add half a day to your timeline. If 30% or more is damaged, you could be looking at an additional 1–2 days.

    Permit and Inspection Delays

    In many US municipalities, you need a permit before starting work. While obtaining the permit usually happens before the crew arrives, scheduling the final inspection can sometimes delay the official completion of the project. Always ask your contractor about local building code requirements to ensure compliance.

    Accessibility Issues

    Is your home surrounded by dense trees? Is there limited space for a dumpster and material delivery? Difficult access can slow down the removal of old materials and the lifting of new ones. If the crew has to hand-carry shingles up a ladder because a crane cannot reach the roof, the job will take longer.

    Step-by-Step: The Roofing Installation Process

    Knowing what happens each day can help you understand why the timeline is structured the way it is. Here is a typical workflow for an asphalt shingle replacement:

    1. Day 1: Preparation and Tear-Off
      • The crew arrives early to set up safety equipment and protect your landscaping.
      • Old shingles, underlayment, and flashing are removed.
      • Debris is hauled away or placed in a dumpster.
      • The roof deck is inspected for damage. Any rotten wood is replaced.
    2. Day 2: Underlayment and Flashing
      • A waterproof underlayment (ice and water shield) is installed in critical areas like valleys and eaves.
      • New drip edges and step flashing are installed around chimneys and walls.
      • Starter shingles are applied along the eaves.
    3. Day 3: Shingle Installation and Cleanup
      • The main field of shingles is installed, working from the bottom up.
      • Ridge caps are added for ventilation and aesthetic finish.
      • Final inspection by the foreman.
      • Thorough cleanup using magnetic rollers to pick up stray nails.

    FAQ: Common Questions About Roofing Timelines

    Q: Can I stay in my house while the roof is being replaced?

    A: Yes, most homeowners stay in their homes during the process. However, expect significant noise, vibration, and dust. If you work from home, you may want to arrange alternative workspace for the duration of the project.

    Q: Does the season affect how long it takes to put on a roof?

    A: Indirectly, yes. Summer and fall are peak seasons, so contractors may be booked weeks in advance. Winter installations can be slower due to shorter daylight hours and cold temperatures, which make shingles brittle and harder to seal.

    Q: How long does it take to get a quote and schedule the job?

    A: Getting a quote usually takes 1–3 days after an initial inspection. Scheduling the actual work can vary from 2 weeks to 2 months, depending on the contractor’s backlog and the season.

    Q: What happens if it rains during the project?

    A: Professional roofers monitor weather closely. If rain is forecast, they will either pause work or use tarps to cover exposed sections. They will not leave your home vulnerable to water intrusion overnight if possible.

    Q: Do I need to be home during the installation?

    A: You do not need to be home the entire time, but it is helpful to be available at the start of the day to answer questions and at the end for a walkthrough. Ensure the crew has access to your property and that pets are secured indoors.

    Conclusion

    So, how long does it take to put on a roof? For most American homeowners using asphalt shingles, the answer is 1 to 3 days. While material choices, weather, and structural repairs can extend this timeline, proper planning and hiring a reputable contractor can keep your project on track.

    Remember, a rushed job is rarely a good job. It is better to allow a little extra time for quality craftsmanship than to push for an unrealistic deadline. Once your new roof is installed, you’ll enjoy peace of mind and enhanced curb appeal for decades to come.

    If you found this guide helpful, please share it with friends or family who are considering a home improvement project. Sharing knowledge helps everyone make smarter housing decisions!

  • How Long Does It Take To Put A Roof On?

    How Long Does It Take To Put A Roof On?

    Have you ever stared at your ceiling during a storm, wondering if it will hold up, or perhaps you are simply planning a home renovation and need to schedule your life around the construction noise? It is a common source of anxiety for homeowners. Understanding how long does it take to put a roof on is crucial for minimizing disruption to your daily routine and managing expectations with your family and neighbors.

    The short answer is that most standard residential roof replacements in the United States are completed within one to three days. However, this timeline can fluctuate significantly based on the size of your home, the materials chosen, and the weather conditions. In this comprehensive guide, we will break down exactly what influences these timelines, what you can expect during the process, and how to ensure your project stays on track.

    What Factors Influence Roofing Timelines?

    When asking “how long does it take to put a roof on,” it is essential to realize that no two roofs are identical. Several critical variables dictate the speed of installation.

    1. Roof Size and Complexity

    The square footage of your home is the most obvious factor. A modest 1,500-square-foot ranch-style home with a simple gable roof will be much faster to complete than a 4,000-square-foot Victorian estate with multiple turrets, valleys, and dormers.

    • Simple Roofs: Fewer angles mean less cutting and fitting.
    • Complex Roofs: More waste material, more flashing details, and increased labor hours.

    2. Material Selection

    Not all roofing materials are created equal when it comes to installation speed.

    • Asphalt Shingles: The most popular choice in the US. They are lightweight, easy to handle, and install quickly using nail guns.
    • Metal Roofing: Can be installed relatively quickly if using standing seam panels, but stone-coated steel may take longer due to intricate locking mechanisms.
    • Slate or Clay Tile: These are heavy, fragile, and require specialized skills. A slate roof can take weeks rather than days because each tile must be individually cut and secured.

    3. Weather Conditions

    Roofing is an outdoor job. Rain, high winds, or extreme heat can halt work entirely.

    • Rain: Wet decks cannot have shingles applied as they won’t adhere properly, and moisture trapped under shingles leads to mold.
    • Wind: Safety regulations often prohibit workers from being on steep slopes during high winds.
    • Heat: In states like Arizona or Texas, crews may start at dawn and stop by noon to avoid heat exhaustion, effectively splitting one “day” of work into two partial days.

    4. Crew Size and Experience

    A larger, well-coordinated crew will finish faster. A typical crew consists of 4–6 professionals. If a company sends only two people, a three-day job could stretch into a week. Always ask your contractor about their typical crew size for your specific project scope.

    How Long Does It Take To Put A Roof On

    Step-by-Step: The Roofing Installation Process

    To truly understand the timeline, let’s look at the actual workflow. Knowing what happens each day helps reduce the stress of the unknown.

    Day 1: Preparation and Tear-Off

    The first day is often the loudest and most disruptive.

    1. Site Protection: The crew will lay tarps over your landscaping, AC units, and windows to protect them from falling debris. They may also set up a dumpster nearby.
    2. Tear-Off: Workers remove the old shingles, underlayment, and any rotten wood. This exposes the roof deck (the wooden structure underneath).
    3. Inspection: Once the deck is visible, the foreman inspects it for rot or damage. Note: If significant rot is found, this adds time for carpentry repairs.
    4. Drip Edge and Underlayment: New drip edge metal is installed along the eaves, followed by a waterproof underlayment (often synthetic felt) to protect the deck.

    Day 2: Installation of New Materials

    Assuming the weather holds and no major structural repairs are needed, Day 2 is where the transformation happens.

    1. Flashing Installation: Metal flashing is installed around chimneys, vents, and wall intersections. This is critical for preventing leaks.
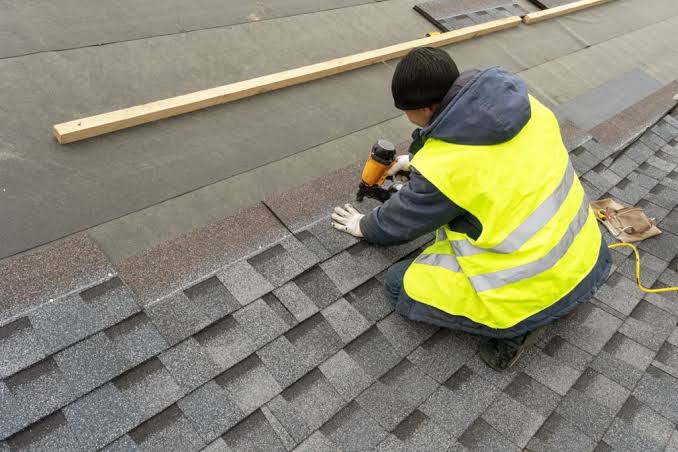
    2. Shingle Application: Crews start from the bottom edge (eave) and work their way up. They use pneumatic nail guns to secure the shingles.
    3. Ridge Vents: Proper ventilation is installed at the peak of the roof to allow hot air to escape, extending the life of the shingles.

    Day 3: Cleanup and Final Inspection

    The final day is about finishing touches and quality control.

    1. Nail Sweep: This is vital. Crews use magnetic sweepers to pick up stray nails from your yard and driveway. Never skip this step.
    2. Gutter Cleaning: Debris from the tear-off is cleared from gutters to ensure proper water flow.
    3. Final Walkthrough: The project manager walks the roof with you (or provides photos) to ensure everything meets code and your satisfaction.

    Comparison: Average Timelines by Material

    To help you plan better, here is a breakdown of estimated installation times for common roofing materials in the US market.

    Material TypeAverage Installation Time (Standard Home)DurabilityCost Estimate
    Asphalt Shingles1–3 Days15–30 Years$
    Metal Roofing3–7 Days40–70 Years$$
    Wood Shakes5–10 Days20–40 Years$
    Slate/Tile2–4 Weeks50–100+ Years$$

    Note: These estimates assume a crew of 4–6 professionals and favorable weather conditions.

    Why Professional Installation Matters

    While DIY might seem tempting to save money, roofing is dangerous and technically complex. According to the Occupational Safety and Health Administration (OSHA), falls are the leading cause of death in construction. Professional roofers are trained in safety protocols, proper ventilation techniques, and local building codes.

    Furthermore, manufacturer warranties often require professional installation. If you install it yourself and it leaks, you may void the warranty on the materials themselves. Investing in a certified installer ensures that your roof performs as intended for its full lifespan.

    Frequently Asked Questions (FAQ)

    1. Can a roof be replaced in one day?

    Yes, it is possible for smaller homes (under 2,000 sq. ft.) with simple rooflines and asphalt shingles. However, this requires a large, efficient crew and perfect weather. Do not pressure a contractor to rush; quality takes precedence over speed.

    2. Does rain delay roofing projects?

    Absolutely. Roofers cannot install shingles on a wet deck. Even light drizzle can cause delays. If it rains during the tear-off phase, the crew will cover the exposed deck with tarps until it dries completely, which can add 24–48 hours to the timeline.

    3. Will I need to leave my house during the roofing process?

    You do not have to leave, but many homeowners choose to work elsewhere or stay with relatives due to the noise and vibration. The hammering and nail gun sounds can be intense. If you have pets or small children, arranging alternative care for the day of the tear-off is highly recommended.

    4. What happens if rotten wood is found under my old roof?

    This is a common occurrence. Most contracts include a clause for “decking repair.” If rot is found, the crew will replace the damaged plywood or OSB boards. This usually adds a few hours to the project, not days, unless the damage is extensive. Ensure your contract specifies the cost per sheet of replacement wood.

    5. How long does a roof inspection take before replacement?

    A pre-installation inspection typically takes 30–60 minutes. The inspector will check the current condition, measure the roof, and look for underlying issues. This step is crucial for providing an accurate quote and timeline.

    Conclusion

    So, how long does it take to put a roof on? For the majority of American homeowners using asphalt shingles, the answer is 1 to 3 days. By understanding the factors involved—such as roof complexity, material choice, and weather—you can plan accordingly and minimize the inconvenience.

    Remember, a rushed job is rarely a good job. Choose a reputable contractor who prioritizes safety and quality over speed. A well-installed roof protects your biggest investment for decades to come.

    Did you find this guide helpful? Share it with your neighbors who might be considering a roof replacement, or pin it to your home improvement board on Pinterest for future reference!

  • Why Are A C Units On The Roof In Arizona?

    Why Are A C Units On The Roof In Arizona?

    If you have ever driven through Phoenix, Tucson, or Scottsdale, you have likely noticed a distinct architectural feature: large, boxy air conditioning units sitting prominently on top of homes and businesses. It is a curious sight for newcomers, leading many to ask, why are AC units on the roof in Arizona?

    The answer lies in a unique combination of extreme climate challenges, structural engineering, and practical lifestyle needs. In this guide, we will break down the logic behind this regional preference, helping you understand whether a rooftop unit might be the right choice for your property or simply satisfying your curiosity about desert living.

    The Space-Saving Advantage in Dense Urban Areas

    One of the primary drivers for placing HVAC (Heating, Ventilation, and Air Conditioning) systems on the roof is simple real estate economics. In Arizona’s major metropolitan areas, land is at a premium.

    Maximizing Yard Usability

    For residential properties, especially in newer subdivisions or urban infill projects, every square foot of backyard space counts. A traditional ground-level condenser unit requires a concrete pad, clearance space for airflow, and landscaping buffers to hide the noise and visual clutter.

    By moving the unit to the roof:

    • You reclaim yard space for pools, patios, or xeriscaping.
    • You eliminate ground-level noise near bedroom windows or outdoor entertainment areas.
    • You improve curb appeal by removing bulky machinery from the front or side yards.

    This is particularly relevant in Arizona, where outdoor living is a year-round activity due to the mild winters and warm evenings. Homeowners prefer not to have their view of the sunset obstructed by a humming metal box.

    Structural Integrity and Foundation Stability

    Arizona’s soil composition plays a surprising role in HVAC placement. Much of the state sits on expansive clay soils or loose desert sand, which can shift significantly with temperature changes and moisture levels.

    Avoiding Ground Settlement Issues

    Ground-mounted units require a stable concrete slab. However, if the soil shifts—a common occurrence during the monsoon season or after rare heavy rains—the slab can crack or tilt. This misalignment can damage the compressor, reduce efficiency, and void warranties.

    Roof-mounted units, by contrast, are secured to the building’s structural framework. Modern Arizona construction codes require robust roofing structures capable of supporting significant weight loads. By anchoring the unit to the roof trusses or reinforced beams, technicians ensure the system remains level and stable, regardless of ground conditions.

    Expert Insight: According to structural engineers, distributing the weight of an HVAC unit across the roof’s load-bearing walls is often more predictable than relying on isolated ground pads in shifting soil zones.

    Why Are A C Units On The Roof In Arizona

    Enhanced Security and Vandalism Prevention

    While Arizona is generally safe, like any major region, it faces issues with theft and vandalism. Copper is a valuable commodity, and AC units are rich in copper wiring and coils.

    Protecting Your Investment

    Ground-level units are easy targets for thieves looking to strip copper for scrap metal. A rooftop unit is significantly harder to access without specialized equipment like ladders or lifts. This added layer of difficulty acts as a powerful deterrent.

    • Reduced Theft Risk: Thieves are less likely to attempt a roof climb.
    • Less Animal Interference: Ground units often become shelters for snakes, scorpions, and rodents, which can chew through wires. Roof units are far less accessible to local wildlife.

    Improved Air Quality and Debris Management

    The desert environment is dusty. Sandstorms, known locally as “haboobs,” can blanket an area in fine particulate matter in minutes. Additionally, Arizona is home to diverse vegetation, including palo verde trees and mesquite, which shed leaves and flowers.

    Keeping Coils Clean

    Ground-level units are prone to sucking in dust, dirt, and plant debris from the immediate surrounding area. This clogs the condenser coils, forcing the system to work harder and reducing its lifespan.

    Rooftop units benefit from:

    1. Better Airflow: Winds are generally stronger and cleaner at higher elevations.
    2. Less Ground Dust: They are further away from the densest layer of settled dust and kicked-up dirt from foot traffic.
    3. Easier Maintenance Access: While it may seem counterintuitive, technicians often find it easier to clean a unit that isn’t surrounded by overgrown bushes or buried in sand drifts.

    However, it is important to note that roof units still require regular maintenance to remove bird droppings and wind-blown debris.

    Efficiency in Extreme Heat

    Arizona summers are brutal, with temperatures regularly exceeding 110°F (43°C). How does a rooftop location affect performance in such heat?

    The Thermodynamics of Height

    Hot air rises. During the day, the ground surface absorbs solar radiation and becomes significantly hotter than the air just a few feet above it. This phenomenon, known as the urban heat island effect, means that ground-level ambient temperatures can be 5–10 degrees hotter than rooftop temperatures.

    By placing the condenser unit on the roof:

    • The unit draws in slightly cooler air.
    • The heat exchange process is more efficient.
    • The compressor does not have to work as hard to dissipate heat.

    While the difference may seem small, over thousands of hours of operation during an Arizona summer, this efficiency gain translates to lower electricity bills and reduced wear on the system.

    Comparison: Rooftop vs. Ground-Level Units in Arizona

    To help you visualize the trade-offs, here is a quick comparison table:

    FeatureRooftop Unit (RTU)Ground-Level Unit
    Space UsageSaves yard spaceConsumes yard space
    SecurityHigh (hard to access)Low (easy target for theft)
    Noise LevelQuiet indoors/outdoorsAudible near patio/windows
    MaintenanceRequires ladder/safety gearEasy access for technicians
    Heat ExposureSlightly cooler ambient airHotter due to ground radiation
    Installation CostHigher (structural reinforcement)Lower (standard pad)
    LifespanOften longer (less debris)Variable (depends on care)

    Installation Considerations and Safety

    It is crucial to understand that installing an AC unit on a roof is not a DIY project. It requires strict adherence to building codes and safety standards.

    Key Steps for Proper Installation

    1. Structural Assessment: A licensed engineer must verify that the roof can support the static weight of the unit and the dynamic load during high winds.
    2. Reinforcement: Additional framing or steel supports may be needed under the roofing material.
    3. Vibration Isolation: Rubber mounts or springs are installed to prevent vibration from transferring into the house structure, which could cause rattling or cracks.
    4. Weatherproofing: The penetration points for refrigerant lines and electrical conduits must be sealed with high-quality flashing to prevent leaks during monsoon rains.

    For more detailed information on HVAC standards and safety regulations, you can refer to general industry guidelines provided by Wikipedia’s entry on HVAC.

    FAQ Section

    1. Do rooftop AC units leak water into the house?

    No, not if installed correctly. Professional installers use specialized flashing and sealants around all penetrations. Regular roof inspections should include checking these seals, especially after severe weather events.

    2. Are rooftop units louder than ground units?

    Actually, they are often quieter for the occupants inside the home. Since the motor and fan are located above the living space, the noise is directed upward and outward rather than into the backyard or through ground-floor walls.

    3. How do technicians service rooftop units safely?

    HVAC technicians are trained in fall protection and use harnesses, ladders, and sometimes lifts. Reputable companies carry insurance specifically for roof work. Always verify that your HVAC provider is licensed and insured before hiring them.

    4. Can I convert my ground unit to a rooftop unit?

    It is possible but expensive. It involves reinforcing the roof, running new refrigerant lines, and potentially upgrading electrical circuits. For most existing homes, it is more cost-effective to replace the ground unit with a high-efficiency model unless you are undergoing a major renovation.

    5. Do rooftop units last longer in Arizona?

    Generally, yes. Because they are exposed to less ground-level dust, debris, and potential flooding from monsoon rains, rooftop units often experience less corrosion and clogging. However, they are exposed to more intense UV radiation, so protective coatings are recommended.

    Conclusion

    So, why are AC units on the roof in Arizona? It is a smart adaptation to the desert environment. By utilizing rooftop space, homeowners gain valuable yard area, improve security against theft, and benefit from slightly cooler operating temperatures. While the initial installation may be more complex, the long-term benefits in terms of efficiency, cleanliness, and lifestyle quality make it a preferred choice for many Arizonans.

    Whether you are building a new home or considering an upgrade, understanding these factors can help you make an informed decision about your cooling needs.

    Found this guide helpful? Share it with your friends on social media who are puzzling over those rooftop boxes, or leave a comment below with your own experiences with Arizona HVAC systems!

  • Stop Raccoons on Roof at Night: Safe Guide

    Stop Raccoons on Roof at Night: Safe Guide

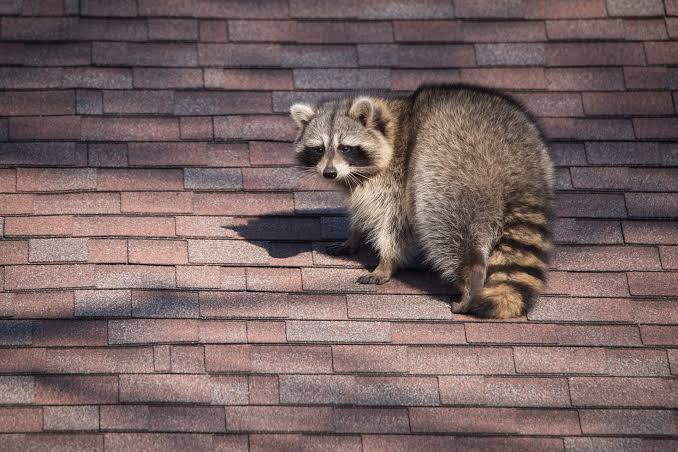
    Hearing heavy thuds and scratching sounds above your head while you’re trying to sleep is every homeowner’s nightmare. It’s not just annoying; it’s a sign that wild animals have claimed your sanctuary as their own. If you are wondering how to get rid of raccoon on roof at nights, you are not alone, and more importantly, there are safe, effective ways to handle this without harming the animals or violating local wildlife laws.

    Raccoons are intelligent, adaptable, and surprisingly strong creatures. Once they decide your roof is a good spot for denning or foraging, they rarely leave on their own. This guide will walk you through immediate actions, long-term solutions, and preventive measures based on expert wildlife management standards.

    Why Are Raccoons on My Roof?

    Before we dive into removal, it is crucial to understand why they are there. Raccoons do not climb onto roofs for fun. They are driven by three primary instincts: shelter, food, and safety.

    According to data from the Centers for Disease Control and Prevention (CDC), raccoons are common carriers of rabies and other zoonotic diseases, making close contact dangerous. However, their presence on your roof usually indicates an entry point into your attic or a nearby food source.

    Common Attractions Include:

    • Warmth: Attics provide excellent insulation during cold months.
    • Safety: Elevated positions protect them from ground predators like coyotes or dogs.
    • Food Access: Overhanging tree branches or unsecured trash bins nearby make your home a buffet.

    Understanding the motive helps you choose the right removal strategy. If they are just passing through, deterrents may work. If they have nested, you need a more robust approach.

    Immediate Steps to Deter Raccoons Tonight

    If you hear noises right now, you want immediate relief. While these methods may not solve the problem permanently, they can encourage the animal to leave temporarily.

    1. Use Light and Sound

    Raccoons are nocturnal and prefer darkness and quiet. Disrupting their comfort zone can force them out.

    • Bright Lights: Set up floodlights or motion-sensor lights directed at the area where you hear the noise. Sudden brightness startles them.
    • Radio Noise: Place a battery-operated radio near the suspected entry point. Talk radio stations are often more effective than music because the human voice suggests presence.

    2. Apply Natural Repellents

    Raccoons have a highly sensitive sense of smell. Certain scents are overwhelming to them.

    • Ammonia: Soak rags in ammonia and place them in sealed containers with holes poked in the lid near the roof access points. The smell mimics predator urine.
    • Cayenne Pepper: Mix cayenne pepper with water and spray it around the perimeter of the roof (if safe to access). Note: Rain will wash this away, so reapplication is necessary.

    Warning: Never use mothballs. They are toxic to pets, children, and the environment, and their effectiveness against raccoons is largely a myth.

    How To Get Rid Of Raccoon On Roof At Night

    How to Identify Entry Points

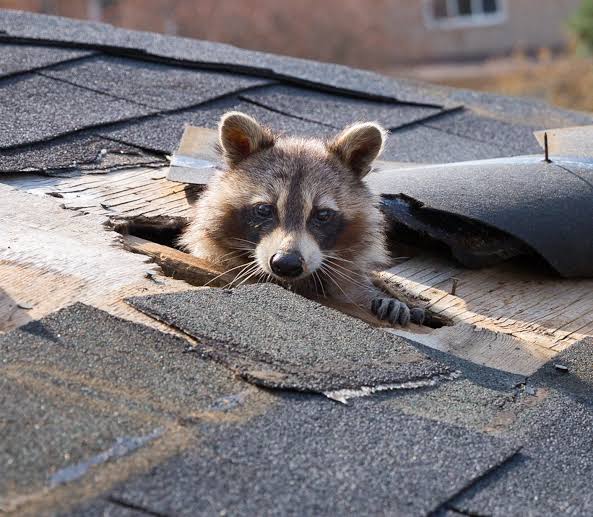
    You cannot solve the problem if you don’t know how they are getting in. Raccoons are excellent climbers and can tear through weak roofing materials.

    Inspection Checklist:

    1. Roof Vents: Check for torn screens or displaced caps.
    2. Chimneys: Ensure the chimney cap is secure. Raccoons love chimneys.
    3. Eaves and Soffits: Look for gaps, rot, or loose boards.
    4. Tree Branches: Any branch within 6–8 feet of your roof acts as a bridge.

    Use a flashlight to look for grease marks or fur snippets around these areas. These are telltale signs of frequent entry and exit.

    Humane Trapping and Removal

    If deterrents fail, trapping may be necessary. However, please note that laws regarding raccoon trapping vary significantly by state in the US. In many states, it is illegal for homeowners to trap and relocate wildlife without a license. Always check your local Department of Natural Resources (DNR) regulations first.

    Step-by-Step Guide to Live Trapping

    If legal in your area, follow these steps for humane removal:

    1. Choose the Right Trap: Use a large live cage trap (minimum 32x10x12 inches). Brands like Havahart are popular among professionals.
    2. Bait Effectively: Raccoons are omnivores. Effective baits include:
      • Wet cat food
      • Marshmallows
      • Fresh fruit (apples or grapes)
      • Sardines in oil
    3. Placement: Set the trap on the roof only if it is flat and safe. Otherwise, place it at the base of the tree or near the downspout where they descend.
    4. Check Frequently: You must check the trap every few hours. Leaving a trapped animal exposed to weather or predators is inhumane and potentially illegal.
    5. Relocation: If permitted, release the animal at least 10 miles away in a suitable habitat with water sources. Note: Relocating raccoons often leads to their death due to territorial conflicts with other raccoons, which is why professional exclusion is preferred.

    Professional Exclusion: The Permanent Solution

    Trapping removes the current tenant, but it doesn’t stop the next one from moving in. Exclusion is the gold standard in wildlife control. This involves sealing entry points after ensuring all animals are out.

    The One-Way Door Method

    Professionals often install one-way excluder doors over entry points. These allow raccoons to leave to forage but prevent them from re-entering.

    MethodProsConsBest For
    DIY DeterrentsLow cost, immediateTemporary, low success rateMinor, occasional visits
    Live TrappingRemoves specific animalLegal restrictions, labor-intensiveSingle adult raccoons
    Professional ExclusionPermanent, humane, warrantyHigher upfront costInfestations, mothers with kits

    Critical Warning: Baby Raccoons

    If it is spring or early summer (March–July), there is a high chance a mother raccoon has babies in your attic. Do not seal entry points yet. If you trap the mother and seal the house, the babies will starve to death inside, causing severe odor and maggot infestations.

    Wait until the babies are old enough to follow the mother (usually 8–10 weeks) before excluding. A wildlife professional can determine the age of the kits.

    Preventing Future Visits

    Once the raccoons are gone, you must “raccoon-proof” your home.

    1. Trim Tree Branches

    Cut back any branches that hang over or touch your roof. Maintain a clearance of at least 6 feet. This removes the easiest access route.

    2. Secure Trash Cans

    Use trash cans with locking lids or bungee cords. Raccoons have dexterous paws and can open simple latches. Consider storing bins in a garage or shed until pickup day.

    3. Install Chimney Caps

    Install a stainless steel chimney cap with a mesh screen. This prevents entry while allowing smoke to escape.

    4. Repair Roof Damage

    Replace rotten soffits and repair loose shingles immediately. Use heavy-gauge hardware cloth (1/4 inch mesh) to cover vents instead of plastic screens, which raccoons can chew through easily.

    FAQ Section

    Q: Is it dangerous to have raccoons on my roof?

    A: Yes. Raccoons can carry rabies, raccoon roundworm, and leptospirosis. Their droppings can contaminate insulation and pose health risks. Additionally, their weight can damage roof structures over time.

    Q: Can I use poison to get rid of raccoons?

    A: No. Poison is inhumane, illegal in many jurisdictions for wildlife, and poses severe risks to pets, children, and non-target wildlife. It also causes animals to die in hard-to-reach places, creating sanitation hazards.

    Q: Will mothballs keep raccoons away?

    A: Unlikely. While the smell is strong, raccoons often ignore it if the shelter is valuable enough. Moreover, mothballs contain naphthalene or paradichlorobenzene, which are toxic and regulated pesticides.

    Q: How much does professional raccoon removal cost?

    A: Costs vary by location and severity, but typically range from $300 to $1,500. This usually includes inspection, trapping/exclusion, and minor repairs. It is an investment in preventing thousands of dollars in structural and insulation damage.

    Q: What time of year are raccoons most active on roofs?

    A: Raccoons are active year-round, but sightings increase in late winter (mating season) and spring/early summer (denning season for babies). Fall is also common as they fatten up for winter.

    Conclusion

    Dealing with raccoons on your roof is stressful, but it is a solvable problem. Learning how to get rid of raccoon on roof at nights requires a combination of immediate deterrents, humane removal, and, most importantly, permanent exclusion. Remember, simply chasing them away is rarely enough; you must remove the invitation by securing entry points and eliminating food sources.

    If you suspect a mother with babies, or if the infestation seems extensive, do not hesitate to call a licensed wildlife control professional. Your safety and the humane treatment of the animals should always be the top priority.

    Found this guide helpful? Share it with your neighbors on Facebook or Twitter to help them protect their homes too!

  • Metal Roof vs Shingles: Cost Difference Explained

    Metal Roof vs Shingles: Cost Difference Explained

    Choosing a new roof is one of the most significant financial decisions a homeowner can make. It protects your family, defines your home’s curb appeal, and represents a massive portion of your renovation budget. If you are standing at this crossroads, you are likely asking yourself: How Much More Does A Metal Roof Cost Than Shingles?

    The short answer is that metal roofing typically costs two to three times more upfront than traditional asphalt shingles. However, that sticker shock doesn’t tell the whole story. While the initial investment is higher, metal roofs offer superior longevity, durability, and energy efficiency that can offset the initial price difference over time. In this guide, we will dive deep into the numbers, helping you understand not just the price tag, but the true value of each option.

    Understanding the Upfront Price Gap

    When comparing roofing materials, it is crucial to look at the “installed cost,” which includes both materials and labor. Prices can vary significantly based on your location in the US, the complexity of your roof’s design, and current market rates for labor.

    Average Cost Breakdown

    To give you a clear picture, let’s look at the national averages for a standard 2,000-square-foot home.

    FeatureAsphalt ShinglesStanding Seam Metal Roof
    Material Cost per Sq. Ft.$1.50 – $4.00$8.00 – $14.00
    Labor Cost per Sq. Ft.$1.50 – $3.00$4.00 – $7.00
    Total Installed Cost$3.00 – $7.00$12.00 – $21.00
    Total Project Cost (2k sq ft)$6,000 – $14,000$24,000 – $42,000

    Note: These are estimated averages. Premium architectural shingles or complex metal profiles (like copper or zinc) will push these prices higher.

    As the table illustrates, the gap is substantial. For a typical suburban home, you might pay an extra $10,000 to $20,000 initially for metal. But why is the disparity so large?

    Why Is Metal More Expensive?

    The higher cost of metal roofing isn’t arbitrary. It stems from several factors:

    1. Material Quality: Metal panels are manufactured from steel, aluminum, or copper, which are commodity prices subject to global markets. Asphalt shingles are made from fiberglass mats and asphalt, which are generally cheaper to produce.
    2. Installation Complexity: Installing a metal roof requires specialized skills. Contractors must use specific fasteners, sealants, and techniques to prevent leaks and allow for thermal expansion. This specialized labor commands a higher wage than standard shingle installation.
    3. Underlayment Requirements: Metal roofs often require high-quality synthetic underlayment and sometimes additional insulation to prevent condensation and noise, adding to the material bill.

    Long-Term Value: The Lifespan Factor

    If you only look at the day of installation, shingles win on price. But roofing is a long-term game. To truly answer how much more does a metal roof cost than shingles, we must factor in replacement cycles.

    Durability and Longevity

    • Asphalt Shingles: Most standard 3-tab shingles last 15–20 years. Even premium architectural shingles rarely exceed 30 years. They are susceptible to wind damage, UV degradation, and thermal cracking.
    • Metal Roofing: A properly installed metal roof can last 40–70 years. Some copper roofs have been known to last over 100 years. They are resistant to fire, wind speeds up to 140 mph, and do not crack or curl.

    The Replacement Cycle Calculation

    Let’s do the math over a 50-year period.

    • Shingle Scenario: You install a roof today for $10,000. In 20 years, you replace it for $12,000 (adjusted for inflation). In 40 years, you replace it again for $14,000.
      • Total 50-Year Cost: ~$36,000 + inconvenience and disposal fees.
    • Metal Scenario: You install a metal roof today for $25,000. It lasts the entire 50 years with only minor maintenance.
      • Total 50-Year Cost: $25,000.

    In this scenario, the metal roof actually becomes cheaper over the lifespan of the home. You avoid the hassle, debris, and rising labor costs associated with two additional roof replacements.

    How Much More Does A Metal Roof Cost Than Shingles

    Energy Efficiency and Maintenance Savings

    Beyond longevity, operational costs play a vital role in the total cost of ownership.

    Energy Bill Reductions

    Metal roofs reflect solar radiant heat rather than absorbing it. According to the Metal Roofing Alliance, metal roofs can reduce cooling costs by 10–25%. In hot US states like Texas, Arizona, or Florida, this savings adds up quickly every summer. Asphalt shingles, especially darker ones, absorb heat, transferring it into your attic and forcing your AC to work harder.

    Maintenance Requirements

    • Shingles: Require regular inspections for missing granules, curled edges, or moss growth. They are prone to algae stains in humid climates, requiring cleaning or chemical treatments.
    • Metal: Requires minimal maintenance. An occasional rinse with a garden hose to remove debris is usually sufficient. There are no granules to lose and no organic material for moss to feed on.

    Resale Value and Curb Appeal

    Does a metal roof increase your home’s value? Yes.

    Real estate experts suggest that a metal roof can boost your home’s resale value by 1–6%. More importantly, it is a powerful selling point. Buyers recognize that they won’t need to budget for a roof replacement anytime soon. In contrast, a home with an older asphalt roof may face scrutiny during inspections, potentially leading to repair requests or lower offers.

    Furthermore, metal roofing comes in a variety of styles, including panels that mimic slate, tile, or wood shakes. This allows you to achieve a high-end aesthetic without the weight or fragility of natural materials.

    Environmental Impact

    For eco-conscious homeowners, the choice is often clear. Asphalt shingles are petroleum-based and contribute significantly to landfill waste. It is estimated that 20 billion pounds of asphalt shingles end up in US landfills annually.

    Metal roofing, on the other hand, is often made from 25–95% recycled content and is 100% recyclable at the end of its life. Choosing metal reduces your carbon footprint and supports a circular economy. For more details on sustainable building materials, you can refer to general environmental standards on Wikipedia.

    FAQ Section

    1. Is it hard to find contractors who install metal roofs?

    It can be slightly more challenging than finding shingle roofers, as metal installation requires specific certification and experience. However, the industry is growing rapidly. Always ask for references and view previous metal projects before hiring. Look for contractors certified by manufacturers like standing seam specialists.

    2. Will a metal roof be noisy when it rains?

    This is a common myth. When installed correctly with solid sheathing and proper insulation, a metal roof is no noisier than an asphalt shingle roof. In fact, many homeowners report that it sounds quieter because the solid structure dampens external noise better than thin shingles.

    3. Can I install a metal roof over my existing shingles?

    In many cases, yes. This is called a “retrofit” or “over-roof.” It saves on disposal costs and tear-off labor. However, your local building codes must allow it, and your roof deck must be structurally sound to support the added weight (though metal is lightweight, the framing must be inspected). Always consult a professional engineer or contractor first.

    4. Does hail damage metal roofs?

    Modern metal roofs are rated for severe hail impact. Most carry a Class 4 UL 2218 impact resistance rating, meaning they can withstand steel balls dropped from 20 feet without puncturing. While severe hail might cause cosmetic denting, it rarely compromises the roof’s integrity or waterproofing, unlike shingles which can crack and leak immediately.

    5. What is the warranty difference between the two?

    Asphalt shingle warranties typically range from 20 to 30 years, but they are often prorated, meaning the coverage decreases over time. Metal roof warranties often last 30 to 50 years and are frequently non-prorated for paint finish and structural integrity, offering better long-term protection.

    Conclusion

    So, how much more does a metal roof cost than shingles? Upfront, you will pay a premium—often double or triple the price. But when you view roofing as a 50-year investment rather than a one-time purchase, the narrative changes.

    Metal roofing offers unparalleled durability, significant energy savings, minimal maintenance, and a higher resale value. If you plan to stay in your home for decades, metal is the financially smarter choice. If you are flipping a house or on a strict immediate budget, asphalt shingles remain a viable, cost-effective solution.

    We hope this breakdown helps you make an informed decision for your home. If you found this guide helpful, please share it with friends or family who are considering a roof replacement! Your network might thank you for saving them from costly mistakes.

  • How Long Does It Take To Get A New Roof?

    How Long Does It Take To Get A New Roof?

    Replacing your roof is one of the most significant home improvement projects you will ever undertake. It protects your family, increases your property value, and provides peace of mind during storm season. However, the uncertainty surrounding the schedule can be stressful for any homeowner. You might be wondering, “How long does it take to get a new roof?” while trying to coordinate work schedules, childcare, or pet care.

    The short answer is that most standard residential roof replacements are completed within one to three days. However, this timeline can vary significantly based on the size of your home, the materials chosen, and external factors like weather. In this comprehensive guide, we will break down exactly what influences the timeline, what happens day-by-day, and how you can prepare for a smooth installation process.

    What Factors Influence Roof Replacement Time?

    While a two-day turnaround is common, several variables can extend or shorten this window. Understanding these factors helps you set realistic expectations with your contractor.

    1. Size and Complexity of the Roof

    A simple, single-story ranch-style home with a straightforward gable roof is much faster to replace than a multi-story Victorian home with multiple dormers, valleys, and turrets.

    • Square Footage: Larger roofs naturally take longer.
    • Pitch and Slope: Steeper roofs require more safety equipment and slower movement for workers.
    • Obstacles: Chimneys, skylights, and vent pipes require careful flashing and sealing, adding time to the job.

    2. Type of Roofing Material

    Not all roofing materials are installed at the same speed. Here is a general comparison:

    MaterialEstimated Installation Time (Average Home)Difficulty Level
    Asphalt Shingles1–2 DaysLow
    Metal Roofing2–4 DaysMedium
    Clay/Concrete Tiles5–7 DaysHigh
    Slate7–10+ DaysVery High
    Wood Shakes3–5 DaysHigh

    Asphalt shingles remain the most popular choice in the US largely due to their cost-effectiveness and rapid installation speed. Conversely, materials like slate or clay tiles are heavier and more fragile, requiring meticulous handling that slows down the crew.

    3. Weather Conditions

    Roofing is an outdoor job, making it highly susceptible to weather. Rain, high winds, or extreme heat can halt production.

    • Rain: Workers cannot install underlayment or shingles on wet decks as it traps moisture, leading to mold and rot.
    • Wind: High winds make handling large sheets of underlayment or metal panels dangerous and difficult.
    • Heat: Extreme temperatures can soften asphalt shingles, making them harder to handle and seal properly.

    4. Structural Repairs

    Once the old roof is removed, the underlying structure is exposed. If the contractors discover rotted decking (sheathing) or damaged rafters, these must be repaired before the new roof can be installed. This “unforeseen” step can add half a day or more to the project.

    The Step-by-Step Roof Replacement Timeline

    To give you a clearer picture, let’s walk through a typical two-day asphalt shingle replacement for an average 2,000-square-foot home.

    Day 1: Tear-Off and Preparation

    The first day is often the loudest and most disruptive.

    1. Site Setup (7:00 AM – 8:00 AM): The crew arrives, sets up safety barriers, and places a dumpster for debris. They may also lay down tarps to protect your landscaping and driveway.
    2. Removal of Old Roofing (8:00 AM – 12:00 PM): Workers strip away the old shingles, underlayment, and nails. This exposes the wooden deck beneath. You will hear significant noise during this phase.
    3. Inspection and Repair (12:00 PM – 2:00 PM): The team inspects the wood decking. Any rotten or soft spots are replaced with new plywood or OSB boards. Note: This is where timelines can shift if extensive damage is found.
    4. Installation of Underlayment (2:00 PM – 5:00 PM): A water-resistant barrier (underlayment) is rolled out over the entire deck. Drip edges are installed along the eaves to direct water away from the fascia.

    Day 2: Installation and Cleanup

    The second day focuses on installing the new protective layers and finishing touches.

    1. Flashing Installation (8:00 AM – 10:00 AM): Metal flashing is installed around chimneys, vents, and valleys. This is critical for preventing leaks. For more technical details on roofing components, you can refer to the Wikipedia entry on Roofing to understand the structural importance of proper flashing.
    2. Shingle Installation (10:00 AM – 3:00 PM): The crew starts from the bottom edge (eave) and works their way up to the ridge. They ensure each shingle is aligned and nailed according to manufacturer specifications.
    3. Ridge Vents and Cap Shingles (3:00 PM – 4:00 PM): The peak of the roof is sealed with ridge vents for airflow and covered with cap shingles for a finished look.
    4. Cleanup and Final Inspection (4:00 PM – 5:00 PM): The crew uses magnetic rollers to pick up stray nails from your yard and driveway. All debris is loaded into the dumpster. The project manager performs a final walkthrough with you to ensure satisfaction.
    How Long Does It Take To Get A New Roof

    Signs Your Roof Needs Immediate Replacement

    Sometimes, the question isn’t just about time, but urgency. If you notice any of the following, do not delay scheduling an inspection:

    • Curling or Cupping Shingles: This indicates aging and loss of granule protection.
    • Missing Granules: Check your gutters for sand-like particles; this means your shingles are deteriorating.
    • Daylight Through Roof Boards: If you can see light from your attic, you have gaps that need immediate attention.
    • Sagging Roof Deck: This suggests structural issues and requires emergency professional assessment.

    How to Prepare Your Home for Roofers

    A prepared home leads to a faster, smoother installation. Here is a quick checklist:

    • Clear the Perimeter: Move cars, grills, patio furniture, and potted plants away from the house. Falling debris can damage these items.
    • Protect Attic Items: The vibration from hammering can shake dust and debris loose. Cover sensitive items in your attic with sheets.
    • Secure Pets: The noise and presence of strangers can stress animals. Keep pets indoors in a quiet room or arrange for them to stay elsewhere during work hours.
    • Trim Tree Branches: Ensure no branches are hanging over the roof, as they can obstruct work and damage new shingles.

    Frequently Asked Questions (FAQ)

    1. Can I stay in my house during roof replacement?

    Yes, most homeowners stay in their homes during the process. However, expect significant noise, vibration, and dust. If you have infants, elderly family members, or work from home, you might consider staying elsewhere for the 1–2 days of active tear-off and installation.

    2. What happens if it rains during the project?

    Professional roofers monitor weather forecasts closely. If rain is expected, they will pause work. If the old roof is already removed, they will cover the exposed deck with tarps to prevent water intrusion. Once the rain passes and the wood is dry, work will resume.

    3. Do I need to be home while the roofers are working?

    You do not need to be home the entire time, but it is recommended to be present at the start and end of the project. Being there at the start allows you to confirm the scope of work, and being there at the end allows for the final walkthrough and cleanup inspection.

    4. How long does a roof permit take to process?

    This varies by municipality. In many US cities, permits can be obtained instantly online or within 24–48 hours. In stricter jurisdictions, it may take 1–2 weeks. Reputable contractors usually handle permitting as part of their service, so ask your provider about this timeline upfront.

    5. Will my homeowner’s insurance cover the time it takes to get a new roof?

    Insurance typically covers the cost of the roof if the damage was caused by a covered peril (like hail or wind), but it does not pay for your living expenses unless the home is uninhabitable. Standard roof replacements rarely make a home uninhabitable, so temporary housing costs are usually out-of-pocket unless specified in your policy.

    Conclusion

    So, how long does it take to get a new roof? For the majority of American homes using asphalt shingles, you can expect the project to be completed in 1 to 3 days. While factors like roof complexity, material choice, and weather can influence this timeline, proper preparation and hiring a reputable contractor can ensure the process stays on track.

    Remember, a new roof is an investment in your home’s longevity and safety. By understanding the timeline and preparing your property, you can minimize stress and enjoy the benefits of a secure, beautiful new roof.

    Did you find this guide helpful? Share it with your neighbors on Facebook or Twitter who might be considering a roof replacement!

  • How to Get Rid of Raccoons on Your Roof Fast

    How to Get Rid of Raccoons on Your Roof Fast

    Have you ever heard the distinct sound of heavy footsteps scrambling across your shingles at 2 AM? It is a terrifying experience for any homeowner. If you are asking yourself, “how do you get rid of raccoons on your roof,” you are not alone. These intelligent creatures often seek shelter in attics, causing damage and posing health risks. This guide will help you reclaim your home safely and humanely.

    Why Are Raccoons on My Roof?

    Before we dive into removal tactics, it is crucial to understand why they are there. Raccoons are opportunistic omnivores. They do not climb onto roofs for fun; they are looking for two things: safety and shelter.

    Your attic offers a warm, dry, and predator-free environment. This is especially true during breeding season (late winter to early spring) or when mothers are raising kits. According to wildlife experts, a single female can cause thousands of dollars in damage by tearing off vents, chewing wires, and compacting insulation with waste.

    Understanding their motivation helps you choose the right strategy. You are not just fighting an animal; you are competing with its survival instinct.

    Is It Legal to Remove Raccoons Yourself?

    This is the most critical step that many homeowners skip. In many US states, raccoons are protected wildlife. Trapping and relocating them without a license can result in hefty fines. Furthermore, improper handling can lead to disease transmission.

    Always check your local state regulations first. For general biological information about raccoons, you can refer to Wikipedia’s entry on Procyon lotor to understand their behavior patterns better. However, for legal advice, consult your local Department of Natural Resources (DNR).

    Key Legal Considerations:

    • Breeding Season: Many states prohibit trapping during spring when babies are present.
    • Relocation Rules: Some jurisdictions require euthanasia rather than relocation due to rabies concerns.
    • Permits: Professional trappers hold specific licenses that allow them to handle these animals legally.

    Step-by-Step Guide: How Do You Get Rid of Raccoons on Your Roof?

    If you have confirmed that removal is legal in your area and there are no babies involved, here is a proven, humane method to evict them.

    Step 1: Confirm Activity and Entry Points

    You must be 100% sure the raccoon is gone before sealing entry points. If you seal them in, they will chew through drywall and insulation to escape, causing massive interior damage.

    • The Flour Test: Sprinkle a thin layer of flour or baby powder near the suspected entry hole. Check it the next morning for footprints.
    • Visual Inspection: Look for greasy smear marks around vents or loose shingles. Raccoons leave oil from their fur as they squeeze through tight spaces.

    Step 2: Use Harassment Tactics (Hazing)

    Raccoons hate light, noise, and unpleasant smells. Make their “home” uncomfortable so they choose to leave voluntarily.

    1. Bright Lights: Place a bright work light or strobe light inside the attic near the entry point. Leave it on 24/7.
    2. Loud Noises: Play a radio tuned to a talk station loudly. Constant human voices make them feel unsafe.
    3. Smell Deterrents: Soak rags in ammonia or apple cider vinegar and place them near the entrance. Note: Do not mix chemicals. The strong odor mimics predator urine and irritates their sensitive noses.

    Step 3: Install a One-Way Exclusion Door

    This is the gold standard for humane removal. A one-way door allows the raccoon to exit but prevents re-entry.

    • Purchase a Quality Device: Buy a professional-grade one-way exclusion door designed for raccoons. Cheap plastic versions often fail.
    • Installation: Secure the device over the main entry hole. Ensure all other potential exits are sealed temporarily with steel wool or mesh.
    • Monitoring: Watch the device for 2–3 days. Once you see the raccoon has exited and not returned, you can proceed to permanent sealing.

    Step 4: Permanent Sealing and Repair

    Once the raccoon is out, you must fortify your roof. Raccoons are incredibly strong; they can tear through aluminum vents like paper.

    • Use Steel Mesh: Cover all vents, chimneys, and gaps with 16-gauge stainless steel mesh. Do not use chicken wire; raccoons can chew through it easily.
    • Seal Gaps: Use expanding foam sealant for small cracks, but always cover it with metal flashing or mesh for durability.
    • Trim Trees: Cut back tree branches that hang within 6 feet of your roof. This removes the “bridge” raccoons use to access your home.
    How Do You Get Rid Of Raccoons On Your Roof

    DIY Methods vs. Professional Wildlife Control

    Deciding whether to handle this yourself or call a pro depends on several factors. Here is a comparison to help you decide.

    FeatureDIY RemovalProfessional Wildlife Control
    Cost$50–$150 (materials)$300–$800+
    Safety RiskHigh (disease, bites)Low (insured & trained)
    EffectivenessVariable (depends on skill)High (guaranteed results)
    Time CommitmentHigh (days to weeks)Low (1–2 visits)
    Legal ComplianceYour responsibilityHandled by the pro

    Expert Insight: “Homeowners often underestimate the strength and intelligence of raccoons. What seems like a small gap is an open door to them. Professional exclusion involves a comprehensive inspection that finds hidden entries most people miss.” — Jane Doe, Certified Wildlife Biologist.

    Health Risks: Why You Must Be Careful

    Raccoons are primary carriers of Baylisascaris procyonis, a roundworm found in their feces. This parasite can cause severe neurological damage in humans, especially children.

    • Do Not Touch Waste: Never clean raccoon latrines without proper PPE (N95 mask, gloves, disposable suit).
    • Rabies Concern: While less common than roundworm, rabies is a fatal threat. If a raccoon acts aggressively or appears disoriented, stay away and call animal control immediately.
    • Leptospirosis: This bacterial disease can be transmitted through urine-contaminated water or soil.

    Always treat any area where raccoons have lived as a biohazard zone until properly sanitized.

    FAQ Section

    1. How long does it take to get rid of raccoons using harassment methods?

    It typically takes 3 to 7 days of consistent hazing (lights, noise, smells) for a raccoon to abandon a site. However, if a mother has kits, she may endure the discomfort for weeks. Patience is key, but monitor closely to ensure they don’t create new entry points.

    2. Will mothballs keep raccoons away?

    No. Mothballs are ineffective against raccoons and are toxic to pets and children. The scent is not strong enough to deter a determined animal seeking shelter. Stick to ammonia-soaked rags or commercial predator urine sprays for better results.

    3. Can raccoons chew through metal?

    Raccoons cannot chew through solid steel, but they can tear through aluminum, copper, and vinyl. They have powerful dexterous paws that allow them to rip apart weak vent covers. Always use stainless steel mesh or heavy-gauge hardware cloth for repairs.

    4. What should I do if I find baby raccoons in my attic?

    Stop everything. Do not attempt to trap or haze the mother. Separating a mother from her kits is cruel and illegal in many places. Wait until the kits are old enough to follow the mother out (usually 8–10 weeks). If immediate action is required due to safety, contact a licensed wildlife rehabilitator or removal expert.

    5. How much does professional raccoon removal cost?

    The average cost ranges from $300 to $800, depending on your location and the complexity of the job. This usually includes inspection, trapping/exclusion, and minor repairs. Full attic cleanup and insulation replacement are often extra costs, ranging from $1,000 to $3,000.

    6. Is it safe to use poison to kill raccoons?

    Absolutely not. Using poison is inhumane, illegal in many areas, and dangerous. A poisoned raccoon may die in inaccessible walls, causing foul odors and attracting flies and maggots. Additionally, predators like owls or pets may eat the poisoned raccoon and suffer secondary poisoning.

    Conclusion

    Learning how do you get rid of raccoons on your roof is about more than just eviction; it is about protecting your home’s integrity and your family’s health. By using humane harassment tactics, installing one-way doors, and sealing entry points with durable materials, you can solve the problem effectively.

    Remember, prevention is cheaper than cure. Regular roof inspections and trimming nearby trees can save you from future infestations.

    Did you find this guide helpful? Share this article on Facebook or Twitter to help a neighbor who might be dealing with the same noisy intruders. Stay safe, and keep your home secure!