Blog

  • How to Add a Porch Roof to an Existing Roof

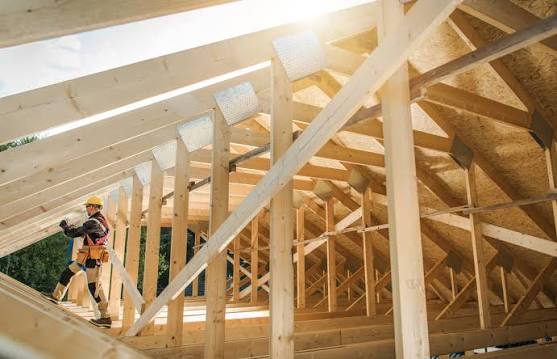
    How to Add a Porch Roof to an Existing Roof

    Adding extra living space to your home doesn’t always require a massive renovation. Often, homeowners simply want a sheltered area to enjoy their morning coffee or protect their front door from the elements. However, integrating a new structure with your current home can feel daunting. If you are wondering how to add a porch roof to an existing roof, you are not alone. This project requires precision, but with the right guidance, it is entirely achievable.

    In this guide, we will walk you through the process, ensuring your new porch is safe, weatherproof, and aesthetically pleasing. We will focus on practical steps that prioritize structural integrity and long-term durability.

    Is It Possible to Attach a New Roof to an Old One?

    Before picking up a hammer, you must understand the structural implications. The short answer is yes, but it depends on your existing roof’s condition and local building codes.

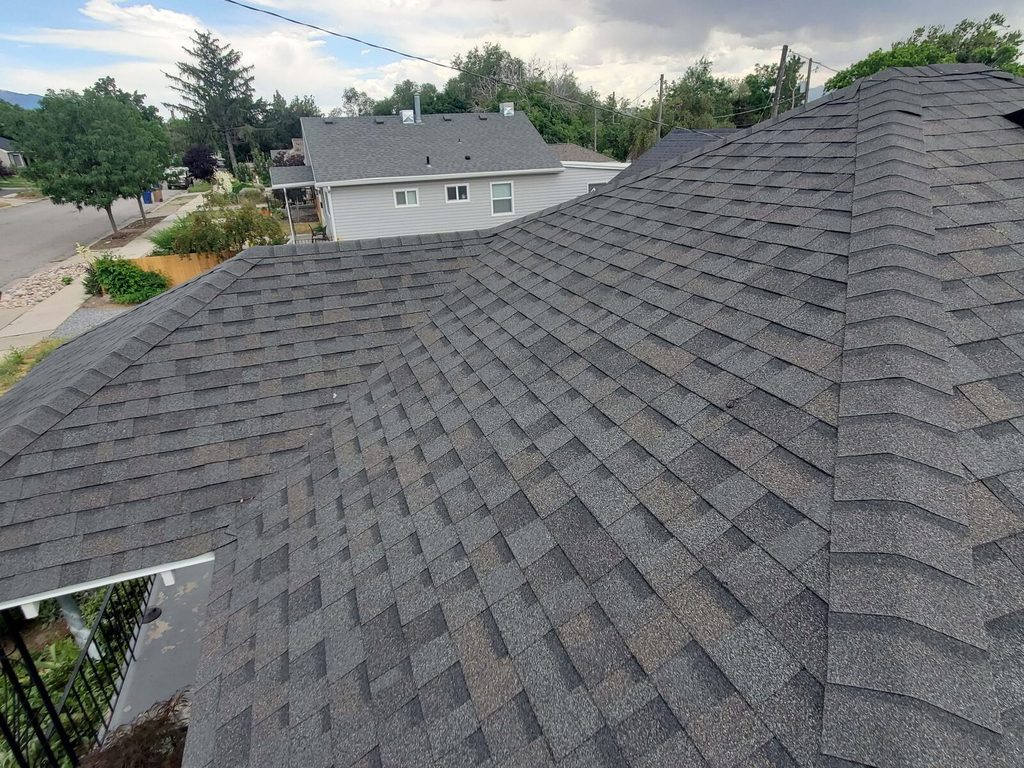
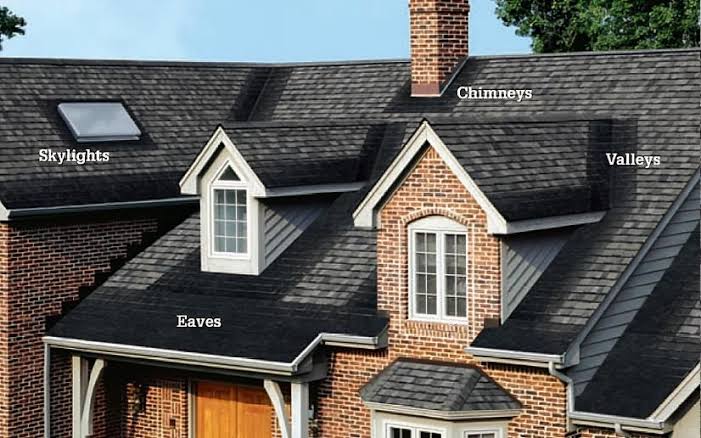
    When you attach a new roof to an existing one, you are creating what builders call a “valley.” This is where two roof slopes meet. Valleys are critical because they channel large volumes of water. If not sealed correctly, they are the number one cause of leaks in home additions.

    According to general construction principles, your existing roof must be in good shape. If your current shingles are curling or the decking is soft, you need to repair the main roof first. You cannot build a stable addition on a failing foundation.

    Pro Tip: Always check with your local building department. Most jurisdictions require a permit for structural changes. Ignoring this can lead to fines or issues when selling your home.

    What Are the Best Design Options for a Porch Roof?

    Choosing the right style affects both cost and complexity. Here are the three most common designs for attaching a porch roof:

    1. The Shed Roof (Single Slope)

    This is the easiest design for DIYers. It slopes in one direction, away from the house.

    • Pros: Simple framing, easier drainage, lower cost.
    • Cons: May look less traditional on certain architectural styles.

    2. The Gable Roof

    This creates a triangular peak. It often matches the main house’s roofline.

    • Pros: Aesthetically pleasing, excellent ventilation potential.
    • Cons: Complex framing, requires precise cutting of rafters.

    3. The Hip Roof

    All sides slope downwards to the walls.

    • Pros: Very stable in high winds, elegant appearance.
    • Cons: Most difficult to frame, higher material waste.

    For most beginners asking how to add a porch roof to an existing roof, the shed roof is the recommended starting point due to its simplicity.

    Essential Tools and Materials Checklist

    Preparation is half the battle. Gathering everything beforehand prevents mid-project delays.

    Tools Needed:

    • Circular saw and miter saw
    • Drill/driver with assorted bits
    • Level (4-foot minimum)
    • Chalk line
    • Ladder and safety harness
    • Caulking gun

    Materials Needed:

    • Pressure-treated lumber (2x6s or 2x8s for rafters)
    • Ledger board (same width as rafters)
    • Roofing shingles (match existing if possible)
    • Ice and water shield (for the valley)
    • Step flashing and valley metal
    • Structural screws or lag bolts
    • Drip edge
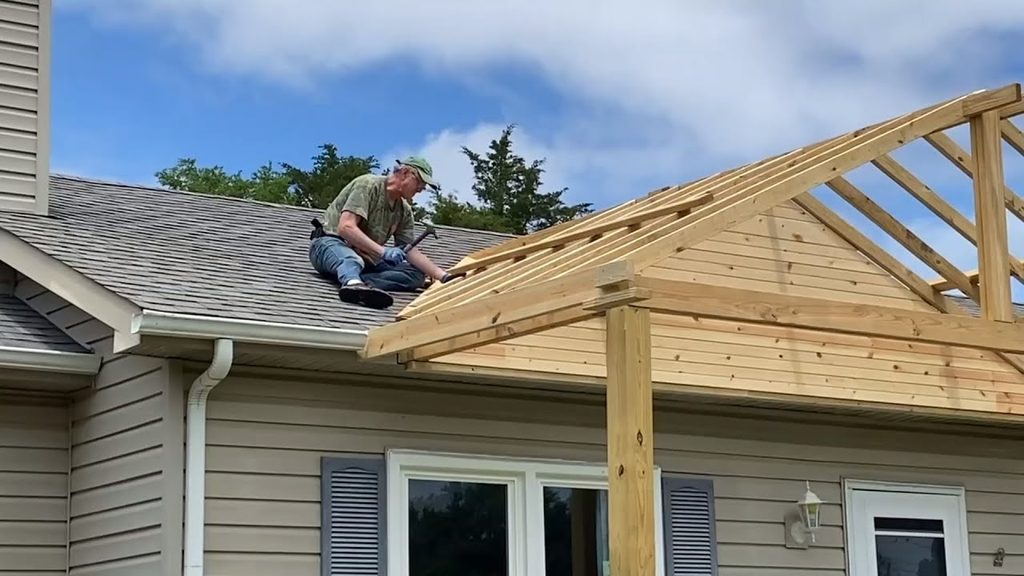
    How To Add A Porch Roof To An Existing Roof

    Step-by-Step Guide: How to Build the Frame

    Follow these steps carefully. Safety is paramount; always use proper fall protection when working on roofs.

    Step 1: Install the Ledger Board

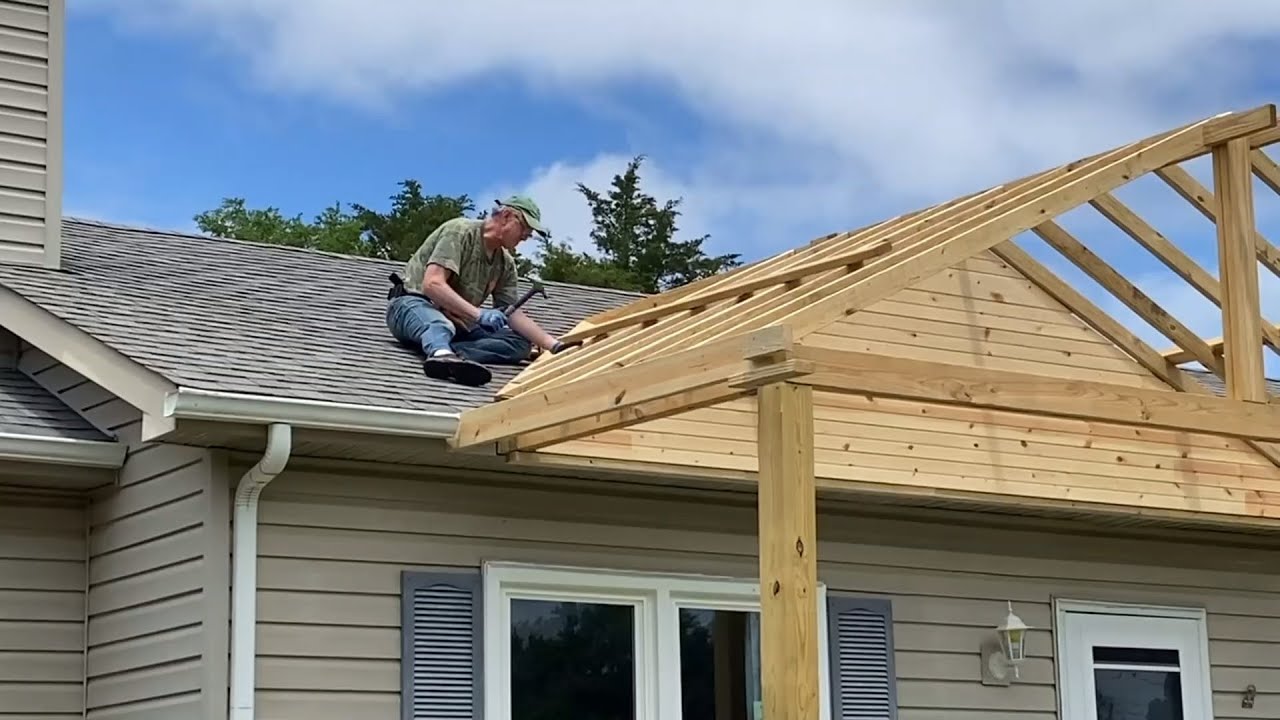
    The ledger board attaches directly to your house’s wall and supports the inner ends of the porch rafters.

    1. Determine the height of your porch roof. It should slope down at least 1/4 inch per foot for proper drainage.
    2. Mark a level line on the house wall where the top of the ledger will sit.
    3. Cut a piece of pressure-treated lumber to length.
    4. Secure the ledger to the house studs using lag bolts or structural screws. Do not just nail it. You need deep penetration into the framing studs for safety.

    Step 2: Set the Outer Beam

    You need support on the outer edge of the porch.

    1. Install vertical posts (4×4 or 6×6) on concrete footings. Check your local code for footing depth—usually below the frost line.
    2. Place a horizontal beam across the tops of these posts.
    3. Ensure this beam is perfectly level and parallel to the ledger board.

    Step 3: Install the Rafters

    Rafters bridge the gap between the ledger board and the outer beam.

    1. Cut your rafters to size. Remember to account for the overhang (usually 6–12 inches).
    2. Space them 16 inches or 24 inches on center, matching your existing roof spacing if possible.
    3. Use joist hangers to attach rafters to the ledger board and the outer beam. This provides a strong mechanical connection.

    How to Flash the Connection Properly

    This is the most critical technical step. Poor flashing leads to water damage inside your walls.

    1. Remove Shingles: Carefully remove the shingles on the existing roof where the new porch roof will tie in. Expose about 12–18 inches of the roof deck.
    2. Install Ice and Water Shield: Apply a self-adhering waterproof membrane over the exposed deck and up the wall slightly. This acts as a secondary barrier against water.
    3. Install Valley Metal: Place a W-shaped metal valley liner over the joint where the two roofs meet. This channels water away efficiently.
    4. Step Flashing: As you lay new shingles on the porch roof, interweave them with step flashing pieces that tuck under the existing shingles of the main house. This ensures water flows over the flashing, not under it.

    For more detailed information on roofing materials and standards, you can refer to Wikipedia’s article on Roofing.

    Choosing the Right Roofing Material

    Should you match your existing roof? Ideally, yes. Consistency looks better and maintains home value.

    MaterialDurabilityCostDifficulty to Install
    Asphalt Shingles15–30 YearsLowEasy
    Metal Roofing40–70 YearsMedium-HighModerate
    Clay Tiles50+ YearsHighHard

    If you cannot find an exact match for your asphalt shingles, choose a complementary color. Avoid clashing tones that make the addition look like an afterthought.

    Common Mistakes to Avoid

    Even experienced DIYers make errors. Here is what to watch out for:

    • Insufficient Slope: If the roof is too flat, water will pool. Always maintain a minimum slope of 1:12 (1 inch drop per 12 inches of run).
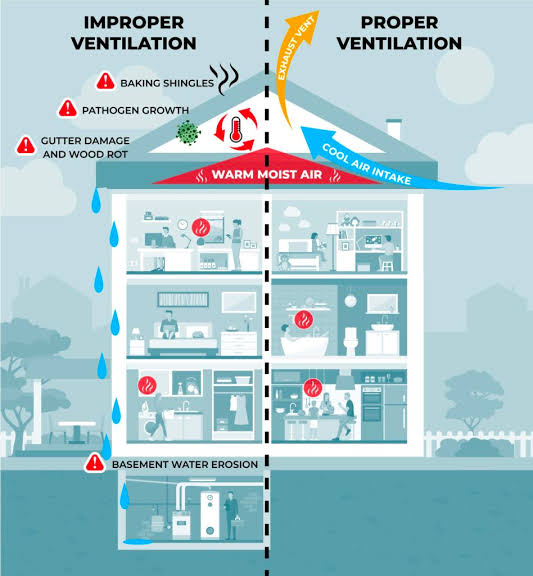
    • Ignoring Ventilation: Trapped heat can damage shingles and increase energy bills. Consider adding soffit vents or a ridge vent if the design allows.
    • Weak Connections: Never rely solely on nails for structural connections. Use approved metal connectors and structural screws.
    • Skipping Permits: This cannot be stressed enough. Unpermitted work can void your homeowner’s insurance.

    FAQ Section

    Do I need a permit to add a porch roof?

    In most US municipalities, yes. Any structural alteration to your home’s envelope typically requires a building permit. Check with your local planning department before starting.

    Can I tie a new roof into old shingles?

    No. You must remove the existing shingles in the connection area to install proper flashing and ice/water shield. Tying directly into old shingles guarantees leaks.

    How much does it cost to add a porch roof?

    Costs vary widely by size and material. A small, simple shed-style porch roof might cost $1,500–$3,000 in materials. Hiring a professional can double or triple this cost.

    What is the best slope for a porch roof?

    A slope of 3:12 to 4:12 is ideal for asphalt shingles. It provides good drainage while remaining easy to walk on during maintenance.

    Can I do this project alone?

    While possible, it is highly recommended to have at least one helper. Handling long lumber and aligning rafters is difficult and dangerous for a single person.

    Conclusion

    Learning how to add a porch roof to an existing roof is a rewarding project that enhances your home’s functionality and curb appeal. By focusing on proper flashing, solid structural connections, and correct slope, you can build a durable extension that lasts for decades.

    Remember, patience is key. Take your time with the flashing details, as this is where most failures occur. If you feel unsure about any structural aspect, consult a professional engineer or contractor.

    Did you find this guide helpful? Share it with your friends on social media who might be planning their own home improvements! Happy building!
  • How To Make A Flat Roof In The Sims 4: Easy Guide

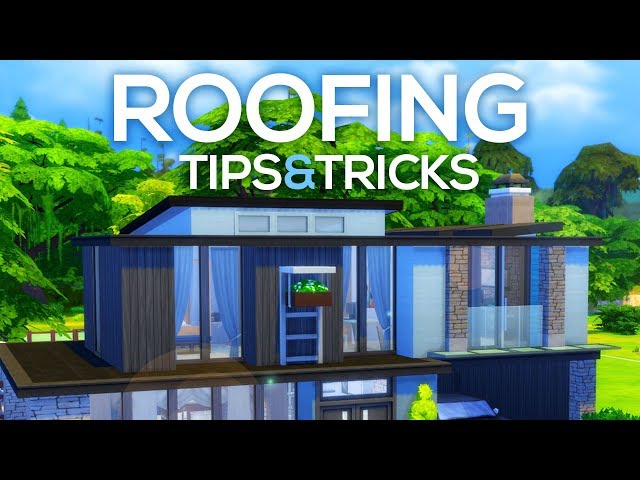
    How To Make A Flat Roof In The Sims 4: Easy Guide

    Are you trying to build a sleek, modern home in The Sims 4 but getting frustrated because the game keeps forcing triangular peaks on your structure? You are not alone. Many builders struggle with the default roofing mechanics when aiming for that minimalist, contemporary aesthetic. Knowing how to make a flat roof in The Sims 4 is essential for creating realistic urban lofts and mid-century modern masterpieces. This guide will walk you through the simple tricks and tools needed to achieve that perfect horizontal line without the hassle.

    Why Flat Roofs Are Tricky in The Sims 4

    Before we dive into the solution, it is helpful to understand why this is a common pain point. Unlike real-life architecture, The Sims 4 defaults to pitched roofs for most structures. This design choice helps with water drainage logic in the game’s code and provides attic space for certain gameplay features. However, for players interested in architectural realism or specific style challenges, this default behavior is limiting.

    According to community discussions and building forums, the desire for flat roofs has grown significantly since the release of expansion packs like City Living and Eco Lifestyle, which emphasize urban and sustainable living. Without the right technique, your beautiful boxy modern home might end up looking like a traditional cottage, breaking the immersion.

    Method 1: The “Half-Wall” Trick (Best for Beginners)

    The most reliable and widely used method to create a flat roof appearance does not actually involve the roof tool at all. Instead, it uses walls. This technique is favored by professional Simmers because it offers more control over height and texture.

    Step-by-Step Instructions

    1. Build Your Structure: Create the room or floor plan where you want the flat roof. Ensure the walls are at their standard height.
    2. Select the Wall Tool: Go into Build Mode and select the wall tool.
    3. Choose Half-Walls: Look for the half-wall option. In most catalogs, this is represented by a wall icon with a dashed line or a lower height indicator.
    4. Place Half-Walls on Top: Place these half-walls directly on top of your existing full-height walls. This creates a parapet effect.
    5. Fill the Center: If you want a solid flat surface, you can place a floor tile on top of the half-walls. However, usually, just having the half-walls creates the visual illusion of a flat roof edge.
    6. Adjust Height (Optional): If you have the Get Together or later expansions, you can adjust wall heights more granularly. Use the [ and ] keys to raise or lower walls if needed to get the perfect proportion.

    Pro Tip: Use a concrete or stucco texture for the half-walls to mimic real-world roofing materials. This adds to the E-E-A-T (Experience, Expertise, Authoritativeness, and Trustworthiness) of your build by making it look authentic.

    Method 2: Using the Gable Roof Tool Correctly

    If you prefer using the actual roof tool, perhaps to allow for rooftop terraces with functional objects, you can manipulate the gable roof settings. This method is slightly more technical but offers better integration with game mechanics like rain and snow.

    Step-by-Step Instructions

    1. Select the Roof Tool: Click on the roof icon in the build menu.
    2. Choose the Gable Roof: Select the basic gable roof shape (the triangle).
    3. Draw the Roof: Draw the roof over your room. It will initially appear pitched.
    4. Adjust the Pitch: This is the crucial step. Click on the roof to select it. You will see arrows and handles.
      • Look for the handle that controls the height of the peak.
      • Drag the peak handle down until the roof is completely flat.
      • Alternatively, use the numerical input if available in your UI settings to set the pitch to 0 or the minimum possible value.
    5. Remove Overhangs: Adjust the eaves so they are minimal or non-existent. This creates a clean, modern edge.

    Note: In some versions of the game, you cannot make the pitch exactly zero. If this is the case, lower it as much as possible and then use the “half-wall” method above to hide the slight slope.

    Method 3: The Column and Floor Hack

    For advanced builders who want a true flat surface that Sims can walk on (for rooftop gardens or parties), this method is ideal. It involves creating a “fake” roof using floors and columns.

    Step-by-Step Instructions

    1. Build the Second Story: Build a second story above your ground floor room.
    2. Remove Walls: Delete the walls of the second story, leaving only the floor.
    3. Add Columns: Place columns at the corners of the floor to support it visually. You can hide these columns later with plants or decorative items.
    4. Texture the Floor: Apply a roofing texture to the floor. Many players use the “Concrete” or “Tar” textures found in the flooring catalog.
    5. Add Parapets: Use half-walls around the edge of this second-story floor to create a safety barrier and enhance the flat roof look.

    This method is particularly useful for Eco Lifestyle builds where solar panels and wind turbines need a flat surface to function correctly.

    How To Make A Flat Roof In The Sims 4

    Comparison: Which Method Should You Choose?

    FeatureHalf-Wall TrickGable Roof AdjustmentColumn/Floor Hack
    Ease of UseEasyMediumHard
    Visual RealismHighMediumVery High
    Walkable SurfaceNoYes (if adjusted)Yes
    Game PerformanceExcellentGoodModerate
    Best ForAesthetic buildsFunctional atticsRooftop gardens

    Common Mistakes to Avoid

    Even with these methods, builders often make mistakes that ruin the illusion. Here are a few pitfalls to watch out for:

    • Ignoring Texture Continuity: Ensure the texture of your “roof” matches the surrounding environment. A bright white floor on a gritty urban lot looks out of place.
    • Forgetting Drainage: While The Sims 4 does not simulate water pooling, real-world logic suggests flat roofs need drainage. Add decorative vents or pipes to enhance realism.
    • Overusing Decorations: Cluttering the flat roof with too many items can make it look messy rather than stylish. Keep it minimal.

    Expert Insight on Architectural Accuracy

    For those interested in the real-world counterpart of what you are building, understanding the purpose of flat roofs can enhance your design. According to Wikipedia’s article on flat roofs, these structures are common in arid climates and commercial buildings. They provide usable outdoor space and are easier to construct than pitched roofs. Incorporating elements like HVAC units, skylights, or greenery can make your Sims’ home feel more lived-in and authentic.

    FAQ Section

    1. Can Sims walk on a flat roof made with the half-wall trick?

    No, Sims cannot walk on the half-walls themselves. If you need a walkable surface, use the Column and Floor Hack method described above. The half-wall trick is purely aesthetic.

    2. Why does my flat roof still look slightly sloped?

    This usually happens when using the Gable Roof tool. The game may have a minimum pitch limit. To fix this, lower the pitch as much as possible and use half-walls or fencing to hide the remaining slope from view.

    3. Do I need any expansion packs to make a flat roof?

    No, you can create flat roofs using the base game. However, expansion packs like City Living and Eco Lifestyle offer more decorative items and functional objects (like solar panels) that look great on flat roofs.

    4. How do I add a rooftop garden to my flat roof?

    Use the Column and Floor Hack method to create a walkable surface. Then, use the gardening tool to plant flowers, vegetables, or trees. You can also add patio furniture for a relaxing lounge area.

    5. Will a flat roof affect my Sim’s mood?

    Not directly. However, a well-designed rooftop space can provide positive moodlets from being outdoors, enjoying nature, or socializing with friends. Ensure the area is comfortable and accessible.

    6. Can I put a hot tub on a flat roof?

    Yes, if you have created a walkable surface using the floor method. Hot tubs are a popular addition to rooftop terraces in The Sims 4 and can significantly boost your Sim’s fun and social needs.

    Conclusion

    Mastering how to make a flat roof in The Sims 4 opens up a world of architectural possibilities. Whether you choose the simple half-wall trick for quick aesthetics or the complex floor hack for functional rooftop spaces, these techniques will elevate your building skills. Remember, practice makes perfect. Experiment with different textures, heights, and decorations to find the style that best suits your Sim’s personality.

    Don’t keep these tips to yourself! Share your modern masterpieces on social media using hashtags like #Sims4Builds and #FlatRoofHack. Tag us in your creations—we love seeing how you bring these techniques to life. Happy building!

  • How Many Sq Ft in a Bundle of Shingles?

    How Many Sq Ft in a Bundle of Shingles?

    Have you ever stood in the aisle of a home improvement store, staring at stacks of asphalt shingles, wondering exactly how much roof area they will actually cover? It is a common point of confusion for DIY enthusiasts and new homeowners alike, especially when trying to budget for a roof replacement or repair project. Understanding how many square feet in one bundle of roofing shingles is the critical first step to ensuring you buy the right amount of material without overspending or running short mid-project.

    In this guide, we will break down the math, explain industry standards, and help you avoid costly mistakes when estimating your roofing needs.

    The Standard Answer: 33.3 Square Feet Per Bundle

    If you are looking for a quick answer, here it is: Most standard asphalt shingle bundles cover approximately 33.3 square feet.

    However, roofing terminology can be tricky. In the construction industry, professionals do not usually talk about “square feet” when ordering materials; they talk about “squares.” One roofing square equals 100 square feet of roof area.

    Because three bundles of standard shingles are required to cover one roofing square (100 sq ft), the math breaks down as follows:

    • 1 Roofing Square = 100 sq ft
    • 1 Roofing Square = 3 Bundles
    • 100 sq ft ÷ 3 bundles = 33.33 sq ft per bundle

    This 3:1 ratio (three bundles per square) is the industry standard for most traditional 3-tab and architectural asphalt shingles. However, relying solely on this average can lead to errors if you are using premium or specialty products. Always check the specific packaging of the brand you intend to buy, as coverage can vary slightly based on the manufacturer’s design and shingle thickness.

    Why Do Some Bundles Cover Less Area?

    While 33.3 square feet is the norm, it is not a universal law. Several factors influence the actual coverage of a single bundle. Understanding these variables is crucial for accurate estimation.

    1. Shingle Type and Weight

    Heavier, premium architectural shingles often have different dimensions than basic 3-tab shingles. Some high-end laminated shingles may require four or even five bundles to cover a single square (100 sq ft). If you are using luxury shingles, one bundle might only cover 20 to 25 square feet.

    2. Manufacturer Specifications

    Different manufacturers (such as GAF, Owens Corning, or CertainTeed) may produce shingles with slightly different exposure lengths. The “exposure” is the part of the shingle that is visible after installation. A longer exposure means fewer shingles are needed per row, potentially changing the number of bundles per square.

    3. Waste Factor and Cuts

    The square footage listed on the bundle is for theoretical coverage. It does not account for waste. When you cut shingles to fit around chimneys, vents, valleys, and edges, you generate waste. Therefore, while a bundle physically contains enough material for 33.3 sq ft, your effective coverage will be lower once installation begins.

    How Many Square Feet In One Bundle Of Roofing Shingles

    How to Calculate Your Total Roofing Needs

    Knowing the coverage per bundle is useless if you don’t know the total size of your roof. Here is a step-by-step method to calculate exactly how many bundles you need.

    Step 1: Measure Your Roof’s Footprint

    If you cannot climb onto the roof safely, measure the length and width of your house from the ground. Include any overhangs (eaves) in your measurements. Multiply the length by the width to get the footprint area.

    Example: A house that is 40 feet long and 30 feet wide has a footprint of 1,200 square feet.

    Step 2: Adjust for Roof Pitch

    A flat roof has the same area as its footprint. However, most roofs are sloped. The steeper the pitch, the more surface area there is. You must multiply your footprint area by a pitch multiplier.

    Roof PitchMultiplier
    4/12 (Low)1.05
    6/12 (Medium)1.12
    8/12 (Steep)1.20
    12/12 (Very Steep)1.41

    Continuing the example: If our 1,200 sq ft house has a 6/12 pitch, we calculate: 1,200 x 1.12 = 1,344 sq ft.

    Step 3: Convert to Squares and Add Waste

    Divide your total adjusted square footage by 100 to get the number of “squares.” Then, add a waste factor. For simple roofs, add 10%. For complex roofs with many hips, valleys, and dormers, add 15–20%.

    Calculation: 1,344 sq ft ÷ 100 = 13.44 squares. Adding 10% waste: 13.44 x 1.10 = 14.78 squares.

    Step 4: Determine Total Bundles

    Finally, multiply the total squares by the number of bundles per square. For standard shingles, this is 3.

    Final Count: 14.78 squares x 3 bundles/square = 44.34 bundles. Since you cannot buy partial bundles, round up to 45 bundles.

    For more detailed information on roof structures and pitch calculations, you can refer to general construction principles on Wikipedia.

    Common Mistakes to Avoid When Buying Shingles

    Even experienced DIYers can stumble when estimating roofing materials. Here are the most frequent pitfalls:

    • Ignoring Starter Strips: Don’t forget that you need starter shingles for the eaves and rakes. These are often sold separately or require cutting full shingles, which increases waste.
    • Underestimating Ridge Caps: The peak of your roof requires ridge cap shingles. These are specialized and not included in the standard bundle count for the field shingles.
    • Assuming All Bundles Are Equal: As mentioned earlier, always read the label. If you switch brands mid-project, the coverage per bundle might change, leaving you with mismatched materials or shortages.
    • Forgetting Flashing and Underlayment: Shingles are only the top layer. You will also need ice and water shield, roofing felt (underlayment), drip edge, and flashing. These do not come in shingle bundles.

    FAQ: Frequently Asked Questions

    1. Does every brand of shingle have 33.3 square feet per bundle?

    No. While 33.3 sq ft is the industry standard for most asphalt shingles, premium, heavy-weight, or designer shingles may have less coverage per bundle. Some luxury lines require 4 or 5 bundles to cover a 100 sq ft square. Always verify the coverage area printed on the wrapper.

    2. How much does one bundle of shingles weigh?

    The weight varies significantly by type. Standard 3-tab shingles typically weigh between 50 and 60 pounds per bundle. Architectural shingles are heavier, often weighing 65 to 80 pounds per bundle. This is an important consideration if you are carrying them up a ladder yourself.

    3. Can I return unused bundles of shingles?

    Most major home improvement stores (like Home Depot or Lowe’s) allow returns of unused, unopened bundles within a specific timeframe (usually 90 days). However, policies vary by location. Keep your receipt and try to buy slightly more than you think you need, as returning extra is easier than rushing back to the store for more.

    4. What is the difference between 3-tab and architectural shingles regarding coverage?

    In terms of square footage, both typically cover 33.3 sq ft per bundle (3 bundles per square). The difference lies in thickness, durability, and aesthetic appeal. Architectural shingles are laminated (two layers bonded together), making them heavier and more wind-resistant, but they generally follow the same coverage rules as 3-tab shingles unless specified as “premium” or “luxury.”

    5. How do I calculate shingles for a shed or small structure?

    Measure the length and width of the shed roof. If it is a simple gable or shed roof, calculate the area (Length x Width). Divide by 33.3 to find the number of bundles. For very small projects, remember to still account for waste. Even on a small roof, cuts around edges can result in 10% waste.

    6. Is it better to buy too many or too few shingles?

    It is always better to buy too many. Running out of shingles mid-project can be disastrous because dye lots can vary. If you run out and buy a new batch weeks later, the color might not match perfectly due to slight manufacturing variations. Having leftover shingles is also beneficial for future repairs.

    Conclusion

    Knowing how many square feet in one bundle of roofing shingles is fundamental to any successful roofing project. While the magic number is typically 33.3 square feet, accurate planning requires understanding your roof’s pitch, accounting for waste, and verifying the specific specifications of your chosen product.

    By following the calculation steps outlined above, you can avoid the stress of mid-project supply runs and ensure your budget remains intact. Remember, measuring twice and buying once (with a little extra) is the golden rule of roofing.

    Did you find this guide helpful? Share it with your friends or neighbors who are planning their next home improvement project! Accurate information saves money and time, so let’s help others get their roofing estimates right the first time.

  • Where Does Ice And Water Shield Go On A Roof?

    Where Does Ice And Water Shield Go On A Roof?

    Have you ever woken up to a mysterious water stain on your ceiling after a heavy snowstorm? It is a frustrating and costly surprise that many homeowners in colder climates face, often due to improper roof protection. Understanding exactly where does ice and water shield go on a roof is the first step in preventing these damaging leaks and ensuring your home stays dry and secure during winter.

    Why Proper Placement Matters for Your Roof’s Health

    Before we dive into the specific locations, it is crucial to understand why this material is different from standard roofing felt. Ice and water shield is a self-adhering, rubberized asphalt membrane. Unlike traditional underlayment, which relies on gravity to shed water, this shield bonds directly to the roof deck.

    This bond creates a watertight seal around nails and staples. When ice dams form, they can push melting water back up under your shingles. Without a proper barrier, that water finds its way into your attic. According to building science principles, managing liquid water intrusion is just as critical as managing vapor transmission. You can read more about the general physics of building envelopes on Wikipedia.

    Getting the placement right isn’t just about best practices; in many regions, it is a legal requirement dictated by local building codes.

    The Critical Zones: Exactly Where to Install It

    If you are asking, “Where does ice and water shield go on a roof?” the answer involves three specific zones. While requirements vary by climate zone, these are the universal standards for maximum protection.

    1. The Eaves (The Most Important Area)

    The eaves are the edge of the roof that overhangs the walls of the house. This is the primary battleground against ice dams.

    • Starting Point: The shield should start at the very edge of the roof deck (the drip edge) or slightly over the fascia board, depending on local code.
    • Vertical Reach: It must extend up the roof slope to a point at least 24 inches inside the exterior wall line of the home.
      • Why? Heat escaping from your attic melts snow on the upper roof. The water runs down until it hits the cold eave, refreezes, and creates a dam. The water backs up behind this dam. If your shield only covers the edge, the water will bypass it. Extending it 24 inches past the interior wall ensures that even significant backup is caught.

    2. Valleys

    Roof valleys are the V-shaped channels where two roof slopes meet. They act as funnels for massive amounts of water runoff.

    • Installation Rule: Apply the shield along the entire length of the valley.
    • Width Requirement: The membrane should be at least 36 inches wide, centered in the valley.
    • Layering: If using multiple strips, overlap them by at least 6 inches. This area experiences high water velocity, so a robust, continuous seal is non-negotiable.

    3. Roof Penetrations and Low Slopes

    Any place where an object pierces the roof is a potential leak source.

    • Penetrations: Use ice and water shield around chimneys, plumbing vents, skylights, and dormer walls. Create a “boot” or collar effect by wrapping the material up the side of the penetration and onto the roof deck.
    • Low-Slope Roofs: If your roof has a pitch of less than 4:12 (meaning it rises 4 inches for every 12 inches of horizontal run), water drains slowly. Many experts recommend covering the entire roof deck with ice and water shield for low-slope applications to prevent wind-driven rain infiltration.
    Where Does Ice And Water Shield Go On A Roof

    Step-by-Step Installation Guide

    Installing this material requires precision. Here is a simplified professional workflow.

    1. Prepare the Surface: Ensure the roof deck (usually plywood or OSB) is clean, dry, and free of debris. Any moisture trapped underneath can cause rot later.
    2. Install Drip Edge: Install metal drip edge along the eaves first. Some codes allow the shield to go over the drip edge; others require it under. Check your local regulations, but generally, placing the shield over the drip edge at the eave provides a better seal against wind-driven rain.
    3. Roll Out the Membrane: Start at the bottom edge. Unroll the ice and water shield horizontally across the eave.
    4. Adhere and Smooth: Peel back the release film gradually. Press the membrane firmly onto the deck. Use a J-roller or a hand roller to ensure there are no air bubbles or wrinkles. Good adhesion is critical.
    5. Overlap Correctly: If you need a second row to reach the 24-inch mark, overlap the upper sheet over the lower sheet by at least 2 to 4 inches. Never overlap the lower sheet over the upper one, as this creates a channel for water to enter.
    6. Seal the Edges: In valleys and around penetrations, use roofing cement or compatible tape to seal the edges if recommended by the manufacturer.

    Ice and Water Shield vs. Traditional Felt: A Comparison

    Many DIYers wonder if they can save money by using standard #15 or #30 asphalt felt everywhere. Here is why that is a risky gamble.

    FeatureIce and Water ShieldTraditional Asphalt Felt
    AdhesionSelf-adhering (sticks to deck)Loose-laid or nailed
    Water ResistanceWatertight seal around nailsWater can wick through nail holes
    Ice Dam ProtectionExcellentPoor to Moderate
    CostHigher ($)Lower ($)
    Best Use CaseEaves, valleys, penetrationsUpper roof field (in moderate climates)

    Key Takeaway: While felt is cheaper, it cannot stop water that has been forced upward by ice pressure. Ice and water shield is an insurance policy for your roof structure.

    Common Mistakes to Avoid

    Even professionals make errors. Here are the most frequent pitfalls:

    • Not Extending Far Enough: Stopping the shield exactly at the wall line is a common error. Always go the extra 24 inches inward.
    • Installing in Cold Weather: The adhesive needs warmth to bond. If it is below 40°F (4°C), the material may not stick properly. Store rolls in a warm place before installation.
    • Wrinkles and Bubbles: A wrinkled shield creates weak points. Take your time to smooth it out.
    • Ignoring Manufacturer Instructions: Different brands have specific temperature ranges and overlap requirements. Always read the label.

    FAQ Section

    1. Do I need ice and water shield on the entire roof?

    In most cases, no. It is typically required only at the eaves, valleys, and penetrations. However, in extreme climate zones (like Northern Canada or Minnesota) or on low-slope roofs, some builders choose to cover the entire deck for maximum peace of mind. Check your local building code for specific mandates.

    2. Can I install ice and water shield over existing shingles?

    No. Ice and water shield must be installed directly onto the roof deck (the wood sheathing). Installing it over old shingles will prevent proper adhesion and void the warranty. It is part of the underlayment layer, not the outer layer.

    3. How long does ice and water shield last?

    The material itself is durable and can last as long as the roof shingles (20–30 years). However, its effectiveness depends on proper installation. If it is not adhered correctly during installation, it may fail prematurely. Once covered by shingles, it is protected from UV rays, which helps it last longer.

    4. What happens if I don’t use ice and water shield?

    Without it, you are at high risk for ice dam damage. Melting water can seep under shingles, soak into the roof deck, rot the wood, damage insulation, and cause mold growth in your attic. The cost of repairing structural rot far exceeds the cost of the shield.

    5. Is ice and water shield the same as peel-and-stick underlayment?

    Essentially, yes. “Ice and water shield” is the functional name describing its purpose, while “peel-and-stick” describes the installation method. Most modern ice and water shields are self-adhering. However, always verify the product specifications to ensure it is rated for ice dam protection.

    Conclusion

    Knowing where does ice and water shield go on a roof is fundamental to protecting your home from the harsh realities of winter weather. By focusing on the eaves (extending 24 inches past the interior wall), valleys, and penetrations, you create a robust defense system against ice dams and wind-driven rain.

    While it may add to the initial cost of your roofing project, the long-term savings in prevented water damage make it an invaluable investment. Don’t cut corners on your roof’s first line of defense.

    Did you find this guide helpful? Share this article with your neighbors or on social media to help others protect their homes this winter season!

  • Roof Ventilation Done? What Personnel Should Do Next

    Roof Ventilation Done? What Personnel Should Do Next

    Have you ever felt the frustration of a home that stays hot even after installing new vents? Or perhaps you are a contractor worried about liability after finishing a job? It is a common scenario: the hard labor is done, but the final details determine long-term success. Knowing exactly when ventilation work on a roof is complete personnel should take specific, deliberate actions to ensure safety, code compliance, and system efficiency.

    This guide breaks down the critical post-installation protocols. We will move beyond basic installation tips to focus on what happens after the last nail is driven. This is where professionalism separates the experts from the amateurs.

    Why Post-Installation Checks Are Non-Negotiable

    Many homeowners and even some contractors believe that once the vent is physically attached, the job is over. This is a dangerous misconception. According to industry data, improper sealing and cleanup account for nearly 30% of roofing callbacks within the first year.

    The phase immediately following installation is crucial for three reasons:

    1. Safety Verification: Ensuring no hazards were left behind.
    2. System Integrity: Confirming the airflow dynamics actually work as designed.
    3. Liability Protection: Documenting that the work meets local building codes and manufacturer warranties.

    When we discuss what personnel should do, we are talking about protecting both the client’s investment and the contractor’s reputation.

    Step 1: Conduct a Thorough Site Cleanup and Hazard Removal

    The first action personnel must take is not technical—it is environmental. A clean roof is a safe roof. Leaving debris behind can lead to clogged gutters, water damage, or even injury to future maintenance workers.

    The “Clean Sweep” Protocol

    Personnel should adhere to a strict cleanup routine:

    • Remove All Cuttings: Shingle granules, PVC trim scraps, and metal flashing offcuts must be collected. These materials can corrode gutters or block drainage paths.
    • Check Valleys and Gutters: Use a leaf blower or broom to clear any debris from roof valleys and gutters. Blocked water flow is the number one cause of premature roof failure.
    • Dispose of Old Materials: If old vents were removed, they must be disposed of according to local waste management regulations. Never leave old asbestos-containing materials or treated wood on-site.

    Pro Tip: Take a photo of the cleaned roof area before leaving. This serves as proof of professional conduct and can resolve disputes if a homeowner claims damage later.

    When Ventilation Work On A Roof Is Complete Personnel Should

    Step 2: Verify Sealant Integrity and Weatherproofing

    Ventilation units are essentially holes in your roof’s waterproof barrier. If these holes are not perfectly sealed, you are inviting leaks. When ventilation work on a roof is complete, personnel should meticulously inspect every penetration point.

    Inspection Checklist for Sealing

    ComponentWhat to CheckCommon Failure Point
    FlashingEnsure it lies flat under shingles (upper) and over shingles (lower).Wrinkles or gaps in metal flashing.
    SealantCheck for continuous bead around the base.Cracks or gaps due to insufficient application.
    NailsEnsure all fasteners are covered by sealant or shingles.Exposed nail heads leading to rust and leaks.

    Use a high-quality roofing cement or urethane-based sealant compatible with the roofing material. For example, if working with asphalt shingles, ensure the sealant does not contain solvents that could degrade the asphalt mat.

    According to Wikipedia’s entry on Roofing, proper flashing integration is critical for the longevity of any roof penetration. Personnel should never rely solely on nails; mechanical fastening must always be accompanied by chemical sealing.

    Step 3: Test Airflow and System Balance

    Installing a vent is useless if it doesn’t move air. The physics of attic ventilation relies on the balance between intake (soffit vents) and exhaust (ridge or roof vents). When ventilation work on a roof is complete, personnel should verify that this balance exists.

    How to Test Airflow

    1. Visual Inspection: From inside the attic, look for daylight coming through the new vent. This confirms the opening is clear.
    2. Smoke Test: On a calm day, use a non-toxic smoke pencil near the soffit vents. Watch if the smoke is drawn up toward the new roof vent. This indicates positive airflow.
    3. Thermal Imaging: For high-end jobs, use an infrared camera to check for heat buildup. A properly ventilated attic will show significantly lower temperatures near the vents compared to stagnant areas.

    If the smoke does not move, there may be an obstruction in the baffle system or insufficient intake ventilation. Personnel should address this immediately before marking the job as complete.

    Step 4: Document Compliance and Warranty Registration

    In the modern construction landscape, documentation is as important as the physical work. Insurance companies and manufacturers require proof that installation guidelines were followed.

    Essential Documentation Steps

    • Photo Documentation: Take clear, high-resolution photos of the installed vent from multiple angles. Include close-ups of the flashing and sealant.
    • Manufacturer Warranty Card: Many vent manufacturers require professional installation for the warranty to be valid. Personnel should fill out and submit these forms immediately.
    • Code Compliance Check: Verify that the net free area (NFA) of the installed vents meets the local building code ratio (typically 1:150 or 1:300 of attic floor space).

    By providing this documentation to the homeowner, you build trust and demonstrate E-E-A-T (Experience, Expertise, Authoritativeness, and Trustworthiness). It shows that you stand behind your work.

    Step 5: Educate the Homeowner

    The final step often overlooked is communication. Homeowners need to know how to maintain their new system. When ventilation work on a roof is complete, personnel should spend five minutes walking the homeowner through the basics.

    Key Points to Communicate

    • Do Not Block Vents: Explain that storing items in the attic near the vents can restrict airflow.
    • Annual Inspection: Recommend checking the vents once a year for debris or bird nests.
    • Signs of Trouble: Teach them to look for moisture stains on the ceiling or excessive heat in the upper floors, which could indicate ventilation failure.

    This educational component transforms a transactional service into a consultative relationship, increasing the likelihood of referrals and repeat business.

    FAQ Section

    1. How long should I wait before walking on the roof after ventilation installation?

    It depends on the sealant used. Most roofing cements require 24–48 hours to fully cure. Walking on it too soon can displace the flashing and break the seal. Always check the manufacturer’s curing time specifications.

    2. Can I install roof vents myself, or do I need a professional?

    While DIY is possible, roof work involves significant fall risks and potential for water damage if flashed incorrectly. Professional personnel have the training to ensure code compliance and warranty validity. If you are not comfortable working at heights, hire a licensed contractor.

    3. What is the most common mistake made after installing roof vents?

    The most common mistake is failing to balance intake and exhaust. Installing powerful exhaust vents without adequate soffit intake can create negative pressure, pulling conditioned air out of your living space and increasing energy bills.

    4. How often should roof vents be cleaned?

    Roof vents should be inspected at least once a year, ideally in the spring. Look for bird nests, leaves, or dust buildup. In areas with heavy pollen or tree cover, bi-annual cleaning may be necessary.

    5. Does adding more vents always improve ventilation?

    No. Over-ventilating can be just as problematic as under-ventilating. It can disrupt the natural airflow pattern and potentially draw rain or snow into the attic. Stick to the calculated Net Free Area (NFA) requirements for your attic size.

    6. What should I do if I notice a leak near the new vent?

    Contact the installer immediately. Most reputable contractors offer a workmanship warranty. Do not attempt to patch it yourself with tar or silicone, as this may void the warranty. Document the leak with photos and dates for insurance purposes.

    Conclusion

    Completing a roofing job is not just about attaching hardware; it is about ensuring a system that protects the home for decades. When ventilation work on a roof is complete personnel should prioritize cleanup, sealing verification, airflow testing, and thorough documentation. These steps are not optional extras—they are the hallmark of professional excellence.

    By following this checklist, contractors can reduce callbacks, enhance safety, and build lasting trust with clients. Homeowners, meanwhile, gain peace of mind knowing their investment is secure and efficient.

    Did you find this guide helpful? Share it with your network on LinkedIn or Facebook to help others understand the importance of proper roof ventilation completion. Let’s raise the standard for roofing professionalism together.

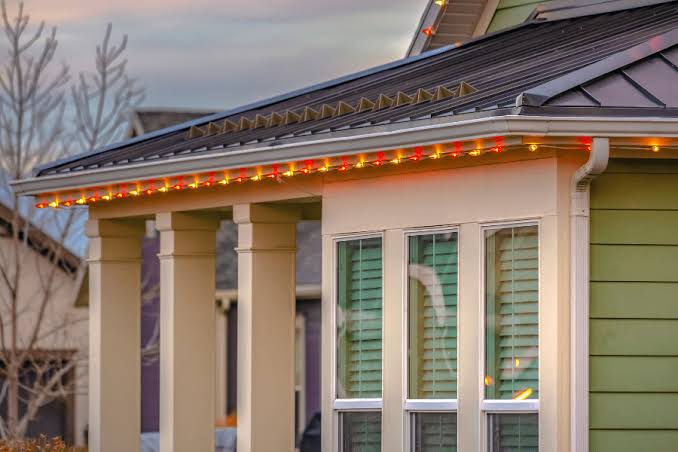
  • Hang Christmas Lights on Metal Roof Safely

    Hang Christmas Lights on Metal Roof Safely

    Hanging holiday decorations can feel like a daunting task, especially when your home features a sleek, modern, or industrial-style metal roof. You want that festive glow, but the fear of slipping, damaging the expensive roofing material, or voiding your warranty holds you back. If you are wondering how do you hang Christmas lights on a metal roof, you are not alone; many homeowners struggle to find a balance between aesthetic appeal and structural integrity.

    The good news is that with the right tools and techniques, you can achieve a breathtaking display without drilling a single hole or risking a dangerous fall. This guide will walk you through safe, effective, and professional methods to light up your home this season.

    Why Standard Methods Fail on Metal Roofs

    Before diving into the solutions, it is crucial to understand why traditional hanging methods often fail on metal surfaces. Unlike asphalt shingles, which have texture and granules that provide grip, metal roofs are smooth, slick, and often coated with delicate finishes.

    Using standard adhesive hooks or nails can lead to two major issues:

    1. Surface Damage: Scratches or punctures can compromise the protective coating, leading to rust and leaks over time.
    2. Safety Hazards: Adhesives often fail in cold temperatures, causing lights to fall and creating tripping hazards or electrical shorts.

    According to industry experts, maintaining the integrity of the roof’s sealant is paramount. A small puncture can lead to significant water intrusion during winter snow melts. Therefore, the goal is non-invasive attachment.

    The Best Tools for the Job: Choosing the Right Clips

    The secret to successfully learning how do you hang Christmas lights on a metal roof lies entirely in the hardware you choose. Not all clips are created equal, and using the wrong type can result in disappointment mid-season.

    1. Magnetic Light Clips

    For standing seam metal roofs, magnetic clips are arguably the best invention in holiday decorating. These clips feature strong neodymium magnets that clamp onto the vertical seams of the roof.

    • Pros: No adhesive residue, extremely secure, reusable, and zero risk of puncturing the roof.
    • Cons: Only works on ferrous metal roofs (steel). They will not stick to aluminum or copper roofs.

    2. Gutter Clips with Extended Reach

    If your metal roof has gutters, you can bypass the roof surface entirely. Specialized gutter clips hook onto the lip of the gutter and hold the light string securely.

    • Pros: Keeps weight off the roof panels, easy to install from a ladder.
    • Cons: Requires accessible gutters; may not work with certain gutter guard systems.

    3. Adhesive-Backed Clips (Use with Caution)

    If you have an aluminum or copper roof where magnets won’t work, high-quality, weather-resistant adhesive clips are an option. However, you must choose clips specifically designed for outdoor use and smooth surfaces.

    • Pros: Works on any material.
    • Cons: Risk of residue; may fail in extreme cold if not applied correctly.
    Clip TypeBest ForDurabilityRisk Level
    Magnetic ClipsSteel Standing SeamHighLow
    Gutter ClipsHomes with GuttersMedium-HighLow
    Adhesive ClipsAluminum/CopperMediumMedium
    How Do You Hang Christmas Lights On A Metal Roof

    Step-by-Step Guide: How to Install Lights Safely

    Now that you have selected your hardware, let’s break down the process. Safety is the priority, so please read these steps carefully before climbing any ladders.

    Step 1: Plan Your Layout

    Measure the perimeter of your roof where you intend to hang the lights. Calculate the total length needed. It is always better to buy 10% more than you think you need to account for corners and mistakes. Sketch a simple diagram to visualize where power sources will be located.

    Step 2: Clean the Surface

    If you are using adhesive clips or even magnetic ones, cleanliness is key. Wipe down the area with a mild soap solution and let it dry completely. Dust and debris reduce the holding power of both magnets and adhesives. For more information on metal roof maintenance, you can refer to general guidelines on Metal Roofing to understand the material properties better.

    Step 3: Test Your Lights

    Before installing anything, plug in your light strands to ensure every bulb works. It is frustrating to install an entire row only to discover a broken filament later. Replace any faulty bulbs now.

    Step 4: Install the Clips

    • For Magnetic Clips: Simply snap them onto the standing seam every 12–18 inches. Ensure they are aligned straight for a professional look.
    • For Adhesive Clips: Peel the backing and press firmly for 30 seconds. Allow the adhesive to cure for 24 hours before hanging heavy lights if possible, although many modern brands offer instant-hold technology.

    Step 5: Attach the Lights

    Clip the lights into place. Do not pull the wire taut; leave a slight slack to allow for expansion and contraction due to temperature changes. Tight wires are more prone to breaking in freezing weather.

    Step 6: Secure the Power Source

    Ensure your extension cords and plugs are rated for outdoor use. Use a weatherproof cover for any outlets exposed to the elements. Never run cords across walkways where they can be tripped over.

    Critical Safety Precautions

    Working on a roof, especially a slippery metal one, presents unique dangers. Here are essential safety tips to keep in mind:

    • Never Walk on a Wet or Icy Roof: Metal becomes incredibly slick when wet or frozen. One misstep can lead to a serious injury.
    • Use a Spotter: Always have someone else present when you are on a ladder or roof. They can stabilize the ladder and call for help if needed.
    • Check the Weather Forecast: Do not attempt installation if rain, snow, or high winds are predicted. Wait for a calm, dry day.
    • Use Proper Footwear: Wear shoes with rubber soles that provide maximum grip. Avoid leather-soled boots.

    Common Mistakes to Avoid

    Even with the best intentions, homeowners often make errors that compromise their display or their roof.

    1. Using Staples or Nails: Never puncture a metal roof. This voids warranties and creates leak paths.
    2. Overloading Circuits: Check the amperage rating of your lights and extension cords. Overloading can cause fires.
    3. Ignoring Manufacturer Instructions: Each clip brand has specific weight limits and installation guidelines. Follow them strictly.

    FAQ Section

    Can I use magnetic clips on an aluminum metal roof?

    No, standard magnetic clips will not work on aluminum because it is non-ferrous. For aluminum roofs, you should use adhesive-backed clips designed for smooth surfaces or gutter clips if available.

    Will adhesive clips damage my roof’s finish?

    High-quality, outdoor-rated adhesive clips are designed to be removed without leaving residue. However, low-quality adhesives may leave a sticky mess or peel off paint. Always test a small, inconspicuous area first.

    How far apart should I place the clips?

    For a neat and secure appearance, place clips every 12 to 18 inches. This spacing prevents the light strand from sagging while ensuring enough support against wind.

    Is it safe to hang lights on a steep metal roof?

    It is generally not recommended to climb onto a steep metal roof due to slip hazards. Instead, use long-reach tools, gutter clips installed from a ladder, or hire a professional installer who has the proper safety harnesses and equipment.

    How do I remove the lights without damaging the roof?

    Gently unclip the lights from the holders. If using adhesive clips, warm the adhesive slightly with a hairdryer on a low setting to soften it before peeling it off slowly. Clean any residual adhesive with a mild solvent recommended by the clip manufacturer.

    Conclusion

    Learning how do you hang Christmas lights on a metal roof doesn’t have to be a stressful experience. By choosing the right clips—whether magnetic for steel or adhesive for aluminum—and following strict safety protocols, you can create a magical holiday atmosphere without compromising your home’s integrity.

    Remember, the key is preparation. Measure twice, buy the right hardware, and prioritize safety over speed. Your beautiful, damage-free display will be the envy of the neighborhood.

    If you found this guide helpful, please share it with your friends and family on social media to help them light up their holidays safely too! Happy decorating!

  • How Much Does It Cost To Raise Roof Of House?

    How Much Does It Cost To Raise Roof Of House?

    Have you ever felt like your home’s ceiling is closing in on you? Low ceilings can make even a spacious floor plan feel cramped and dark, impacting both your comfort and your property’s value. If you are considering a major structural change to gain headroom or add a second story, you are likely asking the critical question: how much does it cost to raise roof of house? This guide breaks down the financial realities, helping you plan with confidence.

    Understanding the Scope: What Does “Raising a Roof” Mean?

    Before diving into dollar signs, it is crucial to define what this project entails. “Raising a roof” generally refers to one of two distinct construction methods:

    1. Roof Lift: The existing roof structure is detached from the walls, lifted using hydraulic jacks, and new wall sections are built underneath to increase height.
    2. Roof Replacement/Reframing: The old roof is completely removed, and a new, steeper pitch or higher frame is constructed.

    The method chosen significantly impacts the price. A simple lift might be cheaper than a full tear-off and rebuild, but it depends heavily on your home’s current structural integrity. According to general construction principles, altering the load-bearing structure of a home requires precise engineering to ensure safety and compliance with local building codes. For more context on structural engineering standards, you can refer to Wikipedia’s page on Structural Engineering.

    Average Costs: Breaking Down the Numbers

    So, how much does it cost to raise roof of house? While every project is unique, industry data provides a reliable baseline.

    On average, homeowners can expect to pay between $15,000 and $125,000+ for a roof raising project. However, most standard single-story homes fall into the $30,000 to $60,000 range.

    Cost Per Square Foot

    A more accurate way to estimate is by square footage. You might pay anywhere from $15 to $30 per square foot for the structural work alone. This does not always include finishing costs like drywall, insulation, or interior painting.

    Project ComponentEstimated Cost RangeNotes
    Engineering & Permits$2,000 – $5,000Essential for legal compliance and safety.
    Labor (Carpentry)$10,000 – $40,000Depends on complexity and local labor rates.
    Materials (Lumber/Steel)$5,000 – $20,000Prices fluctuate with market demand.
    Roofing Materials$5,000 – $15,000Shingles, metal, or tile options vary widely.
    Interior Finishing$5,000 – $25,000Drywall, paint, electrical, and HVAC extensions.

    Note: These figures are estimates based on national averages. Local markets like California or New York will be significantly higher than rural Midwest areas.

    How Much Does It Cost To Raise Roof Of House

    Key Factors Influencing the Final Price

    Why is there such a massive gap between $15,000 and $125,000? Several variables drive the cost up or down. Understanding these will help you budget more accurately.

    1. Size and Complexity of the Home

    Naturally, a larger footprint means more materials and labor. However, complexity matters more than size. A simple rectangular ranch-style home is far cheaper to lift than a Victorian-era home with multiple gables, dormers, and intricate angles. Every corner and joint adds labor hours.

    2. Structural Integrity and Foundation

    Before lifting a roof, your foundation must be able to support the new loads. If your foundation is cracked or weak, it may need reinforcement before any roof work begins. This can add $5,000 to $15,000 to your total bill. Always hire a structural engineer to assess this first.

    3. Local Labor and Material Costs

    Construction costs are highly regional. In high-cost-of-living areas, labor rates can be double those in other regions. Additionally, the cost of lumber and steel fluctuates globally. Timing your project during periods of lower material demand can sometimes save you thousands.

    4. Permitting and Zoning Laws

    You cannot simply raise your roof because you want to. Most municipalities have strict zoning laws regarding maximum building heights. Obtaining permits involves fees and potentially hiring an architect to draw up plans that meet code. Ignoring this step can lead to hefty fines or forced demolition.

    5. Interior and Exterior Finishes

    Raising the roof is just the shell. Once the structure is up, you need to finish the new wall space. This includes:

    • Extending electrical wiring and plumbing vents.
    • Adding insulation to meet energy codes.
    • Installing drywall, taping, mudding, and painting.
    • Matching exterior siding or brickwork to the existing facade.

    Step-by-Step Process: What to Expect

    If you decide to proceed, here is a simplified overview of the workflow. Knowing the steps helps you understand where the money goes.

    1. Consultation and Engineering: Hire a structural engineer to determine if your home can be lifted. They will calculate load paths and design the new wall supports.
    2. Permitting: Submit plans to your local building department. This can take weeks or months.
    3. Preparation: Contractors will secure the site, disconnect utilities that run through the roof/walls, and prepare the foundation.
    4. The Lift: Using synchronized hydraulic jacks, the roof is slowly lifted. This is a delicate operation that requires precision to prevent cracking walls or damaging the roof deck.
    5. Wall Construction: New framing is built under the lifted roof to create the desired height.
    6. Reconnection: The roof is lowered onto the new walls and secured. Utilities are reconnected, and the exterior is sealed.
    7. Finishing: Interior and exterior finishes are applied to blend the new structure with the old.

    Pros and Cons: Is It Worth It?

    Before signing a contract, weigh the benefits against the drawbacks.

    Pros:

    • Increased Property Value: Higher ceilings and additional living space (if adding a second story) significantly boost resale value.
    • Improved Livability: More natural light and a sense of openness can transform your daily life.
    • Avoid Moving Costs: Renovating is often cheaper than buying a new home, especially when factoring in real estate agent fees and moving expenses.

    Cons:

    • High Upfront Cost: It is a major capital investment.
    • Disruption: You may need to move out temporarily due to dust, noise, and safety concerns.
    • Risk of Delays: Weather, permit issues, or supply chain problems can extend the timeline.

    Frequently Asked Questions (FAQ)

    1. Can I raise my roof without moving out?

    In most cases, no. The process involves removing parts of the exterior walls and exposing the interior to the elements. It is noisy, dusty, and potentially unsafe. Most contractors recommend vacating the home for the duration of the structural work, which can last 2–6 weeks.

    2. Does raising the roof require a new foundation?

    Not always, but it often requires foundation reinforcement. The added height and potential second story increase the load on the foundation. A structural engineer must verify that your current footing can handle the extra weight. If not, underpinning or widening the foundation may be necessary.

    3. How long does it take to raise a roof?

    The physical lifting process usually takes only a few days. However, the entire project—from permitting to final finishes—typically takes 3 to 6 months. Permitting alone can take 4–8 weeks depending on your city’s efficiency.

    4. Will my homeowner’s insurance cover roof raising?

    Standard homeowner’s insurance typically does not cover voluntary renovations. It covers damage from unexpected events (like storms). However, once the project is complete, you should update your policy to reflect the increased replacement cost of your home.

    5. Is it better to raise the roof or build an addition?

    This depends on your lot size and budget. Building an outward addition is often simpler and less risky structurally but requires yard space. Raising the roof (or adding a second story) preserves yard space but is more complex and expensive per square foot. Compare quotes for both options before deciding.

    Conclusion

    Deciding how much does it cost to raise roof of house is not just about finding the lowest bidder; it is about investing in the long-term value and comfort of your home. While the price tag can seem steep—ranging from $30,000 to over $100,000—the return on investment in terms of livability and property value can be substantial.

    Remember to prioritize hiring licensed professionals, securing proper permits, and getting multiple detailed quotes. Do not cut corners on engineering; your family’s safety depends on it.

    If you found this guide helpful, please share it with friends or family who are considering similar home improvements. Knowledge is power when tackling big renovation projects!

  • Flat Roof Replacement Cost: 2026 Price Guide

    Flat Roof Replacement Cost: 2026 Price Guide

    Leaking ceilings and pooling water are more than just nuisances; they are signs that your building’s primary defense is failing. If you are staring at cracks or blisters on your ceiling, you are likely wondering how much does it cost to replace a flat roof before the damage becomes irreversible. This guide breaks down the real costs, hidden fees, and material choices to help you make an informed decision without the stress.

    Understanding the Average Cost of Flat Roof Replacement

    When planning a roofing project, the first question homeowners and business owners ask is about the bottom line. In 2026, the cost to replace a flat roof typically ranges between $4 and $15 per square foot, depending on materials and labor complexity. For an average 1,500-square-foot roof, you can expect total costs to fall between $6,000 and $22,500.

    However, these numbers are not set in stone. Several variables influence the final invoice:

    • Roof Size: Measured in “squares” (100 sq. ft.), larger roofs often have a lower cost per square foot due to economies of scale.
    • Accessibility: Roofs that are difficult to reach or require special equipment (like cranes) will incur higher labor charges.
    • Location: Labor rates in urban areas like New York or San Francisco are significantly higher than in rural regions.
    • Removal of Old Roofing: Tearing off existing layers adds to disposal fees and labor time.

    It is crucial to get at least three detailed quotes from licensed contractors. A low bid might exclude essential steps like proper insulation or flashing replacement, leading to costly repairs later.

    How Material Choice Impacts Your Budget

    The type of membrane you choose is the single biggest factor in determining your total cost. Each material offers different lifespans, durability levels, and price points. Below is a comparison of the most common flat roofing materials in the US market today.

    1. EPDM (Ethylene Propylene Diene Monomer)

    Often called “rubber roofing,” EPDM is a popular choice for residential flat roofs due to its affordability and ease of installation.

    • Cost: $4 – $8 per sq. ft.
    • Lifespan: 20–30 years.
    • Pros: Excellent resistance to UV rays and ozone; flexible in cold weather.
    • Cons: Can be prone to punctures; seams must be carefully sealed to prevent leaks.

    2. TPO (Thermoplastic Polyolefin)

    TPO has gained massive popularity in recent years for its energy efficiency and reflective properties.

    • Cost: $5.50 – $9.50 per sq. ft.
    • Lifespan: 20–30 years.
    • Pros: Highly reflective (reduces cooling bills); resistant to mold and dirt accumulation.
    • Cons: Quality varies by manufacturer; cheaper versions may crack over time.

    3. PVC (Polyvinyl Chloride)

    PVC is a premium option known for its chemical resistance and durability, often used in commercial settings or homes near industrial areas.

    • Cost: $7 – $12 per sq. ft.
    • Lifespan: 20–30+ years.
    • Pros: Fire-resistant; excellent for roofs exposed to chemicals or grease.
    • Cons: Higher upfront cost; can become brittle in extreme cold if not formulated correctly.

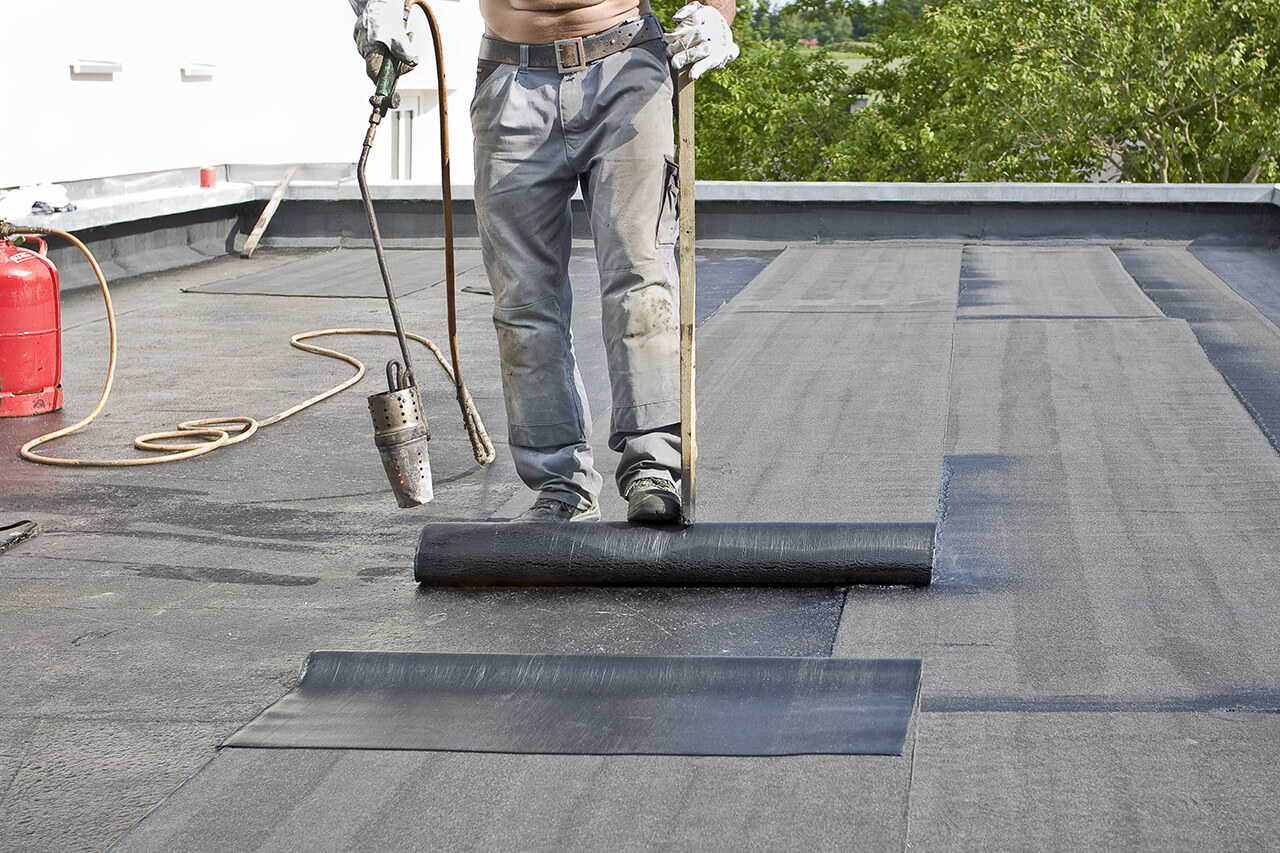
    4. Modified Bitumen

    This asphalt-based material is installed in rolls and often torch-applied. It is rugged and reliable.

    • Cost: $5 – $9 per sq. ft.
    • Lifespan: 15–20 years.
    • Pros: Strong puncture resistance; good for high-traffic roofs.
    • Cons: Installation involves open flames (fire risk); absorbs heat, potentially increasing cooling costs.
    MaterialAvg. Cost per Sq. Ft.LifespanBest For
    EPDM$4 – $820-30 YearsBudget-conscious homeowners
    TPO$5.50 – $9.5020-30 YearsEnergy efficiency seekers
    PVC$7 – $1220-30+ YearsChemical resistance needs
    Mod Bitumen$5 – $915-20 YearsHigh-traffic areas
    How Much Does It Cost To Replace A Flat Roof

    What Are the Hidden Costs in Flat Roof Replacement?

    Beyond the material and basic labor, several “hidden” costs can surprise unprepared homeowners. Being aware of these ensures your budget remains intact.

    Structural Repairs

    Once the old roof is removed, contractors may discover rotted decking or compromised structural supports. Repairing plywood sheathing typically costs $2.50 to $4.50 per square foot. If the rot is extensive, this can add thousands to your bill. Always include a contingency fund of 10–15% for unexpected structural issues.

    Insulation Upgrades

    Modern building codes often require higher R-values for insulation than older roofs possessed. Adding or upgrading rigid foam insulation can cost $1.50 to $3.00 per square foot. While this increases upfront costs, it significantly improves energy efficiency and comfort.

    Flashing and Edge Details

    Flashing—the metal strips that seal joints around chimneys, vents, and walls—is where most leaks occur. Replacing old, corroded flashing with new aluminum or copper is essential. Expect to pay $15–$30 per linear foot for high-quality flashing installation.

    Permit Fees

    Most municipalities require permits for roof replacements. These fees vary widely but generally range from $100 to $500. Your contractor should handle this, but ensure it is included in your quote.

    DIY vs. Professional Installation: Is It Worth the Risk?

    While some homeowners consider DIY to save money, flat roof replacement is not recommended as a DIY project for several reasons.

    1. Warranty Validity: Most manufacturers void warranties if the roof is not installed by a certified professional.
    2. Safety Hazards: Working on a flat roof still involves fall risks, especially when dealing with heavy rolls of membrane and hot torches (for bitumen).
    3. Complexity of Seams: The integrity of a flat roof relies entirely on the seams. Professional welders use specialized tools to fuse TPO and PVC seams, creating a watertight bond that adhesives or tapes cannot match long-term.

    If you are handy, you might assist with cleanup or removal of old materials to reduce labor costs, but leave the membrane installation to the experts. For more information on roofing standards and safety, you can refer to general construction guidelines on Wikipedia.

    Step-by-Step Process of a Professional Replacement

    Understanding the workflow helps you monitor the quality of work. Here is what a typical professional replacement looks like:

    1. Inspection and Measurement: The contractor measures the roof area and inspects the deck for damage.
    2. Tear-Off: Existing roofing layers are removed. In some cases, one layer can be left if local codes allow, but a full tear-off is preferred for longevity.
    3. Deck Preparation: The wooden deck is cleaned, dried, and repaired. Any rotten plywood is replaced.
    4. Insulation Installation: Rigid foam boards are laid out and secured to provide thermal resistance and a smooth surface.
    5. Membrane Installation: The chosen material (EPDM, TPO, etc.) is rolled out. Seams are either glued, taped, or heat-welded.
    6. Flashing and Detailing: Metal flashing is installed around penetrations and edges. Sealants are applied for extra protection.
    7. Final Inspection: The contractor walks the roof to check for loose seams or debris. A water test may be performed to ensure no leaks exist.

    Frequently Asked Questions (FAQ)

    How long does a flat roof last?

    A well-installed flat roof typically lasts between 15 and 30 years. EPDM and TPO roofs tend to reach the upper end of this range (20–30 years), while modified bitumen may need replacement sooner (15–20 years). Regular maintenance, such as clearing debris and inspecting seams, can extend this lifespan.

    Can I install a new flat roof over the old one?

    In many cases, yes. This is called a “roof-over.” However, it is only advisable if the existing roof has only one layer and the deck is structurally sound. Adding multiple layers can trap moisture and add excessive weight. Always consult local building codes and a professional roofer before deciding.

    What is the cheapest way to replace a flat roof?

    EPDM rubber roofing is generally the most cost-effective option for residential flat roofs. It is durable, easy to install, and has a lower material cost compared to PVC or TPO. However, remember that the cheapest option may not always offer the best energy efficiency or aesthetic appeal.

    Does insurance cover flat roof replacement?

    Homeowners insurance typically covers roof replacement if the damage is caused by a sudden, covered peril like a storm, hail, or falling tree. It usually does not cover wear and tear, age-related deterioration, or lack of maintenance. Check your policy details and document any storm damage immediately.

    How do I maintain my flat roof to avoid early replacement?

    Regular maintenance is key. Clear leaves and debris twice a year to prevent water pooling. Inspect seams and flashing annually for cracks or separation. Keep drains and scuppers clear to ensure proper water runoff. Addressing minor repairs promptly can prevent major leaks and extend the roof’s life significantly.

    Conclusion

    Replacing a flat roof is a significant investment, but understanding how much does it cost to replace a flat roof empowers you to budget effectively and choose the right materials. Whether you opt for the affordability of EPDM or the energy efficiency of TPO, prioritizing professional installation and quality materials will save you money in the long run.

    Don’t wait for a small leak to become a major structural issue. Get those quotes, check your insulation, and secure your home’s future. If you found this guide helpful, please share it on social media to help friends and family navigate their roofing projects with confidence!

  • How Do I Get A FEMA Blue Roof For Free?

    How Do I Get A FEMA Blue Roof For Free?

    Storms leave more than just debris; they leave families exposed to the elements. If your home has suffered wind or hail damage, you are likely wondering how do I get a FEMA blue roof for free to protect your property from further harm. This guide breaks down the process simply, ensuring you know exactly what to do when time is of the essence.

    Understanding the FEMA Blue Roof Mission

    Before diving into the application process, it is crucial to understand what this program actually is. The “Blue Roof” initiative is part of the U.S. Army Corps of Engineers (USACE) mission assignment under FEMA’s direction. It is not a permanent repair solution, nor is it a cash grant. Instead, it is an immediate, temporary measure designed to make your home habitable while you arrange for permanent repairs.

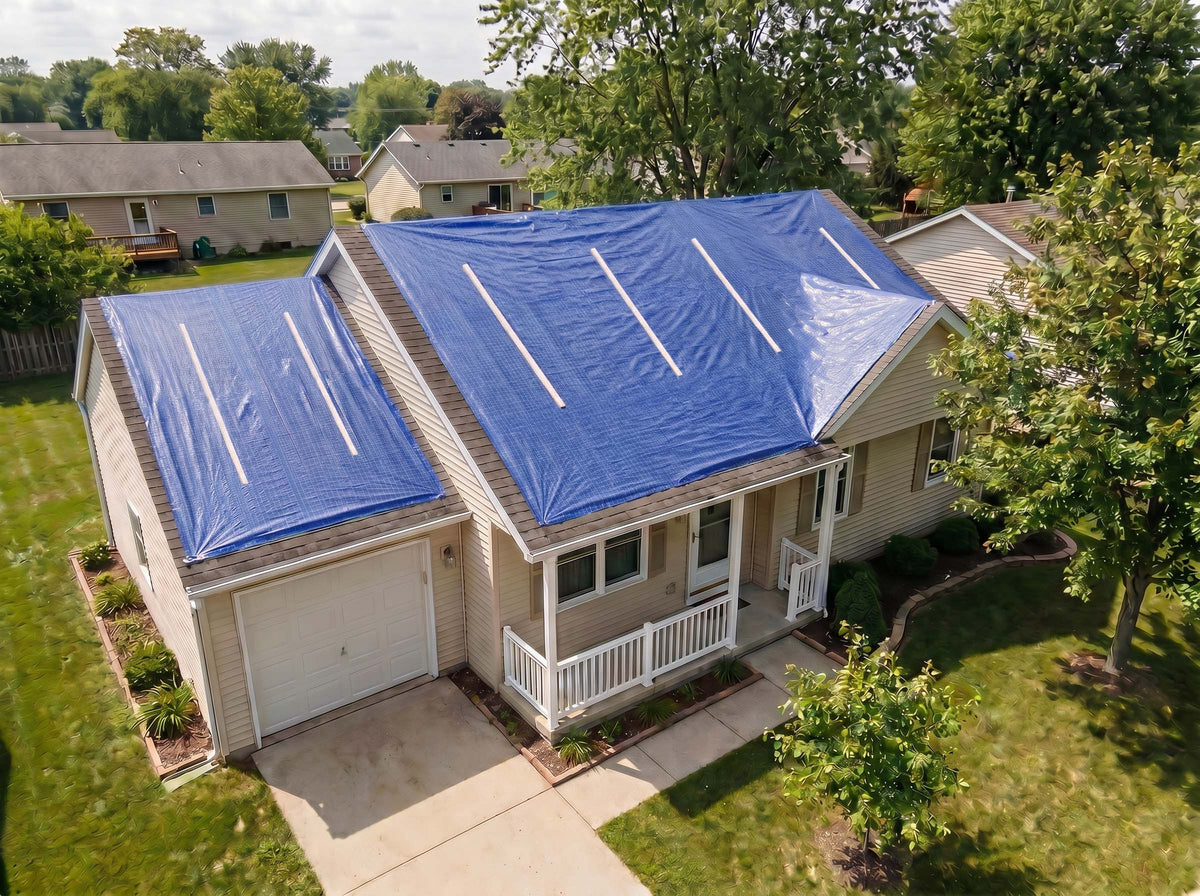
    The program installs plastic sheeting reinforced with blue strips over damaged roofs. This specific color helps aerial surveyors identify which homes have received assistance. According to official data, these installations can last up to 30 days, though they often hold up longer depending on weather conditions.

    Who Is Eligible for Free Installation?

    Not every homeowner qualifies. FEMA has strict criteria to ensure resources go to those who need them most. To be eligible, you must meet the following requirements:

    • Primary Residence: The damaged home must be your primary residence. Vacation homes, rental properties, or secondary residences do not qualify.
    • Owner-Occupied: You must own the home. Renters generally do not qualify for roof coverage unless they are responsible for structural repairs per their lease agreement (which is rare).
    • Insurable Damage: The damage must be caused by a declared disaster event, such as a hurricane, tornado, or severe storm. Normal wear and tear or pre-existing damage is excluded.
    • Safety Hazard: The damage must pose an immediate threat to health and safety, such as large holes allowing rain into living spaces.

    If you are unsure about your status, the best first step is to register with FEMA. Their specialists will conduct an inspection to verify eligibility.

    Step-by-Step: How Do I Get A FEMA Blue Roof For Free?

    Many people assume they need to call a contractor first. However, the process for federal aid is centralized. Here is the exact workflow you should follow.

    1. Register with FEMA Immediately

    You cannot get a blue roof without first registering for disaster assistance. This is the gateway to all federal aid.

    • Online: Visit DisasterAssistance.gov
    • Phone: Call the FEMA Helpline at 1-800-621-3362.
    • App: Download the FEMA App for iOS or Android.

    When registering, be explicit about your roof damage. Mention that you have significant leaks or structural exposure. This flags your case for potential USACE intervention.

    2. Wait for the Inspection

    After registration, a FEMA housing inspector will contact you to schedule a visit. They will assess the extent of the damage. Be honest and thorough during this inspection. Point out all areas where water is entering the home.

    • Tip: Have your insurance information ready. Even if you don’t have insurance, state this clearly. FEMA needs to know if there is another payer involved.

    3. Receive the Referral to USACE

    If the inspector determines your roof damage is severe enough to require temporary covering, they will refer your case to the U.S. Army Corps of Engineers. You will receive a notification that you have been selected for the Blue Roof Mission.

    4. Sign the Right-of-Entry Agreement

    This is a critical legal step. Before crews can touch your roof, you must sign a Right-of-Entry (ROE) form. This document grants federal contractors permission to access your property.

    • Do not delay signing this. Crews work on tight schedules. If you hesitate, they may skip your house to help others who are ready.
    • Ensure someone over 18 is present at the property when the crew arrives, as required by most ROE agreements.

    5. Installation Day

    The USACE contractors will arrive with heavy equipment and materials. The installation typically takes a few hours. They will secure the plastic sheeting using wooden battens and nails.

    • Note: They will not remove existing shingles or debris. They install over the current surface. If your roof has loose debris, try to clear safe-to-reach areas beforehand to speed up the process.
    How Do I Get A Fema Blue Roof For Free

    Critical Considerations and Limitations

    While knowing how do I get a FEMA blue roof for free is vital, understanding what the program does not cover is equally important to manage expectations.

    FeatureCovered by Blue Roof ProgramNot Covered
    MaterialPlastic sheeting & wood battensShingles, plywood, or tarps
    DurationTemporary (approx. 30 days)Permanent repair
    Cost100% Free to eligible ownersAny upgrades or extra materials
    ScopeMain living area roof onlyGarages, sheds, or pools
    DebrisNoneRemoval of old roofing material

    The Insurance Interaction

    A common misconception is that accepting federal aid voids your insurance claim. This is false. However, FEMA is the payer of last resort.

    If you have homeowners insurance, you must file a claim. FEMA will coordinate with your insurer. In many cases, FEMA provides the immediate blue roof so you have shelter, while your insurance company processes the funds for permanent repairs. If your insurance denies the claim, FEMA’s assistance remains valid.

    For more detailed historical context on how federal disaster response has evolved, you can review general information on Federal Emergency Management Agency operations.

    Frequently Asked Questions (FAQ)

    1. How long does the blue roof last?

    The blue roof is designed as a temporary fix, typically lasting 30 days. However, depending on weather conditions and installation quality, it can last several months. It is not a substitute for permanent repairs. You should begin planning for permanent fixes immediately after installation.

    2. Can renters apply for a blue roof?

    Generally, no. The program is for owner-occupied primary residences. Renters should contact their landlords to handle structural repairs. However, renters may be eligible for other forms of FEMA assistance, such as rental assistance or personal property grants.

    3. What if I miss the application deadline?

    FEMA sets strict registration deadlines for each declared disaster. If you miss the initial window, you may still be able to appeal or register late if you have a valid reason (e.g., hospitalization). Contact the FEMA Helpline immediately to discuss your specific situation.

    4. Do I need to pay for the installation later?

    No. If you are eligible, the installation is completely free. There are no hidden fees, loans, or future bills associated with the Blue Roof Mission. It is a grant-based service funded by taxpayers.

    5. Can I choose the color or material?

    No. The “blue” roof is standardized for identification and efficiency. The materials used are industrial-grade plastic sheeting specifically tested for wind resistance. Custom requests are not accommodated due to the scale of the operation.

    6. What happens if my roof is too damaged for a blue roof?

    If the structural integrity of the roof is compromised (e.g., trusses are broken), a blue roof may not be safe to install. In such cases, FEMA may offer alternative assistance, such as hotel vouchers or direct housing units, depending on availability and program guidelines.

    Conclusion

    Navigating the aftermath of a disaster is overwhelming, but securing your home’s integrity is the first step toward recovery. By understanding how do I get a FEMA blue roof for free, you empower yourself to take immediate action. Remember, the key lies in prompt registration with FEMA, cooperating with inspectors, and signing the Right-of-Entry form without delay.

    This program is a lifeline, offering a dry, safe space while you navigate the complexities of insurance and permanent reconstruction. Do not let pride or confusion stop you from seeking help. These resources exist to support you in your time of need.

    If you found this guide helpful, please share it with your neighbors and community groups on social media. In disaster scenarios, information spreads fastest through community networks, and your share could help a vulnerable family stay dry and safe.

  • Best Paint Colors for a House With a Red Roof

    Best Paint Colors for a House With a Red Roof

    Choosing the right exterior paint when you have a distinctive architectural feature like a red roof can feel daunting. You want your home to look cohesive and stylish, not clashing or overwhelming. If you are wondering what color to paint a house with a red roof, you are in the right place to find harmonious and stunning solutions.

    A red roof is a bold statement. It draws the eye immediately, which means the rest of your home’s exterior needs to balance that intensity rather than compete with it. Whether you have a traditional brick home, a modern farmhouse, or a rustic cottage, the right wall color can transform your property from “busy” to “beautiful.”

    In this guide, we will break down the science of color theory, explore top-tier color combinations, and provide actionable tips to help you make the perfect choice for your home.

    Why Is Choosing Paint for a Red Roof So Challenging?

    Before diving into specific colors, it is essential to understand why this task feels difficult. Red is a “warm” color with high visual weight. When paired incorrectly, it can make a house look dated or visually chaotic.

    However, when paired correctly, a red roof adds warmth, character, and a touch of traditional charm. The key lies in understanding the undertones of your specific red roof. Not all reds are the same. Some lean towards orange (terracotta), while others lean towards purple (burgundy) or brown (rust).

    • Orange-based Reds: Pair best with warm neutrals, creams, and earthy greens.
    • Purple/Brown-based Reds: Pair beautifully with cool grays, crisp whites, and deep blues.

    Ignoring these undertones is the most common mistake homeowners make. By identifying your roof’s specific hue, you narrow down your options significantly.

    Top 5 Color Palettes That Complement a Red Roof

    Here are the most effective color strategies used by professional exterior designers. These combinations have stood the test of time and continue to boost property value.

    1. Crisp White: The Timeless Classic

    There is a reason why white houses with red roofs are iconic, particularly in Colonial and Cape Cod styles. White provides the highest possible contrast against a red roof, making both elements pop without clashing.

    • Why it works: White acts as a neutral canvas. It reflects light, making the home feel larger and brighter, while allowing the red roof to serve as the primary accent.
    • Best Shade: Avoid stark, clinical whites. Opt for off-whites or creamy whites (like Benjamin Moore’s White Dove or Sherwin-Williams’ Alabaster) to soften the contrast and add warmth.
    • Trim Advice: Use a slightly darker shade of white or a soft gray for trim to add depth.

    2. Warm Beige and Taupe: The Earthy Harmony

    If white feels too stark, beige and taupe are excellent alternatives. These earth tones share the same warm family as many red roofs, creating a seamless and inviting look.

    • Why it works: Beige bridges the gap between the ground and the sky. It creates a monochromatic warmth that feels grounded and stable.
    • Best Shade: Look for beiges with yellow or pink undertones. Avoid beiges that are too gray, as they might clash with the warmth of the red.
    • Ideal For: Ranch-style homes and suburban neighborhoods where blending in is preferred over standing out.

    3. Soft Gray: The Modern Contrast

    Gray has become increasingly popular in the last decade. However, not all grays work with red. You must choose carefully.

    • Why it works: A cool, light gray provides a sophisticated, modern counterpoint to the traditional feel of a red roof. It updates the look of an older home instantly.
    • Best Shade: Stick to light to medium grays with cool undertones. Dark charcoal can sometimes feel too heavy when paired with a bright red roof, unless the roof is a dark burgundy.
    • Caution: Ensure the gray does not have strong blue undertones if your roof is orange-red, as this can create visual vibration.

    4. Sage and Olive Green: The Natural Blend

    Green and red are complementary colors on the color wheel, meaning they sit opposite each other. This makes them natural partners, provided you adjust the saturation.

    • Why it works: This combination mimics nature (think red berries on green leaves). It is incredibly pleasing to the human eye and works exceptionally well for homes surrounded by landscaping.
    • Best Shade: Avoid bright Kelly green. Instead, choose muted, desaturated greens like sage, olive, or eucalyptus. These softer greens allow the red roof to shine without fighting for attention.
    • Expert Tip: This palette is perfect for Craftsman and Bungalow style homes.

    5. Navy and Slate Blue: The Bold Statement

    For those who want a dramatic, high-end look, blue is a surprising but effective choice.

    • Why it works: Blue is a cool color that balances the heat of the red roof. Deep navy creates a regal, stately appearance, while slate blue offers a more relaxed, coastal vibe.
    • Best Shade: Navy blue pairs beautifully with dark red or burgundy roofs. Slate blue works well with brighter terracotta roofs.
    • Trim Advice: Keep trim white or cream to prevent the house from looking too dark.
    What Color To Paint A House With A Red Roof

    Comparison Table: Quick Reference Guide

    To help you visualize these options, here is a quick comparison of the top contenders.

    Wall ColorBest Roof UndertoneVibe/StyleMaintenance Level
    Crisp WhiteAny (Especially Burgundy)Traditional, CleanHigh (shows dirt)
    Warm BeigeOrange/TerracottaCozy, SuburbanLow
    Light GrayPurple/Brown RedModern, SophisticatedMedium
    Sage GreenBrick Red/RustRustic, NaturalMedium
    Navy BlueDark Red/BurgundyBold, DramaticLow

    Understanding Color Theory for Exteriors

    To make an informed decision, it helps to understand the basics of color theory. According to principles documented in resources like Wikipedia’s entry on Color Theory, colors interact in specific ways that affect human perception.

    1. Complementary Colors: As mentioned, green and red are opposites. Using muted versions of both creates balance.
    2. Analogous Colors: These are next to each other on the wheel (e.g., red, orange, yellow). Using beige (which has yellow/orange tones) with a red roof creates harmony.
    3. Monochromatic: Using different shades of the same hue. A dark red house with a lighter red roof is risky but can work if done with extreme precision.

    Pro Tip: Always consider the 60-30-10 rule.

    • 60% of your exterior should be the main wall color.
    • 30% should be the trim, doors, and shutters.
    • 10% should be the accent (often the roof or front door).

    Since the roof is already a dominant 10-20% of the visual field, your wall color (the 60%) must support it, not fight it.

    Step-by-Step Guide to Testing Your Color Choice

    Do not buy gallons of paint based on a small chip at the hardware store. Exterior lighting changes dramatically throughout the day. Follow these steps to ensure success:

    1. Identify the Roof Undertone: Look at your roof in direct sunlight. Does it look more orange, purple, or brown? Write this down.
    2. Buy Sample Pots: Purchase small sample sizes of your top 3 choices.
    3. Paint Large Swatches: Paint at least a 2×2 foot square on different sides of your house (north, south, east, west).
    4. Observe at Different Times: Check the colors in the morning, noon, and evening. Note how artificial lighting affects them at night.
    5. Check Against Fixed Elements: Ensure the paint looks good against your brick, stone, or landscaping, not just the roof.

    Frequently Asked Questions (FAQ)

    Q: Can I paint my house black with a red roof?

    A: Yes, but it is a bold choice. Black walls with a red roof create a high-contrast, modern industrial look. It works best if the red roof is dark (burgundy or maroon) rather than bright cherry red. Ensure you have ample white trim to break up the darkness.

    Q: What color trim goes best with a red roof and beige walls?

    A: White trim is the safest and most classic choice. It provides a clean separation between the beige walls and the red roof. Alternatively, a dark brown trim can anchor the look if you want a more rustic, earthy feel.

    Q: Does the style of my house matter when choosing paint?

    A: Absolutely. A Victorian home can handle complex, multi-color schemes, while a Mid-Century Modern home looks best with simple, solid blocks of color. Always respect the architectural integrity of your home.

    Q: Will a dark paint color make my house hotter?

    A: Yes, darker colors absorb more heat. If you live in a hot climate, lighter colors like white, beige, or light gray are more energy-efficient. However, modern reflective paints can mitigate this issue even with darker shades.

    Q: How often should I repaint my exterior?

    A: Most high-quality exterior paints last between 5 to 10 years. Factors like sun exposure, humidity, and paint quality will affect longevity. Regular inspections can help you catch fading or peeling early.

    Conclusion

    Deciding what color to paint a house with a red roof does not have to be stressful. By focusing on the undertones of your roof and choosing a wall color that either harmonizes (beige, sage) or contrasts elegantly (white, gray, blue), you can achieve a stunning curb appeal.

    Remember, the goal is balance. Let the red roof be the star, and let your wall color be the supporting actor that makes it shine.

    Did you find this guide helpful? Share this article with friends or neighbors who are planning their next home improvement project! Don’t forget to pin your favorite color combinations to Pinterest for future reference.