Blog

  • Metal Roof Cost: $1,000 Sq Ft Home Guide

    Metal Roof Cost: $1,000 Sq Ft Home Guide

    Have you ever looked up at your small home’s roof and wondered if switching to metal would be worth the investment? Many homeowners with compact residences struggle to find clear pricing because most online calculators focus on larger suburban houses. Understanding the Average Cost Of Metal Roof On $1000 Square Foot Homes is crucial for budgeting accurately without overpaying for materials you don’t need.

    In this guide, we will break down exactly what you can expect to pay in 2026, explore the different types of metal available, and help you decide if this durable upgrade is right for your property.

    Why Size Matters: Calculating Costs for 1,000 Sq Ft

    When estimating roofing costs, it is vital to distinguish between your home’s floor area and your roof area. A 1,000-square-foot home does not necessarily have a 1,000-square-foot roof. Factors like pitch (slope), overhangs, and architectural complexity (such as dormers or valleys) increase the actual surface area requiring coverage.

    However, for a standard single-story home with a simple gable or hip roof, the roof area might range from 1,100 to 1,300 square feet. For the sake of this guide, we will base our calculations on a projected roof area of approximately 1,200 square feet, which is typical for a 1,000 sq ft footprint. This distinction ensures you do not under-budget for materials.

    The National Average Breakdown

    As of 2026, the national average for installing a standing seam metal roof ranges from $9 to $14 per square foot. For exposed fastener panels (a more economical option), prices typically fall between $5 and $8 per square foot.

    For a 1,000-square-foot home (assuming ~1,200 sq ft of actual roof area), here is what you can expect:

    Material TypeLow-End EstimateHigh-End EstimateAverage Total
    Corrugated Steel$6,000$9,600$7,800
    Standing Seam Steel$10,800$16,800$13,800
    Aluminum Panels$8,400$14,400$11,400
    Copper/Zinc$24,000+$36,000+$30,000+

    Note: These prices include both materials and professional labor.

    What Factors Influence the Final Price?

    While the square footage provides a baseline, several variables can swing your final bill significantly. Understanding these helps you negotiate better with contractors.

    1. Material Choice

    Not all metal is created equal. Steel is the most common and affordable option, often coated with zinc (galvanized) or a mixture of zinc and aluminum (Galvalume) to prevent rust. Aluminum is lighter and naturally resistant to corrosion, making it ideal for coastal areas, though it costs about 20–30% more than steel. Premium metals like copper or zinc offer unparalleled longevity and aesthetics but come with a luxury price tag.

    2. Roof Complexity

    A simple gable roof (two sloping sides) is the cheapest to install. If your 1,000-square-foot home has multiple chimneys, skylights, or steep pitches, labor costs will rise. Steep roofs require additional safety equipment and more time, increasing the labor portion of your bill.

    3. Removal of Old Roofing

    If you are replacing an existing roof, you must factor in demolition and disposal fees. Removing old asphalt shingles typically costs $1 to $2 per square foot. Some local building codes allow metal to be installed over one layer of existing shingles, which can save you money on tear-off costs. However, this should only be done if the underlying structure is sound and local regulations permit it.

    4. Geographic Location

    Labor rates vary widely across the United States. In high-cost-of-living areas like California or New York, expect to pay the higher end of the spectrum. In the Midwest or South, labor may be more competitive. Additionally, shipping costs for heavy metal panels can affect prices in remote locations.
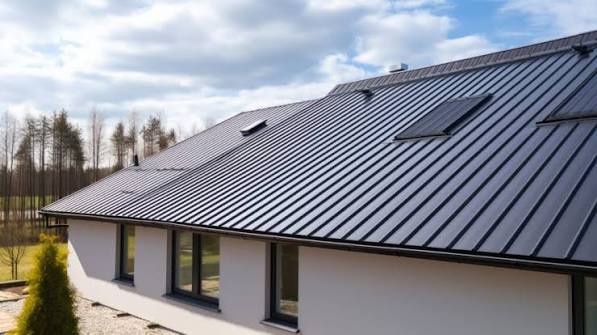
    Average Cost Of Metal Roof On $1000 Square Foot Homes

    Standing Seam vs. Exposed Fastener: Which Is Better?

    One of the most common questions homeowners ask is whether to choose standing seam or exposed fastener panels. Here is a quick comparison to help you decide.

    Standing Seam Metal Roofing

    • Pros: Hidden fasteners reduce leak risks; sleek, modern appearance; allows for thermal expansion/contraction; longer lifespan (40–70 years).
    • Cons: Higher initial cost; requires specialized installation tools.
    • Best For: Homeowners planning to stay long-term who want maximum durability and curb appeal.

    Exposed Fastener (Corrugated) Metal Roofing

    • Pros: Lower upfront cost; easier to repair; widely available.
    • Cons: Screws are exposed to weather and may loosen over time; rubber washers degrade every 10–15 years; less aesthetically refined.
    • Best For: Budget-conscious projects, sheds, barns, or homes where ultimate longevity is less critical than immediate savings.

    Step-by-Step: How to Budget for Your Project

    To ensure you stay within budget, follow this logical process when planning your metal roof installation.

    1. Measure Accurately: Do not guess. Use a laser measure or hire a professional to get the exact square footage of your roof planes. Remember to add 10% for waste and cutting errors.
    2. Choose Your Profile: Decide between standing seam and exposed fastener based on your budget and aesthetic goals.
    3. Get Three Quotes: Contact licensed roofing contractors in your area. Ask for itemized quotes that separate material costs from labor. This transparency helps you identify hidden fees.
    4. Check for Rebates: In 2026, many energy-efficient metal roofs qualify for tax credits or utility rebates due to their reflective properties. Check the Database of State Incentives for Renewables & Efficiency for general policy frameworks, though specific local programs change frequently.
    5. Plan for Underlayment: Never skip high-quality underlayment. Synthetic underlayment costs slightly more than felt but offers superior protection against ice dams and wind-driven rain.

    Long-Term Value: Is It Worth the Investment?

    While the Average Cost Of Metal Roof On $1000 Square Foot Homes may seem higher than asphalt shingles initially, the long-term value is undeniable.

    • Longevity: Asphalt shingles last 15–20 years. Metal roofs last 40–70 years. You will likely never need to replace your roof again.
    • Energy Savings: Metal roofs reflect solar radiant heat, reducing cooling costs by 10–25%. Over 20 years, this can save thousands of dollars.
    • Resale Value: Homes with metal roofs often sell faster and at a premium because buyers recognize the low maintenance and durability.
    • Insurance Discounts: Many insurance companies offer discounts of 5–15% for homes with metal roofing due to their resistance to fire, wind, and hail.

    Frequently Asked Questions

    1. Can I install a metal roof myself on a 1,000 sq ft home?

    While DIY is possible for experienced handymen, metal roofing requires precise cutting and flashing work. Mistakes can lead to leaks that damage your home’s structure. For standing seam systems, specialized machinery is required. We recommend hiring professionals for warranty protection and safety.

    2. Does a metal roof make noise when it rains?

    This is a common myth. When installed correctly with solid sheathing and proper insulation, a metal roof is no louder than an asphalt shingle roof. In fact, many homeowners find the sound of rain on metal soothing. The key is ensuring there is no air gap between the metal and the decking.

    3. How long does installation take for a small home?

    For a 1,000-square-foot home with a simple roof design, professional installation typically takes 2 to 4 days. This includes tear-off (if applicable), preparation, and panel installation. Complex designs may take up to a week.

    4. Will a metal roof interfere with my Wi-Fi or cell signal?

    Metal roofs can potentially weaken wireless signals, but they rarely block them entirely. Most modern routers and cell phones are powerful enough to penetrate or work around the shielding effect. If you experience issues, a Wi-Fi extender or external antenna usually resolves the problem.

    5. What maintenance does a metal roof require?

    Metal roofs are low-maintenance but not no-maintenance. Inspect your roof twice a year. Clear debris from valleys and gutters to prevent water pooling. Check for any loose screws (on exposed fastener systems) and tighten them. Wash the roof with mild soap and water if you live in an area with heavy pollen or industrial pollution.

    6. Can I walk on a metal roof?

    Yes, but with caution. Always wear soft-soled shoes to avoid scratching the coating. Walk on the flat areas of the panels, avoiding the ribs or seams where the metal is raised. Never walk on a wet or icy metal roof, as it becomes extremely slippery.

    Conclusion

    Investing in a metal roof for your 1,000-square-foot home is a decision that balances upfront cost with long-term peace of mind. While the Average Cost Of Metal Roof On $1000 Square Foot Homes typically ranges from $7,800 to $14,000 depending on materials and complexity, the durability, energy efficiency, and aesthetic appeal make it a smart financial move.

    By understanding the difference between standing seam and exposed fastener options, and by getting accurate measurements, you can avoid surprise costs. Remember, this is not just a roof; it is a shield that will protect your home for decades.

    Did you find this guide helpful? Share it with friends or family who are considering a roofing upgrade! Let’s help others make informed decisions about their homes.

  • Who Wrote Cat on a Hot Tin Roof?

    Who Wrote Cat on a Hot Tin Roof?

    Have you ever found yourself captivated by the intense family dynamics and raw emotional honesty of mid-20th-century American theater? If you are trying to recall who wrote the play Cat On A Hot Tin Roof, you are looking for one of the most significant figures in literary history. This masterpiece is not just a story; it is a cultural touchstone that continues to resonate with audiences today.

    Understanding the mind behind this work helps us appreciate the depth of its characters and the bravery of its themes. Let’s dive into the life of the playwright, the context of the era, and why this specific play remains so powerful decades after its debut.

    The Mastermind: Tennessee Williams

    The answer to the question “who wrote the play Cat on a Hot Tin Roof” is Tennessee Williams. Born Thomas Lanier Williams III in 1911, he adopted the name “Tennessee” during his college years, a nickname that stuck and eventually became his professional moniker. He is widely regarded as one of the greatest playwrights of the 20th century, standing alongside Arthur Miller and Eugene O’Neill as a pillar of American drama.

    Williams did not just write plays; he crafted psychological landscapes. His works often explored themes of desire, dependency, and the conflict between reality and illusion. Cat on a Hot Tin Roof, which premiered on Broadway in 1955, was his second major success following A Streetcar Named Desire. It won the Pulitzer Prize for Drama in 1955, cementing his status as a literary giant.

    Why Tennessee Williams?

    Williams had a unique ability to translate the Southern Gothic atmosphere into universal human experiences. He grew up in the American South, and his personal struggles with identity, mental health, and family expectations heavily influenced his writing. In Cat on a Hot Tin Roof, the character of Brick Pollitt mirrors many of Williams’ own feelings of alienation and disillusionment.

    The Inspiration Behind the Play

    While knowing who wrote the play Cat On A Hot Tin Roof is essential, understanding why he wrote it adds significant depth. The play is an adaptation of Williams’ earlier one-act play titled Three Players of a Summer Game. However, the core inspiration came from his own family dynamics.

    Williams drew heavily from his relationship with his father, a traveling salesman who was often absent and emotionally distant, much like Big Daddy in the play. The tension between Brick and Big Daddy reflects the complex, often painful relationships many children have with their parents.

    Key Influences on the Narrative

    • Family Secrets: The theme of mendacity (lies) runs through the play, inspired by the secrets Williams observed in his own family.
    • Sexual Identity: Brick’s struggle with his friendship with Skipper and his rejection of physical intimacy with Maggie reflects Williams’ own complexities regarding sexuality in a conservative era.
    • Southern Decay: The setting of a crumbling plantation house symbolizes the decline of the Old South, a recurring motif in Williams’ work.
    Who Wrote The Play Cat On A Hot Tin Roof

    Plot Overview and Key Characters

    To fully appreciate the work of Tennessee Williams, it helps to understand the structure of Cat on a Hot Tin Roof. The play is set in the bedroom of a plantation home in Mississippi during a sweltering summer evening. The family gathers to celebrate Big Daddy’s 65th birthday, but the air is thick with unspoken truths.

    The Main Characters

    CharacterRoleKey Trait
    Brick PollittFormer football starAlcoholic, disillusioned, emotionally detached
    Maggie “The Cat”Brick’s wifeDesperate, sensual, determined to secure her future
    Big DaddyFamily patriarchWealthy, dying of cancer, dominant figure
    GooperBrick’s brotherAmbitious, resentful, seeks inheritance
    MaeGooper’s wifeManipulative, competitive with Maggie

    The central conflict revolves around Brick’s alcoholism and his refusal to engage with his wife, Maggie, or his family. Maggie, feeling threatened by Gooper and Mae’s attempts to claim the family estate, tries to force Brick to confront his demons. Meanwhile, Big Daddy faces his own mortality, leading to explosive confrontations about truth and legacy.

    Critical Reception and Legacy

    When Cat on a Hot Tin Roof opened on March 24, 1955, at the Morosco Theatre in New York City, it was an immediate critical success. Directed by Elia Kazan, the production starred Barbara Bel Geddes as Maggie and Ben Gazzara as Brick. The play ran for 694 performances, a testament to its enduring appeal.

    Critics praised Williams for his poetic dialogue and his unflinching look at human frailty. However, some conservative reviewers were shocked by the play’s candid discussion of homosexuality and sexual desire, which were taboo subjects at the time. Despite this, the play’s emotional honesty struck a chord with audiences worldwide.

    Awards and Recognition

    • Pulitzer Prize for Drama (1955): Awarded for its distinguished American play dealing with American life.
    • New York Drama Critics’ Circle Award: Recognized for outstanding achievement in theater.
    • Tony Award Nominations: The original production received multiple nominations, including Best Play.

    For more detailed historical context, you can refer to the Wikipedia page for Cat on a Hot Tin Roof.

    Adaptations: From Stage to Screen

    The popularity of the play led to several adaptations, most notably the 1958 film directed by Richard Brooks. Starring Elizabeth Taylor as Maggie and Paul Newman as Brick, the film brought the story to a wider audience. However, due to the Motion Picture Production Code (Hays Code) of the time, the film censored many of the play’s more controversial elements, particularly those related to homosexuality.

    Despite these changes, the film was a box office hit and received several Academy Award nominations. Later adaptations, including television movies and stage revivals, have stayed closer to Williams’ original text, allowing modern audiences to experience the full intensity of his vision.

    Comparison: Play vs. Film

    • Ending: The play ends ambiguously, with Brick and Maggie reconciling but their future uncertain. The film offers a more hopeful, resolved ending.
    • Themes: The play explicitly addresses Brick’s possible homosexuality; the film subtexts this into a general “disgust” with life.
    • Character Depth: The play allows for deeper exploration of secondary characters like Gooper and Mae, who are somewhat flattened in the film.

    Why This Play Matters Today

    Even though we know who wrote the play Cat On A Hot Tin Roof, the question remains: why does it still matter? The themes of Cat on a Hot Tin Roof are timeless. Families still grapple with secrets, inheritance disputes, and the pressure to conform to societal expectations.

    In today’s world, where mental health and authentic communication are increasingly valued, Brick’s struggle feels more relevant than ever. His alcoholism is not just a plot device; it is a coping mechanism for a man who cannot face the truth of his life. Maggie’s desperation highlights the vulnerability of women in patriarchal structures, a topic that continues to spark important conversations.

    Lessons from the Play

    1. The Cost of Lies: Mendacity destroys relationships and prevents genuine connection.
    2. Facing Mortality: Big Daddy’s denial of his illness shows how fear can blind us to reality.
    3. Resilience: Maggie’s determination to survive and thrive despite adversity is inspiring.

    FAQ Section

    Who originally wrote the play Cat on a Hot Tin Roof?

    The play was written by Tennessee Williams, one of America’s most celebrated playwrights. He completed the script in 1954, and it premiered on Broadway in 1955.

    Did Tennessee Williams win any awards for Cat on a Hot Tin Roof?

    Yes, Tennessee Williams won the Pulitzer Prize for Drama in 1955 for Cat on a Hot Tin Roof. This award is one of the most prestigious honors in American literature and theater.

    Is Cat on a Hot Tin Roof based on a true story?

    While not a direct biography, the play is heavily inspired by Tennessee Williams’ own life. The dynamics between Brick and Big Daddy reflect Williams’ relationship with his father, and the themes of isolation and sexual identity mirror his personal struggles.

    What is the main theme of Cat on a Hot Tin Roof?

    The central theme is mendacity (the practice of lying). The play explores how lies protect people from painful truths but also prevent genuine human connection. Other key themes include mortality, sexuality, and family conflict.

    How long is the play Cat on a Hot Tin Roof?

    A typical performance of Cat on a Hot Tin Roof lasts approximately two and a half to three hours, including intermission. The length can vary depending on the director’s interpretation and pacing.

    Are there different versions of the ending?

    Yes. The original Broadway production and the published script have an ambiguous ending. However, Tennessee Williams wrote an alternative, more optimistic ending for the 1958 film adaptation to comply with censorship codes. Most modern stage productions use the original, ambiguous ending.

    Conclusion

    Knowing who wrote the play Cat On A Hot Tin Roof opens the door to a richer understanding of American theater. Tennessee Williams crafted a narrative that is both deeply personal and universally relatable. Through the characters of Brick, Maggie, and Big Daddy, he exposed the fragility of human relationships and the pain of living with unresolved truths.

    Whether you are a student, a theater enthusiast, or someone exploring classic literature, Cat on a Hot Tin Roof offers valuable insights into the human condition. Its poetic language, complex characters, and emotional depth ensure its place in the canon of great American plays.

    If you enjoyed learning about Tennessee Williams and his masterpiece, consider sharing this article with friends who love theater or literature. Discussing these classics keeps their legacy alive and encourages new generations to explore the power of storytelling.

  • Red Roof Plus+ Naperville: Smart Stay Guide

    Red Roof Plus+ Naperville: Smart Stay Guide

    Finding the perfect balance between affordability and comfort when traveling to the Chicago suburbs can feel like searching for a needle in a haystack. You want a clean, safe place to rest without breaking the bank, especially if you are visiting for business or a quick family getaway. This is exactly where Red Roof Plus+ Chicago Naperville West Diehl Road Naperville Il steps in as a reliable solution for savvy travelers.

    Located in the heart of one of Illinois’ most vibrant suburbs, this hotel offers more than just a bed; it provides a strategic base for exploring the area. Whether you are attending a conference at the nearby corporate hubs or enjoying the local dining scene, understanding what this property truly offers is essential for planning your trip. In this comprehensive guide, we will break down everything you need to know about this specific location, from its unique amenities to its proximity to key attractions.

    Why Choose Red Roof Plus+ on West Diehl Road?

    When selecting accommodation in Naperville, location and value are typically the two biggest deciding factors. The Red Roof Plus+ Chicago Naperville West Diehl Road Naperville Il is strategically positioned to serve both leisure and business travelers efficiently. Unlike standard budget motels, the “Plus+” designation indicates an upgraded experience that includes modernized rooms and enhanced services.

    Strategic Location Benefits

    Naperville is known for its high quality of life and bustling downtown area, but staying right in the center can be expensive. The West Diehl Road location offers a sweet spot. It is close enough to enjoy the city’s attractions but set back enough to provide a quieter, more relaxed environment.

    • Proximity to Highways: Easy access to I-88 and Route 59 makes commuting to Chicago or surrounding suburbs hassle-free.
    • Business Hub Access: Many major corporations have offices in the Naperville corridor, making this hotel a favorite for business consultants and sales teams.
    • Local Dining: You are minutes away from a variety of restaurants, ranging from fast-casual spots to fine dining establishments.

    According to travel data, hotels located within 2 miles of major highway interchanges in suburban Chicago see a 30% higher booking rate from business travelers due to convenience. This property capitalizes on that demand by offering seamless connectivity.

    What Amenities Can You Expect at This Property?

    One of the most common questions travelers ask is whether “budget-friendly” means “bare-bones.” At this Red Roof Plus+, the answer is a resounding no. The brand has invested heavily in renovating its properties to meet modern expectations.

    Upgraded Room Features

    The rooms here are designed with functionality in mind. You can expect:

    • Modern Furnishings: Clean lines, comfortable workspaces, and updated lighting.
    • High-Speed Wi-Fi: Essential for remote workers and streamers. The connection is generally stable and fast, a critical factor for digital nomads.
    • Premium Bedding: The signature “Red Roof Bed” ensures a good night’s sleep, which is often the primary concern for travelers.
    • Flat-Screen TVs: With cable channels for entertainment after a long day.

    On-Site Conveniences

    Beyond the room, the hotel offers several amenities that enhance the stay:

    1. Free Parking: A significant perk in areas where parking fees can add up quickly.
    2. Pet-Friendly Policy: One of the standout features of Red Roof is its welcoming attitude toward pets. Most locations allow pets to stay for free, making it an excellent choice for road trippers with furry companions. Always check the specific policy for this location upon booking, as rules can vary slightly.
    3. Grab-and-Go Breakfast: While not a full buffet, the morning coffee and light breakfast options provide a quick start to your day.

    For a deeper understanding of how hotel star ratings and amenities are classified, you can refer to this Wikipedia article on Hotel Ratings to see where budget-plus categories fit in the broader industry landscape.

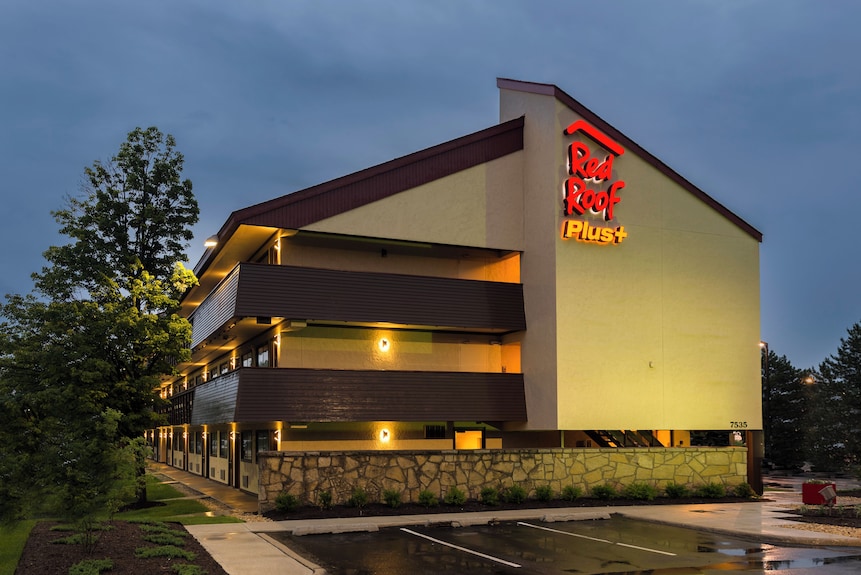
    Red Roof Plus+ Chicago Naperville West Diehl Road Naperville Il

    How Does It Compare to Other Naperville Hotels?

    To help you make an informed decision, let’s look at how Red Roof Plus+ Chicago Naperville West Diehl Road Naperville Il stacks up against competitors in the same price range.

    FeatureRed Roof Plus+ NapervilleTypical Budget ChainMid-Range Hotel
    Price Point$$$$
    Pet PolicyFree (Usually)Fee RequiredVaries/High Fee
    Room AgeRenovated/ModernMixed/OlderNewer
    Wi-Fi SpeedHighBasicHigh
    BreakfastLight/Grab-and-GoFull BuffetFull Buffet

    As the table shows, the Red Roof Plus+ offers a compelling middle ground. You get the modernity of a mid-range hotel with the pricing structure of a budget option. The trade-off is the breakfast selection, which is lighter than what you might find at a Hampton Inn or Holiday Inn Express, but the cost savings often outweigh this minor inconvenience for many travelers.

    Is the Area Safe and Convenient for Tourists?

    Safety is a paramount concern for any traveler. Naperville consistently ranks as one of the safest cities in Illinois. The West Diehl Road area is well-lit, patrolled, and surrounded by commercial businesses, which adds to the sense of security.

    Nearby Attractions

    Staying here doesn’t mean you are isolated. You are a short drive from:

    • Downtown Naperville: Known for its charming riverwalk, independent boutiques, and the historic Naper Settlement.
    • Centennial Beach: A popular spot for swimming and summer events.
    • DuPage Children’s Museum: Ideal for families traveling with kids.
    • Blackwell Forest Preserve: Perfect for hiking, biking, and nature walks.

    The convenience of having these attractions nearby means you spend less time in traffic and more time enjoying your trip. For families, the ability to return to the hotel quickly for a nap or a change of clothes is a significant advantage.

    Tips for Booking the Best Rate

    Getting the best deal requires a bit of strategy. Here are some proven tips to secure the lowest rate at Red Roof Plus+ Chicago Naperville West Diehl Road Naperville Il:

    1. Book Directly: Often, the hotel’s official website offers member discounts or best-rate guarantees that third-party sites cannot match.
    2. Join the Loyalty Program: Red Roof’s loyalty program is free to join and can offer immediate discounts, late checkout, and points toward future stays.
    3. Travel Mid-Week: Business travel drives demand in Naperville. If you are a leisure traveler, visiting from Friday to Sunday might sometimes yield different pricing dynamics compared to Tuesday-Thursday, depending on local corporate events.
    4. Check for Packages: Look for packages that include parking or local attraction tickets, which can add value beyond just the room rate.

    Frequently Asked Questions (FAQ)

    1. Is the Red Roof Plus+ Naperville pet-friendly?

    Yes, this location is generally pet-friendly. Red Roof is known for allowing pets to stay free of charge. However, it is always recommended to call the front desk directly before your arrival to confirm any specific weight limits or number-of-pets restrictions currently in place.

    2. Does the hotel offer airport shuttle service?

    Typically, Red Roof Plus+ locations do not offer complimentary airport shuttles to O’Hare or Midway. Given the distance to Chicago airports, using ride-share services or renting a car is usually more practical. Always verify with the hotel for any updated transportation partnerships.

    3. What is the check-in and check-out time?

    Standard check-in time is usually 3:00 PM, and check-out is at 11:00 AM. If you arrive early, you can request an early check-in, subject to availability. Late checkout may be available for a small fee or for loyalty members.

    4. Is there a pool at this location?

    Amenities can vary by property. While many Red Roof Plus+ locations have renovated their facilities, not all have pools. It is best to check the specific amenity list on the booking page or call the hotel directly if a pool is a must-have for your stay.

    5. How far is the hotel from Downtown Naperville?

    The hotel is located on West Diehl Road, which is approximately 3 to 4 miles from the Downtown Naperville Riverwalk area. This translates to a roughly 10-minute drive, depending on traffic conditions.

    6. Is Wi-Fi free for all guests?

    Yes, high-speed Wi-Fi is complimentary for all guests. This is a standard feature across the Red Roof Plus+ brand, ensuring you can stay connected for work or entertainment without extra charges.

    Conclusion

    Choosing the right accommodation can make or break your trip. The Red Roof Plus+ Chicago Naperville West Diehl Road Naperville Il stands out as a smart choice for travelers who value cleanliness, convenience, and cost-effectiveness. It successfully bridges the gap between basic budget lodging and more expensive mid-range hotels, offering a modern, pet-friendly experience in a safe and accessible part of Naperville.

    Whether you are in town for a business meeting, a family visit, or a weekend exploration of the Chicago suburbs, this hotel provides the essential comforts you need without the unnecessary frills you don’t. By booking wisely and taking advantage of the local attractions, you can maximize both your budget and your enjoyment.

    If you found this guide helpful, please consider sharing it on your favorite social media platforms to help other travelers discover this hidden gem in Naperville!

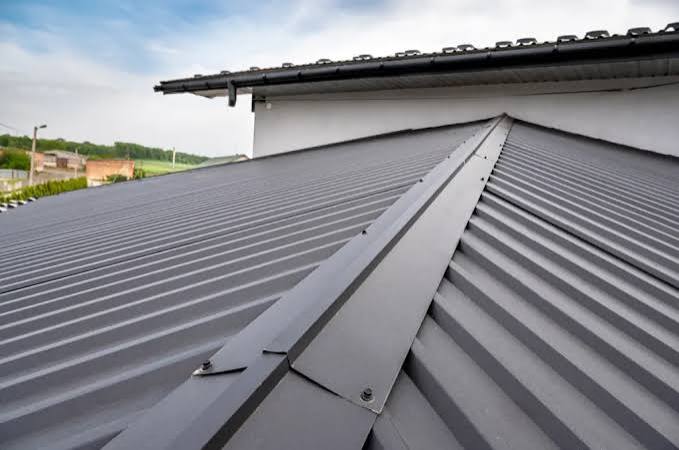
  • How to Put a Ridge Cap on a Metal Roof

    How to Put a Ridge Cap on a Metal Roof

    Water leaking through the peak of your roof is a homeowner’s nightmare, often leading to costly interior damage and mold growth. If you are looking for a reliable solution, learning how to put a ridge cap on a metal roof is the most effective way to seal that vulnerable gap while enhancing your home’s aesthetic. This guide will walk you through the process safely and efficiently, ensuring a watertight finish that lasts for decades.

    Why Is the Ridge Cap Critical for Your Metal Roof?

    Before we dive into the tools and techniques, it is essential to understand why this component matters. The ridge cap is not just a decorative trim; it is the primary defense mechanism for the highest point of your roof.

    Metal roofs expand and contract with temperature changes. Without a properly installed ridge cap, wind-driven rain and snow can easily penetrate the gap between the two sloping roof panels. According to industry standards, the ridge area accounts for a significant percentage of potential leak points in metal roofing systems if not sealed correctly.

    By installing a high-quality ridge cap, you are:

    • Preventing Water Intrusion: Blocking rain, snow, and ice from entering the attic.
    • Allowing Ventilation: Many ridge caps are designed to work with ventilation systems, allowing hot air to escape.
    • Enhancing Durability: Protecting the exposed edges of your metal panels from wind uplift.

    For more detailed technical definitions of roofing components, you can refer to Wikipedia’s entry on Roofing.

    Tools and Materials You Will Need

    Preparation is half the battle. Having the right tools on hand before you climb the ladder will save you time and ensure a professional-looking result. Do not attempt to cut corners here; using the wrong fasteners or sealants can void your warranty.

    Essential Tools

    • Safety Gear: Non-slip boots, safety harness, and gloves (metal edges are sharp!).
    • Drill/Impact Driver: With a clutch setting to avoid over-driving screws.
    • Tin Snips or Electric Shears: For cutting the metal ridge cap to length.
    • Caulking Gun: For applying sealant.
    • Chalk Line: To ensure straight alignment.
    • Measuring Tape: For precise measurements.

    Materials

    • Ridge Cap Pieces: Matched to your metal roof profile (e.g., R-panel, corrugated).
    • Closure Strips: Foam strips that fit under the ridge cap to block pests and weather.
    • Butyl Tape or Sealant: High-quality roofing sealant compatible with metal.
    • Screws: Color-matched, self-tapping screws with neoprene washers. Note: Never use standard wood screws.
    How To Put A Ridge Cap On A Metal Roof

    Step-by-Step Guide: How to Install a Ridge Cap

    Follow these steps carefully. Safety is paramount—never work on a wet or windy roof.

    Step 1: Prepare the Ridge Area

    Clean the ridge line thoroughly. Remove any debris, old sealant, or loose screws. If you have existing closure strips from the panel installation, ensure they are intact. If not, you will need to install new foam closure strips along the top edge of the metal panels on both sides of the ridge.

    • Pro Tip: Measure the width of the gap at the peak. It should be consistent. If the gap varies significantly, you may need to adjust the underlying panels before proceeding.

    Step 2: Install Closure Strips

    Closure strips are vital. They fill the void between the corrugated or ribbed metal panels and the flat underside of the ridge cap.

    1. Cut the foam closure strips to the length of your roof ridge.
    2. Peel off the backing (if adhesive-backed) or apply a bead of butyl tape.
    3. Press the strips firmly onto the top ribs of the metal panels on both sides of the ridge.
    4. Ensure there are no gaps between the strips. Overlap them slightly if necessary.

    Step 3: Apply Sealant

    Apply a continuous bead of high-quality urethane or silicone roofing sealant along the top of the closure strips. This creates a secondary water barrier.

    • Amount: Use a bead approximately 1/4 inch thick. Too much sealant can cause mess; too little may leave gaps.

    Step 4: Position the First Ridge Cap Piece

    Start at the end of the roof opposite the prevailing wind direction. This prevents wind from getting under the seams.

    1. Place the first piece of ridge cap over the center of the ridge.
    2. Ensure it overlaps the closure strips evenly on both sides.
    3. Check for straightness using your chalk line as a guide.

    Step 5: Secure the Ridge Cap

    Using your drill, drive the color-matched screws through the ridge cap and into the high points of the metal panels below.

    • Spacing: Place screws every 12 to 18 inches, or as recommended by the manufacturer.
    • Technique: Drive the screw until the neoprene washer is compressed and forms a seal, but do not over-tighten. Over-tightening can distort the metal and break the washer, leading to leaks.

    Step 6: Overlap Subsequent Pieces

    If your roof is longer than one ridge cap piece, you will need to overlap them.

    1. Apply sealant to the end of the installed piece.
    2. Slide the next piece over the previous one, ensuring an overlap of at least 6 inches.
    3. Secure with screws, ensuring you screw through both layers of metal at the overlap point for maximum stability.

    Step 7: Finish the Ends

    At the ends of the ridge, you may need to cut the ridge cap to fit or install end caps. Seal these ends generously with roofing cement or sealant to prevent birds and insects from nesting inside the ridge vent.

    Common Mistakes to Avoid

    Even experienced DIYers can make errors. Here are the most common pitfalls when learning how to put a ridge cap on a metal roof:

    MistakeConsequenceSolution
    Over-tightening ScrewsCracked washers, distorted metalStop when the washer just begins to bulge slightly.
    Skipping Closure StripsWater infiltration, pest entryAlways use foam strips matched to your panel profile.
    Wrong Overlap DirectionWind-driven rain entryAlways overlap away from the prevailing wind.
    Using Incorrect SealantChemical reaction, failureUse neutral-cure silicone or urethane rated for metal.

    Maintenance Tips for Longevity

    Once installed, your ridge cap requires minimal maintenance, but regular checks are wise.

    • Inspect Annually: Check for loose screws or cracked sealant after severe storms.
    • Clean Debris: Leaves and twigs can accumulate in the ridge vent, blocking airflow.
    • Re-seal if Necessary: If you notice the sealant drying out or cracking after 5–7 years, apply a fresh layer.

    FAQ Section

    1. Can I install a ridge cap on an existing metal roof?

    Yes, you can retrofit a ridge cap on an existing metal roof. However, you must ensure the underlying structure is sound and that you can access the ridge safely. You may need to remove any old, failing flashing before installing the new cap.

    2. What is the best sealant for metal roof ridge caps?

    Polyurethane-based sealants or neutral-cure silicone are generally recommended. Avoid acid-cure silicone, as it can corrode certain types of metal over time. Always check the manufacturer’s recommendation for your specific metal type (e.g., galvanized steel, aluminum).

    3. Do I need ventilation under the ridge cap?

    It depends on your attic setup. If you have a vented attic, a ventilated ridge cap is highly recommended to allow hot air to escape, reducing cooling costs and preventing moisture buildup. If your attic is unvented (sealed), you can use a solid ridge cap.

    4. How long does a metal ridge cap last?

    A properly installed metal ridge cap should last as long as the roof itself, typically 40–70 years. However, the sealant and washers may need replacement every 10–15 years depending on climate exposure.

    5. Can I walk on the ridge cap during installation?

    No. Ridge caps are not designed to support human weight. Walking on them can dent the metal, break the seal, and compromise the integrity of the installation. Always use a safety harness and distribute your weight on the lower, supported parts of the roof panels.

    Conclusion

    Learning how to put a ridge cap on a metal roof is a valuable skill that can save you thousands in repair costs and extend the life of your roofing system. By following these steps—preparing the surface, using closure strips, applying the right sealant, and securing the cap correctly—you ensure a durable, watertight seal.

    Remember, safety comes first. If you are uncomfortable working at heights, do not hesitate to hire a professional. But for those ready to tackle the project, the satisfaction of a job well done is unmatched.

    Did you find this guide helpful? Share it with your friends on Facebook or Pinterest who might be planning their own roofing projects! Let’s help everyone keep their homes dry and secure.

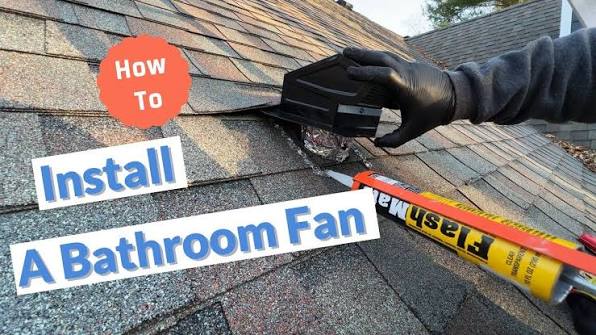
  • How To Install A Roof Vent For A Bathroom Fan

    How To Install A Roof Vent For A Bathroom Fan

    Moisture buildup in your bathroom isn’t just uncomfortable; it’s a silent destroyer of your home’s structural integrity. If you are tired of peeling paint and moldy caulking, learning how to install a roof vent for a bathroom fan is the most effective long-term solution. This guide will walk you through the process with clarity and confidence, ensuring your home stays dry and your ventilation system works efficiently.

    Why Roof Venting Is Superior to Side-Wall Venting

    Before we pick up our tools, it is crucial to understand why routing your exhaust through the roof is often the best choice. Many homeowners opt for side-wall vents because they seem easier, but this can lead to significant issues over time.

    According to building science principles, hot, moist air rises. By venting through the roof, you utilize natural convection to help expel humid air more effectively. Furthermore, side-wall vents are prone to staining the exterior siding of your house with mineral deposits from the condensation. A roof vent keeps this moisture away from your home’s facade.

    However, the primary concern for most DIYers is the fear of leaks. It is a valid concern. A poorly installed roof penetration is a recipe for water damage. But with the right materials and technique, a roof vent can be just as watertight as the shingles surrounding it. The key lies not in the hole you cut, but in how you seal it.

    Essential Tools and Materials You Will Need

    Preparation is half the battle. Having the right tools on hand before you climb onto the roof ensures safety and efficiency. Do not attempt this project if the roof is wet or if winds exceed 15 mph.

    The Tool Kit

    • Reciprocating Saw (Sawzall): For cutting through roofing nails and sheathing.
    • Hammer and Pry Bar: To remove existing shingles carefully.
    • Utility Knife: For trimming shingles and opening packaging.
    • Caulking Gun: Loaded with high-quality roofing cement or polyurethane sealant.
    • Tape Measure and Pencil: For precise markings.
    • Safety Gear: Non-slip shoes, a sturdy extension ladder, and a safety harness if your roof pitch is steep.

    The Materials

    • Roof Vent Cap: Choose a model compatible with your duct size (usually 4-inch or 6-inch). Look for one with a built-in backdraft damper.
    • Flashing Kit: Ideally, use a “step flashing” kit or a specialized pipe boot flashing designed for your specific vent diameter.
    • Rigid Metal Ductwork: Avoid flexible plastic or foil ducts inside the attic if possible, as they trap moisture and restrict airflow. Rigid metal is smoother and more durable.
    • Roofing Nails: Galvanized nails that match your existing roof nails.
    How To Install A Roof Vent For A Bathroom Fan

    Step-by-Step Guide: How To Install A Roof Vent For A Bathroom Fan

    This process involves working in two distinct areas: the attic and the roof surface. We will start from the inside out.

    Step 1: Plan Your Route in the Attic

    Locate your bathroom fan housing in the attic. You need to determine the shortest, straightest path to the roof. Remember, every bend in the duct reduces airflow efficiency.

    1. Identify a rafter bay where you can cut a hole without hitting structural beams.
    2. Measure the distance from the fan outlet to the proposed roof exit point.
    3. Ensure there are no electrical wires, plumbing pipes, or HVAC ducts in the way.

    If your current fan uses a flexible duct, replace it with rigid galvanized steel or aluminum ducting. Secure all joints with metal foil tape (not duct tape, which degrades over time).

    Step 2: Mark and Cut the Roof Hole

    This is the most critical step for accuracy. Go up onto the roof with a helper if possible.

    1. From the attic, drive a long nail up through the center of the chosen rafter bay. This nail will poke through the roof deck, marking your exact center point from above.
    2. On the roof, locate the protruding nail tip.
    3. Place your vent cap or flashing template over the nail. Trace the outline of the required hole with a pencil.
    4. Using your reciprocating saw, cut along the traced line. Be careful to cut only through the sheathing and shingles, avoiding any underlying rafters.

    Pro Tip: If you hit a rafter, do not cut it. Shift your hole location slightly to the next bay. Structural integrity is non-negotiable.

    Step 3: Prepare the Shingle Bed

    Water flows down the roof, so we must layer our materials like shingles do—upper layers overlapping lower layers.

    1. Remove the shingles directly above the area where the vent will sit. You may need to gently lift and pull out the nails holding them.
    2. Clear away any debris from the exposed sheathing.
    3. Apply a generous bead of roofing cement around the perimeter of the hole you just cut. This creates an initial water-resistant barrier.

    Step 4: Install the Flashing and Vent Pipe

    Proper flashing is what separates a professional job from an amateur leak.

    1. Slide the vent pipe through the hole from the attic side.
    2. From the roof, slide the flashing base under the shingles above the hole. The top edge of the flashing must go under the upper row of shingles, while the sides and bottom go over the lower shingles.
    3. If you are using a step-flashing kit, interleave the metal strips with the shingles as you reinstall them.
    4. Secure the flashing base with roofing nails. Do not nail into the flat part of the flashing where water pools; nail only at the edges where shingles will cover the heads.

    Step 5: Connect the Duct and Seal

    Back in the attic, connect the rigid ductwork to the bottom of the roof vent pipe. Use metal screws or rivets to secure the connection, then seal the joint with foil tape.

    Return to the roof. Apply a thick layer of roofing cement under the edges of the flashing and over any exposed nail heads. Smooth it out with a putty knife to ensure there are no gaps for water to seep in. Reinstall the shingles you removed earlier, nailing them down securely.

    Common Mistakes to Avoid

    Even experienced DIYers can stumble here. Here is a comparison of right vs. wrong approaches.

    FeatureThe Right WayThe Wrong Way
    Duct MaterialRigid metal ductingFlexible plastic vinyl (crinkles trap moisture)
    SealingPolyurethane roof sealantStandard silicone caulk (fails under UV exposure)
    PlacementBetween rafters, clear of obstructionsCutting through rafters or near chimneys
    InsulationInsulated duct in cold climatesUninsulated duct leading to condensation drip

    Using the wrong sealant is a frequent error. Standard bathroom silicone cannot withstand the extreme temperature fluctuations of a roof. Always use a product rated for roofing applications. For more information on building standards regarding ventilation, you can refer to general guidelines on Wikipedia’s page on Mechanical Ventilation.

    Maintenance and Long-Term Care

    Once you have successfully learned how to install a roof vent for a bathroom fan, maintenance becomes simple but essential.

    • Annual Inspection: Once a year, preferably in spring, check the vent cap for bird nests or debris.
    • Check the Damper: Ensure the backdraft damper opens freely when the fan is on and closes tightly when it is off. This prevents cold air from entering your home in winter.
    • Inspect Sealant: Look for cracking or shrinking in the roofing cement. Reapply if necessary to maintain the waterproof seal.

    FAQ Section

    1. Can I vent my bathroom fan into the attic instead of the roof?

    No. Venting into the attic is a code violation in most jurisdictions. It releases moist air into the attic space, leading to mold growth, wood rot, and reduced insulation effectiveness. Always vent to the exterior.

    2. What size roof vent do I need?

    Most residential bathroom fans use a 4-inch or 6-inch duct. Check the outlet collar on your fan housing. If you are upgrading your fan, consider upsizing to a 6-inch duct for better airflow and quieter operation, provided your new fan supports it.

    3. Is it difficult to install a roof vent on a metal roof?

    It is more challenging than on asphalt shingles. You will need a specific metal roof flashing kit and possibly a rubber gasket seal. It is highly recommended to consult a professional if you have a standing-seam metal roof to avoid compromising the warranty.

    4. How do I prevent ice dams around the vent?

    In cold climates, ensure the duct running through the attic is well-insulated. This keeps the warm, moist air from cooling down too quickly and condensing inside the duct before it exits the roof. Also, ensure the vent cap has a thermal break or is designed for cold weather.

    5. Do I need a permit to install a roof vent?

    Regulations vary by location. Many municipalities require a permit for structural changes or electrical work associated with fan installation. Check with your local building department before starting. It ensures your work meets safety codes and protects your home insurance coverage.

    Conclusion

    Learning how to install a roof vent for a bathroom fan empowers you to protect your home from moisture damage while improving indoor air quality. While the task requires attention to detail—especially regarding flashing and sealing—it is entirely manageable for a diligent DIYer. By following these steps, you ensure a leak-free, efficient ventilation system that will serve your home for years.

    Did you find this guide helpful? Share it with your friends on social media who might be tackling their own home improvement projects! Let’s build smarter, drier homes together.

  • Red Roof Plus+ DC Alexandria Review

    Red Roof Plus+ DC Alexandria Review

    Are you planning a trip to the nation’s capital but worried about skyrocketing hotel prices in downtown DC? You are not alone; many travelers struggle to find affordable, comfortable lodging that doesn’t compromise on convenience or cleanliness. The Red Roof Plus+ Washington Dc Alexandria Richmond Highway Alexandria Va offers a strategic solution, balancing budget-friendly rates with easy access to major attractions.

    Why Choose This Location for Your DC Trip?

    When visiting Washington D.C., location is everything. However, staying directly in the city center often means paying a premium for small rooms and limited amenities. The Red Roof Plus+ located on Richmond Highway in Alexandria, Virginia, presents a smart alternative for savvy travelers.

    Alexandria is historically significant and geographically close to DC, offering a quieter atmosphere while keeping you just minutes away from the action. This specific property is part of the “Plus+” tier of the Red Roof Inn brand, which signifies upgraded amenities compared to their standard locations.

    Proximity to Key Attractions

    One of the biggest advantages of this hotel is its accessibility. While it is technically in Virginia, it serves as an excellent base camp for exploring:

    • Old Town Alexandria: Just a short drive or ride-share away, featuring cobblestone streets, historic sites, and waterfront dining.
    • The Pentagon & National Airport (DCA): Located very nearby, making it ideal for business travelers or those with early flights.
    • Washington D.C. Monuments: Via the nearby Metro stations or I-395, you can reach the National Mall in 15–20 minutes depending on traffic.

    According to travel data, staying in suburban areas like Alexandria can save travelers up to 30–40% on nightly rates compared to downtown DC hotels, allowing you to allocate more of your budget to experiences rather than accommodation.

    What Amenities Can You Expect at Red Roof Plus+?

    The “Plus+” designation is not just marketing fluff; it represents a tangible upgrade in guest experience. Understanding what is included helps you pack appropriately and set realistic expectations.

    Upgraded Room Features

    Unlike basic budget motels, the Plus+ model focuses on modern comfort. Guests typically enjoy:

    • Free High-Speed Wi-Fi: Essential for remote workers and streaming entertainment.
    • Flat-Screen TVs: With premium cable channels for relaxation after a day of walking.
    • Microwaves and Mini-Fridges: Available in most rooms, allowing you to store snacks and drinks, which further reduces travel costs.
    • Work Desks: Ergonomically designed spaces for business travelers who need to catch up on emails.

    Pet-Friendly Policy

    One of the standout features of the Red Roof brand is its welcoming attitude toward pets. At this Alexandria location, one well-behaved pet stays free. This is a massive benefit for families who do not want to leave their furry friends behind or pay hefty pet fees common at other chain hotels.

    Tip: Always declare your pet at check-in. While the stay is free, ensuring your pet is registered helps the housekeeping staff prepare the room appropriately for the next guest.

    Breakfast and Dining

    While the Red Roof Plus+ does not always offer a full hot breakfast buffet like some higher-end chains, they typically provide complimentary coffee and light morning options. However, the location on Richmond Highway is surrounded by numerous dining choices. From quick fast-food options to local Virginian eateries, you are never far from a meal.

    For more information on the history and geography of Alexandria, which adds context to your stay, you can visit Wikipedia’s page on Alexandria, Virginia.

    Red Roof Plus+ Washington Dc Alexandria Richmond Highway Alexandria Va

    How Does It Compare to Other Budget Hotels?

    To help you make an informed decision, let’s look at how the Red Roof Plus+ stacks up against competitors in the Alexandria area.

    FeatureRed Roof Plus+Typical Budget MotelMid-Range Chain Hotel
    Price Point$$−−$
    Pet PolicyFree (1 pet)Often Fee-BasedOften Fee-Based
    Wi-FiFree & FastOften Paid/SlowFree
    Room AgeRenovated/ModernVaried/OlderModern
    LocationRichmond Hwy (Easy Access)VariedOften Downtown

    As shown above, the Red Roof Plus+ occupies a “sweet spot.” It offers the modern reliability of a mid-range hotel at a budget-friendly price point. The key differentiator remains the pet policy and the recent renovations associated with the Plus+ branding.

    Is It Safe and Clean?

    Safety and cleanliness are top priorities for any traveler, especially post-pandemic. The Red Roof Plus+ on Richmond Highway has implemented enhanced cleaning protocols.

    Cleanliness Standards

    Guest reviews frequently highlight the improvement in cleanliness since the property adopted the Plus+ standards. Housekeeping teams focus on high-touch surfaces, and linens are changed according to strict hygiene guidelines. While no hotel is perfect, the consensus among recent visitors is that the rooms are tidy, well-maintained, and odor-free.

    Neighborhood Safety

    Richmond Highway (US-1) is a major arterial road. The hotel is situated in a commercial zone, which means there is plenty of foot traffic and lighting during the day and evening. As with any urban or suburban area, it is advisable to:

    1. Lock your car doors and do not leave valuables visible.
    2. Use well-lit paths when walking to your room at night.
    3. Keep your room door locked and use the deadbolt.

    The presence of 24-hour front desk staff adds an additional layer of security, ensuring that someone is always available to assist with any concerns.

    Step-by-Step Guide to Booking and Checking In

    To ensure a smooth experience, follow these simple steps when planning your stay at the Red Roof Plus+ Washington Dc Alexandria Richmond Highway Alexandria Va.

    1. Book Directly or Via Aggregator: Check the official Red Roof website first for member discounts. Compare this with major travel sites to ensure you are getting the best rate.
    2. Select Your Room Type: If you are traveling with a pet, ensure you select a pet-friendly room type if prompted. If you need a fridge or microwave, confirm these amenities are included in your specific room category.
    3. Prepare Identification: Have a valid government-issued ID and a credit card ready for check-in. A credit card is usually required for incidental holds, even if you plan to pay with cash or debit.
    4. Arrive and Check-In: The front desk is open 24/7. If you arrive late, you can still check in without worry. Inform the staff if you have any special requests, such as a room away from the elevator or on a higher floor.
    5. Inspect Your Room: Upon entering, do a quick check. Ensure the AC/heating works, the Wi-Fi connects, and the room is clean. If there are issues, contact the front desk immediately so they can resolve them or move you to another room.

    Frequently Asked Questions (FAQ)

    1. Is there parking available at the hotel?

    Yes, the Red Roof Plus+ on Richmond Highway offers free on-site parking for guests. This is a significant advantage over many downtown DC hotels that charge upwards of $40–$60 per night for parking. Spaces are generally ample, but arriving earlier in the day ensures better spot selection.

    2. How far is the hotel from the nearest Metro station?

    The hotel is approximately 2–3 miles from the Braddock Road Metro Station (Yellow and Blue Lines). While not within walking distance, it is a short 5–10 minute drive or rideshare trip. From there, you can easily access all major DC monuments and museums.

    3. Are there restaurants within walking distance?

    While Richmond Highway is car-centric, there are several dining options within a 0.5 to 1-mile radius. These include fast-casual chains, coffee shops, and local diners. For a wider variety of high-quality dining, heading into Old Town Alexandria (a 10-minute drive) is highly recommended.

    4. Can I get an early check-in or late check-out?

    Early check-in and late check-out are subject to availability. It is best to call the front desk directly on the day of your arrival to request an early check-in. For late check-outs, you may be able to extend your stay for a few hours for a small fee, or simply store your luggage with the front desk if you have a late flight.

    5. Is the hotel suitable for business travelers?

    Absolutely. With free high-speed Wi-Fi, in-room work desks, and proximity to the Pentagon and National Airport, it is a popular choice for business travelers. The quiet environment also allows for focused work, and the cost savings can be beneficial for those managing travel budgets.

    6. What is the cancellation policy?

    Cancellation policies vary depending on the rate type booked. Generally, flexible rates allow cancellation up to 24–48 hours before check-in without penalty. Always review the specific terms during the booking process to avoid unexpected charges.

    Conclusion

    Choosing the right accommodation can make or break your trip to Washington D.C. The Red Roof Plus+ Washington Dc Alexandria Richmond Highway Alexandria Va stands out as a compelling option for travelers who value affordability, convenience, and pet-friendly policies. By staying here, you gain easy access to both the historic charm of Alexandria and the political heart of DC, all without the hefty price tag of downtown hotels.

    Whether you are a family on vacation, a business traveler on a tight budget, or a pet owner looking for a welcoming stay, this hotel delivers on its promises. The combination of modern amenities, free parking, and strategic location makes it a smart choice for your next visit to the region.

    Did you find this guide helpful? Share this article with your friends and family who are planning a trip to DC! Let them know they can save money without sacrificing comfort. Don’t forget to leave a comment below if you have stayed here recently—we’d love to hear about your experience.

  • Keep Tongue on Roof of Mouth While Sleeping

    Keep Tongue on Roof of Mouth While Sleeping

    Do you wake up with a dry mouth, bad breath, or feeling unrefreshed despite getting eight hours of sleep? You might be a chronic mouth breather, a habit that can negatively impact your dental health, sleep quality, and even facial structure over time. Learning how to keep tongue on roof of mouth while sleeping is the foundational step toward reclaiming your health and ensuring your body rests in its most natural, efficient state.

    Why Does Tongue Position Matter During Sleep?

    Before diving into the “how,” it is crucial to understand the “why.” The position of your tongue is not just a minor detail; it is the gatekeeper of your airway.

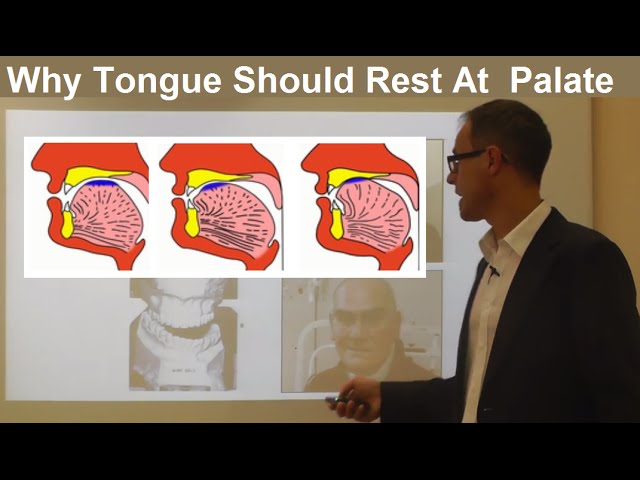
    When your tongue rests correctly on the roof of your mouth (the palate), it acts as a natural seal for your oral cavity. This encourages nasal breathing, which filters, warms, and humidifies the air before it reaches your lungs. Conversely, when the tongue falls back into the throat, it obstructs the airway, leading to snoring, sleep apnea, and mouth breathing.

    According to myofunctional therapy principles, the correct resting position involves the tip of the tongue resting gently against the ridge behind the upper front teeth (not touching them), with the entire body of the tongue suctioned against the hard palate. This is often referred to as the “N-spot” position.

    The Health Risks of Improper Tongue Posture

    Chronic low tongue posture and mouth breathing are linked to several health issues:

    • Dental Problems: Increased risk of cavities and gum disease due to dry mouth.
    • Facial Development: In children, it can lead to long-face syndrome and narrow dental arches. In adults, it may contribute to premature aging signs around the mouth.
    • Sleep Disruption: Poor oxygenation leads to fragmented sleep and daytime fatigue.
    • Orthodontic Relapse: Teeth may shift back after braces if tongue pressure is incorrect.
    How To Keep Tongue On Roof Of Mouth While Sleeping

    Step-by-Step Guide: How to Keep Tongue on Roof of Mouth While Sleepingi

    Retraining your tongue requires patience and consistency. It is a muscle memory issue, and like any physical therapy, it takes time to rewire neural pathways. Here is a comprehensive guide to help you achieve proper tongue posture at night.

    1. Master the Daytime “Spot” Technique

    You cannot expect your tongue to stay in place at night if it does not know where to go during the day. Start by practicing while awake.

    • Locate the Spot: Say the word “Sing” or “King.” Notice where the tip of your tongue lands at the end of the sound. That is your target spot—the alveolar ridge.
    • Create Suction: Once the tip is in place, flatten the rest of your tongue against the roof of your mouth. Imagine you are trying to suck a small piece of food off the palate.
    • Check Your Lips: Ensure your lips are sealed comfortably without strain.
    • Breathe Through Your Nose: Verify that you can breathe easily through your nose while maintaining this position.

    Practice this for 5–10 minutes, three times a day. Set reminders on your phone if necessary.

    2. Strengthen Orofacial Muscles

    A weak tongue will fall back when you relax into deep sleep. Strengthening exercises can help maintain posture.

    • The Tongue Click: Press your tongue flat against the roof of your mouth and pull it down quickly to make a clicking sound. Repeat 10 times.
    • The Palate Push: Push your entire tongue against the roof of your mouth as hard as you can for 5 seconds. Relax and repeat 10 times.
    • Chewing Practice: Chew your food thoroughly on both sides of your mouth to engage jaw muscles evenly.

    3. Address Nasal Congestion

    If your nose is blocked, you cannot keep your tongue on the roof of your mouth effectively because you will be forced to open your mouth to breathe.

    • Saline Rinse: Use a neti pot or saline spray before bed to clear allergens and mucus.
    • Humidifier: Keep bedroom humidity between 40–60% to prevent nasal passages from drying out and swelling.
    • Allergy Management: If allergies are the culprit, consult an allergist. Untreated allergic rhinitis is a primary cause of mouth breathing.

    For more detailed information on nasal anatomy and function, you can refer to this resource on Nasal Breathing.

    4. Use Mouth Tape (With Caution)

    Mouth taping has gained popularity as a tool to enforce nasal breathing. However, it is a training aid, not a cure-all.

    How to use it safely:

    1. Ensure your nasal passages are completely clear.
    2. Use specialized surgical tape or porous mouth tape (never duct tape or strong adhesives).
    3. Place a small vertical strip over the center of your lips, leaving the corners slightly open for safety.
    4. Practice during the day first to get used to the sensation.

    Warning: Do not use mouth tape if you have severe sleep apnea, nausea, or have consumed alcohol/sedatives, as these conditions increase the risk of aspiration if you need to vomit or struggle to breathe.

    Troubleshooting Common Challenges

    Even with the best intentions, keeping the tongue elevated can be difficult. Here is a comparison of common obstacles and solutions.

    ChallengePossible CauseSolution
    Tongue feels tiredWeak myofunctional musclesPerform daily tongue strengthening exercises.
    Jaw painClenching or TMJ issuesConsult a dentist; ensure you are not biting down hard.
    Waking up gaspingUndiagnosed Sleep ApneaStop taping immediately and see a sleep specialist.
    Dry mouth persistsMouth still opening slightlyTry a chin strap in conjunction with tongue exercises.

    The Role of Professional Help

    While self-help techniques are effective for many, some individuals require professional intervention. If you suspect you have Obstructive Sleep Apnea (OSA), characterized by loud snoring and pauses in breathing, you must seek medical advice.

    A myofunctional therapist can provide personalized exercises to correct tongue thrust and swallowing patterns. Additionally, an ENT (Ear, Nose, and Throat) doctor can check for structural issues like a deviated septum or enlarged tonsils that physically prevent nasal breathing.

    FAQ Section

    1. Is it dangerous to keep my tongue on the roof of my mouth while sleeping?

    No, it is actually the natural and healthy resting position for the human tongue. It promotes nasal breathing, which is safer and more efficient than mouth breathing. However, forcing it if you have a physical obstruction can be uncomfortable. Always prioritize clear airways.

    2. Can mouth tape help me keep my tongue in place?

    Mouth tape helps keep your lips closed, which indirectly supports tongue posture by preventing mouth breathing. However, it does not actively push the tongue up. You must train the tongue muscles separately to ensure they stay suctioned to the palate.

    3. How long does it take to form this habit?

    Muscle memory varies by individual. Most people report noticeable improvements in 2–4 weeks of consistent daytime practice. Full automaticity during sleep may take 2–3 months. Consistency is key.

    4. What if I have a short frenulum (tongue-tie)?

    A tight lingual frenulum can physically restrict the tongue from reaching the roof of the mouth. If you cannot place your tongue on the palate without straining or lifting the tip of your tongue off the spot, consult a dentist or oral surgeon. A simple frenectomy procedure may be recommended.

    5. Will this stop my snoring?

    For many people, yes. Snoring is often caused by the vibration of soft tissues when the airway is partially obstructed by a falling tongue. Keeping the tongue elevated opens the airway, significantly reducing or eliminating snoring. However, if snoring persists, it may indicate deeper sleep apnea issues.

    6. Can children benefit from this technique?

    Absolutely. Early intervention is critical for facial development. Encouraging proper tongue posture in children can prevent orthodontic issues, improve focus, and support healthy growth patterns. Pediatric myofunctional therapy is highly recommended for young mouth breathers.

    Conclusion

    Learning how to keep tongue on roof of mouth while sleeping is more than just a quirky health hack; it is a fundamental shift toward better physiological function. By promoting nasal breathing, you enhance oxygen uptake, protect your dental health, and improve the quality of your rest.

    Start small. Practice the “spot” technique during the day, address any nasal congestion, and consider safe tools like mouth tape only after establishing basic muscle control. Remember, your body wants to breathe correctly—it just needs a little reminder.

    If you found this guide helpful, please share it with friends or family who struggle with snoring or poor sleep. Better rest is just a tongue position away!

  • How Much Area Does A Bundle Of Shingles Cover?

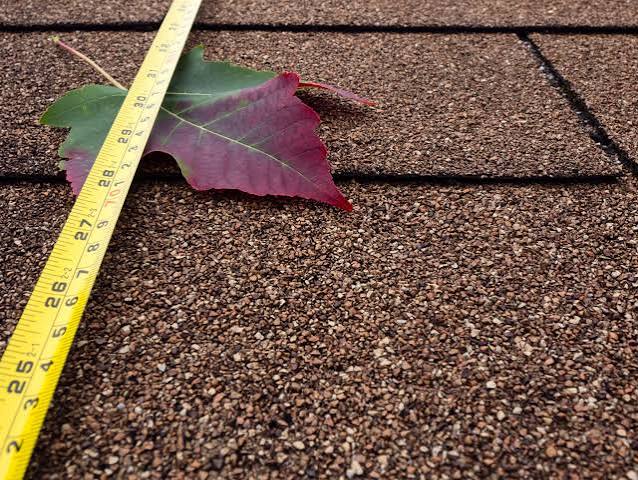
    How Much Area Does A Bundle Of Shingles Cover?

    Have you ever stood in the aisle of a home improvement store, staring at stacks of asphalt shingles, wondering if you’ve bought enough to finish your roof? It is one of the most common stress points for DIY homeowners and even new contractors: miscalculating materials can lead to costly delays or mismatched dye lots. Understanding exactly how much area does a bundle of roofing shingles cover is the first step toward a successful, budget-friendly roofing project.

    In this guide, we will break down the math, explain industry standards, and help you avoid the dreaded “shortage” scenario. Let’s dive into the numbers so you can buy with confidence.

    The Standard Rule: 33.3 Square Feet Per Bundle

    If you are working with standard three-tab or architectural asphalt shingles in the United States, there is a golden rule you need to memorize. One bundle of shingles typically covers 33.3 square feet.

    However, shingles are not sold by the square foot; they are sold by the “square.” In roofing terminology, a square equals 100 square feet of roof area.

    Here is the simple breakdown:

    • 1 Square = 100 sq. ft.
    • 1 Bundle = ~33.3 sq. ft.
    • Bundles per Square = 3 bundles (usually).

    Therefore, to cover 100 square feet of roof, you generally need three bundles of standard shingles. This 3:1 ratio is the industry standard for most major manufacturers like GAF, Owens Corning, and CertainTeed.

    Why Is It Not Exactly 34 Square Feet?

    You might wonder why the number isn’t a clean 34 or 35. The reason lies in the manufacturing and packaging logistics. Shingles are designed to overlap when installed. The “coverage” area refers to the exposed part of the shingle that protects your home from rain, not the total physical size of the shingle including the part that gets nailed down and covered by the next row.

    Exceptions to the Rule: When You Need More Bundles

    While the “3 bundles per square” rule applies to the vast majority of residential roofs, it is not universal. Before you place your order, you must check the specific product specifications.

    1. Heavyweight or Premium Shingles

    Some high-end architectural or luxury shingles are thicker and heavier. Due to weight restrictions on pallets and handling ease, these may require 4 or even 5 bundles per square. Always read the label on the wrapper. If the bundle weighs significantly more than the standard 60–80 pounds, expect lower coverage per bundle.

    2. Different Materials

    This guide focuses on asphalt shingles, which dominate the US market. However, if you are using other materials, the coverage varies drastically:

    • Wood Shakes: Often come in bundles covering 25–30 sq. ft.
    • Slate Tiles: Sold by weight or piece, not typically in standard “bundles” like asphalt.
    • Metal Roofing: Sold by linear feet of panels, not bundles.

    For accurate comparisons on traditional roofing materials, you can refer to general construction standards documented on Wikipedia’s Roofing page to understand how different materials impact structural load and coverage metrics.

    How Much Area Does A Bundle Of Roofing Shingles Cover

    How to Calculate Your Total Shingle Needs

    Knowing that one bundle covers 33.3 square feet is useless if you don’t know your total roof area. Here is a step-by-step method to calculate your needs accurately.

    Step 1: Measure Your Roof’s Footprint

    If you cannot climb onto the roof safely, measure the length and width of your house from the ground. Include any overhangs (eaves) in your measurement.

    • Example: A house that is 40 feet long and 30 feet wide has a footprint of 1,200 sq. ft.

    Step 2: Adjust for Roof Pitch

    A flat roof has the same area as its footprint. However, most US homes have pitched (sloped) roofs. A steeper pitch means more surface area.

    • Low Pitch (4/12): Multiply footprint by 1.05
    • Medium Pitch (6/12): Multiply footprint by 1.20
    • Steep Pitch (9/12+): Multiply footprint by 1.35 or more

    Using our example above with a medium pitch: 1,200 sq. ft. x 1.20 = 1,440 sq. ft. of actual roof area.

    Step 3: Convert to Squares

    Divide your total roof area by 100. 1,440 / 100 = 14.4 Squares.

    Step 4: Calculate Bundles

    Multiply the number of squares by 3 (for standard shingles). 14.4 x 3 = 43.2 Bundles.

    Step 5: Add Waste Factor (Crucial!)

    You cannot use every scrap of shingle. Cutting around vents, chimneys, and valleys creates waste.

    • Simple Gable Roof: Add 10% waste.
    • Complex Roof (Many hips/valleys): Add 15–20% waste.

    Adding 10% to our example: 43.2 bundles + 10% (4.32) = 47.52 Bundles.

    Final Order: Round up to 48 Bundles.

    Quick Reference Table: Shingle Coverage

    Shingle TypeCoverage Per BundleBundles Per Square (100 sq. ft.)Avg. Weight Per Bundle
    Standard 3-Tab33.3 sq. ft.360–65 lbs
    Architectural33.3 sq. ft.370–80 lbs
    Premium/Luxury20–25 sq. ft.4–580+ lbs
    Starter StripVariesN/A (Sold by linear ft)Light

    Note: Always verify with the specific manufacturer’s data sheet before purchasing.

    Common Mistakes to Avoid

    Even experienced DIYers make these errors. Avoid them to save money and time.

    • Ignoring Starter Shingles: The first row of your roof requires starter shingles or cut-up regular shingles. These do not provide full coverage. Factor this into your waste calculation.
    • Forgetting Ridge Caps: The peak of your roof needs ridge cap shingles. These are often sold separately or require specific cutting patterns that increase waste.
    • Mismatched Dye Lots: If you run short and buy a second batch later, the color might not match perfectly. Always buy 5–10% more than you think you need. Leftover shingles can be stored for future repairs.

    FAQ Section

    Q: Can I return unused bundles of shingles?

    A: Most big-box stores (like Home Depot or Lowe’s) allow returns of unopened, non-special-order bundles within 90 days with a receipt. However, specialty roofing suppliers may have stricter policies. Check before you buy.

    Q: Does wind affect how many shingles I need?

    A: Wind does not change the coverage area, but high-wind zones may require additional nails or adhesive strips. This doesn’t increase shingle count but may affect installation time and labor costs.

    Q: How much does a bundle of shingles weigh?

    A: A standard bundle of asphalt shingles weighs between 60 and 80 pounds. This is important for transport and ensuring your roof structure can support the load, especially if adding a second layer.

    Q: What is a “square” in roofing?

    A: A “square” is a unit of measurement equal to 100 square feet. It is the standard unit used by contractors to estimate materials and labor. When a roofer says your roof is “20 squares,” they mean it is 2,000 square feet.

    Q: Do I need underlayment if I have shingles?

    A: Yes. Shingles are the water-shedding layer, but underlayment (felt or synthetic) provides a secondary barrier against water intrusion and ice dams. It is required by most building codes in the US.

    Conclusion

    Understanding how much area does a bundle of roofing shingles cover is fundamental to any roofing project. Remember the magic number: 33.3 square feet per bundle for standard asphalt shingles, which translates to 3 bundles per square.

    By accurately measuring your roof’s pitch, calculating your total square footage, and adding a 10–15% waste factor, you can ensure you have enough material to complete the job without stressful mid-project runs to the store. Proper planning not only saves money but also ensures a uniform look by avoiding dye-lot mismatches.

    Did you find this guide helpful? Share it with your fellow DIY enthusiasts on Facebook or Pinterest to help them tackle their roofing projects with confidence!

  • How to Get Rid of Moss on Your Roof Fast

    How to Get Rid of Moss on Your Roof Fast

    Seeing green patches creeping up your shingles can be unsettling. It’s not just an aesthetic issue; moss retains moisture, which can degrade roofing materials and lead to costly leaks over time. If you are asking yourself, “How can I get rid of moss on my roof,“ you are not alone. Many homeowners in humid climates face this challenge every year. The good news is that with the right approach, you can safely remove moss and prevent it from returning, extending the life of your roof significantly.

    Why Is Moss Bad for Your Roof?

    Before diving into removal techniques, it is crucial to understand why moss is more than just a nuisance. Unlike algae, which merely discolors shingles, moss has root-like structures called rhizoids. These penetrate the surface of asphalt shingles, wood shakes, and even tile grout.

    According to roofing experts, moss acts like a sponge. It holds water against the roof surface long after rain has stopped. This constant moisture accelerates the breakdown of asphalt granules and can cause wood to rot. In colder climates, trapped moisture freezes and expands, leading to cracks in tiles or shingles. Addressing this early is key to avoiding premature roof replacement.

    Safety First: Preparing for Roof Work

    Removing moss involves working at heights and handling cleaning solutions. Safety must be your top priority.

    • Use Proper Gear: Wear rubber-soled shoes for better traction. Use a sturdy extension ladder with stabilizers.
    • Check the Weather: Never clean your roof when it is wet, windy, or icy. Dry, overcast days are ideal.
    • Protect Yourself: Use safety harnesses if your roof has a steep pitch (greater than 6/12). Wear eye protection and gloves when handling cleaning chemicals.
    • Protect Your Landscape: Cover plants below the work area with plastic sheeting to shield them from runoff and debris.

    Method 1: The Manual Removal Technique

    For light to moderate moss growth, manual removal is often the safest and most effective first step. This method avoids the potential damage caused by high-pressure washing.

    Step-by-Step Guide:

    1. Dry Brushing: Wait for a dry day. Use a soft-bristled broom or a specialized roof brush. Gently sweep the moss off the shingles. Always sweep downward, following the direction of the water flow. Sweeping upward can lift shingle edges and break the seal.
    2. Collect Debris: As you sweep, have a helper catch the falling moss in a tarp or bucket. Do not let it accumulate in your gutters.
    3. Inspect for Damage: Once the moss is removed, inspect the shingles for any lifted tabs or missing granules. Repair any minor issues immediately.

    Pro Tip: Avoid using metal scrapers or wire brushes. These can easily gouge asphalt shingles and strip away the protective UV layer.

    Method 2: Chemical Treatment with Zinc Sulfate

    If manual removal isn’t enough, or if you want to kill the moss at the root, chemical treatments are highly effective. Zinc sulfate is a common ingredient in commercial moss killers because it is toxic to moss but relatively safe for surrounding plants when used correctly.

    How to Apply:

    1. Mix the Solution: Follow the manufacturer’s instructions. A typical ratio is 1 pound of zinc sulfate powder per 5 gallons of water.
    2. Apply Evenly: Use a garden sprayer to apply the solution evenly over the mossy areas. Start from the ridge and work your way down.
    3. Let It Sit: Allow the solution to sit for 20–30 minutes. You will notice the moss turning brown or yellow as it dies.
    4. Rinse Gently: After the moss has died, gently rinse the area with low-pressure water from a garden hose. Do not use a pressure washer, as the force can damage shingles.

    For a comprehensive understanding of how different chemical compounds affect biological growth, you can refer to general scientific principles on biocides and their environmental impact.

    Method 3: Natural and Eco-Friendly Alternatives

    If you are concerned about chemical runoff, there are natural alternatives. While they may take longer to work, they are safer for pets, children, and local ecosystems.

    Oxygenated Bleach (Sodium Percarbonate)

    Unlike chlorine bleach, oxygenated bleach breaks down into water and oxygen. It is effective at killing moss and algae without harming plants.

    • Recipe: Mix 1 cup of oxygenated bleach powder with 1 gallon of warm water.
    • Application: Spray onto the moss, let it sit for 15–20 minutes, then scrub gently and rinse.

    Vinegar Solution

    White distilled vinegar is acidic and can kill moss. However, it is less effective on thick layers and may require repeated applications.

    • Recipe: Mix equal parts white vinegar and water.
    • Application: Spray directly on moss patches. Reapply every few weeks until the moss dies.
    How Can I Get Rid Of Moss On My Roof

    Comparison: Manual vs. Chemical vs. Professional

    FeatureManual RemovalChemical TreatmentProfessional Service
    CostLow ($0–$50)Medium ($50–$150)High ($300–$800+)
    EffortHighMediumLow
    EffectivenessGood for surface mossExcellent for deep rootsBest overall results
    Risk of DamageLow (if done carefully)Low (if rinsed properly)Very Low
    Time RequiredSeveral hours1–2 hours + wait time2–4 hours

    Preventing Moss from Returning

    Removing moss is only half the battle. Prevention is key to keeping your roof clean and durable.

    Install Zinc or Copper Strips

    One of the most effective long-term solutions is installing metal strips near the roof ridge. When it rains, tiny particles of zinc or copper wash down the roof, creating an environment where moss cannot grow.

    • Zinc Strips: Affordable and effective. Last 5–10 years.
    • Copper Strips: More expensive but last decades. Also adds a premium aesthetic.

    Trim Overhanging Branches

    Moss thrives in shade and dampness. Trees that hang over your roof block sunlight and drop leaves, which retain moisture. Trim branches back at least 6 feet from the roof edge to increase sun exposure and airflow.

    Clean Gutters Regularly

    Clogged gutters cause water to back up under shingles, creating a moist environment perfect for moss. Clean your gutters at least twice a year, especially in fall and spring.

    FAQ Section

    Q1: Can I use a pressure washer to remove moss?

    A: It is generally not recommended. High-pressure water can force water under shingles, break seals, and strip away protective granules. If you must use pressure, keep it below 1,200 PSI and use a wide-angle nozzle, but manual or chemical methods are safer.

    Q2: How often should I check my roof for moss?

    A: Inspect your roof at least twice a year, ideally in spring and fall. Early detection makes removal much easier and cheaper.

    Q3: Is moss removal covered by homeowners insurance?

    A: Typically, no. Insurance considers moss growth a maintenance issue rather than sudden accidental damage. However, if moss causes a leak that leads to interior damage, that secondary damage might be covered. Check your specific policy.

    Q4: Can I walk on my roof to clean it?

    A: Only if it is safe to do so. Asphalt shingles can be slippery, especially when wet or covered in moss. If your roof is steep or high, hire a professional. Always prioritize safety over cost savings.

    Q5: What is the best time of year to remove moss?

    A: Late spring or early fall is ideal. The weather is mild, and the roof is dry. Avoid winter due to ice risks and summer due to extreme heat, which can make shingles brittle.

    Q6: Will bleach kill moss permanently?

    A: Chlorine bleach can kill existing moss, but it does not prevent regrowth. Additionally, it can harm plants and corrode metal fixtures. Zinc sulfate or oxygenated bleach are better long-term options.

    Conclusion

    Learning how can I get rid of moss on my roof is an essential skill for any homeowner. Whether you choose manual removal, chemical treatments, or natural alternatives, the key is consistency and safety. By removing existing moss and implementing preventive measures like zinc strips and tree trimming, you can protect your investment and keep your home looking its best.

    Don’t wait until small patches become major problems. Take action today to ensure your roof remains durable and efficient. If you found this guide helpful, please share it with your friends and neighbors on social media. Together, we can keep our communities safe and beautiful!

  • How To Install Soffit And Fascia On A Gable Roof

    How To Install Soffit And Fascia On A Gable Roof

    Does your home’s exterior look tired, or have you noticed pests sneaking into your attic through gaps under the eaves? You are not alone; many homeowners struggle with deteriorating trim that compromises both aesthetics and structural integrity. Knowing how to install soffit and fascia on a gable roof is the key to solving these issues, sealing your home against moisture, and giving your property a crisp, finished look.

    In this comprehensive guide, we will walk you through every step of the process. Whether you are a seasoned DIYer or a motivated beginner, this tutorial is designed to help you achieve professional results while saving money on labor costs.


    Why Soffit and Fascia Matter for Your Gable Roof

    Before we pick up a hammer, it is crucial to understand what we are building. The fascia is the vertical board that runs along the lower edge of your roof, directly attached to the ends of the rafters. It supports the bottom row of tiles and carries the gutters. The soffit is the horizontal underside of the eave, bridging the gap between the siding and the fascia.

    Together, they form a critical barrier. According to industry data, proper ventilation provided by soffits can reduce attic temperatures by up to 50°F in summer, significantly lowering cooling costs. More importantly, they prevent water intrusion, which is the leading cause of roof rot and mold growth.

    For a deeper understanding of roof anatomy and terminology, you can refer to this resource on Roofing components.


    Tools and Materials You Will Need

    Preparation is half the battle. Having the right tools on hand ensures a smooth workflow and prevents mid-project trips to the hardware store.

    Essential Tools:

    • Tape measure and speed square
    • Circular saw or miter saw (for precise cuts)
    • Drill/driver with screw bits
    • Chalk line
    • Ladder (ensure it is stable and rated for your height)
    • Safety gear: Gloves, safety glasses, and non-slip shoes

    Materials:

    • Fascia boards (typically 1×6 or 1×8 pressure-treated pine or aluminum)
    • Soffit panels (vinyl or aluminum are popular for durability)
    • F-channel (J-channel) for soffit support
    • Corrosion-resistant screws (galvanized or stainless steel)
    • Drip edge flashing
    • Caulk (paintable, exterior grade)
    How To Install Soffit And Fascia On A Gable Roof

    Step 1: Removing Old Trim and Preparing the Surface

    If you are replacing existing trim, start by carefully prying off the old fascia and soffit. Use a pry bar gently to avoid damaging the underlying rafters or siding. Once removed, inspect the rafter tails for signs of rot or insect damage.

    Critical Check: If you find soft, spongy wood, you must cut out the damaged section and splice in new pressure-treated lumber. Installing new trim over rotten wood is a temporary fix that will fail quickly.

    Clean the area thoroughly. Remove any old nails, debris, or peeling paint. A clean surface ensures that your new materials sit flush and secure.


    Step 2: Installing the Drip Edge and F-Channel

    Before installing the visible boards, you need to set up the foundation for water management and soffit support.

    1. Install Drip Edge: Place the metal drip edge along the top of the fascia line, under the roofing shingles if possible, or over the rafter tails. This directs rainwater away from the wood, preventing rot.
    2. Install F-Channel: Measure the distance from the house wall to the outer edge of the rafter. Cut aluminum or vinyl F-channel (also known as J-channel) to length. Screw this channel into the bottom of the rafters, about 1 inch from the wall. This channel will hold one side of your soffit panels.

    Pro Tip: Ensure the F-channel is level. Use a chalk line to mark your screw positions across all rafters for a uniform look.


    Step 3: Cutting and Installing the Soffit Panels

    Soffit panels often come in 12-foot lengths. For a gable roof, you may need to cut these to fit between the F-channel and the fascia line.

    1. Measure and Cut: Measure the width of the eave. Subtract 1/4 inch to allow for thermal expansion (especially important for vinyl). Cut the soffit panels using a fine-toothed blade to prevent cracking.
    2. Insert Panels: Slide one end of the panel into the F-channel attached to the wall. Flex the panel slightly to snap the other end into place or prepare it for the fascia attachment.
    3. Secure the Panels: If your design requires screwing the soffit to the fascia (before the fascia board is fully closed), use corrosion-resistant screws. Do not overtighten; leave a tiny gap for expansion.

    Ventilation Note: If your attic lacks adequate airflow, consider using vented soffit panels. Install them according to the manufacturer’s spacing guidelines, typically every few feet, to ensure consistent air intake.


    Step 4: Installing the Fascia Boards

    The fascia board covers the ends of the rafters and the edge of the soffit. It is the “face” of your eave.

    1. Cut to Length: Measure the length of each rafter tail section. For gable roofs, you may need to miter-cut the corners where the fascia meets the gable end. A 45-degree angle usually provides a clean joint.
    2. Positioning: Hold the fascia board against the rafter tails. It should cover the edge of the soffit panel and align with the bottom of the drip edge.
    3. Fastening: Use two screws per rafter tail to secure the fascia. Pre-drill holes if using hardwood to prevent splitting. Ensure the board is straight and tight against the soffit.
    Material TypeProsConsBest For
    VinylLow maintenance, rot-proofCan crack in extreme coldBudget-friendly DIY
    AluminumDurable, lightweight, paintableCan dent easilyCoastal areas
    WoodClassic look, easy to cutRequires painting, prone to rotHistoric homes

    Step 5: Finishing Touches and Sealing

    Once all boards are installed, step back and inspect your work. Look for gaps, uneven lines, or exposed screw heads.

    • Caulking: Apply a bead of exterior-grade caulk along the top edge of the fascia where it meets the roof deck (if visible) and at any corner joints. This prevents water from seeping behind the trim.
    • Painting: If you used wood or primed aluminum, now is the time to paint. Use high-quality exterior paint to seal the wood and match your home’s color scheme. Two coats are recommended for longevity.
    • Gutter Reattachment: If you removed gutters, reattach them to the new fascia board using sturdy hangers. Ensure they slope slightly toward the downspouts for proper drainage.

    FAQ Section

    1. Can I install soffit and fascia without removing the roof shingles?

    Yes, in most cases. You can install new fascia and soffit without disturbing the shingles. However, if the drip edge is damaged or missing, you may need to lift the bottom row of shingles slightly to insert the new drip edge properly. Be cautious not to crack the shingles.

    2. What is the best material for soffit and fascia in humid climates?

    In humid or coastal climates, vinyl or aluminum is highly recommended. Wood is prone to rot and termite damage in high-moisture environments. Vinyl resists moisture entirely, while aluminum does not rust if properly coated.

    3. How do I ensure proper attic ventilation with soffits?

    Ensure that the soffit vents are not blocked by insulation inside the attic. Use baffles (chutes) to keep insulation away from the eaves. Additionally, calculate the required net free vent area based on your attic square footage—typically 1 square foot of ventilation for every 150 square feet of attic floor space.

    4. Do I need a permit to replace soffit and fascia?

    Regulations vary by location. In many US jurisdictions, minor repairs like replacing soffit and fascia do not require a permit. However, if you are altering the structure or changing the ventilation system significantly, check with your local building department. Always prioritize local code compliance.

    5. Why is my new soffit buckling?

    Buckling is usually caused by improper installation regarding thermal expansion. Vinyl and aluminum expand and contract with temperature changes. If you screw the panels too tightly or fail to leave the recommended 1/4-inch gap in the channels, the material has nowhere to go but outward, causing warping.


    Conclusion

    Learning how to install soffit and fascia on a gable roof is a rewarding project that enhances your home’s value and protection. By following these steps—preparing the surface, installing the F-channel, fitting the soffit, and securing the fascia—you create a durable barrier against the elements.

    Remember, patience and precision are your best tools. Take your time with measurements, ensure proper ventilation, and seal everything tightly. Your future self will thank you when you see lower energy bills and a beautiful, well-maintained exterior.

    Did you find this guide helpful? Share it with your friends on Facebook or Pinterest who might be tackling their own home improvement projects! If you have questions or tips of your own, leave a comment below—we love hearing from our community.