Blog

  • How To Get Rid Of Moss On Roof Shingles

    How To Get Rid Of Moss On Roof Shingles

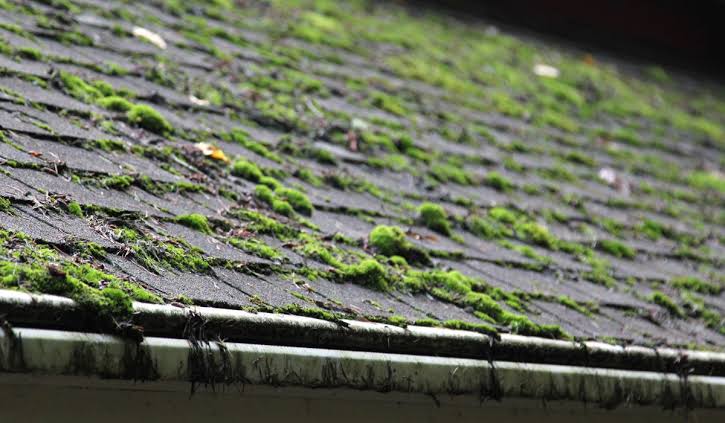
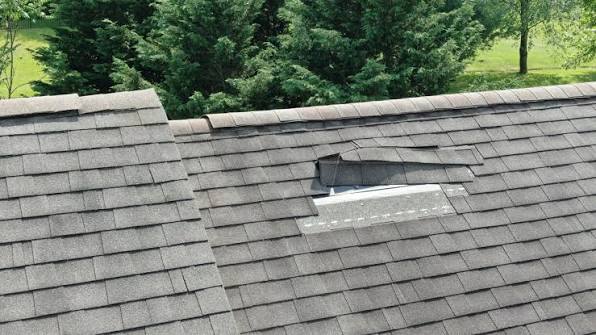
    Is that green, fuzzy layer on your roof causing you sleepless nights? You are not alone. Many homeowners in humid climates struggle with this persistent issue, worrying about potential leaks and structural damage. If you are wondering how to get rid of moss on the roof shingles without damaging your home’s most critical protective layer, you have come to the right place.

    Moss is more than just an eyesore; it holds moisture against your shingles, accelerating wear and tear. In this guide, we will walk you through safe, effective, and proven methods to remove moss and prevent it from returning. Let’s restore your roof’s integrity and curb appeal together.

    Why Is Moss Dangerous for Your Roof?

    Before we dive into the removal process, it is crucial to understand why moss is a threat. Unlike algae, which merely discolors shingles, moss has root-like structures called rhizoids. These penetrate the surface of asphalt shingles, lifting them up and breaking the seal.

    According to roofing experts, trapped moisture under moss can lead to:

    • Wood Rot: The decking beneath the shingles can decay.
    • Granule Loss: Essential protective granules wash away faster.
    • Ice Dams: In colder climates, moss traps water that freezes, causing significant damage.

    A study by the Asphalt Roofing Manufacturers Association (ARMA) suggests that proper maintenance can extend the life of a roof by up to 50%. Removing moss is a key part of that maintenance.

    Method 1: The Gentle DIY Chemical Approach

    For most homeowners, using a specialized moss-killing solution is the safest and most effective first step. This method minimizes physical stress on the shingles.

    Step-by-Step Guide

    1. Choose the Right Product: Look for a moss killer containing zinc sulfate or potassium salts of fatty acids. Avoid bleach-based cleaners if possible, as they can harm surrounding landscaping and corrode metal fixtures.
    2. Protect Your Landscape: Wet down any plants near the roofline with plain water before applying chemicals. This creates a barrier that prevents absorption of the cleaner.
    3. Apply the Solution: Using a garden sprayer, apply the moss killer generously over the affected areas. Ensure you cover the moss thoroughly but avoid runoff waste.
    4. Wait Patiently: Let the solution work for 2–3 days. You will notice the moss turning brown or yellow, indicating it is dead.
    5. Rinse Gently: Use a garden hose with a gentle spray nozzle to wash away the dead moss. Never use a high-pressure washer, as this can strip granules and void your warranty.

    Pro Tip: Perform this task on a cloudy day. Direct sunlight can cause the chemical solution to evaporate too quickly, reducing its effectiveness.

    Method 2: Manual Removal (With Caution)

    If the moss patch is small, you might consider manual removal. However, this requires extreme care to avoid damaging the shingles.

    Tools Needed:

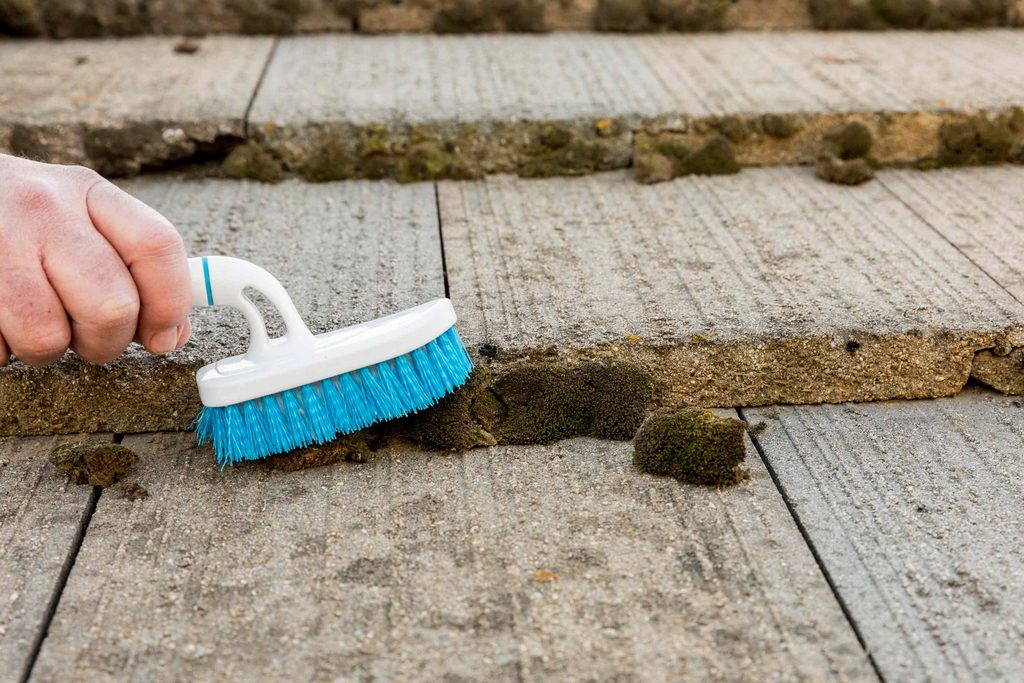
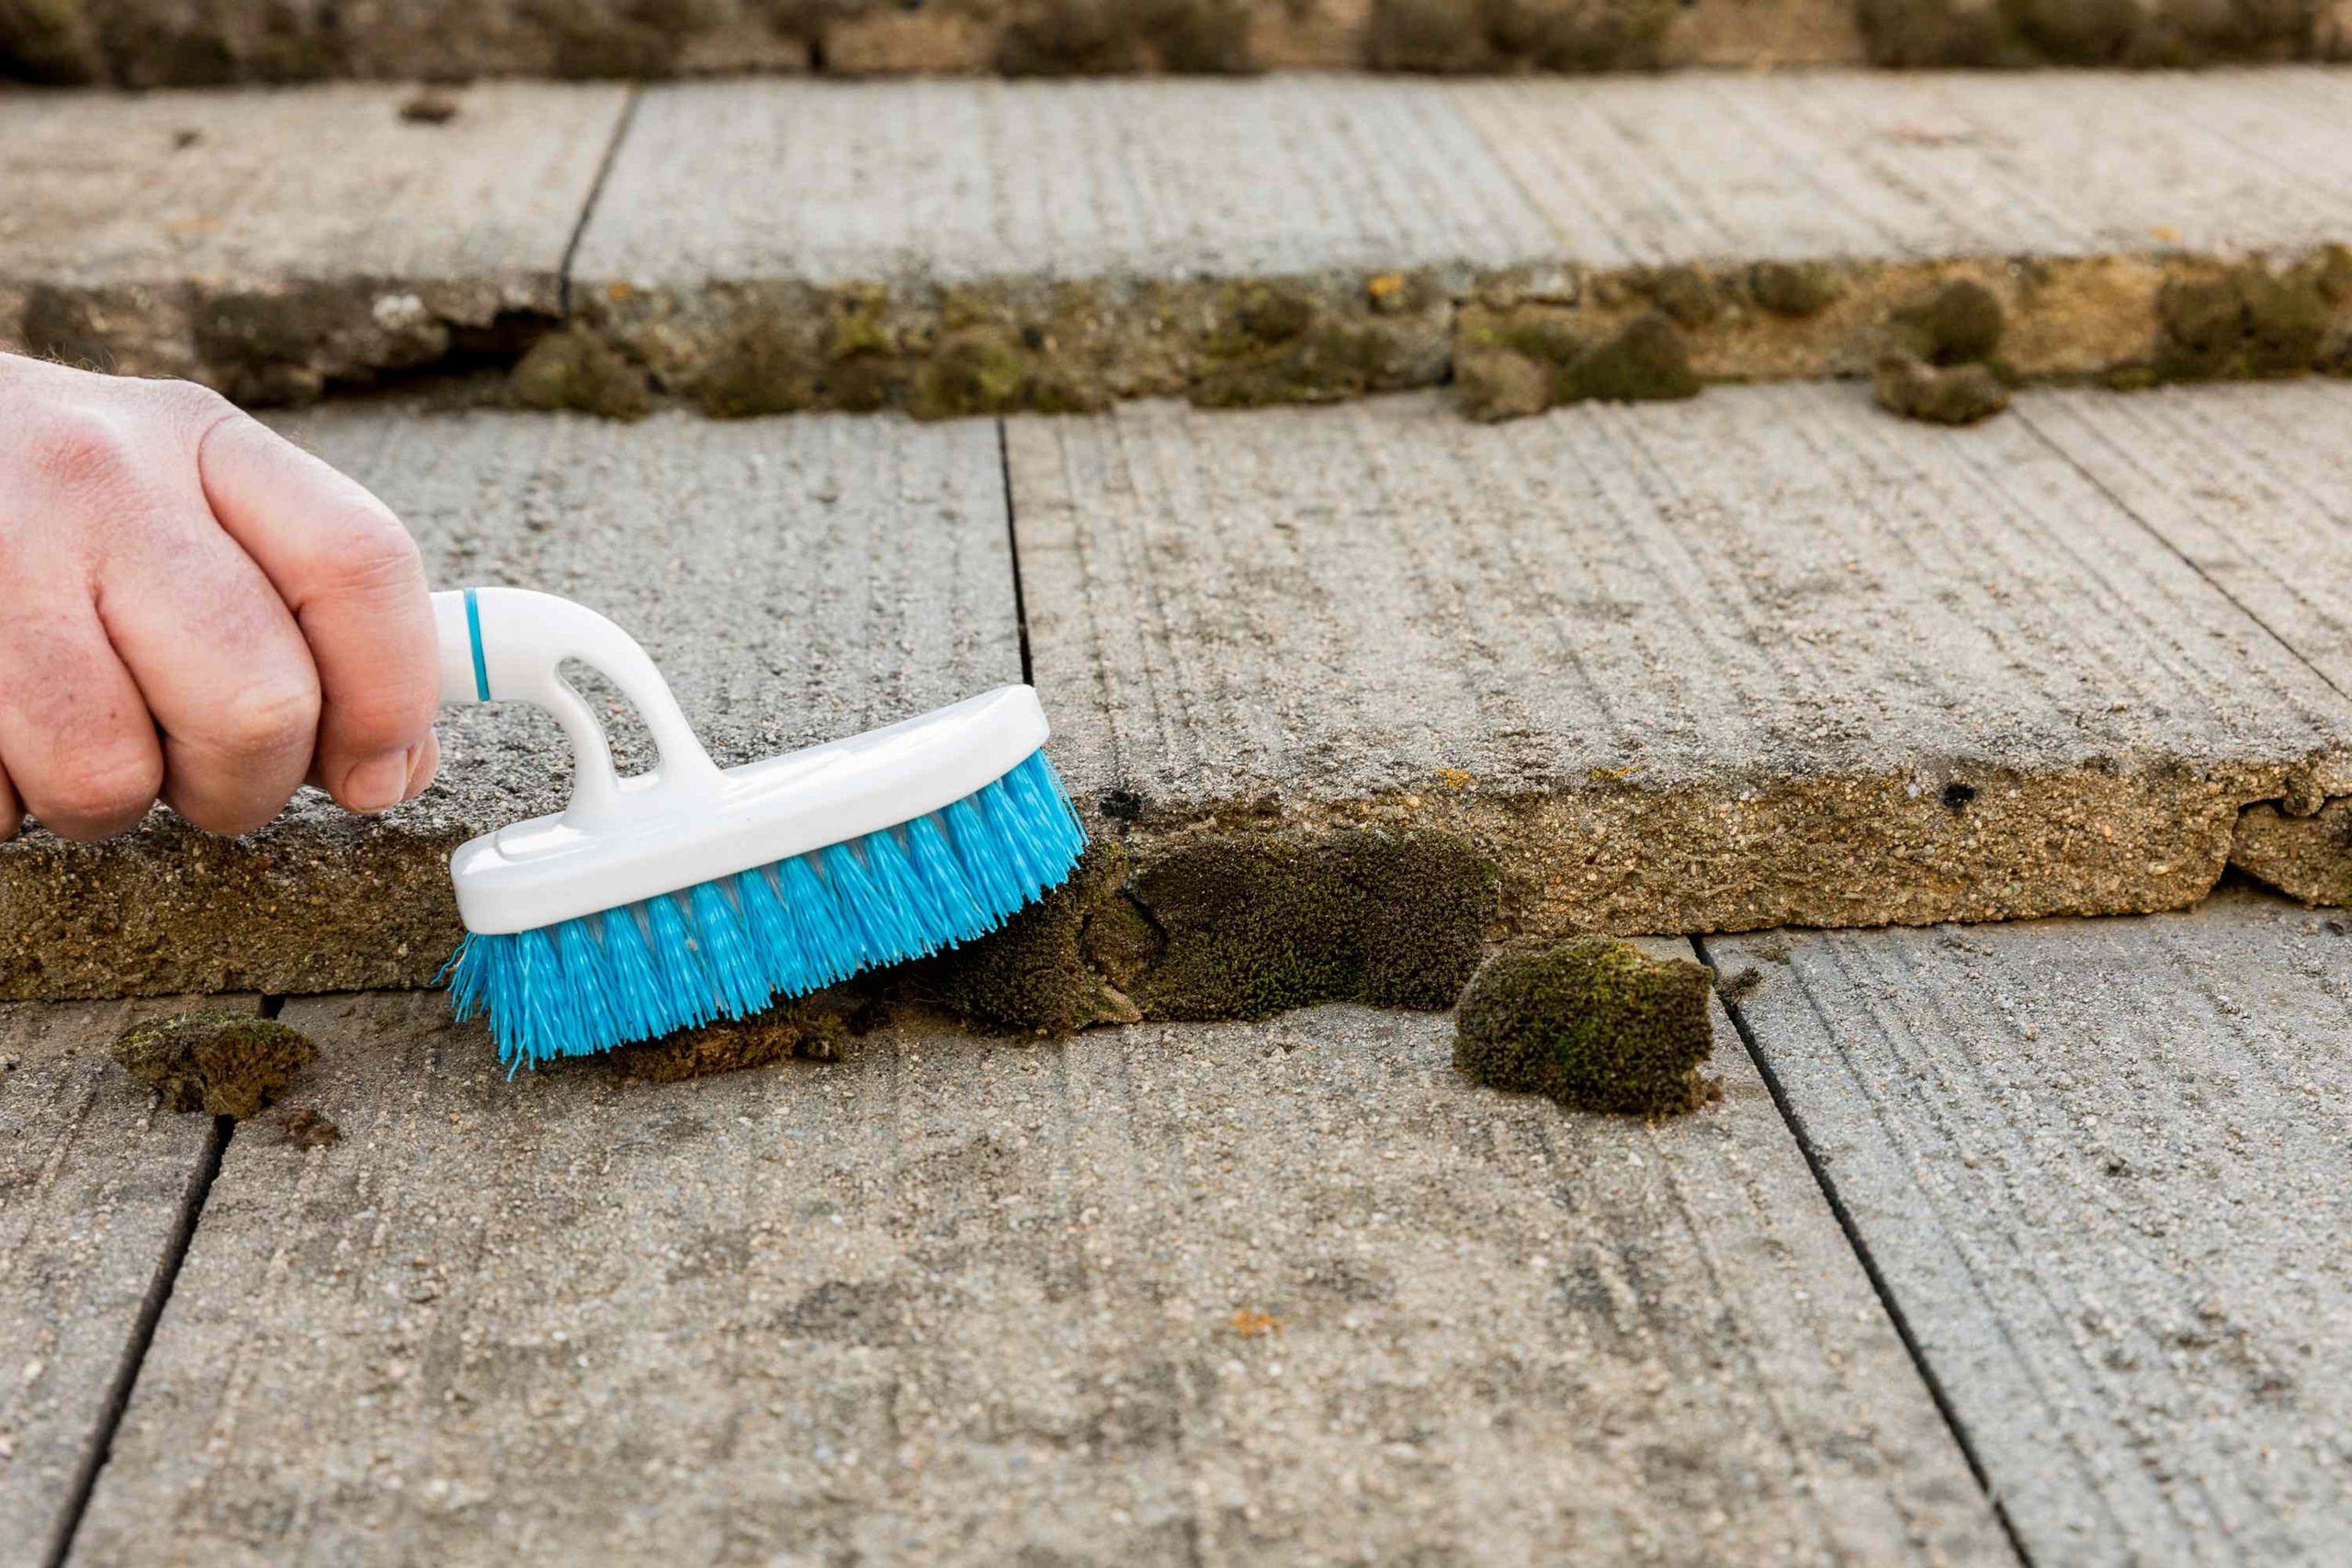
    • Soft-bristle brush or a plastic scraper
    • Safety harness and non-slip shoes
    • Garden hose

    The Process:

    1. Safety First: Always use a sturdy ladder and consider wearing a safety harness. If your roof has a steep pitch, skip this method and hire a professional.
    2. Wet the Area: Lightly spray the moss with water to soften it.
    3. Gently Scrape: Use the soft-bristle brush to sweep the moss off the shingles. Work from the top of the roof downward to prevent water from getting under the shingles.
    4. Avoid Metal Tools: Never use metal scrapers or wire brushes, as they will gouge the asphalt and compromise the waterproofing.

    Comparison: Chemical vs. Manual Removal

    FeatureChemical TreatmentManual Removal
    Safety for ShinglesHigh (if done correctly)Moderate (risk of physical damage)
    Effort LevelLowHigh
    EffectivenessKills roots deeplyRemoves surface growth only
    Best ForLarge areas, fragile roofsSmall spots, sturdy roofs
    Time Required3–5 days (including wait time)Immediate results
    How To Get Rid Of Moss On The Roof Shingles

    Preventing Moss from Returning

    Removing moss is only half the battle. Prevention is key to maintaining a healthy roof long-term. Here are three proven strategies to keep moss at bay.

    1. Install Zinc or Copper Strips

    One of the most effective long-term solutions is installing metal strips along the ridge of your roof. When it rains, tiny particles of zinc or copper wash down the roof, creating an environment where moss cannot grow.

    • Zinc Strips: Cost-effective and widely available.
    • Copper Strips: More expensive but last longer and offer a premium aesthetic.

    2. Trim Overhanging Branches

    Moss thrives in shade and dampness. Trees that hang over your roof block sunlight and drop leaves, which retain moisture. Regularly trimming these branches allows sunlight to dry out the roof surface naturally.

    3. Keep Gutters Clean

    Clogged gutters cause water to back up onto the roof deck, keeping shingles wet for extended periods. Clean your gutters at least twice a year—once in spring and once in fall—to ensure proper drainage.

    When to Call a Professional

    While DIY methods are great for minor issues, some situations require expert intervention. Consider hiring a professional roofer if:

    • Your roof has a steep pitch (greater than 6:12).
    • The moss covers more than 30% of the roof surface.
    • You notice missing, cracked, or curled shingles.
    • You are uncomfortable working at heights.

    Professional cleaners often use low-pressure soft wash systems that are safer and more thorough than typical DIY approaches. According to Wikipedia, mosses are non-vascular plants that require specific moist conditions to thrive, which professionals can help mitigate through advanced treatment plans.

    FAQ Section

    Q1: Can I use bleach to remove moss from my roof?

    A: While bleach can kill moss, it is generally not recommended. Bleach can damage surrounding vegetation, corrode metal flashings, and degrade the asphalt in shingles over time. Safer alternatives include zinc sulfate or oxygen-based cleaners.

    Q2: How often should I clean moss off my roof?

    A: It depends on your climate. In humid, shady areas, you may need to treat your roof every 1–2 years. In drier, sunnier climates, inspection every 3–5 years may suffice. Regular visual inspections from the ground are recommended annually.

    Q3: Will pressure washing damage my shingles?

    A: Yes, high-pressure washing can strip the protective granules from asphalt shingles, leading to premature aging and leaks. Most manufacturers explicitly warn against using pressure washers. Always opt for low-pressure rinsing or soft washing techniques.

    Q4: Is moss removal covered by homeowners insurance?

    A: Typically, no. Moss growth is considered a maintenance issue resulting from neglect or environmental factors, not a sudden accidental event. However, if moss causes significant damage that leads to a leak, the resulting water damage might be covered, depending on your policy. Check with your insurer.

    Q5: Can I walk on my roof to clean it?

    A: Walking on your roof can crack shingles, especially if they are old or brittle. If you must go up, wear soft-soled shoes and step carefully on the balls of your feet. However, using a long-handled brush from a ladder is often safer and less damaging.

    Q6: What is the best season to remove moss?

    A: Late spring or early fall is ideal. The weather is mild, allowing chemicals to work effectively without freezing or evaporating too quickly. Avoid cleaning during extreme heat or heavy rain seasons.

    Conclusion

    Learning how to get rid of moss on the roof shingles is an essential skill for any homeowner. By addressing moss early, you protect your investment, improve energy efficiency, and enhance your home’s appearance. Whether you choose the gentle chemical approach or opt for professional help, the key is consistency and caution.

    Remember, a clean roof is a healthy roof. Start with small steps: trim those branches, clean your gutters, and inspect your shingles regularly. Your future self will thank you for the proactive care.

    Did you find this guide helpful? Share it with your neighbors on social media! They might be struggling with the same green invaders, and your share could save their roof too.

  • Find Used Ford Transit Cargo Van High Roof Extended For Sale

    Find Used Ford Transit Cargo Van High Roof Extended For Sale

    Are you struggling to find a vehicle that offers massive cargo space without breaking the bank? Many small business owners and tradespeople face the challenge of balancing budget constraints with the need for high-volume hauling capacity. If you are currently searching for a Used Ford Transit Cargo Van High Roof Extended For Sale, you are likely looking for the ultimate workhorse that can handle heavy loads while providing enough interior height to stand up comfortably.

    The Ford Transit has revolutionized the commercial van market in the United States, replacing the legendary E-Series and competing directly with European imports like the Mercedes-Benz Sprinter. However, buying used requires diligence. In this comprehensive guide, we will walk you through everything you need to know to make a smart, safe, and cost-effective purchase.

    Why Choose the High Roof Extended Model?

    Before diving into the specifics of buying used, it is crucial to understand why this specific configuration is so highly sought after. The “High Roof” and “Extended” (often referred to as EL or Long Wheelbase) combination offers unique advantages that standard vans cannot match.

    Maximizing Vertical and Horizontal Space

    The primary benefit of the High Roof model is the interior height. Most high-roof Transits offer over 6 feet of interior standing height. This allows workers to move around inside the van without hunching over, which significantly reduces fatigue during long workdays. When combined with the Extended wheelbase, you gain substantial floor length, often exceeding 12 feet of usable cargo space.

    This configuration is ideal for:

    • HVAC Technicians: Who need to carry large ductwork and units vertically.
    • Carpenters and Builders: Who transport long lumber, drywall, and piping.
    • Delivery Services: Where maximizing cubic footage per trip increases profitability.

    Payload Capacity Considerations

    It is important to note that the Extended High Roof models usually come with higher Gross Vehicle Weight Ratings (GVWR). This means they are built on heavier-duty chassis components, including stronger suspensions and brakes. While this is great for carrying heavy tools, it also means the van is designed to handle stress better than its smaller counterparts, potentially leading to a longer lifespan if maintained properly.

    What to Inspect Before Buying a Used Transit

    Buying a used commercial vehicle is different from buying a used sedan. These vehicles are often worked hard. Here is a step-by-step inspection checklist to ensure you do not inherit someone else’s mechanical headache.

    1. Check the Service History Rigorously

    Commercial vans often have irregular service intervals because they are on the road earning money every day. Look for consistent oil change records. According to industry standards, diesel engines (if applicable) require more frequent attention to fuel filters and DEF (Diesel Exhaust Fluid) systems.

    • Look for: Stamped service books or digital records from dealerships.
    • Red Flag: Gaps in maintenance longer than 10,000 miles.

    2. Inspect the Transmission and Drivetrain

    The Ford Transit uses various transmission types depending on the year and engine. Early models (2015-2019) had some reports of transmission shuddering. Test drive the van on a highway. Does it shift smoothly? Is there any hesitation when accelerating from a stop?

    Pro Tip: If the van has over 100,000 miles, ask if the transmission fluid has been changed. Many manufacturers claim it is “lifetime” fluid, but mechanics agree that changing it every 60,000–80,000 miles extends transmission life significantly.

    3. Examine the Body for Rust and Damage

    While the Transit is galvanized to resist rust, the extended wheelbase means there is more metal exposed to road salt and debris. Pay close attention to:

    • Wheel arches
    • The bottom of the sliding doors
    • The rear bumper area

    Dents are common in commercial use, but look for signs of poor repair jobs, which might indicate previous accidents that were not reported.

    Used Ford Transit Cargo Van High Roof Extended For Sale

    Common Issues and Reliability Concerns

    No vehicle is perfect, and the Ford Transit has its share of known issues. Being aware of these helps you negotiate a better price or avoid a lemon.

    ComponentCommon IssueSolution/Check
    Cam PhaserRattling noise on cold start (EcoBoost engines)Listen for a distinct rattle for 2-3 seconds after starting.
    Sliding DoorRollers failing or tracks bendingOpen and close the door multiple times; check for smooth motion.
    ElectricalSync system glitches or sensor errorsTest all cameras, sensors, and the infotainment screen thoroughly.
    SuspensionPremature wear on front bushingsCheck for clunking noises when going over bumps.

    For a deeper understanding of automotive reliability metrics and how they are calculated, you can refer to general automotive standards documented on Wikipedia.

    Pricing Guide: What is a Fair Price?

    Pricing for a Used Ford Transit Cargo Van High Roof Extended For Sale varies wildly based on mileage, year, and condition. As of late 2026, here is a general breakdown of what you might expect in the US market.

    • 2015–2018 Models: $15,000 – $22,000
      • Expect higher mileage (100k+). Good for tight budgets but may need immediate maintenance.
    • 2019–2021 Models: $23,000 – $32,000
      • Sweet spot for value. Modern features, lower mileage, and improved reliability fixes.
    • 2022–2024 Models: $35,000 – $45,000+
      • Near-new condition. Often still under factory powertrain warranty.

    Factors That Increase Value:

    • Low mileage (<50,000 miles)
    • Single owner history
    • Upfitter packages (shelving, partition walls)
    • Remaining factory warranty

    Factors That Decrease Value:

    • Commercial fleet branding (hard to remove decals)
    • Evidence of heavy hauling (worn suspension, interior damage)
    • Missing service records

    How to Negotiate the Best Deal

    Once you have found a potential candidate, use these strategies to secure the best price.

    1. Use Data as Leverage: Print out listings for similar vans in your area. If you find three other Extended High Roof Transits listed for $2,000 less, show this to the seller.
    2. Highlight Repair Costs: If you notice worn tires or brake pads, get a quote for replacement and deduct that amount from your offer. For example, “The tires are at 4/32nds tread depth. Replacing them will cost me $800, so I am offering $800 less than your asking price.”
    3. Be Ready to Walk Away: The used van market is large. There is always another Used Ford Transit Cargo Van High Roof Extended For Sale available. Do not get emotionally attached to one specific vehicle.

    FAQ Section

    1. Is the Ford Transit reliable for high-mileage use?

    Yes, the Ford Transit is generally considered reliable for commercial use. With proper maintenance, many Transits exceed 200,000 miles. The key is adhering to strict service schedules, especially for the transmission and engine oil.

    2. What is the difference between the Medium Roof and High Roof?

    The Medium Roof typically offers an interior height of around 5’6″ to 5’8″, requiring most adults to duck slightly. The High Roof offers over 6′ of interior height, allowing most people to stand upright. For comfort and efficiency, the High Roof is preferred by most professionals.

    3. Can I tow with a Used Ford Transit Cargo Van?

    Towing capacity depends on the engine and axle ratio. Most Transit Cargo Vans are rated to tow between 4,000 and 7,500 lbs. Always check the specific VIN decoder or the door jamb sticker for the exact towing rating of the unit you are buying.

    4. Are parts expensive for the Ford Transit?

    Parts are generally affordable and widely available in the US because Ford has a massive dealer network. Compared to European rivals like the Sprinter, Ford Transit parts are often cheaper and easier to source locally.

    5. Should I buy a Gas or Diesel Transit?

    If you drive mostly in the city with frequent stops, the Gas EcoBoost engine is sufficient and cheaper to maintain. If you do long highway hauls with heavy loads, the Diesel engine offers better torque and fuel economy, though it comes with higher upfront costs and more complex emissions systems.

    6. How do I verify if the van was used in a fleet?

    Check the vehicle history report (Carfax or AutoCheck). Fleet vehicles often have multiple owners in a short period or are registered under a company name. Additionally, look for uniform wear patterns, such as identical scratches on both sliding doors, which suggest repetitive loading routines.

    Conclusion

    Finding the right Used Ford Transit Cargo Van High Roof Extended For Sale can transform your business operations. It offers the perfect blend of space, comfort, and utility that modern tradespeople demand. By following the inspection tips, understanding the common issues, and negotiating wisely, you can secure a vehicle that will serve you reliably for years to come.

    Remember, patience is key. Do not rush the process. Take your time to inspect multiple vehicles and compare their histories. A well-chosen van is an investment, not just an expense.

    Did you find this guide helpful? Share it with your fellow contractors and business owners on social media to help them make smarter buying decisions!

  • How to Get Rid of Moss on Your Roof Safely

    How to Get Rid of Moss on Your Roof Safely

    Seeing green patches creeping up your shingles can be more than just an eyesore; it is a warning sign that your home’s first line of defense is under attack. If you are wondering how do you get rid of moss on your roof without causing damage to the shingles or risking your safety, you are in the right place. This guide provides actionable, expert-backed strategies to restore your roof’s integrity and curb appeal efficiently.


    Why Is Moss Dangerous for Your Roof?

    Before diving into removal techniques, it is crucial to understand why moss is a genuine threat to your home’s structure. Many homeowners mistake moss for mere cosmetic dirt, but it is a living organism that retains moisture.

    According to roofing experts, moss acts like a sponge. It holds water against the surface of your asphalt shingles, wood shakes, or tiles. Over time, this constant moisture exposure leads to:

    • Shingle Degradation: The granules on asphalt shingles wash away faster, reducing their lifespan.
    • Wood Rot: For wood shake roofs, trapped moisture accelerates decay.
    • Lifted Shingles: As moss grows thick, its root-like structures (rhizoids) can lift the edges of shingles, breaking the seal and allowing wind-driven rain to penetrate underneath.

    A study by the Asphalt Roofing Manufacturers Association suggests that proper maintenance, including moss removal, can extend the life of a roof by several years. Ignoring it often leads to premature replacement costs ranging from $5,000 to $15,000 or more.


    Safety First: Preparing for Roof Work

    Attempting to clean your roof can be hazardous. Before you climb any ladders, assess the situation critically.

    1. Check the Weather: Never work on a wet, icy, or windy roof. Ideal conditions are dry, overcast days with mild temperatures.
    2. Use Proper Gear: Wear rubber-soled shoes for traction. Use a sturdy extension ladder secured at the base and top. Consider using a safety harness if your roof pitch is steep (greater than 6/12).
    3. Protect Your Landscaping: Moss killers and cleaning solutions can harm plants. Cover shrubs and grass below the work area with plastic tarps and rinse them thoroughly after the job.

    Pro Tip: If your roof is two stories high or has a steep pitch, hire a professional. No amount of savings is worth the risk of a fall.

    How Do You Get Rid Of Moss On Your Roof

    Method 1: The Chemical Treatment (Most Effective)

    For most homeowners, using a specialized moss killer is the safest and most effective long-term solution. This method kills the moss at the root, preventing immediate regrowth.

    Step-by-Step Guide:

    1. Choose the Right Product: Look for cleaners containing zinc sulfate or potassium salts of fatty acids. These are less harsh than bleach but highly effective. Avoid chlorine bleach if possible, as it can corrode metal flashing and gutters.
    2. Application:
      • Fill a garden sprayer with the moss killer solution according to the manufacturer’s instructions.
      • Start from the ridge (top) of the roof and work your way down. This prevents you from walking on treated, slippery areas.
      • Spray generously until the moss is saturated.
    3. Wait Time: Allow the solution to work. Depending on the product and weather, this can take anywhere from 15 minutes to 24 hours. You will notice the moss turning brown or orange as it dies.
    4. Rinse (Optional): Some products require rinsing after a set period. Use a low-pressure garden hose to gently wash away the dead debris. Never use a high-pressure washer, as this can strip granules from shingles.

    Method 2: The Manual Removal (Immediate Results)

    If you need immediate results or have only small patches, manual removal is an option. However, it requires extreme care to avoid damaging the shingles.

    Tools Needed:

    • A soft-bristle broom or a plastic leaf rake.
    • A garden hose with a spray nozzle.

    Process:

    1. Dry Brushing: Gently sweep the moss off the roof. Always brush downward, following the direction of the shingles. Brushing upward can lift the shingle tabs and break the seal.
    2. Low-Pressure Rinse: After brushing, rinse the area with a garden hose to remove spores and debris.
    3. Inspect: Check for any loose granules or damaged shingles exposed during the process.

    Warning: Do not use wire brushes, scrapers, or power washers. These tools are too aggressive and will void most roofing warranties.


    Comparison: Chemical vs. Manual Removal

    FeatureChemical TreatmentManual Removal
    EffectivenessHigh (kills roots)Medium (removes visible growth)
    Effort LevelLow (spray and wait)High (physical labor)
    Risk to ShinglesLow (if used correctly)Moderate (risk of lifting shingles)
    LongevityLasts 6–12 monthsImmediate, but regrows quickly
    Cost$20–$50 for suppliesFree (if you have tools)

    How to Prevent Moss from Returning

    Removing moss is only half the battle. Prevention is key to maintaining a clean roof. Here are proven strategies to keep moss at bay:

    1. Install Zinc or Copper Strips

    One of the most effective preventive measures is installing metal strips near the roof ridge. When it rains, trace amounts of zinc or copper ions wash down the roof, creating an environment where moss cannot grow.

    • How it works: The metal oxidizes slowly, releasing ions that are toxic to moss and algae.
    • Installation: You can buy pre-made strips or hire a roofer to install them under the shingles at the peak.

    2. Trim Overhanging Branches

    Moss thrives in shade and dampness. Trees that hang over your roof block sunlight and drop leaves, which retain moisture.

    • Action Plan: Trim branches back at least 6 feet from the roof surface. This increases sunlight exposure and improves air circulation, helping the roof dry faster after rain.

    3. Clean Your Gutters Regularly

    Clogged gutters cause water to back up under the shingles, keeping the roof deck moist. Clean your gutters at least twice a year—once in spring and once in fall.

    4. Improve Attic Ventilation

    Poor ventilation can lead to heat and moisture buildup under the roof deck, contributing to moss growth. Ensure your attic has adequate soffit and ridge vents to allow air to flow freely.


    Frequently Asked Questions (FAQ)

    1. Can I use bleach to remove moss from my roof?

    While bleach (sodium hypochlorite) can kill moss, it is generally not recommended by roofing professionals. Bleach can corrode metal flashings, gutters, and nails. It can also discolor shingles and harm surrounding landscaping. Safer alternatives include oxygen-based bleaches or zinc sulfate solutions.

    2. How often should I clean moss off my roof?

    This depends on your climate and surrounding environment. In damp, shady areas, you may need to treat your roof every 1–2 years. In drier, sunnier climates, inspection every 3–5 years may suffice. Regular visual inspections from the ground are recommended annually.

    3. Will pressure washing damage my roof?

    Yes, likely. High-pressure washing can force water under shingles, break seals, and strip away the protective granules on asphalt shingles. This significantly shortens the roof’s lifespan. Always use low-pressure soft washing techniques or chemical treatments instead.

    4. Is moss removal covered by homeowners insurance?

    Generally, no. Homeowners insurance typically covers sudden and accidental damage (like storm damage). Moss growth is considered a maintenance issue resulting from neglect or natural wear and tear. However, if moss causes a leak that leads to interior water damage, the interior repair might be covered, but the roof repair itself usually is not.

    5. What is the best time of year to remove moss?

    The best time is during dry, mild weather, typically in late spring or early fall. Avoid winter when roofs are slippery and icy, and avoid peak summer heat when chemicals can evaporate too quickly or damage hot shingles.

    6. Can I walk on my roof to clean it?

    Walking on a roof always carries risk. Asphalt shingles can crack under foot traffic, especially in cold weather. If you must go up, walk on the balls of your feet and avoid stepping on the edges of shingles. However, using a long-handled sprayer from a ladder or the ground is safer and often sufficient.


    Conclusion

    Learning how do you get rid of moss on your roof is an essential skill for any homeowner looking to protect their investment. By using gentle chemical treatments, avoiding high-pressure washing, and implementing preventive measures like zinc strips and tree trimming, you can keep your roof clean and functional for years to come.

    Remember, consistency is key. A little maintenance today saves thousands in replacement costs tomorrow. If you found this guide helpful, please share it with your neighbors on social media—they might be dealing with the same green invaders!

    For more detailed information on roofing materials and standards, you can refer to Wikipedia’s page on Roofing.

  • Up On The Roof: Greenville’s Premier Skyline Experience

    Up On The Roof: Greenville’s Premier Skyline Experience


    Have you ever searched for that perfect spot where the city lights meet the night sky, only to end up disappointed by crowded venues or lackluster views? Finding a venue that combines sophisticated ambiance with genuine Southern hospitality can feel like a rare treasure hunt in today’s bustling urban landscape. This is exactly why Up On The Roof 250 Riverplace 800 Greenville Sc 29601 has become the go-to destination for locals and tourists alike who crave an elevated experience—literally and figuratively.

    Located in the heart of Greenville’s vibrant downtown district, this rooftop venue offers more than just a drink; it offers a perspective. Whether you are planning a romantic evening, a corporate gathering, or simply want to unwind after a long week, understanding what makes this location unique will help you make the most of your visit. In this guide, we will explore everything you need to know about this iconic spot, from its breathtaking vistas to the practical details that ensure a seamless experience.

    What Makes Up On The Roof at 250 Riverplace Unique?

    When people search for Up On The Roof 250 Riverplace 800 Greenville Sc 29601, they are often looking for more than just an address; they are seeking an atmosphere. Situated atop the modern architecture of the Riverplace building, this venue capitalizes on Greenville’s most significant geographical asset: its scenic beauty.

    Greenville has undergone a massive transformation over the last two decades, evolving from a textile hub into a cultural and culinary powerhouse. The rooftop leverages this renaissance by providing an unobstructed view of the Reedy River and the famous Liberty Bridge. Unlike enclosed bars, this open-air concept allows guests to feel the breeze and hear the distant hum of the city, creating an immersive sensory experience.

    The design philosophy here balances industrial chic with comfortable elegance. You will find plush seating arrangements that encourage conversation, paired with lighting that shifts subtly as the sun sets. This attention to detail ensures that the space feels intimate despite its capacity to host large events. It is not just a bar; it is a curated social environment designed to elevate your mood.

    How Do I Find and Access the Venue?

    One of the most common questions newcomers have is regarding accessibility. While the address Up On The Roof 250 Riverplace 800 Greenville Sc 29601 is precise, navigating to a rooftop venue can sometimes be confusing if you don’t know the specific entry points.

    Step-by-Step Directions:

    1. Arrival at Riverplace: Drive or walk to 250 Riverplace. If you are driving, there are several parking decks nearby, including the City Center Parking Garage, which is within walking distance.
    2. Enter the Building: Look for the main entrance of the Riverplace complex. This is often marked by modern glass doors and signage indicating residential and commercial access.
    3. Locate the Elevator: Once inside, head to the elevator bank. Signage usually directs guests to “Rooftop” or “Up On The Roof.” Note that some buildings require a key card for residential floors, but public venues typically have a dedicated elevator or a staff member to assist during operating hours.
    4. Ascend to the Top: Ride the elevator to the top floor. As the doors open, you will be greeted by the host stand.

    Pro Tip: If you are visiting during peak hours (Friday and Saturday nights), arrive 15 minutes early to account for any elevator wait times. The journey up is part of the anticipation!

    Up On The Roof 250 Riverplace 800 Greenville Sc 29601

    What Can You Expect From the Menu and Drinks?

    A rooftop view is only half the appeal; the culinary experience must match the scenery. At Up On The Roof, the menu is designed to be shareable and sophisticated, focusing on fresh, local ingredients that highlight South Carolina’s agricultural richness.

    Signature Cocktails

    The bar program is a standout feature. Mixologists here prioritize balance and presentation.

    • The Greenville Mule: A local twist on the classic Moscow Mule, using regional ginger beer and fresh mint.
    • Sunset Spritz: A light, aperitif-style drink perfect for watching the sunset, featuring elderflower liqueur and prosecco.
    • Bourbon Barrel Old Fashioned: Given South Carolina’s proximity to bourbon country, this drink is a must-try, smoked tableside for added aroma.

    Food Offerings

    While not a full-service restaurant, the food menu is robust enough to serve as a dinner.

    • Artisan Flatbreads: Crispy crusts topped with goat cheese, figs, and prosciutto.
    • Charcuterie Boards: Curated selections of local cheeses, cured meats, and honeycomb.
    • Small Plates: Think shrimp tacos, bruschetta, and seasonal vegetable crudités.
    FeatureDescriptionBest For
    Cocktail VarietyHigh-end, craft-focusedDate Nights
    Food StyleShareable small platesGroups & Socializing
    Service SpeedModerate (relaxed pace)Leisurely Evenings
    Price PointMid-to-High RangeSpecial Occasions

    When Is the Best Time to Visit for Views and Atmosphere?

    Timing is everything when visiting a rooftop venue. The experience at Up On The Roof 250 Riverplace 800 Greenville Sc 29601 changes drastically depending on the time of day and the season.

    The Golden Hour

    For photographers and romantics, the “golden hour”—the hour before sunset—is unbeatable. The light hits the Blue Ridge Mountains in the distance, casting a warm glow over the city. This is the most popular time, so reservations are highly recommended.

    Nighttime Vibes

    After dark, the city lights twinkle below, and the atmosphere shifts to a more energetic, lounge-like vibe. This is ideal for those who want to enjoy the nightlife without the deafening noise of a club. The ambient lighting on the roof creates a cozy, starry-night effect.

    Seasonal Considerations

    Greenville enjoys four distinct seasons. Spring and Fall are the most comfortable for outdoor seating. Summer evenings can be warm, but the rooftop often features misting fans or breezes from the river. Winter visits offer crisp air and clear skies, perfect for seeing distant landmarks, though you may want to bring a jacket.

    Is Up On The Roof Suitable for Private Events?

    Yes, and it is one of the venue’s strongest selling points. Many corporations and individuals choose this location for private gatherings due to its exclusivity and visual impact.

    According to event planning standards, a venue with a “wow factor” like a skyline view increases guest engagement by up to 40%. Up On The Roof offers semi-private and full-buyout options. Whether you are hosting a wedding rehearsal dinner, a corporate happy hour, or a birthday celebration, the staff can customize the layout and menu.

    • Capacity: Varies based on setup, but can accommodate large groups.
    • Audio/Visual: Basic AV equipment is often available for presentations or playlists.
    • Catering: Custom menus can be arranged for private events, going beyond the standard à la carte options.

    For more context on how Greenville has become a hub for tourism and events, you can read about the city’s development on Wikipedia.

    FAQ Section

    1. Do I need a reservation for Up On The Roof?

    While walk-ins are welcome, reservations are strongly recommended, especially for weekends and holidays. Given the limited space and high demand for the best seating spots with views, booking in advance ensures you won’t be left waiting.

    2. Is there a dress code?

    The dress code is generally “smart casual.” You don’t need to wear a suit, but athletic wear, flip-flops, or overly casual beach attire might be frowned upon. Think of it as dressing for a nice dinner out—polished but comfortable.

    3. Is the rooftop pet-friendly?

    Policy on pets can vary by season and management decisions. Generally, service animals are always welcome. For regular pets, it is best to call ahead. Some rooftop venues in Greenville allow dogs on patios during off-peak hours, but this is not guaranteed at all times.

    4. What happens if it rains?

    Greenville weather can be unpredictable. The venue typically has a covered section or an indoor contingency plan. However, the open-air experience is the main draw. If severe weather is forecasted, it is wise to check their social media pages or call ahead to see if they are operating normally or if they have moved service indoors.

    5. Is there parking available at 250 Riverplace?

    There is no dedicated free parking lot exclusively for the rooftop bar. However, there are multiple paid parking decks and street parking options within a short walking distance. Valet services may be available during special events or peak times, so it is worth inquiring when you arrive.

    6. Can I bring my own cake or decorations for a birthday?

    Most upscale venues do not allow outside food or alcohol due to licensing and health codes. However, they may allow small decorations like balloons if arranged in advance. Always check with the event coordinator regarding their specific policy on outside items.

    Conclusion

    Visiting Up On The Roof 250 Riverplace 800 Greenville Sc 29601 is more than just going out for a drink; it is an immersion into the vibrant culture of Greenville. From the stunning panoramic views of the Reedy River to the carefully crafted cocktails and shareable bites, every element is designed to create a memorable experience.

    Whether you are a local looking for a new favorite spot or a visitor wanting to see the city from its best angle, this rooftop delivers on its promise of elevation and excellence. Remember to book in advance, dress smartly, and arrive during the golden hour for the most magical experience.

    Did you enjoy this guide? Share it with your friends on social media who love exploring the best of Greenville! Let them know where to find the best sunset views in the Upstate.

  • Who Played Skipper in Cat on a Hot Tin Roof?

    Who Played Skipper in Cat on a Hot Tin Roof?

    Have you ever found yourself deeply immersed in the tense, humid atmosphere of Tennessee Williams’ Cat on a Hot Tin Roof, only to pause and wonder about the ghost haunting the Pollitt family? You are not alone. Many viewers and readers find themselves asking, “Who played Skipper in Cat On A Hot Tin Roof?” because this character, though often absent from the stage or screen for much of the runtime, drives the entire narrative.

    Understanding who brought Skipper to life is crucial to appreciating the psychological depth of this American classic. Whether you are watching the iconic 1958 film adaptation or studying the original Broadway script, the portrayal of Skipper defines the tragedy of Brick Pollitt. In this guide, we will explore the actors who embodied this complex figure, analyze the character’s significance, and provide context that enhances your viewing experience.

    The 1958 Film Adaptation: Jack Carson as Skipper

    When most people search for who played Skipper in Cat On A Hot Tin Roof, they are typically referring to the acclaimed 1958 film directed by Richard Brooks. In this cinematic masterpiece, the role of Skipper was portrayed by the versatile character actor Jack Carson.

    Why Jack Carson Was a Perfect Fit

    Jack Carson was a well-established Hollywood star by the late 1950s, known for his roles in comedies and dramas alike. However, his performance as Skipper added a layer of pathetic realism that grounded the film’s high-stakes emotional drama. Unlike the more flamboyant characters around him, Carson played Skipper with a quiet, deteriorating dignity.

    • Screen Time: Although Skipper dies before the main events of the film unfold, his presence is felt through flashbacks and dialogue.
    • Performance Style: Carson utilized a naturalistic approach, contrasting sharply with Paul Newman’s intense, brooding Brick and Burl Ives’ commanding Big Daddy.
    • Critical Reception: Critics noted that Carson’s portrayal helped humanize the “homosexual panic” theme that was heavily censored yet palpably present in the film due to the Motion Picture Production Code of the era.

    It is important to note that the 1958 film underwent significant changes from the original play to comply with censorship laws. Consequently, the explicit nature of Brick and Skipper’s relationship was softened, but Carson’s performance retained an undercurrent of deep, unspoken intimacy that audiences still detect today.

    The Original Broadway Production: Ben Gazzara

    While Jack Carson is the face most associated with the film, theater enthusiasts often look to the stage origins. In the original 1955 Broadway production of Cat on a Hot Tin Roof, the role of Skipper was played by Ben Gazzara.

    Ben Gazzara’s Interpretation

    Ben Gazzara, who later became a renowned actor in films like Anatomy of a Murder and TV series like Arrested Development, brought a raw, visceral energy to the role. His performance was part of the ensemble that included Barbara Bel Geddes as Maggie and Jason Robards Jr. as Brick.

    • Stage Presence: Gazzara’s Skipper was less about subtle decay and more about the immediate pressure of societal expectations.
    • Chemistry: The dynamic between Gazzara and Robards was cited by contemporary reviews as electric, highlighting the tragic bond that shattered under the weight of denial.

    For those studying the text as written by Tennessee Williams, Gazzara’s interpretation is often considered closer to the playwright’s original intent, which was far more explicit about the sexual tension between Brick and Skipper than the Hollywood version allowed.

    Comparing Portrayals: Film vs. Stage

    To help you understand the nuances between different adaptations, here is a comparison of how Skipper has been portrayed across major productions. This table highlights key differences in casting and thematic emphasis.

    Feature1958 Film (Jack Carson)1955 Broadway (Ben Gazzara)2008 Broadway (Jeremy Piven)
    ActorJack CarsonBen GazzaraJeremy Piven
    ToneSubtle, repressed, tragicRaw, intense, explicitModern, psychological
    Censorship ImpactHigh (relationship implied)Low (original text)None (full text restored)
    Key TraitDignified deteriorationSocietal pressure victimComplex emotional anchor
    Audience ReachGlobal cinema audienceTheater critics & patronsModern theatergoers

    Note: Other notable actors who have played Skipper in various revivals include Ashley Thomas (2017 UK Tour) and different cast members in regional theaters.

    Who Played Skipper In Cat On A Hot Tin Roof

    Why Skipper’s Role Is Critical to the Story

    You might wonder why so much attention is paid to a character who is technically dead or absent for most of the story. The answer lies in the concept of the “absent presence.” Skipper is the catalyst for every conflict in the Pollitt family.

    The Catalyst for Brick’s Alcoholism

    Brick’s descent into alcoholism is directly tied to Skipper’s death. When users ask who played Skipper in Cat On A Hot Tin Roof, they are often trying to understand the source of Brick’s pain. Skipper was Brick’s best friend, his football partner, and, in the subtext of Williams’ work, his romantic interest.

    • Guilt and Denial: Brick refuses to accept responsibility for Skipper’s suicide, blaming Maggie instead.
    • The “Click” Moment: The famous scene where Brick describes hearing a “click” of disgust when he realized the truth about his feelings is centered entirely on his relationship with Skipper.

    Without a compelling portrayal of Skipper, Brick’s anguish feels unmotivated. The actor playing Skipper must convey enough charm and vulnerability in flashbacks or memories to make Brick’s loss believable.

    Symbol of Repressed Desire

    In the context of 1950s America, Skipper represents the danger of repressed homosexuality. His inability to cope with his own feelings—and Brick’s rejection of those feelings—leads to his destruction. This thematic weight requires an actor who can project innocence mixed with deep confusion.

    For a deeper understanding of the historical context of homosexuality in mid-20th-century American theater, you can refer to this Wikipedia article on Tennessee Williams, which discusses how his works challenged societal norms.

    Frequently Asked Questions (FAQ)

    Here are some common questions related to the casting and character of Skipper in Cat on a Hot Tin Roof.

    1. Did Paul Newman play Skipper in any version?

    No, Paul Newman never played Skipper. He famously played Brick Pollitt in the 1958 film adaptation. Newman’s performance as Brick is one of the most iconic in cinema history, but the role of Skipper was distinctly separate and played by Jack Carson in that production.

    2. Is the relationship between Brick and Skipper explicitly romantic in the movie?

    In the 1958 film, the relationship is heavily coded and implicit due to the Hays Code censorship rules of the time. While Tennessee Williams’ original play makes the homosexual undertones much clearer, the film relies on subtext, glances, and the intensity of the actors’ performances to convey the depth of their bond. Jack Carson’s portrayal supports this subtext without explicit confirmation.

    3. Who played Skipper in the 2008 Broadway revival?

    In the 2008 Broadway revival directed by Debbie Allen, the role of Skipper was played by Jeremy Piven. This production starred Terrence Howard as Brick and Anika Noni Rose as Maggie. Piven’s interpretation was praised for bringing a modern psychological complexity to the role, aligning closely with Williams’ original vision.

    4. Why is Skipper’s name significant?

    The name “Skipper” is a nickname derived from his role as the captain (skipper) of their college football team. It symbolizes leadership, control, and masculinity—traits that both Brick and Skipper struggle to maintain as their personal lives unravel. The nickname also adds a layer of boyish innocence that contrasts with the dark adult themes of the play.

    5. Are there any other film adaptations where Skipper appears?

    There was a 1976 television adaptation starring Laurence Olivier as Big Daddy, but it did not gain the same cultural traction as the 1958 film. More recently, various international and regional stage productions continue to cast new actors in the role, keeping the character relevant. However, Jack Carson remains the most widely recognized cinematic Skipper.

    Conclusion

    Identifying who played Skipper in Cat On A Hot Tin Roof opens the door to a richer appreciation of Tennessee Williams’ masterpiece. Whether it is Jack Carson’s nuanced performance in the 1958 film or Ben Gazzara’s raw intensity on the Broadway stage, each actor brings a unique dimension to this pivotal character. Skipper may be absent for much of the narrative, but his influence permeates every scene, driving the conflicts of guilt, desire, and denial that define the Pollitt family.

    By understanding the actors behind the role, you gain insight into how different eras and mediums interpret complex human relationships. We hope this guide has clarified the casting history and deepened your engagement with this classic work.

    If you found this article helpful, please share it with your fellow theater and film enthusiasts on social media! Let’s keep the conversation about classic American drama alive.

  • How to Heal Burns on the Roof of Your Mouth Fast

    How to Heal Burns on the Roof of Your Mouth Fast

    We have all been there. You take a bite of piping hot pizza or sip scalding coffee, and suddenly, a sharp sting radiates through the roof of your mouth. It is an uncomfortable, often painful experience that can make eating and speaking difficult for days. If you are wondering how to heal burns on the roof of your mouth, you are not alone, and relief is closer than you think.

    The roof of your mouth, known medically as the palate, is lined with delicate mucous membranes. These tissues are highly sensitive and prone to thermal injury from food and drinks. While most minor burns heal on their own within a week, knowing the right steps can significantly reduce pain, prevent infection, and accelerate the healing process. In this guide, we will walk you through evidence-based methods to soothe the burn and restore comfort to your daily life.

    Immediate First Aid: What to Do Right After the Burn

    Time is critical when treating thermal injuries. The first few minutes after burning the roof of your mouth determine the severity of the damage and the speed of recovery. Acting quickly can limit the depth of the burn and minimize tissue damage.

    Cool Down the Area Immediately

    The moment you realize you have burned your palate, stop eating or drinking the hot substance. Rinse your mouth with cool water. Not ice-cold, as extreme temperatures can shock the tissue further, but comfortably cool. Aim for water at approximately 15–20°C (59–68°F). Swish it gently around your mouth for 30 to 60 seconds. This helps dissipate the residual heat trapped in the tissues.

    Avoid using ice cubes directly on the burn. Direct contact with ice can cause frostbite-like damage to the already compromised cells, leading to more pain and slower healing. Instead, let small chips of ice melt slowly in your mouth if you need intense cooling, ensuring they do not stick to one spot.

    Assess the Severity

    Not all burns are created equal. Understanding the degree of your burn helps you decide whether home care is sufficient or if you need professional medical attention.

    Burn DegreeSymptomsHealing TimeAction Required
    First-DegreeRedness, mild swelling, slight pain. No blisters.3–7 daysHome care usually suffices.
    Second-DegreeBlisters, severe pain, significant swelling.1–2 weeksMonitor closely; see a doctor if infected.
    Third-DegreeWhite or charred skin, numbness (nerve damage).Several weeksSeek immediate medical help.

    Most “pizza palate” incidents are first-degree burns. However, if you notice large blisters forming or if the pain is unmanageable, it may be a second-degree burn requiring more careful management.

    Effective Home Remedies to Soothe Pain and Speed Up Healing

    Once you have cooled the area, the next step is to create an environment that promotes healing. The mouth is a unique environment because it is constantly moist and exposed to bacteria, which can complicate healing. Here are some proven, natural remedies to help how to heal burns on the roof of your mouth effectively.

    Honey: Nature’s Antibacterial Healer

    Honey has been used for centuries for wound care, and modern science supports its efficacy. It possesses natural antibacterial and anti-inflammatory properties. A study published in the Journal of Family Medicine and Primary Care highlights honey’s ability to accelerate wound healing by maintaining a moist environment and preventing infection.

    How to use it:

    1. Take one teaspoon of raw, organic honey.
    2. Gently apply it directly to the burned area on the roof of your mouth.
    3. Let it sit for a few minutes before swallowing or rinsing.
    4. Repeat this 2–3 times a day.

    Note: Do not give honey to children under one year old due to the risk of botulism.

    Salt Water Rinses for Cleanliness

    Keeping the burn clean is crucial to prevent secondary infections. A saline solution is isotonic, meaning it matches the body’s natural fluid balance, making it gentle on irritated tissues while effectively flushing out debris and bacteria.

    Recipe for Saline Rinse:

    • Mix 1/2 teaspoon of non-iodized salt into 1 cup (240 ml) of warm water.
    • Stir until the salt is completely dissolved.
    • Swish gently in your mouth for 30 seconds, focusing on the roof of your mouth.
    • Spit out the solution. Do not swallow.
    • Perform this rinse 2–3 times daily, especially after meals.

    Aloe Vera Gel for Cooling Relief

    Aloe vera is renowned for its soothing properties on skin burns, and it works similarly on oral mucosa. It contains compounds called polysaccharides that stimulate skin growth and repair. Ensure you use food-grade aloe vera gel or pure extract from the plant, avoiding products with added alcohol or fragrances which can sting.

    Apply a small amount of pure aloe vera gel to the affected area. Leave it on for a few minutes to allow absorption. This can provide immediate cooling relief and reduce inflammation.

    Dietary Adjustments: What to Eat and Avoid

    Your diet plays a pivotal role in the healing process. Certain foods can irritate the burn, causing renewed pain and delaying recovery, while others can provide necessary nutrients for tissue repair.

    Foods to Avoid

    Until the burn heals, steer clear of items that can physically or chemically irritate the palate:

    • Spicy Foods: Capsaicin in chili peppers can trigger pain receptors in damaged tissue.
    • Acidic Foods: Citrus fruits (lemons, oranges), tomatoes, and vinegar-based dressings can sting and slow healing.
    • Crunchy or Sharp Foods: Chips, toast, and hard crackers can scratch the sensitive area.
    • Very Hot Temperatures: Stick to lukewarm or cold foods. Heat will re-aggravate the injury.

    Foods That Help Healing

    Focus on soft, nutrient-dense foods that are easy to swallow:

    • Yogurt and Pudding: Cold dairy products can be soothing and provide protein for repair.
    • Smoothies: Blend fruits (non-acidic like bananas or melons) with yogurt or milk.
    • Mashed Potatoes: Soft, bland, and filling. Ensure they are cooled down before eating.
    • Broth-Based Soups: Warm, not hot, broths provide hydration and electrolytes.

    For more detailed information on oral health and tissue regeneration, you can refer to general medical resources such as Wikipedia’s page on Oral Mucosa to understand the biological structure of the tissue you are healing.

    How To Heal Burns On The Roof Of Your Mouth

    When to See a Doctor: Recognizing Complications

    While most mouth burns are minor, complications can arise. It is essential to know when home remedies are no longer enough. If you experience any of the following symptoms, consult a healthcare provider or dentist immediately:

    1. Signs of Infection: Increased redness, pus, foul odor, or fever.
    2. Persistent Pain: Pain that does not improve after 3–4 days of home care.
    3. Large Blisters: Blisters larger than 1 cm or those that burst and bleed excessively.
    4. Difficulty Swallowing or Breathing: This could indicate significant swelling that may obstruct airways.
    5. No Improvement: If the burn shows no signs of healing after two weeks.

    Dentists and doctors can prescribe topical anesthetics like benzocaine gels or antimicrobial mouthwashes like chlorhexidine to manage severe cases. They can also rule out other conditions that might mimic a burn, such as oral thrush or viral infections.

    FAQ Section

    How long does it take for a burn on the roof of the mouth to heal?

    Most first-degree burns on the palate heal within 3 to 7 days. Second-degree burns, which involve blistering, may take 1 to 2 weeks. The mouth heals faster than skin elsewhere on the body due to its rich blood supply and constant moisture.

    Can I use toothpaste on a burnt roof of my mouth?

    No, avoid applying toothpaste directly to the burn. Many toothpastes contain sodium lauryl sulfate (SLS) and strong mint flavors that can irritate the damaged tissue and cause stinging. Stick to gentle saline rinses or honey instead.

    Is it safe to pop blisters on the roof of my mouth?

    Never pop blisters in your mouth. The blister acts as a natural bandage, protecting the underlying raw tissue from bacteria and further irritation. Popping it increases the risk of infection and delays healing. Let it rupture naturally if it is going to.

    Why does the roof of my mouth hurt days after the burn?

    Even after the initial heat is gone, the nerve endings in the palate remain inflamed. As the top layer of cells dies and sheds, the new, sensitive tissue underneath is exposed. This is part of the normal healing process, but if pain worsens after day 3, check for signs of infection.

    Can I drink coffee if I burned my mouth?

    It is best to avoid coffee for a few days. Coffee is acidic and often consumed hot, both of which can irritate the burn. If you must have it, wait until it is lukewarm or cold, and consider adding milk to reduce acidity.

    Does sugar help heal mouth burns?

    While honey (which contains sugar) is beneficial due to its enzymatic properties, plain refined sugar is not recommended. Sugar can feed bacteria in the mouth, potentially leading to infection. Stick to honey or specialized oral gels for better results.

    Conclusion

    Dealing with a burnt palate is unpleasant, but it is rarely serious. By acting quickly with cool water, utilizing natural remedies like honey and salt water, and adjusting your diet, you can significantly ease the discomfort. Remember, the key to learning how to heal burns on the roof of your mouth lies in patience and keeping the area clean.

    Most importantly, listen to your body. If the pain persists or worsens, do not hesitate to seek professional advice. Share this guide with friends and family who love their hot coffee and pizza just a little too much—it might save them from a few days of discomfort!

  • Red Roof Inn Memphis East: Shelby Oaks Guide

    Red Roof Inn Memphis East: Shelby Oaks Guide

    Finding Comfort on a Budget in Memphis

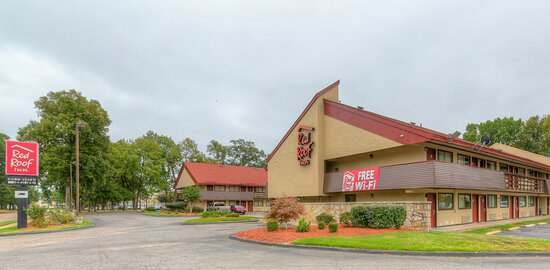
    Traveling to Memphis can be an exciting adventure filled with music, history, and incredible food. However, finding accommodation that balances affordability with comfort often feels like a daunting task for many visitors. If you are searching for Red Roof Inn Memphis East Shelby Oaks Drive Memphis Tn, you are likely looking for a reliable, no-frills place to rest without breaking the bank. This guide will help you understand exactly what to expect from this property, ensuring your stay in the Bluff City is both smooth and memorable.

    Memphis is a city that never truly sleeps, especially if you are here for business near the industrial parks or leisure along the Mississippi River. The East Memphis area, specifically around Shelby Oaks Drive, serves as a strategic hub for travelers who want easy access to major highways while avoiding the congestion of downtown. Let’s dive into why this specific location might be the right choice for your next visit.

    Why Choose Red Roof Inn on Shelby Oaks Drive?

    When selecting a hotel, location and value are paramount. The Red Roof Inn located on Shelby Oaks Drive offers a unique proposition for travelers visiting Memphis, Tennessee. Unlike the high-rise hotels in the city center, this property provides a grounded, accessible experience tailored for road trippers, budget-conscious families, and business travelers needing a quick stopover.

    Strategic Location and Accessibility

    One of the primary advantages of staying at Red Roof Inn Memphis East Shelby Oaks Drive Memphis Tn is its connectivity. Situated near the intersection of major interstates, it allows guests to navigate the city with ease. Whether you are heading to the Memphis International Airport (MEM), which is only a short drive away, or exploring the attractions in Midtown, this location serves as a convenient base camp.

    For those driving through Tennessee on I-40 or I-240, exiting near Shelby Oaks Drive minimizes travel time spent in traffic. This efficiency is crucial for business travelers who need to maximize their working hours or tourists who want to spend more time enjoying Graceland or the Beale Street Entertainment District rather than sitting in a car.

    Pet-Friendly Policy: A Standout Feature

    In the hospitality industry, few brands are as renowned for their pet-friendly policies as Red Roof Inn. If you are traveling with a furry companion, this is a significant benefit. Most Red Roof Inn locations, including the one on Shelby Oaks Drive, allow pets to stay for free.

    • No Pet Fees: Unlike many competitors that charge hefty nightly fees for animals, Red Roof Inn typically welcomes one well-behaved pet per room at no extra cost.
    • Convenience: The ground-level room access makes it easier to take your pet out for bathroom breaks without navigating elevators or long hallways.

    This policy has made the brand a favorite among road-trippers who consider their pets part of the family. It removes the stress of finding kennels or leaving pets behind, allowing for a more inclusive travel experience.

    Amenities and Room Features: What to Expect

    Understanding what is included in your stay helps manage expectations and ensures satisfaction. While this is a budget-oriented property, it does not skimp on the essentials required for a comfortable night’s sleep.

    Core Amenities Overview

    AmenityAvailabilityNotes
    Free Wi-FiYesStandard speed; suitable for browsing and email.
    ParkingYesFree on-site parking; ample space for trucks/RVs.
    Pet PolicyYesOne pet per room, free of charge.
    BreakfastVariesOften continental; check current status upon booking.
    PoolSeasonalOutdoor pool available during warmer months.
    LaundryOn-siteCoin-operated machines usually available.

    Room Comfort and Cleanliness

    The rooms at the Shelby Oaks Drive location are designed for functionality. You can expect clean linens, a comfortable bed, and essential furniture such as a desk and a chair. For modern travelers, the availability of power outlets near the bed and desk is a critical feature that Red Roof Inn has worked to improve across its portfolio.

    While you may not find luxury spa services or concierge desks, the focus here is on hygiene and rest. Recent renovations in many Red Roof Inn properties have focused on updating bathrooms and bedding to meet higher standards of comfort. It is advisable to check recent guest reviews for specific updates regarding this particular branch, as maintenance levels can vary by management.

    Red Roof Inn Memphis East Shelby Oaks Drive Memphis Tn

    Comparing Value: Is It Worth It?

    To determine if Red Roof Inn Memphis East Shelby Oaks Drive Memphis Tn is the right fit, it helps to compare it against other options in the Memphis market.

    Budget vs. Mid-Range Hotels

    • Price Point: Red Roof Inn is consistently priced lower than mid-range chains like Hilton Garden Inn or Courtyard by Marriott. This can save travelers $50–$100 per night, which can be redirected toward dining or entertainment in Memphis.
    • Service Level: Expect limited front-desk hours compared to 24/7 full-service hotels. However, for travelers who simply need a key and a clean bed, this trade-off is often acceptable.
    • Target Audience: Ideal for solo travelers, couples on a budget, and pet owners. Less ideal for large families needing suites or business executives requiring extensive meeting facilities.

    According to general travel industry data, budget hotels account for a significant portion of overnight stays in the US, driven by economic factors and the rise of “bleisure” (business + leisure) travel where cost-efficiency is key. Choosing a budget option like Red Roof Inn allows for extended stays or more frequent trips without financial strain.

    How to Book and Prepare for Your Stay

    Booking your stay efficiently can enhance your overall experience. Follow these steps to ensure a smooth check-in process at the Shelby Oaks Drive location.

    1. Check Official Website First: Always start by visiting the official Red Roof Inn website. They often offer member discounts or best-rate guarantees that third-party booking sites may not match.
    2. Verify Pet Policies: If traveling with a pet, confirm the current policy during booking. Although the brand is pet-friendly, specific locations may have temporary restrictions or require notification at check-in.
    3. Read Recent Reviews: Look for reviews from the last three months on platforms like TripAdvisor or Google Maps. Pay attention to comments about cleanliness and noise levels, as these are subjective but critical for comfort.
    4. Request Specific Room Needs: If you need a ground-floor room for accessibility or pet convenience, note this in the special requests section. While not guaranteed, it increases the likelihood of accommodation.
    5. Prepare for Self-Service Elements: Bring any personal toiletries you prefer, as budget hotels may provide basic items only. Having your own coffee maker or snacks can also enhance your stay if breakfast options are limited.

    For more context on the history and development of Memphis neighborhoods, you can refer to Wikipedia’s page on Memphis, Tennessee, which provides detailed insights into the city’s geography and cultural significance.

    Frequently Asked Questions (FAQ)

    1. Is the Red Roof Inn on Shelby Oaks Drive safe?

    Safety is a common concern for any traveler. The East Memphis area, including Shelby Oaks Drive, is generally considered a commercial and industrial zone. It is well-lit and patrolled, but as with any urban area, it is wise to practice standard safety precautions. Keep your vehicle locked and valuables out of sight. Reading recent guest reviews can provide current perspectives on neighborhood safety.

    2. Does this location offer free breakfast?

    Breakfast policies can change based on management and seasonal demand. Historically, many Red Roof Inns offer a simple continental breakfast. However, it is crucial to verify this at the time of booking. Do not assume it is included unless explicitly stated in your reservation confirmation.

    3. Can I park an RV or large truck here?

    Yes, one of the benefits of Red Roof Inn properties is their accommodating parking lots. The Shelby Oaks Drive location typically has ample space for larger vehicles, including RVs and trucks. This makes it a popular choice for cross-country drivers who need a secure place to park overnight.

    4. How far is this hotel from Beale Street?

    The distance from Red Roof Inn Memphis East Shelby Oaks Drive Memphis Tn to Beale Street is approximately 10–12 miles, depending on the route taken. By car, this usually takes about 15–20 minutes without heavy traffic. Using ride-sharing services or driving yourself is the most convenient way to reach the entertainment district.

    5. Are there restaurants nearby?

    Yes, the East Memphis area has numerous dining options. You will find fast-food chains, casual dining establishments, and local eateries within a few miles of the hotel. This proximity ensures that you do not need to travel far for meals, adding to the convenience of your stay.

    6. What is the check-in and check-out time?

    Standard check-in time is typically 3:00 PM, and check-out is 11:00 AM. If you arrive early, you may request early check-in, but it is subject to availability. Late check-out may also be possible for a fee or based on occupancy levels. Always communicate with the front desk upon arrival to discuss any timing needs.

    Conclusion

    Choosing the right accommodation can make or break your trip to Memphis. The Red Roof Inn Memphis East Shelby Oaks Drive Memphis Tn stands out as a practical, budget-friendly option for travelers who prioritize value, location, and pet-friendly policies. While it may not offer luxury amenities, it delivers on the core promises of cleanliness, comfort, and convenience.

    By understanding what to expect and preparing accordingly, you can enjoy a stress-free stay that leaves you with more resources to explore the rich culture and history of Memphis. Whether you are here for the blues, the barbecue, or business, this hotel serves as a reliable home base.

    If you found this guide helpful, please share it with your fellow travelers on social media. Helping others find great deals and comfortable stays contributes to a better travel community for everyone. Safe travels!

  • Roof & Siding Replacement Costs 2026

    Roof & Siding Replacement Costs 2026

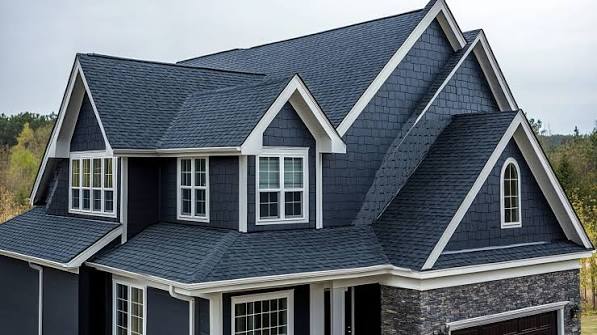
    Replacing your home’s exterior is one of the most significant investments you can make as a homeowner. It protects your family from the elements, boosts curb appeal, and significantly increases property value. However, staring at an empty bank account while looking at weathered shingles or cracked vinyl can be stressful. If you are asking, “How Much Does It Cost To Replace Roof And Siding,” you are not alone. This guide breaks down the real numbers for 2026, helping you budget with confidence and avoid costly surprises.

    Understanding the Total Investment: Roof and Siding Combined

    When tackling both projects simultaneously, many homeowners hope for a bulk discount. While contractors may offer slight savings on labor mobilization since they are already on-site, the material costs remain distinct. Generally, replacing both the roof and siding for an average-sized American home (approximately 2,000 square feet) ranges between $25,000 and $45,000.

    This wide range exists because “roof” and “siding” are broad categories. A basic asphalt shingle roof with vinyl siding sits at the lower end, while a slate roof with fiber cement or wood siding pushes the price toward the higher end. Understanding these variables is crucial for setting a realistic budget.

    Pro Tip: Always get at least three detailed quotes. Ensure each quote breaks down material costs, labor, waste removal, and permits separately. This transparency allows you to compare apples to apples.

    How Much Does It Cost to Replace a Roof in 2026?

    The roof is your home’s first line of defense. In 2026, material prices have stabilized post-pandemic but remain influenced by supply chain nuances and fuel costs for transportation.

    Average Costs by Material

    Material TypeCost per Square FootAvg. Total Cost (2,000 sq ft home)Lifespan
    Asphalt Shingles$3.50 – $5.50$7,000 – $11,00015–25 Years
    Metal Roofing$7.00 – $12.00$14,000 – $24,00040–70 Years
    Clay/Concrete Tile$10.00 – $18.00$20,000 – $36,00050+ Years
    Wood Shakes$6.00 – $9.00$12,000 – $18,00020–30 Years
    Slate$15.00 – $30.00+$30,000 – $60,000+75–100+ Years

    Note: These estimates include materials and professional installation but exclude structural repairs.

    Factors Influencing Roof Cost

    1. Roof Pitch and Complexity: A steep, multi-gabled roof requires more safety equipment, time, and skill than a simple gable roof. Expect to pay 10–20% more for complex architectures.
    2. Underlayment Quality: Don’t skimp here. High-quality synthetic underlayment costs more upfront but prevents ice dams and water intrusion better than traditional felt paper.
    3. Removal of Old Materials: Most quotes include “tear-off” costs. If you have multiple layers of old roofing, disposal fees will increase.

    For deeper technical definitions of roofing materials and their historical development, you can refer to Wikipedia’s entry on Roofing. This resource provides excellent background on how material science has evolved, which helps explain why modern options like metal and composite are gaining popularity despite higher initial costs.

    How Much Does It Cost To Replace Roof And Siding

    How Much Does It Cost to Install New Siding?

    Siding covers the vertical walls of your home. The cost varies dramatically based on the material’s durability, aesthetic appeal, and insulation properties.

    Average Costs by Material

    Material TypeCost per Square FootAvg. Total Cost (2,000 sq ft home)Maintenance Level
    Vinyl$2.50 – $8.00$5,000 – $16,000Low
    Fiber Cement$6.00 – $12.00$12,000 – $24,000Medium
    Engineered Wood$4.50 – $9.00$9,000 – $18,000Medium
    Brick Veneer$10.00 – $20.00$20,000 – $40,000Very Low
    Natural Wood$8.00 – $15.00+$16,000 – $30,000+High

    Why Fiber Cement is Gaining Ground

    In 2026, fiber cement (such as James Hardie) remains a top choice for US homeowners. It offers the look of wood without the rot risk and withstands harsh weather better than vinyl. While the upfront cost is higher than vinyl, its longevity and resistance to fire and pests often justify the investment for those planning to stay in their homes long-term.

    Can You Save Money by Doing Both Projects Together?

    Yes, but the savings are primarily logistical rather than material-based.

    • Reduced Mobilization Fees: Contractors charge for setting up scaffolding, dumpsters, and safety barriers. Doing both jobs at once means paying these setup fees only once.
    • Better Coordination: The roofer and siding installer can coordinate flashing details where the roof meets the wall. Poor coordination here is a leading cause of leaks. When one company handles both, or when teams communicate closely, the risk of future water damage drops significantly.
    • Negotiating Power: You are a bigger customer when you bundle services. Use this leverage to ask for waived permit fees or upgraded gutters included in the package.

    However, do not expect a 50% discount. Material costs are fixed by manufacturers. Realistic savings range from 5% to 10% of the total labor cost.

    Hidden Costs to Watch Out For

    Budgeting for just the materials and labor is a common mistake. Here are the hidden costs that often catch homeowners off guard:

    1. Structural Repairs: Once the old siding and roof are removed, contractors may find rotted sheathing, damaged rafters, or mold. Set aside a 10–15% contingency fund for these unexpected repairs.
    2. Permits: Local municipalities require permits for exterior work. Costs vary by county but typically range from $200 to $1,000.
    3. Dumpster Fees: Disposing of old construction debris is expensive. Heavy materials like tile or brick weigh more, leading to higher disposal fees.
    4. Landscaping Protection: Heavy equipment and falling debris can damage your lawn, shrubs, or driveway. Factor in the cost of protective plywood or professional landscaping restoration if necessary.

    Step-by-Step Guide to Budgeting Your Project

    Follow these steps to create a precise budget for your roof and siding replacement:

    1. Measure Your Home: Calculate the square footage of your roof (including overhangs) and the exterior walls. Subtract areas for windows and doors.
    2. Choose Your Materials: Decide on the tier of quality. For example, choose between architectural shingles vs. 3-tab shingles, or insulated vinyl vs. standard vinyl.
    3. Get Three Quotes: Contact licensed, insured local contractors. Ask for references from jobs completed in the last six months.
    4. Check for Insurance Coverage: If your roof damage was caused by a recent storm (hail, wind), check your homeowner’s insurance policy. You might only need to pay your deductible.
    5. Finalize the Contract: Ensure the contract specifies start/end dates, payment schedule, warranty details, and cleanup procedures. Never pay the full amount upfront.

    Frequently Asked Questions (FAQ)

    1. Does homeowners insurance cover roof and siding replacement?

    Insurance typically covers damage caused by “acts of God” like hail, windstorms, or falling trees. It does not cover wear and tear, age-related deterioration, or lack of maintenance. Always document damage with photos and file a claim promptly after a storm.

    2. How long does it take to replace both roof and siding?

    For an average-sized home, expect the project to take 1 to 3 weeks. Weather delays are common, so build flexibility into your schedule. Complex homes or custom materials may take longer.

    3. Should I replace the roof or siding first?

    Ideally, do them simultaneously. If you must stagger them, replace the roof first. This ensures that the roofing drip edge and flashing are properly installed over the new siding, preventing water from getting behind the siding panels.

    4. What is the best time of year to replace roof and siding?

    Late spring through early fall is peak season due to favorable weather. However, scheduling in late winter or early spring might yield better pricing and faster availability, provided temperatures are above freezing for proper sealant adhesion.

    5. Do I need a permit to replace my roof and siding?

    In most US jurisdictions, yes. Structural changes and exterior cladding replacements usually require building permits to ensure compliance with local codes and wind/load standards. Your contractor should handle this process.

    6. How does new roofing and siding affect home value?

    According to real estate data, new siding can recoup 70–80% of its cost in resale value, while a new roof can recoup 60–70%. More importantly, it significantly reduces time on the market, as buyers prefer homes with major systems recently updated.

    Conclusion

    Knowing how much does it cost to replace roof and siding empowers you to make smart financial decisions. While the initial price tag of $25,000 to $45,000+ may seem steep, view it as a long-term investment in your home’s integrity and value. By choosing the right materials, hiring reputable contractors, and planning for hidden costs, you can achieve a beautiful, durable exterior that stands the test of time.

    Don’t let the complexity overwhelm you. Start with small steps: measure your home, research materials, and reach out to local pros. Your future self—and your future buyers—will thank you.

    Found this guide helpful? Share it with your neighbors on Facebook or Pinterest who might be facing similar home improvement projects!

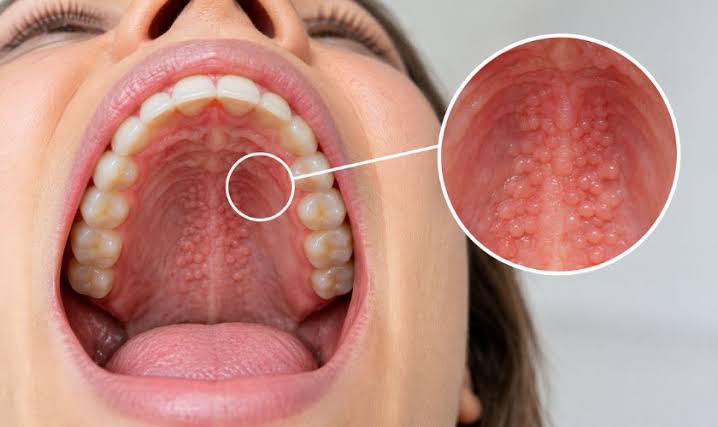
  • What Do Bumps On The Roof Of Your Mouth Mean?

    What Do Bumps On The Roof Of Your Mouth Mean?

    Have you ever run your tongue over the roof of your mouth and felt something unusual? It can be alarming to discover a lump or bump in such a sensitive area, leading to immediate questions about your health. If you are asking yourself, “What do bumps on the roof of your mouth mean,” you are not alone; this is a common concern with various potential causes, ranging from minor irritations to conditions requiring medical attention.

    In this guide, we will explore the most likely reasons for these bumps, how to treat them at home, and exactly when you should seek professional help. Our goal is to provide you with clear, actionable information backed by dental expertise so you can find relief and peace of mind.

    Common Causes of Bumps on the Roof of Your Mouth

    The roof of your mouth, known medically as the palate, is divided into two sections: the hard palate (front) and the soft palate (back). Because this area is exposed to hot foods, bacteria, and physical trauma, it is prone to several types of lesions. Understanding the specific characteristics of the bump can help identify the cause.

    1. Thermal Burns (Pizza Palate)

    One of the most frequent causes of bumps on the roof of the mouth is a thermal burn. This often happens when you eat food that is too hot, such as melted cheese or fresh-out-of-the-oven pizza.

    • Symptoms: Redness, blistering, or a raw, tender feeling.
    • Healing Time: Typically heals within 3–7 days.
    • Treatment: Rinse with cool water and avoid spicy or acidic foods until healed.

    2. Canker Sores (Aphthous Ulcers)

    Canker sores are small, shallow lesions that develop on the soft tissues in your mouth or at the base of your gums. Unlike cold sores, they don’t occur on the surface of your lips and aren’t contagious.

    • Appearance: White or yellow center with a red border.
    • Trigger Factors: Stress, minor injury to oral tissues, acidic foods, or vitamin deficiencies.
    • Management: Over-the-counter topical gels can reduce pain. They usually resolve on their own within one to two weeks.

    3. Oral Mucoceles

    These are harmless, fluid-filled cysts that form when a salivary gland becomes blocked or injured. While more common on the inner lip, they can appear on the roof of the mouth.

    • Texture: Soft, movable, and often bluish or clear.
    • Cause: Often results from biting the cheek or sucking on the lips/cheeks.
    • Outcome: Many disappear on their own, but persistent ones may need minor surgical removal by a dentist.

    4. Torus Palatinus

    If you have had a hard, bony bump in the center of the roof of your mouth for years, it might be a torus palatinus. This is a benign bone growth.

    • Characteristics: Hard, immovable, and painless.
    • Prevalence: Affects approximately 20-30% of the population.
    • Action Required: None, unless it interferes with denture fitting or gets irritated.

    Infections and Viral Conditions

    Sometimes, bumps are a sign of an underlying infection. These require different treatment approaches compared to simple irritations.

    Herpes Simplex Virus (Cold Sores)

    While commonly associated with the lips, the herpes simplex virus type 1 (HSV-1) can cause outbreaks inside the mouth, particularly on the hard palate.

    • Symptoms: Clusters of small, painful blisters that burst and crust over.
    • Contagiousness: Highly contagious through direct contact.
    • Treatment: Antiviral medications prescribed by a doctor can shorten the outbreak duration.

    Oral Thrush (Candidiasis)

    Oral thrush is a fungal infection caused by an overgrowth of Candida albicans. It is more common in infants, the elderly, and individuals with compromised immune systems.

    • Appearance: Creamy white lesions that may bleed slightly when scraped.
    • Risk Factors: Antibiotic use, diabetes, or wearing dentures.
    • Remedy: Antifungal mouthwashes or lozenges prescribed by a healthcare provider.

    For more detailed information on fungal infections in the oral cavity, you can refer to this comprehensive overview on Wikipedia.

    What Do Bumps On The Roof Of Your Mouth Mean

    When Should You Worry? Red Flags to Watch For

    Most bumps on the roof of the mouth are benign and temporary. However, certain symptoms indicate a need for professional evaluation. Use this checklist to determine if you should see a dentist or doctor:

    SymptomPotential ConcernAction
    Persists > 2 WeeksChronic irritation or pathologySchedule dental exam
    Rapid GrowthTumor or cyst expansionImmediate consultation
    BleedingTrauma or vascular issueSee a professional
    Difficulty SwallowingObstruction or severe inflammationUrgent care
    Fever AccompanimentSystemic infectionMedical attention

    Note: Oral cancer can sometimes present as a non-healing sore or lump. While rare, early detection is crucial for successful treatment. If you are a smoker or heavy drinker, your risk is higher, and regular screenings are essential.

    Step-by-Step Home Care Guide

    If your bump is likely due to a minor burn or irritation, you can manage it at home with these steps. Follow this routine to promote healing and reduce discomfort.

    1. Salt Water Rinse
      • Mix 1/2 teaspoon of salt into 8 ounces (240 ml) of warm water.
      • Swish gently around your mouth for 30 seconds.
      • Spit out the solution. Repeat 2–3 times daily. This helps reduce bacteria and soothe inflammation.
    2. Hydration Maintenance
      • Drink at least 2 liters of water throughout the day.
      • Keep the water temperature between 22–28°C (room temperature) to avoid further irritating the sensitive tissue.
    3. Dietary Adjustments
      • Avoid crunchy foods (chips, nuts) that can scratch the bump.
      • Steer clear of acidic items like citrus fruits, tomatoes, and vinegar-based dressings.
      • Opt for soft, cool foods like yogurt, smoothies, or mashed potatoes.
    4. Topical Relief
      • Apply an over-the-counter oral gel containing benzocaine if pain is significant.
      • Use only as directed on the package, typically no more than 4 times a day.

    FAQ Section

    1. Can stress cause bumps on the roof of my mouth?

    Yes, indirectly. Stress weakens the immune system, making you more susceptible to canker sores and viral outbreaks like herpes. Additionally, stress can lead to habits like teeth grinding or cheek biting, which may cause physical trauma resulting in bumps.

    2. Are bumps on the roof of the mouth contagious?

    It depends on the cause. Canker sores and torus palatinus are not contagious. However, bumps caused by the herpes simplex virus (cold sores) or certain bacterial infections are contagious. Always practice good hygiene and avoid sharing utensils if you suspect an infectious cause.

    3. How long does it take for a burn on the roof of the mouth to heal?

    Minor thermal burns usually heal within 3 to 7 days. The mouth has a rich blood supply, which aids in rapid tissue regeneration. If the burn is severe or shows signs of infection (pus, increasing redness), it may take longer and require medical attention.

    4. What is the difference between a canker sore and a cold sore?

    The primary difference is location and cause. Canker sores appear inside the mouth, are not caused by a virus, and are not contagious. Cold sores are caused by the HSV-1 virus, usually appear on the lips or outer mouth, and are highly contagious. However, cold sores can occasionally appear on the hard palate.

    5. Should I pop a bump on the roof of my mouth?

    No. Never attempt to pop or squeeze a bump in your mouth. This can introduce bacteria, lead to serious infection, and delay healing. If the bump is a mucocele or abscess, it requires professional drainage by a dentist under sterile conditions.

    Conclusion

    Discovering a bump on the roof of your mouth can be unsettling, but in most cases, it is a temporary issue caused by minor trauma, burns, or common conditions like canker sores. By understanding what do bumps on the roof of your mouth mean, you can better assess whether home care is sufficient or if professional intervention is needed.

    Remember to monitor the bump for changes in size, color, or pain levels. If it persists for more than two weeks, consult your dentist to rule out any serious underlying conditions. Maintaining good oral hygiene and staying hydrated are your best defenses against many of these common oral issues.

    Found this guide helpful? Share it with friends and family on social media to help them navigate their oral health concerns with confidence!

  • Spot Storm Roof Damage Fast: A Homeowner’s Guide

    Spot Storm Roof Damage Fast: A Homeowner’s Guide

    Have you just weathered a severe thunderstorm, hail event, or high-wind episode? It is natural to feel anxious about the integrity of your home’s most critical protective layer. Many homeowners ask, “How do I know if my roof has storm damage“ before visible leaks appear, often missing the window for easy insurance claims or minor repairs.

    Ignoring subtle signs can lead to costly structural issues down the line. In this guide, we will walk you through a professional-grade inspection process, helping you identify damage early, stay safe, and make informed decisions about repairs.

    Why Immediate Inspection Matters After a Storm

    Storms are unpredictable. While some pass with little impact, others can compromise your roofing system in seconds. According to the Insurance Information Institute, wind and hail are among the top causes of property insurance losses in the United States.

    The primary reason to inspect immediately is prevention. A small crack in a shingle or a displaced flashing piece might seem insignificant, but it allows water to seep into your attic. Over time, this moisture leads to mold, rotting wood, and compromised insulation.

    Furthermore, insurance companies often have strict timelines for filing storm-related claims. Documenting damage promptly ensures you have the evidence needed to support your claim. Delaying inspection can result in denied coverage if the insurer argues that the damage worsened due to neglect.

    Safety First: Pre-Inspection Checklist

    Before you climb a ladder or even step into your yard, prioritize safety. Storm conditions can leave behind hidden hazards.

    • Wait for Clear Weather: Never inspect a roof during rain, high winds, or when surfaces are wet and slippery.
    • Check for Downed Power Lines: Ensure no electrical wires are touching your roof or fence.
    • Use Proper Gear: Wear rubber-soled shoes for grip. If using a ladder, ensure it is on stable ground and have a spotter hold it steady.
    • Avoid Walking on the Roof: Unless you are trained, stay on the ground or use binoculars. Walking on a damaged roof can cause further harm to the shingles and pose a serious fall risk.

    Visual Signs from the Ground: What to Look For

    You do not need to be on the roof to spot major red flags. Start your assessment from your driveway or yard. Use binoculars for a closer look without risking your safety.

    1. Missing or Curling Shingles

    High winds can lift shingles, breaking the sealant strip that holds them down. Look for:

    • Bare spots where shingles are completely gone.
    • Curling edges that indicate wind uplift or age-related wear exacerbated by the storm.
    • Creased shingles, which suggest they were bent by wind or debris.

    2. Granule Loss

    Asphalt shingles are coated with granules that protect against UV rays. Heavy hail or rain can wash these away.

    • Check your gutters and downspouts. An accumulation of sand-like granules indicates significant surface wear.
    • Look for dark spots on the roof where the asphalt layer is exposed.

    3. Damaged Flashing and Vents

    Flashing is the metal material used to seal joints around chimneys, vents, and skylights.

    • Look for bent or missing metal pieces.
    • Check if vent caps are cracked or detached. These are common entry points for water during high winds.

    4. Debris Impact

    Look for branches, tree limbs, or other debris resting on the roof. Even if the debris is removed, the impact point may have cracked the underlying structure.

    How Do I Know If My Roof Has Storm Damage

    Interior Checks: Clues Inside Your Home

    Sometimes, the exterior looks fine, but the storm has compromised the roof’s integrity from within. Your attic is the best place to investigate.

    Water Stains and Leaks

    Shine a flashlight across your attic rafters and insulation.

    • Dark stains on wood beams indicate past or current leaks.
    • Damp insulation feels cold and clumpy compared to dry, fluffy insulation.
    • Mold growth appears as black or green spots on wooden surfaces.

    Daylight Penetration

    Turn off the lights in your attic during the day. If you see beams of sunlight piercing through the roof deck, you have holes or gaps that need immediate attention. This is a definitive sign of structural compromise.

    Sagging Roof Deck

    Look up at the underside of the roof. Any sagging or bowing suggests that the structural supports are weakened, possibly due to water saturation or impact damage. This is a critical issue requiring professional intervention.

    Specific Damage Types: Hail vs. Wind

    Understanding the type of storm helps you identify specific damage patterns.

    FeatureWind DamageHail Damage
    Primary SignMissing shingles, lifted edgesDents, bruising, circular cracks
    Granule LossModerate, often in stripsHeavy, localized around impact points
    Metal ComponentsBent flashing, loose ventsDented gutters, dinged AC units
    VisibilityOften obvious from groundMay require close-up inspection

    Wind Damage tends to be linear, following the direction of the gusts. Shingles may be torn off entirely or creased where they folded back.

    Hail Damage is more random. Look for bruises on shingles—soft spots where the matting underneath is broken. Unlike wind damage, hail bruises may not be visible from the ground and often require a professional touch to confirm.

    When to Call a Professional Roofer

    While DIY inspections are useful for initial assessments, they have limitations. You should contact a licensed roofing contractor if:

    1. You See Structural Issues: Sagging roofs or large holes are not DIY fixes.
    2. You Are Unsure: If you suspect damage but cannot confirm it, a professional inspection provides clarity.
    3. You Plan to File an Insurance Claim: Insurance adjusters rely on detailed reports. A professional roofer can provide documented evidence, including photos and written assessments, which strengthens your claim.
    4. Your Roof is Old: Older roofs are more fragile. Walking on them can cause more damage than the storm did.

    For more information on how insurance processes work for property damage, you can refer to general guidelines on property insurance claims to understand the broader context of coverage.

    Step-by-Step: Documenting Damage for Insurance

    If you find damage, follow these steps to prepare for your insurance claim:

    1. Take Photos: Capture wide shots of the entire roof and close-ups of specific damage. Include dates and timestamps if possible.
    2. Measure Debris: If there are dents from hail, place a coin next to the dent for scale in your photos.
    3. Keep Records: Save all receipts for temporary repairs, such as tarps or emergency patching.
    4. Contact Your Insurer: Report the damage immediately. Provide your documentation and request an adjuster’s visit.
    5. Get a Second Opinion: If the insurance adjuster’s estimate seems low, hire an independent roofer to provide a counter-estimate.

    FAQ Section

    How long after a storm can I file an insurance claim?

    Most insurance policies allow you to file a claim within one year of the incident, but it is best to file within 30 days. Delays can complicate the verification process, as new weather events may cause additional damage that is hard to distinguish from the original storm.

    Can I repair storm damage myself?

    Minor repairs, such as replacing a single shingle, can be done by experienced homeowners. However, most storm damage involves complex issues like underlayment tears or flashing displacement. Incorrect repairs can void warranties and lead to leaks. For significant damage, always hire a licensed professional.

    What is the difference between cosmetic and functional hail damage?

    Cosmetic damage affects the appearance of the shingles (e.g., minor granule loss) but does not compromise their ability to shed water. Functional damage impacts the shingle’s integrity (e.g., fractures, bruising), leading to potential leaks. Insurance typically covers functional damage but may exclude cosmetic issues depending on your policy.

    Will a new roof increase my home’s value?

    Yes, a new roof can significantly boost curb appeal and home value. It also assures potential buyers that the home is protected from the elements. According to real estate experts, a new roof can offer a high return on investment, especially if the previous roof had visible storm damage.

    How often should I inspect my roof?

    Ideally, you should inspect your roof twice a year: once in the spring and once in the fall. Additionally, perform a quick visual check after any severe weather event. Regular maintenance extends the lifespan of your roof and prevents small issues from becoming major expenses.

    Conclusion

    Knowing how do I know if my roof has storm damage empowers you to protect your home and your wallet. By conducting regular visual checks from the ground, monitoring your attic for leaks, and understanding the signs of wind and hail impact, you can catch problems early.

    Remember, safety is paramount. If you are unsure about the extent of the damage, do not hesitate to call a professional. Early detection leads to simpler, cheaper repairs and ensures your home remains a safe haven for your family.

    Found this guide helpful? Share it with your neighbors on social media to help them prepare for the next storm. Together, we can build more resilient communities.