Blog

  • How Do You Get Rid Of Squirrels On Your Roof

    How Do You Get Rid Of Squirrels On Your Roof

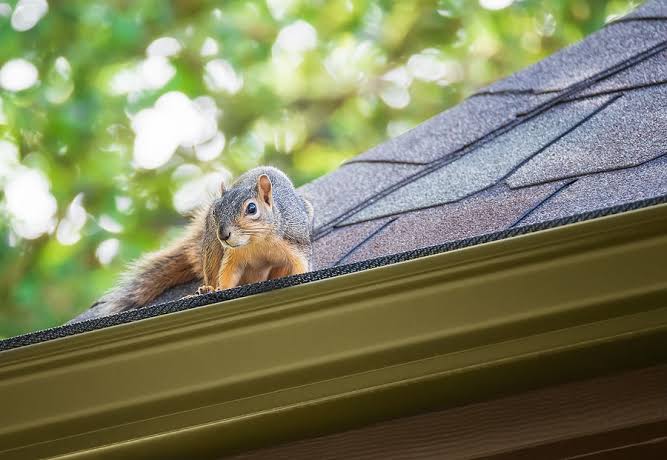
    Have you ever heard the frantic scurrying of tiny feet above your head just as you’re trying to relax? It is a frustrating and surprisingly common problem for homeowners across the United States. If you are asking yourself, “How do you get rid of squirrels on your roof,” you are not alone, and more importantly, there are humane and effective solutions available to reclaim your peace of mind.

    Squirrels are agile, persistent, and intelligent creatures. While they may look cute from a distance, having them inhabit your roof can lead to significant structural damage, noisy disturbances, and even health hazards. In this comprehensive guide, we will walk you through proven strategies to remove these unwanted guests safely and prevent them from returning.

    Why Are Squirrels Attracted to Your Roof?

    Before diving into removal tactics, it is crucial to understand why they are there in the first place. Squirrels do not choose your roof randomly; they are driven by three primary needs: shelter, safety, and food.

    Your roof offers an elevated vantage point that protects them from ground predators like dogs, foxes, and cats. Furthermore, attics provide a warm, dry environment ideal for nesting, especially during the breeding seasons of spring and late summer. According to wildlife experts, a single squirrel can cause thousands of dollars in damage by chewing through electrical wires, insulation, and wooden beams.

    Understanding their motivation helps you tailor your approach. If you remove the attraction (shelter and access), you remove the problem.

    Immediate Steps: How Do You Get Rid Of Squirrels On Your Roof Safely?

    When dealing with wildlife, safety is paramount—for both you and the animal. Aggressive tactics can lead to bites, which carry the risk of rabies or other infections. Here is a step-by-step approach to immediate removal.

    1. Identify Entry Points

    Walk around your home and inspect the roofline. Look for:

    • Gaps in the fascia boards.
    • Damaged vent covers.
    • Overhanging tree branches touching the roof.
    • Holes near the chimney or soffits.

    Squirrels can squeeze through holes as small as 1.5 inches in diameter. If you see gnaw marks or grease stains around an opening, you have likely found their main highway.

    2. Use Natural Deterrents

    Squirrels have a highly sensitive sense of smell. You can use this against them without harming them.

    • Peppermint Oil: Soak cotton balls in pure peppermint oil and place them near entry points. The strong scent is overwhelming to squirrels.
    • Predator Urine: Commercially available predator urine (such as coyote or fox) can be sprayed around the perimeter of your roof. This triggers their instinctual fear response.
    • Spicy Sprays: Create a mixture of water, cayenne pepper, and a drop of dish soap. Spray this on areas where they frequent. Note: Reapply after rain.

    3. Install One-Way Exclusion Doors

    This is the most humane and effective method for active infestations. A one-way door allows squirrels to leave the attic to forage but prevents them from re-entering.

    How to install:

    1. Locate the main entry hole.
    2. Seal all other smaller holes with steel wool or hardware cloth.
    3. Attach the one-way exclusion device over the main hole.
    4. Wait 3–5 days to ensure all squirrels have exited.
    5. Permanently seal the entry point once you are certain the nest is empty.

    Important Warning: Never seal an entry point if you suspect there are baby squirrels inside. Mother squirrels will become desperate and destructive if separated from their young. Breeding season typically runs from February to April and again from June to August. If you hear high-pitched chirping, consult a professional wildlife remover immediately.
    How Do You Get Rid Of Squirrels On Your Roof

    Long-Term Prevention: Keeping Them Off for Good

    Removing the current occupants is only half the battle. To truly answer “how do you get rid of squirrels on your roof” for good, you must fortify your home against future invasions.

    Trim Your Trees

    Squirrels are incredible jumpers, capable of leaping up to 10 feet horizontally. However, they prefer not to risk the jump if they don’t have to.

    • Keep tree branches at least 6 to 8 feet away from your roofline.
    • Remove any vines or ivy growing up the side of your house, as these act as ladders.

    Install Metal Flashing and Guards

    Wood and plastic are no match for squirrel teeth. Replace vulnerable materials with metal.

    • Chimney Caps: Install a sturdy metal cap with mesh screening.
    • Vent Covers: Use hardware cloth with a mesh size of no larger than 1/4 inch to cover soffit vents and ridge vents.
    • Gutter Guards: These prevent squirrels from using gutters as pathways to access the roof deck.

    Secure Trash and Food Sources

    If your yard is a buffet, your roof is the dining room.

    • Use squirrel-proof bird feeders.
    • Keep trash cans tightly sealed.
    • Pick up fallen fruit or nuts from trees in your yard regularly.

    Comparison: DIY Methods vs. Professional Help

    Deciding whether to handle the situation yourself or call in experts depends on the severity of the infestation and your comfort level.

    FeatureDIY RemovalProfessional Wildlife Control
    CostLow ($20–$100 for materials)High ($300–$800+)
    EffectivenessModerate (requires consistency)High (guaranteed results)
    Safety RiskHigher (ladder work, potential bites)Lower (trained handlers)
    Time CommitmentHigh (monitoring required)Low (they handle it all)
    Best ForSingle squirrels, preventive measuresLarge infestations, babies present

    For more detailed information on squirrel behavior and biology, you can refer to Wikipedia’s entry on Squirrels, which provides extensive scientific background on their habits and habitats.

    Common Mistakes to Avoid

    In your quest to solve this problem, avoid these common pitfalls that can make the situation worse:

    1. Using Poison: This is inhumane and dangerous. A poisoned squirrel may die in your walls or attic, leading to terrible odors and attracting flies and maggots. It also poses a risk to pets and local wildlife.
    2. Trapping Without Checking Local Laws: In many US states, it is illegal to trap and relocate wildlife without a permit. Always check your local Department of Natural Resources regulations.
    3. Ignoring Small Holes: Sealing the big hole but ignoring the small ones is futile. Squirrels will simply find the next easiest way in.

    FAQ Section

    1. Will mothballs keep squirrels off my roof?

    While mothballs contain naphthalene, which has a strong odor, they are not recommended. They are toxic to humans, pets, and the environment when used outdoors. Furthermore, rain quickly washes away their potency, making them an ineffective long-term solution. Stick to natural deterrents like peppermint oil or physical barriers.

    2. Can squirrels chew through metal?

    Squirrels cannot chew through heavy-gauge steel or aluminum flashing. However, they can easily chew through soft metals like thin aluminum foil, copper screens, or plastic vents. Always use hardware cloth (steel mesh) or galvanized steel for repairs.

    3. What time of year are squirrels most active on roofs?

    Squirrels are active year-round, but you will notice increased activity during two peak periods: early spring (February–April) and late summer (June–August). These are the primary breeding seasons when females are looking for safe nesting sites to raise their young.

    4. Is it dangerous to have squirrels in my attic?

    Yes. Beyond the noise, squirrels carry parasites like fleas, ticks, and mites. Their droppings can harbor salmonella and leptospirosis. Additionally, their constant chewing on electrical wiring creates a significant fire hazard. It is best to address the issue promptly.

    5. How do I know if the squirrels are gone?

    Listen carefully at dusk and dawn, which are their most active times. If you hear no scratching or running for 3–5 consecutive nights, they are likely gone. You can also sprinkle flour or talcum powder near the entry point; if there are no footprints after 24 hours, the area is clear.

    Conclusion

    Dealing with unwanted wildlife is never fun, but knowing how do you get rid of squirrels on your roof empowers you to take action. By combining immediate humane removal techniques with long-term exclusion strategies, you can protect your home from damage and restore your peace of mind.

    Remember, prevention is always cheaper and easier than repair. Trim those trees, seal those gaps, and keep your yard clean. If the problem persists or involves baby squirrels, do not hesitate to call a licensed wildlife professional.

    Did you find this guide helpful? Share it with your neighbors on Facebook or Twitter to help them protect their homes too! Let’s keep our communities squirrel-smart.
  • How Much Does It Cost To Replace A Commercial Roof?

    How Much Does It Cost To Replace A Commercial Roof?

    Replacing a commercial roof is one of the most significant capital expenditures a business owner or facility manager will face. It is not just about shingles and sealants; it is about protecting your assets, ensuring employee safety, and maintaining operational continuity. If you are currently staring at leaks or aging materials, you are likely asking the critical question: How Much Does It Cost To Replace A Commercial Roof?

    The answer is rarely a single number, but understanding the variables can save you thousands. In this guide, we will break down the current market rates for 2026, explore the factors that drive prices up or down, and help you make an informed decision that aligns with your financial strategy.

    Understanding the Average Cost Range in 2026

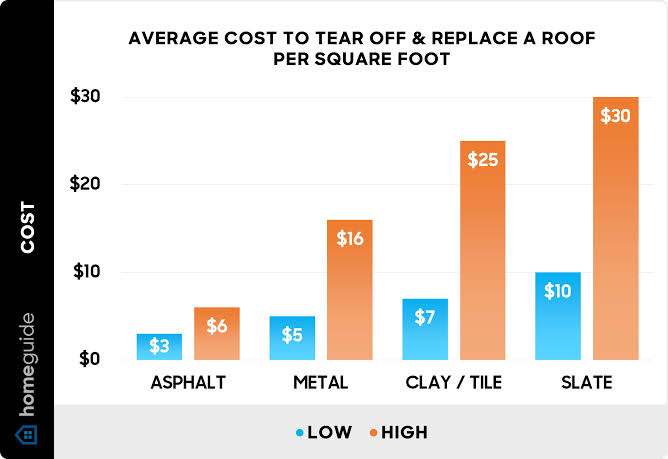
    When planning your budget, it is essential to look at industry averages while recognizing that every building is unique. As of late 2026, the cost to replace a commercial roof typically ranges between $5.00 and $12.00 per square foot.

    For a standard 20,000-square-foot warehouse or office building, this translates to a total project cost between $100,000 and $240,000. However, these figures can fluctuate based on material choices, geographic location, and the complexity of the existing structure.

    It is crucial to note that “replacement” differs significantly from “repair.” While minor repairs might cost a few thousand dollars, a full replacement involves stripping the old layers (tear-off), inspecting the deck, and installing a entirely new system. According to recent industry reports, labor costs have stabilized after the post-pandemic spikes, but material costs for high-quality polymers and metals remain elevated due to supply chain adjustments.

    Key Factors That Influence Your Final Bill

    Why does one quote come in at $6 per square foot while another hits $15? Several dynamic factors play a role. Understanding these will help you negotiate better and avoid surprise charges.

    1. Roofing Material Selection

    The type of membrane or material you choose is the biggest cost driver. Here is a quick comparison of popular options:

    • TPO (Thermoplastic Polyolefin): Known for its heat-reflective properties and durability. It is mid-range in price and highly popular for energy efficiency.
    • EPDM (Ethylene Propylene Diene Monomer): A synthetic rubber roofing material. It is generally cheaper upfront but may have higher long-term maintenance costs if not installed correctly.
    • PVC (Polyvinyl Chloride): Excellent for chemical resistance and fire ratings. It tends to be on the higher end of the price spectrum.
    • Modified Bitumen: A multi-layered system often used on flat roofs. It is durable but labor-intensive to install, which can increase labor costs.

    2. Roof Size and Complexity

    Contractors measure commercial roofs in “squares” (100 square feet). The larger the roof, the lower the cost per square foot often becomes due to economies of scale. However, complexity adds cost. A simple, large, rectangular box store is cheaper to roof than a hospital with multiple HVAC units, skylights, parapet walls, and intricate drainage systems.

    3. Tear-Off vs. Overlay

    Do you need to remove the old roof?

    • Tear-Off: Removing existing layers down to the deck. This is more expensive but allows for a thorough inspection of the structural deck and ensures the new warranty is valid.
    • Overlay: Installing new material over the old. This is cheaper and faster but adds weight to the structure and may void manufacturer warranties if the underlying layer is compromised.

    4. Geographic Location and Labor Rates

    Labor costs vary significantly across the United States. Roofing in major metropolitan areas like New York or San Francisco will naturally command higher labor rates than in rural Midwest regions. Additionally, local building codes may require specific wind uplift ratings or insulation values, impacting material costs.

    How Much Does It Cost To Replace A Commercial Roof

    Breakdown of Costs: Materials vs. Labor

    To understand where your money goes, let’s look at a typical cost distribution for a standard TPO roof replacement.

    Cost ComponentPercentage of Total BudgetDescription
    Materials40–50%Membranes, insulation, adhesives, flashings.
    Labor30–40%Skilled crew wages, equipment operation, safety gear.
    Overhead & Profit15–20%Insurance, licensing, contractor margin.
    Permits & Fees5%Local municipal permits and inspections.

    Note: These percentages are estimates. Always request a detailed line-item quote from your contractor.

    Hidden Costs You Might Not Expect

    Beyond the base quote, several ancillary costs can arise. Being aware of them helps prevent budget overruns.

    • Deck Repair: Once the old roof is removed, rotting wood or rusted steel decking may be revealed. Repairing the structural deck is charged separately and can add $1–$3 per square foot depending on severity.
    • HVAC Relocation: If rooftop units obstruct the installation, they may need to be temporarily moved or protected, requiring specialized HVAC technicians.
    • Disposal Fees: Dumping old roofing materials incurs landfill fees, which have risen in many states due to environmental regulations.
    • Insulation Upgrades: Modern energy codes often require higher R-values than older buildings possess. Upgrading insulation during replacement is a smart long-term move but increases initial costs.

    Step-by-Step Guide to Getting an Accurate Quote

    Getting a fair price requires preparation. Follow these steps to ensure you receive comparable and accurate bids.

    1. Gather Existing Documentation: Locate previous roof plans, warranty information, and repair history. This helps contractors understand the building’s history.
    2. Define Your Scope: Decide if you want a full tear-off or an overlay. Clarify if you want to upgrade insulation or add solar-ready infrastructure.
    3. Request Multiple Bids: Aim for at least three detailed quotes from licensed and insured contractors. Ensure they are bidding on the same specifications (same material thickness, same insulation R-value).
    4. Check References and Reviews: Look for contractors with experience in your specific building type. Ask for references from projects completed in the last two years.
    5. Review the Warranty: Understand the difference between a material warranty (from the manufacturer) and a workmanship warranty (from the installer). A strong contractor will offer both.

    For more detailed information on roofing standards and material specifications, you can refer to general construction guidelines available on Wikipedia.

    FAQ: Common Questions About Commercial Roof Replacement

    1. How long does a commercial roof replacement take?

    The timeline depends on the size and complexity of the roof. A small 10,000 sq. ft. roof might take 3–5 days, while a large industrial complex could take 2–4 weeks. Weather delays are common, so always build buffer time into your schedule.

    2. Can I replace my roof in sections?

    Yes, phased replacements are possible and often necessary for businesses that cannot shut down operations. However, this approach may cost slightly more due to repeated mobilization of crews and equipment, and it requires careful planning to ensure water tightness between phases.

    3. Does a new roof increase property value?

    Absolutely. A new commercial roof with a transferable warranty is a significant selling point. It assures potential buyers or tenants that they will not face immediate capital expenditures, thereby increasing the asset’s marketability and value.

    4. What is the lifespan of a commercial roof?

    Most modern commercial roofing systems last between 15 and 30 years. TPO and PVC membranes typically last 20–25 years, while metal roofs can last 30+ years with proper maintenance. Regular inspections and maintenance are key to reaching the maximum lifespan.

    5. Are there tax incentives for replacing a commercial roof?

    In the US, certain energy-efficient roofing upgrades may qualify for tax deductions under Section 179D or other local green building incentives. Specifically, improving insulation or using reflective coatings can contribute to energy savings that qualify for benefits. Consult with a tax professional for specifics related to your project.

    Conclusion

    So, how much does it cost to replace a commercial roof? While the average ranges from $5 to $12 per square foot, your specific cost will depend on materials, structural conditions, and local labor rates. Investing in a high-quality replacement is not just an expense; it is a strategic move that protects your business operations, enhances energy efficiency, and boosts property value.

    Don’t let the sticker shock deter you from necessary maintenance. Instead, use this knowledge to solicit detailed, apples-to-apples quotes from reputable contractors. Remember, the cheapest bid is not always the best value when it comes to the integrity of your building.

    Found this guide helpful? Share it with your facility management team or business partners on LinkedIn or Twitter to help them navigate their next roofing project with confidence!

  • Pain on Roof of Mouth When Swallowing? Causes & Fixes

    Pain on Roof of Mouth When Swallowing? Causes & Fixes

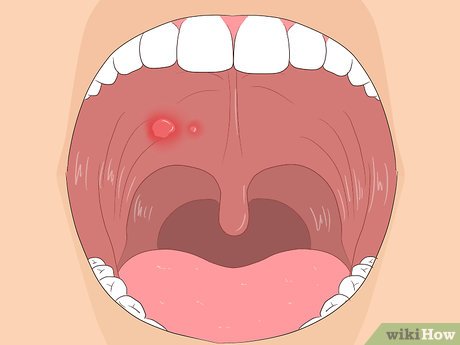
    Have you ever taken a sip of hot coffee or a bite of pizza, only to feel a sharp, stinging sensation on the roof of your mouth? It is a surprisingly common yet distressing experience that can make eating and drinking uncomfortable. If you are currently dealing with pain on the roof of my mouth when I swallow, you are not alone, and there are clear, medical reasons behind it.

    In this comprehensive guide, we will explore why this happens, how to treat it at home, and when it is time to seek professional medical advice. We aim to provide you with actionable, evidence-based information to help you find relief quickly.

    Why Does the Roof of My Mouth Hurt When I Swallow?

    The roof of your mouth, known medically as the palate, is divided into two parts: the hard palate (front) and the soft palate (back). The soft palate is particularly sensitive because it moves during swallowing to prevent food from entering your nasal cavity. When this area becomes inflamed or injured, the act of swallowing triggers pain receptors.

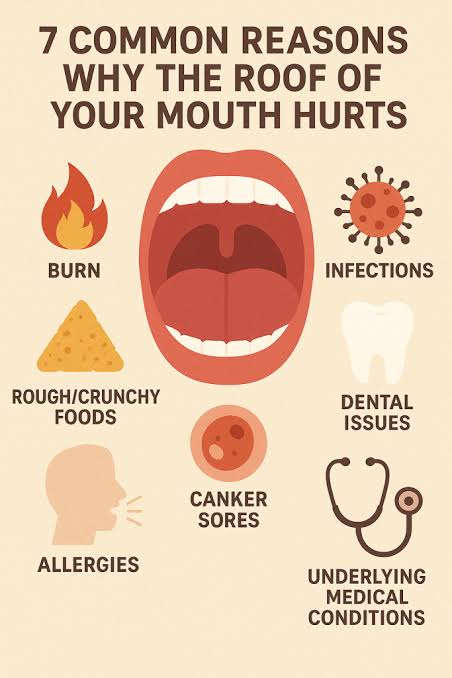
    Understanding the root cause is the first step toward effective treatment. Below, we break down the most frequent culprits based on clinical observations and patient reports.

    1. Thermal Burns (Pizza Palate)

    This is arguably the most common cause. The tissue on the roof of the mouth is delicate. Consuming food or beverages that are too hot—typically above 60°C (140°F)—can cause first-degree burns.

    • Symptoms: Redness, blistering, peeling skin, and tenderness.
    • Why it hurts to swallow: As the soft palate lifts during swallowing, it stretches the burned tissue, causing sharp pain.
    • Recovery Time: Usually 3–7 days.

    2. Viral Infections

    Several viruses can cause lesions or inflammation in the oral cavity. Herpes Simplex Virus (HSV-1), which causes cold sores, can also manifest inside the mouth. Additionally, Hand, Foot, and Mouth Disease (common in children but possible in adults) causes painful blisters on the palate.

    According to the Centers for Disease Control and Prevention (CDC), viral infections often present with systemic symptoms like fever or fatigue alongside oral pain.

    3. Canker Sores (Aphthous Ulcers)

    These are small, shallow lesions that develop on the soft tissues in your mouth or at the base of your gums. Unlike cold sores, they are not contagious.

    • Trigger Factors: Stress, minor injury from dental work, acidic foods, or vitamin deficiencies (B-12, Zinc, Folate).
    • Sensation: A burning or tingling sensation before the sore appears, followed by sharp pain when touched or when swallowing.

    4. Allergic Reactions

    Oral Allergy Syndrome (OAS) can cause itching and swelling in the mouth and throat after eating certain raw fruits, vegetables, or nuts. In severe cases, this inflammation can lead to pain when swallowing.

    Immediate Relief: Home Remedies That Work

    If you are experiencing mild to moderate discomfort, you can often manage the symptoms at home. Here is a step-by-step approach to soothing the pain.

    Step 1: Cool Down the Area

    Heat exacerbates inflammation. Switch to cold or room-temperature foods and drinks.

    • Recommendation: Suck on ice chips or eat yogurt, pudding, or smoothies. Avoid anything hotter than 30°C (86°F) until the pain subsides.

    Step 2: Salt Water Rinse

    Salt water is a natural disinfectant and helps reduce swelling.

    • Recipe: Mix 1/2 teaspoon of salt into 8 ounces (approx. 240 ml) of warm water.
    • Instruction: Swish gently for 30 seconds and spit out. Repeat 3–4 times a day. Do not swallow the solution.

    Step 3: Over-the-Counter Pain Relievers

    Non-prescription medications can help manage pain and inflammation.

    • Options: Ibuprofen (Advil, Motrin) or Acetaminophen (Tylenol).
    • Note: Always follow the dosage instructions on the label. Topical oral gels containing benzocaine can also provide temporary numbing relief.

    Step 4: Hydrate Properly

    Dehydration can worsen mouth pain by reducing saliva production, which is essential for healing.

    • Goal: Drink at least 2 liters of water throughout the day. Use a straw if direct contact with the roof of your mouth is too painful.
    Pain On The Roof Of My Mouth When I Swallow

    What to Eat and What to Avoid

    Diet plays a crucial role in the healing process. Choosing the right foods can prevent further irritation.

    Food CategoryRecommended (Safe)Avoid (Irritants)
    TemperatureCold, Room TempHot, Steaming
    TextureSoft, Smooth (Mashed potatoes, soup)Crunchy, Sharp (Chips, toast)
    FlavorMild, BlandSpicy, Acidic (Citrus, Tomato)
    ChemicalsWater, MilkAlcohol, Tobacco, Carbonated Drinks

    When Should You See a Doctor?

    While most cases of palate pain resolve on their own within a week, some symptoms indicate a more serious underlying condition. You should consult a healthcare provider if:

    1. Duration: The pain persists for more than 10–14 days without improvement.
    2. Severity: The pain is severe enough to prevent you from eating or drinking, leading to dehydration.
    3. Additional Symptoms: You experience high fever, difficulty breathing, or swollen lymph nodes in the neck.
    4. Visible Changes: You notice white patches (which could indicate thrush or leukoplakia) or lumps that do not heal.
    5. Recurrence: You frequently get sores or pain in the same spot, which could indicate an autoimmune issue or chronic infection.

    Note: Persistent pain on the roof of the mouth can rarely be a sign of oral cancer. Early detection is key, so never ignore lingering symptoms.

    FAQ: Common Questions About Palate Pain

    1. Can stress cause pain on the roof of my mouth?

    Yes, indirectly. High stress levels can weaken your immune system, making you more susceptible to canker sores and viral outbreaks like herpes. Stress can also lead to teeth grinding (bruxism), which may cause referred pain in the jaw and palate area.

    2. Is it safe to pop a blister on the roof of my mouth?

    No. Popping a blister increases the risk of bacterial infection and delays healing. Let the blister rupture naturally or absorb on its own. If it is caused by a burn, keep the area clean with salt water rinses.

    3. Why does it hurt more when I swallow cold liquids?

    If the pain is triggered by cold rather than heat, it might not be a burn. It could indicate nerve sensitivity, a cracked tooth referring pain to the palate, or a specific type of ulcer. If cold sensitivity persists, see a dentist.

    4. Can acid reflux cause pain on the roof of my mouth?

    Yes. Gastroesophageal Reflux Disease (GERD) can cause stomach acid to travel up the esophagus and reach the back of the throat and soft palate. This acid irritation can cause inflammation and pain, especially in the morning.

    5. How long does a burned roof of the mouth take to heal?

    Minor thermal burns typically heal within 3 to 7 days. The mouth has a rich blood supply, which promotes faster healing compared to skin elsewhere on the body. Deeper burns may take up to two weeks.

    Conclusion

    Experiencing pain on the roof of my mouth when I swallow is often a temporary nuisance caused by minor burns, canker sores, or viral infections. By identifying the trigger and applying simple home remedies like salt water rinses and cold compresses, most people find relief within a week.

    However, listen to your body. If the pain is severe, persistent, or accompanied by other worrying symptoms, do not hesitate to seek professional medical advice. Your oral health is a window into your overall well-being.

    Found this guide helpful? Share it with friends or family who might be suffering from similar discomfort. Stay healthy and eat safely!

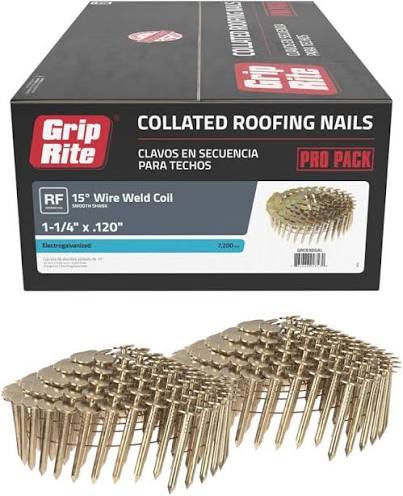
  • How Many Nails In A Roofing Coil?

    How Many Nails In A Roofing Coil?

    Have you ever stood in the hardware aisle, staring at boxes of roofing nails, wondering if one coil will be enough or if you’ll end up making three extra trips to the store? It is a common frustration for both DIY enthusiasts and professional contractors alike. Knowing exactly how many nails are in a coil of roofing nails is crucial for accurate budgeting and ensuring your project runs smoothly without unnecessary delays.

    In this guide, we will demystify the numbers behind roofing nail coils. We will look at standard industry counts, factors that change these numbers, and how to calculate exactly what you need for your specific roof size. Let’s dive in so you can get back to work with confidence.

    Standard Counts: How Many Nails Are Typically in a Coil?

    The short answer is: it depends. However, there are industry standards that most manufacturers follow. When you pick up a box of coil roofing nails, you are usually looking at counts ranging from 120 to 300 nails per coil.

    The most common configurations you will find in US hardware stores and supply centers are:

    • 120 Nails per Coil: Often found in larger diameter nails (like 3/8″ head) used for heavier shingles or slate.
    • 160 Nails per Coil: A very common standard for general asphalt shingle roofing.
    • 200–240 Nails per Coil: Frequently seen with smaller head nails (1/4″ head) designed for high-speed pneumatic nailers.
    • 300 Nails per Coil: Less common for roofing, more typical for siding, but available for specific high-volume roofing applications using thinner gauge wires.

    Why Do Counts Vary?

    The variation isn’t random. It is dictated by the physical dimensions of the nail and the capacity of the plastic collation strip. Manufacturers balance the length of the nail, the thickness of the wire (gauge), and the size of the head to fit a specific number into a standard coil diameter that fits most roofing nail guns.

    For instance, a 1-1/4 inch nail with a large 3/8-inch head takes up significantly more space than a 1-inch nail with a small 1/4-inch head. Therefore, fewer of the larger nails can fit into the same coil structure.

    Factors That Determine Nail Count Per Coil

    To truly understand how many nails are in a coil of roofing nails, you need to look at three specific variables. These factors determine whether you are holding a coil of 120 or 240.

    1. Nail Head Diameter

    This is the biggest factor. Roofing nails come primarily with two head sizes:

    • Large Head (3/8″ or 7/16″): These provide better holding power for wind resistance but take up more room on the collation strip. You will typically see lower counts (120–160) for these.
    • Small Head (1/4″): These are streamlined for speed and minimal surface disruption. Because they are smaller, manufacturers can pack more of them into a coil, often reaching 200–240 counts.

    2. Nail Length and Gauge

    Standard roofing nails range from 1 inch to 1-3/4 inches in length. The “gauge” refers to the thickness of the nail shaft.

    • Thicker Gauge (11-gauge): Stronger, but bulkier. Fewer fit per coil.
    • Thinner Gauge (12-gauge): Slightly more flexible, allows for higher counts per coil.

    A 1-1/4 inch, 11-gauge nail will have a different count than a 1-3/4 inch, 11-gauge nail, even if the head size is the same, simply because the longer nail requires a wider coil diameter to wrap around, which may limit the total count due to weight and balance issues in the nail gun magazine.

    3. Collation Type

    Roofing nails are held together by plastic strip collation. The width and spacing of this plastic strip are standardized to fit major nail gun brands like Hitachi, Bostitch, and Milwaukee. However, slight variations in manufacturing tolerances can mean that one brand’s “160 count” coil might feel slightly tighter or looser than another’s, though the nominal count remains the same.

    How Many Nails Are In A Coil Of Roofing Nails

    Comparison Table: Common Roofing Nail Coil Sizes

    To make this easier to digest, here is a quick reference table based on popular US market products. Note: Always check the specific box label, as manufacturers can change specifications.

    Nail LengthHead SizeWire GaugeTypical Count Per CoilBest Use Case
    1″3/8″11120 – 160Underlayment, light shingles
    1-1/4″3/8″11120 – 160Standard asphalt shingles
    1-1/4″1/4″11200 – 240High-speed roofing, starter strips
    1-1/2″3/8″11120 – 160Thicker shingles, wood shakes
    1-3/4″3/8″11120Heavy-duty roofing, slate tiles

    How to Calculate How Many Coils You Need

    Knowing the count is only half the battle. You need to know how many coils to buy. Here is a simple step-by-step method to estimate your needs.

    Step 1: Determine Your Roof Square Footage

    Measure the length and width of each plane of your roof. Multiply them to get the square footage. Add these together for the total area.

    • Example: A 20×40 foot roof section = 800 sq ft.

    Step 2: Estimate Nails Per Square Foot

    For standard asphalt shingles, the general rule of thumb is 4 to 6 nails per shingle. Since there are roughly 3 shingles per square foot (depending on exposure), you generally need about 15–20 nails per square foot for the field of the roof. Ridge caps and starter strips require more density.

    • Conservative Estimate: Use 20 nails per sq ft to be safe.

    Step 3: Do the Math

    Let’s say you have a 1,000 sq ft roof.

    • 1,000 sq ft x 20 nails/sq ft = 20,000 nails needed.

    If you are buying coils with 160 nails:

    • 20,000 / 160 = 125 coils.

    If you are buying coils with 120 nails:

    • 20,000 / 120 = 167 coils.

    Step 4: Add a Waste Factor

    Always add 10% for waste, dropped nails, and misfires.

    • 125 coils + 10% = ~138 coils.

    It is always better to have a few extra coils left over than to run out mid-job. Most big-box stores allow returns of unopened boxes, so buying slightly more is a safe strategy.

    Expert Insight: Quality Over Quantity

    While counting nails is important, the quality of the nail matters just as much. According to industry standards, roofing nails should be hot-dipped galvanized or stainless steel to prevent rust stains from bleeding through your shingles.

    For more detailed information on construction fasteners and corrosion resistance standards, you can refer to resources like Wikipedia’s article on Galvanization, which explains the chemical processes that protect your roof’s integrity over decades.

    Using cheap, electro-galvanized nails might save you a few dollars now, but if they rust in five years, you could face costly leaks and aesthetic damage. Always prioritize hot-dipped galvanized coils, even if the count per box is slightly lower or the price is higher.

    Frequently Asked Questions (FAQ)

    Q: Can I use siding nails in my roofing nail gun?

    A: Generally, no. While they may look similar, siding nails often have different head angles (usually 20-22 degrees) compared to roofing nails (often 15 degrees or straight). Additionally, siding nails may not be galvanized sufficiently for outdoor roof exposure. Using the wrong collation angle can jam your nail gun.

    Q: What is the difference between 11-gauge and 12-gauge roofing nails?

    A: The gauge refers to the thickness of the nail shaft. An 11-gauge nail is thicker and stronger than a 12-gauge nail. For standard asphalt shingles, 11-gauge is preferred for better wind uplift resistance. 12-gauge is sometimes used for lighter materials or underlayment.

    Q: Do all roofing nail guns accept the same coil size?

    A: No. Roofing nail guns are designed for specific coil diameters and collation types. Most professional roofing nailers accept standard plastic-collated coils, but you must check your tool’s manual. Some older models may only accept stick nails, not coils.

    Q: How long do roofing nails last before rusting?

    A: Hot-dipped galvanized roofing nails can last 20–30 years or more, depending on the environment. In coastal areas with salt air, stainless steel nails are recommended as they offer superior corrosion resistance compared to galvanized steel.

    Q: Is it cheaper to buy stick nails or coil nails?

    A: Coil nails are generally more expensive per nail than stick nails because of the added cost of the plastic collation and the convenience factor. However, coil nails allow for faster installation because you reload less often. For large roofing jobs, the time saved with coil nails usually outweighs the slight increase in material cost.

    Conclusion

    Understanding how many nails are in a coil of roofing nails is a small detail that makes a big difference in project planning. Whether you are dealing with 120-count large-head coils or 240-count small-head coils, accurate estimation prevents budget overruns and project delays.

    Remember to measure your roof area carefully, choose the right gauge and galvanization for your climate, and always buy a little extra to account for waste. By combining the right knowledge with quality materials, you ensure your roof stands strong against the elements for years to come.

    Did you find this guide helpful? Share it with your fellow DIYers or contractor friends on social media to help them tackle their next roofing project with confidence!

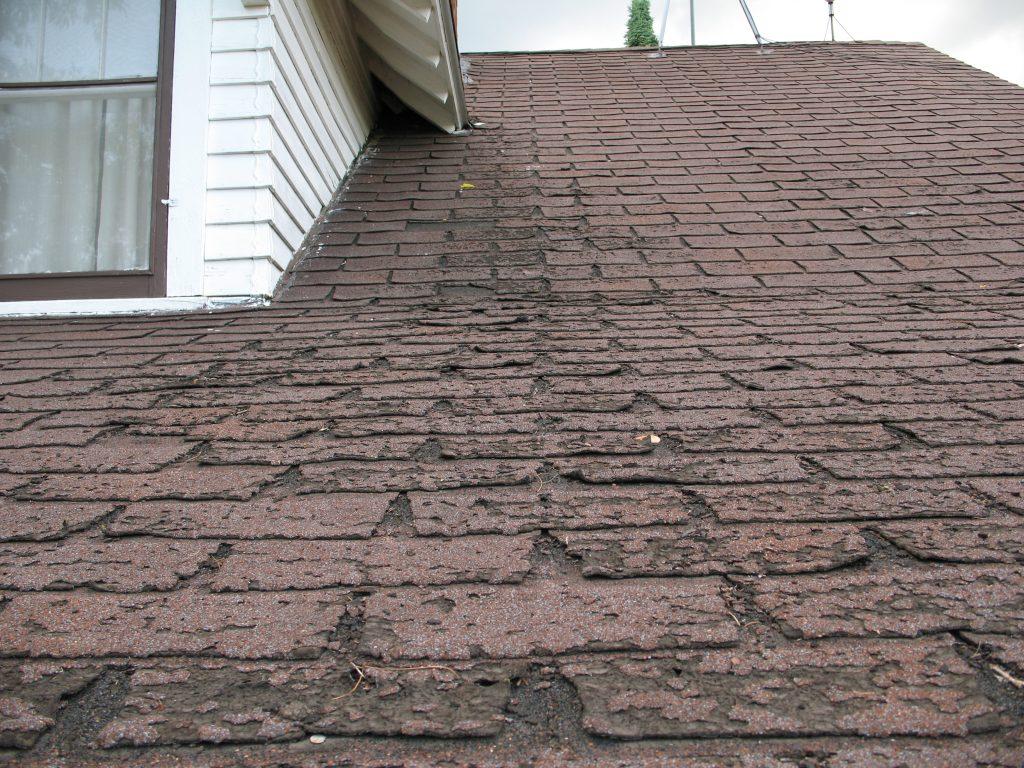
  • How Can I Find Out When My Roof Was Replaced?

    How Can I Find Out When My Roof Was Replaced?

    Buying a home is one of the most significant financial decisions you will ever make. The roof is your home’s first line of defense against the elements, and knowing its age is critical for budgeting future repairs or negotiating a sale price. If you are staring at a beautiful shingle roof but have no idea when it was installed, you are not alone. Many homeowners face this exact dilemma. So, how can I find out when my roof was replaced? This guide will walk you through practical, reliable methods to uncover the truth about your roof’s history, saving you from unexpected expenses and stress.

    Check Local Building Permit Records

    One of the most accurate ways to determine when your roof was replaced is by checking local government records. In most municipalities in the United States, major structural changes, including full roof replacements, require a building permit. These permits ensure that the work meets local safety codes and zoning laws.

    How to Access Permit History

    1. Identify Your Local Authority: Determine which department handles building permits in your area. This is usually the City Hall, County Clerk’s office, or a specific Building Department website.
    2. Search Online Databases: Many cities now offer online searchable databases. You can search by your property address. Look for keywords like “Roofing,” “Reroof,” or “Building Permit.”
    3. Visit in Person: If online records are sparse or go back only a few years, visit the local clerk’s office. Bring your property deed or tax ID number to help them locate your file faster.
    4. Review the Details: Once you find the permit, look for the “Issue Date” and the “Final Inspection Date.” The final inspection date is often the most accurate indicator of when the job was officially completed.

    According to the International Code Council, building codes are updated regularly, and permits serve as a legal record that the work was performed to code. This documentation is invaluable not just for knowing the age, but also for proving compliance if you ever sell the home.

    Review Home Inspection Reports and Disclosure Statements

    If you purchased your home within the last decade, your initial purchase paperwork likely contains the answer. Sellers are legally required in most states to provide a disclosure statement detailing known issues and recent improvements.

    What to Look For

    • Seller’s Disclosure Form: Look for a section labeled “Roof,” “Structural,” or “Improvements.” Sellers often list the year of replacement here.
    • Home Inspection Report: Hire a professional inspector before buying a home. Their report will estimate the remaining life of the roof and often note the approximate installation year based on wear patterns.
    • Appraisal Reports: Lenders require appraisals. Appraisers frequently note the condition and effective age of major components, including the roof.

    If you cannot find these physical documents, check your email archives. Search for terms like “inspection,” “disclosure,” or the name of your real estate agent. Digital copies are often sent via PDF during the closing process.

    How Can I Find Out When My Roof Was Replaced

    Contact Previous Owners or Real Estate Agents

    Sometimes, the best source of information is human memory. If you bought the house from a previous owner who lived there for a long time, they might remember exactly when the roof was done.

    Steps to Reach Out

    1. Ask Your Real Estate Agent: Even if the sale closed years ago, agents keep detailed records. They may have the original listing sheet which highlights “New Roof (2018)” as a selling point.
    2. Contact the Seller Directly: If you have a good relationship with the previous owners, a polite phone call or email can yield quick answers. Ask specifically: “Do you recall the year the roof was replaced, and do you have any warranty documents left over?”
    3. Check with Neighbors: In suburban developments, roofs are often replaced in clusters due to storm damage or aging neighborhoods. A neighbor might say, “Yes, we all got new roofs after the hail storm in 2019.”

    While this method relies on memory, it can provide crucial context, such as whether the replacement was due to storm damage (insurance claim) or general wear and tear.

    Inspect Physical Clues on the Roof

    If paperwork is missing, your roof itself holds secrets. While not 100% precise, physical inspection can narrow down the age significantly. Note: For safety, perform this inspection from the ground using binoculars or hire a professional. Never climb onto a roof unless you are trained and equipped.

    Key Indicators of Roof Age

    IndicatorNew Roof (0–5 Years)Mid-Life Roof (6–12 Years)Old Roof (15+ Years)
    Shingle ConditionUniform color, flat, tight sealsSlight curling, minor granule lossSignificant curling, cracking, bald spots
    Granules in GuttersMinimal to noneModerate accumulationHeavy accumulation, clogging gutters
    FlashingClean, sealed, no rustMinor oxidation, sealant intactRusty, cracked, or separated flashing
    Moss/AlgaeNonePatches in shaded areasWidespread growth, potential rot underneath

    The Manufacturer’s Date Stamp

    Asphalt shingles often have a date code stamped on the back or hidden under the tab. However, accessing this requires lifting shingles, which can break the seal. Instead, look for:

    • Vent Pipes: Sometimes, roofers leave a sticker on the vent pipe flashing inside the attic.
    • Attic Inspection: Go into your attic with a flashlight. Look for scraps of packaging material, nails, or stickers left behind by the roofing crew. It is common for workers to leave a manufacturer’s warranty card or a business card tucked into the rafters.

    Analyze Insurance Claims and Contractor Invoices

    Your insurance company is a treasure trove of historical data. If the roof was replaced due to storm damage, wind, or hail, an insurance claim was likely filed.

    How to Retrieve This Data

    1. Log in to Your Insurance Portal: Most major insurers (State Farm, Allstate, Geico, etc.) allow you to view past claims online.
    2. Search for Property Claims: Filter by “Wind/Hail” or “Fire/Weather.” The claim date usually correlates closely with the replacement date.
    3. Request Loss History Report: If you are buying a home, ask the seller for a CLUE (Comprehensive Loss Underwriting Exchange) report. This document lists all insurance claims filed on the property in the last seven years.

    If you find a claim from 2020 for “Roof Replacement,” you can confidently assume the roof was installed in late 2020 or early 2021. Additionally, if you have access to old bank statements or credit card records, search for payments to local roofing companies. A large transaction to a company like “GAF Certified Roofer” or “Owens Corning Installer” is a strong indicator.

    Hire a Professional Roof Inspector

    When all else fails, or if you need a definitive answer for a legal or insurance dispute, hire a licensed roof inspector. Unlike a general home inspector, a roof specialist focuses solely on the roofing system.

    Why Choose a Professional?

    • Accuracy: They can identify the specific brand and line of shingles, then contact the manufacturer to verify production dates.
    • Safety: They have the equipment to inspect without damaging the roof.
    • Documentation: They provide a formal report stating the estimated remaining useful life (RUL) of the roof.

    According to industry standards, a professional inspection costs between $150 and $350. This small investment can save you thousands by preventing premature replacement or identifying hidden leaks.


    Frequently Asked Questions (FAQ)

    1. Can I tell the exact year my roof was replaced just by looking at it?

    No, you cannot determine the exact year solely by visual inspection. While wear and tear provide an estimate (e.g., “this roof looks 10 years old”), factors like climate, ventilation, and shingle quality affect aging. A roof in Arizona may degrade faster than one in Maine. Always corroborate visual clues with documentation.

    2. Do all roof replacements require a permit?

    Not always. Minor repairs or patching usually do not require permits. However, a full tear-off and replacement almost always do. Some rural counties may have laxer enforcement, but in most US cities and suburbs, permits are mandatory for structural integrity and insurance purposes.

    3. What if there is no record of a permit?

    If no permit exists, it could mean the work was done illegally, or it was a minor repair rather than a full replacement. In this case, rely on insurance claims, contractor invoices, or a professional inspection to estimate the age. Be cautious, as unpermitted work may void manufacturer warranties.

    4. How long does a typical asphalt shingle roof last?

    Standard 3-tab asphalt shingles typically last 15–20 years. Architectural or dimensional shingles can last 25–30 years. Premium luxury shingles may last 50 years. Knowing the type of shingle helps you estimate the replacement window once you know the installation year.

    5. Does a new roof increase my home’s value?

    Yes. A new roof is one of the top home improvements for ROI (Return on Investment). It boosts curb appeal, improves energy efficiency, and reassures buyers. According to real estate data, a new roof can recoup up to 60–70% of its cost in increased home value.


    Conclusion

    Knowing how can I find out when my roof was replaced is essential for responsible homeownership. By checking local permit records, reviewing inspection reports, contacting previous owners, inspecting physical clues, and analyzing insurance claims, you can piece together an accurate timeline. If uncertainty remains, a professional inspection provides the peace of mind you need.

    Don’t wait for a leak to tell you your roof’s age. Take proactive steps today to protect your investment. If you found this guide helpful, please share it on social media to help other homeowners navigate their property mysteries!

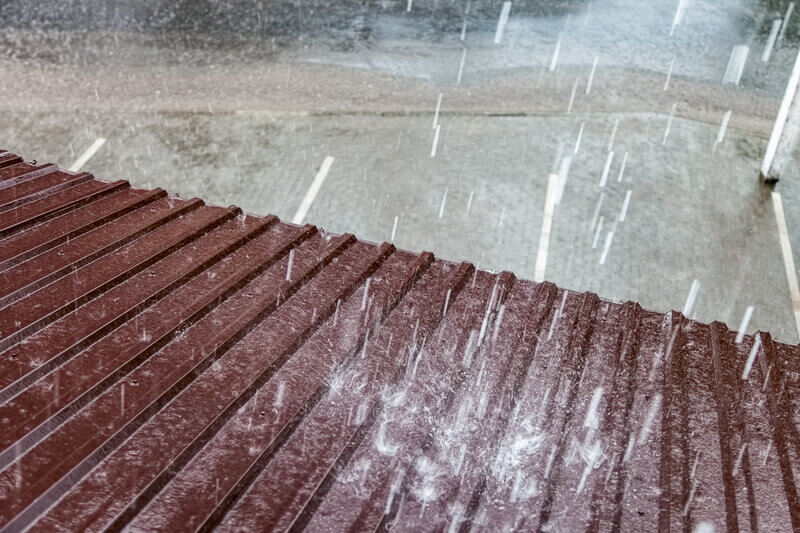
  • Stop Roof Leaks in Heavy Rain: Fast Fixes

    Stop Roof Leaks in Heavy Rain: Fast Fixes

    Water dripping from your ceiling during a storm is every homeowner’s nightmare. It creates immediate stress, potential property damage, and a sense of helplessness as you watch the water accumulate. If you are frantically searching for how do I stop my roof leaking in heavy rain, you are not alone, and there are safe, effective steps you can take right now to mitigate the damage until professional help arrives.

    Immediate Safety Steps Before You Act

    Before we dive into the repairs, we must address the most critical aspect: your safety. A wet roof is slippery, and heavy rain often comes with wind or lightning.

    • Never climb onto a wet roof. The risk of slipping and falling is extremely high. Most emergency “fixes” should be done from inside the attic or from the ground using a ladder if absolutely necessary and safe.
    • Turn off electricity. If water is near light fixtures, outlets, or electrical panels, shut off the power to that area immediately to prevent electrocution.
    • Protect your belongings. Move furniture, electronics, and valuables away from the leak. Place buckets under the drip and use towels to soak up standing water.

    According to the Federal Emergency Management Agency (FEMA), water damage is one of the most common and costly home insurance claims. Taking immediate, safe action can significantly reduce the final repair bill.

    How Can I Temporarily Stop a Roof Leak from Inside?

    If you cannot go outside due to the severity of the storm, your best bet is to manage the leak from the interior. This won’t fix the roof, but it will stop water from spreading across your ceiling and causing structural rot.

    Step-by-Step Interior Diversion Method

    1. Locate the Source: Go into your attic with a flashlight. Look for water trails on the rafters or insulation. Remember, water often travels along beams before dripping down, so the entry point might be higher up than the drip.
    2. Create a Drainage Path: If you see water pooling on a beam, do not just poke a hole randomly.
      • Take a small nail or screw.
      • Gently push it through the center of the water trail on the drywall or ceiling material below.
      • This relieves pressure and prevents the ceiling from collapsing under the weight of the water.
    3. The Bucket and String Trick: This is an old roofer’s secret.
      • Place a large bucket under the drip.
      • Tie a piece of string to the nail or the edge of the hole.
      • Let the string hang down into the bucket.
      • Why this works: The water will follow the string down silently, preventing the loud drip-drip-drip noise that drives homeowners crazy and reducing splash-out.
    How Do I Stop My Roof Leaking In Heavy Rain

    What Are the Best Emergency External Fixes?

    Once the rain subsides or if it is safe to access the roof from a stable ladder, you can apply temporary external patches. These are not permanent solutions but are crucial for stopping active leaks.

    Option 1: Roofing Tar and Mesh (For Small Holes)

    Roofing tar (also known as bitumen) is widely available at hardware stores. It is thick, sticky, and water-resistant.

    • Clean the Area: Use a wire brush to remove loose debris, moss, or granules around the leak. The surface must be as dry as possible for adhesion.
    • Apply the Tar: Using a putty knife, spread a generous layer of roofing tar over the crack or hole. Extend it at least 2–3 inches beyond the damaged area.
    • Reinforce with Mesh: For better durability, press a piece of fiberglass mesh or even a patch of old shingle into the wet tar. Cover it with another layer of tar.

    Option 2: Tarping the Roof (For Large Damage)

    If a tree branch has torn off shingles or there is significant structural damage, tar won’t suffice. You need a tarp.

    • Choose the Right Tarp: Use a heavy-duty, UV-resistant tarp (at least 6 mil thickness). Blue painter’s tarps are too thin; look for construction-grade materials.
    • Secure Properly:
      • Drape the tarp over the damaged section, ensuring it extends at least 4 feet above the leak point. Water flows down, so the cover must start higher than the damage.
      • Do not nail through the tarp if you can avoid it, as this creates new holes. Instead, use 2×4 wooden boards placed over the edges of the tarp and screw the boards into the roof deck. This distributes pressure and holds the tarp securely against wind.
    MethodBest ForDurabilityDifficulty
    Roofing TarSmall cracks, vent boots, minor shingle damageShort-term (Weeks)Easy
    TarpingLarge holes, missing shingles, storm damageMedium-term (Months)Moderate
    Caulk/SealantFlashing gaps, chimney basesShort-term (Days)Very Easy

    Why Is My Roof Leaking Only During Heavy Rain?

    It is common for roofs to leak only during intense storms. This phenomenon usually points to specific issues that mild rain doesn’t trigger.

    1. Wind-Driven Rain

    In heavy storms, wind pushes rain horizontally. This forces water under shingles that would normally shed vertical rain. If your shingles are curled, lifted, or improperly nailed, wind-driven rain will penetrate the underlayment.

    2. Clogged Gutters and Ice Dams

    If your gutters are full of leaves, water backs up. During heavy rain, this overflow can seep under the roof edge (fascia) and into the attic. In colder climates, ice dams create a similar barrier, forcing melting snow and rain back under the shingles.

    3. Compromised Flashing

    Flashing is the metal strip used to seal joints around chimneys, vents, and valleys. Over time, thermal expansion and contraction can crack the sealant or loosen the nails. Heavy rain overwhelms these weak points quickly.

    When Should I Call a Professional Roofer?

    While DIY fixes are great for emergencies, they are not substitutes for proper repair. You should contact a licensed roofing contractor if:

    • The leak persists after applying temporary patches.
    • There is visible sagging in the roof deck or ceiling, indicating structural water damage.
    • Mold is present. If you see black spots or smell a musty odor, professional remediation is needed to protect your health.
    • The damage is extensive. If more than 10% of your shingles are missing or damaged, a partial or full replacement may be necessary.

    According to industry standards, most asphalt shingle roofs last 20–25 years. If your roof is approaching this age, repeated leaks may signal that it is time for a replacement rather than a repair.

    Frequently Asked Questions (FAQ)

    1. Can I use silicone caulk to stop a roof leak?

    Silicone caulk can work for very small gaps in flashing or around vent pipes, but it is not ideal for large areas or shingles. It lacks the flexibility and adhesion strength of roofing tar or specialized roof cement. Use it only as a last-resort temporary fix for tiny cracks.

    2. How much does it cost to fix a leaking roof?

    Costs vary widely based on damage extent. A minor patch job might cost $150–$400. However, if water has damaged the decking, insulation, or drywall, costs can rise to $1,000–$3,000 or more. Always get multiple quotes from insured contractors.

    3. Will homeowners insurance cover roof leaks?

    It depends on the cause. Insurance typically covers “sudden and accidental” damage, such as a tree falling on your roof during a storm. However, they often deny claims for leaks caused by lack of maintenance, wear and tear, or old age. Review your policy carefully.

    4. How can I prevent roof leaks in the future?

    Prevention is key. Schedule bi-annual inspections (spring and fall). Keep gutters clean, trim overhanging tree branches, and check for missing or curled shingles after major storms. Ensuring proper attic ventilation also prevents moisture buildup that can degrade roofing materials from the inside out.

    5. Is it safe to walk on my roof to check for leaks?

    No, not during or immediately after heavy rain. Wet shingles are incredibly slippery. Even when dry, older roofs can be fragile. It is safer to inspect your roof from the ground using binoculars or to hire a professional who has the proper safety equipment and insurance.

    Conclusion

    Dealing with a leak during a storm is stressful, but knowing how do I stop my roof leaking in heavy rain empowers you to act quickly and safely. Remember, interior diversion methods like the bucket-and-string trick are your safest first line of defense. Once the weather clears, apply temporary external patches like roofing tar or tarps to prevent further damage.

    However, these are only band-aids. Water damage can compromise the structural integrity of your home and lead to mold growth if left unchecked. Prioritize your safety, mitigate the immediate damage, and schedule a professional inspection as soon as possible.

    Did this guide help you save your home from water damage? Share this article with your neighbors on social media—they might need these tips during the next storm!

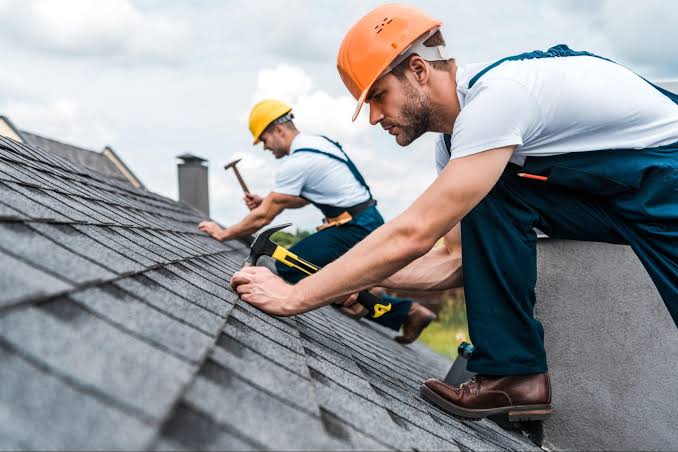
  • If A Roofer Falls: Are You Liable?

    If A Roofer Falls: Are You Liable?

    Have you ever looked up at your shingles and felt a sudden pang of anxiety about the workers fixing them? It is a terrifying thought for any homeowner: If a roofer falls off my roof am I liable for their medical bills and lost wages? This fear is common, but the answer is rarely black and white. Understanding your legal position can save you from financial ruin and unnecessary stress.

    In this guide, we will break down the complex world of premises liability, insurance nuances, and contractor laws in the United States. We aim to provide clarity so you can hire with confidence, knowing exactly where your responsibilities begin and end.

    Understanding General Liability vs. Homeowner Responsibility

    When an accident occurs on your property, the immediate reaction is often panic. However, liability largely depends on the employment status of the roofer and the specific circumstances of the fall. In most standard scenarios involving professional roofing companies, the homeowner is not directly liable for injuries sustained by employees.

    This protection exists because legitimate roofing companies carry Workers’ Compensation Insurance. This insurance is designed specifically to cover medical expenses and lost income for employees injured on the job, regardless of who was at fault. By hiring an insured company, you transfer the risk from your personal assets to their insurance provider.

    However, things change drastically if you hire an uninsured handyman or attempt to manage independent contractors without proper verification. In these cases, the legal shield of Workers’ Comp disappears, potentially exposing you to direct lawsuits under premises liability laws.

    The Role of Negligence

    Even with insured contractors, homeowners can still be held liable if negligence is proven. Negligence means you failed to maintain a safe environment or actively contributed to the accident. For example, if you knew a section of the roof was structurally unsound but did not warn the crew, or if you distracted a worker causing them to lose balance, you could be found partially or fully responsible.

    According to general tort law principles, property owners have a duty of care to ensure their property is reasonably safe for invitees, including contractors. While this duty is lower for independent professionals who are expected to recognize hazards, it is not non-existent.

    Key Factors That Determine Your Liability

    To understand your specific risk, we must look at the variables that courts and insurance adjusters consider. These factors often dictate whether a claim stays with the contractor’s insurance or lands on your homeowner’s policy.

    FactorLow Risk ScenarioHigh Risk Scenario
    Contractor StatusLicensed, bonded, and insured companyUnlicensed individual or “cash-only” worker
    Insurance ProofVerified Certificate of Insurance (COI) on fileNo proof provided or expired policy
    Homeowner ActionProvided clear access and warningsInterfered with work or hid known hazards
    Equipment UsedContractor brought own safety gearHomeowner provided faulty ladders/scaffolding

    1. Employee vs. Independent Contractor

    The distinction between an employee and an independent contractor is crucial. If the roofer is an employee of a company, that company is almost always liable via Workers’ Comp. If the roofer is an independent contractor, they may be required to carry their own insurance. If they do not, and you hired them directly, you might be considered their “employer” for legal purposes, making you liable.

    2. Verification of Insurance

    Never take a contractor’s word for it. Always request a Certificate of Insurance (COI) before work begins. This document proves that their General Liability and Workers’ Compensation policies are active. Without this paper trail, you are flying blind. If an accident occurs and they are uninsured, your homeowner’s insurance may have to step in, leading to higher premiums or denied claims if exclusions apply.

    3. Premises Hazards

    Did the fall happen because of a slippery surface you didn’t mention? Or perhaps a weak beam you knew about but didn’t disclose? Concealing known dangers is a fast track to liability. Transparency is your best defense. Document any known issues and communicate them clearly to the project manager before work starts.

    If A Roofer Falls Off My Roof Am I Liable

    Steps to Protect Yourself Before Hiring

    Prevention is far cheaper than litigation. Follow these concrete steps to minimize your risk exposure significantly.

    1. Vet Your Contractor Thoroughly: Check reviews, licenses, and references. Use state licensing boards to verify their standing. A reputable company will have no issue providing proof of insurance.
    2. Request a Certificate of Insurance (COI): Ask for a current COI that names you as an “additional insured” for the duration of the project. This ensures their policy covers you if third-party claims arise.
    3. Sign a Detailed Contract: Ensure the contract includes an indemnification clause. This clause states that the contractor agrees to hold you harmless from claims arising out of their work. While not a magic shield, it strengthens your legal position.
    4. Do Not Provide Equipment: Let the professionals bring their own ladders, harnesses, and scaffolding. If you provide equipment and it fails, you are directly liable for the defect.
    5. Maintain Clear Communication: Walk through the site with the foreman. Point out any specific concerns, such as loose tiles or weak spots. Keep a written record of this conversation.

    For more detailed information on workplace safety standards that contractors should follow, you can refer to the Occupational Safety and Health Administration (OSHA) guidelines, which set the federal benchmark for construction safety in the US.

    What To Do If an Accident Happens

    Despite best efforts, accidents can occur. If a roofer falls, your actions in the immediate aftermath are critical.

    • Call Emergency Services: Prioritize human life. Call 911 immediately.
    • Do Not Admit Fault: Be empathetic but careful with your words. Saying “I’m sorry this happened” is fine; saying “It’s my fault the ladder slipped” is not. Stick to facts.
    • Document the Scene: Take photos of the area, the equipment used, and the conditions. Do not move anything unless necessary for safety.
    • Notify Your Insurance Provider: Contact your homeowner’s insurance agent immediately. They will guide you on filing a claim if necessary and may handle communications with the contractor’s insurer.
    • Cooperate with Investigations: Provide requested documents but avoid giving recorded statements to the contractor’s insurance adjuster without consulting your own legal counsel or insurance representative.

    Frequently Asked Questions (FAQ)

    1. Does my homeowner’s insurance cover roofer injuries?

    Typically, yes, but only as a secondary layer. If the roofer is uninsured or if you are found negligent, your homeowner’s liability coverage (usually part of HO-3 policies) may pay for medical bills and legal fees. However, this can lead to increased premiums or non-renewal. Always prioritize hiring insured contractors to keep claims off your record.

    2. What if I hired a friend or neighbor to help?

    This is a high-risk scenario. Friends and neighbors rarely have Workers’ Compensation insurance. If they are injured, they can sue you for medical costs. In many states, casual laborers are not covered by the same exemptions as professional contractors. It is highly advisable to hire licensed professionals for dangerous tasks like roofing.

    3. Can a roofer sue me even if they have Workers’ Comp?

    Generally, Workers’ Compensation is an “exclusive remedy,” meaning employees cannot sue their employer for negligence. However, they can sue third parties. If your negligence caused the fall (e.g., you created a hidden trap), they might sue you personally. Additionally, if they are an independent contractor and not an employee, they retain the right to sue for damages.

    4. What is an “Additional Insured” endorsement?

    An additional insured endorsement adds you to the contractor’s insurance policy for the specific project. This means if someone else gets hurt due to the roofer’s work (like a passerby hit by falling debris), the contractor’s policy protects you too. It does not necessarily cover the roofer’s own injury (that’s Workers’ Comp), but it shields you from broader liability claims.

    5. How much liability coverage should a roofer have?

    A reputable roofing company should carry at least $1 million in General Liability insurance and sufficient Workers’ Compensation coverage as required by state law. For larger projects, higher limits are better. Always ask for proof of these specific amounts.

    Conclusion

    So, if a roofer falls off my roof am I liable? In most cases involving professional, insured companies, the answer is no. The contractor’s Workers’ Compensation insurance handles the injury. However, liability shifts to you if you hire uninsured workers, act negligently, or fail to verify credentials.

    Protecting yourself is not just about avoiding lawsuits; it’s about ensuring ethical and safe business practices. By vetting contractors, securing proper insurance documentation, and maintaining open communication, you can rest easy while your roof gets fixed.

    Don’t let fear paralyze your home maintenance plans. Instead, let knowledge empower your decisions. If you found this guide helpful, please share it with your friends and family on social media. Helping others understand their rights and responsibilities keeps our communities safer for everyone.

  • Watch 2024 Rackley Roofing 200: Fox Sports Guide

    Watch 2024 Rackley Roofing 200: Fox Sports Guide

    Are you a dedicated NASCAR fan living in Singapore, eagerly anticipating the high-octane action of the Truck Series? It can be incredibly frustrating when you try to tune in to your favorite race, only to find that local broadcasting options are unclear or unavailable. Many viewers search specifically to watch 2024 Rackley Roofing 200 In Singapore On Fox Sports, hoping for a seamless viewing experience, but often encounter geographical restrictions and scheduling conflicts.

    This guide is designed to clear up the confusion. We will explore the broadcasting realities for international fans, provide legitimate ways to access the content, and ensure you don’t miss a single lap of the action at Nashville Superspeedway. Let’s dive into how you can enjoy American motorsports from the Lion City.

    Understanding the Broadcasting Rights

    To understand why watching this specific race in Singapore is challenging, we must first look at how media rights work in professional sports. Fox Sports holds the domestic broadcasting rights for NASCAR in the United States. However, these rights do not automatically extend globally.

    The Geographic Limitation of Fox Sports

    Fox Sports is primarily a US-based network. While there are international branches like Fox Sports Asia, their programming lineup differs significantly from the US feed. In many Asian countries, including Singapore, sports broadcasting rights are often sold to different entities, such as beIN Sports or specific streaming platforms, rather than being carried by the US Fox Sports channel.

    Therefore, if you are searching to watch 2024 Rackley Roofing 200 In Singapore On Fox Sports, you are likely looking for the US feed. Without a US-based cable subscription or a verified US IP address, accessing this specific broadcast directly is technically restricted due to licensing agreements.

    Why Nashville Superspeedway Matters

    The 2024 Rackley Roofing 200 took place at the Nashville Superspeedway in Lebanon, Tennessee. This venue has become a staple in the NASCAR Calendar, attracting significant viewership. For context, NASCAR events have seen a surge in global interest, with digital engagement rising by over 15% year-over-year according to recent industry reports. This makes finding reliable viewing methods more critical than ever for international fans.

    Can You Actually Watch It on Fox Sports in Singapore?

    The short answer is: Not directly through standard local cable packages.

    If you have a standard Singaporean TV subscription (such as StarHub or Singtel), you will not find the US Fox Sports channel broadcasting live NASCAR races. These providers typically carry regional sports networks that focus on football, basketball, and local interests.

    However, there is a nuance. If you have a subscription to a US-based streaming service that includes Fox Sports, you can watch it, provided you can bypass geo-restrictions legally and technically. This leads us to the most viable solutions for Singaporean viewers.

    Watch 2024 Rackley Roofing 200 In Singapore On Fox Sports

    Step-by-Step Guide to Watching NASCAR in Singapore

    Since direct access via local Fox Sports is unlikely, here is a practical, step-by-step approach to ensuring you can watch the race. Please note that this method focuses on legitimate streaming services that offer Fox Sports content.

    Step 1: Choose a Compatible Streaming Service

    You need a service that carries the Fox Sports USA feed. The most popular options include:

    • FuboTV
    • Hulu + Live TV
    • YouTube TV
    • DirecTV Stream

    These platforms require a US payment method and often a US residential address for sign-up.

    Step 2: Ensure Technical Compatibility

    To access these services from Singapore, you must ensure your device and connection are configured correctly.

    1. Device Setup: Use a smart TV, laptop, or mobile device that supports the chosen app.
    2. Network Configuration: Most US streaming services use Geo-IP detection. You may need a reliable premium VPN service that offers dedicated US servers. Note: Always check the Terms of Service of your streaming provider regarding VPN usage.
    3. Time Zone Adjustment: Singapore is 12–13 hours ahead of US Eastern Time. If the race starts at 8:00 PM ET on Friday, it will be 8:00 AM or 9:00 AM SGT on Saturday. Set your calendar alerts accordingly.

    Step 3: Verify the Schedule

    Before subscribing, verify the exact broadcast time. The 2024 Rackley Roofing 200 was scheduled for late May. For future races, always check the official NASCAR schedule to confirm dates and times, as they can shift due to weather or television programming changes.

    Comparison of Viewing Options

    To help you decide the best route, here is a comparison of available methods for viewers in Singapore.

    FeatureUS Cable/Satellite (via VPN)International Sports Packages (e.g., beIN)NASCAR Official Pass
    Availability in SGLow (Requires Workarounds)Medium (Check Local Listings)High (Global Access)
    CostHigh ($70+/month)VariableModerate (~$100/year)
    Live QualityHD/4KHDHD
    Ease of AccessDifficultEasyVery Easy
    Fox Sports FeedYesNo (Usually different commentary)No (In-car cameras only)

    Note: NASCAR Official Pass does not typically show the main broadcast feed with commentators due to rights issues, but it offers excellent alternative angles.

    Why Direct Fox Sports Access Is Complicated

    The complexity arises from the fragmented nature of global media rights. In the US, Fox, NBC, TNT, and Amazon Prime Video share NASCAR rights. In Asia, these rights are bundled differently.

    For instance, beIN Sports has historically held rights to various motorsport events in Southeast Asia. However, they may not carry every single Truck Series race live. This discrepancy is why users specifically search to watch 2024 Rackley Roofing 200 In Singapore On Fox Sports—they want the primary US broadcast experience, which is not natively available locally.

    The Role of Digital Streaming

    Digital streaming has democratized access, but it has also tightened geo-fencing. Services like FuboTV invest heavily in technology to detect non-US IPs. This means that simply finding a free stream is not only illegal but often results in poor quality and security risks. Investing in a legitimate subscription is the safest way to enjoy the sport.

    Expert Tips for the Best Viewing Experience

    To maximize your enjoyment of the race from Singapore, consider these professional tips:

    1. Check Internet Speed: Streaming HD content requires a stable connection of at least 25 Mbps. Use a wired Ethernet connection if possible to reduce latency.
    2. Audio Setup: NASCAR is loud. Use a soundbar or headphones to appreciate the engine notes and commentator insights, which are key parts of the Fox Sports broadcast style.
    3. Community Engagement: Join online forums or social media groups during the race. Since you are watching alone or in a small group, engaging with the global fanbase enhances the experience.

    FAQ Section

    1. Is Fox Sports available in Singapore?

    No, the US version of Fox Sports is not available in Singapore through local cable providers. Singapore has its own regional sports channels, but they do not carry the US NASCAR broadcast feed.

    2. Can I use a VPN to watch the 2024 Rackley Roofing 200?

    Technically, yes. A VPN can mask your Singapore IP address and make it appear as if you are in the US. However, you must still subscribe to a US-based streaming service that carries Fox Sports. Be aware that some streaming services actively block known VPN IPs.

    3. What time did the 2024 Rackley Roofing 200 air in Singapore?

    The race aired in the US on Friday evening. Due to the 12-13 hour time difference, it would have been broadcast early Saturday morning in Singapore (typically around 8:00 AM or 9:00 AM SGT).

    4. Are there any free legal ways to watch NASCAR in Singapore?

    There are no consistent free legal streams for live NASCAR races in Singapore. Some highlights may be available on YouTube or the official NASCAR website after the event, but live viewing usually requires a paid subscription.

    5. Does NASCAR TrackPass work in Singapore?

    Yes, NASCAR TrackPass (now part of NASCAR Premium) is available globally. However, it primarily offers in-car cameras, leaderboards, and archives. It generally does not include the live main broadcast feed from Fox Sports due to broadcasting rights restrictions.

    6. Will the 2025 Rackley Roofing 200 be easier to watch?

    Broadcasting deals change periodically. It is advisable to check the latest announcements from NASCAR and local Singaporean sports broadcasters closer to the 2025 season. However, the US-centric nature of Fox Sports means international access will likely remain complex without a US streaming subscription.

    Conclusion

    While the desire to watch 2024 Rackley Roofing 200 In Singapore On Fox Sports is common among expats and fans, the reality involves navigating geo-restrictions and understanding international broadcasting rights. Direct access via local Singaporean TV is not possible, but using legitimate US streaming services combined with technical adjustments can provide the solution.

    By following the steps outlined above, you can enjoy the thrill of NASCAR from anywhere in the world. Remember to plan for the time difference and ensure your internet connection is robust.

    If you found this guide helpful, please share it with your fellow racing enthusiasts on social media. Let’s keep the passion for motorsports alive, no matter where we are!

  • How To Get Rid Of Sore On Roof Of Mouth Fast

    How To Get Rid Of Sore On Roof Of Mouth Fast

    Have you ever taken a bite of piping hot pizza only to regret it seconds later? That sharp, stinging pain on the roof of your mouth is not just annoying; it can make eating, drinking, and even speaking uncomfortable. If you are wondering how to get rid of sore on roof of mouth, you are not alone, and there are effective ways to speed up healing and manage the pain at home.

    In this guide, we will explore safe, evidence-based methods to soothe your palate, prevent infection, and help you return to enjoying your favorite foods without fear.

    Why Does the Roof of My Mouth Hurt?

    Before diving into treatments, it helps to understand what you are dealing with. The roof of your mouth, known as the palate, is covered in delicate mucous membranes. These tissues are highly sensitive to temperature, texture, and chemicals.

    Most sores on the palate fall into two categories:

    1. Thermal Burns: Caused by hot food or drinks (like coffee or cheese).
    2. Canker Sores (Aphthous Ulcers): Small, shallow lesions that develop on soft tissues in your mouth or at the base of your gums.

    According to dental health statistics, nearly 20% of the general population suffers from recurrent canker sores. While thermal burns usually heal within 3–7 days, canker sores can linger for up to two weeks if not treated properly. Understanding the cause helps you choose the right remedy.

    Immediate Relief: Cold Therapy and Salt Water

    When pain strikes, your first instinct might be to reach for medication. However, simple home interventions are often the most effective first line of defense.

    1. The Power of Cold

    Cold temperatures constrict blood vessels, which reduces inflammation and numbs the nerve endings responsible for pain.

    • Suck on ice chips: Let them melt slowly over the sore spot.
    • Eat frozen yogurt or popsicles: Avoid acidic flavors like lemon or orange, as citric acid can sting. Stick to mild flavors like vanilla or berry.
    • Drink cold water: Keep your mouth hydrated and cool.

    2. Salt Water Rinse

    This is a gold-standard remedy recommended by dentists worldwide. Salt water is a natural disinfectant that helps reduce bacteria and speeds up the healing process.

    How to make it:

    • Mix 1/2 teaspoon of salt into 1 cup (240 ml) of warm water.
    • Swish the solution around your mouth for 30 seconds.
    • Spit it out. Do not swallow.
    • Repeat this 3–4 times a day, especially after meals.

    Pro Tip: Ensure the water is warm, not hot. Hot water will aggravate the burn or sore.

    Topical Treatments and Over-the-Counter Solutions

    If home remedies aren’t cutting it, over-the-counter (OTC) products can provide stronger relief. These are designed to coat the sore, protecting it from further irritation while it heals.

    Honey: Nature’s Healer

    Raw honey has antibacterial and anti-inflammatory properties. A study published in the Journal of Clinical and Diagnostic Research found that honey could significantly reduce the size and pain of oral ulcers compared to standard treatments.

    • Application: Dab a small amount of raw honey directly onto the sore using a clean cotton swab. Leave it for a few minutes before rinsing gently.

    OTC Gels and Pastes

    Look for products containing benzocaine or hydrogen peroxide.

    • Benzocaine: Acts as a local anesthetic to numb the area temporarily.
    • Hydrogen Peroxide Rinses: Help clean the sore and reduce bacterial load.
    Product TypeBest ForFrequency
    Ice/Cold FoodsImmediate pain reliefAs needed
    Salt Water RinseCleaning & Healing3-4 times daily
    HoneyNatural antibacterial action2-3 times daily
    Benzocaine GelNumbing severe painUp to 4 times daily
    How To Get Rid Of Sore On Roof Of Mouth

    What to Avoid: Foods That Worsen the Pain

    Knowing what not to eat is just as important as knowing what remedies to use. Certain foods can irritate the open wound, delaying healing and increasing discomfort.

    • Acidic Foods: Tomatoes, citrus fruits (lemons, oranges, grapefruits), and vinegar-based dressings.
    • Spicy Foods: Chili powder, hot sauce, and curries can cause intense stinging.
    • Crunchy or Sharp Foods: Chips, toast, and nuts can physically scrape the sore, reopening the wound.
    • Very Hot Beverages: Coffee, tea, or soup should be cooled to lukewarm temperatures before consumption.

    Instead, opt for a soft diet. Think mashed potatoes, smoothies, scrambled eggs, and oatmeal. These foods require minimal chewing and are gentle on the palate.

    When to See a Doctor: Red Flags

    While most sores on the roof of the mouth are benign and self-limiting, some symptoms indicate a more serious underlying issue. You should consult a healthcare provider if:

    1. The sore does not heal after two weeks.
    2. You have a high fever accompanying the sore.
    3. The pain is so severe that you cannot drink fluids, leading to dehydration.
    4. You notice white patches that cannot be wiped away (could indicate oral thrush or leukoplakia).
    5. The sore bleeds easily or grows in size.

    For more detailed information on oral conditions, you can refer to reputable medical resources such as Wikipedia’s page on Mouth Ulcers to understand the broader medical context.

    Preventing Future Sores

    Prevention is always better than cure. Here are some strategies to keep your palate healthy:

    • Let Food Cool Down: Wait at least 2–3 minutes after taking food out of the microwave or oven. Test the temperature with your lip before taking a bite.
    • Maintain Oral Hygiene: Brush twice a day with a soft-bristled toothbrush. Avoid toothpastes containing sodium lauryl sulfate (SLS), as some studies suggest SLS may trigger canker sores in sensitive individuals.
    • Manage Stress: High stress levels weaken the immune system, making you more prone to outbreaks. Practice mindfulness, yoga, or adequate sleep.
    • Check Your Diet: Deficiencies in Vitamin B12, zinc, folate, and iron are linked to recurrent mouth sores. Consider a balanced diet or supplements if advised by your doctor.

    FAQ: Common Questions About Palate Sores

    1. How long does it take for a burn on the roof of the mouth to heal?

    Minor thermal burns typically heal within 3 to 7 days. The mouth has a rich blood supply, which promotes rapid tissue regeneration. However, deeper burns or infected sores may take up to two weeks.

    2. Can I put aspirin directly on the sore?

    No. This is a common myth. Placing aspirin directly on gum or palate tissue can cause chemical burns due to its acidity, worsening the pain and damaging the tissue further. Always swallow aspirin as directed or use approved topical gels.

    3. Is a sore on the roof of the mouth contagious?

    It depends on the cause. Canker sores and thermal burns are NOT contagious. However, if the sore is caused by the herpes simplex virus (cold sores), it is highly contagious. If you are unsure, avoid sharing utensils or kissing until it heals.

    4. Why do I keep getting sores on the roof of my mouth?

    Recurrent sores may be triggered by stress, hormonal changes, minor injury from brushing or eating, food sensitivities (like chocolate or coffee), or nutritional deficiencies. If they are frequent, keep a food diary to identify triggers.

    5. Does milk help with a burned palate?

    Yes, cold milk can be soothing. It coats the mouth and provides a cooling effect. Additionally, dairy products contain calcium and proteins that may support tissue repair. Ensure the milk is cold, not warm.

    Conclusion

    Dealing with a sore on the roof of your mouth is unpleasant, but it is rarely serious. By understanding how to get rid of sore on roof of mouth through simple steps like cold therapy, salt water rinses, and avoiding irritants, you can significantly reduce your recovery time.

    Remember, patience is key. Your mouth is one of the fastest-healing parts of your body, but it needs a clean and calm environment to do its job. If symptoms persist beyond two weeks, do not hesitate to seek professional dental advice.

    Found this guide helpful? Share it with friends and family on social media so they can find relief too! Your next meal doesn’t have to be painful.

  • Is The Roof of Your Mouth Supposed to Be Flat?

    Is The Roof of Your Mouth Supposed to Be Flat?

    Have you ever run your tongue along the top of your mouth and wondered about its shape? It is a common curiosity, especially if you notice bumps or ridges that seem unusual. Many people ask, “Is the roof of your mouth supposed to be flat?” because they are unsure what constitutes normal oral anatomy versus a potential health concern.

    The short answer is no, the roof of your mouth is not supposed to be perfectly flat. In fact, a completely smooth palate is often an anomaly rather than the norm. Understanding the natural contours of your hard and soft palate can help you distinguish between healthy anatomical features and signs that require professional dental attention.

    In this comprehensive guide, we will explore the intricate structure of your palate, explain why it has ridges, and identify when changes in its shape might signal a problem. By the end of this article, you will have a clear understanding of what is normal for your oral health.

    Understanding the Natural Anatomy of Your Palate

    To answer whether the roof of your mouth should be flat, we first need to look at what makes up this area. The roof of your mouth, medically known as the palate, is divided into two distinct sections: the hard palate and the soft palate.

    The Hard Palate

    The hard palate is the bony front part of the roof of your mouth. It separates your oral cavity from your nasal cavity. If you run your tongue along this area, you will likely feel a firm, rigid surface. However, it is rarely smooth. Most adults have transverse palatine folds, also known as palatal rugae. These are the irregular ridges or wrinkles located just behind your upper front teeth.

    These rugae serve a functional purpose. They help grip food against the tongue during chewing and swallowing, preventing food from slipping back too quickly. According to general anatomical standards, having between 3 to 5 prominent ridges on each side is considered typical.

    The Soft Palate

    Behind the hard palate lies the soft palate. This area is made of muscle and tissue, lacking bone. It is smoother than the hard palate but still has texture. The soft palate plays a crucial role in speech and swallowing by closing off the nasal passages when you swallow.

    FeatureHard PalateSoft Palate
    CompositionBone covered by mucous membraneMuscle and connective tissue
    TextureFirm, often with ridges (rugae)Softer, smoother, flexible
    FunctionChewing support, separation from noseSpeech, swallowing, breathing
    SensationLess sensitive to touchHighly sensitive

    If you are wondering is the roof of your mouth supposed to be flat, remember that the hard palate has natural bumps, while the soft palate is relatively smoother but still curved. A perfectly flat, featureless hard palate is uncommon.

    Why Does the Roof of My Mouth Have Bumps?

    Many patients visit dentists concerned about the bumps on their palate, fearing they are growths or tumors. In most cases, these are normal anatomical structures.

    Palatal Rugae

    As mentioned earlier, palatal rugae are the most common reason for a “bumpy” feeling. They are unique to each individual, much like fingerprints. Their presence is a sign of normal development. They do not change significantly throughout adulthood unless there is trauma or significant orthodontic movement.

    Torus Palatinus

    Another common cause of a bump or raised area is a torus palatinus. This is a benign bony growth that occurs in the midline of the hard palate. It is not a tumor and is not cancerous. Studies suggest that torus palatinus affects approximately 20% to 30% of the population, with higher prevalence in certain ethnic groups.

    While a torus palatinus can make the roof of the mouth feel less flat and more domed or lumpy, it is generally harmless. It usually requires no treatment unless it interferes with denture fitting or causes ulceration due to trauma from hard foods.

    For more detailed information on oral anatomical variations, you can refer to resources such as Wikipedia’s page on the Palate, which provides extensive diagrams and medical definitions.

    When Should You Be Concerned About Palate Shape?

    While a non-flat palate is normal, certain changes or symptoms warrant a visit to your dentist or doctor. Here are some red flags to watch for:

    • Sudden Changes: If the shape of your palate changes rapidly over days or weeks.
    • Pain or Tenderness: Normal rugae or torus palatinus should not be painful. Persistent pain could indicate an infection, abscess, or other issue.
    • Sores or Ulcers: Any sore that does not heal within two weeks should be evaluated.
    • Color Changes: White patches (leukoplakia), red patches (erythroplakia), or dark spots may indicate precancerous conditions or infections like thrush.
    • Difficulty Swallowing or Speaking: If the structure of your palate seems to interfere with basic functions.

    It is important to differentiate between normal anatomical variance and pathological changes. Regular dental check-ups are the best way to monitor these changes.

    Is The Roof Of Your Mouth Supposed To Be Flat

    Common Conditions That Affect the Roof of the Mouth

    Several conditions can alter the appearance or sensation of the roof of your mouth. Understanding these can help alleviate anxiety when you notice something unusual.

    1. Canker Sores (Aphthous Ulcers)

    These are small, shallow lesions that develop on the soft tissues in your mouth or at the base of your gums. They can appear on the soft palate and are often painful. They typically heal on their own within one to two weeks.

    2. Oral Thrush

    Caused by an overgrowth of the fungus Candida albicans, oral thrush appears as creamy white lesions on your tongue or inner cheeks. It can spread to the roof of your mouth, causing a cottony feeling and loss of taste. This is more common in infants, the elderly, and those with compromised immune systems.

    3. Burns from Hot Food

    Accidentally burning the roof of your mouth with hot pizza or coffee is common. This can cause temporary swelling, blistering, or peeling skin, making the palate feel rough or uneven. This usually resolves within a few days.

    4. Nasopalatine Duct Cyst

    This is a rare, non-cancerous cyst that develops in the midline of the palate. It may cause a swelling that feels like a fluid-filled bump. While often asymptomatic, it may require surgical removal if it becomes infected or large.

    How to Maintain a Healthy Palate

    Keeping the roof of your mouth healthy is part of overall oral hygiene. Here are some practical steps:

    1. Brush Gently: When brushing your teeth, avoid scrubbing the roof of your mouth aggressively. Use a soft-bristled toothbrush.
    2. Stay Hydrated: Dry mouth can increase the risk of infections and irritation. Drink plenty of water throughout the day.
    3. Avoid Irritants: Limit consumption of very hot foods and beverages. Reduce tobacco and alcohol use, as these are major risk factors for oral cancers.
    4. Regular Dental Visits: Schedule check-ups every six months. Your dentist can spot abnormalities early.

    FAQ Section

    1. Is it normal for the roof of my mouth to feel rough?

    Yes, it is entirely normal. The hard palate contains palatal rugae, which are natural ridges that create a rough or textured surface. This texture helps with chewing and speech.

    2. Can braces change the shape of the roof of my mouth?

    Orthodontic treatment can slightly alter the position of the teeth and the surrounding bone, but it generally does not change the fundamental shape of the hard palate. However, expanders used in orthodontics can widen the palate, potentially making it feel different temporarily.

    3. What does a healthy roof of the mouth look like?

    A healthy palate should be pink in color, similar to the rest of your gum tissue. It may have ridges (rugae) on the front half and be smoother on the back half. There should be no sores, white patches, or persistent swelling.

    4. Why does the roof of my mouth hurt after eating spicy food?

    Spicy foods contain capsaicin, which can irritate the sensitive mucous membranes of the palate. This can cause temporary inflammation or a burning sensation. Rinsing with milk or water can help soothe the irritation.

    5. Can stress cause bumps on the roof of my mouth?

    Stress itself does not directly cause structural bumps, but it can weaken the immune system, leading to outbreaks of canker sores or cold sores. These can appear on the palate and feel like painful bumps.

    6. Is a high arch in the roof of the mouth a problem?

    A high-arched palate is a common anatomical variation. In most cases, it is not a problem. However, in some instances, it may be associated with certain genetic conditions or affect speech and breathing. If you have concerns, consult a healthcare provider.

    Conclusion

    So, is the roof of your mouth supposed to be flat? The answer is a definitive no. A healthy palate is characterized by natural ridges, curves, and textures that play vital roles in eating and speaking. While a completely smooth palate is rare, significant changes, pain, or discoloration should never be ignored.

    By understanding the normal anatomy of your mouth, you can better monitor your oral health and identify when professional care is needed. Remember, regular dental check-ups are your best defense against oral health issues.

    If you found this article helpful, please share it with friends and family who might be curious about their oral anatomy. Staying informed is the first step toward better health!