Blog

  • What Is The Angle Of A 6 12 Pitch Roof?

    What Is The Angle Of A 6 12 Pitch Roof?

    Have you ever stood in front of a house, looked up at its roof, and wondered exactly how steep it is? For homeowners, contractors, and DIY enthusiasts alike, understanding roof geometry is crucial for everything from material estimation to safety planning. If you are specifically asking, “What is the angle of a 6 12 pitch roof,“ you are looking at one of the most common and versatile slopes in American residential construction.

    In this guide, we will break down the mathematics, practical implications, and design considerations of a 6/12 pitch. Whether you are planning a new build, replacing shingles, or simply satisfying your curiosity, this article provides the precise data and expert insights you need.

    Understanding the Basics: What Does 6/12 Mean?

    Before we dive into the specific angle, it is essential to understand the terminology. In the United States, roof pitch is expressed as a ratio of rise to run.

    • Rise: The vertical height the roof gains.
    • Run: The horizontal distance covered.

    A 6/12 pitch means that for every 12 inches of horizontal distance (run), the roof rises 6 inches vertically. This is often written as 6:12 or 6/12. It is not a percentage, nor is it directly an angle in degrees—yet. To get the angle, we must use trigonometry.

    The Mathematical Calculation

    To find the angle in degrees, we use the inverse tangent function (arctan). The formula is:

    Angle=arctan⁡(RiseRun)Angle=arctan(RunRise​)

    For a 6/12 pitch: Angle=arctan⁡(612)=arctan⁡(0.5)Angle=arctan(126​)=arctan(0.5)

    When you calculate this, the result is approximately 26.57 degrees.

    So, to answer the primary question directly: The angle of a 6 12 pitch roof is 26.57°.

    This specific angle places the roof in the “medium slope” category. It is steep enough to shed water and snow effectively but gentle enough to be walked on with proper safety precautions.

    Why Is the 6/12 Pitch So Popular in the US?

    The 6/12 pitch is arguably the “Goldilocks” of roofing slopes—not too flat, not too steep. Here is why it dominates the suburban landscape across the United States.

    1. Optimal Water Drainage

    Flat roofs (low slope) are prone to pooling water, which can lead to leaks and structural damage over time. A 26.57-degree angle ensures that rainwater runs off quickly. According to building science principles, gravity does the heavy lifting here, reducing the reliance on sealants alone to keep the home dry.

    2. Snow Shedding Capabilities

    For homeowners in regions with moderate snowfall, such as the Midwest or Northeast, a 6/12 pitch is highly effective. While extremely heavy snow might still accumulate, the slope is generally sufficient to allow snow to slide off before it becomes dangerously heavy. This reduces the risk of roof collapse compared to flatter pitches like 3/12 or 4/12.

    3. Attic Space and Ventilation

    One of the hidden benefits of a 6/12 pitch is the interior volume it creates. Unlike low-slope roofs that offer minimal attic space, a 6/12 roof provides ample room for:

    • Storage boxes and seasonal items.
    • HVAC systems and ductwork.
    • Proper ventilation pathways, which are critical for preventing ice dams and mold growth.

    4. Walkability and Safety

    From a contractor’s perspective, a 6/12 roof is manageable. While OSHA (Occupational Safety and Health Administration) requires fall protection for roofs steeper than 4/12 in many commercial contexts, residential contractors often find a 6/12 pitch stable enough to work on with standard safety harnesses and non-slip footwear. It is not so steep that installation becomes exponentially more dangerous or expensive.

    Comparison: 6/12 Pitch vs. Other Common Pitches

    To help you visualize where the 6/12 stands, let’s compare it to other common residential roof slopes.

    Roof PitchAngle (Degrees)ClassificationBest For
    2/12~9.46°Low SlopeModern minimalist designs, hot climates.
    4/12~18.43°Low-MediumCost-effective builds, mild weather areas.
    6/1226.57°MediumAll-around performance, snow/rain balance.
    8/12~33.69°Medium-HighHeavy snow regions, traditional aesthetics.
    12/1245.00°SteepGothic styles, extreme snow shedding.

    As you can see, the 6/12 pitch sits comfortably in the middle. It offers a significant upgrade in drainage over the 4/12 pitch without the dramatic cost increase associated with the 8/12 or higher pitches.
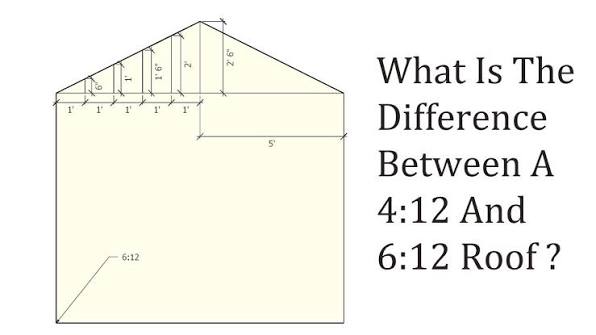
    What Is The Angle Of A 6 12 Pitch Roof

    Material Considerations for a 6/12 Roof

    Not all roofing materials are created equal. The angle of your roof dictates what materials you can safely and effectively use.

    Asphalt Shingles

    This is the most common choice for a 6/12 pitch. Standard asphalt shingles perform excellently at this angle. They are affordable, easy to install, and widely available. Most manufacturers warranty their shingles for pitches between 4/12 and 21/12, making the 6/12 pitch ideal for maximizing product lifespan.

    Metal Roofing

    Metal roofs are increasingly popular for their durability. A 6/12 pitch is suitable for both standing seam metal roofs and metal shingles. The slope ensures that water sheds rapidly, minimizing the chance of corrosion or leakage at the seams.

    Tile and Slate

    While clay tiles and slate are heavier and often associated with steeper roofs (8/12 or higher), they can be used on a 6/12 pitch. However, this requires careful installation with additional underlayment and fastening methods to prevent slippage. Always consult with a structural engineer if switching to heavy materials on an existing frame.

    Expert Note: Always check the manufacturer’s minimum slope requirements. Installing a material on a pitch lower than recommended can void your warranty. For more detailed standards on roofing materials, you can refer to general construction guidelines on Wikipedia.

    Cost Implications: Is a 6/12 Pitch Expensive?

    Cost is always a major factor in roofing decisions. How does a 6/12 pitch affect your budget?

    • Material Costs: Moderate. You use more material than a flat roof, but less than a steep cathedral-style roof.
    • Labor Costs: Reasonable. Because the roof is walkable, laborers can work more efficiently. Steeper roofs require special scaffolding, lift equipment, and slower movement, which drives up labor hours. A 6/12 pitch strikes a balance, keeping labor costs competitive.
    • Maintenance: Lower long-term costs. Due to efficient water shedding, these roofs tend to have fewer leak-related repairs compared to low-slope roofs.

    Step-by-Step: How to Measure Your Roof Pitch

    If you are unsure whether your roof is truly a 6/12, here is how you can verify it safely.

    1. Gather Tools: You will need a level (at least 12 inches long), a tape measure, and a pencil.
    2. Access the Attic: It is safer to measure from inside the attic rather than climbing onto the roof.
    3. Place the Level: Hold the level horizontally against the bottom of a rafter. Ensure the bubble is centered, indicating it is perfectly level.
    4. Measure the Rise: At the 12-inch mark on the level, measure the vertical distance from the bottom of the level to the bottom of the rafter.
    5. Calculate: If the vertical distance is 6 inches, you have a 6/12 pitch. If it is 4 inches, it is a 4/12 pitch.

    Note: If measuring from the outside, ensure you are measuring the structural slope, not just the edge trim.

    FAQ Section

    1. Can I walk on a 6/12 pitch roof?

    Yes, but with caution. A 6/12 pitch (26.57 degrees) is considered walkable by professional roofers using proper safety gear, such as harnesses and rubber-soled shoes. However, for homeowners, it is generally recommended to avoid walking on the roof unless necessary, as it can still be slippery when wet or dusty.

    2. Is a 6/12 pitch good for solar panels?

    Absolutely. A 6/12 pitch is often considered ideal for solar panel installation in many parts of the US. The angle allows for good sun exposure throughout the day, and the slope helps keep the panels clean by allowing rain to wash away dust and debris.

    3. How much does a 6/12 roof cost compared to a 4/12?

    Generally, a 6/12 roof may cost slightly more in materials due to the increased surface area (about 11% more surface area than a flat plane). However, the difference in labor is minimal. The total cost difference is usually marginal, but the performance benefits of the 6/12 often outweigh the small price increase.

    4. What is the minimum pitch for asphalt shingles?

    Most asphalt shingle manufacturers require a minimum pitch of 2/12 or 4/12, depending on the specific product and local building codes. A 6/12 pitch is well above the minimum, ensuring optimal performance and warranty validity.

    5. Does a 6/12 pitch require special ventilation?

    No special ventilation is required solely because of the 6/12 pitch, but adequate ventilation is crucial for any roof. The ample attic space provided by a 6/12 slope makes it easier to install soffit vents, ridge vents, and baffles, which help regulate temperature and moisture.

    6. How do I convert 6/12 pitch to percentage?

    To convert roof pitch to a percentage, divide the rise by the run and multiply by 100. For a 6/12 pitch: (6/12)×100=50%(6/12)×100=50%. So, a 6/12 pitch is a 50% slope.

    Conclusion

    Understanding what is the angle of a 6 12 pitch roof is more than just a math exercise; it is a key component of smart home ownership and construction planning. At 26.57 degrees, this pitch offers a perfect blend of aesthetic appeal, functional drainage, and cost-effectiveness. It is steep enough to handle rain and snow efficiently while remaining safe and affordable to build and maintain.

    Whether you are building a new home in the suburbs or replacing an aging roof, the 6/12 pitch remains a top-tier choice for American homeowners. It balances the extremes, providing durability without the premium price tag of steeper designs.

    Did you find this guide helpful? Share this article with your friends, family, or contractor to help them make informed roofing decisions. Don’t forget to bookmark this page for future reference on all things roofing!
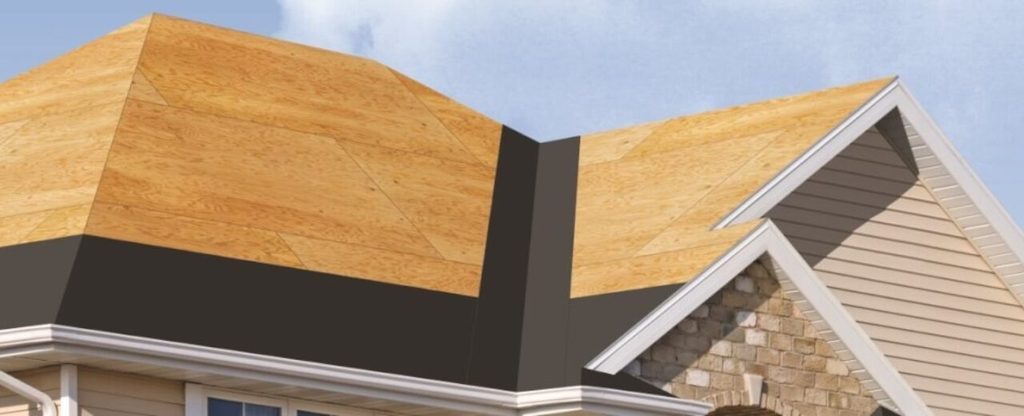
  • What Is An Ice And Water Shield On A Roof?

    What Is An Ice And Water Shield On A Roof?

    Have you ever woken up to a mysterious water stain on your ceiling after a heavy snowstorm, wondering where the leak came from despite having a “new” roof? It is a frustrating and costly experience that many homeowners in colder climates face, often due to a missing or failed protective layer. Understanding what is an ice and water shield on a roof is the first step toward preventing these damaging leaks and ensuring your home stays dry and secure during harsh winter weather.

    The Critical Role of Ice and Water Shield

    When we talk about roofing, most people think immediately of shingles. Shingles are the visible armor of your home, designed to shed rain and snow. However, shingles alone are not enough to guarantee a watertight seal, especially in areas prone to freezing temperatures. This is where the ice and water shield comes into play.

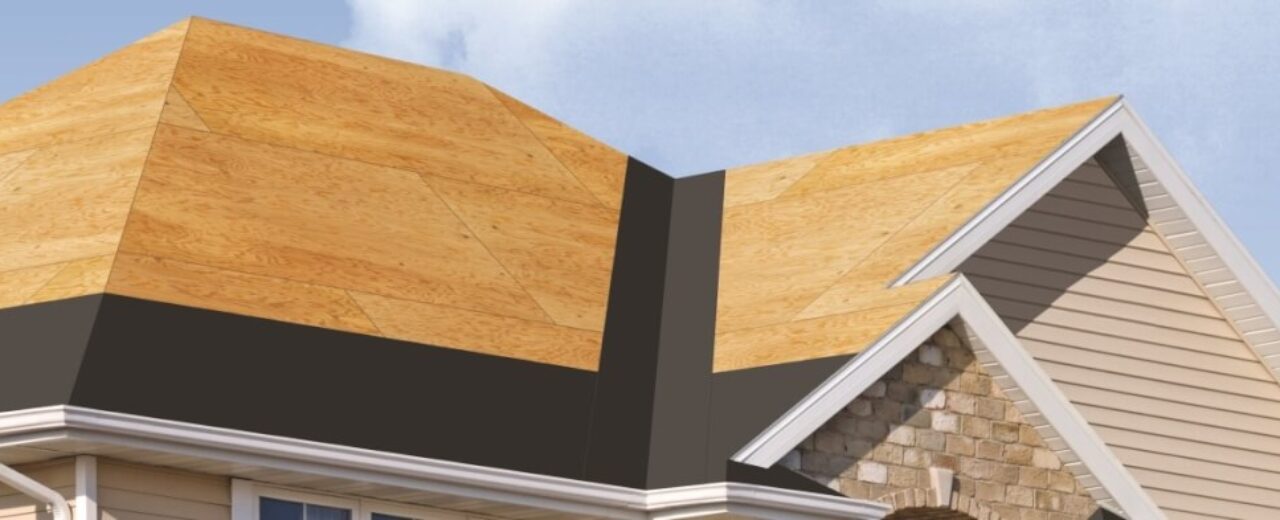
    An ice and water shield is a self-adhering, rubberized asphalt membrane installed directly onto the roof deck (the wooden surface beneath the shingles). Unlike traditional felt underlayment, which is merely nailed down, this shield sticks aggressively to the wood. Its primary purpose is to create an impermeable barrier against water infiltration caused by ice dams and wind-driven rain.

    According to industry standards, this material is essential in specific zones of your roof. While it can be used across the entire roof surface, building codes typically mandate its use in “vulnerable areas.” These include:

    • Eaves (the edge of the roof)
    • Valleys (where two roof slopes meet)
    • Around chimneys and skylights
    • Wall-to-roof intersections

    The logic is simple: if water gets past your shingles, the shield stops it from rotting your wood decking and ruining your insulation.

    Why Do You Need It? Understanding Ice Dams

    To truly appreciate the value of this product, you must understand the enemy: ice dams.

    An ice dam forms when heat escapes from your attic, warming the roof deck. This causes snow on the upper part of the roof to melt. As the water runs down toward the colder eaves (the overhang), it refreezes. Over time, this builds up a ridge of ice.

    Here is the dangerous part: subsequent melting snow has nowhere to go. It backs up behind the ice ridge, seeping under the shingles. Without protection, this water soaks into the roof deck, leading to:

    1. Rotting plywood or OSB sheathing.
    2. Mold growth in the attic.
    3. Damaged drywall and paint inside your home.
    4. Compromised structural integrity over time.

    A standard felt underlayment might slow this process, but it cannot stop it. Felt is porous and relies on gravity to shed water. When water is pushed upward by pressure from an ice dam, felt fails. An ice and water shield, however, seals around nail holes and adheres tightly, blocking that upward-moving water.

    Ice and Water Shield vs. Traditional Felt Underlayment

    Many homeowners ask if they can just use cheaper roofing felt instead. While felt has its place, it is not a substitute for a rubberized membrane in high-risk areas. Let’s look at the differences.

    FeatureIce and Water ShieldTraditional Felt Underlayment
    MaterialRubberized asphalt with polymer modifiersAsphalt-saturated organic or fiberglass mat
    AdhesionSelf-adhering (sticks to deck)Mechanically fastened (nailed/stapled)
    Water ResistanceWaterproof (impermeable)Water-resistant (permeable)
    Nail SealingSeals around nails automaticallyDoes not seal around nails
    Best Use CaseEaves, valleys, penetrationsField of the roof (in mild climates)
    CostHigherLower

    As you can see, the shield offers superior protection. The ability to seal around nails is a game-changer. Every time a roofer nails a shingle, they puncture the underlayment. With felt, those are potential entry points for water. With an ice and water shield, the rubberized material flows around the nail shaft, creating a watertight seal.

    What Is An Ice And Water Shield On A Roof

    Where Should It Be Installed?

    You do not necessarily need to cover your entire roof with ice and water shield, although doing so provides maximum protection. Most building codes in the United States, influenced by the International Residential Code (IRC), require it in specific zones.

    1. The Eaves

    This is the most critical area. Codes typically require the shield to extend from the edge of the roof inward to a point at least 24 inches inside the exterior wall line of the house. This covers the area where ice dams are most likely to form.

    2. Roof Valleys

    Valleys channel massive amounts of water. If debris blocks a valley, water can pool and seep under shingles. Installing the shield here provides a secondary line of defense.

    3. Penetrations

    Any object that pierces the roof plane is a leak risk. This includes:

    • Chimneys
    • Skylights
    • Vent pipes
    • Dormer walls

    For more detailed technical definitions and historical context on roofing materials, you can refer to Wikipedia’s entry on Roofing.

    How Is It Installed? A Step-by-Step Overview

    While you should always hire a licensed professional for roofing work, understanding the process helps you verify that the job is done correctly.

    1. Preparation: The roof deck must be clean, dry, and free of protruding nails. Any old underlayment should be removed.
    2. Temperature Check: Ice and water shields require warmth to adhere properly. Most manufacturers recommend installation when the ambient temperature is above 40°F (4°C). If it is colder, the adhesive may not stick, requiring manual sealing or heating.
    3. Starting at the Eave: The first row is installed along the drip edge. It is crucial to align it straight.
    4. Overlapping: Subsequent rows must overlap the previous one. Typically, a 2-inch to 4-inch overlap is required, but you must check the specific manufacturer’s instructions.
    5. Pressing Down: Once placed, the membrane must be firmly pressed down to ensure full contact with the wood deck. Some roofers use a J-roller for this.
    6. Sealing Edges: In valleys and around penetrations, additional patches or sealants may be applied to ensure no gaps exist.

    Common Myths About Ice and Water Shields

    There is a lot of misinformation in the roofing industry. Let’s clear up a few common myths.

    Myth 1: It prevents ice dams from forming. Fact: No. Ice and water shields do not stop ice dams. They only prevent the water from those dams from entering your home. To prevent ice dams, you need proper attic insulation and ventilation.

    Myth 2: It lasts forever. Fact: While durable, these membranes are part of the roofing system. If you replace your shingles, you should inspect the shield. If it is brittle or damaged, it needs replacement.

    Myth 3: All shields are the same. Fact: There are different grades. Some are designed for steep slopes, while others are for low-slope applications. Some have granulated surfaces for better traction during installation, while others are smooth. Always use the product specified by your shingle manufacturer to maintain warranty coverage.

    FAQ Section

    1. How long does an ice and water shield last?

    Generally, an ice and water shield lasts as long as the shingles above it, typically 20 to 30 years. However, its effectiveness can degrade if exposed to UV light for extended periods before shingles are installed. It should be covered by shingles within a few days of installation.

    2. Can I install it myself?

    While it is physically possible, it is not recommended for DIYers. Roofing is dangerous, and improper installation (such as poor overlapping or installing in cold weather without proper adhesion techniques) can void warranties and lead to leaks. Professional installation ensures the seal is perfect.

    3. Does it make the roof hotter?

    No. The shield is installed beneath the shingles and does not significantly impact the thermal performance of the roof. In fact, by preventing moisture intrusion, it helps maintain the efficiency of your attic insulation.

    4. Is it required by law?

    In many US states with significant snowfall, yes. Building codes based on the IRC mandate its use in eaves and valleys. Even if not legally required in your area, it is a wise investment for any home in a climate that experiences freezing rain or snow.

    5. What happens if I don’t use it?

    Without it, your home is vulnerable to water damage from ice dams and wind-driven rain. This can lead to expensive repairs involving drywall replacement, mold remediation, and structural wood repair. The cost of the shield is a fraction of the cost of repairing water damage.

    Conclusion

    Understanding what is an ice and water shield on a roof is crucial for any homeowner who wants to protect their investment. It is not just an optional upgrade; it is a vital component of a modern roofing system, especially in regions with winter weather. By creating a watertight seal around nails and blocking back-up water from ice dams, it saves you from the headache and expense of interior water damage.

    If you are planning a roof replacement or new construction, insist on high-quality ice and water shield in all vulnerable areas. Your future self—and your dry ceiling—will thank you.

    Found this guide helpful? Share it with your friends and neighbors on social media to help them protect their homes too!

  • Is It Ok To Put A Metal Roof Over Shingles?

    Is It Ok To Put A Metal Roof Over Shingles?

    Have you been staring at your aging asphalt shingles, dreading the mess, cost, and hassle of a full tear-off? You are not alone; many homeowners look for shortcuts that save time without compromising quality. The burning question on everyone’s mind is: Is it ok to put a metal roof over shingles? The short answer is yes, but with significant caveats that can make or break your investment.

    In this comprehensive guide, we will dive deep into the structural, financial, and practical implications of installing metal roofing directly over existing shingles. We will help you decide if this method is right for your home, ensuring you avoid costly mistakes while maximizing the lifespan of your new roof.

    Why Consider Installing Metal Over Shingles?

    Before we get into the technical “how-to,” let’s address the “why.” For many US homeowners, the primary driver is convenience. Removing old asphalt shingles is a labor-intensive process that generates massive amounts of waste. By leaving the old layer in place, you skip the demolition phase entirely.

    However, it is not just about laziness. There are legitimate benefits to this approach, provided your home is a good candidate. Let’s explore the advantages and disadvantages to give you a balanced view.

    The Pros: Speed and Savings

    • Cost Efficiency: You save money on labor costs associated with tear-off and dumpster fees for debris disposal. According to industry estimates, skipping the tear-off can reduce total project costs by 10–15%.
    • Time-Saving: Without the removal process, installation can be completed in half the time. This means less exposure to the elements for your home’s interior.
    • Added Insulation: The existing shingle layer acts as an additional thermal barrier, potentially improving your home’s energy efficiency slightly.
    • Less Mess: No nails flying everywhere, no dust clouds, and no heavy dumpsters blocking your driveway for weeks.

    The Cons: Hidden Risks

    • Trapped Moisture: If there is any existing water damage or rot, covering it up traps the problem. This can lead to accelerated decay of the roof deck.
    • Weight Load: While metal is light, adding it to existing shingles adds weight. Most modern homes can handle this, but older structures might need an engineering assessment.
    • Voided Warranties: Some metal roofing manufacturers will void their warranty if installed over more than one layer of existing roofing. Always check the fine print.
    • Aesthetic Issues: If the old shingles are curled or uneven, the new metal roof may not lie flat, leading to visible waves or “oil-canning” effects.

    Critical Pre-Installation Checks

    You cannot simply screw metal panels onto old shingles and hope for the best. Proper preparation is vital. Before you hire a contractor or start a DIY project, you must verify three key conditions.

    1. Structural Integrity Assessment

    Your roof deck (the wood beneath the shingles) must be solid. If the previous roof had leaks, the plywood or OSB sheathing might be soft or rotted.

    • Action Step: Walk the attic space. Look for dark stains, sagging beams, or daylight coming through cracks.
    • Rule of Thumb: If more than 10% of the deck shows signs of rot, a full tear-off is recommended to replace the damaged wood.

    2. Local Building Codes

    Building codes vary significantly across the United States. Some municipalities strictly prohibit more than two layers of roofing material.

    • Check First: Contact your local building department. Ignoring code can result in fines or issues when selling your home later.
    • Reference: For general standards on roofing materials and safety, you can refer to guidelines outlined by organizations like the International Code Council or basic material properties found on Wikipedia.

    3. Condition of Existing Shingles

    The existing shingles must be relatively flat. If they are severely curled, buckled, or missing in large patches, they do not provide a stable base.

    • Fix It First: Replace any missing shingles and nail down any lifted edges before installing the metal underlayment.
    Is It Ok To Put A Metal Roof Over Shingles

    Step-by-Step Installation Overview

    If you have cleared the checks above, here is how the process generally works. Note that this is a simplified overview; professional installation is highly recommended for warranty purposes.

    1. Prepare the Surface: Clean the roof of moss, debris, and loose granules. Secure any loose shingles with roofing nails.
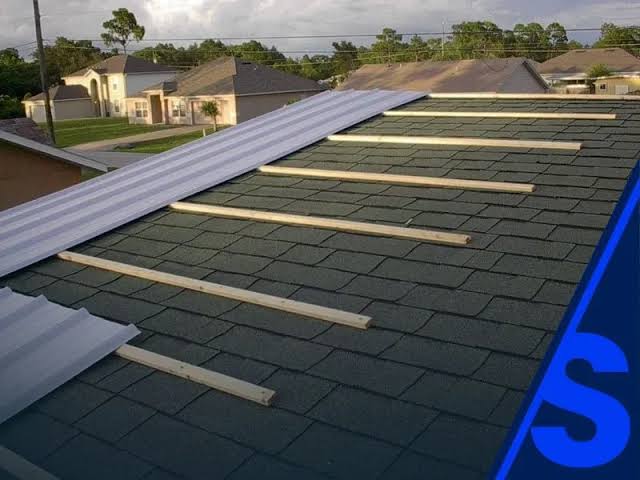
    2. Install Furring Strips (Battens): This is crucial. You should never install metal panels directly against asphalt shingles. Install horizontal or vertical wooden furring strips (usually 1x4s) over the shingles. This creates an air gap that allows moisture to escape and prevents heat buildup.
    3. Apply Underlayment: Place a high-quality synthetic underlayment over the battens or directly over the shingles (depending on the specific system used). This acts as a secondary water barrier.
    4. Install Metal Panels: Start from the eave and work your way up. Use screws with rubber washers designed specifically for metal roofing. Ensure screws penetrate into the roof deck, not just the shingles.
    5. Flashings and Trim: Pay extra attention to valleys, chimneys, and vents. Proper flashing is where most leaks occur in overlay jobs.

    Metal Roof vs. Tear-Off: A Comparison

    To help you visualize the trade-offs, here is a quick comparison table.

    FeatureMetal Over ShinglesFull Tear-Off & Replace
    CostLower (Save on labor/disposal)Higher
    TimeFast (1-3 days)Slow (3-7 days)
    InspectionCannot inspect deck fullyFull deck inspection possible
    WarrantyMay be limitedFull manufacturer warranty
    LongevityGood (if prep is done right)Excellent (best practice)

    People Also Ask: Common Questions Answered

    Does putting metal over shingles void the warranty?

    It depends on the manufacturer. Many top-tier metal roofing brands require a clean deck for their premium warranties. However, some offer specific “retrofit” warranties for overlay installations. Always read the warranty documentation before purchasing materials.

    Will the extra weight damage my house?

    In most cases, no. Asphalt shingles weigh about 2–3 pounds per square foot, while standing seam metal roofs weigh about 1–1.5 pounds per square foot. Even combined, the load is typically well within the design limits of standard residential framing. However, if you live in an area with heavy snow loads, consult a structural engineer.

    Can I do this myself (DIY)?

    While technically possible, it is not recommended for beginners. Metal roofing requires precise cutting, flashing details, and understanding of thermal expansion. A mistake in flashing can lead to leaks that are difficult to trace because the water is trapped between two layers.

    How long will a metal roof last over shingles?

    A properly installed metal roof can last 40–70 years. However, if moisture is trapped underneath due to poor ventilation or existing leaks, the lifespan could be reduced. Ensuring proper airflow via furring strips is key to maximizing longevity.

    What type of metal roof is best for overlays?

    Standing seam metal roofs are generally preferred over corrugated or exposed-fastener panels for overlays. They are more durable, handle thermal expansion better, and have fewer penetration points where leaks can occur.

    Expert Insight: The Importance of Ventilation

    One of the biggest myths is that metal roofs “breathe.” They do not. Asphalt shingles also do not breathe. When you combine them, you create a sandwich that can trap heat and moisture.

    According to roofing experts, the single most important factor in a successful overlay is ventilation. By using furring strips (battens), you create a channel for air to flow from the eave to the ridge. This airflow prevents condensation from forming on the underside of the metal panels, which could otherwise drip onto your shingles and cause rot.

    Pro Tip: If your current attic ventilation is poor, fix it before installing the new roof. Add ridge vents or soffit vents to ensure your attic stays dry and cool.

    Conclusion

    So, is it ok to put a metal roof over shingles? Yes, it is a viable, cost-effective option for many homeowners, provided the existing roof is in decent condition and local codes allow it. It offers speed, savings, and added insulation. However, it requires meticulous preparation, particularly regarding ventilation and flashing, to avoid trapping moisture.

    If your current shingles are flat, dry, and securely attached, an overlay can be a smart move. But if you suspect hidden rot or major structural issues, bite the bullet and pay for the tear-off. Your future self will thank you for the peace of mind.

    Found this guide helpful? Share it with your neighbors who might be considering a roof upgrade! Don’t forget to bookmark this page for future reference as you plan your home improvement projects.

  • Red Roof Inn Rancho Cordova: Budget Stay Guide

    Red Roof Inn Rancho Cordova: Budget Stay Guide

    Are you planning a trip to the Sacramento area but worried about skyrocketing hotel costs? Finding a clean, reliable, and affordable place to rest shouldn’t be a stressor on your vacation or business trip budget. If you are searching for Red Roof Inn Rancho Cordova Sacramento Rancho Cordova Ca 95670, you have likely identified a strategic location that balances cost-effectiveness with convenient access to major highways and local attractions.

    In this comprehensive guide, we will break down everything you need to know about staying at this specific property. From room amenities and pet policies to nearby dining options and safety tips, we aim to provide you with the insider knowledge needed to make an informed decision. Whether you are passing through on Interstate 80 or visiting family in the suburbs, this review covers the essentials to ensure your stay is comfortable and hassle-free.

    Why Choose Red Roof Inn in Rancho Cordova?

    Rancho Cordova is a vibrant suburb located east of Sacramento. It serves as a crucial hub for travelers because it offers easier access to freeways compared to downtown Sacramento, often resulting in less traffic congestion. The Red Roof Inn Rancho Cordova Sacramento Rancho Cordova Ca 95670 is situated strategically to leverage this advantage.

    Strategic Location Benefits

    The primary appeal of this location is its proximity to Interstate 80. For road trippers heading toward Lake Tahoe or coming from the Bay Area, this exit provides a perfect midpoint stop. Additionally, being in Rancho Cordova means you are close to:

    • Sacramento International Airport (SMF): Approximately a 20-25 minute drive.
    • Downtown Sacramento: About 15 minutes away, allowing easy access to the State Capitol and Golden 1 Center without paying downtown parking fees.
    • Local Employment Hubs: Many businesses in the Folsom and Roseville areas find this location convenient for temporary housing during relocation or projects.

    Affordability Meets Convenience

    One of the core value propositions of the Red Roof Inn brand is affordability. In a region where hotel prices can surge during peak tourist seasons or major events in Sacramento, this property remains a budget-friendly anchor. You get the essential comforts—clean bedding, private bathrooms, and Wi-Fi—without the frills that inflate prices at luxury chains.

    What Amenities Can You Expect?

    When booking a budget hotel, managing expectations is key. However, “budget” does not have to mean “bare minimum.” Here is what guests typically experience at this location.

    Room Features

    Most rooms at the Rancho Cordova location are designed for functionality. You can expect:

    • Comfortable Bedding: Red Roof Inn has invested in upgrading their mattresses in recent years to ensure better sleep quality.
    • Flat-Screen TVs: Equipped with cable channels for evening entertainment.
    • Work Desks: Ideal for business travelers who need a quick space to check emails.
    • Climate Control: Individual AC/heating units allow you to customize the room temperature, which is vital given Sacramento’s hot summers.

    Connectivity and Work Needs

    In today’s digital age, Wi-Fi is not a luxury; it is a necessity. The property offers free high-speed Wi-Fi. While it may not be fiber-optic speed suitable for heavy video editing, it is generally robust enough for streaming movies, checking emails, and browsing social media.

    Pro Tip: If you require a guaranteed strong signal for a video conference, request a room closer to the main lobby or bring a personal hotspot as a backup.

    Pet-Friendly Policy

    One of the standout features of this brand is its pet policy. Unlike many hotels that charge exorbitant fees or restrict pet sizes, Red Roof Inn is known for being pet-friendly. Usually, one well-behaved pet stays free per room. This makes the Red Roof Inn Rancho Cordova Sacramento Rancho Cordova Ca 95670 an excellent choice for families traveling with dogs or cats.

    Note: Always confirm the current pet policy at the time of booking, as terms can change.

    How Does It Compare to Other Local Hotels?

    To help you decide if this is the right fit, let’s look at how it stacks up against competitors in the Rancho Cordova area.

    FeatureRed Roof Inn Rancho CordovaMid-Range Chain (e.g., Holiday Inn)Luxury Hotel (Downtown Sac)
    Price Range$$$$
    Pet PolicyFree (Usually 1 pet)Fee Required ($50-$100)Often Restricted/High Fee
    BreakfastNot Typically IncludedOften IncludedOften Included/Premium
    LocationSuburban/Easy Highway AccessSuburbanUrban/City Center
    Best ForBudget Travelers, Road TripsFamilies, Business LeisureLuxury Seekers, Events

    As shown in the table, if your priority is cost savings and pet accommodation, the Red Roof Inn wins. If you require complimentary breakfast and a pool, you might need to look at mid-range options, but you will pay significantly more.

    Red Roof Inn Rancho Cordova Sacramento Rancho Cordova Ca 95670

    Nearby Attractions and Dining

    Staying at Red Roof Inn Rancho Cordova Sacramento Rancho Cordova Ca 95670 puts you within a short driving distance of several notable spots. You don’t have to eat at fast-food chains every night; the area has diverse culinary options.

    Dining Options Within 5 Miles

    1. Local Cafes: Start your morning with coffee at nearby independent roasters in Rancho Cordova.
    2. Family Restaurants: Chains like Olive Garden and Applebee’s are accessible via Sunrise Boulevard.
    3. Ethnic Cuisine: The area boasts authentic Mexican and Asian fusion restaurants that offer great value.

    Things to Do

    • Ancil Hoffman Park: A beautiful regional park perfect for jogging, picnics, and golf. It’s only a few minutes from the hotel.
    • Sunrise Mall: Located nearby, this is one of the largest shopping centers in the region, offering retail therapy and dining.
    • Sacramento Zoo: A short drive west, making it a great day trip for families with children.

    For more context on the geography and history of the area, you can refer to the Rancho Cordova Wikipedia page. Understanding the local layout can help you plan your daily itineraries more efficiently.

    Tips for a Better Stay Experience

    Even at a budget hotel, small actions can significantly improve your experience. Here is a step-by-step guide to ensuring your stay is smooth.

    1. Book Directly or Use Reputable Aggregators: Check the official Red Roof Inn website first. They often have member discounts that third-party sites do not offer.
    2. Request a Ground Floor Room: If you have heavy luggage or mobility issues, ask for a ground-floor unit. It also allows quicker exit in case of emergencies.
    3. Inspect Upon Entry: Before unpacking, do a quick check of the room. Ensure the locks work, the bathroom is clean, and there are no signs of pests. If anything is amiss, contact the front desk immediately for a room change.
    4. Bring Your Own Toiletries: While basic soap is provided, bringing your own shampoo, conditioner, and toothpaste ensures you have products you trust and prefer.
    5. Use Noise Cancelling Headphones: As with any highway-adjacent hotel, some traffic noise is inevitable. Headphones can help ensure a restful night’s sleep.

    FAQ Section

    Is the Red Roof Inn in Rancho Cordova safe?

    Safety is a top priority for travelers. The Rancho Cordova area is generally considered safe for suburban standards. The hotel participates in standard security protocols, including well-lit parking lots and 24-hour front desk service. However, as with any travel destination, it is advisable to keep valuables out of sight in your car and lock your room door securely.

    Does this location offer free breakfast?

    Typically, Red Roof Inn properties do not include free breakfast in their standard rate. This is one way they keep costs low. However, there are numerous bakeries and cafes within a 5-minute drive where you can grab an affordable morning meal.

    Can I check in late at night?

    Yes, the front desk is staffed 24 hours a day. Whether you arrive at 2 PM or 2 AM, you will be able to check in. It is recommended to call ahead if you are arriving very late to ensure your reservation is held properly.

    Is there parking available?

    Yes, the hotel offers free onsite parking for guests. This is a significant advantage over downtown Sacramento hotels, which often charge daily parking fees. The lot is paved and monitored, providing peace of mind for your vehicle.

    How far is the hotel from Sacramento International Airport?

    The drive from Sacramento International Airport (SMF) to the Red Roof Inn Rancho Cordova Sacramento Rancho Cordova Ca 95670 takes approximately 20 to 25 minutes, depending on traffic conditions. It is a straightforward drive mostly via highways, making it a convenient layover spot for early flights.

    Conclusion

    Choosing the right accommodation can make or break your trip. The Red Roof Inn Rancho Cordova Sacramento Rancho Cordova Ca 95670 stands out as a pragmatic, budget-conscious choice for travelers who value location and affordability over luxury frills. Its pet-friendly policy, free Wi-Fi, and strategic access to Interstate 80 make it a versatile option for road trippers, business travelers, and families alike.

    By understanding what to expect and utilizing the tips provided in this guide, you can ensure a comfortable and stress-free stay. Remember, the goal of travel is exploration and relaxation, and having a reliable base camp is essential to achieving that.

    If you found this guide helpful, please consider sharing it on your favorite social media platforms. Helping fellow travelers find great deals creates a community of informed and happy explorers. Safe travels!

  • Build a Rooftop Deck on a Sloped Roof: The Ultimate Guide

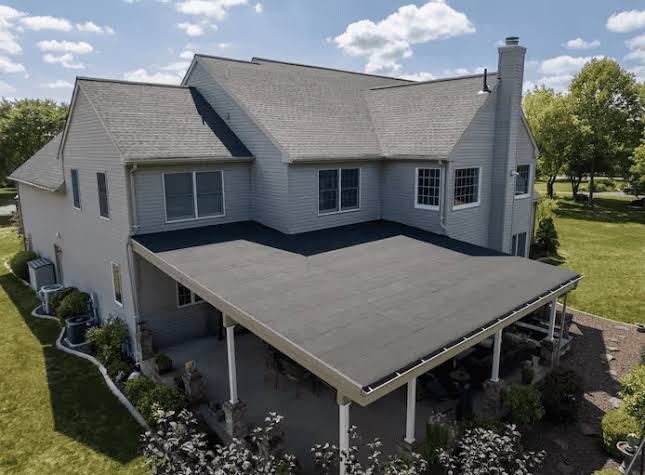
    Build a Rooftop Deck on a Sloped Roof: The Ultimate Guide

    Have you ever looked at your home’s angled roofline and imagined a stunning outdoor oasis perched above the rest? It is a dream many homeowners share, but the reality of how to build a rooftop deck on a sloped roof is far more complex than standard patio construction. You are likely worried about structural integrity, water drainage, and whether your current roof can even support the weight.

    You are not alone in these concerns. Transforming a sloped surface into a usable flat space requires precise engineering and careful planning. This guide will walk you through the critical steps, safety considerations, and material choices needed to turn that architectural challenge into your new favorite retreat.

    Is It Structurally Possible to Build on a Slope?

    Before you buy a single board or bolt, you must answer the most critical question: Can your house hold it? A sloped roof is designed to shed water and snow, not to support the live load of people, furniture, and planters.

    According to general building standards, a typical residential roof is designed to handle a “dead load” (the weight of the roof itself) and a “live load” (snow or maintenance workers), usually around 20 to 40 pounds per square foot (psf). However, a deck often requires a capacity of 60 to 100 psf or more, depending on local codes and intended use.

    Expert Insight: “Attempting to build a deck directly on rafters without reinforcing the underlying structure is a recipe for catastrophic failure. Always consult a licensed structural engineer before breaking ground.”

    You will likely need to install new support beams that transfer the deck’s weight directly to the home’s load-bearing walls or foundation, bypassing the existing roof framing entirely. This is non-negotiable for safety.

    What Are the Key Challenges of Sloped Roof Decks?

    Building on a slope introduces unique hurdles that flat roofs do not face. Understanding these early will save you time, money, and potential headaches.

    1. Creating a Level Surface

    The most obvious issue is gravity. To have a usable deck, you must create a level platform on an angled surface. This requires a framework of varying heights, known as “sleepers” or “pedestals,” to compensate for the pitch.

    2. Waterproofing and Drainage

    Water is the enemy of any roof structure. When you build a deck over a roof, you trap moisture between the decking and the roofing membrane. If water pools here, it can lead to rot, mold, and leaks into your living space below.

    3. Wind Uplift

    Rooftop decks are exposed to higher wind speeds than ground-level patios. On a sloped roof, wind can get underneath the deck structure, creating uplift forces that can tear the deck away if not properly anchored.

    ChallengeRisk FactorMitigation Strategy
    Structural LoadHighReinforce framing; consult an engineer.
    Water TrappingHighUse elevated pedestal systems; ensure proper slope away from the house.
    Wind UpliftMedium-HighUse mechanical fasteners; avoid loose-laid pavers.
    AccessMediumPlan for safe stairways or ladder access points.
    How To Build A Rooftop Deck On A Sloped Roof

    How Do You Prepare the Existing Roof Structure?

    Preparation is 80% of the job. You cannot simply lay wood over shingles. Here is the step-by-step preparation process:

    1. Inspect the Roof Membrane: Ensure the existing roof is in excellent condition. If you have asphalt shingles, they may need to be replaced with a more durable, seamless membrane like EPDM or TPO, which are better suited for covering under decks.
    2. Install a Protective Layer: Place a root barrier and a heavy-duty waterproof membrane over the existing roof. This layer protects the roof from punctures caused by the deck framework.
    3. Check for Ventilation: Your roof needs to breathe. Ensure that soffit and ridge vents are not blocked by your new deck structure. Poor ventilation can lead to heat buildup and moisture accumulation.

    For more detailed information on roofing materials and their properties, you can refer to this comprehensive resource on Roofing materials.

    What Materials Are Best for Rooftop Decks?

    Choosing the right materials is crucial for longevity and weight management. You want materials that are durable, lightweight, and slip-resistant.

    Composite Decking

    Composite boards are made from a mix of wood fibers and plastic. They are heavier than wood but require zero maintenance. They do not rot, splinter, or fade easily.

    • Pros: Low maintenance, long lifespan, consistent color.
    • Cons: Higher upfront cost, can get hot in direct sun.

    Pressure-Treated Wood

    This is the most common choice for DIYers due to its affordability.

    • Pros: Cheap, easy to cut and install, widely available.
    • Cons: Requires annual sealing/staining, prone to warping and cracking over time.

    Aluminum Decking

    Aluminum is becoming increasingly popular for rooftop applications.

    • Pros: Extremely lightweight, fire-resistant, reflects heat, completely waterproof.
    • Cons: Expensive, can be noisy when rain hits it, industrial aesthetic.

    Recommendation: For a sloped roof where weight is a concern, aluminum or lightweight composite systems are often the best choice. Avoid heavy natural stone or concrete pavers unless your structural engineer explicitly approves the load capacity.

    Step-by-Step: Building the Framework

    Once you have your permits and engineering plans, here is how you physically build the structure. Note that this is a generalized overview; always follow your specific engineered drawings.

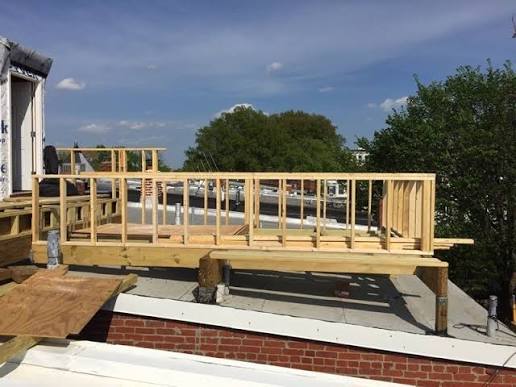
    Step 1: Install the Primary Beams

    Install heavy-duty steel or laminated wood beams that run perpendicular to the roof slope. These beams must be anchored to the home’s structural frame, not just the roof sheathing. Use galvanized steel brackets and bolts for maximum strength.

    Step 2: Create the Leveling System

    This is the trickiest part. You need to build a grid of joists that sit on top of the primary beams. Because the roof is sloped, the height of the supports under each joist will vary.

    • Use adjustable steel pedestals or custom-cut wooden blocks.
    • Use a laser level to ensure the top of every joist is perfectly flat.
    • Maintain a slight slope (1/4 inch per foot) away from the house on the deck surface itself to encourage water runoff.

    Step 3: Add Cross-Bracing

    To prevent racking (side-to-side movement) and handle wind uplift, install diagonal cross-bracing between the joists. This stiffens the entire framework.

    Step 4: Install the Decking

    Lay your chosen decking material perpendicular to the joists.

    • Leave a 1/8-inch gap between boards for drainage and expansion.
    • Use hidden fasteners for a cleaner look and to reduce tripping hazards.
    • Ensure all screws are stainless steel or coated to prevent rust stains.

    Step 5: Install Railings and Safety Features

    Railings are mandatory for any deck more than 30 inches off the ground. On a rooftop, wind loads are higher, so railing posts must be bolted directly into the structural framing, not just the deck boards.

    Frequently Asked Questions (FAQ)

    1. Do I need a permit to build a rooftop deck?

    Yes, almost certainly. Rooftop decks involve structural changes and safety hazards. Most municipalities require a building permit, and some may require zoning approval if the deck is visible from the street or neighbors. Check with your local building department first.

    2. How much does it cost to build a rooftop deck on a sloped roof?

    Costs vary widely based on size and materials, but expect to pay significantly more than a ground-level deck. Due to the need for structural reinforcement and specialized labor, costs can range from $50 to $100+ per square foot. A small 10×10 deck could easily cost $15,000 to $25,000.

    3. Can I build a rooftop deck myself (DIY)?

    While you can handle the decking installation, the structural framing and engineering should not be a DIY project. Incorrectly calculated loads can lead to roof collapse. Hire a professional for the structural work, and then you can tackle the cosmetic decking installation if you are experienced.

    4. How do I handle snow removal on a rooftop deck?

    Snow adds significant weight. Design your deck with easy access for removal. Avoid using metal shovels that can damage the decking; use plastic shovels or a roof rake. Ensure your drainage system is clear so melting snow can escape quickly.

    5. What is the best way to waterproof under the deck?

    The best method is a “hot-mopped” asphalt membrane or a single-ply EPDM rubber membrane. These create a seamless barrier that is less likely to leak than sheet-based products. Always have a professional roofer install this layer before the deck framework goes up.

    Conclusion

    Learning how to build a rooftop deck on a sloped roof is a journey that balances ambition with engineering precision. While the challenges of weight, water, and wind are real, they are not insurmountable. With proper structural reinforcement, high-quality waterproofing, and the right materials, you can create a breathtaking outdoor space that adds significant value and enjoyment to your home.

    Remember, safety is paramount. Never skip the structural assessment. Once your deck is built, take a moment to enjoy the view—you earned it!

    Did you find this guide helpful? Share it with your friends on social media who are dreaming of their own rooftop oasis!

  • How Long Does It Take To Install A New Roof?

    How Long Does It Take To Install A New Roof?

    Have you ever stared at your ceiling during a storm, worrying about leaks, only to hesitate on calling a roofer because you’re afraid of the disruption? You are not alone. Many homeowners delay necessary repairs because they dread the noise, the mess, and the uncertainty of the schedule. Understanding exactly how long does it take to install a new roof can help you plan your life around the project, minimizing stress and maximizing convenience.

    In this guide, we will break down the typical timelines, the variables that speed up or slow down the process, and what you can expect from start to finish. Whether you have a modest ranch-style home or a sprawling two-story colonial, knowing the timeline empowers you to make informed decisions.

    The Short Answer: Typical Roofing Timelines

    If you are looking for a quick estimate, here is the general rule of thumb for residential roofing in the United States:

    • Small to Medium Homes (1,500–2,500 sq. ft.): 1 to 2 days.
    • Large or Complex Homes (3,000+ sq. ft.): 2 to 4 days.
    • Complex Architectures (Multiple peaks, steep pitches): 3 to 5+ days.

    For the most common roofing material in the US—asphalt shingles—a professional crew can typically complete a tear-off and replacement in one to three days. However, “typical” does not mean “guaranteed.” Several critical factors influence this window.

    What Factors Influence Roof Installation Time?

    When asking how long does it take to install a new roof, you must consider the unique characteristics of your property. A roofing contractor cannot give you an exact hour-by-hour schedule without inspecting these variables.

    1. Roof Size and Complexity

    The square footage is the most obvious factor. A simple gable roof is much faster to strip and replace than a hip roof with multiple valleys, dormers, and chimneys. Every penetration (like a vent pipe or skylight) requires careful flashing work, which adds time.

    2. Type of Roofing Material

    Not all materials are created equal when it comes to installation speed.

    MaterialEstimated Installation TimeDifficulty Level
    Asphalt Shingles1–3 DaysLow
    Metal Roofing2–5 DaysMedium
    Clay/Concrete Tile5–10 DaysHigh
    Slate7–14 DaysVery High
    Wood Shake3–6 DaysMedium-High

    Source: Industry standards based on average crew productivity.

    Asphalt shingles are lightweight and easy to handle, allowing crews to work quickly. In contrast, slate and clay tiles are heavy, fragile, and require specialized labor, significantly extending the timeline.

    3. Weather Conditions

    Roofing is an outdoor job, making it highly susceptible to weather. Rain, high winds, or extreme heat can halt work entirely.

    • Rain: Wet roofs are slippery and dangerous. Furthermore, you cannot install underlayment or shingles on a wet deck as it traps moisture, leading to mold and rot.
    • Wind: High winds can blow away loose materials and make handling large sheets of underlayment impossible.
    • Heat: Extreme heat can soften asphalt shingles, making them difficult to nail properly without damaging them.

    4. Structural Repairs Needed

    Once the old roof is torn off, the truth is revealed. If the roofing deck (the wood beneath the shingles) has rot, water damage, or structural weakness, it must be repaired before new materials can be installed. This unexpected step can add 1–2 extra days to your project.

    How Long Does It Take To Install A New Roof

    Step-by-Step: The Roof Installation Process

    Understanding the workflow helps you see why each day is necessary. Here is a breakdown of a standard asphalt shingle replacement.

    Day 1: Preparation and Tear-Off

    The crew arrives early, usually between 7:00 AM and 8:00 AM. They will set up safety equipment, including ladders and harnesses. They also place tarps around your home to protect landscaping and catch falling debris.

    The next phase is the tear-off. Workers remove the old shingles, underlayment, and nails. This is the noisiest part of the process. Once the roof is bare, they inspect the decking. If repairs are needed, they are completed immediately. By the end of Day 1, the roof deck should be clean, dry, and ready for new materials.

    Day 2: Underlayment and Flashing

    With the deck prepped, the team installs the ice and water shield along the eaves and valleys. This is a critical step for preventing leaks in areas prone to ice dams. Next, they roll out the synthetic underlayment over the entire roof surface.

    Flashing is then installed around chimneys, vents, and walls. Proper flashing is essential; according to the National Roofing Contractors Association, improper flashing is one of the leading causes of roof leaks. This meticulous work ensures that water is directed away from vulnerable joints.

    Day 3: Shingle Installation and Cleanup

    This is the most visible phase. Crews start from the bottom edge (the drip edge) and work their way up, row by row. They ensure proper alignment and nailing patterns to meet manufacturer warranties.

    Once the shingles are down, they install ridge vents for proper attic ventilation. Finally, the crew performs a thorough cleanup. They use magnetic rollers to pick up stray nails from your yard and driveway, ensuring your property is safe for pets and children.

    Why Choosing the Right Contractor Matters

    You might wonder why some quotes promise a one-day job while others say three. Experience plays a huge role. A well-coordinated crew with the right equipment can work efficiently without cutting corners.

    However, beware of contractors who promise unrealistically fast timelines. Rushing can lead to:

    • Missed nails or improper nailing depth.
    • Poorly sealed flashing.
    • Inadequate cleanup.

    Always check reviews, ask for references, and verify licensing. A reputable contractor will provide a realistic timeline that accounts for potential weather delays and structural surprises.

    Frequently Asked Questions (FAQ)

    1. Can a roof be replaced in one day?

    Yes, for smaller homes (under 2,000 sq. ft.) with simple rooflines and asphalt shingles, a large, experienced crew can complete the job in one day. However, this leaves little room for error or unexpected repairs.

    2. Do I need to be home during the roof installation?

    It is not strictly required, but it is recommended to be available for the initial walkthrough and final inspection. Ensure you have a way to contact the foreman if questions arise. Also, secure pets indoors, as the noise and open gates can be stressful for animals.

    3. What happens if it rains during the installation?

    If rain is forecast, contractors will monitor the weather closely. If the roof is torn off but not yet covered, they may use temporary tarps to protect the deck. However, most professionals will avoid tearing off a roof if heavy rain is imminent. Expect a possible delay of 1–2 days.

    4. How long does a roof inspection take before installation?

    A thorough pre-installation inspection usually takes 30 to 60 minutes. The inspector will check the current condition, measure the roof, and identify any potential structural issues. This step is crucial for an accurate quote and timeline.

    5. Will my homeowner’s insurance cover the time it takes to install a new roof?

    Insurance typically covers the cost of materials and labor for damage caused by covered perils (like hail or wind), not the duration of the work. However, if the installation is delayed due to additional damage discovered, your adjuster may need to re-evaluate the claim.

    6. Is it normal for there to be noise inside the house?

    Yes. Roofing involves hammering, walking on the deck, and dropping debris. The vibration can be felt throughout the house. If you work from home or have small children napping, consider planning alternative arrangements for the loudest days (usually Day 1).

    Conclusion

    So, how long does it take to install a new roof? For most American homeowners using asphalt shingles, the answer is 1 to 3 days. While this seems short, the preparation, execution, and cleanup involve significant labor and precision.

    By understanding the factors that influence this timeline—such as roof complexity, material choice, and weather—you can set realistic expectations. Remember, a slightly longer timeline often indicates a contractor who prioritizes quality and safety over speed.

    Don’t let the fear of disruption keep you from protecting your home. A new roof adds value, efficiency, and peace of mind. If you found this guide helpful, please share it on social media to help friends and family prepare for their own roofing projects!

  • Which Roof Slope Qualifies As Low Slope?

    Which Roof Slope Qualifies As Low Slope?

    Have you ever stood in a hardware store or spoken with a contractor, feeling completely lost when they started talking about “pitch” and “rise over run”? You are not alone. Many homeowners and property managers struggle to distinguish between different roof types, leading to costly mistakes in material selection and maintenance. Understanding which of the following roof slope qualifies as low slope is the first step toward protecting your investment and ensuring your building remains watertight for decades.

    In this guide, we will break down the technical definitions into plain English, helping you make informed decisions for your home or business.

    What Exactly Is a Low-Slope Roof?

    To answer the question directly: In the construction and roofing industry, a low-slope roof is generally defined as any roof with a pitch of 3:12 or less.

    This means that for every 12 horizontal inches (the run), the roof rises vertically no more than 3 inches (the rise). However, the definition can vary slightly depending on the context—whether you are talking about residential building codes, commercial standards, or specific manufacturer warranties.

    The “Flat” Roof Misconception

    It is crucial to note that very few roofs are truly “flat.” Even roofs that appear flat to the naked eye have a slight pitch to allow water to drain toward scuppers or gutters. If a roof were perfectly level, water would pool, leading to structural damage and leaks. Therefore, when professionals discuss low-slope roofing, they are usually referring to roofs that rely on specialized membrane systems rather than traditional shingles.

    How Is Roof Slope Measured and Classified?

    Understanding the measurement system is key to identifying your roof type. Roof slope is expressed as a ratio of vertical rise to horizontal run.

    The Standard Ratio System

    The most common way to express this in the United States is using the “X:12” format. Here is how the classifications typically break down:

    • Flat/Low Slope: 0:12 to 3:12
    • Conventional Slope: 4:12 to 9:12
    • Steep Slope: 10:12 and above

    For a roof to qualify as low slope, it must fall within that bottom tier. If you are looking at a blueprint or listening to a roofer, a 2:12 pitch is a classic example of a low-slope roof. It has enough angle to shed water slowly but not enough to support standard asphalt shingles effectively.

    Why Does This Classification Matter?

    The slope determines gravity’s ability to move water off the surface. On a steep roof, gravity does most of the work. On a low-slope roof, water moves slowly, increasing the risk of backup under shingles or through seams. This is why the materials used for low-slope roofs are fundamentally different from those used on steep roofs.

    Which Materials Are Best for Low-Slope Roofs?

    Once you have confirmed which of the following roof slope qualifies as low slope, the next critical decision is material selection. You cannot simply slap standard three-tab asphalt shingles on a 2:12 roof; it will leak, and your warranty will be void.

    Here are the top-tier materials designed specifically for low-slope applications:

    Material TypeBest ForLifespanKey Benefit
    EPDM (Rubber)Residential & Commercial20–30 YearsExcellent durability and weather resistance.
    TPO (Thermoplastic)Commercial Buildings20–25 YearsReflects UV rays, improving energy efficiency.
    PVC (Vinyl)Chemical Exposure Areas20+ YearsResistant to oils, fats, and chemicals.
    Modified BitumenHigh Traffic Areas15–20 YearsTough, layered protection similar to rolled asphalt.
    Built-Up Roofing (BUR)Historic/Traditional15–20 YearsMultiple layers of tar and gravel provide mass.

    Expert Insight

    According to industry standards, single-ply membranes like TPO and EPDM have become the gold standard for low-slope roofing in the last two decades. They offer seamless installation options (via heat welding or adhesive) that significantly reduce the number of potential leak points compared to older methods.

    Which Of The Following Roof Slope Qualifies As Low Slope

    What Are the Common Problems with Low-Slope Roofs?

    While low-slope roofs are cost-effective and easier to install on large commercial buildings, they come with unique challenges. Being aware of these issues helps in proactive maintenance.

    1. Water Pooling (Ponding)

    This is the number one enemy of low-slope roofs. If the drainage system is clogged or the roof deck settles unevenly, water can sit in puddles. Over time, this standing water can degrade the roofing membrane, promote algae growth, and add excessive weight to the structure.

    2. Debris Accumulation

    Because the wind doesn’t sweep debris off a low-slope roof as easily as it does a steep roof, leaves, branches, and dirt tend to accumulate. This debris can block drains and retain moisture against the roof surface.

    3. Membrane Shrinkage

    Some older rubber-based materials can shrink over time, pulling away from flashings and edges. This creates gaps where water can enter the building envelope. Regular inspections are vital to catch this early.

    How Do Building Codes Define Low Slope?

    Building codes can vary by municipality, but most in the US follow guidelines set by the International Building Code (IBC) or reference standards from organizations like ASTM.

    Generally, the IBC considers any roof with a slope less than 2:12 to require specific waterproofing measures distinct from standard shingle roofing. However, many manufacturers will not warrant their shingle products unless the pitch is at least 4:12.

    For a deeper understanding of historical roofing standards and material evolution, you can refer to general construction principles outlined on Wikipedia’s Roofing page. This external resource provides a broad overview of how roofing technologies have evolved to meet different slope requirements.

    Step-by-Step: How to Determine Your Roof’s Slope

    If you are unsure whether your roof qualifies as low slope, you can measure it yourself safely from the ground or inside an attic. Do not climb onto a roof unless you are trained and equipped with proper safety gear.

    1. Gather Tools: You will need a level (at least 12 inches long), a tape measure, and a pencil.
    2. Access the Attic: Go into your attic and locate a rafter or the underside of the roof deck.
    3. Place the Level: Hold the level horizontally against the rafter. Ensure the bubble is centered, indicating it is perfectly level.
    4. Measure the Rise: At the 12-inch mark on your level, use the tape measure to determine the vertical distance from the bottom of the level to the underside of the rafter.
    5. Calculate the Ratio: If the vertical distance is 3 inches or less, you have a low-slope roof. For example, if it measures 2 inches, your pitch is 2:12.

    FAQ Section

    Q: Can I put asphalt shingles on a low-slope roof?

    A: Generally, no. Most asphalt shingle manufacturers require a minimum pitch of 4:12. Installing them on a lower slope can lead to water infiltration beneath the shingles. If you must use shingles on a low slope, special underlayment and sealing techniques are required, but a membrane system is always recommended.

    Q: Is a 3:12 roof considered flat or low slope?

    A: A 3:12 roof is considered low slope, not flat. While it is on the border, it still has enough pitch to shed water relatively well. However, it is still too low for standard shingle installation without specific precautions.

    Q: How often should I inspect a low-slope roof?

    A: You should inspect a low-slope roof at least twice a year—once in the spring and once in the fall. Additionally, check it after any major storm. Look for ponding water, debris buildup, and signs of membrane tearing.

    Q: What is the cheapest option for a low-slope roof?

    A: Modified bitumen or basic EPDM rubber roofing tends to be the most cost-effective initial investment. However, consider the lifecycle cost; TPO might cost slightly more upfront but offers better energy savings due to its reflective white surface.

    Q: Does snow slide off low-slope roofs?

    A: No, snow tends to accumulate on low-slope roofs. This adds significant weight load to the structure. If you live in a heavy snowfall area, ensure your roof structure is engineered to handle the extra load, and consider installing heating cables to prevent ice dams at the edges.

    Conclusion

    Determining which of the following roof slope qualifies as low slope is more than just a trivia question; it is a fundamental aspect of building maintenance and safety. Remember, if your roof has a pitch of 3:12 or less, it falls into the low-slope category. This classification dictates that you must use specialized waterproofing membranes like EPDM, TPO, or PVC rather than traditional shingles.

    By understanding your roof’s slope, you can choose the right materials, anticipate maintenance needs, and avoid costly leaks. Don’t let water pooling or debris buildup compromise your property. Take action today by scheduling a professional inspection if you suspect your roof is low-slope.

    Found this guide helpful? Share it with your friends on social media or send it to your property manager to ensure everyone is on the same page about roof health!

  • How to Get Rid of Pigeons on Your Roof: A Pro Guide

    How to Get Rid of Pigeons on Your Roof: A Pro Guide

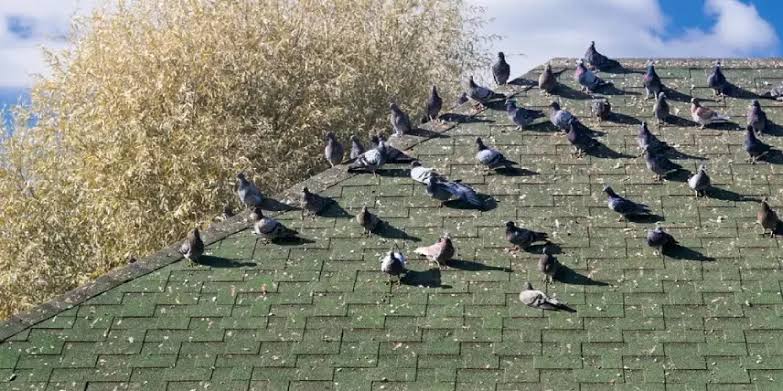
    Dealing with a flock of pigeons roosting on your roof is more than just a nuisance; it is a genuine threat to your property’s structural integrity and your family’s health. The constant cooing, the mess, and the potential for disease can make you feel helpless in your own home. If you are wondering how do you get rid of pigeons on your roof, you are not alone, and there are effective, humane solutions available.

    In this comprehensive guide, we will walk you through proven strategies to deter these persistent birds. We combine expert insights with practical, step-by-step instructions to ensure you can reclaim your roof safely and legally.

    Why Are Pigeons Attracted to Your Roof?

    Before we dive into removal tactics, it is crucial to understand why they are there. Pigeons, often called “rats with wings” by frustrated homeowners, are creatures of habit. They seek three main things: shelter, safety, and food.

    Your roof offers an ideal vantage point. It provides protection from predators like hawks and cats, while also offering flat surfaces or nooks for nesting. According to urban wildlife studies, once a pair of pigeons establishes a nest, they will return to the same spot repeatedly, often bringing more birds with them.

    Understanding this behavior is key. You cannot simply shoo them away once; you must make your roof an unattractive environment for the long term.

    What Are the Most Effective Humane Deterrents?

    When asking how do you get rid of pigeons on your roof, the first rule is to prioritize humane methods. In many parts of the US, harming migratory birds or their active nests can violate federal laws like the Migratory Bird Treaty Act. Therefore, exclusion and deterrents are your best friends.

    1. Physical Barriers: Bird Spikes and Netting

    Physical barriers are widely considered the gold standard in professional pest control. They do not harm the birds but simply make landing impossible.

    • Bird Spikes: These are strips of plastic or stainless steel spikes that attach to ledges, rails, and roof peaks. Pigeons cannot land on them because there is no flat surface.
      • Pros: Highly effective, low maintenance, invisible from the street if installed correctly.
      • Cons: Requires professional installation for complex roofs; initial cost can be higher.
    • Bird Netting: This involves covering large open areas (like under eaves or across courtyards) with durable mesh.
      • Pros: Completely blocks access to specific zones.
      • Cons: Can look unsightly if not tensioned properly; requires regular inspection for tears.

    2. Visual and Auditory Scares

    For smaller infestations, you might try scare tactics. However, pigeons are intelligent and quickly habituate to static objects.

    • Reflective Tape and CDs: These create flashing lights and unpredictable movements that disorient birds.
    • Decoy Predators: Plastic owls or hawks can work temporarily. Pro Tip: Move the decoy every few days, or the pigeons will realize it is fake.
    • Ultrasonic Devices: These emit high-frequency sounds uncomfortable for birds but inaudible to humans. Effectiveness varies greatly depending on the environment and background noise.
    MethodEffectivenessCostMaintenance Level
    Bird SpikesHighMedium-HighLow
    Bird NettingHighMediumMedium
    Visual ScaresLow-MediumLowHigh (must move often)
    UltrasonicVariableMediumLow

    How Do You Clean Pigeon Droppings Safely?

    One of the most dangerous aspects of a pigeon infestation is the waste. Pigeon droppings are acidic and can corrode roofing materials, but more importantly, they carry diseases such as histoplasmosis, cryptococcosis, and psittacosis.

    Never dry-sweep pigeon droppings. This releases harmful spores into the air, which you can then inhale.

    Follow this strict safety protocol for cleanup:

    1. Gear Up: Wear an N95 respirator mask, heavy-duty rubber gloves, and protective eyewear. Disposable coveralls are recommended.
    2. Wet the Area: Generously spray the droppings with a water and disinfectant mixture (a 10% bleach solution works well). Let it soak for 15–20 minutes to suppress dust and kill bacteria.
    3. Scrape Carefully: Use a plastic scraper to lift the waste. Avoid creating dust.
    4. Dispose Properly: Place all waste, including your gloves and mask, into double-sealed plastic bags. Check your local municipal guidelines for hazardous waste disposal.
    5. Sanitize: Wash the area thoroughly with hot water and detergent. For more detailed health guidelines, you can refer to resources from the Centers for Disease Control and Prevention (CDC) regarding environmental hygiene.

    Can DIY Methods Really Work Long-Term?

    Many homeowners ask if homemade remedies are effective. The short answer is: rarely for long-term solutions.

    Common DIY myths include using mothballs, cayenne pepper, or vinegar. While strong smells may deter pigeons initially, rain washes these away quickly, and birds adapt to the scents. Furthermore, some DIY chemicals can damage your roof shingles or void your warranty.

    However, one DIY method has merit: Slope Modification. Pigeons prefer flat surfaces. If you have a flat section of roof where they gather, installing a simple wooden or metal slope (at least 45 degrees) can physically prevent them from standing comfortably. This is a cheap, effective, and permanent structural change.

    How Do You Get Rid Of Pigeons On Your Roof

    When Should You Call a Professional?

    While DIY methods are great for minor issues, there are times when you need expert help. Consider hiring a licensed wildlife control professional if:

    • The infestation is large (more than 5–10 birds).
    • There are active nests with eggs or chicks (legal restrictions apply).
    • You are uncomfortable working at heights.
    • Previous DIY attempts have failed.

    Professionals have access to industrial-grade netting and gel repellents that are not available to consumers. They also carry insurance, protecting you from liability if an accident occurs during removal.

    FAQ Section

    1. Is it illegal to remove pigeons from my roof?

    In the US, feral pigeons are generally not protected under the Migratory Bird Treaty Act. However, native wild pigeons (like band-tailed pigeons in the West) are protected. Always check your state and local wildlife regulations before taking action. Never destroy active nests of protected species.

    2. Will bird spikes hurt the pigeons?

    No. High-quality bird spikes are designed to be humane. They simply deny the birds a place to land or roost. They do not impale or injure the birds. Ensure you buy spikes with rounded tips for maximum safety and durability.

    3. How long does it take to get rid of pigeons?

    It varies. Visual deterrents may show results in a few days but often fail within weeks. Physical barriers like spikes or netting provide immediate and permanent results once installed. Consistency is key; if you stop your deterrent routine, they will return.

    4. Can pigeons damage my roof structure?

    Yes. Their droppings are highly acidic and can eat through metal flashing, wood, and even concrete over time. Additionally, their nests can block gutters, leading to water damage and roof leaks. The weight of large flocks can also stress weaker roof structures.

    5. What is the best natural repellent for pigeons?

    There is no single “best” natural repellent that works permanently. However, keeping your roof clean of food sources is the most effective natural deterrent. Ensure trash cans are sealed and avoid feeding birds anywhere near your property. Some homeowners find success with essential oils like peppermint or eucalyptus, but these require frequent reapplication.

    Conclusion

    Learning how do you get rid of pigeons on your roof is about combining immediate action with long-term prevention. While the sight of pigeons may seem harmless, the health risks and property damage they cause are significant. By starting with humane physical barriers like spikes or netting, maintaining strict hygiene during cleanup, and staying consistent with your deterrents, you can reclaim your home.

    Remember, patience is vital. Pigeons are stubborn, but they are not invincible. Take action today to protect your investment and your peace of mind.

    Did you find this guide helpful? Share it on Facebook or Twitter to help other homeowners tackle their pigeon problems!

  • Owens Corning Compton Plant: A Local Guide

    Owens Corning Compton Plant: A Local Guide

    Have you ever driven past a large industrial facility and wondered exactly what goes on behind those walls? For residents and business owners in Southern California, identifying local manufacturing hubs is crucial for understanding supply chains and community economic health. Specifically, many locals are curious about the operations surrounding the Owens Corning Compton Roofing Plant North Tamarind Avenue Compton Ca, seeking clarity on its role in the region’s construction landscape.

    In this comprehensive guide, we will demystify the presence of major industrial players in Compton. We will explore how facilities like these contribute to the roofing industry, address common environmental concerns, and provide actionable insights for homeowners and contractors alike. Whether you are a local resident concerned about air quality or a contractor looking for supply chain details, this article serves as your definitive resource.

    What Is the Reality of the Owens Corning Facility in Compton?

    When searching for “Owens Corning Compton Roofing Plant North Tamarind Avenue Compton Ca,” it is essential to first clarify the nature of the facility. Owens Corning is a global leader in building materials and systems, renowned for its insulation and roofing solutions. However, the specific operational footprint in cities like Compton often involves distribution centers, sales offices, or specialized processing units rather than full-scale primary manufacturing plants that produce raw fiberglass or asphalt shingles from scratch.

    Compton, located in Los Angeles County, has historically been an industrial hub. The presence of major corporations here is strategic due to proximity to the Ports of Los Angeles and Long Beach, as well as access to major freeways like the I-710 and I-105. For Owens Corning, having a facility in this area allows for efficient distribution of roofing materials to contractors across Greater Los Angeles.

    It is important to note that while the keyword phrase suggests a “plant,” the actual function may be more aligned with logistics and distribution. This distinction matters because distribution centers have different environmental impacts and operational hours compared to heavy manufacturing plants. Understanding this helps set realistic expectations regarding noise, traffic, and industrial activity in the neighborhood surrounding North Tamarind Avenue.

    The Strategic Importance of Location

    Why Compton? The answer lies in logistics. The construction boom in Southern California requires a steady, rapid flow of materials. A facility in Compton acts as a critical node in the supply chain.

    • Proximity to Ports: Easy access to imported raw materials.
    • Central Distribution: Equidistant access to Los Angeles, Orange County, and the Inland Empire.
    • Workforce Access: Availability of skilled labor in the logistics and transportation sectors.

    How Does Owens Corning Impact Local Roofing Standards?

    Owens Corning is not just a supplier; they are a standard-setter in the roofing industry. Their products, such as the Duration® Shingles and EcoSure® insulation, are widely used in residential and commercial projects throughout California. The presence of their local infrastructure supports contractors by ensuring that high-quality materials are readily available.

    Quality and Durability in a California Climate

    California’s climate poses unique challenges for roofing materials, including intense UV exposure, dry heat, and occasional heavy rains during El Niño years. Owens Corning designs its products to withstand these specific conditions.

    FeatureBenefit for CA Homeowners
    Algae ResistancePrevents unsightly black streaks common in humid coastal areas.
    Wind ResistanceRated for high winds, crucial for Santa Ana wind events.
    Energy EfficiencyReflective shingles help reduce cooling costs during hot summers.

    By having a local distribution point, contractors can quickly replace damaged materials or start new projects without long lead times. This efficiency directly benefits homeowners who need timely repairs, especially after storm seasons.

    Owens Corning Compton Roofing Plant North Tamarind Avenue Compton Ca

    Are There Environmental Concerns for Nearby Residents?

    One of the most common questions associated with industrial facilities in residential-adjacent areas like Compton is regarding environmental impact. Residents often worry about air quality, noise pollution, and truck traffic. It is vital to approach this topic with facts and an understanding of regulatory frameworks.

    Regulatory Compliance and Sustainability

    Owens Corning has made significant public commitments to sustainability. According to their corporate reports, they aim to reduce greenhouse gas emissions and improve water efficiency across their operations. While specific data for a single distribution center may not be publicly itemized in real-time, the company adheres to strict California Environmental Quality Act (CEQA) standards.

    For more context on how industrial zoning works in California and the historical context of industrial areas in Los Angeles County, you can refer to general information on Industrial Zoning and Environmental Regulations.

    Mitigating Local Impact

    Facilities in urban areas like Compton are subject to rigorous monitoring by the South Coast Air Quality Management District (SCAQMD). Key measures typically include:

    1. Truck Routing: Designated routes to minimize traffic through residential streets.
    2. Idle Reduction Policies: Strict limits on how long trucks can idle while loading or unloading.
    3. Noise Barriers: Installation of sound walls if the facility operates near residential zones.

    If you live near North Tamarind Avenue and have specific concerns, the best course of action is to engage with local city council meetings or review public records filed with the City of Compton’s Planning Department. Transparency is key, and local government bodies are required to maintain records of any complaints or violations.

    How Can Contractors and Homeowners Benefit from Local Presence?

    The existence of a major supplier’s infrastructure in Compton offers tangible benefits for two main groups: professional contractors and DIY homeowners.

    For Professional Contractors

    • Just-in-Time Delivery: Reduced need for large on-site storage, lowering project overhead.
    • Product Availability: Access to the full range of Owens Corning products, including specialized underlayments and ventilation systems.
    • Technical Support: Proximity often means easier access to regional sales representatives who can provide technical advice on complex roofing jobs.

    For Homeowners

    • Faster Repairs: In emergency situations, such as roof leaks during rain, local availability means faster material procurement.
    • Warranty Validation: Using materials sourced through authorized local channels ensures that manufacturer warranties remain valid.
    • Competitive Pricing: Reduced transportation costs for suppliers can sometimes translate to more competitive pricing for consumers.

    Step-by-Step: Verifying Local Supplier Authorization

    If you are planning a roofing project and want to ensure you are buying from an authorized source linked to the local supply chain, follow these steps:

    1. Visit the Official Website: Go to the Owens Corning contractor locator tool.
    2. Enter Your Zip Code: Input your Compton or surrounding area zip code.
    3. Check Certification: Look for “Master Contractor” or “Preferred Contractor” badges. These indicate a strong relationship with the supplier.
    4. Ask for Proof: When getting quotes, ask the contractor where they source their materials. A reputable contractor will be transparent about using locally distributed, authentic products.
    5. Verify Warranty: Ensure the contractor registers the warranty with Owens Corning immediately upon completion. This step is crucial for long-term protection.

    FAQ Section

    1. Is there an actual manufacturing plant at North Tamarind Avenue in Compton?

    While the address is associated with Owens Corning’s operations in the area, it is primarily a distribution and sales support facility rather than a primary manufacturing plant where raw shingles are produced. Heavy manufacturing typically occurs in larger, specialized industrial zones outside dense urban centers.

    2. How does the facility affect traffic on North Tamarind Avenue?

    Like any industrial facility, there is truck traffic associated with deliveries and pickups. However, these operations are regulated by local city ordinances and state laws regarding commercial vehicle hours. Most deliveries occur during standard business hours to minimize disruption to residential traffic patterns.

    3. Can I buy roofing materials directly from this location?

    Generally, Owens Corning distribution centers serve licensed contractors and wholesalers rather than individual retail customers. Homeowners should work with a certified roofing contractor who purchases materials from these local distributors to ensure proper installation and warranty coverage.

    4. What should I do if I experience excessive noise or dust from the facility?

    If you believe the facility is violating local noise or air quality regulations, you should document the issue (dates, times, photos) and report it to the City of Compton’s Code Enforcement Division or the South Coast Air Quality Management District. They have the authority to investigate and enforce compliance.

    5. Does Owens Corning offer eco-friendly roofing options available in Compton?

    Yes, Owens Corning offers a range of sustainable products, including shingles made with recycled content and insulation products that improve home energy efficiency. These products are available through their local distribution network, supporting California’s strict energy efficiency standards (Title 24).

    6. How can I find a roofer who uses Owens Corning products in Compton?

    You can use the “Find a Contractor” tool on the Owens Corning website. By entering your location, you will receive a list of nearby certified professionals who are trained in installing their specific roofing systems and have access to the local supply chain.

    Conclusion

    The Owens Corning Compton Roofing Plant North Tamarind Avenue Compton Ca represents a vital link in the Southern California construction supply chain. While it may not be a traditional manufacturing plant in the sense of producing raw materials on-site, its role as a distribution and logistics hub is indispensable for local contractors and homeowners. It ensures that high-quality, durable roofing materials are available quickly and efficiently, supporting the region’s housing needs.

    For residents, understanding the facility’s role helps alleviate unfounded fears while empowering you to hold operators accountable to environmental standards. For homeowners and builders, leveraging this local presence means faster project completion and access to top-tier roofing technology.

    We hope this guide has clarified the operations and impact of this facility. If you found this information helpful, please consider sharing it on social media to help your neighbors and community stay informed about local industrial developments. Knowledge is power, especially when it comes to our homes and our environment.

  • 2024 Transit 350 EV: Low Roof vs Standard Height

    2024 Transit 350 EV: Low Roof vs Standard Height

    Choosing the right commercial vehicle is more than just picking a color; it’s about selecting a tool that fits your daily workflow like a glove. If you are transitioning to electric or expanding your fleet, you might be stuck debating between roof heights, wondering which option offers the best balance of utility and efficiency. This 2024 Transit 350 EV Low Roof Vs Standard Height Comparison will help you cut through the noise and make a data-driven decision for your business.

    The shift to electric commercial vehicles is accelerating, with many businesses looking to reduce carbon footprints while maintaining operational efficiency. However, the physical dimensions of the vehicle play a crucial role in how it performs in real-world scenarios, from urban parking garages to suburban delivery routes. Understanding these nuances is essential before signing any lease or purchase agreement.

    Why Roof Height Matters for Your Business

    Before diving into the specific specs of the 2024 Ford E-Transit, it is vital to understand why this dimension is critical. Roof height affects three main areas: cargo capacity, aerodynamics (and thus range), and accessibility.

    For a business owner, every cubic foot of cargo space translates to potential revenue. However, every inch of height added to the vehicle increases wind resistance, which can drain the battery faster. It is a delicate balancing act. The “Low Roof” and “Standard Height” (often referred to as Medium Roof in some contexts, but distinct in the Transit lineup) offer different solutions to this problem.

    Key Specifications: The Numbers Game

    To make an informed choice, we need to look at the hard data. While both models share the same chassis and powertrain, their vertical dimensions change the driving and loading experience significantly.

    Feature2024 Transit 350 EV Low Roof2024 Transit 350 EV Standard Height
    Overall HeightApprox. 81.5 inchesApprox. 97.4 inches
    Interior Standing Height~60 inches (Kneeling/Crouching)~72 inches (Standing)
    Cargo Volume~404 cu ft~487 cu ft
    Aerodynamic DragLower (Better Range Potential)Higher (Slightly Reduced Range)
    Garage FitFits most residential garagesMay not fit standard garages

    Note: Exact specifications may vary slightly based on wheelbase configuration (130″ vs 148″) and optional equipment. Always verify with the official Ford builder tool.

    Interior Usability: Can You Stand Up?

    The most immediate difference you will notice is inside the cabin. For many tradespeople, the ability to stand upright while organizing tools or retrieving parts is a game-changer for productivity and safety.

    The Standard Height Advantage With an interior standing height of approximately 72 inches, the Standard Height model allows most adults to stand fully upright. This reduces back strain during long loading sessions. If your team spends hours inside the van sorting packages or accessing heavy equipment, this ergonomic benefit is significant. It transforms the van from a mere transport box into a mobile workspace.

    The Low Roof Reality The Low Roof model offers an interior height of around 60 inches. This means you will be crouching or kneeling for most tasks. While this might seem inconvenient, it is perfectly adequate for drivers who primarily load at the rear door and rarely enter the cargo area. If your workflow involves pallet jacks or forklifts loading from the back, you may never need to step inside the high-ceiling area anyway.

    2024 Transit 350 Ev Low Roof Vs Standard Height Comparison

    Cargo Capacity and Volume Analysis

    When comparing the 2024 Transit 350 EV Low Roof Vs Standard Height, cargo volume is a primary differentiator. The Standard Height model offers roughly 80+ cubic feet more space than its lower counterpart.

    To visualize this, imagine adding an extra row of shelving or several large appliance boxes. For HVAC technicians, plumbers, or parcel delivery services, this extra vertical space allows for taller items to be stored upright. This maximizes the floor plan efficiency because you aren’t forced to lay long items flat.

    However, if your cargo consists mainly of flat, dense materials like tiles, lumber, or stacked boxes, the Low Roof might suffice. The key is to audit your typical load. Do you carry tall ladders, standing refrigerators, or tall shelving units? If yes, the Standard Height is likely necessary. If no, the Low Roof keeps the center of gravity lower and the vehicle more stable.

    Impact on Range and Efficiency

    One of the biggest concerns for EV adopters is range anxiety. Does the taller roof hurt your mileage? The answer is yes, but perhaps not as much as you think.

    Aerodynamics play a massive role in electric vehicle efficiency. A taller vehicle presents a larger frontal area to the wind, increasing drag. According to general automotive engineering principles, drag increases with the square of speed. Therefore, at highway speeds, the Standard Height model will consume more energy than the Low Roof model.

    While Ford has not released separate EPA range estimates for each roof height specifically in all marketing materials, real-world tests suggest a variance of 5-10% in range depending on driving conditions. If your route involves significant highway driving, the Low Roof could provide a tangible buffer in range. For city stop-and-go traffic, the difference is negligible.

    Accessibility and Parking Constraints

    Where do you park your van overnight? This simple question often dictates the roof height choice.

    Residential Garages Most standard residential garage doors have a clearance of 7 feet (84 inches). The Low Roof Transit, at roughly 81.5 inches, fits comfortably in most home garages. This is a huge perk for owner-operators who want to charge their vehicle at home using a Level 2 charger without building expensive external infrastructure.

    The Standard Height model, at nearly 97.4 inches, will not fit in a standard garage. You will need to park outdoors or in a commercial lot with higher clearances. This impacts security, weather protection for the vehicle, and charging convenience.

    Urban Infrastructure In cities, parking garages often have height restrictions ranging from 6’8″ to 7’6″. The Low Roof navigates these structures with ease. The Standard Height model may be barred from entering older multi-story parking decks, limiting where you can make deliveries or take breaks. Always check the clearance signs in your primary operating zones.

    Cost Implications and Total Cost of Ownership

    Is there a price difference? Generally, the Standard Height model carries a slight premium over the Low Roof due to the additional materials and manufacturing complexity. However, the base price difference is often minimal compared to the cost of batteries or optional tech packages.

    Consider the Total Cost of Ownership (TCO):

    1. Purchase Price: Standard Height is slightly higher.
    2. Energy Costs: Low Roof may save slightly on electricity due to better aerodynamics.
    3. Infrastructure: Low Roof saves money if it allows home garage charging vs. installing a covered outdoor charger.
    4. Productivity: Standard Height may save money on worker compensation claims related to back injuries from crouching.

    Weigh these factors against your specific business model. For a single-owner operator, the garage fit might be the deciding financial factor. For a fleet manager, employee ergonomics might outweigh the minor energy savings.

    Expert Insight on Electric Vans

    According to industry analysis, the adoption of electric vans is driven by total lifecycle costs rather than just upfront price. As noted in broader automotive studies, optimizing vehicle specification to match route profiles is key to maximizing ROI. You can read more about the general history and evolution of commercial vans on Wikipedia to understand how far the platform has come.

    The E-Transit represents a mature iteration of this platform, designed specifically to handle the weight of batteries without compromising payload. Choosing the right roof height ensures that you aren’t paying for unused space or suffering from unnecessary range loss.

    FAQ Section

    Q1: Which model has a better payload capacity? Both the Low Roof and Standard Height 2024 Transit 350 EV models are built on the same robust chassis. The payload capacity is primarily determined by the battery pack size and gross vehicle weight rating (GVWR), not the roof height. Therefore, payload differences are negligible, but always check the specific window sticker for your configured model.

    Q2: Can I install roof racks on the Standard Height model? Yes, both models support roof rack systems. However, adding racks and cargo to the roof of the Standard Height model will significantly increase aerodynamic drag, further reducing your electric range. It is recommended to keep roof loads minimal for EVs.

    Q3: Is the Low Roof easier to drive? Many drivers report that the Low Roof feels more car-like and stable, especially in windy conditions or when changing lanes at highway speeds. The lower center of gravity provides a confident driving experience, which can be beneficial for new EV drivers.

    Q4: Does the Standard Height model require special maintenance? No, the maintenance schedule for the E-Transit is consistent across roof heights. The mechanical and electrical components are identical. The only difference is the physical body panels, which would only affect repair costs in the event of an accident involving the roof.

    Q5: How does the charging time differ between the two? There is no difference in charging time. Both models utilize the same battery technology and charging ports. Charging speed depends on the charger type (Level 2 vs. DC Fast Charging) and the state of charge, not the vehicle’s roof height.

    Conclusion

    Making the right choice in the 2024 Transit 350 EV Low Roof Vs Standard Height Comparison comes down to your specific operational needs. If you prioritize home charging convenience, maximum range efficiency, and urban maneuverability, the Low Roof is the smart pick. It fits in garages, slices through the wind, and offers ample space for most standard trades.

    However, if your team needs to stand upright to work efficiently, or if you regularly carry tall cargo, the Standard Height model is worth the trade-off in aerodynamics and parking flexibility. It transforms the van into a more ergonomic workspace, potentially boosting productivity and reducing physical strain.

    Evaluate your daily routes, your parking situation, and your cargo types. Once you decide, you’ll be well on your way to a smoother, greener, and more efficient business operation.

    Found this comparison helpful? Share it with your fellow business owners on LinkedIn or Facebook to help them make the switch to electric with confidence!