Blog

  • How to Install a Metal Roof: The Ultimate DIY Guide

    How to Install a Metal Roof: The Ultimate DIY Guide

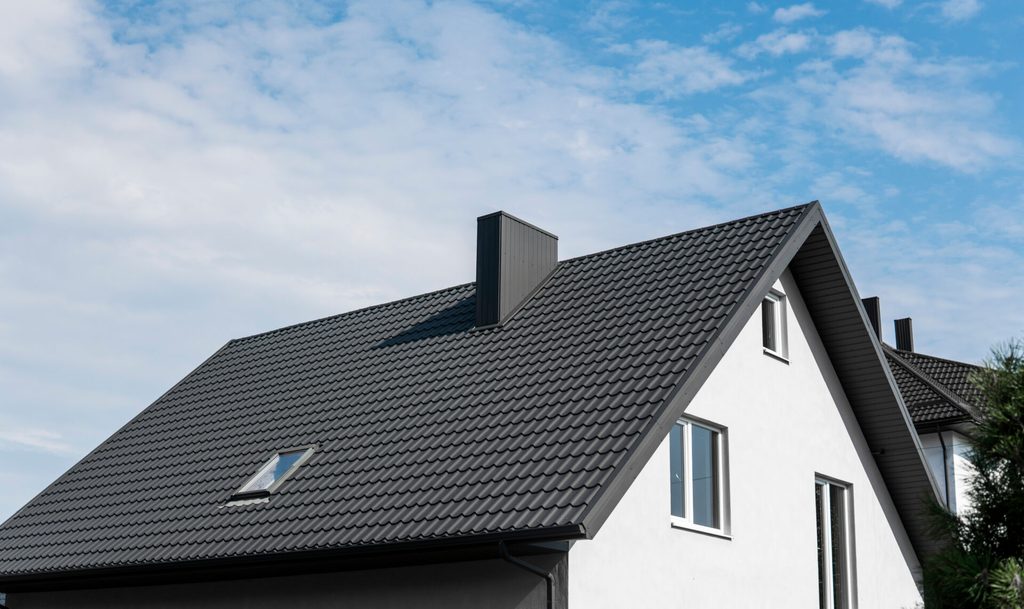
    Have you ever looked up at your aging shingle roof and wondered if there was a more durable, energy-efficient alternative? Many homeowners feel overwhelmed by the prospect of replacing their roof, fearing high costs and complex procedures. If you are asking, “How do you install a metal roof on a house,” you are not alone; this guide breaks down the process into manageable, safe, and effective steps for the dedicated DIYer.

    Metal roofing has surged in popularity across the United States, not just for its sleek modern aesthetic but for its longevity. While traditional asphalt shingles may last 15–20 years, a properly installed metal roof can protect your home for 40–70 years. However, installation precision is critical. A minor error in flashing or fastening can lead to leaks that compromise your home’s structural integrity. This article provides a comprehensive, expert-backed roadmap to help you navigate this significant home improvement project with confidence.

    Why Choose Metal Over Traditional Shingles?

    Before diving into the tools and techniques, it is essential to understand why metal is worth the investment. According to the Metal Roofing Alliance, metal roofs reflect solar radiant heat, which can reduce cooling costs by 10–25%. Furthermore, they are non-combustible and highly resistant to wind uplift, making them ideal for areas prone to severe weather.

    FeatureAsphalt ShinglesMetal Roofing
    Lifespan15–20 Years40–70+ Years
    MaintenanceModerate to HighLow
    Energy EfficiencyStandardHigh (Reflective)
    WeightHeavyLightweight
    RecyclabilityLow100% Recyclable

    While the upfront cost of metal is higher, the long-term value proposition is undeniable. But achieving this value requires strict adherence to installation protocols.

    What Tools and Materials Do You Need?

    Preparation is half the battle. Attempting to install a metal roof without the right equipment is a recipe for disaster. You will need specific tools designed for metalwork to ensure clean cuts and secure fastening.

    Essential Tools List

    • Electric Shears or Nibblers: For cutting metal panels without damaging the protective coating. Avoid abrasive saws as they create heat that ruins the galvanized layer.
    • Drill/Driver with Clutch: To prevent over-driving screws, which can strip holes and cause leaks.
    • Seam Roller: For locking standing seam panels together.
    • Chalk Line and Tape Measure: For precise alignment.
    • Safety Gear: Harness, non-slip boots, gloves, and eye protection.

    Material Checklist

    • Metal Panels: Choose between standing seam (hidden fasteners) or exposed fastener panels (corrugated or ribbed).
    • Underlayment: A synthetic, breathable underlayment is crucial for moisture management.
    • Closure Strips: Foam strips that fill gaps at ridges and eaves to prevent pest entry and wind noise.
    • Fasteners: Use only manufacturer-recommended screws with neoprene washers. Never mix metal types (e.g., steel screws on aluminum panels) to avoid galvanic corrosion.

    How Do You Prepare the Existing Roof Structure?

    One of the most common questions beginners ask is whether they need to tear off the old roof. In many cases, you can install metal over existing asphalt shingles, provided the local building code allows it and the roof deck is sound. This method saves time and disposal fees.

    However, inspection is non-negotiable. Walk the roof and check for soft spots, rot, or damaged rafters. Any compromised wood must be replaced before proceeding. If you are installing over shingles, ensure they are flat. Curling or missing shingles should be repaired to create a smooth surface.

    According to Wikipedia’s entry on Roofing, proper ventilation is critical when layering roofing materials. Ensure your attic has adequate intake and exhaust ventilation to prevent heat buildup, which can warp metal panels and degrade underlayment.
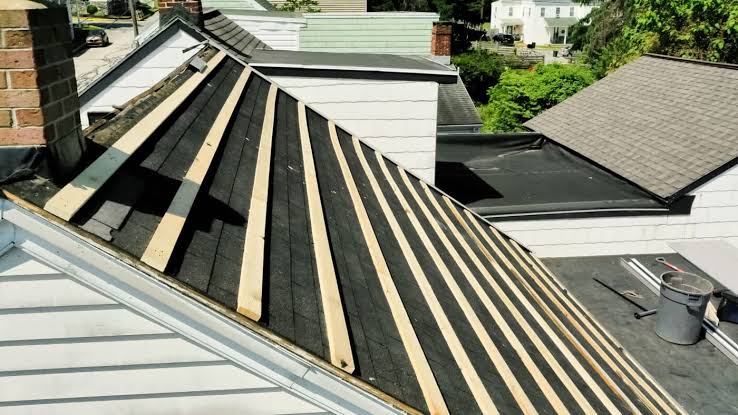
    How Do You Install A Metal Roof On A House

    Step-by-Step: How Do You Install a Metal Roof on a House?

    Now, let’s get into the core of the process. Follow these steps meticulously to ensure a watertight seal.

    Step 1: Install the Drip Edge and Underlayment

    Start at the eaves (the bottom edge of the roof). Install a metal drip edge along the eaves to direct water away from the fascia board. Next, roll out your synthetic underlayment horizontally, starting from the bottom. Overlap each row by at least 6 inches and secure it with cap nails or staples. This layer acts as your secondary water barrier.

    Step 2: Apply Flashing at Valleys and Penetrations

    Valleys are where two roof slopes meet, channeling significant water volume. Install W-shaped metal valley flashing over the underlayment. Seal the edges with high-quality urethane sealant. Similarly, flash around chimneys, vents, and skylights using step flashing or boot flashings designed for metal roofs. Note: Never rely solely on caulk for waterproofing; mechanical flashing is primary.

    Step 3: Install the First Metal Panel

    This is the most critical step. If the first panel is crooked, every subsequent panel will be too. Start at the bottom corner of the roof, ensuring the panel overhangs the drip edge by about 1–2 inches. Use a chalk line to verify it is perfectly square with the eave. Secure the panel with screws, placing them in the flat area of the panel, not the high ribs, unless specified by the manufacturer.

    Step 4: Overlap and Secure Subsequent Panels

    Install the next panel by overlapping the side lap of the previous one. Most panels have a designated overlap width (usually 1–2 inches). Ensure the ribs align perfectly. Continue this process across the roof, checking alignment every few rows. Cut panels to fit around obstacles using electric shears, deburring any sharp edges afterward.

    Step 5: Install Ridge Caps and Trim

    Once all field panels are installed, finish the roof with ridge caps. These cover the peak of the roof and provide ventilation if you use vented ridge caps. Apply closure strips underneath the ridge cap to block wind-driven rain and pests. Secure the ridge cap with screws spaced evenly along the length. Finally, install gable trim on the sides to give the roof a finished look and protect the edges.

    Common Mistakes to Avoid During Installation

    Even experienced contractors make errors. Here are the top pitfalls to watch out for:

    1. Over-tightening Screws: This compresses the neoprene washer too much, causing it to fail prematurely. Stop drilling when the washer just touches the metal.
    2. Walking on Installed Panels: Metal roofs can dent. Always walk on the screw lines or use distributed weight boards if you must traverse the roof.
    3. Ignoring Thermal Expansion: Metal expands and contracts with temperature changes. Leave slight gaps at end laps and use slotted holes if recommended to allow for movement.
    4. Using Wrong Fasteners: Using standard steel screws on aluminum roofing will cause rapid corrosion. Always match the fastener material to the panel material.

    Frequently Asked Questions (FAQ)

    Can I install a metal roof myself without professional help?

    Yes, but it requires advanced DIY skills, comfort with heights, and strict adherence to safety protocols. If your roof has complex angles, valleys, or turrets, hiring a professional is recommended.

    Do I need a permit to install a metal roof?

    In most US jurisdictions, yes. Roofing is a structural component, and local building codes regulate materials and installation methods. Check with your local building department before starting.

    How long does it take to install a metal roof?

    For a typical 2,000-square-foot home, a professional crew takes 2–3 days. A DIYer should expect 1–2 weeks, depending on experience and helper availability.

    Is metal roofing noisy during rain?

    No. When installed with solid sheathing and proper underlayment, metal roofs are no noisier than asphalt shingles. The insulation and attic space dampen sound significantly.

    What is the best type of metal for residential roofing?

    Galvalume (steel coated with aluminum and zinc) is the most popular due to its balance of cost and durability. Copper and zinc are premium options with unique aesthetics but higher price tags.

    Conclusion

    Learning how do you install a metal roof on a house is a rewarding journey that can significantly enhance your home’s value and resilience. By carefully preparing the structure, using the right tools, and following a meticulous step-by-step process, you can achieve a professional-grade result. Remember, patience and precision are your best friends in this project.

    If you found this guide helpful, please share it on social media to help other homeowners make informed decisions about their roofing projects. Have you installed a metal roof? Share your tips or questions in the comments below!
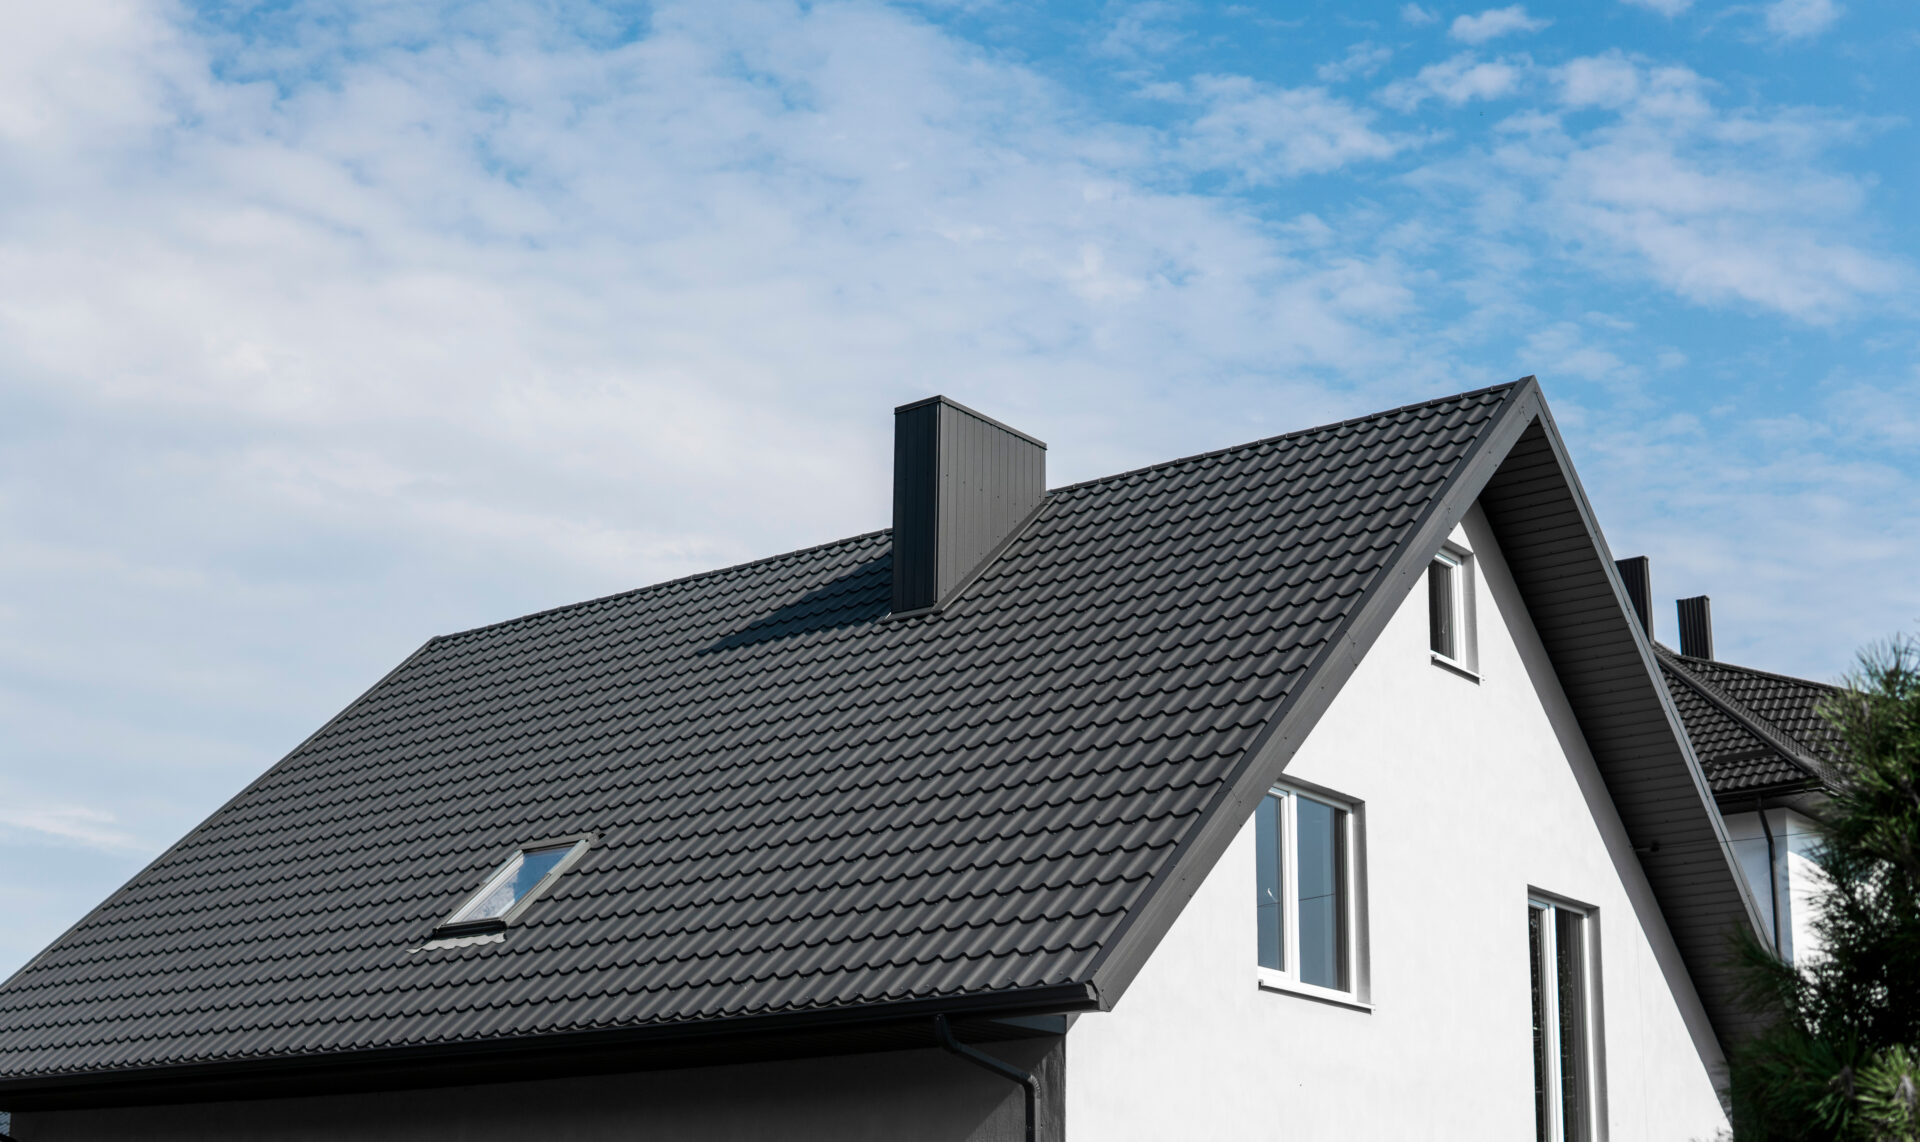
  • How Much Will It Cost To Get A New Roof?

    How Much Will It Cost To Get A New Roof?

    Replacing a roof is one of the most significant investments a homeowner can make. It protects your family, enhances curb appeal, and preserves your property value. However, staring at a blank checkbook while waiting for contractor quotes can be stressful. If you are asking, “How much will it cost to get a new roof,“ you are not alone. This guide breaks down the numbers clearly so you can budget with confidence.

    Understanding the Average Cost of a New Roof in 2026

    The short answer? For an average-sized home in the United States, a new roof typically costs between $8,500 and $14,000. However, this range is broad because every home is unique.

    According to recent industry data from 2025-2026, the national average sits around $11,500 for a standard asphalt shingle replacement on a 2,000-square-foot home. But “average” doesn’t always apply to your specific situation. Costs can dip as low as $5,000 for small repairs or simple materials, or skyrocket past $30,000 for premium materials like slate or copper on large, complex structures.

    Several core factors drive these prices:

    • Roof Size: Measured in “squares” (one square equals 100 square feet).
    • Material Choice: The single biggest variable in your budget.
    • Labor Costs: Varies significantly by region and contractor demand.
    • Complexity: Steep pitches, multiple chimneys, and skylights increase labor time.

    How Material Choice Impacts Your Total Bill

    When calculating how much will it cost to get a new roof, the material you choose is the primary lever you can pull. Here is a breakdown of common roofing materials and their estimated costs per square foot (including installation) in the current market.

    1. Asphalt Shingles (Most Popular)

    • Cost: $4.50 – $8.50 per sq. ft.
    • Pros: Affordable, widely available, easy to repair.
    • Cons: Shorter lifespan (15–25 years), less eco-friendly.
    • Best For: Budget-conscious homeowners and standard suburban homes.

    2. Metal Roofing (Growing Trend)

    • Cost: $9.00 – $16.00 per sq. ft.
    • Pros: Lasts 40–70 years, energy-efficient, fire-resistant.
    • Cons: Higher upfront cost, can be noisy during rain if not insulated properly.
    • Best For: Long-term owners and areas prone to severe weather.

    3. Clay or Concrete Tiles

    • Cost: $10.00 – $20.00+ per sq. ft.
    • Pros: Extremely durable, excellent for hot climates, high aesthetic value.
    • Cons: Very heavy (may require structural reinforcement), fragile if walked on.
    • Best For: Southwestern US styles and Mediterranean architecture.

    4. Slate and Wood Shakes

    • Cost: $15.00 – $30.00+ per sq. ft.
    • Pros: Premium look, natural materials, incredibly long-lasting (slate can last 100+ years).
    • Cons: Expensive, requires specialized installers, heavy weight.
    • Best For: Luxury homes and historic restorations.
    MaterialAvg. Cost per Sq. Ft.LifespanMaintenance Level
    Asphalt Shingles$4.50 – $8.5015-25 YearsModerate
    Metal$9.00 – $16.0040-70 YearsLow
    Clay/Concrete Tile$10.00 – $20.0050+ YearsLow
    Slate$15.00 – $30.00+75-100+ YearsLow

    Note: Prices include materials and professional labor.

    How Much Will It Cost To Get A New Roof

    Hidden Costs You Might Not Expect

    Many homeowners focus solely on the shingles, but the question “How much will it cost to get a new roof” involves more than just the visible layer. Here are common additional expenses that can surprise you:

    Tear-Off and Disposal

    Removing the old roof is labor-intensive. Most contractors charge $1.00 to $5.00 per square foot for tear-off and disposal fees. If your home has multiple layers of old roofing, this cost increases. Always ask if your quote includes “haul-away” fees.

    Underlayment and Decking Repair

    Once the old shingles are gone, contractors inspect the wood decking beneath. If they find rot or water damage, you must pay for plywood replacement. This typically costs $75 to $100 per sheet of plywood, plus labor. It is unpredictable until the job starts, so set aside a 10% contingency fund.

    Permits and Inspections

    Local municipalities often require permits for roof replacements. These fees vary by city but generally range from $150 to $500. While some contractors include this in their bid, others list it separately. Check your local building department requirements early.

    Ventilation and Flashing

    Upgrading ridge vents, soffit vents, or replacing flashing around chimneys and skylights is crucial for longevity. Neglecting these can void warranties. Expect to pay an extra $500 to $1,500 for comprehensive ventilation upgrades.

    Regional Labor Variations Across the US

    Labor accounts for roughly 40–60% of your total roofing cost. Therefore, where you live matters immensely.

    • Northeast & Midwest: Higher labor costs due to union prevalence and shorter working seasons. Winter delays can also impact pricing.
    • South & Southeast: Competitive markets may lower labor costs, but hurricane-resistant codes (like in Florida) may require more expensive installation methods.
    • West Coast: High cost of living areas like California and Washington see premium labor rates, often exceeding $100 per hour for skilled roofers.

    For a deeper understanding of regional construction standards, you can refer to general building code information on Wikipedia.

    Steps to Get an Accurate Quote

    To ensure you are comparing apples to apples, follow these steps when seeking estimates:

    1. Measure Your Roof: Use online satellite tools or ask a contractor for a precise measurement in “squares.” Do not rely on your home’s square footage; the roof area is usually larger due to pitch.
    2. Choose Your Material: Decide on asphalt, metal, or tile before getting quotes. This allows contractors to give fixed prices rather than vague ranges.
    3. Get Three Quotes: Always obtain at least three detailed written estimates. Look for line-item breakdowns, not just a bottom-line number.
    4. Check Credentials: Verify the contractor is licensed, insured, and has good standing with the Better Business Bureau (BBB).
    5. Ask About Warranty: Distinguish between the manufacturer’s warranty (covers materials) and the workmanship warranty (covers installation errors). Aim for at least a 5–10 year workmanship guarantee.

    FAQ Section

    Q: Does homeowners insurance cover a new roof?

    A: Typically, insurance only covers roof replacement if the damage is caused by a sudden, covered peril like a storm, hail, or fire. They do not cover wear and tear or age-related deterioration. Check your policy’s “Actual Cash Value” vs. “Replacement Cost” clauses.

    Q: How long does a roof replacement take?

    A: For an average residential home, the physical installation takes 1 to 3 days. However, scheduling, permit approval, and material delivery can extend the timeline to 2–4 weeks from contract signing.

    Q: Can I install a new roof over the old one?

    A: While possible (“overlay”), it is generally not recommended. It hides potential deck damage, adds unnecessary weight, and often voids manufacturer warranties. Most professional contractors insist on a full tear-off.

    Q: What is the best time of year to replace a roof?

    A: Late spring through early fall is ideal due to dry weather. However, scheduling during the “off-season” (late fall or winter, depending on your region) might yield slight discounts as contractors have fewer jobs.

    Q: How do I know if I need a repair or a full replacement?

    A: If your roof is under 15 years old and damage is localized (less than 30% of the surface), repair is cost-effective. If your roof is nearing its lifespan limit, has widespread leaks, or shows curling/granule loss, a full replacement is the smarter financial move.

    Conclusion

    So, how much will it cost to get a new roof? For most US homeowners, expect to invest between $8,500 and $14,000 for a quality asphalt shingle roof. While this is a significant expense, viewing it as a long-term asset protection strategy helps justify the cost. By choosing the right materials, accounting for hidden fees, and hiring reputable professionals, you ensure your home stays safe and dry for decades.

    Don’t let the sticker shock paralyze you. Start by getting three detailed quotes today. If you found this guide helpful, please share it with friends or neighbors who might be facing similar home improvement decisions. A well-informed homeowner is a protected homeowner!

  • Burnt Roof of Mouth? Here’s What Happens & How to Heal

    Burnt Roof of Mouth? Here’s What Happens & How to Heal

    Have you ever taken a bite of piping hot pizza or sipped scalding coffee, only to feel that sharp, stinging sensation on the roof of your mouth? It is a universally frustrating experience that can ruin your meal and leave you in discomfort for days. If you are asking yourself what happens when you burn the roof of your mouth, you are not alone; understanding the biological response and proper care can significantly speed up your recovery.

    The Immediate Biological Response: What Actually Happens?

    When you consume food or liquids that exceed the safe temperature threshold (typically above 140°F or 60°C), the delicate tissue lining the roof of your mouth, known as the hard and soft palate, suffers thermal injury. This isn’t just a superficial sting; it is a localized burn that triggers an immediate inflammatory response.

    The first thing you notice is the pain. This occurs because the heat damages the nerve endings in the mucous membranes. Your body reacts by sending blood to the area to initiate healing, which causes redness and swelling. In more severe cases, the top layer of skin may separate from the underlying tissue, forming a blister.

    According to dental professionals, these burns are classified similarly to skin burns:

    • First-degree: Redness and mild pain (most common).
    • Second-degree: Blistering and intense pain.
    • Third-degree: Deep tissue damage (rare from food, usually requires medical attention).

    For most people, the experience falls into the first or second degree. While painful, the mouth is one of the fastest-healing parts of the human body due to its rich blood supply and unique cellular regeneration properties.

    Why Does the Roof of My Mouth Feel Rough or Peeled?

    A few hours after the initial burn, you might run your tongue over the roof of your mouth and feel a rough, textured, or even “peeled” surface. This is a normal part of the healing process, but it can be alarming if you aren’t expecting it.

    The Shedding Process

    The roughness you feel is actually dead tissue. When the heat damages the epithelial cells on the surface of your palate, those cells die and begin to slough off. Your body is essentially shedding the damaged layer to make room for new, healthy cells underneath.

    • Day 1-2: The area is tender, red, and sensitive to touch.
    • Day 3-5: A white or yellowish film may appear. This is not necessarily pus; it is often a fibrin clot, a natural bandage your body creates to protect the wound while it heals.
    • Day 7+: The tissue regenerates, and the roughness disappears.

    It is crucial not to pick at this peeling skin. Doing so can expose raw nerve endings, increase the risk of infection, and delay healing. Let the tissue shed naturally during eating or brushing.

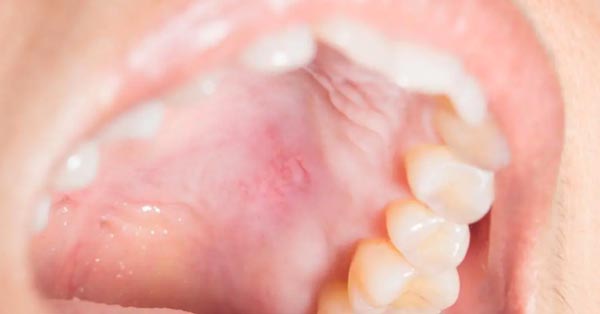
    What Happens When You Burn The Roof Of Your Mouth

    How to Relieve Pain and Speed Up Healing

    While time is the ultimate healer, you don’t have to suffer in silence. There are several evidence-based methods to manage pain and support the regeneration process. Here is a step-by-step guide to treating a burnt palate.

    Step 1: Cool It Down Immediately

    As soon as you realize you’ve burned your mouth, stop eating. Take small sips of cold water or hold ice chips against the roof of your mouth.

    • Recommendation: Use cold water (around 40–50°F / 4–10°C) for 10–15 minutes. Avoid extreme ice directly on the tissue for too long, as this can cause further tissue damage (frostbite-like effect).

    Step 2: Rinse with Salt Water

    Salt water is a natural disinfectant and helps reduce inflammation.

    • Recipe: Mix 1/2 teaspoon of salt into 8 ounces (240 ml) of warm water.
    • Action: Swish gently for 30 seconds and spit out. Repeat 2–3 times a day.

    Step 3: Use Soothing Agents

    Certain foods and products can coat the burn and provide a protective barrier.

    • Honey: Known for its antimicrobial and wound-healing properties. Apply a small amount directly to the burnt area.
    • Yogurt or Milk: The cool temperature and probiotics can soothe irritation.
    • Aloe Vera: Ensure it is food-grade aloe vera gel. It has anti-inflammatory properties that can reduce pain.

    Step 4: Over-the-Counter Pain Relief

    If the pain is interfering with your ability to eat or sleep, consider using OTC medications.

    • Oral Gels: Products containing benzocaine can numb the area temporarily.
    • Anti-inflammatories: Ibuprofen can help reduce swelling and pain systemically.

    Foods to Eat vs. Foods to Avoid

    Your diet plays a critical role in how quickly your mouth heals. Irritating the wound can reset the healing clock. Use this table to guide your food choices during the recovery period.

    Food CategoryRecommended (Healing)Avoid (Irritating)
    TemperatureCold or room temperature foodsPiping hot soups, coffee, tea
    TextureSoft, smooth textures (pudding, yogurt)Crunchy, sharp foods (chips, toast)
    Flavor ProfileBland, mild flavorsSpicy, acidic, or salty foods
    ExamplesIce cream, smoothies, mashed potatoesCitrus fruits, tomato sauce, salsa

    Pro Tip: Stick to a soft-food diet for the first 48 hours. Think of foods that require minimal chewing and won’t scratch the sensitive palate.

    When Should You See a Doctor?

    Most burnt palates heal within 3 to 7 days without professional intervention. However, there are specific signs that indicate a complication or a more severe injury requiring medical attention.

    You should consult a healthcare provider if:

    1. Signs of Infection: Increased redness, swelling, pus, or fever.
    2. Persistent Pain: The pain does not subside after 7–10 days.
    3. Large Blisters: If blisters are large, numerous, or interfering with breathing/swallowing.
    4. White Patches: If white patches persist beyond two weeks, it could indicate a fungal infection (thrush) or other oral conditions unrelated to the burn.

    For more detailed information on oral mucosal injuries, you can refer to resources like Wikipedia’s article on Oral Mucosa to understand the anatomy involved.

    Frequently Asked Questions (FAQ)

    1. How long does it take for the roof of your mouth to heal?

    Typically, minor burns on the roof of the mouth heal within 3 to 7 days. The mouth has a high rate of cell turnover, which allows for faster recovery compared to skin burns on other parts of the body. Severe second-degree burns may take up to two weeks.

    2. Can I brush my teeth if I have a burnt roof of my mouth?

    Yes, maintaining oral hygiene is crucial to prevent infection. However, be gentle around the affected area. Use a soft-bristled toothbrush and avoid scrubbing the burnt spot directly. Rinsing with salt water after brushing can help keep the area clean.

    3. Why does my burnt mouth taste weird?

    Damage to the taste buds and nerve endings on the roof of your mouth can temporarily alter your sense of taste. You might experience a metallic, bitter, or bland taste. This is usually temporary and resolves as the tissue heals.

    4. Is it bad to pop the blister on the roof of my mouth?

    Yes, do not pop it. The blister acts as a natural sterile bandage protecting the raw tissue underneath. Popping it introduces bacteria from your mouth into the open wound, significantly increasing the risk of infection and prolonging healing time.

    5. Can drinking hot coffee cause permanent damage?

    It is highly unlikely. Most thermal injuries from food and beverages are superficial. Permanent damage usually requires exposure to extremely high temperatures for a prolonged period, which is rare in accidental dietary burns. However, chronic consumption of very hot beverages has been linked to other health risks, so moderation is key.

    6. What is the best home remedy for a burnt palate?

    Cold dairy products (like yogurt or milk), honey, and salt water rinses are among the most effective home remedies. They soothe pain, reduce inflammation, and keep the area clean without harsh chemicals.

    Conclusion

    Experiencing the pain of a burnt palate is unpleasant, but understanding what happens when you burn the roof of your mouth can help you manage the situation effectively. By cooling the area immediately, avoiding irritants, and using soothing remedies like salt water or honey, you can minimize discomfort and speed up the natural healing process.

    Remember, your mouth is resilient. With a little care and patience, you’ll be back to enjoying your favorite hot foods in no time. If you found this guide helpful, please share it with your friends and family on social media—because everyone knows someone who loves their pizza just a little too hot!

  • Do You Have Taste Buds on the Roof of Your Mouth?

    Do You Have Taste Buds on the Roof of Your Mouth?

    Have you ever taken a sip of hot coffee or a bite of spicy food and felt a distinct sensation on the roof of your mouth, wondering if you were actually “tasting” it there? It is a common confusion, as our mouths are complex sensory landscapes. Many people ask, “Are there taste buds in the roof of your mouth?” to understand if that upper surface contributes to flavor or if it is merely a structural boundary.

    The short answer is nuanced: while the hard palate (the bony front part) generally lacks taste buds, the soft palate (the muscular back part) does contain them. Understanding this distinction can change how you perceive flavor and even help you identify certain oral health issues. In this guide, we will dive deep into the anatomy of your mouth, debunk common myths, and explain exactly how your sense of taste works beyond just the tongue.

    The Anatomy of Taste: Where Are Taste Buds Located?

    To answer whether taste buds exist on the roof of the mouth, we first need to map out the terrain of the oral cavity. Most people believe taste buds are exclusively located on the tongue, specifically on those small bumps called papillae. While the tongue is indeed the primary organ for taste, it is not the sole player.

    Taste buds are microscopic sensory organs that contain gustatory receptor cells. These cells detect chemical compounds in food and send signals to the brain via cranial nerves. According to standard anatomical models, taste buds are distributed across several areas:

    • The Tongue: Specifically on the fungiform, foliate, and circumvallate papillae.
    • The Soft Palate: The rear, muscular part of the roof of the mouth.
    • The Epiglottis: The flap that covers the windpipe during swallowing.
    • The Upper Esophagus: Though fewer in number here.

    It is crucial to distinguish between the hard palate and the soft palate. The hard palate is the bony structure at the front of the roof of your mouth. It is covered by a thick layer of keratinized epithelium, designed to withstand the friction of chewing. This area does not contain taste buds. Its primary job is mechanical, helping to crush food against the tongue.

    However, the soft palate, located further back near the throat, is softer and more flexible. This area does contain scattered taste buds. This is why you might perceive certain flavors more intensely when food moves toward the back of your mouth during swallowing.

    Why Does the Roof of My Mouth Feel Sensitive to Flavor?

    If the hard palate doesn’t have taste buds, why does it feel like it reacts to strong flavors? This is a common point of confusion. The sensation you feel on the roof of your mouth is often not “taste” in the strict scientific sense, but rather chemesthesis.

    Chemesthesis refers to chemical sensitivity that is not related to taste or smell. It involves the trigeminal nerve, which detects pain, temperature, and touch. When you eat something spicy, minty, or carbonated, the trigeminal nerve is activated.

    Sensation TypeDetected ByExample
    Gustation (Taste)Taste Buds (Gustatory Cells)Sweet, Salty, Sour, Bitter, Umami
    ChemesthesisTrigeminal Nerve EndingsSpiciness (Capsaicin), Coolness (Menthol), Burn

    So, when you feel a “zing” on the roof of your mouth from a soda or a chili pepper, it is your nerve endings reacting to irritation or temperature, not your taste buds identifying a flavor profile. This distinction is vital for understanding oral sensitivity and avoiding damage from excessively hot or acidic foods.

    Are There Taste Buds In The Roof Of Your Mouth

    The Role of the Soft Palate in Flavor Perception

    While the hard palate is inactive in terms of taste, the soft palate plays a surprising role in the overall eating experience. Research suggests that the taste buds on the soft palate are particularly sensitive to bitter and sweet tastes. This may serve an evolutionary purpose: detecting potentially toxic substances (often bitter) before they are fully swallowed, or identifying high-energy foods (sweet).

    Furthermore, the soft palate helps close off the nasal cavity during swallowing. This action forces air through the nose, enhancing retronasal olfaction. Simply put, much of what we perceive as “flavor” is actually smell. By directing aromas upward into the nasal passage, the soft palate amplifies the complexity of the food you are eating.

    For more detailed anatomical references, you can review the structural breakdown provided by Wikipedia’s entry on the palate, which offers comprehensive diagrams of the oral cavity’s divisions.

    Common Myths About Taste Buds and the Palate

    There are several misconceptions about how we taste that persist despite scientific evidence. Let’s clear up a few:

    Myth 1: The Tongue Map is Accurate

    You may have learned in school that different parts of the tongue detect specific tastes (e.g., sweet at the tip, bitter at the back). This “tongue map” has been debunked. All taste buds, including those on the soft palate, can detect all five basic tastes, though some areas may be slightly more sensitive to certain profiles.

    Myth 2: Only the Tongue Tastes

    As established, taste buds are present in the throat, epiglottis, and soft palate. Ignoring these areas leads to an incomplete understanding of flavor perception.

    Myth 3: Burning the Roof of Your Mouth Destroys Taste Buds

    Since the hard palate lacks taste buds, burning it with hot pizza cheese won’t destroy your ability to taste. However, it can damage the delicate tissue and nerve endings, causing temporary pain and reduced sensitivity to texture and temperature. The soft palate, having taste buds, can suffer temporary taste distortion if severely burned, but these cells regenerate quickly.

    How to Protect Your Oral Sensory Health

    Maintaining the health of your entire oral cavity, including the roof of your mouth, ensures optimal sensory function. Here are practical steps to keep your taste buds and nerve endings healthy:

    1. Avoid Extreme Temperatures: Consistently consuming scalding hot beverages can damage the epithelial lining of the hard and soft palates. Let your coffee cool to around 60°C (140°F) before drinking.
    2. Practice Good Oral Hygiene: Bacteria buildup can affect taste perception. Brush your tongue gently and use a mouthwash that doesn’t contain excessive alcohol, which can dry out oral tissues.
    3. Stay Hydrated: Saliva is essential for dissolving food particles so they can reach taste receptors. Dehydration leads to dry mouth, which significantly dulls taste. Aim for at least 2 liters of water daily.
    4. Quit Smoking: Smoking damages taste buds and reduces blood flow to the oral tissues, impairing both taste and smell. Smokers often report a diminished ability to taste subtle flavors.
    5. Monitor Medications: Some medications can cause metallic tastes or dry mouth. If you notice sudden changes in taste, consult your healthcare provider.

    FAQ Section

    1. Can you lose taste buds on the roof of your mouth?

    Yes, but it is rare to lose them exclusively on the soft palate without other symptoms. Taste buds regenerate every 10–14 days. However, aging, smoking, radiation therapy, or certain infections can reduce the overall number of functional taste buds in the mouth, including those on the soft palate.

    2. Why does the roof of my mouth hurt when I eat acidic foods?

    This is likely due to the thin mucous membrane on the hard palate being irritated by acid, not because of taste buds. The trigeminal nerve endings detect the acidity as a mild pain or sting. This is a protective mechanism to prevent tissue damage.

    3. Are there more taste buds on the tongue or the roof of the mouth?

    There are significantly more taste buds on the tongue. The tongue contains thousands of taste buds across its various papillae. The soft palate has a much smaller concentration, serving more as a supplementary sensory area rather than the primary detector.

    4. Can burns on the roof of the mouth affect my sense of taste?

    Temporary burns on the hard palate will not affect taste since there are no taste buds there. However, severe burns that extend to the soft palate could temporarily impair taste sensation in that specific area. Full recovery usually occurs within two weeks as the cells regenerate.

    5. Do children have taste buds on the roof of their mouths?

    Yes, children have taste buds on their soft palates, just like adults. In fact, children often have a higher density of taste buds overall, which is why they may be more sensitive to bitter flavors (like vegetables) than adults. As we age, the number of taste buds naturally decreases.

    Conclusion

    So, are there taste buds in the roof of your mouth? The answer is yes, but with a caveat. They are located specifically on the soft palate, not the hard bony front section. While the tongue remains the powerhouse of taste, the soft palate contributes to our ability to detect bitter and sweet notes and plays a critical role in directing aromas for a full flavor experience.

    Understanding this anatomy helps us appreciate the complexity of eating. It also reminds us to care for our entire oral cavity, not just our teeth and tongue. By avoiding extreme temperatures and maintaining good hygiene, you protect both your taste buds and the sensitive nerve endings that make every meal enjoyable.

    If you found this explanation helpful, please share it with your friends and family! You might just change the way they think about their next cup of coffee. Don’t forget to leave a comment below if you’ve ever experienced strange sensations on the roof of your mouth—we’d love to hear your stories.

  • Is Your Roof Failing? Key Signs It Needs Replacement

    Is Your Roof Failing? Key Signs It Needs Replacement

    Your home is likely your biggest investment, and the roof is its first line of defense against the elements. Ignoring minor issues can lead to catastrophic water damage, mold growth, and skyrocketing repair bills down the line. If you are staring at your ceiling wondering how to tell if a roof needs to be replaced, you are not alone; recognizing the early warning signs is crucial for protecting your property and your wallet.

    In this guide, we will break down the definitive indicators that your roof has reached the end of its lifecycle. We will move beyond simple guesswork and provide you with actionable, professional insights to help you make an informed decision.

    How Old Is Your Roof? Understanding Lifespan Expectations

    The age of your roofing material is the single most significant factor in determining its remaining life. While some homeowners assume roofs last forever, every material has a finite lifespan dictated by weather exposure, installation quality, and maintenance.

    Most standard asphalt shingle roofs—the most common type in the United States—last between 15 to 20 years. If your home was built or reroofed within this window, you should be conducting annual inspections. However, age alone isn’t a death sentence; it is a context clue.

    Roofing MaterialAverage LifespanKey Vulnerability
    Asphalt Shingles15–20 YearsUV Radiation, Wind
    Wood Shakes20–30 YearsMoisture, Rot, Insects
    Metal Roofing40–70 YearsCorrosion (if uncoated)
    Slate/Tile50–100+ YearsWeight, Impact Damage

    If your asphalt roof is approaching the 20-year mark, even if it looks “okay” from the ground, it is likely losing its granular protection. At this stage, proactive replacement is often cheaper than emergency repairs after a storm. For more detailed information on roofing materials and their historical development, you can refer to Wikipedia’s entry on roofing.

    Are Your Shingles Curling, Cracking, or Missing?

    Visual inspection from the ground can reveal a lot. You do not need to climb a ladder to spot major distress signals. Grab a pair of binoculars and look for these specific issues:

    1. Curling Edges

    Shingles may curl upward (cupping) or downward (clawing). This usually indicates that the shingles are drying out and losing their flexibility. Once shingles curl, they are prone to breaking off in high winds, exposing the underlayment to rain.

    2. Cracked Shingles

    Cracks occur due to thermal expansion and contraction. In climates with hot days and cold nights, shingles expand and contract repeatedly. Over time, this stress causes fractures. A cracked shingle cannot effectively shed water, leading to slow, hidden leaks.

    3. Missing Granules

    Asphalt shingles are coated with ceramic granules that protect them from UV rays. If you notice bare spots where the black asphalt base is visible, the shingle is deteriorating. You might also find an accumulation of these granules in your gutters. While some granule loss is normal in the first year, excessive loss in older roofs signals the end is near.

    4. Missing Shingles Entirely

    If you see patches of your roof deck or underlayment, you have an immediate problem. Missing shingles create direct pathways for water to enter your attic. This often requires immediate patching, but if it is widespread, it suggests the adhesive strips have failed, necessitating a full replacement.

    How To Tell If A Roof Needs To Be Replaced

    What Do Dark Streaks and Moss Growth Indicate?

    Aesthetics matter, but dark streaks and moss are more than just ugly; they are structural threats.

    Dark Streaks: These are often caused by Gloeocapsa magma, a type of algae. While algae itself doesn’t eat the shingle, it retains moisture. This constant dampness accelerates the degradation of the roofing material. Furthermore, heavy algae growth can void certain manufacturer warranties.

    Moss Growth: Moss is more dangerous than algae. Its root systems can lift shingles, breaking the seal and allowing wind-driven rain underneath. Moss also holds water against the roof surface for extended periods, which can rot wood decking beneath the shingles.

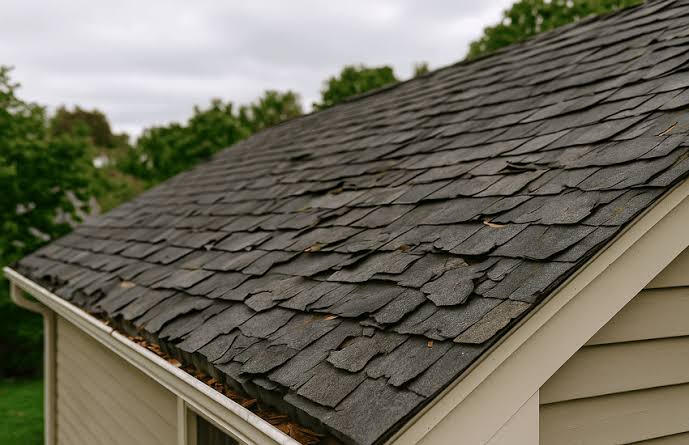
    If you see significant moss coverage, especially in shaded areas, it is a sign that your roof is retaining too much moisture. Cleaning it might help temporarily, but if the underlying shingles are soft or spongy, replacement is the only safe option.

    Is Your Attic Showing Signs of Water Intrusion?

    Sometimes the roof looks fine from the outside, but the damage is happening internally. Your attic is the best place to diagnose hidden roof failures. Visit your attic during the day and look for:

    • Daylight Through the Roof Boards: If you can see pinpricks of sunlight coming through the roof deck, you have gaps. These gaps allow water, air, and pests to enter.
    • Water Stains or Mold: Look for dark streaks or discolored patches on the underside of the roof deck or on the insulation. Musty smells are also a strong indicator of trapped moisture.
    • Sagging Decking: If the wooden boards between the rafters appear to sag or bow, this indicates long-term water saturation. This is a critical structural issue that requires immediate professional attention.

    Pro Tip: Check your attic after a heavy rainstorm. Use a flashlight to trace any wet spots back to their source. Remember, water travels; the leak inside might not be directly below the hole outside.

    Why Is Your Energy Bill Suddenly Spiking?

    Your roof plays a vital role in your home’s thermal envelope. As roofs age, their ability to reflect heat and provide insulation diminishes.

    If you notice your HVAC system working harder to maintain temperature, or if your energy bills have increased without a change in usage habits, your roof might be the culprit. Poor ventilation, often associated with aging roofing systems, can cause heat to build up in the attic. This “superheated” attic radiates heat into your living spaces in summer and allows heat to escape in winter.

    Replacing an old roof with modern, energy-efficient materials can significantly improve your home’s insulation values. Many new shingles come with reflective coatings designed to lower cooling costs by up to 15%.

    When Should You Repair vs. Replace?

    This is the most common question homeowners face. Not every leak requires a full tear-off. Here is a simple framework to help you decide:

    Choose Repair If:

    • The roof is less than 10 years old.
    • Damage is isolated to a small area (e.g., missing shingles from a fallen branch).
    • There is no widespread granule loss or curling.
    • The underlayment and decking are dry and solid.

    Choose Replacement If:

    • The roof is over 15–20 years old.
    • More than 30% of the roof shows signs of wear (curling, cracking, missing shingles).
    • You have multiple leaks in different areas.
    • The shingles are blistering or balding extensively.
    • You plan to sell the home soon (a new roof boosts curb appeal and value).

    Attempting to patch a roof that is globally failing is often a “false economy.” You may spend thousands on repeated repairs over two years, only to replace the roof anyway. A full replacement provides a fresh warranty and peace of mind.

    Frequently Asked Questions (FAQ)

    1. Can I replace just one section of my roof?

    Technically, yes, but it is rarely recommended. Matching the color and texture of old shingles with new ones is difficult due to weathering and manufacturing changes. Furthermore, blending old and new sections can create weak points at the seams. Most professionals advise replacing the entire roof plane for uniformity and warranty validity.

    2. Does homeowners insurance cover roof replacement?

    It depends on the cause of the damage. Insurance typically covers “sudden and accidental” damage, such as from a storm, hail, or falling tree. However, they generally do not cover wear and tear, age-related deterioration, or lack of maintenance. Always review your policy and document damage with photos immediately after a storm.

    3. How long does a roof replacement take?

    For an average-sized single-family home, a professional crew can typically complete a roof replacement in 1 to 3 days. Factors that may extend this timeline include complex roof architecture (multiple valleys, turrets), bad weather, or the discovery of rotted decking that needs repair.

    4. What is the best season to replace a roof?

    Late spring to early fall is ideal because roofing adhesives require warm temperatures to seal properly. However, reputable contractors work year-round. Winter replacements are possible but may take longer due to colder temperatures affecting material flexibility and worker safety. Avoid scheduling during peak hurricane or tornado seasons if possible.

    5. Will a new roof increase my home’s value?

    Yes. According to real estate experts, a new roof can offer a high return on investment (ROI), often recouping 60–70% of the cost upon sale. More importantly, it removes a major objection from potential buyers, making your home easier to sell.

    Conclusion

    Knowing how to tell if a roof needs to be replaced empowers you to protect your home proactively rather than reactively. By monitoring the age of your roof, inspecting for physical damage like curling or missing shingles, checking your attic for leaks, and watching for spikes in energy costs, you can avoid costly emergencies.

    Remember, a roof is not just a covering; it is a critical system that ensures the safety and comfort of your family. If you suspect your roof is nearing the end of its life, do not wait for a leak to appear. Schedule a professional inspection today.

    Found this guide helpful? Share it with your neighbors on social media to help them protect their homes too!

  • How to Install a Metal Roof on a Mobile Home

    How to Install a Metal Roof on a Mobile Home

    Replacing the roof on a manufactured home is one of the most critical maintenance tasks you can undertake. Many older mobile homes suffer from leaks due to deteriorating rubber or asphalt shingles that simply weren’t designed to last decades. If you are tired of patching leaks every spring, learning how to install a metal roof on a mobile home can be the permanent solution you need. This guide will walk you through the process with clarity, safety, and precision.

    Why Choose Metal for Your Mobile Home?

    Before diving into the tools and screws, it is vital to understand why metal is superior for manufactured housing. Unlike site-built homes, mobile homes have unique structural considerations. They are lighter, and their frames are designed to flex slightly during transport and settling.

    Traditional asphalt shingles add significant weight and can crack when the home shifts. Metal roofing, particularly aluminum or light-gauge steel, is incredibly lightweight—often weighing less than 1.5 pounds per square foot. This reduces stress on the trusses while providing a lifespan of 40 to 70 years. According to industry data, metal roofs reflect solar radiant heat, which can reduce cooling costs by 10–25%, a massive benefit for mobile homes that often struggle with insulation efficiency.

    Can You Put a Metal Roof Over an Existing Mobile Home Roof?

    This is the most common question homeowners ask. The short answer is: It depends, but usually no.

    While “roof-over” methods are popular for site-built houses, mobile homes present specific risks. Most manufactured homes built before 1980 have low-slope roofs (sometimes as low as 1:12 pitch). Metal roofing generally requires a minimum pitch of 3:12 for water to shed properly without specialized sealing systems.

    Furthermore, adding a second layer traps moisture between the old and new roofs. In a mobile home, where ventilation is already a challenge, this trapped humidity can rot the wooden decking and corrode the steel frame beneath. For long-term integrity, it is highly recommended to remove the old roofing material down to the deck. This allows you to inspect the structural integrity of the plywood or OSB sheathing and repair any soft spots caused by previous leaks.

    Essential Tools and Materials Checklist

    Preparation is half the battle. Having the right tools prevents mid-project delays and ensures a professional finish. Do not skimp on quality here; your roof is your primary defense against the elements.

    Required Tools:

    • Drill/Impact Driver: With a clutch setting to prevent over-driving screws.
    • Metal Snips or Electric Shear: For cutting panels to size. Avoid abrasive saws if possible, as they create hot edges that burn off galvanization.
    • Chalk Line: For ensuring straight panel alignment.
    • Safety Gear: Harness, non-slip boots, gloves, and eye protection. Never work on a roof alone.
    • Sealant Gun: For applying butyl tape and urethane sealant.

    Materials Needed:

    • Metal Panels: Standing seam or corrugated panels (Aluminum is best for coastal areas; Galvalume steel is cost-effective for inland).
    • Screws: Self-tapping metal roofing screws with EPDM washers. Ensure they are long enough to penetrate the purlins or rafters, not just the decking.
    • Closure Strips: Foam strips that fit under the ribs of the metal to block wind and pests.
    • Trim Pieces: Eave trim, gable trim, and ridge caps.
    • Underlayment: A synthetic, breathable roof underlayment is superior to felt paper for moisture management.
    How To Install A Metal Roof On A Mobile Home

    Step-by-Step Installation Guide

    Installing a metal roof requires precision. Follow these steps methodically to ensure a watertight seal.

    Step 1: Remove Old Roofing and Inspect Decking

    Strip away all existing shingles, rubber membranes, or vent pipes. Once exposed, inspect the wood decking. Any board that feels soft or shows signs of rot must be replaced. Use exterior-grade plywood of the same thickness as the existing deck. Nail it securely to the rafters.

    Step 2: Install Drip Edge and Underlayment

    Start at the eaves (the bottom edge). Install a metal drip edge along the eaves to direct water away from the fascia. Next, roll out your synthetic underlayment. Start from the bottom and work your way up, overlapping each row by at least 6 inches. Secure it with roofing nails or staples every 12–18 inches. This layer acts as a secondary barrier against wind-driven rain.

    Step 3: Install Closure Strips and Eave Trim

    If you are using corrugated or ribbed panels, install foam closure strips along the eave. These fill the gaps between the metal ribs and the roof deck, preventing birds, insects, and wind from entering. Snap the eave trim over the closure strip and secure it with screws every 12 inches.

    Step 4: Lay the First Panel

    This is the most critical step. If the first panel is crooked, the entire roof will be crooked. Measure carefully to ensure the panel overhangs the drip edge by about 1–2 inches. Use a chalk line to mark your screw lines. Drill pilot holes if necessary, then drive your screws through the flat part of the panel (not the high rib, unless specified by the manufacturer) into the structural framing below.

    Pro Tip: Do not overtighten screws. The EPDM washer should compress slightly to form a seal, but if you crush it, it will fail. Stop when you feel resistance.

    Step 5: Install Subsequent Panels

    Overlap the next panel according to the manufacturer’s specifications (usually one rib overlap). Check alignment every three panels. Consistency is key. Continue this process until you reach the opposite side of the roof.

    Step 6: Add Ridge Cap and Flashing

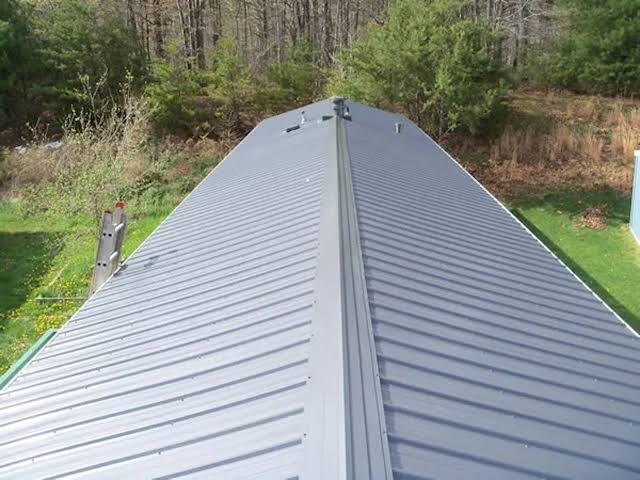
    Once the field panels are complete, install the ridge cap along the peak of the roof. Apply a bead of urethane sealant under the ridge cap before screwing it down. This prevents water from penetrating the highest point of your roof. Install gable trim on the sides to finish the edges cleanly.

    For detailed standards on roofing materials and safety, you can refer to general construction guidelines provided by Wikipedia.

    Cost Breakdown: DIY vs. Professional

    Understanding the financial aspect helps you plan better. Here is a realistic comparison for a standard 1,500 sq. ft. mobile home.

    ItemDIY Cost EstimateProfessional Cost Estimate
    Materials$3,000 – $5,000$3,000 – $5,000
    Labor$0 (Your time)$4,000 – $7,000
    Disposal Fees$100 – $300Included
    Total$3,100 – $5,300$7,000 – $12,000

    Note: Prices vary by region and metal type. Aluminum is typically 20% more expensive than steel but offers better corrosion resistance.

    Common Mistakes to Avoid

    Even experienced DIYers make errors. Here are the top pitfalls to watch out for:

    1. Walking on the Ribs: Never step on the high ribs of the metal panels. Always step on the flat areas where the screws are located, or use a plank to distribute your weight. Stepping on ribs can dent the metal and break the seal.
    2. Ignoring Thermal Expansion: Metal expands and contracts with temperature changes. If you screw panels too tightly without allowing for slight movement, the oil-canning effect (popping noises) may occur, and screws can back out over time.
    3. Mixing Metals: Do not use copper flashing with aluminum or steel roofing. The galvanic reaction will cause rapid corrosion. Stick to compatible metals or use isolated barriers.

    Frequently Asked Questions (FAQ)

    1. What is the best type of metal for a mobile home roof?

    Aluminum is often the best choice for mobile homes. It is lightweight, rust-proof, and easy to cut. However, Galvalume steel is a strong, cost-effective alternative if you live in an area without salt air. Avoid heavy copper or zinc unless you have verified your home’s structural capacity.

    2. Do I need a permit to install a metal roof on my mobile home?

    In most jurisdictions, yes. Roofing is considered a structural change. Check with your local county building department. Additionally, if you live in a mobile home park, you must get approval from the park management, as they often have aesthetic guidelines.

    3. How long does it take to install a metal roof on a mobile home?

    For a DIY team of two people, expect the project to take 3 to 5 days. This includes removal of the old roof, repairs, and installation. Professionals can typically complete the job in 1–2 days.

    4. Will a metal roof make my mobile home hotter?

    No, actually the opposite. Metal roofs reflect solar radiation. When installed with proper ventilation and an air gap (if using standing seam), they can significantly keep your home cooler in summer compared to dark asphalt shingles that absorb heat.

    5. Can I install solar panels on a metal mobile home roof?

    Yes, and it is easier than on shingle roofs. You can use clamps that attach directly to the metal seams without drilling holes, preserving the warranty and waterproofing of your roof. Ensure your roof structure can support the additional load.

    Conclusion

    Learning how to install a metal roof on a mobile home is a rewarding project that adds value, durability, and peace of mind to your living space. By removing the old material, preparing the deck correctly, and following precise installation steps, you can achieve a professional-grade result. Remember, safety is paramount—never rush the process, and always double-check your measurements.

    If you found this guide helpful, please share it on social media to help other mobile homeowners tackle their renovation projects with confidence. Have questions or tips of your own? Leave a comment below!

  • How Do I Get Rid Of Moss On My Roof?

    How Do I Get Rid Of Moss On My Roof?

    Have you noticed unsightly green patches creeping up your shingles? You are not alone; many homeowners struggle with this issue and often ask, “How do I get rid of moss on my roof” before it causes structural damage. In this guide, we will walk you through safe, proven methods to restore your roof’s health without compromising its integrity.

    Why Is Moss Dangerous for Your Roof?

    Before diving into removal techniques, it is crucial to understand why moss is more than just an aesthetic nuisance. Moss acts like a sponge, retaining moisture against your roofing materials long after the rain has stopped. This constant dampness can lead to rot in wooden underlayment, corrosion of metal flashings, and the lifting of shingles, which creates entry points for water leaks.

    According to industry experts, ignoring moss growth can reduce the lifespan of your asphalt shingles by up to 50%. The roots of moss (rhizoids) can penetrate tiny cracks in shingles, widening them over time. By addressing this early, you save thousands in potential repair costs.

    What Causes Moss to Grow on Roofs?

    Understanding the root cause helps prevent future outbreaks. Moss thrives in specific conditions:

    • Shade: Trees or nearby buildings that block sunlight create a cool, damp environment ideal for moss.
    • Moisture: High humidity, frequent rain, or poor drainage contributes to growth.
    • Debris: Leaves and twigs trap moisture and provide organic material for moss to feed on.
    • Climate: Regions with mild, wet winters and cool summers see the most moss activity.

    If your roof faces north or is surrounded by tall trees, you are at higher risk. Regular maintenance is key to breaking this cycle.

    Step-by-Step Guide: How to Remove Moss Safely

    Removing moss requires patience and the right approach. Aggressive scraping or high-pressure washing can damage shingles and void warranties. Follow these steps for a safe cleanup.

    Step 1: Safety First

    Never attempt roof work alone or in wet/windy conditions. Use a sturdy extension ladder with stabilizers. Wear rubber-soled shoes for grip and safety goggles to protect your eyes from debris and cleaning solutions. If your roof is steep (greater than 6/12 pitch), consider hiring a professional.

    Step 2: Dry Brushing

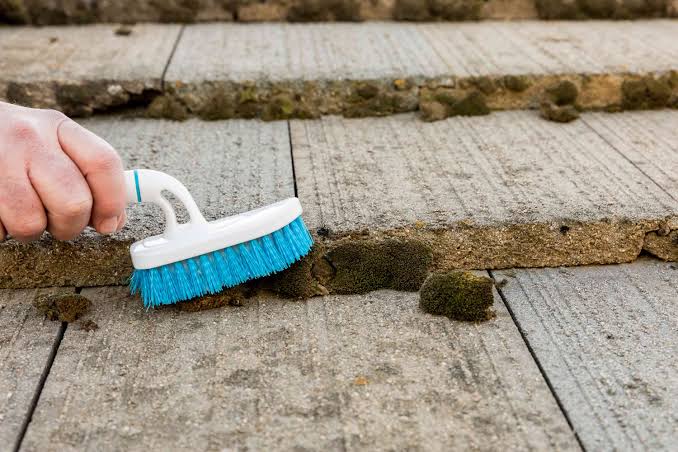
    Start by gently removing loose moss and debris. Use a soft-bristle broom or a leaf blower on a low setting.

    • Do: Sweep downwards from the ridge to the eaves to avoid lifting shingles.
    • Don’t: Use a wire brush or pressure washer, as these can strip the protective granules off asphalt shingles.

    Step 3: Apply a Moss-Killing Solution

    For effective removal, you need a solution that kills the moss at the root. You can use a commercial moss killer or a DIY mixture.

    DIY Recipe:

    • Mix 1 cup of oxygen bleach (sodium percarbonate) with 1 gallon of warm water.
    • Note: Avoid chlorine bleach if possible, as it can harm surrounding plants and corrode metal fixtures. Oxygen bleach is safer and environmentally friendly.

    Apply the solution using a garden sprayer. Ensure thorough coverage but avoid runoff into gutters where possible. Let it sit for 15–20 minutes. Do not let it dry completely before rinsing.

    Step 4: Gentle Rinsing

    Rinse the roof with a garden hose using a gentle spray nozzle. Start from the top and work your way down. This ensures that any remaining moss spores are washed away without forcing water under the shingles.

    Step 5: Clean Gutters

    Moss debris often clogs gutters. After cleaning the roof, remove all debris from your gutters and downspouts to ensure proper water drainage. Clogged gutters can cause water to back up under the shingles, leading to ice dams in winter.

    How Do I Get Rid Of Moss On My Roof

    Chemical vs. Natural Remedies: Which Is Better?

    Choosing the right treatment depends on your environmental concerns and the severity of the infestation. Here is a comparison to help you decide.

    FeatureChemical Moss KillersNatural Remedies (Vinegar/Oxygen Bleach)
    EffectivenessHigh; fast-actingModerate; may require repeated applications
    Cost$20–$50 per bottle$5–$15 for ingredients
    Environmental ImpactCan harm plants/pets if misusedBiodegradable and safer for gardens
    LongevityLasts 6–12 monthsLasts 3–6 months
    Ease of UseReady-to-use sprays availableRequires mixing and preparation

    For most homeowners, oxygen bleach offers the best balance of effectiveness and safety. It kills moss without the harsh fumes of chlorine or the potential plant damage of strong acids.

    How to Prevent Moss from Returning

    Prevention is always cheaper than cure. Once your roof is clean, take these steps to keep moss at bay.

    Install Zinc or Copper Strips

    One of the most effective long-term solutions is installing metal strips near the roof ridge. When it rains, tiny particles of zinc or copper wash down the roof, creating an environment that inhibits moss and algae growth. These strips can last for decades and require zero maintenance.

    Trim Overhanging Branches

    Sunlight is moss’s enemy. Trim tree branches that shade your roof to allow more UV exposure and improve air circulation. This also reduces the amount of leaf litter that accumulates on your shingles.

    Improve Roof Ventilation

    Poor attic ventilation can lead to excess heat and moisture buildup, which encourages moss growth. Ensure your attic has adequate soffit and ridge vents to keep the roof deck dry and cool.

    Regular Inspections

    Schedule bi-annual inspections, ideally in spring and fall. Look for early signs of moss, damaged shingles, or clogged gutters. Early detection makes removal much easier.

    When to Call a Professional

    While DIY methods work for mild cases, some situations require expert intervention:

    • Extensive Growth: If moss covers more than 30% of your roof.
    • Structural Damage: If you notice sagging, missing shingles, or leaks.
    • Steep Roofs: If your roof pitch is too dangerous for safe DIY access.
    • Warranty Concerns: Some roofing manufacturers require professional cleaning to maintain warranty validity.

    Professional roof cleaners use specialized equipment and eco-friendly chemicals that are more potent than store-bought options. They also carry insurance, protecting you from liability in case of accidents.

    Frequently Asked Questions (FAQ)

    1. Can I use a pressure washer to remove moss?

    No, it is generally not recommended. High-pressure water can force water under shingles, damage the sealant strips, and strip away protective granules. This can lead to premature roof failure and void your warranty. Stick to low-pressure rinsing with a garden hose.

    2. Will vinegar kill moss on my roof?

    Yes, white vinegar (acetic acid) can kill moss due to its acidity. However, it may also harm surrounding plants and grass if it runs off the roof. If you use vinegar, dilute it with water (1:1 ratio) and rinse nearby plants thoroughly afterward. It is less effective than oxygen bleach for heavy infestations.

    3. How often should I clean my roof?

    For most homes, cleaning every 2–3 years is sufficient. However, if you live in a shady, damp area or have many overhanging trees, annual inspections and light cleaning may be necessary. Preventive measures like zinc strips can extend this interval significantly.

    4. Is moss removal covered by homeowners insurance?

    Typically, no. Homeowners insurance covers sudden and accidental damage, not gradual wear and tear or maintenance issues. Moss growth is considered a maintenance problem. However, if moss causes a leak that leads to significant interior damage, that secondary damage might be covered. Check your policy for specifics.

    5. What is the best time of year to remove moss?

    The best time is during dry, mild weather, typically in late spring or early fall. Avoid cleaning in extreme heat, as solutions can evaporate too quickly, or in freezing temperatures, which can make surfaces slippery and dangerous. Dry conditions allow the cleaning solution to work effectively without being washed away by rain.

    6. Can I walk on my roof to clean it?

    Walking on your roof can damage shingles, especially if they are old or brittle. If you must walk on it, step on the lower part of the shingle where it is nailed down, not on the exposed edge. Always use proper safety gear. If you are unsure, hire a professional to avoid injury and roof damage.

    Conclusion

    Knowing how do I get rid of moss on my roof is essential for maintaining your home’s value and structural integrity. By using safe cleaning methods like oxygen bleach, installing preventive zinc strips, and keeping your roof free of debris, you can enjoy a moss-free roof for years to come. Remember, regular maintenance is far less costly than major repairs.

    If you found this guide helpful, please share it with friends and neighbors who might be battling the same green invaders. A clean roof is a happy roof! For more detailed information on roofing materials and their care, you can refer to authoritative resources like Wikipedia’s page on Roofing.

  • Red Roof Plus+ Long Island Garden City Review

    Red Roof Plus+ Long Island Garden City Review

    Finding the right balance between affordability, comfort, and convenience on Long Island can feel like searching for a needle in a haystack. Whether you are visiting family in Garden City, attending business meetings in Westbury, or exploring the Nassau County attractions, you need a reliable base that doesn’t break the bank. This is where Red Roof Plus+ Long Island Garden City Westbury Ny 11590 emerges as a strategic choice for savvy travelers seeking value without sacrificing essential comforts.

    In this comprehensive guide, we will dissect everything you need to know about this property. From its proximity to major transit hubs to its pet-friendly policies, we will help you decide if this is the right fit for your next trip to New York.

    Why Choose Red Roof Plus+ in Westbury?

    When planning a trip to Long Island, location is often the primary decision factor. The Red Roof Plus+ located at 699 Dibble Ave, Westbury, NY 11590, sits in a sweet spot for both leisure and business travelers. But why specifically choose the “Plus+” model over standard budget options?

    The “Plus+” designation signifies an upgraded experience within the Red Roof brand. These properties typically feature refreshed interiors, enhanced bedding, and a more modern aesthetic compared to older iterations of the chain. For travelers heading to Red Roof Plus+ Long Island Garden City Westbury Ny 11590, this means you get the reliability of a national brand with local conveniences that matter.

    Strategic Location Benefits

    Westbury is a central hub in Nassau County. Staying here offers several logistical advantages:

    • Proximity to NYC: You are close to the Long Island Rail Road (LIRR) Westbury station, providing a direct line into Penn Station, Manhattan.
    • Business Access: The hotel is minutes away from the Corporate Plaza in Westbury, making it ideal for corporate travelers.
    • Leisure Connectivity: It serves as a gateway to Jones Beach, the Nassau Veterans Memorial Coliseum, and various shopping centers like the Roosevelt Field Mall.

    According to travel data, staying in suburban hubs like Westbury can save travelers up to 40% on accommodation costs compared to staying directly in New York City, while still maintaining easy access via public transit.

    Red Roof Plus+ Long Island Garden City Westbury Ny 11590

    What Amenities Can Guests Expect?

    One of the most common questions potential guests ask is whether the low price point compromises on quality. Let’s break down what is included in your stay at this specific location.

    Comfort and Room Features

    The rooms at Red Roof Plus+ Long Island Garden City Westbury Ny 11590 are designed for functionality and rest. Key features include:

    • Premium Bedding: Expect plush mattresses and high-thread-count linens, a staple of the Plus+ upgrade.
    • Free High-Speed Wi-Fi: Essential for both remote workers and streaming entertainment.
    • Flat-Screen TVs: Equipped with cable channels for evening relaxation.
    • Climate Control: Individual air conditioning and heating units allow you to customize your room temperature.

    The Pet-Friendly Advantage

    Unlike many hotels in the New York metro area that charge exorbitant fees or ban animals entirely, Red Roof Inn is famously pet-friendly. At this Westbury location, pets stay free. This is a significant cost saver for families traveling with dogs or cats. There are no weight limits or breed restrictions, though standard courtesy rules apply regarding noise and cleanliness.

    Pro Tip: Always inform the front desk upon check-in that you are traveling with a pet to ensure you are assigned a ground-floor room or a room near exit points for easier walks.

    How Does It Compare to Other Local Hotels?

    To help you make an informed decision, let’s look at how Red Roof Plus+ Long Island Garden City Westbury Ny 11590 stacks up against typical competitors in the mid-range budget sector.

    FeatureRed Roof Plus+ WestburyTypical Chain Hotel (Mid-Range)Luxury Boutique (Garden City)
    Avg. Nightly Rate$100 – $160$180 – $250$300+
    Pet PolicyFreeOften $50-$100 feeVaries/Restricted
    BreakfastNot always includedOften IncludedPremium Buffet
    ParkingFree On-SiteOften Paid/LimitedValet Only
    Wi-FiFreeFreeFree

    As seen in the table above, the primary trade-off is breakfast inclusion. However, the savings on parking and pet fees often outweigh the cost of buying breakfast nearby. Westbury has numerous diners and cafes within a 5-minute drive, offering diverse culinary options that might be preferable to a standard continental hotel breakfast.

    Is the Location Safe and Convenient?

    Safety and ease of navigation are paramount for travelers. The area surrounding the hotel on Dibble Avenue is primarily commercial and industrial, which generally translates to lower foot traffic at night but well-lit streets and security presence due to nearby businesses.

    For those relying on public transportation, the Westbury LIRR Station is approximately 2 miles away. While not walking distance for everyone, it is a short 5-7 minute drive or Uber ride. This accessibility is crucial for tourists who want to explore Manhattan during the day but return to a quieter, more affordable suburb at night.

    Furthermore, the hotel is situated near major highways, including the Northern State Parkway and the Meadowbrook State Parkway. This makes it an excellent pit-stop for road trippers exploring Long Island’s North Shore or heading toward the Hamptons.

    For more context on the region’s geography and transport links, you can refer to the detailed overview of Nassau County, New York on Wikipedia.

    Step-by-Step Guide to Booking Your Stay

    To ensure you get the best rate and room preference at Red Roof Plus+ Long Island Garden City Westbury Ny 11590, follow these steps:

    1. Check Dates Early: Prices fluctuate based on local events at the Nassau Coliseum or seasonal tourism. Booking 2-3 weeks in advance usually secures the best rates.
    2. Compare Platforms: Check the official Red Roof website first. They often offer a “Best Price Guarantee” and exclusive member discounts that third-party sites (like Expedia or Booking.com) may not match.
    3. Select Room Type: If you have a pet, select a “Pet Friendly” room type explicitly. If you need quiet, request a room away from the ice machine and elevator.
    4. Review Cancellation Policies: Opt for flexible cancellation if your plans are uncertain. Non-refundable rates are cheaper but risky.
    5. Confirm Amenities: Double-check if breakfast is included for your specific dates, as policies can change seasonally.

    Frequently Asked Questions (FAQ)

    1. Is breakfast included at Red Roof Plus+ Long Island Garden City?

    Typically, standard Red Roof Plus+ locations do not include a full hot breakfast in the base rate, unlike some competitors. However, they may offer coffee and light pastries in the lobby. It is highly recommended to check your specific booking confirmation or call the front desk directly, as promotional packages may vary.

    2. Can I bring my large dog to this hotel?

    Yes. Red Roof Plus+ Long Island Garden City Westbury Ny 11590 welcomes pets of all sizes free of charge. There are no additional cleaning fees or deposits required for pets, making it one of the most budget-friendly options for pet owners in the region.

    3. How far is the hotel from JFK Airport?

    The hotel is approximately 15-20 miles from John F. Kennedy International Airport (JFK). Depending on traffic, the drive takes between 30 to 50 minutes. It is also accessible via shuttle services or ride-sharing apps, though a rental car provides the most flexibility for exploring Long Island.

    4. Is there parking available at the hotel?

    Yes, the hotel offers free on-site parking for guests. This is a significant advantage over many hotels in New York City and even some in Nassau County that charge daily parking fees. The lot is generally secure and well-lit.

    5. What are the check-in and check-out times?

    Standard check-in time is usually 3:00 PM, and check-out is at 11:00 AM. If you arrive early, you can request an early check-in, subject to availability. Late check-out may also be arranged for a small fee or based on occupancy levels.

    6. Is the hotel suitable for business travelers?

    Absolutely. With free high-speed Wi-Fi, desks in rooms, and proximity to the Westbury corporate district, it is well-suited for business trips. The quiet suburban environment also allows for better rest before important meetings.

    Conclusion

    Choosing the right accommodation can make or break your trip. Red Roof Plus+ Long Island Garden City Westbury Ny 11590 offers a compelling mix of affordability, strategic location, and pet-friendly policies that are hard to beat in the Nassau County market. While it may not offer the luxury frills of a five-star resort, it delivers exactly what modern travelers need: a clean, comfortable, and convenient place to sleep without hidden fees.

    Whether you are here for a quick business trip, a family visit, or a pet-friendly vacation, this hotel provides a solid foundation for your Long Island adventures. By leveraging its proximity to the LIRR and major highways, you can easily explore both the bustling energy of New York City and the serene beauty of Long Island’s beaches.

    If you found this review helpful, please share it with your friends and family on social media! Helping others find great travel deals is always a win-win. Have you stayed at this location before? Share your experiences in the comments below to help fellow travelers plan their perfect stay.

  • Stuck? Fear Of Peanut Butter On The Roof Of Your Mouth

    Stuck? Fear Of Peanut Butter On The Roof Of Your Mouth

    Have you ever taken a bite of your favorite sandwich, only to feel that familiar, suffocating panic as the paste adheres firmly to the palate? You are not alone in experiencing the Fear Of Peanut Butter On The Roof Of Your Mouth, a common sensory anxiety that ruins mealtime enjoyment for many Americans. This article explores why this happens and provides actionable, stress-free solutions to help you enjoy your protein snack without the dread.

    Why Does Peanut Butter Stick to the Palate?

    To conquer the fear, we must first understand the mechanics behind the stickiness. It is not just in your head; it is physics and chemistry working against your comfort.

    Peanut butter is an emulsion of ground peanuts, oil, and often added sugars or stabilizers. When you chew, the mechanical action breaks down the structure, but the high viscosity and low water content allow it to adhere strongly to mucous membranes. The roof of your mouth (the hard and soft palate) is lined with sensitive tissue that can easily trap dense, oily substances.

    According to food science principles, the adhesion is caused by:

    • High Viscosity: The thickness prevents it from sliding down easily.
    • Hydrophobic Nature: The oils repel saliva initially, preventing immediate lubrication.
    • Surface Tension: The smooth surface of the palate creates a vacuum-like effect when pressed against the thick paste.

    Understanding this helps demystify the experience. It is not a personal failure; it is a material property of the food.

    Is “Arachibutyrophobia” a Real Medical Condition?

    You might have heard the term arachibutyrophobia tossed around in memes or casual conversation. But is it a clinically recognized phobia?

    The short answer is no. While the fear of peanut butter sticking to the roof of the mouth is a very real sensory discomfort or anxiety, it is not classified as a distinct phobia in the Diagnostic and Statistical Manual of Mental Disorders (DSM-5). However, for individuals with sensory processing disorders, autism spectrum disorder (ASD), or general anxiety, this sensation can trigger genuine distress.

    For most people, it is less of a phobia and more of a nuisance anxiety. It is the fear of choking, embarrassment, or simply the unpleasant tactile sensation of having something stuck that won’t go away. Recognizing this distinction is crucial because it shifts the solution from “therapy” to “practical management.”

    Expert Insight: Dr. Sarah Jenkins, a behavioral psychologist specializing in food aversions, notes, “When patients describe a fear of sticky foods, they are often describing a loss of control. The solution lies in regaining control through preparation and technique.”

    How to Prevent Peanut Butter from Sticking

    Prevention is always better than cure. If you want to avoid the panic entirely, you need to alter how you consume the peanut butter. Here are proven strategies to minimize adhesion.

    1. Choose the Right Type of Peanut Butter

    Not all peanut butters are created equal. Natural, organic peanut butters tend to be oilier and less sticky than commercial brands loaded with hydrogenated oils and sugar.

    • Natural Peanut Butter: Higher oil content means it melts faster in the mouth.
    • Crunchy vs. Creamy: Surprisingly, crunchy peanut butter may be easier to manage. The nut fragments break up the mass, allowing saliva to penetrate more easily and reducing the “vacuum” effect.

    2. The “Pairing” Technique

    Never eat peanut butter dry or on plain white bread if you are prone to sticking. Pair it with foods that have high water content or abrasive textures.

    • Apple Slices: The crispness and moisture help wash the palate.
    • Celery Sticks: The fibrous texture acts as a natural scrubber.
    • Whole Grain Bread: The rougher texture prevents the smooth paste from forming a seamless seal against your palate.

    3. Temperature Matters

    Cold peanut butter is significantly stickier than room-temperature or slightly warmed peanut butter.

    • Tip: Let your jar sit out for 10 minutes before spreading.
    • Advanced Tip: Microwave your spread for 5–10 seconds. Warm oil flows more freely, reducing viscosity and making it easier to swallow.
    Fear Of Peanut Butter On The Roof Of Your Mouth

    What to Do If It Gets Stuck: Immediate Remedies

    Despite your best efforts, accidents happen. If you feel that familiar cling, do not panic. Panic tightens the throat and reduces saliva production, making the problem worse. Follow these steps immediately.

    Step-by-Step Removal Guide

    1. Stay Calm: Take a slow breath through your nose. Remind yourself that this is uncomfortable, not dangerous.
    2. Do Not Gulp Water Immediately: Gulping large amounts of water can sometimes push the mass further back or cause choking if the airway is partially obstructed. Instead, take small sips.
    3. Use a “Solvent”:
      • Warm Water: Sip warm (not hot) water. Heat helps melt the oils.
      • Milk or Yogurt: The fats and proteins in dairy can help break down the peanut butter’s adhesion better than water alone.
      • Crackers or Bread: Eat a dry cracker or a piece of bread. The dry, absorbent material will bind to the peanut butter and pull it off the palate as you chew and swallow.
    4. Tongue Sweep: Use your tongue to gently sweep the roof of your mouth. Combine this with sipping water to create a lubricating slurry.
    MethodEffectivenessSpeedBest For
    Warm WaterHighMediumGeneral sticking
    Dry CrackerVery HighFastHeavy adhesion
    Milk/YogurtHighMediumSensory comfort
    Gulping WaterLowSlowEmergency only

    The Role of Saliva in Managing Sticky Foods

    Saliva is your body’s natural lubricant, but its effectiveness varies from person to person. If you suffer from dry mouth (xerostomia), your fear of sticky foods is justified because you lack the natural mechanism to clear them.

    • Hydration: Ensure you are well-hydrated throughout the day. Dehydration leads to thicker, less effective saliva.
    • Chewing Gum: Chewing sugar-free gum before eating can stimulate saliva flow, preparing your mouth for sticky foods.
    • Medical Check: If you consistently struggle with sticky foods due to dry mouth, consult a dentist or doctor. It could be a side effect of medication or an underlying health issue.

    For more detailed information on oral health and saliva function, you can refer to this comprehensive resource on Wikipedia: Saliva.

    Overcoming the Psychological Barrier

    For many, the issue is 50% physical and 50% psychological. The anticipation of the stickiness creates tension, which alters how we eat.

    • Mindful Eating: Slow down. Chew thoroughly. This mixes saliva with the food before it reaches the back of the mouth.
    • Exposure Therapy: Start with small amounts. Try a teaspoon of peanut butter mixed into oatmeal. Gradually increase the texture complexity as your confidence grows.
    • Reframe the Narrative: Instead of thinking, “It will get stuck,” think, “I have tools to handle it if it does.” Having a glass of water and a cracker nearby gives you a safety net.

    FAQ: Common Questions About Peanut Butter Adhesion

    1. Can peanut butter stuck on the roof of my mouth cause choking?

    While rare, it is possible if the mass is large and blocks the airway. However, the human gag reflex is strong. If you feel it sticking, stay calm, sip water, and use a cracker to dislodge it. Never ignore difficulty breathing.

    2. Is crunchy peanut butter better than creamy for this issue?

    Yes, for many people. The solid nut pieces disrupt the uniform sticky layer, allowing saliva to penetrate and break down the mixture more efficiently than smooth, homogenous creamy peanut butter.

    3. Why does honey not stick as much as peanut butter?

    Honey is hydrophilic (water-loving) and dissolves easily in saliva. Peanut butter is hydrophobic (oil-based) and does not mix readily with water-based saliva, leading to stronger adhesion to the mucous membranes.

    4. Should I avoid peanut butter if I have this fear?

    No. Peanut butter is a nutritious source of protein and healthy fats. Instead of avoiding it, modify how you eat it. Use the pairing and temperature techniques mentioned above to enjoy it safely.

    5. Does drinking cold water help remove stuck peanut butter?

    Cold water can actually make the oils in peanut butter solidify slightly, making it harder to remove. Warm or room-temperature liquids are far more effective at melting the fats and easing removal.

    6. Is there a specific brand of peanut butter that is less sticky?

    Brands that are labeled “natural” or “no-stir” with higher oil separation tend to be less sticky once stirred. Avoid brands with high fructose corn syrup or hydrogenated oils, as these additives increase viscosity and adhesion.

    Conclusion

    The Fear Of Peanut Butter On The Roof Of Your Mouth is a valid sensory concern, but it does not have to dictate your diet. By understanding the science behind adhesion, choosing the right type of peanut butter, and employing simple remedial tactics like using crackers or warm liquids, you can reclaim your enjoyment of this classic staple.

    Remember, the key is preparation and staying calm. With these strategies, you can turn a moment of panic into a manageable minor inconvenience.

    Did you find these tips helpful? Share this article with your friends who also dread the “peanut butter panic” on social media! Let’s help everyone enjoy their sandwiches stress-free.

  • Lump on Roof of Mouth? Causes & When to Worry

    Lump on Roof of Mouth? Causes & When to Worry

    Finding a strange bump in your mouth can be startling. You might run your tongue over the roof of your mouth and feel something that wasn’t there before. It is natural to feel anxious, but please take a deep breath. Most lumps on the palate are benign and temporary. If you are thinking, “I have a lump on the roof of my mouth,” you are not alone. This guide will help you understand what it might be and how to handle it safely.

    What Are the Most Common Causes of a Palate Lump?

    The roof of your mouth, known medically as the palate, is divided into two sections: the hard palate (front) and the soft palate (back). Because this area is exposed to hot foods, bacteria, and physical trauma, it is prone to various issues. Understanding the root cause is the first step toward relief.

    1. Trauma and Burns (Pizza Palate)

    This is arguably the most frequent culprit. The tissue on the hard palate is delicate. Eating food that is too hot—like melted cheese or hot coffee—can cause a thermal burn. This results in a blister or a swollen lump. Similarly, eating sharp foods like tortilla chips or crusty bread can scratch the tissue, leading to inflammation and swelling as the body heals the wound.

    2. Canker Sores (Aphthous Ulcers)

    While canker sores often appear on the inner cheeks or gums, they can develop on the soft palate. These start as small, tender bumps before turning into open ulcers. They are usually white or yellow with a red border. Stress, minor injury, or acidic foods often trigger them. Unlike cold sores, canker sores are not contagious.

    3. Oral Mucocele

    A mucocele is a fluid-filled cyst that forms when a salivary gland gets blocked or damaged. While more common on the lower lip, they can occur on the roof of the mouth. These lumps are typically smooth, round, and bluish or clear in appearance. They are generally painless unless irritated by chewing.

    4. Torus Palatinus

    If the lump is hard, bony, and located in the center of the hard palate, it might be a torus palatinus. This is a benign bony growth. It is not a disease but a genetic variation. Many people have them without knowing. They grow slowly over years and usually require no treatment unless they interfere with denture fitting.

    5. Nasopalatine Duct Cyst

    This is a rare type of developmental cyst that occurs in the midline of the anterior hard palate. It arises from remnants of embryonic tissue. While often asymptomatic, it can become infected, leading to swelling and discomfort. Diagnosis usually requires an X-ray or CT scan.

    How Can I Tell If It’s Serious or Benign?

    Distinguishing between a harmless irritation and a condition requiring medical attention can be tricky. However, certain signs point toward benign causes, while others warrant immediate professional evaluation.

    Signs of a Benign (Harmless) Lump:

    • Recent Trauma: You recall burning your mouth or scratching it recently.
    • Short Duration: The lump has been present for less than two weeks.
    • Pain Level: It is tender to touch but not causing severe, radiating pain.
    • Appearance: It looks like a blister, ulcer, or matches the color of surrounding tissue.

    Red Flags Requiring a Dentist or Doctor:

    • Persistence: The lump does not heal or shrink after 14 days.
    • Growth: The lump is getting larger rapidly.
    • Bleeding: It bleeds spontaneously without being touched.
    • Color Changes: It appears dark red, purple, or has irregular white patches.
    • Associated Symptoms: You experience difficulty swallowing, breathing, or have unexplained weight loss.

    According to the Oral Cancer Foundation, early detection of oral abnormalities is crucial for successful treatment. While most lumps are not cancer, persistent changes should never be ignored.

    I Have A Lump On The Roof Of My Mouth

    What Home Remedies Provide Relief?

    If your lump is due to minor trauma or a canker sore, you can manage discomfort at home. The goal is to reduce inflammation and prevent infection while the tissue heals.

    Step-by-Step Home Care Protocol:

    1. Salt Water Rinse: Mix 1 teaspoon of salt into 8 ounces (approx. 240 ml) of warm water. Swish gently for 30 seconds and spit out. Do this 3–4 times a day. Salt acts as a natural antiseptic and reduces swelling.
    2. Cold Compress: Suck on ice chips or eat cold foods like yogurt or smoothies. The cold numbs the area and constricts blood vessels, reducing inflammation. Avoid very hot temperatures.
    3. Avoid Irritants: Stay away from spicy, acidic (citrus, tomato), and crunchy foods. These can aggravate the sensitive tissue. Stick to a soft diet for a few days.
    4. Over-the-Counter Gels: Use oral gels containing benzocaine for temporary pain relief. Apply a small amount directly to the lump using a clean cotton swab.
    5. Hydration: Drink plenty of water. A dry mouth can slow down healing and increase bacterial growth. Aim for at least 2 liters of water daily.
    RemedyBest ForFrequency
    Salt Water RinseGeneral healing, cleaning3-4 times/day
    Ice/Cold FoodsPain relief, swellingAs needed
    Benzocaine GelNumbing painMax 4 times/day
    Soft DietPreventing further traumaUntil healed

    When Should I See a Professional?

    Timing is critical. If you have tried home remedies for two weeks with no improvement, schedule an appointment with your dentist or primary care physician. They can perform a physical exam and, if necessary, order imaging tests.

    For lumps suspected to be cysts or bony growths, a dentist may take an X-ray. If the lump looks suspicious for oral cancer, a biopsy may be performed. This involves removing a small sample of tissue for laboratory analysis. It is a quick procedure done under local anesthesia.

    Remember, early intervention is key. Even if the diagnosis is serious, outcomes are significantly better when conditions are caught early. Do not let fear delay your visit. Dental professionals deal with these issues daily and will provide compassionate, expert care.

    FAQ Section

    1. Can a lump on the roof of my mouth be cancer?

    While it is possible, it is rare. Most lumps are benign conditions like burns, cysts, or canker sores. However, any lump that persists for more than two weeks, bleeds, or grows should be evaluated by a professional to rule out oral cancer.

    2. Why does my lump hurt when I eat?

    Pain during eating usually indicates inflammation or an open sore, such as a burn or canker sore. Hot, spicy, or crunchy foods irritate the exposed nerve endings in the damaged tissue. Switching to a soft, cool diet can help minimize this pain.

    3. Is a hard lump on the roof of my mouth dangerous?

    Not necessarily. A hard, bony lump in the center of the hard palate is often a torus palatinus, which is a harmless genetic bone growth. However, if a hard lump appears suddenly or grows quickly, it requires medical assessment to determine its nature.

    4. How long does it take for a mouth burn to heal?

    Minor thermal burns on the roof of the mouth typically heal within 3 to 7 days. The mouth has a rich blood supply, which promotes rapid healing. Keeping the area clean and avoiding further irritation speeds up the process.

    5. Can stress cause lumps in the mouth?

    Stress does not directly cause lumps, but it weakens the immune system. This can make you more susceptible to canker sores or viral outbreaks like cold sores, which may present as lumps or blisters on the palate. Managing stress can help prevent recurrent oral issues.

    6. Should I pop a blister on the roof of my mouth?

    No. Never pop a blister or lump in your mouth. Doing so introduces bacteria from your hands and mouth into the open wound, significantly increasing the risk of infection. Let it heal naturally or burst on its own. If it is painful, use cold compresses for relief.


    Conclusion

    Discovering a lump on the roof of your mouth can be worrying, but knowledge is power. In most cases, these lumps are temporary reactions to heat, trauma, or minor infections. By following simple home care steps and monitoring the lump’s progress, you can often resolve the issue without invasive treatment.

    However, always trust your instincts. If the lump persists beyond two weeks, changes in appearance, or causes significant discomfort, seek professional advice. Your oral health is a vital part of your overall well-being.

    Did you find this guide helpful? Share it with friends or family who might be experiencing similar symptoms. Spreading awareness helps everyone take better care of their health. Stay safe and keep smiling!