Blog

  • Remove Doors & Roof: Unibody Vehicle Guide

    Remove Doors & Roof: Unibody Vehicle Guide

    Have you ever looked at your SUV or crossover and imagined it as an open-air adventure machine, only to realize that unlike older Jeeps or trucks, the body is fused to the frame? You are not alone. Many enthusiasts dream of the freedom of open-air driving but hit a wall when they discover their vehicle uses unibody construction.

    The process of removing the doors and roof from a unibody construction vehicle is not just a simple unbolt-and-lift job; it is a complex engineering challenge that affects the very soul of your car’s safety. In this guide, we will walk you through the realities, risks, and rigorous steps required if you are determined to pursue this modification, ensuring you understand exactly what you are getting into before you pick up a wrench.


    Why Is Removing Parts from a Unibody So Different?

    To understand why this task is difficult, you must first understand the architecture. Most modern cars, including crossovers like the Honda CR-V, Toyota RAV4, or Ford Escape, use a unibody (or monocoque) design.

    In a traditional body-on-frame vehicle, the body sits on top of a rigid ladder frame. The frame handles the stress of driving, while the body is essentially cosmetic and protective. You can remove the roof or doors of a Jeep Wrangler because the underlying frame remains intact and rigid.

    However, in a unibody vehicle, the outer skin is the structure. The roof pillars, floor pan, and door frames work together to distribute impact forces and maintain torsional rigidity. When you remove these components, you are literally cutting away the skeleton of the car.

    The Engineering Reality

    According to automotive engineering principles, the roof and door pillars contribute significantly to the vehicle’s torsional stiffness. Without them, the chassis can flex excessively during cornering, leading to:

    • Poor handling dynamics.
    • Premature wear on suspension components.
    • Increased noise, vibration, and harshness (NVH).

    For a deeper understanding of automotive chassis designs, you can refer to the detailed explanations on Wikipedia’s Automobile page, which outlines the historical shift from body-on-frame to unibody structures for improved safety and efficiency.


    What Are the Safety Risks of Cutting a Unibody?

    Before we discuss how to do it, we must address why you might want to reconsider. The safety implications are severe and non-negotiable.

    1. Compromised Crashworthiness

    Modern vehicles are designed with specific “crumple zones” and load paths. The A-pillars (front), B-pillars (middle), and C-pillars (rear) are reinforced with high-strength steel or boron steel to protect occupants in a rollover or side-impact collision.

    • Rollover Risk: Without a roof, the survival space for occupants is eliminated in a flip.
    • Side Impact: Doors often contain side-impact beams. Removing them leaves passengers vulnerable to direct intrusion from other vehicles.

    2. Structural Flex and Fatigue

    When you remove the roof and doors, the remaining chassis lacks the triangulation needed to resist twisting forces. Over time, this flexing can cause:

    • Cracks in the windshield frame.
    • Misalignment of doors and hatches (if any remain).
    • Failure of spot welds in the floor pan.

    Expert Insight: “Modifying the structural integrity of a unibody vehicle voids all safety certifications. It transforms a passenger car into an experimental prototype with no crash testing data.” — Automotive Safety Engineer, NHTSA Guidelines.

    Removing The Doors And Roof From A Unibody Construction Vehicle

    Step-by-Step: How to Approach the Modification

    If you are proceeding for a show car, a dedicated off-road trail rig (not street legal), or a static display, here is the professional approach to minimizing damage and maintaining some level of rigidity.

    Disclaimer: This procedure is for educational purposes. Modifying structural components may violate local laws and void insurance. Always consult a certified structural engineer.

    Phase 1: Preparation and Reinforcement

    You cannot simply cut. You must replace the lost rigidity.

    1. Design a Subframe: Before removing anything, fabricate a steel subframe or roll cage that connects the front firewall to the rear bulkhead. This internal skeleton will take over the load-bearing duties of the roof and pillars.
    2. Gather Tools:
      • Angle grinder with cut-off wheels.
      • MIG/TIG Welder (minimum 200 amp capability).
      • Clamps and jigs.
      • Rust inhibitor and undercoating.

    Phase 2: Removing the Doors

    Doors on unibody cars are often integral to the side structure.

    1. Disconnect Electronics: Carefully remove door panels and disconnect wiring harnesses for windows, locks, and speakers. Label every connector.
    2. Support the Door: Use a transmission jack or a helper to hold the door weight.
    3. Remove Hinges: Unbolt the hinges from the body side. Note that some hinges are welded or riveted in modern cars, requiring grinding rather than unbolting.
    4. Seal the Opening: Once removed, you must plate the opening or integrate it into your new roll cage structure to prevent water ingress and add stiffness.

    Phase 3: Removing the Roof

    This is the most critical step.

    1. Install Internal Bracing: Weld temporary cross-braces inside the cabin from left to right, just below the headliner level. This prevents the car from collapsing inward when the roof is cut.
    2. Cut the Pillars: Using an angle grinder, carefully cut through the A, B, and C pillars. Do not cut all the way through at once; leave small tacks to hold alignment until your new external frame is ready.
    3. Lift the Roof: With help, lift the roof section away.
    4. Weld the New Structure: Immediately weld your pre-fabricated roll cage or subframe to the remaining floor pan and firewall. Use full-penetration welds for maximum strength.

    Phase 4: Finishing and Protection

    • Grind and Smooth: Clean all welds to prevent stress concentrators.
    • Rust Proofing: Apply epoxy primer and heavy-duty undercoating to all exposed metal. Unibody cars are prone to rust, and cutting exposes fresh steel.
    • Weather Sealing: Install custom rubber seals around the new frame to keep rain out.

    Legal and Insurance Implications

    It is crucial to understand that removing the doors and roof from a unibody construction vehicle typically renders the vehicle illegal for public road use in the United States and many other countries.

    AspectStock Unibody VehicleModified (No Roof/Doors)
    Street LegalityLegalLikely Illegal (No VIN verification for mod)
    InsuranceCoveredVoided / Denied Claims
    Safety Rating5-Star (Typical)No Rating / Unsafe
    Resale ValueStandard Market ValueNiche / Significantly Reduced

    Most Department of Motor Vehicles (DMV) offices require vehicles to have original safety equipment intact. Removing structural components changes the vehicle’s classification, often requiring it to be registered as a “kit car” or “custom build,” which involves rigorous inspections that most home modifications fail.


    FAQ: Common Questions About Unibody Modifications

    1. Can I put the doors and roof back on later?

    Technically, yes, but it is extremely difficult. Once you cut the pillars, the original alignment is lost. You would need to weld the original pieces back on, which weakens the metal further due to heat distortion. It is not recommended unless you have professional body shop equipment.

    2. Does removing the roof affect the airbag system?

    Yes. Side curtain airbags are usually housed in the roof rail. Removing the roof disables these airbags. Additionally, the change in structural rigidity can confuse the crash sensors, potentially causing accidental deployment or failure to deploy in an accident.

    3. Is there a kit available for unibody cars like the RAV4 or CR-V?

    Unlike the Jeep Wrangler or Ford Bronco, there are no mass-produced, safety-certified kits for removing the roof and doors of unibody crossovers. Any such modification is purely custom fabrication.

    4. Will my car handle worse without the roof?

    Yes. The loss of torsional rigidity means the chassis will flex more during cornering. This leads to unpredictable handling, increased body roll, and a feeling of “looseness” in the steering. Adding a roll cage can mitigate this, but it adds significant weight.

    5. Can I drive this modified car on public roads?

    In most US states, no. Vehicles must meet Federal Motor Vehicle Safety Standards (FMVSS). Removing structural elements violates these standards. You may be able to drive it on private property or designated off-road trails, but always check local laws.

    6. What is the best alternative to cutting my unibody car?

    If you want the open-air experience, consider buying a vehicle designed for it, such as a Jeep Wrangler, Ford Bronco, or Suzuki Jimny. Alternatively, install a large sunroof or a removable T-top if your specific model supports it, which preserves structural integrity.


    Conclusion

    Removing the doors and roof from a unibody construction vehicle is a feat of engineering that goes far beyond simple mechanical removal. It requires a complete reimagining of the car’s structural support system, extensive welding, and a acceptance of significant legal and safety trade-offs.

    While the idea of an open-air cruiser is appealing, the reality involves compromising the very features that make modern cars safe and reliable. For most enthusiasts, the risks outweigh the rewards. However, if you are building a dedicated track toy or show piece with proper reinforcement, ensure you prioritize structural rigidity above all else.

    Did you find this guide helpful? Share it with your fellow car enthusiasts on social media to spread awareness about the complexities of unibody modifications. Stay safe, and keep building smart!

  • How Much Does It Cost To Start A Roofing Company?

    How Much Does It Cost To Start A Roofing Company?

    Starting a business is thrilling, but the financial uncertainty can be daunting. You likely have the skills and the drive, but you need a clear financial roadmap to turn your ambition into a legitimate enterprise. Understanding exactly how much does it cost to start a roofing company is the first critical step toward building a sustainable and profitable business in the competitive US construction market.

    The Realistic Budget: Breaking Down Initial Expenses

    When aspiring entrepreneurs ask about startup costs, they often expect a single number. However, the reality is nuanced. Depending on whether you are starting as a solo operator or hiring a crew immediately, costs can range significantly.

    Generally, you can expect to spend between $10,000 and $50,000 to launch a basic roofing business. If you plan to scale quickly with multiple trucks and employees, that figure can easily exceed $100,000.

    To help you visualize this, let’s look at the core expense categories.

    1. Legal Formation and Licensing Fees

    Before you hammer a single nail, you must legitimize your business. This involves registering your entity (LLC is highly recommended for liability protection) and obtaining necessary licenses.

    • Business Registration: Filing for an LLC typically costs between $50 and $500, depending on your state.
    • General Contractor License: Many states require a specific roofing or general contractor license. Exam fees and application costs usually range from $200 to $1,000.
    • Local Permits: Some municipalities require local business operation permits, costing another $50–$200.

    It is crucial to check your specific state requirements. For instance, states like Florida and California have stringent licensing boards, while others may have lighter regulations. Always verify with your state’s contractor board.

    2. Insurance: Your Safety Net

    In the roofing industry, insurance is not optional; it is a survival requirement. Without proper coverage, one accident could bankrupt you before you begin.

    • General Liability Insurance: This covers property damage and bodily injury. Expect to pay $1,000–$3,000 annually for a new business.
    • Workers’ Compensation: If you hire even one employee, this is mandatory in most states. Costs vary by payroll size but can start around $2,000–$5,000 per year.
    • Commercial Auto Insurance: For your work truck, premiums are higher than personal auto insurance, ranging from $1,500 to $3,000 annually.

    Pro Tip: Shop around with brokers who specialize in construction. Bundling policies can often save you 10–15% on total premiums.

    3. Equipment and Tools

    You don’t need the most expensive gear on day one, but you do need reliable tools. Here is a breakdown of essential startup equipment:

    ItemEstimated CostNotes
    Work Truck$15,000 – $30,000Used heavy-duty pickup (Ford F-150/Chevy Silverado)
    Ladders & Racks$1,000 – $2,500Extension ladders, ladder racks, and stabilizers
    Hand Tools$500 – $1,000Hammers, pry bars, chalk lines, utility knives
    Safety Gear$300 – $600Harnesses, helmets, non-slip boots, gloves
    Air Compressor/Nailer$400 – $800Essential for efficient shingle installation
    Dumpster/Tarping$200 – $500For debris management and emergency repairs

    Total Estimated Equipment Cost: $17,400 – $35,400

    Note that many new roofers start with a used truck to keep costs low. However, ensure the vehicle is mechanically sound to avoid costly breakdowns during job sites.

    4. Marketing and Branding

    You can be the best roofer in town, but if no one knows you exist, you won’t get jobs. Initial marketing efforts are vital for generating leads.

    • Website Development: A professional, mobile-optimized website costs $500–$2,000. It must include clear contact forms and service area maps.
    • Logo and Branding: Professional logo design and business cards: $200–$500.
    • Local SEO & Google Business Profile: Setting up your Google Business Profile is free, but optimizing it and managing reviews may require tools or agency help ($100–$300/month).
    • Initial Advertising: Budget $500–$1,000 for initial local Facebook ads or direct mail campaigns to your neighborhood.
    How Much Does It Cost To Start A Roofing Company

    Hidden Costs You Might Overlook

    Beyond the obvious expenses, several hidden costs can catch new business owners off guard. Being prepared for these ensures your cash flow remains healthy.

    • Software Subscriptions: You will need estimating software (like AccuLynx or JobNimbus) and accounting tools (like QuickBooks). Expect to pay $100–$300 per month.
    • Uniforms and Branded Apparel: Professionalism builds trust. Outfitting yourself and your crew with branded shirts and hats costs $200–$500 initially.
    • Continuing Education: Maintaining your license often requires continuing education credits, which can cost $100–$300 annually.

    For a deeper understanding of occupational safety standards which influence insurance and training costs, you can refer to resources on Occupational Safety and Health Administration (OSHA) guidelines.

    Step-by-Step Guide to Launching Your Roofing Business

    Now that you understand the costs, here is a logical sequence to launch your company efficiently.

    1. Write a Business Plan: Outline your services (residential vs. commercial), target market, and financial projections. This is essential if you seek a small business loan.
    2. Register Your Business: Choose a unique name, register your LLC, and obtain your EIN (Employer Identification Number) from the IRS.
    3. Secure Funding: Use personal savings, small business loans, or lines of credit to cover the $10k–$50k startup range.
    4. Obtain Licenses and Insurance: Apply for your state contractor license and purchase your insurance policies. Do not skip this step.
    5. Buy Equipment: Purchase your truck and tools. Consider leasing expensive machinery if cash flow is tight.
    6. Set Up Operations: Implement your software for estimating and invoicing. Create standard contracts for clients.
    7. Launch Marketing: Go live with your website and claim your Google Business Profile. Start networking with local real estate agents and insurance adjusters.

    Frequently Asked Questions (FAQ)

    1. Can I start a roofing company with no money?

    Technically, no. You need capital for licensing, insurance, and basic tools. However, you can minimize costs by starting as a subcontractor for established companies, using their insurance and materials, while you save up to launch your own independent brand.

    2. Do I need a college degree to start a roofing company?

    No, a college degree is not required. However, practical experience is vital. Most successful roofers start as apprentices or laborers to learn the trade before moving into management and business ownership. Some states require proof of experience hours to qualify for a contractor’s license.

    3. What is the most expensive part of starting a roofing business?

    For most startups, the work truck and insurance are the largest initial expenses. A reliable used truck can cost $20,000+, and comprehensive insurance packages can require significant upfront premiums. Managing these two costs effectively is key to staying within budget.

    4. How long does it take to become profitable?

    Many roofing businesses break even within 6 to 12 months. Profitability depends on your marketing effectiveness, pricing strategy, and ability to manage job costs. Residential roofing often has faster payment cycles than commercial projects, aiding quicker cash flow.

    5. Should I focus on residential or commercial roofing?

    Residential roofing is easier to enter with lower startup costs and simpler equipment needs. Commercial roofing often requires specialized certifications, larger crews, and more expensive safety equipment. For most beginners, residential roofing is the recommended starting point.

    Conclusion

    Starting a roofing company is a significant financial commitment, but it is also a lucrative opportunity for those willing to put in the work. By budgeting realistically for how much does it cost to start a roofing company, you set yourself up for success rather than surprise debt. Remember, investing in quality insurance and reliable equipment is not an expense—it is an investment in your reputation and longevity.

    Take the time to plan, secure your funding, and build a strong brand. The demand for skilled roofers in the US continues to grow, driven by aging housing stock and extreme weather events.

    Did you find this guide helpful? Share this article with your fellow entrepreneurs on LinkedIn or Facebook to help them navigate their own startup journey!

  • Why Are AC Units on Roofs in Arizona?

    Why Are AC Units on Roofs in Arizona?

    If you have ever driven through Phoenix or Tucson, you have likely noticed a distinct architectural feature: large, boxy metal units perched atop residential and commercial buildings. It is a curious sight for newcomers, leading many to ask, why are air conditioning units on the roof in Arizona? The answer lies in a unique combination of extreme heat management, space optimization, and local building codes that differ significantly from other parts of the United States.

    For homeowners in the Grand Canyon State, understanding this setup is not just about curiosity; it is about maintenance, efficiency, and protecting your investment. In this guide, we will break down the engineering logic behind rooftop ACs, debunk common myths, and help you decide if this system is right for your property.

    The Space-Saving Advantage in Dense Urban Areas

    One of the primary drivers for rooftop installations is real estate value. In cities like Phoenix, Scottsdale, and Mesa, land is at a premium. Traditional ground-mounted split systems require a significant footprint in your backyard or side yard. This equipment needs clearance for airflow and maintenance access, which can eat up valuable outdoor living space.

    By moving the condenser unit to the roof, homeowners reclaim their yard. This is particularly beneficial for:

    • Small Lot Homes: Where every square foot of garden or patio matters.
    • Commercial Buildings: Which often lack peripheral space due to parking lots or adjacent structures.
    • Aesthetic Preferences: Many residents prefer not to look at noisy, industrial-looking machinery while enjoying their backyard barbecue.

    This vertical utilization of space allows for better landscape design and keeps the “mechanical eyesore” out of sight and out of mind.

    Enhanced Security and Vandalism Protection

    Arizona’s urban centers have grown rapidly, and with density comes security concerns. Ground-level AC units are vulnerable to theft, vandalism, and accidental damage. Copper coils, in particular, are a target for thieves due to their scrap metal value.

    Placing the unit on the roof adds a natural layer of security. It is significantly harder for opportunistic thieves to access a heavy unit situated 15 or 20 feet in the air. For business owners in downtown Phoenix, this reduces insurance premiums and the risk of costly repairs due to malicious damage. While not entirely theft-proof, the difficulty of access acts as a strong deterrent compared to a unit sitting openly in an alleyway.

    Why Are Air Conditioning Units On The Roof In Arizona

    Efficiency and Airflow in the Desert Heat

    There is a common misconception that rooftop units are less efficient because they are closer to the sun. However, when installed correctly, they can offer superior performance in Arizona’s specific climate.

    Better Air Intake Quality

    Ground-level units often struggle with dust, sand, and debris kicked up by wind or lawn maintenance. In Arizona, where dust storms (haboobs) are frequent, ground units can clog quickly. Rooftop units generally enjoy cleaner air intake, as dust settles closer to the ground. This means:

    1. Less Frequent Cleaning: Coils stay cleaner for longer periods.
    2. Improved Airflow: Unobstructed intake leads to better heat exchange.
    3. Longer Lifespan: Reduced strain on the fan motors and compressors.

    Thermal Dynamics

    While the roof surface gets hot, modern installation practices include raised curbs and insulation barriers that prevent heat transfer from the roof deck to the AC unit. Furthermore, hot air rises. By placing the exhaust high above the ground, the unit expels hot air into an area where it can dissipate more easily, rather than recirculating it in a confined backyard space.

    Structural Integrity and Installation Standards

    You might wonder, “Can my roof hold that weight?” This is a valid concern. In Arizona, building codes are strict regarding rooftop HVAC installations. Engineers must calculate the load-bearing capacity of the roof structure before approval.

    Typically, these units are placed over load-bearing walls or reinforced beams. The installation involves:

    • Steel Curbs: To elevate the unit and provide a stable base.
    • Flashing and Sealants: To prevent water leaks around the penetration points.
    • Vibration Isolators: To prevent the humming of the compressor from transferring into the living space below.

    According to general engineering principles outlined in resources like Wikipedia’s entry on HVAC, proper structural support is critical for any rooftop mechanical equipment to ensure safety and longevity. In Arizona, licensed contractors are well-versed in these requirements, ensuring that your roof remains structurally sound despite the added weight.

    Maintenance Challenges: The Trade-Off

    While there are clear benefits, rooftop AC units come with specific maintenance challenges that Arizona homeowners must accept. You cannot simply walk outside and hose down the coils. Servicing these units requires specialized equipment and trained professionals.

    FeatureGround-Mounted UnitRooftop Unit
    AccessibilityEasy for DIY cleaningRequires professional ladder/lift
    SecurityLow (vulnerable to theft)High (hard to reach)
    Space UsageConsumes yard spaceSaves yard space
    Noise LevelAudible in backyardMuffled by roof/attic
    Installation CostLowerHigher (structural reinforcement)

    Safety First

    Never attempt to climb onto your roof to service an AC unit yourself. The combination of extreme heat, slippery surfaces, and high-voltage electricity makes this extremely dangerous. Always hire a licensed Arizona HVAC technician who has the proper safety gear and insurance.

    Is a Rooftop Unit Right for Your Arizona Home?

    Deciding between a ground-mounted and rooftop unit depends on your specific situation. Consider a rooftop unit if:

    • You have limited yard space.
    • You are concerned about theft or vandalism.
    • You want to reduce noise pollution in your outdoor living areas.
    • Your home’s structure is already reinforced or designed for it (common in flat-roof homes).

    Stick with ground-mounted units if:

    • You have ample side-yard space.
    • You prefer easier, lower-cost maintenance access.
    • Your roof is pitched or not structurally suited for heavy loads without expensive modifications.

    Frequently Asked Questions (FAQ)

    1. Do rooftop AC units cool better than ground units in Arizona?

    Not necessarily “better,” but they can be more consistent. Because they are less prone to dust clogging from ground-level debris, they maintain efficiency longer between cleanings. However, the cooling power depends more on the unit’s SEER rating and proper sizing than its location.

    2. Will a rooftop AC unit damage my roof?

    No, not if installed correctly. Professional installers use flashing, curbs, and sealants designed to withstand Arizona’s intense UV radiation and monsoon rains. Regular roof inspections alongside HVAC maintenance can prevent any potential leaks.

    3. How much does it cost to install a rooftop AC unit in Arizona?

    Installation costs are typically 10–20% higher than ground units due to the need for structural reinforcement, crane usage (if necessary), and complex ductwork routing. However, this can be offset by the increased property usability and security benefits.

    4. Can I convert my ground unit to a rooftop unit?

    It is possible but often impractical for existing homes. It would require significant structural modifications to the roof, new ductwork routing, and electrical upgrades. It is usually more cost-effective to replace an old ground unit with a new high-efficiency ground unit unless you are undergoing a major renovation.

    5. What happens during a monsoon storm?

    Rooftop units are built to withstand high winds and heavy rain. They are anchored securely to the roof curb. However, it is wise to turn off the unit during severe dust storms to prevent excessive debris intake. After the storm, check for any visible debris around the intake vents.

    Conclusion

    So, why are air conditioning units on the roof in Arizona? It is a smart adaptation to the desert environment. By leveraging vertical space, enhancing security, and improving airflow quality, rooftop ACs offer a practical solution for many Arizona residents. While they require professional maintenance and higher initial installation costs, the long-term benefits of saved yard space and reduced vandalism risk make them a popular choice in the Valley of the Sun.

    If you are considering a new HVAC system, consult with a local expert who understands the nuances of Arizona’s climate and building codes. Whether you choose rooftop or ground-mounted, proper installation and regular maintenance are key to staying cool when the mercury rises.

    Found this guide helpful? Share it with your neighbors on Facebook or Twitter to help them understand the quirks of desert living!

  • Do You Need A Building Permit To Replace A Roof?

    Do You Need A Building Permit To Replace A Roof?

    Replacing a roof is one of the most significant investments you will make as a homeowner. It protects your family, increases your property value, and ensures your home remains weatherproof. However, before you hire a contractor or buy materials, you likely have a pressing question: Do you need a building permit to replace a roof? The answer isn’t always a simple yes or no, but navigating these regulations is crucial for your safety and financial security.

    In this comprehensive guide, we will break down exactly when permits are required, why they matter, and how to handle the process smoothly. Whether you are dealing with minor repairs or a full structural overhaul, understanding local building codes will save you from costly fines and insurance headaches down the road.

    Why Permits Matter: More Than Just Red Tape

    Many homeowners view building permits as unnecessary bureaucratic hurdles. However, permits exist for a vital reason: public safety. Your roof is not just shingles; it is a complex system involving structural integrity, ventilation, and fire resistance.

    When a local building department issues a permit, they ensure that the work complies with the International Residential Code (IRC) and local amendments. This verification process protects you from substandard workmanship that could lead to leaks, mold, or even structural collapse during severe weather events like hurricanes or heavy snow loads.

    According to data from the National Association of Home Builders (NAHB), proper permitting and inspection can significantly reduce the likelihood of future insurance claims related to structural failures. Ignoring this step might seem like a way to save money or time initially, but it often leads to much higher costs if problems arise later.

    When Is a Roofing Permit Required?

    The short answer is: It depends on your location and the scope of work. However, there are general guidelines that apply across most jurisdictions in the United States.

    1. Full Roof Replacement

    In the vast majority of US cities and counties, a complete tear-off and replacement of roofing material requires a permit. This is because removing old layers exposes the roof deck (the wooden structure underneath), allowing inspectors to check for rot, termite damage, or weakened trusses.

    2. Structural Changes

    If your project involves changing the pitch of the roof, adding skylights, or installing new dormers, a permit is almost always mandatory. These changes affect the load-bearing capacity of your home’s frame.

    3. Changing Roofing Materials

    Switching from asphalt shingles to heavier materials like clay tiles, slate, or concrete requires a permit. The additional weight may necessitate reinforcing the roof structure, which must be verified by an engineer or inspector.

    4. Local Climate Zones

    Areas prone to high winds, hurricanes, or heavy snowfall often have stricter permitting requirements. For example, in Florida or coastal Texas, permits ensure that roofing materials meet specific wind-uplift ratings.

    Note: Some rural areas or small towns may have laxer enforcement, but relying on this is risky. Always assume a permit is needed until proven otherwise.

    When Might You Not Need a Permit?

    While rare for major projects, there are scenarios where a permit might not be necessary:

    • Minor Repairs: Replacing a few damaged shingles (usually less than 10% of the total roof area) often does not require a permit.
    • Like-for-Like Overlay: In some jurisdictions, laying new shingles over existing ones (without tearing off the old layer) may not require a permit, provided no structural work is done. However, many modern codes prohibit more than two layers of roofing material.
    • Emergency Temporary Fixes: Tarping a leak after a storm is generally exempt, but permanent repairs will still need documentation.

    To be certain, you must check with your local building department. Rules vary significantly between states, counties, and even individual municipalities.

    Do You Need A Building Permit To Replace A Roof

    How to Check Your Local Requirements

    Navigating local bureaucracy can feel overwhelming, but it is straightforward if you follow these steps:

    1. Visit Your Local Building Department Website: Search for “[Your City/County] building permit requirements.” Most departments have downloadable PDFs or FAQs.
    2. Call the Permit Office: If the website is unclear, call directly. Ask specifically: “Do I need a permit for a full roof replacement on a single-family home?”
    3. Consult Your Contractor: Reputable, licensed roofing contractors should know the local codes intimately. If a contractor suggests skipping the permit to “save you money,” consider this a major red flag.

    For a broader understanding of how building codes are standardized across the US, you can refer to resources like Wikipedia’s article on Building Codes, which explains the framework of the International Code Council (ICC) standards adopted by most states.

    The Risks of Skipping a Permit

    Choosing to bypass the permitting process might seem appealing to avoid fees (typically $50–$500) and delays. However, the consequences can be severe.

    Risk FactorConsequence
    Insurance DenialIf your roof fails or causes water damage, your insurer may deny the claim if they discover unpermitted work.
    Fines and PenaltiesLocal authorities can issue fines that far exceed the original permit cost. You may also be forced to pay double fees for late permitting.
    Difficulty SellingDuring a home sale, unpermitted work can fail inspection, forcing you to lower the price or pay for retroactive permits and inspections.
    Safety HazardsWithout inspection, improper installation (e.g., incorrect nailing patterns) can lead to premature roof failure.

    Real-World Example: A homeowner in Arizona replaced their roof without a permit to save $300. Two years later, a monsoon storm lifted sections of the shingles. When they filed an insurance claim, the adjuster noted the lack of permit records. The claim was denied, leaving the homeowner with a $15,000 repair bill.

    Step-by-Step: How to Obtain a Roofing Permit

    If you determine that a permit is required, here is how to secure one efficiently:

    1. Gather Documentation: You will typically need proof of ownership, a detailed scope of work, and product specifications (e.g., shingle brand and type).
    2. Submit Application: Most cities now offer online portals. Fill out the application form accurately.
    3. Pay the Fee: Permit fees are usually based on the project’s valuation. Expect to pay between $100 and $500 depending on your location.
    4. Schedule Inspections: There are usually two key inspections:
      • Dry-In Inspection: After the underlayment is installed but before shingles are applied. This checks the waterproofing barrier.
      • Final Inspection: After the roof is complete. This ensures proper flashing, ventilation, and cleanup.
    5. Receive Approval: Once passed, you will receive a final approval certificate. Keep this document safe for future resale.

    FAQ Section

    1. Who is responsible for pulling the permit: the homeowner or the contractor?

    Typically, the licensed contractor handles the permitting process as part of their service. However, if you are doing the work yourself (DIY), you are responsible for obtaining the permit. Always clarify this in your contract.

    2. How long does it take to get a roofing permit?

    Processing times vary by location. In busy urban areas, it can take 1–2 weeks. In smaller towns, it might be approved instantly or within 24–48 hours. Plan your project timeline accordingly.

    3. Can I get a permit after the work is done?

    Yes, this is called a “retroactive permit.” However, it is more expensive and complicated. You may need to expose parts of the roof for inspection, which can cause additional damage and cost. It is always better to get the permit beforehand.

    4. Does replacing gutters require a permit?

    Generally, no. Simple gutter replacement does not affect the structural integrity of the home and rarely requires a permit. However, if you are altering the drainage system significantly, check local rules.

    5. What happens if my roof fails inspection?

    If your roof fails inspection, the inspector will provide a list of corrections needed (e.g., missing nails, improper flashing). You must fix these issues and schedule a re-inspection. Most contractors include re-inspection costs in their initial quote.

    Conclusion

    So, do you need a building permit to replace a roof? In most cases, yes. While it adds a small layer of administrative work and cost, it provides invaluable protection for your investment, your safety, and your legal standing as a homeowner.

    Don’t let the fear of bureaucracy cut corners on your home’s most critical defense against the elements. By following local codes and ensuring proper inspections, you guarantee that your new roof will stand the test of time.

    Found this guide helpful? Share it with friends or neighbors who are planning home improvements on social media! Helping others navigate these rules ensures safer communities for everyone.

  • Can You Go Through A Carwash With A Roof Rack?

    Can You Go Through A Carwash With A Roof Rack?

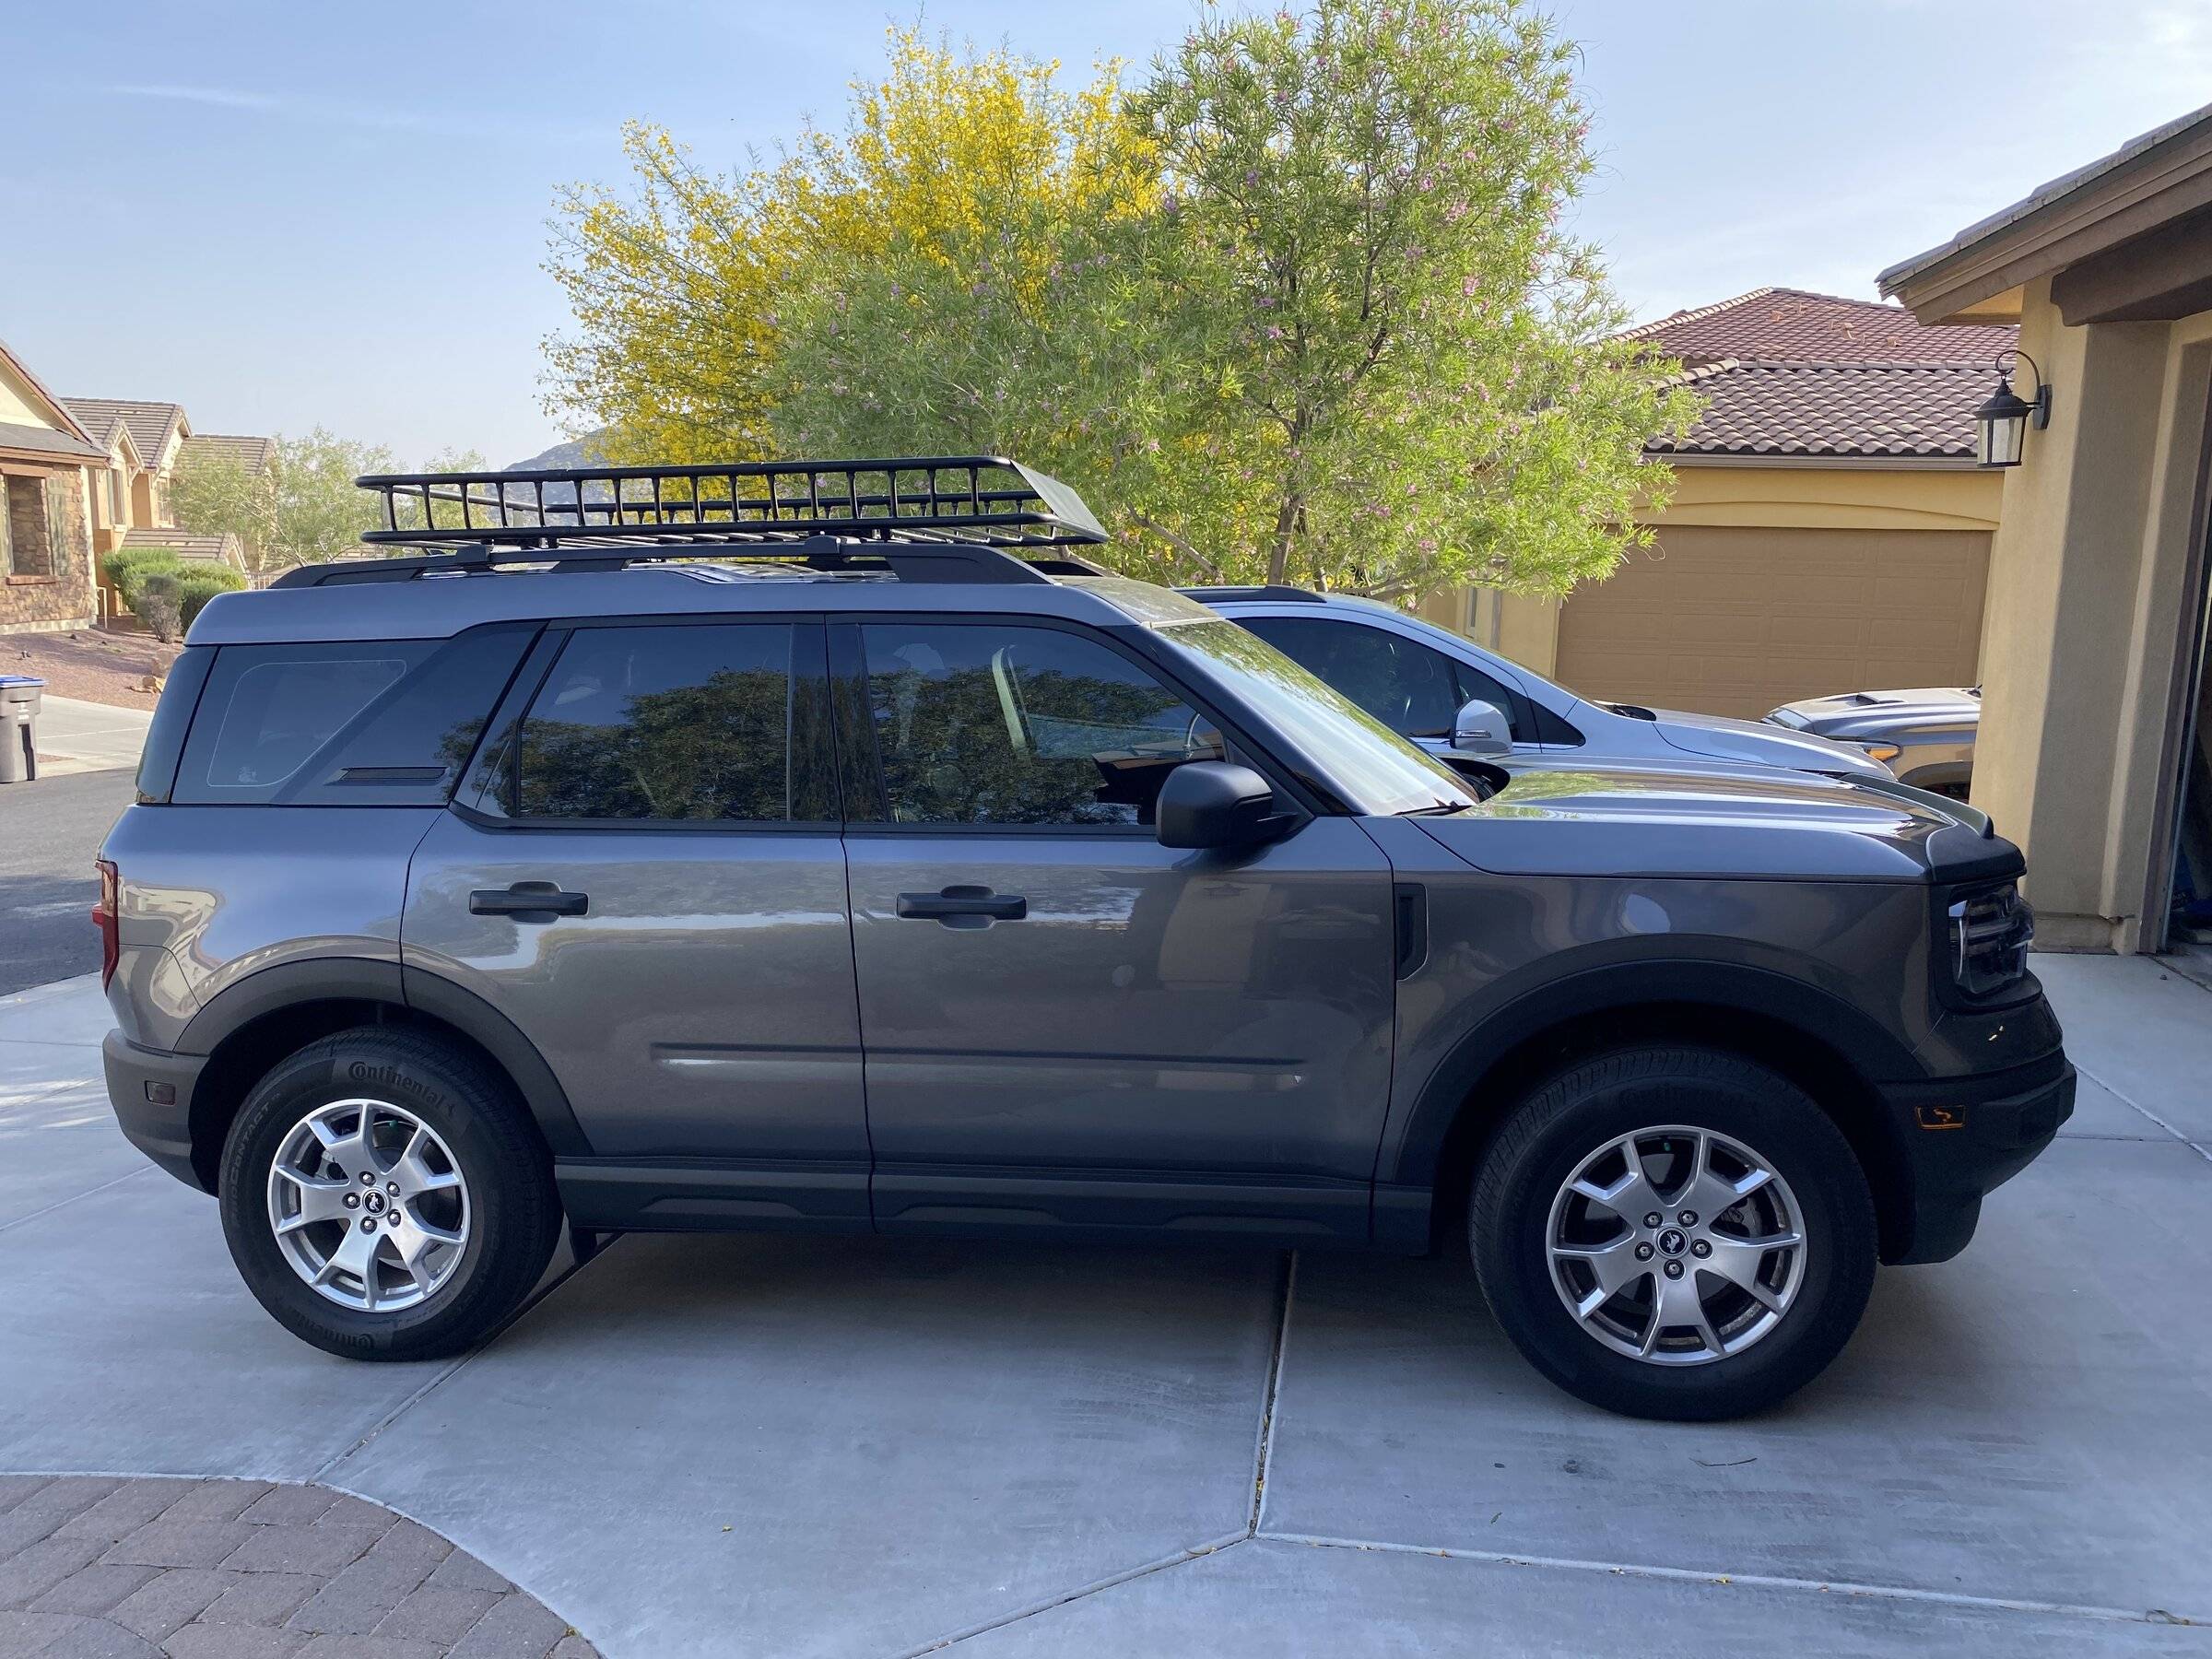
    Have you ever stood at the entrance of an automated car wash, staring at those spinning brushes, while wondering if your expensive roof rack will survive the ordeal? It is a common dilemma for outdoor enthusiasts and daily commuters alike. The short answer to can you go through a carwash with a roof rack is: it depends heavily on the type of car wash and the specific design of your rack.

    Making the wrong choice here can lead to scratched paint, bent crossbars, or even a detached cargo box flying off in the tunnel. In this guide, we will break down exactly what is safe, what is risky, and how to prepare your vehicle for a clean without compromising your gear. Let’s dive into the details so you can drive away with confidence.

    Understanding the Risks: Why Car Washes and Roof Racks Clash

    Before we look at the “how,” we need to understand the “why.” Automated car washes are designed for standard vehicle profiles. They use sensors, brushes, and high-pressure jets that assume a certain height and shape. When you add a roof rack, you change the aerodynamics and physical dimensions of your car.

    The primary risks include:

    • Physical Impact: Touchless washes are generally safe, but friction washes (with brushes) can catch on crossbars or cargo boxes.
    • Sensor Confusion: Some older car wash systems may not detect the added height of a roof box, leading to collisions with overhead machinery.
    • Water Intrusion: High-pressure jets can force water into the mounting points of your rack, potentially causing rust or loosening the clamps over time.

    According to general automotive maintenance standards, any aftermarket addition alters the vehicle’s original specifications. For more context on vehicle modifications and safety standards, you can refer to Wikipedia’s article on automotive accessories.

    Type of Car Wash: Which One Is Safe for Your Roof Rack?

    Not all car washes are created equal. Here is a breakdown of the most common types and their compatibility with roof racks.

    1. Touchless Automatic Car Washes (Safe)

    This is the gold standard for vehicles with roof racks. Touchless washes use high-pressure water and specialized detergents to clean the car without any physical contact.

    • Why it’s safe: There are no brushes or cloth strips to snag on your rack.
    • Precaution: Ensure your rack is tightly secured. While there is no physical contact, the high-pressure water can still be intense.

    2. Soft-Cloth Automatic Car Washes (Risky)

    These use large, rotating cloth strips. While softer than bristles, they can still wrap around protruding parts of a roof rack.

    • The Risk: If your roof rack has loose straps, bike wheels, or irregular shapes, the cloth can get tangled. This can damage the cloth, the rack, or your car’s paint.
    • Verdict: Avoid unless you have a completely flush, low-profile rack with no accessories attached.

    3. Brush Automatic Car Washes (Avoid)

    These use stiff bristles to scrub the car. They are aggressive and known for causing swirl marks on paint.

    • The Risk: High probability of scratching your roof rack’s finish or bending thin crossbars. The bristles can also get caught in the gaps between the rack and the roof.
    • Verdict: Do not use. The potential for damage outweighs the convenience.

    4. Self-Service Bay (Safe with Caution)

    If you prefer control, a self-service bay is a great option.

    • Why it’s safe: You control the pressure and angle of the spray.
    • Precaution: Avoid spraying directly into the locking mechanisms or mounting feet for extended periods.
    Can You Go Through A Carwash With A Roof Rack

    Step-by-Step Guide: How to Prep Your Car for the Wash

    If you decide to go through a touchless car wash or use a self-service bay, preparation is key. Follow these steps to ensure a smooth experience.

    1. Inspect the Mounting Points: Before entering the wash, check that all bolts, clamps, and locks are tight. Use a torque wrench if necessary, following the manufacturer’s specifications (usually between 5–10 Nm for most consumer racks).
    2. Remove Loose Accessories: Take off any bike trays, ski carriers, or cargo bags if possible. These items often have moving parts or straps that can flap violently in high winds or water jets.
    3. Check Height Clearance: Measure the total height of your vehicle with the rack installed. Compare this to the clearance sign at the car wash entrance. Most standard tunnels have a clearance of 7–8 feet (2.1–2.4 meters), but always verify.
    4. Fold Down Antennas: If your car has a whip antenna or radio mast, fold it down to prevent it from snapping against the rack or the wash equipment.
    5. Close All Windows and Sunroofs: This seems obvious, but double-check. Water pressure can force water into slightly open seals.

    Roof Rack Materials: What Can Handle the Heat?

    Different materials react differently to car wash chemicals and heat. Here is a quick comparison:

    MaterialDurability in Car WashNotes
    AluminumHighResistant to rust, but can oxidize if coated poorly. Safe for touchless washes.
    SteelMediumProne to rust if the powder coating is chipped. Inspect for scratches after washing.
    Plastic/CompositeHighGenerally safe, but avoid high-heat wax cycles which might warp thin plastic components.
    Wood (Rare)LowNot recommended for automatic washes. Water absorption can cause warping or rot.

    Note: Always consult your specific roof rack manual. Brands like Thule, Yakima, and Rhino-Rack have specific care instructions.

    Expert Tips for Maintaining Your Roof Rack Post-Wash

    Cleaning is only half the battle. Proper aftercare ensures longevity.

    • Dry Thoroughly: Water spots can be difficult to remove from matte black racks. Use a microfiber towel to dry the rack manually after the wash cycle.
    • Lubricate Locks: Car wash detergents can strip away natural oils. Apply a small amount of silicone-based lubricant to the keyholes and locking mechanisms every few months.
    • Inspect for Damage: Look for any new scratches or loose fittings. Catching a loose bolt early can prevent a catastrophic failure on the highway.

    FAQ Section

    1. Can I leave my bike on the rack during a car wash?

    No. Never leave bikes, skis, or kayaks on the rack during an automatic car wash. The wind resistance and water pressure can dislodge them, causing severe damage to your vehicle, the car wash equipment, and other cars. Always remove all cargo.

    2. Will a car wash void my roof rack warranty?

    Generally, no. Using a touchless car wash will not void your warranty. However, if you use a brush wash and it causes physical damage (bent bars, scratched coating), the manufacturer may deny a warranty claim for that specific damage. Always check your warranty terms.

    3. How often should I wash my roof rack?

    It is recommended to wash your roof rack every time you wash your car, especially if you live in an area with road salt, pollen, or bird droppings. Accumulated debris can corrode the mounting points over time.

    4. Is hand washing better for roof racks?

    Yes, hand washing is the safest method. It allows you to gently clean around the complex shapes of the rack without the risk of high-pressure water forcing its way into seals or brushes snagging on components. Use a soft sponge and mild soap.

    5. What if my roof rack is making noise after the car wash?

    Noise usually indicates a loose fit or water trapped in the channels. Check all tightening bolts first. If they are secure, dry the rack thoroughly. If the noise persists, it may be due to wind turbulence caused by the rack’s position, which is unrelated to the wash.

    Conclusion

    So, can you go through a carwash with a roof rack? Yes, but with caveats. Stick to touchless automatic car washes or self-service bays to minimize risk. Avoid brush and soft-cloth tunnels unless you are willing to gamble with your gear. By removing accessories, checking your height clearance, and performing regular maintenance, you can keep both your car and your roof rack in pristine condition.

    Remember, a little extra caution goes a long way in protecting your investment. If you found this guide helpful, please share it with your fellow adventurers on social media. Safe travels and happy cleaning!

  • Why Does The Roof Of My Mouth Hurt So Bad?

    Why Does The Roof Of My Mouth Hurt So Bad?

    Have you ever taken a bite of piping hot pizza only to spend the next two days wincing every time your tongue touches the top of your mouth? It is a surprisingly common yet incredibly frustrating experience that can make eating, drinking, and even speaking uncomfortable. If you are currently rubbing your tongue against the rough texture of your palate and asking, “Why does the roof of my mouth hurt so bad,” you are not alone, and there is usually a straightforward explanation.

    In this guide, we will explore the most likely culprits behind your discomfort, ranging from minor thermal injuries to underlying health conditions. We will also provide actionable, expert-backed advice on how to soothe the pain and speed up healing, ensuring you can get back to enjoying your favorite foods without fear.

    Understanding the Anatomy: Why Is the Palate Sensitive?

    Before diving into the causes, it helps to understand what is hurting. The roof of your mouth is called the palate. It consists of two parts:

    • The Hard Palate: The bony front section directly behind your upper teeth.
    • The Soft Palate: The muscular, flexible back section near your throat.

    This area is lined with delicate mucous membranes that are highly sensitive to temperature, texture, and chemical changes. Because it is constantly exposed to food and drink, it is prone to various types of trauma. According to dental professionals, the tissue in the mouth heals faster than skin elsewhere on the body due to rich blood supply, but the initial pain can be intense because of the high concentration of nerve endings.

    Common Causes: Why Does the Roof Of My Mouth Hurt So Bad?

    When patients visit dentists complaining of palate pain, the diagnosis often falls into one of several common categories. Let’s break them down.

    1. Thermal Burns (Pizza Palate)

    This is the number one reason for sudden, sharp pain. The medical term is often informal, but “pizza palate” is widely recognized. When you consume food or liquids that are too hot (above 140°F or 60°C), the thin layer of tissue on the hard palate can scald.

    • Symptoms: Redness, swelling, blistering, and a raw, tender feeling.
    • Healing Time: Usually 3–7 days.
    • Why it hurts: The heat damages the epithelial cells, exposing the nerves underneath.

    2. Physical Trauma and Abrasions

    Sometimes, the culprit isn’t heat, but texture. Crunchy foods like tortilla chips, hard crusts, or popcorn kernels can scratch or puncture the soft tissue.

    • Scenario: You might feel a sharp sting while eating, followed by a lingering soreness.
    • Risk: These small abrasions can become entry points for bacteria, leading to secondary infections if not kept clean.

    3. Canker Sores (Aphthous Ulcers)

    Canker sores are small, shallow lesions that develop on the soft tissues in your mouth or at the base of your gums. While they commonly appear on the inside of cheeks or lips, they can also form on the soft palate.

    • Appearance: White or yellow center with a red border.
    • Trigger Factors: Stress, minor injury, acidic foods, or vitamin deficiencies (B-12, zinc, folate).
    • Pain Level: High, especially when eating spicy or acidic foods.

    4. Oral Thrush (Candidiasis)

    Oral thrush is a fungal infection caused by an overgrowth of Candida alb yeast. It is more common in infants, the elderly, and individuals with compromised immune systems or those who use inhalers for asthma.

    • Symptoms: Creamy white lesions on the roof of the mouth, inner cheeks, and sometimes the tongue. Bleeding may occur if scraped.
    • Sensation: A cotton-like feeling in the mouth, loss of taste, and cracking at the corners of the mouth.

    5. Sinus Infections and Allergies

    Surprisingly, your nose and mouth are connected. Severe sinus congestion or allergies can cause post-nasal drip, which irritates the soft palate. Additionally, pressure from inflamed sinuses can refer pain to the upper teeth and the roof of the mouth.

    CausePrimary SymptomTypical DurationImmediate Relief
    Thermal BurnRaw, blistered skin3–7 daysCold water, ice chips
    Physical ScratchSharp, localized pain2–5 daysSalt water rinse
    Canker SoreWhite ulcer with red halo1–2 weeksTopical gels, avoid acid
    Oral ThrushWhite patches, cotton feelRequires treatmentAntifungal medication
    Why Does The Roof Of My Mouth Hurt So Bad

    How to Find Relief: Step-by-Step Home Remedies

    If you are dealing with minor burns or scratches, you can manage the pain at home. Here is a proven protocol to reduce inflammation and promote healing.

    Step 1: Cool Down the Area

    Immediately after a burn, rinse your mouth with cold water. Do not use ice directly on the tissue as it can cause further damage (freezer burn). Instead, suck on ice chips or popsicles. The cold constricts blood vessels, reducing swelling and numbing the nerve endings.

    Step 2: Salt Water Rinses

    Mix 1/2 teaspoon of salt into 8 ounces (240 ml) of warm water. Swish this solution gently around your mouth for 30 seconds, then spit it out.

    • Why it works: Salt is a natural disinfectant. It helps draw out fluid from the tissues, reducing swelling, and creates an environment where bacteria struggle to survive.
    • Frequency: Repeat 2–3 times a day.

    Step 3: Avoid Irritants

    While healing, strictly avoid:

    • Spicy foods (chili, hot sauce)
    • Acidic foods (citrus fruits, tomato sauce, vinegar)
    • Crunchy or sharp foods (chips, nuts)
    • Alcohol-based mouthwashes (they sting and dry out the tissue)

    Step 4: Use Over-the-Counter Aids

    For persistent pain, consider using oral gels containing benzocaine. These provide temporary numbing. However, use them sparingly and follow package instructions. For canker sores, look for products specifically designed to coat the ulcer and protect it from friction.

    When to See a Doctor or Dentist

    While most cases of palate pain resolve on their own, some situations require professional attention. You should seek medical advice if:

    1. The pain lasts longer than two weeks. Most minor oral injuries heal within 7–10 days. Persistent pain could indicate a more serious issue.
    2. You have difficulty swallowing or breathing. This could signal a severe allergic reaction or a deep infection spreading to the throat.
    3. You notice white patches that bleed. This is a classic sign of oral thrush or potentially other conditions like leukoplakia, which requires a biopsy.
    4. You have a high fever. Fever combined with mouth sores may indicate a viral infection like herpes simplex or hand, foot, and mouth disease.

    For more detailed information on oral conditions and their systemic links, you can refer to resources provided by Wikipedia which offers a broad overview of oral anatomy and common pathologies.

    FAQ Section

    1. Can stress cause the roof of my mouth to hurt?

    Yes, indirectly. Stress weakens the immune system, making you more susceptible to canker sores and cold sores. Additionally, stress often leads to behaviors like teeth grinding (bruxism) or consuming more acidic/comfort foods, which can irritate the palate.

    2. Why does the roof of my mouth hurt after eating pineapple?

    Pineapple contains an enzyme called bromelain, which breaks down proteins. When you eat fresh pineapple, this enzyme essentially starts “digesting” the delicate mucous membranes in your mouth, causing a tingling or burning sensation. Cooking pineapple deactivates bromelain, preventing this effect.

    3. Is it normal for the roof of my mouth to hurt when I have a cold?

    It is quite common. Congestion leads to mouth breathing, which dries out the oral tissues. A dry palate is more prone to irritation and cracking. Furthermore, post-nasal drip can carry inflammatory mucus that irritates the soft palate.

    4. How can I prevent burning the roof of my mouth?

    The best prevention is patience. Allow hot foods and beverages to cool for at least 2–3 minutes before consuming. Test the temperature with a small sip or bite first. Also, be mindful of microwaved foods, which often have “hot spots” that are significantly hotter than the rest of the dish.

    5. Can vitamin deficiencies cause palate pain?

    Absolutely. Deficiencies in Vitamin B12, Iron, Folate, and Zinc are linked to recurrent aphthous stomatitis (canker sores). If you frequently suffer from mouth sores without obvious physical trauma, consider discussing a blood test with your healthcare provider to check your nutrient levels.

    Conclusion

    Dealing with a sore palate is never fun, but understanding why does the roof of my mouth hurt so bad is the first step toward relief. In most cases, the culprit is a minor thermal burn or physical scratch that will heal naturally within a week. By keeping the area clean, avoiding irritants, and using simple home remedies like salt water rinses, you can significantly reduce discomfort.

    However, listen to your body. If the pain persists, worsens, or is accompanied by other symptoms like fever or white patches, do not hesitate to consult a dental or medical professional. Early intervention can prevent minor issues from becoming major complications.

    Found this guide helpful? Share it with your friends on social media who might be suffering from “pizza palate” right now! Let’s help everyone enjoy their meals pain-free.

  • Why Does the Roof of My Mouth Hurt When I Eat?

    Why Does the Roof of My Mouth Hurt When I Eat?

    Have you ever taken a bite of your favorite pizza or sipped hot coffee, only to be stopped in your tracks by a sharp sting? It is a frustrating and surprisingly common experience that can turn mealtime into a chore. If you are constantly dealing with pain in the roof of my mouth when I eat, you are not alone, and there are clear, actionable steps you can take to find relief.

    The roof of your mouth, medically known as the palate, is sensitive tissue that plays a crucial role in eating and speaking. When it becomes irritated, inflamed, or injured, even soft foods can become uncomfortable. In this guide, we will explore why this happens, how to treat it at home, and when it is time to seek professional medical advice.

    What Causes Pain in the Roof of My Mouth When I Eat?

    Understanding the root cause is the first step toward healing. The palate is lined with mucous membranes that are delicate and prone to various irritants. Here are the most common culprits behind this discomfort.

    1. Thermal Burns (Pizza Palate)

    This is arguably the most frequent cause. The hard palate has less blood flow than other parts of the mouth, making it slower to heal from heat damage. Consuming food or drinks that are too hot—typically above 140°F (60°C)—can cause first-degree burns. This condition is so common it has earned the nickname “pizza palate.”

    2. Abrasive Foods

    Crunchy foods like tortilla chips, hard crusts, or popcorn kernels can physically scratch or abrade the soft tissue of the palate. These micro-tears may not bleed visibly but can cause significant stinging when exposed to acidic or salty foods later in the meal.

    3. Canker Sores (Aphthous Ulcers)

    Canker sores are small, shallow lesions that develop on the soft tissues in your mouth or at the base of your gums. Unlike cold sores, they don’t occur on the surface of your lips and aren’t contagious. However, they can be painful, especially when eating spicy or acidic foods. Stress, minor injury to your mouth, or certain toothpastes can trigger them.

    4. Allergic Reactions

    Oral Allergy Syndrome (OAS) can cause itching, tingling, or pain in the roof of the mouth immediately after eating certain raw fruits, vegetables, or nuts. This is due to cross-reactivity between pollen allergens and proteins in these foods.

    How Can I Tell If It’s a Burn or an Infection?

    Distinguishing between a simple burn and an infection is vital for proper treatment. While both cause pain, their symptoms and progression differ significantly.

    FeatureThermal BurnInfection (Viral/Bacterial)
    OnsetImmediate after eating hot foodGradual, often over 1-2 days
    AppearanceRedness, blistering, or peeling skinWhite/yellow ulcers, red halo, swelling
    DurationHeals in 3–7 daysMay last 1–2 weeks without treatment
    Other SymptomsLocalized pain onlyFever, swollen lymph nodes, fatigue

    If you notice systemic symptoms like fever or if the pain spreads beyond the palate, it is likely an infection rather than a simple burn. For more detailed information on oral infections, you can refer to Wikipedia’s article on Stomatitis.

    Pain In The Roof Of My Mouth When I Eat

    What Are the Best Home Remedies for Immediate Relief?

    If you are experiencing pain in the roof of my mouth when I eat, you do not always need prescription medication. Several effective home remedies can soothe the irritation and promote faster healing.

    Step-by-Step Soothing Routine

    1. Rinse with Salt Water Mix 1/2 teaspoon of salt into 8 ounces (approx. 240 ml) of warm water. Swish gently for 30 seconds and spit it out. This helps reduce inflammation and keeps the area clean. Do this 2–3 times a day.
    2. Apply Cold Compresses Suck on ice chips or eat cold, soft foods like yogurt or smoothies. The cold temperature numbs the nerve endings and reduces swelling. Avoid icy treats with hard chunks that could further irritate the tissue.
    3. Use Honey Raw honey has natural antibacterial and anti-inflammatory properties. Apply a small amount directly to the affected area on the roof of your mouth. Let it sit for a few minutes before swallowing. Note: Do not give honey to children under one year old.
    4. Stay Hydrated Drink plenty of water throughout the day. A dry mouth exacerbates pain and slows down the healing process. Aim for at least 2 liters of water daily, keeping the temperature cool or room temperature.

    Foods to Avoid During Healing

    While your palate heals, certain foods can act as irritants. Temporarily remove these from your diet:

    • Acidic foods: Citrus fruits, tomatoes, and vinegar-based dressings.
    • Spicy foods: Chili peppers, hot sauce, and curries.
    • Crunchy/Sharp foods: Chips, crackers, and toast.
    • Very hot beverages: Coffee, tea, or soup. Let them cool to lukewarm before consuming.

    When Should I See a Doctor or Dentist?

    Most cases of palate pain resolve on their own within a week. However, ignoring persistent symptoms can lead to complications. You should schedule an appointment with a healthcare provider if:

    • The pain lasts longer than two weeks.
    • You have difficulty swallowing or breathing.
    • You notice white patches that do not wipe away (potential sign of oral thrush or leukoplakia).
    • You have a high fever or swollen glands in your neck.
    • The pain is severe enough to prevent you from eating or drinking adequately.

    Early intervention is key, especially if the underlying cause is a bacterial infection or a dental issue like an abscessed tooth referring pain to the palate.

    Can Toothpaste or Mouthwash Cause This Pain?

    Yes, your oral hygiene products might be the hidden culprit. Many commercial toothpastes and mouthwashes contain sodium lauryl sulfate (SLS), a foaming agent that can irritate sensitive oral tissues. For some individuals, SLS triggers canker sores or general inflammation on the roof of the mouth.

    Solution: Switch to an SLS-free toothpaste and an alcohol-free mouthwash. Look for products labeled “sensitive” or “natural,” which often use milder ingredients. Give your mouth two weeks to adjust to the new products to see if the pain subsides.

    FAQ Section

    1. Why does the roof of my mouth hurt only when I eat specific foods?

    If the pain is triggered by specific items like apples, carrots, or nuts, it may be due to mechanical abrasion from hard textures. If it happens with fruits like melons or bananas, it could be Oral Allergy Syndrome. Pay attention to the texture and type of food to identify the trigger.

    2. Is pain in the roof of the mouth a sign of cancer?

    While oral cancer can present as a sore that doesn’t heal, it is rare for palate pain to be the only symptom without other signs like lumps, bleeding, or numbness. Most cases are benign burns or ulcers. However, any sore lasting more than two weeks should be evaluated by a professional to rule out serious conditions.

    3. How long does a burned roof of the mouth take to heal?

    Minor thermal burns typically heal within 3 to 7 days. The mouth has a rich blood supply (except for the hard palate), which aids in rapid cell regeneration. Keeping the area clean and avoiding further irritation will speed up the process.

    4. Can stress cause pain in the roof of my mouth?

    Indirectly, yes. Stress weakens the immune system, making you more susceptible to canker sores and viral outbreaks like cold sores. Additionally, stress can lead to teeth grinding (bruxism), which may cause referred pain or accidental biting of the palate.

    5. What is the best over-the-counter medication for this pain?

    Topical oral gels containing benzocaine can provide temporary numbness. Anti-inflammatory medications like ibuprofen can help reduce swelling and pain. Always follow the dosage instructions on the label and consult a pharmacist if you have other health conditions.

    Conclusion

    Dealing with pain in the roof of my mouth when I eat is unpleasant, but it is rarely a cause for panic. In most cases, it is a temporary issue caused by thermal burns, abrasive foods, or minor ulcers. By identifying the trigger, adjusting your diet, and using simple home remedies like salt water rinses, you can find relief quickly.

    Remember, your oral health is a window into your overall well-being. If the pain persists despite home care, do not hesitate to consult a dentist or doctor. Early diagnosis ensures that you can return to enjoying your meals without discomfort.

    Found this guide helpful? Share it with friends and family on social media who might be suffering from similar oral discomfort. Your share could help someone find the relief they need today!

  • How To File A Roof Insurance Claim In Cumming GA

    How To File A Roof Insurance Claim In Cumming GA

    Dealing with roof damage is stressful enough without the added headache of navigating complex insurance paperwork. If you are a homeowner in Forsyth County, you likely know that Georgia weather can be unpredictable, ranging from severe hail storms to high winds that tear shingles loose. Knowing how to file a roof insurance claim in Cumming GA efficiently can save you thousands of dollars and significant peace of mind during a chaotic time.

    This guide is designed to walk you through the process with clarity and confidence. We will cover everything from immediate safety steps to negotiating with adjusters, ensuring you get the fair compensation you deserve under your policy.

    Why Acting Fast Is Critical in Cumming

    Time is not just money; it is coverage. Most homeowners insurance policies in Georgia have strict deadlines for reporting damage. While state laws vary, many insurers require you to report claims within 30 to 60 days of the incident. However, waiting too long can lead to denied claims if the insurer argues that subsequent weather events caused further damage.

    In Cumming, where spring thunderstorms and occasional winter ice storms are common, identifying the source of damage quickly is vital. Immediate action also prevents secondary issues like water intrusion, mold growth, and structural rot, which are often excluded from standard coverage.

    Step 1: Document Everything Before You Call

    Before you pick up the phone to call your insurance carrier, you need evidence. Insurance adjusters rely heavily on proof. Without it, your claim may be undervalued or denied.

    Take High-Quality Photos and Videos

    Do not just take one photo from the ground. You need a comprehensive visual record:

    • Wide Shots: Capture the entire house from all four sides to show context.
    • Close-Ups: Focus on specific damage points, such as missing shingles, dented vents, or cracked flashing.
    • Interior Damage: Photograph any water stains on ceilings, walls, or damaged personal property inside the attic.
    • Date Stamps: Ensure your camera or phone settings include date and time stamps.

    Create a Written Inventory

    Write down a detailed description of what happened. Include:

    • The date and approximate time of the storm.
    • Weather conditions (e.g., “golf ball-sized hail,” “winds estimated over 50 mph”).
    • Any immediate actions you took to mitigate damage (such as placing tarps).

    Pro Tip: Keep a copy of this documentation in a cloud storage service. This ensures you have access even if your home suffers severe damage.

    Step 2: Review Your Policy Details

    Not all roof damage is covered. Understanding your specific policy is crucial before filing. In Georgia, many policies have moved toward Actual Cash Value (ACV) rather than Replacement Cost Value (RCV) for older roofs.

    • RCV Policies: Pay the cost to replace the roof with new materials, minus your deductible.
    • ACV Policies: Pay the current value of the roof, accounting for depreciation based on age and wear.

    Check your policy for any “wind/hail deductibles.” In hurricane-prone or storm-heavy areas like parts of Georgia, these deductibles can be higher than your standard all-peril deductible. Knowing this number beforehand helps you decide if filing a claim is financially viable.

    Step 3: Contact Your Insurance Provider

    Once you have your documentation and policy details ready, contact your insurer. Be clear, concise, and factual.

    1. Report the Incident: State that you wish to file a claim for storm damage.
    2. Provide Documentation: Offer to send the photos and inventory you prepared.
    3. Get a Claim Number: Write this down immediately. It is your reference point for all future communications.
    4. Ask About Timelines: Inquire about when an adjuster will be assigned and when they expect to visit.

    During this call, avoid speculating about the cause of damage if you are unsure. Stick to the facts: “I noticed damage after the storm on [Date].”

    Step 4: Prepare for the Adjuster’s Visit

    The insurance adjuster is the person who determines the extent of the damage and the payout amount. Their goal is to assess liability accurately, but remember, they work for the insurance company, not for you.

    Do’s and Don’ts During the Inspection

    DoDon’t
    Be present during the inspection.Leave the adjuster alone to walk the property.
    Point out all visible damage.Argue aggressively or become emotional.
    Provide your own photos and notes.Assume the adjuster sees everything from the ground.
    Ask questions about their findings.Sign any settlement documents immediately.

    In Cumming, local adjusters are familiar with common roofing materials like architectural shingles and metal roofs. However, they may miss subtle signs of wind uplift or hail bruising. Having a professional roofer present during the inspection can be invaluable.

    Step 5: Hire a Reputable Local Roofer

    While you cannot force the insurance company to use a specific contractor, hiring a trusted local expert is one of the smartest moves you can make. A reputable roofing company in Cumming can act as your advocate.

    Look for contractors who:

    • Are licensed and insured in Georgia.
    • Have experience dealing with insurance claims.
    • Offer free inspections and detailed estimates.

    A professional roofer can identify damage that an adjuster might overlook. They can also provide a scope of work that matches industry standards, ensuring you aren’t short-changed on materials or labor costs. For more information on construction standards, you can refer to general building guidelines available on Wikipedia.

    Step 6: Review the Settlement Offer

    After the inspection, the insurance company will send a settlement offer. Do not accept the first offer blindly.

    Compare the insurer’s estimate with the quote from your chosen roofer. Look for discrepancies in:

    • Square footage calculations.
    • Material quality (e.g., matching shingle brands).
    • Labor costs and overhead.
    • Waste removal fees.

    If there is a significant gap, you have the right to dispute the claim. Provide your roofer’s detailed estimate to your adjuster and request a re-evaluation. This process is known as “supplementing” the claim.

    How To File A Roof Insurance Claim In Cumming Ga

    Common Challenges in Cumming Claims

    Filing a claim in Forsyth County comes with unique challenges. One major issue is the age of the roof. Many insurers in Georgia are becoming stricter about roofs older than 15–20 years. They may argue that damage is due to “wear and tear” rather than a specific storm event.

    To combat this, ensure your roofer provides evidence of sudden, accidental damage. Hail hits, for example, leave distinct marks that differ from natural aging. Wind damage often shows lifted shingles or broken seals, which are not typical of gradual deterioration.

    FAQ Section

    1. Will my insurance rates go up if I file a roof claim in Cumming?

    It depends on your carrier and claim history. A single weather-related claim may not increase your premium significantly, especially if it was a widespread event affecting many neighbors. However, multiple claims within a few years can lead to higher rates or non-renewal. Always weigh the repair cost against your deductible and potential rate hikes.

    2. How long does the roof insurance claim process take in Georgia?

    Typically, the process takes between 2 to 4 weeks. Simple claims may be resolved faster, while complex disputes or large-scale storm events can delay adjustments due to high volume. Georgia law requires insurers to acknowledge claims promptly, but investigation times can vary.

    3. What if the insurance adjuster denies my claim?

    If your claim is denied, request a written explanation citing the specific policy language. You can then hire a public adjuster or an attorney specializing in insurance disputes. Often, providing additional evidence from a licensed roofing contractor can overturn a denial.

    4. Can I choose my own roofing contractor?

    Yes. In Georgia, you have the right to choose any licensed contractor to repair your roof. The insurance company cannot force you to use their “preferred” vendors. However, using a preferred vendor might streamline the payment process, though it may limit your negotiation power.

    5. What is the difference between ACV and RCV in my payout?

    Actual Cash Value (ACV) pays you the depreciated value of your roof at the time of loss. Replacement Cost Value (RCV) pays the full cost to replace the roof with new materials. If you have an RCV policy, you may receive an initial check for the ACV amount, with the remaining “recoverable depreciation” paid after repairs are completed and invoices submitted.

    Conclusion

    Learning how to file a roof insurance claim in Cumming GA doesn’t have to be overwhelming. By documenting damage thoroughly, understanding your policy, and partnering with a trusted local roofer, you can navigate the system effectively. Remember, the goal is to restore your home to its pre-loss condition, not just to patch it up.

    Stay organized, ask questions, and don’t hesitate to advocate for yourself. If you found this guide helpful, please share it with your neighbors in Cumming and Forsyth County. Helping others prepare can strengthen our community’s resilience against future storms.

  • Should You Brush the Roof of Your Mouth?

    Should You Brush the Roof of Your Mouth?

    Have you ever finished brushing your teeth, looked in the mirror, and wondered if you missed a spot? Many people focus exclusively on their teeth and gums, often neglecting other critical areas of the oral cavity. If you have found yourself asking, “Are you supposed to brush the roof of your mouth,” you are not alone, and the answer is more nuanced than a simple yes or no.

    Maintaining comprehensive oral hygiene is about more than just a bright smile; it is about systemic health. The roof of your mouth, known medically as the palate, plays a surprising role in your overall bacterial load. In this guide, we will explore why this area matters, how to clean it safely, and what dental professionals recommend for optimal health.

    Why the Roof of Your Mouth Matters for Oral Health

    To understand whether you should brush your palate, we first need to understand its anatomy and function. The roof of the mouth is divided into two parts: the hard palate at the front and the soft palate at the back. While it may seem like an inert surface, it is actually a prime real estate for bacteria.

    The Bacterial Haven

    Your mouth is home to over 700 species of bacteria. While many are harmless, others contribute to tooth decay, gum disease, and bad breath (halitosis). The rough texture of the hard palate can trap food particles, plaque, and dead cells. If left uncleaned, these residues create a biofilm that contributes to poor oral health.

    According to general dental consensus, reducing the overall bacterial load in the mouth is crucial. By ignoring the roof of your mouth, you are leaving a significant portion of your oral cavity uncleaned. This can undermine your efforts in brushing and flossing elsewhere.

    Are You Supposed to Brush the Roof of Your Mouth?

    The short answer is yes, but with caution. You are supposed to clean the roof of your mouth, but “brushing” it with the same intensity as your enamel might not be the best approach.

    The Difference Between Cleaning and Scrubbing

    Enamel is the hardest substance in the human body, designed to withstand vigorous scrubbing. The tissue on the roof of your mouth, however, is mucous membrane. It is delicate, sensitive, and prone to abrasion.

    • Hard Palate: Can tolerate gentle brushing.
    • Soft Palate: Extremely sensitive and should generally be avoided by toothbrush bristles to prevent gagging or tissue damage.

    Dental experts suggest that while you should remove debris and bacteria from this area, the method matters. Aggressive scrubbing can lead to micro-tears in the tissue, creating entry points for infection and causing unnecessary discomfort.

    How to Safely Clean the Roof of Your Mouth

    If you decide to incorporate this step into your routine, technique is everything. Here is a step-by-step guide to doing it safely and effectively.

    Step 1: Choose the Right Tool

    You do not necessarily need a separate tool. Your regular toothbrush can work, but consider the following:

    • Soft-Bristled Toothbrush: Essential to prevent irritation.
    • Tongue Scraper: Some people find a wide tongue scraper effective for the hard palate.
    • Dedicated Palate Cleaner: Rare, but some electric toothbrushes come with specific modes or heads for soft tissue.

    Step 2: The Gentle Sweep

    1. Wet your toothbrush and apply a small amount of toothpaste.
    2. Place the brush gently against the front part of the hard palate (behind your upper front teeth).
    3. Use light, circular motions or gentle back-and-forth strokes.
    4. Move gradually toward the back, but stop before you reach the soft palate (the squishy part near the throat).

    Step 3: Rinse Thoroughly

    After cleaning the palate, rinse your mouth with water or an alcohol-free mouthwash to remove dislodged bacteria and debris.

    Pro Tip: If you experience any bleeding or persistent soreness, stop immediately. Your goal is hygiene, not exfoliation.

    Are You Supposed To Brush The Roof Of Your Mouth

    Brushing vs. Scraping: Which is Better?

    When it comes to the roof of the mouth and the tongue, there is an ongoing debate between brushing and scraping. Let’s break down the pros and cons to help you decide.

    FeatureBrushing (Toothbrush)Scraping (Tongue Scraper)
    EffectivenessGood for removing loose debrisExcellent for removing thick biofilm
    ComfortFamiliar feel, but can trigger gag reflexOften feels cleaner, less gagging
    Risk of IrritationModerate (if bristles are hard)Low (if used with light pressure)
    Ease of UseHigh (already in hand)Medium (requires separate tool)

    For most people, gentle brushing is sufficient for the hard palate. However, if you suffer from chronic bad breath, incorporating a scraper for the tongue and the very front of the palate might yield better results.

    The Connection to Bad Breath (Halitosis)

    One of the primary reasons people ask, “Are you supposed to brush the roof of your mouth?” is due to persistent bad breath. Halitosis is often caused by volatile sulfur compounds produced by bacteria breaking down food particles and proteins.

    The roof of the mouth, particularly the posterior aspect near the tonsils, can harbor anaerobic bacteria. These bacteria thrive in low-oxygen environments and produce foul-smelling gases. By regularly cleaning this area, you reduce the substrate available for these bacteria, thereby significantly reducing odor.

    A study published in the Journal of Clinical Dentistry noted that mechanical cleaning of oral soft tissues, including the palate and tongue, resulted in a measurable reduction in halitosis compared to tooth brushing alone. This highlights the importance of a holistic approach to oral care.

    Common Mistakes to Avoid

    Even with good intentions, many people make errors when trying to clean their palate. Here are the most common pitfalls:

    1. Using Hard Bristles: Never use a medium or hard-bristled brush on soft tissue. It causes micro-abrasions that can become infected.
    2. Going Too Far Back: Attempting to brush the soft palate often triggers the gag reflex and provides little hygiene benefit. Stick to the hard palate.
    3. Ignoring Frequency: Cleaning the palate once a month is not enough. It should be part of your daily routine, ideally once a day.
    4. Pressing Too Hard: Let the bristles do the work. Pressing hard does not clean better; it only damages tissue.

    Expert Insights and Scientific Context

    To further validate the importance of total oral hygiene, we can look at broader medical resources. The structure of the oral cavity is complex, and maintaining its health is linked to systemic conditions. For more detailed anatomical context, you can refer to the Wikipedia page on the Human Mouth, which outlines the various components and their functions.

    Dentists emphasize that the mouth is the gateway to the body. Poor oral hygiene has been linked to heart disease, diabetes, and respiratory issues. By expanding your cleaning routine to include the roof of your mouth, you are taking a proactive step toward overall wellness.

    FAQ Section

    1. Can I use mouthwash instead of brushing the roof of my mouth?

    Mouthwash is a great adjunct, but it is not a replacement for mechanical cleaning. While antimicrobial rinses kill bacteria, they do not physically remove the biofilm and food debris stuck to the textured surface of the palate. Mechanical cleaning is necessary for thorough hygiene.

    2. Does brushing the roof of my mouth prevent thrush?

    Oral thrush is a fungal infection caused by Candida. While good hygiene helps maintain a balanced oral microbiome, brushing the palate alone cannot prevent thrush if other risk factors (like antibiotic use or a compromised immune system) are present. However, a clean environment is less conducive to fungal overgrowth.

    3. My palate bleeds when I brush it. What should I do?

    Bleeding is a sign of trauma or underlying gum disease. Stop brushing the area immediately and switch to a softer brush. If bleeding persists for more than a few days, consult your dentist. It could indicate gingivitis or a more serious condition.

    4. Is it normal for the roof of my mouth to feel rough?

    Yes, the hard palate has a naturally textured surface with ridges called rugae. This texture helps in manipulating food during chewing. However, if you notice new lumps, sores, or changes in texture, see a dental professional for an evaluation.

    5. How often should I clean the roof of my mouth?

    Ideally, you should clean the roof of your mouth once a day. This can be done during your morning or evening brushing routine. Consistency is key to preventing bacterial buildup.

    Conclusion

    So, are you supposed to brush the roof of your mouth? Yes, you are. But remember, it is about cleaning, not scrubbing. By gently incorporating this step into your daily routine, you can reduce bad breath, lower your bacterial load, and improve your overall oral health.

    Start with a soft-bristled toothbrush, be gentle, and focus on the hard palate. Your mouth—and your breath—will thank you.

    Did you find this guide helpful? Share this article with your friends and family on social media to help them achieve better oral hygiene habits. Together, we can promote healthier smiles and healthier bodies.

  • New Roof Cost Per Sq Ft: 2026 Guide

    New Roof Cost Per Sq Ft: 2026 Guide

    Replacing a roof is one of the most significant home investments you will ever make. It protects your family, enhances curb appeal, and significantly impacts your property’s resale value. However, staring at blank contractor quotes can be overwhelming, leaving many homeowners asking the critical question: How much does a new roof cost per square foot?

    Understanding this metric is essential for budgeting accurately and avoiding surprise fees. In this comprehensive guide, we will break down the current market rates for 2026, explain the variables that drive prices up or down, and help you make an informed decision without the stress.

    Understanding the Basics: What Is a “Square” in Roofing?

    Before diving into dollar amounts, it is crucial to understand how roofing professionals measure area. In the construction industry, a “square” is not a single square foot.

    • 1 Roofing Square = 100 Square Feet

    When contractors give you a price per square, they are quoting you for every 100 square feet of roof surface. To find the cost per square foot, you simply divide the price per square by 100.

    For example, if a contractor charges $12,000 for a 20-square roof (2,000 sq. ft.), the cost per square foot is $6.00. Knowing this distinction prevents confusion when comparing bids from different companies.

    Average New Roof Cost Per Square Foot in 2026

    So, what is the actual number? As of late 2026, the national average for a new roof installation ranges between $4.50 and $15.00 per square foot.

    This wide range exists because “roofing” is not a one-size-fits-all service. The final price depends heavily on the material chosen, the complexity of your roof’s design, and your geographic location.

    Breakdown by Material Type

    The material you choose is the biggest driver of cost. Here is a realistic look at the price per square foot for popular roofing materials in the US market:

    Material TypeCost Per Sq. Ft. (Materials + Labor)LifespanBest For
    3-Tab Asphalt Shingles$4.50 – $6.5015–20 YearsBudget-conscious homeowners
    Architectural Shingles$6.00 – $8.5025–30 YearsBalance of cost and durability
    Metal Roofing (Steel)$9.00 – $14.0040–70 YearsLong-term investment & snow areas
    Clay/Concrete Tiles$10.00 – $18.00+50+ YearsHot climates & specific aesthetics
    Slate Roofing$15.00 – $30.00+75–100+ YearsLuxury homes & historic preservation

    Note: Prices include removal of old roofing, underlayment, and standard installation labor.

    Key Factors That Influence Your Roofing Quote

    While the material sets the baseline, several other factors can cause your final bill to fluctuate. Understanding these will help you anticipate potential extra costs.

    1. Roof Pitch and Complexity

    A flat or low-slope roof is easier and safer to work on, often costing less. Conversely, a steep-pitched roof requires special safety equipment, more labor time, and slower work pacing. If your roof has multiple valleys, dormers, chimneys, or skylights, the labor cost per square foot will increase due to the intricate flashing work required.

    2. Geographic Location

    Labor rates vary significantly across the United States. Homeowners in high-cost-of-living areas like California, New York, or Massachusetts will typically pay 20–30% more than those in the Midwest or South. Additionally, local building codes may require specific wind-resistant or fire-rated materials, which can affect pricing.

    3. Removal of Old Roofing

    Most quotes include the cost of tearing off the existing roof (“tear-off”). However, if you have multiple layers of old shingles (some homes have two or three layers), the disposal fees and labor hours increase. Always confirm if your quote includes tear-off and dumpster fees.

    4. Underlayment and Ventilation

    Never skimp on what lies beneath the shingles. High-quality synthetic underlayment and proper attic ventilation systems add to the upfront cost but prevent ice dams and mold growth later. Upgrading from felt paper to synthetic underlayment might add $0.50–$1.00 per square foot but offers superior protection.

    How Much Does A New Roof Cost Per Square Foot

    Hidden Costs to Watch Out For

    When asking how much does a new roof cost per square foot, be aware that the base price rarely tells the whole story. Here are common additional expenses:

    • Decking Repair: If the wooden deck beneath your shingles is rotten, it must be replaced. This usually costs $40–$60 per sheet of plywood, plus labor.
    • Permits: Local municipalities often require permits for roof replacement, ranging from $100 to $500 depending on the city.
    • Warranty Upgrades: Standard manufacturer warranties cover material defects. Extended labor warranties or “no-leak” guarantees from the contractor may cost extra but provide peace of mind.

    For more detailed information on roofing standards and material specifications, you can refer to Wikipedia’s article on Roofing.

    How to Calculate Your Estimated Roof Cost

    Want a quick estimate before calling contractors? Follow these steps:

    1. Measure Your Home’s Footprint: Measure the length and width of your home’s ground-level footprint. Multiply these to get the area.
    2. Account for Overhangs and Pitch: Add 10–20% to your footprint area to account for eaves overhangs and the slope of the roof. Steeper roofs have more surface area than the footprint suggests.
    3. Choose Your Material Price: Pick the average cost per square foot from the table above.
    4. Do the Math:
      • Example: A 2,000 sq. ft. home with a moderate pitch might have a 2,400 sq. ft. roof surface.
      • Using architectural shingles at $7.00/sq. ft.:
      • 2,400 x $7.00 = $16,800 estimated total.

    FAQ: Common Questions About Roofing Costs

    Q: Is it cheaper to overlay shingles instead of tearing off the old roof?

    A: While overlaying saves on tear-off labor and disposal fees initially, it is generally not recommended. It hides potential deck damage, voids many manufacturer warranties, and adds excessive weight to your structure. Most professional roofers insist on a full tear-off for long-term reliability.

    Q: Does insurance cover the cost of a new roof?

    A: Homeowners insurance typically covers roof replacement only if the damage is caused by a sudden, covered peril like a hailstorm, hurricane, or falling tree. It does not cover wear and tear or age-related deterioration. Check your policy’s “Actual Cash Value” vs. “Replacement Cost Value” clauses.

    Q: What is the best time of year to replace a roof?

    A: Late spring through early fall is the peak season, meaning prices may be higher due to demand. However, scheduling in late fall or winter (if weather permits in your region) can sometimes yield discounts as contractors look to fill their schedules. Avoid installing asphalt shingles in freezing temperatures, as they become brittle and difficult to seal properly.

    Q: How long does a roof replacement take?

    A: For an average-sized single-family home (2,000–2,500 sq. ft.), a professional crew can typically complete the job in 1 to 3 days. Larger homes or complex designs with slate or tile may take a week or more.

    Q: Should I hire a local roofer or a national chain?

    A: Local roofers often provide better personalized service and are more familiar with local building codes and weather challenges. National chains may offer standardized pricing but might subcontract the actual labor. Always check reviews, licensing, and insurance regardless of the company size.

    Conclusion

    Knowing how much does a new roof cost per square foot empowers you to navigate the hiring process with confidence. While the national average hovers between $4.50 and $15.00 per square foot, your specific project will depend on material choices, roof complexity, and location.

    Remember, the cheapest bid is not always the best value. Prioritize quality materials, reputable contractors, and proper ventilation to ensure your roof lasts for decades. A well-installed roof is not just an expense; it is a vital asset that secures your home’s future.

    If you found this guide helpful, please share it with friends or family who are planning their own home improvements. Knowledge is the best tool for a successful renovation!