Category: preventive maintenance

  • Safe Ways: Remove Roof Leaves From Ground

    Safe Ways: Remove Roof Leaves From Ground

    Climbing a ladder to clear debris is one of the most dangerous household chores you can undertake. Every year, thousands of homeowners end up in emergency rooms due to falls from ladders while attempting basic roof maintenance. If you are looking for how to get leaves off roof without getting on roof, you are making a smart choice for both your safety and your home’s longevity.

    Leaves may seem harmless, but when they accumulate on your roof, they trap moisture, promote moss growth, and clog gutters. This can lead to costly water damage, rotting shingles, and even structural issues over time. The good news? You don’t need to risk your neck to solve this problem. With the right tools and techniques, you can keep your roof clean from the safety of your backyard.

    Why Removing Leaves From Your Roof Is Critical

    Before we dive into the methods, it is essential to understand why this task matters. Many homeowners ignore roof debris until they see a leak. However, prevention is far cheaper than repair.

    According to the National Safety Council, ladder-related incidents account for a significant portion of home injury emergencies. By keeping your feet on the ground, you eliminate this risk entirely. Furthermore, wet leaves decompose and create a sludge that retains water against your shingles. This constant moisture exposure can reduce the lifespan of your asphalt shingles by several years.

    For more detailed information on the biological decomposition process of organic matter on building materials, you can refer to this resource on organic decay. Understanding this process highlights why prompt removal is necessary for maintaining your home’s integrity.

    Method 1: Using a Leaf Blower with Extension Kit

    The most popular and efficient way to clear dry leaves is using a leaf blower. However, standard nozzles often lack the reach or angle needed for roof work.

    Step-by-Step Guide:

    1. Choose the Right Tool: Use a gas-powered or high-voltage cordless leaf blower. Electric corded models may lack the necessary power.
    2. Attach an Extension Wand: Purchase a rigid extension kit specifically designed for roof cleaning. These wands often have a curved tip to direct airflow upward.
    3. Position Yourself Safely: Stand on stable, level ground. Ensure you have a clear line of sight to the roof section you are cleaning.
    4. Start from the Peak: Begin blowing leaves from the top of the roof downward. This prevents you from blowing debris onto areas you have already cleaned.
    5. Use Short Bursts: Do not hold the trigger down continuously. Use short, controlled bursts to dislodge clumps of wet leaves.

    Pro Tip: If the leaves are damp, wait for a sunny day. Dry leaves are significantly lighter and easier to move with air pressure alone.

    Method 2: The Garden Hose with Spray Nozzle

    If you do not own a leaf blower, or if the leaves are stuck due to rain or sap, water pressure is an excellent alternative. This method also helps flush out gutters simultaneously.

    Step-by-Step Guide:

    1. Select a High-Pressure Nozzle: Use a nozzle with a “jet” or “flat fan” setting. Avoid the “mist” setting as it lacks force.
    2. Extend Your Reach: If your hose is too short, use a hose extender or a telescoping wand attachment.
    3. Aim Carefully: Direct the water stream from the edge of the roof toward the center, pushing leaves toward the gutters or off the side.
    4. Watch the Gutters: As leaves wash into the gutters, ensure they are flowing out through the downspouts. If water backs up, you may need to clear the downspout separately.

    Caution: Be mindful of water intrusion. Do not spray water directly under shingles or into vents. Keep the angle shallow and parallel to the roof surface.

    Method 3: Roof Rakes and Specialized Tools

    For heavy, wet debris or thick layers of moss-covered leaves, mechanical tools are often more effective than air or water.

    Top Tools for Ground-Level Cleaning:

    • Roof Rake: A long-handled rake with a soft rubber or plastic head. It pulls debris down without damaging shingles.
    • Gutter Scoop on a Pole: Specifically designed to pull leaves out of gutters from the ground.
    • Telescoping Brush: Useful for scrubbing away sticky residue after the bulk leaves are removed.

    Comparison: Air vs. Water vs. Mechanical

    FeatureLeaf BlowerGarden HoseRoof Rake
    Best ForDry, loose leavesSticky/wet leavesHeavy debris/moss
    SpeedFastModerateSlow
    Risk of DamageLow (if used correctly)Medium (water intrusion)Low (if soft-headed)
    Effort LevelLowMediumHigh

    Method 4: Preventive Measures to Reduce Future Buildup

    The best way to learn how to get leaves off roof without getting on roof is to minimize the need for frequent cleaning. Prevention saves time and effort in the long run.

    Install Gutter Guards

    Gutter guards prevent leaves from entering your gutter system. While they do not stop leaves from landing on the roof surface, they ensure that once leaves blow off the roof, they do not clog the drainage system. Mesh screens, foam inserts, and reverse-curve systems are popular options.

    Trim Overhanging Branches

    Trees are the primary source of roof debris. Trim branches that hang within 6–10 feet of your roof. This reduces the volume of leaves falling directly onto your shingles and minimizes the risk of branch damage during storms.

    Consider Zinc Strips

    If moss is a recurring issue alongside leaves, install zinc or copper strips near the roof peak. When it rains, small amounts of metal wash down the roof, inhibiting moss and algae growth. This keeps the surface smoother, allowing leaves to slide off more easily during wind or rain.
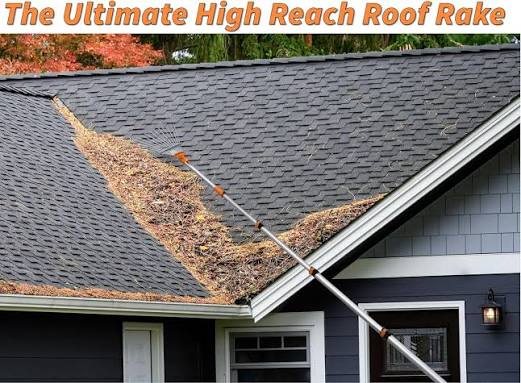
    How To Get Leaves Off Roof Without Getting On Roof

    Common Mistakes to Avoid

    Even when staying on the ground, mistakes can happen. Here are some pitfalls to avoid:

    • Ignoring Weather Conditions: Never attempt to clean a wet or icy roof from the ground. Slippery surfaces make it hard to maintain balance, and wet leaves are heavier and harder to move.
    • Using Metal Tools: Never use a metal rake or sharp objects on your roof. Asphalt shingles are fragile, and metal can tear the granule layer, leading to premature aging.
    • Overlooking Safety Gear: Even though you are on the ground, wear safety glasses and gloves. Debris can fly back at you, and gutter sludge can contain bacteria or sharp objects.

    FAQ Section

    1. Can I use a pressure washer to clean my roof?

    It is generally not recommended to use a high-pressure washer on asphalt shingles. The high pressure can strip away the protective granules, void your warranty, and force water under the shingles, causing leaks. Stick to a standard garden hose with a strong nozzle.

    2. How often should I remove leaves from my roof?

    You should inspect your roof at least twice a year: once in late spring and once in late autumn. If you live near many trees, check monthly during peak leaf-drop seasons. Prompt removal prevents moisture buildup and pest infestations.

    3. What if the leaves are wet and stuck?

    Wet leaves are challenging for leaf blowers. In this case, use a garden hose with a jet nozzle to loosen them, or wait for a few sunny days to let them dry out. Alternatively, use a soft-bristled roof rake to gently pull them down.

    4. Is it safe to stand on a ladder while using a leaf blower?

    No. Standing on a ladder while operating a powerful tool like a leaf blower compromises your balance and increases the risk of falling. Always keep both feet on stable ground. If you cannot reach the area from the ground, hire a professional.

    5. Will walking on the roof damage it?

    Yes, walking on asphalt shingles can crack them or dislodge granules. This is precisely why learning how to get leaves off roof without getting on roof is so important. Foot traffic accelerates wear and tear, potentially leading to leaks.

    6. What should I do with the leaves after they fall?

    Rake them up promptly from your yard and driveway. Leaving them in piles near your foundation can attract pests like rodents and insects. Composting them is an eco-friendly disposal method, provided they are not diseased.

    Conclusion

    Maintaining a clean roof is vital for protecting your home, but it should never come at the cost of your safety. By using tools like leaf blowers with extensions, garden hoses, and specialized roof rakes, you can effectively manage debris without ever climbing a ladder. Remember, consistency is key. Regular inspections and preventive measures like trimming trees and installing gutter guards will reduce the workload significantly.

    Stay safe, keep your feet on the ground, and enjoy the peace of mind that comes with a well-maintained home. If you found this guide helpful, please share it with your friends and neighbors on social media. Together, we can promote safer home maintenance practices for everyone.
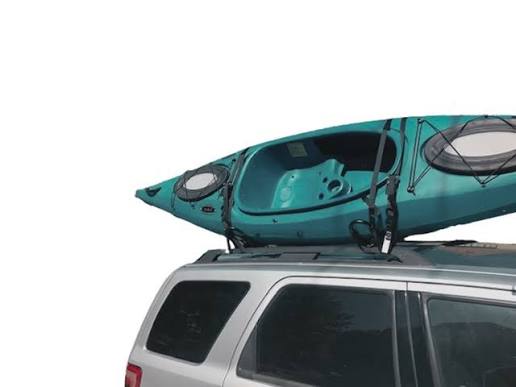
  • Best Way To Strap A Kayak To A Roof Rack

    Best Way To Strap A Kayak To A Roof Rack

    Transporting your kayak can feel daunting, especially if you are worried about damaging your vehicle or losing your expensive gear on the highway. You want peace of mind knowing your vessel is secure, but conflicting advice online often leads to confusion and anxiety. Finding the best way to strap a kayak to a roof rack is essential for both safety and the longevity of your equipment.

    In this comprehensive guide, we will walk you through the exact methods used by professionals and seasoned paddlers. We will cover everything from choosing the right straps to tightening them with precision, ensuring your next adventure starts before you even hit the water.

    Why Proper Strapping Techniques Matter

    Before diving into the “how-to,” it is crucial to understand the “why.” Improperly secured kayaks are not just an inconvenience; they are a significant road hazard. According to data from the National Highway Traffic Safety Administration (NHTSA), unsecured loads contribute to thousands of accidents annually in the United States.

    When a kayak shifts during transit, it creates uneven wind resistance, which can destabilize your vehicle at high speeds. More importantly, excessive movement can crack the hull of your kayak or scratch your car’s paint. By mastering the correct strapping technique, you protect your investment and ensure the safety of everyone on the road.

    Choosing the Right Equipment for the Job

    Not all straps are created equal. Using the wrong gear is the most common mistake beginners make. Here is what you need:

    1. Cam Buckle Straps vs. Ratchet Straps

    • Cam Buckle Straps: These are the gold standard for kayaking. They allow you to tighten the strap manually without the risk of over-tightening. Over-tightening can warp the shape of your kayak, especially plastic rotomolded ones.
    • Ratchet Straps: Avoid these unless absolutely necessary. The mechanical advantage of a ratchet makes it very easy to crush your kayak’s hull. If you must use them, exercise extreme caution.

    2. Quality Matters

    Look for straps made from UV-resistant polyester. Cheap nylon straps stretch when wet or under tension, which can loosen your load mid-drive. Aim for straps with a breaking strength of at least 1,500 lbs, though you will never apply that much force.

    3. Bow and Stern Lines

    Straps hold the kayak down, but bow and stern lines prevent it from sliding forward or backward. These are non-negotiable for highway driving.

    Best Way To Strap A Kayak To A Roof Rack

    Step-by-Step Guide: The Best Way To Strap A Kayak To A Roof Rack

    Follow these precise steps to ensure a secure fit. This method works for most single-person kayaks on crossbar roof racks.

    Step 1: Positioning the Kayak

    Place the kayak upside down (hull up) on the roof rack. This position is more aerodynamic and prevents water from pooling in the cockpit. Center the kayak so that the weight is evenly distributed between the front and rear crossbars.

    • Tip: If you have a partner, lift together using your legs, not your back. If alone, use a loading assist tool or slide the kayak up from the rear bumper carefully.

    Step 2: Attaching the Main Straps

    Take your cam buckle straps. Thread the strap through the cam buckle and place the buckle on the side of the kayak, away from the door frame, to avoid scratching your car when opening doors.

    1. Loop the strap over the crossbar and under the kayak hull.
    2. Bring the strap back up over the other side of the crossbar.
    3. Feed the end through the cam buckle.

    Crucial Detail: Ensure the strap passes under the crossbar, not just resting on top. This prevents the kayak from sliding sideways.

    Step 3: Tightening Correctly

    Pull the loose end of the strap to remove slack. Then, press down on the cam lever to lock it.

    • The “Hand-Tight” Rule: The strap should be tight enough that you cannot twist it more than a quarter turn with your fingers. It should not be drum-tight. If you see the kayak hull deforming or indenting, you have gone too far. Loosen it slightly.

    Step 4: Securing Bow and Stern Lines

    Attach one end of the bow line to the handle or secure point on the front of the kayak. Attach the other end to a sturdy anchor point on your vehicle’s front bumper or tow hook. Repeat this process for the stern (rear) of the kayak.

    • Note: Do not attach these to plastic trim pieces or weak parts of the bumper. Use metal anchor points only. These lines should have slight tension but not pull the kayak down aggressively.

    Common Mistakes to Avoid

    Even experienced paddlers can slip up. Here are the most frequent errors:

    MistakeConsequenceSolution
    Over-tighteningCracked hull, warped shapeUse cam buckles; stop when snug.
    Ignoring Wind DirectionIncreased drag, noisePlace kayak hull-up for aerodynamics.
    No Bow/Stern LinesKayak slides off during brakingAlways use front and rear tie-downs.
    Straps Touching PaintScratches and swirl marksPlace a towel under strap contact points.

    Understanding Wind Resistance and Aerodynamics

    Did you know that a poorly strapped kayak can increase your fuel consumption by up to 15%? Aerodynamics play a huge role in transport efficiency. When you strap a kayak hull-up, you create a smoother surface that cuts through the air.

    If you must transport a kayak right-side up (cockpit up), ensure all hatches are closed tightly. However, this position catches more wind and can cause the kayak to act like a sail, putting immense stress on your straps. For the best way to strap a kayak to a roof rack, always prioritize the hull-up orientation unless specific rack designs dictate otherwise.

    For more detailed information on vehicle aerodynamics and load impact, you can refer to general physics principles outlined on Wikipedia.

    Maintenance Checks During Your Trip

    Security is not a “set it and forget it” task. Vibrations from the road can loosen straps over time.

    1. First Stop: After driving for 15–20 minutes, pull over safely. Check all straps. It is normal for them to settle and loosen slightly. Retighten if necessary.
    2. Regular Intervals: Check your straps every time you stop for gas or restrooms.
    3. Post-Trip Inspection: Inspect your straps for fraying or wear after each use. Replace them if you see any signs of damage.

    FAQ Section

    1. Can I use bungee cords instead of straps?

    No. Bungee cords stretch and bounce, which means they cannot provide the consistent tension needed to keep a heavy kayak secure. They are suitable for light accessories like paddle holders but never for securing the main vessel.

    2. How many straps do I need for one kayak?

    You need a minimum of two main straps (one for each crossbar) and two additional lines for the bow and stern. Total: four attachment points. For longer kayaks (over 14 feet), consider adding a third crossbar or extra support.

    3. Is it safe to leave my kayak on the roof overnight?

    While possible, it is not recommended. Overnight dew can make straps slippery, and temperature changes can affect tension. Additionally, it poses a theft risk. If you must, use a cable lock through the kayak and around the rack for security.

    4. What if my car doesn’t have roof rack crossbars?

    You can use soft rack systems (foam blocks with straps) that sit directly on the roof. However, these are less stable and suitable only for short distances and low speeds. For regular transport, installing proper crossbars is the safest investment.

    5. How do I prevent the straps from flapping in the wind?

    Excess strap length creates noise and drag. Once tightened, roll up the excess strap and secure it with a rubber band or velcro tie. Some high-end straps come with built-in keepers for this purpose.

    Conclusion

    Mastering the best way to strap a kayak to a roof rack is a skill that pays off in safety, equipment longevity, and peace of mind. By using the right equipment—specifically cam buckle straps—and following the hand-tight rule, you can transport your kayak confidently across any distance. Remember to always use bow and stern lines, check your tension after the first few miles, and prioritize aerodynamics.

    Your next adventure awaits, and now you’re ready to hit the road as safely as you hit the water. If you found this guide helpful, please share it with your fellow paddlers on social media. Safe travels and happy paddling!

  • Clean Roof No Pressure Washer: Safe Guide

    Clean Roof No Pressure Washer: Safe Guide

    Have you noticed dark streaks or green patches creeping up your shingles? It is a common homeowner dilemma: you know the roof needs attention, but you are terrified of blasting away granules with high-powered equipment. If you are asking yourself, “How Do I Clean My Roof Without A Pressure Washer,“ you are already on the right track toward preserving your home’s integrity.

    High-pressure washing can void warranties, dislodge protective granules, and force water under shingles, leading to costly leaks. The good news is that you do not need industrial machinery to restore your roof’s appearance. In this guide, we will walk you through safe, effective, and professional-grade techniques to clean your roof using low-pressure methods, often referred to as “soft washing.”

    Why You Should Avoid Pressure Washers on Roofs

    Before diving into the how, it is crucial to understand the why. Many homeowners assume that more pressure equals a cleaner surface. However, asphalt shingles—the most common roofing material in the US—are covered in tiny ceramic granules. These granules protect the asphalt from UV rays and weathering.

    According to industry standards, using a pressure washer above 1,500 PSI can strip these granules away. Once the granules are gone, the underlying asphalt is exposed to the sun, causing it to become brittle and crack prematurely. Furthermore, the intense force of water can break the sealant strips between shingles, compromising the roof’s waterproofing capabilities.

    By opting for non-pressure methods, you extend the lifespan of your roof while achieving a visually clean result. This approach aligns with the recommendations of major roofing manufacturers who often specify that high-pressure cleaning voids product warranties.

    The Best Alternative: The Soft Wash Method

    The most effective way to answer “How Do I Clean My Roof Without A Pressure Washer” is by utilizing the Soft Wash technique. This method relies on specialized cleaning solutions rather than brute force to kill organic growth like moss, algae, and lichen.

    What Is Soft Washing?

    Soft washing involves applying a biodegradable chemical solution to the roof surface and allowing it to dwell. The solution kills the organic matter at the root. Over time, usually after a few rainfalls or a gentle rinse, the dead organisms wash away naturally.

    The Chemistry Behind It

    The primary culprit for those black streaks is Gloeocapsa magma, a type of algae. To eliminate it, you need a fungicide or an algaecide. The most common and effective ingredient is sodium hypochlorite (household bleach), mixed with water and a surfactant (soap) to help it stick to the vertical surfaces.

    Expert Tip: Always check local environmental regulations before using bleach-based solutions. Some areas have strict rules about runoff into storm drains or gardens.

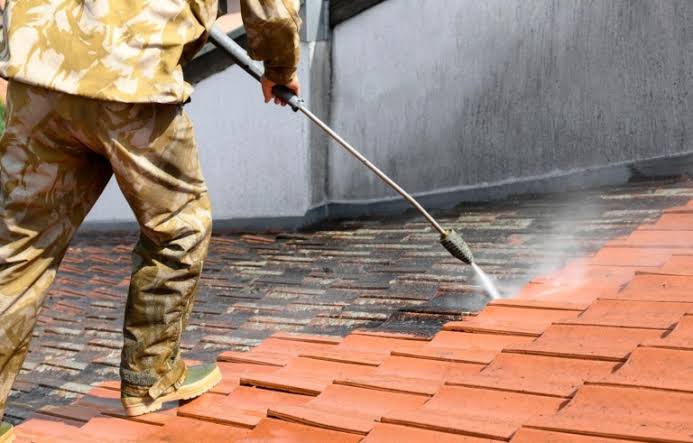
    How Do I Clean My Roof Without A Pressure Washer

    Step-by-Step Guide: How to Clean Your Roof Safely

    Follow this detailed tutorial to clean your roof effectively without risking damage.

    Step 1: Safety First

    Roof work is dangerous. Before you begin:

    • Use a sturdy extension ladder with stabilizers.
    • Wear rubber-soled shoes with excellent traction.
    • Consider using a safety harness if your roof pitch is steep (greater than 6/12).
    • Work on a dry, calm day. Wind can blow cleaning solutions onto your landscaping or into your eyes.

    Step 2: Prepare the Cleaning Solution

    You can create a potent yet safe cleaning mixture at home. Here is a standard recipe used by many professionals:

    IngredientQuantityPurpose
    Water1 GallonBase liquid
    Bleach (Sodium Hypochlorite)1–2 LitersKills algae and moss
    Laundry Detergent1 CupSurfactant to help solution adhere
    Oxygenated Bleach (Optional)1 CupBoosts cleaning power, less harsh

    Mix these ingredients in a large plastic bucket. Never mix bleach with ammonia or acids, as this creates toxic gas.

    Step 3: Protect Your Landscaping

    Since we are using a bleach-based solution, you must protect your plants.

    1. Thoroughly wet all plants, shrubs, and grass near the house with plain water. Saturated plants absorb less chemical runoff.
    2. Cover sensitive plants with plastic tarps if possible.
    3. Rinse the plants again immediately after you finish applying the solution to the roof.

    Step 4: Application

    You do not need a pressure washer to apply the solution. Instead, use a garden sprayer or a pump sprayer.

    1. Start from the bottom of the roof and work your way up. This prevents streaks.
    2. Spray the solution generously onto the affected areas. Ensure the shingles are saturated but not dripping excessively.
    3. Let the solution dwell for 15–20 minutes. Do not let it dry completely; if it starts to dry, mist it lightly with water.

    Step 5: The Gentle Rinse (Optional)

    In many cases, you do not need to rinse at all. The rain will wash away the dead algae over the next few weeks. However, if you want immediate results:

    1. Use a garden hose with a standard nozzle.
    2. Set the pressure to the lowest setting.
    3. Gently spray from the top down to push debris off the roof. Never spray upward under the shingles.

    For more detailed information on roofing materials and their maintenance requirements, you can refer to general construction guidelines on Wikipedia.

    Manual Cleaning: When to Use a Brush

    If you have stubborn moss patches that chemicals alone do not remove, you may need manual assistance. However, this requires extreme care.

    • Use a Soft-Bristle Brush: Never use wire brushes or stiff brooms. A soft-bristle brush on an extension pole allows you to reach the center of the roof from the ground or the edge.
    • Gentle Sweeping Motion: Sweep gently to lift the moss. Do not scrub hard. The goal is to loosen the hold of the moss, not to scrape the shingle.
    • Vacuum Debris: After brushing, use a leaf blower on a low setting or a roof vacuum to remove the loose debris from the gutters and valleys. Clogged gutters retain moisture, which encourages new moss growth.

    Pros and Cons: Chemical vs. Manual Cleaning

    To help you decide which method suits your situation, here is a quick comparison.

    FeatureChemical Soft WashManual Brushing
    Effort LevelLowHigh
    Risk to ShinglesVery LowModerate (if done incorrectly)
    Effectiveness on AlgaeExcellentPoor
    Effectiveness on Thick MossGood (may need repeat)Good
    Time Required1–2 hours (mostly waiting)3–4 hours of labor
    CostLow (DIY chemicals)Low (tool cost only)

    Preventing Future Growth

    Cleaning is only half the battle. Preventing regrowth saves you time and money in the long run.

    1. Install Zinc or Copper Strips: Near the ridge of your roof, install metal strips. When it rains, tiny particles of zinc or copper wash down the roof. These metals are natural biocides that inhibit algae and moss growth. This is a long-term solution recommended by many roofing experts.
    2. Trim Overhanging Branches: Shade and moisture are the best friends of moss. Trim trees to allow sunlight to hit your roof, keeping it dry and warm.
    3. Keep Gutters Clean: Ensure water flows freely off the roof. Standing water accelerates organic growth.

    FAQ Section

    1. Can I use vinegar to clean my roof?

    Yes, white vinegar is a natural alternative to bleach. It is less effective on heavy algae infestations but works well for mild stains and is safer for plants. Mix equal parts vinegar and water. However, note that vinegar may require more frequent applications than bleach-based solutions.

    2. How often should I clean my roof?

    Generally, you should inspect your roof annually. Cleaning is typically needed every 2–3 years, depending on your climate. Humid, shaded environments may require more frequent cleaning, while dry, sunny areas may go longer between cleanings.

    3. Will walking on my roof damage it?

    Yes, it can. Asphalt shingles are fragile, especially in hot weather when they become soft. Walking on them can crack the shingles or dislodge granules. Whenever possible, perform cleaning from the ground using extension poles or from the ladder at the edge.

    4. Is it safe to clean a roof in direct sunlight?

    No. Avoid cleaning in direct, hot sunlight. The heat causes the cleaning solution to evaporate too quickly, reducing its effectiveness and potentially leaving streaks. Early morning or late afternoon on a cloudy day is ideal.

    5. What if the stains return after a week?

    If stains return quickly, it may indicate that the algae was not fully killed, or there is an internal moisture issue. Ensure you allowed the solution to dwell for the full 20 minutes. If the problem persists, consult a professional roofer to check for underlying ventilation or leak issues.

    Conclusion

    Learning how do I clean my roof without a pressure washer is a smart investment in your home’s longevity. By choosing the soft wash method or gentle manual cleaning, you avoid the catastrophic damage that high-pressure water can cause. You save money on repairs, maintain your warranty, and keep your home looking pristine.

    Remember, patience is key. Let the chemicals do the heavy lifting, protect your landscaping, and prioritize your safety above all else.

    Did you find this guide helpful? Share it with your neighbors on social media to help them protect their roofs too! A clean roof is a happy home.

  • TPO vs PVC Roofing: How to Spot the Difference

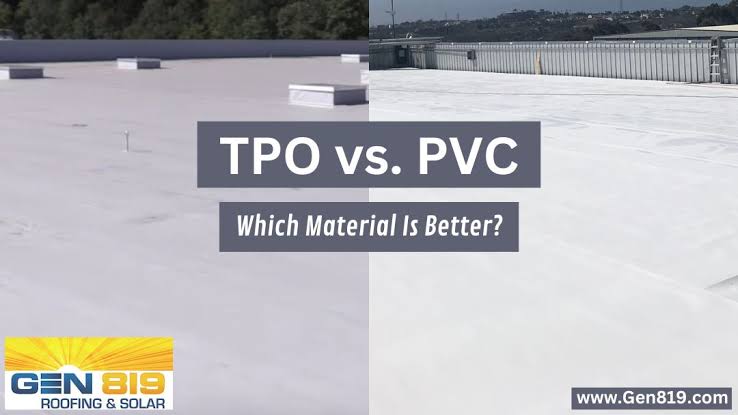
    TPO vs PVC Roofing: How to Spot the Difference

    Choosing the right commercial roofing material can feel like navigating a maze of technical jargon and conflicting advice. You want a roof that lasts, protects your assets, and fits your budget, but the visual similarities between popular single-ply membranes make this decision difficult. Understanding How To Tell The Difference Between Tpo And Pvc Roofing is the first step toward making an informed investment that serves your building for decades.

    Both Thermoplastic Polyolefin (TPO) and Polyvinyl Chloride (PVC) are dominant players in the commercial roofing industry. They look similar—often both are bright white—and they share some installation methods. However, their chemical compositions, performance under stress, and long-term maintenance needs differ significantly. In this guide, we will break down these differences clearly, helping you identify which material is on your roof or which one you should install next.

    What Are the Core Chemical Differences?

    To truly understand how to distinguish these materials, we must look beyond the surface. The fundamental difference lies in their molecular structure and how they are manufactured.

    TPO (Thermoplastic Polyolefin) is a blend of polypropylene and ethylene-propylene rubber, reinforced with polyester mesh. It was developed as a more affordable, environmentally friendly alternative to older roofing systems. TPO does not contain chlorine, which makes it a favorite for those concerned about environmental impact during disposal.

    PVC (Polyvinyl Chloride), on the other hand, is a thermoplastic material that has been used in roofing since the 1960s. It contains chlorine, which gives it inherent fire-resistant properties. PVC membranes are typically reinforced with polyester or fiberglass scrim to provide dimensional stability.

    According to Wikipedia’s entry on Vinyl composition tile (which shares the base polymer chemistry with roofing PVC), the addition of plasticizers and stabilizers in PVC creates a flexible, durable material distinct from the rubber-blend nature of TPO. This chemical distinction drives most of the performance differences we will discuss below.

    How Can You Visually Identify TPO vs PVC?

    If you are standing on a roof or looking at photos, visual cues are your first line of defense. While both membranes are often white to reflect UV rays, there are subtle signs you can look for.

    1. Surface Texture and Sheen

    • PVC: Often has a slightly glossy or “wet” look when new. Over time, high-quality PVC may develop a slight chalky residue, but it generally retains a smoother, more plastic-like texture.
    • TPO: Typically has a matte finish. It feels more like a heavy-duty plastic sheet or even a thin rubber. It lacks the high-gloss sheen of PVC.

    2. Seam Appearance

    The way the sheets are joined is a major giveaway.

    • PVC Seams: These are usually heat-welded. The seams appear fused together, creating a continuous, homogeneous bond. If you run your finger along a well-installed PVC seam, it should feel smooth and uniform, almost as if the two sheets are one.
    • TPO Seams: These can be heat-welded or taped. However, older TPO installations or specific brands might use adhesive tapes. If you see tape lines or if the seam looks slightly raised and less “melted” than PVC, it is likely TPO. Note: Modern TPO is also heat-welded, so this method requires checking the weld quality.

    3. Flexibility and Stiffness

    • PVC: Remains flexible in cold temperatures due to plasticizers. It drapes easily over irregularities.
    • TPO: Can be stiffer, especially in colder weather. It may resist conforming to complex roof details unless specifically formulated for cold-weather application.

    Performance Comparison: Durability and Lifespan

    When evaluating How To Tell The Difference Between Tpo And Pvc Roofing, performance data is crucial. Here is a breakdown of how they handle real-world conditions.

    FeatureTPO RoofingPVC Roofing
    Lifespan20–30 years20–30+ years
    Chemical ResistanceModerate. Can degrade with exposure to oils, fats, and certain industrial chemicals.Excellent. Highly resistant to oils, greases, and industrial pollutants. Ideal for restaurants.
    Fire ResistanceGood (requires fire retardants).Superior (inherent chlorine content provides self-extinguishing properties).
    Puncture ResistanceHigh (due to thicker plies often used).High, but depends on thickness.
    CostGenerally lower initial cost.Higher initial cost, but potentially lower lifecycle cost in harsh environments.

    The “Restaurant Rule”

    One of the easiest ways to determine which roof is better for a specific building is the type of business inside. If the building houses a restaurant, bakery, or any facility that vents cooking exhaust, PVC is the superior choice. The oils and fats in the exhaust can break down the polymers in TPO over time, leading to premature failure. PVC’s chemical resistance makes it impervious to these airborne contaminants.

    How To Tell The Difference Between Tpo And Pvc Roofing

    Installation Methods: A Key Identifier

    How the roof was installed can also help you identify the material. While both use similar mechanical fastening or fully adhered methods, the welding process differs slightly.

    1. Heat Welding Temperature:
      • PVC requires precise temperature control during welding. If the heat is too high, the plasticizers can burn off, weakening the seam.
      • TPO is generally more forgiving during the welding process, though it still requires skilled labor.
    2. Adhesive Use:
      • While less common now, some TPO systems were historically installed using adhesives. If you find glue residues or tape at the seams, it is likely an older TPO system. PVC is almost exclusively heat-welded in modern applications.

    Maintenance Requirements: What to Expect

    Understanding maintenance needs helps you plan your budget.

    • TPO Maintenance: TPO is prone to shrinking over time, especially if lower-quality formulations were used. This shrinkage can pull at the seams and flashings, causing tears. Regular inspections should focus on seam integrity and edge details. Cleaning is straightforward; mild soap and water work well.
    • PVC Maintenance: PVC is less prone to shrinking. However, because it contains plasticizers, there is a theoretical risk of them migrating out over decades, though modern formulations have largely mitigated this. PVC roofs should be inspected for punctures and seam integrity. Like TPO, they are easy to clean.

    Pro Tip: For both roofs, avoid using harsh solvents or abrasive cleaners. Stick to pH-neutral cleaners to preserve the membrane’s reflective coating.

    Cost Analysis: Initial Investment vs. Long-Term Value

    When asking How To Tell The Difference Between Tpo And Pvc Roofing, cost is often the deciding factor.

    • Upfront Cost: TPO is generally 10–20% cheaper than PVC. This makes it attractive for large warehouses or buildings with tight budgets.
    • Long-Term Value: PVC may offer better value for buildings in harsh chemical environments or where fire safety is a premium. The longer lifespan and lower repair frequency in specific conditions can offset the higher initial price.

    FAQ Section

    1. Can I put a new TPO roof over an existing PVC roof?

    Generally, no. The two materials are chemically incompatible. Installing TPO over PVC can lead to adhesion failures and chemical reactions that damage both layers. Always consult a professional roofer before overlaying any membrane.

    2. Which is better for cold climates: TPO or PVC?

    PVC tends to perform better in extreme cold because it remains flexible due to its plasticizer content. TPO can become brittle in sub-zero temperatures, making it more susceptible to cracking during foot traffic or hail events. However, newer TPO formulations are improving in this area.

    3. How do I know if my roof is leaking due to material failure?

    If you see cracks around seams or flashings, it could be TPO shrinkage. If you see blistering or soft spots, it might be water trapped under a PVC membrane. For PVC, check for seam separation caused by poor welding. For TPO, look for tearing at the edges.

    4. Is TPO or PVC more environmentally friendly?

    TPO is often marketed as more “green” because it contains no chlorine and is easier to recycle. PVC recycling programs exist but are less widespread. However, PVC’s longevity and energy efficiency (high reflectivity) also contribute to its environmental profile.

    5. Can I walk on both TPO and PVC roofs?

    Yes, both are designed to withstand foot traffic for maintenance purposes. However, always wear soft-soled shoes to avoid puncturing the membrane. Avoid dragging heavy equipment across either surface.

    6. What is the biggest weakness of TPO roofing?

    The biggest historical weakness of TPO has been inconsistent quality among manufacturers and potential shrinkage. Early generations of TPO had issues with seam integrity, though modern, branded TPO products have largely resolved these issues.

    Conclusion

    Knowing How To Tell The Difference Between Tpo And Pvc Roofing empowers you to make smarter decisions about your commercial property. While they may look similar at a glance, their chemical makeup, resistance to chemicals, and behavior in different climates set them apart.

    • Choose PVC if you need superior chemical resistance, fire safety, and flexibility in cold climates.
    • Choose TPO if you are budget-conscious, prioritize environmental recyclability, and have a standard commercial application without heavy chemical exposure.

    Always consult with a certified roofing contractor to inspect your specific situation. They can perform core cuts and seam tests to definitively identify your current roof and recommend the best path forward.

    Found this guide helpful? Share it with your network on LinkedIn or Twitter to help other property managers make informed roofing decisions!

  • Why Gravel on Flat Roofs? Key Benefits Explained

    Why Gravel on Flat Roofs? Key Benefits Explained

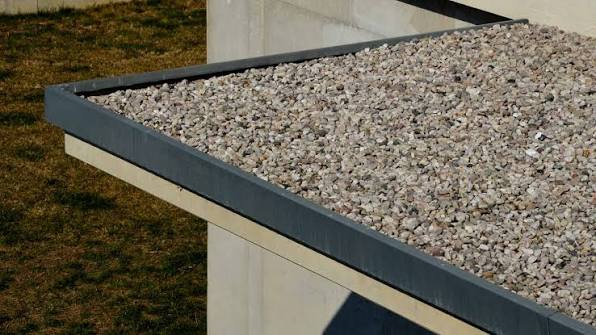
    Have you ever looked at a commercial building or an older home and wondered why its flat roof is covered in small stones? It might look like a simple landscaping choice, but there is serious engineering behind it. If you are a property owner or manager trying to understand what is the purpose of gravel on a flat roof, you are asking the right question. This layer of stone is not just decorative; it is a critical component that protects your investment from harsh weather and costly repairs.

    In this guide, we will break down exactly why gravel is used, how it works, and whether it is the right choice for your property. We will move beyond the basics to provide you with actionable insights backed by industry standards.

    The Primary Function: Protection Against UV Rays

    The most significant threat to any flat roofing system is not rain, but the sun. Ultraviolet (UV) radiation is relentless. Over time, UV rays break down the chemical bonds in roofing materials, particularly asphalt-based membranes. This process, known as photodegradation, causes the roof to become brittle, crack, and eventually fail.

    Gravel acts as a physical shield. By covering the sensitive bitumen or tar layer, the stones absorb and reflect UV radiation before it can penetrate the waterproof membrane. According to industry data, a properly installed gravel layer can extend the lifespan of a built-up roof (BUR) by 10 to 15 years compared to an exposed membrane.

    Think of it like sunscreen for your house. Without it, the “skin” of your roof burns and ages prematurely. With it, the underlying structure remains cool and intact. This is why what is the purpose of gravel on a flat roof often starts with the answer: UV protection.

    Ballast: Keeping the Roof in Place

    Flat roofs are susceptible to wind uplift. When high winds sweep across a flat surface, they create pressure differences that can try to lift the roofing material off the deck. This is especially true for single-ply membranes or loose-laid systems.

    Gravel serves as ballast. The weight of the stones holds the roofing layers firmly against the structural deck. This mechanical anchoring is crucial in areas prone to storms or high winds.

    • Wind Resistance: A standard layer of gravel can withstand wind speeds of up to 90–120 mph, depending on the size and density of the stone.
    • Stability: It prevents shifting and wrinkling of the membrane, which can lead to tears over time.

    For buildings in coastal regions or open plains, this ballasting effect is not optional—it is a necessity for structural integrity.

    Fire Resistance and Safety Standards

    Safety is a non-negotiable aspect of commercial construction. Asphalt and tar are combustible materials. If left exposed, they can contribute to the spread of fire, especially from external sources like nearby wildfires or sparks from adjacent buildings.

    Gravel is naturally fire-resistant. Most roofing gravel consists of crushed stone, such as granite or limestone, which does not burn. By covering the combustible bitumen, the gravel layer creates a fire barrier. This helps buildings meet strict fire codes, such as those set by the National Fire Protection Association (NFPA).

    In many jurisdictions, a gravel-surfaced roof can achieve a Class A fire rating, the highest level of fire resistance. This can also lead to lower insurance premiums for property owners, adding a financial benefit to the safety feature.

    Drainage and Water Management

    While flat roofs are not perfectly flat—they have a slight pitch for drainage—water pooling is still a common issue. Standing water adds immense weight and accelerates wear.

    Gravel improves drainage in two ways:

    1. Surface Texture: The irregular shape of the stones creates tiny channels that allow water to flow more freely toward drains and scuppers.
    2. Preventing Debris Clogs: While gravel can trap some debris, it also prevents larger leaves and branches from sticking directly to the sticky membrane. This makes it easier for wind to blow lighter debris off the roof or for maintenance crews to clean it.

    However, it is important to note that gravel must be installed correctly. If the layer is too thick or uneven, it can actually hinder drainage. Proper installation ensures that water moves efficiently off the roof surface.

    Gravel vs. Other Surfacing Options

    Is gravel the only option? No. Let’s compare it to other common flat roof surfacing methods to see where it stands.

    FeatureGravel SurfaceWhite Coating (Elastomeric)Green Roof
    UV ProtectionExcellent (Physical block)Good (Reflective)Excellent (Vegetation)
    WeightHeavy (Requires strong structure)LightVery Heavy (Soil + Plants)
    MaintenanceLow (Occasional cleaning)Medium (Re-coating every 5-10 yrs)High (Gardening/ Irrigation)
    CostModerateLow to ModerateHigh
    Lifespan20–30 Years10–20 Years20+ Years

    As shown in the table, gravel offers a robust, low-maintenance solution with a long lifespan. However, its weight is a consideration. Not all building structures can support the additional load of several tons of stone. Always consult a structural engineer before adding gravel to an existing roof.

    What Is The Purpose Of Gravel On A Flat Roof

    How Gravel Is Installed: A Step-by-Step Overview

    Understanding the installation process helps clarify why professional application is vital. Here is a simplified overview of how gravel is applied to a built-up roof:

    1. Base Layer Preparation: The roof deck is cleaned and inspected for damage. Any existing leaks are repaired.
    2. Bitumen Application: A hot layer of asphalt or coal tar bitumen is mopped onto the roof. This acts as the adhesive.
    3. Ply Sheets: Multiple layers of roofing felt (ply sheets) are embedded into the hot bitumen. This creates the waterproof membrane.
    4. Flood Coat: A final, thick layer of hot bitumen is applied over the top ply. This is called the flood coat.
    5. Gravel Embedment: While the flood coat is still hot and liquid, gravel is evenly spread across the surface. The stones sink slightly into the bitumen, locking them in place.
    6. Cooling and Setting: The roof is allowed to cool. The bitumen hardens, permanently bonding the gravel to the roof.

    This process requires specialized equipment and skilled labor. DIY attempts are highly discouraged due to the dangers of handling hot bitumen and the precision required for even distribution.

    Common Misconceptions About Roofing Gravel

    Many people believe that gravel damages the roof or causes leaks. Let’s debunk these myths.

    • Myth: Gravel punctures the membrane.
      • Fact: When installed correctly, the gravel is embedded in the bitumen, not resting loosely on top. The rounded edges of river rock or crushed stone are designed to minimize puncture risk.
    • Myth: Gravel makes leaks harder to find.
      • Fact: While it can obscure the exact leak source, experienced roofers use moisture meters and thermal imaging to locate issues without removing large sections of gravel.
    • Myth: All gravel is the same.
      • Fact: Roofing gravel is specifically sized (usually 3/8 to 3/4 inch) and washed to remove dust. Using construction gravel can clog drains and fail to adhere properly.

    For more detailed information on roofing materials and standards, you can refer to Wikipedia’s article on Built-up Roofing, which provides a comprehensive historical and technical overview.

    FAQ Section

    1. Can I remove the gravel from my flat roof?

    Removing gravel is possible but not recommended. It exposes the underlying bitumen to UV rays, which will cause rapid deterioration. If you want to change the surface, it is better to install a new membrane over the existing one or consult a professional for a complete replacement.

    2. How much does gravel weigh on a roof?

    A standard layer of gravel weighs approximately 10–15 pounds per square foot. For a 1,000-square-foot roof, this adds 10,000–15,000 pounds of weight. Ensure your building’s structure can handle this load.

    3. Does gravel help with insulation?

    Gravel itself has minimal insulating value (R-value). Its primary role is protection, not thermal insulation. However, by keeping the roof cooler in summer, it can indirectly reduce cooling costs. For true insulation, rigid foam boards are installed beneath the membrane.

    4. How often should I clean the gravel on my roof?

    Inspect and clean your gravel roof at least twice a year, ideally in spring and fall. Remove debris, leaves, and any standing water. Check for areas where gravel has washed away and replenish it to maintain uniform coverage.

    5. What type of gravel is best for flat roofs?

    Crushed stone or river rock is commonly used. The stones should be clean, dry, and uniformly sized. Avoid using gravel with sharp edges or excessive dust, as these can compromise the adhesion and drainage.

    6. Is a gravel roof better than a white coated roof?

    It depends on your priorities. Gravel offers superior durability and fire resistance. White coatings offer better energy efficiency by reflecting heat. Consider your climate, budget, and structural capacity when choosing between the two.

    Conclusion

    So, what is the purpose of gravel on a flat roof? It is a multifaceted solution that provides UV protection, wind ballast, fire resistance, and improved drainage. While it may seem like an old-fashioned technique, it remains one of the most reliable and cost-effective methods for protecting flat roofing systems.

    By understanding the benefits and maintenance requirements, you can make informed decisions about your property’s roofing needs. Whether you are managing a commercial complex or a residential building, gravel offers a durable shield against the elements.

    If you found this guide helpful, please share it with your network on social media. Helping others understand their roofing systems can save them from costly repairs and extend the life of their buildings. Stay informed, stay protected, and keep your roof in top shape!

  • How Much Does It Cost To Recoat An Rv Roof?

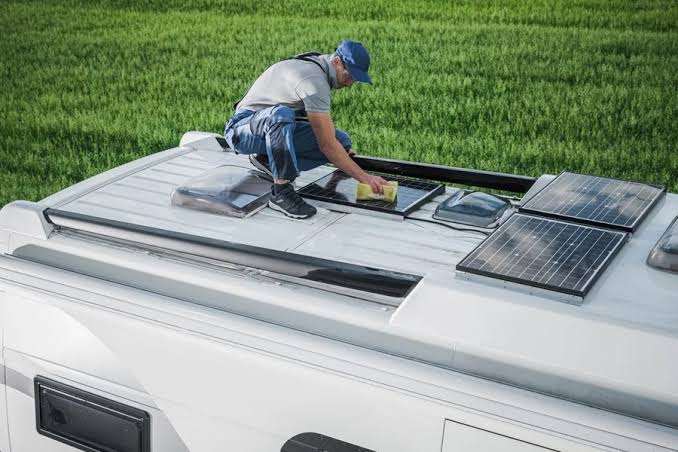
    How Much Does It Cost To Recoat An Rv Roof?

    Leaking roofs are the nightmare of every RV owner. One small crack can lead to massive water damage, ruining insulation, wood framing, and your peace of mind. If you are staring at a worn-out roof and wondering how much does it cost to recoat an RV roof, you are not alone. This guide breaks down the real costs, helping you decide whether to grab a brush or call a pro.

    Understanding the Average Cost Breakdown

    The short answer? Recoating an RV roof typically costs between $300 and $1,500. However, this range is broad because it depends heavily on the size of your rig, the type of coating used, and who does the work.

    For a standard Class C motorhome or a large travel trailer (25–30 feet), most owners spend around $600 to $900 for materials if they choose the DIY route. If you hire a professional mobile RV technician, expect to pay between $1,200 and $2,500, including labor and premium materials.

    Why the discrepancy? Labor is the biggest variable. Professional technicians charge for their expertise, insurance, and the convenience of not having to climb onto your roof yourself. However, the material cost remains relatively stable across the board.

    RV SizeDIY Material CostProfessional Service Cost
    Small (Under 20 ft)$250 – $400$800 – $1,200
    Medium (20-30 ft)$400 – $700$1,200 – $1,800
    Large (30+ ft)$700 – $1,000+$1,800 – $2,500+

    What Factors Influence the Price of Recoating?

    Before you budget, you need to understand what drives the price up or down. It is not just about the square footage.

    1. Type of Coating Material

    Not all coatings are created equal. The three most common types are:

    • Acrylic Coatings: These are water-based, eco-friendly, and reflect UV rays well. They are generally the cheapest option but may require reapplication every 3–5 years.
    • Silicone Coatings: Highly durable and waterproof, silicone forms a seamless barrier. It is more expensive than acrylic but lasts longer.
    • Liquid Rubber (EPDM): This is the gold standard for many RVers. It bonds directly to EPDM rubber roofs and is incredibly flexible. It sits in the mid-to-high price range but offers superior longevity.

    2. Roof Condition and Prep Work

    If your roof has minor cracks, a simple cleaning and coat will suffice. However, if there is delamination, significant tears, or old adhesive residue, the prep work increases. You might need to purchase patch kits, primers, or sealants before applying the main coat. Ignoring prep work is the number one reason coatings fail.

    3. Geographic Location

    Labor costs vary by state. A technician in California or New York will charge significantly more than one in the Midwest. Additionally, shipping heavy gallons of coating material can add to your DIY costs if you cannot find them locally.

    DIY vs. Hiring a Pro: Which Is Right for You?

    This is the most critical decision you will make. Let’s look at the pros and cons to help you choose.

    The DIY Approach

    Pros:

    • Cost Savings: You save 50–60% by eliminating labor costs.
    • Control: You choose exactly which products to use.
    • Satisfaction: There is pride in maintaining your own rig.

    Cons:

    • Physical Risk: Climbing on an RV roof can be dangerous, especially if it is slippery or steep.
    • Time-Consuming: Proper cleaning, drying, and application can take a full weekend.
    • Warranty Issues: Some manufacturers void warranties if non-approved products are used.

    The Professional Approach

    Pros:

    • Expertise: Pros know how to handle tricky areas like vents, AC units, and seams.
    • Speed: They can often complete the job in one day.
    • Warranty: Many pros offer a labor warranty on their work.

    Cons:

    • Higher Cost: You pay for convenience and skill.
    • Scheduling: You may have to wait weeks for an appointment during peak season.

    Expert Insight: According to industry standards, proper surface preparation accounts for 80% of the success of any roofing project. Whether you DIY or hire out, never skip the cleaning phase. For more details on roofing materials, you can refer to general construction standards on Wikipedia.

    How Much Does It Cost To Recoat An Rv Roof

    Step-by-Step Guide to Recoating Your RV Roof

    If you decide to tackle this project yourself, follow these steps to ensure a long-lasting finish.

    Step 1: Safety First

    Ensure your RV is parked on level ground. Use a sturdy ladder with stabilizers. Wear non-slip shoes and consider using a safety harness if your roof is high or slippery.

    Step 2: Thorough Cleaning

    You cannot coat over dirt. Use a dedicated RV roof cleaner or a mixture of mild dish soap and water. Scrub the entire surface with a soft-bristle brush. Pay special attention to seams and around fixtures.

    • Tip: Avoid pressure washers on high settings, as they can force water under existing seals.

    Step 3: Inspect and Repair

    Walk the roof (carefully) and look for cracks, bubbles, or loose seams. Use a compatible sealant or patch kit to fix any damage. Allow repairs to cure completely according to the product instructions.

    Step 4: Masking and Priming

    Use painter’s tape to mask off areas you do not want coated, such as solar panels or AC units. If your chosen coating requires a primer (common for metal or fiberglass roofs), apply it now and let it dry.

    Step 5: Apply the Coating

    Stir the coating thoroughly. Using a high-quality roller with an extension pole, apply the first coat evenly. Work in small sections to maintain a “wet edge.”

    • Quantity: Most roofs require two coats. Wait for the first coat to dry (usually 4–6 hours, depending on humidity) before applying the second.

    Step 6: Clean Up and Cure

    Remove the tape while the final coat is still slightly tacky to avoid peeling. Allow the roof to cure for at least 24–48 hours before exposing it to rain or heavy dew.

    Frequently Asked Questions (FAQ)

    How often should I recoat my RV roof?

    Most experts recommend recoating every 3 to 5 years. However, this depends on the climate. If you live in an area with intense sun exposure or harsh winters, you may need to do it more frequently. Annual inspections are crucial to catch wear early.

    Can I recoat over an existing coating?

    Yes, in most cases. However, the existing coating must be firmly adhered, clean, and free of mold or mildew. If the old coating is peeling or flaking, it must be removed entirely before applying a new layer. Check with the manufacturer of your new coating for compatibility.

    What is the best time of year to recoat an RV roof?

    The ideal time is during spring or early fall. You need temperatures between 50°F and 90°F (10°C–32°C) for proper curing. Avoid rainy seasons or extreme heat, as these can affect the bonding and drying process.

    Does recoating void my RV warranty?

    It depends. Some RV manufacturers require specific types of coatings or professional application to maintain the roof warranty. Always check your owner’s manual or contact the manufacturer before starting. Using third-party coatings without approval may void coverage for roof-related leaks.

    How long does the recoating process take?

    For a DIYer, plan for two days. Day one is for cleaning, repairing, and applying the first coat. Day two is for applying the second coat. Professionals can often complete the job in one long day, but curing time remains the same.

    Conclusion

    Knowing how much does it cost to recoat an RV roof empowers you to make the right financial decision for your rig. Whether you spend $400 doing it yourself or $1,500 hiring a pro, the investment is far cheaper than replacing a water-damaged interior.

    Remember, the key to longevity is not just the product you buy, but the preparation you put in. A clean, well-prepped roof ensures your coating bonds correctly and protects your home on wheels for years to come.

    Did you find this guide helpful? Share it with your fellow RVers on Facebook or Pinterest to help them protect their investments too! Safe travels and dry roofs!

  • How Much Does It Cost To Reseal A Camper Roof?

    How Much Does It Cost To Reseal A Camper Roof?

    Leaking roofs are the number one nightmare for any RV owner. A small drip can quickly turn into thousands of dollars in water damage if ignored. If you are wondering how much does it cost to reseal a camper roof, you are not alone; understanding these costs is crucial for budgeting your next maintenance trip and keeping your home-on-wheels dry.

    Understanding the Average Cost Breakdown

    The cost to reseal a camper roof varies significantly based on whether you choose to do it yourself or hire a professional. Generally, you can expect to pay between $300 and $1,500 for a complete resealing job.

    For those opting for a DIY approach, the cost is primarily for materials. You will likely spend between $100 and $300. This covers high-quality sealant, cleaning supplies, primers, and tools like brushes or caulking guns. The price fluctuates depending on the size of your RV and the type of sealant chosen.

    If you hire a professional service, labor becomes the biggest expense. Professional rates typically range from $50 to $100 per hour, with most jobs taking 4 to 8 hours. Consequently, total professional costs often land between $600 and $1,500. While this is more expensive upfront, it comes with the benefit of expertise and warranty coverage.

    Service TypeEstimated Cost RangeWhat’s Included
    DIY Resealing$100 – $300Sealant, cleaner, primer, tools
    Professional Resealing$600 – $1,500Labor, materials, inspection, warranty

    Factors That Influence Resealing Prices

    Several variables affect the final bill. Understanding these helps you predict expenses more accurately.

    1. Size and Type of Your RV

    A small teardrop trailer requires far less material than a 40-foot Class A motorhome. Larger roofs have more surface area, seams, and fixtures (like AC units and vents) that need careful sealing.

    2. Condition of the Existing Roof

    If your roof has minor cracks, a simple reseal suffices. However, if there is significant delamination, rot, or structural damage, you may need repairs before sealing. This adds to the cost. Always inspect thoroughly before starting.

    3. Type of Sealant Used

    Not all sealants are created equal. Silicone-based sealants are cheaper but harder to remove later. Polyurethane and acrylic-based sealants offer better flexibility and longevity but come at a higher price point. Self-leveling lap sealants are popular for horizontal surfaces, while non-sag formulas are best for vertical edges.

    4. Geographic Location

    Labor costs vary by region. Services in urban areas or states with high living costs (like California or New York) will charge more than those in rural areas. Additionally, weather conditions can delay work, potentially increasing labor time.

    DIY vs. Professional: Which Is Right for You?

    Deciding between doing it yourself and hiring a pro depends on your skill level, budget, and time.

    The DIY Route

    Pros:

    • Cost-Effective: You save hundreds on labor.
    • Control: You choose the exact products used.
    • Satisfaction: Completing the job yourself feels rewarding.

    Cons:

    • Time-Consuming: Proper preparation takes days due to drying times.
    • Risk of Error: Missing a spot can lead to leaks.
    • Physical Effort: Working on a roof is physically demanding and potentially dangerous.

    Hiring a Professional

    Pros:

    • Expertise: Professionals spot issues amateurs might miss.
    • Warranty: Many shops offer guarantees on their work.
    • Convenience: You save time and avoid physical strain.

    Cons:

    • Higher Cost: Labor fees add up quickly.
    • Scheduling: You may need to wait weeks for an appointment.

    For most beginners, if the roof is in good condition and only needs routine maintenance, DIY is feasible. However, if you notice soft spots or extensive cracking, consult a professional.

    How Much Does It Cost To Reseal A Camper Roof

    Step-by-Step Guide to Resealing Your Camper Roof

    If you decide to tackle this project yourself, follow these steps for a durable finish.

    Step 1: Gather Your Supplies

    You will need:

    • RV roof sealant (polyurethane or acrylic recommended)
    • Rubber roof cleaner or mild soap
    • Stiff brush and rags
    • Painter’s tape
    • Caulking gun
    • Primer (if required by sealant manufacturer)

    Step 2: Clean the Roof Thoroughly

    Cleanliness is critical for adhesion. Wash the entire roof with a specialized RV roof cleaner. Scrub away dirt, mold, and old sealant residue. Rinse well and let it dry completely. Note: Do not proceed if the roof is damp. Moisture trapped under sealant causes failure.

    Step 3: Inspect and Prepare Surfaces

    Check for cracks, bubbles, or loose seams. Remove old, failing sealant using a plastic scraper to avoid damaging the roof membrane. Apply painter’s tape around vents, AC units, and edges to create clean lines.

    Step 4: Apply Primer (If Needed)

    Some sealants require a primer for optimal bonding. Apply a thin, even coat according to the product instructions. Let it dry for the recommended time, usually 1–2 hours.

    Step 5: Apply the Sealant

    Load your caulking gun. Apply a generous bead of sealant along all seams, edges, and around fixtures. Use a putty knife or gloved finger to smooth the bead, ensuring it fills all gaps. Aim for a uniform thickness of about 1/8 inch.

    Step 6: Let It Cure

    Allow the sealant to cure fully before exposing it to rain or walking on it. Curing times vary by product and temperature but typically range from 24 to 48 hours. Check the manufacturer’s label for specific details.

    When Should You Reseal Your Camper Roof?

    Prevention is cheaper than repair. Most experts recommend resealing your RV roof every 1 to 2 years. However, this depends on usage and exposure.

    Signs you need immediate attention include:

    • Visible cracks or peeling sealant.
    • Water stains on interior ceilings.
    • Soft spots when walking on the roof.
    • Mold or mildew smells inside the camper.

    Regular inspections twice a year—spring and fall—are ideal. Catching small issues early prevents costly water damage. For more detailed information on roof materials, you can refer to Wikipedia’s page on roofing, which provides a broad overview of material properties relevant to various structures, including RVs.

    FAQ Section

    How long does RV roof sealant last?

    Most high-quality RV roof sealants last between 1 to 3 years before needing reapplication. Factors like UV exposure, temperature fluctuations, and physical wear affect longevity. Regular inspections help extend its life.

    Can I reseal over old sealant?

    It is not recommended. Old sealant often loses adhesion and traps moisture. For a lasting fix, remove old sealant completely before applying new material. This ensures a strong bond and prevents future leaks.

    What is the best sealant for EPDM rubber roofs?

    For EPDM rubber roofs, use sealants specifically designed for rubber membranes. Acrylic-based or polyurethane sealants are excellent choices. Avoid silicone unless the manufacturer explicitly approves it, as it can be difficult to remove later.

    Does insurance cover roof resealing?

    Generally, no. Insurance considers resealing routine maintenance, which is the owner’s responsibility. However, if water damage occurs due to a sudden, covered peril (like a storm), insurance might cover the resulting interior damage, but not the roof repair itself.

    How often should I check my camper roof?

    Inspect your roof at least twice a year. Check it in the spring before camping season and in the fall before storage. Also, inspect after any severe weather events or long trips.

    Is it safe to walk on my camper roof?

    Yes, but with caution. Walk softly and avoid sharp objects. Distribute your weight evenly, preferably by kneeling or using a board. Never jump or stand on weak spots. Always ensure the roof is dry and clean to prevent slipping.

    Conclusion

    Knowing how much does it cost to reseal a camper roof empowers you to make smart financial decisions for your RV. Whether you choose the DIY route for savings or hire a pro for peace of mind, regular maintenance is key. Spending a few hundred dollars now can save you thousands in water damage repairs later.

    Don’t wait for a leak to appear. Inspect your roof today, gather your supplies, and keep your adventures dry and worry-free. If you found this guide helpful, please share it with fellow RV enthusiasts on social media! Happy camping!

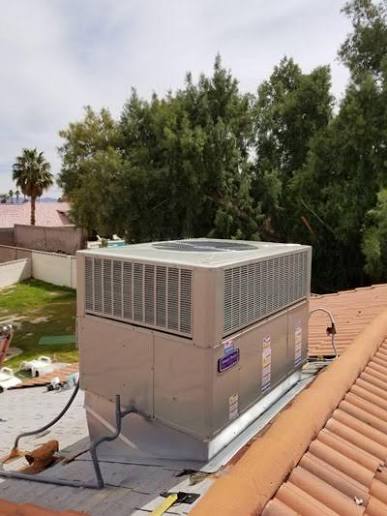
  • Why Are AC Units On the Roof in Las Vegas?

    Why Are AC Units On the Roof in Las Vegas?

    If you have ever driven through the sprawling suburbs or the bustling downtown area of Las Vegas, you have likely noticed a distinct architectural feature: large, boxy air conditioning units perched atop flat roofs. It is a sight that often puzzles visitors from cooler climates. You might find yourself asking, why are AC units on the roof in Las Vegas? The answer lies in a unique combination of extreme climate challenges, urban density, and engineering efficiency designed specifically for the Mojave Desert environment.

    In this guide, we will break down the technical and practical reasons behind this common practice. Whether you are a new homeowner, a business owner, or simply curious about desert infrastructure, understanding these systems can help you appreciate the ingenuity required to keep Las Vegas cool when temperatures soar above 110°F (43°C).

    Maximizing Limited Space in Urban Environments

    One of the primary drivers for placing HVAC (Heating, Ventilation, and Air Conditioning) systems on the roof is land scarcity. Las Vegas has experienced explosive growth over the past few decades. As the population swells, commercial buildings, casinos, hotels, and even multi-family residential complexes are built closer together.

    The Ground-Space Premium

    In dense urban areas, every square foot of ground-level real estate is valuable. Placing bulky condenser units on the ground would consume parking spaces, reduce landscaping potential, or limit pedestrian walkways. By moving these units to the roof, building owners free up critical ground space for revenue-generating activities or essential amenities.

    • Commercial Efficiency: Casinos and hotels need vast floor plans for gaming and hospitality. Rooftop units ensure that the interior footprint remains uncluttered.
    • Residential Density: In apartment complexes, ground-level units can be noisy and obstructive. Rooftop placement keeps living areas quiet and accessible.

    Superior Heat Dissipation in the Desert Climate

    While it may seem counterintuitive to place heat-generating machinery under the blazing sun, rooftop placement actually offers significant thermodynamic advantages in Las Vegas’s dry climate.

    Avoiding Ground-Level Heat Islands

    Ground-level surfaces, such as asphalt parking lots and concrete sidewalks, absorb solar radiation throughout the day and re-radiate it as heat. This phenomenon, known as the “urban heat island effect,” means that the air near the ground is often significantly hotter than the air just 20–30 feet up.

    By installing AC units on the roof:

    1. Access to Cooler Air: The units draw in ambient air that is slightly cooler than the ground-level air trapped between buildings.
    2. Better Exhaust Dispersion: Hot air expelled by the condensers dissipates more quickly into the open atmosphere rather than getting trapped in narrow alleys or courtyards.

    According to basic principles of thermodynamics, hot air rises. Rooftop units leverage this natural convection, allowing waste heat to escape upward and away from the building’s intake vents, improving overall system efficiency.

    Enhanced Security and Vandalism Prevention

    Las Vegas is a major tourist destination with millions of visitors annually. While generally safe, high-traffic areas pose risks to exposed infrastructure. Ground-level AC units are vulnerable to theft, vandalism, and accidental damage from vehicles.

    Protecting Critical Infrastructure

    Rooftop placement acts as a natural security barrier.

    • Theft Deterrence: Copper coils and motors are valuable targets for scrap metal thieves. Accessing them on a roof requires specialized equipment and effort, deterring opportunistic crime.
    • Accidental Damage: In busy commercial districts, delivery trucks or careless drivers might strike ground-level units. Rooftop units are completely isolated from traffic hazards.

    For businesses, minimizing downtime is crucial. A damaged AC unit in July can halt operations entirely. Rooftop installation reduces the risk of such disruptive incidents.

    Noise Reduction for Indoor Comfort

    Air conditioning compressors are noisy. In a city that never sleeps, maintaining a quiet indoor environment is essential for both residential comfort and hotel guest satisfaction.

    Sound Barrier Benefits

    Placing the noisiest components of the HVAC system on the roof creates a physical distance between the sound source and the occupants.

    • Vertical Separation: Sound intensity decreases as it travels. By placing the unit above the occupied floors, the noise is directed upward into the sky rather than into living rooms or office spaces.
    • Structural Insulation: The roof structure itself acts as a sound buffer. When combined with proper vibration isolators, rooftop units can operate nearly silently from the perspective of those inside.

    This is particularly important for hotels on the Strip, where guests expect tranquility despite the chaotic energy outside.

    Why Are Ac Units On The Roof In Las Vegas

    Ease of Maintenance and Service Access

    Contrary to popular belief, rooftop units can be easier for technicians to service than ground-level units tucked away in cramped mechanical rooms or fenced-in side yards.

    Streamlined Repair Processes

    HVAC professionals in Las Vegas are accustomed to working at heights. Rooftop units offer several logistical benefits:

    1. Unobstructed Access: Technicians do not need to navigate around furniture, landscaping, or parked cars.
    2. Centralized Location: For large commercial buildings, multiple units can be grouped on the roof, allowing a technician to service several systems in one trip without moving between different sides of the building.
    3. Safety Compliance: Modern roofing standards include dedicated walkways and safety anchors, ensuring that maintenance can be performed safely and efficiently.

    However, it is worth noting that regular maintenance is critical. Dust and sandstorms in Las Vegas can clog filters and coils faster than in other regions. Building owners must schedule frequent cleanings to maintain optimal performance.

    Comparison: Rooftop vs. Ground-Level Units in Las Vegas

    To help you visualize the trade-offs, here is a quick comparison of the two installation methods in the context of the Las Vegas climate.

    FeatureRooftop UnitsGround-Level Units
    Space UsageSaves valuable ground spaceConsumes parking/landscaping area
    Heat ExposureExposed to direct sun, but better airflowTrapped in ground-level heat islands
    SecurityHigh (hard to access)Low (vulnerable to theft/vandalism)
    Noise LevelQuiet indoors (sound travels up)Can be noisy if near windows/patios
    MaintenanceRequires roof access/liftsEasy access, but may be obstructed
    CostHigher initial installation costLower initial installation cost

    Understanding the Technology Behind Rooftop Units

    Most rooftop units in Las Vegas are “Package Units.” Unlike split systems where the compressor is outside and the air handler is inside, a package unit contains all components in a single cabinet. This design is ideal for flat-roofed commercial buildings common in Nevada.

    These units are engineered to withstand extreme temperatures. Standard AC units may struggle when ambient temperatures exceed 100°F, but units installed in Las Vegas are often rated for “high ambient” operation. They feature larger condensers and specialized compressors designed to reject heat effectively even in the scorching desert summer.

    For more detailed information on how HVAC systems function thermodynamically, you can refer to the general principles outlined on Wikipedia’s Heating, Ventilation, and Air Conditioning page.

    FAQ Section

    1. Do rooftop AC units work harder in the summer because they are in the sun?

    While they are exposed to direct sunlight, the benefit of accessing cooler upper-air currents and avoiding ground-level heat traps usually outweighs the solar gain. Additionally, modern units are insulated and designed to handle high solar loads. Proper shading structures or reflective coatings can further mitigate solar heat absorption.

    2. Is it more expensive to install AC units on the roof?

    Yes, the initial installation cost is typically higher due to the need for cranes, structural reinforcement of the roof, and specialized labor. However, the long-term benefits in space utilization, security, and noise reduction often provide a better return on investment for commercial properties.

    3. Can residential homes in Las Vegas have rooftop AC units?

    Yes, but it is less common than in commercial buildings. Single-family homes usually have pitched roofs, making rooftop installation difficult. However, some modern custom homes with flat architectural designs do utilize rooftop package units, especially if lot size is small.

    4. How does sand and dust affect rooftop AC units in Las Vegas?

    Sand and dust can clog coils and filters, reducing efficiency and potentially causing overheating. This is why quarterly maintenance is highly recommended in Las Vegas. Technicians will clean the coils and replace filters to ensure the system runs smoothly despite the dusty environment.

    5. What happens if a rooftop unit leaks?

    Roof penetrations for HVAC units are sealed with flashing and waterproof membranes. If a leak occurs, it is usually due to degraded sealing material rather than the unit itself. Regular roof inspections alongside HVAC maintenance can prevent water damage to the building interior.

    Conclusion

    So, why are AC units on the roof in Las Vegas? It is not just a matter of tradition; it is a strategic response to the city’s unique environmental and urban challenges. From maximizing valuable real estate and enhancing security to leveraging cooler upper-air temperatures and reducing noise pollution, rooftop HVAC systems offer a comprehensive solution for keeping the desert city comfortable.

    As Las Vegas continues to grow and temperatures rise due to climate change, the efficiency and resilience of these rooftop systems will remain vital. If you found this explanation helpful, please share it with your friends or colleagues who are curious about desert living! Understanding our infrastructure helps us appreciate the engineering marvels that make life in the Mojave Desert possible.

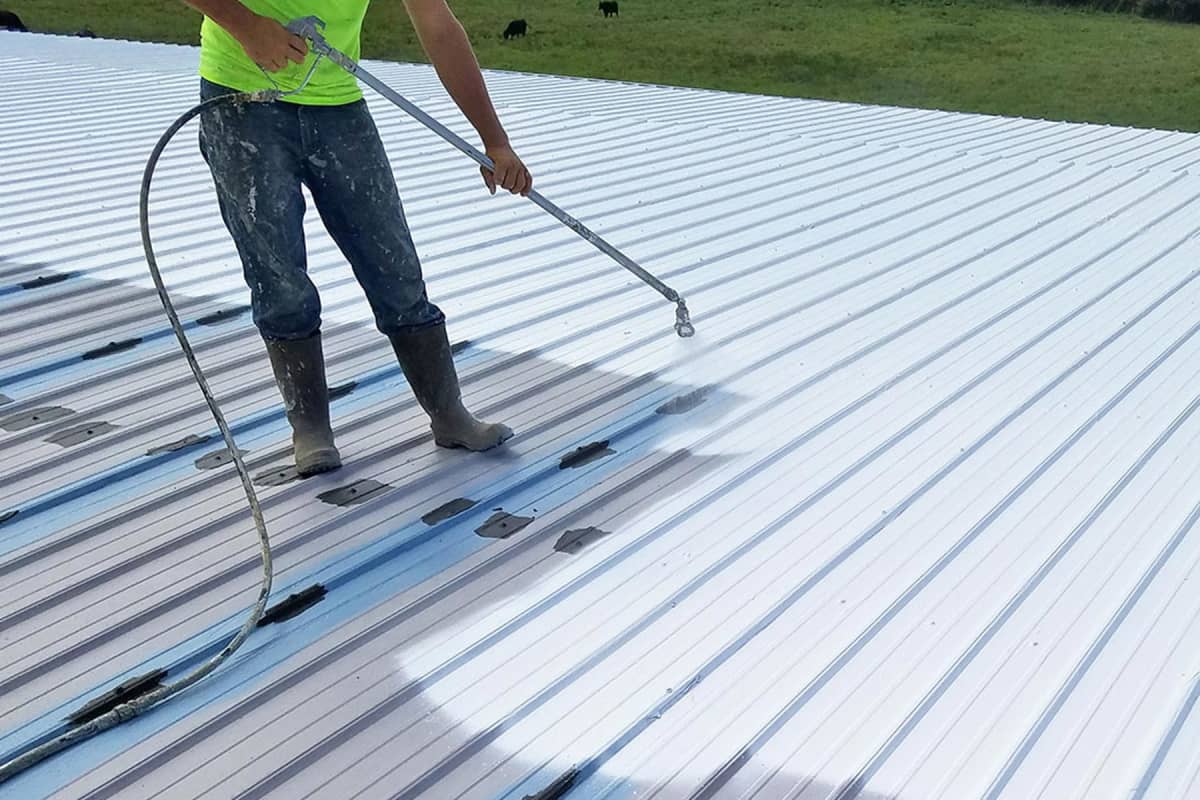
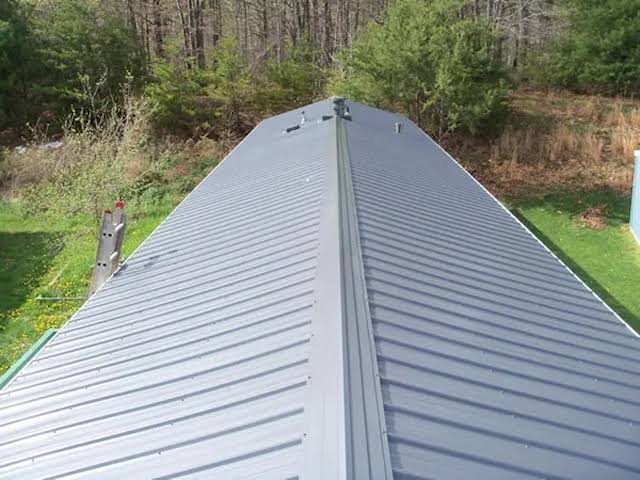
  • How To Put A Metal Roof On A Trailer House

    How To Put A Metal Roof On A Trailer House

    Replacing the roof on a mobile or trailer home is one of the most daunting yet rewarding DIY projects you can undertake. Many homeowners face leaking ceilings, rising energy bills, and the fear of structural damage due to aging asphalt shingles or worn-out rubber membranes. If you are looking for a durable, cost-effective solution, learning how to put a metal roof on a trailer house can extend the life of your home by decades while significantly improving its curb appeal.

    This guide is designed to walk you through the process safely and efficiently, ensuring you meet industry standards without breaking the bank.

    Why Choose Metal for Your Mobile Home?

    Before diving into the tools and screws, it is crucial to understand why metal is often superior to traditional materials for manufactured housing. Mobile homes have unique structural requirements compared to site-built houses. They are lighter, and their frames are designed to be transported. Therefore, weight distribution is critical.

    The Weight Advantage

    Traditional asphalt shingles can weigh between 200 to 350 pounds per square (100 sq. ft.). In contrast, standing seam metal roofing typically weighs only 50 to 150 pounds per square. This significant reduction in load puts less stress on the trusses and walls of your trailer house, which is vital for older models that may have experienced some settling over time.

    Durability and Longevity

    According to data from the National Association of Home Builders, asphalt shingles last an average of 15–20 years. Metal roofs, however, can last 40–70 years. For a mobile homeowner, this means installing a roof once rather than two or three times over the lifespan of the home.

    FeatureAsphalt ShinglesMetal Roofing
    Lifespan15–20 Years40–70 Years
    WeightHeavy (High Load)Light (Low Load)
    Fire ResistanceLow to ModerateClass A Rating
    MaintenanceHigh (Prone to Moss/Curling)Low (Occasional Cleaning)
    Energy EfficiencyStandardHigh (Reflects Solar Heat)

    Essential Tools and Materials Checklist

    You cannot learn how to put a metal roof on a trailer house without the right gear. Using improper tools can lead to leaks or injury. Here is what you will need:

    • Safety Gear: OSHA-approved harness, non-slip boots, heavy-duty gloves, and safety glasses.
    • Measurement Tools: Tape measure, chalk line, and a carpenter’s square.
    • Cutting Tools: Electric metal shears (nibblers) or a circular saw with a metal-cutting blade. Avoid abrasive wheels as they burn off the protective coating.
    • Fastening Tools: Cordless drill with a clutch setting (to prevent over-driving screws).
    • Materials:
      • Metal panels (corrugated or standing seam).
      • Closure strips (foam strips that fit under the ribs of the metal).
      • Screws with neoprene washers (specifically designed for metal roofing).
      • Ridge cap flashing.
      • Drip edge flashing.
      • Butyl tape or sealant compatible with metal.
    How To Put A Metal Roof On A Trailer House

    Step 1: Assessing and Preparing the Existing Roof

    The most common mistake DIYers make is installing new metal directly over damaged substrates. You must ensure the foundation is solid.

    1. Inspect the Decking: Walk the roof carefully. Look for soft spots, which indicate rotting wood or compromised insulation. If the existing roof is rubber (EPDM) or asphalt, check for large tears or bubbling.
    2. Remove Loose Debris: Clear all leaves, branches, and old loose shingles.
    3. Repair Structural Issues: If you find rotten plywood or OSB decking, replace these sections immediately. A metal roof is only as strong as what it is screwed into.
    4. Check Local Codes: While many areas allow “roof-over” installations (installing metal over existing material), some jurisdictions require complete tear-offs. Check with your local building department. For more information on building code standards, you can refer to general construction guidelines on Wikipedia.

    Step 2: Installing Furring Strips or Battens

    Unlike standard houses, trailer homes often lack a solid plywood deck under the original roofing material. Instead, they may have thin paneling or insulation exposed. To create a solid surface for screwing in the metal panels, you need to install furring strips (also known as battens).

    • Material: Use 1×4 or 2×4 pressure-treated lumber.
    • Spacing: Install the strips vertically, spaced 24 inches on center. This aligns with the typical truss spacing in mobile homes.
    • Attachment: Screw the strips directly into the roof trusses, not just the decking. Use long enough screws to penetrate the truss by at least 1.5 inches. This ensures the wind uplift resistance required for metal roofing.

    Pro Tip: Ensure the strips are straight. Use a chalk line to mark your layout. If the strips are crooked, your metal panels will be crooked, leading to alignment issues at the ridge.

    Step 3: Laying the Underlayment

    While metal is waterproof, condensation can form underneath it due to temperature differences. An underlayment acts as a secondary moisture barrier.

    1. Choose Synthetic Underlayment: Avoid felt paper, which can trap moisture. Use a breathable synthetic underlayment rated for high temperatures.
    2. Roll It Out: Start at the eaves (bottom edge) and roll horizontally across the roof.
    3. Overlap: Overlap each row by at least 6 inches. Secure it with cap nails or staples, ensuring it lies flat against the furring strips.

    Step 4: Installing Drip Edge and First Panel

    Proper water diversion starts at the edges.

    1. Install Drip Edge: Attach metal drip edge flashing along the eaves and gable ends. Secure it with roofing nails every 12 inches. This prevents water from wicking back under the metal panels and rotting the wood.
    2. Place Closure Strips: If you are using corrugated metal, insert foam closure strips into the bottom of the first panel’s ribs. This blocks pests and wind-driven rain.
    3. Hang the First Panel: Lift the first metal panel onto the roof. Align it so it overhangs the drip edge by about 1 to 1.5 inches. Ensure it is perfectly square with the roof edge. If the first panel is off, every subsequent panel will be off.

    Step 5: Fastening the Metal Panels

    This is the core of learning how to put a metal roof on a trailer house. Precision here prevents leaks.

    • Screw Placement: Drive screws through the flat part of the panel, not the raised rib (unless using specific standing seam clips). Screwing into the rib can cause the metal to distort and leak.
    • Tightness: Use your drill’s clutch. The neoprene washer should compress slightly to form a seal but should not be squashed flat. Over-tightening will crack the washer; under-tightening will allow water ingress.
    • Pattern: Follow the manufacturer’s recommended screw pattern, usually every 12 to 24 inches along the purlins (furring strips).
    • Overlapping: Overlap subsequent panels according to the manufacturer’s specs (usually 6–12 inches sideways). Use sealant tape between overlaps if recommended.

    Step 6: Ridge Cap and Flashing

    The ridge is where two roof slopes meet, making it the most vulnerable spot for leaks.

    1. Install Ridge Vent (Optional but Recommended): For better attic ventilation, install a continuous ridge vent before the cap. This helps reduce heat buildup in the summer, lowering cooling costs.
    2. Attach Ridge Cap: Place the pre-formed ridge cap over the peak. Secure it with screws every 12 inches.
    3. Seal Ends: Use butyl sealant or specialized ridge end caps to close off the open ends of the ridge cap. This prevents birds and insects from entering the roof cavity.

    Frequently Asked Questions (FAQ)

    1. Can I install a metal roof over my existing shingles?

    Yes, in many cases, you can install metal over existing asphalt shingles. This saves on disposal fees and labor. However, you must ensure the existing roof is securely attached and not holding moisture. Installing furring strips over the shingles provides a flat, ventilated surface for the new metal.

    2. How much does it cost to put a metal roof on a trailer house?

    Costs vary by region and material quality, but generally, expect to pay between $3.50 and $8.00 per square foot for materials and DIY labor. For a typical 1,500 sq. ft. mobile home, the total material cost might range from $5,000 to $12,000. This is often cheaper than hiring a contractor for a full tear-off and replacement.

    3. Do I need a permit to replace my mobile home roof?

    Most jurisdictions require a building permit for re-roofing, even for mobile homes. Permits ensure that the work meets wind-load and fire-safety codes. Always check with your local county or city building department before starting. Failure to obtain a permit can result in fines and issues when selling the home.

    4. Will a metal roof make my trailer house hotter?

    No, actually the opposite. Modern metal roofs often come with reflective pigments (cool-roof technology) that reflect solar radiant heat. This can reduce cooling costs by 10–25%. Additionally, the air gap created by furring strips provides natural insulation, reducing heat transfer into the living space.

    5. What gauge metal should I use for a mobile home?

    For residential applications, 29-gauge or 26-gauge steel is standard. 29-gauge is lighter and more cost-effective, suitable for most mobile homes. 26-gauge is thicker and more durable, offering better resistance to hail and heavy foot traffic during maintenance. Avoid thinner gauges (like 30 or 32) as they can oil-can (pop in and out) due to thermal expansion.

    Conclusion

    Learning how to put a metal roof on a trailer house is a powerful way to take control of your home’s longevity and efficiency. By following these steps—preparing the surface, installing furring strips, and carefully fastening the panels—you can achieve a professional-looking result that protects your family from the elements.

    Remember, safety is paramount. Never rush the process, and always double-check your measurements. A well-installed metal roof is an investment that pays dividends in lower energy bills and peace of mind for decades.

    If you found this guide helpful, please share it on social media to help other mobile homeowners tackle their roofing projects with confidence!

  • How Many Layers of Shingles on a Roof?

    How Many Layers of Shingles on a Roof?

    Have you ever looked up at your home’s roof and wondered if that extra thickness is helping or hurting your house? It is a common dilemma for homeowners facing wear and tear: how many layers of shingles should be on a roof before it becomes a liability rather than an asset? While adding a second layer might seem like a quick, cost-saving fix, understanding the structural and financial implications is crucial for your home’s long-term health.

    In this guide, we will break down the industry standards, legal restrictions, and practical realities of roof layering. We aim to help you make an informed decision that balances budget concerns with safety and durability.

    The General Rule: Why One Layer Is Best

    When asking how many layers of shingles should be on a roof, the short answer from most professional roofers is simple: one.

    Ideally, every time you replace your roof, the old shingles should be completely removed (a process known as a “tear-off”) before new materials are installed. This ensures that the roofing deck—the wooden foundation beneath your shingles—is fully visible and inspectable.

    The Hidden Dangers of Multiple Layers

    While some local building codes may permit two layers, there are significant reasons why experts advise against it:

    1. Masked Damage: Old shingles can hide rotting wood, mold, or damaged decking. If you cover these issues without fixing them, the structural integrity of your roof continues to degrade unseen.
    2. Weight Load: Asphalt shingles are heavier than they look. A single square (100 sq. ft.) of asphalt shingles weighs between 200 to 350 pounds. Adding a second layer doubles this load. Many older homes were not engineered to support this extra weight, risking sagging or even collapse in extreme cases.
    3. Warranty Voidance: Most major shingle manufacturers will void their warranty if their product is installed over more than one existing layer. This leaves you financially exposed if premature failure occurs.

    According to the International Residential Code (IRC), which serves as the basis for many local regulations in the United States, no more than two layers of roof covering are allowed on any structure. However, just because it is legal in some areas does not mean it is advisable.

    Can You Put Two Layers of Shingles on a Roof?

    Yes, technically, you can. But should you? This is where the nuance lies.

    In many jurisdictions across the US, building codes allow for a maximum of two layers of asphalt shingles. If you currently have one layer, you may be permitted to install a second one directly over it. However, if you already have two layers, you must remove all of them before installing new ones.

    The “Overlay” Method: Pros and Cons

    Some homeowners choose an overlay (installing new shingles over old) to save money and time. Let’s look at the trade-offs objectively.

    FeatureTear-Off (One Layer)Overlay (Two Layers)
    CostHigher (labor + disposal fees)Lower (no removal costs)
    TimeLonger (2–4 days typically)Faster (1–2 days typically)
    InspectionFull deck inspection possibleDeck remains hidden
    LongevityMaximum lifespan achievedReduced lifespan due to heat retention
    Resale ValueHigher buyer confidencePotential red flag for inspectors

    Key Insight: While an overlay saves roughly 15–25% on upfront labor costs, it often leads to higher maintenance costs later. The trapped heat between two layers can cause the new shingles to age faster, potentially reducing their lifespan by several years.

    How Many Layers Of Shingles Should Be On A Roof

    What Happens If You Have Three Layers?

    If you are wondering how many layers of shingles should be on a roof and you discover you already have three, you are in a critical situation.

    Having three layers is almost universally a violation of building codes in the United States. It poses severe risks:

    • Structural Failure: The weight may exceed the design load of your roof trusses or rafters.
    • Insurance Issues: Homeowners insurance providers may deny claims related to roof damage if they discover unpermitted or code-violating work. In some cases, they may cancel your policy entirely.
    • Difficulty in Future Repairs: When the time comes to replace the roof again, the cost and labor required to remove three layers of bonded shingles will be exponentially higher than a standard tear-off.

    If you suspect you have three layers, consult a licensed structural engineer or a certified roofing contractor immediately. Do not attempt to add another layer.

    Factors That Determine Your Roof’s Limit

    Not all roofs are created equal. Several variables influence whether you can safely add a second layer.

    1. Local Building Codes

    Regulations vary by state, county, and even city. For example, some areas in Florida or California with strict wind mitigation codes may prohibit overlays entirely to ensure proper nailing patterns into the deck. Always check with your local building department before starting work.

    2. Condition of the Existing Roof

    You cannot install new shingles over old ones if the existing roof is:

    • Curling or buckling significantly.
    • Missing large sections of shingles.
    • Showing signs of water damage or leaks.
    • Made of a different material (e.g., you cannot put asphalt shingles over wood shakes or slate without specific preparation).

    3. Type of Shingles

    Architectural (dimensional) shingles are thicker and heavier than traditional 3-tab shingles. If your first layer consists of heavy architectural shingles, adding a second layer may push the weight limit too far. Conversely, if the first layer is lightweight 3-tab, a second layer might be structurally safer, though still not ideal for longevity.

    Step-by-Step: How to Check Your Current Layers

    If you are unsure how many layers you currently have, follow these steps to investigate safely. Note: Always prioritize safety. Use a sturdy ladder and have a spotter.

    1. Inspect the Edge: Look at the edge of your roof near the gutter or fascia board. You can often see the distinct layers of shingles stacked on top of each other.
    2. Check Vent Pipes: Look around plumbing vents or chimney flashing. These penetrations often reveal the thickness of the roofing material.
    3. Review Home Records: If you bought the house recently, check the disclosure statements or previous inspection reports. They often note the number of layers.
    4. Consult a Professional: The most accurate method is to hire a roofer for a minor inspection. They can lift a corner of a shingle near the edge to count the layers precisely.

    FAQ Section

    Q1: Does adding a second layer of shingles void my warranty?

    A: Yes, in most cases. Major manufacturers like GAF, Owens Corning, and CertainTeed typically require a complete tear-off to validate their full warranty. Installing over an existing layer may result in a limited or voided warranty, leaving you responsible for replacement costs if defects arise.

    Q2: Is it cheaper to overlay shingles or tear them off?

    A: Overlaying is initially cheaper because you save on labor and dumpster fees for disposing of the old material. However, when you factor in the reduced lifespan of the new shingles and potential future repair costs, a tear-off is often more cost-effective in the long run.

    Q3: Can I mix different brands of shingles in different layers?

    A: It is strongly discouraged. Different brands have varying thicknesses, granule compositions, and expansion rates. Mixing them can lead to uneven wear, poor sealing, and aesthetic issues. Stick to one consistent system if possible, or better yet, remove the old layer entirely.

    Q4: How much weight does a second layer add to my roof?

    A: A second layer of asphalt shingles adds approximately 2.5 to 3.5 pounds per square foot. For an average 2,000-square-foot roof, this equals an additional 5,000 to 7,000 pounds of weight. Ensure your home’s framing was built to handle this load.

    Q5: Will having two layers affect my home’s resale value?

    A: It can. Knowledgeable buyers and home inspectors often view multiple layers as a deferred maintenance issue. It may lower your appraised value or require you to reduce the price to account for the eventual costly tear-off the buyer will face.

    Q6: Can I install metal roofing over two layers of shingles?

    A: Generally, no. Most metal roofing manufacturers and building codes require a solid, flat substrate. Installing metal over two layers of shingles creates an uneven surface that can cause the metal panels to warp, leak, or fail. A tear-off is usually required before installing metal.

    Conclusion

    So, how many layers of shingles should be on a roof? The ideal answer is one. While a second layer is sometimes permissible under local codes, it comes with compromises in longevity, warranty coverage, and structural safety. Three layers are rarely acceptable and pose serious risks.

    Investing in a complete tear-off ensures your home is protected, your warranty is valid, and your roof lasts as long as possible. Don’t let short-term savings lead to long-term headaches.

    If you found this guide helpful, please share it with friends or neighbors who might be facing similar roofing decisions. A well-informed homeowner is a safe homeowner!