Winter in the United States brings picturesque snowfalls, but for homeowners, it often brings a hidden danger: ice dams. These stubborn ridges of ice can cause significant water damage to your attic, walls, and ceilings if left unchecked. If you are staring at a frozen barrier along your eaves, you are likely wondering how to get rid of ice dams on your roof without causing further damage to your shingles or risking your safety.
This guide provides actionable, safe, and effective strategies to handle this common winter nuisance, backed by industry best practices and expert insights.
What Are Ice Dams and Why Do They Form?
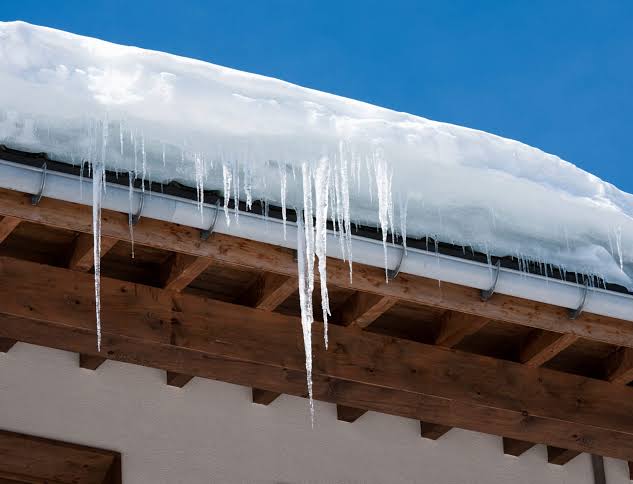
Before we dive into removal techniques, it is crucial to understand the enemy. An ice dam is a ridge of ice that forms at the edge of a roof, preventing melting snow from draining off. The water backs up behind the dam and can leak into the home, causing damage to walls, ceilings, insulation, and other structural elements.
The primary culprit is not just cold weather, but heat loss from your home. According to the U.S. Department of Energy, adequate attic insulation and ventilation are critical to maintaining a cold roof surface. When heat escapes from your living space into the attic, it warms the roof deck, melting the bottom layer of snow. This water runs down the roof until it hits the colder eaves (which are not warmed by indoor heat), where it refreezes. Over time, this cycle builds a thick wall of ice.
Immediate Solutions: How To Get Rid Of Ice Dams On Your Roof
If you already have an ice dam, you need to act carefully. Aggressive removal can strip granules from your shingles or puncture the roofing material. Here are the safest methods to remove existing ice dams.
1. Use Calcium Chloride Ice Melters
The safest and most effective DIY method is using a chemical ice melter specifically designed for roofs. Do not use rock salt (sodium chloride), as it can corrode metal flashings, gutters, and damage vegetation below.
Step-by-Step Application:
- Purchase Calcium Chloride: Look for products labeled “safe for roofs” or containing calcium chloride pellets.
- Fill a Nylon Stocking: Take a clean nylon stocking or pantyhose and fill it with about 3–5 pounds of calcium chloride pellets. Tie the end securely.
- Place Across the Ice Dam: Lay the filled stocking vertically across the ice dam, perpendicular to the edge of the roof. Ensure it extends from the top of the dam down into the gutter.
- Wait for Results: The calcium chloride will melt a channel through the ice within a few hours. This channel allows trapped water behind the dam to drain off the roof safely.
Note: You may need multiple stockings for larger dams. Replace them as the pellets dissolve.
2. Steam Removal (Professional Method)
For severe ice dams, hiring a professional with a steam generator is the gold standard. Steam melts ice quickly without the high pressure that can damage shingles.
- Why choose steam? It uses hot vapor rather than hot water, reducing the risk of thermal shock to cold shingles.
- Cost Consideration: This service typically ranges from $200 to $500 depending on the size of the roof and accessibility.
3. What NOT To Do: Avoid Hammers and Chisels
It might be tempting to grab a hammer and chip away at the ice, but this is highly discouraged. Striking the ice can easily crack asphalt shingles, tear underlayment, or dent metal flashing. Once the protective layer of your roof is compromised, you invite leaks even after the ice is gone.
Similarly, avoid using high-pressure power washers. The force of the water can drive moisture under shingles and strip away the protective granule layer, significantly shortening the lifespan of your roof.
Long-Term Prevention: Stopping Ice Dams Before They Start
Removing an ice dam is a temporary fix. To truly solve the problem, you must address the root cause: heat loss and poor ventilation.
Improve Attic Insulation
The goal is to keep the heat inside your living space, not your attic. Check your current insulation levels. The Department of Energy recommends R-values between R-38 and R-60 for attics in most northern U.S. climates.
- Action Step: Add blown-in cellulose or fiberglass batts to reach the recommended depth. Pay special attention to areas around light fixtures, chimneys, and ductwork, which are common sources of heat leakage.
Enhance Roof Ventilation
A well-ventilated attic stays close to the outside temperature, preventing snow from melting on the roof deck.
| Ventilation Type | Function | Benefit |
|---|---|---|
| Soffit Vents | Intake cool air from the eaves | Ensures consistent airflow from the bottom up |
| Ridge Vents | Exhaust warm air at the peak | Removes heat buildup efficiently without fans |
| Gable Vents | Side-wall ventilation | Helps cross-ventilation in certain roof designs |
Ensure that soffit vents are not blocked by insulation. Use baffles (chutes) to maintain a clear air path from the soffit to the ridge.
Seal Air Leaks
Insulation alone is not enough if warm air is bypassing it. Seal gaps around:
- Plumbing stacks
- Electrical wiring
- Chimneys
- Attic hatches
Use caulk or expanding foam to seal these penetrations. This step is often more impactful than adding more insulation.
When to Call a Professional
While DIY methods work for minor issues, some situations require expert intervention. Consider calling a roofing contractor if:
- The ice dam is massive (over 6 inches thick).
- You notice active leaking inside your home.
- Your roof has a steep pitch that makes ladder use dangerous.
- You are unsure about the structural integrity of your attic insulation.
According to the National Roofing Contractors Association (NRCA), regular inspections can prevent costly repairs. A professional can also install heated cable systems along the eaves. While these do not fix insulation issues, they can prevent ice buildup in problem areas as a supplementary measure.
FAQ Section
1. Can I use hot water to melt ice dams?
Pouring hot water on an ice dam is risky. It can create thermal shock, cracking cold shingles. Furthermore, the water may refreeze lower down on the roof or in gutters, creating new ice problems. It is better to use calcium chloride or steam.
2. Will removing gutters prevent ice dams?
No. Ice dams form on the roof deck, not just in the gutters. While clogged gutters can exacerbate the issue by holding water against the eaves, the root cause is heat loss from the attic. Removing gutters will not stop ice dams and may cause water damage to your foundation.
3. How much does it cost to fix the underlying cause of ice dams?
Costs vary widely based on home size and current insulation levels. Adding attic insulation typically costs between $1,500 and $3,000. Sealing air leaks is cheaper, often under $500 if done DIY, or $1,000–$2,000 professionally. However, this investment pays off by lowering energy bills and preventing water damage repairs.
4. Is it safe to walk on my roof to remove ice?
Generally, no. Roofs are slippery when wet or icy, and ladders can slide out from under you. Falls from roofs are a leading cause of home injury in winter. Always prioritize ground-based solutions like the stocking method or hire professionals with proper safety gear.
5. Do heated roof cables work?
Heated cables (roof de-icing cables) can help prevent ice dams by keeping the eaves warm. However, they are a band-aid solution. If your attic is poorly insulated, you will still lose heat and money. Use cables only in conjunction with proper insulation and ventilation improvements.
Conclusion
Learning how to get rid of ice dams on your roof is essential for protecting your home’s integrity during harsh winters. While immediate relief can be found using calcium chloride stockings, the true solution lies in addressing attic insulation and ventilation. By keeping your attic cold and your living space warm, you stop the melt-freeze cycle at its source.
Don’t wait for water stains to appear on your ceiling. Take proactive steps this season to safeguard your home. If you found this guide helpful, please share it with your neighbors on social media—because a well-informed community is a safer community!