Category: preventive maintenance

  • How to Get Rid of Pigeons on Your Roof Fast

    How to Get Rid of Pigeons on Your Roof Fast

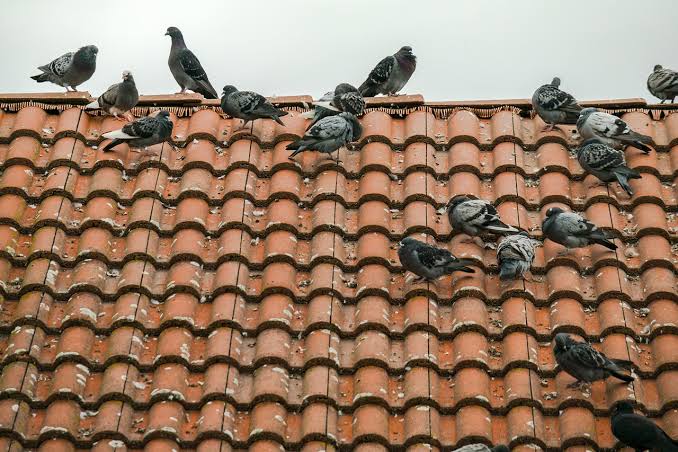
    Dealing with a flock of pigeons roosting on your home is more than just a nuisance; it is a genuine health hazard and a threat to your property’s structural integrity. If you have found yourself asking, “How can I get rid of pigeons on my roof,” you are not alone in this frustrating battle. This guide provides actionable, humane, and effective strategies to reclaim your space from these persistent urban pests.

    Why Are Pigeons Choosing Your Roof?

    Before we dive into removal tactics, it is crucial to understand why your roof has become a pigeon hotspot. Pigeons, scientifically known as Columba livia, are creatures of habit. They seek three primary things: safety, shelter, and proximity to food sources.

    Your roof offers an elevated vantage point that protects them from ground-level predators like cats and raccoons. Furthermore, flat roofs, chimneys, and HVAC units provide ideal nesting spots that mimic the cliff ledges they inhabit in the wild. According to urban wildlife studies, once a pair of pigeons establishes a nest, they will return to the same spot repeatedly, often bringing their offspring back to the same location.

    Understanding this behavior is key. You cannot simply shoo them away once; you must make the environment permanently unattractive to them.

    Top 5 Proven Methods to Remove Pigeons

    When considering how can I get rid of pigeons on my roof, you have several options ranging from DIY fixes to professional installations. Here are the most effective methods, ranked by efficacy and longevity.

    1. Install Bird Spikes (The Physical Barrier)

    Bird spikes are arguably the most reliable long-term solution for flat surfaces, ledges, and roof peaks. These devices do not harm the birds; instead, they make landing physically impossible.

    • How it works: Spikes create an uneven surface that prevents pigeons from gaining footing.
    • Installation Tip: Ensure the spikes cover the entire landing zone. Gaps larger than two inches may still allow bold pigeons to squeeze through.
    • Material Choice: Stainless steel spikes last longer than plastic ones, which can degrade under UV exposure after a few years.

    2. Use Bird Netting for Large Areas

    If you have a large, open roof area or recessed balconies, netting is the superior choice. It creates a physical barrier that blocks access entirely.

    • Best For: Covering eaves, solar panels, or large flat sections.
    • Durability: Look for UV-stabilized polyethylene netting. Cheap netting will rot within a season.
    • Professional Note: Improperly installed netting can sag, creating a trap for birds. Tensioning the net correctly is vital.

    3. Apply Visual and Auditory Deterrents

    Pigeons are wary of predators and sudden movements. Reflective objects, such as old CDs, reflective tape, or specialized predator decoys (like owls or hawks), can work temporarily.

    • The Limitation: Pigeons are intelligent. They quickly realize that a plastic owl that never moves is not a threat.
    • Pro Tip: Move decoys every few days and combine them with auditory deterrents, such as ultrasonic repellers or distress call emitters, to maintain effectiveness.

    4. Seal Entry Points and Nesting Sites

    Prevention is better than cure. Inspect your roof for any gaps, broken tiles, or open vents where pigeons might enter to nest inside the attic or roof cavity.

    • Action Step: Use hardware cloth or steel wool to block small openings. Avoid using foam alone, as pigeons can peck through it.
    • Safety Warning: Always wear a mask and gloves when sealing areas with existing droppings due to the risk of histoplasmosis, a fungal infection linked to bird waste.

    5. Hire Professional Pest Control

    If the infestation is severe, or if you are uncomfortable working at heights, professional help is the safest route. Experts can assess the extent of the damage and install commercial-grade exclusion systems.

    For more detailed information on the biological behavior of feral pigeons and their impact on urban environments, you can refer to this comprehensive resource on Wikipedia.
    How Can I Get Rid Of Pigeons On My Roof

    Comparison: DIY vs. Professional Pigeon Removal

    Choosing between doing it yourself and hiring a pro depends on your budget, the severity of the issue, and your comfort level.

    FeatureDIY MethodsProfessional Services
    CostLow ($50–$200)High ($500–$2,000+)
    EffectivenessVariable; requires maintenanceHigh; often comes with warranties
    Safety RiskHigh (working on roofs)Low (insured professionals)
    Time CommitmentHigh (research & install)Low (you just schedule it)
    LongevityShort to Medium termLong term

    Step-by-Step Guide: Cleaning Up After Pigeons

    Once you have addressed how can I get rid of pigeons on my roof, you must deal with the aftermath. Pigeon droppings are acidic and can corrode roofing materials, not to mention the health risks.

    Step 1: Safety First Put on an N95 respirator mask, heavy-duty gloves, and protective eyewear. Wet the droppings with a mixture of water and disinfectant to prevent dust particles from becoming airborne.

    Step 2: Removal Use a plastic scraper to remove thick layers of waste. Do not use a pressure washer initially, as this can spray contaminated water into the air and onto your siding.

    Step 3: Disinfection Apply a enzymatic cleaner or a bleach solution (1 part bleach to 10 parts water) to the affected area. Let it sit for 15 minutes to kill bacteria and fungi.

    Step 4: Rinse and Dry Rinse the area gently with a garden hose. Allow the roof to dry completely before installing any deterrents like spikes or netting.

    Frequently Asked Questions (FAQ)

    1. Is it legal to remove pigeons from my roof?

    In the United States, feral pigeons are generally not protected under the Migratory Bird Treaty Act. However, local ordinances may vary. It is illegal to use poison or cruel traps in many jurisdictions. Always check your local city regulations before taking action.

    2. Will mothballs keep pigeons away?

    Mothballs contain naphthalene or paradichlorobenzene, which are toxic chemicals. While the smell may deter birds temporarily, using them outdoors is often illegal due to environmental contamination risks. They are not a recommended or safe solution for roof use.

    3. How long does it take to see results after installing deterrents?

    Results vary. Visual deterrents may work immediately but lose effectiveness over weeks. Physical barriers like spikes and netting work instantly upon installation. Behavioral changes in the flock usually take 2–4 weeks as they search for new roosting sites.

    4. Can pigeons damage my roof structure?

    Yes. Their droppings are highly acidic and can eat through metal flashing, shingles, and paint. Additionally, the weight of accumulated nests and debris can clog gutters, leading to water damage and mold growth inside your home.

    5. What is the most humane way to get rid of pigeons?

    Exclusion methods are the most humane. By using spikes, netting, or sealing entry points, you prevent them from accessing your roof without harming them. Avoid glue traps or poisons, which cause unnecessary suffering and are often ineffective for long-term control.

    Conclusion

    Learning how can I get rid of pigeons on my roof is about consistency and using the right tools for the job. While no single method works perfectly for every situation, combining physical barriers like spikes or netting with regular maintenance offers the best protection. Remember, the goal is not to harm the birds, but to encourage them to find a more suitable home elsewhere.

    By taking action now, you protect your health, your property value, and your peace of mind. Don’t let the cooing and mess dictate your home life.

    Did you find this guide helpful? Share this article with your neighbors on social media—pigeon problems are often community-wide, and solving them together is more effective!
  • Does Home Warranty Cover Roof Moss?

    Does Home Warranty Cover Roof Moss?

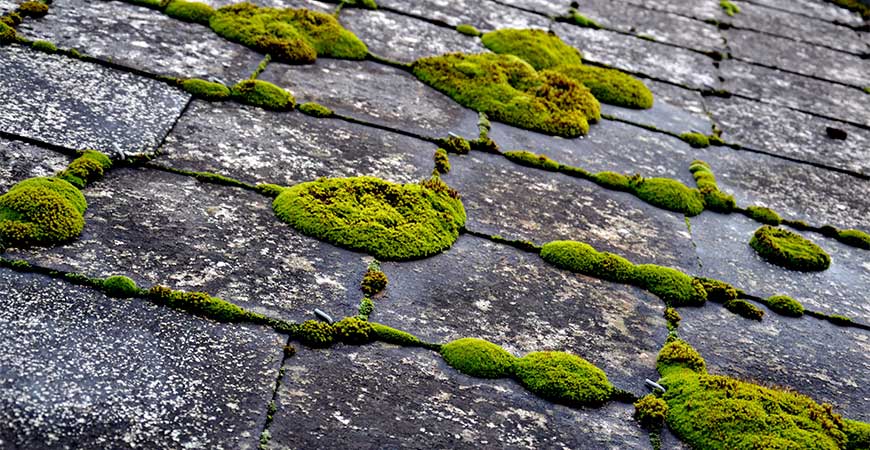
    Finding green patches spreading across your shingles can be alarming, not just for your home’s curb appeal but for your wallet. Many homeowners panic, asking themselves the critical question: If My Roof Has Moss Does Homeowner Warranty Cover It? The short answer is often complex, but understanding the distinction between maintenance and sudden damage is key to saving money. In this guide, we will break down exactly what is covered, what isn’t, and how you can handle moss before it becomes a costly disaster.

    Understanding the Difference: Warranty vs. Insurance

    Before diving into the specifics of moss coverage, it is vital to clarify a common misconception. Most people confuse homeowners insurance with a home warranty. These are two entirely different products serving different purposes.

    Homeowners insurance typically covers sudden, accidental events like storm damage, fire, or falling trees. A home warranty, on the other hand, is a service contract that covers the repair or replacement of major home systems and appliances due to normal wear and tear.

    However, roofs are a unique category. Standard home warranties rarely cover the entire roof structure. Instead, they might offer limited “roof leak” coverage as an add-on. Even then, the presence of moss introduces a layer of complexity regarding negligence and maintenance.

    Why Moss Is Considered a Maintenance Issue

    Moss does not appear overnight. It grows slowly over months or years due to moisture, shade, and lack of sunlight. Because its growth is gradual, insurance companies and warranty providers classify it as a maintenance issue.

    According to general industry standards, homeowners are expected to perform regular upkeep. If damage results from a failure to maintain the property, coverage is usually denied. This is why knowing if my roof has moss does homeowner warranty cover it often leads to a “no,” unless specific conditions are met.

    Does a Home Warranty Cover Moss Removal?

    The direct answer is generally no. Most standard home warranty contracts explicitly exclude cosmetic issues and routine maintenance tasks. Moss removal falls squarely into the category of routine maintenance.

    What Standard Contracts Say

    When you read the fine print of a typical home warranty provider (such as American Home Shield or Choice Home Warranty), you will find clauses related to “pre-existing conditions” and “lack of maintenance.”

    • Cosmetic Exclusions: Moss is often viewed as a cosmetic blemish until it causes structural damage.
    • Preventative Care: Removing moss is considered preventative care, which is the homeowner’s responsibility, not the warranty company’s.

    However, if the moss has caused a leak and you have purchased a specific Roof Leak Protection add-on, the scenario changes slightly. The warranty might cover the cost to repair the leak itself, but they will likely still refuse to pay for the moss removal or the replacement of the shingles damaged by the moss’s long-term presence.

    Will Homeowners Insurance Pay for Moss Damage?

    If a home warranty won’t touch it, will your homeowners insurance step in? Unfortunately, the outlook is similar but for different reasons.

    Insurance policies are designed to cover sudden and accidental perils. Moss growth is neither sudden nor accidental; it is a gradual process. Therefore, most standard HO-3 policies (the most common type of homeowners insurance) will deny a claim for moss removal or damage caused directly by moss accumulation.

    The “Neglect” Clause

    Insurance adjusters look for signs of neglect. If they see thick layers of moss, they may argue that the homeowner failed to mitigate known risks. Wikipedia provides a detailed overview of how standard home insurance policies define covered perils versus exclusions, highlighting that gradual deterioration is almost universally excluded.

    FeatureHome WarrantyHomeowners Insurance
    Primary FocusSystems & Appliances (Wear & Tear)Sudden Accidents & Disasters
    Moss RemovalNot Covered (Maintenance)Not Covered (Gradual Damage)
    Leak RepairPossibly (with Add-on)Possibly (if sudden cause)
    Shingle ReplacementRarelyOnly if storm/wind damaged

    When Might You Get Coverage?

    While the general rule is exclusion, there are nuanced scenarios where you might receive some financial assistance.

    1. The Leak Connection

    If you have a roof leak endorsement on your home warranty, and the moss has trapped moisture leading to a leak, the warranty might cover the interior water damage repair or the patching of the leak source. However, they will likely deduct the cost of the moss cleanup from your payout or require you to clean it first.

    2. Storm Damage Synergy

    If a heavy storm blows off shingles that were already weakened by moss, your homeowners insurance might cover the storm damage. They will pay for the wind damage, but they may cite “betterment” clauses, meaning they won’t pay to upgrade your roof or fix pre-existing moss rot.

    3. New Roof Warranties

    If your roof is new, it might be under a manufacturer’s warranty or a workmanship warranty from the roofing contractor. Some high-end shingle manufacturers offer algae and moss resistance guarantees. Check your original installation documents. If the shingles were advertised as “algae-resistant” and failed prematurely, the manufacturer might cover the replacement.

    If My Roof Has Moss Does Homeowner Warranty Cover It

    How to Prevent and Remove Moss Safely

    Since coverage is unlikely, the best strategy is proactive management. Here is a step-by-step guide to handling moss without voiding any existing warranties or damaging your roof.

    Step 1: Safety First

    Never walk on a wet, mossy roof. It is incredibly slippery. Use a sturdy ladder with stabilizers and wear rubber-soled shoes. If the roof is steep, hire a professional.

    Step 2: The Gentle Cleaning Method

    Avoid pressure washing, which can strip the granules off asphalt shingles and void manufacturer warranties. Instead, use a chemical treatment.

    1. Mix Solution: Combine 50% water and 50% bleach, or use a specialized roof moss killer containing zinc sulfate.
    2. Apply: Use a garden sprayer to apply the solution evenly over the mossy areas. Do not rinse immediately.
    3. Wait: Let the solution sit for 15–20 minutes. The moss will turn orange or brown, indicating it is dying.
    4. Rinse Gently: Use a low-pressure hose to gently rinse the dead moss away. Work from the top down to avoid forcing water under the shingles.

    Step 3: Install Zinc Strips

    For long-term prevention, install zinc or copper strips near the roof ridge. When it rains, tiny particles of metal wash down the roof, creating an environment where moss cannot grow. This is a cost-effective, one-time investment that protects your roof for years.

    FAQ Section

    1. Can I claim moss removal as a medical necessity if I have allergies?

    No. Home warranties and insurance policies do not cover environmental hazards or health-related maintenance issues. Moss removal remains a structural maintenance task regardless of health impacts.

    2. Does trimming trees help prevent moss?

    Yes. Moss thrives in shade and dampness. Trimming overhanging branches allows more sunlight to hit your roof, drying out the surface and making it less hospitable for moss growth. This is a highly recommended preventative measure.

    3. Will removing moss myself void my roof warranty?

    It can, if you use high-pressure washing or harsh chemicals not approved by the shingle manufacturer. Always check your shingle manufacturer’s maintenance guidelines before applying any treatments. Using soft-wash techniques is usually safe.

    4. How often should I inspect my roof for moss?

    You should inspect your roof at least twice a year, ideally in spring and fall. Look for dark patches or green growth, especially on the north-facing side of your home where sunlight is scarce.

    5. Is there a specific type of home warranty that covers roofs?

    Some premium home warranty plans offer “Roof Leak” coverage as an optional add-on. While this does not cover moss removal, it may cover the repair costs if the moss leads to a leak. Always read the exclusions carefully.

    6. What is the average cost of professional moss removal?

    Professional moss removal typically costs between $300 and $600, depending on the roof size and severity of the growth. While this seems high, it is significantly cheaper than replacing a roof section damaged by rot.

    Conclusion

    So, if my roof has moss does homeowner warranty cover it? In most cases, the answer is no. Both home warranties and homeowners insurance view moss as a maintenance issue resulting from gradual wear and environmental factors, rather than a sudden, covered peril.

    However, this doesn’t mean you are helpless. By understanding the limitations of your coverage, you can take proactive steps to protect your investment. Regular inspections, gentle cleaning methods, and preventive measures like zinc strips can save you thousands in the long run. Don’t wait for a leak to appear; address moss early to keep your home safe and your wallet happy.

    If you found this guide helpful, please share it with your neighbors on social media. Many homeowners are unaware of these distinctions, and spreading knowledge can help everyone protect their homes better!

  • Is It Time? How Can You Tell If You Need A New Roof

    Is It Time? How Can You Tell If You Need A New Roof

    Your home is likely your most significant investment, and the roof is its first line of defense against the elements. Yet, many homeowners ignore subtle warning signs until a minor leak turns into a catastrophic structural failure. If you are asking yourself, “How can you tell if you need a new roof,“ you are already taking the right step toward protecting your property and your wallet.

    Ignoring roof damage can lead to mold growth, compromised insulation, and even electrical hazards. In this comprehensive guide, we will walk you through the definitive signs that indicate it is time for a replacement, helping you make an informed decision before disaster strikes.

    1. How Old Is Your Roof? Understanding Material Lifespans

    The age of your roof is the single most reliable indicator of its remaining life. While high-quality materials last longer, every roof has an expiration date. Knowing the typical lifespan of your specific roofing material helps you anticipate replacement needs before visible damage occurs.

    Here is a general breakdown of common roofing materials:

    Material TypeAverage LifespanKey Characteristics
    Asphalt Shingles15–20 YearsMost common in the US; affordable but susceptible to wind and heat.
    Wood Shakes/Shingles20–25 YearsNatural aesthetic; requires regular maintenance to prevent rot.
    Metal Roofing40–70 YearsDurable and energy-efficient; higher upfront cost but long-lasting.
    Clay/Concrete Tiles50+ YearsExtremely durable; heavy weight requires strong structural support.
    Slate75–100+ YearsPremium durability and aesthetics; very expensive and heavy.

    If your asphalt shingle roof is approaching the 15-year mark, you should begin inspecting it annually. Even if it looks fine from the ground, UV radiation and thermal cycling degrade the underlying matting over time. According to industry standards, once a roof passes 80% of its expected lifespan, proactive replacement is often more cost-effective than repeated repairs.

    2. Are Your Shingles Curling, Cracking, or Missing?

    Visual inspection is the easiest way to assess roof health. You do not need to climb onto the roof to spot these issues; a pair of binoculars and a keen eye from the ground are sufficient.

    Curling and Cupping

    Shingles that curl upward (cupping) or downward (clawing) are losing their adhesive integrity. This is often caused by poor ventilation in the attic, which traps heat and moisture, causing the shingles to warp. Once shingles curl, they become brittle and prone to breaking under foot traffic or wind.

    Missing Granules

    Asphalt shingles are coated with granules that protect them from UV rays. If you notice bare spots on your shingles or find an accumulation of sand-like granules in your gutters, your roof is losing its protective layer. This exposure accelerates aging and increases the risk of leaks.

    Missing Shingles

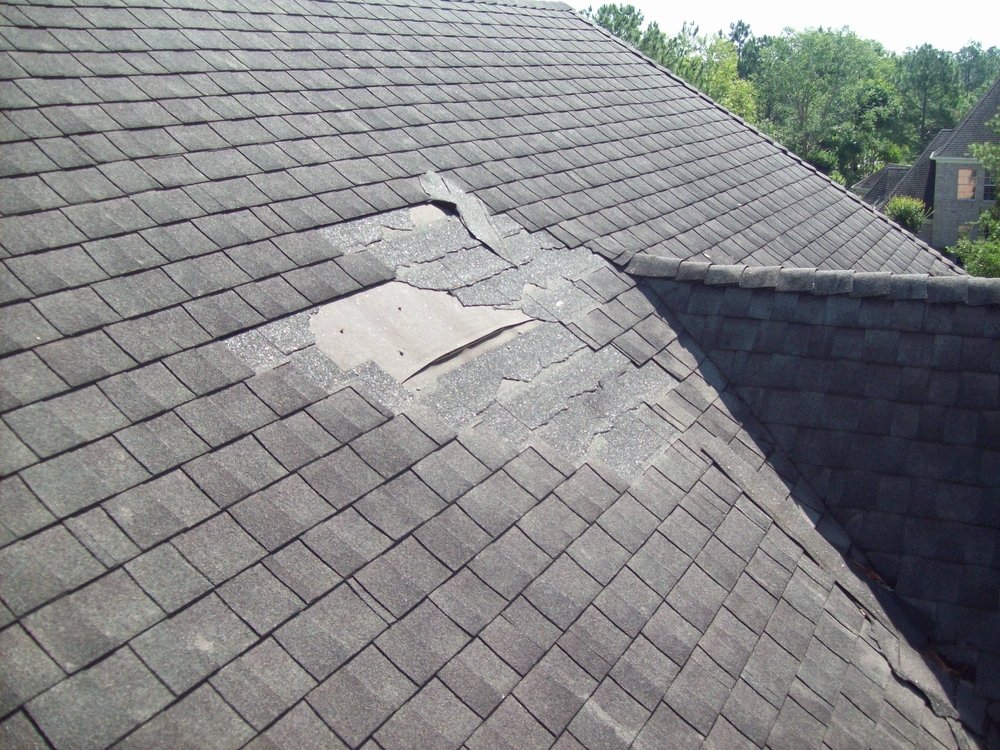
    After a storm, it is common to lose a shingle or two. However, if you notice multiple missing shingles or large patches where the underlayment is exposed, patch repairs may no longer be sufficient. Widespread missing shingles indicate that the bonding agent has failed across the entire roof surface.

    How Can You Tell If You Need A New Roof

    3. What Do Dark Streaks and Moss Growth Indicate?

    While moss might look rustic, it is detrimental to your roof’s longevity. Moss retains moisture against the shingle surface, which can cause the organic material in wood shakes to rot or lift asphalt shingles, breaking the seal.

    Dark streaks, often mistaken for dirt, are actually algae growth (Gloeocapsa magma). While algae itself does not destroy the roof structure immediately, it indicates that moisture is lingering on your roof longer than it should. This persistent dampness can degrade shingle adhesives and shorten the roof’s life.

    Pro Tip: If you see moss or algae, do not pressure wash your roof. High-pressure water can force water under the shingles and strip away protective granules. Instead, use a specialized roof cleaning solution or hire a professional soft-wash service.

    4. Is There Daylight Coming Through Your Attic Boards?

    One of the most definitive answers to “how can you tell if you need a new roof” is found in your attic. On a bright sunny day, go into your attic and turn off the lights. Look up at the underside of the roof deck.

    If you see any pinpoints of daylight shining through, you have gaps in your roof structure. These gaps are not just entry points for rain; they allow warm air to escape in winter and hot air to enter in summer, drastically reducing your home’s energy efficiency. Furthermore, these openings invite pests, dust, and moisture, leading to potential mold issues.

    If you see light, the problem is likely structural or related to severe shingle displacement. This is rarely a simple fix and usually warrants a professional assessment for full replacement.

    5. Are You Finding Water Stains on Ceilings or Walls?

    Water stains on your interior ceilings or walls are a red flag. However, it is crucial to understand that the location of the stain inside your home does not always correspond directly to the leak’s origin on the roof. Water can travel along rafters, pipes, or insulation before dripping down.

    Look for:

    • Brownish-yellow rings on drywall.
    • Bubbling or peeling paint.
    • Damp spots around chimneys or vents.

    If you have had multiple leaks repaired over the years and new ones keep appearing, the entire roofing system may be compromised. Constant patching becomes a money pit, and a full replacement becomes the logical financial choice. For more detailed information on how water damages building structures, you can refer to resources on water damage restoration.

    6. Is Your Energy Bill Suddenly Increasing?

    A failing roof often fails at insulation before it fails at waterproofing. As shingles deteriorate and ventilation systems clog, your attic temperature fluctuates wildly. This forces your HVAC system to work harder to maintain a comfortable indoor temperature.

    If your energy bills have spiked without a change in usage habits or utility rates, your roof’s thermal performance may be degraded. A new roof with proper ventilation and modern reflective materials can significantly improve your home’s energy efficiency, potentially offsetting the cost of replacement over time.

    7. Sagging Roof Deck: A Critical Emergency

    If your roof line appears to sag or dip in the middle, this is a critical structural issue. A sagging roof indicates that the decking or the supporting trusses are weakening, possibly due to long-term water damage, rot, or excessive weight from snow or multiple layers of old shingles.

    Do not wait. A sagging roof is at risk of collapse. Contact a structural engineer or a licensed roofing contractor immediately. This is not a cosmetic issue; it is a safety hazard that requires urgent attention.


    Frequently Asked Questions (FAQ)

    Q1: Can I just repair my roof instead of replacing it?

    A: It depends on the extent of the damage. If the damage is localized (e.g., a few missing shingles from a storm) and the roof is relatively young (under 10 years), repair is a viable option. However, if the roof is near the end of its lifespan or damage is widespread, repairs are merely a temporary band-aid. Continually repairing an old roof often costs more in the long run than a single replacement.

    Q2: How much does a new roof cost in the US?

    A: Costs vary widely based on location, material, and roof size. On average, homeowners in the US spend between $5,000 and $15,000 for a standard asphalt shingle roof replacement. Metal roofs and slate tiles can cost significantly more, ranging from $15,000 to $30,000+. Always get at least three detailed quotes from licensed contractors.

    Q3: Will my homeowner’s insurance cover a new roof?

    A: Insurance typically covers roof replacement if the damage is caused by a sudden, accidental event like a hailstorm, hurricane, or falling tree. It generally does not cover wear and tear, age-related deterioration, or lack of maintenance. Review your policy carefully and document all damage with photos before filing a claim.

    Q4: How long does a roof replacement take?

    A: For an average-sized single-family home, a complete roof replacement usually takes 1 to 3 days. Factors that can extend this timeline include complex roof designs (multiple valleys, turrets), bad weather, or the discovery of underlying structural rot that needs repair before new shingles can be installed.

    Q5: Should I replace the roof before selling my house?

    A: Not necessarily. If the roof has several years of life left, a professional cleaning and minor repairs may suffice. However, if the roof is old and visibly damaged, replacing it can increase your home’s curb appeal and prevent buyers from negotiating a lower price or demanding a credit. A new roof can also make the home easier to insure for the new buyer.


    Conclusion

    Knowing how can you tell if you need a new roof empowers you to act proactively rather than reactively. By monitoring the age of your roof, inspecting for curled or missing shingles, checking your attic for light and moisture, and keeping an eye on your energy bills, you can avoid costly emergency repairs.

    Remember, your roof protects everything beneath it. Do not wait for a leak to ruin your ceiling before taking action. If you notice any of the signs discussed above, schedule a professional inspection today.

    Found this guide helpful? Share it with your friends and family on social media to help them protect their homes too! A well-informed homeowner is a safe homeowner.

  • Is It Time? How Do You Know When You Need A New Roof

    Is It Time? How Do You Know When You Need A New Roof

    Your home is likely your most significant financial investment, and the roof is its primary shield against the elements. Ignoring subtle warning signs can lead to catastrophic water damage, mold growth, and skyrocketing repair bills. If you are asking yourself, “How do you know when you need a new roof,” you are taking the first crucial step toward protecting your property and peace of mind.

    In this comprehensive guide, we will walk you through the definitive signs that indicate your roof has reached the end of its lifecycle. We will combine industry expertise with practical advice to help you make an informed decision, ensuring your home remains safe, dry, and valuable.

    1. How Old Is Your Roof? Understanding Material Lifespans

    Age is the single most reliable indicator of roof health. Even if your roof looks fine from the street, materials degrade over time due to UV exposure, temperature fluctuations, and weather events.

    Most roofing materials have a predictable lifespan. Knowing what your roof is made of helps you set realistic expectations.

    Roofing MaterialAverage LifespanKey Durability Factor
    Asphalt Shingles15–20 yearsSusceptible to wind and heat damage
    Wood Shakes/Shingles20–25 yearsProne to rot, mold, and insect damage
    Metal Roofing40–70 yearsHighly resistant to weather and fire
    Clay/Concrete Tiles50+ yearsHeavy but extremely durable
    Slate75–100+ yearsNatural stone, virtually indestructible

    Source: Data aggregated from industry standards and manufacturer warranties.

    If your asphalt shingle roof is approaching its 20th birthday, it is time to start budgeting for a replacement, even if no major leaks are visible yet. The protective granules wear down, making the underlying asphalt vulnerable to cracking.

    2. Are There Visible Signs of Damage on Your Shingles?

    You do not need to be a professional roofer to spot obvious distress signals. However, you should exercise caution. If you must inspect your roof visually, use binoculars from the ground or a drone. Climbing onto a damaged roof is dangerous.

    Look for these specific red flags:

    • Curling or Cupping Shingles: When shingle edges turn upward (cupping) or downward (clawing), they have lost their flexibility and adhesive strength. This often happens due to poor ventilation or old age.
    • Missing Shingles: High winds can tear shingles off. If you see bare spots on your roof deck, water can penetrate immediately.
    • Cracked Shingles: Cracks allow water to seep into the underlayment. This is common in areas with extreme temperature swings.
    • Bald Spots: Asphalt shingles are covered in ceramic granules that protect against UV rays. If you see dark patches where granules are missing, the shingle is deteriorating rapidly.

    Pro Tip: Check your gutters. If you find an excessive amount of sand-like granules in your downspouts, your shingles are shedding their protective layer. This is a clear sign that replacement is imminent.

    How Do You Know When You Need A New Roof

    3. Is Your Attic Showing Signs of Water Intrusion?

    Often, the roof looks fine from the outside, but the damage is happening underneath. Your attic is the best place to diagnose hidden roof problems. Grab a flashlight and head up there after a rainstorm.

    What to look for:

    1. Daylight Through the Roof Boards: If you can see beams of sunlight piercing through the roof deck, you have gaps that will let water in.
    2. Water Stains or Mold: Dark streaks or wet insulation indicate active leaks. Mold poses serious health risks and suggests long-term moisture issues.
    3. Sagging Decking: If the wooden structure feels soft or spongy when you walk on it (carefully!), the wood has rotted. This requires immediate structural repair and roof replacement.

    According to the Environmental Protection Agency (EPA), indoor mold growth can cause various health effects, including nasal stuffiness, throat irritation, coughing or wheezing, eye irritation, or, in some cases, skin irritation. Preventing roof leaks is a primary method of mold prevention.

    4. Are You Experiencing Higher Energy Bills?

    A surprising indicator of a failing roof is your electricity bill. Your roof plays a vital role in your home’s thermal envelope. If it is compromised, your HVAC system has to work harder to maintain a comfortable temperature.

    Old, damaged, or poorly ventilated roofs can trap heat in the summer and let warmth escape in the winter. If you notice a sudden spike in energy costs without a change in usage habits, have your roof’s insulation and ventilation inspected. Proper airflow prevents heat buildup that can prematurely age shingles and drive up cooling costs.

    5. How Does Your Roof Look From the Street?

    Curb appeal matters, not just for aesthetics but for property value. A sagging roofline is a critical structural warning. If the ridge line (the peak of the roof) looks uneven or dipped, the structural integrity may be compromised. This could be due to:

    • Long-term water damage weakening the rafters.
    • Overloading from heavy snow or multiple layers of old roofing.
    • Foundation settling.

    A sagging roof is not a “repair” job; it is a full replacement scenario that may also require structural engineering support. Do not delay addressing this issue.

    6. Have You Had Frequent Repairs Recently?

    There is a concept in home maintenance called the “money pit” threshold. If you have called a roofer three or more times in the last two years for different leaks or issues, it is likely more cost-effective to replace the entire roof.

    Constant patching is a temporary fix. Each time a roofer lifts shingles to patch a leak, they break the sealant strip, potentially creating new weak points. Eventually, the cost of cumulative repairs will exceed the price of a new installation. Plus, a new roof comes with a fresh warranty, offering long-term security.

    FAQ Section

    Q: Can I just put a new roof over the old one?

    A: While technically possible in some jurisdictions, it is generally not recommended. Adding a second layer adds weight stress to your home’s structure, traps heat (reducing shingle life), and makes it difficult to identify underlying deck damage. Most building codes allow only two layers maximum, and many manufacturers void warranties if installed over existing shingles.

    Q: How much does a new roof cost?

    A: Costs vary widely based on size, material, and location. For a typical 2,000-square-foot home, an asphalt shingle roof might range from $8,000 to $15,000, while metal or slate can cost $20,000 to $50,000+. Always get at least three detailed quotes from licensed contractors.

    Q: Will homeowners insurance cover a new roof?

    A: Insurance typically covers roof replacement if the damage is caused by a sudden, accidental event like a storm, hail, or falling tree. It usually does not cover wear and tear, age-related deterioration, or lack of maintenance. Review your policy carefully.

    Q: How long does a roof replacement take?

    A: For an average-sized residential home, a professional crew can complete a tear-off and replacement in 1–3 days. Larger homes or complex designs (multiple peaks, valleys) may take up to a week. Weather conditions can also impact the timeline.

    Q: What is the best time of year to replace a roof?

    A: Late spring to early fall is ideal because roofing materials require warm temperatures to seal properly. Asphalt shingles need heat to activate the adhesive strips. However, reputable contractors can work in cooler weather using special techniques, so don’t wait until summer if you have active leaks.

    Conclusion

    Knowing how do you know when you need a new roof is about combining observation with knowledge. By monitoring the age of your materials, inspecting for physical damage, checking your attic for leaks, and watching your energy bills, you can catch problems before they become disasters.

    Remember, a roof is not just an expense; it is an investment in your home’s longevity and your family’s safety. Do not wait for a ceiling to collapse before taking action. Regular inspections and timely replacements save money in the long run.

    Found this guide helpful? Share it with your neighbors on Facebook or Twitter to help them protect their homes too! A community of well-maintained homes is a safer, more valuable neighborhood for everyone.

  • How Much Does It Cost To Fix A Roof Leak?

    How Much Does It Cost To Fix A Roof Leak?

    Discovering a water stain on your ceiling is every homeowner’s nightmare. It triggers immediate anxiety about structural damage, mold growth, and, most pressingly, the financial burden of repairs. If you are staring at that damp patch and asking, “How much does it cost to fix a roof leak,” you are not alone. This guide breaks down the costs clearly, helping you budget effectively and avoid unnecessary expenses.

    Understanding the Average Cost of Roof Leak Repairs

    The short answer is that fixing a roof leak typically costs between $400 and $1,000, with the national average hovering around $750. However, this figure can vary significantly depending on the severity of the leak, the type of roofing material, and your location.

    Minor repairs, such as replacing a few missing shingles or resealing a vent pipe, might cost as little as $150 to $400. On the other hand, if the leak has caused structural damage to the decking or requires extensive flashing replacement, costs can skyrocket to $2,500 or more.

    It is crucial to understand that ignoring a small leak often leads to exponentially higher costs later. Water damage is insidious; what starts as a minor drip can rot wooden beams, ruin insulation, and promote hazardous mold growth within weeks.

    Key Factors That Influence Repair Prices

    When contractors provide a quote, they are evaluating several specific variables. Understanding these factors will help you determine if a quote is fair.

    1. Type of Roofing Material

    Different materials require different labor skills and replacement parts.

    • Asphalt Shingles: The most common and affordable option. Repairs are generally quick and inexpensive.
    • Metal Roofing: Durable but requires specialized tools for sealing seams. Costs are moderate.
    • Tile or Slate: These are premium materials. Breaking a tile during repair is a risk, and matching old tiles can be difficult, driving up labor and material costs.
    • Flat Roofs (EPDM/TPO): Common in commercial buildings or modern homes. Repairs often involve chemical sealants or patching membranes, which varies in price based on square footage.

    2. Accessibility and Roof Pitch

    Safety is a major cost driver. A steeply pitched roof requires harnesses, scaffolding, and more time to navigate safely. Similarly, if your roof is multi-storied or surrounded by obstacles like trees or power lines, contractors may charge a premium for the increased risk and difficulty.

    3. Extent of Water Damage

    The visible leak is only part of the problem. Contractors must assess:

    • Roof Decking: Is the wood beneath the shingles rotted?
    • Insulation: Has water saturated the attic insulation?
    • Interior Damage: Do ceilings or walls need drywall repair and repainting?

    If the water has compromised the structural integrity of the roof deck, you are no longer just paying for a “leak fix”; you are paying for structural restoration.

    4. Location and Labor Rates

    Labor costs vary wildly across the United States. In high-cost-of-living areas like California or New York, hourly rates for licensed roofers can be 30-50% higher than in the Midwest. Additionally, emergency repairs after a storm often incur surge pricing due to high demand.

    How Much Does It Cost To Fix A Roof Leak

    Common Causes of Roof Leaks and Their Specific Costs

    Identifying the source of the leak is half the battle. Here is a breakdown of common issues and their typical repair costs.

    Cause of LeakTypical Repair ActionEstimated Cost Range
    Missing ShinglesReplace 1-3 shingles$150 – $350
    Damaged FlashingReseal or replace metal flashing around chimneys/vents$200 – $600
    Clogged GuttersCleaning and realigning gutters$100 – $250
    Vent Pipe Boot FailureReplace rubber boot around plumbing vent$150 – $400
    Valley LeaksRepairing the intersection of two roof slopes$300 – $800
    Skylight LeaksResealing or replacing skylight gaskets$400 – $1,000+

    Note: These prices include both labor and materials but exclude interior damage repair.

    DIY vs. Professional Repair: What Should You Choose?

    Many homeowners wonder if they can save money by fixing the leak themselves. While DIY is tempting, it comes with significant risks.

    When DIY Might Work

    If the issue is purely cosmetic or minor, such as a single loose shingle on a low-pitch roof, you might handle it. You would need:

    • A sturdy ladder
    • Roofing cement
    • Replacement shingles
    • Safety gear (non-slip shoes)

    However, even minor DIY errors can void your manufacturer’s warranty.

    When to Call a Professional

    You should always hire a licensed contractor if:

    • The roof is steep or high.
    • The source of the leak is not obvious.
    • There is signs of mold or structural rot.
    • The roof is under warranty.

    According to industry standards, professional roofers carry liability insurance and workers’ compensation. If you fall off your roof while attempting a DIY fix, your homeowner’s insurance may not cover the medical bills. Furthermore, professionals have moisture meters and thermal imaging cameras to detect hidden water pockets that the naked eye cannot see.

    For more detailed information on roofing materials and standards, you can refer to Wikipedia’s entry on Roofing.

    Step-by-Step: What to Expect During a Professional Repair

    Knowing the process helps reduce anxiety and ensures you are getting quality service.

    1. Inspection: The roofer will climb onto the roof to visually inspect shingles, flashing, and vents. They may also check the attic for water trails.
    2. Diagnosis: They will identify the exact entry point. Note: Water often enters far from where it appears on the ceiling due to runoff along rafters.
    3. Quote Presentation: You receive a detailed breakdown of labor, materials, and timeline.
    4. Preparation: The crew sets up safety equipment and protects your landscaping from falling debris.
    5. Repair Execution:
      • Damaged shingles are removed.
      • Rotted decking is cut out and replaced.
      • New flashing is installed with proper sealant.
      • Matching shingles are nailed in place.
    6. Cleanup and Water Test: The area is cleaned, and the roofer may simulate rain with a hose to ensure the leak is sealed.

    FAQ Section

    1. Does homeowners insurance cover roof leak repairs?

    Generally, yes, but only if the leak is caused by a sudden, accidental event like a storm, wind, or falling tree. Insurance typically does not cover leaks resulting from lack of maintenance, wear and tear, or age. Always review your policy details.

    2. How long does it take to fix a roof leak?

    Minor repairs usually take 2 to 4 hours. More complex issues involving decking replacement or flashing reconstruction can take 1 to 2 days. Weather conditions can also cause delays.

    3. Can I patch a roof leak from the inside?

    While you can use temporary sealants from the attic to stop active dripping, this is not a permanent solution. Water will continue to pool and rot the structure. Proper repair must always be done from the exterior to address the root cause.

    4. How do I find a trustworthy roofing contractor?

    Look for contractors who are licensed, insured, and have positive reviews on platforms like Google or BBB. Ask for local references and verify their physical address. Avoid door-to-door solicitors who demand full payment upfront.

    5. What is the lifespan of a typical roof repair?

    A high-quality professional repair should last 10 to 15 years, or until the rest of the roof needs replacement. However, if the surrounding shingles are brittle and old, further leaks may occur nearby soon after.

    Conclusion

    Addressing a roof leak promptly is one of the smartest investments you can make in your home. While the question “How much does it cost to fix a roof leak“ has a variable answer, knowing the average ranges ($400–$1,000) empowers you to negotiate better and spot unfair quotes. Remember, the cost of prevention is always lower than the cost of restoration.

    Don’t let a small drip turn into a major renovation project. Inspect your roof regularly, maintain your gutters, and act quickly when signs of water appear.

    Found this guide helpful? Share it with your friends on social media to help them protect their homes too! Your network might just thank you for saving them from a costly surprise.

  • Spot Roof Hail Damage Fast: A Homeowner’s Guide

    Spot Roof Hail Damage Fast: A Homeowner’s Guide

    Have you just weathered a nasty storm, and now you’re staring up at your shingles with a knot in your stomach? It is completely normal to feel anxious about potential structural issues after severe weather, but panic won’t help your home. Understanding how do you know if your roof has hail damage is the first step toward protecting your investment and ensuring your family stays safe and dry.

    In this guide, we will walk you through exactly what to look for, how to inspect your property safely, and when it is time to bring in the professionals. Let’s turn that uncertainty into actionable knowledge.

    Why Early Detection of Hail Damage Matters

    Hailstorms are becoming increasingly frequent and severe across many parts of the United States. According to recent climate data, billion-dollar hail events are no longer rare occurrences. When ice chunks strike your roof, they don’t just make noise; they compromise the integrity of your roofing materials.

    Ignoring these signs can lead to:

    • Water Intrusion: Even small cracks can allow moisture to seep into your attic, leading to mold and rot.
    • Reduced Lifespan: A roof that should last 20 years might fail in 10 if hail damage is left untreated.
    • Insurance Complications: Most insurance policies require timely reporting of storm damage. Waiting too long can result in denied claims.

    Knowing the specific indicators of hail impact allows you to act quickly, preserving both your home’s value and your peace of mind.

    What Does Hail Damage Look Like on Different Roof Types?

    Not all roofs react to hail the same way. The material you have plays a significant role in how damage manifests. Here is a breakdown of what to expect based on common roofing materials.

    Asphalt Shingles

    Asphalt shingles are the most common roofing material in the US, and they are quite vulnerable to hail. Look for:

    • Black Bruises: These are dark spots where the granules have been knocked off, exposing the asphalt underneath.
    • Shiny Spots: If you see areas that look unusually shiny or smooth, the protective granule layer has likely been stripped away.
    • Cracked Shingles: Hail can cause fractures that run along the shingle, which may not be visible from the ground.

    Metal Roofs

    Metal roofs are durable, but they are not invincible. Hail damage on metal usually appears as:

    • Dents: Circular depressions that match the size of the hailstones.
    • Paint Chipping: Impact points may chip away the protective coating, leading to rust over time.

    Wood Shakes and Tiles

    • Wood: Look for splits, orange-brown discoloration (fresh wood exposure), or impact marks with sharp edges.
    • Clay/Concrete Tiles: These may crack or shatter entirely. Listen for loose pieces rattling in the gutters after a storm.

    Pro Tip: Always compare the damage on your roof to other objects around your property. If your air conditioner unit, window screens, or mailbox show dents, your roof likely sustained impact as well.

    How Do You Know If Your Roof Has Hail Damage

    Step-by-Step: How to Inspect Your Roof Safely

    You do not need to climb onto your roof to identify most hail damage. In fact, walking on a damaged roof can cause further harm and void warranties. Follow this safe, ground-level inspection routine.

    1. Check Your Gutters and Downspouts

    Start by looking at your gutter system. Hail knocks granules off asphalt shingles, and these granules wash into the gutters.

    • What to look for: An accumulation of sand-like granules. While some granule loss is normal over time, a sudden surge after a storm is a red flag.
    • Action: Clean out a section of the gutter. If you find a thick layer of granules mixed with debris, note it as evidence.

    2. Inspect Ground-Level Fixtures

    Look at items that sit at the same elevation as your roof or slightly lower.

    • Vents and Pipes: Check plastic vent caps or pipe flashings for cracks or dents.
    • Soft Metal: Aluminum flashing around chimneys or valleys is soft and easily dented. Dents here suggest significant hail impact.

    3. Use Binoculars for a Closer Look

    Stand at various corners of your house and use binoculars to scan the roof surface.

    • Pattern Recognition: Hail damage is often random but widespread. Look for clusters of dark spots or missing granules.
    • Lighting: Inspect during the early morning or late afternoon when the sun is low. This creates shadows that highlight dents and irregularities.

    4. Document Everything

    Take clear, high-resolution photos of any suspected damage. Include close-ups and wide shots that show the location on the roof. Date-stamp these images for your insurance records.

    Hail Damage vs. Normal Wear and Tear

    One of the biggest challenges homeowners face is distinguishing between age-related wear and storm damage. Here is a quick comparison to help you tell the difference.

    FeatureHail DamageNormal Wear & Tear
    PatternRandom, scattered impactsUniform, consistent aging
    Granule LossSharp, distinct bare spotsGradual thinning over large areas
    Shingle ConditionCracks with sharp edgesCurling, blistering, or softening
    Surrounding ItemsDents on AC units, cars, etc.No corresponding damage elsewhere
    TimingAppears immediately after a stormDevelops slowly over years

    If you are unsure, remember that hail damage is typically accompanied by collateral damage to other property features. If your car is fine and the trees are untouched, it might just be an old roof.

    When to Call a Professional Roofer

    While DIY inspections are great for initial assessments, they have limits. You should contact a licensed roofing contractor if:

    • You see visible cracks or missing shingles.
    • You notice water stains on your ceiling or walls inside the home.
    • The storm involved hail larger than 1 inch in diameter (quarter-sized or bigger).
    • You are planning to file an insurance claim.

    A professional roofer can perform a thorough inspection using safety harnesses and provide a detailed report. This documentation is crucial for insurance adjusters. For more information on how roofing materials are tested for durability, you can refer to general standards on Wikipedia.

    Navigating the Insurance Claim Process

    If you confirm damage, the next step is dealing with insurance. Here is how to streamline the process:

    1. Review Your Policy: Check your deductible and coverage limits. Understand if you have “Actual Cash Value” or “Replacement Cost” coverage.
    2. File Promptly: Most insurers have a deadline for filing storm claims, often within one year of the event.
    3. Get Multiple Estimates: Obtain at least two quotes from reputable local roofers. Do not automatically accept the insurance adjuster’s first offer if it seems low.
    4. Keep Records: Save all receipts, photos, and correspondence.

    Note: Be wary of “storm chasers”—contractors who descend on a neighborhood after a storm offering cheap repairs. Always verify licenses and check reviews before signing a contract.

    FAQ: Common Questions About Roof Hail Damage

    1. Can hail damage cause leaks immediately?

    Not always. Sometimes the damage is cosmetic initially, but the compromised shingles degrade faster under UV exposure, leading to leaks months or even years later. However, severe hail can puncture shingles, causing immediate leaks.

    2. How big does hail need to be to damage a roof?

    Generally, hail needs to be at least 1 inch in diameter (the size of a quarter) to cause significant functional damage to standard asphalt shingles. Smaller hail can cause cosmetic bruising, but larger stones are required to crack or break shingles.

    3. Will my insurance cover hail damage?

    Most standard homeowners insurance policies cover hail damage. However, coverage depends on your specific policy terms, deductible, and whether the damage is deemed “cosmetic” or “functional.” Some policies exclude cosmetic damage entirely.

    4. How long do I have to file a claim for hail damage?

    This varies by insurer and state, but typically you have one to two years from the date of the storm. It is best to file as soon as possible while evidence is fresh and contractors are available.

    5. Can I repair hail damage myself?

    Minor cosmetic issues might seem fixable, but roof repair is dangerous and complex. Improper repairs can void warranties and lead to leaks. It is highly recommended to hire a professional for any structural or waterproofing repairs.

    Conclusion

    Knowing how do you know if your roof has hail damage empowers you to take control of your home maintenance. By recognizing the signs—such as black bruises, granule loss, and dented fixtures—you can prevent minor issues from becoming major headaches. Remember, early detection saves money, extends your roof’s life, and simplifies the insurance process.

    Don’t wait for a leak to appear. If you suspect your roof took a hit during the last storm, perform a safe ground-level inspection today. If you found this guide helpful, please share it with your neighbors on social media. Staying informed together helps our entire community stay safe and secure.

  • How To Identify Cedar Shake On A Roof From Attic

    How To Identify Cedar Shake On A Roof From Attic

    Have you ever looked up into your attic and wondered exactly what is protecting your home from the elements above? Identifying the roofing material without climbing onto the roof can be tricky, but it is essential for proper maintenance and insurance purposes. If you are trying to figure out how to identify cedar shake on a roof from attic, this guide will walk you through the specific visual and sensory clues you need to look for.

    Cedar shake roofs are prized for their natural beauty and durability, but they require different care than asphalt shingles or metal roofing. Knowing what you have allows you to spot leaks early, manage ventilation needs, and plan for eventual replacement. Let’s dive into the attic and solve this mystery together.

    Why Identifying Your Roof Material Matters

    Before we grab our flashlights, it is important to understand why this identification process is critical. Many homeowners assume their roof is asphalt because it is the most common material in the United States. However, cedar shakes offer unique insulation properties and aesthetic value that affect your home’s energy efficiency and resale value.

    According to industry data, wood roofing can last 30 to 50 years if properly maintained, significantly longer than standard asphalt shingles. Misidentifying your roof could lead to using the wrong cleaning chemicals or ignoring specific ventilation requirements that prevent mold growth. By confirming your roof type from the safety of your attic, you save time, money, and potential safety risks associated with climbing ladders.

    Visual Clues: What Does Cedar Look Like from Below?

    The most reliable way to determine if you have cedar shakes is by observing the underside of the roof deck. When you enter your attic, turn off any bright overhead lights if possible and use a focused flashlight. This helps highlight textures and gaps that ambient light might wash out.

    1. Check for Irregular Gaps and Light Penetration

    Unlike asphalt shingles, which are installed over a solid sheathing (usually plywood or OSB), cedar shakes are often installed over spaced sheathing boards.

    • Look for gaps: If you see daylight filtering through narrow, consistent gaps between wooden boards, this is a strong indicator of a wood shake roof. These gaps allow the wood to breathe and dry out after rain.
    • Board spacing: The boards underneath are typically 1×4 or 1×6 inch lumber, spaced anywhere from 1/2 inch to several inches apart, depending on the length of the shake.

    2. Examine the Texture and Grain

    If your attic has solid sheathing (plywood) instead of spaced boards, do not rule out cedar yet. Some modern installations use solid decking with an underlayment. In this case, look for:

    • Nail patterns: Cedar shakes are hand-nailed. Look for rows of nails that may appear slightly irregular compared to the precise, machine-gun pattern of asphalt shingles.
    • Wood grain visibility: If the sheathing is thin or if there are areas where the underlayment is damaged, you might see the rough, textured backside of the shakes themselves. Cedar backs are often sawn or split, showing a distinct woody texture rather than the smooth, granular surface of asphalt.

    3. Color and Aging Signs

    Fresh cedar is a warm, reddish-brown. However, from the attic, you are looking at the underside.

    • Untreated wood: The underside usually remains lighter than the top, often a pale tan or cream color.
    • Weathering: If the roof is older, you might see dark stains or water marks. Cedar is prone to holding moisture if ventilation is poor, so look for dark streaks running along the rafters or sheathing.

    The Smell Test: A Unique Identifier

    One of the most underrated methods for how to identify cedar shake on a roof from attic is using your sense of smell. This is particularly effective in warmer weather or after a rainstorm.

    Cedar contains natural oils, such as thujaplicins, which give it a distinct, aromatic scent. When the roof heats up during the day or gets wet, these oils are released.

    • Enter the attic on a hot day: If you detect a faint, woody, slightly sweet aroma that resembles a pencil sharpener or a sauna, it is likely cedar.
    • Compare with other materials: Asphalt shingles emit a tar-like, petroleum smell when hot. Metal roofs are odorless. Clay tiles have an earthy, dusty smell. If the air smells like fresh lumber or pine forest, you are likely dealing with cedar.

    Pro Tip: If you cannot smell anything, try rubbing a small, inconspicuous area of exposed wood (if visible) with your finger. The friction generates heat and may release the scent.

    How To Identify Cedar Shake On A Roof From Attic

    Structural Indicators: Rafters and Ventilation

    The structure of your attic can provide secondary clues about your roofing material. Cedar shake roofs are heavier than asphalt but lighter than clay tile or slate. However, the installation requirements differ significantly.

    Ventilation Requirements

    Cedar roofs require superior ventilation to prevent rot and mold.

    • Soffit and Ridge Vents: Check if your attic has extensive soffit vents and a continuous ridge vent. While all roofs benefit from this, cedar roofs depend on it. If you see large, prominent ventilation systems that seem excessive for a standard home, it might be designed for a wood roof.
    • Airflow: Place your hand near the eaves. You should feel a steady flow of air moving upward. Poor airflow in a cedar roof attic often leads to visible mold on the underside of the sheathing.

    Weight and Support

    While difficult to judge visually, you can look for signs of structural reinforcement.

    • Heavier Rafters: In older homes with original cedar roofs, rafters may be larger (e.g., 2×8 or 2×10) compared to the 2x6s often used for lighter asphalt roofs. This is not a definitive rule, but it can support other evidence.

    Comparison: Cedar Shake vs. Asphalt Shingles from the Attic

    To help you distinguish between the two most common roofing types, refer to the table below.

    FeatureCedar Shake RoofAsphalt Shingle Roof
    Underside ViewOften shows spaced boards with light gapsSolid plywood/OSB sheathing, no light gaps
    SmellWoody, aromatic, natural oil scentTar-like, petroleum, or no scent
    Nail PatternIrregular, hand-driven nailsUniform, machine-driven nail lines
    VentilationCritical; often has extensive ventingStandard ventilation suffices
    Moisture SignsProne to dark water stains/mold if wetLess prone to visible underside staining

    Step-by-Step Guide to Confirmation

    If you are still unsure, follow this systematic approach to confirm your findings.

    1. Safety First: Wear a N95 mask, gloves, and sturdy shoes. Attics can contain insulation fibers, dust, and sharp nails. Ensure you have a stable footing on the joists, not the drywall ceiling.
    2. Timing: Choose a sunny day around midday. The heat will help activate the scent of the cedar and make light gaps more visible.
    3. Locate the Eaves: Start at the edge of the roof where it meets the exterior wall. This is often where the roof structure is most visible.
    4. Inspect the Sheathing: Look up. Do you see solid wood panels or individual boards with gaps? Gaps suggest cedar.
    5. Check for Underlayment: If you see black felt paper (tar paper) stapled to spaced boards, it is almost certainly cedar or wood shingles. Asphalt shingles are nailed directly to solid sheathing.
    6. Sniff the Air: Take a deep breath. Does it smell like wood or tar?
    7. Consult External Resources: For more detailed technical specifications on wood roofing standards, you can refer to the Cedar Shake & Shingle Bureau or general construction guidelines on Wikipedia.

    FAQ Section

    1. Can I identify cedar shakes if my attic has insulation covering the roof deck?

    It is more challenging but not impossible. Look for areas where insulation is thin or missing, such as near eaves, vents, or plumbing stacks. You may also be able to gently move insulation aside in a non-critical area to peek at the sheathing. Always wear protective gear when handling insulation.

    2. What if I see plywood but still suspect cedar?

    Some modern building codes require solid sheathing even for cedar roofs, especially in high-wind or fire-prone areas. In this case, rely on the smell test and the nail pattern. Also, check the exterior from the ground using binoculars. Cedar shakes have a thick, textured, and irregular appearance that is distinct from the flat, uniform look of asphalt.

    3. Is it dangerous to go into the attic to check my roof?

    Attics can pose risks such as falls through the ceiling, exposure to mold, or contact with electrical wiring. If you are uncomfortable or if your attic is inaccessible, consider hiring a professional roofer or home inspector. They can identify the material safely and provide a detailed report.

    4. How old does a cedar roof need to be to lose its smell?

    Cedar retains its aromatic oils for many years, but the scent may fade after 10–15 years, especially if the roof has been treated with sealants or fire retardants. If the roof is very old and odorless, rely on visual cues like spaced sheathing and nail patterns.

    5. Why do I see white powder on the wood in my attic?

    White powder could be efflorescence (mineral deposits from moisture) or mold spores. Cedar is susceptible to mold if ventilation is poor. If you see this, it confirms you have a wood product, but it also indicates a moisture problem that needs immediate attention to prevent structural damage.

    6. Can I use this method to identify wood shingles vs. cedar shakes?

    From the attic, it is difficult to distinguish between wood shingles (machine-cut, uniform thickness) and wood shakes (hand-split, tapered). Both are installed similarly with spaced sheathing. To differentiate them, you would need to inspect the roof from the exterior. Shakes are thicker and more rustic, while shingles are smoother and thinner.

    Conclusion

    Learning how to identify cedar shake on a roof from attic is a valuable skill for any homeowner. By combining visual inspection of sheathing gaps, analyzing nail patterns, and using the unique scent of cedar, you can confidently determine your roofing material without climbing a ladder. Remember, cedar roofs are an investment in natural beauty and longevity, but they demand proper ventilation and maintenance.

    If you discover you have cedar shakes, take pride in your home’s character! Share this guide with friends or neighbors who might be curious about their own roofs. Knowledge is the first step toward better home care. Have you identified your roof type? Let us know in the comments or share your experience on social media!

  • How Many Layers Are on Your Roof?

    How Many Layers Are on Your Roof?

    Have you ever looked up at your home and wondered what exactly is protecting your family from the elements? It is a common concern for homeowners, especially when planning renovations or noticing minor leaks. Knowing how many layers of materials does your roof currently have is not just a trivia question; it is a critical factor in determining your next steps for repair, replacement, and overall home safety.

    In this guide, we will walk you through everything you need to know about roof layers, building codes, and why this specific detail matters more than you might think.

    Why Does the Number of Roof Layers Matter?

    You might be thinking, “If one layer protects my home, wouldn’t two be even better?” This is a common misconception. While it may seem like extra padding, multiple layers of roofing material can actually cause significant structural and financial issues.

    Structural Weight Concerns

    Every roofing material has a weight. Asphalt shingles, for example, weigh approximately 2 to 4 pounds per square foot. When you add a second or third layer, you are doubling or tripling that load. Most residential roofs are engineered to support a specific dead load (the weight of the structure itself) plus a live load (snow, rain, workers). Exceeding this limit can lead to sagging rafters, cracked drywall inside your home, or in extreme cases, structural failure.

    Heat Trapping and Energy Efficiency

    Multiple layers trap heat. In the summer, this can cause your attic temperature to skyrocket, forcing your HVAC system to work harder. This leads to higher energy bills and can prematurely age your roofing materials from the inside out due to excessive thermal cycling.

    The “Masking” Effect

    New shingles installed over old ones often conform to the uneven surface of the underlying layer. If the bottom layer has curled, missing, or damaged shingles, the new layer will mirror these imperfections. This prevents proper sealing and makes the new roof look wavy or unprofessional shortly after installation.

    How to Determine Your Current Roof Layers

    Unless you have detailed records from previous renovations, figuring out how many layers of materials does your roof currently have requires a bit of detective work. Here are three reliable methods to find out.

    1. Check Your Home Inspection Report

    If you bought your home recently, your pre-purchase home inspection report is the best place to start. Inspectors often note the number of shingle layers visible at the edges, in the attic, or around vent pipes. Look for sections labeled “Roofing” or “Exterior.”

    2. Visual Inspection from the Ground

    Grab a pair of binoculars and walk around your house. Look closely at the edge of the roof (the rake edge) or around chimneys and vent stacks. You may be able to see the distinct thickness of the shingle layers. A single layer of asphalt shingle is relatively thin, while two layers will appear noticeably thicker and may have a “step-down” appearance where the layers meet.

    3. Professional Roof Inspection

    The most accurate method is hiring a licensed roofing contractor. They can safely access the roof and lift a corner of a shingle near a vent or edge to count the layers directly. This is highly recommended if you are considering selling your home or applying for insurance claims.

    What Do Building Codes Say About Multiple Layers?

    Regulations vary by location, but most jurisdictions in the United States follow guidelines similar to the International Residential Code (IRC). Understanding these rules is vital before you decide to overlay new shingles.

    Jurisdiction TypeTypical RuleException
    Most US StatesMax 2 layers of asphalt shinglesNone generally allowed for 3rd layer
    High Wind ZonesOften require tear-off to deckTo ensure proper nailing adhesion
    Heavy Snow AreasStrict weight limits enforcedMay prohibit 2 layers entirely

    According to general building standards, you are typically allowed to have no more than two layers of asphalt shingles. If your roof already has two layers, you must tear off all existing materials down to the roof deck before installing new shingles. Ignoring this can result in failed inspections, voided warranties, and difficulties when selling your property.

    For more detailed information on building standards, you can refer to the International Code Council or general construction principles outlined on Wikipedia.

    How Many Layers Of Materials Does Your Roof Currently Have

    Tear-Off vs. Overlay: Making the Right Choice

    When it is time for a new roof, you have two options: a tear-off (removing old materials) or an overlay (installing over existing materials). Here is a comparison to help you decide.

    Advantages of a Full Tear-Off

    • Inspection of Decking: Removing old shingles allows the roofer to inspect the wood decking for rot, mold, or water damage. Fixing these issues early prevents costly interior repairs later.
    • Better Warranty Coverage: Most major shingle manufacturers (like GAF, Owens Corning, and CertainTeed) offer stronger warranties when their products are installed on a clean deck.
    • Improved Curb Appeal: A fresh start ensures a flat, uniform surface that looks professional and increases home value.
    • Proper Ventilation: It allows for the installation of modern ice and water shields and proper underlayment, which are crucial for longevity.

    Advantages of an Overlay

    • Lower Initial Cost: You save on labor costs associated with hauling away debris and removing old nails.
    • Faster Installation: Without the tear-off process, the job can be completed in half the time.
    • Less Mess: There is significantly less debris and dust generated during the project.

    The Verdict

    While an overlay is cheaper upfront, a tear-off is almost always the better long-term investment. It addresses hidden problems and ensures your new roof lasts its full expected lifespan (typically 20–30 years for asphalt shingles).

    Step-by-Step: What Happens During a Roof Replacement?

    If you determine that you have too many layers or damaged decking, here is what a professional replacement process looks like.

    1. Setup and Protection: The crew will cover your landscaping, windows, and AC units with tarps to protect them from falling debris.
    2. Removal of Old Materials: Workers will strip off the existing shingles, underlayment, and flashing. All nails are removed or hammered flat.
    3. Deck Inspection: The exposed wood deck is inspected for soft spots, rot, or damage. Any compromised boards are replaced.
    4. Installation of Underlayment: A water-resistant barrier (ice and water shield) is installed along the eaves and valleys, followed by synthetic underlayment over the rest of the deck.
    5. Flashing Installation: New metal flashing is installed around chimneys, vents, and walls to prevent water intrusion.
    6. Shingle Installation: New shingles are nailed down according to manufacturer specifications, starting from the bottom edge and working up.
    7. Cleanup: The site is thoroughly cleaned using magnetic rollers to pick up stray nails, and all debris is hauled away.

    FAQ: Common Questions About Roof Layers

    1. Can I put a third layer of shingles on my roof?

    No. In nearly all US jurisdictions, building codes prohibit installing a third layer of asphalt shingles. The weight and inability to properly nail through three layers make it unsafe and non-compliant.

    2. Does having two layers void my homeowner’s insurance?

    Not necessarily, but it can complicate claims. Some insurers may deny coverage for water damage if they determine that improper installation over multiple layers contributed to the leak. Always disclose the number of layers to your insurance provider.

    3. How much does it cost to tear off an old roof?

    The cost varies by region and roof size, but expect to pay between $1,000 and $3,000 for tear-off and disposal fees on an average-sized home. This is usually included in the total quote for a new roof installation.

    4. Will a roof overlay affect my home’s resale value?

    Yes, potentially negatively. Home inspectors will note multiple layers, and savvy buyers may request a price reduction to account for the eventual need for a full tear-off. A single-layer roof is more attractive to buyers.

    5. How can I tell if my roof has only one layer without climbing up?

    Look at the vent pipes protruding from the roof. If the flashing collar around the pipe sits flush with the shingles, it is likely a single layer. If there is a visible “step” or gap between the shingles and the flashing, there may be multiple layers.

    6. Is it cheaper to overlay shingles?

    Yes, initially. You save on labor and disposal fees. However, because the lifespan of the new shingles may be reduced due to heat trapping and uneven surfaces, the cost-per-year of protection may actually be higher.

    Conclusion

    Knowing how many layers of materials does your roof currently have is essential for making informed decisions about your home’s maintenance. While adding a second layer might seem like a quick fix, it often leads to higher long-term costs, potential code violations, and structural risks.

    If you suspect your roof has multiple layers, schedule a professional inspection today. It is better to address these issues proactively than to deal with unexpected leaks or structural damage later.

    Found this guide helpful? Share it with your neighbors on Facebook or Twitter to help them protect their homes too! Don’t forget to bookmark this page for future reference as you plan your home improvement projects.

  • What Is The Car Part Between Door And Roof Called?

    What Is The Car Part Between Door And Roof Called?

    Have you ever stood next to your vehicle, pointed at the vertical support separating the front and rear windows, and struggled to find the right word for it? You are not alone; many drivers know their engines but get stuck on basic body terminology. If you have been asking yourself, “What is the car part between door and roof called,” the answer is the B-pillar.

    Understanding this component is more than just trivia. It is essential for communicating with mechanics, understanding crash safety ratings, and appreciating the engineering that keeps you safe on the road. In this guide, we will break down exactly what the B-pillar is, why it matters, and how it differs from other structural parts of your car.

    Defining the B-Pillar: More Than Just a Post

    The vertical structure located between the front and rear doors (or between the front door and the rear quarter panel in two-door cars) is technically known as the B-pillar.

    In automotive anatomy, pillars are labeled alphabetically from front to back:

    • A-Pillar: Supports the windshield and connects to the front fenders.
    • B-Pillar: The central support between the front and rear side windows.
    • C-Pillar: Supports the rear window and connects to the rear fenders.
    • D-Pillar: Found only on larger vehicles like SUVs and station wagons, supporting the very back of the vehicle.

    The B-pillar is arguably the most critical structural element in the side profile of a modern sedan or SUV. It serves as the anchor point for the front door’s rear hinge and the rear door’s front hinge. Without it, the roof would lack central support, and the doors would have no rigid frame to latch against securely.

    Why the Name “B-Pillar”?

    The naming convention is straightforward. Engineers needed a standardized way to refer to these vertical supports across different vehicle models. Since the A-pillar is at the front, the next logical letter is B. This standardization helps manufacturers, repair shops, and insurance adjusters communicate clearly about damage and repairs.

    The Critical Role of the B-Pillar in Safety

    When you ask, “What is the car part between door and roof called,” you are actually identifying one of the most important safety features in your vehicle. The B-pillar is not just a cosmetic frame for your windows; it is a primary load-bearing structure designed to protect occupants during collisions.

    Side-Impact Protection

    In a side-impact collision (often called a T-bone accident), the B-pillar is the first line of defense. It is engineered to absorb and distribute kinetic energy away from the passengers. Modern B-pillars are often reinforced with ultra-high-strength steel (UHSS) or even boron steel, which is significantly stronger than traditional mild steel.

    According to data from the Insurance Institute for Highway Safety (IIHS), the strength of the B-pillar directly correlates with survival rates in side-impact crashes. A weak B-pillar can intrude into the cabin, causing severe injury to the torso and head.

    Roof Crush Resistance

    The B-pillar also plays a vital role in preventing roof collapse during rollover accidents. It works in tandem with the A and C pillars to create a “safety cage” around the passenger compartment. This structural integrity ensures that even if the vehicle flips, there is enough space to protect the occupants’ heads.

    Expert Insight: “The B-pillar is the backbone of the passenger cell’s lateral stiffness. Its design balances the need for visibility with the non-negotiable requirement for crashworthiness.” — Automotive Structural Engineer, Society of Automotive Engineers (SAE).

    What Is The Car Part Between Door And Roof Called

    B-Pillar vs. Other Pillars: A Quick Comparison

    To fully understand the B-pillar, it helps to see how it compares to its neighbors. Here is a breakdown of the differences in function and location.

    FeatureA-PillarB-PillarC-Pillar
    LocationFront, framing the windshieldMiddle, between front/rear doorsRear, framing the back window
    Primary FunctionWindshield support, airbag housingDoor hinge support, side-impact protectionRear window support, trunk/hatch structure
    Visibility ImpactHigh (can create blind spots)Medium (divides side view)Low (rear quarter view)
    Common IssuesRust at base, windshield leaksLatch alignment issues, rust in seamsWater leakage, trim rattling

    Common Issues and Maintenance Tips for Your B-Pillar

    While the B-pillar is built to be durable, it is not immune to wear and tear. Knowing what to look for can save you from costly repairs down the line.

    1. Rust and Corrosion

    Because the B-pillar is often covered by interior trim and exterior moldings, moisture can sometimes get trapped inside. This is especially common in older vehicles or in regions with heavy road salt usage.

    • Check: Look for bubbling paint near the door hinges or musty smells inside the cabin.
    • Prevention: Keep drainage channels clear and wash your car regularly, paying attention to door jambs.

    2. Door Alignment Problems

    If your front or rear door starts to sag, doesn’t latch properly, or makes a clunking noise when closing, the issue might stem from the B-pillar hinges or the pillar itself shifting slightly due to stress.

    • Solution: Have a professional inspect the hinge pins and the pillar structure. Do not attempt to force a misaligned door, as this can damage the striker plate on the B-pillar.

    3. Trim and Seal Degradation

    The rubber weatherstripping that runs along the B-pillar ensures your car remains watertight and quiet. Over time, UV exposure and temperature changes can cause this rubber to crack or harden.

    • Fix: Replace worn weatherstripping to prevent wind noise and water leaks. This is a relatively inexpensive DIY fix for most car owners.

    How to Identify the B-Pillar on Different Vehicle Types

    Not all cars look the same, and the visibility of the B-pillar can vary depending on the body style.

    • Sedans and SUVs: The B-pillar is usually prominent and painted black or body-colored. It is clearly visible between the front and rear doors.
    • Hardtop Coupes: Some sporty coupes feature a “pillarless” design when the windows are rolled down, but they still have a structural B-pillar integrated into the door frame or roofline for safety.
    • Convertibles: Traditional convertibles often lack a fixed B-pillar to allow for an open-air experience. Instead, they use reinforced door frames and deployable roll bars to compensate for the missing structural support. For more details on convertible safety structures, you can refer to Wikipedia’s article on automobile safety.

    Frequently Asked Questions (FAQ)

    1. Can I remove the B-pillar from my car?

    No. The B-pillar is a critical structural component. Removing it would compromise the vehicle’s integrity, making it unsafe to drive. It is illegal in most jurisdictions to modify structural safety elements without professional engineering certification.

    2. Why is my B-pillar making a squeaking noise?

    Squeaking usually comes from the rubber weatherstripping rubbing against the glass or the door frame. Applying a silicone-based lubricant to the rubber seals often resolves this issue. If the noise persists, check for loose interior trim panels.

    3. Does the B-pillar contain side airbags?

    In many modern vehicles, yes. Side-curtain airbags are often housed in the roof rail above the B-pillar, while side-impact airbags may be mounted within the B-pillar itself or the seat. Always consult your owner’s manual for specific airbag locations.

    4. How much does it cost to repair a damaged B-pillar?

    Repair costs vary widely depending on the extent of the damage. Minor dent repair might cost $200–$500, while structural replacement due to a collision can range from $1,500 to $3,000 or more, as it involves welding and realigning the frame.

    5. What is the difference between a B-pillar and a door post?

    They are essentially the same thing. “Door post” is a colloquial term, while “B-pillar” is the technical industry standard. Both refer to the vertical support between the front and rear doors.

    6. Do electric vehicles (EVs) have B-pillars?

    Yes, EVs have B-pillars. In fact, because EV batteries are located in the floor, the upper structure (including the B-pillar) must be extremely rigid to protect occupants from side impacts and to maintain the integrity of the high-voltage system casing.

    Conclusion

    So, the next time someone asks, “What is the car part between door and roof called,” you can confidently answer: The B-pillar.

    This unassuming vertical post is a marvel of modern engineering, balancing aesthetics, functionality, and, most importantly, safety. From anchoring your doors to protecting you in a side-impact collision, the B-pillar works silently every time you drive. Understanding its role helps you appreciate your vehicle’s design and maintain it better.

    Did you find this guide helpful? Share this article with your fellow car enthusiasts on social media to help them master their automotive anatomy!