Category: preventive maintenance

  • Lilly Miller Moss Out 27oz: The Ultimate Roof Cleaner

    Lilly Miller Moss Out 27oz: The Ultimate Roof Cleaner

    Have you ever looked up at your roof or walked across your patio only to be greeted by unsightly green patches of moss and slippery algae? It is a common frustration for homeowners in humid climates, but ignoring it can lead to costly structural damage over time. Fortunately, there is a powerful solution designed specifically for this purpose: Lilly Miller Moss Out For Roofs And Walks Concentrate 27Oz. This concentrated formula is not just a cleaner; it is a preventative treatment that restores the aesthetic appeal of your home while protecting its integrity.

    In this comprehensive guide, we will explore everything you need to know about this product. From understanding how it works to step-by-step application instructions, we aim to provide you with the knowledge to tackle moss growth confidently and safely.

    What Is Lilly Miller Moss Out and How Does It Work?

    Before diving into the application process, it is crucial to understand the science behind the product. Many homeowners mistakenly believe that moss is merely a surface-level cosmetic issue. However, moss roots can penetrate shingles, wood, and concrete, causing moisture retention that accelerates decay.

    Lilly Miller Moss Out For Roofs And Walks Concentrate 27Oz utilizes a potent blend of active ingredients designed to kill moss, algae, lichen, and mildew on contact. The primary mechanism involves disrupting the cellular structure of the plant life, causing it to dry out and die within days. Unlike pressure washing, which can damage roofing materials by forcing water under shingles, this chemical approach is gentle on surfaces but tough on organic growth.

    The “Concentrate” aspect of the 27-ounce bottle is particularly significant. It allows for customization based on the severity of the infestation. For light maintenance, a diluted mix suffices, while heavy moss coverage may require a stronger concentration. This versatility makes it a cost-effective choice compared to pre-mixed solutions that offer less flexibility.

    According to general horticultural principles, maintaining a pH balance that discourages organic growth is key to long-term prevention. You can read more about the biological nature of moss and its impact on structures on Wikipedia.

    Why Choose the 27oz Concentrate Over Other Cleaners?

    With countless cleaning products available on the market, why should you specifically choose this brand and size? The answer lies in efficiency, coverage, and ease of use.

    Key Benefits at a Glance

    • High Coverage Area: One 27oz bottle can cover a significant square footage when mixed correctly, making it ideal for average-sized residential roofs and walkways.
    • No Scrubbing Required: One of the biggest selling points is that it requires no physical scrubbing. You spray it on, let it work, and rinse it off later. This saves hours of labor and reduces the risk of personal injury from climbing ladders.
    • Preventative Action: It does not just kill existing moss; it leaves a residue that inhibits new growth for several months, depending on weather conditions.
    • Safe for Most Surfaces: When used as directed, it is safe for asphalt shingles, wood shakes, tile, brick, stone, and concrete.

    Comparison: Chemical Treatment vs. Pressure Washing

    FeatureLilly Miller Moss OutPressure Washing
    Risk of DamageLow (Chemical action)High (Water force can lift shingles)
    Labor IntensityLow (Spray and wait)High (Physical effort required)
    LongevityMonths of preventionImmediate clean, no prevention
    Water UsageMinimalExcessive
    Cost EfficiencyHigh (Concentrate lasts longer)Variable (Equipment rental/purchase)

    As seen in the table above, the chemical approach offered by Lilly Miller Moss Out For Roofs And Walks Concentrate 27Oz provides a safer and more sustainable solution for long-term home maintenance.
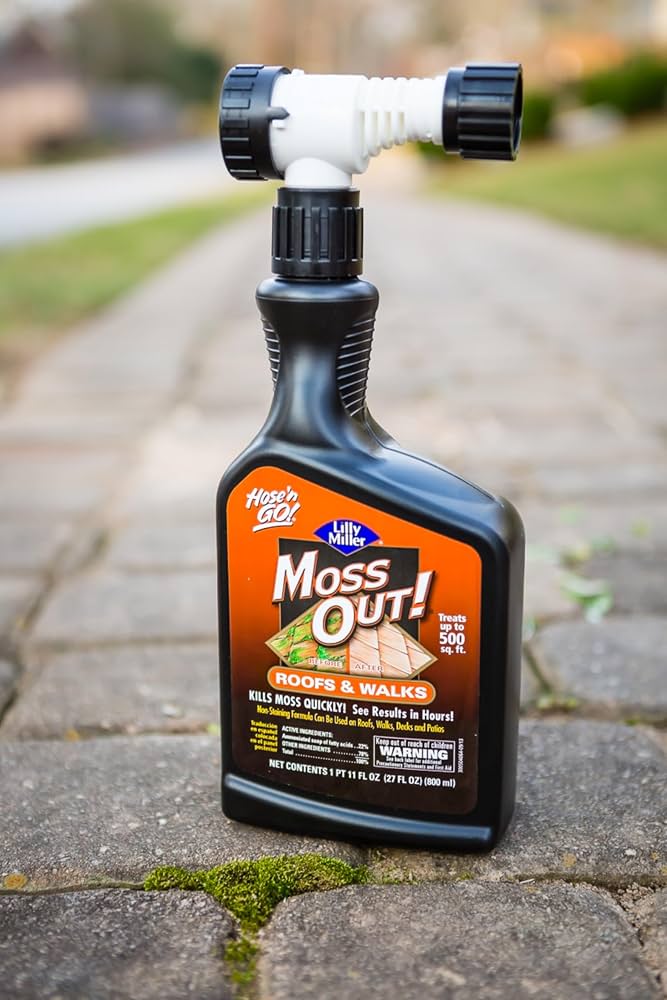
    Lilly Miller Moss Out For Roofs And Walks Concentrate 27Oz

    Step-by-Step Guide: How to Apply Correctly

    Proper application is critical to achieving the best results. Incorrect mixing or application can lead to ineffective cleaning or potential damage to surrounding plants. Follow these detailed steps to ensure success.

    Step 1: Preparation and Safety

    Safety should always be your top priority. Wear protective gear, including:

    • Rubber gloves
    • Safety goggles
    • Long-sleeved clothing
    • Non-slip shoes if working on walks

    Ensure the weather forecast predicts dry conditions for at least 24 hours after application. Rain will wash away the concentrate before it has time to work.

    Step 2: Mixing the Solution

    For the Lilly Miller Moss Out For Roofs And Walks Concentrate 27Oz, the standard mixing ratio is typically 1 part concentrate to 4 parts water for moderate growth. However, always check the specific label instructions as formulations can update.

    1. Fill a garden sprayer with 1 gallon of water.
    2. Add the recommended amount of concentrate (usually around 6-8 ounces per gallon for heavy moss).
    3. Shake or stir gently to mix. Do not use metal containers as the chemicals may react.

    Step 3: Application Technique

    Start from the bottom of the roof or walkway and work your way up. This prevents streaking and ensures even coverage.

    • For Roofs: Spray evenly until the surface is wet but not dripping excessively. Pay special attention to shaded areas where moss thrives.
    • For Walks: Apply directly to the stained areas. For porous concrete, you may need to saturate the surface slightly more.

    Step 4: Waiting Period

    Allow the solution to sit for 24 to 48 hours. You will notice the moss turning brown or yellow, indicating it is dying. Do not rinse immediately. The drying process is part of the killing mechanism.

    Step 5: Rinsing and Cleanup

    After the waiting period, rinse the area with a garden hose. Use low pressure to avoid damaging shingles. The dead moss should wash away easily. If some residues remain, a soft-bristle brush can be used gently, but often the rain or hose rinse is sufficient.

    Common Mistakes to Avoid

    Even with a high-quality product like Lilly Miller Moss Out For Roofs And Walks Concentrate 27Oz, user error can hinder results. Here are the most common pitfalls:

    1. Applying in Direct Sunlight: Extreme heat can cause the solution to evaporate too quickly, reducing its effectiveness. Apply in the early morning or late afternoon.
    2. Ignoring Surrounding Plants: While the product is designed for hardscapes, it can harm delicate garden plants. Wet down nearby grass and shrubs with plain water before application to create a barrier, and rinse them thoroughly afterward.
    3. Using Too Little Product: Skimping on the concentrate to save money often leads to incomplete kills, requiring re-application sooner. Stick to the recommended ratios.
    4. Neglecting Gutters: Moss often starts in gutters. Ensure you apply the solution there as well to prevent blockages and water backup.

    Frequently Asked Questions (FAQ)

    1. How long does it take for the moss to die?

    You will typically see color changes within 24 to 48 hours. Complete drying and detachment of the moss may take up to two weeks, depending on the thickness of the growth and weather conditions.

    2. Is Lilly Miller Moss Out safe for pets?

    Once the product has dried completely, it is generally safe for pets. However, keep dogs and cats away from the treated area during the application and the initial 24-hour drying period. Always rinse the area thoroughly before allowing pets back onto walks or roofs.

    3. Can I use this on my wooden deck?

    Yes, Lilly Miller Moss Out For Roofs And Walks Concentrate 27Oz is safe for wood decks. However, test a small, inconspicuous area first to ensure it does not discolor any specific stain or finish you may have applied.

    4. How often should I apply this product?

    For preventative maintenance, applying once a year is usually sufficient. In areas with high humidity or heavy shade, you may need to apply it every six months. Regular inspection of your roof and walks will help determine the optimal frequency.

    5. What if it rains shortly after application?

    If it rains within 24 hours of application, the effectiveness may be reduced. You may need to reapply the product once the surface has dried completely. Check the weather forecast carefully before starting your project.

    6. Does this product remove black streaks caused by algae?

    Yes, the formula is effective against Gloeocapsa magma, the blue-green algae responsible for black streaks on roofs. It may take slightly longer to fade completely compared to green moss, but the results are typically visible within a few weeks.

    Conclusion

    Maintaining a clean and moss-free home exterior is not just about curb appeal; it is about protecting your investment. Lilly Miller Moss Out For Roofs And Walks Concentrate 27Oz offers a reliable, efficient, and user-friendly solution to combat organic growth. By following the proper application steps and safety guidelines, you can restore the beauty of your roof and walkways without the hassle of intense physical labor or expensive professional services.

    Remember, consistency is key. Regular inspections and timely applications will keep your home looking pristine for years to come. If you found this guide helpful, please share it with your friends and neighbors on social media. Helping others maintain their homes creates a safer and more beautiful community for everyone.

    Disclaimer: Always read and follow the manufacturer’s label instructions carefully. This article is for informational purposes and does not replace professional advice for severe structural issues.

  • Keep Your Roof In Top Shape With Our Maintenance Services

    Keep Your Roof In Top Shape With Our Maintenance Services

    Your roof is the unsung hero of your home, silently battling rain, wind, sun, and snow every single day. Yet, most homeowners only think about it when a leak appears on their ceiling or a shingle ends up in their yard. Ignoring minor wear and tear can lead to catastrophic structural damage and expensive emergency repairs down the line. That is why it is crucial to Keep Your Roof In Top Shape With Our Maintenance Services, ensuring your home remains safe, dry, and energy-efficient for years to come.

    In this comprehensive guide, we will explore why regular maintenance is not just an option but a necessity. We will break down exactly what professional maintenance entails, answer your most pressing questions, and provide actionable steps you can take to protect your biggest investment. Whether you have asphalt shingles, metal roofing, or tile, understanding the lifecycle of your roof is the first step toward longevity.


    Why Is Regular Roof Maintenance Critical for Homeowners?

    Many homeowners operate under the misconception that a new roof is “set and forget.” However, data suggests otherwise. According to industry standards, a well-maintained roof can last 20โ€“30% longer than a neglected one. But why exactly does maintenance matter so much?

    Preventing Small Issues from Becoming Big Problems

    A tiny crack in a shingle or a small gap in flashing might seem insignificant. However, water is persistent. Over time, that small entry point allows moisture to seep into the underlayment, rotting the wood decking and compromising the structural integrity of your attic. By addressing these issues early, you save thousands of dollars in potential restoration costs.

    Enhancing Energy Efficiency

    Did you know that a damaged or poorly insulated roof can significantly increase your utility bills? When your roofโ€™s ventilation system is blocked by debris or its insulation is compromised by moisture, your HVAC system has to work harder to regulate indoor temperatures. Regular maintenance ensures your attic breathes correctly, keeping your home cooler in summer and warmer in winter.

    Protecting Warranty Validity

    Most roofing manufacturers require proof of regular maintenance to keep warranties valid. If you file a claim for a defect but cannot show that you performed routine inspections and cleaning, the manufacturer may deny your request. Professional documentation from our services provides the paper trail you need to stay protected.


    What Does Professional Roof Maintenance Include?

    When you hire professionals to Keep Your Roof In Top Shape With Our Maintenance Services, you are not just paying for someone to look at your house. You are investing in a thorough, multi-point inspection and care protocol. Here is what a comprehensive service typically covers:

    1. Comprehensive Visual Inspection

    We examine every inch of your roof surface. This includes checking for:

    • Missing, cracked, or curling shingles.
    • Granule loss (which indicates aging).
    • Damaged flashing around chimneys, vents, and skylights.
    • Signs of moss, algae, or mold growth.

    2. Gutter and Downspout Cleaning

    Clogged gutters are the number one cause of water backup under roof edges. We remove leaves, twigs, and sediment to ensure water flows freely away from your foundation.

    3. Debris Removal

    Branches, pine needles, and other debris trap moisture against the roof surface. We safely remove this material to prevent decay and pest infestations.

    4. Ventilation Check

    Proper airflow is vital. We inspect ridge vents, soffit vents, and turbine vents to ensure they are not blocked by nests or dirt.

    FeatureDIY InspectionProfessional Maintenance
    SafetyHigh risk of falls/injuryInsured, trained professionals
    ThoroughnessSurface level onlyIncludes attic, underside, and flashings
    ToolsBinoculars/LadderDrones, moisture meters, safety gear
    DocumentationNoneDetailed report with photos
    Keep Your Roof In Top Shape With Our Maintenance Services

    How Often Should You Schedule Roof Inspections?

    The frequency of maintenance depends on several factors, including your location, the age of your roof, and local weather conditions. However, general best practices recommend the following schedule:

    Twice a Year: Spring and Fall

    Spring inspections check for damage caused by winter snow and ice dams. Fall inspections prepare your roof for the harsh winter months ahead. This bi-annual rhythm is the gold standard for preventative care.

    After Severe Weather Events

    If your area experiences hailstorms, hurricanes, or heavy winds, schedule an immediate inspection. Hail can bruise shingles without breaking them, leading to premature failure that isn’t visible from the ground.

    Before Buying or Selling a Home

    A professional roof certification can be a powerful negotiating tool. It assures buyers that the roof is in good condition, potentially speeding up the sale process.


    Can I Maintain My Roof Myself, or Do I Need a Pro?

    While some minor tasks can be handled by homeowners, major maintenance requires professional expertise. Letโ€™s break down the pros and cons.

    DIY Tasks (Low Risk)

    • Visual Checks from the Ground: Use binoculars to spot missing shingles.
    • Cleaning Gutters: If you have a single-story home and are comfortable on a ladder, this is manageable. Always use a sturdy ladder and have a spotter.
    • Trimming Overhanging Branches: Keep trees trimmed back at least 6โ€“10 feet from the roof edge to prevent physical damage and shade-induced moss growth.

    Professional Tasks (High Risk/Technical)

    • Walking on the Roof: Sloped roofs are dangerous. Professionals use harnesses and proper footwear.
    • Identifying Subtle Damage: Experts know what to look for beneath the surface, such as soft spots in the decking or rusted nail heads.
    • Repairing Flashing: Improperly sealed flashing is a leading cause of leaks. This requires specific sealants and techniques.

    For more detailed information on roofing materials and their lifespans, you can refer to this Wikipedia article on Roofing, which provides a broad overview of global standards and material types.


    Step-by-Step Guide: What Happens During Our Service Visit?

    To demystify the process, here is a step-by-step look at how we execute our maintenance plan to Keep Your Roof In Top Shape With Our Maintenance Services:

    1. Initial Consultation: We discuss any concerns you have, such as past leaks or stains on interior ceilings.
    2. Safety Setup: Our team sets up ladders, safety harnesses, and perimeter caution tape.
    3. Exterior Inspection: We walk the roof (if safe) or use drone technology to capture high-resolution images of hard-to-reach areas.
    4. Attic Inspection: We enter your attic to check for daylight coming through cracks, water stains, or inadequate ventilation.
    5. Cleaning Phase: We gently remove debris using leaf blowers or soft-bristle brooms. Note: We never use pressure washers on asphalt shingles, as this strips protective granules.
    6. Minor Repairs: If agreed upon, we replace loose shingles, re-seal flashing, or apply anti-moss treatments.
    7. Reporting: You receive a digital report with before-and-after photos, a summary of findings, and recommendations for future action.

    FAQ Section

    1. How much does professional roof maintenance cost?

    Costs vary based on roof size, pitch, and material. On average, homeowners can expect to pay between $150 and $500 for a standard inspection and cleaning. While this seems like an expense, it is significantly cheaper than the $5,000โ€“$10,000 cost of a full roof replacement caused by neglect.

    2. Will roof maintenance void my warranty?

    No, quite the opposite. Most manufacturers require regular maintenance to keep the warranty active. However, ensure you hire licensed and insured professionals. DIY repairs done incorrectly can sometimes void warranties if they cause further damage.

    3. How do I know if my roof needs repair or replacement?

    If your roof is less than 15 years old and has isolated damage, repair is usually sufficient. If your roof is nearing the end of its lifespan (20+ years for asphalt), has widespread granule loss, or has multiple leaks, replacement may be more cost-effective. Our inspection report will give you a clear recommendation.

    4. Can I stay home during the maintenance service?

    Yes, you do not need to be present for the exterior inspection and cleaning. However, if we need to access your attic, we will coordinate a time with you. We respect your property and leave no mess behind.

    5. What is the best season for roof maintenance?

    Spring and Fall are ideal. Avoid winter if possible, as snow and ice make inspections difficult and dangerous. Summer can be extremely hot for workers, but it is a viable option if spring/fall slots are full.

    6. Do you offer emergency services if a leak is found?

    Yes. If our inspection reveals an active leak or critical vulnerability, we prioritize immediate temporary repairs to prevent water damage while you plan for permanent solutions.


    Conclusion

    Your roof is more than just a covering; it is the shield that protects your family, your belongings, and your peace of mind. Neglecting it is a gamble with high stakes, but maintaining it is a smart, strategic investment in your homeโ€™s future. By choosing to Keep Your Roof In Top Shape With Our Maintenance Services, you are proactively preventing disasters, saving money on energy bills, and extending the life of your roofing system.

    Donโ€™t wait for a drip to turn into a flood. Take control of your homeโ€™s health today. If you found this guide helpful, please share it with your friends and neighbors on social media. Together, we can help our community build safer, more resilient homes. Contact us today to schedule your comprehensive roof inspection!

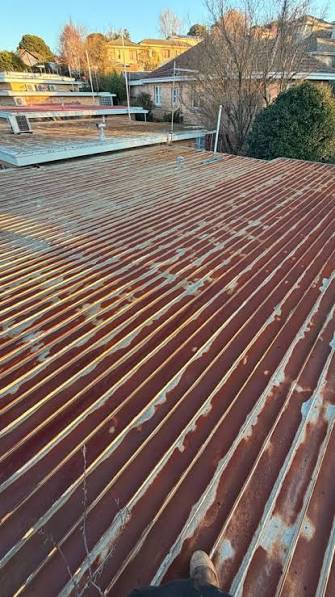
  • If The Roof Is Rusted The Basement Is Flooded Meaning

    If The Roof Is Rusted The Basement Is Flooded Meaning

    Have you ever walked into an older home and noticed a strange correlation between the condition of the exterior and the state of the interior? It is a frustrating reality for many homeowners: visible decay on the outside often signals hidden disaster within. Understanding the “If The Roof Is Rusted The Basement Is Flooded Meaning“ is crucial not just for property owners, but for anyone interested in recognizing the signs of long-term neglect in systems, whether they are physical structures or organizational frameworks.

    This phrase is more than just a literal observation; it is a powerful metaphor for cause and effect. In this guide, we will dissect the literal implications of rusted roofing leading to basement flooding, explore the deeper symbolic meaning, and provide actionable steps to prevent this cascade of failure. By the end of this article, you will know exactly what to look for and how to stop small problems from becoming catastrophic expenses.

    What Does “If The Roof Is Rusted The Basement Is Flooded” Literally Mean?

    At its most basic level, this statement describes a direct physical consequence of deferred maintenance. A roof is the primary shield of a building against the elements. When that shield compromisesโ€”specifically through rusting in metal roofs or degradation in other materialsโ€”water infiltration becomes inevitable.

    The Physics of Water Intrusion

    Water is persistent. It follows the path of least resistance. When a roof develops rust holes, cracks, or compromised seams, rainwater does not simply stop at the attic. Gravity pulls it downward through the structural framework.

    1. Entry Point: Water enters through the rusted section of the roof.
    2. Travel Path: It saturates insulation, rots wooden beams, and seeps through drywall.
    3. Accumulation: If the drainage systems (gutters and downspouts) are also neglected, water pools around the foundation.
    4. The Result: Hydrostatic pressure builds up against the basement walls, forcing water through cracks, resulting in a flooded basement.

    Therefore, the phrase literally means that visible exterior neglect (rusted roof) is a reliable predictor of severe interior damage (flooded basement). It suggests that the homeowner has ignored maintenance for so long that the entire structural integrity is compromised.

    Why Is This Phrase Used as a Metaphor for Neglect?

    Beyond construction, this saying has gained traction in business management, psychology, and systems theory. It serves as a vivid illustration of systemic failure.

    The Iceberg Theory of Problems

    In many contexts, the “rusted roof” represents the visible symptoms of a problem, while the “flooded basement” represents the deep-rooted, costly consequences that are hidden from immediate view.

    • In Business: A “rusted roof” might be poor customer service reviews or high employee turnover. The “flooded basement” is the eventual bankruptcy or toxic company culture that results from ignoring those early warning signs.
    • In Personal Health: Ignoring minor symptoms (the rust) can lead to chronic, life-altering conditions (the flood).

    The core lesson is that small, visible issues are rarely isolated. They are usually indicators of a broader pattern of neglect that allows larger, more expensive disasters to brew unnoticed below the surface.

    If The Roof Is Rusted The Basement Is Flooded Meaning

    How Does a Rusted Roof Actually Cause Basement Flooding?

    To truly understand the severity, we must look at the mechanical link between the roof and the foundation. Many people assume these two parts of the house are unrelated, but they are intimately connected through the homeโ€™s water management system.

    The Chain Reaction of Decay

    StageConditionConsequence
    1. Initial DamageSmall rust spots appear on metal flashing or roofing panels.Minor leaks during heavy rain; attic moisture increases.
    2. Structural WeakeningRust expands, creating holes. Gutters clog with rust debris.Water overflows gutters, dumping directly next to the foundation.
    3. Soil SaturationGround around the house becomes oversaturated.Soil expands, exerting pressure on basement walls (hydrostatic pressure).
    4. Foundation FailureCracks form in the basement concrete due to pressure and age.Water forces its way through cracks, flooding the basement.

    According to data from the Insurance Information Institute, water damage and freezing are among the most common causes of home insurance claims. Ignoring roof maintenance significantly increases the likelihood of these claims.

    The Role of Gutters and Downspouts

    A rusted roof often coincides with rusted or clogged gutters. When gutters fail, they do not channel water away from the house. Instead, they create a “waterfall” effect directly against the foundation. This is the missing link that connects the roof to the basement. Without proper diversion, even a small roof leak can contribute to significant ground saturation.

    What Are the Signs That Your Roof Is Causing Basement Issues?

    Identifying the problem early can save thousands of dollars. Here are the key indicators that your “roof is rusted” and your “basement is flooding” scenario is in progress.

    Exterior Warning Signs

    • Visible Rust Streaks: Look for orange or brown streaks running down the side of your house from the roofline.
    • Granule Loss: For asphalt shingles, check gutters for excessive granules, which indicate aging.
    • Sagging Rooflines: This suggests structural weakening from long-term water exposure.
    • Moss or Algae Growth: Indicates trapped moisture, which accelerates rust and decay.

    Interior Warning Signs

    • Musty Odors: A damp smell in the attic or upper floors often precedes visible leaks.
    • Water Stains on Ceilings: Brown or yellow rings on top-floor ceilings are direct evidence of roof leaks.
    • Efflorescence in Basement: White, chalky residue on basement walls indicates water moving through masonry.
    • High Humidity Levels: If your basement feels clammy despite using a dehumidifier, the source may be external infiltration.

    Step-by-Step Guide to Preventing the “Rusted Roof, Flooded Basement” Cycle

    Prevention is always cheaper than cure. Follow these steps to break the cycle of neglect.

    Step 1: Conduct a Bi-Annual Roof Inspection

    Inspect your roof in spring and fall. Look for rust spots, loose shingles, or damaged flashing. If you are uncomfortable climbing a ladder, hire a professional. Note: Use binoculars for a safe initial assessment from the ground.

    Step 2: Clean and Repair Gutters

    Ensure gutters are free of debris. Check for rust holes in metal gutters and seal them with waterproof patching compound. Ensure downspouts extend at least 6 feet (1.8 meters) away from the foundation.

    Step 3: Improve Landscape Grading

    The ground around your home should slope away from the foundation. A slope of 5% for the first 10 feet is recommended to direct water away from the basement.

    Step 4: Seal Basement Cracks

    Use hydraulic cement or epoxy injection to seal any existing cracks in the basement walls. This prevents water from entering even if the soil becomes saturated.

    Step 5: Install a Sump Pump

    If you live in an area with high rainfall, a sump pump is essential. It actively removes water that accumulates in the basement pit, preventing flooding even if some water bypasses your exterior defenses.

    Frequently Asked Questions (FAQ)

    1. Can a small rust spot on the roof really cause a flooded basement?

    Yes, indirectly. While a small rust spot may only cause a minor attic leak, it often indicates that the entire roofing system and gutter system are aged and failing. If the gutters are also compromised, water will pool around the foundation, which is the primary cause of basement flooding.

    2. How long does it take for a rusted roof to cause basement damage?

    There is no fixed timeline, as it depends on rainfall frequency and soil type. However, significant structural damage can occur within one to two seasons of heavy rain if the roof and gutters are completely neglected. Slow, chronic leaks can cause mold and rot over several years before visible flooding occurs.

    3. Is it better to repair the roof or fix the basement first?

    Always address the source of the water first. Fixing the basement without repairing the rusted roof and gutters is a temporary solution. Water will continue to enter the system, eventually overwhelming any basement repairs. Fix the roof to stop the input; fix the basement to manage the output.

    4. Does homeowners insurance cover damage from a rusted roof?

    Generally, no. Most insurance policies cover “sudden and accidental” damage. Damage resulting from long-term neglect, wear and tear, or lack of maintenance (like a rusted-out roof) is typically excluded. This makes preventive maintenance financially critical.

    5. What is the best material to prevent roof rust?

    Galvanized steel with a high-quality coating, aluminum, or copper are excellent choices for resisting rust. Aluminum and copper do not rust in the traditional sense, though they can oxidize. Modern coated steel roofs can last 40โ€“70 years with minimal maintenance.

    Conclusion

    The phrase “If The Roof Is Rusted The Basement Is Flooded Meaning“ serves as a stark reminder of the interconnectedness of our environments. Whether you are managing a home, a business, or your personal well-being, ignoring visible signs of decay inevitably leads to hidden, costly disasters.

    By understanding the literal mechanics of water damage and the metaphorical implications of systemic neglect, you can take proactive steps to protect your assets. Regular inspections, timely repairs, and a mindset of preventive maintenance are your best defenses against the “flood.”

    Donโ€™t wait for the basement to fill up. Check your roof today. If you found this guide helpful, please share it with your friends and family on social media to help them avoid costly home repairs!

  • Safe Ladder Placement on Roofs With Gutters

    Safe Ladder Placement on Roofs With Gutters

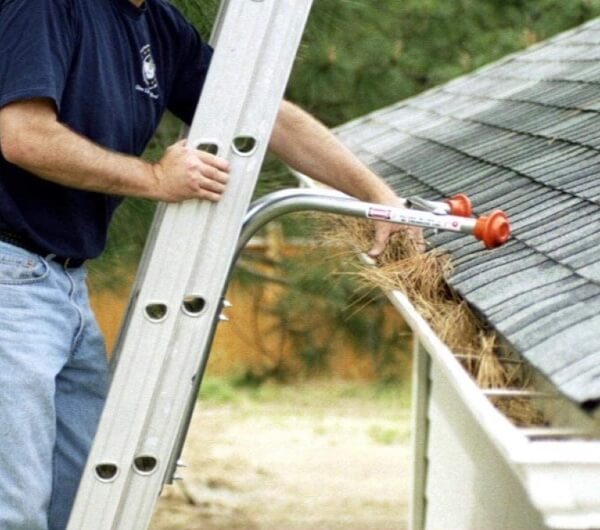
    Have you ever stood at the base of your house, ladder in hand, hesitating because youโ€™re terrified of crushing your expensive aluminum gutters? You are not alone. Many homeowners struggle with how to put a ladder on a roof with gutters without causing costly damage or risking personal injury. This guide provides safe, professional techniques to protect both your home and yourself.

    Why Proper Ladder Placement Matters

    Before we dive into the mechanics, it is crucial to understand the stakes. According to the Consumer Product Safety Commission (CPSC), over 164,000 people are treated in emergency rooms annually for ladder-related injuries in the United States. A significant portion of these accidents stems from improper setup on uneven or fragile surfaces like roof edges.

    Furthermore, gutters are not designed to bear weight. Most residential gutters are made from thin aluminum or vinyl. Placing a standard ladder directly against them can cause immediate denting, detachment from the fascia board, or even complete collapse. This leads to water damage, mold growth, and expensive repairs. By mastering the correct technique, you ensure structural integrity and personal safety.

    Essential Tools for Safe Access

    You cannot achieve a stable setup with just any ladder. Here is what you need:

    • Extension Ladder: Ensure it is rated for your weight plus tools (Type I or IA).
    • Ladder Stabilizer (Standoff): This is the most critical tool. It creates a bridge over the gutter.
    • Gutter Guards/Protectors: Foam or rubber pads that sit inside the gutter channel.
    • Level: To check ground stability.
    • Helper: Never work alone when positioning heavy ladders.

    Expert Tip: Invest in a high-quality ladder stabilizer. It pays for itself by preventing hundreds of dollars in gutter repair costs.

    How To Put A Ladder On A Roof With Gutters

    Step-by-Step Guide: How To Put A Ladder On A Roof With Gutters

    Follow these precise steps to set up your ladder correctly. Rushing this process is the number one cause of accidents.

    1. Inspect the Ground and Gutter Condition

    Start at the base. The ground must be firm, level, and free of debris. If the soil is soft, use a wide board under the ladder feet to distribute weight. Next, inspect your gutters. Look for existing loose sections, rust, or cracks. If the gutters are already compromised, do not place any weight near them until they are repaired.

    2. Apply the 4-to-1 Rule

    This is the golden rule of ladder safety. For every four feet of height to the point where the ladder rests against the roof, the base should be one foot away from the wall.

    • Example: If your eaves are 16 feet high, place the ladder base 4 feet away from the house.
    • Why? This angle (approximately 75 degrees) ensures optimal balance and prevents the ladder from sliding out or tipping backward.

    3. Install the Ladder Stabilizer

    This is the core answer to how to put a ladder on a roof with gutters without damage. A stabilizer attaches to the top of your extension ladder. It features two arms that extend outward, creating a wider footprint.

    • Attach the stabilizer securely to the ladderโ€™s top rungs.
    • Extend the arms so that the contact points rest on the roof shingles, not the gutter.
    • The center of the stabilizer should hover over the gutter, leaving a gap of at least 2โ€“3 inches. This ensures zero weight is transferred to the gutter system.

    4. Use Gutter Protectors as a Backup

    Even with a stabilizer, accidental bumps can happen. Slide foam or rubber gutter guards into the channel directly beneath where the ladder will pass. These act as shock absorbers. While they should not bear the main load, they provide an essential safety net against minor slips.

    5. Raise and Secure the Ladder

    With your helper holding the base, slowly raise the ladder. Walk it up hand-over-hand until the stabilizer arms rest firmly on the roof surface. Ensure the rubber feet of the stabilizer grip the shingles without tearing them. Once in position, secure the ladder base to prevent sliding. If possible, tie off the top of the ladder to a solid anchor point on the roof structure, not the gutter.

    Common Mistakes to Avoid

    Many DIY enthusiasts make critical errors that compromise safety. Here is a comparison of right vs. wrong practices:

    PracticeCorrect ApproachIncorrect Approach
    Contact PointLadder rests on roof/shingles via stabilizerLadder rests directly on gutter edge
    Angle75-degree angle (4-to-1 rule)Too steep (slips back) or too flat (bends)
    Ground BaseLevel, firm, possibly boardedUneven, muddy, or on gravel
    ProtectionUses stabilizer + foam guardsNo protection used

    Avoiding these mistakes significantly reduces the risk of injury and property damage. For more detailed safety standards, refer to the Occupational Safety and Health Administration (OSHA) guidelines, which are the gold standard for workplace safety in the US.

    People Also Ask: Specific Scenarios

    What if I donโ€™t have a ladder stabilizer?

    If you absolutely must proceed without a stabilizer, you are taking a higher risk. In this case, use thick wooden planks (2x4s) placed across the gutter and resting on the roof edge. Place the ladder on top of these planks. However, this method is less stable and not recommended for heights above 10 feet. Always prioritize buying a proper stabilizer.

    Can I lean the ladder against the fascia board instead?

    No. The fascia board is typically made of wood or composite material that is not designed to handle lateral pressure. Leaning a ladder against it can crack the board, detach the gutter mounting brackets, and cause the ladder to slip unexpectedly. Always aim for the roof surface itself.

    How do I protect asphalt shingles from damage?

    Standard ladder stabilizers come with rubberized feet to prevent scratching. However, if you are concerned about granule loss on older shingles, place a piece of plywood or a heavy-duty moving blanket between the stabilizer feet and the roof. This distributes the weight further and protects the roofing material.

    Is it safe to use a step ladder on a roof?

    Generally, no. Step ladders are designed for self-supporting use on flat ground. They are not meant to lean against structures. Using a step ladder on a roof edge is highly unstable and dangerous. Always use an extension ladder with proper stabilization for roof access.

    FAQ Section

    Q: How much weight can typical residential gutters hold?

    A: Most aluminum gutters can support only 10โ€“20 pounds of direct downward pressure before bending or detaching. This is far less than the weight of a person plus a ladder. Never rely on the gutterโ€™s structural integrity.

    Q: What is the best type of ladder for two-story homes?

    A: For two-story homes, use a Type IA extension ladder rated for 300 pounds. Ensure it extends at least 3 feet above the roofline for safe transition onto the roof, as recommended by safety experts.

    Q: Can rain affect ladder stability on a roof?

    A: Yes. Wet shingles are extremely slippery. Avoid setting up ladders on roofs during or immediately after rain. If you must work in damp conditions, wear shoes with high-traction soles and ensure your stabilizer has aggressive rubber grips.

    Q: How often should I inspect my ladder before use?

    A: Inspect your ladder before every single use. Check for cracked rungs, loose rivets, damaged feet, and bent rails. A compromised ladder can fail catastrophically, regardless of how well it is positioned.

    Q: What should I do if my gutters are already damaged?

    A: If your gutters are loose or dented, do not attempt to place a ladder near them. Repair or replace the gutters first. Working around damaged structures increases the likelihood of sudden failure and injury.

    Conclusion

    Learning how to put a ladder on a roof with gutters is a vital skill for any homeowner. It protects your investment and, more importantly, keeps you safe. Remember the key takeaways: always use a ladder stabilizer, follow the 4-to-1 rule, and never let the ladder touch the gutter directly.

    By following these steps, you can perform maintenance tasks with confidence and peace of mind. Donโ€™t cut corners when it comes to safety. Invest in the right tools, take your time, and always prioritize stability over speed.

    If you found this guide helpful, please share it with your friends and neighbors on social media. Helping others stay safe on their ladders is a small act that can make a big difference. Stay safe and happy home maintaining!

  • How to Install Ridge Cap Shingles on a Hip Roof

    How to Install Ridge Cap Shingles on a Hip Roof

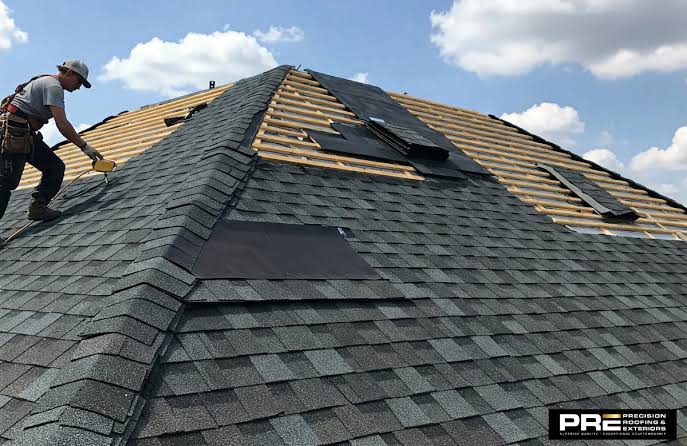
    Have you ever looked up at your homeโ€™s roofline and noticed those vulnerable peaks where two slopes meet? These areas, known as hips and ridges, are the most susceptible points for water infiltration if not sealed correctly. Knowing how to install ridge cap shingles on a hip roof is essential for protecting your home from leaks while enhancing its architectural beauty.

    Whether you are a seasoned DIY enthusiast or a homeowner looking to understand the process before hiring a pro, this guide will walk you through every step with clarity and precision. We prioritize safety, durability, and aesthetic perfection to ensure your roof stands strong against the elements.

    Why Are Ridge Caps Critical for Roof Integrity?

    Before diving into the tools and techniques, it is vital to understand why this specific component matters. The ridge and hips are not just decorative; they are functional barriers.

    According to roofing industry standards, the intersection of roof planes creates a natural channel for wind-driven rain and snow melt. Without proper capping, water can seep under the standard field shingles, leading to rot, mold, and structural damage.

    Expert Insight: “The ridge cap is the final seal of the roofing system. If installed incorrectly, even the best underlayment cannot prevent water intrusion during high-wind storms.” โ€“ National Roofing Contractors Association (NRCA)

    For a deeper understanding of roof anatomy and terminology, you can refer to this comprehensive resource on Roof construction.

    Tools and Materials You Will Need

    Preparation is half the battle. Having the right tools on hand prevents mid-job trips to the hardware store and ensures a smoother workflow.

    Essential Tools:

    • Chalk Line: For creating straight guidelines.
    • Utility Knife: With extra blades for clean cuts.
    • Hammer or Pneumatic Nail Gun: A nail gun speeds up the process significantly.
    • Tape Measure: For precise spacing.
    • Ladder and Safety Harness: Non-negotiable for height work.

    Materials:

    • Ridge Cap Shingles: You can buy pre-cut caps or cut them from standard three-tab shingles.
    • Roofing Nails: 1-ยผ inch galvanized nails are standard.
    • Asphalt Plastic Cement: For sealing edges in high-wind zones.
    Material TypeProsCons
    Pre-Cut CapsUniform size, faster installation, professional look.More expensive per square foot.
    Field Shingle CutsCost-effective, uses leftover material.Time-consuming, requires precise cutting skills.
    How To Install Ridge Cap Shingles On A Hip Roof

    Step-by-Step Guide: How to Install Ridge Cap Shingles on a Hip Roof

    Follow these detailed steps to ensure a watertight seal. We assume you have already installed the field shingles up to the hip line.

    Step 1: Prepare the Hip Line

    Ensure that the field shingles on both sides of the hip are trimmed evenly. There should be no overhang greater than ยฝ inch beyond the hip line. Use your chalk line to snap a straight guideline along the center of the hip. This visual aid ensures your caps remain aligned as you move upward.

    Step 2: Start at the Bottom

    Unlike ridge caps which often start from one end, hip caps typically start at the bottom eave and work their way up to the peak. This method allows each subsequent shingle to overlap the previous one, shedding water effectively like fish scales.

    1. Take your first ridge cap shingle.
    2. Align it so that it covers the joint between the two roof planes.
    3. Ensure the bottom edge of the cap aligns with the bottom edge of the last course of field shingles.

    Step 3: Nailing Technique

    Proper nailing is crucial for wind resistance.

    • Place two nails on each side of the cap, approximately 1 inch from the edge and 1 inch above the exposure line.
    • Do not nail too close to the edge, as this can cause the shingle to crack or tear in high winds.
    • If using a nail gun, set the depth correctly so the nail head sits flush with the shingle surfaceโ€”not driven in too deep to puncture the mat, nor too shallow to catch wind.

    Step 4: Overlapping and Alignment

    Place the second cap shingle over the first. The standard exposure for ridge caps is usually 5 inches. This means 5 inches of the shingle are visible, and the rest is covered by the next piece.

    • Use your tape measure to verify the 5-inch exposure for the first few courses.
    • Continue this pattern, moving up the hip line toward the peak.
    • Keep the edges straight using your initial chalk line as a reference.

    Step 5: Handling the Peak

    When you reach the top of the hip where it meets the main ridge, you will need to trim the final cap shingle.

    1. Measure the remaining distance to the peak.
    2. Cut the shingle to fit, ensuring it overlaps the last full cap by at least 2 inches.
    3. Seal the cut edge with asphalt plastic cement if you live in an area prone to heavy rain or wind.

    Common Mistakes to Avoid

    Even experienced DIYers can stumble on these common pitfalls. Being aware of them saves time and money.

    • Incorrect Nailing Position: Nailing too high exposes the nail head to the elements; nailing too low compromises the seal of the next shingle.
    • Ignoring Wind Direction: In areas with prevailing winds, consider starting the installation on the side opposite the wind direction to prevent uplift.
    • Poor Cutting: Using a dull knife results in jagged edges that look unprofessional and may not lay flat. Change blades frequently.
    • Skipping the Starter Strip: Some manufacturers recommend a starter strip at the bottom of the hip for added protection. Check your specific shingle manufacturerโ€™s instructions.

    FAQ Section

    1. Can I use regular shingles for ridge caps?

    Yes, you can cut standard three-tab shingles into smaller pieces to create ridge caps. However, pre-cut ridge cap shingles are thicker and designed specifically for this purpose, offering better durability and a cleaner aesthetic. If you cut your own, ensure each piece is roughly 12×12 inches.

    2. How many nails should I use per ridge cap shingle?

    Typically, you should use four nails per cap shingleโ€”two on each side. In high-wind zones (such as coastal areas), some manufacturers recommend six nails or the use of adhesive strips. Always consult the specific installation instructions provided by your shingle brand.

    3. What is the difference between a hip and a ridge?

    A ridge is the horizontal line at the very top of the roof where two sloping sides meet. A hip is the external angle formed by the meeting of two sloping ends of a roof. While the installation process is similar, hips run diagonally from the eave to the ridge, whereas ridges run horizontally.

    4. Do I need to seal the ridge cap shingles?

    In most standard residential applications, the weight of the overlapping shingles and the nails provide sufficient hold. However, applying a dab of asphalt plastic cement under the exposed corner of each cap can provide extra security against wind uplift, especially in storm-prone regions.

    5. How long does it take to install ridge caps on an average house?

    For a DIYer with moderate experience, installing ridge caps on an average-sized hip roof can take 4 to 8 hours. This depends on the complexity of the roofline, the number of hips, and weather conditions. Professional crews can often complete this in half the time.

    Conclusion

    Mastering how to install ridge cap shingles on a hip roof is a rewarding skill that protects your homeโ€™s most vital shield. By following the steps outlined aboveโ€”preparing the surface, aligning carefully, and nailing preciselyโ€”you ensure a durable, leak-proof finish that enhances your homeโ€™s curb appeal.

    Remember, safety is paramount. Never hesitate to use a harness or seek professional help if the roof pitch is steep or if you feel uncomfortable working at heights.

    Did you find this guide helpful? Share it with your friends on social media who might be tackling their own home improvement projects! Letโ€™s build safer, stronger homes together.

  • How to Install a Ridge Vent on a Shingle Roof

    How to Install a Ridge Vent on a Shingle Roof

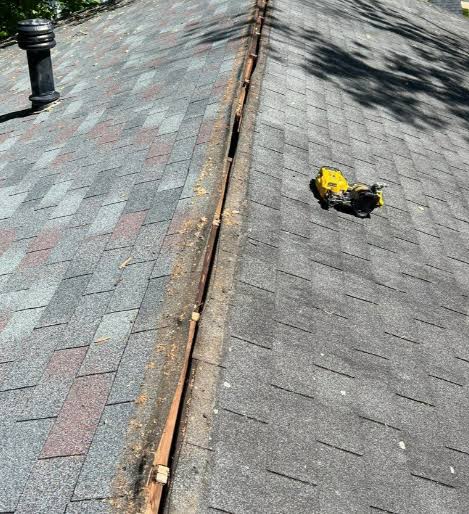
    Is your attic trapping heat like an oven, causing your AC to work overtime? Poor ventilation can lead to premature shingle failure and costly moisture damage. Learning how to install a ridge vent on a shingle roof is one of the most effective DIY upgrades you can make to protect your homeโ€™s structural integrity and improve energy efficiency.

    In this comprehensive guide, we will walk you through the entire process, from safety preparations to the final shingle placement. Whether you are a seasoned DIYer or a cautious homeowner, this tutorial provides the clarity and confidence you need to get the job done right.

    Why Ridge Vents Are Superior for Attic Ventilation

    Before we pick up a hammer, it is crucial to understand why you are doing this. Ridge vents are widely considered the gold standard in residential roofing ventilation. Unlike box vents or turbine vents that puncture the roof field, ridge vents run continuously along the peak of your roof.

    This continuous design allows hot air and moisture to escape uniformly across the entire length of the attic. According to building science principles, proper ventilation requires a balance of intake (usually at the soffits) and exhaust (at the ridge). A ridge vent creates a natural convection current, often referred to as the “stack effect,” which pulls cool air in from the bottom and pushes hot air out the top.

    The Benefits at a Glance

    FeatureRidge VentBox/Turbine Vents
    AestheticsLow profile, nearly invisibleBulky, visible protrusions
    CoverageContinuous exhaust along the peakSpot ventilation only
    Leak RiskLow (if installed correctly)Higher (multiple penetration points)
    MaintenanceMinimal to noneMoving parts may jam or wear out

    By choosing a ridge vent, you are opting for a solution that is both aesthetically pleasing and functionally superior. For more detailed information on building standards regarding ventilation, you can refer to general construction guidelines on Wikipedia.

    Essential Tools and Materials Checklist

    Preparation is half the battle in any roofing project. Having the right tools on hand prevents unnecessary trips up and down the ladder, keeping you safe and efficient.

    Tools Required:

    • Circular saw with a depth-adjustable blade
    • Reciprocating saw (for cutting near obstacles)
    • Hammer or pneumatic nail gun
    • Chalk line
    • Tape measure
    • Utility knife
    • Safety harness and non-slip shoes
    • Ladder stabilizer

    Materials Needed:

    • Ridge vent rolls (plastic or aluminum)
    • Roofing nails (galvanized, 1-3/4 inch)
    • Cap shingles (matching your existing roof color)
    • Roofing cement (optional, for extra sealing)
    • Drip edge flashing (if replacing old ridge caps)
    How To Install A Ridge Vent On A Shingle Roof

    Step-by-Step Guide: How to Install a Ridge Vent on a Shingle Roof

    Follow these steps carefully. Remember, working on a roof involves height risks. If you feel uncomfortable at any point, please consult a professional roofer.

    Step 1: Safety First and Site Preparation

    Never underestimate the danger of a sloped surface. Ensure your ladder is secure and use a roof anchor system if the pitch is steep. Check the weather forecast; you need a dry, calm day. Wet shingles are slippery, and wind can make handling large rolls of ridge vent difficult.

    Clear the work area of debris. If there are old box vents near the ridge, plan to remove them later, as the ridge vent will replace their function.

    Step 2: Remove Existing Ridge Cap Shingles

    Start by removing the existing cap shingles along the ridge line. Use a flat bar or pry bar to gently lift the nails. Be careful not to damage the underlying field shingles too much, although some wear is expected.

    Remove all nails and debris. You should expose the original ridge board or the top layer of sheathing. Measure the length of the ridge where you intend to install the vent.

    Step 3: Mark and Cut the Ventilation Slot

    This is the most critical technical step. You need to cut a slot along the peak of the roof to allow air to flow from the attic into the vent.

    1. Measure: Determine the width of the slot based on the manufacturerโ€™s instructions for your specific ridge vent product. Typically, this is between 2 to 3 inches wide.
    2. Mark: Snap a chalk line on both sides of the ridge centerline to ensure a straight cut.
    3. Set Depth: Adjust your circular saw blade depth to exactly 1 inch. This is vital. You want to cut through the roof sheathing (plywood or OSB) but not through the rafters or trusses below. Cutting into structural members compromises the roof’s integrity.
    4. Cut: Carefully cut along the chalk lines. Use a reciprocating saw for the ends or around any obstructions like plumbing stacks.

    Remove the cut strip of wood. You should now see the open attic space below. Check for any protruding nails from the underside and hammer them flat.

    Step 4: Install the Ridge Vent Roll

    Unroll the ridge vent material along the peak. Most modern ridge vents come in flexible rolls that conform to the roof’s shape.

    1. Positioning: Center the vent over the slot you just cut. The mesh or baffles inside the vent should face downward into the attic.
    2. Securing: Start at one end of the ridge. Nail the vent down using galvanized roofing nails. Place nails every 6 to 8 inches along the flange of the vent.
    3. Overlap: If you need multiple rolls, overlap the ends by at least 2 inches to ensure continuous airflow and prevent water intrusion.

    Ensure the vent lies flat against the roof deck. Any gaps can allow rain-driven snow or insects to enter.

    Step 5: Install the Cap Shingles

    Now that the vent is secure, you need to cover it with shingles to protect it from the elements and blend it with your roof.

    1. Prepare Cap Shingles: If you donโ€™t have pre-cut cap shingles, you can cut standard three-tab shingles into thirds.
    2. Nailing Pattern: Place the first cap shingle at the end of the ridge. Nail it down with two nails per side, ensuring the nails penetrate the ventโ€™s nailing flange but do not pierce the ventilation channel itself.
    3. Overlapping: Each subsequent shingle should overlap the previous one by about 5 to 6 inches, following the exposure line recommended by the shingle manufacturer. This ensures water sheds correctly down the roof.
    4. Sealing: In high-wind areas, apply a dab of roofing cement under the leading edge of each cap shingle for added security.

    Continue this process until you reach the other end of the ridge. Trim the final shingle to fit flush with the edge of the roof.

    Common Mistakes to Avoid

    Even experienced DIYers can stumble. Here are the most frequent errors when learning how to install a ridge vent on a shingle roof:

    • Cutting Too Deep: As mentioned, cutting into rafters is a structural hazard. Always double-check your saw depth.
    • Blocking Airflow: Ensure that insulation in the attic does not block the soffit vents. If air cannot get in, it cannot get out through the ridge vent.
    • Using Wrong Nails: Standard steel nails will rust quickly. Always use galvanized or stainless steel roofing nails to prevent staining and failure.
    • Ignoring Local Codes: Some municipalities have specific requirements for net free vent area (NFVA). Check your local building codes before starting.

    FAQ Section

    1. Can I install a ridge vent on an existing roof without replacing all shingles?

    Yes, you can. The process involves removing only the ridge cap shingles and cutting the slot. The field shingles remain intact. However, if your existing shingles are very old or brittle, they may crack during the process, so proceed with caution.

    2. How long does it take to install a ridge vent?

    For an average-sized home (approx. 2,000 sq. ft.), a two-person team can typically complete the installation in 4 to 6 hours. A solo DIYer might take a full day, especially if it is their first time.

    3. Do ridge vents leak?

    When installed correctly, ridge vents are highly resistant to leaks. The key is proper nailing and overlapping of cap shingles. The design allows water to shed over the top while air escapes from the sides. Using roofing cement on nail heads can provide extra peace of mind.

    4. What if my roof has no soffit vents?

    Ridge vents require intake ventilation to work effectively. If you do not have soffit vents, you may need to install them or use drip-edge vents. Without adequate intake, the ridge vent will not create the necessary airflow, and you might even pull conditioned air from your living space into the attic.

    5. Is plastic or aluminum ridge vent better?

    Both materials are effective. Plastic vents are flexible and easier to install on complex roof lines. Aluminum vents are more rigid and durable but can be harder to bend around curves. Choose the material that best fits your roofโ€™s geometry and your comfort level with installation.

    Conclusion

    Learning how to install a ridge vent on a shingle roof is a rewarding project that pays dividends in comfort and cost savings. By improving your atticโ€™s airflow, you reduce the strain on your HVAC system, prevent moisture buildup, and extend the lifespan of your roofing materials.

    Remember, safety is paramount. Take your time, measure twice, and cut once. If you follow the steps outlined above, you will achieve a professional-looking result that enhances your homeโ€™s value.

    Did you find this guide helpful? Share it with your friends on social media who might be considering similar home improvements! Letโ€™s help more homeowners breathe new life into their roofs.

  • Thatched Roof Replacement Cost: 2026 Price Guide

    Thatched Roof Replacement Cost: 2026 Price Guide

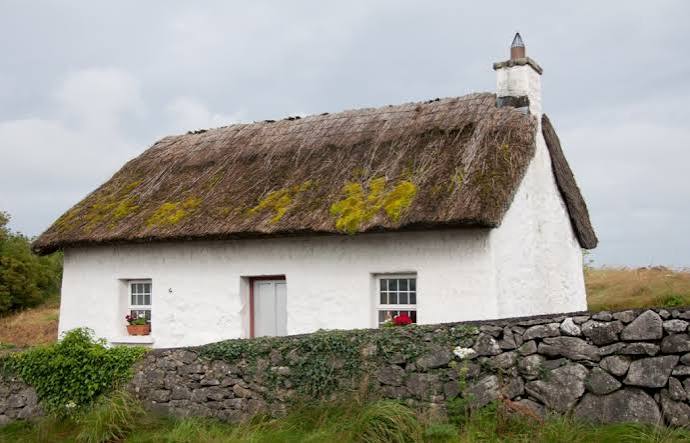
    Replacing a thatched roof is one of the most significant financial commitments a homeowner can make, often sparking anxiety about budget overruns and hidden fees. If you are staring at aging straw or reeds and wondering how much does it cost to replace a thatched roof, you are not alone in seeking clarity amidst varying quotes. This guide breaks down the real costs, helping you plan your project with confidence and avoid unpleasant financial surprises.

    Understanding the Total Cost of Thatch Replacement

    When we discuss the cost of replacing a thatched roof, it is crucial to understand that this is not a standard roofing job. Unlike asphalt shingles or metal roofing, thatching is a specialized craft requiring skilled artisans who are becoming increasingly rare in the United States.

    In 2026, the average cost to fully replace a thatched roof in the US ranges between $40,000 and $85,000, depending heavily on the size of the roof, the type of material used, and your geographic location. For smaller structures like gazebos or sheds, costs may start around $15,000, while large historic estates can easily exceed $100,000.

    The price per square foot typically falls between $20 and $35. However, this metric can be misleading because thatchers often charge by the “square” (100 square feet) or by the volume of material required. The complexity of the roof designโ€”such as the number of valleys, dormers, and chimneysโ€”plays a massive role in the final bill.

    Key Cost Drivers

    • Labor: Accounts for 60โ€“70% of the total cost due to the specialized skill set required.
    • Materials: High-quality water reed or long-straw wheat.
    • Scaffolding: Essential for safety and access, often costing $2,000โ€“$5,000 separately.
    • Removal: Disposing of old thatch and preparing the roof deck.

    What Factors Influence Thatched Roof Prices?

    Several variables can swing your final invoice significantly. Understanding these helps you anticipate where your money is going.

    1. Type of Thatching Material

    Not all thatch is created equal. The two primary materials used in the US are Water Reed and Long Straw.

    • Water Reed: This is the premium choice. It is more durable, lasting 40โ€“60 years, and offers a cleaner, sharper aesthetic. However, it is more expensive due to import costs (often from Europe) or limited domestic supply.
    • Long Straw: More traditional and rustic, straw lasts 15โ€“25 years. It is generally cheaper upfront but requires more frequent maintenance and replacement cycles.

    2. Roof Complexity and Pitch

    A simple gable roof is far cheaper to thatch than a complex hip roof with multiple intersections. The pitch (angle) of the roof also matters. Steeper pitches require more safety equipment and take longer to complete, driving up labor hours.

    3. Geographic Location

    If you live in an area with few certified thatchers, such as parts of the Midwest or West Coast, you may pay a premium for travel and accommodation expenses for the artisan. In contrast, regions with a higher concentration of historic homes, like parts of New England or Virginia, may have more competitive local pricing.

    4. Structural Repairs

    Before new thatch can be applied, the underlying roof structure must be sound. If your rafters or battens need replacement due to rot or insect damage, this will add to the cost. Always budget an extra 10โ€“15% for unforeseen structural repairs.

    How Much Does It Cost To Replace A Thatched Roof

    Material Comparison: Water Reed vs. Long Straw

    Choosing the right material is critical for both budget and longevity. Here is a quick comparison to help you decide.

    FeatureWater ReedLong Straw
    Lifespan40โ€“60 years15โ€“25 years
    CostHigh ($25โ€“$35/sq ft)Moderate ($15โ€“$25/sq ft)
    MaintenanceLowModerate to High
    AppearanceNeat, uniform, sharp linesRustic, textured, softer look
    DurabilityHighly resistant to wind/rainLess resistant to severe weather
    Best ForLong-term investment, wet climatesBudget-conscious, historical accuracy

    For many US homeowners, water reed is the preferred option despite the higher initial cost because it reduces the frequency of replacement. Over a 60-year period, you might replace a straw roof three times, whereas a reed roof only once.

    The Step-by-Step Replacement Process

    Understanding the workflow helps you manage expectations during the project. A typical replacement takes 4โ€“8 weeks for an average-sized home.

    1. Site Assessment and Quote: A master thatcher inspects the roof structure and measures the area. They provide a detailed quote including materials and labor.
    2. Scaffolding Installation: Safe access is paramount. Scaffolding is erected around the property, which may require permits depending on local zoning laws.
    3. Stripping the Old Roof: The existing thatch is removed carefully to avoid damaging the underlying timber. The debris is cleared away.
    4. Structural Inspection and Repair: The roof deck is inspected. Any rotten battens or rafters are replaced. A new breathable underlay is often installed to improve insulation and moisture control.
    5. Fixing Battens: New wooden battens are fixed horizontally across the rafters. These will hold the thatch in place.
    6. Thatching Application: The thatcher begins laying the material, starting from the eaves and working up to the ridge. This is done in layers called “bolts.”
    7. Ridge Work: The ridge is the most vulnerable part of the roof. It is capped with a distinct style, often using wire netting or additional reed bundles for protection.
    8. Wire Netting Installation: To protect against birds and squirrels, a mesh net is usually stapled over the thatch. This is optional but highly recommended in the US.
    9. Final Cleanup: Scaffolding is removed, and the site is cleaned. A final inspection ensures the thickness and fixings meet industry standards.

    For more detailed information on traditional building methods, you can refer to Wikipediaโ€™s article on Thatching, which provides a global historical context for this ancient craft.

    Maintenance Costs After Replacement

    Your investment doesnโ€™t end with installation. Proper maintenance extends the life of your thatched roof significantly.

    • Annual Inspections: Hire a professional once a year to check for loose patches or bird damage. Cost: $150โ€“$300.
    • Ridge Replacement: The ridge wears out faster than the main body. It typically needs replacing every 10โ€“15 years. Cost: $2,000โ€“$5,000.
    • Cleaning: Removing moss and debris prevents moisture retention. Cost: $200โ€“$400.

    Ignoring maintenance can void warranties and lead to premature failure, costing you thousands in early replacement fees.

    Frequently Asked Questions (FAQ)

    How long does a thatched roof last in the US climate?

    With proper maintenance, a water reed roof can last 40โ€“60 years, while long straw lasts 15โ€“25 years. The humid climate in some US regions may reduce lifespan slightly compared to drier European climates, making ventilation crucial.

    Is a thatched roof more expensive than slate or tile?

    Yes, initially. A high-end slate roof might cost $20โ€“$30 per square foot installed, similar to thatch. However, slate lasts 75โ€“100 years. Thatch is chosen for its aesthetic, historical value, and superior insulation properties, not necessarily for long-term cost savings.

    Does homeowners insurance cover thatched roofs?

    Many standard insurers hesitate to cover thatched roofs due to fire risk. You may need a specialist insurer, which can cost 20โ€“50% more than standard premiums. Ensure your policy covers “accidental damage” and has clear clauses on maintenance requirements.

    Can I install a thatched roof myself?

    No. Thatching is a highly specialized trade requiring years of apprenticeship. Incorrect installation can lead to leaks, structural damage, and fire hazards. Always hire a certified master thatcher with proven experience in the US market.

    Are there tax credits for installing a thatched roof?

    While there are no specific federal tax credits for thatching itself, if the roof improves energy efficiency (due to thick insulation properties), you might qualify for certain green home improvement incentives. Consult a tax professional for current 2026 regulations.

    Conclusion

    Deciding how much does it cost to replace a thatched roof involves looking beyond the initial price tag. While the upfront cost of $40,000 to $85,000 is significant, the unique beauty, historical charm, and natural insulation of a thatched roof offer value that standard materials cannot match. By choosing high-quality water reed and committing to regular maintenance, you protect your investment and ensure your home remains a stunning landmark for decades.

    If you found this guide helpful, please share it on social media to help other homeowners navigate the complexities of historic roof restoration. Your share could save someone from a costly mistake!

  • How Long Does Color Last on Metal Roof?

    How Long Does Color Last on Metal Roof?

    Have you ever looked up at your neighborโ€™s vibrant red or sleek charcoal metal roof and wondered if it will still look that good in twenty years? It is a valid concern, especially since replacing a roof is one of the most significant investments a homeowner can make. Many homeowners ask, “How long does the color last on a metal roof?” because they want to ensure their curb appeal remains intact without constant repainting.

    The short answer is: significantly longer than you might think. However, the exact timeline depends on several critical factors, including the type of coating used, your local climate, and how well the roof was installed. In this guide, we will break down everything you need to know about metal roof color retention, helping you make an informed decision for your home.

    The Real Lifespan of Metal Roof Colors

    When we discuss color longevity, we are technically talking about the durability of the paint system or coating applied to the metal substrate. Unlike asphalt shingles, which lose granules and fade unevenly, metal roofs use sophisticated chemical coatings designed to withstand harsh UV rays and weather extremes.

    Generally, a high-quality metal roof color will last between 30 to 50 years before showing significant signs of fading or chalking. However, “lasting” doesn’t mean it looks brand new for five decades. It means the color remains consistent, and the protective layer continues to shield the metal from corrosion.

    Understanding Paint Systems: The Key Factor

    Not all metal roofs are created equal. The lifespan of the color is directly tied to the resin technology used in the paint. Here is a breakdown of the most common types:

    1. Polyester (PE): This is the most basic and affordable option. While cost-effective, polyester coatings typically last only 10 to 15 years before noticeable fading occurs. They are best suited for agricultural buildings or areas with mild climates.
    2. Silicone Modified Polyester (SMP): A step up from standard polyester, SMP offers better durability and gloss retention. You can expect these colors to last 20 to 25 years. They are a popular middle-ground choice for residential homes.
    3. PVDF (Kynar 500/Hylar 500): This is the gold standard for residential metal roofing. PVDF coatings contain polyvinylidene fluoride, which provides exceptional resistance to UV radiation and chemicals. These coatings often come with 30 to 40-year warranties against fading and chalking. If you want your color to last, this is the specification you should look for.

    Pro Tip: Always check the technical data sheet for the specific paint system. Look for terms like “70% PVDF” or brand names like Kynar 500. This ensures you are getting a premium product.

    What Causes Metal Roof Color to Fade?

    Even the best coatings are not invincible. Several environmental factors contribute to the degradation of color over time. Understanding these can help you choose the right color and maintain your roof effectively.

    UV Radiation

    The sun is the primary enemy of any exterior paint. Ultraviolet (UV) rays break down the chemical bonds in pigments, leading to fading. Darker colors absorb more heat, which can accelerate this process slightly compared to lighter colors, though modern PVDF coatings mitigate this difference significantly.

    Climate and Weather Conditions

    • Coastal Areas: Salt spray is highly corrosive. While the color may remain intact, the underlying metal needs robust protection. Specialized coatings are required for seaside homes.
    • Industrial Areas: Airborne pollutants and acid rain can eat away at lower-quality paints.
    • High Humidity: Constant moisture can promote mold or mildew growth on the surface, which may discolor the roof even if the paint itself hasn’t faded.

    Installation Quality

    Believe it or not, how the roof is installed affects color longevity. If panels are scratched during installation, those spots become weak points where rust can start, eventually affecting the surrounding paint. Proper handling and using touch-up pens immediately on any scratches are crucial.

    How Long Does The Color Last On A Metal Roof

    Comparison: Metal Roof vs. Other Materials

    To put the longevity of metal roof colors into perspective, letโ€™s compare it with other common roofing materials.

    MaterialAverage Color LifespanMaintenance RequiredNotes
    Metal (PVDF)30โ€“50 YearsLowBest color retention; resistant to cracking.
    Asphalt Shingles15โ€“20 YearsMediumGranules wash away, exposing asphalt to UV.
    Clay Tile50+ YearsLowColor is baked in; very durable but heavy.
    Wood Shake10โ€“15 YearsHighRequires staining/sealing; prone to graying.

    As you can see, metal roofing with a premium coating outperforms asphalt and wood significantly in terms of color stability. For more detailed information on material properties, you can refer to general construction standards on Wikipedia.

    How to Maintain Your Metal Roofโ€™s Color

    While metal roofs are low-maintenance, they are not no-maintenance. Simple steps can extend the vibrancy of your roofโ€™s color for decades.

    1. Regular Cleaning

    Dirt, pollen, and debris can trap moisture against the roof surface. Over time, this can lead to streaking or organic growth that stains the paint.

    • Frequency: Clean your roof every 1โ€“2 years.
    • Method: Use a garden hose with a gentle spray nozzle. Avoid pressure washers, as high pressure can force water under the seams or damage the coating.
    • Solution: Mix mild dish soap with water. Avoid abrasive cleaners or solvents that can strip the protective layer.

    2. Inspect for Scratches and Damage

    After severe storms or if tree branches have rubbed against the roof, inspect for scratches.

    • Action: If you see bare metal, use a manufacturer-approved touch-up paint immediately. This prevents rust from spreading underneath the color coat.

    3. Keep Gutters Clean

    Clogged gutters cause water to back up onto the roof edge. Standing water can accelerate wear on the paint system at the eaves. Ensure your drainage system is functioning correctly.

    FAQ Section

    1. Do darker metal roof colors fade faster than lighter ones?

    Technically, yes, darker colors absorb more UV energy and heat, which can accelerate pigment breakdown. However, with modern PVDF coatings, the difference is minimal. Most manufacturers offer similar warranty periods for both dark and light colors because the chemical structure of the paint is designed to resist UV degradation regardless of hue.

    2. Can I repaint my metal roof if the color fades?

    Yes, you can repaint a metal roof, but it is rarely necessary within the first 30 years if a quality coating was used. If you do need to repaint, it requires thorough cleaning, priming with a metal-specific primer, and using an acrylic urethane or specialized metal roof paint. It is a labor-intensive process, so choosing the right initial coating is far more cost-effective.

    3. What is “chalking” and is it bad?

    Chalking is a powdery residue that forms on the surface of the paint as it degrades. It is a natural part of the weathering process for many paints. While it indicates some UV exposure, it actually helps protect the underlying layers by reflecting UV rays. As long as the chalking is uniform and not accompanied by rust or peeling, it is mostly a cosmetic issue.

    4. Does the warranty cover fading?

    Most reputable metal roofing manufacturers provide two types of warranties: a weathering warranty (against leaks) and a finish warranty (against fading and chalking). The finish warranty usually specifies a limit on how much the color can change (measured in Delta E units) over a set period, typically 20โ€“40 years. Always read the fine print to understand what constitutes “excessive” fading.

    5. How does location affect color longevity?

    Location plays a huge role. Homes in high-UV areas (like Arizona or Florida) or coastal regions with salt air will experience faster wear than homes in temperate, inland climates. If you live in a harsh environment, invest in the highest grade coating available (PVDF) and consider lighter colors that reflect heat.

    Conclusion

    So, how long does the color last on a metal roof? With a premium PVDF coating, you can expect vibrant, consistent color for 30 to 50 years. This makes metal roofing one of the most durable and aesthetically stable options available for homeowners today.

    By choosing the right paint system, understanding your local climateโ€™s impact, and performing simple annual maintenance, you can ensure your roof remains a striking feature of your home for decades. It is not just about protecting your house from the elements; it is about maintaining its beauty and value.

    Did you find this guide helpful? Share it with friends or family who are considering a new roof! Letโ€™s help everyone make smarter, longer-lasting home improvements.

  • Can I Put Salt On My Roof To Melt Ice? The Truth

    Can I Put Salt On My Roof To Melt Ice? The Truth

    Have you ever stared up at a menacing icicle hanging from your gutter, worrying about the potential water damage it could cause inside your home? It is a stressful situation that many homeowners in colder climates face every winter, leading them to search for quick fixes. You might be asking yourself, “Can I put salt on my roof to melt ice“ without causing further harm to your property?

    The short answer is no, and doing so can lead to expensive repairs down the line. While salt is effective on driveways, it is notoriously harsh on roofing materials. In this guide, we will explore why using salt is a risky gamble, discuss the science behind the damage, and provide you with safer, professional-approved methods to keep your roof ice-free this winter.

    Why Using Salt on Your Roof Is a Bad Idea

    When winter strikes, the instinct to reach for the bag of rock salt or sodium chloride is strong. It works wonders on concrete sidewalks, so logic suggests it should work on your roof, right? Unfortunately, roofing systems are complex assemblies of materials that react very differently to chemicals than pavement does.

    The Chemical Reaction with Roofing Materials

    Most modern roofs use asphalt shingles, which are composed of a fiberglass mat coated with asphalt and ceramic granules. Salt is hygroscopic, meaning it attracts moisture. When you spread salt on your roof, it doesn’t just melt the ice; it creates a brine solution that can seep under the shingles.

    This brine accelerates the corrosion of metal components. Your roof isn’t just shingles; it includes nails, flashing, drip edges, and gutters, most of which are made of aluminum, steel, or copper. Saltwater is highly corrosive to these metals. According to general chemical principles outlined on Wikipedia, chloride ions are particularly aggressive in breaking down the protective oxide layers on metals, leading to rapid rust and structural failure.

    Damage to Asphalt Shingles

    Beyond metal corrosion, salt can degrade the asphalt itself. The granules on your shingles protect them from UV rays and physical wear. Salt crystals are abrasive. When walked on or blown by wind, they can dislodge these protective granules. Once the granules are gone, the asphalt underneath is exposed to the sun, causing it to dry out, crack, and curl prematurely. This significantly shortens the lifespan of your roof, potentially forcing a replacement years earlier than expected.

    Harm to Your Landscape and Foundation

    What goes down must go somewhere. When the salt melts the ice on your roof, that salty runoff flows into your gutters and downspouts, eventually pooling around your homeโ€™s foundation. High concentrations of salt in the soil can kill grass, shrubs, and trees near your house. It can also alter the soil chemistry, making it difficult for plants to absorb water and nutrients, leading to brown, dead patches in your spring garden.

    Safer Alternatives to Salt for Ice Melting

    If salt is off the table, what can you use? Fortunately, there are several effective alternatives that are gentler on your roof while still tackling the ice problem.

    Calcium Chloride: The Professional Choice

    Calcium chloride is widely regarded as the safest chemical option for roofs. Unlike rock salt (sodium chloride), calcium chloride generates heat as it dissolves, which helps melt ice faster even in extremely low temperatures (down to -25ยฐF).

    • Pros: Works at lower temperatures, less corrosive to metals, safer for vegetation in moderate amounts.
    • Cons: More expensive than rock salt, can still be slippery if not used correctly.

    To use it safely, look for calcium chloride pellets specifically labeled for roof use. Avoid pouring it directly onto dry shingles if possible; instead, apply it strategically to ice dams or heavy buildup areas.

    Magnesium Chloride: The Eco-Friendly Option

    Magnesium chloride is another excellent alternative. It is less corrosive than both sodium and calcium chloride, making it the best choice if you are worried about your metal gutters or nearby garden beds.

    • Pros: Least corrosive option, environmentally friendly, effective down to 0ยฐF.
    • Cons: Less effective in extreme cold compared to calcium chloride, higher cost.

    Potassium Chloride: A Gentle Alternative

    Often used as a fertilizer, potassium chloride can also melt ice. It is generally safe for plants and less damaging to concrete and metals. However, it is less effective at melting ice quickly and is typically more expensive, making it a better choice for preventive measures rather than emergency ice removal.

    Can I Put Salt On My Roof To Melt Ice

    Comparison: Salt vs. Safe Alternatives

    To help you make an informed decision, here is a quick comparison of common de-icing agents:

    FeatureRock Salt (Sodium Chloride)Calcium ChlorideMagnesium Chloride
    EffectivenessHigh (above 15ยฐF)Very High (down to -25ยฐF)Moderate (down to 0ยฐF)
    CorrosivenessVery HighModerateLow
    Shingle SafetyPoorGoodExcellent
    Plant SafetyPoorModerateGood
    CostLowHighHighest

    How to Safely Remove Ice from Your Roof

    Chemicals are only part of the solution. Physical removal and prevention are often more effective and safer for your homeโ€™s structure. Here is a step-by-step approach to managing roof ice without climbing up there with a hammer.

    Step 1: Use a Roof Rake

    A roof rake is a long-handled tool designed to pull snow off the edge of your roof from the ground. By removing the snow before it turns into ice, you prevent ice dams from forming in the first place.

    1. Stand firmly on the ground, away from the drip line.
    2. Gently pull the snow down from the edge of the roof.
    3. Do not scrape the shingles aggressively, as this can remove granules.
    4. Leave a thin layer of snow to avoid damaging the shingles.

    Step 2: Install Heat Cables

    For chronic ice dam problems, heat cables (also known as roof de-icing cables) are a long-term solution. These electric cables zigzag along the roof edge and inside the gutters.

    • Installation: They should be installed in a pattern that creates channels for water to flow off the roof.
    • Operation: Turn them on when snow is falling or when temperatures hover around freezing.
    • Benefit: They prevent ice buildup entirely, eliminating the need for chemical melting.

    Step 3: Improve Attic Insulation and Ventilation

    Ice dams form because heat escapes from your attic, melting the snow on the upper part of the roof. The water runs down to the colder eaves and refreezes. Fixing the root cause is the most effective strategy.

    • Insulation: Ensure your attic floor has adequate insulation (R-value 38 or higher is recommended in many US climates).
    • Ventilation: Install soffit and ridge vents to allow cold air to circulate under the roof deck, keeping the roof surface cold.

    FAQ Section

    Can I use table salt on my roof?

    No, table salt is essentially refined sodium chloride. It poses the same risks as rock salt, including corrosion of metal fixtures and damage to asphalt shingles. It is also more expensive and less effective due to its finer grain size.

    Will vinegar melt ice on my roof?

    While vinegar (acetic acid) can lower the freezing point of water, it is not practical for large-scale ice removal. It would require massive quantities to be effective, and the acidity could potentially damage certain roofing materials or surrounding paint. It is not recommended as a primary de-icing method.

    How do I get rid of ice dams without damaging my roof?

    The safest way is prevention. Use a roof rake to remove snow from the eaves. If an ice dam has already formed, use calcium chloride pellets placed in nylon stockings laid across the dam. This allows the chemical to melt a channel through the ice without direct contact with the shingles. Never chip away at ice dams with sharp tools.

    Is it safe to pour hot water on my roof?

    Pouring hot water on a frozen roof is dangerous and ineffective. The water will likely refreeze almost immediately, creating even more ice. Additionally, the thermal shock from hot water hitting freezing cold shingles can cause them to crack or break.

    What is the best time to treat roof ice?

    Prevention is key. Treat your roof before a major storm hits by ensuring gutters are clean and installing heat cables if necessary. If you must use chemicals, apply them early in the ice formation process. Waiting until thick, hard ice dams have formed makes removal much more difficult and risky.

    Conclusion

    So, can I put salt on my roof to melt ice? Technically yes, but practically, you absolutely should not. The potential cost of repairing corroded gutters, damaged shingles, and ruined landscaping far outweighs the convenience of using cheap rock salt.

    Instead, opt for safer alternatives like calcium chloride or magnesium chloride, and focus on preventive measures like roof raking and improving attic ventilation. Your roof is one of the most significant investments in your home; treating it with care ensures it protects you for decades to come.

    If you found this guide helpful, please share it with your neighbors on social media. Winter safety is a community effort, and spreading the word about safe ice removal practices can help everyone protect their homes this season. Stay warm and stay safe!

  • How Often Should You Replace Your Roof?

    How Often Should You Replace Your Roof?

    Most homeowners dread the thought of a major home renovation, but ignoring your roof can lead to costly water damage and structural issues. Knowing exactly how often should you replace your roof on your house is crucial for protecting your investment and ensuring your familyโ€™s safety. This guide breaks down the timelines, materials, and warning signs so you can plan ahead with confidence.

    Understanding Average Roof Lifespans by Material

    The short answer to “how often should you replace your roof” depends heavily on one factor: what is it made of? Not all roofing materials are created equal. Some are designed for budget-friendly, shorter-term solutions, while others are built to last generations.

    Here is a breakdown of the most common roofing materials found in US homes and their expected lifespans:

    1. Asphalt Shingles (The Most Common Choice)

    Asphalt shingles cover approximately 80% of homes in the United States due to their affordability and ease of installation. However, they have the shortest lifespan among popular materials.

    • 3-Tab Asphalt Shingles: These are the basic, economical option. They typically last 15โ€“20 years.
    • Architectural (Dimensional) Shingles: These are thicker and more durable. You can expect them to last 25โ€“30 years.
    • Premium/Luxury Shingles: High-end asphalt options can mimic slate or wood and may last 30โ€“50 years with proper maintenance.

    2. Metal Roofing

    Metal roofs are gaining popularity in the US for their durability and energy efficiency.

    • Steel/Aluminum: Lasts 40โ€“70 years.
    • Copper/Zinc: Can last 50โ€“100+ years, often outliving the homeowner. While the upfront cost is higher, the long-term value is significant because you likely wonโ€™t need to replace it twice.

    3. Wood Shakes and Shingles

    For a rustic, natural look, many homeowners choose cedar or redwood.

    • Lifespan: 20โ€“40 years.
    • Caveat: Wood requires regular maintenance to prevent rot, mold, and insect damage. In humid climates, their lifespan may be significantly shorter.

    4. Slate and Tile

    These are premium, heavy-duty materials often found in historic or high-end homes.

    • Clay/Concrete Tile: Lasts 50โ€“100 years.
    • Slate: Can last 75โ€“200 years. These materials are incredibly durable but require a reinforced roof structure due to their weight.
    MaterialAverage LifespanCost LevelMaintenance Need
    3-Tab Asphalt15โ€“20 YearsLowModerate
    Architectural Asphalt25โ€“30 YearsMediumLow
    Metal40โ€“70 YearsHighVery Low
    Wood Shake20โ€“40 YearsMedium-HighHigh
    Slate/Tile50โ€“100+ YearsVery HighLow

    Key Factors That Shorten Your Roofโ€™s Life

    Even if you have a 30-year architectural shingle roof, it might not last that long. Several external and internal factors can accelerate wear and tear. Understanding these can help you mitigate damage.

    Climate and Weather Conditions

    Your geographic location plays a massive role. According to data from the National Oceanic and Atmospheric Administration (NOAA), extreme weather events are becoming more frequent.

    • Hot Climates: UV rays bake asphalt shingles, causing them to become brittle and crack prematurely.
    • Cold Climates: Freeze-thaw cycles can cause ice dams, which lift shingles and allow water infiltration.
    • Coastal Areas: Salt air can corrode metal fasteners and degrade certain materials faster.

    Installation Quality

    A roof is only as good as its installation. Poor ventilation is a silent killer of roofs. If your attic doesnโ€™t breathe, heat builds up in the summer, essentially “cooking” your shingles from underneath. In winter, poor ventilation leads to moisture buildup and rot. Always hire licensed, insured professionals with strong local reviews.

    Lack of Maintenance

    Neglect is the number one reason roofs fail before their time. Clogged gutters cause water to back up under shingles. Overhanging tree branches can scrape off protective granules during windstorms. Regular inspections can catch small issues before they become catastrophic failures.

    5 Warning Signs Itโ€™s Time for a Replacement

    How do you know if itโ€™s time to act? Donโ€™t wait for a leak to appear inside your living room. Look for these exterior and interior indicators:

    1. Curling or Cupping Shingles: If the edges of your shingles are turning upward (cupping) or downward (clawing), they are past their prime and losing their waterproofing ability.
    2. Missing Granules: Check your gutters. If you see an accumulation of sand-like granules, your shingles are shedding their protective layer. This exposes the asphalt to UV damage.
    3. Daylight Through the Roof Boards: Go into your attic on a sunny day. If you see spots of sunlight coming through the roof deck, you have gaps that need immediate attention.
    4. Sagging Roof Deck: A sagging roof indicates structural issues, possibly from prolonged water damage or inadequate support. This is a critical safety hazard.
    5. Age of the Roof: If your roof is approaching the end of its expected lifespan (e.g., 20 years for 3-tab shingles), start planning for replacement even if it looks okay. Preventative replacement is cheaper than emergency repairs.

    For more detailed information on building standards and material science, you can refer to general construction resources like Wikipediaโ€™s entry on Roofing.

    How Often Should You Replace Your Roof On Your House

    Step-by-Step: How to Assess Your Roofโ€™s Condition

    If you are unsure about the state of your roof, follow this simple DIY assessment guide. Safety First: Never walk on a steep or wet roof. Use binoculars from the ground or a sturdy ladder.

    1. Inspect from the Ground: Walk around your house. Look for missing shingles, dark streaks (algae), or sagging lines.
    2. Check the Gutters: Clean them out and look for granule loss. Note any rust or damage to the gutter system itself.
    3. Examine the Flashing: Look at the metal strips around chimneys, vents, and skylights. Cracked or missing flashing is a common source of leaks.
    4. Attic Inspection: Look for water stains, mold, or daylight piercing through. Check for proper ventilation flow.
    5. Professional Inspection: If you find any of the above issues, or if your roof is over 15 years old, hire a certified roofer for a detailed inspection. Most offer free or low-cost assessments.

    FAQ: Common Questions About Roof Replacement

    How much does it cost to replace a roof?

    The cost varies widely based on size, material, and location. For an average 2,000-square-foot home, an asphalt shingle roof typically costs between $8,000 and $12,000. Metal roofs can range from $15,000 to $30,000+. Always get at least three quotes from reputable contractors.

    Can I install a new roof over the old one?

    In some cases, yes. This is called a “roof-over.” However, most building codes allow only one layer of overlay. If you already have two layers, you must tear off the old roof. Additionally, a tear-off allows inspectors to check the decking for rot, which is crucial for long-term integrity.

    Does homeowners insurance cover roof replacement?

    It depends on the cause of the damage. Insurance typically covers sudden, accidental damage from storms, hail, or falling trees. It generally does not cover wear and tear, age-related deterioration, or lack of maintenance. Review your policy carefully.

    What is the best time of year to replace a roof?

    Late spring to early fall is the peak season, but scheduling can be difficult. Late fall or early winter can sometimes offer better pricing and faster scheduling, provided the weather permits safe installation. Avoid extreme heat or heavy rain periods.

    How long does a roof replacement take?

    For an average-sized home, a professional crew can complete an asphalt shingle replacement in 1โ€“3 days. Larger homes or complex roofs with multiple valleys, chimneys, or slate tiles may take a week or more.

    Conclusion

    Knowing how often should you replace your roof on your house is not just about counting years; itโ€™s about understanding your material, monitoring your environment, and recognizing the early signs of failure. While asphalt shingles may need replacing every 20โ€“30 years, metal and slate can protect your home for half a century or more.

    Donโ€™t wait for a leak to ruin your ceiling. Regular inspections and timely maintenance can extend your roofโ€™s life and save you thousands in emergency repairs. If your roof is nearing the end of its expected lifespan, start getting quotes now.

    Found this guide helpful? Share it with your neighbors on Facebook or Pinterest to help them protect their homes too! A well-maintained neighborhood starts with a solid roof over every head.