Category: preventive maintenance

  • How Do I Know When I Need A New Roof?

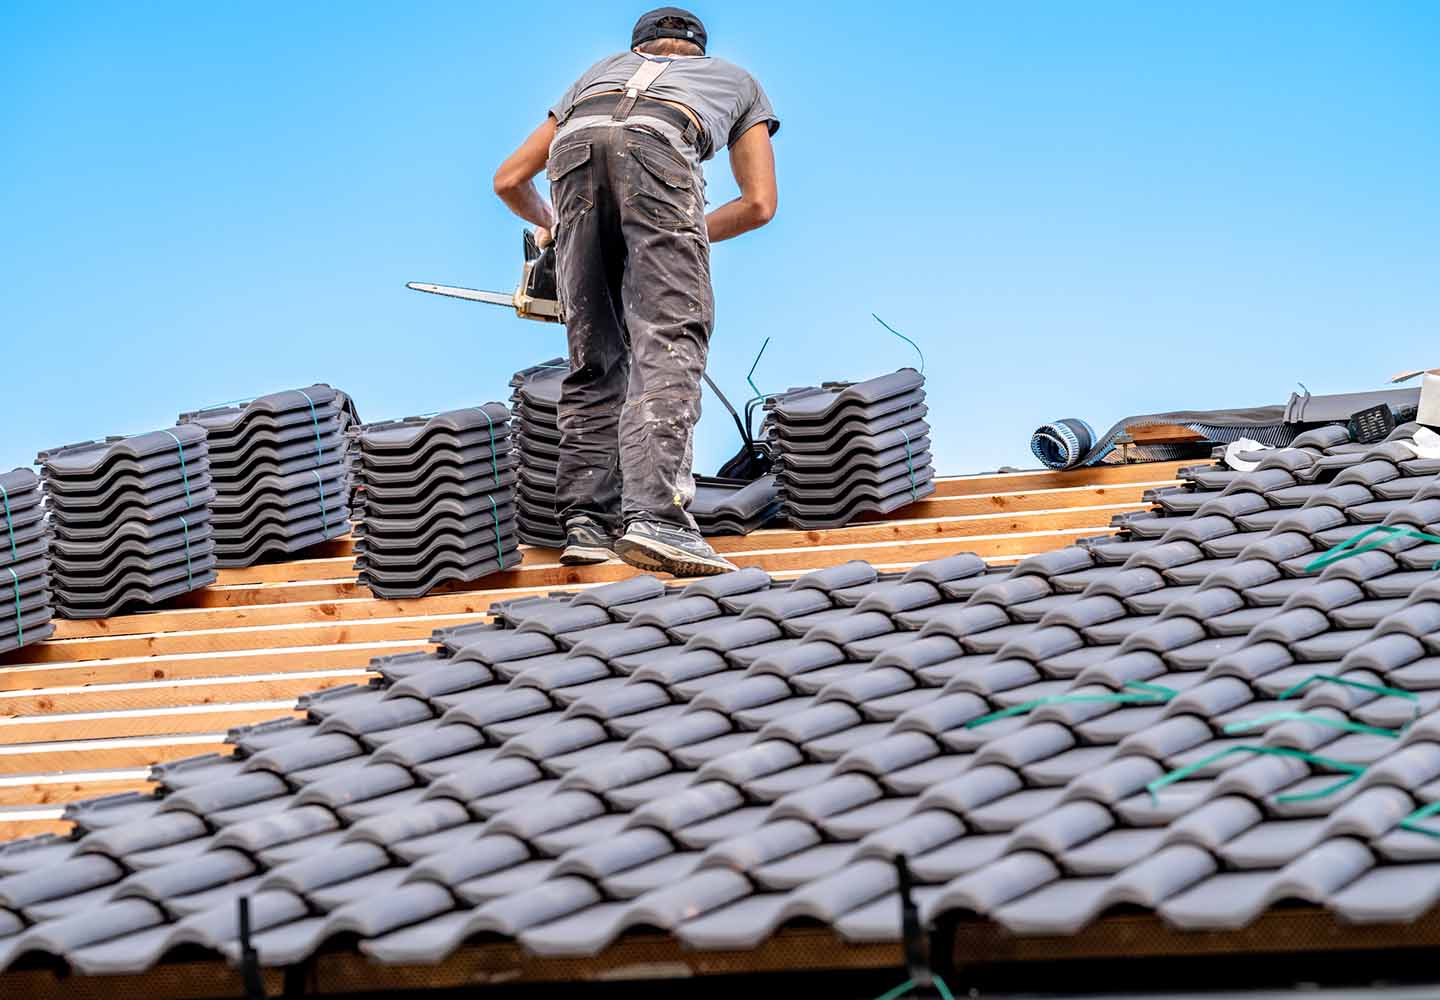
    How Do I Know When I Need A New Roof?

    Replacing a roof is one of the most significant investments a homeowner can make. It is not just about aesthetics; it is about protecting your family, your belongings, and the structural integrity of your house from the elements. Many homeowners delay this crucial maintenance until it is too late, leading to costly interior water damage and mold issues. If you are asking yourself, “How do I know when I need a new roof,” you are already taking the right step toward proactive home care.

    In this comprehensive guide, we will break down the clear indicators that your roof has reached the end of its life. We will move beyond simple guesswork and provide you with actionable, expert-backed advice to help you make an informed decision. Whether you are dealing with an aging asphalt shingle roof or noticing subtle leaks, understanding these signs can save you thousands of dollars in emergency repairs.

    1. How Old Is Your Roof? Understanding Material Lifespans

    The first and most objective factor in determining if you need a new roof is its age. Every roofing material has an expected lifespan. While proper maintenance can extend this life, physics and weathering eventually take their toll.

    If you do not know the age of your roof, check your home inspection report from when you bought the house, or look for permits filed with your local municipality. Here is a general breakdown of average lifespans for common roofing materials:

    Roofing MaterialAverage LifespanKey Characteristics
    Asphalt Shingles (3-tab)15โ€“20 YearsMost common, affordable, prone to wind damage.
    Architectural Asphalt25โ€“30 YearsThicker, more durable, better aesthetic appeal.
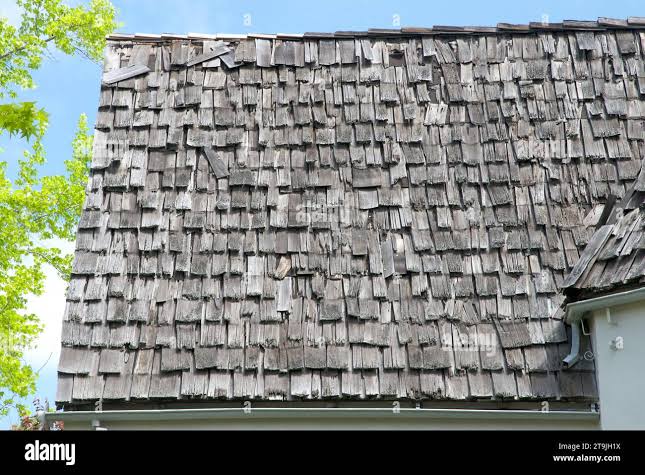
    Wood Shakes/Shingles20โ€“25 YearsNatural look, requires regular maintenance against rot.
    Metal Roofing40โ€“70 YearsHighly durable, energy-efficient, higher upfront cost.
    Slate/Tile50โ€“100+ YearsExtremely long-lasting, heavy, requires specialized installation.

    Source: Data aggregated from industry standards and manufacturer warranties.

    If your asphalt shingle roof is approaching the 20-year mark, you should begin scheduling annual inspections. Even if it looks fine from the ground, the underlying materials may be deteriorating. According to the National Association of Home Builders, regular maintenance can significantly extend the service life of building components, but replacement is inevitable after the material’s warranty period expires.

    2. Are Your Shingles Curling, Cracking, or Missing?

    Visual inspection is your first line of defense. You do not need to climb onto the roof to spot major issues; often, a pair of binoculars and a view from the ground are sufficient.

    Curling and Cupping

    Shingles that curl upward at the edges (cupping) or downward in the center (clawing) are suffering from heat stress and age. This distortion breaks the sealant strip that holds shingles together, making them vulnerable to wind uplift. Once shingles curl, they lose their ability to shed water effectively, leading to potential leaks underneath.

    Cracking and Brittle Texture

    As asphalt shingles age, the oils that keep them flexible evaporate. This causes the shingles to become brittle and crack. If you see cracks running through the shingles, they can no longer protect the roof deck from moisture. In colder climates, freeze-thaw cycles accelerate this cracking process.

    Missing Granules

    Check your gutters and downspouts. If you find an accumulation of sand-like granules, your shingles are shedding their protective coating. These granules protect the asphalt from UV rays. Without them, the sun bakes the asphalt, causing it to dry out and fail prematurely. Bald spots on your roof are a definitive sign that replacement is near.

    How Do I Know When I Need A New Roof

    3. Is There Evidence of Water Damage in Your Attic?

    Your roofโ€™s primary job is to keep water out. If water is getting in, the system has failed. However, leaks are not always visible from the outside. The attic is the best place to diagnose hidden roof problems.

    Grab a flashlight and head into your attic during the day. Look for the following signs:

    • Daylight Beams: If you can see sunlight piercing through the roof boards, you have gaps that water and pests can enter.
    • Water Stains: Dark streaks or wet spots on the underside of the roof decking or on the insulation indicate active or past leaks.
    • Mold and Mildew: A musty smell or visible black/green growth suggests chronic moisture intrusion. This is a health hazard and indicates that ventilation or waterproofing has failed.
    • Sagging Decking: If the wood between the rafters looks bowed or sagging, it has absorbed water and lost its structural strength. This is a critical safety issue requiring immediate attention.

    4. Why Are My Energy Bills Suddenly Spiking?

    A surprising indicator of a failing roof is your utility bill. Your roof plays a crucial role in your homeโ€™s thermal envelope. As shingles degrade, they lose their reflective properties and insulating value.

    Furthermore, poor roof ventilation often accompanies aging roofs. If hot air gets trapped in your attic during summer, it radiates down into your living space, forcing your AC to work harder. In winter, heat escapes through poorly insulated or damaged areas, making your furnace run continuously.

    If your energy costs have risen without a change in usage habits, have a professional assess your roofโ€™s insulation and ventilation. Sometimes, a new roof with modern, energy-efficient materials can lower your monthly bills significantly.

    5. Is Your Roof Sagging? A Critical Structural Warning

    A sagging roofline is perhaps the most alarming sign of all. It indicates that the structural integrity of the roof deck or the supporting trusses has been compromised.

    This sagging is usually caused by:

    1. Long-term water damage: Rotting wood loses its load-bearing capacity.
    2. Excessive weight: Multiple layers of old shingles or heavy snow accumulation.
    3. Foundation issues: Though less common, settling foundations can distort the roof frame.

    Important: If you notice a sag, do not wait. This is not a DIY fix. Contact a structural engineer or a licensed roofing contractor immediately. A collapsing roof poses a severe safety risk to your household.

    6. Have Neighbors Been Replacing Their Roofs Recently?

    Context matters. If your home was built in a subdivision where all houses were constructed around the same time, your neighborsโ€™ roofs are likely the same age as yours. If you notice a surge in roofing trucks in your neighborhood, it is a strong hint that the local weather patterns and material batch used in your area have reached their expiration date simultaneously.

    Talking to neighbors can provide valuable insights. Ask them about their experience with the roofing contractor they used and whether they encountered unexpected damage during replacement. This “social proof” can help you gauge the urgency of your own situation.

    7. What Do Professional Inspectors Say?

    While DIY checks are helpful, they are not substitutes for professional expertise. A certified roof inspector can identify issues that are invisible to the untrained eye, such as:

    • Flashing Failure: The metal strips around chimneys, vents, and valleys are common leak points. If the flashing is rusted, loose, or improperly sealed, water will enter regardless of the shingle condition.
    • Ventilation Issues: Improper airflow can cause premature aging of shingles from the inside out.
    • Soft Spots: Inspectors walk the roof to feel for soft areas in the deck, indicating rot beneath the shingles.

    Most reputable roofing companies offer free or low-cost inspections. Getting a second opinion is wise if you are unsure about a diagnosis.


    FAQ Section

    Q: Can I just repair my roof instead of replacing it?

    A: It depends on the extent of the damage. If the damage is localized (e.g., a few missing shingles from a storm) and the roof is relatively young (under 10 years), repairs are cost-effective. However, if the roof is near the end of its lifespan or has widespread issues like curling or granule loss, repairs are merely a band-aid. Frequent repairs on an old roof often cost more in the long run than a full replacement.

    Q: How much does a new roof cost in the US?

    A: Costs vary widely based on location, material, and roof size. On average, a standard asphalt shingle roof replacement for a 2,000-square-foot home ranges from $8,000 to $15,000. Metal roofs can cost $15,000 to $30,000+, while slate and tile are significantly higher. Always get at least three detailed quotes from licensed contractors.

    Q: Does homeowners insurance cover roof replacement?

    A: Typically, insurance covers roof damage caused by sudden, accidental events like hail, windstorms, or falling trees. It generally does not cover wear and tear, age-related deterioration, or lack of maintenance. Review your policy carefully and document any storm damage with photos immediately after it occurs.

    Q: How long does a roof replacement take?

    A: For an average-sized residential home, a complete roof replacement usually takes 1 to 3 days. Larger homes, complex roof designs (many valleys, turrets, or steep pitches), or bad weather conditions can extend this timeline. Your contractor should provide a specific schedule before starting work.

    Q: What is the best time of year to replace a roof?

    A: Late spring to early fall is ideal because temperatures are moderate, allowing roofing adhesives to seal properly. However, roofing can be done in cooler weather as long as it is not freezing or raining. Avoiding the peak summer heat can also be more comfortable for the crew and prevent shingles from becoming too soft during installation.


    Conclusion

    Knowing how do I know when I need a new roof is about observing the subtle and obvious signs of wear. From checking the age of your shingles and looking for granule loss in your gutters to inspecting your attic for water stains, these steps empower you to act before minor issues become major disasters.

    Remember, a roof is your homeโ€™s first line of defense. Ignoring the signs of failure can lead to structural damage, mold growth, and decreased property value. If you notice multiple signs listed in this article, do not hesitate to contact a professional for an inspection.

    Did you find this guide helpful? Share it with your friends and family on social media to help them protect their homes too. A well-informed homeowner is a prepared homeowner!
  • How To Find A Roof Leak On A Flat Roof

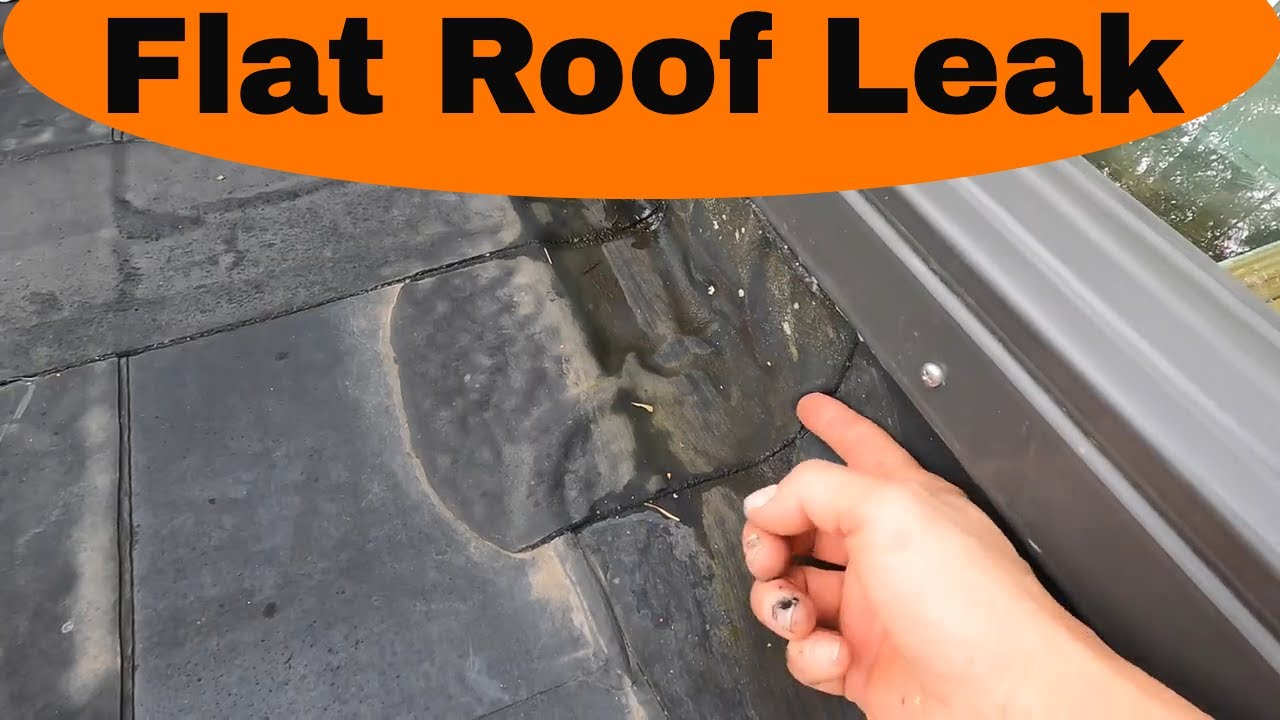
    How To Find A Roof Leak On A Flat Roof

    Water dripping from your ceiling is one of the most stressful sights for any homeowner or property manager. It signals immediate damage, potential mold growth, and costly repairs if left unchecked. If you are staring at a wet spot and wondering how to find a roof leak on a flat roof, you are not alone; flat roofs are notorious for hiding the source of water intrusion due to their unique drainage dynamics.

    Unlike sloped roofs where gravity quickly directs water away, flat roofs allow water to pool, making the entry point difficult to trace. However, with a systematic approach and the right tools, you can identify the culprit before it causes structural harm. This guide will walk you through professional inspection techniques, safety protocols, and common failure points specific to flat roofing systems.

    Why Is Finding Leaks on Flat Roofs So Difficult?

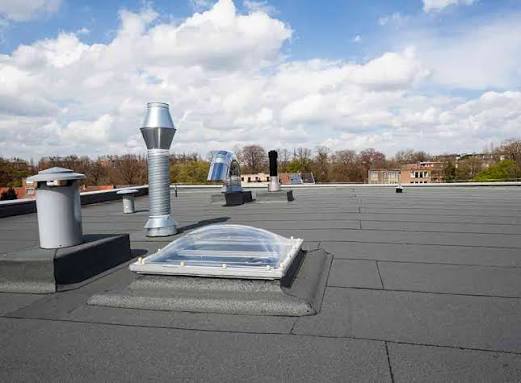
    Before diving into the detection process, it is crucial to understand why flat roofs behave differently than pitched roofs. In the roofing industry, we often say that “water finds its own level,” but on a flat roof, water also finds every tiny imperfection in the membrane.

    According to data from the National Roofing Contractors Association (NRCA), improper installation and lack of maintenance account for over 60% of premature roof failures. On a flat roof, a leak occurring at point A might manifest as a stain at point B, several feet away. This phenomenon, known as “water migration,” happens because water travels along insulation boards, decking, or vapor barriers before dripping through the ceiling drywall.

    Understanding this migration is key. You are not just looking for a hole; you are looking for the path the water took. For more detailed information on roofing materials and their properties, you can refer to the comprehensive overview on Wikipediaโ€™s Roofing page.

    How To Find A Roof Leak On A Flat Roof

    Step 1: Prioritize Safety and Preparation

    Never compromise safety for the sake of curiosity. Flat roofs can be slippery, especially when wet or covered in debris. Before you climb up, ensure you have the proper gear:

    • Non-slip footwear: Rubber-soled shoes with good traction.
    • Safety harness: If the roof is more than one story high, a fall protection system is mandatory.
    • Clear weather: Never inspect a roof during rain, high winds, or immediately after a storm when surfaces are slick.
    • Helper: Always have someone on the ground who knows you are on the roof.

    Once safe, clear the roof of any loose debris like leaves, branches, or trash. Debris can hold moisture against the membrane, accelerating wear and masking the actual leak source.

    Step 2: Visual Inspection of Common Failure Points

    Most leaks originate from specific weak points rather than the middle of an open field. Start your inspection by examining these high-risk areas:

    1. Flashing and Penetrations

    Flashing is the metal or rubber material used to seal joints around protrusions. Check around:

    • HVAC units
    • Vent pipes
    • Skylights
    • Chimneys

    Look for cracks, rust, or separated seams in the flashing. If the sealant looks brittle or cracked, water is likely entering there.

    2. Roof Drains and Scuppers

    Clogged drains cause water to pool, increasing the hydrostatic pressure on the membrane. Ensure all drains are free of debris. Look for signs of standing water (ponding) that remains more than 48 hours after rainfall. Ponding water accelerates membrane degradation and is a primary cause of leaks.

    3. Membrane Seams and Blisters

    Walk the perimeter and the field of the roof. Look for:

    • Blisters: Bubble-like formations indicating trapped air or moisture beneath the membrane.
    • Alligatoring: A pattern of cracks resembling alligator skin, common in older asphalt-based roofs.
    • Open Seams: Areas where the roofing plies have separated.

    Step 3: The Water Hose Test (Controlled Testing)

    If visual inspection doesnโ€™t reveal the source, you may need to perform a controlled water test. This method requires two people: one on the roof with a hose and one inside the building watching the ceiling.

    Procedure:

    1. Isolate Sections: Divide the roof into manageable sections (e.g., 10×10 feet).
    2. Start Low: Begin testing the area closest to the interior leak, not the highest point. Water flows down, so the source is often lower than you think.
    3. Apply Water Slowly: Use a garden hose to gently soak the section for 5โ€“10 minutes. Do not use high pressure, which can force water into intact seams and create false positives.
    4. Wait and Observe: The person inside should watch for drips. If no leak appears, move to the next section uphill.
    5. Mark the Spot: Once the leak reproduces, mark the exact area on the roof with chalk or tape.

    Note: This process can take several hours. Patience is essential.

    Step 4: Advanced Detection Methods

    For complex leaks or large commercial buildings, professional tools may be necessary. While DIYers can rent some of these, others require certified technicians.

    MethodHow It WorksBest For
    Infrared ThermographyDetects temperature differences; wet insulation retains heat differently than dry insulation.Locating hidden moisture under the membrane.
    Electronic Leak DetectionUses electrical current to find breaches in the membrane.Single-ply membranes (EPDM, TPO).
    Dye TestingFluorescent dye is added to water; UV light reveals the path.Tracing complex water migration paths.

    Infrared cameras are particularly effective because they can “see” wet insulation that is not yet visible on the surface. Wet spots appear as dark or light anomalies depending on the time of day and ambient temperature.

    Common Causes of Flat Roof Leaks

    Understanding why leaks happen helps prevent future issues. Here are the top offenders:

    • Poor Installation: Improperly adhered seams or insufficient flashing height.
    • Material Aging: UV exposure breaks down chemical bonds in roofing materials over time.
    • Foot Traffic: Excessive walking on the roof can puncture membranes or dislodge gravel.
    • Vegetation: Roots from weeds or trees can penetrate the roofing layers.

    FAQ Section

    Q1: Can I patch a flat roof leak myself?

    A: Small punctures or minor seam separations can often be patched with roofing cement or a patch kit designed for your specific membrane type (EPDM, TPO, etc.). However, if the leak is near flashing or involves large areas of blistering, professional repair is recommended to ensure a watertight seal.

    Q2: How long does it take to find a leak on a flat roof?

    A: A simple visual inspection might take 30โ€“60 minutes. If a water hose test is required, it can take several hours or even a full day, depending on the roof’s size and the complexity of the water migration.

    Q3: Why is my ceiling leaking when it hasnโ€™t rained recently?

    A: This could be due to condensation from poor attic ventilation, a burst pipe, or residual water from a previous storm that was trapped in the insulation and is slowly releasing. It is crucial to rule out plumbing issues before assuming it is a roof leak.

    Q4: What is the lifespan of a typical flat roof?

    A: Most modern flat roofs last between 15 to 30 years, depending on the material. EPDM and TPO roofs tend to last longer (20โ€“30 years), while built-up roofing (BUR) may require more frequent maintenance. Regular inspections can extend this lifespan significantly.

    Q5: Should I walk on my flat roof?

    A: Only when necessary and with proper safety precautions. Frequent foot traffic can damage the membrane. If you must access the roof, wear soft-soled shoes and avoid dragging equipment across the surface.

    Q6: How much does professional leak detection cost?

    A: Costs vary by region and roof size, but professional leak detection typically ranges from $300 to $1,000. This fee often includes a detailed report and thermal imaging, which can save thousands in unnecessary tear-off costs.

    Conclusion

    Learning how to find a roof leak on a flat roof is a valuable skill that can save you significant money and stress. By prioritizing safety, conducting thorough visual inspections, and using systematic testing methods like the hose test, you can pinpoint the source of water intrusion with confidence. Remember, early detection is key to preventing extensive structural damage and mold growth.

    If the leak proves elusive or the repair seems beyond your comfort level, do not hesitate to call a licensed roofing professional. Their expertise and specialized tools can provide a definitive solution.

    Did you find this guide helpful? Share it with your friends on social media to help them protect their homes too!

  • How To Fix A Leaky Roof On A Mobile Home

    How To Fix A Leaky Roof On A Mobile Home

    Water dripping from your ceiling is more than just an annoyance; it is a ticking time bomb for mold, structural rot, and costly repairs. If you are staring at a wet spot and wondering how to fix a leaky roof on a mobile home, you are not alone. This guide provides clear, actionable steps to seal leaks effectively, helping you restore peace of mind and dryness to your living space without breaking the bank.

    Why Do Mobile Home Roofs Leak?

    Before grabbing a toolbox, it is crucial to understand why the leak is happening. Mobile homes (also known as manufactured homes) have unique roofing systems compared to traditional stick-built houses. They often feature low-pitch roofs made of metal or asphalt shingles, which are susceptible to specific types of wear and tear.

    The primary culprit is usually the failure of sealants around protrusions. Vents, skylights, and air conditioning units create breaks in the roofing membrane. Over time, exposure to UV rays, extreme temperature fluctuations, and wind causes these sealants to crack, shrink, or peel away. According to industry data, nearly 80% of roof leaks originate not from the main field of the roof, but from these flashings and penetrations.

    Additionally, mobile homes can shift slightly over time due to foundation settling. This movement can stress the roof seams, particularly in older models with rubberized or TPO (Thermoplastic Olefin) membranes, leading to micro-tears that eventually become significant leaks.

    Tools and Materials You Will Need

    To successfully repair your roof, you need the right equipment. Using inferior materials may save money upfront but will lead to recurring leaks. Here is a checklist of essentials:

    • Safety Gear: Non-slip shoes, safety harness (if the pitch is steep), and sturdy gloves.
    • Cleaning Supplies: A stiff-bristle brush, mild detergent, and a garden hose.
    • Repair Materials:
      • High-quality roofing cement or elastomeric sealant (specifically designed for mobile homes/RVs).
      • Roofing tape or patch fabric (fiberglass mesh).
      • Replacement shingles or metal panels (if physical damage exists).
    • Tools: Putty knife, caulk gun, utility knife, and a ladder.

    Pro Tip: Always choose a sealant that remains flexible after curing. Mobile homes expand and contract with temperature changes; rigid sealants will crack within months.

    How To Fix A Leaky Roof On A Mobile Home

    Step-by-Step Guide: How To Fix A Leaky Roof On A Mobile Home

    Fixing a leak requires methodical preparation. Rushing this process often results in trapping moisture under the patch, which accelerates rot. Follow these precise steps for a lasting repair.

    Step 1: Locate the Source of the Leak

    Water travels. The drip inside your home may be several feet away from the actual entry point on the roof. Go into your attic or crawl space (if accessible) during a rainstorm or have someone spray water on the roof while you inspect from below. Look for water stains, dark spots, or damp insulation. Mark the area directly above the interior leak on the exterior roof.

    Step 2: Clean the Area Thoroughly

    Adhesion is the key to any waterproof repair. Dirt, moss, algae, and old, flaking sealant must be removed.

    1. Sweep the area around the leak with a stiff brush.
    2. Wash the surface with a mixture of water and mild detergent.
    3. Rinse thoroughly and allow it to dry completely. This is critical. Applying sealant to a damp surface will cause it to fail. Wait at least 24 hours after cleaning if it has rained recently.

    Step 3: Prepare the Surface

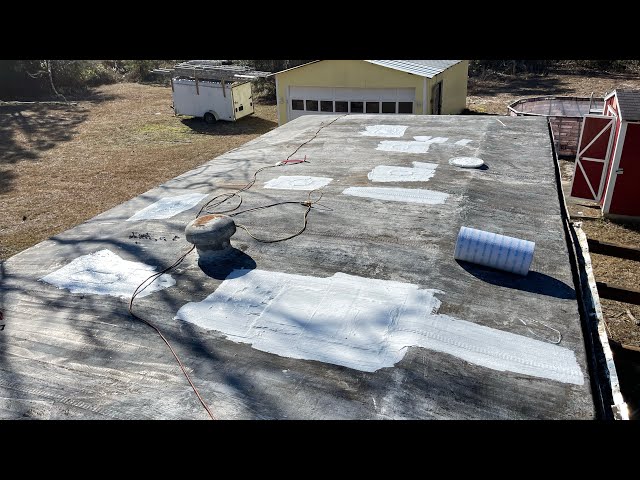
    If there is old caulking or cracked tar, scrape it away using a putty knife. For metal roofs, lightly sand the area around the leak to create a “tooth” for the new sealant to grip. If you are repairing a rubber (EPDM) roof, use a specialized primer recommended by the manufacturer to ensure chemical bonding.

    Step 4: Apply the Patch or Sealant

    For small cracks or holes around vents:

    1. Load your caulk gun with high-grade elastomeric sealant.
    2. Apply a generous bead of sealant over the crack, extending at least 2 inches beyond the damage on all sides.
    3. Smooth it out with a putty knife dipped in soapy water to prevent sticking.

    For larger tears or holes:

    1. Cut a piece of roofing patch fabric or fiberglass mesh slightly larger than the damaged area.
    2. Apply a layer of roofing cement to the roof surface.
    3. Press the patch firmly into the wet cement.
    4. Apply another thick layer of cement over the top of the patch, feathering the edges to blend with the surrounding roof. This creates a watertight “sandwich.”

    Step 5: Inspect and Maintain

    Once the repair is complete, monitor it during the next few rainstorms. Check the interior ceiling for any new signs of moisture. Regular maintenance, such as clearing debris from roof valleys and re-applying sealant every 2โ€“3 years, can extend the life of your mobile home roof significantly.

    Common Mistakes to Avoid

    Even experienced DIYers can make errors when dealing with mobile home roofing. Here are the most frequent pitfalls:

    MistakeConsequenceSolution
    Ignoring Vent BootsWater enters through cracked rubber boots around plumbing vents.Replace rubber boots entirely rather than just sealing cracks.
    Using Silicone CaulkSilicone does not adhere well to many roofing materials and cannot be painted over.Use polyurethane or elastomeric roofing sealants instead.
    Patch Over Wet WoodTraps moisture, leading to rapid rot and mold growth.Ensure the substrate is bone-dry before applying any patch.
    Walking on Weak SpotsCan puncture the roof further, especially on older aluminum skins.Distribute weight using plywood boards or walk only on supported rafters.

    When to Call a Professional

    While many leaks are manageable DIY projects, some situations require expert intervention. If the leak is widespread, if the roof deck feels soft or spongy when walked on, or if the structural integrity of the trusses is compromised, do not attempt a repair yourself.

    According to general construction guidelines, significant water damage can affect the electrical systems within the walls of a mobile home, posing a fire hazard. For complex issues, refer to resources like Wikipediaโ€™s article on Roofing to understand the broader technical standards and material classifications used in the industry.

    FAQ Section

    1. Can I use regular house roof shingles on a mobile home?

    It depends on the pitch. Most mobile homes have low-slope roofs (less than 3:12 pitch). Standard asphalt shingles require a steeper pitch to shed water effectively. Using them on a low-slope roof can lead to water backing up under the shingles. Instead, use modified bitumen, EPDM rubber, or metal roofing systems designed for low slopes.

    2. How much does it cost to fix a mobile home roof?

    A minor DIY patch job using sealant and tape typically costs between $50 and $150. However, a full roof replacement can range from $3,000 to $8,000 depending on the size of the home and materials used. Hiring a professional for a localized repair usually averages $300โ€“$600.

    3. What is the best sealant for a mobile home roof?

    Elastomeric liquid roof coatings or polyurethane-based sealants are widely considered the best options. They remain flexible in extreme temperatures, adhere well to metal and rubber, and provide UV protection. Brands like Dicor or Eternabond are popular choices in the mobile home community.

    4. How often should I inspect my mobile home roof?

    You should perform a visual inspection at least twice a year: once in the spring after winter storms and once in the fall before heavy rains or snow. Additionally, check the roof after any severe weather event, such as hail or high winds.

    5. Is it better to patch or replace the roof?

    If the roof is less than 10 years old and the damage is isolated to a small area (like a vent boot), patching is cost-effective. However, if the roof is over 15 years old, shows signs of widespread oxidation (chalky residue), or has multiple leaks, a full replacement is often more economical in the long run.

    Conclusion

    Learning how to fix a leaky roof on a mobile home empowers you to protect your biggest asset. By identifying the source early, using the right flexible materials, and following a thorough cleaning and application process, you can stop leaks in their tracks. Remember, consistency is keyโ€”regular inspections prevent small cracks from becoming catastrophic failures.

    Did this guide help you dry out your home? Share this article with fellow mobile home owners on social media to help them save money and avoid water damage. Stay dry and safe!

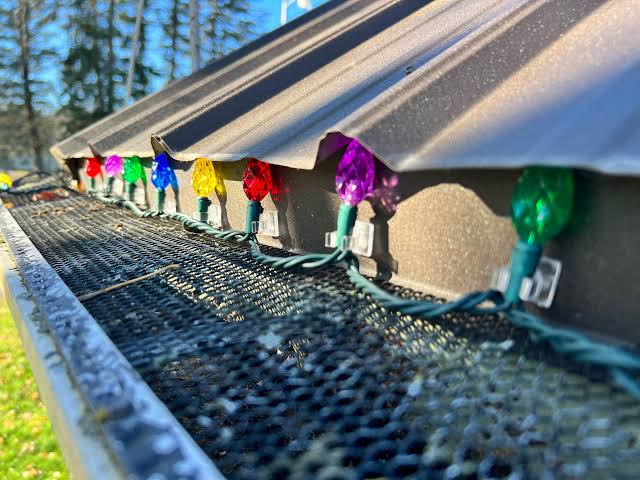
  • How to Attach Christmas Lights to a Metal Roof

    How to Attach Christmas Lights to a Metal Roof

    Hanging holiday decorations on a metal roof can feel like walking a tightrope between festive cheer and potential property damage. Many homeowners worry about puncturing their expensive roofing material or dealing with slippery surfaces during winter installations. If you are wondering how do you attach Christmas lights to a metal roof without causing leaks or voiding your warranty, you are in the right place. This guide provides safe, professional-approved methods to secure your lights effectively while keeping your roof intact.


    Why Metal Roofs Require Special Care

    Metal roofs are durable and long-lasting, but they present unique challenges for holiday decorators. Unlike asphalt shingles, which have texture and gaps that allow for easy clipping, metal panels are smooth, slick, and often coated with delicate finishes.

    Drilling holes or using adhesive tapes incorrectly can compromise the protective coating, leading to rust or water infiltration. According to industry standards, maintaining the integrity of the metal panelโ€™s seal is crucial for the longevity of the roof. Therefore, the method you choose must be non-invasive and secure enough to withstand wind and snow loads.

    The Best Tools for the Job: Choosing the Right Clips

    The secret to a successful installation lies in selecting the correct hardware. Standard plastic clips designed for gutters or shingles often fail on metal roofs because they cannot grip the smooth surface or the specific profile of standing seam panels.

    1. Standing Seam Clips

    If you have a standing seam metal roof (where panels connect via raised vertical legs), specialized standing seam clips are your best option. These clips slide under the seam cap without penetrating the metal. They hold the wire securely and are invisible from the ground once installed.

    2. Magnetic Hooks and Clips

    For flat metal sections or corrugated profiles, heavy-duty magnetic hooks offer a versatile solution. Ensure you use magnets with rubber coatings to prevent scratching the paint finish. These are excellent for temporary setups but may shift in high winds if not paired with additional securing methods.

    3. Adhesive-Backed Clips (Use with Caution)

    Some manufacturers offer UV-resistant, adhesive-backed clips specifically rated for metal surfaces. While convenient, these should only be used if the roof surface is thoroughly cleaned and dried. Note that removal can sometimes leave residue or damage older paint finishes.

    Clip TypeBest ForDurabilityRisk of Damage
    Standing Seam ClipsRaised seam panelsHighNone
    Magnetic HooksFlat/Corrugated metalMediumLow (if coated)
    Adhesive ClipsSmooth surfacesLow-MediumModerate
    Gutter ClipsMetal gutters onlyHighNone
    How Do You Attach Christmas Lights To A Metal Roof

    Step-by-Step Guide: How to Install Lights Safely

    Follow these detailed steps to ensure your installation is both beautiful and safe. Always prioritize personal safety over aesthetic perfection.

    Step 1: Inspect and Clean the Surface

    Before handling any lights, inspect your roof for loose panels or sharp edges. Use a soft brush to remove debris, dirt, or oxidation from the area where you plan to attach the clips. A clean surface ensures better adhesion for magnetic or adhesive options.

    Step 2: Plan Your Layout

    Measure the length of your roofline and calculate the total footage of lights needed. It is recommended to buy 10โ€“15% more than you think you need to account for corners and mistakes. Map out where your power source is located to avoid using excessive extension cords, which can be tripping hazards.

    Step 3: Install the Clips First

    Do not try to attach lights and clips simultaneously. Install all the clips along the roofline first.

    • For Standing Seams: Slide the clip under the seam cap at intervals of 12โ€“18 inches. Ensure it snaps firmly into place.
    • For Magnetic Hooks: Place them evenly along the edge, ensuring they are aligned straight.

    Step 4: Attach the Lights

    Once the clips are secure, snap the light strand into each clip. Start from the power source and work your way outward. Avoid pulling the wire taut; leave a slight slack to accommodate thermal expansion and contraction of the metal roof during temperature changes.

    Step 5: Secure the Power Cord

    Use weatherproof cable ties or additional clips to secure the main power cord along the roof edge. This prevents wind from whipping the cord around, which could dislodge your lights or damage the roof coating.

    Critical Safety Precautions

    Working on a metal roof during winter poses significant risks. Slips and falls are common due to ice, frost, or even morning dew on the smooth metal surface.

    • Use Proper Footwear: Wear shoes with rubber soles that provide maximum grip. Avoid boots with hard plastic or worn-out treads.
    • Check the Weather: Never attempt installation if rain, snow, or high winds are forecasted. Wet metal is extremely slippery.
    • Use a Harness: If your roof has a steep pitch, use a safety harness anchored to a secure point. Do not rely solely on ladders.
    • Electrical Safety: Ensure all lights are rated for outdoor use (look for the UL label). Use GFCI-protected outlets to prevent electrical shocks.

    For more information on electrical safety standards, you can refer to the National Electrical Code overview on Wikipedia.

    Common Mistakes to Avoid

    Even experienced DIYers make errors when dealing with metal roofs. Here are the most frequent pitfalls:

    1. Using Screws or Nails: Never penetrate the metal panel to hang lights. This creates immediate leak points and voids most manufacturer warranties.
    2. Ignoring Thermal Expansion: Metal expands and contracts with temperature changes. If your lights are pulled too tight, the wires can break or pull the clips off during cold snaps.
    3. Overloading Circuits: Calculate the amperage of your light strands. Overloading a circuit can trip breakers or cause fire hazards. LED lights are recommended as they consume significantly less power.
    4. Leaving Lights Up Too Long: Prolonged exposure to sun and weather can degrade the plastic clips and wire insulation. Remove your lights within a few weeks after the holidays.

    FAQ Section

    Q1: Will magnetic clips scratch my metal roof?

    Standard bare magnets can scratch the paint or coating if they slide. However, high-quality magnetic hooks designed for automotive or roofing use come with rubber or felt coatings. These protect the finish while providing strong hold. Always test a small, inconspicuous area first.

    Q2: Can I use adhesive tape to stick lights directly to the roof?

    It is not recommended. Most household tapes lose adhesion in cold temperatures and leave difficult-to-remove residue. Furthermore, removing the tape can peel off the paint or protective coating of the metal roof. Always use purpose-built clips.

    Q3: How far apart should I place the clips?

    For standard mini-lights or LED strands, place clips every 12 to 18 inches. If you are using heavier rope lights or larger bulbs, reduce the distance to 6โ€“10 inches to prevent sagging. Consistent spacing ensures a professional, neat appearance.

    Q4: Is it safe to walk on a metal roof in winter?

    Walking on a metal roof in winter is hazardous due to potential ice and slick surfaces. If possible, install lights from a sturdy ladder using an extension pole or hook tool. If you must go on the roof, ensure it is dry, wear non-slip footwear, and use fall protection gear.

    Q5: What type of lights are best for metal roofs?

    LED lights are the best choice. They generate less heat, reducing the risk of melting plastic clips or damaging the roof coating. They are also lighter, putting less stress on the attachment points, and are more energy-efficient.

    Q6: Will installing clips void my roof warranty?

    Non-penetrating clips, such as standing seam clips or magnetic hooks, generally do not void warranties because they do not alter the structure or integrity of the roof. However, drilling holes or using harsh adhesives likely will. Always check your specific manufacturerโ€™s warranty guidelines before proceeding.

    Conclusion

    Learning how do you attach Christmas lights to a metal roof is all about choosing the right tools and prioritizing safety. By using non-invasive methods like standing seam clips or coated magnetic hooks, you can create a stunning holiday display without compromising your roofโ€™s integrity. Remember to plan your layout, respect the weather conditions, and never penetrate the metal surface.

    Your home deserves to shine this holiday season, but not at the expense of your roofโ€™s longevity. Take your time, use the right equipment, and enjoy the festive glow. If you found this guide helpful, please share it with your friends and neighbors on social media to help them decorate safely too!

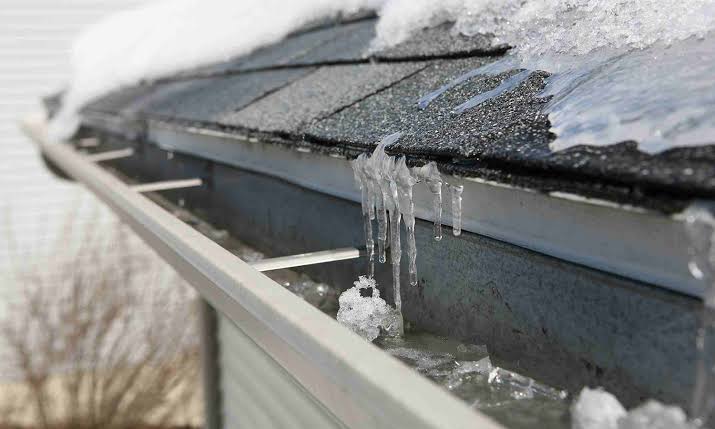
  • Best Way To Get Rid Of Ice Dams On Roof

    Best Way To Get Rid Of Ice Dams On Roof

    There is nothing quite as unsettling as hearing the drip-drip-drip of water inside your walls during the dead of winter. For many homeowners in the US, ice dams are not just a nuisance; they are a silent threat that can cause thousands of dollars in structural damage if left unchecked. If you are staring up at those jagged ridges of ice and wondering about the best way to get rid of ice dams on roof, you have come to the right place.

    In this guide, we will walk you through safe, effective, and professional-approved methods to handle this icy menace. We prioritize safety above all else, ensuring you protect both your home and yourself while tackling this common winter woe.

    Why Do Ice Dams Form? Understanding the Enemy

    Before we dive into removal, it is crucial to understand why these ice blocks form. An ice dam occurs when snow melts on the upper, warmer part of your roof, runs down, and refreezes at the colder eaves (the edge of the roof). This creates a barrier that traps subsequent melting water behind it.

    This trapped water has nowhere to go but upโ€”under your shingles, into your insulation, and eventually, onto your ceiling. According to insurance industry data, water damage from ice dams is one of the most frequent winter-related home insurance claims in northern states.

    The root cause is usually uneven roof temperatures. Your attic is likely too warm, heating the roof deck and melting the snow from below, while the eaves remain freezing cold because they extend beyond the heated living space.

    Immediate Action: Safe Removal Methods

    When you spot an ice dam, time is of the essence. However, panic leads to mistakes. Here are the safest ways to address the problem immediately.

    1. Use Calcium Chloride Ice Melt (The Gold Standard)

    Many homeowners make the critical mistake of using rock salt (sodium chloride). Do not do this. Rock salt is highly corrosive and can damage your roof shingles, gutters, paint, and surrounding landscaping.

    Instead, opt for calcium chloride. It is safer for roofing materials and works effectively in lower temperatures.

    Step-by-Step Application:

    1. Fill Nylon Stockings: Take a pair of old nylon pantyhose or socks. Fill them with calcium chloride ice melt pellets. Tie the end securely.
    2. Position Vertically: Lay the filled stocking vertically across the ice dam, perpendicular to the gutter. Ensure it crosses from the top of the dam down into the gutter.
    3. Wait for Channels: As the calcium chloride dissolves, it will melt a channel through the ice. This allows the trapped water behind the dam to drain freely off the roof.
    4. Repeat if Necessary: For large dams, place multiple stockings every 3โ€“4 feet along the roofline.

    This method is passive and safe. It does not require you to climb onto the roof or use sharp tools that could puncture your shingles.

    2. Professional Steam Removal

    If the ice dam is massive or if you are uncomfortable handling chemicals, hiring a professional with a steam generator is the best way to get rid of ice dams on roof without physical labor.

    Professionals use high-temperature, low-pressure steam to melt the ice instantly.

    • Pros: Immediate results, no chemical residue, zero risk of damaging shingles if done correctly.
    • Cons: More expensive than DIY methods; requires scheduling.

    Note: Always verify that the contractor uses steam, not high-pressure hot water, which can strip granules off your asphalt shingles.

    Best Way To Get Rid Of Ice Dams On Roof

    What NOT To Do: Avoiding Costly Mistakes

    In the rush to fix the leak, many homeowners resort to dangerous or destructive tactics. Avoid these common pitfalls:

    MethodWhy Itโ€™s DangerousPotential Damage
    Chipping with Axe/HammerHigh risk of slipping; easy to hit the roof deck.Punctured shingles, cracked underlayment, personal injury.
    Using Rock SaltCorrosive chemical reaction.Rusty gutters, killed plants, degraded asphalt shingles.
    Hot Water HoseWater refreezes quickly, creating more ice.Slippery roof surface, increased ice mass, thermal shock to shingles.
    Climbing on Icy RoofExtreme fall hazard.Severe bodily harm or death.

    As emphasized by safety guidelines, never attempt to physically chip away ice unless you are a trained professional with proper harnesses and safety gear. The risk of falling far outweighs the benefit of quick removal.

    Long-Term Prevention: Stopping Ice Dams Before They Start

    Removing the ice is only half the battle. To ensure you donโ€™t face this issue next winter, you must address the underlying causes: heat loss and poor ventilation.

    Improve Attic Insulation

    The primary driver of ice dams is heat escaping from your living space into the attic. This warms the roof deck, melting the snow.

    • Check R-Value: Ensure your attic insulation meets the recommended R-value for your climate zone. For most northern US states, an R-value of 49 to 60 is recommended.
    • Seal Air Leaks: Look for gaps around chimneys, vent pipes, and light fixtures. Use caulk or expanding foam to seal these leaks. This prevents warm air from bypassing your insulation.

    Enhance Roof Ventilation

    A cold roof is a happy roof. Proper ventilation ensures that the temperature of your roof deck matches the outside air temperature.

    • Soffit and Ridge Vents: Ensure your soffit vents (intake) are not blocked by insulation. Install or clear ridge vents (exhaust) to allow continuous airflow.
    • Fan Installation: In some cases, installing an attic fan can help circulate air and reduce heat buildup, though natural ventilation is often sufficient if properly designed.

    Install Heating Cables

    For homes prone to severe ice damming despite good insulation, electric heating cables can be a viable solution. These zig-zag cables are installed along the eaves and in gutters.

    • How They Work: They generate low-level heat to keep a path open for water drainage.
    • Installation Tip: Follow the manufacturerโ€™s instructions precisely. Incorrect installation can cause fire hazards or damage the roof.

    For more detailed information on building science and thermal dynamics related to roofing, you can refer to general principles outlined on Wikipedia.

    When to Call a Professional

    While DIY methods work for minor issues, certain scenarios demand expert intervention:

    1. Steep Roofs: If your roof pitch is steep, the risk of falling is too high for DIY.
    2. High Eaves: If you cannot reach the eaves safely from a ladder, do not attempt it.
    3. Active Leaks Inside: If water is already pouring into your home, you need immediate professional mitigation to prevent mold and structural rot.
    4. Uncertain Cause: If you have good insulation but still get ice dams, a professional energy audit can identify hidden thermal bridges.

    FAQ Section

    1. Can I use table salt to melt ice dams?

    No. Table salt is ineffective in very low temperatures and, like rock salt, can corrode metal gutters and damage roofing materials. Always use calcium chloride specifically designed for roofs.

    2. How much does it cost to remove ice dams professionally?

    Prices vary by region and severity, but typically range from $200 to $500 for standard residential removal. Steam removal may cost more due to equipment requirements.

    3. Will removing the ice dam stop the leak immediately?

    Not always. Once water has penetrated under the shingles, it may take time to dry out. However, removing the dam stops new water from entering. You may need to repair interior drywall or insulation after the roof dries.

    4. Is it safe to spray water on the roof to melt ice?

    Generally, no. In freezing temperatures, the water will refreeze almost instantly, adding more weight and ice to the roof. It also creates a slippery hazard for anyone on ladders or the roof.

    5. How can I tell if my attic insulation is sufficient?

    If you can see the floor joists in your attic, you likely need more insulation. A simple rule of thumb is that insulation should be deep enough to cover the joists completely. Consider an energy audit for a precise assessment.

    6. Do ice dams void my home insurance?

    Not necessarily. Most standard policies cover sudden and accidental water damage from ice dams. However, if negligence is proven (e.g., known lack of maintenance), claims might be disputed. Always check your specific policy details.

    Conclusion

    Dealing with winter weather is challenging, but knowing the best way to get rid of ice dams on roof empowers you to protect your biggest investment. Remember, the key is a two-pronged approach: safe, immediate removal using calcium chloride or professional steam, followed by long-term prevention through better insulation and ventilation.

    Donโ€™t wait for the next big snowstorm to act. Inspect your attic today, seal those leaks, and prepare your home for a dry, worry-free winter.

    Found this guide helpful? Share it with your neighbors on Facebook or Twitter to help them protect their homes too!

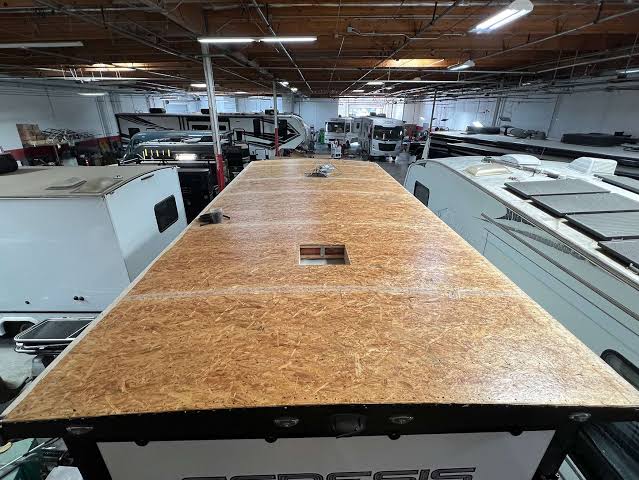
  • How Much Does It Cost To Replace A Camper Roof?

    How Much Does It Cost To Replace A Camper Roof?

    Leaking roofs are every RVerโ€™s nightmare. One small drip can quickly turn into thousands of dollars in water damage if left unchecked. If you are staring at a sagging ceiling or pooling water, you are likely asking the critical question: How much does it cost to replace a camper roof?

    The answer isn’t a single number, but understanding the variables can save you from overpaying. In this guide, we will break down the costs by material type, labor fees, and hidden expenses so you can make an informed decision for your rig.

    Understanding the Average Cost Range

    Before diving into specific materials, it is essential to establish a baseline. In 2026, the national average for a full camper roof replacement ranges between $3,000 and $15,000.

    This wide variance exists because “camper” covers everything from a small pop-up trailer to a 40-foot Class A motorhome. The size of your vehicle, the complexity of the roof structure (such as slide-outs or skylights), and your geographic location all play pivotal roles in the final bill.

    According to industry data, most mid-sized travel trailers fall into the $4,500 to $7,500 range for a professional replacement. However, DIY enthusiasts might reduce this cost by 40-50%, provided they have the necessary skills and tools.

    Cost Breakdown by Roof Material

    The material you choose is the single biggest factor influencing price. Each type offers different benefits regarding durability, weight, and insulation.

    1. EPDM Rubber Roofing

    EPDM (Ethylene Propylene Diene Monomer) is the most common roofing material for modern travel trailers. It is lightweight, flexible, and relatively affordable.

    • Average Cost: $1,500 โ€“ $4,500 (Materials + Labor)
    • Lifespan: 10โ€“15 years
    • Best For: Budget-conscious owners and smaller trailers.

    Pros:

    • Lightweight, improving fuel efficiency.
    • Easy to repair with patch kits.
    • Resistant to UV radiation and ozone.

    Cons:

    • Can be punctured by sharp branches.
    • Seams may require regular sealing.

    2. TPO (Thermoplastic Polyolefin)

    TPO is often considered the premium upgrade from EPDM. It is more durable, resistant to tears, and typically comes in white, which reflects heat.

    • Average Cost: $2,500 โ€“ $6,000 (Materials + Labor)
    • Lifespan: 15โ€“20 years
    • Best For: Owners in hot climates who want better energy efficiency.

    Pros:

    • Higher tear strength than EPDM.
    • Reflects sunlight, keeping the interior cooler.
    • Environmentally friendly and recyclable.

    Cons:

    • Slightly more expensive upfront.
    • Requires specialized adhesives for installation.

    3. Fiberglass Roofing

    Fiberglass is standard on higher-end motorhomes and fifth wheels. It is rigid, durable, and provides a smooth finish that looks sleek.

    • Average Cost: $5,000 โ€“ $12,000+ (Materials + Labor)
    • Lifespan: 20+ years
    • Best For: Large motorhomes and permanent installations.

    Pros:

    • Extremely durable and impact-resistant.
    • Low maintenance once installed.
    • Excellent structural integrity.

    Cons:

    • Heavy, which may affect payload capacity.
    • Prone to cracking if the frame flexes significantly.
    • Most expensive option.

    Comparison Table: Quick View

    MaterialAvg. Cost RangeLifespanMaintenance LevelWeight
    EPDM Rubber$1,500 – $4,50010-15 YearsMediumLight
    TPO$2,500 – $6,00015-20 YearsLowLight
    Fiberglass$5,000 – $12,000+20+ YearsLowHeavy
    How Much Does It Cost To Replace A Camper Roof

    Labor Costs vs. DIY Savings

    If you are handy with tools, you might consider doing the job yourself. However, roof replacement is not a beginner-level project.

    Professional Installation Costs

    Labor typically accounts for 40% to 60% of the total cost. Mechanics charge between $75 and $150 per hour, depending on their expertise and location. A full roof replacement usually takes 1โ€“3 days.

    • Small Trailer: 8โ€“12 hours of labor.
    • Large Motorhome: 20โ€“30 hours of labor.

    DIY Potential Savings

    By buying materials directly, you can save significantly. For example, a roll of EPDM rubber might cost $800โ€“$1,200, whereas a shop charges $2,500+ for the same material installed.

    Warning: Improper installation can lead to leaks that cause rot in the wooden subfloor. This secondary damage can cost $5,000 to $10,000 to fix. If you are unsure about sealing edges or handling adhesives, hire a professional.

    Hidden Costs You Must Consider

    When budgeting for how much does it cost to replace a camper roof, do not forget these additional expenses:

    1. Subfloor Repair: If water has leaked in, the plywood underneath may be rotted. Replacing rotten wood adds $500โ€“$2,000 to the bill.
    2. Removal of Fixtures: Skylights, air conditioners, and solar panels must be removed and resealed. Some shops charge extra for each fixture.
    3. Disposal Fees: Old roofing materials must be disposed of properly, which can cost $100โ€“$300.
    4. Insulation Upgrade: While the roof is off, it is the perfect time to add extra insulation. This costs an additional $200โ€“$500 but improves comfort.

    Step-by-Step Overview of the Replacement Process

    Understanding the workflow helps you verify if a contractor is doing the job correctly. Here is what a professional replacement entails:

    1. Removal: All old roofing material, sealants, and fixtures (AC units, vents) are stripped away.
    2. Inspection: The underlying wood structure is inspected for rot or mold. Any damaged sections are cut out and replaced with new marine-grade plywood.
    3. Cleaning: The surface is thoroughly cleaned and dried. Moisture meters are used to ensure no dampness remains.
    4. Installation: The new membrane (EPDM/TPO) or fiberglass sheets are laid out. Adhesives are applied evenly to prevent bubbles.
    5. Sealing: All seams, edges, and penetrations (where screws or vents go through) are sealed with high-quality lap sealant.
    6. Reassembly: Fixtures are reinstalled with new gaskets and sealant to ensure a watertight fit.

    For more detailed technical standards on recreational vehicle construction, you can refer to general industry guidelines available on Wikipedia.

    FAQ: Common Questions About Camper Roof Replacement

    1. Can I just patch my roof instead of replacing it?

    Yes, if the damage is localized (e.g., a small tear or crack). Patch kits cost under $50. However, if the roof is older than 10 years or has multiple weak spots, a full replacement is more cost-effective in the long run.

    2. How often should I replace my camper roof?

    Most rubber roofs last 10โ€“15 years, while fiberglass can last 20+ years. Regular inspections twice a year can extend these lifespans. If you see widespread cracking, bubbling, or soft spots, it is time for a replacement.

    3. Does insurance cover roof replacement?

    It depends on your policy. Standard auto/RV insurance usually covers damage from accidents, falling objects, or storms. However, it typically does not cover wear and tear or lack of maintenance. Check your policy for “comprehensive coverage.”

    4. What is the best time of year to replace a roof?

    Spring and early fall are ideal. Temperatures between 50ยฐF and 80ยฐF (10ยฐCโ€“27ยฐC) allow adhesives to cure properly. Avoid extreme heat or cold, as these can affect the bonding process.

    5. Will a new roof increase my RV’s resale value?

    Absolutely. A new roof is a major selling point. Buyers are often wary of water damage, so having a recently replaced roof with a warranty can increase your RV’s value by $1,000โ€“$3,000 and make it sell faster.

    Conclusion

    Knowing how much does it cost to replace a camper roof empowers you to budget effectively and avoid scams. While the upfront cost of $3,000 to $15,000 may seem steep, it is an investment in the longevity of your home on wheels. Ignoring a failing roof leads to far more expensive structural repairs down the line.

    Whether you choose durable fiberglass or cost-effective EPDM, prioritize quality installation. If you found this guide helpful, please share it with your fellow RVers on social media. A well-maintained roof means more adventures and fewer worries!

  • When Was My Roof Replaced? 5 Easy Ways to Check

    When Was My Roof Replaced? 5 Easy Ways to Check

    Buying a home is one of the most significant investments you will ever make. However, once the excitement settles, practical questions often arise, especially regarding major structural components like the roofing system. Many homeowners find themselves asking, “How do I find out when my roof was replaced?” because this information is crucial for insurance, maintenance planning, and future resale value.

    If you are feeling unsure or overwhelmed by the lack of documentation, donโ€™t worry. You are not alone. In this guide, we will walk you through simple, effective steps to uncover your roofโ€™s history without needing a degree in construction.

    Why Knowing Your Roofโ€™s Age Matters

    Before we dive into the how, letโ€™s briefly address the why. Understanding the age of your roof is not just about satisfying curiosity; it is a critical piece of financial and safety data.

    • Insurance Premiums: Many insurers offer discounts for newer roofs or may deny coverage for roofs older than 20โ€“25 years.
    • Maintenance Planning: Asphalt shingles typically last 15โ€“20 years. Knowing the installation date helps you budget for repairs or replacement before leaks occur.
    • Resale Value: A recent roof replacement can significantly boost your homeโ€™s market value and appeal to buyers.

    Now, letโ€™s explore the five most reliable methods to determine when your roof was installed.

    1. Check Your Local Building Permit Records

    One of the most accurate ways to determine when a roof was replaced is by searching for building permits. In most jurisdictions in the United States, replacing a roof requires a permit to ensure the work meets local building codes and safety standards.

    How to Search for Permits

    1. Visit Your County or City Website: Most municipalities have an online database for public records. Look for sections labeled “Building Department,” “Permit Search,” or “Property Records.”
    2. Enter Your Address: Use your exact street address to filter results.
    3. Filter by Date or Type: Look for permits issued under categories like “Roofing,” “Re-roofing,” or “Structural Repair.”

    If you find a permit, it will usually list the issue date, the contractorโ€™s name, and the scope of work. This date is a strong indicator of when the work was completed. If you cannot find records online, consider visiting your local building department in person or calling them. They often have archived records that are not digitized.

    Pro Tip: If you bought the house recently, check the closing documents provided by your title company. They often include a summary of permitted improvements made during the previous ownerโ€™s tenure.

    2. Review Your Home Inspection Report

    If you purchased your home within the last few years, your pre-purchase home inspection report is a goldmine of information. Professional home inspectors are trained to estimate the age of roofing materials based on wear patterns, granule loss, and manufacturer markings.

    What to Look For in the Report

    • Estimated Remaining Life: Inspectors often phrase this as “The roof has approximately 5โ€“7 years of useful life remaining.”
    • Installation Date Estimates: Some inspectors note if the roof appears to be “new,” “mid-life,” or “near end-of-life.”
    • Photos: Compare current photos of your roof with those in the report. Significant changes in appearance can help narrow down the timeline.

    If you no longer have a copy of the report, contact the inspection company. They typically retain records for several years and may provide you with a digital copy for a small fee or even for free.

    3. Contact Previous Owners or Real Estate Agents

    Sometimes, the simplest solution is the most effective. Reaching out to the previous owners or the real estate agent who handled the sale can provide direct answers.

    Steps to Take

    1. Ask Your Real Estate Agent: They may have kept notes from the listing description or conversations with the seller.
    2. Contact Previous Owners: If you have their contact information, send a polite email or message. Most people are happy to share maintenance records, especially if they kept receipts for tax or warranty purposes.
    3. Check Seller Disclosure Forms: In many states, sellers are legally required to disclose known issues and major improvements. Review the disclosure statement you signed during the purchase process.

    While this method relies on memory and honesty, it can often lead you to physical documents like invoices or warranty certificates that confirm the exact date.

    4. Inspect the Roof for Manufacturer Dates

    If paper trails are missing, your roof itself holds clues. Manufacturers often embed date codes into shingles, vents, or flashing. While this requires a bit of detective work, it can be highly accurate.

    Where to Look

    • Shingle Bundles: If any leftover bundles were stored in the garage or shed, check the packaging. The manufacturing date is usually printed on the wrapper.
    • Vent Pipes and Flashing: Look at the metal flashing around chimneys and vent pipes. Sometimes, installers write the date with a marker on the underside of the flashing or on the plywood decking visible from the attic.
    • Attic Inspection: Carefully enter your attic (with proper safety gear) and look up at the underside of the roof deck. Contractors sometimes stamp or write the installation date on the wood sheathing.

    Safety Warning: Never climb onto your roof unless you are trained and equipped with proper fall protection. If you are uncomfortable doing this, hire a professional roofer for a minor inspection.

    5. Hire a Professional Roofer for an Assessment

    When all else fails, a professional opinion is your best bet. Licensed roofing contractors have extensive experience identifying different types of roofing materials and estimating their age based on visual cues.

    What a Professional Looks For

    • Granule Loss: Excessive granules in gutters indicate aging asphalt shingles.
    • Curling or Cracking: These are signs of weathering that correlate with age.
    • Moss and Algae Growth: While dependent on climate, heavy growth can suggest an older roof.

    Many roofing companies offer free or low-cost inspections. During the visit, ask specifically: “Based on your experience, when do you estimate this roof was installed?” They can often give you a range (e.g., “This looks like a 2018โ€“2019 install”) which is sufficient for most insurance and maintenance purposes.

    For more detailed information on roofing materials and their typical lifespans, you can refer to this Wikipedia article on roofing.

    How Do I Find Out When My Roof Was Replaced

    Comparison: Methods to Find Roof Replacement Date

    MethodAccuracyCostEffort LevelBest For
    Building PermitsHighFreeMediumOfficial verification
    Home Inspection ReportMedium-HighFree (if owned)LowRecent homebuyers
    Previous Owner/AgentVariableFreeLowQuick answers
    Physical InspectionMediumFreeHighDIY enthusiasts
    Professional RooferHigh$0โ€“$150LowAccurate estimates

    Frequently Asked Questions (FAQ)

    Q: Can I tell the exact year my roof was replaced just by looking at it?

    A: Not exactly. While you can estimate the age based on wear and tear, determining the exact year usually requires documentation like permits or invoices. Visual inspections provide a range rather than a specific date.

    Q: Do I need a permit for every roof replacement?

    A: In most US jurisdictions, yes. Full roof replacements typically require a permit to ensure compliance with local building codes. However, minor repairs might not. Always check with your local building department.

    Q: How long does a typical asphalt shingle roof last?

    A: Standard 3-tab asphalt shingles last about 15โ€“20 years, while architectural or premium shingles can last 25โ€“30 years. Climate, ventilation, and maintenance play significant roles in longevity.

    Q: Will knowing the roof age help lower my insurance premiums?

    A: Yes. Many insurance companies offer discounts for roofs that are less than 10 years old. Conversely, older roofs may result in higher premiums or require a specialized inspection before coverage is granted.

    Q: What if there are no records and the previous owner doesnโ€™t know?

    A: In this case, hiring a professional roofer for an assessment is your best option. They can provide a written estimate of the roofโ€™s age, which is often accepted by insurance companies and potential buyers.

    Conclusion

    Finding out when your roof was replaced doesnโ€™t have to be a stressful mystery. By starting with building permits and home inspection reports, you can often find concrete evidence. If those avenues are dry, reaching out to previous owners or conducting a physical inspection can yield valuable clues. Finally, a professional assessment provides peace of mind and expert validation.

    Knowing your roofโ€™s age empowers you to maintain your home proactively, save on insurance, and protect your investment. Donโ€™t wait for a leak to start asking questions. Take action today to uncover your roofโ€™s history.

    Found this guide helpful? Share it with your friends on social media who might be navigating homeownership for the first time!

  • Best Way to Repair a Flat Roof: Expert Guide

    Best Way to Repair a Flat Roof: Expert Guide

    Leaking roofs are every homeownerโ€™s nightmare, but flat roofs present unique challenges that sloped roofs simply donโ€™t have. If you are staring at a puddle on your ceiling or noticing bubbling material on your rooftop, you are likely wondering what is the best way to repair a flat roof without breaking the bank or causing further damage. This guide provides clear, actionable steps to help you tackle common issues safely and effectively.

    Understanding Your Flat Roof Material

    Before you pick up a trowel or a roll of tape, you must identify what your roof is made of. Using the wrong repair method can void warranties or cause immediate failure. Most residential and commercial flat roofs in the US fall into three categories:

    1. EPDM (Rubber): A black, synthetic rubber membrane. It is durable and flexible.
    2. TPO (Thermoplastic Polyolefin): Usually white or light gray, known for reflecting heat.
    3. Built-Up Roofing (BUR) or Modified Bitumen: Layers of asphalt and fabric, often covered with gravel or a mineral surface.

    According to industry standards, the longevity of these materials varies significantly. For detailed technical specifications on roofing membranes, you can refer to general construction resources like Wikipediaโ€™s entry on Roofing. However, for practical repairs, knowing the material dictates the adhesive or patch kit you must buy.

    What Is the Best Way to Repair a Flat Roof?

    The “best” way depends entirely on the severity of the damage. However, for 80% of minor issues, the most effective method is cleaning the area thoroughly and applying a compatible self-adhering patch or liquid coating.

    Quick fixes like silicone caulk often fail because they do not bond well with UV-exposed roofing materials over time. A proper repair requires mechanical adhesion or chemical welding, depending on the membrane type.

    Step-by-Step: Repairing Small Punctures and Cracks

    If you have a small hole (less than 6 inches) or a hairline crack, follow this precise protocol. This method works best for EPDM and TPO roofs.

    1. Clean the Area: Use a specialized roof cleaner or a mixture of mild dish soap and water. Scrub the area within a 6-inch radius of the damage. Crucial: The surface must be 100% dry. Moisture prevents adhesion.
    2. Round the Corners: If cutting a patch, round the corners. Sharp corners are prone to peeling under thermal expansion and contraction.
    3. Apply Primer (If Required): Some patches require a primer pen. Apply it evenly and let it tack up for 5โ€“10 minutes.
    4. Install the Patch: Peel the backing off the self-adhering patch. Center it over the damage.
    5. Roll It Out: Use a J-roller or a heavy hand roller. Apply firm pressure from the center outward to remove air bubbles. Ensure there are no wrinkles.

    Pro Tip: Always repair on a day when the temperature is between 50ยฐF and 90ยฐF (10ยฐCโ€“32ยฐC). Extreme cold makes membranes brittle; extreme heat makes them too soft to handle properly.

    How Do You Fix a Blister on a Flat Roof?

    Blisters are bubbles trapped under the roofing membrane, caused by moisture turning into steam or poor initial installation. Ignoring them can lead to ruptures.

    The Repair Process:

    • Cut an X: Use a sharp utility knife to cut an “X” shape into the blister. Do not cut through the underlying deck.
    • Dry It Out: Lift the flaps and allow the area to dry completely. You may use a heat gun on a low setting to accelerate drying, but be careful not to burn the membrane.
    • Apply Adhesive: Inject roofing cement or compatible adhesive under the flaps.
    • Press Down: Firmly press the flaps back into place.
    • Patch Over: For added security, place a small patch over the “X” cut using the method described above.
    What Is The Best Way To Repair A Flat Roof

    Dealing with Ponding Water Issues

    Ponding water is water that remains on the roof for more than 48 hours after rainfall. This is not just a cosmetic issue; the weight can stress the structure, and standing water accelerates membrane degradation.

    Why It Happens:

    • Structural sagging.
    • Clogged drains or scuppers.
    • Improper slope during installation.

    The Fix: While re-sloping a roof is a major construction project, you can mitigate minor ponding by:

    1. Clearing Drains: Ensure all drains are free of leaves and debris.
    2. Installing Drainage Mats: These are porous layers placed under the membrane to channel water to drains.
    3. Using Tapered Insulation: In severe cases, adding tapered foam insulation boards can create a slight slope toward drains. This is usually a job for professionals.

    Comparison: DIY Patch Kits vs. Professional Replacement

    When deciding how to proceed, consider the scope of the damage. Here is a quick comparison to help you decide.

    FeatureDIY Patch/CoatingProfessional Replacement
    Cost$50 – $300$5,000 – $15,000+
    Time2 – 4 hours3 – 7 days
    Longevity2 – 5 years (if done correctly)15 – 30 years
    Best ForSmall holes, minor cracks, blistersLarge tears, widespread aging, structural issues
    Skill LevelBeginner to IntermediateExpert Required

    Note: If more than 25% of your roof is damaged, replacement is often more cost-effective than repeated repairs.

    When Should You Call a Professional?

    While DIY repairs are satisfying and economical, some situations demand expert intervention. You should call a licensed roofer if:

    • The Leak Source is Unknown: Water travels. The drip inside your house may be 10 feet away from the actual roof breach. Professionals use moisture meters and infrared cameras to locate hidden leaks.
    • Structural Damage: If the roof deck feels soft or spongy when you walk on it, the wood beneath is rotting. This requires deck replacement, not just membrane repair.
    • Warranty Concerns: Many flat roof manufacturers void warranties if unauthorized repairs are performed. Check your warranty terms before applying any aftermarket products.
    • Large Scale Damage: If you have multiple large blisters or tears spanning several feet, a patch job will likely fail quickly.

    Frequently Asked Questions (FAQ)

    1. Can I use regular tar to repair my flat roof?

    No. Regular asphalt tar is not compatible with modern single-ply membranes like EPDM or TPO. It can cause chemical reactions that degrade the membrane further. Always use manufacturer-approved adhesives or coatings.

    2. How long does a flat roof repair last?

    A properly executed DIY patch can last 3 to 5 years. Professional repairs using heat-welded seams or high-grade coatings can last 10 years or more, depending on weather conditions and maintenance.

    3. What is the best sealant for a flat roof?

    For EPDM roofs, use EPDM-specific splice adhesive or seam tape. For TPO, use TPO-compatible weldable patches. For general maintenance, acrylic or silicone-based roof coatings are popular, but ensure they are compatible with your specific membrane type.

    4. Why is my flat roof leaking after rain?

    Flat roofs leak due to punctures, failed seams, blistering, or clogged drains. Because water does not run off quickly, even a tiny pinhole can allow significant water ingress over time. Regular inspection of seams and drains is critical.

    5. Is it safe to walk on a flat roof?

    Generally, yes, but with caution. Avoid walking on the roof in extreme heat (it can become slippery) or when wet. Always wear soft-soled shoes to avoid puncturing the membrane. If the roof is old or shows signs of sagging, do not walk on it.

    Conclusion

    Knowing what is the best way to repair a flat roof empowers you to maintain your homeโ€™s integrity and avoid costly emergency replacements. For minor issues, a clean, dry surface and a compatible patch kit are your best friends. For structural issues or widespread damage, professional assessment is non-negotiable.

    Regular maintenanceโ€”clearing drains, inspecting seams, and addressing small punctures immediatelyโ€”can extend the life of your flat roof by decades. Donโ€™t wait for a major leak to take action.

    Found this guide helpful? Share it with your neighbors or on social media to help others protect their homes from water damage!

  • Find a Reliable Roofer Near You Fast

    Find a Reliable Roofer Near You Fast

    Your roof is your homeโ€™s first line of defense against the elements, but finding someone trustworthy to fix it can feel like navigating a minefield. With countless ads promising “cheap fixes” and storm chasers knocking on doors after every bad weather event, homeowners are often left anxious and confused. If you are asking yourself, “How do I find a reliable roofer in my area,” you are not alone, and this guide will walk you through the exact steps to secure quality work without the stress.

    Why Vetting Your Roofer Is Non-Negotiable

    Before we dive into the how, letโ€™s address the why. The roofing industry has a higher incidence of fraud and poor workmanship compared to many other home improvement sectors. According to industry data, improper installation is the leading cause of premature roof failure, not material defects.

    A “reliable” roofer isnโ€™t just someone who shows up on time. They are licensed, insured, transparent about costs, and willing to stand behind their work with a solid warranty. Choosing incorrectly can lead to water damage, mold issues, and voided manufacturer warranties, costing you thousands in the long run.

    How Do I Find A Reliable Roofer In My Area

    Step 1: Verify Licensing and Insurance Credentials

    The absolute first step in answering how do I find a reliable roofer in my area is checking their legal standing. Never take a contractor’s word for it; always ask for proof.

    General Liability and Workers’ Compensation

    You need to ensure the company carries two specific types of insurance:

    1. General Liability Insurance: This protects your property if the roofer accidentally damages your home (e.g., dropping a ladder on your siding).
    2. Workers’ Compensation: This covers medical costs if a worker gets injured on your property. Without this, you could be held liable for their medical bills.

    Pro Tip: Ask for the certificate of insurance (COI) and call the provider to verify it is current. Do not accept a photocopy without verification.

    State and Local Licensing

    Licensing requirements vary significantly by state. Some states require rigorous testing and continuing education, while others have minimal requirements. You can check your stateโ€™s contractor license board website to verify their status. For a broader understanding of construction regulations and standards, you can refer to general industry guidelines on Wikipedia.

    Step 2: Check Reputation Beyond the Star Rating

    Online reviews are helpful, but they can be manipulated. A 5-star rating means little if it comes from only three friends of the owner. Here is how to dig deeper:

    • Look for Volume and Consistency: A reliable roofer should have a steady stream of reviews over several years, not just a spike of 50 reviews in one week.
    • Read the 3-Star Reviews: These are often the most honest. They highlight minor communication issues or cleanup problems that donโ€™t necessarily indicate incompetence but show where the company might lack polish.
    • Check Third-Party Sites: Donโ€™t just rely on Google. Check the Better Business Bureau (BBB), Angi, or HomeAdvisor. Look for how the company responds to negative feedback. Do they get defensive, or do they try to resolve the issue?

    Step 3: Ask for Local References and Portfolios

    A roofer who has worked in your neighborhood understands the local climate challenges. For example, a roofer in Florida needs to understand hurricane straps, while one in Minnesota needs to know about ice dams.

    Actionable Step: Ask the contractor for three references from jobs completed in the last 12 months. Call these homeowners and ask:

    • Did they finish on schedule?
    • Was the cleanup thorough?
    • Have there been any leaks since the work was done?

    Request photos of previous projects similar to yours. If you have a complex hip roof or a specific material like slate or clay tile, ensure they have specific experience with those materials.

    Step 4: Get Multiple Detailed Estimates

    Never accept the first bid. Aim for at least three detailed estimates. However, beware of the “low-ball” tactic. If one bid is significantly lower than the others, it is a red flag, not a bargain.

    What Should Be in a Written Estimate?

    A professional quote should include:

    • Scope of Work: Exactly what will be done (tear-off, repair, replacement).
    • Materials: Brand, type, and color of shingles, underlayment, and flashing.
    • Timeline: Start and completion dates.
    • Payment Schedule: Never pay 100% upfront. A standard deposit is 10โ€“30%, with the remainder paid upon satisfactory completion.
    • Cleanup Protocol: How will debris be removed? Will they use a magnet sweep for nails?
    FeatureReliable RooferUnreliable Roofer
    Estimate FormatDetailed, itemized PDFHandwritten napkin or verbal
    Payment TermsDeposit + Completion100% Upfront or Cash Only
    WarrantyWritten labor & material warranty“We guarantee it” (verbal only)
    CommunicationResponsive, professional email/phoneHard to reach, uses personal cell only

    Step 5: Understand Warranties: Manufacturer vs. Workmanship

    This is where many homeowners get confused. There are two types of warranties you need to look for:

    1. Manufacturerโ€™s Warranty: This covers defects in the shingles or materials. Most major brands offer 20โ€“50 year warranties, but these are often prorated.
    2. Workmanship Warranty: This covers errors made during installation. This is provided by the roofer. A reliable roofer will offer a workmanship warranty of at least 2โ€“5 years, with top-tier contractors offering 10+ years.

    Critical Note: If the installation is faulty, the manufacturerโ€™s warranty may be voided. This is why the rooferโ€™s workmanship guarantee is arguably more important than the shingle brand.

    Step 6: Watch Out for Red Flags

    Knowing what to avoid is just as important as knowing what to look for. Steer clear of contractors who exhibit these behaviors:

    • Door-to-Door Solicitations: Especially after a storm. These are often “storm chasers” who move from town to town, leaving behind poor work and no recourse for warranty claims.
    • High-Pressure Sales Tactics: “This price is only good for today.” Legitimate businesses give you time to think.
    • No Physical Address: A reliable company has a local office. P.O. boxes or virtual offices can be signs of a transient operation.
    • Requesting Cash Only: This is a major tax and liability red flag. Always pay by check or credit card for a paper trail.

    Step 7: Review the Contract Thoroughly

    Before signing, read every line. The contract should mirror the estimate. Ensure it includes:

    • Start and end dates.
    • Specific materials (brand, model, color).
    • Cleanup and disposal details.
    • Lien waiver clause (protects you from subcontractors suing you if the main contractor doesnโ€™t pay them).

    If anything is vague, ask for clarification in writing. A professional roofer will welcome these questions as it shows you are an informed homeowner.


    Frequently Asked Questions (FAQ)

    How much should I expect to pay for a new roof?

    Costs vary widely based on size, material, and location. On average, a standard asphalt shingle roof replacement in the US ranges from $5,000 to $15,000. Premium materials like metal or slate can cost $20,000+. Always get local quotes for accuracy.

    Can I hire a roofer without a license?

    In many states, it is illegal for a contractor to perform roofing work without a license. Even if it is legal in your area, hiring an unlicensed roofer means you have no recourse if things go wrong, and your homeownerโ€™s insurance may deny claims related to their work.

    How long does a roof replacement take?

    For an average-sized home (2,000โ€“2,500 sq. ft.), a full tear-off and replacement typically takes 1โ€“3 days. Larger homes or complex roofs with multiple valleys and chimneys may take up to a week. Weather delays are common and should be accounted for.

    What is the best time of year to replace a roof?

    Late spring to early fall is ideal because temperatures are moderate, allowing adhesives to seal properly. However, reputable roofers work year-round. Winter installations are possible but may require special cold-weather adhesives and safety precautions.

    Should I be home during the roofing work?

    You do not need to be home the entire time, but it is helpful to be available at the start to discuss access and at the end for the final walkthrough. Ensure pets and children are kept indoors for safety due to falling debris and loud noise.

    How do I know if my roofer is using good underlayment?

    Ask specifically about the underlayment brand and type. Synthetic underlayment is generally superior to traditional felt paper as it is more durable and water-resistant. A reliable roofer will happily explain their choice of materials.


    Conclusion

    Finding the right professional doesnโ€™t have to be a gamble. By following these stepsโ€”verifying insurance, checking deep-dive reviews, getting multiple detailed bids, and understanding warrantiesโ€”you can confidently answer the question, “How do I find a reliable roofer in my area?”

    Remember, the cheapest option is rarely the best when it comes to your homeโ€™s structural integrity. Invest time in vetting now to save money and stress later.

    Did you find this guide helpful? Share it with your neighbors on Facebook or Nextdoor to help them avoid roofing scams too! A well-informed community is a safer community.

  • What Is a Thin Piece of Wood Used to Cover a Roof?

    What Is a Thin Piece of Wood Used to Cover a Roof?

    Have you ever looked at a charming cottage or a rustic cabin and wondered about the textured, layered look of its roof? You might find yourself searching for the specific term: a thin piece of wood used to cover a roof. It is a common query for homeowners interested in traditional aesthetics or those restoring historic properties. Understanding this material is crucial for making informed decisions about durability, cost, and maintenance.

    In this guide, we will demystify wood roofing. We will explore the differences between shingles and shakes, analyze their pros and cons, and provide expert advice on whether this timeless material is right for your home.

    What Exactly Is a Thin Piece of Wood Used to Cover a Roof?

    When people refer to “a thin piece of wood used to cover a roof,” they are typically talking about wood shingles or wood shakes. While these terms are often used interchangeably in casual conversation, there is a distinct technical difference between the two that affects performance and price.

    Wood Shingles vs. Wood Shakes

    Understanding this distinction is vital for anyone considering wood roofing.

    • Wood Shingles: These are sawn on both sides. They are uniform in thickness, smooth, and taper evenly from the butt (the thick end) to the tip. Because they are machine-cut, they offer a more refined, consistent appearance.
    • Wood Shakes: These are traditionally split from logs, usually by hand or machine-assisted splitting. This process creates a rougher, more textured surface with natural variations in thickness. Shakes are generally thicker than shingles and offer a more rugged, rustic aesthetic.

    According to industry standards, shakes are often preferred for their durability due to their thickness, while shingles are chosen for their uniformity and lower cost. Both serve the same primary function: protecting the structure from weather while providing natural insulation and visual appeal.

    Why Choose Wood Roofing Over Modern Alternatives?

    Despite the rise of asphalt, metal, and synthetic composite roofs, wood remains a premium choice for many architects and homeowners. But why?

    Natural Insulation and Energy Efficiency

    Wood is a natural insulator. Unlike metal, which conducts heat, or asphalt, which can absorb significant solar radiation, wood air pockets provide thermal resistance. This can help keep your home cooler in the summer and warmer in the winter, potentially lowering energy bills.

    Aesthetic Appeal and Curb Value

    There is an undeniable charm to wood roofing. It ages gracefully, transitioning from a fresh, bright hue to a distinguished silvery-gray patina if left untreated. For homes in wooded areas, mountain regions, or historic districts, wood roofing blends seamlessly with the environment. Real estate data often suggests that high-quality wood roofs can increase curb appeal and property value, particularly in luxury markets.

    Environmental Sustainability

    For eco-conscious homeowners, wood is a renewable resource. Most wood shingles and shakes are made from Western Red Cedar, White Cedar, or Redwood. These trees are often harvested from sustainably managed forests. Furthermore, at the end of their life cycle, wood roofing materials are biodegradable, unlike asphalt shingles which contribute significantly to landfill waste.

    A Thin Piece Of Wood Used To Cover A Roof

    Key Considerations: Durability and Maintenance

    While beautiful, wood roofing is not “install and forget.” It requires a proactive approach to maintenance to ensure longevity.

    Lifespan Expectations

    The lifespan of a wood roof depends heavily on the type of wood, the climate, and maintenance practices.

    Material TypeAverage LifespanMaintenance LevelCost Estimate
    Cedar Shingles20โ€“30 yearsModerate$$
    Cedar Shakes30โ€“40+ yearsHigh$
    Asphalt Shingles15โ€“20 yearsLow$
    Metal Roofing40โ€“70 yearsLow$

    Note: Costs vary significantly by region and installation complexity.

    The Moisture Challenge

    The biggest enemy of wood roofing is moisture. Without proper ventilation and treatment, wood can rot, warp, or become a breeding ground for moss and algae. In humid climates, this risk is amplified. Homeowners must ensure their roof has adequate airflow underneath the shingles to allow drying after rain or snow.

    Fire Resistance Concerns

    Historically, wood roofs were considered a fire hazard. However, modern building codes have addressed this. Most wood shingles and shakes sold today are treated with fire-retardant chemicals to achieve a Class A, B, or C fire rating. Class A offers the highest resistance. It is essential to check local building codes, as some wildfire-prone areas may restrict or ban untreated wood roofing entirely.

    How to Maintain Your Wood Roof: A Step-by-Step Guide

    Proper maintenance can extend the life of your wood roof by decades. Here is a practical routine for homeowners.

    1. Annual Inspection: Twice a year (spring and fall), inspect your roof from the ground using binoculars. Look for cracked, curled, or missing shingles.
    2. Clean Debris: Remove leaves, branches, and pine needles. Accumulated debris holds moisture against the wood, accelerating decay. Use a leaf blower or a soft-bristle broom. Never use a pressure washer, as the high pressure can damage the wood fibers and strip away protective treatments.
    3. Trim Overhanging Branches: Trees touching your roof can scratch the surface and drop debris. Keep branches trimmed back at least 6โ€“10 feet from the roof edge.
    4. Check for Moss and Algae: If you see green growth, it needs to be addressed. Use a specialized roof cleaning solution designed for wood. Avoid bleach, which can discolor the wood and harm surrounding plants.
    5. Reapply Protective Stains: Every 3โ€“5 years, consider applying a UV-inhibiting stain or sealant. This helps preserve the color and repels water. For more detailed information on wood properties and preservation, you can refer to resources like Wikipediaโ€™s entry on Wood Preservation.

    Common Misconceptions About Wood Roofing

    Letโ€™s address some frequent myths that deter homeowners from choosing wood.

    • Myth: Wood roofs attract termites.
      • Fact: Western Red Cedar and Redwood contain natural tannins and oils that act as insect repellents. While no wood is completely immune, cedar is highly resistant to termites and carpenter ants.
    • Myth: They are too expensive to maintain.
      • Fact: While maintenance is required, it is not overly complex. Regular cleaning and occasional staining are manageable for most homeowners or local professionals. The long-term aesthetic and insulation benefits often offset the maintenance costs.
    • Myth: All wood roofs look the same.
      • Fact: The variety is vast. You can choose between handsplit shakes, tapersawn shakes, or smooth shingles. You can also select different grades (Prime, No. 1, No. 2) based on the number of knots and grain straightness.

    FAQ Section

    1. What is the best type of wood for roofing?

    Western Red Cedar is widely considered the best option due to its natural resistance to rot, insects, and warping. It is lightweight, durable, and has excellent insulating properties. White Cedar and Redwood are also popular choices depending on regional availability.

    2. How much does a wood shingle roof cost?

    The cost varies by location and quality, but generally, you can expect to pay between $6 and $12 per square foot for materials and installation. This is significantly higher than asphalt shingles but comparable to high-end slate or tile.

    3. Can I install wood shingles myself?

    While DIY is possible for small projects like sheds, roofing a house is complex and dangerous. Improper installation can lead to leaks and void warranties. It is strongly recommended to hire a certified professional with experience in wood roofing to ensure proper nailing patterns, spacing, and underlayment installation.

    4. Do wood roofs require special underlayment?

    Yes. Standard felt paper may not be sufficient. Many experts recommend using a breathable synthetic underlayment that allows moisture to escape while preventing water intrusion. In some climates, an ice and water shield is also necessary along the eaves.

    5. How do I clean my wood roof without damaging it?

    Use a low-pressure garden hose and a soft-bristle brush. Apply a cleaner specifically formulated for wood roofs to remove moss, algae, and dirt. Rinse thoroughly. Avoid walking on the roof if possible, as wet wood shingles can be slippery and fragile.

    6. Will my insurance cover a wood roof?

    Some insurance companies charge higher premiums for wood roofs due to perceived fire risks. However, if your roof has a Class A fire rating, you may qualify for discounts. Always shop around and provide proof of fire treatment to your insurer.

    Conclusion

    Choosing a thin piece of wood used to cover a roof is more than just a construction decision; it is a commitment to timeless beauty and natural sustainability. Whether you opt for the refined look of sawn shingles or the rugged charm of handsplit shakes, wood roofing offers unique benefits that modern materials struggle to replicate.

    By understanding the maintenance requirements and investing in quality installation, you can enjoy a roof that protects your home and enhances its character for decades. If you appreciate the warmth of natural materials and are willing to perform regular upkeep, wood roofing is an excellent investment.

    Did you find this guide helpful? Share it with friends who are planning their dream home renovation or follow us on social media for more expert tips on sustainable living and home improvement!