Have you ever spent hours untangling a massive spool of lights, only to hear a terrifying pop or see a spark flash just as you plug them in? It is a nightmare scenario for any homeowner who wants their house to look festive without becoming a hazard. If you are wondering how to keep icicle lights from blowing up on roof, you are not alone; thousands of Americans face this issue every December due to moisture, poor connections, or overloaded circuits.
In this guide, we will walk you through proven strategies to ensure your display stays bright, safe, and intact throughout the winter season. We will cover everything from pre-installation checks to smart wiring techniques that prevent overheating and electrical failure.
Why Do Icicle Lights Fail or “Blow Up”?
Before we dive into the solutions, it is crucial to understand the root causes of failure. When people say lights “blow up,” they usually mean one of three things: a bulb shatters, a fuse blows instantly, or the plastic housing melts due to excessive heat.
According to the U.S. Consumer Product Safety Commission (CPSC), decorative lighting causes an estimated 160 home fires each year in the United States. The primary culprits are often damaged insulation, water intrusion, and daisy-chaining too many strands together.
The Role of Moisture and Ice
Icicle lights are designed for outdoor use, but they are not invincible. When snow melts and refreezes around the socket, it can create a conductive path between the hot and neutral wires. This causes a short circuit. If the breaker does not trip immediately, the resistance generates intense heat, potentially melting the wire casing or shattering the bulb.
Overloading the Circuit
Many homeowners make the mistake of plugging multiple high-wattage incandescent strands into a single extension cord. This draws more amperage than the wire can handle, leading to overheating. Modern LED lights mitigate this risk significantly, but improper usage can still cause failures.
Step-by-Step Guide to Safe Installation
To ensure your lights survive the winter, follow this detailed installation protocol. These steps are designed to minimize stress on the bulbs and electrical connections.
1. Pre-Installation Inspection
Never skip this step. Even if your lights worked last year, weather exposure degrades materials over time.
- Check for Fraying: Look closely at the first 3–5 feet of the cord. This area suffers the most wear from being pulled out of storage boxes.
- Inspect Bulbs: Ensure no bulbs are cracked or loose in their sockets. A loose bulb allows moisture to enter the socket, causing corrosion and shorts.
- Test Indoors First: Plug the strands into an indoor outlet before climbing the ladder. If they flicker or don’t light up, troubleshoot now, not while standing on a icy roof.
2. Choose the Right Hardware
Using the wrong clips or fasteners is a leading cause of physical damage to the wires.
| Hardware Type | Pros | Cons | Verdict |
|---|---|---|---|
| Plastic Gutter Clips | Easy to install, cheap | Can crack in extreme cold | Good for mild winters |
| Shingle Tabs | No damage to gutters | Harder to remove | Best for asphalt roofs |
| Adhesive Hooks | Versatile placement | Adhesive fails in cold/wet | Avoid for heavy strands |
| Cable Ties (Zip Ties) | Secure hold | Can cut into wire insulation | Avoid directly on wire |
Pro Tip: Always use UV-resistant plastic clips. Standard plastic becomes brittle in freezing temperatures and may snap, dropping your lights onto the ground or leaving jagged edges that cut the wire.
3. Proper Hanging Technique
How you hang the lights affects their longevity. Tension is the enemy of electrical integrity.
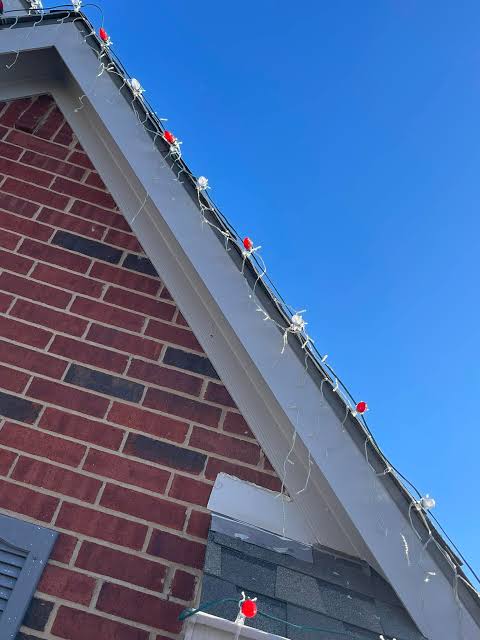
- Leave Slack: Do not pull the strand tight. Leave a small amount of slack between clips. This allows for thermal contraction when temperatures drop below freezing. If the wire is taut, the copper inside can stretch and break.
- Protect the Connectors: The male and female ends of the strands are the most vulnerable points. Ensure these connectors are elevated slightly above the gutter line so they do not sit in pooled water or ice buildup.
- Use Drip Loops: When running extension cords from the outlet to the roof, create a “drip loop.” This is a U-shape in the cord that ensures rainwater runs off the bottom of the loop rather than traveling down the wire into the electrical outlet.
Managing Power and Preventing Overloads
One of the most common reasons lights fail catastrophically is power mismanagement. Understanding the electrical load is key to knowing how to keep icicle lights from blowing up on roof.
Calculate Your Wattage
Check the tag on your light strands.
- Incandescent Strands: Typically use 40–60 watts per strand. Most standard outlets can handle 15 amps (1,800 watts). However, for safety, you should never exceed 80% of capacity (1,440 watts). This means you can safely connect roughly 20–25 incandescent strands end-to-end.
- LED Strands: Typically use 2–5 watts per strand. You can connect significantly more, often up to 40–50 strands, depending on the manufacturer’s specifications.
Warning: Never mix LED and incandescent strands in the same series. They have different voltage requirements and can cause one type to burn out prematurely or fail entirely.
Use Outdoor-Rated Extension Cords
Not all extension cords are created equal. Using an indoor-rated cord outside is a fire hazard. Look for cords marked with “W-A” or “W” on the jacket, indicating they are suitable for wet locations. These cords have thicker insulation and grounded plugs to prevent shock and short circuits.
For more detailed information on electrical safety standards, you can refer to the National Electrical Code overview on Wikipedia to understand the regulatory background of safe wiring practices.
Maintenance During the Season
Once your lights are up, your job isn’t done. Winter weather is dynamic, and regular checks can prevent disasters.
Clear Snow and Ice Buildup
Heavy snow can weigh down the strands, pulling them away from the clips and stressing the wires. Gently brush off excess snow using a soft broom. Never use sharp objects like ice picks to clear ice near the lights, as you risk piercing the insulation.
Monitor for Flickering
If you notice a section of lights flickering, it is often a sign of a loose connection or impending bulb failure. Address this immediately. A flickering light creates arcing, which generates heat and can ignite nearby dry leaves or debris trapped in the gutters.
Check Connections Weekly
Wind and thermal expansion can loosen plugs. Once a week, visually inspect the connection points between strands. Ensure they are tightly seated and, if possible, covered with electrical tape or a silicone sealant cap to keep moisture out.
FAQ Section
Q: Can I leave my icicle lights up all year?
A: It is not recommended. Prolonged exposure to UV rays, rain, and temperature fluctuations will degrade the plastic housing and wire insulation, significantly increasing the risk of failure next season. Store them in a cool, dry place during the off-season.
Q: Why do my lights work indoors but fail when I put them on the roof?
A: This is usually due to moisture or temperature. Cold temperatures make wires brittle, and moisture can seep into micro-cracks that aren’t apparent indoors. Additionally, the physical tension of hanging them on the roof may expose weak points in the wiring.
Q: Is it safe to use staple guns to attach lights?
A: No. Stapling directly into the wire can pierce the insulation, creating a direct path for electricity to escape. This can cause shorts, shocks, or fires. Always use purpose-built plastic clips or shingle tabs.
Q: How do I store icicle lights to prevent tangling and damage?
A: Wrap each strand individually around a piece of cardboard or a dedicated light reel. Place them in a rigid plastic bin with a lid to protect them from pests and moisture. Avoid stuffing them loosely into bags, as this causes wire fatigue and bulb breakage.
Q: What should I do if a bulb burns out?
A: Replace it immediately with a bulb of the same voltage and wattage. Leaving an empty socket can disrupt the circuit in older series-wired lights, causing the entire strand to go out. In parallel-wired LED lights, it may not affect the rest, but it leaves the socket open to moisture.
Conclusion
Keeping your holiday display safe doesn’t have to be complicated. By understanding how to keep icicle lights from blowing up on roof, you are taking proactive steps to protect your home and your family. Remember to inspect your gear before installation, use the right clips to avoid physical stress, manage your electrical load carefully, and perform regular maintenance throughout the season.
A beautiful holiday display is one that shines brightly without posing a risk. Take the time to do it right, and your lights will last for many seasons to come.
Did you find these tips helpful? Share this article with your neighbors and friends on social media to help everyone have a safer, brighter holiday season!
Leave a Reply