Category: homeowner roofing guide

  • Does a Metal Roof Qualify for Energy Tax Credit 2024?

    Does a Metal Roof Qualify for Energy Tax Credit 2024?

    Installing a new roof is a significant investment, but many homeowners are unaware that upgrading to an energy-efficient metal roof can actually pay you back through federal incentives. With rising energy costs and increasing environmental awareness, understanding these financial benefits is crucial for making a smart home improvement decision. If you are wondering, “does a metal roof qualify for energy tax credit 2024,” the answer is yes, but specific criteria must be met to ensure you receive the benefit.

    In this comprehensive guide, we will break down exactly what makes a metal roof eligible, how much money you can save, and the step-by-step process to claim your credit without triggering an audit.

    Understanding the 2024 Energy Efficient Home Improvement Credit

    The landscape of home improvement tax incentives changed significantly with the passage of the Inflation Reduction Act (IRA). Previously known as the Nonbusiness Energy Property Credit, this incentive was revamped and extended through 2032. For the 2024 tax year, it is officially called the Energy Efficient Home Improvement Credit.

    It is vital to understand that this is a tax credit, not a tax deduction. A deduction reduces your taxable income, whereas a credit reduces your tax bill dollar-for-dollar. This makes the credit significantly more valuable for most homeowners.

    Key Changes for 2024

    • Annual Limit: The credit is now capped on an annual basis rather than a lifetime limit.
    • Increased Cap: The maximum credit for qualified building envelope components (like roofs) has increased.
    • Efficiency Standards: The requirements for what constitutes “energy efficient” have become stricter, aligning with ENERGY STARยฎ standards.

    Does a Metal Roof Qualify for Energy Tax Credit 2024? The Specific Criteria

    Not every metal roof automatically qualifies. You cannot simply choose any color or type of metal panel and expect a rebate from the IRS. To answer the question, “does a metal roof qualify for energy tax credit 2024,” we must look at two main factors: reflectivity and certification.

    1. The “Cool Roof” Requirement

    To qualify, the metal roof must meet specific solar reflectance and thermal emittance standards. These are often referred to as “cool roof” properties. The goal is to reflect more sunlight and absorb less heat than a standard roof.

    According to the IRS guidelines for 2024, the roofing product must meet the current ENERGY STARยฎ program requirements. Generally, this means:

    • Initial Solar Reflectance: Must be at least 0.25 (for steep-slope roofs) or higher depending on the specific ENERGY STAR version active at the time of installation.
    • Thermal Emittance: Must be sufficiently high to release absorbed heat.

    Most standard unpainted or dark-colored metal roofs do not qualify. However, metal roofs coated with special reflective pigments (often light colors or specialized “cool” coatings) frequently meet these standards.

    2. Manufacturer Certification

    This is the most critical step. You must verify that the specific product you are buying is certified. The manufacturer must provide a Manufacturerโ€™s Certification Statement. This document explicitly states that the product meets the applicable energy efficiency standards set by the IRS.

    Pro Tip: Do not rely on verbal assurances from contractors. Always ask for the written certification sheet for the exact SKU (Stock Keeping Unit) of the roofing material being installed.
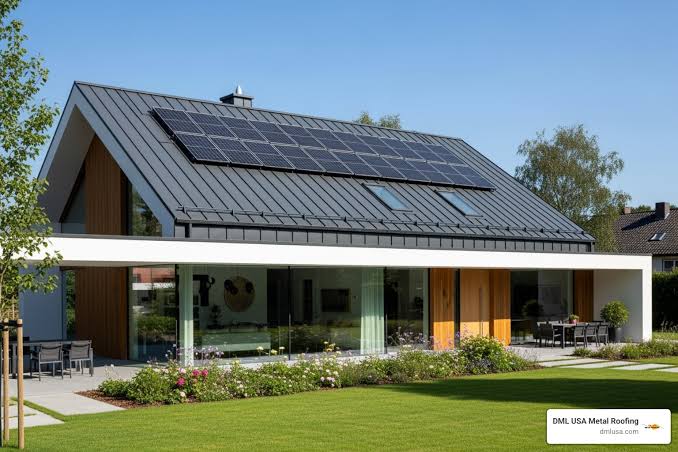
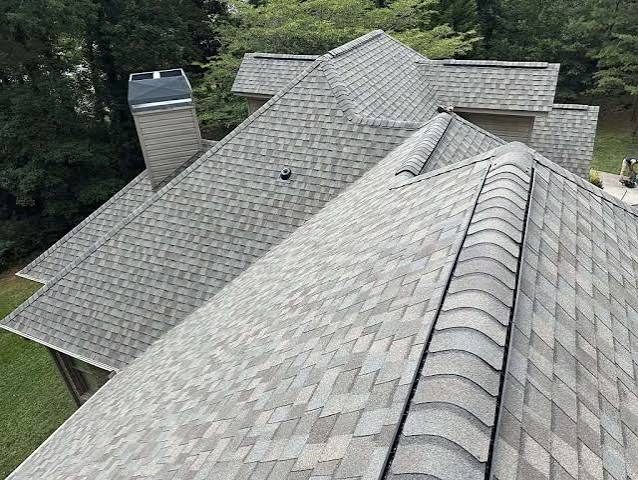
    Does A Metal Roof Qualify For Energy Tax Credit 2024

    How Much Can You Save? Breaking Down the Numbers

    Understanding the financial impact helps justify the upfront cost of a premium energy-efficient metal roof. Under the 2024 rules, the calculation is straightforward but has strict caps.

    The Calculation Formula

    The credit is equal to 30% of the total cost of the qualified property, including labor and installation materials.

    The Annual Cap

    For tax years beginning in 2023, 2024, and beyond, the maximum credit amount for all qualified building envelope components (which includes roofs, windows, doors, and insulation) is $1,200 per year.

    However, there is a sub-limit specifically for roofs:

    • Maximum Credit for Roofs: $600 per year.
    Expense ItemExample CostCredit Eligible?Potential Credit (30%)
    Metal Roofing Materials$8,000Yes (if certified)$2,400
    Installation Labor$4,000Yes$1,200
    Total Project Cost$12,000$3,600
    IRS Cap Applied$600

    As shown in the table above, even if 30% of your total cost exceeds $600, you are limited to claiming $600 for the roof component. Note that if you also install energy-efficient windows in the same year, those fall under the same $1,200 total umbrella, so strategic planning of your renovations can maximize your return.

    Step-by-Step Guide to Claiming Your Credit

    Claiming the credit requires careful documentation. Follow these steps to ensure your claim is processed smoothly by the IRS.

    Step 1: Verify Eligibility Before Purchase

    Before signing a contract, check the ENERGY STARยฎ Roof Products List or ask your contractor for the Manufacturerโ€™s Certification Statement. Ensure the product is listed for the current year.

    Step 2: Keep Detailed Records

    Save every receipt. You need proof of payment for both materials and labor. The invoice should clearly separate the cost of the roofing materials from other services if possible, though a total project invoice is acceptable if it describes the qualified work.

    Step 3: File IRS Form 5695

    When filing your 2024 federal tax return, you must complete IRS Form 5695 (Residential Energy Credits).

    1. Go to Part II of the form (Nonbusiness Energy Property Credit).
    2. Enter the total cost of the qualified metal roof installation.
    3. Calculate 30% of that cost.
    4. Apply the $600 cap limitation as instructed in the formโ€™s worksheet.

    Step 4: Attach Documentation

    While you do not send the receipts to the IRS with your return, you must keep them in your records for at least three years in case of an audit. The Manufacturerโ€™s Certification Statement is your primary defense if the IRS questions the eligibility of your roof.

    Common Mistakes to Avoid

    Even well-intentioned homeowners make errors that lead to denied credits. Here are the most common pitfalls:

    • Assuming All Metal Roofs Qualify: As mentioned, only those meeting ENERGY STARยฎ standards qualify. A standard galvanized steel roof usually does not.
    • Missing the Tax Year Window: The work must be completed and paid for within the 2024 calendar year (January 1 โ€“ December 31, 2024). If you pay a deposit in 2024 but the installation finishes in 2025, you generally claim it in 2025.
    • Confusing Credits with Rebates: Some local utilities offer instant rebates. You can often claim both the utility rebate and the federal tax credit, provided the rebate doesnโ€™t reduce the “cost basis” of your purchase in a way that violates specific state rules. Always check local guidelines.

    FAQ Section

    1. Does a metal roof qualify for energy tax credit 2024 if I install it myself?

    Yes, DIY installations can qualify, but you can only claim the cost of the materials. You cannot claim the value of your own labor. Ensure you keep receipts for all purchased materials and that the materials themselves are certified energy-efficient products.

    2. Can I claim the credit for a metal roof over an existing shingle roof?

    Generally, no. The IRS typically requires that the new roofing be part of a substantial renovation or replacement. Adding a metal layer over old shingles (“roof-over”) may not qualify as a new building envelope component in the eyes of some auditors, and it may void the ENERGY STARยฎ certification of the product. It is safest to remove the old roof entirely.

    3. Is there an income limit for claiming this tax credit?

    No. Unlike some other green energy incentives (like the Electric Vehicle credit), the Energy Efficient Home Improvement Credit does not have an income cap. Homeowners of any income level can claim this credit as long as they owe federal taxes.

    4. What if my tax liability is less than $600?

    This credit is non-refundable. This means it can reduce your tax bill to zero, but it will not result in a refund check if the credit amount exceeds what you owe in taxes. However, under current laws, unused portions of this specific credit generally do not carry forward to future years, so it is best utilized when you have a sufficient tax liability.

    5. Where can I find the official list of qualifying products?

    You should consult the ENERGY STARยฎ website or the manufacturerโ€™s documentation. For broader context on energy conservation standards, you can also refer to general resources like Wikipediaโ€™s page on Energy Efficiency to understand the scientific principles behind reflectivity and emittance, though always prioritize IRS publications for tax rules.

    Conclusion

    So, does a metal roof qualify for energy tax credit 2024? Absolutely, provided it meets the stringent ENERGY STARยฎ requirements for solar reflectance and thermal emittance. By choosing a certified “cool roof” system, you not only enhance your homeโ€™s durability and aesthetic appeal but also secure a $600 federal tax credit while lowering your monthly cooling bills.

    Remember, the key to success is documentation. Secure your Manufacturerโ€™s Certification Statement, keep your receipts, and file Form 5695 accurately.

    Found this guide helpful? Share it with friends or family who are considering a roof replacement. Helping others navigate these complex tax rules can save them hundreds of dollars!
  • Does a Metal Roof Increase Home Value?

    Does a Metal Roof Increase Home Value?

    Are you standing in your driveway, looking up at your aging shingle roof, and wondering if swapping it for metal will actually pay off when you sell? Itโ€™s a common dilemma for homeowners who want to upgrade their propertyโ€™s durability without throwing money into a void. You arenโ€™t just looking for a new roof; you are looking for smart equity growth. The burning question on every homeownerโ€™s mind is: Does a metal roof increase the value of your home?

    The short answer is yes, but the real story lies in the numbers, the longevity, and the specific preferences of todayโ€™s buyers. In this guide, we will break down the financial realities, aesthetic impacts, and practical benefits of metal roofing to help you make an informed decision.


    How Much Value Does a Metal Roof Actually Add?

    When we talk about home value, we need to distinguish between resale value (what you get back when you sell) and market appeal (how fast it sells). Metal roofs excel in both categories, though the financial return can vary based on your location and the quality of the installation.

    According to recent remodeling impact reports, metal roofing consistently ranks as one of the top exterior improvements for Return on Investment (ROI). On average, homeowners can recoup 85% to 95% of the installation cost upon resale. In some high-end markets or areas prone to severe weather, this figure can even exceed 100%.

    Why is the retention rate so high? Because buyers recognize that a metal roof is a “one-and-done” solution. Unlike asphalt shingles that may need replacing every 15โ€“20 years, a quality metal roof lasts 40โ€“70 years. This long-term savings potential is immediately factored into the homeโ€™s appraisal value.

    Key Financial Benefits at a Glance

    • Higher Appraisal Values: Appraisers often adjust the comparable sales data upward for homes with newer, premium roofing materials.
    • Reduced Negotiation Friction: During inspections, a solid metal roof eliminates the “roof replacement contingency” that often kills deals or lowers offers.
    • Insurance Discounts: Many insurance carriers offer premiums reductions of 10โ€“30% for metal roofs due to their fire and wind resistance, a selling point you can highlight to potential buyers.

    Do Home Buyers Prefer Metal Roofs Over Asphalt Shingles?

    Understanding buyer intent is crucial. The modern US homebuyer is increasingly educated about sustainability and maintenance costs. While asphalt shingles remain the most common roofing material due to low upfront cost, they are no longer the “gold standard” for discerning buyers.

    The Shift Toward Durability

    Todayโ€™s market favors low-maintenance homes. A survey by the National Association of Realtors (NAR) indicates that “new roof” is among the top three features that encourage buyers to proceed with a purchase. However, a metal roof signals a higher tier of quality.

    Buyers perceive metal roofs as:

    1. Modern and Stylish: With advancements in coating technology, metal roofs can mimic slate, tile, or wood shake without the weight or decay issues.
    2. Energy Efficient: Reflective pigments in metal roofing can reduce cooling costs by up to 25%, a major selling point in warmer US states like Texas, Florida, and Arizona.
    3. Eco-Friendly: Metal roofs are often made from recycled materials and are 100% recyclable at the end of their life, appealing to environmentally conscious demographics.

    Expert Insight: “In competitive housing markets, a metal roof acts as a differentiator. It tells the buyer, ‘This home has been protected with the best materials available.’ It reduces anxiety about future repair bills.”

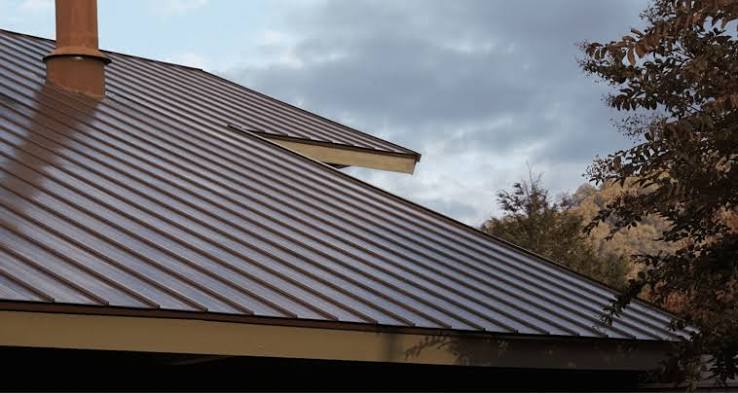
    Does A Metal Roof Increase The Value Of Your Home

    What Are the Pros and Cons of Metal Roofing for Resale?

    To provide a balanced view, letโ€™s look at the trade-offs. No home improvement is perfect for every situation. Here is a breakdown to help you weigh the decision.

    FeatureMetal RoofingAsphalt Shingles
    Lifespan40โ€“70+ Years15โ€“25 Years
    Upfront CostHigh ($15,000โ€“$30,000+)Low to Moderate ($8,000โ€“$15,000)
    MaintenanceVery LowModerate (Prone to moss, curling)
    NoiseCan be noisy without insulationQuiet
    Aesthetic VarietyHigh (Standing seam, stone-coated)Standard (Limited textures)
    Resale AppealPremium / LuxuryStandard / Expected

    The Noise Myth

    One common concern buyers raise is noise during rain or hail. However, this is largely a misconception for modern installations. When installed with proper solid sheathing and attic insulation, a metal roof is no louder than an asphalt roof. In fact, many homeowners report it sounds quieter because the mass of the structure dampens the sound. If you are installing a metal roof, ensure your contractor uses acoustic underlayment to mitigate any potential noise issues, which preserves the home’s comfort rating.


    How Does Location Impact the Value Added by a Metal Roof?

    Geography plays a massive role in whether a metal roof increases your homeโ€™s value significantly.

    1. Severe Weather Zones

    If you live in the Midwest (hail alley), the Southeast (hurricane zones), or the West Coast (wildfire risks), a metal roof is not just a luxury; itโ€™s a necessity. In these regions, the value add is substantial because the roof provides critical protection. Buyers in these areas are willing to pay a premium for impact-resistant Class 4 rated metal panels.

    2. Historic Districts

    Be cautious if your home is in a designated historic district. Some HOAs or local preservation committees may restrict the type of metal roofing allowed. In these cases, stone-coated steel tiles that mimic traditional clay or slate might be the only approved option. Always check local ordinances before investing.

    3. Urban vs. Rural

    In rural areas, the rustic appeal of standing-seam metal roofs fits the aesthetic perfectly, often boosting curb appeal significantly. In dense urban suburbs, the style must match the neighborhood norm. A sleek, dark gray standing seam roof might look out of place next to traditional colonial homes with architectural shingles, potentially limiting your buyer pool.


    What Type of Metal Roof Offers the Best ROI?

    Not all metal roofs are created equal. The material you choose affects both the cost and the perceived value.

    • Steel (Galvalume): The most common and cost-effective. It offers excellent durability and is widely accepted by buyers. Best for: General ROI.
    • Aluminum: Ideal for coastal homes because it does not rust. It is lighter and more expensive than steel. Best for: Coastal properties.
    • Copper and Zinc: These are premium luxury materials. They develop a patina over time and are extremely durable. While they add immense prestige, the ROI might be lower percentage-wise because the initial cost is so high. Best for: High-end luxury estates.

    For most homeowners aiming to maximize resale value, painted galvanized steel or aluminum with a Kynar 500 finish offers the best balance of cost, durability, and aesthetic appeal.


    FAQ Section

    1. Will a metal roof interfere with Wi-Fi or cell signals?

    Generally, no. While metal blocks radio waves, your Wi-Fi router and cell signals usually enter through windows and doors, not the roof. Unless you have a satellite dish mounted directly on the metal roof without proper clearance, you should not experience significant signal degradation.

    2. How long does it take to install a metal roof?

    A typical residential metal roof installation takes 2 to 5 days, depending on the complexity of the roofline and the size of the crew. This is comparable to asphalt shingle installation but requires more specialized labor.

    3. Can I install a metal roof over my existing shingles?

    In many cases, yes. This is called a “retrofit” installation. It saves on disposal costs and landfill waste. However, you must check local building codes and ensure the existing roof deck is structurally sound. Always consult with a licensed contractor to verify if your specific home qualifies. For more details on roofing structures, you can refer to general construction standards on Wikipedia.

    4. Does the color of the metal roof affect home value?

    Yes, indirectly. Neutral colors like charcoal, bronze, black, and slate gray tend to have the broadest appeal. Bold colors like bright red or blue may limit your buyer pool unless they fit a specific regional aesthetic (like barn-red in rural areas). Stick to timeless, neutral tones to maximize resale potential.

    5. Is a metal roof harder to repair than shingles?

    Repairs can be more complex because panels are large and interlocked. However, metal roofs require repairs far less frequently. If a panel is damaged by a falling branch, a professional can replace that specific section. It is not a DIY-friendly repair, so factor in professional service costs for long-term maintenance.


    Conclusion

    So, does a metal roof increase the value of your home? Absolutely. It transforms your property from a standard listing into a premium, low-maintenance asset. While the upfront cost is higher than asphalt, the combination of increased resale value, energy savings, insurance discounts, and decades of durability makes it a financially sound investment.

    By choosing the right material and color for your region, you not only protect your family but also secure a stronger financial position for the future. If you are planning to sell within the next 5โ€“10 years, a metal roof is one of the few upgrades that truly pays for itself.

    Found this guide helpful? Share it with your friends on Facebook or Pinterest who are considering home renovations, and help them make smarter investment choices!

  • Do You Need A Permit To Build A Porch Roof?

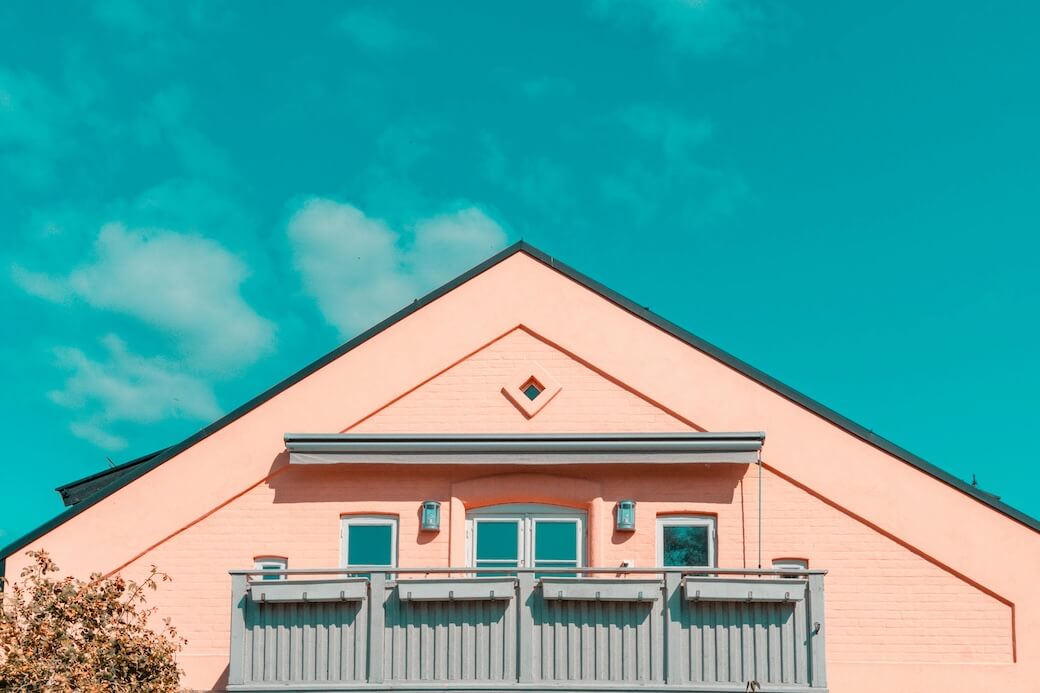
    Do You Need A Permit To Build A Porch Roof?

    Adding a covered space to your home is one of the most rewarding upgrades you can make. It extends your living area, protects your furniture from the elements, and significantly boosts curb appeal. However, before you buy lumber or hire a contractor, you are likely asking the critical question: Do You Need A Permit To Build A Porch Roof?

    The short answer is: Yes, in most cases, you do. But the specifics depend heavily on where you live and how you build it. Navigating local bureaucracy can feel overwhelming, but understanding the rules now saves you from costly fines or having to tear down your hard work later. This guide will walk you through everything you need to know about permits, safety standards, and the step-by-step process to ensure your project is compliant and safe.

    Why Most Porch Roofs Require a Building Permit

    Many homeowners assume that because a porch roof is an “add-on” rather than a full room addition, it might slip under the regulatory radar. This is a dangerous misconception. Local building departments exist to ensure public safety, structural integrity, and adherence to zoning laws.

    When you ask, “Do You Need A Permit To Build A Porch Roof,” you are essentially asking if your local government needs to verify that your structure wonโ€™t collapse, catch fire easily, or violate neighborhood aesthetics.

    The Safety Factor

    A porch roof must withstand wind loads, snow loads, and its own weight. If attached incorrectly to your main house, it can compromise the existing structureโ€™s integrity. Permits ensure that a professional inspector reviews your plans to confirm they meet the International Residential Code (IRC), which serves as the baseline for most US jurisdictions.

    Zoning and Setbacks

    Beyond safety, permits address zoning. Your property likely has “setback” requirementsโ€”minimum distances your structure must be from property lines, sidewalks, or other buildings. A permit process verifies that your new roof doesnโ€™t encroach on your neighborโ€™s space or block required easements.

    Factors That Determine Permit Requirements

    While the general rule is “yes,” there are nuances. Here are the primary variables that influence whether you need a permit:

    1. Attachment to the Main Structure

    • Attached Roofs: If the porch roof connects directly to your houseโ€™s framing, a permit is almost always required. This involves modifying the existing structure, which carries higher liability.
    • Detached Structures: If you are building a standalone pavilion or gazebo not touching the house, some jurisdictions may have different rules, though permits are still common for structures over a certain square footage.

    2. Size and Square Footage

    Many municipalities have a threshold for “minor structures.” For example:

    • Under 100 sq. ft.: Some areas may exempt small, detached structures from permits.
    • Over 100โ€“200 sq. ft.: Most areas require full permitting.
    • Note: Even if a permit isn’t required for size, electrical or plumbing work within the porch usually triggers a separate permit requirement.

    3. Local Jurisdiction Rules

    Building codes are hyper-local. What applies in rural Texas may differ vastly from suburban New York.

    • Urban Areas: Typically stricter due to density and fire codes.
    • Rural Areas: May be more lenient but still enforce basic safety standards.

    Risks of Building Without a Permit

    Skipping the permit process might seem like a way to save time and money ($50โ€“$500 typically), but the long-term risks far outweigh the initial savings.

    Risk CategoryConsequence
    Financial PenaltiesFines can range from double the permit fee to thousands of dollars.
    Forced RemovalThe city can issue a stop-work order and require you to demolish the structure at your own expense.
    Insurance IssuesIf the roof collapses or causes damage, your homeownerโ€™s insurance may deny the claim because the work was unpermitted.
    Resale ProblemsDuring a home sale, unpermitted work can fail inspection, lowering your homeโ€™s value or killing the deal entirely.

    Expert Insight: “Unpermitted additions are the number one cause of delayed closings in real estate transactions. Always check with your local building department first.” โ€“ National Association of Realtors Guidelines

    Do You Need A Permit To Build A Porch Roof

    Step-by-Step Guide to Getting Your Permit

    If youโ€™ve determined that you do need a permit to build a porch roof, here is how to navigate the process smoothly.

    Step 1: Contact Your Local Building Department

    Visit your city or county website. Look for the “Building & Safety” or “Permit Center” section. You can often find application forms online. If unsure, call them directly. Ask specifically: “What are the requirements for a residential attached porch roof permit?”

    Step 2: Prepare Your Plans

    You donโ€™t always need an architect, but you do need detailed drawings. These should include:

    • Site Plan: Showing where the porch sits on your property relative to boundary lines.
    • Framing Plan: Detailing beam sizes, post spacing, and connection methods.
    • Foundation Plan: Showing footings and concrete specs.

    Tip: Many big-box hardware stores offer pre-approved plan sets for standard porch roofs that are already code-compliant.

    Step 3: Submit the Application

    Submit your drawings along with the application fee. Fees vary by location but generally range from $50 to $300 for simple residential projects. Some areas charge based on the projected cost of construction.

    Step 4: Wait for Review

    The building department will review your plans for code compliance. This can take anywhere from 2 days to 4 weeks. They may request revisions if your calculations for snow load or wind resistance are insufficient.

    Step 5: Schedule Inspections

    Once approved, you will receive a permit card to display on-site. You must schedule inspections at key stages:

    1. Footing Inspection: Before pouring concrete.
    2. Framing Inspection: After the structure is up but before roofing material is applied.
    3. Final Inspection: When the project is complete.

    Common Questions About Porch Roof Permits

    1. Can I build a porch roof myself without a permit?

    In very rare cases, minor repairs might not need a permit, but new construction almost always does. Even if you are doing the labor yourself (DIY), you are still responsible for obtaining the permit and passing inspections. Some cities require licensed contractors for electrical or structural work, so check local labor laws too.

    2. How much does a porch roof permit cost?

    Costs vary widely. In small towns, it might be $50โ€“$100. In larger cities like Los Angeles or New York, fees can exceed $500 due to additional plan review charges. Always budget for this in your initial project estimate.

    3. What happens if I get caught building without a permit?

    You will likely receive a “Notice of Violation.” You may be forced to stop work immediately. To resolve it, you might have to pay a penalty fee (often 2x the original permit cost) and expose parts of the structure for inspection. In worst-case scenarios, you must dismantle the roof.

    4. Do I need a permit for a simple awning?

    Retractable fabric awnings that are not permanently fixed to the foundation often do not require building permits. However, if you are installing a permanent metal or wood structure with posts and a solid roof, it is considered a building improvement and requires a permit.

    5. How long does the permit process take?

    For straightforward residential projects, expect 1โ€“3 weeks. Complex designs or busy municipal departments can extend this to 6โ€“8 weeks. Start this process before you buy materials to avoid storage issues and project delays.

    Conclusion

    So, do you need a permit to build a porch roof? For the vast majority of homeowners in the US, the answer is a definitive yes. While it adds a step to your project timeline, it provides peace of mind, ensures safety, and protects your investment.

    Building a porch roof is a significant improvement that enhances your lifestyle. By following the proper legal channels, you ensure that your new outdoor space is safe, durable, and fully recognized by future buyers. Donโ€™t let the paperwork intimidate you; view it as a quality control check for your home.

    Found this guide helpful? Share it with your friends on Facebook or Pinterest who are planning their own home improvements! Letโ€™s help everyone build safely and smartly.

  • Do I Need Drip Edge On All Sides Of Roof?

    Do I Need Drip Edge On All Sides Of Roof?

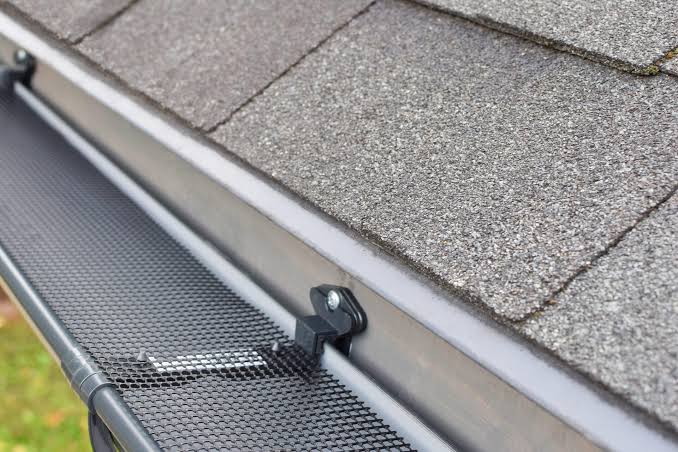
    Have you ever noticed water staining on your fascia boards or peeling paint under your roofโ€™s eaves after a heavy storm? It is a frustrating and costly issue that many homeowners face, often because a small but critical component was overlooked during installation. If you are asking yourself, “Do I need drip edge on all sides of roof,“ the short answer is yes, and understanding why can save your home from significant structural damage.

    In this guide, we will break down exactly what drip edge is, why comprehensive coverage is non-negotiable for a healthy roof, and how proper installation protects your investment. Whether you are planning a new roof replacement or inspecting an existing one, this information is vital for maintaining your homeโ€™s integrity.

    What Is Drip Edge and Why Does It Matter?

    Before diving into the specifics of placement, letโ€™s clarify what we are talking about. Drip edge is a type of metal flashing installed along the edges of your roof. Its primary function is to direct water away from the fascia and into the gutters. Without it, water can wick back under the shingles, rotting the wood decking and damaging the interior of your home.

    Think of drip edge as the raincoat for your roofโ€™s edges. Just as a raincoat keeps you dry by shedding water outward, drip edge ensures that rainwater follows a controlled path off the roof and into your gutter system.

    The Science Behind Water Movement

    Water is persistent. Due to surface tension and wind-driven rain, water does not always fall straight down. It can climb upward under shingles or blow sideways onto your fascia boards. According to basic physics principles regarding fluid dynamics, water seeks the path of least resistance. Without a metal barrier to break this tension, water will seep into the porous wood materials of your roof structure.

    For a deeper understanding of how building envelopes manage moisture, you can refer to general construction principles outlined on Wikipedia.

    Do I Need Drip Edge On All Sides Of Roof? The Definitive Answer

    The question “Do I need drip edge on all sides of roof” is one of the most common inquiries in residential roofing. The definitive answer is yes. You should install drip edge on all four sides of a standard gable or hip roof: the two eaves (bottom horizontal edges) and the two rakes (side sloping edges).

    Here is why partial installation is a risky gamble:

    1. Eaves (Bottom Edges): This is where the majority of water runoff occurs. Drip edge here prevents water from rotting the fascia board and dripping behind the gutters.
    2. Rakes (Side Edges): While less water flows down the sides, wind-driven rain can easily push water under the shingles on the rake edges. Without drip edge, this moisture can infiltrate the roof deck and cause leaks in your attic or walls.

    Industry Standards and Building Codes

    Most modern building codes, including the International Residential Code (IRC), require drip edge installation on all eaves and rakes. Ignoring this requirement can not only lead to damage but may also void your roofing manufacturerโ€™s warranty. Major shingle manufacturers like GAF and Owens Corning explicitly state in their installation instructions that drip edge must be used on all perimeter edges to validate their warranty coverage.

    Do I Need Drip Edge On All Sides Of Roof

    Eaves vs. Rakes: Understanding the Difference

    To fully grasp why all sides need protection, it helps to distinguish between the two types of roof edges.

    FeatureEavesRakes
    LocationThe lower, horizontal edge of the roof.The sloped, vertical edge on the side of the roof.
    Water FlowHigh volume of direct runoff.Lower volume, but susceptible to wind-driven rain.
    Primary RiskRotting fascia, gutter overflow, ice dams.Water infiltration under shingles, siding damage.
    Drip Edge RoleDirects water into gutters.Seals the edge to prevent lateral water entry.

    Why Skipping the Rakes Is a Mistake

    Some older homes or budget-conscious contractors might skip the rake edges to save money. However, this is a false economy. Wind storms can drive rain horizontally against the side of your house. If the rake edge is not sealed with drip edge, water can bypass the shingles entirely, soaking the roof deck and leading to mold growth inside your attic.

    Consequences of Missing Drip Edge

    If you choose to ignore the advice and ask, “Do I need drip edge on all sides of roof?” only to decide “no,” you risk several serious issues:

    • Wood Rot: The fascia and rafters are typically made of wood. Constant exposure to moisture leads to decay, compromising the structural integrity of the roof overhang.
    • Pest Infestation: Rotting wood attracts termites, carpenter ants, and other pests that can spread into your homeโ€™s framing.
    • Paint Peeling and Staining: Water running down the fascia will cause exterior paint to bubble and peel, requiring frequent and expensive repainting.
    • Ice Dam Formation: In colder climates, missing drip edge at the eaves can contribute to ice dams. When snow melts and refreezes at the edge, it can back up under shingles, causing massive interior leaks.

    How to Install Drip Edge Correctly

    If you are a DIY enthusiast or want to verify your contractorโ€™s work, here is a step-by-step overview of proper installation. Note that local codes may vary, so always check with your local building department.

    Step 1: Prepare the Roof Deck

    Ensure the roof deck is clean and dry. If you are replacing an old roof, remove any old, rusted flashing.

    Step 2: Install Drip Edge on the Eaves First

    Start with the bottom edges (eaves). Place the drip edge so that the vertical flange goes up against the fascia board, and the horizontal flange lies flat on the roof deck.

    • Tip: The drip edge should extend slightly into the gutter to ensure water drops directly into it, not behind it.

    Step 3: Secure the Eave Flashing

    Nail the drip edge every 12 to 16 inches using roofing nails. Ensure the nails are driven flush but not too deep to dent the metal.

    Step 4: Install Underlayment

    Roll out your roofing underlayment (felt or synthetic) over the eave drip edge. This creates a secondary water barrier.

    Step 5: Install Drip Edge on the Rakes

    Now, move to the side edges (rakes). Place the drip edge over the underlayment. This layering is crucial because it ensures that any water getting under the shingles hits the drip edge and is directed away, rather than getting trapped under the underlayment.

    Step 6: Secure and Seal

    Nail the rake drip edge securely. Use roofing cement to seal any overlaps or corners to prevent wind uplift.

    FAQ Section

    1. Can I install drip edge after the shingles are already on?

    It is highly recommended to install drip edge before the shingles. Installing it afterward requires lifting shingles, which can break the seal strips and compromise the warranty. If you must add it later, it should be done by a professional to minimize damage.

    2. What material is best for drip edge?

    Aluminum is the most common choice due to its rust resistance and affordability. Galvanized steel is stronger but can rust over time if the coating is damaged. Copper is premium, durable, and aesthetically pleasing but significantly more expensive.

    3. Does drip edge help with ice dams?

    Yes, indirectly. By ensuring water flows freely into the gutters and away from the fascia, drip edge reduces the likelihood of water pooling and freezing at the roofโ€™s edge. However, proper attic insulation and ventilation are the primary defenses against ice dams.

    4. How much does it cost to install drip edge?

    The material cost is relatively low, typically ranging from $1 to $3 per linear foot. Labor costs vary by region, but since it is usually part of a full roof replacement, the incremental cost is minimal compared to the protection it offers.

    5. Can I use caulk instead of drip edge?

    No. Caulk is not a substitute for mechanical flashing. It will crack, shrink, and fail over time due to UV exposure and temperature fluctuations. Drip edge provides a permanent, physical barrier that caulk cannot match.

    Conclusion

    So, do you need drip edge on all sides of roof? Absolutely. It is not an optional accessory; it is a fundamental component of a weather-resistant roofing system. Installing drip edge on both the eaves and rakes protects your fascia, prevents wood rot, keeps pests at bay, and ensures your roofing warranty remains valid.

    Ignoring this small detail can lead to thousands of dollars in repairs down the line. By investing in proper drip edge installation, you are investing in the longevity and safety of your home.

    If you found this guide helpful, please share it with your friends and family on social media. Helping others understand the importance of proper roofing details can save them from costly headaches in the future!

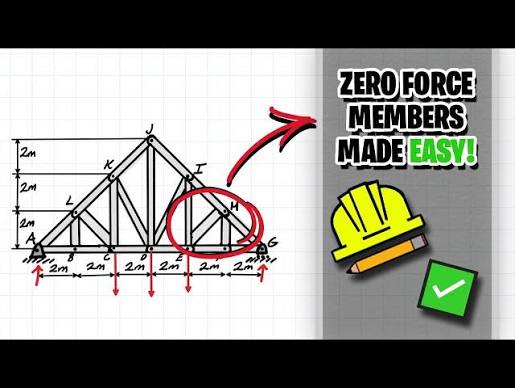
  • How to Determine The Zero Force Members In The Pratt Roof Truss

    How to Determine The Zero Force Members In The Pratt Roof Truss

    Are you staring at a complex web of lines in your structural analysis textbook, wondering which bars actually carry weight and which are just there for stability? It is a common frustration for engineering students and junior designers alike. Knowing how to determine the zero force members in the Pratt roof truss can cut your calculation time in half and give you a deeper intuitive understanding of structural behavior.

    In this guide, we will break down the logic behind zero-force members (ZFMs). We wonโ€™t just give you formulas; we will teach you the visual “inspection method” that professionals use to identify these members instantly. By the end of this article, you will be able to look at a Pratt truss and confidently cross out the non-load-bearing elements before you even write down your first equilibrium equation.


    What Are Zero-Force Members and Why Do They Matter?

    Before we dive into the specific geometry of the Pratt truss, letโ€™s define what we are looking for. A zero-force member is a structural component within a truss that carries no internal axial force under a specific loading condition.

    You might ask, “If they carry no load, why are they there?” This is a critical question. While they may not carry load in an idealized theoretical model, in the real world, these members provide:

    • Stability: They prevent long compression members from buckling.
    • Redundancy: If the loading pattern changes (e.g., wind blows from a different direction), a zero-force member might suddenly become active.
    • Construction Support: They help maintain the shape of the truss during assembly.

    However, for the purpose of static analysis, identifying them allows you to simplify the free-body diagram significantly. Instead of solving for 15 unknown forces, you might only need to solve for 10.


    The Two Golden Rules of Inspection

    To determine the zero force members in the Pratt roof truss, you do not always need to perform the Method of Joints or the Method of Sections. You can use two simple rules based on the equilibrium of forces (โˆ‘Fx=0โˆ‘Fxโ€‹=0 and โˆ‘Fy=0โˆ‘Fyโ€‹=0).

    Rule 1: The Two-Member Joint

    If a joint connects only two non-collinear members and there are no external loads or support reactions applied to that joint, then both members are zero-force members.

    • Logic: For the joint to remain stationary, the forces in the two members must balance each other. Since they are not collinear (not in a straight line), the only way their vector sum can be zero is if the magnitude of the force in both is zero.

    Rule 2: The Three-Member Joint

    If a joint connects three members, where two are collinear (forming a straight line) and the third is not, and there is no external load at that joint, then the third (non-collinear) member is a zero-force member.

    • Logic: Summing forces perpendicular to the collinear axis reveals that the non-collinear member has no opposing force to balance it. Therefore, its force must be zero.

    Pro Tip: Always check for external loads first. If a load is applied directly to a joint, Rule 1 and Rule 2 generally do not apply immediately, as the external force disrupts the zero-sum condition.

    Determine The Zero Force Members In The Pratt Roof Truss

    Step-by-Step: Analyzing the Pratt Roof Truss

    The Pratt truss is characterized by its diagonal members that slope downward toward the center. This configuration puts the longer diagonal members in tension and the shorter vertical members in compression under gravity loads. This is efficient because steel handles tension well, and short columns handle compression without buckling easily.

    Letโ€™s walk through how to determine the zero force members in the Pratt roof truss using a standard symmetric loading scenario (gravity loads applied only at the top chord joints).

    Step 1: Identify the Loading Conditions

    Assume a standard simply supported Pratt truss with pin support at one end and roller support at the other. Loads are applied vertically at the upper chord panel points.

    Step 2: Inspect the Supports

    Look at the supports. Usually, there are reaction forces here. Do not apply the zero-force rules blindly at the supports unless you have already calculated the reactions and know they don’t align with specific members in a way that creates a zero-force scenario (which is rare in standard Pratt trusses).

    Step 3: Scan the Unloaded Joints

    Move to the joints where no external load is applied. In a typical roof truss, loads are often applied at the top chord. The bottom chord joints are typically unloaded.

    Letโ€™s look at a specific joint on the bottom chord of a Pratt truss:

    1. Imagine a bottom chord joint connecting a left horizontal member, a right horizontal member, and a vertical web member.
    2. The two horizontal members are collinear.
    3. The vertical member is non-collinear.
    4. Is there an external load at this bottom joint? No.
    5. Conclusion: According to Rule 2, the vertical member connected to this unloaded bottom joint is a zero-force member.

    Step 4: Propagate the Logic

    Once you identify a vertical member as a zero-force member, look at the joint at the other end of that vertical member (on the top chord).

    1. If that vertical member has zero force, it effectively disappears from the analysis of the top joint.
    2. Now, inspect the top joint. Does it now consist of only two non-collinear members with no external load?
    3. If yes, those remaining members might also be zero-force, or it may simplify the geometry enough to apply Rule 1 or 2 again.

    Note: In a standard Pratt truss with gravity loads on all top chords, the verticals connected to the unloaded bottom chords are the primary candidates for zero-force status. However, this depends heavily on whether the load is applied at every panel point.


    Common Mistakes When Identifying ZFMs

    Even experienced students make errors when trying to determine the zero force members in the Pratt roof truss. Here is a comparison of correct vs. incorrect thinking.

    ScenarioIncorrect AssumptionCorrect Analysis
    Joint with External Load“It looks like Rule 2, so the vertical is zero.”Stop! An external load breaks the symmetry. The vertical member must carry part of that load.
    Symmetry“The truss is symmetric, so all inner members are zero.”Symmetry helps calculate reactions, but it does not automatically make internal members zero. Check joint equilibrium.
    Diagonal Members“Diagonals are always in tension, never zero.”Diagonals can be zero if the loading pattern is unusual (e.g., specific point loads that bypass them).

    For a deeper mathematical understanding of truss stability and determinacy, you can refer to the general principles outlined on Wikipedia’s Truss page.


    Why the Pratt Configuration is Unique

    When you determine the zero force members in the Pratt roof truss, it is helpful to understand why this design is popular. Unlike the Howe truss (where diagonals slope upward toward the center), the Pratt truss places diagonals in tension.

    In many standard loading cases for Pratt trusses:

    • Verticals: Often carry compression. Some may be zero-force if the bottom chord joints are unloaded.
    • Diagonals: Carry tension. It is rare for diagonals to be zero-force in a fully loaded Pratt truss unless the load path is very specific.

    This distinction is vital. If you assume a diagonal is a zero-force member incorrectly, you might underestimate the tension requirements for the steel cables or rods used in that position.


    FAQ Section

    1. Can a zero-force member become load-bearing later?

    Yes. Zero-force members are identified based on a specific loading condition. If the wind direction changes, or if a live load (like snow) accumulates unevenly, a member that was previously “zero” may suddenly carry significant stress. This is why they are never removed from actual structures.

    2. Do I need to calculate reactions before finding zero-force members?

    Not always. If you are using the inspection method (Rules 1 and 2) on joints that are far away from the supports and have no external loads, you can identify ZFMs without knowing the support reactions. However, for joints near supports, calculating reactions first is safer.

    3. Are zero-force members present in all trusses?

    No. Their presence depends on the geometry and the loading. A Warren truss, for example, has different zero-force characteristics compared to a Pratt truss. Always analyze the specific joint conditions.

    4. What happens if I ignore a zero-force member in my calculation?

    If you correctly identify it as zero, ignoring it simplifies the math. If you incorrectly ignore a member that is not zero, your entire analysis will be wrong, leading to potential structural failure in design scenarios. Always double-check using โˆ‘Fy=0โˆ‘Fyโ€‹=0.

    5. How does this help in real-world construction?

    Identifying these members helps engineers optimize material usage. While we keep them for stability, knowing they carry minimal load allows us to use lighter gauge materials for those specific bars, reducing cost and weight without compromising safety.


    Conclusion

    Learning to determine the zero force members in the Pratt roof truss is a fundamental skill that bridges the gap between theoretical statics and practical engineering intuition. By mastering the two inspection rulesโ€”checking for unloaded two-member joints and unloaded three-member joints with two collinear barsโ€”you can streamline your analysis process significantly.

    Remember, while these members may carry “zero” force in your textbook problems, they play a vital role in the real-world stability and buckling resistance of the structure.

    Did this guide help clarify the concept for you? If you found this tutorial useful, please share it with your study group or on LinkedIn to help fellow engineering students master structural analysis!

  • Can You Write Off A Roof Replacement On Your Taxes?

    Can You Write Off A Roof Replacement On Your Taxes?

    Replacing a roof is one of the most significant expenses a homeowner can face. It is a major investment in your propertyโ€™s safety and value, often costing tens of thousands of dollars. Naturally, many homeowners ask, “Can you write off a roof replacement on your taxes?” to help alleviate this financial burden.

    The short answer is nuanced: for most primary residences, the answer is no, but there are critical exceptions. Understanding these distinctions can save you from costly errors during tax season and help you maximize legitimate savings. In this guide, we will break down exactly when a new roof impacts your tax return and how to navigate IRS regulations effectively.

    The General Rule: Personal Use vs. Business Use

    To understand why the IRS treats roof replacements differently than other expenses, we must look at the concept of “personal use.” The Internal Revenue Service (IRS) generally views your primary home as a personal asset, not a business investment. Therefore, routine maintenance and capital improvementsโ€”like a new roofโ€”are considered personal living expenses.

    Unlike medical expenses or charitable donations, you cannot deduct the cost of improving your personal home from your taxable income in the year you pay for it. This rule applies regardless of whether the roof was replaced due to age, storm damage, or aesthetic upgrades.

    However, this does not mean the money is entirely “lost” in the eyes of the tax code. While you cannot take an immediate deduction, the cost may affect your capital gains when you eventually sell the home. By adding the cost of the roof to your homeโ€™s “basis,” you reduce the potential profit subject to taxation upon sale. For more detailed definitions of property basis, you can refer to the official IRS guidelines on Basis of Property, which align with general accounting principles found on resources like Wikipediaโ€™s entry on Tax Basis.

    Exception 1: Rental Properties and Business Use

    If you own a rental property, the rules change dramatically. For landlords, a roof is not a personal expense; it is a necessary component of generating rental income. In this scenario, you can write off the cost, but the method depends on the nature of the work.

    Repair vs. Improvement

    The IRS distinguishes between a “repair” and an “improvement.”

    • Repairs keep the property in good working condition without adding value or prolonging its life significantly (e.g., fixing a few missing shingles). These can be deducted fully in the current tax year.
    • Improvements add value, prolong the useful life, or adapt the property to new uses (e.g., replacing the entire roof). These must be capitalized and depreciated over time.

    For residential rental properties, the cost of a new roof is typically depreciated over 27.5 years using the Modified Accelerated Cost Recovery System (MACRS). This means you deduct a portion of the roof’s cost each year rather than all at once.

    FeaturePersonal ResidenceRental Property
    Immediate DeductionNoNo (must depreciate)
    DepreciationNot applicableYes, over 27.5 years
    Impact on SaleIncreases basis (lowers capital gains)Adjusted basis affects depreciation recapture
    Repair DeductionNoYes, if minor

    Exception 2: Energy-Efficient Roofing Credits

    While you may not get a direct deduction for a standard asphalt shingle roof, you might qualify for a federal tax credit if you install energy-efficient roofing materials. The Residential Clean Energy Credit and the Energy Efficient Home Improvement Credit are powerful tools for homeowners looking to upgrade.

    As of recent tax years, homeowners can claim a credit for qualifying metal roofs with appropriate pigmented coatings or asphalt shingles designed to meet specific energy efficiency standards. These credits directly reduce your tax liability dollar-for-dollar, which is often more valuable than a deduction.

    To qualify, the materials must meet the ENERGY STARยฎ program requirements. It is crucial to keep manufacturer certification statements and receipts. Unlike deductions, which lower your taxable income, credits lower your actual tax bill. If your tax liability is $5,000 and you have a $1,000 credit, you now owe $4,000.

    Exception 3: Casualty Losses from Storm Damage

    Sometimes, a roof replacement isn’t a choiceโ€”it’s a necessity due to sudden, unexpected events like hurricanes, hailstorms, or falling trees. In these cases, you may be able to claim a casualty loss.

    However, the Tax Cuts and Jobs Act of 2017 significantly restricted casualty loss deductions. Currently, you can only deduct casualty losses if they are attributable to a federally declared disaster. Even then, there are hurdles:

    1. You must itemize deductions instead of taking the standard deduction.
    2. You must subtract $100 per event.
    3. You must subtract 10% of your adjusted gross income (AGI) from the total loss.

    For example, if your AGI is $100,000, the first $10,000 of your loss (plus $100) is not deductible. This makes claiming casualty losses difficult for many taxpayers unless the damage is catastrophic and widespread.

    Can You Write Off A Roof Replacement On Your Taxes

    How to Document Your Roof Replacement

    Whether you are dealing with a rental property depreciation schedule or preparing for a future home sale, documentation is key. The IRS requires substantiation for all claims. Here is a step-by-step approach to keeping your records audit-proof:

    1. Keep All Receipts: Ensure invoices detail the materials used, labor costs, and dates of service.
    2. Save Contracts: The signed contract should specify the scope of work. Was it a full replacement or a repair? This distinction matters for rentals.
    3. Before and After Photos: Visual evidence can support claims of damage (for casualty losses) or proof of installation (for energy credits).
    4. Manufacturer Certifications: If claiming energy credits, save the specific ENERGY STARยฎ certification documents provided by the manufacturer.
    5. Insurance Correspondence: If insurance paid part of the cost, keep those records. You can only deduct or depreciate the amount you paid out-of-pocket, not what the insurance covered.

    Frequently Asked Questions (FAQ)

    1. Can I deduct a new roof if I work from home?

    If you use part of your home exclusively and regularly for business, you may qualify for the Home Office Deduction. In this case, you can depreciate the portion of the roof that corresponds to the percentage of your home used for business. For example, if your home office is 10% of your homeโ€™s square footage, you can depreciate 10% of the roofโ€™s cost over 39 years (non-residential real property rates often apply to home offices).

    2. Does a new roof increase my homeโ€™s basis?

    Yes. Capital improvements, such as a new roof, add to your homeโ€™s cost basis. When you sell your home, your profit is calculated as the selling price minus your basis. A higher basis means a lower taxable gain. Note that if you exclude up to $250,000 ($500,000 for married couples) of gain under Section 121, this may not impact your taxes immediately, but it is still good record-keeping.

    3. Can I write off a roof replacement for a vacation home?

    Generally, no. A second home used for personal purposes is treated the same as a primary residence. You cannot deduct maintenance or improvement costs. However, if you rent out the vacation home for part of the year, you may be able to deduct a portion of the expenses proportional to the rental use days, similar to a rental property.

    4. What if my insurance paid for the roof?

    If your insurance company covered the cost of the roof replacement due to storm damage, you cannot deduct that amount. You can only claim deductions or credits for expenses you actually paid. If insurance covered 80% of the cost, you can only factor in the remaining 20% for basis adjustments or depreciation.

    5. Is there a time limit for claiming energy credits?

    Tax credits are subject to annual legislative changes. The Inflation Reduction Act extended several energy credits through 2032. However, eligibility requirements and credit amounts can change. Always check the current yearโ€™s IRS Form 5695 instructions to ensure your roofing materials qualify for the current tax year.

    Conclusion

    So, can you write off a roof replacement on your taxes? For most homeowners with primary residences, the answer is noโ€”not as an immediate deduction. However, the cost is not wasted. It increases your homeโ€™s basis, potentially lowering future capital gains taxes. For landlords, business owners, and those installing energy-efficient systems, significant tax benefits are available through depreciation, business deductions, and federal credits.

    Navigating tax laws can be complex, and mistakes can be costly. Always keep meticulous records and consider consulting with a certified CPA or tax professional who can tailor advice to your specific financial situation.

    Did you find this guide helpful? Share it with your friends on social media who might be facing a similar roofing dilemma!

  • Can You Section 179 A Roof On A Rental Property?

    Can You Section 179 A Roof On A Rental Property?

    Have you ever stared at a massive invoice for a new roof on your rental unit and wondered if there was a way to deduct that cost immediately rather than spreading it out over decades? It is a common frustration for landlords who want to improve their cash flow but feel trapped by complex tax codes. The burning question many investors ask is: Can you Section 179 a roof on a rental property?

    The short answer is nuanced. While Section 179 is a powerful tool for business equipment, it generally does not apply to residential rental real estate improvements like roofs. However, all is not lost. There are other potent depreciation strategies, such as Bonus Depreciation and Cost Segregation, that can help you achieve similar immediate tax benefits. In this guide, we will break down exactly why Section 179 usually fails for roofs, what alternatives exist, and how you can legally minimize your tax burden.

    Why Section 179 Typically Does Not Apply to Rental Roofs

    To understand why you likely cannot use Section 179 for a rental roof, we must first look at what Section 179 actually covers. Under Internal Revenue Code Section 179, businesses can deduct the full purchase price of qualifying equipment and software purchased or financed during the tax year. This is designed to stimulate business investment in tangible personal property.

    The Distinction Between Personal and Real Property

    The IRS makes a strict distinction between tangible personal property and real property.

    • Tangible Personal Property: Includes items like machinery, vehicles, computers, and office furniture. These are eligible for Section 179.
    • Real Property: Includes land, buildings, and structural components permanently attached to the building. A roof is considered a structural component of the building.

    Because a roof is an integral part of the buildingโ€™s structure, it is classified as real property. Section 179 explicitly excludes real property improvements from its deduction limits. Therefore, if you are asking, “Can you Section 179 a roof on a rental property,” the technical answer is almost always no.

    The Exception: Non-Residential vs. Residential

    Even if we look beyond the personal/real property divide, Section 179 has further limitations regarding the type of real property. It is primarily designed for active trade or business assets. While some non-residential real property improvements might qualify under specific recent legislative changes (like the Qualified Improvement Property rules), residential rental properties are generally excluded from these accelerated deductions under Section 179.

    If Not Section 179, What Are Your Options?

    Just because Section 179 is off the table does not mean you are stuck depreciating that roof over 27.5 years. The tax code offers other mechanisms that may provide the immediate write-off you are looking for.

    1. Bonus Depreciation

    Bonus Depreciation allows you to deduct a significant percentage of the cost of qualified property in the first year it is placed in service. For many years, this was 100%, allowing for a full immediate write-off.

    However, it is crucial to note that Bonus Depreciation percentages have been phasing down. Under current tax laws leading into 2026 and beyond, the percentage has decreased annually. You must check the specific rate for the tax year in which the roof was installed. While a standard roof replacement on a residential building typically falls under the 27.5-year straight-line depreciation schedule, there are ways to potentially reclassify parts of the work.

    2. Cost Segregation Studies

    This is where professional tax strategy comes into play. A Cost Segregation Study is an engineering-based analysis that identifies components of a building that can be depreciated over shorter recovery periods (5, 7, or 15 years) rather than the standard 27.5 or 39 years.

    While the roof structure itself is usually 27.5 years, certain aspects associated with the roofing project might be reclassified:

    • Roof-mounted equipment: HVAC units, solar panels, or communication antennas attached to the roof.
    • Land improvements: If the roofing project includes extensive drainage work or landscaping repairs that are distinct from the building structure.

    By segregating these costs, you can apply Bonus Depreciation to the shorter-life assets, accelerating your tax savings significantly.

    3. Repair vs. Improvement

    Another critical distinction is whether the work is a repair or an improvement.

    • Repair: Maintains the property in its normal operating condition. Example: Patching a few shingles or fixing a leak. This is fully deductible in the current year.
    • Improvement: Adds value, prolongs life, or adapts the property to a new use. Example: Replacing the entire roof. This must be capitalized and depreciated.

    The IRS uses the “Betterment, Restoration, Adaptation” test. If you are simply maintaining the existing roof, you might deduct it as a repair. However, a full replacement is almost universally considered an improvement.

    Can You Section 179 A Roof On A Rental Property

    Comparison: Section 179 vs. Standard Depreciation vs. Bonus Depreciation

    To clarify the differences, here is a quick comparison table for landlords:

    FeatureSection 179Standard Depreciation (Residential)Bonus Depreciation
    Eligible AssetsTangible personal property (equipment, vehicles)Real property (buildings, structural components)Qualified property (often personal property, some real)
    Roof EligibilityNo (Structural component)Yes (Over 27.5 years)Limited (Depends on classification)
    Deduction SpeedImmediate (up to limit)Slow (Annual deductions)Fast (Percentage in Year 1)
    Income LimitationCannot exceed taxable incomeNo income limitationNo income limitation
    Best ForBusiness equipment purchasesLong-term hold residential rentalsAccelerating deductions on eligible assets

    Step-by-Step Guide to Maximizing Roof Deductions

    If you have recently replaced a roof on your rental property, follow these steps to ensure you are optimizing your tax position:

    1. Document Everything: Keep all invoices, contracts, and photos. Detailed records are essential if the IRS questions your classification of repairs vs. improvements.
    2. Consult a Tax Professional: Do not guess. Ask your CPA specifically about a Cost Segregation Study. For high-value properties, the cost of the study is often outweighed by the tax savings.
    3. Identify Separate Assets: Look at your invoice. Are there line items for gutters, skylights, or roof-mounted fans? These might be separable from the main roof structure.
    4. Check State Laws: While federal law dictates Section 179 and Bonus Depreciation, some states do not conform to federal bonus depreciation rules. You may need to make state-level adjustments.
    5. File Form 4562: To claim any depreciation, including Section 179 or Bonus Depreciation, you must file IRS Form 4562 with your tax return.

    Frequently Asked Questions (FAQ)

    1. Can I use Section 179 for a commercial rental property roof?

    Generally, no. Even for commercial properties, the roof is considered a structural component of the building (real property). Section 179 is for personal property. However, commercial real property improvements may qualify for other deductions like Qualified Improvement Property (QIP) under Bonus Depreciation rules, but this is distinct from Section 179.

    2. What is the useful life of a rental property roof for tax purposes?

    For residential rental properties, the IRS assigns a useful life of 27.5 years using the straight-line depreciation method. This means you deduct 1/27.5th of the cost each year. For commercial properties, it is 39 years.

    3. Can I deduct the full cost of a roof repair in one year?

    Yes, if it qualifies as a repair rather than an improvement. Routine maintenance, such as replacing damaged shingles or sealing leaks, can be deducted as a current expense. However, replacing the entire roof system is considered a capital improvement and must be depreciated.

    4. Does the Tax Cuts and Jobs Act (TCJA) change roof depreciation?

    The TCJA introduced 100% Bonus Depreciation for qualified property. While this primarily benefited personal property, it also allowed for immediate expensing of certain qualified improvement property. However, residential rental real estate structural components like roofs generally remain on the 27.5-year schedule unless segmented via a cost segregation study.

    5. What happens if I sell the property before the roof is fully depreciated?

    When you sell the property, you must recapture the depreciation taken. This is known as Depreciation Recapture. The portion of the gain attributable to depreciation is taxed at a maximum rate of 25%, while the remaining capital gains are taxed at standard capital gains rates.

    6. Is a new roof considered a betterment?

    Yes. According to IRS regulations, a new roof restores the unit of property to a like-new condition and substantially prolongs its life. Therefore, it is a betterment and must be capitalized, not expensed as a repair.

    Conclusion

    So, can you Section 179 a roof on a rental property? The direct answer is no, because a roof is a structural component of real property, not eligible personal property. However, this does not mean you lack options for tax efficiency.

    By leveraging Bonus Depreciation where applicable, conducting a Cost Segregation Study, and carefully distinguishing between repairs and improvements, you can still significantly reduce your taxable income. The key is proactive planning and professional advice. Don’t let the complexity of the tax code intimidate you; instead, use it to your advantage to build wealth through your rental investments.

    If you found this guide helpful, please share it with your fellow landlord friends on social media. Knowledge is power, and saving on taxes is everyoneโ€™s favorite hobby!

  • Is Replacing a Rental Roof Tax Deductible?

    Is Replacing a Rental Roof Tax Deductible?

    Owning a rental property is a fantastic way to build wealth, but dealing with unexpected maintenance costs can feel like a financial punch in the gut. When your tenant calls about a leak, your first thought is often about the repair bill, but your second thought should be about the tax implications. Many landlords mistakenly believe that every dollar spent on fixing their property is immediately deductible, leading to costly errors during tax season.

    Understanding is replacing a roof on a rental property tax deductible requires navigating the complex rules set by the Internal Revenue Service (IRS). It is not a simple yes or no answer; it depends entirely on whether the work is classified as a “repair” or a “capital improvement.” In this guide, we will break down these distinctions clearly, helping you keep more of your hard-earned money while staying fully compliant with federal tax laws.


    Repair vs. Improvement: The Critical Distinction

    To understand the tax treatment of your new roof, you must first master the difference between a repair and an improvement. The IRS treats these two categories very differently, and misclassifying them can lead to audits or missed savings opportunities.

    What Counts as a Repair?

    A repair is an expense that keeps your property in good working condition without adding significant value or prolonging its life. Think of it as maintenance. If you patch a few missing shingles after a storm or fix a small leak around a vent pipe, this is typically considered a repair.

    • Tax Treatment: Repairs are fully deductible in the year they are incurred. You can subtract the entire cost from your rental income on your Schedule E form.
    • Example: Spending $500 to seal a leak and replace three damaged shingles.

    What Counts as a Capital Improvement?

    A capital improvement adds value to your property, prolongs its useful life, or adapts it to a new use. Replacing an entire roof usually falls into this category because it significantly extends the life of the building and enhances its value.

    • Tax Treatment: You cannot deduct the full cost in one year. Instead, you must capitalize the cost and recover it over time through depreciation.
    • Example: Spending $15,000 to remove the old roof and install a new 30-year architectural shingle roof.

    The IRS uses the “BAR” test to determine if an expense is an improvement:

    1. Betterment: Does it improve the condition beyond the original state?
    2. Adaptation: Does it adapt the property to a new use?
    3. Restoration: Does it restore the property to a like-new condition?

    If your roof replacement hits any of these points, it is likely a capital improvement.


    How Depreciation Works for Roof Replacements

    Since a full roof replacement is generally a capital improvement, you must depreciate the cost. This means you spread the deduction over the “useful life” of the asset as defined by the IRS.

    The 27.5-Year Rule

    For residential rental properties, the IRS mandates a depreciation period of 27.5 years under the Modified Accelerated Cost Recovery System (MACRS). This applies to the structure itself, including components like the roof.

    Here is how the math works in practice:

    • Total Cost of Roof: $27,500
    • Depreciation Period: 27.5 years
    • Annual Deduction: $1,000 per year

    While this seems less appealing than an immediate deduction, it provides a steady tax benefit for nearly three decades. It is crucial to note that land cannot be depreciated, so ensure your contractorโ€™s invoice separates materials and labor from any land-related costs (though rare for roofing).

    Bonus Depreciation and Section 179

    In recent years, tax laws have introduced incentives like Bonus Depreciation, which allowed landlords to deduct a large percentage of the cost in the first year. However, these provisions are phasing out. As of 2026, the bonus depreciation percentage has decreased significantly compared to previous years. Always consult the current year’s IRS guidelines or a tax professional to see if any temporary provisions apply to your specific situation.

    Is Replacing A Roof On A Rental Property Tax Deductible

    The Safe Harbor Election: A Loophole for Small Expenses

    There is a valuable exception known as the De Minimis Safe Harbor Election. This rule allows businesses and landlords to deduct certain lower-cost items immediately rather than capitalizing and depreciating them.

    To qualify for this safe harbor regarding your roof:

    1. You must have an applicable financial statement (AFS) or not have one (different thresholds apply).
    2. The cost of the item must be below a certain threshold (typically $2,500 per invoice or item for those without an AFS).
    3. You must make a formal election statement on your tax return.

    Scenario: If you are only replacing a small section of the roof, such as a detached garage or a small porch, and the total cost is under $2,500, you might be able to deduct it immediately under this safe harbor. However, a full main-house roof replacement will almost always exceed this limit, requiring standard depreciation.


    Comparison: Immediate Deduction vs. Depreciation

    To visualize the impact on your cash flow and tax liability, consider this comparison table.

    FeatureRepair (Immediate Deduction)Capital Improvement (Depreciation)
    DefinitionMaintains current conditionAdds value or extends life
    Roof ExamplePatching leaks, replacing shinglesFull roof replacement
    Tax Benefit Timing100% in Year 1Spread over 27.5 years
    Cash Flow ImpactImmediate tax refund/savingsSmaller annual tax savings
    Record KeepingSimple receipt retentionRequires asset ledger tracking
    IRS ScrutinyLower risk if documentedHigher scrutiny on classification

    Steps to Properly Document Your Roof Expense

    Proper documentation is your best defense against an IRS audit. Follow these steps to ensure your records are impeccable.

    1. Get Detailed Invoices: Do not accept a receipt that just says “Roof Work.” Ensure the invoice details the scope of work, materials used, and labor hours. It should explicitly state if it was a repair or a full replacement.
    2. Take Before and After Photos: Visual evidence supports your claim. If you claimed it was a repair, photos showing minor damage help prove your point. If it was a replacement, photos show the extent of the work.
    3. Keep Contracts and Permits: If your local municipality required a permit for the roof replacement, keep a copy. Permits are strong evidence that major structural work was performed, supporting the capitalization argument.
    4. Separate Personal and Rental Expenses: If you live in part of the property (house hacking), you must allocate the roof cost between personal and rental use. Only the rental portion is depreciable. For more on general property tax concepts, you can refer to Wikipediaโ€™s page on Property Tax for foundational knowledge, though always rely on IRS publications for specific filing rules.

    FAQ Section

    1. Can I deduct the cost of a new roof if I sell the property?

    No, you cannot take a remaining depreciation deduction as a lump sum when you sell. However, the undepreciated basis of the roof is part of your propertyโ€™s adjusted basis. This reduces your capital gains tax liability when you sell the property. Essentially, you get the tax benefit either through annual depreciation or upon sale via lower capital gains.

    2. What if I repaired the roof last year but didnโ€™t deduct it?

    If you missed a deduction for a legitimate repair in a previous year, you can file an amended tax return (Form 1040-X) for that specific year. Generally, you have three years from the date you filed the original return to claim a refund. Do not try to claim it on the current yearโ€™s return, as this can raise red flags.

    3. Does insurance reimbursement affect my tax deduction?

    Yes. If your insurance company pays for part or all of the roof replacement due to storm damage, you cannot deduct the reimbursed amount. You can only deduct or depreciate the out-of-pocket expenses you paid. Additionally, if the insurance payout exceeds your adjusted basis in the roof, you may have a taxable gain.

    4. Is a roof inspection tax deductible?

    Generally, routine inspections are considered maintenance and can be deducted as a repair expense in the year they occur. However, if the inspection is part of a larger capital improvement project (like assessing the roof before a full replacement), it may need to be capitalized as part of the total improvement cost.

    5. What happens if I use the wrong classification?

    If you deduct a capital improvement as a repair, the IRS may disallow the deduction, charge back taxes, and impose penalties and interest. Conversely, if you capitalize a simple repair, you lose the immediate tax benefit, though you can correct this by amending your return. Accuracy is key to avoiding unnecessary stress.


    Conclusion

    Navigating the question “is replacing a roof on a rental property tax deductible” comes down to understanding the nature of the work. While simple repairs offer immediate tax relief, a full roof replacement is a capital improvement that must be depreciated over 27.5 years. Although depreciation spreads the benefit over time, it remains a powerful tool for reducing your taxable rental income year after year.

    By keeping meticulous records, understanding the BAR test, and leveraging safe harbor elections where applicable, you can optimize your tax strategy legally and effectively. Remember, tax laws are subject to change, and every property situation is unique.

    Did you find this guide helpful? Share it with fellow landlords on Facebook or LinkedIn to help them save money on their next maintenance project! And donโ€™t forget to consult with a qualified CPA to tailor these strategies to your specific financial portfolio.

  • Boost Curb Appeal: New Roof Beauty Guide

    Boost Curb Appeal: New Roof Beauty Guide

    Your home is likely your most significant investment, yet the roof often gets neglected until it leaks. Many homeowners donโ€™t realize that a worn-out roof drags down the entire aesthetic of their property, making even a well-maintained garden look lackluster. If you are looking to improve the beauty of your home with a roof replacement, you are not just fixing a structural necessity; you are unlocking a powerful design opportunity that can instantly elevate your curb appeal.

    Why Is the Roof Critical to Home Aesthetics?

    When we think about home improvement, we often focus on kitchens, bathrooms, or landscaping. However, the roof accounts for up to 40% of your homeโ€™s visible exterior surface area. It is the “hat” of your house, framing the entire structure. A sagging, discolored, or mismatched roof creates visual discord, while a new, well-chosen roof provides harmony and character.

    According to the National Association of Realtors (NAR), curb appeal is one of the top factors influencing buyer interest. A fresh roof signals that the home is well-cared-for, modern, and secure. But beyond mere maintenance, a roof replacement allows you to redefine your homeโ€™s architectural style. Whether you want a sleek, modern minimalist look or a rustic, traditional charm, the right roofing material and color can dictate the mood of your entire property.

    How Do Different Roofing Materials Impact Visual Appeal?

    Not all roofs are created equal. The material you choose defines the texture, depth, and overall vibe of your home. Here is a breakdown of popular options and their aesthetic contributions:

    1. Asphalt Shingles: Versatile and Classic

    Asphalt remains the most popular choice in the US due to its affordability and versatility. Modern architectural asphalt shingles come in various shapes and colors that can mimic more expensive materials like wood or slate.

    • Best for: Traditional suburban homes, Colonial styles, and budget-conscious renovations.
    • Aesthetic Note: Look for “dimensional” shingles that offer shadow lines, creating a richer, more textured appearance than flat 3-tab shingles.

    2. Metal Roofing: Modern and Sleek

    Once reserved for barns, metal roofing has entered the mainstream residential market. It offers clean lines and a contemporary edge. Standing seam metal roofs, in particular, provide a vertical rhythm that can make a house appear taller and more elegant.

    • Best for: Modern farmhouses, industrial-style homes, and coastal properties.
    • Aesthetic Note: Available in matte finishes, copper patinas, and even stone-coated variants that look like tile.

    3. Clay and Concrete Tiles: Mediterranean Elegance

    If you want to make a bold statement, tile roofing is unmatched. These heavy, durable materials evoke the warmth of Spanish, Mediterranean, or Southwestern architecture.

    • Best for: Stucco homes, warm-climate regions, and luxury estates.
    • Aesthetic Note: The natural variation in clay tiles adds organic beauty that synthetic materials struggle to replicate.

    4. Slate: Timeless Luxury

    Slate is the gold standard for durability and beauty. Its natural stone composition offers unique color variations and a prestigious look that ages gracefully over decades.

    • Best for: Historic homes, Tudor styles, and high-end custom builds.
    • Aesthetic Note: Slate develops a subtle patina over time, enhancing its character without losing integrity.

    For a deeper understanding of historical roofing materials and their evolution, you can refer to this comprehensive resource on Roofing materials from Wikipedia.

    Improve The Beauty Of Your Home With A Roof Replacement

    What Color Should You Choose for Your New Roof?

    Color selection is arguably the most critical decision when aiming to improve the beauty of your home with a roof replacement. The wrong color can clash with your siding, brick, or stone, while the right color creates a cohesive masterpiece.

    The Rule of Contrast and Harmony

    • Light Siding: If your home has white, cream, or light gray siding, you have flexibility. Dark roofs (charcoal, black) create striking contrast, while lighter roofs (slate gray, tan) offer a softer, monochromatic look.
    • Dark Siding: For homes with dark blue, brown, or black siding, avoid matching the roof exactly. Instead, choose a complementary tone. For example, pair dark blue siding with a cool gray roof.
    • Brick Homes: Brick is multicolored. Pick a roof color that matches the mortar or the secondary color in the brick, not necessarily the dominant red. This ties the elements together subtly.

    Trend Alert: Cool Tones vs. Warm Tones

    Currently, there is a shift toward cooler tones. Grays, blues, and blacks are dominating the market, replacing the warm browns and tans of the early 2000s. However, if your home features warm wood accents or copper gutters, a warm-toned roof might still be the better aesthetic choice.

    Does a New Roof Increase Property Value?

    Yes, significantly. While aesthetics are subjective, value is measurable. A roof replacement is one of the few home improvements that offers a high return on investment (ROI) because it addresses both function and form.

    FeatureImpact on BeautyImpact on Value
    Curb AppealHighMedium-High
    Energy EfficiencyLow (Visual)High (Long-term savings)
    DurabilityMedium (Clean look)High (Buyer confidence)
    ModernizationHighMedium

    According to the Remodeling 2023 Cost vs. Value Report, mid-range roofing replacements recoup approximately 60-70% of their cost upon resale. However, the “beauty premium” is harder to quantify but essential for selling speed. A beautiful home sells faster.

    How to Execute a Beauty-Focused Roof Replacement

    To ensure your new roof enhances your homeโ€™s beauty, follow these strategic steps:

    1. Assess Your Architecture: Identify your homeโ€™s style (e.g., Victorian, Ranch, Craftsman). Research what roofing styles are historically accurate or aesthetically pleasing for that architecture.
    2. Gather Samples: Never choose a color from a small swatch alone. Order large samples or view full-sized mockups in different lighting conditions (morning sun, afternoon shade).
    3. Consider the Surroundings: Look at your neighborsโ€™ homes and the natural landscape. You want your home to stand out positively, not clash with the neighborhoodโ€™s character.
    4. Hire a Design-Savvy Contractor: Not all roofers are designers. Choose a contractor who understands color theory and can provide digital renderings of how the new roof will look on your specific home.
    5. Update Accessories: A new roof is the perfect time to replace gutters, downspouts, and fascia boards. Matching these elements to your new roof color creates a polished, finished look.

    Frequently Asked Questions (FAQ)

    1. How long does a roof replacement take?

    Most residential roof replacements can be completed in 1โ€“3 days, depending on the size of the home and the complexity of the roofline. Weather plays a significant role, so always have a buffer in your schedule.

    2. Can I install a new roof over the old one?

    While “overlaying” is possible, it is generally not recommended if you want to improve the beauty of your home with a roof replacement. Removing the old layers allows contractors to inspect the deck for damage, ensures proper ventilation, and results in a smoother, flatter final appearance.

    3. What is the most durable roofing material?

    Slate and metal roofs are among the most durable, often lasting 50+ years. Clay tiles also offer exceptional longevity. Asphalt shingles typically last 15โ€“30 years, depending on quality and climate.

    4. Will a new roof help with energy bills?

    Yes. Modern roofing materials often come with reflective coatings (cool roofs) that reflect more sunlight and absorb less heat. This can lower your cooling costs by 10โ€“15%, especially in hotter climates.

    5. How do I maintain the beauty of my new roof?

    Regular maintenance is key. Clean your gutters twice a year to prevent water backup and staining. Trim overhanging tree branches to prevent moss growth and physical damage. Schedule a professional inspection every 2โ€“3 years.

    6. Is metal roofing noisy during rain?

    This is a common myth. When installed correctly with solid sheathing and proper insulation, metal roofing is no noisier than asphalt shingles. In fact, many homeowners find the sound of rain on metal quite soothing.

    Conclusion

    Replacing your roof is a major undertaking, but it is also one of the most transformative projects you can undertake for your home. By choosing the right material, color, and style, you can improve the beauty of your home with a roof replacement in ways that go far beyond simple protection from the elements. You create a visual identity that reflects your taste and increases your propertyโ€™s marketability.

    Donโ€™t let an aging roof dull your homeโ€™s potential. Take the time to explore your options, consult with experts, and visualize the possibilities. A beautiful roof is not just an expense; itโ€™s an investment in your homeโ€™s soul.

    Did you find this guide helpful? Share it with friends on Facebook or Pinterest who are considering a home makeover!

  • I Burned The Roof Of My Mouth: How to Heal Fast

    I Burned The Roof Of My Mouth: How to Heal Fast

    We have all been there. You take a bite of piping-hot pizza or sip scalding coffee, and suddenly, a sharp sting radiates across the top of your mouth. It is an uncomfortable, often painful experience that can make eating and speaking difficult for days. If you are thinking, “I burned the roof of my mouth how to heal,“ you are not alone, and relief is possible with the right care.

    The roof of your mouth, known medically as the palate, is covered by delicate mucous membranes. While these tissues are resilient, they are highly sensitive to thermal injury. Understanding how to treat this common injury effectively can significantly reduce your recovery time and prevent complications like infection. In this guide, we will walk you through immediate first aid, proven home remedies, and when to seek professional medical help.

    Immediate First Aid: What to Do Right After the Burn

    Time is critical when dealing with thermal burns in the mouth. The severity of the burn depends on the temperature of the substance and the duration of contact. Most kitchen-related burns are first-degree (superficial) or mild second-degree burns. Here is exactly what you should do in the first few minutes.

    1. Cool the Area Immediately

    Do not ignore the pain. The heat continues to damage tissue even after you swallow the food.

    • Sip Cold Water: Take small sips of cold water (around 4โ€“10ยฐC). Do not use ice-cold water directly on the burn as extreme cold can cause further tissue damage similar to frostbite.
    • Swish Gently: Hold the cold water in your mouth for 10โ€“15 seconds before swallowing. This helps draw heat away from the palate.
    • Avoid Ice Cubes: Placing solid ice directly on the burned palate can stick to the tissue and cause tearing when removed.

    2. Assess the Damage

    Look in a mirror if possible.

    • Redness: Indicates a first-degree burn. It will be painful but should heal in 3โ€“7 days.
    • Blisters or White Patches: Indicates a second-degree burn. These take longer to heal (up to 2 weeks) and require more careful management to prevent infection.
    • Charring or Numbness: This is rare from food but indicates a third-degree burn. Seek emergency medical attention immediately.

    Proven Home Remedies to Soothe Pain and Speed Up Healing

    Once the initial heat is dissipated, your goal shifts to soothing inflammation and promoting tissue regeneration. Here are the most effective, science-backed methods to manage the discomfort.

    Honey: Natureโ€™s Healer

    Honey is not just a sweetener; it has potent antibacterial and anti-inflammatory properties. A study published in the Journal of Family Medicine and Primary Care highlights honeyโ€™s effectiveness in wound healing.

    • How to use: Take one teaspoon of raw, organic honey. Let it coat the burned area slowly. Do not rinse it out immediately. Repeat 2โ€“3 times a day.
    • Why it works: Honey creates a protective barrier, keeps the wound moist, and prevents bacterial growth.

    Salt Water Rinses

    Salt water is a classic remedy for a reason. It helps clean the wound and reduces swelling.

    • Recipe: Mix 1/2 teaspoon of salt into 8 ounces (approx. 240 ml) of warm water. Ensure the water is lukewarm, not hot.
    • Instruction: Swish gently for 30 seconds and spit out. Do this 2โ€“3 times a day, especially after meals.
    • Note: Avoid using too much salt, as it can dehydrate the tissue and increase pain.

    Yogurt and Milk

    Dairy products can provide a cooling effect and contain probiotics that support oral health.

    • Recommendation: Eat plain, cold yogurt. The smooth texture prevents further irritation, and the cold temperature soothes the nerve endings.
    • Caution: If you are lactose intolerant or if the burn is severe, dairy might increase mucus production, which some find uncomfortable. Listen to your body.

    Aloe Vera Gel

    Aloe vera is widely recognized for treating skin burns, and it works similarly for oral mucosa.

    • Selection: Use food-grade aloe vera gel or pure extract from the plant. Ensure it does not contain alcohol or added sugars.
    • Application: Apply a small amount directly to the burned spot. Leave it for a few minutes before rinsing with cool water.
    I Burned The Roof Of My Mouth How To Heal

    Foods to Avoid During Recovery

    What you eat is just as important as how you treat the burn. Certain foods can aggravate the injured tissue, delay healing, or introduce bacteria.

    Food CategoryWhy to AvoidSafe Alternatives
    Spicy FoodsCapsaicin irritates nerve endings and increases inflammation.Mild herbs like basil or oregano.
    Acidic FoodsCitrus and tomatoes sting open wounds and slow healing.Bananas, melons, cooked apples.
    Crunchy/Hard FoodsChips, nuts, and toast can physically scrape the blister.Mashed potatoes, smoothies, soups.
    Hot BeveragesRe-exposing the area to heat resets the healing clock.Iced tea, room-temperature water.
    Alcohol & TobaccoBoth dry out the mouth and impair immune response.Water, herbal teas (cooled).

    Understanding the Healing Timeline

    Patience is key. Oral tissue heals faster than skin because of the rich blood supply in the mouth, but it is still a biological process that cannot be rushed.

    • Days 1โ€“2: Peak pain and sensitivity. You may notice redness or slight swelling. Stick to liquid or very soft foods.
    • Days 3โ€“5: Pain should decrease significantly. If blisters formed, they may burst or begin to reabsorb. A white film may appear; this is often fibrin, a normal part of healing, not necessarily pus.
    • Days 6โ€“10: Most first-degree burns are fully healed. Second-degree burns may still feel tender but should be functional.
    • Beyond 2 Weeks: If pain persists, see a dentist or doctor. Persistent non-healing ulcers can indicate other underlying issues.

    According to general medical consensus, the mouthโ€™s rapid cell turnover rate allows for quicker recovery compared to external skin. For more detailed information on oral mucosa biology, you can refer to Wikipediaโ€™s article on Oral Mucosa.

    When to See a Doctor

    While most palate burns are minor, complications can arise. Seek professional medical advice if you experience:

    1. Signs of Infection: Increased redness, swelling, pus, or fever.
    2. Difficulty Breathing or Swallowing: This could indicate swelling in the throat, which is a medical emergency.
    3. No Improvement: If the pain does not subside after 7โ€“10 days of home care.
    4. Large Blisters: If blisters are larger than 1 cm or interfere with eating significantly, a doctor may need to drain them safely.

    FAQ: Common Questions About Burning the Roof of Your Mouth

    1. Why does the roof of my mouth peel after a burn?

    Peeling is a natural part of the healing process. The top layer of damaged cells dies and sheds to make way for new, healthy tissue. Do not pull the peeling skin, as this can cause bleeding and increase the risk of infection. Let it fall off naturally.

    2. Can I use toothpaste on a burned palate?

    It is generally not recommended. Many toothpastes contain sodium lauryl sulfate (SLS) and strong mint flavors that can sting and irritate the open wound. If you must brush, use a sensitive-teeth formula and avoid scrubbing the burned area directly.

    3. Does sugar help heal a burned mouth?

    No. While honey is beneficial, refined sugar can promote bacterial growth in the mouth. Bacteria thrive on sugar, which can lead to infection in the open wound. Stick to natural remedies like honey rather than sprinkling sugar on the burn.

    4. How long does it take for a blister on the roof of the mouth to heal?

    Small blisters typically heal within 7 to 10 days. Larger or deeper blisters may take up to two weeks. Keeping the area clean with salt water rinses and avoiding irritating foods will speed up this process.

    5. Is it safe to pop a blister on the roof of my mouth?

    No. Never pop a blister in your mouth. The fluid inside protects the underlying tissue from bacteria. Popping it creates an open wound that is painful and prone to infection. Let it rupture on its own or reabsorb into the body.

    6. Can stress affect the healing of a mouth burn?

    Yes. High stress levels can weaken the immune system and slow down the bodyโ€™s natural healing processes. Additionally, stress may lead to behaviors like teeth grinding, which can inadvertently irritate the sensitive palate further.

    Conclusion

    Dealing with a burned palate is unpleasant, but it is rarely serious. By acting quickly with cold water, utilizing natural remedies like honey and salt water, and avoiding irritating foods, you can manage the pain and support your bodyโ€™s natural healing abilities. Remember, the key phrase “I burned the roof of my mouth how to heal“ leads to simple, consistent care rather than complex medical interventions for most cases.

    Listen to your body. If the pain is manageable and decreasing, you are on the right track. If symptoms worsen, do not hesitate to consult a healthcare professional.

    Did this guide help you soothe your pain? Share this article with friends and family on social media so they know what to do the next time they enjoy their coffee a little too eagerly! Stay safe and eat wisely.