Category: preventive maintenance

  • What Roofing Maintenance Do Pros Do?

    What Roofing Maintenance Do Pros Do?

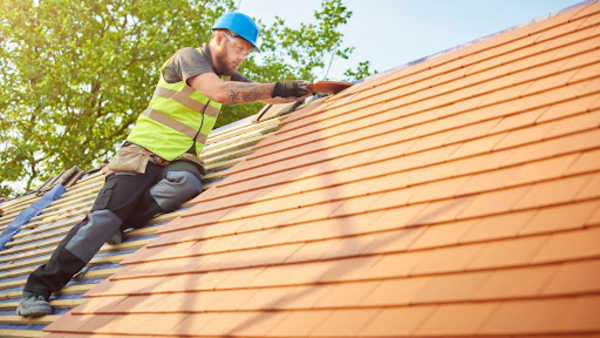
    Your roof is your home’s first line of defense against the elements, yet it is often the most neglected part of the property until a leak appears. Many homeowners assume that if they can’t see damage from the ground, everything is fine, but hidden issues like compromised flashing or granule loss can lead to costly structural repairs down the line. Understanding what kind of roofing maintenance do professional roofing companies do is crucial for protecting your investment and ensuring your family stays safe and dry. By leveraging expert care, you can catch minor problems before they escalate into major emergencies.


    The Comprehensive Visual and Physical Inspection

    The cornerstone of any professional maintenance visit is a thorough inspection that goes far beyond a casual glance from the sidewalk. Professional roofers are trained to identify subtle signs of wear and tear that the untrained eye might miss. This process is not just about looking for holes; it is a systematic evaluation of the entire roofing system.

    What Exactly Are They Looking For?

    During this phase, technicians examine several critical components:

    • Shingle Integrity: They check for cracked, curled, or missing shingles. For asphalt roofs, they look for “bald spots” where granules have washed away, exposing the asphalt mat to UV radiation.
    • Flashing Condition: Flashing seals the joints around chimneys, vents, and skylights. Professionals check for rust, cracks, or separation in these metal strips, which are common entry points for water.
    • Ventilation Systems: Proper airflow is vital. Inspectors ensure that ridge vents, soffit vents, and turbine vents are not blocked by debris or bird nests.
    • Structural Sagging: They assess the roof deck for any signs of sagging, which could indicate underlying structural issues or water retention in the decking materials.

    According to industry standards, a professional inspection should occur at least twice a year—typically in the spring and fall. This frequency aligns with seasonal changes that can stress roofing materials, such as freezing temperatures in winter and intense heat in summer.

    Debris Removal and Gutter Cleaning

    One of the most practical aspects of professional maintenance is the removal of physical debris. While it may seem like a simple task, improper cleaning can cause more harm than good. Professional companies use specialized tools and safety protocols to clear roofs without damaging the surface.

    Why Professional Cleaning Matters

    Leaves, branches, and moss can trap moisture against the roof surface, accelerating decay and promoting mold growth. Here is how professionals handle this:

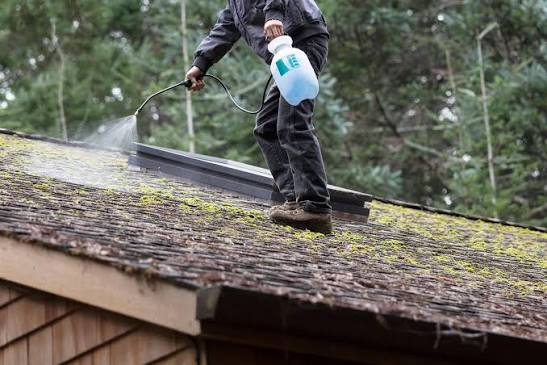
    1. Soft Washing Techniques: Unlike high-pressure power washing, which can strip granules from asphalt shingles or crack clay tiles, pros use low-pressure soft washing. This method effectively removes algae and moss without compromising the material’s integrity.
    2. Gutter Flushing: Clogged gutters cause water to back up under the shingles, leading to rot in the fascia and soffits. Professionals remove all sludge and flush the downspouts to ensure proper drainage.
    3. Valley Clearing: Roof valleys (where two roof planes meet) channel large volumes of water. Debris here is particularly dangerous. Pros carefully clear these areas to prevent water damming.
    DIY CleaningProfessional Cleaning
    High risk of personal injuryInsured and safety-equipped
    Potential damage to shinglesUses non-destructive methods
    May miss hidden debris in valleysThorough, systematic removal
    No warranty on work performedOften includes service guarantee
    What Kind Of Roofing Maintenance Do Professional Roofing Companies Do

    Minor Repairs and Preventative Sealing

    Inspection and cleaning are diagnostic and preventive, but maintenance also involves proactive repairs. Professional roofing companies do not just point out problems; they fix small issues immediately to prevent them from becoming big ones.

    Common On-the-Spot Fixes

    • Re-sealing Flashing: If flashing is intact but the sealant has dried out, pros will apply high-quality roofing cement or urethane sealant to restore watertightness.
    • Replacing Individual Shingles: Instead of replacing an entire section, technicians will swap out damaged shingles with matching materials to maintain aesthetic consistency and protection.
    • Pipe Boot Replacement: The rubber boots around plumbing vents often crack due to sun exposure. Professionals replace these inexpensive but critical components during routine maintenance.

    This proactive approach is supported by data from the National Roofing Contractors Association, which emphasizes that regular maintenance can extend the lifespan of a roof by up to 50%. By addressing minor leaks and weak points early, homeowners avoid the exponential costs associated with major water damage restoration.

    Attic and Ventilation Assessment

    A roof is a system, and its performance is heavily influenced by what happens underneath it. Professional maintenance includes an assessment of the attic space, which is often overlooked by general handymen.

    The Role of Ventilation and Insulation

    Poor ventilation can cause heat and moisture to build up in the attic, leading to:

    • Ice Dams: In winter, warm air escaping into the attic melts snow on the roof, which refreezes at the eaves, causing water to back up under shingles.
    • Premature Aging: Excessive heat in the summer can bake shingles from the underside, making them brittle and prone to cracking.

    Professionals check for adequate intake and exhaust ventilation. They also inspect insulation levels to ensure it does not block soffit vents. If they find mold or mildew in the attic, it is often a sign of roof leaks or poor ventilation, prompting further investigation.

    Documentation and Reporting

    A key differentiator between a handyman and a professional roofing company is the level of documentation provided. After the maintenance visit, reputable companies provide a detailed report.

    What Should Be in Your Report?

    • Photo Evidence: Before-and-after photos of problem areas, such as cracked flashing or cleaned gutters.
    • Condition Rating: A summary of the roof’s current health, often rated on a scale (e.g., Good, Fair, Poor).
    • Recommendations: A prioritized list of suggested repairs, distinguishing between urgent fixes and long-term monitoring items.
    • Warranty Information: Details on any work performed and remaining manufacturer warranties.

    This documentation is invaluable for insurance claims and future home sales. It provides proof of care, which can be a significant selling point and may even help in negotiating lower home insurance premiums.


    FAQ Section

    1. How often should I have my roof professionally maintained?

    Most experts recommend bi-annual maintenance, ideally in the spring and fall. However, if you live in an area with severe weather conditions, such as heavy snowfall or frequent hurricanes, an additional inspection after major storms is advisable.

    2. Can I perform roofing maintenance myself to save money?

    While you can clean gutters from the ground or trim overhanging branches, walking on your roof is dangerous and can void warranties. Professional roofers have the necessary safety gear, insurance, and expertise to identify issues that are not visible to the untrained eye. DIY attempts often lead to accidental damage or personal injury.

    3. Does professional roofing maintenance include a warranty?

    Many professional roofing companies offer a workmanship warranty on the maintenance services they perform, such as sealing or minor repairs. However, this is distinct from the manufacturer’s warranty on the roofing materials. Always ask for clarity on what is covered before signing a contract.

    4. What is the difference between roof repair and roof maintenance?

    Roof maintenance is proactive and preventive, aimed at extending the life of the roof and identifying small issues before they grow. Roof repair is reactive, fixing specific damages that have already occurred, such as a leak or storm damage. Maintenance is generally less expensive and helps avoid the need for major repairs.

    5. Will regular maintenance void my roof warranty?

    On the contrary, many manufacturer warranties require regular professional maintenance to remain valid. Neglecting maintenance can be seen as improper care, giving manufacturers grounds to deny claims. Always check your specific warranty terms, but generally, documented professional care strengthens your position.

    6. How much does professional roofing maintenance cost?

    Costs vary based on roof size, pitch, and material, but a typical maintenance visit ranges from $150 to $500. This fee usually covers the inspection, cleaning, and minor adjustments. While this may seem like an expense, it is significantly cheaper than the thousands of dollars required for premature roof replacement or interior water damage repair.


    Conclusion

    Understanding what kind of roofing maintenance do professional roofing companies do reveals that it is much more than just a quick look-up. It is a comprehensive service involving detailed inspections, careful cleaning, proactive minor repairs, and ventilation assessments. By investing in regular professional maintenance, you are not just paying for a service; you are buying peace of mind and extending the lifespan of one of your home’s most critical assets.

    Don’t wait for a drip in your ceiling to take action. Schedule a professional inspection today to ensure your roof is ready for whatever weather comes next. If you found this guide helpful, please share it with your friends and neighbors on social media to help them protect their homes too!
  • What Does It Mean If Snow Stays On Your Roof?

    What Does It Mean If Snow Stays On Your Roof?

    Have you ever looked out your window after a fresh snowfall and noticed that while your neighbors’ roofs are bare, yours is still covered in a thick blanket of white? It might look picturesque, but many homeowners worry about the implications. Understanding what does it mean if snow stays on your roof is crucial for maintaining your home’s structural integrity and energy efficiency.

    In this guide, we will decode the signs your roof is giving you, explain the science behind heat loss, and provide actionable steps to protect your home from winter damage.

    The Science Behind Snow Melting Patterns

    To understand why snow behaves differently on various roofs, we must first look at basic thermodynamics. Your home generates heat. In a well-insulated house, that heat stays inside. In a poorly insulated one, it escapes upward through the attic and roof deck.

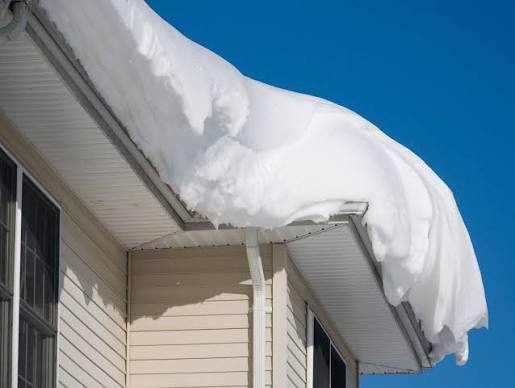
    When heat escapes, it warms the surface of your shingles. If the roof surface temperature rises above freezing (32°F or 0°C), the bottom layer of snow begins to melt. This water then runs down the roof until it hits the colder eaves (the overhanging edge), where it refreezes. This cycle creates ice dams and leaves patches of bare roof.

    Conversely, if your roof remains uniformly covered in snow, it generally indicates that very little heat is escaping from your living space into the attic. While this sounds positive for your energy bill, it requires careful monitoring to ensure it doesn’t lead to other issues like excessive weight load.

    Is a Snow-Covered Roof Good or Bad?

    The answer is not black and white. A roof covered in snow can be both a blessing and a curse, depending on the context.

    The Good News: Efficient Insulation

    If your entire roof is covered in snow while others are melting, it is often a sign that your attic insulation is working effectively. You are not wasting money heating the outdoors. According to the U.S. Department of Energy, proper attic insulation can reduce heating costs by up to 20%.

    The Bad News: Structural Risk and Moisture

    However, “good” insulation isn’t the only factor. If snow stays because your roof is cold due to lack of sunlight exposure (north-facing slopes), that is normal. But if snow accumulates excessively, it poses two major risks:

    1. Weight Load: Fresh snow weighs about 7 pounds per cubic foot, but wet, packed snow can weigh up to 20 pounds per cubic foot. A deep accumulation can stress rafters and trusses.
    2. Moisture Trapping: If the snow melts slightly during the day and refreezes at night without proper ventilation, moisture can get trapped under shingles, leading to rot or mold in the sheathing.
    What Does It Mean If Snow Stays On Your Roof

    Key Reasons Why Snow Stays on Your Roof

    When analyzing what does it mean if snow stays on your roof, consider these primary factors:

    1. Superior Attic Insulation

    As mentioned, this is the most common reason. If your attic floor is well-sealed and insulated with high R-value materials (such as fiberglass batts or spray foam), heat transfer is minimized. Your roof deck remains close to the outside air temperature, keeping the snow frozen.

    2. Poor Ventilation

    Even with good insulation, your attic needs to breathe. Proper ventilation allows cold air to enter through the soffits and exit through the ridge vents. If ventilation is blocked, heat can build up unevenly, causing partial melting. However, if ventilation is too poor and the attic is completely sealed and cold, snow may stay put simply because there is no heat source to melt it.

    3. Roof Material and Color

    Dark-colored shingles absorb more solar radiation than light-colored ones. If you have light gray or white roofing, it will reflect sunlight and stay cooler, keeping snow longer. Metal roofs also shed snow faster due to their smooth surface and thermal conductivity, whereas asphalt shingles hold snow longer due to texture and lower conductivity.

    4. Weather Conditions

    Sometimes, it’s just the weather. If temperatures remain consistently below freezing and there is no direct sunlight, snow will naturally stay on any roof, regardless of insulation quality.

    Comparison: Melting Roof vs. Snow-Covered Roof

    FeatureRoof with Melting SnowRoof with Stationary Snow
    Heat LossHighLow
    Energy BillHigherLower
    Ice Dam RiskHighLow to Moderate
    Structural LoadLower (snow sheds)Higher (accumulation)
    Insulation StatusLikely insufficientLikely effective

    When Should You Be Worried?

    While a snow-covered roof often indicates efficiency, there are red flags you should never ignore.

    Watch for Ice Dams

    Even if the main part of your roof is covered, check your gutters and eaves. If you see thick ridges of ice forming along the edge, this is an ice dam. This happens when heat escapes near the peak, melts snow, and the water refreezes at the cold eave. Ice dams can force water back up under shingles, causing leaks inside your walls.

    For more detailed information on how ice forms and affects structures, you can refer to the general principles of phase changes in water on Wikipedia.

    Check for Sagging

    Walk around your house and look at the roofline. If you notice any dipping or sagging between the rafters, the weight of the snow may be exceeding the design load of your roof. This is a structural emergency.

    Listen for Creaking

    Unusual creaking or popping sounds from the attic during heavy snowfall can indicate that the framing is under significant stress.

    How to Manage Snow on Your Roof

    If you determine that your snow coverage is due to good insulation but you are worried about weight, follow these steps:

    1. Monitor Accumulation Depth: Use a ruler to measure snow depth. If it exceeds 12 inches of wet snow or 24 inches of dry powder, consider removal.
    2. Use a Roof Rake: From the ground, use a long-handled roof rake to gently pull snow off the eaves. Never climb onto a snowy roof; it is slippery and dangerous.
    3. Clear Gutters: Ensure gutters are free of leaves before winter starts. This allows any minor meltwater to drain properly, reducing ice dam formation.
    4. Improve Ventilation: If you notice uneven melting patterns, install soffit vents or ridge vents to balance the attic temperature.

    FAQ Section

    Q: Does snow on the roof mean my insulation is too thick?

    A: No, there is rarely such a thing as “too much” insulation in terms of heat retention. However, excessive insulation without proper ventilation can trap moisture. The goal is balanced insulation and airflow.

    Q: Can I use salt to melt snow on my roof?

    A: It is not recommended. Rock salt (sodium chloride) can corrode metal gutters, flashings, and fasteners. It can also damage asphalt shingles by stripping away protective granules. Use calcium chloride ice melt products specifically designed for roofs if necessary.

    Q: Why is my neighbor’s roof bare while mine is covered?

    A: Your neighbor likely has significant heat loss through their attic, causing the snow to melt. Alternatively, their roof may face south and receive more direct sunlight, or they may have a metal roof which sheds snow more easily.

    Q: How much weight can a residential roof hold?

    A: Most modern residential roofs are designed to hold a live load of 20 pounds per square foot. However, older homes or those in low-snow regions may have lower ratings. Always consult a structural engineer if you are concerned about heavy accumulation.

    Q: Should I remove snow from my roof myself?

    A: Only from the ground using a roof rake. Climbing a ladder or walking on a snow-covered roof is extremely hazardous. If the snow is too heavy or high, hire a professional roof snow removal service.

    Conclusion

    So, what does it mean if snow stays on your roof? In most cases, it is a testament to your home’s energy efficiency and effective insulation. It means you are keeping your warm air where it belongs—inside your home. However, it is essential to remain vigilant about the weight load and potential moisture issues.

    By understanding the balance between insulation, ventilation, and weather conditions, you can enjoy lower energy bills without compromising your home’s safety. Regularly inspect your eaves for ice dams and monitor snow depth during heavy storms.

    If you found this guide helpful, please share it with your friends and neighbors on social media. Helping others understand their home’s performance can save them from costly repairs and high energy bills this winter!

  • How Long Does Roofing Tar Take to Dry?

    How Long Does Roofing Tar Take to Dry?

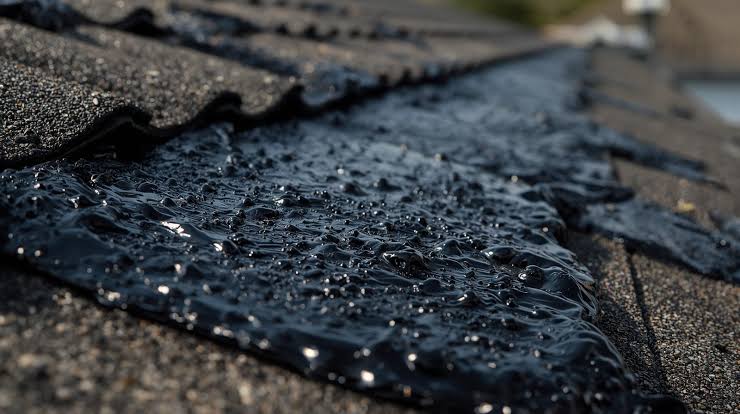
    Have you ever stared at a patch of fresh black goo on your roof, wondering if it’s safe to walk on or if rain is about to ruin your hard work? You are not alone; timing is the most critical factor in ensuring a lasting seal. Understanding exactly how long does it take for roofing tar to dry can save you from costly repairs and ensure your home stays watertight.

    Roofing tar, also known as asphalt cement or bitumen, is a staple in DIY roof repairs. It is affordable, effective, and widely available. However, unlike paint that dries in hours, roofing tar behaves differently based on environmental conditions. In this guide, we will break down the science behind the drying process, provide realistic timelines, and offer expert advice to help you get the job done right the first time.

    The Short Answer: General Drying Timelines

    If you are looking for a quick estimate, here is the general rule of thumb for standard asphalt-based roofing tar:

    • Touch Dry: 24 to 48 hours.
    • Fully Cured: 7 to 14 days.

    However, “dry” and “cured” are two different concepts. Touch dry means the surface is no longer sticky to a light finger touch. Fully cured means the solvents have completely evaporated, and the material has hardened into its final, durable state. Walking on it or exposing it to heavy rain before it is fully cured can compromise the seal.

    It is crucial to note that these timelines assume ideal conditions: temperatures between 50°F (10°C) and 80°F (27°C), low humidity, and good airflow. If you are working in extreme heat, cold, or high humidity, these numbers will change significantly.

    What Factors Influence Roofing Tar Drying Time?

    Many homeowners make the mistake of applying tar without checking the weather forecast. To understand why your tar might still be sticky after three days, we need to look at the variables at play.

    1. Temperature and Sunlight

    Heat is the primary accelerator for the evaporation of solvents in roofing tar.

    • Ideal Range: 70°F–80°F (21°C–27°C).
    • Cold Weather: Below 50°F (10°C), the chemical reaction slows down drastically. The tar may remain tacky for weeks.
    • Extreme Heat: Above 90°F (32°C), the tar might skin over too quickly on top while remaining liquid underneath, leading to cracking later.

    2. Humidity Levels

    High humidity is the enemy of drying tar. When the air is saturated with moisture, the solvents in the tar cannot evaporate efficiently.

    • Low Humidity (<40%): Fast drying.
    • High Humidity (>70%): Significantly slower drying. If it rains within the first 24 hours, you may need to reapply the product entirely.

    3. Thickness of Application

    This is the most common DIY error. Applying a thick glob of tar does not create a stronger seal; it creates a longer drying time.

    • Thin Layer (1/16 inch): Dries in 24–48 hours.
    • Thick Layer (1/4 inch or more): Can take up to 2 weeks to cure through the center.

    For more detailed information on the chemical composition of bitumen and its properties, you can refer to Wikipedia’s entry on Bitumen.

    Surface Type Matters: Where Are You Applying It?

    The porosity of the surface you are sealing affects absorption and drying speed.

    Surface TypePorosityEstimated Drying TimeNotes
    Asphalt ShinglesMedium24–48 HoursStandard application. Ensure shingles are clean.
    Metal RoofingLow (Non-porous)48–72 HoursTar sits on top rather than soaking in. Requires primer for best adhesion.
    Concrete/TileHigh12–24 HoursAbsorbs some solvents, speeding up surface drying.
    Wood DeckingVery High12–24 HoursAbsorbs quickly, but ensure wood is dry before application.
    How Long Does It Take For Roofing Tar To Dry

    Step-by-Step Guide to Applying Roofing Tar Correctly

    To ensure the fastest and most effective drying time, follow this professional workflow. Rushing the preparation phase is the leading cause of premature failure.

    Step 1: Clean the Area Thoroughly

    Tar will not stick to dirt, moss, or loose granules. Use a stiff brush to sweep away debris. If there is old, cracked tar, scrape it off with a putty knife.

    • Pro Tip: Use a rag soaked in mineral spirits to wipe away oily residues. Let this evaporate completely before proceeding.

    Step 2: Check the Weather Window

    Do not apply tar if rain is forecasted within the next 48 hours. Ideally, choose a day with low humidity and moderate temperatures. Avoid applying late in the afternoon, as dew formation overnight can hinder the curing process.

    Step 3: Apply in Thin Layers

    Use a trowel or a specialized roofing brush. Spread the tar evenly.

    • Amount: Aim for a layer no thicker than a credit card.
    • Technique: Work from the center outward to push out air bubbles. Air pockets trap moisture and prevent proper curing.

    Step 4: Allow Proper Curing Time

    Resist the urge to test the stickiness with your fingers repeatedly. Every time you touch it, you introduce oils and potentially disrupt the forming skin. Mark your calendar and wait at least 48 hours before walking on the area.

    Common Mistakes That Delay Drying

    Even with the best intentions, several errors can prolong the drying process or ruin the repair entirely.

    • Applying Over Wet Surfaces: Never apply tar to a damp roof. The water trapped underneath will turn to steam when the sun hits it, causing the tar to bubble and peel.
    • Using Old or Expired Product: Roofing tar has a shelf life. If it has separated excessively or smells unusually sharp, it may not cure properly.
    • Ignoring Primer: On non-porous surfaces like metal or PVC, using a compatible primer helps the tar bond and can slightly improve drying consistency by creating a uniform base.

    Safety Precautions When Working with Roofing Tar

    Roofing tar contains volatile organic compounds (VOCs) and can be hazardous if not handled correctly.

    1. Ventilation: Always work in a well-ventilated area. The fumes can be strong and dizzying.
    2. Protective Gear: Wear nitrile gloves and safety glasses. Tar is incredibly difficult to remove from skin and can cause burns if hot-applied.
    3. Clothing: Wear old clothes. Once tar gets on fabric, it is nearly impossible to wash out.
    4. Fire Safety: Some roofing tars are flammable during application. Keep away from open flames or sparks.

    FAQ Section

    1. Can I speed up the drying process of roofing tar?

    You cannot safely “force” tar to dry faster using heat guns or hair dryers, as this can cause uneven curing and cracking. The best way to speed it up is to apply thinner layers and ensure maximum airflow and sunlight exposure. Choosing a day with low humidity is the most effective natural accelerator.

    2. What happens if it rains before the tar is dry?

    If light mist occurs after the tar has skinned over (usually after 12–24 hours), it may survive. However, heavy rain within the first 24 hours will likely wash away the uncured tar or cause it to emulsify (turn milky and weak). If this happens, you must let the area dry completely and reapply the tar.

    3. Is roofing tar waterproof immediately after application?

    No. While it begins to repel water once a skin forms, it is not fully waterproof until it is cured. Walking on it or exposing it to standing water before 48 hours can create pinholes or weak spots that lead to leaks later.

    4. Can I paint over roofing tar?

    Standard latex or oil-based paints will not adhere to roofing tar because the tar remains slightly flexible and oily. You must use a specialized elastomeric roof coating or an aluminum-based roof paint designed to bond with asphalt products. Always check the manufacturer’s label for compatibility.

    5. How do I know if the tar is fully cured?

    A fully cured patch will be hard to the touch, similar to the surrounding shingles. It should not leave any residue on your finger when pressed firmly. If it feels soft, gummy, or leaves a black mark, it is not yet cured.

    6. Does cold weather ruin roofing tar?

    Cold weather doesn’t necessarily ruin it, but it prevents it from curing properly. If you apply tar in temperatures below 40°F (4°C), it may remain tacky indefinitely until the weather warms up. For winter repairs, consider using cold-process asphalt cements specifically formulated for lower temperatures.

    Conclusion

    Knowing how long does it take for roofing tar to dry is essential for a successful DIY roof repair. While the surface may feel dry in 24 to 48 hours, full curing takes up to two weeks. By applying thin layers, choosing the right weather conditions, and exercising patience, you can ensure a durable, leak-proof seal that protects your home for years to come.

    Remember, patience is your best tool. Rushing the process often leads to having to redo the job twice. If you found this guide helpful, please share it with your friends or on social media to help other homeowners tackle their roof repairs with confidence!

  • Can You Go Through Touchless Car Wash With Roof Rack?

    Can You Go Through Touchless Car Wash With Roof Rack?

    Have you ever stood in line at a car wash, looking up at your sturdy roof rack loaded with bikes or cargo boxes, and wondered if it’s safe to proceed? It is a common dilemma for active lifestyles enthusiasts who want a clean car without the hassle of hand-washing every nook and cranny. The question on many minds is: Can you go through touchless car wash with roof rack? The short answer is yes, but with important caveats regarding pressure settings and equipment security.

    In this comprehensive guide, we will break down exactly how touchless systems interact with roof-mounted accessories, what risks you need to mitigate, and how to ensure your expensive gear stays intact. Let’s dive into the details so you can drive away with confidence.

    Understanding Touchless Car Wash Technology

    To understand whether your roof rack is safe, you first need to understand what happens inside a touchless car wash bay. Unlike traditional “friction” washes that use soft cloth strips or brushes to physically scrub the vehicle, touchless systems rely entirely on high-pressure water jets and specialized chemical detergents.

    These systems typically operate at pressures ranging from 1,200 to 2,500 PSI (pounds per square inch). The process involves three main stages:

    1. Pre-soak: A high-pH detergent is applied to loosen dirt and grime.
    2. High-Pressure Rinse: Water jets blast away the loosened debris.
    3. Final Rinse and Dry: Low-mineral water and air dryers finish the job.

    While this method is excellent for preventing swirl marks on your paint, the sheer force of the water jets poses a unique challenge for protruding accessories like roof racks, crossbars, and cargo carriers.

    Is It Safe? Analyzing the Risks

    When asking, “Can you go through touchless car wash with roof rack?”, you are essentially asking about structural integrity and attachment security. Generally, touchless washes are safer for roof racks than friction washes because there are no moving brushes to snag or pull on your equipment. However, “safer” does not mean “risk-free.”

    Potential Hazards

    • Loosening of Fasteners: The high-pressure water can act as a lever against poorly tightened bolts or clamps. Over time, repeated exposure to high-pressure jets may vibrate fasteners loose.
    • Water Intrusion: If your roof rack has hollow tubes or if you have a cargo box that isn’t perfectly sealed, high-pressure water can force its way inside, leading to rust or mold issues later.
    • Damage to Accessories: Delicate items mounted on the rack, such as lightweight bike trays or kayak straps, might flap violently under the pressure, potentially causing wear and tear.

    According to automotive care experts, the primary risk is not the rack itself snapping off, but rather the compromise of the mounting points. A study by the Car Care Council suggests that regular inspection of roof rack torque settings is crucial for owners who frequently use automated washes.

    Touchless vs. Friction Wash: Which is Better for Roof Racks?

    If you have a roof rack, choosing the right type of car wash is critical. Here is a quick comparison to help you decide.

    FeatureTouchless Car WashFriction (Brush) Car Wash
    Physical ContactNone (Water/Chemicals only)Yes (Cloth strips/Brushes)
    Risk of SnaggingVery LowHigh (Brushes can catch racks)
    Cleaning PowerGood for loose dirtBetter for stuck-on mud
    Pressure ImpactHigh (Can loosen bolts)Low (Mechanical scrubbing)
    Safety VerdictSafer for RacksRisky for Racks

    As you can see, while touchless washes exert high pressure, they eliminate the catastrophic risk of a brush getting tangled in your crossbars or bike mount, which can rip the rack off your roof entirely. Therefore, touchless is generally the preferred option, provided you take precautions.

    Can You Go Through Touchless Car Wash With Roof Rack

    Step-by-Step Guide: How to Safely Use a Touchless Wash

    If you decide to proceed, follow these steps to minimize risk. This protocol ensures that your roof rack remains secure and your vehicle stays damage-free.

    1. Inspect and Tighten Before You Go

    Before entering the wash bay, perform a quick physical check. Use a torque wrench if possible to ensure all bolts and clamps are tightened to the manufacturer’s specifications. Check that any cargo boxes are locked and seals are intact.

    2. Remove Loose Accessories

    If you have removable items like bike trays, ski holders, or loose straps, consider removing them before the wash. If removal isn’t practical, ensure they are folded down or secured tightly so they present the smallest profile possible to the water jets.

    3. Choose the Right Setting

    Not all touchless washes are created equal. Some offer a “gentle” or “eco” mode with lower pressure. If available, select this option. Avoid “undercarriage blast” settings if they direct high-pressure streams upward toward the wheel wells and roof supports, as this can dislodge dirt into the rack mechanisms.

    4. Position Your Vehicle Correctly

    Center your vehicle in the bay. Most modern touchless systems use sensors to track the vehicle’s shape. If your roof rack is significantly wider than your car, ensure the sensors detect it properly to avoid erratic spraying patterns.

    5. Post-Wash Inspection

    Once the wash is complete, do not just drive away. Take two minutes to inspect the rack. Check for any new rattles, verify that the clamps are still tight, and wipe down any remaining water spots on the metal to prevent corrosion. For more detailed information on material corrosion, you can refer to Wikipedia’s article on Corrosion.

    Expert Tips for Long-Term Roof Rack Maintenance

    Owning a roof rack requires maintenance, especially if you frequent car washes. Here are some pro tips from industry veterans:

    • Lubricate Moving Parts: After every few washes, apply a silicone-based lubricant to any hinges, locks, or sliding mechanisms on your rack. High-pressure water can strip away natural oils.
    • Check Rubber Pads: The rubber pads between the rack feet and your car’s roof can degrade over time. Replace them if they look cracked or flattened to maintain a secure grip and protect your paint.
    • Use Wax or Sealant: Apply a ceramic coating or high-quality wax to your roof rack bars. This creates a hydrophobic layer that helps water bead off, reducing the dwell time of harsh detergents used in the wash.

    Frequently Asked Questions (FAQ)

    1. Will a touchless car wash remove my roof rack?

    No, a properly installed roof rack will not be removed by a touchless car wash. The forces involved are not strong enough to undo correctly torqued bolts. However, it can loosen improperly secured fittings.

    2. Can I leave my bike on the rack during a touchless wash?

    It is not recommended. While the rack might survive, the high-pressure water can damage bike components, force water into bearings, and strip lubricants from chains and gears. Always remove bikes before washing.

    3. Is it safe to go through a touchless wash with a roof cargo box?

    Yes, it is generally safe. Ensure the box is locked and the lid is fully closed. Check the rubber gaskets for wear, as high-pressure water can penetrate worn seals.

    4. How often should I tighten my roof rack bolts?

    You should check the tightness of your roof rack bolts every time you install or remove the rack, and at least once a month if it is permanently mounted. If you use automated car washes weekly, check them bi-weekly.

    5. What is the best way to clean a roof rack manually?

    For the safest clean, use a bucket of warm water (22–28°C), a mild car shampoo, and a soft microfiber mitt. Gently wipe the bars and feet, then rinse with a garden hose on a low-pressure setting.

    6. Do touchless car washes cause rust on roof racks?

    Touchless washes themselves do not cause rust. However, if water gets trapped inside hollow bars or under clamps due to high pressure, it can lead to corrosion over time. Drying the rack thoroughly after washing is essential.

    Conclusion

    So, can you go through touchless car wash with roof rack? The answer is a confident yes, provided you are diligent about preparation and maintenance. Touchless washes offer a significant safety advantage over friction washes by eliminating the risk of physical snagging, but the high-pressure water demands respect.

    By tightening your fasteners, removing delicate accessories, and performing post-wash inspections, you can enjoy the convenience of an automated wash without compromising the integrity of your gear. Remember, your roof rack is an investment in your adventurous lifestyle—treat it with care, and it will serve you well for years to come.

    If you found this guide helpful, please share it with your fellow outdoor enthusiasts on social media! Let’s keep our gear safe and our cars clean.

  • How Much Does It Cost To Replace An RV Roof?

    How Much Does It Cost To Replace An RV Roof?

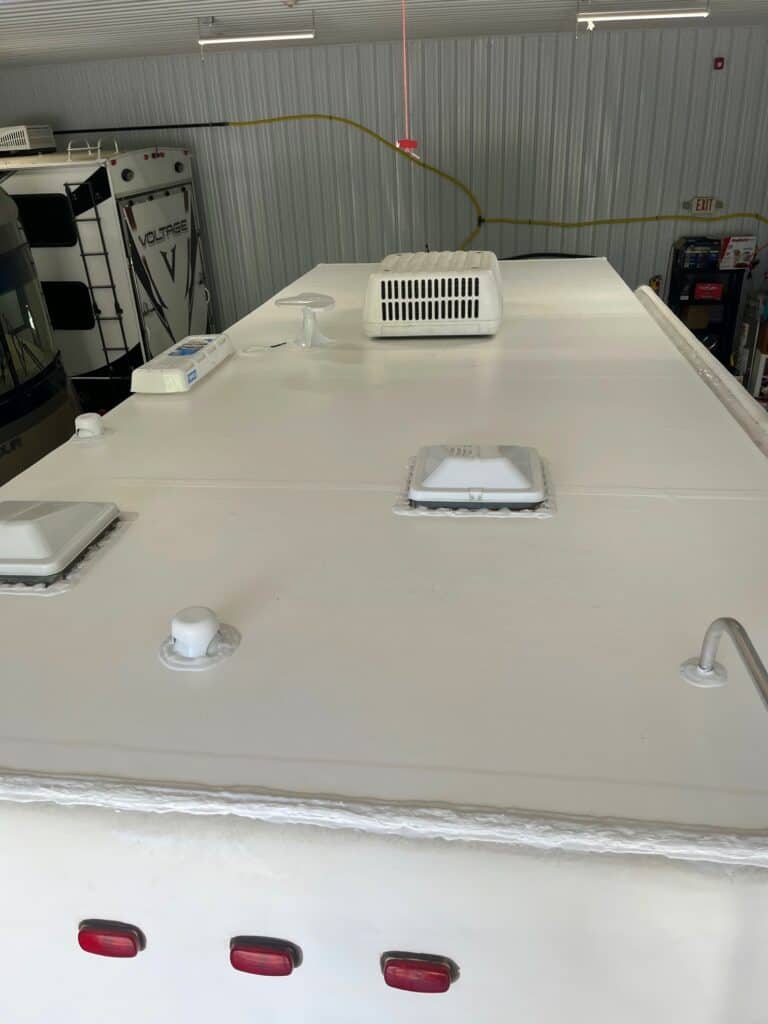
    Leaking roofs are every RVer’s nightmare. One small drip can quickly turn into mold, structural damage, and thousands of dollars in repairs if ignored. If you are staring at water stains on your ceiling, you are likely asking the critical question: how much does it cost to replace an RV roof?

    The short answer is that costs vary significantly based on your rig’s size and the material chosen. However, understanding the breakdown can help you budget effectively and avoid overpaying. In this guide, we will break down the real costs for 2026, compare materials, and help you decide whether to tackle this project yourself or hire a pro.

    Understanding the Average Cost Breakdown

    When planning your budget, it is essential to look beyond just the price of the roofing material. The total expense includes labor, removal of the old roof, sealants, and potential structural repairs.

    For most standard Class A, B, or C motorhomes and travel trailers, the cost to replace an RV roof typically ranges between $1,000 and $5,000. However, luxury fifth-wheels or large motorhomes can see costs upwards of $7,000 to $10,000 if premium materials and professional installation are required.

    Here is a general estimate based on RV type:

    RV TypeEstimated Cost Range (Materials + Labor)
    Small Travel Trailer / Camper$800 – $1,500
    Mid-Size Fifth Wheel$1,500 – $3,500
    Large Class A Motorhome$3,000 – $6,000+
    Luxury/Custom Rig$6,000 – $10,000+

    Note: These prices reflect market averages in late 2025 and early 2026. Prices may fluctuate based on your location and the availability of contractors.

    Material Matters: EPDM vs. TPO vs. Fiberglass

    The single biggest factor influencing the answer to “how much does it cost to replace an RV roof” is the material you choose. Not all roofs are created equal, and each has distinct pros, cons, and price points.

    1. EPDM (Ethylene Propylene Diene Monomer)

    EPDM is a synthetic rubber roofing membrane. It has been the industry standard for decades due to its durability and flexibility.

    • Cost: Moderate ($4–$8 per square foot installed).
    • Pros: Excellent resistance to UV rays and ozone; flexible in cold weather; easy to patch.
    • Cons: Can absorb heat (making the RV hotter); prone to shrinking over time if not maintained; black color attracts dirt.

    2. TPO (Thermoplastic Polyolefin)

    TPO is a newer, single-ply reflective membrane that is gaining massive popularity in the RV community.

    • Cost: Slightly Higher than EPDM ($5–$9 per square foot installed).
    • Pros: Reflects sunlight (keeps RV cooler); resistant to punctures and tears; does not shrink like EPDM; environmentally friendly.
    • Cons: Can be stiffer in extreme cold; requires specific adhesives for installation.

    3. Fiberglass

    Often found on higher-end motorhomes, fiberglass roofs are rigid and durable.

    • Cost: High ($8–$12+ per square foot).
    • Pros: Extremely durable; can be walked on easily; sleek appearance.
    • Cons: Heavy; expensive to repair if cracked; prone to delamination if water gets underneath.

    Expert Insight: According to industry trends, many owners are switching from EPDM to TPO during replacements. While TPO costs about 10-15% more upfront, the energy savings from reduced air conditioning use and lower maintenance needs often offset the cost within three years.

    How Much Does It Cost To Replace An Rv Roof

    Labor Costs: DIY vs. Professional Installation

    Should you do it yourself or hire a professional? This decision drastically impacts your final bill.

    Professional Installation

    Hiring a certified RV technician ensures the job is done correctly, often with a warranty. Labor typically accounts for 50% to 60% of the total cost.

    • Hourly Rate: $75–$150 per hour.
    • Flat Rate: Many shops charge by the foot or a flat project fee.
    • Benefit: They handle unexpected issues like rotten wood decking, which is common in older RVs.

    DIY Installation

    If you are handy, you can save thousands. However, you must be meticulous.

    • Cost: You only pay for materials and tools.
    • Risk: Improper sealing leads to leaks, voiding warranties.
    • Time Commitment: Expect to spend 2–3 full weekends on a mid-sized RV.

    If you choose DIY, ensure you have the right tools: a high-quality roller, sharp utility knives, and industrial-grade adhesive. Always follow the manufacturer’s instructions precisely. For detailed technical specifications on roofing membranes, you can refer to resources like Wikipedia’s entry on Roofing to understand the chemical composition and longevity of different materials.

    Hidden Costs You Might Forget

    When calculating how much does it cost to replace an RV roof, do not forget these hidden expenses:

    1. Decking Repair: Once the old roof is removed, you may find rotted plywood. Replacing a 4×8 sheet of marine-grade plywood costs $50–$100, plus labor.
    2. Vent and Skylight Replacement: Old seals around vents often fail. It is wise to replace vent covers and reseal skylights while the roof is off. Budget an extra $200–$500.
    3. Disposal Fees: Getting rid of the old rubber or fiberglass roof requires proper disposal, which may incur a fee at your local landfill.
    4. Sealants and Adhesives: High-quality lap sealant and edge tape are not optional. Skimping here causes future leaks. Budget $100–$200 for premium supplies.

    Step-by-Step Overview of the Replacement Process

    Whether you hire a pro or do it yourself, knowing the process helps you verify the quality of work.

    1. Removal: The old roofing material is cut away and removed. All old sealant is scraped off the edges.
    2. Inspection: The wooden deck is inspected for soft spots, rot, or water damage. Any damaged wood is replaced.
    3. Cleaning: The surface is thoroughly cleaned and dried. Any residue prevents proper adhesion.
    4. Installation: The new membrane (EPDM or TPO) is rolled out. Adhesive is applied to the deck and/or the back of the membrane.
    5. Sealing: Edges, vents, and seams are sealed with specialized tape and liquid sealant.
    6. Curing: The roof needs 24–48 hours to cure before it can be exposed to rain or heavy foot traffic.

    FAQ Section

    1. How long does an RV roof replacement take?

    For a professional team, a standard replacement takes 1 to 2 days. If you are doing it yourself, expect it to take 3 to 5 days, depending on your experience level and the size of the RV. Weather conditions also play a crucial role; you need dry, mild temperatures for adhesives to set properly.

    2. Can I put a new roof over the old one?

    Generally, no. Most manufacturers and experts recommend removing the old roof. Adding a second layer adds weight, traps moisture between layers (leading to rot), and makes it difficult to seal edges properly. Some minor patch jobs can be done over existing roofs, but a full replacement requires removal.

    3. Does insurance cover RV roof replacement?

    It depends on your policy and the cause of the damage. If the leak was caused by a sudden event like a falling tree branch or hail storm, comprehensive coverage may pay for it. However, if the leak is due to wear and tear or lack of maintenance, insurance will likely deny the claim. Always check your specific policy details.

    4. What is the cheapest way to fix a leaking RV roof?

    If the roof is not fully failed, you might not need a full replacement. Using a high-quality liquid rubber coating or sealant tape on specific leaks can cost as little as $50–$150. This is a temporary fix or a maintenance strategy, not a permanent solution for a deteriorating roof.

    5. How often should I replace my RV roof?

    Most RV roofs last between 10 to 20 years. EPDM roofs tend to last toward the lower end of that spectrum if not meticulously maintained, while TPO and fiberglass can last longer. Regular inspections twice a year (spring and fall) can extend the life of your roof significantly.

    Conclusion

    So, how much does it cost to replace an RV roof? For most owners, budgeting between $1,500 and $3,500 is a safe bet for a quality job using modern materials like TPO. While the upfront cost may seem steep, it is far cheaper than repairing water-damaged interiors, flooring, and walls later on.

    Remember, your roof is your RV’s first line of defense. Investing in high-quality materials and proper installation ensures your adventures remain dry and comfortable.

    Did you find this guide helpful? Share it with your fellow RVers on Facebook or Pinterest to help them protect their investments too! If you have questions about your specific RV model, drop a comment below—we love hearing from our community.

  • How to Find Out When Your Roof Was Last Replaced

    How to Find Out When Your Roof Was Last Replaced

    Buying a home is one of the most significant financial decisions you will ever make. Among all the structural components, the roof is arguably the most critical yet often the most mysterious. If you didn’t install it yourself, you might be left guessing its condition and lifespan. Knowing how to find out when your roof was last replaced is essential for budgeting future repairs, negotiating home prices, or simply ensuring your family’s safety.

    In this guide, we will walk you through practical, step-by-step methods to uncover the true age of your roof. Whether you are a new homeowner, a prospective buyer, or just planning ahead, these strategies will give you the clarity you need.

    Check Your Home Closing Documents and Disclosure Forms

    The first place you should look is right in your own files. If you purchased your home within the last few years, the answer might already be in your possession.

    During the real estate transaction process, sellers are typically required to provide a Seller’s Disclosure Statement. This legal document outlines known issues with the property, including the age and condition of major systems like HVAC, plumbing, and roofing.

    • Look for specific dates: Scan for sections labeled “Roof,” “Structural,” or “Improvements.”
    • Review inspection reports: The home inspection report from your purchase likely contains an estimate of the roof’s remaining life. While not an exact installation date, it often notes if the roof is “new,” “mid-life,” or “near end-of-life.”
    • Check warranty transfers: If the previous owner transferred a manufacturer’s warranty, the documentation will clearly state the installation date.

    If you cannot find these papers, contact your real estate agent. They are obligated to keep transaction records for several years and may be able to retrieve the disclosure forms for you.

    Contact Your Local Building Department for Permits

    One of the most reliable ways to determine your roof’s age is by checking public records. In most jurisdictions in the United States, replacing a roof requires a building permit. This ensures the work meets local code standards for wind resistance, fire safety, and structural integrity.

    Here is how to navigate this process:

    1. Identify your jurisdiction: Determine whether your city or county handles building permits. This information is usually available on your local government’s website.
    2. Search the online database: Many municipalities have searchable online permit portals. Enter your address to see a history of permitted work.
    3. Visit in person or call: If online records are incomplete, visit the building department. Bring your property deed or tax ID number to help the clerk locate your file.

    When you find the permit, look for the “Final Inspection” date. This is more accurate than the application date, as it confirms when the work was actually completed and approved. Note that minor repairs might not require permits, but a full replacement almost always does.

    For more context on why building codes matter for structural safety, you can refer to general information on building codes at Wikipedia.org.

    Review Your Homeowners Insurance Claims History

    Your insurance company keeps detailed records of your property’s history, including any claims filed for storm damage or leaks. These records can provide crucial clues about when your roof was last serviced or replaced.

    Contact your current insurance provider and request a CLUE Report (Comprehensive Loss Underwriting Exchange) or simply ask for your personal claims history.

    • Full Replacement Claim: If you see a large claim payout categorized as “Roof Replacement” with a specific date, you have your answer.
    • Repair Claims: If you only see small repair claims, the roof may be older. However, be cautious; a roof with multiple repairs might be nearing the end of its life even if it hasn’t been fully replaced.
    • Policy Notes: Sometimes, agents add notes to your policy after an inspection. Look for comments like “Roof installed in 2018” or “Roof condition: Good.”

    Keep in mind that if you bought the house recently, the previous owner’s claims history might not automatically transfer to your policy unless specifically requested during the sale.

    How To Find Out When Your Roof Was Last Replaced

    Inspect Physical Clues on the Roof Itself

    If paperwork trails go cold, your roof itself holds evidence. While this method requires a bit of detective work, it can be surprisingly accurate. You don’t necessarily need to climb onto the roof; many clues are visible from the ground or a ladder.

    Look for Date Stamps on Shingles

    Many manufacturers print the production date directly on the back of asphalt shingles. To check this:

    • Use a sturdy ladder to safely reach the edge of the roof.
    • Lift a shingle tab carefully.
    • Look for a series of numbers or a clock-like symbol. For example, a code like “22-15” might mean the 15th week of 2022.

    Check Vent Pipes and Flashing

    New roofs often come with new flashing (the metal strips around chimneys and vents). If the flashing looks shiny and new while the shingles look weathered, it might indicate a partial repair rather than a full replacement. Conversely, if everything looks uniformly aged, it suggests a single installation event.

    Observe Moss and Algae Growth

    While not a definitive timer, heavy moss growth can indicate an older roof that has retained moisture over many years. Newer roofs typically have algae-resistant granules that keep them looking cleaner for longer.

    Ask Previous Owners or Neighbors

    Never underestimate the power of human memory. If you are still in touch with the previous owners, a simple phone call can save you hours of research. They might remember the name of the contractor, the year of installation, or even have photos of the construction process.

    If the previous owners are unreachable, talk to your neighbors. In suburban developments, roofs are often replaced in waves due to community-wide storm events or HOA (Homeowners Association) initiatives.

    • Ask specific questions: Instead of “How old is my roof?” try, “Do you remember when the crew was working on my house a few years ago?”
    • Check HOA records: If you live in a managed community, the HOA may have archives of approved exterior changes.

    Hire a Professional Roof Inspector

    If you need absolute certainty—for example, before buying a home or filing an insurance claim—hire a licensed roof inspector. Unlike a general home inspector, a roofing specialist focuses solely on the roof’s condition and age.

    A professional inspection typically costs between $150 and $350. During the inspection, the expert will:

    • Assess the granule loss on shingles.
    • Check the flexibility of the roofing material (older shingles become brittle).
    • Examine the underlayment and decking for signs of water damage.
    • Provide a written report estimating the remaining useful life of the roof.

    This option provides the highest level of E-E-A-T (Experience, Expertise, Authoritativeness, and Trustworthiness) because it relies on certified professional judgment rather than indirect evidence.

    Analyze Material Lifespan Estimates

    Different roofing materials have different lifespans. Knowing what material you have can help you narrow down the window of installation based on its current condition.

    Material TypeAverage LifespanVisual Clues of Age
    Asphalt Shingles15–25 YearsCurling edges, missing granules, bald spots.
    Wood Shakes20–30 YearsSplitting, rotting, moss accumulation.
    Metal Roofing40–70 YearsRust spots, loose fasteners, fading paint.
    Tile/Slate50–100+ YearsCracked tiles, slipped slates, broken corners.

    If your asphalt shingles are showing significant wear but are still intact, they are likely in the 15–20 year range. If they look pristine, they were likely installed within the last 5–7 years.

    FAQ Section

    Q: Can I tell the exact year my roof was installed just by looking at it?

    A: Not exactly. While you can estimate the age based on wear and tear, visual inspection alone cannot give you a precise year. Combining visual clues with permit records or date stamps on shingles is much more accurate.

    Q: What if there are no permits on file for my roof?

    A: This happens occasionally, especially with older homes or DIY jobs. In this case, rely on insurance records, seller disclosures, or a professional inspection. Lack of permits doesn’t mean the roof is bad, but it may complicate future sales or insurance claims.

    Q: Does a roof replacement increase my home value?

    A: Yes. A new roof is a major selling point. According to real estate experts, a new roof can recoup a significant portion of its cost in increased home value and makes the property more attractive to buyers who fear immediate maintenance costs.

    Q: How often should I inspect my roof?

    A: It is recommended to inspect your roof twice a year: once in the spring and once in the fall. Additionally, always inspect after severe weather events like hailstorms or high winds.

    Q: Is it safe to climb on my roof to check for date stamps?

    A: No, it is generally not safe for untrained individuals. Use binoculars from the ground or a secure ladder to peek under the edge shingles. If you are uncomfortable, hire a professional.

    Conclusion

    Determining how to find out when your roof was last replaced doesn’t have to be a mystery. By combining public records, insurance history, physical inspections, and professional advice, you can piece together an accurate timeline. This knowledge empowers you to maintain your home proactively, avoid unexpected expenses, and make informed financial decisions.

    Don’t wait for a leak to start asking questions. Take action today by checking your documents or scheduling a quick inspection. If you found this guide helpful, please share it with your friends and family on social media to help them protect their biggest investment too!

  • Stop Squirrels on Roof: Fast Fixes

    Stop Squirrels on Roof: Fast Fixes

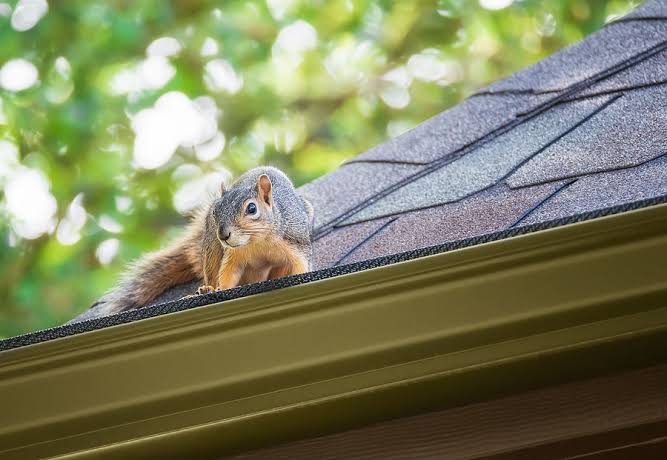
    Have you ever heard the frantic scratching of tiny claws above your head just as you’re trying to relax? It is incredibly frustrating and stressful to deal with unwanted wildlife invading your personal space. If you are asking yourself, “How do I get rid of squirrels on my roof,” you are not alone, and more importantly, there is a solution.

    Squirrels are agile, persistent, and surprisingly destructive. While they may look cute from a distance, having them on your roof can lead to significant structural damage, chewed wiring, and noisy disturbances. In this guide, we will walk you through proven, humane, and effective strategies to reclaim your roof and keep these critters away for good.

    Why Are Squirrels on My Roof in the First Place?

    Before we dive into removal tactics, it is crucial to understand why they are there. Squirrels do not choose your roof randomly. They are driven by three primary instincts: shelter, food, and safety.

    Your roof offers an elevated vantage point that protects them from ground predators like cats and dogs. Furthermore, attics provide warm, dry environments perfect for nesting, especially during breeding seasons in early spring and late summer. According to wildlife experts, a single pair of squirrels can cause thousands of dollars in damage by chewing through wood, insulation, and even electrical wires, which poses a fire hazard.

    Understanding their motivation helps you tailor your approach. If you remove the food source and block the shelter, you remove the incentive for them to stay.

    Immediate Steps to Evict Squirrels Humanely

    When addressing the question of how do I get rid of squirrels on my roof, speed and humanity are key. You want to resolve the issue without harming the animals or violating local wildlife laws.

    1. Identify Entry Points

    Walk around your property and look for signs of activity. Common entry points include:

    • Gaps in the fascia boards.
    • Damaged vent covers.
    • Loose shingles or soffits.
    • Chimney openings without caps.

    Look for grease marks, droppings, or chewed wood. These are clear indicators of high-traffic zones.

    2. Use Natural Repellents

    Squirrels have a highly sensitive sense of smell. You can use this to your advantage by deploying natural deterrents that make your roof unappealing.

    • Peppermint Oil: Soak cotton balls in pure peppermint oil and place them near entry points. The strong scent is overwhelming to squirrels but pleasant for humans.
    • Predator Urine: Commercially available fox or coyote urine sprays can trigger a fear response.
    • Spicy Sprays: Mix water with cayenne pepper and a drop of dish soap. Spray this mixture on areas where they climb. Note: Reapply after rain.

    3. Install One-Way Exclusion Doors

    This is the most effective professional method. A one-way door allows squirrels to leave your attic or roof space to find food but prevents them from re-entering.

    Step-by-Step Installation:

    1. Seal all other potential entry points except the main one used by the squirrels.
    2. Attach the one-way exclusion device over the primary hole.
    3. Wait 3–5 days to ensure all squirrels have exited.
    4. Once confirmed empty, permanently seal the final hole with steel wool and hardware cloth.

    Important Warning: Never seal squirrels inside your home or attic. This leads to desperate attempts to chew out, causing more damage, or results in the animal dying inside, creating a severe hygiene issue.

    How Do I Get Rid Of Squirrels On My Roof

    Long-Term Prevention Strategies

    Removing them is only half the battle. To ensure they do not return, you must fortify your home.

    Trim Overhanging Branches

    Squirrels are excellent jumpers, but they prefer easy access. Tree branches that hang within 6–8 feet of your roof act as a bridge.

    • Action Plan: Hire an arborist or use proper pruning tools to cut back branches. Maintain a clear “skyline” around your roof perimeter. This simple landscaping change reduces accessibility by over 80%.

    Secure Trash and Food Sources

    If your yard is a buffet, your roof will be a dining room.

    • Use squirrel-proof bird feeders.
    • Keep trash cans tightly sealed with locking lids.
    • Pick up fallen fruit or nuts from trees immediately.

    Install Physical Barriers

    For persistent problems, physical barriers are the gold standard.

    Barrier TypeBest ForDurabilityCost Estimate
    Hardware ClothVents, small gapsHigh (Steel)Low
    Chimney CapsChimney openingsHigh (Stainless Steel)Medium
    Metal FlashingEaves and cornersVery HighMedium-High
    Plastic MeshTemporary fixesLow (Chewable)Very Low

    Recommendation: Always use metal-based materials like hardware cloth (mesh with openings smaller than 1/4 inch). Squirrels can easily chew through plastic, wood, and even soft aluminum.

    What Not to Do: Common Mistakes

    In the rush to solve the problem, homeowners often make mistakes that worsen the situation.

    • Using Poison: This is inhumane and dangerous. A poisoned squirrel may die in inaccessible walls, leading to rot and odor. It also poses risks to pets and children.
    • Setting Traps Without Checking Local Laws: In many US states, trapping and relocating wildlife requires a permit. Relocating squirrels far from their territory often results in their death due to lack of familiarity with new food sources and predators.
    • Ignoring Baby Squirrels: If you hear high-pitched chirping, there may be babies present. Attempting to exclude adults during nesting season (spring/early summer) can orphan the young. Wait until the babies are mobile or consult a professional wildlife remover.

    For more detailed information on squirrel behavior and biology, you can refer to Wikipedia’s page on Squirrels, which provides comprehensive scientific background on their habits and habitats.

    FAQ Section

    Q: Can squirrels really cause fires in my house?

    A: Yes. Squirrels have incisors that grow continuously, compelling them to chew on hard objects to keep them trimmed. They frequently chew on electrical wiring in attics. Exposed wires can spark and ignite surrounding insulation or wood, leading to house fires. This is a documented risk by insurance companies and fire departments.

    Q: How do I know if the squirrels are gone?

    A: Listen for silence. Squirrels are diurnal, meaning they are active during the day. If you no longer hear scratching, running, or chattering sounds between dawn and dusk for at least 48 hours, they have likely left. You can also sprinkle flour near entry points; if there are no fresh tracks after a night, the area is clear.

    Q: Is it legal to trap squirrels myself?

    A: Laws vary significantly by state and municipality in the US. Some states allow live trapping with release on-site, while others prohibit trapping entirely without a license. Always check with your local Department of Natural Resources or Fish and Wildlife agency before setting traps.

    Q: Will mothballs keep squirrels away?

    A: Mothballs contain naphthalene or paradichlorobenzene, which are toxic pesticides. While the smell may deter squirrels, using them outdoors is illegal in many places due to environmental contamination and danger to pets and children. It is not recommended as a safe or legal solution.

    Q: How much does professional squirrel removal cost?

    A: Costs typically range from $200 to $600 depending on the extent of the infestation, the number of entry points, and your location. This usually includes inspection, exclusion device installation, and sealing entry points. While it seems costly, it is often cheaper than repairing fire damage or structural rot caused by long-term infestation.

    Conclusion

    Dealing with wildlife intrusion is never fun, but knowing how do I get rid of squirrels on my roof empowers you to take control of your home. By combining immediate humane eviction tactics like one-way doors with long-term prevention strategies such as trimming trees and sealing gaps with steel mesh, you can create a squirrel-proof environment.

    Remember, patience is key. Rushing the process can lead to trapped animals or incomplete exclusion. Prioritize humane methods, stay consistent with your deterrents, and secure your home’s exterior.

    Did you find this guide helpful? Share it with your neighbors on social media—because a squirrel-free neighborhood is a happy neighborhood! If you have any unique tips or stories about your squirrel battles, leave a comment below. Let’s help each other keep our homes safe and quiet.

  • How Many Layers of Shingles Can Be On A Roof?

    How Many Layers of Shingles Can Be On A Roof?

    Have you noticed your roof looks thicker than your neighbor’s, or perhaps you’re planning a renovation and wondering if you can save money by skipping the tear-off? It is a common dilemma for homeowners facing aging roofs. Understanding how many layers of shingles can be on a roof is crucial not just for your wallet, but for the structural integrity of your home.

    In this guide, we will break down the building codes, the hidden dangers of multiple layers, and why professional roofers often recommend a complete removal. Let’s dive into the details so you can make an informed decision for your property.

    The General Rule: Two Layers Maximum

    When asking how many layers of shingles can be on a roof, the short answer for most residential properties in the United States is two.

    Most local building codes and international residential codes (IRC) prohibit installing more than two layers of asphalt shingles. This rule exists primarily due to weight limitations and inspection requirements. If your roof already has two layers, you cannot simply add a third. You must strip the roof down to the decking before installing new materials.

    However, “can” does not always mean “should.” Just because code allows a second layer doesn’t mean it is the best choice for your home’s longevity.

    Why Do Codes Limit Layers?

    Building officials enforce these limits to ensure safety. Every layer of shingle adds significant dead load to your roof structure. Older homes, built decades ago, may not have been engineered to support the weight of three or four layers of saturated asphalt shingles.

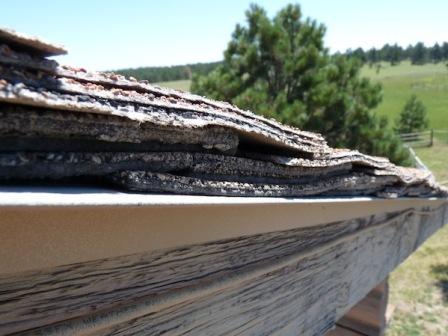
    According to general construction standards, a single square of asphalt shingles (100 square feet) weighs between 200 to 350 pounds. When you double that, you are adding up to 700 pounds per square to your roof’s frame. Over time, this excess weight can lead to sagging rafters or even structural failure during heavy snow or rain events.

    People Also Ask: Common Questions About Roof Layers

    To help you understand the nuances, let’s address specific questions that frequently appear in search results and homeowner forums.

    Can You Put 3 Layers of Shingles on a Roof?

    No, you generally cannot. As mentioned, most jurisdictions strictly enforce a two-layer maximum. Attempting to install a third layer is a code violation that can cause several issues:

    • Failed Inspections: If you plan to sell your home, a home inspector will likely flag the triple-layer roof. This can delay closing or require you to pay for a full tear-off anyway.
    • Voided Warranties: Most shingle manufacturers will void their warranty if their product is installed over more than one existing layer. They know that heat retention and uneven surfaces compromise the new shingles’ performance.
    • Insurance Issues: Some insurance providers may deny claims related to roof damage if they discover non-compliant layering.

    For more detailed information on building material standards, you can refer to resources like Wikipedia’s page on Roofing to understand the historical context of roofing materials.

    Is It Cheaper to Overlay or Tear Off?

    This is the most common debate. On the surface, overlaying (adding a new layer over the old one) seems cheaper because you save on labor and disposal fees. However, the long-term costs often outweigh the initial savings.

    FeatureOverlay (Second Layer)Full Tear-Off
    Initial CostLower (saves ~20-30%)Higher
    Labor TimeFasterSlower
    Deck InspectionImpossibleThorough
    Warranty ValidityOften Voided or LimitedFull Manufacturer Warranty
    LifespanShorter (heat buildup)Longer (proper ventilation)
    Future RemovalMuch More ExpensiveStandard Cost

    While you might save $500–$1,000 initially by overlaying, you risk paying double that amount later when the underlying deck rots unnoticed, or when you eventually have to pay for the removal of two layers instead of one.

    How Many Layers Of Shingles Can Be On A Roof

    What Are the Risks of Multiple Shingle Layers?

    Beyond the legal and financial aspects, there are physical risks to your home.

    1. Trapped Moisture: If there was any minor leakage in the first layer, water gets trapped between the two layers. This creates a perfect environment for mold, rot, and wood decay. Since you can’t see the deck, you won’t know the damage is happening until it’s severe.
    2. Heat Buildup: Asphalt shingles absorb heat. Two layers act as an insulator, trapping heat in your attic. This can increase your cooling bills in the summer and accelerate the aging of the shingles themselves, causing them to curl or crack prematurely.
    3. Uneven Surface: Old shingles rarely lie perfectly flat. Installing new shingles over an uneven surface leads to poor adhesion. Wind uplift becomes a major issue, as the new shingles may not seal correctly against the bumpy texture below.

    Step-by-Step: How to Determine Your Current Roof Status

    If you are unsure whether you have one or two layers, follow these steps to assess your situation safely. Note: Always prioritize safety. If you are uncomfortable climbing, hire a professional.

    1. Check Previous Records: Look for permits or invoices from previous roofing jobs. If a receipt says “tear-off,” you likely have one layer. If it says “overlay,” you might already have two.
    2. Inspect the Edges: Go to a gable end or look at the edge of the roof where the shingles terminate. You can often see the thickness of the material. One layer is roughly 1/4 to 3/8 inch thick. Two layers will look significantly thicker.
    3. Look at Vent Pipes: Check around plumbing vents or chimneys. If the flashing looks like it was installed over a thick base, it might indicate multiple layers.
    4. Consult a Professional: The most accurate method is to have a licensed roofer perform a core sample or a visual inspection. They can tell you immediately if a second layer is viable or if a tear-off is mandatory.

    The Importance of Deck Inspection

    One of the most critical arguments against overlaying is the inability to inspect the roof deck. The deck (usually plywood or OSB boards) is the foundation of your roof.

    During a tear-off, contractors can identify:

    • Soft spots indicating rot.
    • Nail pops that need securing.
    • Damaged flashing that needs replacement.
    • Inadequate ventilation issues.

    By skipping the tear-off, you are essentially putting a band-aid on a wound you haven’t cleaned. If the deck is compromised, the new shingles will fail regardless of their quality.

    Expert Opinion: What Do Professionals Say?

    Most experienced roofers with over 10 years in the industry prefer tear-offs. While they appreciate the ease of an overlay job, they know it leads to more callback complaints.

    “I always advise my clients to tear off the old roof,” says a senior project manager from a leading US roofing association. “The small savings aren’t worth the risk of hiding rot. Plus, when the next homeowner has to replace it, they will hate us for leaving two layers of trash on their house.”

    This sentiment highlights the ethical component of E-E-A-T (Experience, Expertise, Authoritativeness, and Trustworthiness). A trustworthy contractor prioritizes the long-term health of your home over a quick profit.

    Conclusion

    So, how many layers of shingles can be on a roof? Legally, usually two. Practically, one is ideal.

    While adding a second layer might seem like a cost-effective shortcut, it comes with significant downsides: voided warranties, potential structural stress, trapped moisture, and higher future removal costs. For most homeowners, a complete tear-off is the smarter investment. It ensures a clean slate, allows for proper deck inspection, and maximizes the lifespan of your new roofing system.

    Don’t gamble with your home’s protection. If you are considering a roof replacement, get multiple quotes that include a full tear-off option. Compare the long-term value, not just the upfront price.

    Found this guide helpful? Share it with your neighbors or on social media to help others make smarter roofing decisions! 🏠🔨

  • Cedar Shake Roof Life Expectancy: The Real Truth

    Cedar Shake Roof Life Expectancy: The Real Truth

    There is nothing quite like the rustic, timeless charm of a cedar shake roof. It adds character and curb appeal to any home, instantly elevating its aesthetic value. However, many homeowners find themselves asking, “What is the life expectancy of a cedar shake roof?” while worrying about the long-term investment.

    It is a valid concern. Unlike synthetic materials that offer predictable timelines, natural wood behaves differently based on its environment. In this guide, we will break down exactly how long you can expect your roof to last, what factors shorten or extend its life, and how you can protect your investment for decades to come.


    What Is the Average Life Expectancy of a Cedar Shake Roof?

    The short answer is that a well-installed and properly maintained cedar shake roof typically lasts between 30 to 40 years. In some ideal conditions with exceptional care, it can even reach up to 50 years.

    However, this range is not a guarantee. It is an average derived from industry standards and homeowner experiences. To understand where your roof falls in this spectrum, we must look at the quality of the material itself.

    Understanding Wood Grades

    Not all cedar shakes are created equal. The lifespan is heavily dictated by the grade of the western red cedar used:

    • Grade #1 (Premium): These are 100% heartwood, free of knots, and have straight grains. They are the most durable and resistant to decay. If you want your roof to hit that 40-year mark, this is the grade you need.
    • Grade #2 (Standard): Contains some sapwood and minor knots. These are more affordable but may have a slightly shorter lifespan, often ranging from 20 to 30 years if not meticulously maintained.
    • Grade #3 (Utility): Often contains more sapwood and larger knots. These are generally not recommended for primary roofing due to higher susceptibility to curling and decay.

    Pro Tip: Always ask your contractor for “100% Heartwood” shakes. Sapwood is softer and more prone to rotting, which significantly drags down the overall life expectancy of the roof.


    Key Factors That Influence Longevity

    If you are trying to determine why one neighbor’s cedar roof looks new after 25 years while another’s is failing at 15, the answer usually lies in three specific variables: climate, installation, and maintenance.

    1. Climate and Weather Conditions

    Cedar is a natural material that breathes, meaning it expands and contracts with moisture and temperature changes.

    • Humid Climates: High humidity promotes moss, algae, and fungal growth. Without regular cleaning, these organisms trap moisture against the wood, accelerating rot.
    • Dry/Arid Climates: While rot is less of an issue, extreme dryness can cause shakes to become brittle and crack. UV radiation can also degrade the lignin in the wood, causing it to turn gray and lose structural integrity faster.
    • Coastal Areas: Salt air can be corrosive to the fasteners (nails) holding the shakes, leading to premature failure even if the wood itself is sound.

    2. Quality of Installation

    A cedar shake roof is only as good as the installer. Proper ventilation is critical. If hot air gets trapped in the attic, it cooks the shakes from the inside out, drying them prematurely. Furthermore, the use of correct spacing allows for expansion during rain. Poorly spaced shakes can buckle or split when they absorb water.

    3. Maintenance Routine

    This is the biggest variable under your control. A neglected roof may fail in 15 years. A maintained roof can last 40+. Regular removal of debris, moss treatment, and occasional re-coating with preservatives are non-negotiable for maximizing lifespan.


    Cedar Shakes vs. Other Roofing Materials

    To help you contextualize the value, let’s compare cedar shakes to other common roofing options. This comparison highlights why many homeowners choose cedar despite the higher upfront cost.

    FeatureCedar ShakesAsphalt ShinglesMetal RoofingSlate
    Avg. Lifespan30–40 Years15–20 Years40–70 Years50–100+ Years
    Aesthetic AppealHigh (Natural/Rustic)ModerateModern/IndustrialClassic/Elegant
    MaintenanceHigh (Regular Cleaning)LowVery LowLow
    Insulation ValueExcellentPoorPoorGood
    CostHighLowMedium-HighVery High

    As seen in the table, cedar offers a unique balance of longevity and natural insulation. According to Wikipedia’s entry on Wood Shingles, cedar is prized not just for durability but for its natural resistance to insect damage and decay, provided it is kept dry.

    What Is The Life Expectancy Of A Cedar Shake Roof

    How to Extend the Life of Your Cedar Roof

    You cannot change the climate, but you can change how you care for your roof. Here is a step-by-step approach to ensuring your cedar shakes reach their maximum life expectancy.

    Step 1: Annual Inspections

    Twice a year (spring and fall), walk around your property with binoculars. Look for:

    • Loose or missing shakes.
    • Signs of moss or algae buildup.
    • Damaged flashing around chimneys or vents.

    Step 2: Keep It Clean

    Debris such as leaves and pine needles traps moisture. Use a leaf blower or a soft-bristle broom to gently remove debris from the roof surface. Never use a pressure washer on high settings, as this can shred the wood fibers and force water under the shakes.

    Step 3: Treat for Moss and Algae

    If you see green patches, act immediately. Use a zinc-based cleaner or a specialized cedar roof cleaning solution. Apply it according to the manufacturer’s instructions, usually involving a low-pressure spray and letting it sit for 15–20 minutes before rinsing gently.

    Step 4: Apply a Protective Stain or Sealant

    Every 3 to 5 years, consider applying a breathable, oil-based stain or preservative. This helps repel water and blocks UV rays. Ensure the product is specifically designed for cedar roofs to allow the wood to breathe. Trapping moisture inside the wood with a non-breathable sealant will cause rot from the inside.


    Signs It’s Time to Replace Your Cedar Roof

    Even with the best care, all roofs eventually reach the end of their life. Here are the red flags that indicate your cedar shake roof has passed its life expectancy:

    1. Curling or Cupping: If the edges of the shakes are curling upward significantly, they are no longer shedding water effectively.
    2. Splitting: Large cracks running through the center of the shakes compromise the waterproof barrier.
    3. Thinning: If the shakes have worn down to less than half their original thickness, they are vulnerable to wind and hail damage.
    4. Soft Spots: If you can press into the wood and it feels spongy, rot has set in. This is a critical structural issue.
    5. Interior Leaks: Water stains on your ceiling or attic insulation are the ultimate sign that the roof system has failed.

    FAQ Section

    Q1: Does a cedar shake roof require more maintenance than asphalt?

    A: Yes. While asphalt shingles are largely “install and forget,” cedar shakes require annual cleaning and periodic treatments to prevent moss and rot. However, the trade-off is a significantly longer lifespan and better natural insulation.

    Q2: Can I walk on my cedar shake roof for repairs?

    A: It is not recommended. Cedar shakes can be brittle, especially as they age. Walking on them can cause them to crack or break. Always hire a professional roofer who uses proper safety equipment and knows how to distribute their weight without damaging the shakes.

    Q3: How does fire resistance affect cedar roof longevity?

    A: Natural cedar is combustible. However, many modern cedar shakes are treated with fire-retardant chemicals. These treatments do not significantly alter the physical lifespan of the wood but are crucial for insurance purposes and safety in wildfire-prone areas. Check local building codes for requirements.

    Q4: Will painting my cedar roof extend its life?

    A: Painting is generally discouraged for cedar shakes. Paint forms a solid film that traps moisture inside the wood, leading to rapid rot. Instead, use semi-transparent stains or preservatives that penetrate the wood while allowing it to breathe.

    Q5: Is cedar roofing worth the extra cost?

    A: For many homeowners, yes. While the upfront cost is higher than asphalt, the 30–40 year lifespan means you may only replace the roof once or twice in the lifetime of the home, compared to two or three replacements with asphalt. Plus, the aesthetic appeal can increase property value.

    Q6: What is the best season to install or repair a cedar roof?

    A: Late spring or early summer is ideal. The weather is typically dry, allowing the wood to acclimate properly. Avoid installation during heavy rain seasons or extreme winter cold, as moisture content management is critical for cedar.


    Conclusion

    So, what is the life expectancy of a cedar shake roof? With premium materials and diligent care, you can enjoy a beautiful, durable roof for 30 to 40 years, and potentially longer. It is an investment in both the beauty and the efficiency of your home.

    While it requires more attention than synthetic alternatives, the reward is a living, breathing roof that ages gracefully. By keeping it clean, treating it regularly, and addressing issues early, you ensure that your cedar roof remains a standout feature of your home for decades.

    Did you find this guide helpful? Share it with your friends on social media who are considering a roof upgrade, or leave a comment below with your own cedar roof experiences!

  • How to Get Rid of Moss on Roof Shingles

    How to Get Rid of Moss on Roof Shingles

    Is that green, fuzzy layer creeping up your roof causing you sleepless nights? You are not alone. Moss is more than just an eyesore; it traps moisture against your shingles, leading to premature decay, leaks, and costly repairs. If you are wondering how do you get rid of moss on roof shingles without damaging your home or risking your safety, this guide is for you. We will walk you through safe, effective, and proven methods to restore your roof’s integrity and curb appeal.

    Why Is Moss Bad for Your Roof?

    Before we dive into the removal process, it is crucial to understand why moss is a threat. Many homeowners mistake moss for harmless vegetation, but its impact on roofing materials is significant.

    Moss acts like a sponge. It absorbs rainwater and holds it against the surface of your asphalt shingles. Over time, this constant moisture can cause the granules on the shingles to loosen and wash away. Once the protective granule layer is compromised, the underlying asphalt is exposed to UV rays and weather elements, accelerating aging.

    Furthermore, moss roots (rhizoids) can lift the edges of shingles. This creates gaps where wind-driven rain can penetrate, leading to water damage in your attic or ceiling. According to industry estimates, ignoring moss growth can reduce the lifespan of a standard 20-year asphalt roof by up to 5–7 years.

    Safety First: Preparing for Roof Work

    Removing moss is a physical task that involves working at heights. Before you grab any tools, prioritize safety.

    • Check the Weather: Never work on a wet, icy, or windy day. Dry conditions provide better traction.
    • Use Proper Gear: Wear rubber-soled shoes with good grip. Use a sturdy extension ladder secured at the base.
    • Safety Harness: If your roof has a steep pitch (greater than 6/12), consider hiring a professional. If you proceed, use a fall-arrest system.
    • Protect Your Landscaping: The cleaning solutions we will discuss can harm plants. Cover shrubs and grass below the work area with plastic tarps.
    How Do You Get Rid Of Moss On Roof Shingles

    Method 1: The Manual Removal Technique (Low Moisture)

    For light to moderate moss growth, manual removal is often the safest first step. This method minimizes the risk of water intrusion into your home.

    Step-by-Step Guide:

    1. Sweep Gently: Use a soft-bristle broom or a leaf blower on a low setting. Start from the ridge (top) and work your way down.
      • Critical Tip: Always sweep downward, following the direction of the shingle overlap. Sweeping upward can lift shingles and break the seal.
    2. Scrape Carefully: For stubborn patches, use a plastic putty knife or a specialized roof scraper. Avoid metal tools, as they can gouge the shingles.
    3. Collect Debris: Ensure all moss clumps are removed from the gutters. Clogged gutters contribute to moisture retention, which encourages new moss growth.

    Note: Manual removal does not kill the spores. It only removes the visible plant matter. You must follow up with a treatment to prevent regrowth.

    Method 2: Chemical Treatment with Zinc Sulfate or Bleach Solution

    If manual removal isn’t enough, or if the moss is thick, a chemical treatment is necessary. There are two primary approaches: commercial moss killers and DIY bleach solutions.

    Option A: Commercial Moss Killers (Zinc Sulfate)

    Products containing zinc sulfate or copper sulfate are highly effective. They work by dehydrating the moss and preventing spore germination.

    • Application: Mix the powder with water according to the manufacturer’s instructions. Spray evenly over the affected areas using a garden sprayer.
    • Wait Time: Allow the solution to sit for 20–30 minutes. Do not rinse immediately.
    • Removal: After the moss turns brown and dies (usually within 24–48 hours), gently sweep it off.

    Option B: DIY Bleach Solution

    A common household remedy is a mixture of chlorine bleach and water.

    • The Ratio: Mix 1 part chlorine bleach with 3 parts water.
    • Application: Apply using a pump sprayer. Avoid high-pressure washing, which can strip granules.
    • Dwell Time: Let it sit for 15–20 minutes.
    • Rinsing: Rinse gently with a garden hose from the top down.

    Comparison: Zinc Sulfate vs. Bleach

    FeatureZinc SulfateBleach Solution
    EffectivenessHigh (Long-lasting)Moderate (Short-term)
    Plant SafetySafer if rinsed properlyHarmful to plants/grass
    Shingle SafetyVery SafeCan degrade seals if overused
    CostModerateLow

    Method 3: Installing Zinc or Copper Strips (Prevention)

    Once you have cleaned your roof, the goal is to keep it clean. The most effective long-term solution is installing metal strips near the roof ridge.

    When it rains, tiny particles of zinc or copper wash down the roof. These metals are toxic to moss, algae, and lichen, creating an inhospitable environment for growth.

    • Installation: Nail 2-inch wide strips of zinc or copper along the peak of the roof.
    • Coverage: Ensure the strips extend under the cap shingles so they are hidden but functional.
    • Longevity: These strips can provide protection for 10–20 years, making them a cost-effective investment.

    For more detailed information on the chemical properties of these metals and their environmental impact, you can refer to this Wikipedia article on Zinc.

    What NOT to Do: Common Mistakes

    Avoid these common pitfalls that can void your roof warranty or cause structural damage.

    1. Never Use a Pressure Washer: High-pressure water (above 1,500 PSI) can blast off the protective granules on asphalt shingles. This exposes the asphalt to sun damage and significantly shortens the roof’s life. Most manufacturers explicitly void warranties if pressure washing is used.
    2. Avoid Walking on Wet Moss: Wet moss is incredibly slippery. Even with safety gear, the risk of falling is high.
    3. Do Not Ignore Gutters: Cleaning the roof while ignoring clogged gutters is futile. Water backup in gutters keeps the roof edge damp, inviting moss back immediately.

    When to Call a Professional

    While DIY methods are effective for many, certain situations require expert intervention:

    • Steep Roofs: If your roof pitch is steep, the risk of injury is too high for amateur work.
    • Extensive Damage: If you notice curled, cracked, or missing shingles during inspection, a roofer should assess structural integrity.
    • Large Surface Area: If more than 30% of your roof is covered, professional cleaning equipment and eco-friendly industrial solutions may be more efficient.

    The average cost for professional roof cleaning ranges from $300 to $600, depending on size and location. Compared to the $10,000+ cost of a full roof replacement, this maintenance is a wise financial decision.

    FAQ Section

    1. Will vinegar kill moss on roof shingles?

    Yes, white vinegar can kill moss due to its acetic acid content. However, it is less effective than zinc sulfate or bleach for large areas. It requires repeated applications and may not prevent regrowth as effectively as metal strips.

    2. How often should I clean moss off my roof?

    Inspect your roof twice a year, ideally in spring and fall. If you live in a shady, damp climate, you may need to treat for moss every 2–3 years. With zinc strips installed, maintenance can be reduced to once every decade.

    3. Does moss removal damage asphalt shingles?

    If done correctly using soft brushes and low-pressure rinsing, it does not damage shingles. However, aggressive scraping, walking heavily on shingles, or using high-pressure washers will cause significant damage.

    4. Can I prevent moss without installing metal strips?

    Yes. You can trim overhanging tree branches to increase sunlight exposure and improve air circulation. Keeping the roof dry and sunny is the best natural deterrent against moss growth.

    5. Is moss harmful to humans?

    Moss itself is not toxic to humans. However, the damp environment it creates can promote mold and mildew growth, which may affect indoor air quality if leaks develop. Additionally, slippery moss poses a fall hazard for anyone accessing the roof.

    Conclusion

    Learning how do you get rid of moss on roof shingles is a vital skill for any homeowner. By combining gentle manual removal with effective chemical treatments and long-term prevention strategies like zinc strips, you can extend the life of your roof and maintain your home’s value.

    Remember, consistency is key. Regular inspections and minor maintenance prevent small problems from becoming expensive disasters. Don’t wait for a leak to appear—take action today.

    Found this guide helpful? Share it with your neighbors on Facebook or Pinterest to help them protect their homes too! A moss-free neighborhood is a safer, more beautiful community.