Hanging holiday decorations can transform your home into a winter wonderland, but metal roofs present a unique challenge that many homeowners dread. Drilling holes is strictly off-limits as it voids warranties and causes leaks, leaving many to ask: how do you put Christmas lights on a metal roof without causing expensive damage? This guide provides safe, professional-approved methods to secure your lights while keeping your roof intact and your insurance premium low.
Why Metal Roofs Require Special Care
Before we dive into the “how-to,” it is crucial to understand the “why.” Metal roofing systems are engineered for durability and water shedding, not for puncture. According to industry standards, even a small nail hole can compromise the protective coating of the metal, leading to rust and eventual leakage.
Unlike asphalt shingles, where you might get away with a well-placed nail under a tab, metal panels offer no such forgiveness. Furthermore, metal expands and contracts with temperature changes. A rigid attachment method can cause stress fractures in the panel or pull the fastener loose during high winds. Therefore, the goal is non-penetrating attachment.
The Best Tools for the Job: Magnetic Clips vs. Adhesives
When figuring out how do you put Christmas lights on a metal roof, your choice of hardware is the most critical decision. There are two primary contenders: magnetic clips and heavy-duty adhesives.
1. Magnetic Light Clips (The Gold Standard)
For most standing seam or corrugated metal roofs, magnetic clips are the superior choice. They rely on strong neodymium magnets to clamp onto the metal surface.
- Pros: Zero damage, easy to remove, reusable, holds firmly in wind.
- Cons: Only works on ferrous metals (steel/iron), not aluminum or copper.
2. Heavy-Duty Adhesive Hooks
If your roof is made of aluminum, copper, or zinc, magnets will not work. In this case, you must use outdoor-rated adhesive hooks.
- Pros: Works on all metal types, invisible once installed.
- Cons: Can leave residue, may fail in extreme heat/cold, difficult to reposition.
| Feature | Magnetic Clips | Adhesive Hooks |
|---|---|---|
| Damage Risk | None | Low (Residue possible) |
| Reusability | High | Low |
| Wind Resistance | High | Moderate |
| Metal Compatibility | Steel/Iron Only | All Metals |
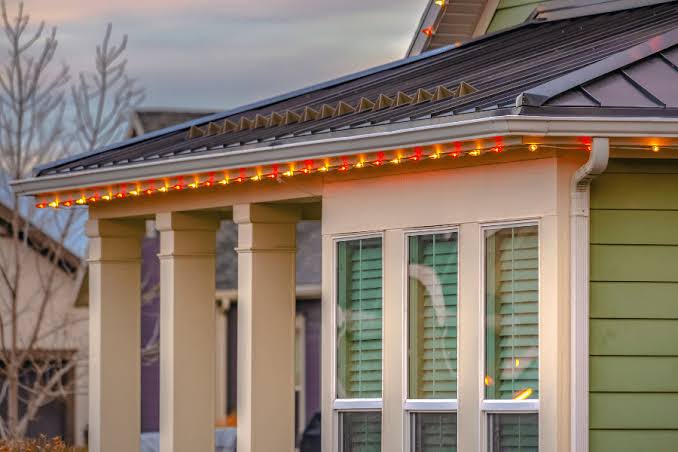
Step-by-Step Guide: How Do You Put Christmas Lights On A Metal Roof
Follow these precise steps to ensure a professional-looking display that stays up all season.
Step 1: Check Your Roof Material
First, determine if your roof is magnetic. Take a simple fridge magnet to a discreet spot on your roof (or use a ladder to test a lower section). If it sticks firmly, you can use magnetic clips. If it slides off, you have an aluminum or copper roof and must use adhesives.
Step 2: Measure and Plan
Measure the linear footage of the roofline where you intend to hang lights. Add 10% extra to account for corners and mistakes. Decide on your pattern. For metal roofs, outlining the eaves (the edge of the roof) is the safest and most visually appealing option. Avoid draping lights over the peak unless you have specific ridge-clipping tools.
Step 3: Clean the Surface
Whether using magnets or adhesives, cleanliness is key. Dust, pollen, and oxidation reduce holding power.
- For Magnets: Wipe the area with a dry cloth to remove debris.
- For Adhesives: Clean the area with isopropyl alcohol and let it dry completely. This ensures the adhesive bonds directly to the metal, not to dirt.
Step 4: Install the Clips
- Magnetic Method: Slide the light bulb into the clip first. Then, snap the magnetic base onto the metal panel. Place clips every 12–18 inches. For heavier LED strands, every 12 inches is recommended to prevent sagging.
- Adhesive Method: Peel the backing off the hook. Press firmly against the clean metal surface for 30 seconds. Wait at least one hour before hanging any weight on them to allow the adhesive to cure.
Step 5: Hang the Lights
Start at the power source and work your way outward. Gently press each bulb into the installed clips. Ensure the wire is not pulled taut; leave a slight slack between clips to accommodate thermal expansion of the metal roof.
Step 6: Secure the Power Cord
Use a separate magnetic or adhesive cord holder to secure the main power line running down the side of the house. This prevents wind from tugging on the connection point at the roof edge.
Safety First: Ladder and Electrical Precautions
According to the Consumer Product Safety Commission, thousands of people are treated in emergency rooms annually for falls related to holiday decorating. When learning how do you put Christmas lights on a metal roof, safety must precede aesthetics.
- Use a Spotter: Never work on a ladder alone. Have someone hold the base.
- Check the Weather: Do not attempt installation if the roof is wet, icy, or windy. Metal roofs become incredibly slippery when wet.
- GFCI Protection: Ensure your outdoor outlet is protected by a Ground Fault Circuit Interrupter (GFCI). This cuts power instantly if moisture causes a short circuit.
- LED Only: Use only LED lights. They emit minimal heat, reducing the risk of melting adhesive or damaging roof coatings, and they draw less power, lowering fire risk.
Common Mistakes to Avoid
Even with the right tools, errors can happen. Here are the most frequent pitfalls:
- Using Nails or Staples: Never pierce the metal. It voids warranties and creates leak paths.
- Ignoring Thermal Expansion: Metal roofs expand in the sun and contract at night. If your light wires are pulled tight, they can snap or pull clips off. Always leave slack.
- Overloading Circuits: Check the wattage of your light strands. Do not daisy-chain more than three strands together unless the manufacturer explicitly states it is safe.
- Leaving Lights Up Year-Round: UV exposure degrades plastic clips and wire insulation. Remove lights within a month after the holidays to extend their lifespan.
FAQ Section
Can I use magnetic clips on an aluminum metal roof?
No. Aluminum is non-ferrous, meaning it is not magnetic. Magnetic clips will not stick. For aluminum roofs, you must use high-quality, outdoor-rated adhesive hooks or clips that clamp onto the edge of the panel without piercing it.
Will magnetic clips scratch my roof?
High-quality magnetic clips are designed with rubber or plastic coatings to protect the finish. However, if dirt or grit gets trapped between the magnet and the roof, it could cause minor scratching. Always clean the roof surface before installation to mitigate this risk.
How long do adhesive light hooks last on a metal roof?
Outdoor-rated adhesive hooks typically last one to two seasons. Extreme temperature fluctuations can weaken the adhesive bond over time. It is best to replace them annually rather than risking your lights falling mid-season.
Is it safe to walk on a metal roof to hang lights?
Generally, no. Metal roofs can be slippery, especially if there is any dew, frost, or slope. It is safer to use an extension pole or work from a sturdy ladder positioned at the eaves. If you must go on the roof, wear soft-soled shoes and use a safety harness.
What type of lights are best for metal roofs?
LED lights are the best choice. They are lightweight, which puts less stress on clips and adhesives. They also run cool, preventing any potential heat damage to the roof’s protective coating or the adhesive backing of hooks.
Can I install lights on a standing seam roof?
Yes, standing seam roofs are actually ideal for magnetic clips. The raised seams provide a perfect surface for magnets to grip securely. Ensure you place the clips on the flat pan or the seam itself, depending on the clip design, to ensure a tight fit.
Conclusion
Learning how do you put Christmas lights on a metal roof doesn’t have to be a stressful ordeal. By choosing the right non-penetrating tools—magnetic clips for steel roofs and adhesives for aluminum—you can achieve a stunning display without compromising your roof’s integrity. Remember to prioritize safety, plan your layout carefully, and use LED lights for efficiency and longevity.
Your home deserves to shine this holiday season, and your roof deserves to stay leak-free. If you found this guide helpful, please share it with your neighbors on social media to help them decorate safely too! Happy holidays!
Leave a Reply