Blog

  • What Is The Degree Of A 6 12 Pitch Roof?

    What Is The Degree Of A 6 12 Pitch Roof?

    Are you planning a roofing project or simply trying to understand the blueprints for your new home? It can be confusing when contractors speak in ratios like “6 over 12” while you are trying to visualize the actual steepness of the structure. You are not alone; many homeowners struggle to translate these construction terms into real-world angles.

    Understanding what is the degree of a 6 12 pitch roof is crucial for everything from selecting the right shingles to ensuring proper water drainage. In this guide, we will break down the math, explain the practical implications, and help you master this essential roofing concept without needing a degree in engineering.


    The Exact Answer: Converting 6/12 Pitch to Degrees

    Let’s get straight to the point. If you have a roof with a 6/12 pitch, the angle of the roof relative to the horizontal plane is approximately 26.57 degrees.

    But how do we get there? And why does this specific number matter?

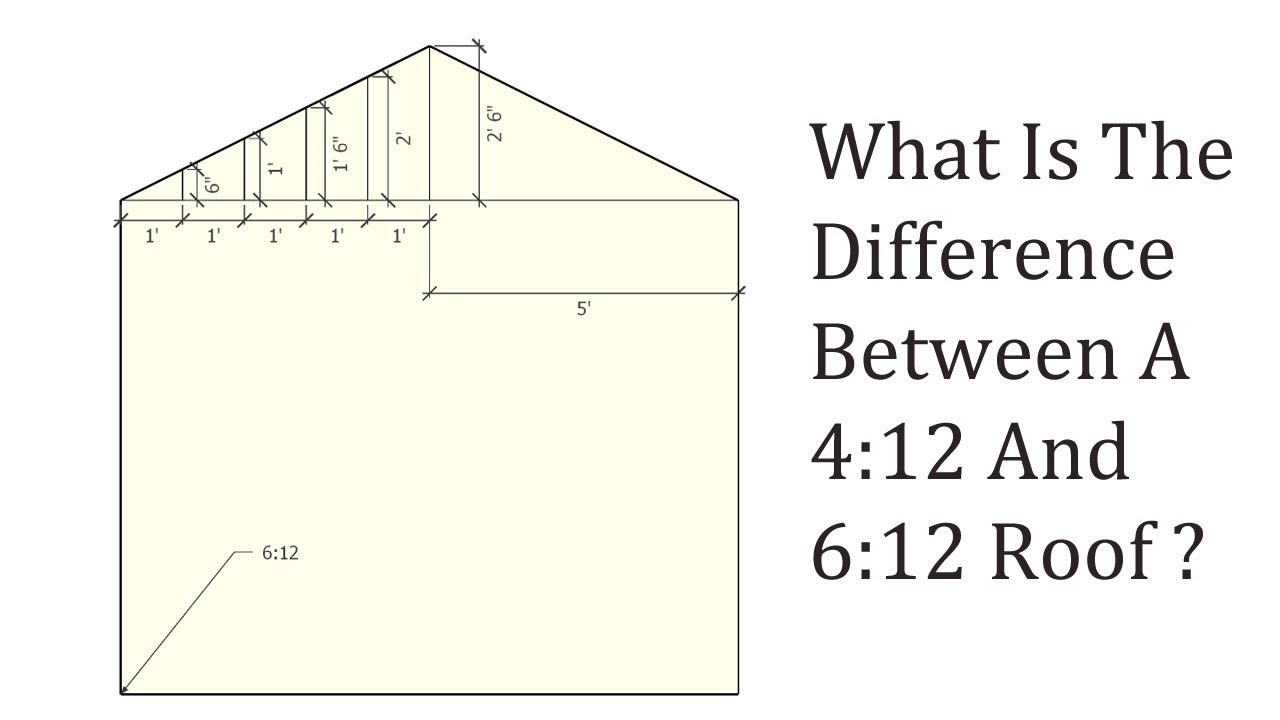
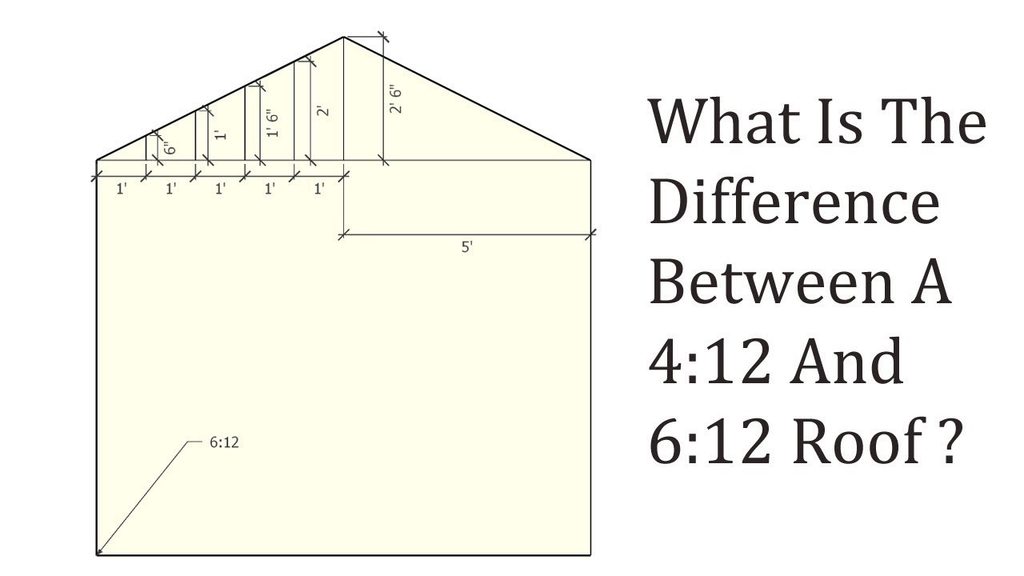
    In roofing terminology, pitch is expressed as a ratio of vertical rise to horizontal run. A 6/12 pitch means that for every 12 inches (one foot) of horizontal distance, the roof rises 6 inches vertically. This is a moderate slope, common in many American residential homes because it balances aesthetic appeal with functional performance.

    The Mathematics Behind the Angle

    To convert any roof pitch to degrees, we use basic trigonometry. Specifically, we use the arctangent function (tan⁻¹). Here is the step-by-step breakdown:

    1. Identify Rise and Run: For a 6/12 pitch, the Rise = 6 and the Run = 12.
    2. Calculate the Ratio: Divide the rise by the run.
      • 6÷12=0.56÷12=0.5
    3. Apply Arctangent: Use a calculator to find the inverse tangent of 0.5.
      • tan⁡−1(0.5)≈26.565∘tan−1(0.5)≈26.565∘

    Rounded to two decimal places, we get 26.57°.

    This calculation is universal. Whether you are in New York or California, a 6/12 pitch will always result in this same angle. Understanding this conversion helps you communicate effectively with architects, engineers, and roofing contractors.


    Why Does Roof Pitch Matter?

    You might wonder why you need to know the degree instead of just sticking with the 6/12 ratio. The answer lies in material compatibility, safety, and local building codes.

    1. Material Suitability

    Not all roofing materials work on every slope. Asphalt shingles, the most popular roofing material in the US, generally require a minimum pitch of 2/12 or 4/12 depending on the manufacturer and installation method. A 6/12 pitch (26.57°) is well within the safe zone for asphalt shingles, metal roofing, and clay tiles. However, if you were considering flat roof membranes like EPDM, this slope would be too steep.

    2. Water Drainage and Snow Load

    The angle of your roof directly impacts how quickly water and snow slide off.

    • Rain: At 26.57 degrees, rain runs off efficiently, reducing the risk of leaks and water pooling.
    • Snow: In colder climates, a 6/12 pitch helps shed snow better than a low-slope roof, but it may still retain some snow during heavy storms. This is a critical factor for structural integrity in states like Minnesota or Maine.

    3. Safety and Walkability

    For maintenance purposes, such as cleaning gutters or inspecting chimneys, the steepness of the roof determines the safety equipment required. A 6/12 pitch is considered moderately steep. While it is walkable for professionals using proper harnesses and footwear, it is dangerous for untrained homeowners. The steeper the angle, the higher the risk of slipping.
    What Is The Degree Of A 6 12 Pitch Roof

    Comparing 6/12 Pitch to Other Common Pitches

    To give you better context, let’s compare the 6/12 pitch against other standard roof slopes used in the United States. This comparison will help you visualize where 26.57 degrees sits on the spectrum.

    Roof Pitch (Rise/Run)Angle (Degrees)ClassificationBest For
    2/12~9.46°Low SlopeFlat-style aesthetics, modern homes
    4/12~18.43°Low-ModerateStandard suburban homes, cost-effective
    6/12~26.57°ModerateTraditional styles, good drainage
    8/12~33.69°SteepColonial styles, heavy snow areas
    12/1245.00°Very SteepA-frames, extreme snow shedding

    As you can see, a 6/12 pitch is right in the middle. It offers a classic triangular look that many homeowners find appealing without being excessively difficult or expensive to build.


    How to Measure Your Roof Pitch Accurately

    If you are unsure whether your roof is actually a 6/12 pitch, you can measure it yourself. However, please prioritize safety. Never climb onto a steep roof without proper fall protection.

    Method 1: From the Attic (Safest)

    1. Go into your attic and locate a rafter.
    2. Place a level horizontally against the bottom edge of the rafter.
    3. Ensure the bubble in the level is centered.
    4. Measure 12 inches along the level from the end touching the rafter.
    5. Measure the vertical distance from the 12-inch mark on the level up to the bottom of the rafter.
    6. If this distance is 6 inches, you have a 6/12 pitch.

    Method 2: From the Exterior (Requires Ladder)

    1. Place a ladder securely against the eaves.
    2. Hold a level horizontally against the roof surface.
    3. Mark the 12-inch point on the level.
    4. Measure the vertical distance from the roof surface to the 12-inch mark.
    5. Again, 6 inches equals a 6/12 pitch.

    For more detailed technical standards on roofing measurements, you can refer to general construction guidelines available on Wikipedia.


    Pros and Cons of a 6/12 Pitch Roof

    Choosing a roof pitch is a trade-off. Here is a quick breakdown of the advantages and disadvantages of opting for a 26.57-degree slope.

    Advantages

    • Aesthetic Appeal: Provides a traditional, balanced look that complements various architectural styles, including Ranch, Colonial, and Craftsman.
    • Cost-Effective: Easier and safer to install than steeper pitches (like 8/12 or 12/12), which can lower labor costs.
    • Attic Space: Offers more usable headroom in the attic compared to lower pitches, potentially allowing for storage or conversion into living space.
    • Efficient Drainage: Sheds water and debris effectively, minimizing maintenance issues.

    Disadvantages

    • Material Usage: Requires more roofing material than a low-slope roof due to the increased surface area.
    • Wind Resistance: While better than very steep roofs, it can still catch wind uplift if not properly secured, especially in hurricane-prone areas.
    • Not Ideal for Flat Looks: If you desire a modern, minimalist aesthetic, a 6/12 pitch may appear too traditional or “busy.”

    FAQ Section

    1. Is a 6/12 pitch roof considered steep?

    No, a 6/12 pitch is generally considered a moderate slope. It is steeper than the minimum requirement for most shingles but not as steep as high-pitch roofs found in Victorian or A-frame homes. It is manageable for professional roofers with standard safety gear.

    2. Can I walk on a 6/12 pitch roof?

    Technically, yes, but it is not recommended for inexperienced individuals. A 26.57-degree angle is slippery, especially when wet or covered in dew. Professionals use harnesses, rope systems, and specialized shoes. If you must go up, ensure you have proper fall arrest equipment.

    3. What is the multiplier for a 6/12 pitch roof?

    When calculating the total square footage of roofing material needed, you use a pitch multiplier. For a 6/12 pitch, the multiplier is approximately 1.118. This means if your floor plan is 1,000 square feet, your roof area is roughly 1,118 square feet. This accounts for the slope’s additional surface area.

    4. Does a 6/12 pitch require special underlayment?

    Generally, no. Standard synthetic or felt underlayment works well for a 6/12 pitch. However, local building codes in high-wind or ice-dam prone areas may require ice and water shield along the eaves and valleys, regardless of the pitch. Always check with your local building department.

    5. How does a 6/12 pitch affect energy efficiency?

    The pitch itself has a minimal direct impact on energy efficiency. However, a 6/12 pitch allows for better attic ventilation options, such as ridge vents, which can help regulate temperature and reduce cooling costs in the summer. The color and type of roofing material play a much larger role in energy efficiency than the angle alone.


    Conclusion

    Knowing what is the degree of a 6 12 pitch roof empowers you to make informed decisions about your home improvement projects. At 26.57 degrees, this pitch offers a perfect blend of functionality, aesthetics, and cost-effectiveness. It ensures efficient water drainage, provides ample attic space, and remains accessible for maintenance when proper safety precautions are taken.

    Whether you are hiring a contractor or DIY-ing a small repair, understanding this angle helps you communicate clearly and avoid costly mistakes. Remember, while the math is simple, the application requires precision and safety.

    Did you find this guide helpful? Share it with your friends on social media who might be planning their own roofing projects! Let’s help everyone build safer, smarter homes.
  • What Is The Angle Of A 5/12 Roof Pitch?

    What Is The Angle Of A 5/12 Roof Pitch?

    Have you ever looked at a blueprint or listened to a contractor discuss roofing specifications and felt confused by terms like “5/12 pitch”? You are not alone. Many homeowners struggle to visualize what these ratios mean in real-world angles, which is crucial when planning renovations or understanding drainage capabilities. If you are asking, “What is the angle of a 5/12 roof pitch,” you have come to the right place for a clear, accurate answer.

    Understanding the specific angle of your roof is not just about geometry; it affects everything from material selection to safety during maintenance. In this guide, we will break down the math, explain the practical implications, and help you master this essential aspect of home construction.

    The Exact Answer: Converting 5/12 Pitch to Degrees

    Let’s get straight to the point. If you need the number for a quick reference, here it is:

    A 5/12 roof pitch converts to an angle of approximately 22.62 degrees.

    To be precise, the calculation yields 22.6198649… degrees. For most construction and architectural purposes, rounding this to 22.6 degrees or even 23 degrees is standard practice. However, knowing the precise decimal is helpful when using digital design software or ordering custom-fabricated materials.

    Why Isn’t It Just 5/12 of 90 Degrees?

    A common misconception among beginners is assuming that a 5/12 pitch means the roof is angled at 5/12ths of a right angle (90 degrees). This is incorrect. Roof pitch is a ratio of rise over run, not a direct fraction of the total angle.

    • Rise: The vertical height the roof gains.
    • Run: The horizontal distance covered.

    In a 5/12 pitch, the roof rises 5 inches for every 12 inches of horizontal distance. This creates a right-angled triangle where we must use trigonometry to find the angle.

    How to Calculate Roof Pitch Angles Yourself

    Understanding how to derive this number empowers you to calculate any roof pitch, not just 5/12. We use basic trigonometry, specifically the tangent function.

    The Formula

    The relationship between the pitch ratio and the angle (θθ) is defined by the arctangent (inverse tangent) function:

    θ=arctan⁡(RiseRun)θ=arctan(RunRise​)

    For a 5/12 pitch:

    1. Divide the rise by the run: 5÷12=0.41675÷12=0.4167
    2. Calculate the arctangent of that result: arctan⁡(0.4167)arctan(0.4167)
    3. The result is 22.62 degrees.

    You can verify this using any scientific calculator or online conversion tool. This method works universally for any standard roof pitch expressed as X/12.

    What Is The Angle Of A 5 12 Roof Pitch

    Why Does the 22.6-Degree Angle Matter?

    Knowing that a 5/12 pitch equals roughly 22.6 degrees is useful, but why does this specific slope matter for your home? This angle sits in a “sweet spot” for residential roofing, balancing aesthetics, cost, and functionality.

    1. Walkability and Safety

    One of the most significant factors influenced by roof angle is safety.

    • Low Slope (< 4/12): Often requires special sealing methods because water drains slowly.
    • Steep Slope (> 9/12): Dangerous to walk on without harnesses and specialized equipment.
    • Moderate Slope (5/12 to 8/12): A 5/12 pitch is considered walkable with caution. Most professional roofers can work on a 22.6-degree slope using standard fall protection, but it is steep enough that slipping is a genuine risk. It is not flat enough to stand comfortably without bracing.

    2. Material Compatibility

    Not all roofing materials work well at 22.6 degrees.

    • Asphalt Shingles: These are the most common choice for a 5/12 pitch. They perform excellently at this angle, providing adequate water shedding.
    • Clay or Concrete Tiles: These often require a steeper pitch (usually 6/12 or higher) to prevent water infiltration under the tiles. While some interlocking tile systems allow for 5/12, it is near the lower limit.
    • Metal Roofing: Standing seam metal roofs work beautifully at 5/12. However, corrugated metal might require additional sealants at this lower angle to prevent capillary action (water wicking up between ridges).

    3. Water Drainage and Debris

    At 22.6 degrees, gravity does a decent job of pulling water off the roof. However, it is not steep enough to shed heavy snow loads rapidly. In regions with heavy snowfall, a 5/12 pitch may require stronger structural support to handle the weight of accumulated snow, as it won’t slide off as easily as it would on a 12/12 (45-degree) roof.

    Comparing 5/12 Pitch to Other Common Pitches

    To better contextualize the 22.62-degree angle, let’s compare it to other standard residential roof pitches. This comparison helps you understand where 5/12 fits in the spectrum of roofing designs.

    Roof PitchAngle (Degrees)ClassificationBest For
    2/129.46°Low SlopeModern styles, requires membrane roofing
    4/1218.43°Low-ModerateStandard suburban homes, good drainage
    5/1222.62°ModerateVersatile, walkable, standard shingles
    6/1226.57°Moderate-SteepTraditional colonial styles, better snow shed
    8/1233.69°SteepVictorian styles, high aesthetic appeal
    12/1245.00°Very SteepA-frame houses, extreme snow regions

    As you can see, the jump from 4/12 to 5/12 adds about 4 degrees, which noticeably changes the visual profile of the house and the ease of installation.

    Practical Applications: When to Choose a 5/12 Pitch

    If you are building a new home or replacing a roof, why might you choose a 5/12 pitch over a steeper or flatter option?

    Cost Efficiency

    A 5/12 pitch uses less material than a steeper roof. Since the surface area increases as the pitch gets steeper, a 22.6-degree roof is more material-efficient than a 45-degree roof. This translates to lower costs for shingles, underlayment, and labor time.

    Aesthetic Balance

    Architecturally, a 5/12 pitch offers a balanced look. It is not so flat that the house looks boxy or commercial, nor is it so steep that it overwhelms the facade. It is a classic choice for Ranch-style, Craftsman, and many contemporary suburban homes.

    Attic Space

    While a 5/12 pitch does not provide as much usable attic space as a 7/12 or 8/12 pitch, it still allows for sufficient ventilation and insulation depth. If you are not planning to convert your attic into living space, 5/12 is an economical choice that maximizes interior ceiling height without wasting volume on unused roof space.

    Expert Insight: The Importance of Precision

    According to general construction standards referenced in architectural engineering resources, precision in roof framing is critical. A deviation of even one degree can affect how ridge caps fit and how water flows into gutters. For more detailed information on geometric principles in construction, you can refer to foundational mathematical concepts on Wikipedia.

    Professional framers use speed squares and digital level apps to ensure the rafters are cut to the exact 22.62-degree angle. If you are DIY-ing a project, always double-check your cuts. A roof that is too flat may pool water, leading to leaks, while one that is too steep may cause shingles to slide before they adhere properly.

    FAQ Section

    Here are answers to the most common questions related to roof pitch angles.

    1. Is a 5/12 roof pitch considered steep?

    No, a 5/12 roof pitch is considered a moderate slope. It is steeper than a low-slope roof (like 2/12 or 3/12) but significantly flatter than steep roofs (like 8/12 or 12/12). It is a very common standard for residential housing in the United States.

    2. Can I walk on a 5/12 roof safely?

    You can walk on a 5/12 roof, but it requires caution. At 22.6 degrees, the slope is slippery, especially if wet or dusty. Professional roofers use harnesses and proper footwear. For homeowners, it is recommended to avoid walking on the roof unless necessary, and even then, use extreme care and safety gear.

    3. What is the rise per foot for a 5/12 pitch?

    The term “5/12” literally means the rise per foot. For every 12 inches (1 foot) of horizontal run, the roof rises 5 inches vertically. This ratio remains constant regardless of the total size of the roof.

    4. Does a 5/12 pitch require special shingles?

    Generally, no. Standard asphalt shingles are perfectly suitable for a 5/12 pitch. However, you must follow the manufacturer’s installation guidelines, which may require specific nailing patterns or underlayment types to ensure warranty validity. Always check with your shingle provider.

    5. How do I measure my roof pitch if I don’t know it?

    You can measure it from inside your attic. Place a level horizontally against the bottom of a rafter. Mark the 12-inch point on the level. Then, measure the vertical distance from that 12-inch mark up to the rafter. If that distance is 5 inches, you have a 5/12 pitch.

    6. Will a 5/12 roof handle heavy rain well?

    Yes, a 5/12 pitch provides adequate drainage for heavy rain. Water will flow off efficiently enough to prevent pooling, provided your gutters and downspouts are clean and correctly sized. It is not ideal for areas with extreme debris (like heavy pine needles), where a steeper pitch might help shed waste faster.

    Conclusion

    So, what is the angle of a 5/12 roof pitch? It is precisely 22.62 degrees. This moderate slope offers an excellent balance of cost-effectiveness, aesthetic appeal, and functional performance for most residential homes. It is steep enough to shed water effectively but gentle enough to keep material costs and installation complexity manageable.

    Whether you are planning a new build, a renovation, or simply satisfying your curiosity, understanding this angle helps you make informed decisions about materials and maintenance.

    Did you find this guide helpful? Share it with your friends or family who might be tackling their own roofing projects! Understanding the geometry of your home is the first step toward maintaining it properly.

  • Should I Kill The Zombie On The Roof Stalker 2?

    Should I Kill The Zombie On The Roof Stalker 2?

    Have you ever looked up at a crumbling rooftop in the Zone, spotted a shambling figure silhouetted against the gray sky, and hesitated? You are not alone. Many players find themselves asking, “Should I kill the zombie on the roof Stalker 2?” because the answer isn’t as simple as just pulling the trigger.

    In S.T.A.L.K.E.R. 2: Heart of Chornobyl, every bullet counts, and every noise can attract a pack of mutants or hostile factions. This guide will help you make the right choice based on your current gear, stealth capabilities, and survival needs. We will break down the risks, rewards, and tactical considerations so you can navigate the Exclusion Zone like a veteran.

    Why Is There a Zombie on the Roof?

    Before you decide whether to engage, it is crucial to understand what you are looking at. In the Stalker universe, zombies are not the fast-running infected of modern Hollywood movies. They are former stalkers who have been mentally broken by psychic emissions from artifacts or anomalies.

    These entities wander aimlessly, often mumbling incoherently. When you see one on a roof, it is usually stuck in a pathing loop or drawn to a specific anomaly cluster nearby. According to lore detailed on Wikipedia, the psychic nature of these zombies makes them unpredictable. They may not notice you immediately, but they can emit a shriek that alerts other enemies if provoked incorrectly.

    Understanding their behavior is the first step in deciding your course of action. Are they a threat? Or are they an opportunity?

    The Case for Killing the Zombie

    There are several compelling reasons to put that zombie down. For many players, especially those early in the game, resources are scarce.

    1. Loot and Resources

    Zombies often carry items from their previous lives as stalkers. While the loot is rarely high-tier military gear, you can frequently find:

    • Medkits: Basic bandages or anti-rad drugs.
    • Ammo: Low-caliber rounds for pistols or shotguns.
    • Food: Canned goods or bread that can prevent starvation.
    • Artifacts: Occasionally, a zombie may have picked up a minor artifact before turning.

    If you are low on supplies, eliminating the zombie provides a quick resource boost without the risk of fighting a heavily armed mercenary.

    2. Clearing Line of Sight

    Roof positions are strategic. A zombie standing on a roof might block your view of a sniper nest or an anomaly field. By removing the obstacle, you gain better situational awareness. Furthermore, if you plan to use that roof as a vantage point later, you do not want a moaning corpse giving away your position.

    3. Experience and Reputation

    While killing mindless zombies does not significantly boost your reputation with major factions like Duty or Freedom, it does contribute to your overall combat proficiency. In Stalker 2, handling threats efficiently builds your confidence and skill tree progression.

    Should I Kill The Zombie On The Roof Stalker 2

    The Case for Leaving It Alone

    However, there are strong arguments for ignoring the zombie entirely. Stealth is often your best weapon in the Zone.

    1. Noise Discipline

    Gunshots echo loudly in the urban ruins of the Exclusion Zone. Firing a rifle or even a pistol can attract:

    • Mutants: Blind dogs or fleshes may investigate the sound.
    • Hostile Stalkers: Bandits or mercenaries might assume a firefight is happening and move in to scavenge or ambush.
    • More Zombies: One shriek can draw a horde from nearby buildings.

    If you are already low on health or ammo, starting a chain reaction of enemies is a death sentence.

    2. Conservation of Ammo

    Ammunition is heavy and expensive. If you have to climb a ladder or jump across gaps to reach the roof, you expend stamina. If you then have to shoot the zombie, you waste bullets. If the zombie is far away and not threatening your immediate path, the cost-benefit analysis often favors leaving it be.

    3. Ethical Roleplay

    For players immersed in the lore, these zombies were once people. Some stalkers choose to avoid killing them unless necessary, viewing them as victims of the Zone rather than monsters. While this does not affect gameplay mechanics directly, it enhances the narrative experience for roleplayers.

    How to Decide: A Quick Comparison

    To help you make a split-second decision, refer to this comparison table.

    FactorKill the ZombieIgnore the Zombie
    Resource GainHigh (Loot)None
    Risk LevelMedium (Noise/Attraction)Low (Stealth)
    Ammo CostYesNo
    Time ConsumedHigh (Climbing/Shooting)Low (Keep moving)
    Best ForEarly game, low suppliesLate game, stealth runs

    Step-by-Step Guide: How to Safely Eliminate the Roof Zombie

    If you decide that the loot is worth the risk, follow these steps to minimize danger.

    1. Assess the Environment: Look around the base of the building. Are there other enemies? Is there an anomaly nearby? Ensure your retreat path is clear.
    2. Choose Your Weapon: Use a suppressed weapon if available. If not, a shotgun is ideal for close-range roof access, while a sniper rifle works for long-distance elimination. Avoid automatic rifles unless necessary.
    3. Approach Quietly: Do not sprint. Crouch-walk to the building entrance. Listen for the zombie’s moans to gauge its direction.
    4. Gain Position: Climb the ladder or use parkour to reach the roof. Keep your crosshair trained on the zombie.
    5. Execute the Shot: Aim for the head. A single headshot is usually sufficient to kill a standard zombie. If you miss, be prepared for it to shriek.
    6. Loot Quickly: Grab the essential items. Do not spend time organizing your inventory on the open roof.
    7. Retreat Immediately: Drop back down or move to a covered position. Wait a few seconds to ensure no other enemies were alerted.

    What If It’s Not a Regular Zombie?

    Be cautious. In Stalker 2, some enemies may appear similar to zombies but are actually mutated humans or psychic emissaries. If the entity glows with a strange aura or moves faster than usual, do not engage unless you are fully prepared. These variants can drain your psi-health rapidly.

    Always check your PDA scanner if possible. If the scanner identifies the target as a “Psi-Zombie” or “Mutant,” treat it as a high-threat enemy. In such cases, using psi-resistant artifacts or consuming anti-psychotics before engagement is recommended.

    FAQ Section

    Q1: Does killing zombies affect my faction reputation?

    Generally, no. Factions like Duty, Freedom, and Monolith do not penalize you for killing zombies, as they are considered hazards of the Zone. However, killing a stalker who has just turned might have different implications depending on the specific quest context.

    Q2: Can zombies drop rare artifacts?

    It is rare, but possible. Most zombies carry common junk or basic supplies. Rare artifacts are more commonly found in anomaly fields or on high-level mutant bosses. Do not rely on zombies for high-tier loot.

    Q3: What is the best weapon for killing roof zombies?

    A silenced pistol or a bolt-action sniper rifle is ideal. Silence prevents attracting additional enemies. If you lack a silencer, a shotgun is effective if you can get close without being detected.

    Q4: Will the zombie fall off the roof if I shoot it?

    Physics in Stalker 2 are realistic. If you shoot a zombie near the edge, it may fall off. This can be useful if you want to avoid climbing up. However, looting a body on the ground level is easier than looting one on a roof, so consider shooting it off the edge if you cannot reach it safely.

    Q5: Do I need special ammo to kill zombies?

    No. Standard ammunition works fine. Zombies have low armor resistance. Headshots are the most efficient way to conserve ammo and ensure a quick kill.

    Q6: Can I sneak past the zombie without killing it?

    Yes. Zombies have poor hearing and vision. If you stay crouched and avoid walking directly into their line of sight, you can often bypass them entirely. Use the environment, such as walls and crates, for cover.

    Conclusion

    So, should you kill the zombie on the roof in Stalker 2? The answer depends on your current situation. If you are desperate for ammo and medkits, and the area is clear, go for the kill. It is a valuable source of early-game resources. However, if you are trying to maintain stealth, conserve ammunition, or are low on health, it is often wiser to leave the zombie alone and slip past unnoticed.

    Remember, the Zone punishes recklessness. Every shot fired is a beacon to other dangers. Assess, adapt, and survive.

    Did this guide help you make the right call? Share your own rooftop encounters and strategies on social media using #Stalker2Tips. Let’s help each other survive the Heart of Chornobyl!

  • How Much Does It Cost To Redo A Flat Roof?

    How Much Does It Cost To Redo A Flat Roof?

    Leaking ceilings and pooling water are more than just annoyances; they are urgent signals that your building’s protection is failing. If you are staring at water stains or noticing your energy bills creeping up, you are likely asking the critical question: how much does it cost to redo a flat roof?

    Understanding the financial scope of this project is essential for effective planning. In this guide, we will break down the costs, materials, and labor factors specific to the US market in 2026, helping you make an informed decision without the stress of hidden fees.

    Understanding the Average Cost Range

    When homeowners and business owners ask about flat roof replacement costs, they are often looking for a single number. However, the reality is a range influenced by size, location, and material choice.

    As of late 2026, the national average cost to replace a flat roof in the United States typically falls between $5,000 and $15,000 for standard residential sizes (approx. 1,000–1,500 sq. ft.). For larger commercial properties, costs can easily exceed $30,000.

    On a per-square-foot basis, you can expect to pay anywhere from $4.00 to $12.00 per square foot. This wide variance exists because “flat roof” is a category that includes several distinct material types, each with different lifespans and installation complexities.

    Key Cost Drivers

    • Roof Size: Measured in “squares” (100 sq. ft.). Larger roofs benefit from economies of scale but require more labor hours.
    • Accessibility: Is your roof on a single-story home or a five-story office building? Higher roofs require cranes or specialized safety equipment, increasing labor costs by 15–20%.
    • Existing Layers: If your current roof has multiple layers of old material, removal and disposal fees will add significantly to the bill.

    Material Choices: Which Option Fits Your Budget?

    The material you choose is the single biggest factor in determining the final price. Here is a breakdown of the most common flat roofing materials used in the US today.

    1. EPDM (Ethylene Propylene Diene Monomer)

    Often called “rubber roofing,” EPDM is a popular choice for its durability and ease of installation.

    • Cost: $4.00 – $8.00 per sq. ft.
    • Lifespan: 20–30 years.
    • Pros: Excellent resistance to UV rays and hail; flexible in cold temperatures.
    • Cons: Can be prone to punctures; seams must be glued or taped carefully.

    2. TPO (Thermoplastic Polyolefin)

    TPO has gained massive popularity in recent years due to its energy efficiency and white reflective surface.

    • Cost: $5.50 – $9.50 per sq. ft.
    • Lifespan: 20–25 years.
    • Pros: Highly reflective (lowers cooling costs); resistant to mold and algae; strong seam welding.
    • Cons: Quality varies by manufacturer; thinner membranes may tear during installation if not handled properly.

    3. PVC (Polyvinyl Chloride)

    PVC is known for its chemical resistance and strength, making it ideal for restaurants or industrial buildings where grease or chemicals might be present.

    • Cost: $7.00 – $12.00 per sq. ft.
    • Lifespan: 20–30 years.
    • Pros: Fire-resistant; highly durable against chemical exposure; strong welded seams.
    • Cons: More expensive; can become brittle over time if plasticizers migrate out.

    4. Modified Bitumen

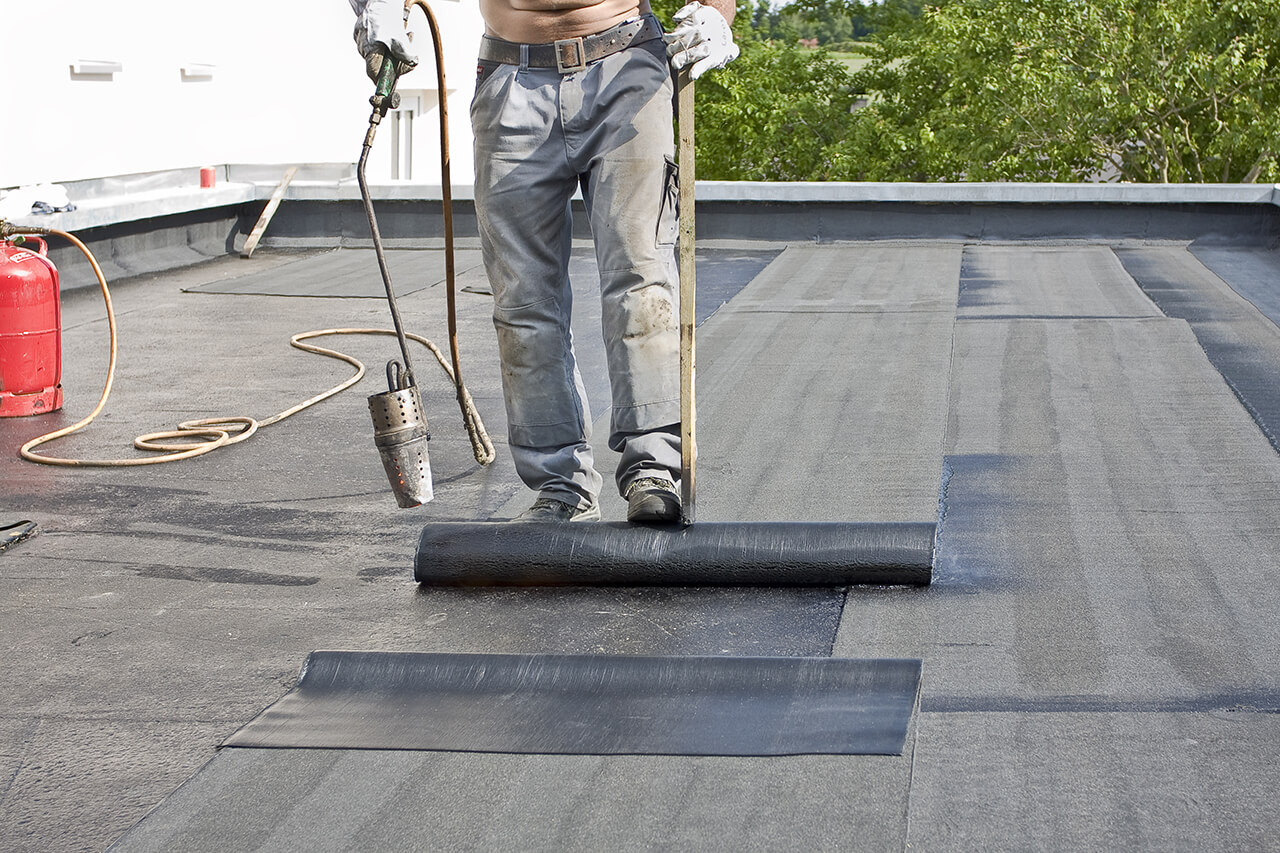
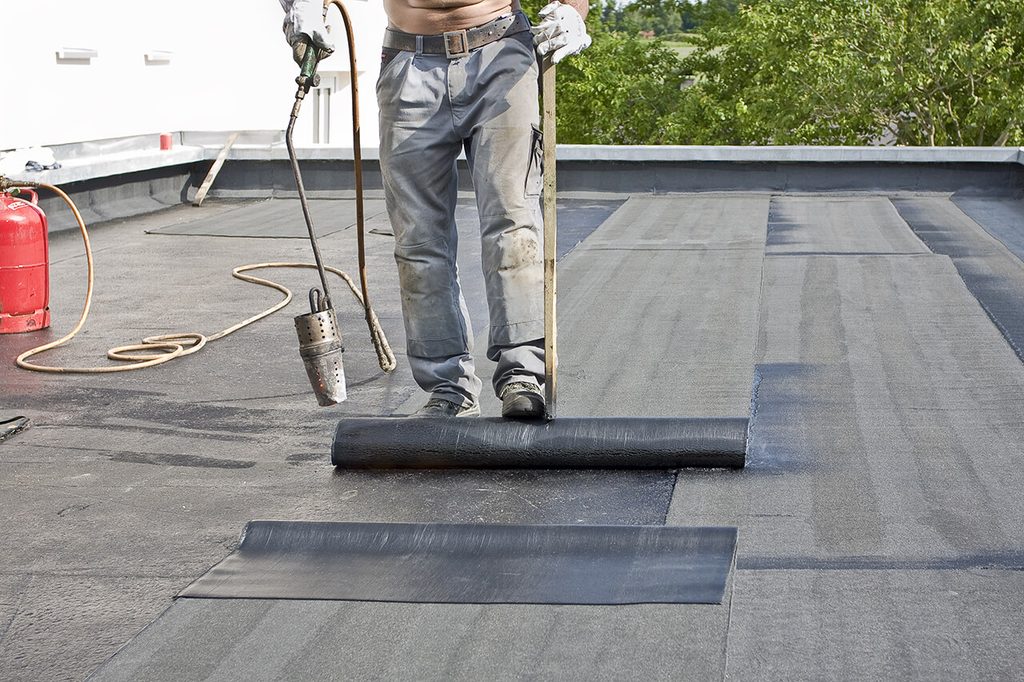
    This is an asphalt-based product reinforced with fiberglass or polyester mats. It is often installed using torches or hot mops.

    • Cost: $5.00 – $9.00 per sq. ft.
    • Lifespan: 15–20 years.
    • Pros: Familiar technology for many roofers; good puncture resistance.
    • Cons: Heavy; installation involves open flames (fire risk); absorbs heat unless coated with reflective paint.
    MaterialAvg. Cost per Sq. Ft.LifespanBest For
    EPDM$4.00 – $8.0020-30 YearsResidential & Small Commercial
    TPO$5.50 – $9.5020-25 YearsEnergy Efficiency Focus
    PVC$7.00 – $12.0020-30 YearsChemical/Grease Exposure
    Mod. Bitumen$5.00 – $9.0015-20 YearsHigh Traffic Areas
    How Much Does It Cost To Redo A Flat Roof

    Labor and Additional Expenses

    While materials account for roughly 40–50% of the total cost, labor and ancillary expenses make up the rest. It is crucial to account for these “hidden” costs to avoid budget overruns.

    Removal and Disposal

    If your existing roof is damaged beyond repair, it must be removed. Most local regulations prohibit installing new roofing over more than two existing layers.

    • Cost: $1.00 – $3.00 per sq. ft.
    • Note: Disposal fees vary by county. Always ask if the quote includes dumpster rental and landfill fees.

    Insulation Upgrades

    Modern building codes in many US states now require higher R-values for roof insulation. If your current insulation is wet or compressed, it must be replaced.

    • Cost: $1.50 – $3.50 per sq. ft. depending on thickness and type (polyiso is common).

    Flashing and Penetrations

    Flat roofs are not perfectly flat; they have a slight pitch for drainage. They also feature vents, skylights, and HVAC units. Each penetration requires custom flashing.

    • Cost: $150 – $300 per penetration.
    • Tip: Poor flashing is the #1 cause of leaks. Do not skimp on high-quality metal or membrane flashing here.

    The Installation Process: What to Expect

    Understanding the workflow helps you verify that your contractor is doing the job correctly. A professional flat roof replacement generally follows these steps:

    1. Inspection and Measurement: The contractor measures the roof area accurately and inspects the deck (the wood or concrete base) for rot or damage.
    2. Removal of Old Material: Existing shingles or membranes are stripped away. The deck is swept clean.
    3. Deck Repair: Any rotten wood or cracked concrete is repaired. This is critical for the longevity of the new roof.
    4. Insulation Installation: New rigid foam boards are laid out and secured. Seams are taped to prevent thermal bridging.
    5. Membrane Installation:
      • For EPDM, the rubber sheet is rolled out, cut to size, and adhered using contact cement or tape.
      • For TPO/PVC, sheets are heat-welded together using a hot air gun to create a monolithic, watertight seal.
    6. Flashing and Detail Work: Metal or membrane flashing is installed around edges, walls, and penetrations.
    7. Final Inspection: The contractor checks all seams and drains to ensure proper water flow.

    For more detailed technical standards on roofing materials, you can refer to general construction guidelines on Wikipedia.

    Frequently Asked Questions (FAQ)

    1. Can I install a new flat roof over the old one?

    In many cases, yes. This is called a “roof-over.” It saves on disposal costs and protects the building from weather during installation. However, you can only do this if the existing roof has only one layer and the deck is structurally sound. Always check local building codes, as some jurisdictions limit the number of layers.

    2. How long does it take to replace a flat roof?

    For an average residential flat roof (1,000–1,500 sq. ft.), the process usually takes 2 to 4 days. Larger commercial projects can take 1–2 weeks. Weather delays are common, so build some buffer time into your schedule.

    3. Is a flat roof more expensive than a sloped roof?

    Generally, flat roofs are less expensive initially than complex sloped roofs (like slate or tile) because they require less material and simpler framing. However, maintenance costs can be higher if not inspected regularly, as flat roofs are more prone to pooling water.

    4. What is the best flat roof material for heavy rain areas?

    TPO and PVC are excellent choices for rainy climates because their seams are heat-welded, creating a continuous waterproof barrier. EPDM is also good but relies on adhesive tapes or glue, which can degrade faster in constant moisture if not maintained.

    5. Does homeowners insurance cover flat roof replacement?

    Insurance typically covers roof replacement only if the damage is caused by a sudden, covered peril like a storm, hail, or falling tree. It usually does not cover wear and tear, age-related deterioration, or lack of maintenance. Check your policy specifics.

    Conclusion

    Knowing how much does it cost to redo a flat roof empowers you to negotiate better with contractors and choose materials that align with your long-term goals. While the upfront cost ranges from $4 to $12 per square foot, investing in quality materials like TPO or PVC can save you money on energy bills and repairs for decades.

    Don’t let the complexity of roofing projects overwhelm you. Start by getting three detailed quotes from licensed, insured professionals in your area. Compare not just the price, but the warranty terms and material specifications.

    Found this guide helpful? Share it with your neighbors or on social media to help others navigate their roofing projects with confidence!

  • Who Is The Best Person To Fix A Leaking Roof?

    Who Is The Best Person To Fix A Leaking Roof?

    Water dripping from your ceiling is more than just an annoyance; it is a ticking time bomb for your home’s structural integrity and your wallet. Seeing those dark stains spread across your drywall can induce immediate panic, leading many homeowners to grab a ladder and a tube of caulk in a desperate attempt to stop the flow. However, before you risk your safety or void your insurance policy with a DIY patch job, you need to ask the critical question: Who is the best person to fix a leaking roof?

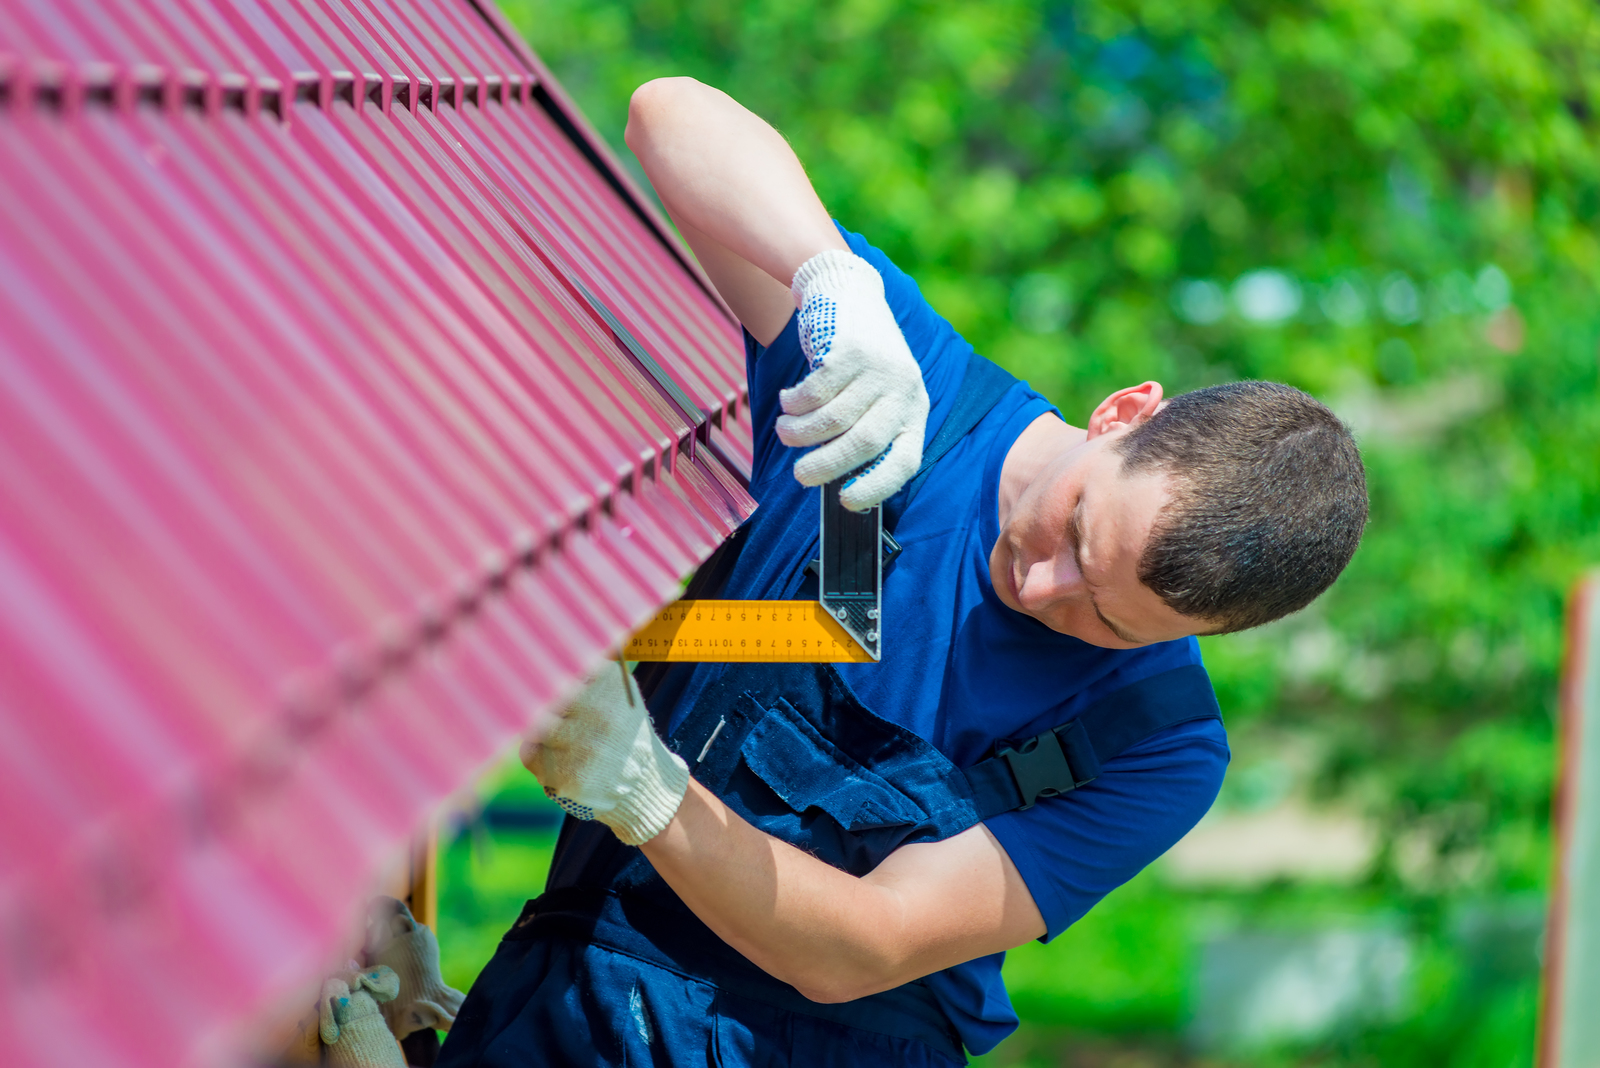
    The short answer is a licensed, insured, and experienced roofing contractor. While handymen and general contractors have their place in home maintenance, roof leaks require specialized diagnostic skills and material-specific knowledge that only a professional roofer possesses. In this guide, we will break down exactly why specialists are superior for this task, how to vet them, and what steps you should take immediately when you spot a leak.

    Why a Licensed Roofing Contractor Is the Top Choice

    When water enters your home, the visible drip is rarely the entry point. Water travels along rafters, pipes, and insulation before finding a way out. This phenomenon, known as “water migration,” makes locating the source incredibly difficult for the untrained eye.

    A licensed roofing contractor specializes exclusively in roof systems. They understand the complex interplay between shingles, underlayment, flashing, ventilation, and drainage. According to industry standards, improper repair can lead to trapped moisture, which causes mold growth and wood rot within months.

    The Risk of General Handymen

    While a handyman might be cheaper and faster for minor tasks like replacing a single loose shingle on a low-pitch roof, they often lack the specific liability insurance required for high-risk roof work. If a handyman falls off your roof or causes further damage to the structure, you could be held personally liable. A professional roofing company carries both Workers’ Compensation and General Liability Insurance, protecting you from financial ruin.

    Key Differences: Roofer vs. Handyman vs. General Contractor

    To help you make an informed decision, let’s compare the three most common options homeowners consider. Understanding these distinctions is vital for protecting your investment.

    FeatureLicensed RooferGeneral ContractorHandyman
    SpecializationHigh (Roofs only)Medium (Whole house)Low (Various small tasks)
    InsuranceSpecific Roofing LiabilityGeneral LiabilityOften Uninsured/Limited
    WarrantyManufacturer & Labor WarrantyLimited Labor WarrantyRarely Offered
    Diagnostic SkillExpert in water tracingVariableBasic Visual Inspection
    CostHigher Initial CostModerateLowest Initial Cost
    Best ForComplex leaks, storm damageFull renovationsMinor cosmetic fixes

    As shown in the table, while a handyman offers a lower upfront cost, the long-term risk is significantly higher. For a problem as critical as a leak, the expertise of a licensed roofer ensures the fix lasts.

    Who Is The Best Person To Fix A Leaking Roof

    How to Identify the Source of Your Roof Leak

    Before calling a professional, it helps to understand what they will be looking for. This knowledge empowers you to communicate effectively with your contractor. Most leaks are not caused by holes in the middle of your shingles but by failures in the “flashings”—the metal strips used to seal transitions.

    Common entry points include:

    • Chimney Flashing: The seal around the chimney base often cracks due to thermal expansion.
    • Vent Pipes: Rubber boots around plumbing vents degrade under UV exposure.
    • Valleys: Where two roof planes meet, debris accumulation can force water under shingles.
    • Skylights: Improper installation or aged seals are frequent culprits.

    If you are safe to do so, inspect your attic during daylight hours. Look for beams of light shining through the roof deck or dark stains on the underside of the plywood. This information can save your roofer time and potentially reduce diagnostic fees.

    Step-by-Step: What to Do Before the Professional Arrives

    While waiting for the best person to fix a leaking roof, you must mitigate further damage. Follow these concrete steps to protect your interior:

    1. Contain the Water: Place a bucket or large bin directly under the drip. If the water is spraying, use a thumbtack to pierce the center of the bulging drywall bubble to release pressure and prevent ceiling collapse.
    2. Document the Damage: Take clear photos and videos of the leak, the water stain, and any damaged belongings. This is crucial for insurance claims.
    3. Temporary Exterior Patch (Safety First): Only if your roof is low-pitch and accessible safely, you can apply a heavy-duty tarp secured with 2x4s nailed into the roof deck (not just the shingles). Note: Do not use silicone caulk on wet surfaces; it will not adhere.
    4. Clear Debris: If safe, remove leaves or branches from gutters and valleys near the suspected leak area to improve drainage.

    For more detailed information on roofing materials and construction standards, you can refer to Wikipedia’s article on Roofing, which provides a comprehensive overview of global roofing practices and material types.

    Red Flags: How to Avoid Roofing Scams

    Unfortunately, the roofing industry is plagued by “storm chasers”—unscrupulous operators who descend on neighborhoods after severe weather. They often demand full payment upfront and perform subpar work.

    Watch out for these warning signs:

    • Door-to-Door Sales: Reputable roofers rarely solicit business door-to-door.
    • Cash-Only Deals: Always pay by check or credit card for traceability.
    • No Physical Address: Ensure the company has a local, verifiable office.
    • Pressure Tactics: Be wary of anyone claiming the offer is “valid only today.”

    Always verify their license number with your state’s licensing board. A legitimate professional will willingly provide this information.

    FAQ Section

    1. Can I fix a small roof leak myself?

    While you can apply temporary patches like roof cement or tarps, permanent repairs require identifying the root cause. DIY fixes often fail because they address the symptom (the hole) rather than the cause (failed flashing or ventilation issues). For anything beyond a single missing shingle on a low roof, hire a pro.

    2. How much does it cost to fix a leaking roof?

    Costs vary widely based on location and severity. Minor flashings repairs may range from $300 to $600, while extensive structural repairs can exceed $2,000. Always get at least three detailed quotes to ensure fair pricing.

    3. Does homeowners insurance cover roof leaks?

    It depends on the cause. Insurance typically covers “sudden and accidental” damage, such as wind storms or falling trees. However, they usually deny claims for leaks caused by lack of maintenance, wear and tear, or age. Review your policy carefully.

    4. How long does a roof repair take?

    Minor repairs often take half a day to one day. More complex issues involving decking replacement or extensive flashing work may take 2–3 days. Weather conditions can also impact the timeline, as roofs cannot be repaired effectively in rain.

    5. What questions should I ask a roofing contractor?

    Ask about their license number, insurance coverage, warranty details (both manufacturer and labor), and request references from recent jobs in your area. A trustworthy contractor will answer these transparently.

    Conclusion

    Determining who is the best person to fix a leaking roof is a decision that impacts the safety and value of your home. While the temptation to save money with a handyman or DIY approach is understandable, the complexity of modern roofing systems demands specialized expertise. A licensed, insured roofing contractor offers the diagnostic precision, proper tools, and warranty protection that other providers simply cannot match.

    Don’t wait for a small drip to become a catastrophic flood. Act quickly, document the damage, and call a reputable professional. By choosing the right expert, you ensure your home remains dry, safe, and secure for years to come.

    Found this guide helpful? Share it with your neighbors on social media to help them protect their homes too!

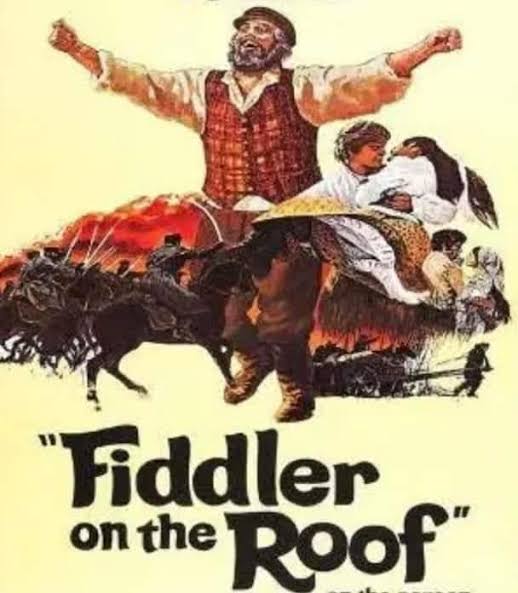
  • What Does The Fiddler In Fiddler On The Roof Represent?

    What Does The Fiddler In Fiddler On The Roof Represent?

    Have you ever watched Fiddler on the Roof and found yourself mesmerized by that lone violinist playing on the precarious rooftop? You are not alone. Many viewers enjoy the catchy tunes and heartfelt story but leave with a lingering question about the deeper meaning behind that opening image. Understanding what does the fiddler in Fiddler on the Roof represent is key to unlocking the emotional core of this timeless masterpiece.

    This article will guide you through the historical, cultural, and theatrical significance of the fiddler. We will explore how this character serves as more than just a musician; he is the living embodiment of the delicate balance between holding onto heritage and adapting to a changing world.

    The Core Symbol: Tradition and Fragility

    To truly grasp the narrative arc of Tevye the milkman and his family, we must first look at the prologue. The fiddler is not merely a background character; he is the central metaphor for the entire play.

    The Balance of Life

    In the opening monologue, Tevye explains why there is a fiddler on the roof. He states that everyone in their little village of Anatevka is a fiddler, trying to scratch out a pleasant, simple tune without breaking his neck.

    The fiddler represents tradition. Just as a fiddler must maintain balance while playing complex melodies on a sloped, unstable surface, the Jewish community in Anatevka must maintain their religious and cultural traditions amidst political instability and social change.

    • The Roof: Represents the precariousness of their existence. It is high, exposed to the elements, and dangerous.
    • The Fiddle: Represents the culture, faith, and daily rituals that give life meaning.
    • The Music: Represents the joy and continuity of life despite hardship.

    If the fiddler loses his balance, he falls. If the community abandons its traditions entirely, it loses its identity. However, if he stands too rigidly still, he cannot play the music. This illustrates the show’s central thesis: Tradition is necessary for survival, but it requires flexibility to endure.

    Why Is the Fiddler on the Roof?

    You might ask, why put the musician in such a dangerous place? Why not on solid ground? This specific imagery was chosen deliberately by the creators, Sheldon Harnick (lyrics) and Jerry Bock (music), along with director Harold Prince.

    A Metaphor for Jewish History

    The position of the fiddler mirrors the historical experience of Eastern European Jews in the late 19th and early 20th centuries. They lived in a “shtetl” (small town) environment that was often hostile or indifferent to their presence.

    Playing music on a roof suggests:

    1. Visibility: Their culture is distinct and visible to the outside world.
    2. Vulnerability: They are exposed to the winds of political change (represented by the Tsar’s edicts and eventual expulsion).
    3. Resilience: Despite the danger, they continue to make music. They choose joy and faith over despair.

    According to literary analysts, the fiddler is also a nod to the Yiddish phrase “a fiddler on the roof” which implies doing something difficult or absurd with grace. It highlights the humor and irony that permeates the Jewish experience depicted in the show.

    What Does The Fiddler In Fiddler On The Roof Represent

    How Does the Fiddler Reflect Tevye’s Struggle?

    While the fiddler appears primarily in the beginning and end, his presence is felt throughout every decision Tevye makes. Tevye is the human counterpart to the symbolic fiddler.

    The Three Daughters as Changing Tunes

    As the plot progresses, Tevye’s three eldest daughters marry in ways that increasingly challenge tradition:

    • Tzeitel marries Lazar Wolf, an older butcher, rather than the young tailor her mother chose. This is a small adjustment to tradition.
    • Hodel marries Perchik, a revolutionary student who is sent to Siberia. This challenges political and social norms.
    • Chava marries Tevyе, a Russian Orthodox Christian. This breaks the most fundamental religious taboo.

    With each daughter’s choice, the “music” becomes more complex. Tevye struggles to keep his balance. He bends, he creaks, but he tries not to break. The fiddler on the roof represents the ideal state of balance that Tevye is striving for but finding harder to maintain as the world around him shifts.

    Expert Insight: Cultural historians note that the fiddler is likely inspired by Marc Chagall’s paintings. Chagall, a Russian-French artist of Belarusian Jewish origin, frequently depicted fiddlers floating above villages. His work captured the dreamlike, spiritual quality of shtetl life, which directly influenced the visual aesthetic of the musical. For more on the artistic origins, you can read about Marc Chagall’s influence on modern art.

    The Disappearance and Return of the Fiddler

    One of the most poignant moments in the musical is the absence of the fiddler during the middle acts. As Tevye faces greater crises—poverty, exile, and familial rifts—the music stops. The balance is lost.

    However, in the final scene, as the villagers are forced to leave Anatevka, the fiddler reappears. He follows Tevye and the other refugees as they walk away from their homes.

    What Does This Final Image Mean?

    The return of the fiddler signifies that while the place may be lost, the culture remains.

    • Physical Home: Anatevka is gone. The houses are empty.
    • Cultural Home: The music travels with them. The fiddler is no longer on the roof of a house, but on the road of life.

    This transition is crucial. It suggests that tradition is not tied to a specific geographic location. It is portable. As long as they keep playing their “tune,” they remain who they are. The fiddler represents the endurance of the Jewish spirit in the face of diaspora and displacement.

    Comparison: Stability vs. Adaptation

    To better understand the fiddler’s role, let’s look at the tension between staying still and moving forward.

    AspectStanding Still (Rigid Tradition)Playing on the Roof (Balanced Tradition)Falling Off (Loss of Identity)
    Risk LevelLow immediate risk, high long-term irrelevance.High risk, requires constant effort.Total loss of cultural connection.
    OutcomeStagnation.Survival and continuity.Assimilation or destruction.
    Tevye’s View“It’s not our custom.”“I try to bend so I don’t break.”Fear of God’s punishment.

    The fiddler chooses the middle path. He does not stand still, nor does he fall. He moves with the music. This is the ultimate lesson for the audience: Life requires dynamic balance.

    FAQ Section

    1. Is the fiddler based on a real person?

    No, the fiddler is not a specific historical figure. He is a symbolic character created for the musical. However, he is heavily inspired by the paintings of Marc Chagall and the general archetype of the Jewish folk musician in Eastern Europe.

    2. Why is the fiddler silent for most of the play?

    The fiddler only plays during the prologue and the epilogue. This structural choice emphasizes that the “balance” is established at the start and tested throughout the story. His silence during the main action allows the audience to focus on Tevye’s internal struggle without distraction. When he returns at the end, it signals resolution and continuity.

    3. What instrument does the fiddler play?

    Despite the name, the instrument is technically a violin. In Yiddish and Eastern European folk contexts, the terms are often used interchangeably, but the style of playing is distinctively klezmer or folk-based, characterized by expressive slides and emotional depth.

    4. Does the fiddler represent God?

    Some interpretations suggest the fiddler represents a divine presence or conscience, watching over the village. While not explicitly stated in the text, the fiddler’s omnipresence and his role in maintaining order align with spiritual symbolism. However, he is more commonly viewed as representing Tradition itself.

    5. How does the fiddler relate to the title?

    The title Fiddler on the Roof comes directly from Tevye’s explanation of the metaphor. It encapsulates the entire theme of the show: the difficulty of maintaining one’s identity and traditions in a world that is constantly trying to knock you off balance.

    6. Can the fiddler be seen as a symbol of hope?

    Yes. Even when the villagers are expelled and their homes are destroyed, the fiddler continues to play. This offers a powerful message of hope. It suggests that culture and community are stronger than physical structures. As long as the music plays, the spirit of Anatevka survives.

    Conclusion

    So, what does the fiddler in Fiddler on the Roof represent? He is the heartbeat of the story. He symbolizes the fragile yet resilient nature of tradition. He reminds us that life is a balancing act, requiring us to hold tight to our roots while adapting to the winds of change.

    Through the fiddler, we learn that tradition is not a static monument but a living, breathing practice. It requires effort, skill, and sometimes, a bit of courage to stay on the roof.

    Did this explanation help clarify the deeper meanings of the musical? If you found this analysis insightful, please share it with your fellow theater lovers on social media. Let’s keep the conversation—and the music—alive!

  • Remove Doors & Roof: Unibody Vehicle Guide

    Remove Doors & Roof: Unibody Vehicle Guide

    Have you ever looked at your SUV or crossover and imagined the freedom of open-air driving, only to hesitate because you weren’t sure if it was safe? Many enthusiasts dream of stripping down their rides for off-road adventures or summer cruises, but removing the doors and roof from a unibody construction vehicle is not as straightforward as it seems. Unlike traditional body-on-frame trucks, these vehicles rely on their entire shell for strength, making modifications a delicate balance between fun and structural integrity.

    In this guide, we will walk you through everything you need to know about this popular modification. We will explore the engineering behind unibody designs, the potential risks involved, and how to approach this project safely and legally. Whether you are a weekend warrior or a curious car owner, understanding the mechanics is crucial before you pick up a wrench.

    Why Is Removing Parts from a Unibody Vehicle Different?

    To understand the complexity of this task, we must first look at what makes a unibody vehicle unique. In traditional body-on-frame vehicles, like many older trucks and heavy-duty SUVs, the body sits on top of a separate, rigid ladder frame. This frame handles all the stress of driving, suspension, and engine torque. The body itself is largely cosmetic and provides passenger comfort.

    However, in a unibody (monocoque) construction, the body and frame are integrated into a single structure. The floor pan, roof, pillars, and side panels all work together to distribute stress and maintain rigidity. When you remove major components like the roof and doors, you are effectively removing key structural members that resist twisting and bending forces.

    According to automotive engineering principles, the roof and door pillars contribute significantly to the vehicle’s torsional stiffness. Without them, the chassis can flex more than intended during cornering or when hitting bumps. This flexing can lead to premature wear on suspension components, misaligned doors (if you put them back on), and even cracks in the windshield or dashboard over time.

    For a deeper technical understanding of monocoque structures, you can refer to the detailed explanation on Wikipedia’s Monocoque page. This resource highlights how aerospace and automotive industries utilize this design for weight savings and efficiency, but also notes the inherent trade-offs in modularity.

    What Are the Risks of Removing the Roof and Doors?

    Before you start unbolted hinges, it is vital to weigh the pros and cons. While the aesthetic and experiential benefits are clear, the risks are substantial if not managed correctly.

    Structural Compromise

    The most immediate risk is the loss of structural rigidity. In a crash scenario, the roof and pillars are designed to protect occupants by maintaining the survival space. Removing them eliminates this protection. Furthermore, daily driving stresses—such as going over speed bumps or taking sharp turns—can cause the vehicle body to twist. Over time, this can lead to:

    • Creaking noises from the dashboard and interior panels.
    • Difficulty closing remaining doors due to frame misalignment.
    • Cracks in the windshield or rear window glass.

    Safety Concerns

    Without doors and a roof, you lose critical safety features. Side-impact airbags, often located in the doors or roof rails, may become ineffective or trigger incorrectly. Additionally, you are exposed to the elements and road debris. In an accident, ejection risk increases significantly without the containment provided by the original structure.

    Legal and Insurance Issues

    In the United States, vehicle modification laws vary by state. Some states require that all original safety equipment remain functional. If you remove doors, you may no longer have legal side mirrors or proper latching mechanisms. Moreover, insurance companies may deny claims if they determine that modifications contributed to damage or injury. Always check with your provider before making permanent changes.

    Removing The Doors And Roof From A Unibody Construction Vehicle:

    Step-by-Step Guide to Safe Removal

    If you have assessed the risks and decided to proceed, follow these steps to minimize damage to your vehicle. Note that this guide assumes you are using bolt-on removal methods rather than cutting metal, which is irreversible and highly discouraged for daily drivers.

    1. Preparation and Tools

    Gather the necessary tools before starting. You will typically need:

    • A socket set (metric or imperial, depending on your vehicle).
    • Torx bits (common in modern European and American cars).
    • A helper (some doors and roof panels are heavy and awkward).
    • Storage bags or labels for bolts and screws.
    • Protective covers for paint and interior surfaces.

    2. Disconnect Electrical Components

    Modern vehicles have complex wiring harnesses running through doors and roof pillars. Before removing any panel:

    • Disconnect the negative battery terminal to prevent short circuits.
    • Carefully detach electrical connectors for power windows, locks, speakers, and airbags.
    • Use a trim removal tool to avoid damaging plastic clips.

    3. Remove the Doors

    Start with the doors to reduce weight and improve access to the roof.

    • Support the door with a jack or have a helper hold it steady.
    • Remove the hinge bolts slowly. Do not remove all bolts at once; loosen them gradually to ensure the door does not shift unexpectedly.
    • Once detached, store the doors in a safe, dry place. Keep the bolts organized.

    4. Remove the Roof Panels

    If your vehicle has a removable hardtop or soft top, follow the manufacturer’s instructions. For fixed roofs, removal is generally not recommended unless the vehicle is specifically designed for it (like some Jeep Wrangler models, though note that the Wrangler uses a hybrid design with significant frame support).

    • Locate the mounting points, usually found inside the cabin near the pillars.
    • Unscrew the fasteners carefully.
    • Lift the roof panel straight up to avoid scratching the paint or damaging weather stripping.

    5. Reinforcement (Optional but Recommended)

    Consider installing aftermarket roll bars or strut braces. These can help restore some of the lost torsional rigidity. While they do not fully replace the structural integrity of the original roof, they provide additional support and safety in case of a rollover.

    Pros and Cons: Is It Worth It?

    To help you decide, here is a quick comparison of the benefits and drawbacks.

    FeatureBenefitsDrawbacks
    Driving ExperienceOpen-air feel, better visibility, connection to nature.Exposure to noise, wind, rain, and dust.
    AestheticsUnique look, stands out in crowds.May look incomplete or “chopped” if not done well.
    PerformanceReduced weight can slightly improve acceleration.Loss of aerodynamic efficiency; increased drag.
    SafetyEasier exit in certain emergency scenarios.Higher risk of injury in collisions; no roof protection.
    MaintenanceEasier access to interior for cleaning.Increased wear on interior materials due to sun exposure.

    Frequently Asked Questions

    1. Can I drive my unibody car without doors on the highway?

    While physically possible, it is often illegal and unsafe. Many states require doors to be present and functional for highway use. Additionally, high-speed winds can create dangerous turbulence inside the cabin, affecting control and comfort. Always check local traffic laws before attempting this.

    2. Will removing the roof void my warranty?

    Yes, in most cases. Modifying the structural components of your vehicle can void the manufacturer’s warranty, especially if subsequent issues arise related to the chassis, suspension, or electrical systems. Consult your dealer’s policy before proceeding.

    3. Do I need to reinforce the chassis after removal?

    It is highly recommended. Installing a roll cage or strut braces can help mitigate the loss of torsional stiffness. This is particularly important if you plan to take the vehicle off-road or drive aggressively. Without reinforcement, you risk long-term damage to the body panels and alignment.

    4. How do I store the removed doors and roof?

    Store them in a climate-controlled environment to prevent warping or damage. Use padded racks or stands to keep them off the ground. Cover them with breathable fabric to protect against dust and scratches. Avoid stacking heavy items on top of glass or painted surfaces.

    5. Are there specific vehicles designed for this?

    Yes, some vehicles are engineered with removable tops and doors in mind, such as the Jeep Wrangler and Ford Bronco. However, even these vehicles have structural limits. The Wrangler, for instance, has a robust frame that helps compensate for the lack of a fixed roof, but it still relies on its body structure for overall rigidity. Always consult your owner’s manual for specific guidelines.

    Conclusion

    Removing the doors and roof from a unibody construction vehicle is a bold modification that offers unparalleled freedom and connection to the outdoors. However, it comes with significant responsibilities regarding safety, legality, and vehicle maintenance. By understanding the structural role these components play, you can make informed decisions and take necessary precautions to protect both yourself and your car.

    If you decide to go ahead, prioritize safety reinforcements, stay within legal boundaries, and respect the engineering limits of your vehicle. Share this guide with fellow enthusiasts who might be considering the same mod, and let us know in the comments about your open-air driving experiences! Stay safe and enjoy the ride.

  • Roof Pain? Quick Relief & Causes

    Roof Pain? Quick Relief & Causes

    Have you ever taken a bite of piping hot pizza or crunchy chips, only to be greeted by a sharp, throbbing pain in the upper part of your mouth? It is an incredibly uncomfortable sensation that can make eating, drinking, and even speaking difficult. If you are currently wincing in discomfort and searching for what to do when the roof of your mouth hurts, you are not alone. This guide provides immediate, actionable steps to soothe the pain and explains why it happens, helping you recover faster and prevent future irritation.

    Why Does the Roof of My Mouth Hurt?

    Before diving into solutions, it is helpful to understand the culprit. The roof of your mouth, known medically as the palate, is covered by delicate mucous membranes. These tissues are sensitive to temperature, texture, and chemical irritants.

    According to dental health statistics, thermal burns from hot food and beverages are among the most common minor oral injuries. However, pain in this area isn’t always due to heat. Identifying the root cause ensures you apply the right remedy.

    Common Causes of Palate Pain

    • Thermal Burns: Consuming food or drinks that are too hot (above 60°C/140°F) can scald the tissue instantly.
    • Abrasion Injury: Eating hard, sharp foods like tortilla chips, crusty bread, or candy can scratch the soft tissue.
    • Canker Sores (Aphthous Ulcers): Small, shallow lesions that develop on the soft tissues in your mouth or at the base of your gums.
    • Oral Thrush: A fungal infection causing creamy white lesions, often seen in infants, the elderly, or those with compromised immune systems.
    • Allergic Reactions: Sensitivity to certain foods, toothpaste ingredients (like sodium lauryl sulfate), or mouthwashes.

    For a deeper understanding of oral anatomy and how these tissues regenerate, you can refer to the detailed overview on Wikipedia’s page about the Human Mouth. Understanding the biological structure helps explain why healing can sometimes feel slow despite the mouth’s rich blood supply.

    Immediate Steps: What To Do When The Roof Of Your Mouth Hurts

    If you have just burned or scraped your palate, time is of the essence. The first few minutes determine the severity of the injury and the speed of your recovery. Here is a step-by-step protocol to minimize damage and alleviate pain immediately.

    Step 1: Cool It Down Immediately

    Do not ignore the burning sensation. As soon as you feel the pain:

    1. Take a sip of cold water (ideally between 4–10°C / 39–50°F).
    2. Swish it gently around your mouth for 30–60 seconds.
    3. Spit it out if it becomes warm, and repeat with fresh cold water. Avoid ice cubes directly on the burn, as extreme cold can cause further tissue damage (freezer burn) on already compromised skin.

    Step 2: Rinse with Salt Water

    After the initial cooling, prepare a saline rinse to clean the area and reduce inflammation.

    • Mix 1/2 teaspoon of salt into 1 cup (240 ml) of warm water.
    • Swish gently for 30 seconds.
    • Spit out the solution. Do this 2–3 times a day. Salt water is a natural disinfectant and helps draw out fluid from inflamed tissues, reducing swelling.

    Step 3: Apply a Protective Barrier

    If the pain persists, consider using an over-the-counter oral gel containing benzocaine or hyaluronic acid. These create a temporary film over the wound, protecting it from air and food particles while numbing the nerve endings.

    What To Do When The Roof Of Your Mouth Hurts

    Home Remedies for Faster Healing

    Once the immediate shock has passed, you can accelerate the healing process using simple household items. These remedies are widely recommended by dental professionals for their safety and efficacy.

    RemedyHow It WorksApplication Method
    HoneyNatural antibacterial and anti-inflammatory properties.Dab a small amount of raw honey directly on the sore. Leave for 10 mins.
    YogurtProbiotics help balance oral bacteria; cool texture soothes.Eat plain, unsweetened yogurt. Avoid flavored varieties with sugar.
    Coconut OilContains lauric acid which reduces inflammation.Swish 1 tablespoon in mouth for 5–10 minutes (oil pulling).
    Aloe VeraPromotes tissue regeneration and cools the burn.Use food-grade aloe vera gel. Apply directly to the affected area.

    Pro Tip: Avoid acidic foods like orange juice, tomato sauce, or vinegar-based dressings for at least 48 hours. Acid will sting the open wound and delay healing significantly.

    When to See a Doctor or Dentist

    While most cases of palate pain resolve within 3 to 7 days, some symptoms indicate a more serious underlying issue. You should seek professional medical advice if:

    • The pain persists for more than two weeks without improvement.
    • You notice white patches that cannot be wiped away (potential sign of leukoplakia or thrush).
    • There is excessive bleeding or pus discharge.
    • You have a high fever accompanying the mouth pain.
    • You experience difficulty swallowing or breathing.

    Ignoring persistent oral lesions can lead to complications. Early diagnosis is key, especially if the sore is unrelated to a recent burn or injury.

    Preventing Future Palate Pain

    Prevention is always better than cure. By making small adjustments to your eating habits, you can protect the sensitive roof of your mouth.

    1. Test Temperature First: Always blow on hot beverages or take a tiny test bite of hot food. Let pizza or coffee sit for 2–3 minutes before consuming.
    2. Chew Thoroughly: Chewing hard foods properly reduces the risk of sharp edges scraping the palate.
    3. Stay Hydrated: A dry mouth is more susceptible to injury and infection. Aim for at least 2 liters of water daily.
    4. Check Your Toothpaste: If you frequently get canker sores, switch to a toothpaste free from sodium lauryl sulfate (SLS), a foaming agent that can irritate sensitive tissues.

    FAQ: Common Questions About Roof of Mouth Pain

    1. How long does it take for a burned roof of the mouth to heal?

    Minor first-degree burns typically heal within 3 to 7 days. The mouth has a high rate of cell turnover, which aids quick recovery. Deeper second-degree burns may take up to two weeks. If it lasts longer, consult a dentist.

    2. Can stress cause pain in the roof of my mouth?

    Indirectly, yes. Stress weakens the immune system, making you more prone to canker sores or cold sores, which can appear on the palate. Additionally, stress can lead to teeth grinding (bruxism), which might cause referred pain or accidental biting injuries.

    3. Is it safe to pop a blister on the roof of my mouth?

    No. Never pop a blister or sore in your mouth. This opens the wound to bacteria, increasing the risk of infection and significantly delaying healing. Let it rupture naturally or absorb on its own.

    4. Why does the roof of my mouth hurt after eating pineapple?

    Pineapple contains an enzyme called bromelain, which breaks down proteins. When you eat fresh pineapple, this enzyme essentially starts “digesting” the sensitive tissues in your mouth, causing a tingling or painful sensation. Cooking pineapple deactivates bromelain, preventing this issue.

    5. Can allergies cause the roof of my mouth to itch or hurt?

    Yes. Oral Allergy Syndrome (OAS) can cause itching, swelling, or pain in the mouth and throat after eating certain raw fruits, vegetables, or nuts. If you suspect this, try cooking the food or avoiding the trigger entirely.

    Conclusion

    Dealing with a painful roof of the mouth is unpleasant, but it is usually a temporary and manageable condition. By knowing what to do when the roof of your mouth hurts, you can take control of the situation. Remember the golden rules: cool the area immediately, keep it clean with salt water rinses, and avoid irritants like spicy or acidic foods.

    Most importantly, listen to your body. If simple home remedies don’t provide relief within a week, do not hesitate to seek professional dental care. Your oral health is a vital window into your overall well-being.

    Found this guide helpful? Share it with friends who love hot coffee or crunchy snacks! Stay healthy and smile bright.

  • Yardistry 16×14 Pavilion Review & Guide

    Yardistry 16×14 Pavilion Review & Guide

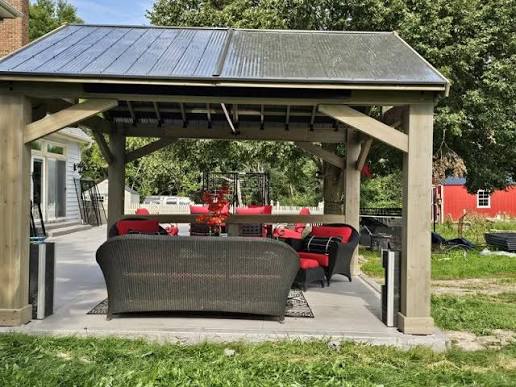
    Are you tired of watching your backyard gatherings get rained out or suffering through scorching summer heat without adequate shade? Many homeowners struggle to find an outdoor structure that balances aesthetic charm with long-term durability and low maintenance. The Yardistry 16 X 14 Timber Frame Pavilion With Aluminum Roof offers a sophisticated solution, blending classic cedar beauty with modern, weather-resistant engineering to create the perfect centerpiece for your outdoor living space.

    Why Choose a Timber Frame Pavilion with an Aluminum Roof?

    When investing in an outdoor structure, the combination of materials matters immensely. Traditional all-wood structures require constant staining and sealing, while all-metal structures can feel industrial and cold. The Yardistry 16×14 model bridges this gap effectively.

    The Durability of Western Red Cedar

    The frame is constructed from 100% premium Western Red Cedar. This wood species is naturally resistant to rot, decay, and insect damage. Unlike pressure-treated pine, cedar does not require chemical treatments to withstand the elements, making it a safer choice for families with pets and children. According to forestry experts, cedar’s natural oils act as a preservative, extending the lifespan of the structure significantly when properly maintained.

    The Advantage of Aluminum Roofing

    The standout feature of this specific model is its aluminum roof. Here is why this matters for US homeowners:

    • Rust Resistance: Unlike steel, aluminum does not rust, which is crucial for humid climates or coastal areas.
    • Lightweight Strength: It places less stress on the timber frame joints compared to heavy clay tiles or slate.
    • Noise Reduction: Yardistry designs these roofs with insulation layers to dampen the sound of rain, creating a peaceful ambiance rather than a noisy drumming effect.

    For more context on the properties of construction materials, you can refer to general architectural standards on Wikipedia.

    Key Features of the Yardistry 16 X 14 Model

    Before you buy, it is essential to understand what exactly you are getting. This isn’t just a kit; it is a engineered structure.

    FeatureSpecificationBenefit
    Dimensions16 ft x 14 ftProvides ample space for large dining tables or lounge sets.
    MaterialWestern Red CedarNatural beauty, aroma, and resistance to decay.
    Roof TypeAluminum PanelsLow maintenance, durable, and weather-tight.
    FoundationConcrete Footings RequiredEnsures stability against wind and shifting soil.
    AssemblyDIY Friendly (2-3 People)Saves on professional installation costs.

    Aesthetic Versatility

    The natural cedar finish blends seamlessly with various landscape styles, from rustic farmhouses to modern suburban gardens. Over time, if left untreated, the wood will age to a distinguished silver-gray patina. However, most owners choose to apply a transparent sealant to maintain the rich reddish-brown hue.

    Yardistry 16 X 14 Timber Frame Pavilion With Aluminum Roof

    Step-by-Step Assembly Guide

    While professional installation is an option, many DIY enthusiasts tackle this project to save money. The Yardistry kits are renowned for their pre-cut and pre-drilled precision. Here is a realistic overview of the assembly process.

    Phase 1: Site Preparation and Foundation

    This is the most critical step. A level foundation is non-negotiable.

    1. Mark the Area: Measure out a 16×14 foot rectangle. Add 2 feet on each side for working space.
    2. Dig Footings: You will need to dig holes for concrete footings. Typically, these should be 12 inches in diameter and extend below the frost line in your region (check local codes, but often 24–36 inches deep).
    3. Set Posts: Use post anchors embedded in the concrete. Ensure they are perfectly plumb (vertical) and square. Allow concrete to cure for at least 48 hours.

    Phase 2: Framing the Structure

    1. Assemble Bents: Construct the side frames (bents) on the ground. These usually consist of two posts and a beam.
    2. Raise the Frames: With the help of at least one other person, lift the frames onto the post anchors. Secure them temporarily with braces.
    3. Install Main Beams: Connect the two side frames with the main ridge beams. This locks the structure’s width and provides rigidity.

    Phase 3: Roof Installation

    1. Install Purlins: Attach the horizontal supports that will hold the roof panels.
    2. Place Aluminum Panels: Start from one corner and work your way across. Use the provided rubber-gasketed screws to ensure a watertight seal.
    3. Trim and Flash: Install edge trims to cover exposed screw heads and give the roof a finished look.

    Note: Always use a torque wrench when tightening bolts to avoid stripping the wood or overtightening metal connectors.

    Maintenance Tips for Longevity

    To keep your Yardistry 16 X 14 Timber Frame Pavilion With Aluminum Roof looking new for decades, follow these simple maintenance routines.

    • Annual Cleaning: Wash the cedar with a mild soap and water solution using a soft brush. Avoid pressure washers on high settings, as they can splinter the wood grain.
    • Sealing/Staining: Apply a high-quality UV-protective cedar sealant every 2–3 years. This prevents the wood from drying out and cracking.
    • Roof Inspection: Twice a year, check the roof panels for any loose screws or debris accumulation in the valleys. Clear leaves and twigs to prevent water pooling.
    • Winter Care: If you live in an area with heavy snowfall, consider using a roof rake to gently remove excess snow, although the aluminum roof is designed to shed snow efficiently.

    Pros and Cons: An Honest Assessment

    No product is perfect. Here is a balanced view to help you decide.

    Pros:

    • High-Quality Materials: Premium cedar and rust-proof aluminum.
    • Design Elegance: Looks far more expensive than it is.
    • Low Maintenance Roof: No shingles to replace or leak.
    • Resale Value: Adds tangible value to your property.

    Cons:

    • Initial Cost: Higher upfront cost than vinyl or softwood alternatives.
    • Assembly Time: Expect to spend a full weekend (or two) on assembly.
    • Weight: The materials are heavy, requiring careful handling during installation.

    Frequently Asked Questions (FAQ)

    1. Do I need a building permit for the Yardistry 16×14 Pavilion?

    In most US municipalities, structures over 100 square feet require a building permit. Since this pavilion is 224 square feet, it is highly likely you will need one. Always check with your local zoning office before purchasing. They may also have specific requirements for setback distances from property lines.

    2. Can I install ceiling fans or lighting in this pavilion?

    Yes, the timber frame is robust enough to support standard ceiling fans and lighting fixtures. However, you must run electrical wiring through conduit along the beams or bury it underground before pouring your foundation. It is recommended to hire a licensed electrician for the wiring portion to ensure code compliance and safety.

    3. How does the aluminum roof handle hail?

    The aluminum panels used by Yardistry are typically gauge-thick and designed to withstand moderate hail. While severe hailstorms (golf ball size or larger) can dent aluminum, the panels are unlikely to crack or leak like asphalt shingles might. The structural integrity remains intact even if cosmetic denting occurs.

    4. Is the wood pre-stained or raw?

    The wood comes raw and unfinished. This allows you to choose your own stain color to match your home’s exterior. However, it is crucial to apply a protective sealant within a few months of assembly to protect the wood from UV damage and moisture absorption during its first winter.

    5. What is the warranty on the Yardistry Pavilion?

    Yardistry typically offers a limited lifetime warranty on the structural components of the cedar frame and a separate warranty on the aluminum roofing materials. Keep your purchase receipt and register your product online to activate the warranty. Coverage usually excludes normal wear and tear or damage from improper assembly.

    Conclusion

    Investing in the Yardistry 16 X 14 Timber Frame Pavilion With Aluminum Roof is more than just buying a garden structure; it is an investment in your lifestyle. It provides a durable, elegant, and functional space that enhances your home’s curb appeal and extends your living area into the outdoors. By combining the natural warmth of cedar with the resilience of aluminum, this pavilion stands up to the diverse weather conditions found across the United States.

    Whether you are hosting summer barbecues, enjoying a quiet morning coffee, or creating a dedicated yoga space, this pavilion delivers both form and function. If you found this guide helpful, please share it with friends who are planning their backyard renovations on social media!

  • Is A 2/12 Roof Pitch Ok For Metal Roof?

    Is A 2/12 Roof Pitch Ok For Metal Roof?

    Have you ever looked at your home’s sleek, modern lines and wondered if that gentle slope is strong enough to handle heavy rain or snow? Many homeowners face this exact dilemma when choosing materials, often asking themselves, is a 2/12 roof pitch ok for metal roof installations? It is a valid concern because water drainage behaves very differently on shallow slopes compared to steep ones.

    The short answer is yes, but with significant caveats. A 2/12 pitch is considered a “low slope,” and while metal is an excellent material for this application, it requires specific profiles and meticulous installation techniques to prevent leaks. In this guide, we will break down exactly how to make it work safely and effectively.

    Understanding the 2/12 Pitch Challenge

    To understand why this question is so common, we first need to define what a 2/12 pitch actually means. In roofing terminology, pitch refers to the vertical rise of the roof for every 12 inches of horizontal run. Therefore, a 2/12 pitch rises only two inches for every foot of length.

    This is a very shallow angle. On such a low slope, gravity does not help water shed off the roof as quickly as it does on steeper roofs. Instead of rushing off, water tends to move slowly. If there are any imperfections in the roofing material, seams, or fasteners, water has more time to find its way inside.

    According to general building standards, anything below a 3/12 pitch is often categorized as a low-slope roof. This classification triggers different building code requirements and manufacturer warranties. Ignoring these distinctions can lead to premature roof failure, voided warranties, and costly interior water damage.

    Can You Install Metal on a 2/12 Pitch?

    Yes, you can install metal roofing on a 2/12 pitch, but you cannot use just any type of metal panel. The profile of the metal panel is the single most important factor in determining success.

    Standing Seam vs. Corrugated Panels

    Not all metal roofs are created equal. Here is a comparison of the two most common types regarding low-slope applications:

    FeatureStanding Seam Metal RoofCorrugated/Exposed Fastener Metal
    Minimum PitchOften approved for 1/12 or 2/12Typically requires 3/12 or higher
    Leak ResistanceHigh (hidden clips, no penetrations)Lower (screw holes are potential leak points)
    CostHigher initial investmentMore affordable
    Installation ComplexityRequires specialized contractorsDIY-friendly but risky on low slopes

    For a 2/12 pitch, standing seam metal roofing is the gold standard. Because the fasteners are hidden beneath the panels and clipped to the structure, there are no thousands of screw holes penetrating the weather barrier. This significantly reduces the risk of leaks caused by thermal expansion and contraction, which is critical on low slopes where water pools slightly longer.

    If you attempt to use corrugated metal with exposed fasteners on a 2/12 pitch, you are taking a substantial risk. Most manufacturers will explicitly void their warranty for this application. The gaskets around the screws can degrade over time, and on a low slope, even a minor seal failure can allow water to wick uphill under the panel overlap.

    Is A 2 12 Roof Pitch Ok For Metal Roof

    Critical Installation Requirements for Low Slopes

    Installing metal on a 2/12 pitch is not a job for amateurs. The margin for error is virtually non-existent. To ensure longevity, you must adhere to strict installation protocols.

    1. Use a Solid Decking Surface

    Unlike steeper roofs where battens or open purlins might be used, a 2/12 metal roof typically requires solid sheathing (plywood or OSB). This provides a continuous, rigid surface that supports the metal panels evenly. Any unevenness in the deck can cause “oil canning” (visible waviness) in the metal, which can compromise the seams.

    2. Implement a Double-Layer Underlayment

    Water management is key. On a low slope, you should not rely solely on the metal panels to keep water out. Think of the underlayment as your secondary line of defense.

    • Primary Layer: Start with a high-quality synthetic underlayment or self-adhering ice and water shield.
    • Secondary Layer: For extra protection, many experts recommend a second layer of modified bitumen or a specialized low-slope underlayment system.

    This dual-layer approach ensures that if wind-driven rain manages to get past the metal seams, it hits a waterproof barrier rather than the wood decking.

    3. Seal All Seams Properly

    On standing seam roofs, the vertical legs of the panels are folded together. For a 2/12 pitch, many manufacturers require the use of sealant tape or liquid sealant within the seams. This creates a watertight bond that prevents capillary action—the phenomenon where water climbs up between two closely spaced surfaces against gravity.

    4. Manage Thermal Movement

    Metal expands and contracts with temperature changes. On a low slope, if the panels are not allowed to move freely via sliding clips, they can buckle or tear at the fastener points. Ensure your contractor uses a clip system designed for thermal movement, especially in regions with high temperature variance.

    Why Experts Recommend Standing Seam for 2/12

    The consensus among roofing professionals is clear: if you have a 2/12 pitch, invest in standing seam. But why is it so much better?

    The primary reason is the absence of penetrations. In an exposed fastener system, every screw is a potential leak. Over ten years, a typical roof might have thousands of screws. Each one relies on a rubber washer to stay sealed. These washers dry out, crack, and fail.

    In contrast, standing seam systems use clips that attach to the deck, while the panels snap or fold onto these clips. There are no screws going through the flat part of the panel where water flows. This design is inherently more watertight. Furthermore, standing seam panels often have taller legs (1.5 to 3 inches), which provides a higher barrier against water backup during heavy storms or ice damming.

    For more detailed technical definitions on roofing slopes and standards, you can refer to resources like Wikipedia’s entry on Roof Pitch, which outlines the geometric principles governing roof design.

    Common Mistakes to Avoid

    Even with the right materials, errors in execution can ruin a low-slope metal roof. Here are the most frequent pitfalls:

    • Ignoring Local Building Codes: Some municipalities have strict minimum pitch requirements for certain materials. Always check with your local building department before starting.
    • Poor Flashing Details: The roof edges, valleys, and penetrations (like chimneys or vents) are where most leaks occur. On a 2/12 pitch, flashings must be oversized and sealed meticulously.
    • Using the Wrong Screws: If you must use exposed fasteners (not recommended), use screws with EPDM washers designed for metal roofing, not standard wood screws.
    • Insufficient Overlap: Panel end laps (where one panel ends and the next begins) must be sealed with butyl tape or sealant. On low slopes, water can easily flow backward under a simple lap joint.

    FAQ Section

    Is a 2/12 pitch too flat for metal roofing?

    No, it is not too flat, provided you use the correct system. A 2/12 pitch is acceptable for standing seam metal roofs with proper sealing. However, it is generally too flat for corrugated or exposed fastener metal panels, which usually require a minimum of 3/12 or 4/12 pitch to ensure proper water shedding.

    What is the minimum pitch for a metal roof?

    The minimum pitch varies by profile. Standing seam systems can often go as low as 1/12 or 0.5/12 with special seals. Corrugated and R-panel styles typically require a minimum of 3/12. Always consult the specific manufacturer’s installation manual for the product you choose, as warranties depend on adhering to these specs.

    Will a 2/12 metal roof leak?

    It can leak if installed incorrectly. The risk of leaking is higher on a 2/12 pitch than on a steeper roof because water drains slower. However, if installed with a standing seam profile, solid decking, double underlayment, and sealed seams, it can be just as watertight as a steeper roof. Proper installation is the deciding factor.

    Do I need special permits for a 2/12 metal roof?

    Likely, yes. Because 2/12 is considered a low slope, it may fall under different building code categories than standard residential roofs. Your local building department may require engineered drawings, specific underlayment ratings, or proof that the chosen metal system is rated for such a low pitch. Always pull the necessary permits to ensure safety and insurance validity.

    How much does it cost to install metal on a 2/12 pitch?

    Expect to pay a premium compared to standard asphalt shingles. Standing seam metal roofing typically costs between $12 and $20 per square foot installed, depending on your location and the complexity of the roof. The higher cost reflects the specialized labor, higher-grade materials, and additional underlayment required for low-slope applications.

    Conclusion

    So, is a 2/12 roof pitch ok for metal roof projects? Absolutely, but only if you approach it with respect for the physics of water drainage. By choosing a standing seam profile, investing in robust underlayment, and hiring experienced professionals who understand low-slope nuances, you can enjoy the durability and aesthetic appeal of metal roofing for decades.

    Don’t cut corners on a low-slope roof. The savings from using cheaper materials or less experienced labor are rarely worth the cost of future repairs. If you found this guide helpful, please share it with friends or family who are considering a similar roofing project. Knowledge is the best tool we have for protecting our homes!