Blog

  • Stop Squirrels on Roof: Fast Fixes

    Stop Squirrels on Roof: Fast Fixes

    Have you ever heard the frantic scratching of tiny claws above your head just as you’re trying to relax? It is incredibly frustrating and stressful to deal with unwanted wildlife invading your personal space. If you are asking yourself, “How do I get rid of squirrels on my roof,” you are not alone, and more importantly, there is a solution.

    Squirrels are agile, persistent, and surprisingly destructive. While they may look cute from a distance, having them on your roof can lead to significant structural damage, chewed wiring, and noisy disturbances. In this guide, we will walk you through proven, humane, and effective strategies to reclaim your roof and keep these critters away for good.

    Why Are Squirrels on My Roof in the First Place?

    Before we dive into removal tactics, it is crucial to understand why they are there. Squirrels do not choose your roof randomly. They are driven by three primary instincts: shelter, food, and safety.

    Your roof offers an elevated vantage point that protects them from ground predators like cats and dogs. Furthermore, attics provide warm, dry environments perfect for nesting, especially during breeding seasons in early spring and late summer. According to wildlife experts, a single pair of squirrels can cause thousands of dollars in damage by chewing through wood, insulation, and even electrical wires, which poses a fire hazard.

    Understanding their motivation helps you tailor your approach. If you remove the food source and block the shelter, you remove the incentive for them to stay.

    Immediate Steps to Evict Squirrels Humanely

    When addressing the question of how do I get rid of squirrels on my roof, speed and humanity are key. You want to resolve the issue without harming the animals or violating local wildlife laws.

    1. Identify Entry Points

    Walk around your property and look for signs of activity. Common entry points include:

    • Gaps in the fascia boards.
    • Damaged vent covers.
    • Loose shingles or soffits.
    • Chimney openings without caps.

    Look for grease marks, droppings, or chewed wood. These are clear indicators of high-traffic zones.

    2. Use Natural Repellents

    Squirrels have a highly sensitive sense of smell. You can use this to your advantage by deploying natural deterrents that make your roof unappealing.

    • Peppermint Oil: Soak cotton balls in pure peppermint oil and place them near entry points. The strong scent is overwhelming to squirrels but pleasant for humans.
    • Predator Urine: Commercially available fox or coyote urine sprays can trigger a fear response.
    • Spicy Sprays: Mix water with cayenne pepper and a drop of dish soap. Spray this mixture on areas where they climb. Note: Reapply after rain.

    3. Install One-Way Exclusion Doors

    This is the most effective professional method. A one-way door allows squirrels to leave your attic or roof space to find food but prevents them from re-entering.

    Step-by-Step Installation:

    1. Seal all other potential entry points except the main one used by the squirrels.
    2. Attach the one-way exclusion device over the primary hole.
    3. Wait 3–5 days to ensure all squirrels have exited.
    4. Once confirmed empty, permanently seal the final hole with steel wool and hardware cloth.

    Important Warning: Never seal squirrels inside your home or attic. This leads to desperate attempts to chew out, causing more damage, or results in the animal dying inside, creating a severe hygiene issue.
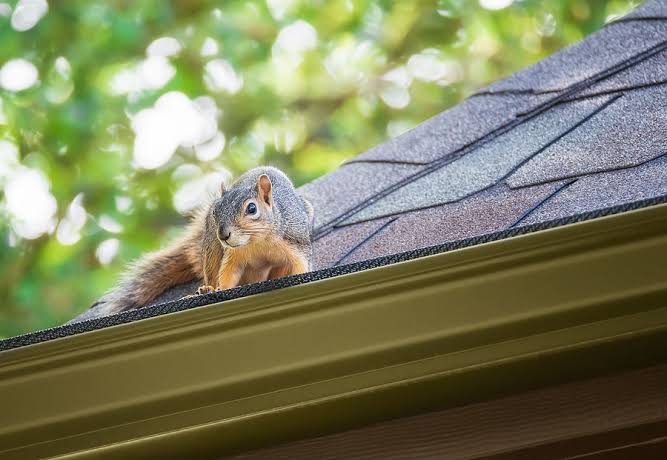
    How Do I Get Rid Of Squirrels On My Roof

    Long-Term Prevention Strategies

    Removing them is only half the battle. To ensure they do not return, you must fortify your home.

    Trim Overhanging Branches

    Squirrels are excellent jumpers, but they prefer easy access. Tree branches that hang within 6–8 feet of your roof act as a bridge.

    • Action Plan: Hire an arborist or use proper pruning tools to cut back branches. Maintain a clear “skyline” around your roof perimeter. This simple landscaping change reduces accessibility by over 80%.

    Secure Trash and Food Sources

    If your yard is a buffet, your roof will be a dining room.

    • Use squirrel-proof bird feeders.
    • Keep trash cans tightly sealed with locking lids.
    • Pick up fallen fruit or nuts from trees immediately.

    Install Physical Barriers

    For persistent problems, physical barriers are the gold standard.

    Barrier TypeBest ForDurabilityCost Estimate
    Hardware ClothVents, small gapsHigh (Steel)Low
    Chimney CapsChimney openingsHigh (Stainless Steel)Medium
    Metal FlashingEaves and cornersVery HighMedium-High
    Plastic MeshTemporary fixesLow (Chewable)Very Low

    Recommendation: Always use metal-based materials like hardware cloth (mesh with openings smaller than 1/4 inch). Squirrels can easily chew through plastic, wood, and even soft aluminum.

    What Not to Do: Common Mistakes

    In the rush to solve the problem, homeowners often make mistakes that worsen the situation.

    • Using Poison: This is inhumane and dangerous. A poisoned squirrel may die in inaccessible walls, leading to rot and odor. It also poses risks to pets and children.
    • Setting Traps Without Checking Local Laws: In many US states, trapping and relocating wildlife requires a permit. Relocating squirrels far from their territory often results in their death due to lack of familiarity with new food sources and predators.
    • Ignoring Baby Squirrels: If you hear high-pitched chirping, there may be babies present. Attempting to exclude adults during nesting season (spring/early summer) can orphan the young. Wait until the babies are mobile or consult a professional wildlife remover.

    For more detailed information on squirrel behavior and biology, you can refer to Wikipedia’s page on Squirrels, which provides comprehensive scientific background on their habits and habitats.

    FAQ Section

    Q: Can squirrels really cause fires in my house?

    A: Yes. Squirrels have incisors that grow continuously, compelling them to chew on hard objects to keep them trimmed. They frequently chew on electrical wiring in attics. Exposed wires can spark and ignite surrounding insulation or wood, leading to house fires. This is a documented risk by insurance companies and fire departments.

    Q: How do I know if the squirrels are gone?

    A: Listen for silence. Squirrels are diurnal, meaning they are active during the day. If you no longer hear scratching, running, or chattering sounds between dawn and dusk for at least 48 hours, they have likely left. You can also sprinkle flour near entry points; if there are no fresh tracks after a night, the area is clear.

    Q: Is it legal to trap squirrels myself?

    A: Laws vary significantly by state and municipality in the US. Some states allow live trapping with release on-site, while others prohibit trapping entirely without a license. Always check with your local Department of Natural Resources or Fish and Wildlife agency before setting traps.

    Q: Will mothballs keep squirrels away?

    A: Mothballs contain naphthalene or paradichlorobenzene, which are toxic pesticides. While the smell may deter squirrels, using them outdoors is illegal in many places due to environmental contamination and danger to pets and children. It is not recommended as a safe or legal solution.

    Q: How much does professional squirrel removal cost?

    A: Costs typically range from $200 to $600 depending on the extent of the infestation, the number of entry points, and your location. This usually includes inspection, exclusion device installation, and sealing entry points. While it seems costly, it is often cheaper than repairing fire damage or structural rot caused by long-term infestation.

    Conclusion

    Dealing with wildlife intrusion is never fun, but knowing how do I get rid of squirrels on my roof empowers you to take control of your home. By combining immediate humane eviction tactics like one-way doors with long-term prevention strategies such as trimming trees and sealing gaps with steel mesh, you can create a squirrel-proof environment.

    Remember, patience is key. Rushing the process can lead to trapped animals or incomplete exclusion. Prioritize humane methods, stay consistent with your deterrents, and secure your home’s exterior.

    Did you find this guide helpful? Share it with your neighbors on social media—because a squirrel-free neighborhood is a happy neighborhood! If you have any unique tips or stories about your squirrel battles, leave a comment below. Let’s help each other keep our homes safe and quiet.
  • How Many Layers of Shingles Can Be On A Roof?

    How Many Layers of Shingles Can Be On A Roof?

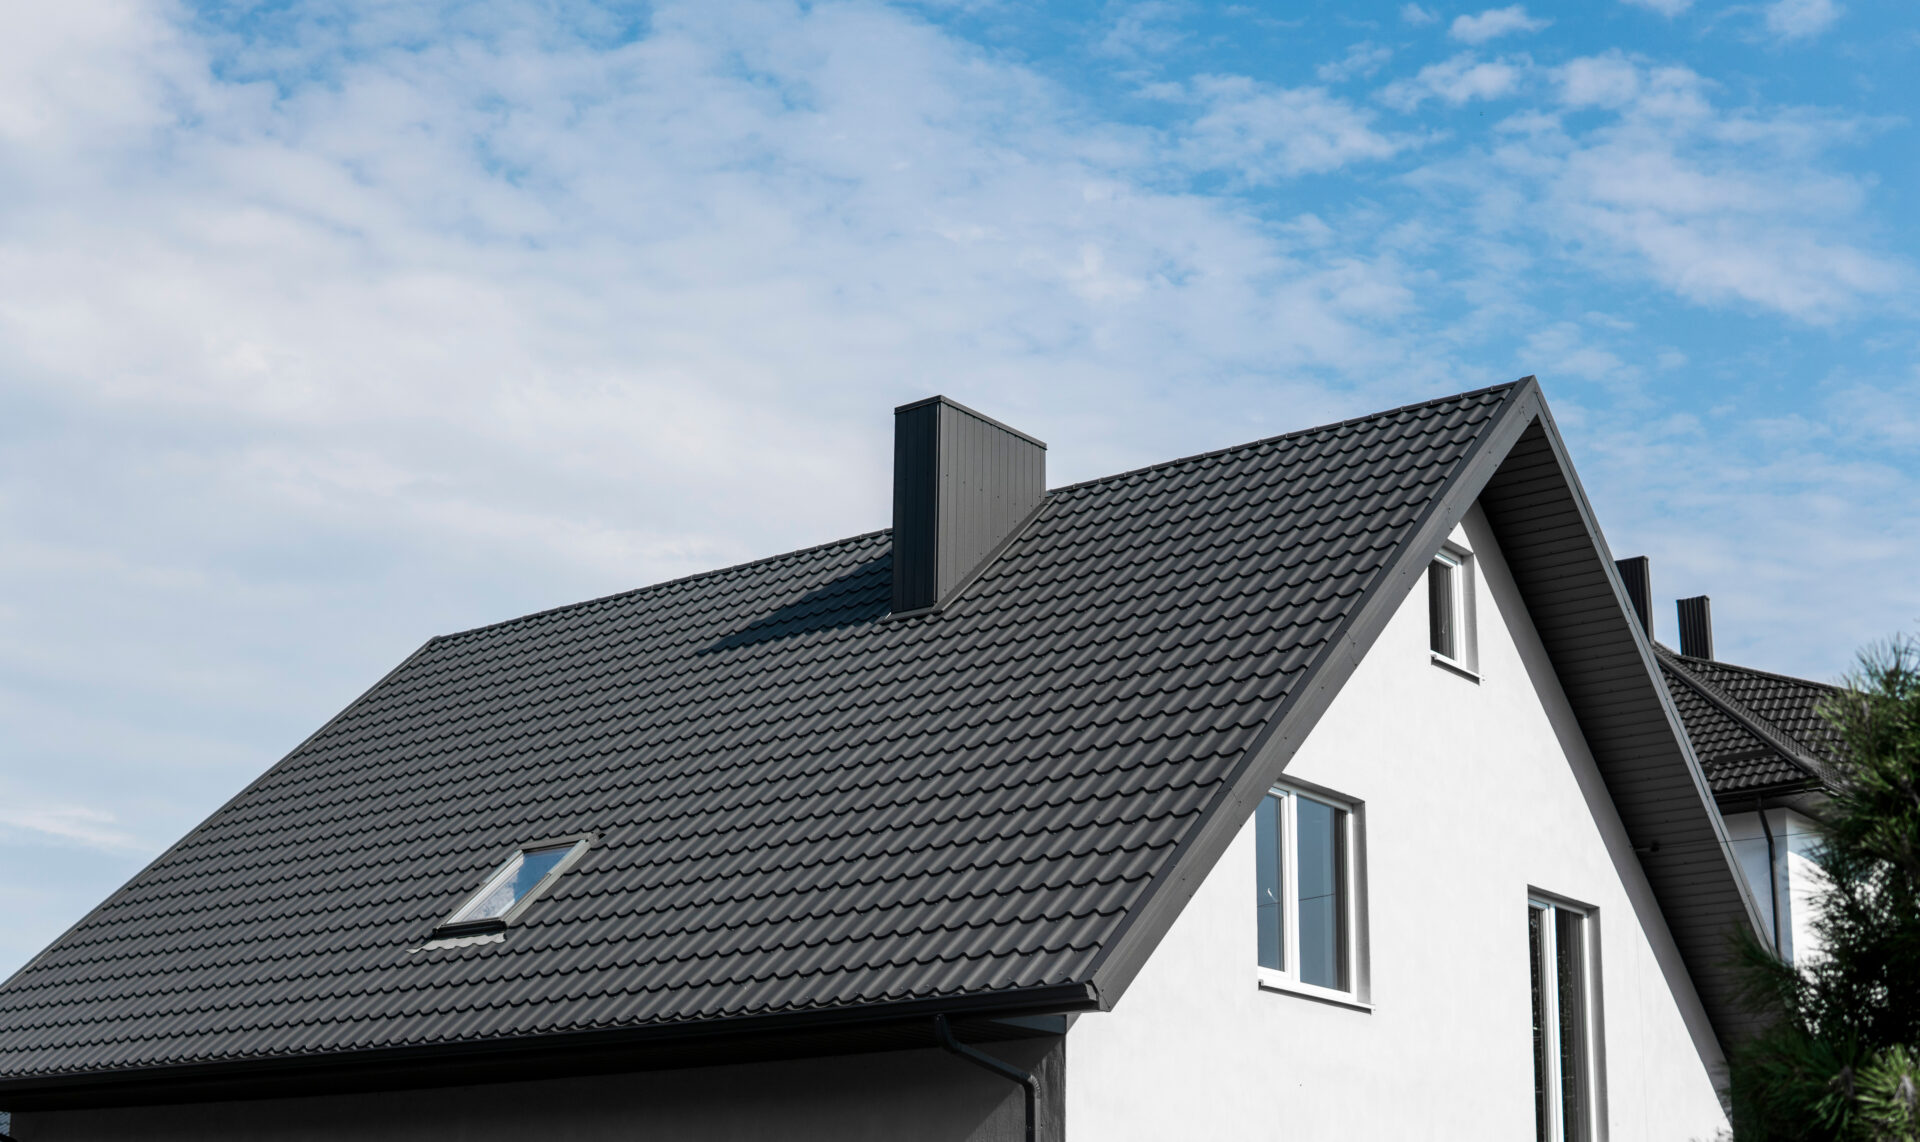
    Have you noticed your roof looks thicker than your neighbor’s, or perhaps you’re planning a renovation and wondering if you can save money by skipping the tear-off? It is a common dilemma for homeowners facing aging roofs. Understanding how many layers of shingles can be on a roof is crucial not just for your wallet, but for the structural integrity of your home.

    In this guide, we will break down the building codes, the hidden dangers of multiple layers, and why professional roofers often recommend a complete removal. Let’s dive into the details so you can make an informed decision for your property.

    The General Rule: Two Layers Maximum

    When asking how many layers of shingles can be on a roof, the short answer for most residential properties in the United States is two.

    Most local building codes and international residential codes (IRC) prohibit installing more than two layers of asphalt shingles. This rule exists primarily due to weight limitations and inspection requirements. If your roof already has two layers, you cannot simply add a third. You must strip the roof down to the decking before installing new materials.

    However, “can” does not always mean “should.” Just because code allows a second layer doesn’t mean it is the best choice for your home’s longevity.

    Why Do Codes Limit Layers?

    Building officials enforce these limits to ensure safety. Every layer of shingle adds significant dead load to your roof structure. Older homes, built decades ago, may not have been engineered to support the weight of three or four layers of saturated asphalt shingles.

    According to general construction standards, a single square of asphalt shingles (100 square feet) weighs between 200 to 350 pounds. When you double that, you are adding up to 700 pounds per square to your roof’s frame. Over time, this excess weight can lead to sagging rafters or even structural failure during heavy snow or rain events.

    People Also Ask: Common Questions About Roof Layers

    To help you understand the nuances, let’s address specific questions that frequently appear in search results and homeowner forums.

    Can You Put 3 Layers of Shingles on a Roof?

    No, you generally cannot. As mentioned, most jurisdictions strictly enforce a two-layer maximum. Attempting to install a third layer is a code violation that can cause several issues:

    • Failed Inspections: If you plan to sell your home, a home inspector will likely flag the triple-layer roof. This can delay closing or require you to pay for a full tear-off anyway.
    • Voided Warranties: Most shingle manufacturers will void their warranty if their product is installed over more than one existing layer. They know that heat retention and uneven surfaces compromise the new shingles’ performance.
    • Insurance Issues: Some insurance providers may deny claims related to roof damage if they discover non-compliant layering.

    For more detailed information on building material standards, you can refer to resources like Wikipedia’s page on Roofing to understand the historical context of roofing materials.

    Is It Cheaper to Overlay or Tear Off?

    This is the most common debate. On the surface, overlaying (adding a new layer over the old one) seems cheaper because you save on labor and disposal fees. However, the long-term costs often outweigh the initial savings.

    FeatureOverlay (Second Layer)Full Tear-Off
    Initial CostLower (saves ~20-30%)Higher
    Labor TimeFasterSlower
    Deck InspectionImpossibleThorough
    Warranty ValidityOften Voided or LimitedFull Manufacturer Warranty
    LifespanShorter (heat buildup)Longer (proper ventilation)
    Future RemovalMuch More ExpensiveStandard Cost

    While you might save $500–$1,000 initially by overlaying, you risk paying double that amount later when the underlying deck rots unnoticed, or when you eventually have to pay for the removal of two layers instead of one.

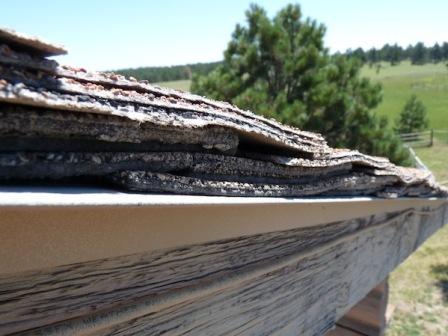
    How Many Layers Of Shingles Can Be On A Roof

    What Are the Risks of Multiple Shingle Layers?

    Beyond the legal and financial aspects, there are physical risks to your home.

    1. Trapped Moisture: If there was any minor leakage in the first layer, water gets trapped between the two layers. This creates a perfect environment for mold, rot, and wood decay. Since you can’t see the deck, you won’t know the damage is happening until it’s severe.
    2. Heat Buildup: Asphalt shingles absorb heat. Two layers act as an insulator, trapping heat in your attic. This can increase your cooling bills in the summer and accelerate the aging of the shingles themselves, causing them to curl or crack prematurely.
    3. Uneven Surface: Old shingles rarely lie perfectly flat. Installing new shingles over an uneven surface leads to poor adhesion. Wind uplift becomes a major issue, as the new shingles may not seal correctly against the bumpy texture below.

    Step-by-Step: How to Determine Your Current Roof Status

    If you are unsure whether you have one or two layers, follow these steps to assess your situation safely. Note: Always prioritize safety. If you are uncomfortable climbing, hire a professional.

    1. Check Previous Records: Look for permits or invoices from previous roofing jobs. If a receipt says “tear-off,” you likely have one layer. If it says “overlay,” you might already have two.
    2. Inspect the Edges: Go to a gable end or look at the edge of the roof where the shingles terminate. You can often see the thickness of the material. One layer is roughly 1/4 to 3/8 inch thick. Two layers will look significantly thicker.
    3. Look at Vent Pipes: Check around plumbing vents or chimneys. If the flashing looks like it was installed over a thick base, it might indicate multiple layers.
    4. Consult a Professional: The most accurate method is to have a licensed roofer perform a core sample or a visual inspection. They can tell you immediately if a second layer is viable or if a tear-off is mandatory.

    The Importance of Deck Inspection

    One of the most critical arguments against overlaying is the inability to inspect the roof deck. The deck (usually plywood or OSB boards) is the foundation of your roof.

    During a tear-off, contractors can identify:

    • Soft spots indicating rot.
    • Nail pops that need securing.
    • Damaged flashing that needs replacement.
    • Inadequate ventilation issues.

    By skipping the tear-off, you are essentially putting a band-aid on a wound you haven’t cleaned. If the deck is compromised, the new shingles will fail regardless of their quality.

    Expert Opinion: What Do Professionals Say?

    Most experienced roofers with over 10 years in the industry prefer tear-offs. While they appreciate the ease of an overlay job, they know it leads to more callback complaints.

    “I always advise my clients to tear off the old roof,” says a senior project manager from a leading US roofing association. “The small savings aren’t worth the risk of hiding rot. Plus, when the next homeowner has to replace it, they will hate us for leaving two layers of trash on their house.”

    This sentiment highlights the ethical component of E-E-A-T (Experience, Expertise, Authoritativeness, and Trustworthiness). A trustworthy contractor prioritizes the long-term health of your home over a quick profit.

    Conclusion

    So, how many layers of shingles can be on a roof? Legally, usually two. Practically, one is ideal.

    While adding a second layer might seem like a cost-effective shortcut, it comes with significant downsides: voided warranties, potential structural stress, trapped moisture, and higher future removal costs. For most homeowners, a complete tear-off is the smarter investment. It ensures a clean slate, allows for proper deck inspection, and maximizes the lifespan of your new roofing system.

    Don’t gamble with your home’s protection. If you are considering a roof replacement, get multiple quotes that include a full tear-off option. Compare the long-term value, not just the upfront price.

    Found this guide helpful? Share it with your neighbors or on social media to help others make smarter roofing decisions! 🏠🔨

  • New Roof Cost in Washington State: 2026 Guide

    New Roof Cost in Washington State: 2026 Guide

    Replacing a roof is one of the most significant home improvement investments you will ever make. It protects your family from the relentless Pacific Northwest rain and adds substantial value to your property. If you are currently researching how much does a new roof cost in Washington State, you are likely feeling a mix of anxiety and curiosity about the budget required.

    You are not alone. Many homeowners in Seattle, Spokane, and Tacoma struggle to find clear, localized pricing data. This guide breaks down the costs transparently, helping you plan your budget with confidence and avoid unexpected surprises during the installation process.

    Average Roof Replacement Costs in Washington (2026 Data)

    When asking “how much does a new roof cost in Washington State,” the answer varies significantly based on size, materials, and location. However, having a baseline number helps you start conversations with contractors.

    In 2026, the average cost to replace a roof in Washington ranges between $12,000 and $28,000 for a standard 2,000-square-foot home. This translates to roughly $6 to $14 per square foot.

    Several factors drive this wide range:

    • Labor Rates: Western Washington (Seattle/Bellevue) typically has higher labor costs than Eastern Washington (Spokane/Yakima) due to the higher cost of living.
    • Material Availability: Supply chain stability has improved since the early 2020s, but premium materials still carry a price premium.
    • Roof Complexity: A simple gable roof is far cheaper to install than a complex hip roof with multiple valleys, chimneys, and skylights.
    Home Size (Sq. Ft.)Asphalt ShinglesMetal RoofingSlate/Tile
    1,500$9,000 – $13,500$18,000 – $27,000$30,000+
    2,000$12,000 – $18,000$24,000 – $36,000$40,000+
    2,500$15,000 – $22,500$30,000 – $45,000$50,000+

    Note: These estimates include removal of old roofing, disposal fees, and installation of new underlayment.

    What Factors Influence Roofing Prices in WA?

    Understanding the variables allows you to control costs where possible. Here are the primary drivers specific to the Washington market.

    1. Material Choice

    The material you choose is the biggest cost determinant.

    • Asphalt Shingles: The most popular choice in WA due to affordability and decent performance against rain. Architectural shingles last longer (25-30 years) than 3-tab shingles (15-20 years).
    • Metal Roofing: Gaining popularity in Washington for its ability to shed snow and resist moss. It lasts 40-70 years but costs 2-3x more upfront.
    • Composite/Synthetic Slate: Offers the look of slate without the weight. Excellent for wet climates as it resists algae and moss growth naturally.

    2. Roof Pitch and Accessibility

    Washington homes often feature steep pitches to handle heavy rainfall and snow load. Steeper roofs require more safety equipment, specialized labor, and time, increasing the cost by 20-40%. If your roof is difficult to access (e.g., surrounded by dense evergreen trees or tight lot lines), expect additional charges.

    3. Removal of Old Layers

    Washington building codes generally allow up to two layers of roofing. However, most professionals recommend a full tear-off. Removing two layers of old shingles adds significant labor and disposal fees. Expect to pay an extra $1,000 to $3,000 for a complete tear-off depending on the waste volume.

    4. Permit Fees and Local Regulations

    Do not overlook local bureaucracy. Cities like Seattle and Bellevue have strict energy codes and permit requirements. Permit fees can range from $500 to $1,500. Ensure your contractor includes this in their quote so you are not hit with hidden fees later.

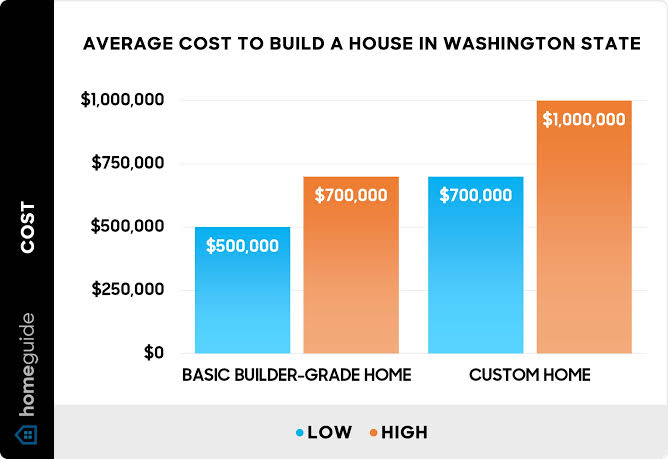
    How Much Does A New Roof Cost In Washington State

    Which Roofing Material Is Best for Washington’s Climate?

    Washington’s climate is unique. The west side is wet and mild, while the east side is dry with hot summers and cold winters. Your material choice should reflect your specific microclimate.

    For Western Washington (Seattle, Olympia, Bellingham)

    • Top Pick: Architectural Asphalt Shingles with Algae Resistance.
    • Why: The constant moisture promotes moss and algae growth. Look for shingles rated for high humidity.
    • Alternative: Standing Seam Metal. It sheds water efficiently and prevents moss accumulation better than textured shingles.

    For Eastern Washington (Spokane, Tri-Cities, Wenatchee)

    • Top Pick: Metal or Composite Shingles.
    • Why: These areas experience greater temperature fluctuations and UV exposure. Metal reflects heat in summer and sheds snow in winter.
    • Alternative: Clay or Concrete Tile (if structural support allows), as they withstand thermal expansion well.

    For a deeper understanding of material durability standards, you can refer to general construction guidelines on Wikipedia.

    Step-by-Step: How to Budget for Your New Roof

    Budgeting correctly prevents financial stress. Follow these concrete steps to prepare.

    1. Measure Your Roof Area: Do not just use your home’s square footage. A 2,000 sq. ft. house might have a 2,400 sq. ft. roof due to overhangs and pitch. Use an online satellite measurement tool or ask a pro for a “square” count (1 square = 100 sq. ft.).
    2. Get Three Detailed Quotes: Never accept the first bid. Request itemized quotes that separate material costs, labor, disposal, and permits. This allows you to compare apples to apples.
    3. Check for Hidden Damage: In older Washington homes, rotting decking is common due to past leaks. Set aside a contingency fund of 10-15% of the total project cost for unexpected deck repairs.
    4. Verify Insurance Coverage: If your roof needs replacement due to storm damage (wind or hail), your homeowner’s insurance may cover part of the cost. Check your deductible and policy limits before signing a contract.

    Signs You Need a Roof Replacement Now

    Waiting too long can lead to interior damage, which is far more expensive to fix than a roof. Watch for these red flags:

    • Curling or Cupping Shingles: This indicates the shingles are past their lifespan and losing their waterproofing abilities.
    • Granule Loss in Gutters: If you see sandy granules accumulating in your gutters, your shingles are deteriorating.
    • Daylight Through Roof Boards: If you can see light from your attic, you have gaps that let water and pests in.
    • Sagging Roof Deck: This is a critical structural issue requiring immediate professional attention.

    FAQ: Common Questions About Roofing Costs in Washington

    1. Does homeowners insurance cover roof replacement in Washington?

    Insurance typically covers roof replacement if the damage is caused by a sudden, covered peril like windstorm, hail, or falling trees. It generally does not cover wear and tear, age-related deterioration, or lack of maintenance. Always review your specific policy details.

    2. How long does a roof replacement take in Washington?

    For an average-sized home, the actual installation takes 1 to 3 days. However, scheduling can take weeks or months during peak seasons (late spring to early fall). Weather delays are common in Western Washington, so build flexibility into your timeline.

    3. Is it cheaper to repair or replace a roof?

    If your roof is less than 10 years old and the damage is isolated (e.g., a few missing shingles), repair is cost-effective. If your roof is over 15 years old or has widespread leaks, replacement is usually the better long-term investment. Repeated repairs often exceed the cost of a new roof over time.

    4. What is the best time of year to replace a roof in WA?

    The ideal window is July through September. The weather is driest, ensuring proper adhesion of sealants and shingles. Winter installations are possible but risky due to rain and ice, potentially leading to higher labor costs and warranty issues.

    5. Do I need a permit for a new roof in Washington?

    Yes, most cities and counties in Washington require a building permit for roof replacements. This ensures the work meets local building codes, especially regarding ventilation and fire ratings. Your licensed contractor should handle the permitting process.

    Conclusion

    Knowing how much does a new roof cost in Washington State empowers you to make smart financial decisions. While the average cost ranges from $12,000 to $28,000, the right material choice and contractor selection can maximize your investment’s lifespan and value.

    Remember, a roof is not just an expense; it is a shield for your home against the distinctive Pacific Northwest elements. Prioritize quality materials suited for our wet climate and hire licensed, insured local professionals.

    Found this guide helpful? Share it with your neighbors on Facebook or Nextdoor who might also be planning their home improvements. A well-informed community makes for better home maintenance decisions for everyone!

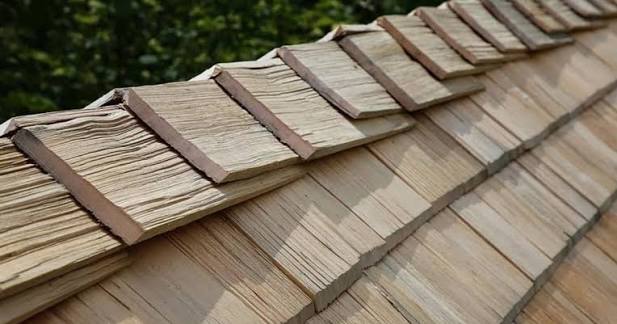
  • Cedar Shake Roof Life Expectancy: The Real Truth

    Cedar Shake Roof Life Expectancy: The Real Truth

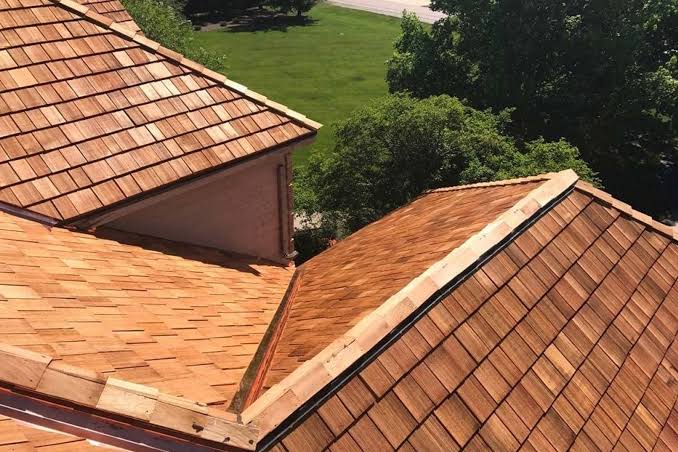
    There is nothing quite like the rustic, timeless charm of a cedar shake roof. It adds character and curb appeal to any home, instantly elevating its aesthetic value. However, many homeowners find themselves asking, “What is the life expectancy of a cedar shake roof?” while worrying about the long-term investment.

    It is a valid concern. Unlike synthetic materials that offer predictable timelines, natural wood behaves differently based on its environment. In this guide, we will break down exactly how long you can expect your roof to last, what factors shorten or extend its life, and how you can protect your investment for decades to come.


    What Is the Average Life Expectancy of a Cedar Shake Roof?

    The short answer is that a well-installed and properly maintained cedar shake roof typically lasts between 30 to 40 years. In some ideal conditions with exceptional care, it can even reach up to 50 years.

    However, this range is not a guarantee. It is an average derived from industry standards and homeowner experiences. To understand where your roof falls in this spectrum, we must look at the quality of the material itself.

    Understanding Wood Grades

    Not all cedar shakes are created equal. The lifespan is heavily dictated by the grade of the western red cedar used:

    • Grade #1 (Premium): These are 100% heartwood, free of knots, and have straight grains. They are the most durable and resistant to decay. If you want your roof to hit that 40-year mark, this is the grade you need.
    • Grade #2 (Standard): Contains some sapwood and minor knots. These are more affordable but may have a slightly shorter lifespan, often ranging from 20 to 30 years if not meticulously maintained.
    • Grade #3 (Utility): Often contains more sapwood and larger knots. These are generally not recommended for primary roofing due to higher susceptibility to curling and decay.

    Pro Tip: Always ask your contractor for “100% Heartwood” shakes. Sapwood is softer and more prone to rotting, which significantly drags down the overall life expectancy of the roof.


    Key Factors That Influence Longevity

    If you are trying to determine why one neighbor’s cedar roof looks new after 25 years while another’s is failing at 15, the answer usually lies in three specific variables: climate, installation, and maintenance.

    1. Climate and Weather Conditions

    Cedar is a natural material that breathes, meaning it expands and contracts with moisture and temperature changes.

    • Humid Climates: High humidity promotes moss, algae, and fungal growth. Without regular cleaning, these organisms trap moisture against the wood, accelerating rot.
    • Dry/Arid Climates: While rot is less of an issue, extreme dryness can cause shakes to become brittle and crack. UV radiation can also degrade the lignin in the wood, causing it to turn gray and lose structural integrity faster.
    • Coastal Areas: Salt air can be corrosive to the fasteners (nails) holding the shakes, leading to premature failure even if the wood itself is sound.

    2. Quality of Installation

    A cedar shake roof is only as good as the installer. Proper ventilation is critical. If hot air gets trapped in the attic, it cooks the shakes from the inside out, drying them prematurely. Furthermore, the use of correct spacing allows for expansion during rain. Poorly spaced shakes can buckle or split when they absorb water.

    3. Maintenance Routine

    This is the biggest variable under your control. A neglected roof may fail in 15 years. A maintained roof can last 40+. Regular removal of debris, moss treatment, and occasional re-coating with preservatives are non-negotiable for maximizing lifespan.


    Cedar Shakes vs. Other Roofing Materials

    To help you contextualize the value, let’s compare cedar shakes to other common roofing options. This comparison highlights why many homeowners choose cedar despite the higher upfront cost.

    FeatureCedar ShakesAsphalt ShinglesMetal RoofingSlate
    Avg. Lifespan30–40 Years15–20 Years40–70 Years50–100+ Years
    Aesthetic AppealHigh (Natural/Rustic)ModerateModern/IndustrialClassic/Elegant
    MaintenanceHigh (Regular Cleaning)LowVery LowLow
    Insulation ValueExcellentPoorPoorGood
    CostHighLowMedium-HighVery High

    As seen in the table, cedar offers a unique balance of longevity and natural insulation. According to Wikipedia’s entry on Wood Shingles, cedar is prized not just for durability but for its natural resistance to insect damage and decay, provided it is kept dry.

    What Is The Life Expectancy Of A Cedar Shake Roof

    How to Extend the Life of Your Cedar Roof

    You cannot change the climate, but you can change how you care for your roof. Here is a step-by-step approach to ensuring your cedar shakes reach their maximum life expectancy.

    Step 1: Annual Inspections

    Twice a year (spring and fall), walk around your property with binoculars. Look for:

    • Loose or missing shakes.
    • Signs of moss or algae buildup.
    • Damaged flashing around chimneys or vents.

    Step 2: Keep It Clean

    Debris such as leaves and pine needles traps moisture. Use a leaf blower or a soft-bristle broom to gently remove debris from the roof surface. Never use a pressure washer on high settings, as this can shred the wood fibers and force water under the shakes.

    Step 3: Treat for Moss and Algae

    If you see green patches, act immediately. Use a zinc-based cleaner or a specialized cedar roof cleaning solution. Apply it according to the manufacturer’s instructions, usually involving a low-pressure spray and letting it sit for 15–20 minutes before rinsing gently.

    Step 4: Apply a Protective Stain or Sealant

    Every 3 to 5 years, consider applying a breathable, oil-based stain or preservative. This helps repel water and blocks UV rays. Ensure the product is specifically designed for cedar roofs to allow the wood to breathe. Trapping moisture inside the wood with a non-breathable sealant will cause rot from the inside.


    Signs It’s Time to Replace Your Cedar Roof

    Even with the best care, all roofs eventually reach the end of their life. Here are the red flags that indicate your cedar shake roof has passed its life expectancy:

    1. Curling or Cupping: If the edges of the shakes are curling upward significantly, they are no longer shedding water effectively.
    2. Splitting: Large cracks running through the center of the shakes compromise the waterproof barrier.
    3. Thinning: If the shakes have worn down to less than half their original thickness, they are vulnerable to wind and hail damage.
    4. Soft Spots: If you can press into the wood and it feels spongy, rot has set in. This is a critical structural issue.
    5. Interior Leaks: Water stains on your ceiling or attic insulation are the ultimate sign that the roof system has failed.

    FAQ Section

    Q1: Does a cedar shake roof require more maintenance than asphalt?

    A: Yes. While asphalt shingles are largely “install and forget,” cedar shakes require annual cleaning and periodic treatments to prevent moss and rot. However, the trade-off is a significantly longer lifespan and better natural insulation.

    Q2: Can I walk on my cedar shake roof for repairs?

    A: It is not recommended. Cedar shakes can be brittle, especially as they age. Walking on them can cause them to crack or break. Always hire a professional roofer who uses proper safety equipment and knows how to distribute their weight without damaging the shakes.

    Q3: How does fire resistance affect cedar roof longevity?

    A: Natural cedar is combustible. However, many modern cedar shakes are treated with fire-retardant chemicals. These treatments do not significantly alter the physical lifespan of the wood but are crucial for insurance purposes and safety in wildfire-prone areas. Check local building codes for requirements.

    Q4: Will painting my cedar roof extend its life?

    A: Painting is generally discouraged for cedar shakes. Paint forms a solid film that traps moisture inside the wood, leading to rapid rot. Instead, use semi-transparent stains or preservatives that penetrate the wood while allowing it to breathe.

    Q5: Is cedar roofing worth the extra cost?

    A: For many homeowners, yes. While the upfront cost is higher than asphalt, the 30–40 year lifespan means you may only replace the roof once or twice in the lifetime of the home, compared to two or three replacements with asphalt. Plus, the aesthetic appeal can increase property value.

    Q6: What is the best season to install or repair a cedar roof?

    A: Late spring or early summer is ideal. The weather is typically dry, allowing the wood to acclimate properly. Avoid installation during heavy rain seasons or extreme winter cold, as moisture content management is critical for cedar.


    Conclusion

    So, what is the life expectancy of a cedar shake roof? With premium materials and diligent care, you can enjoy a beautiful, durable roof for 30 to 40 years, and potentially longer. It is an investment in both the beauty and the efficiency of your home.

    While it requires more attention than synthetic alternatives, the reward is a living, breathing roof that ages gracefully. By keeping it clean, treating it regularly, and addressing issues early, you ensure that your cedar roof remains a standout feature of your home for decades.

    Did you find this guide helpful? Share it with your friends on social media who are considering a roof upgrade, or leave a comment below with your own cedar roof experiences!

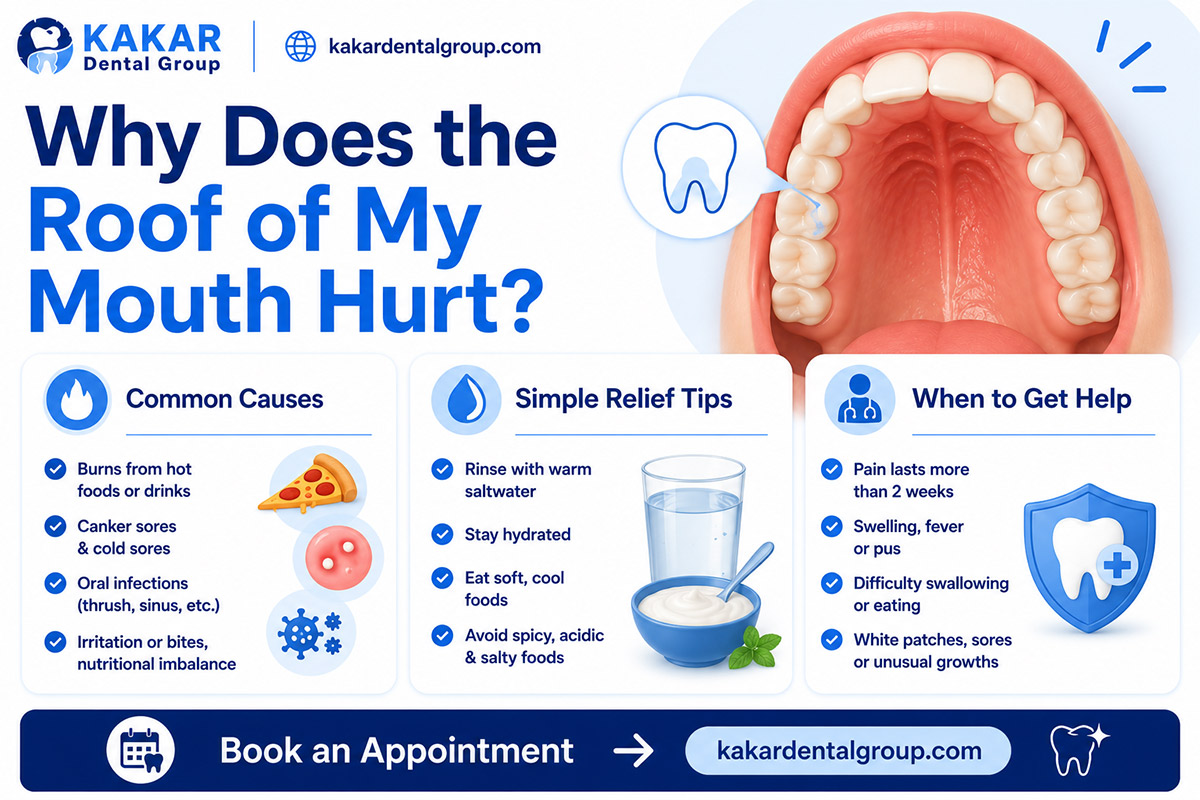
  • Sore on Roof of Mouth? Causes & Fast Relief

    Sore on Roof of Mouth? Causes & Fast Relief

    Have you ever taken a bite of hot pizza or crunchy chips, only to feel a sharp sting hours later? It is an incredibly frustrating and painful experience that can make eating, drinking, and even speaking difficult. If you are currently thinking, “I have a sore in the roof of my mouth,” you are not alone, and there are proven ways to manage the pain and speed up healing.

    The roof of your mouth, known medically as the palate, is sensitive tissue. When it becomes irritated, injured, or infected, it can disrupt your daily life. This guide will walk you through why this happens, how to treat it at home, and when you need professional medical attention. We will break down complex medical information into simple, actionable steps so you can find relief quickly.

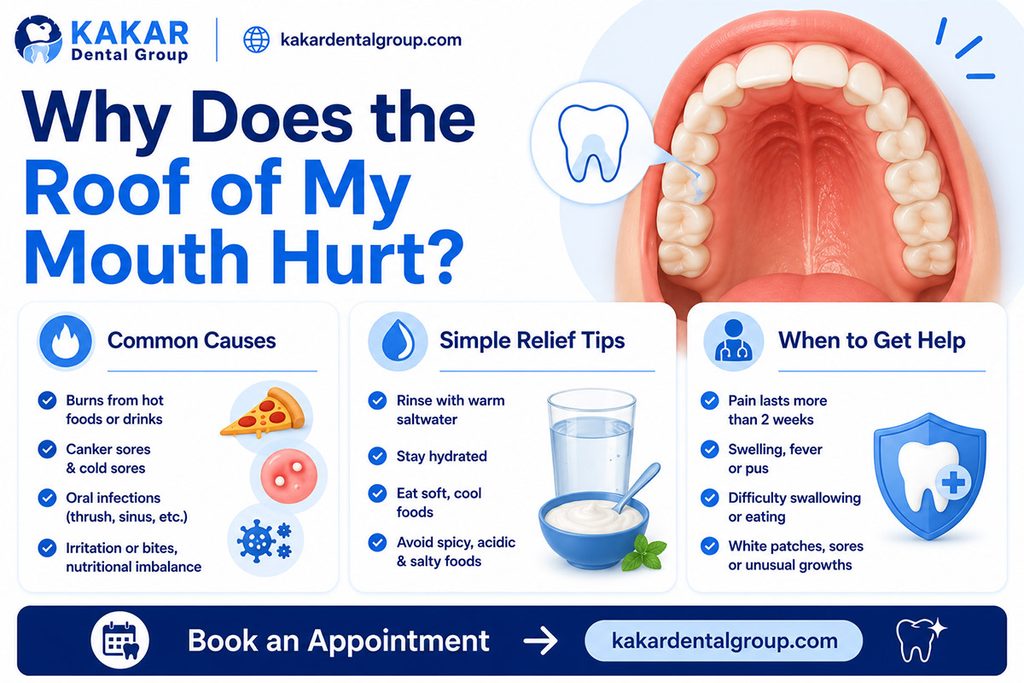
    Why Does the Roof of My Mouth Hurt?

    Understanding the root cause is the first step toward effective treatment. The palate is divided into two parts: the hard palate (the bony front section) and the soft palate (the muscular back section). Sores can appear on either, but the causes often differ slightly.

    1. Thermal Burns (Pizza Palate)

    This is the most common culprit. The tissue on the roof of your mouth is delicate. Consuming food or drinks that are too hot—typically above 140°F (60°C)—can cause first-degree or second-degree burns.

    • Symptoms: Redness, blistering, peeling skin, and a raw, tender sensation.
    • Healing Time: Usually 3–7 days.

    2. Physical Trauma

    Hard foods like tortilla chips, crusty bread, or candy can scratch or puncture the palate. Even aggressive brushing or dental appliances can cause abrasions.

    • Symptoms: A distinct cut or scrape, minor bleeding, and localized pain.

    3. Canker Sores (Aphthous Ulcers)

    These are small, shallow lesions that develop on the soft tissues in your mouth or at the base of your gums. Unlike cold sores, they don’t occur on the surface of your lips and aren’t contagious.

    • Symptoms: Round or oval sores with a white or yellow center and a red border. They can be quite painful.
    • Triggers: Stress, minor injury, acidic foods, or vitamin deficiencies.

    4. Oral Thrush (Candidiasis)

    This is a fungal infection caused by an overgrowth of Candida yeast. It is more common in infants, the elderly, and those with weakened immune systems.

    • Symptoms: Creamy white lesions on the tongue or inner cheeks, which can spread to the roof of the mouth. Bleeding may occur if scraped.

    5. Viral Infections

    Viruses like Herpes Simplex (cold sores) or Hand, Foot, and Mouth Disease can cause blisters and sores on the palate.

    • Symptoms: Clusters of small blisters that burst and form ulcers, often accompanied by fever or fatigue.

    Immediate Home Remedies for Pain Relief

    When you realize, “I have a sore in the roof of my mouth,” your immediate goal is to reduce inflammation and prevent infection. Here are evidence-based home remedies that are safe and effective.

    Salt Water Rinse

    Salt water is a natural disinfectant that helps reduce swelling and cleans the sore.

    1. Mix 1/2 teaspoon of salt into 8 ounces (240 ml) of warm water.
    2. Swish the solution gently around your mouth for 15–30 seconds.
    3. Spit it out. Do not swallow.
    4. Repeat 2–3 times a day.

    Honey Application

    Honey has natural antibacterial and anti-inflammatory properties. Manuka honey, in particular, is renowned for its healing capabilities.

    • Apply a small dab of honey directly to the sore.
    • Let it sit for a few minutes before swallowing or rinsing.
    • Note: Do not give honey to children under 1 year old.

    Cold Compresses

    If the sore is due to a burn, cold can numb the area and reduce inflammation.

    • Suck on ice chips or popsicles.
    • Avoid very acidic flavors (like lemon) which may sting.

    Over-the-Counter Gels

    Products containing benzocaine or lidocaine can provide temporary numbing relief. Look for gels specifically designed for oral use. Always follow the package instructions regarding dosage and frequency.

    I Have A Sore In The Roof Of My Mouth

    What to Eat and What to Avoid

    Your diet plays a crucial role in the healing process. Certain foods can irritate the sore, delaying recovery, while others can soothe it.

    Foods to Eat (Soothing)Foods to Avoid (Irritating)
    Yogurt and smoothiesSpicy foods (chili, hot sauce)
    Mashed potatoesAcidic fruits (citrus, tomatoes)
    Cool soups (not hot)Salty snacks (chips, pretzels)
    ApplesauceCrunchy/hard foods (nuts, toast)
    Pudding or gelatinVery hot beverages

    Pro Tip: Let your food cool to room temperature or below before eating. Aim for a temperature between 68–72°F (20–22°C) to avoid re-injuring the tissue.

    When Should You See a Doctor?

    While most mouth sores heal on their own within a week or two, some signs indicate a more serious underlying issue. According to general medical guidelines, you should consult a healthcare provider if:

    • The sore persists for more than two weeks without improvement.
    • You have difficulty swallowing, breathing, or opening your mouth.
    • You experience a high fever (above 100.4°F or 38°C).
    • The sore is unusually large or spreads rapidly.
    • You notice white patches that cannot be wiped away (potential sign of oral lichen planus or other conditions).

    For more detailed information on oral conditions, you can refer to trusted resources like Wikipedia’s page on Mouth Ulcers to understand the broader medical context, though always prioritize professional medical advice for diagnosis.

    Prevention Tips for a Healthy Palate

    Preventing future sores is easier than treating them. Here are some habits to adopt:

    1. Test Food Temperature: Before taking a big bite, touch the food to your lip or take a tiny test bite.
    2. Chew Carefully: Be mindful when eating hard or sharp foods. Chew slowly to avoid accidental scratches.
    3. Maintain Oral Hygiene: Brush twice a day with a soft-bristled toothbrush and floss daily. This reduces bacteria that can infect minor cuts.
    4. Stay Hydrated: A dry mouth is more prone to irritation. Drink plenty of water throughout the day.
    5. Manage Stress: High stress levels can weaken your immune system, making you more susceptible to canker sores. Practice relaxation techniques like deep breathing or meditation.

    FAQ Section

    1. How long does it take for a burned roof of the mouth to heal?

    Most minor thermal burns on the palate heal within 3 to 7 days. The mouth has a rich blood supply, which promotes rapid healing. However, deeper burns may take up to two weeks. Keep the area clean and avoid irritants to speed up the process.

    2. Can stress cause sores on the roof of my mouth?

    Yes, stress is a known trigger for canker sores (aphthous ulcers). While stress doesn’t directly burn the tissue, it can weaken your immune response, making your mouth more vulnerable to minor injuries and infections. Managing stress can help reduce the frequency of these outbreaks.

    3. Is a sore on the roof of my mouth contagious?

    It depends on the cause. Canker sores and burns are not contagious. However, if the sore is caused by a viral infection like herpes simplex (cold sores) or hand, foot, and mouth disease, it is contagious. Avoid sharing utensils, cups, or kissing until the sore has completely healed if you suspect a viral cause.

    4. Why does my sore hurt more when I eat acidic foods?

    Acidic foods (like oranges, pineapples, or tomato sauce) lower the pH level in your mouth. This acidity irritates the exposed nerve endings in the open sore, causing a sharp stinging sensation. It also slows down the healing process by inflaming the tissue further. Stick to neutral-pH foods during recovery.

    5. Can vitamin deficiencies cause mouth sores?

    Yes. Deficiencies in Vitamin B12, Iron, Folate, and Zinc are linked to recurrent canker sores. If you frequently get sores without an obvious cause like burning or trauma, consider discussing a blood test with your doctor to check your nutrient levels.

    6. Should I pop a blister on the roof of my mouth?

    No, never pop a blister. Popping it exposes the raw tissue underneath to bacteria, increasing the risk of infection and prolonging healing time. Let the blister burst naturally or reabsorb into the body. If it is painful, use a saltwater rinse to keep it clean.

    Conclusion

    Dealing with the thought, “I have a sore in the roof of my mouth,” is uncomfortable, but it is rarely a cause for panic. Most cases are the result of minor burns, physical trauma, or common canker sores that resolve with simple home care. By using saltwater rinses, avoiding irritating foods, and keeping your mouth clean, you can significantly reduce pain and speed up healing.

    Remember, patience is key. Your mouth is one of the fastest-healing parts of your body, but it needs a little help from you. If symptoms persist beyond two weeks or worsen, do not hesitate to seek professional medical advice.

    Found this guide helpful? Share it with friends and family on social media so they can also find quick relief from mouth sores. Your next meal doesn’t have to be painful!

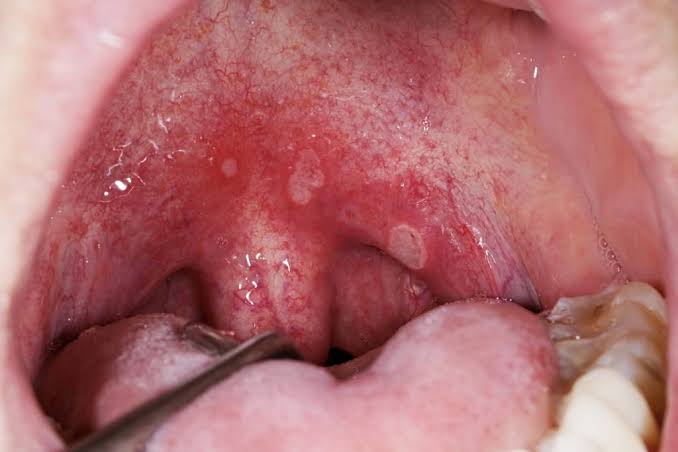
  • What Can Cause Sores In The Roof Of Your Mouth?

    What Can Cause Sores In The Roof Of Your Mouth?

    Have you ever taken a bite of hot pizza only to feel a sharp, stinging pain on the roof of your mouth hours later? Or perhaps you woke up with an unexplained blister that makes eating and speaking uncomfortable? You are not alone; many people experience this painful condition, leading them to ask, “What can cause sores in the roof of your mouth?” Understanding the root cause is the first step toward healing and preventing future occurrences.

    In this guide, we will explore the most common reasons behind these irritating lesions, differentiate between minor injuries and serious conditions, and provide actionable advice for relief. Whether it’s a simple thermal burn or a sign of an underlying health issue, knowing what to look for can save you time, money, and discomfort.

    Common Causes of Palatal Sores

    The roof of your mouth, known medically as the palate, is sensitive tissue. When it develops sores, it is usually a reaction to physical trauma, infection, or systemic health issues. Let’s break down the primary culprits.

    1. Thermal Burns (Pizza Palate)

    This is arguably the most frequent cause of sores on the hard palate. We often refer to this as “pizza palate.” It happens when you consume food or beverages that are too hot.

    • How it happens: Hot cheese, soup, or coffee can scald the delicate mucous membranes.
    • Symptoms: Redness, blistering, peeling skin, and tenderness.
    • Healing Time: Typically 3–7 days.

    According to dental professionals, the palate has fewer nerve endings than the tongue, which is why you might not feel the burn immediately until the damage is done.

    2. Canker Sores (Aphthous Ulcers)

    Canker sores are small, shallow lesions that develop on the soft tissues in your mouth or at the base of your gums. While they commonly appear on the inner cheeks or lips, they can also form on the soft palate (the back part of the roof of your mouth).

    • Appearance: White or yellow center with a red border.
    • Triggers: Stress, minor injury from brushing, food sensitivities (chocolate, coffee, strawberries, eggs, nuts, cheese), or nutritional deficiencies (B-12, zinc, folate, iron).
    • Contagious? No.

    3. Cold Sores (Herpes Simplex Virus)

    Unlike canker sores, cold sores are caused by the herpes simplex virus (HSV-1). They are highly contagious and usually appear on the lips, but primary outbreaks can occur inside the mouth, including the roof.

    • Appearance: Clusters of fluid-filled blisters that burst and crust over.
    • Triggers: Stress, sunlight, fever, or hormonal changes.
    • Contagious? Yes, very.

    4. Physical Trauma

    Your mouth is a rugged environment, but it is not invincible. Sharp foods like tortilla chips, hard candy, or even accidental bites can scratch or puncture the palate. Additionally, ill-fitting dentures or orthodontic appliances can cause chronic friction ulcers.

    5. Oral Thrush (Candidiasis)

    Oral thrush is a fungal infection caused by Candida albicans. It is more common in infants, the elderly, and individuals with compromised immune systems or those who use inhalers for asthma.

    • Symptoms: Creamy white lesions on the tongue or inner cheeks, sometimes spreading to the roof of the mouth. These lesions may bleed slightly when scraped.
    • Risk Factors: Antibiotic use, diabetes, dry mouth.

    6. Allergic Reactions

    Some individuals develop sores or irritation due to allergic reactions to certain ingredients in toothpaste, mouthwash, or specific foods. Sodium lauryl sulfate (SLS), a foaming agent found in many toothpastes, is a known irritant for some people prone to canker sores.

    What Can Cause Sores In The Roof Of Your Mouth

    Differentiating Between Minor and Serious Conditions

    It can be challenging to determine if a sore is benign or requires medical attention. Use this comparison table to help assess your situation.

    FeatureMinor Injury / Canker SorePotential Serious Condition
    DurationHeals within 7–14 daysPersists longer than 2 weeks
    Pain LevelModerate, improves over timeSevere, worsening, or numbness
    AppearanceSmall, round, white/yellow centerLarge, irregular borders, bleeding
    Other SymptomsNone or mild discomfortFever, difficulty swallowing, weight loss
    CauseTrauma, stress, dietInfection, autoimmune disease, cancer

    If your sore fits the description in the right column, it is crucial to consult a healthcare provider. Persistent sores can sometimes be a sign of oral cancer or other systemic diseases. For more detailed information on oral health conditions, you can refer to Wikipedia’s page on Mouth Ulcers to understand the broader medical context.

    Step-by-Step Relief and Treatment

    If you are dealing with a painful sore on the roof of your mouth, here is a practical guide to speeding up recovery and managing pain.

    Step 1: Rinse with Salt Water

    Salt water is a natural disinfectant and helps reduce inflammation.

    • Recipe: Mix 1 teaspoon of salt into 8 ounces (approx. 240 ml) of warm water.
    • Action: Swish gently around your mouth for 30 seconds, then spit it out. Do this 3–4 times a day.

    Step 2: Apply Topical Treatments

    Over-the-counter gels containing benzocaine or hydrogen peroxide can numb the area and promote healing.

    • Tip: Dry the area with a clean tissue before applying the gel for better adhesion.

    Step 3: Avoid Irritants

    While healing, steer clear of:

    • Spicy or acidic foods (citrus, tomatoes).
    • Crunchy or sharp foods (chips, toast).
    • Very hot beverages.

    Step 4: Maintain Oral Hygiene

    Continue brushing and flossing, but use a soft-bristled toothbrush. Consider switching to an SLS-free toothpaste if you suspect sensitivity.

    Step 5: Stay Hydrated

    Dry mouth can exacerbate sores. Drink plenty of water throughout the day. Aim for at least 2 liters of water daily, keeping the temperature cool (22–28°C) to avoid further irritation.

    When to See a Doctor

    While most palatal sores resolve on their own, certain red flags warrant professional evaluation. Seek medical advice if:

    1. The sore does not heal after two weeks.
    2. You have a high fever accompanying the sore.
    3. The sores are spreading rapidly.
    4. You have difficulty eating, drinking, or swallowing.
    5. You notice white patches that cannot be wiped away.

    Early diagnosis is key, especially if the cause is viral, fungal, or related to an autoimmune condition like lupus or Crohn’s disease.

    FAQ Section

    Q1: How long does it take for a burn on the roof of the mouth to heal?

    A: A minor thermal burn typically heals within 3 to 7 days. The mouth has a rich blood supply, which aids in rapid tissue regeneration. However, deeper burns may take up to two weeks. Keep the area clean and avoid hot foods to speed up the process.

    Q2: Can stress cause sores on the roof of my mouth?

    A: Yes, stress is a significant trigger for canker sores (aphthous ulcers). High stress levels can weaken your immune system, making you more susceptible to outbreaks. Managing stress through relaxation techniques, adequate sleep, and exercise can help reduce the frequency of these sores.

    Q3: Are sores on the roof of the mouth contagious?

    A: It depends on the cause. Canker sores and thermal burns are not contagious. However, cold sores caused by the herpes simplex virus and oral thrush (fungal infection) are contagious. Avoid sharing utensils, cups, or lip balm if you suspect a viral or fungal origin.

    Q4: What home remedies work best for immediate pain relief?

    A: For immediate relief, try rinsing with cold water or sucking on ice chips to numb the area. Honey has natural antibacterial properties and can be applied directly to the sore. Over-the-counter oral anesthetics containing benzocaine are also effective for temporary pain management.

    Q5: Could my toothpaste be causing the sores?

    A: It is possible. Many commercial toothpastes contain sodium lauryl sulfate (SLS), a foaming agent that can irritate the mucous lining of the mouth in sensitive individuals. Switching to an SLS-free toothpaste may reduce the frequency of canker sores.

    Q6: When should I worry about a sore on the roof of my mouth?

    A: You should consult a doctor or dentist if the sore persists for more than two weeks, is unusually large, is accompanied by a fever, or if you have difficulty swallowing. Persistent sores can sometimes indicate underlying health issues that require professional treatment.

    Conclusion

    Dealing with sores on the roof of your mouth can be frustrating and painful, but understanding what can cause sores in the roof of your mouth empowers you to take control of your oral health. Most cases are benign, resulting from minor burns, stress-induced canker sores, or physical trauma, and they heal within a week or two with proper care.

    By maintaining good oral hygiene, avoiding known irritants, and managing stress, you can significantly reduce your risk of developing these uncomfortable lesions. Remember, if a sore persists beyond two weeks or is accompanied by other concerning symptoms, do not hesitate to seek professional medical advice.

    Found this guide helpful? Share it with friends and family on social media to help them navigate their own oral health challenges. Your share could be the tip someone needs to find relief today!

  • How Long Does It Take Roof of Mouth to Heal?

    How Long Does It Take Roof of Mouth to Heal?

    Have you ever taken a bite of piping hot pizza or sipped scalding coffee, only to feel that immediate, stinging regret on the roof of your mouth? It is a painful experience that can make eating and speaking uncomfortable for days. If you are currently dealing with this irritation, you are likely asking yourself: how long does it take roof of mouth to heal?

    The good news is that the oral mucosa—the tissue lining your mouth—is one of the fastest-healing tissues in the human body. However, the exact timeline depends on the severity of the burn or injury. In this comprehensive guide, we will break down the healing stages, provide actionable home remedies to speed up recovery, and explain when you should seek professional medical attention.

    Understanding the Healing Timeline

    When we discuss burns or injuries to the palate (the roof of the mouth), it is essential to categorize the damage. Most household incidents result in first-degree or mild second-degree burns. Here is what you can generally expect regarding recovery time.

    First-Degree Burns: 3 to 7 Days

    A first-degree burn affects only the outermost layer of the skin (epithelium). You might experience redness, mild swelling, and tenderness, but there are no blisters.

    • Days 1–2: The area feels raw and sensitive to hot or spicy foods.
    • Days 3–5: The pain subsides significantly. You may notice some peeling of the top layer of skin, which is a normal part of the regeneration process.
    • Days 6–7: The tissue usually returns to normal.

    Second-Degree Burns: 1 to 2 Weeks

    If the heat was intense enough to cause blistering, you have sustained a second-degree burn. These take longer to heal because the damage extends deeper into the dermis.

    • Week 1: Blisters may form and eventually burst. This stage is often the most painful.
    • Week 2: The open sore begins to close up. New tissue forms, appearing pink and smooth.
    • Beyond 2 Weeks: If the burn has not healed by this point, it may indicate an infection or a more severe underlying issue.

    Note: Individual healing rates vary based on age, overall health, and immune system function. Smokers or individuals with diabetes may experience slower healing times.

    Why Does the Mouth Heal Faster Than Skin?

    You might wonder why a cut on your finger takes weeks to heal, while a burnt palate seems to recover in days. Science offers a fascinating explanation.

    According to research highlighted by Wikipedia’s entry on wound healing, the oral cavity has a unique environment that promotes rapid repair. The mouth is constantly bathed in saliva, which contains histatins—proteins that accelerate wound closure. Additionally, the blood supply to the face and head is exceptionally rich, delivering oxygen and nutrients required for tissue repair more efficiently than other parts of the body.

    Immediate Steps to Soothe a Burnt Palate

    If you have just burned the roof of your mouth, immediate action can minimize tissue damage and reduce pain. Follow these steps within the first hour of injury.

    1. Cool the Area Immediately

    Do not ignore the sting. Rinse your mouth with cool water (not ice-cold, as extreme cold can shock the tissue) for at least 30 seconds. This helps dissipate the residual heat trapped in the tissue layers.

    2. Avoid Irritants

    For the next 48 hours, strictly avoid:

    • Hot beverages and soups.
    • Spicy foods (chili, pepper, hot sauce).
    • Acidic foods (citrus fruits, tomato-based sauces).
    • Crunchy or sharp foods (chips, nuts) that can physically scrape the tender area.

    3. Use Salt Water Rinses

    Starting 24 hours after the injury, rinse your mouth with a warm saltwater solution.

    • Recipe: Mix 1/2 teaspoon of salt into 8 ounces (approx. 240 ml) of warm water.
    • Frequency: Swish gently for 30 seconds, 3–4 times a day.
    • Benefit: Salt acts as a mild antiseptic and reduces inflammation.
    How Long Does It Take Roof Of Mouth To Heal

    Home Remedies to Accelerate Healing

    While time is the primary healer, several natural remedies can provide comfort and support the regeneration process.

    RemedyHow It WorksApplication Method
    HoneyHas natural antibacterial and anti-inflammatory properties.Apply a small dab directly to the burnt area 2–3 times daily.
    YogurtProbiotics help balance oral bacteria; cool temperature soothes pain.Eat plain, unsweetened yogurt. Let it sit on the palate before swallowing.
    Aloe VeraContains compounds that stimulate skin growth and repair.Use food-grade aloe vera gel. Apply a thin layer to the affected spot.
    MilkCoats the mouth and provides a cooling effect.Sip cold milk slowly. Avoid if you are lactose intolerant.

    Important: Do not apply butter or oil immediately after a burn. Old myths suggest this helps, but it can actually trap heat inside the tissue, worsening the burn.

    When to See a Doctor or Dentist

    Most palate burns are minor and resolve on their own. However, you should monitor your symptoms closely. Seek professional medical advice if you experience any of the following “red flags”:

    1. Signs of Infection: Increased redness, pus, foul odor, or fever.
    2. Persistent Pain: Pain that does not improve after 7–10 days.
    3. Large Blisters: Blisters larger than 1 centimeter that do not burst or heal.
    4. Difficulty Swallowing: If the swelling obstructs your airway or makes drinking water difficult.
    5. Recurring Issues: If you frequently burn your palate without a clear cause, it could indicate a sensory nerve issue or other medical condition.

    Frequently Asked Questions (FAQ)

    1. Can I brush my teeth if I have a burnt roof of my mouth?

    Yes, you should continue to maintain oral hygiene to prevent infection. However, be gentle around the injured area. Use a soft-bristled toothbrush and avoid scrubbing the palate directly. You might also consider using a mild, alcohol-free mouthwash to avoid stinging.

    2. Is it safe to pop a blister on the roof of my mouth?

    No. Never pop a blister intentionally. The blister serves as a natural bandage, protecting the underlying raw tissue from bacteria. Popping it increases the risk of infection and delays healing. Let it burst naturally or reabsorb on its own.

    3. What foods should I eat while my palate is healing?

    Stick to a soft, bland diet. Ideal options include:

    • Mashed potatoes (cooled down).
    • Smoothies (avoid acidic fruits like oranges).
    • Scrambled eggs.
    • Oatmeal.
    • Pudding or custard.

    4. Does smoking affect the healing of a burnt palate?

    Yes, significantly. Smoking restricts blood flow and introduces harmful chemicals into the mouth, which can dry out the tissues and impair the immune response. If you smoke, try to refrain or reduce usage while your mouth is healing to ensure a faster recovery.

    5. Can stress cause sores on the roof of the mouth?

    While stress itself does not burn the tissue, it can weaken your immune system, making you more susceptible to canker sores (aphthous ulcers) or slowing down the healing of existing injuries. Managing stress through rest and hydration supports overall oral health.

    Conclusion

    Dealing with a burnt or injured palate is unpleasant, but understanding how long does it take roof of mouth to heal can help you manage your expectations and care for your mouth properly. For most minor burns, you can expect full recovery within 3 to 7 days. By keeping the area clean, avoiding irritants, and using soothing remedies like honey or salt water, you can minimize discomfort and speed up the process.

    Remember, your mouth is resilient. With a little patience and proper care, you will be back to enjoying your favorite hot foods in no time.

    Found this guide helpful? Share it with your friends and family on social media to help them handle their next kitchen mishap with confidence! Don’t forget to leave a comment below if you have any other questions about oral health.

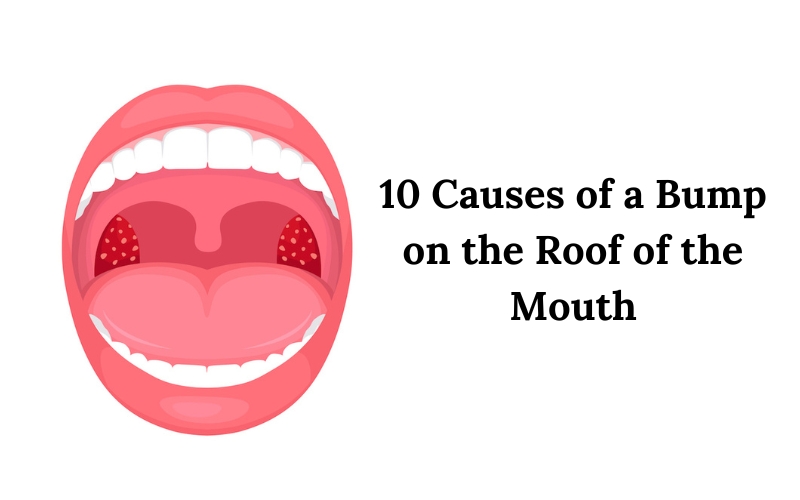
  • The Roof of the Mouth: Hard & Soft Palate Explained

    The Roof of the Mouth: Hard & Soft Palate Explained

    Have you ever run your tongue along the top of your mouth and wondered about the distinct textures you feel? It is a curious part of our anatomy that plays a crucial role in eating, speaking, and breathing, yet many of us rarely think about it until something feels wrong. Understanding exactly what the roof of the mouth is made up of the hard and soft palates can help you better appreciate your oral health and identify potential issues early.

    In this comprehensive guide, we will break down the complex structure of your palate, explain its vital functions, and provide expert insights into keeping this sensitive area healthy. Whether you are a student, a health enthusiast, or simply curious about your body, this article will provide clear, accurate, and actionable information.

    What Exactly Is the Roof of the Mouth Made Of?

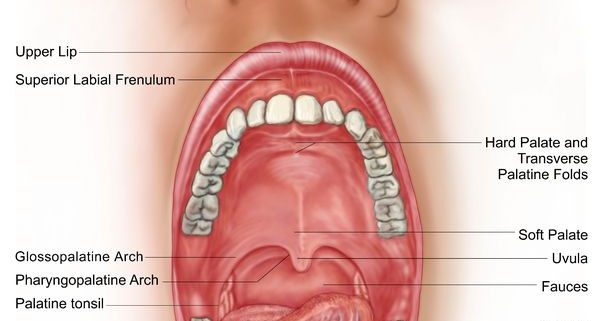
    To answer the primary question directly: the roof of the mouth, medically known as the palate, is divided into two distinct sections—the hard palate and the soft palate. These two structures work together but are composed of different tissues and serve different mechanical purposes.

    The hard palate forms the anterior (front) two-thirds of the roof. It is a bony structure covered by a thin layer of mucous membrane. This rigid surface provides a stable platform against which your tongue can press food during chewing.

    The soft palate makes up the posterior (back) one-third. Unlike its front counterpart, it contains no bone. Instead, it is composed of muscle fibers and connective tissue, making it flexible and movable. This flexibility is essential for swallowing and speech.

    Understanding this division is critical because problems affecting the hard palate (like burns from hot pizza) differ significantly from issues affecting the soft palate (like snoring or sleep apnea).

    The Hard Palate: Structure and Function

    The hard palate is the rigid shelf you feel immediately behind your upper teeth. Its primary job is structural support and mechanical assistance during mastication (chewing).

    Anatomical Composition

    The hard palate is formed by two specific bones:

    1. The Palatine Process of the Maxilla: This is the horizontal part of the upper jawbone.
    2. The Horizontal Plate of the Palatine Bone: This bone sits further back and connects to the maxilla.

    These bones are fused together at the midline by a suture called the median palatine suture. Overlying these bones is a specialized type of tissue called keratinized stratified squamous epithelium. This tissue is tough and resistant to abrasion, which is necessary because it constantly rubs against food.

    Key Functions

    • Chewing Surface: It provides a hard surface for the tongue to crush food against the teeth.
    • Speech Articulation: It helps produce certain consonant sounds, such as “t,” “d,” and “k,” by allowing the tongue to create brief closures against the roof of the mouth.
    • Separation: It physically separates the oral cavity from the nasal cavity, preventing food from entering your nose while eating.
    The Roof Of The Mouth Is Made Up Of The

    The Soft Palate: The Flexible Muscle

    Moving further back into your throat, you encounter the soft palate. If you say “ahhh” in front of a mirror, you can see this structure lift.

    Anatomical Composition

    The soft palate lacks bone. Instead, it is a muscular flap composed of:

    • Muscle Fibers: Including the levator veli palatini and tensor veli palatini muscles.
    • Connective Tissue: Providing structure and elasticity.
    • Mucous Membrane: A non-keratinized lining that is softer and more sensitive than the hard palate.

    At the very back of the soft palate hangs the uvula, that small, teardrop-shaped piece of tissue that often gets blamed for snoring.

    Key Functions

    • Swallowing (Deglutition): When you swallow, the soft palate lifts and moves backward to close off the nasopharynx. This prevents food and liquid from going up into your nasal cavity.
    • Speech: It controls the resonance of your voice. By raising or lowering, it allows air to escape through the nose (for sounds like “m” and “n”) or keeps it in the mouth (for most other sounds).
    • Suction: In infants, the soft palate creates a seal necessary for effective breastfeeding or bottle-feeding.

    Common Issues Affecting the Palate

    Even though the palate is robust, it is susceptible to various conditions. Recognizing these early can prevent complications.

    ConditionAffected AreaSymptomsCommon Causes
    Palatal BurnsHard PalateRedness, blistering, painHot foods (pizza cheese, coffee)
    Canker SoresBothSmall, painful ulcersStress, minor injury, acidic foods
    Sleep ApneaSoft PalateSnoring, daytime fatigueRelaxed muscles blocking airway
    Cleft PalateBothGap in the roof of the mouthCongenital birth defect
    ThrushBothWhite patches, bleedingFungal infection (Candida)

    The Danger of Thermal Burns

    One of the most common injuries to the roof of the mouth is a thermal burn. Because the hard palate has less blood flow than other parts of the mouth, it heals slower. If you burn your palate, avoid spicy or acidic foods for a few days to allow the epithelial layer to regenerate.

    Sleep Apnea and the Soft Palate

    Obstructive Sleep Apnea (OSA) is a serious condition where the soft palate and tongue relax too much during sleep, blocking the airway. According to the National Heart, Lung, and Blood Institute, this can lead to high blood pressure and heart disease. If you snore loudly or wake up gasping, consult a healthcare provider.

    How to Maintain a Healthy Palate

    Keeping the roof of your mouth healthy is largely about good overall oral hygiene and mindful eating habits. Here are some expert-recommended steps:

    1. Practice Gentle Brushing: Many people forget to brush their palate. Use a soft-bristled toothbrush to gently clean the hard palate to remove bacteria and food debris. Do not scrub the soft palate aggressively, as it is sensitive.
    2. Stay Hydrated: A dry mouth increases the risk of infection and bad breath. Saliva helps wash away bacteria from the roof of the mouth. Aim for at least 2 liters of water daily.
    3. Avoid Extremely Hot Foods: Let your coffee or soup cool for a minute before consuming. Repeated thermal injury can lead to chronic inflammation or even cellular changes over time.
    4. Regular Dental Checkups: Dentists examine the roof of your mouth during routine cleanings. They can spot early signs of oral cancer, which often presents as a persistent sore or patch on the palate.
    5. Quit Smoking: Tobacco use is a leading cause of oral cancers and can cause “nicotinic stomatitis,” a condition where the hard palate becomes white and thickened.

    Frequently Asked Questions (FAQ)

    1. Why does the roof of my mouth hurt?

    Pain in the roof of the mouth is commonly caused by thermal burns from hot food, minor trauma from sharp foods (like chips), or canker sores. If the pain persists for more than two weeks, it could indicate an infection or other underlying issue, and you should see a dentist.

    2. Can you get cancer on the roof of your mouth?

    Yes, oral cancer can develop on both the hard and soft palate. Risk factors include tobacco use, heavy alcohol consumption, and HPV infection. Early detection is key, so report any non-healing sores, lumps, or white/red patches to your doctor immediately.

    3. What is the bump on the roof of my mouth?

    A hard, bony bump in the center of the hard palate is often a torus palatinus. It is a benign bony growth that is harmless and requires no treatment unless it interferes with dentures. If the bump is soft, painful, or growing rapidly, seek medical advice.

    4. How does the palate help with speech?

    The palate acts as a barrier and a resonating chamber. The hard palate provides a surface for the tongue to create crisp consonant sounds. The soft palate raises to block nasal airflow for most sounds and lowers to allow nasal airflow for sounds like “m,” “n,” and “ng.”

    5. Is it normal for the roof of my mouth to be white?

    A slightly lighter color than the rest of the mouth can be normal due to the keratinized tissue. However, distinct white patches that cannot be wiped away may indicate leukoplakia or thrush. Always have unusual discoloration checked by a professional.

    Conclusion

    Understanding what the roof of the mouth is made up of the hard and soft palates reveals the intricate design of our oral anatomy. From the bony stability of the hard palate that aids in chewing to the muscular flexibility of the soft palate that enables speech and swallowing, each part plays a vital role in our daily lives.

    By maintaining good oral hygiene, being mindful of food temperatures, and staying hydrated, you can keep your palate healthy and functional. Remember, your mouth is the gateway to your overall health, so don’t ignore persistent symptoms.

    If you found this guide helpful, please share it with friends and family on social media. Spreading awareness about oral anatomy can help others take better care of their health!

  • How Much To Put A New Roof On A House?

    How Much To Put A New Roof On A House?

    Replacing a roof is one of the most significant home improvement projects you will ever undertake. It is not just about aesthetics; it is about protecting your family, your belongings, and your investment from the elements. If you are currently stressing over budgets and quotes, you are not alone. Many homeowners find themselves asking, “How much to put a new roof on a house?” without knowing where to start.

    This guide breaks down the costs clearly, helping you make an informed decision without the headache. We will explore material options, labor factors, and hidden costs so you can plan with confidence.

    Understanding the Average Cost of a New Roof

    When determining how much to put a new roof on a house, the national average typically ranges between $8,500 and $14,500 for a standard 2,000-square-foot home. However, this number can fluctuate significantly based on your location, the complexity of your roof’s design, and the materials you choose.

    In 2026, inflation and supply chain stabilizations have settled into a new normal. While prices have cooled slightly from the post-pandemic peaks, labor shortages in skilled trades continue to keep installation costs steady.

    Key Cost Factors

    • Roof Size: Measured in “squares” (1 square = 100 sq. ft.).
    • Material Type: Asphalt shingles are cheapest; slate and metal are premium.
    • Labor: Varies by region and contractor expertise.
    • Removal Costs: Tearing off the old roof adds to the bill.

    Pro Tip: Always get at least three detailed quotes. A low bid might exclude essential steps like ice and water shield installation or proper ventilation upgrades.

    How Does Roof Size Impact the Total Price?

    The size of your roof is the primary driver of cost. Contractors do not measure your home’s footprint; they measure the actual surface area of the roof, which includes slopes and overhangs.

    Home Size (Sq. Ft.)Approximate Roof Area (Squares)Estimated Cost (Asphalt Shingles)
    1,00010–12 squares$4,500 – $7,000
    1,50015–18 squares$6,500 – $9,500
    2,00020–24 squares$8,500 – $14,000
    2,500+25+ squares$11,000 – $18,000+

    Note: These estimates include removal of old roofing and disposal fees.

    If your roof has multiple stories, steep pitches, or many valleys and chimneys, expect to pay a premium. Complex roofs require more safety equipment, more time, and higher insurance premiums for the contractor, all of which are passed on to you.

    Which Roofing Material Offers the Best Value?

    Choosing the right material is crucial for balancing upfront cost with long-term durability. Here is a breakdown of popular options in the US market.

    1. Asphalt Shingles

    • Cost: $3.50 – $5.50 per sq. ft. installed.
    • Lifespan: 15–30 years.
    • Pros: Affordable, easy to repair, widely available.
    • Cons: Shorter lifespan, susceptible to wind damage.

    2. Metal Roofing

    • Cost: $7.00 – $12.00 per sq. ft. installed.
    • Lifespan: 40–70 years.
    • Pros: Energy-efficient, durable, fire-resistant.
    • Cons: Higher upfront cost, can be noisy during rain if not insulated properly.

    3. Clay or Concrete Tiles

    • Cost: $10.00 – $20.00 per sq. ft. installed.
    • Lifespan: 50–100 years.
    • Pros: Excellent for hot climates, aesthetically distinct.
    • Cons: Very heavy (may require structural reinforcement), fragile if walked on.

    4. Slate Roofing

    • Cost: $15.00 – $30.00+ per sq. ft. installed.
    • Lifespan: 75–200 years.
    • Pros: Unmatched beauty and durability, increases home value.
    • Cons: Extremely expensive, requires specialized installers.

    For most American homeowners, architectural asphalt shingles remain the sweet spot for value and performance. They offer better wind resistance and a more dimensional look than traditional 3-tab shingles, without the premium price tag of metal or slate.

    How Much To Put A New Roof On A House

    What Hidden Costs Should You Budget For?

    When asking how much to put a new roof on a house, many homeowners forget the “invisible” expenses. These can add 10–20% to your total budget if not anticipated.

    • Permits: Most municipalities require a building permit for roof replacement. Costs range from $150 to $500 depending on your city.
    • Decking Repair: Once the old shingles are removed, contractors may find rotten plywood decking. Replacing a sheet of plywood costs $50–$100 per sheet, plus labor.
    • Ventilation Upgrades: Modern building codes often require improved attic ventilation. Installing ridge vents or soffit vents can cost $300–$800.
    • Dumpster Fees: Disposing of old roofing materials is heavy work. Expect to pay $300–$600 for dumpster rental and hauling.
    • Landscaping Protection: If you have delicate gardens, you may need to pay extra for tarps and careful cleanup to prevent damage from falling debris.

    To understand the historical context of roofing materials and their evolution, you can refer to this Wikipedia article on roofing. This resource provides a broad overview of how roofing techniques have changed over centuries, highlighting why modern standards are stricter today.

    How to Choose the Right Roofing Contractor

    Your choice of contractor matters as much as the material you choose. A poor installation can void warranties and lead to leaks within months.

    1. Check Licensing and Insurance: Ensure they have general liability and workers’ compensation insurance. Ask for proof.
    2. Look for Local Reviews: Check Google, Yelp, and the Better Business Bureau. Look for patterns in complaints rather than isolated incidents.
    3. Ask About Warranties:
      • Manufacturer Warranty: Covers defects in the shingles (usually 20–50 years).
      • Workmanship Warranty: Covers installation errors (usually 2–10 years).
    4. Get Everything in Writing: The contract should specify materials, brand, color, start/end dates, payment schedule, and cleanup procedures.

    Avoid paying the full amount upfront. A standard deposit is 10–30%, with the remainder paid upon satisfactory completion.

    DIY vs. Professional Installation: Is It Worth It?

    Some homeowners consider DIY to save money. While technically possible, roofing is dangerous. Falls from roofs are a leading cause of home improvement injuries.

    Furthermore, most manufacturers will void the warranty if the roof is not installed by a certified professional. Given that a new roof is a 20+ year investment, saving $2,000 now could cost you $10,000 later in premature repairs.

    Verdict: Hire a professional. The risk-to-reward ratio for DIY roofing is too high for most homeowners.

    Frequently Asked Questions (FAQ)

    1. How long does a roof replacement take?

    For an average-sized home, a professional crew can complete the job in 1 to 3 days. Larger or more complex roofs may take up to a week. Weather delays are common, so build some flexibility into your schedule.

    2. Does a new roof increase home value?

    Yes. According to real estate experts, a new roof can recoup 60–70% of its cost in increased home value. More importantly, it makes your home easier to sell, as buyers are wary of immediate major repairs.

    3. Can I install a new roof over the old one?

    This is called a “roof-over.” While it saves on disposal costs, it is generally not recommended. It hides potential deck damage, adds excessive weight, and can void manufacturer warranties. Most local codes also limit you to two layers maximum.

    4. What is the best time of year to replace a roof?

    Late spring to early fall is ideal because temperatures are moderate, allowing shingle adhesives to seal properly. However, scheduling during the off-season (late winter) might yield better pricing due to lower demand, provided the weather permits safe work.

    5. How do I maintain my new roof?

    Inspect your roof twice a year (spring and fall). Clean gutters regularly to prevent water backup. Trim tree branches that hang over the roof to prevent damage from falling limbs and to reduce shade, which encourages moss growth.

    Conclusion

    Knowing how much to put a new roof on a house empowers you to budget effectively and avoid scams. While the average cost sits between $8,500 and $14,500, your specific price will depend on materials, size, and local labor rates. Remember, a roof is not just an expense; it is a critical investment in your home’s longevity and your family’s safety.

    Don’t rush the process. Take the time to compare quotes, check credentials, and choose quality materials. Your future self will thank you when storms roll through and your home stays dry and secure.

    Found this guide helpful? Share it with your neighbors on Facebook or Pinterest to help them prepare for their own home improvement projects!

  • How Much Is A New Roof On A Small House?

    How Much Is A New Roof On A Small House?

    Replacing a roof is one of the most significant investments a homeowner can make. It protects your family, enhances curb appeal, and significantly impacts your property value. If you are staring at aging shingles or dealing with a leak, you are likely asking the critical question: how much is a new roof on a small house?

    The answer isn’t a single number, but rather a range influenced by materials, labor, and location. For a typical small home (approximately 1,000 to 1,500 square feet), costs generally range from $5,000 to $15,000. However, understanding the breakdown is essential to avoid overpaying. This guide will walk you through every factor affecting your budget, ensuring you make an informed decision with confidence.

    What Factors Influence the Cost of a Small Roof?

    Before diving into specific numbers, it is crucial to understand why prices vary. Even for small structures, several variables play a massive role in the final invoice.

    1. Roof Size and Complexity

    In the roofing industry, size is measured in “squares.” One square equals 100 square feet of roof area. A small house might have 10 to 15 squares of roofing. However, the footprint of your house is not the same as the roof area. Steeper pitches require more material and safety equipment, increasing labor costs. Additionally, complex designs with multiple valleys, dormers, or chimneys require more time and skill to seal properly.

    2. Material Selection

    This is the biggest cost driver. Asphalt shingles are the most affordable, while metal, slate, or tile can double or triple the price. For small homes, the difference in total material cost is less dramatic than on large estates, but the percentage increase remains significant.

    3. Labor and Location

    Labor costs vary wildly across the United States. A roofer in rural Ohio may charge significantly less per hour than a contractor in San Francisco or New York City. Furthermore, if your small house is difficult to access (e.g., surrounded by dense trees or tight lot lines), contractors may add a “difficulty premium.”

    4. Removal of Old Roofing

    Does your new roof need to go over the old one, or must the old layers be torn off? Most building codes allow only two layers of asphalt shingles. Removing old roofing adds to the disposal fees and labor time. Expect to pay an additional $1–$5 per square foot for tear-off and disposal.

    Average Cost Breakdown by Material (2026 Estimates)

    To give you a clear picture, let’s look at the estimated costs for a small house with a roof area of approximately 1,200 square feet (12 squares). These prices include both materials and professional installation.

    Material TypeCost Per Square FootTotal Estimated Cost (1,200 sq. ft.)LifespanBest For
    3-Tab Asphalt Shingles$3.50 – $5.50$4,200 – $6,60015–20 YearsBudget-conscious owners
    Architectural Shingles$4.50 – $7.50$5,400 – $9,00025–30 YearsBalance of cost & durability
    Metal Roofing (Steel)$8.00 – $14.00$9,600 – $16,80040–70 YearsLong-term investment
    Clay/Concrete Tile$10.00 – $18.00$12,000 – $21,60050+ YearsHot climates, aesthetic appeal
    Slate$15.00 – $30.00+$18,000 – $36,000+75–100+ YearsHistoric homes, luxury

    Note: Prices are national averages for 2026 and may fluctuate based on regional supply chain conditions.

    Why Asphalt Shingles Remain Popular

    For most small homeowners, architectural asphalt shingles offer the best bang for the buck. They mimic the look of wood or slate at a fraction of the cost and are widely available. According to industry data, asphalt shingles account for nearly 80% of the residential roofing market in the US due to their affordability and ease of repair.

    How Much Is A New Roof On A Small House

    Hidden Costs You Might Overlook

    When calculating how much is a new roof on a small house, many homeowners forget the ancillary expenses. These “hidden” costs can add 10–20% to your budget if not planned for.

    • Permits: Most municipalities require a building permit for roof replacement. Fees typically range from $150 to $500, depending on your local government.
    • Underlayment and Flashing: High-quality synthetic underlayment and ice/water shields are critical for preventing leaks. Upgrading from basic felt paper to synthetic materials might cost an extra $200–$400 but offers superior protection.
    • Ventilation Improvements: Proper airflow extends the life of your roof. Installing new ridge vents or soffit vents during replacement is highly recommended and may cost $300–$600.
    • Gutter Replacement: If your gutters are old, they may be damaged during the tear-off process. Many homeowners choose to replace them simultaneously, adding $1,000–$3,000 to the project.

    DIY vs. Hiring a Professional: Is It Worth It?

    You might be tempted to save money by doing it yourself. While DIY projects are rewarding, roofing is dangerous and technically demanding.

    The Risks of DIY Roofing

    • Safety Hazards: Falls from roofs are a leading cause of home improvement injuries. Professionals have harnesses, scaffolding, and insurance.
    • Warranty Voidance: Most manufacturers will void the warranty on shingles if they are not installed by a certified professional.
    • Code Compliance: Incorrect installation can lead to failed inspections, forcing you to redo the work.

    Benefits of Hiring a Pro

    Professional roofers bring expertise, speed, and liability insurance. They can spot underlying structural issues (like rotted decking) that an amateur might miss. For a small house, the labor savings from DIY might be $2,000–$4,000, but the risk of improper installation leading to leaks often outweighs the savings.

    If you are handy, consider handling the cleanup and debris removal yourself to save on dumpster fees, but leave the installation to the experts. For more information on building standards and safety, you can refer to general construction guidelines on Wikipedia.

    How to Save Money on Your Small Roof Replacement

    You don’t have to break the bank to get a quality roof. Here are proven strategies to lower costs:

    1. Choose Standard Colors: Custom-colored shingles or special orders often carry a premium. Stick to standard colors like black, gray, or brown, which are usually in stock and cheaper.
    2. Schedule Off-Season: Roofing demand peaks in late summer and early fall. Scheduling your project in late winter or early spring (weather permitting) can sometimes secure you a discount as contractors look to fill their schedules.
    3. Get Multiple Quotes: Never accept the first bid. Aim for at least three detailed quotes. Ensure each quote includes the same scope of work (materials, tear-off, cleanup) for an accurate comparison.
    4. Check for Insurance Claims: If your roof damage was caused by a recent storm (hail, wind), your homeowners insurance might cover part or all of the replacement. Review your policy and file a claim if applicable.

    FAQ Section

    1. How long does it take to replace a roof on a small house?

    For a small house (1,000–1,500 sq. ft.), a professional crew can typically complete the job in 1 to 2 days. This includes tearing off the old roof, inspecting the decking, and installing the new materials. Weather delays can extend this timeline.

    2. Can I install a new roof over the old one?

    Yes, in many cases, you can install a second layer of asphalt shingles over the existing one. This saves on tear-off and disposal costs. However, this is only allowed if there is currently only one layer of shingles and the local building code permits it. Always check with your contractor first, as trapping moisture between layers can cause issues.

    3. Does a new roof increase home value?

    Absolutely. A new roof is a major selling point. According to real estate experts, a new roof can recoup 60–70% of its cost in increased home value. More importantly, it makes the home easier to sell, as buyers are often wary of immediate major repairs.

    4. What is the cheapest way to replace a roof?

    The most cost-effective method is using 3-tab asphalt shingles and keeping the existing roof structure intact (if code allows). Opting for a simple roof design without complex angles also reduces labor costs. However, remember that “cheapest” upfront may mean higher maintenance costs later.

    5. How do I know if I need a full replacement or just repairs?

    If your roof is over 20 years old, has widespread granule loss, or leaks in multiple areas, a full replacement is likely more cost-effective than repeated repairs. If the damage is isolated to a small section (e.g., from a fallen branch) and the rest of the roof is in good condition, repairs may suffice.

    Conclusion

    So, how much is a new roof on a small house? While the national average hovers between $5,000 and $15,000, your specific cost depends on material choice, location, and roof complexity. By understanding these factors, you can budget accurately and avoid surprises.

    Investing in a quality roof is not just about aesthetics; it’s about protecting your biggest asset. Don’t rush the decision. Get multiple quotes, ask questions, and choose a reputable contractor who values transparency.

    Found this guide helpful? Share it with friends or family who are planning home improvements! Let’s help others make smarter financial decisions for their homes. 🏠🔨