Blog

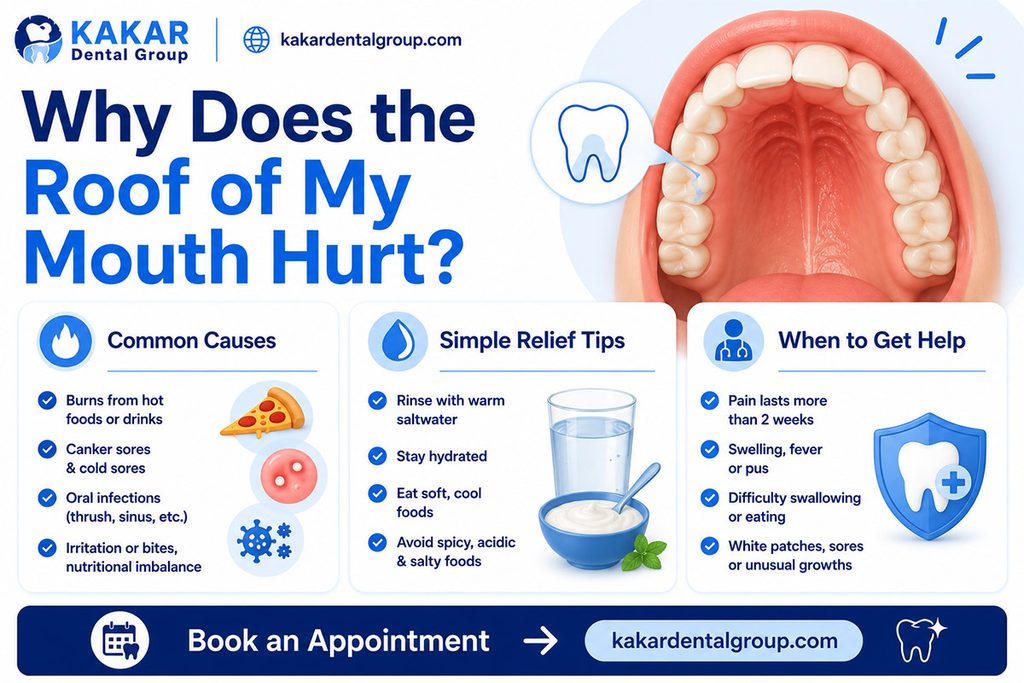
  • Why Is The Roof Of My Mouth Swollen And Hurting?

    Why Is The Roof Of My Mouth Swollen And Hurting?


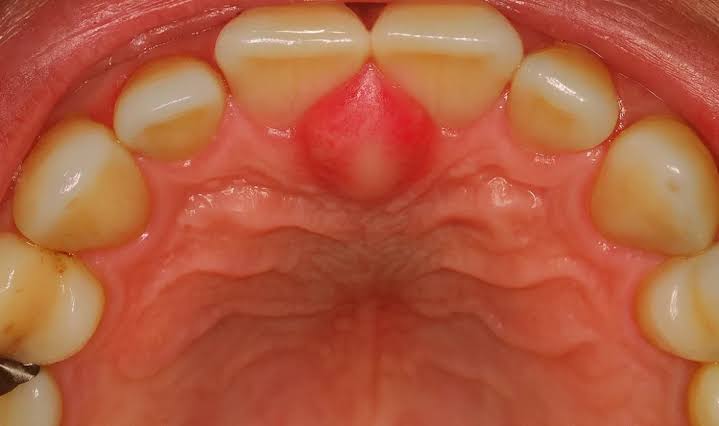
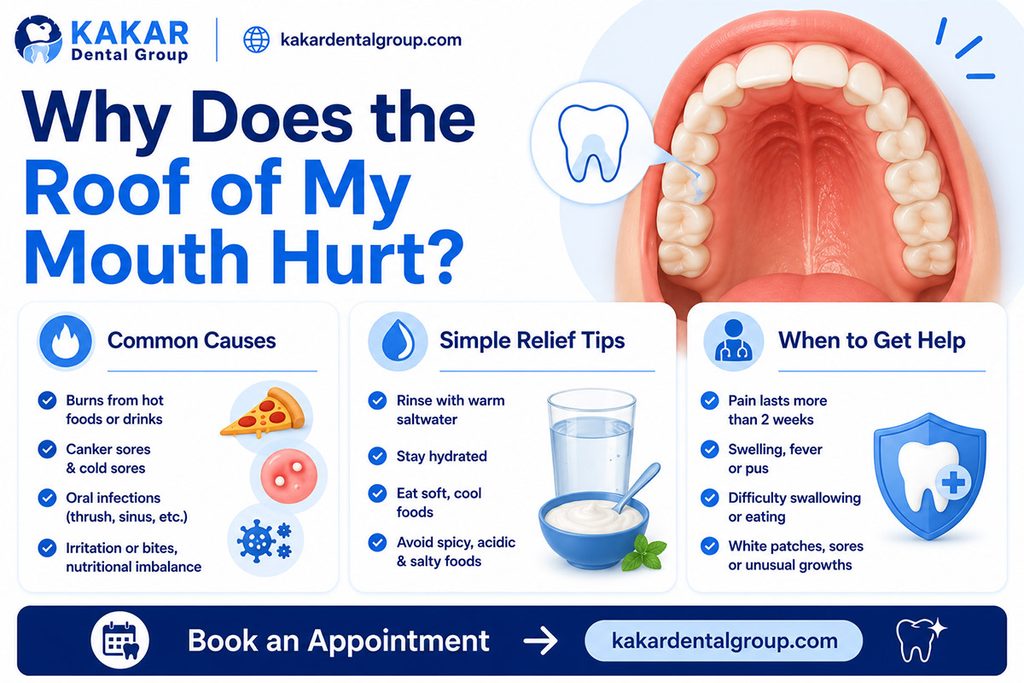
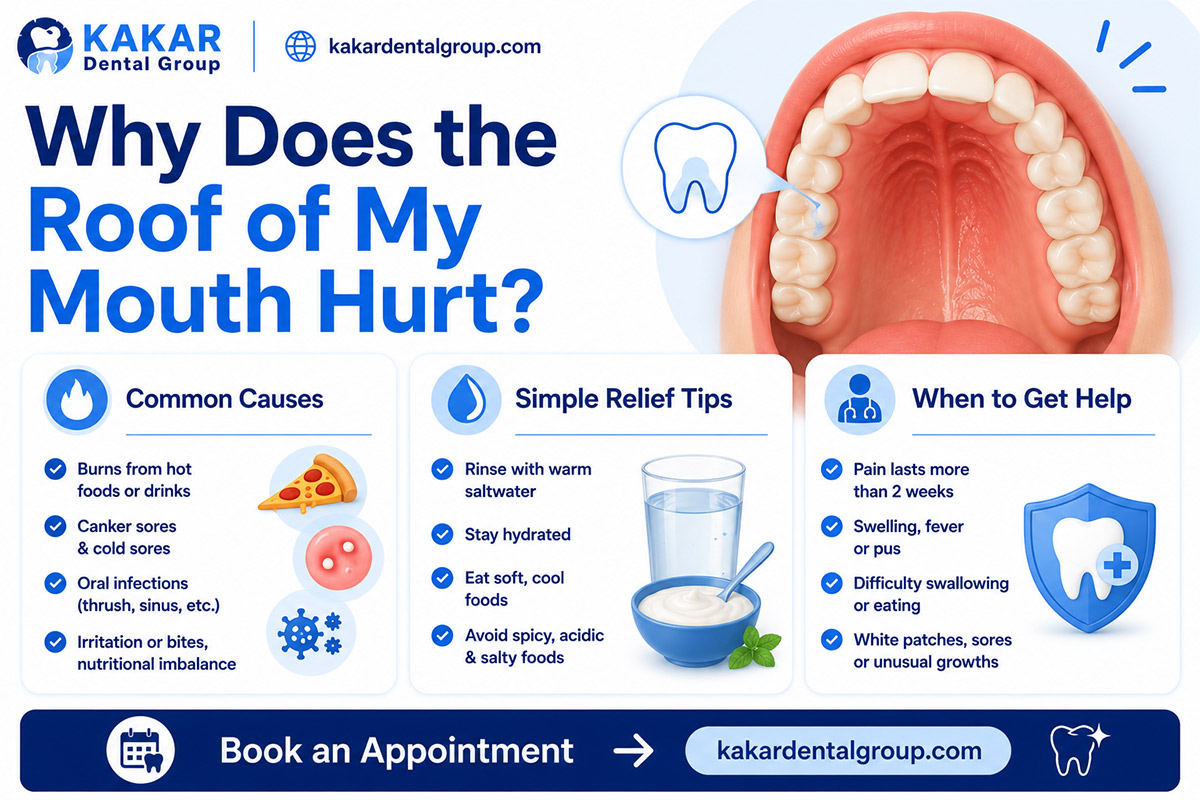
    Have you ever taken a bite of hot pizza or a crunchy chip, only to feel a sharp, throbbing pain on the roof of your mouth? It is an incredibly uncomfortable sensation that can make eating, drinking, and even speaking difficult. If you are currently asking yourself, “Why is the roof of my mouth swollen and hurting,“ you are not alone. This common issue often stems from minor injuries or infections, but understanding the root cause is the first step toward effective relief.

    In this guide, we will explore the most likely reasons for your discomfort, provide actionable home remedies, and help you determine when it is time to seek professional medical advice. Let’s dive in to get you feeling better quickly.

    Common Causes: Why Does the Palate Hurt?

    The roof of your mouth, known medically as the palate, is sensitive tissue. When it becomes inflamed, it is usually a response to irritation, infection, or trauma. Here are the primary culprits behind that painful swelling.

    1. Thermal Burns (Pizza Palate)

    This is arguably the most common reason for sudden pain. The hard palate has thin mucous membranes that are easily damaged by high temperatures. Consuming food or drinks that are too hot—like fresh coffee, soup, or melted cheese—can cause first-degree burns.

    • Symptoms: Redness, blistering, peeling skin, and tenderness.
    • Healing Time: Typically 3–7 days.

    2. Physical Trauma from Food

    Hard, sharp, or crunchy foods can scratch or puncture the delicate tissue of the palate. Think of tortilla chips, hard crusts of bread, or candy. Even aggressive brushing with a hard-bristled toothbrush can cause micro-abrasions that lead to swelling.

    3. Canker Sores (Aphthous Ulcers)

    Canker sores are small, shallow lesions that develop on the soft tissues in your mouth or at the base of your gums. While they often appear on the cheeks or lips, they can also form on the roof of the mouth.

    • Triggers: Stress, minor injury, acidic foods, or vitamin deficiencies.
    • Appearance: White or yellow center with a red border.

    4. Oral Thrush (Yeast Infection)

    Oral thrush is a fungal infection caused by Candida albicans. It is more common in infants, the elderly, and individuals with weakened immune systems or those taking antibiotics.

    • Symptoms: Creamy white lesions, bleeding if scraped, and a cotton-like feeling in the mouth.
    • Risk Factor: According to the Centers for Disease Control and Prevention (CDC), oral candidiasis is a common opportunistic infection in people with compromised immune systems.

    5. Allergic Reactions

    Food allergies or sensitivities to oral care products (like sodium lauryl sulfate in toothpaste) can cause contact stomatitis. This results in inflammation, swelling, and itching on the palate.

    Immediate Relief: How to Soothe the Pain at Home

    If you are dealing with minor swelling or a burn, you can often manage the pain effectively at home. Here is a step-by-step approach to reducing inflammation and promoting healing.

    Step 1: Cool Down the Area

    If the pain is due to a thermal burn, immediate cooling is essential.

    • Sip cold water or suck on ice chips.
    • Avoid hot beverages for at least 24–48 hours.
    • Eat soft, cool foods like yogurt, pudding, or smoothies.

    Step 2: Salt Water Rinse

    Salt water is a natural disinfectant that helps reduce swelling and kills bacteria.

    1. Mix 1/2 teaspoon of salt into 8 ounces (approx. 240 ml) of warm water.
    2. Swish the solution gently around your mouth for 30 seconds.
    3. Spit it out. Do not swallow.
    4. Repeat this process 3–4 times a day, especially after meals.

    Step 3: Use Over-the-Counter Remedies

    • Pain Relievers: Non-prescription medications like ibuprofen or acetaminophen can help reduce pain and inflammation.
    • Topical Gels: Look for oral gels containing benzocaine. These provide temporary numbing relief. Note: Use strictly as directed on the label.

    Step 4: Avoid Irritants

    While your mouth is healing, steer clear of:

    • Spicy foods
    • Acidic fruits (oranges, lemons, tomatoes)
    • Crunchy or sharp snacks
    • Alcohol-based mouthwashes
    Why Is The Roof Of My Mouth Swollen And Hurting

    When to See a Doctor: Red Flags to Watch For

    While most cases of a swollen palate resolve on their own within a week, some symptoms indicate a more serious underlying condition. You should consult a dentist or healthcare provider if you experience:

    SymptomPossible ConcernAction Required
    Swelling lasts > 2 weeksChronic infection or lesionSchedule dental exam
    High fever (>100.4°F / 38°C)Systemic infectionSeek medical attention
    Difficulty breathing/swallowingSevere allergic reactionGo to ER immediately
    White patches that bleedOral thrush or lichen planusConsult doctor for antifungals
    Lumps that grow rapidlyCyst or tumorUrgent specialist referral

    It is crucial to listen to your body. Persistent pain is not normal and should never be ignored. Early diagnosis can prevent complications and ensure faster recovery.

    Preventing Future Palate Pain

    Prevention is always better than cure. Here are some practical tips to keep your oral health in top shape and avoid recurring issues.

    • Test Food Temperature: Always let hot food and drinks cool for a few minutes before consuming. A simple “lip test” can save you from a painful burn.
    • Chew Carefully: Take smaller bites and chew slowly, especially when eating hard or crunchy foods.
    • Maintain Oral Hygiene: Brush twice a day with a soft-bristled toothbrush and floss daily. This prevents gum disease and reduces the bacterial load in your mouth.
    • Stay Hydrated: Dry mouth (xerostomia) increases the risk of irritation and infection. Drink plenty of water throughout the day.
    • Check Your Products: If you frequently get mouth sores, consider switching to a toothpaste free of sodium lauryl sulfate (SLS).

    FAQ Section

    1. Can stress cause the roof of my mouth to swell?

    Indirectly, yes. Stress weakens the immune system, making you more susceptible to canker sores and viral infections like cold sores, which can cause swelling and pain on the palate. However, stress itself does not directly cause physical swelling without an underlying lesion.

    2. Is a swollen roof of the mouth contagious?

    It depends on the cause. If the swelling is due to a burn or trauma, it is not contagious. However, if it is caused by a viral infection (like herpes simplex) or a fungal infection (like thrush), it can be transmitted to others through shared utensils, kissing, or poor hygiene practices.

    3. How long does it take for a burned palate to heal?

    Minor thermal burns usually heal within 3 to 7 days. Deeper burns may take up to two weeks. During this time, the tissue may peel, which is a normal part of the healing process. Keep the area clean and avoid further irritation.

    4. Can dehydration cause mouth pain?

    Yes. Saliva plays a critical role in protecting the oral tissues. When you are dehydrated, saliva production decreases, leading to a dry mouth. This makes the delicate tissues of the palate more prone to irritation, cracking, and infection.

    5. What is the best food to eat when the roof of your mouth hurts?

    Stick to a soft, bland, and cool diet. Excellent options include:

    • Greek yogurt
    • Applesauce
    • Mashed potatoes (cooled)
    • Smoothies (avoid acidic fruits)
    • Scrambled eggs
    • Oatmeal

    6. Should I pop a blister on the roof of my mouth?

    No. Never pop a blister in your mouth. Doing so opens the wound to bacteria, significantly increasing the risk of infection and delaying the healing process. Let the blister rupture naturally or absorb on its own.

    Conclusion

    Dealing with a swollen and painful roof of the mouth is frustrating, but in most cases, it is a temporary issue caused by minor burns, trauma, or common infections. By identifying the cause—whether it’s that too-hot cup of coffee or a stubborn canker sore—you can apply the right treatment to speed up recovery.

    Remember to keep your mouth clean, stay hydrated, and avoid irritants while you heal. If the pain persists for more than two weeks or is accompanied by other severe symptoms, do not hesitate to consult a healthcare professional.

    Found this guide helpful? Share it with your friends and family on social media so they can also find relief from mouth pain. Stay healthy and smile confidently!

  • Stop Itchy Roof of Mouth: Fast Relief Guide

    Stop Itchy Roof of Mouth: Fast Relief Guide

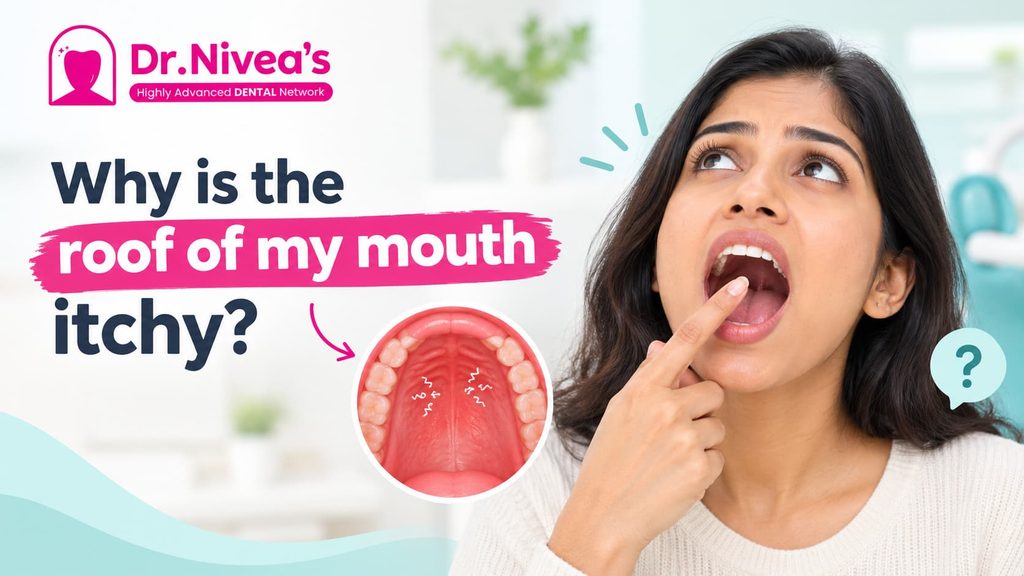
    Have you ever been in the middle of a delicious meal or a quiet afternoon when suddenly, an uncontrollable itch strikes the roof of your mouth? It is a frustrating and distracting sensation that can make it difficult to focus or enjoy your food. If you are searching for how to stop the roof of my mouth from itching, you are not alone; this common issue affects millions of Americans annually, often stemming from mild allergies or environmental irritants.

    In this comprehensive guide, we will explore the root causes of this annoying sensation and provide actionable, expert-backed strategies to bring you immediate relief. We will cover everything from quick home remedies to understanding when you need to see a doctor, ensuring you have the knowledge to manage this condition effectively.

    Why Does the Roof of My Mouth Itch?

    Before diving into solutions, it is crucial to understand the “why.” The roof of your mouth, known medically as the palate, is lined with sensitive mucous membranes. When these membranes become inflamed or irritated, nerve endings send itch signals to your brain.

    According to data from the American College of Allergy, Asthma, and Immunology, up to 30% of adults suffer from some form of allergic rhinitis, which frequently manifests as oral itching. However, allergies are not the only culprit. Identifying the specific trigger is the first step toward effective treatment.

    Common Triggers at a Glance

    Trigger CategorySpecific CausesTypical Symptoms
    AllergiesPollen, dust mites, pet danderItching, sneezing, watery eyes
    Food SensitivitiesNuts, shellfish, certain fruitsSwelling, tingling, hives
    Oral Allergy SyndromeRaw fruits/veggies (cross-reactivity)Itching immediately after eating
    DrynessDehydration, mouth breathingCracking, general irritation
    InfectionsCold sores, thrush (yeast)Pain, white patches, blisters

    How to Stop the Roof of My Mouth From Itching: Immediate Home Remedies

    If you are experiencing sudden itching, you likely want relief now. Here are several proven methods to soothe the irritation instantly. These remedies are safe, easy to implement, and require items you probably already have in your kitchen.

    1. Rinse with Salt Water

    Salt water is a natural antiseptic and anti-inflammatory agent. It helps to reduce swelling and flush out any allergens or irritants stuck in the mucous membranes.

    • Step 1: Mix 1/2 teaspoon of non-iodized salt into 8 ounces (approx. 240 ml) of warm water. Ensure the water is comfortably warm, not hot, to avoid further irritation.
    • Step 2: Swish the solution around your mouth, focusing on tilting your head back to let the water reach the roof of your mouth.
    • Step 3: Gargle for 30 seconds, then spit it out. Do not swallow.
    • Step 4: Repeat this process 2–3 times a day until the itching subsides.

    2. Apply a Cold Compress or Ice Chips

    Cold temperatures constrict blood vessels, which reduces inflammation and numbs the nerve endings responsible for the itch sensation.

    • Method A: Suck on small ice chips. Let them melt slowly against the roof of your mouth. This provides prolonged cooling relief.
    • Method B: If you don’t have ice, drink a glass of cold water. Avoid sugary or acidic drinks, as these can exacerbate irritation.

    3. Use Honey for Soothing

    Honey has natural antibacterial and anti-inflammatory properties. It creates a protective coating over the irritated tissue.

    • Instruction: Take one teaspoon of raw, organic honey and let it coat the roof of your mouth. Hold it there for a minute before swallowing. Note: Do not give honey to children under one year old.

    4. Over-the-Counter Antihistamines

    If the itching is caused by seasonal allergies or histamine release, an oral antihistamine can block the chemical reaction causing the itch.

    • Recommendation: Look for second-generation antihistamines like cetirizine (Zyrtec) or loratadine (Claritin), which are less likely to cause drowsiness than older versions like diphenhydramine (Benadryl). Always follow the dosage instructions on the label.
    How To Stop The Roof Of My Mouth From Itching

    Understanding Oral Allergy Syndrome (OAS)

    One of the most common yet misunderstood causes of an itchy palate is Oral Allergy Syndrome (OAS), also known as pollen-food syndrome. This occurs when your immune system confuses proteins in certain raw fruits, vegetables, or nuts with pollen grains.

    For example, if you are allergic to birch pollen, you might experience an itchy roof of the mouth after eating apples, carrots, or hazelnuts. This is because the protein structures are similar.

    Key Characteristics of OAS:

    • Timing: Symptoms usually occur immediately after eating the trigger food.
    • Duration: The itching typically subsides within minutes to an hour after stopping consumption.
    • Severity: It is generally mild, but in rare cases, it can progress to more severe allergic reactions.

    To manage OAS, try peeling the fruit or cooking it. Heat denatures the proteins, making them less likely to trigger an allergic response. For more detailed information on cross-reactivity, you can refer to the Wikipedia page on Oral Allergy Syndrome.

    When to See a Doctor: Red Flags to Watch For

    While most cases of an itchy roof of the mouth are benign and temporary, some symptoms indicate a more serious underlying condition. You should seek professional medical attention if you experience:

    1. Difficulty Breathing: If the itching is accompanied by throat tightness, wheezing, or shortness of breath, this could be a sign of anaphylaxis, a life-threatening allergic reaction. Call emergency services immediately.
    2. Persistent Symptoms: If the itching lasts for more than a week despite home treatment, it may indicate a chronic infection or autoimmune issue.
    3. Visible Lesions: Look for white patches, blisters, or sores. These could be signs of oral thrush (a yeast infection) or herpes simplex virus (cold sores), which require prescription medication.
    4. Swelling: Significant swelling of the lips, tongue, or face requires immediate medical evaluation.

    Preventive Measures for Long-Term Relief

    Prevention is always better than cure. By making small adjustments to your daily routine, you can significantly reduce the frequency of itchy palate episodes.

    Maintain Oral Hygiene

    Bacteria and food particles can irritate the sensitive tissues of the mouth. Brush your teeth twice a day and floss daily. Consider using an alcohol-free mouthwash, as alcohol can dry out the mucous membranes, leading to irritation.

    Stay Hydrated

    Dehydration leads to dry mouth (xerostomia), which makes the roof of the mouth more susceptible to itching and cracking. Aim to drink at least 2 liters of water daily. If you live in a dry climate or use heating/air conditioning frequently, consider using a humidifier in your bedroom.

    Identify and Avoid Triggers

    Keep a food and symptom diary. Note what you ate and any environmental exposures (like high pollen days) when the itching occurs. Over time, patterns will emerge, allowing you to avoid specific triggers.

    Manage Stress

    Stress can weaken the immune system and exacerbate inflammatory responses, including skin and mucosal irritation. Incorporate stress-reduction techniques such as deep breathing exercises, meditation, or regular physical activity into your routine.

    FAQ Section

    1. Can dehydration cause the roof of my mouth to itch?

    Yes, dehydration can lead to dry mouth, which reduces the protective saliva layer in your mouth. This dryness can cause the delicate tissues on the roof of your mouth to become irritated and itchy. Drinking plenty of water is one of the simplest and most effective ways to prevent this.

    2. Is an itchy roof of the mouth a sign of a cold?

    It can be. In the early stages of a viral upper respiratory infection, the mucous membranes in the nose and mouth may become inflamed and itchy. This is often accompanied by other symptoms like a runny nose, sore throat, or fatigue. If you suspect a cold, rest and hydration are key.

    3. Why does my mouth itch after eating bananas?

    This is likely due to Oral Allergy Syndrome. Bananas contain proteins that are structurally similar to ragweed pollen. If you have a ragweed allergy, your body may mistake the banana proteins for pollen, triggering an immune response that results in itching. Cooking the banana may help, as heat breaks down these proteins.

    4. Can toothpaste cause an itchy roof of the mouth?

    Yes, some individuals are sensitive to ingredients commonly found in toothpaste, such as sodium lauryl sulfate (SLS), cinnamon flavoring, or whitening agents. If you notice itching after brushing, try switching to a hypoallergenic, SLS-free toothpaste to see if symptoms improve.

    5. How long does an allergic itch in the mouth last?

    For mild allergic reactions or Oral Allergy Syndrome, the itching usually subsides within 30 minutes to two hours after removing the trigger. If you take an antihistamine, relief may come faster. If the itching persists beyond 24 hours, consult a healthcare provider.

    6. Is it safe to scratch the roof of my mouth with my tongue?

    While it provides temporary relief, vigorous scratching with your tongue or fingers can damage the delicate tissue, leading to micro-tears and increasing the risk of infection. It is better to use soothing methods like cold water or salt rinses instead of mechanical scratching.

    Conclusion

    Dealing with an itchy roof of the mouth can be uncomfortable, but it is rarely a cause for panic. By understanding the underlying causes—whether they are allergies, dryness, or dietary triggers—you can take control of your symptoms. Simple remedies like salt water rinses, staying hydrated, and avoiding known allergens can provide significant relief.

    Remember, while home remedies are effective for mild cases, persistent or severe symptoms should always be evaluated by a healthcare professional. Your health is paramount, and accurate diagnosis ensures you get the right treatment.

    If you found this guide helpful, please share it with friends and family who might be suffering from similar issues. Spreading awareness about oral health and allergy management can help others find relief faster. Stay healthy, stay hydrated, and keep smiling!

  • How To Install A Ridge Cap On A Metal Roof

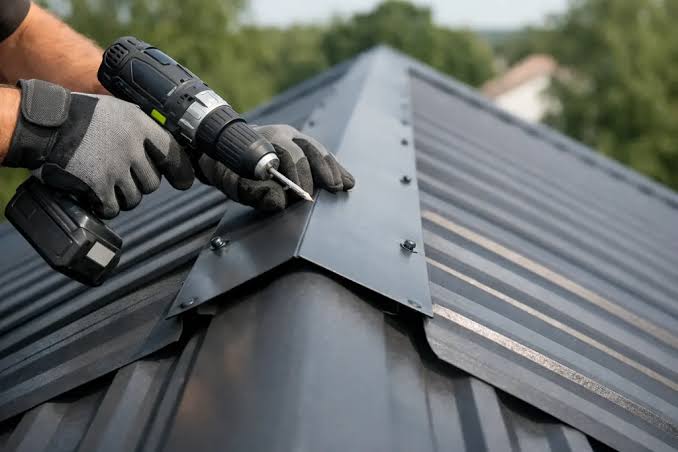
    How To Install A Ridge Cap On A Metal Roof

    Water leaking through the peak of your roof is one of the most stressful issues a homeowner can face. It threatens the structural integrity of your home and can lead to costly interior damage if not addressed immediately. If you are looking for a reliable, weather-tight solution, learning how to install a ridge cap on a metal roof is the critical final step in ensuring your roofing system performs as designed.

    Many DIY enthusiasts hesitate at this stage, fearing they might compromise the warranty or create new leaks. However, with the right tools, preparation, and attention to detail, installing a ridge cap is a manageable task that significantly enhances both the durability and aesthetic appeal of your metal roof. This guide will walk you through the process with professional precision, ensuring you get it right the first time.

    Why Is the Ridge Cap Critical for Metal Roofs?

    Before diving into the tools and steps, it is essential to understand why this component matters. The ridge cap is not merely decorative; it is the primary defense against wind-driven rain and snow entering the gap where two roof planes meet.

    According to industry standards, the ridge is the highest point of vulnerability on any roof. Without a properly sealed ridge cap, water can easily bypass the overlapping metal panels. A well-installed cap directs water away from the seam and allows for necessary ventilation, preventing heat buildup and moisture condensation in your attic.

    Expert Insight: “The ridge cap is the handshake between your two roof slopes. If that handshake isn’t firm and sealed, the entire system fails.” – National Roofing Contractors Association (NRCA) Guidelines

    Tools and Materials You Will Need

    Preparation is half the battle. Gathering the correct materials before you climb the ladder ensures a smooth workflow and reduces the time spent exposed to the elements.

    Essential Tools

    • Drill/Impact Driver: With a clutch setting to avoid over-driving screws.
    • Metal Snips or Electric Shears: For cutting the ridge cap to length.
    • Caulking Gun: For applying sealant.
    • Chalk Line: To ensure straight alignment.
    • Safety Gear: Non-slip boots, gloves, safety glasses, and a harness if the pitch is steep.

    Materials Checklist

    • Ridge Cap Flashing: Match the profile and color of your existing metal panels.
    • Closure Strips (Foam or Rubber): These fill the gap between the ribbed panel and the flat ridge cap.
    • Butyl Tape or Sealant: High-quality, UV-resistant roofing sealant.
    • Screws: Color-matched, self-tapping metal screws with neoprene washers.
    • Ventilation Strip (Optional): If you are installing a vented ridge cap for airflow.

    For more detailed information on metal roofing components and their engineering standards, you can refer to the general overview on Wikipedia’s Metal Roofing page.

    How To Install A Ridge Cap On A Metal Roof

    Step-by-Step Guide: How To Install A Ridge Cap On A Metal Roof

    Follow these steps meticulously. Rushing this process is the most common cause of future leaks.

    Step 1: Prepare the Roof Surface

    Ensure the area along the ridge is clean and dry. Remove any debris, old sealant, or loose screws. If you have existing closure strips from the panel installation, check that they are intact. If not, you will need to install new ones.

    • Tip: Work on a cool day. Metal expands in heat, which can make alignment difficult. Ideal temperatures are between 10°C and 25°C (50°F–77°F).

    Step 2: Install Closure Strips

    Closure strips are foam or rubber pieces that match the contour of your metal panels. They sit under the ridge cap to block wind, dust, and insects.

    1. Measure the length of your ridge.
    2. Cut the closure strips to fit snugly into the ribs of the metal panels along the entire ridge line.
    3. Press them firmly into place. Some professionals use a dab of adhesive to keep them from shifting during cap installation.

    Step 3: Apply Sealant Tape

    Apply a continuous bead of butyl tape or high-grade roofing sealant along the top of the closure strips. This creates a secondary water barrier.

    • Do not skimp here. Use a bead approximately 6mm (1/4 inch) thick. Ensure it is centered so it will be compressed evenly when the cap is screwed down.

    Step 4: Position the First Ridge Cap Piece

    Start at the end of the roof opposite the prevailing wind direction. This prevents wind from getting under the seams of the caps.

    1. Place the first piece of ridge cap over the closure strips.
    2. Ensure it overhangs the edge of the roof by at least 2–3 inches (5–7 cm) for proper drip edge function.
    3. Check for squareness using your chalk line if necessary.

    Step 5: Secure the Ridge Cap

    Using your drill, drive screws through the pre-drilled holes (or mark your own) in the ridge cap.

    • Screw Placement: Screws should go through the high points of the metal panels, not the flat areas, to ensure a tight seal.
    • Spacing: Place screws every 12 to 18 inches (30–45 cm) along the ridge.
    • Torque Control: Tighten until the neoprene washer is compressed and forms a seal, but do not over-tighten. Over-tightening can distort the metal or crush the closure strip, creating gaps.

    Step 6: Overlap Subsequent Pieces

    If your ridge is longer than one piece of flashing, you will need to overlap them.

    1. Apply sealant to the end of the first piece where the next one will sit.
    2. Overlap the second piece by at least 6 inches (15 cm).
    3. Screw down the second piece, ensuring the overlap is tight and sealed.
    4. Continue this process until you reach the other end of the ridge.

    Step 7: Final Inspection and Cleanup

    Once all pieces are installed, walk the ridge (safely) or inspect from a ladder.

    • Check for any visible gaps in the sealant.
    • Ensure all screw heads are flush and sealed.
    • Wipe away any excess sealant that squeezed out for a clean look.

    Common Mistakes to Avoid

    Even experienced DIYers can stumble on these pitfalls. Here is a comparison of right vs. wrong approaches:

    MistakeConsequenceCorrect Approach
    Over-tightening ScrewsCrushes foam strips, distorts metal, causes leaks.Tighten until washer seals, then stop.
    Ignoring Wind DirectionWind lifts cap edges, allowing water ingress.Start installation against the prevailing wind.
    Skipping Closure StripsLeaves gaps for pests and drafts.Always use profile-matched closure strips.
    Insufficient OverlapWater seeps through joints during heavy rain.Maintain minimum 6-inch overlap with sealant.

    FAQ: Frequently Asked Questions

    1. Can I install a ridge cap without closure strips?

    While technically possible, it is highly discouraged. Without closure strips, there is no barrier against wind-driven rain, insects, or dust entering the attic space. The ridge cap will also rattle in the wind, potentially loosening screws over time.

    2. What type of sealant is best for metal roofs?

    Use a high-quality, UV-resistant polyurethane or butyl-based sealant. Avoid standard silicone caulk, as it may not adhere well to certain metal coatings and can degrade faster under UV exposure. Look for products specifically labeled for “metal roofing” or “extreme weather.”

    3. How often do I need to replace the ridge cap?

    A properly installed metal ridge cap should last as long as the roof itself, typically 40–70 years. However, you should inspect the sealant and screws every 2–3 years. If you notice cracking sealant or loose screws, address them immediately to prevent leaks.

    4. Do I need a vented ridge cap?

    It depends on your attic ventilation design. If your roof relies on passive airflow, a vented ridge cap can significantly improve energy efficiency by allowing hot air to escape. If you already have sufficient soffit and gable vents, a solid cap may be sufficient. Consult your local building codes or an HVAC specialist.

    5. Can I install a ridge cap in the rain?

    No. Never install ridge caps or apply sealant on a wet surface. Moisture prevents proper adhesion of sealants and tapes, leading to immediate failure. Wait for a dry forecast with at least 24 hours of no rain after installation.

    Conclusion

    Learning how to install a ridge cap on a metal roof is a valuable skill that protects your biggest investment. By following these steps—preparing the surface, using closure strips, applying quality sealant, and securing the cap correctly—you ensure a watertight, durable finish that withstands the harshest weather conditions.

    Remember, patience and precision are key. Take your time with the alignment and sealing, and your roof will reward you with decades of reliable performance.

    Did you find this guide helpful? Share it with your friends on Facebook or Pinterest who might be tackling their own roofing projects. If you have questions or tips of your own, leave a comment below!

  • Stop Icicle Lights From Blowing Up On Roof

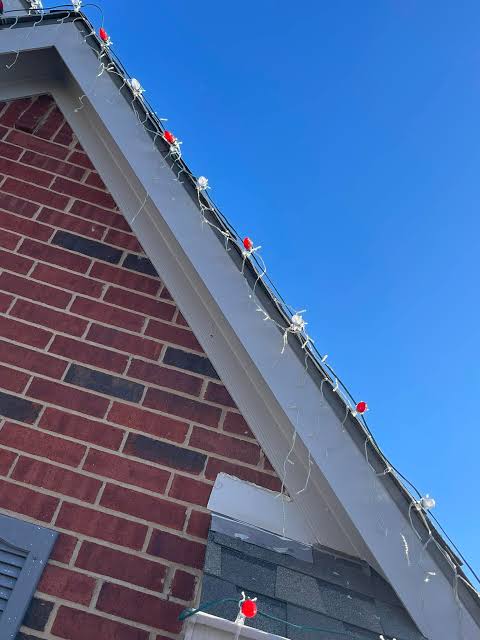
    Stop Icicle Lights From Blowing Up On Roof

    Have you ever spent hours untangling a massive spool of lights, only to hear a terrifying pop or see a spark flash just as you plug them in? It is a nightmare scenario for any homeowner who wants their house to look festive without becoming a hazard. If you are wondering how to keep icicle lights from blowing up on roof, you are not alone; thousands of Americans face this issue every December due to moisture, poor connections, or overloaded circuits.

    In this guide, we will walk you through proven strategies to ensure your display stays bright, safe, and intact throughout the winter season. We will cover everything from pre-installation checks to smart wiring techniques that prevent overheating and electrical failure.

    Why Do Icicle Lights Fail or “Blow Up”?

    Before we dive into the solutions, it is crucial to understand the root causes of failure. When people say lights “blow up,” they usually mean one of three things: a bulb shatters, a fuse blows instantly, or the plastic housing melts due to excessive heat.

    According to the U.S. Consumer Product Safety Commission (CPSC), decorative lighting causes an estimated 160 home fires each year in the United States. The primary culprits are often damaged insulation, water intrusion, and daisy-chaining too many strands together.

    The Role of Moisture and Ice

    Icicle lights are designed for outdoor use, but they are not invincible. When snow melts and refreezes around the socket, it can create a conductive path between the hot and neutral wires. This causes a short circuit. If the breaker does not trip immediately, the resistance generates intense heat, potentially melting the wire casing or shattering the bulb.

    Overloading the Circuit

    Many homeowners make the mistake of plugging multiple high-wattage incandescent strands into a single extension cord. This draws more amperage than the wire can handle, leading to overheating. Modern LED lights mitigate this risk significantly, but improper usage can still cause failures.

    Step-by-Step Guide to Safe Installation

    To ensure your lights survive the winter, follow this detailed installation protocol. These steps are designed to minimize stress on the bulbs and electrical connections.

    1. Pre-Installation Inspection

    Never skip this step. Even if your lights worked last year, weather exposure degrades materials over time.

    • Check for Fraying: Look closely at the first 3–5 feet of the cord. This area suffers the most wear from being pulled out of storage boxes.
    • Inspect Bulbs: Ensure no bulbs are cracked or loose in their sockets. A loose bulb allows moisture to enter the socket, causing corrosion and shorts.
    • Test Indoors First: Plug the strands into an indoor outlet before climbing the ladder. If they flicker or don’t light up, troubleshoot now, not while standing on a icy roof.

    2. Choose the Right Hardware

    Using the wrong clips or fasteners is a leading cause of physical damage to the wires.

    Hardware TypeProsConsVerdict
    Plastic Gutter ClipsEasy to install, cheapCan crack in extreme coldGood for mild winters
    Shingle TabsNo damage to guttersHarder to removeBest for asphalt roofs
    Adhesive HooksVersatile placementAdhesive fails in cold/wetAvoid for heavy strands
    Cable Ties (Zip Ties)Secure holdCan cut into wire insulationAvoid directly on wire

    Pro Tip: Always use UV-resistant plastic clips. Standard plastic becomes brittle in freezing temperatures and may snap, dropping your lights onto the ground or leaving jagged edges that cut the wire.

    3. Proper Hanging Technique

    How you hang the lights affects their longevity. Tension is the enemy of electrical integrity.

    • Leave Slack: Do not pull the strand tight. Leave a small amount of slack between clips. This allows for thermal contraction when temperatures drop below freezing. If the wire is taut, the copper inside can stretch and break.
    • Protect the Connectors: The male and female ends of the strands are the most vulnerable points. Ensure these connectors are elevated slightly above the gutter line so they do not sit in pooled water or ice buildup.
    • Use Drip Loops: When running extension cords from the outlet to the roof, create a “drip loop.” This is a U-shape in the cord that ensures rainwater runs off the bottom of the loop rather than traveling down the wire into the electrical outlet.
    How To Keep Icicle Lights From Blowing Up On Roof

    Managing Power and Preventing Overloads

    One of the most common reasons lights fail catastrophically is power mismanagement. Understanding the electrical load is key to knowing how to keep icicle lights from blowing up on roof.

    Calculate Your Wattage

    Check the tag on your light strands.

    • Incandescent Strands: Typically use 40–60 watts per strand. Most standard outlets can handle 15 amps (1,800 watts). However, for safety, you should never exceed 80% of capacity (1,440 watts). This means you can safely connect roughly 20–25 incandescent strands end-to-end.
    • LED Strands: Typically use 2–5 watts per strand. You can connect significantly more, often up to 40–50 strands, depending on the manufacturer’s specifications.

    Warning: Never mix LED and incandescent strands in the same series. They have different voltage requirements and can cause one type to burn out prematurely or fail entirely.

    Use Outdoor-Rated Extension Cords

    Not all extension cords are created equal. Using an indoor-rated cord outside is a fire hazard. Look for cords marked with “W-A” or “W” on the jacket, indicating they are suitable for wet locations. These cords have thicker insulation and grounded plugs to prevent shock and short circuits.

    For more detailed information on electrical safety standards, you can refer to the National Electrical Code overview on Wikipedia to understand the regulatory background of safe wiring practices.

    Maintenance During the Season

    Once your lights are up, your job isn’t done. Winter weather is dynamic, and regular checks can prevent disasters.

    Clear Snow and Ice Buildup

    Heavy snow can weigh down the strands, pulling them away from the clips and stressing the wires. Gently brush off excess snow using a soft broom. Never use sharp objects like ice picks to clear ice near the lights, as you risk piercing the insulation.

    Monitor for Flickering

    If you notice a section of lights flickering, it is often a sign of a loose connection or impending bulb failure. Address this immediately. A flickering light creates arcing, which generates heat and can ignite nearby dry leaves or debris trapped in the gutters.

    Check Connections Weekly

    Wind and thermal expansion can loosen plugs. Once a week, visually inspect the connection points between strands. Ensure they are tightly seated and, if possible, covered with electrical tape or a silicone sealant cap to keep moisture out.

    FAQ Section

    Q: Can I leave my icicle lights up all year?

    A: It is not recommended. Prolonged exposure to UV rays, rain, and temperature fluctuations will degrade the plastic housing and wire insulation, significantly increasing the risk of failure next season. Store them in a cool, dry place during the off-season.

    Q: Why do my lights work indoors but fail when I put them on the roof?

    A: This is usually due to moisture or temperature. Cold temperatures make wires brittle, and moisture can seep into micro-cracks that aren’t apparent indoors. Additionally, the physical tension of hanging them on the roof may expose weak points in the wiring.

    Q: Is it safe to use staple guns to attach lights?

    A: No. Stapling directly into the wire can pierce the insulation, creating a direct path for electricity to escape. This can cause shorts, shocks, or fires. Always use purpose-built plastic clips or shingle tabs.

    Q: How do I store icicle lights to prevent tangling and damage?

    A: Wrap each strand individually around a piece of cardboard or a dedicated light reel. Place them in a rigid plastic bin with a lid to protect them from pests and moisture. Avoid stuffing them loosely into bags, as this causes wire fatigue and bulb breakage.

    Q: What should I do if a bulb burns out?

    A: Replace it immediately with a bulb of the same voltage and wattage. Leaving an empty socket can disrupt the circuit in older series-wired lights, causing the entire strand to go out. In parallel-wired LED lights, it may not affect the rest, but it leaves the socket open to moisture.

    Conclusion

    Keeping your holiday display safe doesn’t have to be complicated. By understanding how to keep icicle lights from blowing up on roof, you are taking proactive steps to protect your home and your family. Remember to inspect your gear before installation, use the right clips to avoid physical stress, manage your electrical load carefully, and perform regular maintenance throughout the season.

    A beautiful holiday display is one that shines brightly without posing a risk. Take the time to do it right, and your lights will last for many seasons to come.

    Did you find these tips helpful? Share this article with your neighbors and friends on social media to help everyone have a safer, brighter holiday season!

  • How Many Layers of Shingles Are Allowed?

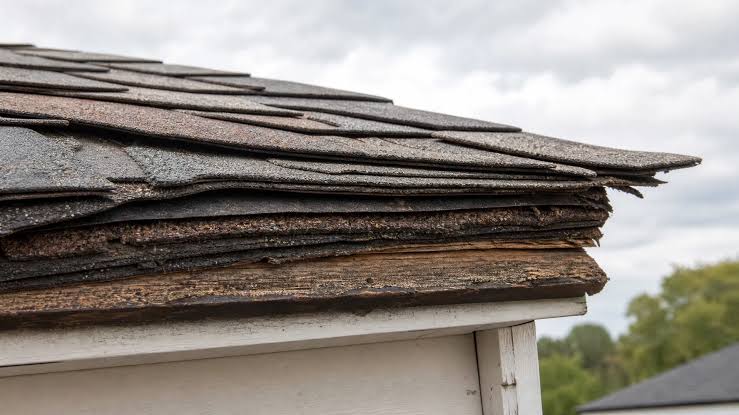
    How Many Layers of Shingles Are Allowed?

    Have you noticed your roof looking a bit uneven or heard rumors that you can save money by just adding new shingles over the old ones? It is a common dilemma for homeowners facing repair costs: tear off the old roof or cover it up? Understanding exactly how many layers of shingles are allowed on a roof is critical not just for your wallet, but for the structural integrity of your home.

    In this guide, we will break down the building codes, the hidden risks of multiple layers, and why most professional roofers recommend a single layer. Let’s dive in to ensure your next roofing decision is safe, compliant, and cost-effective.

    The General Rule: Two Layers Maximum

    When asking how many layers of shingles are allowed on a roof, the short answer for the vast majority of residential properties in the United States is two.

    Most local building codes, which are often based on the International Residential Code (IRC), prohibit installing a third layer of asphalt shingles. If your roof already has two layers, you must perform a complete tear-off before installing new shingles.

    Why Is There a Limit?

    The limitation isn’t arbitrary; it is rooted in physics and safety. Asphalt shingles are heavier than they look. A standard bundle of shingles weighs between 60 to 80 pounds. When you stack them, the weight adds up quickly.

    • Single Layer: Approx. 2–3 lbs per square foot.
    • Double Layer: Approx. 4–6 lbs per square foot.
    • Triple Layer: Approx. 6–9+ lbs per square foot.

    While modern homes are built to handle significant loads, older homes may not have been designed with the extra dead load of multiple roofing layers in mind. Exceeding this limit can stress rafters and trusses, potentially leading to sagging or, in extreme cases, structural failure.

    Can You Put New Shingles Over Old Shingles?

    Yes, you can, but only if there is currently only one layer of shingles. This process is known as a “roof overlay” or “reroofing.”

    However, just because it is allowed doesn’t mean it is always advisable. Before you agree to an overlay, consider the condition of the existing roof. An overlay is only viable if:

    1. The existing shingles are flat and securely attached.
    2. There is no water damage, rot, or mold in the decking beneath.
    3. The roof deck is solid and does not need replacement.

    If the underlying deck is compromised, covering it with new shingles is like putting a bandage on a broken bone. It hides the problem but does not fix it. For more detailed information on construction standards, you can refer to general building principles outlined on Wikipedia.

    Risks of Multiple Layers of Shingles

    While adding a second layer might seem like a quick fix, it comes with several long-term drawbacks that every homeowner should weigh carefully.

    1. Voided Manufacturer Warranties

    This is a critical point often overlooked. Most major shingle manufacturers (such as GAF, Owens Corning, and CertainTeed) will void their warranty if their product is installed over an existing layer of shingles. They require installation on a clean, solid deck to guarantee performance. Without a warranty, you are solely responsible for any premature failures.

    2. Trapped Heat and Moisture

    Roofs need to breathe. Ventilation systems are designed to move air under a single layer of shingles. When you add a second layer:

    • Heat Buildup: The extra layer acts as insulation, trapping heat in the attic. This can cause shingles to age faster and curl prematurely.
    • Moisture Retention: If any moisture gets trapped between the two layers, it cannot evaporate easily. This creates a perfect environment for mold, mildew, and wood rot.

    3. Difficulty in Future Repairs

    When you eventually need to replace the roof again, having two layers makes the job significantly harder and more expensive. Contractors must tear off twice the material, which increases labor time and disposal fees. Additionally, finding leaks becomes a nightmare because water can travel horizontally between layers before dripping into your ceiling, making the source of the leak hard to pinpoint.

    How Many Layers Of Shingles Are Allowed On A Roof

    Cost Comparison: Overlay vs. Tear-Off

    Many homeowners choose overlays to save money. Let’s look at the numbers to see if the savings are real.

    FeatureRoof Overlay (1 Layer Added)Full Tear-Off & Replace
    Upfront CostLower (saves on labor/disposal)Higher (includes removal costs)
    WarrantyOften VoidedFull Manufacturer Warranty
    LifespanShorter (due to heat/trapped issues)Standard (20–30 years)
    InspectionCannot inspect deck for rotFull deck inspection possible
    Future RemovalVery Expensive (2 layers to remove)Standard Cost

    Expert Insight: While an overlay might save you 15–20% upfront, the lack of warranty and potential for hidden damage often makes it a false economy. In the long run, a full tear-off provides better value and peace of mind.

    When Is a Complete Tear-Off Necessary?

    There are specific scenarios where you have no choice but to remove all existing shingles. You must opt for a tear-off if:

    • You already have two layers: As mentioned, code prohibits a third.
    • The deck is damaged: If there are soft spots, rot, or water stains on the underside of the roof deck.
    • Shingles are curled or buckled: You cannot install new shingles flat over uneven surfaces.
    • You are changing roofing materials: If you are switching from asphalt to metal, tile, or slate, you must remove the old material.
    • Local Code Requires It: Some strict municipalities mandate a tear-off regardless of the number of layers to ensure proper ice and water shield installation.

    Step-by-Step: What Happens During a Tear-Off?

    If you decide to do it right, here is what the professional process looks like:

    1. Preparation: The crew covers your landscaping and sets up dumpsters for debris.
    2. Removal: Workers use shovels and pry bars to remove old shingles, underlayment, and nails down to the wooden deck.
    3. Inspection: The exposed deck is inspected for rot, soft spots, or nail pops. Damaged plywood is replaced.
    4. Preparation: New drip edge, ice and water shield (in valleys and eaves), and synthetic underlayment are installed.
    5. Installation: New shingles are installed according to manufacturer specifications, ensuring proper nailing patterns and ventilation.
    6. Cleanup: The site is magnetically swept for stray nails, and debris is hauled away.

    FAQ Section

    1. Does insurance cover roof replacement if I have multiple layers?

    Most insurance policies cover “actual cash value” or “replacement cost” for damage caused by covered perils (like hail or wind). However, if an adjuster finds that the roof was improperly installed (e.g., three layers), they may deny the claim or reduce the payout, citing negligence or code violations. Always check with your provider.

    2. Can I add a second layer of architectural shingles over 3-tab shingles?

    Technically, yes, provided there is only one existing layer. However, mixing shingle types can lead to uneven surfaces. Architectural shingles are thicker, so the transition areas may be bumpy. It is generally better to match the type or opt for a tear-off.

    3. How much weight does a second layer add to my roof?

    A second layer adds approximately 2–4 pounds per square foot. For an average 2,000-square-foot roof, this equals an additional 4,000–8,000 pounds of weight. While most frames can handle this, older homes should be evaluated by a structural engineer.

    4. Will a second layer affect my home’s resale value?

    Potentially, yes. Savvy home inspectors will identify multiple layers during a pre-sale inspection. Buyers may view it as a deferred maintenance issue, fearing the eventual high cost of removing two layers. A single, warrantied roof is a stronger selling point.

    5. Is it legal to have three layers of shingles?

    In almost all jurisdictions in the US, having three layers of asphalt shingles is a code violation. If you sell your home, this could fail inspection and require immediate remediation before the sale can close.

    Conclusion

    So, how many layers of shingles are allowed on a roof? The definitive answer is two, but aiming for one is always the superior choice for longevity, warranty protection, and structural health.

    While the temptation to save money with an overlay is understandable, the risks of voided warranties, trapped moisture, and future removal costs often outweigh the initial savings. Investing in a complete tear-off ensures your home is protected by a solid foundation and a valid manufacturer warranty.

    If you are unsure about the current state of your roof, hire a licensed roofing contractor for a thorough inspection. Don’t let hidden damage compromise your home’s safety.

    Found this guide helpful? Share it with your neighbors or on social media to help others make informed roofing decisions!

  • Why Is The Roof Of My Mouth Swollen? Causes & Fixes

    Why Is The Roof Of My Mouth Swollen? Causes & Fixes

    Have you ever taken a bite of hot pizza or a crunchy chip, only to feel a sharp, lingering pain on the roof of your mouth? It is an incredibly uncomfortable sensation that can make eating, drinking, and even speaking difficult. If you are currently asking yourself, “Why is the roof of my mouth swollen and sore,“ you are not alone; this is a common oral health issue with various triggers ranging from minor burns to underlying infections.

    In this comprehensive guide, we will explore the most likely culprits behind your discomfort, provide actionable steps for relief, and help you understand when it is time to seek professional medical advice. Let’s dive into the science of your palate and how to heal it effectively.

    Understanding the Anatomy: What Is the Palate?

    Before we diagnose the pain, it helps to understand what we are dealing with. The roof of your mouth is medically known as the palate. It is divided into two parts:

    • The Hard Palate: The bony front section just behind your teeth.
    • The Soft Palate: The muscular back section near your throat.

    Both areas are lined with delicate mucous membranes. Because these tissues are thin and sensitive, they are highly susceptible to irritation, trauma, and infection. When these tissues become inflamed, you experience swelling, redness, and soreness.

    Common Causes: Why Is the Roof Of My Mouth Swollen And Sore?

    Identifying the root cause is the first step toward healing. Here are the most frequent reasons for palate inflammation, categorized by type.

    1. Thermal Burns (Pizza Palate)

    This is arguably the most common cause. Consuming food or beverages that are too hot can scald the delicate tissue of the hard palate.

    • Symptoms: Immediate stinging, blistering, or peeling skin.
    • Recovery Time: Typically 3–7 days.
    • Expert Insight: According to dental professionals, second-degree burns on the palate can cause significant swelling as the body rushes blood to the area to repair damaged cells.

    2. Physical Trauma and Abrasion

    Your mouth is a tough environment, but it has limits. Eating hard, sharp foods like tortilla chips, crusty bread, or candy can scratch or puncture the palate.

    • Mechanism: Micro-abrasions create entry points for bacteria, leading to localized swelling.
    • Prevention: Chew slowly and avoid using your teeth to open packages or crack nuts.

    3. Canker Sores (Aphthous Ulcers)

    These are small, shallow lesions that develop on the soft tissues in your mouth or at the base of your gums. Unlike cold sores, they don’t occur on the surface of your lips and aren’t contagious.

    • Appearance: White or yellow center with a red border.
    • Triggers: Stress, minor injury to oral tissues, acidic foods, or vitamin deficiencies (B-12, zinc, folate).

    4. Allergic Reactions

    Oral Allergy Syndrome (OAS) can cause itching and swelling in the mouth shortly after eating certain raw fruits, vegetables, or nuts.

    • Common Triggers: Pollen-related cross-reactivity with apples, carrots, or celery.
    • Severity: Usually mild, but severe swelling that impacts breathing requires immediate emergency care.

    5. Infections (Viral and Fungal)

    • Herpes Simplex Virus (HSV-1): Can cause cold sores inside the mouth, often on the hard palate. These are fluid-filled blisters that burst and crust over.
    • Oral Thrush (Candidiasis): A fungal infection causing creamy white lesions on the tongue or inner cheeks, which can spread to the palate. It is more common in infants, the elderly, and those with compromised immune systems.

    For a deeper understanding of oral mucosal diseases, you can refer to general medical resources such as Wikipedia’s page on Oral Medicine to see broader classifications of conditions affecting the mouth.

    Why Is The Roof Of My Mouth Swollen And Sore

    Immediate Relief: How to Soothe a Swollen Palate

    If you are suffering right now, here is a step-by-step protocol to reduce pain and accelerate healing.

    Step 1: Cool It Down

    Apply cold to the affected area to constrict blood vessels and reduce swelling.

    • Action: Suck on ice chips or eat sugar-free popsicles.
    • Duration: Apply intermittently for 10–15 minutes.

    Step 2: Salt Water Rinse

    Salt water is a natural disinfectant that helps reduce inflammation and keeps the area clean.

    • Recipe: Mix 1/2 teaspoon of salt into 8 ounces (240 ml) of warm water.
    • Method: Swish gently for 30 seconds, then spit out. Repeat 3–4 times a day.
    • Note: Do not use hot water, as it will aggravate the burn or sore.

    Step 3: Avoid Irritants

    While healing, your palate is vulnerable. Strictly avoid:

    • Spicy foods (chili, hot sauce)
    • Acidic foods (citrus fruits, tomato sauce, vinegar)
    • Crunchy/hard textures (chips, nuts)
    • Alcohol-based mouthwashes

    Step 4: Over-the-Counter Remedies

    • Pain Relievers: Ibuprofen or acetaminophen can help manage pain and reduce inflammation.
    • Topical Gels: Benzocaine-based gels (like Orajel) can numb the area temporarily. Use sparingly and follow label instructions.

    Comparison: Home Remedies vs. Medical Treatments

    FeatureHome RemediesMedical Treatments
    Best ForMinor burns, small abrasions, mild canker soresSevere infections, persistent ulcers, allergic reactions
    CostLow (salt, ice, honey)Variable (consultation fees, prescription meds)
    SpeedGradual relief (2–7 days)Faster resolution for specific conditions
    RiskMinimalPotential side effects from medication

    When to See a Doctor or Dentist

    While most cases of a swollen palate resolve on their own, some symptoms indicate a more serious underlying issue. Seek professional care if:

    1. Persistence: The swelling or sore does not heal after two weeks.
    2. Severity: You have difficulty breathing, swallowing, or opening your mouth.
    3. Systemic Symptoms: You experience high fever, fatigue, or swollen lymph nodes in the neck.
    4. Recurrence: You frequently get sores or swelling without an obvious cause (like burning your mouth).
    5. White Patches: You notice thick white patches that cannot be wiped away (potential sign of leukoplakia or thrush).

    FAQ Section

    1. Can dehydration cause the roof of my mouth to swell?

    Yes, indirectly. Dehydration reduces saliva production, leading to a dry mouth (xerostomia). Saliva is essential for protecting oral tissues and washing away food particles. Without it, the palate becomes more susceptible to irritation, friction, and bacterial growth, which can lead to soreness and mild swelling.

    2. Is a swollen palate a sign of cancer?

    It is rare, but persistent sores that do not heal within two weeks can be a sign of oral cancer. Other warning signs include unexplained bleeding, numbness, or lumps in the neck. However, the vast majority of swollen palates are caused by benign issues like burns or canker sores. If you are concerned, always consult a healthcare provider for peace of mind.

    3. How long does it take for a burned palate to heal?

    Minor first-degree burns typically heal within 3 to 7 days. More severe second-degree burns, which may involve blistering, can take up to two weeks to fully resolve. During this time, keeping the area clean and avoiding irritants is crucial.

    4. Can stress cause the roof of my mouth to hurt?

    Stress weakens the immune system, making you more prone to canker sores and viral outbreaks like herpes simplex. Additionally, stress can lead to unconscious habits like grinding your teeth or pressing your tongue against the roof of your mouth, causing physical trauma and swelling.

    5. What foods should I eat when the roof of my mouth is sore?

    Stick to a soft, bland diet. Excellent options include:

    • Yogurt and pudding
    • Mashed potatoes
    • Smoothies (avoid acidic fruits like orange or pineapple)
    • Lukewarm soups (broth-based, not tomato-based)
    • Scrambled eggs

    Conclusion

    Dealing with a painful, swollen palate is never fun, but understanding why is the roof of my mouth swollen and sore empowers you to take the right steps for recovery. In most cases, the culprit is a minor burn, physical abrasion, or a common canker sore that will heal with simple home care like salt water rinses and cold compresses.

    Remember to listen to your body. If the pain persists beyond two weeks or is accompanied by other severe symptoms, do not hesitate to consult a dentist or doctor. Early intervention can prevent minor issues from becoming major complications.

    Found this guide helpful? Share it with friends and family on social media to help them navigate their next “pizza palate” mishap! Stay healthy, and keep smiling.

  • Five Star II Space Saver Swing Set Review

    Five Star II Space Saver Swing Set Review

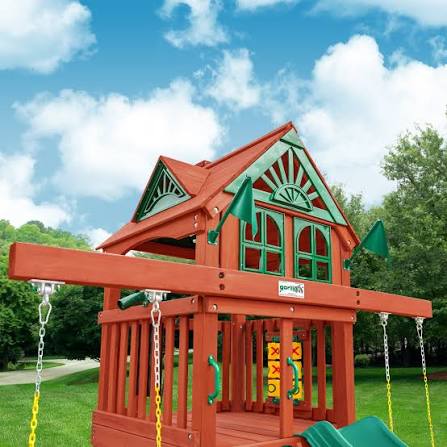
    Is your backyard feeling cramped, but you still want to give your children the joy of outdoor play? Many parents struggle to find high-quality play equipment that fits into limited spaces without sacrificing safety or fun. The Five Star Ii Space Saver Swing Set With Wood Roof offers a brilliant solution, combining compact design with robust construction to maximize play value in minimal square footage.

    In this comprehensive guide, we will explore why this specific model has become a top choice for US homeowners with smaller lots. We will dive into its features, assembly requirements, safety standards, and long-term durability to help you make an informed decision.

    Why Choose a Space-Saver Design?

    Urban and suburban living often means compromising on yard size. However, the desire for children to engage in physical activity outdoors remains non-negotiable for many families. Traditional swing sets can dominate a landscape, leaving little room for gardening, pets, or other activities.

    The concept behind the “Space Saver” design is efficient footprint utilization. By positioning swings and accessories closer together and utilizing vertical space effectively, these sets provide a full play experience without requiring a massive clearing. According to landscape architects, optimizing vertical space is key to small-yard design, allowing for multi-functional areas that do not feel cluttered.

    The Five Star Ii Space Saver Swing Set With Wood Roof exemplifies this philosophy. It is engineered to fit into corners or narrow strips of land, making it an ideal candidate for townhouses or homes with modest backyards.

    Key Features of the Five Star II Model

    When evaluating any playset, it is crucial to look beyond the aesthetic appeal. The structural integrity and material quality are paramount. Here is what sets this model apart:

    1. The Protective Wood Roof

    One of the standout features is the included wood roof. Unlike canvas covers that degrade quickly under UV exposure, a wooden roof provides lasting protection. It shields children from harsh sun rays and light rain, extending the lifespan of the plastic components and keeping the seating area cooler during summer months. This feature also adds a rustic, premium look that blends well with most home exteriors.

    2. Compact Yet Sturdy Frame

    Despite its smaller footprint, the frame is constructed from high-quality, pressure-treated lumber. This treatment is essential for resisting rot, decay, and insect damage, which are common issues in humid climates across the United States. The A-frame design provides inherent stability, reducing the wobble often associated with lighter, metal-based swing sets.

    3. Versatile Play Options

    Do not let the word “space saver” fool you into thinking it lacks features. Typically, this model includes:

    • Two belt swings for classic swinging fun.
    • A trapeze bar for developing upper body strength.
    • Sometimes configured with a small slide or glider, depending on the specific retailer package.

    This variety ensures that children of different ages and interests can enjoy the set simultaneously, promoting social play and coordination.

    Assembly and Installation Guide

    One of the most common concerns for buyers is the complexity of assembly. While professional installation is always an option, many DIY enthusiasts choose to build it themselves. Here is a realistic overview of what to expect.

    Step-by-Step Overview

    1. Site Preparation: Choose a flat area with at least 6 feet of clearance on all sides. Ensure the ground is free of rocks and roots.
    2. Unpacking and Inventory: Lay out all parts. Check against the manual to ensure no hardware is missing. Tip: Organize bolts by size in separate bowls to save time.
    3. Frame Assembly: Begin with the A-frames. Use a power drill with a socket attachment for efficiency, but hand-tighten the final turns to prevent stripping the wood.
    4. Beam Installation: Lift the main beam onto the A-frames. This step usually requires two adults. Ensure the beam is level before securing.
    5. Roof Construction: Assemble the roof trusses and attach shingles or roofing material as per the instructions. This adds significant weight, so ensure the frame is fully secured first.
    6. Hanging Accessories: Attach swings and bars using the provided hardware. Ensure chains are not twisted and seats hang evenly.

    Tools Required

    • Power drill/driver
    • Socket set (typically 1/2 inch)
    • Level
    • Tape measure
    • Ladder

    Time Estimate: For two average-handiness adults, expect the assembly to take between 6 to 8 hours. Rushing this process can compromise safety, so patience is key.

    Five Star Ii Space Saver Swing Set With Wood Roof

    Safety Standards and Maintenance

    Safety is the primary concern for any parent purchasing playground equipment. The Five Star Ii Space Saver Swing Set With Wood Roof is designed with safety in mind, but proper maintenance is required to keep it secure over the years.

    Understanding Safety Certifications

    Reputable swing sets should adhere to guidelines set by organizations like the ASTM (American Society for Testing and Materials). While specific certifications vary by manufacturer batch, looking for compliance with ASTM F1148 standards is a good benchmark for consumer safety. These standards cover everything from the height of fall surfaces to the spacing of swing hangers to prevent entrapment.

    Routine Maintenance Checklist

    To ensure longevity and safety, perform these checks seasonally:

    Maintenance TaskFrequencyWhy It Matters
    Tighten HardwareEvery 3 monthsWood expands and contracts with weather, loosening bolts.
    Inspect WoodAnnuallyLook for splinters, cracks, or signs of rot. Sand and seal as needed.
    Check Chains/RopesMonthlyLook for rust, wear, or sharp edges that could injure hands.
    Clean Plastic PartsBi-annuallyRemove dirt and mold to prevent slippery surfaces.

    Pro Tip: Apply a water-repellent stain or sealant to the wood every 1–2 years. This not only preserves the color but also adds a layer of protection against moisture intrusion, which is the biggest enemy of wooden playsets.

    Pros and Cons: An Honest Assessment

    No product is perfect. Here is a balanced view to help you decide if this set is right for your family.

    Advantages

    • Space Efficiency: Ideal for yards under 10×10 feet of usable play space.
    • Aesthetic Appeal: The wood roof and natural timber look more sophisticated than plastic-only sets.
    • Durability: Pressure-treated wood lasts significantly longer than untreated pine or cheap metal.
    • Weather Protection: The roof extends the playing season by providing shade and slight rain protection.

    Disadvantages

    • Assembly Complexity: It is not a “plug-and-play” item; requires significant time and effort to build.
    • Weight Limit: Due to its compact nature, it may have lower weight limits compared to massive commercial-grade sets. Always check the specific manual for max user weight (usually around 110 lbs per swing).
    • Initial Cost: Higher upfront cost than basic metal frames, though better long-term value.

    Frequently Asked Questions (FAQ)

    1. How much space do I actually need for the Five Star II Space Saver?

    You typically need a flat area of approximately 8×8 feet for the footprint, but you must add a safety zone. We recommend a total clear area of at least 14×14 feet to account for the swinging arc and safe landing zones. Always measure twice before purchasing.

    2. Can I leave the swing set outside during winter?

    Yes, the Five Star Ii Space Saver Swing Set With Wood Roof is designed for year-round outdoor use. However, it is advisable to remove removable accessories like swings or tarps if heavy snow is expected, to prevent excessive weight load on the beams. Covering the seat cushions can also prolong their life.

    3. Is the wood treated with harmful chemicals?

    Most modern pressure-treated woods used in reputable playsets are treated with micronized copper azole (MCA) or similar low-toxicity preservatives, rather than the older, more hazardous CCA treatments. Always check the manufacturer’s label for specific chemical information and wear gloves during assembly.

    4. What is the maximum age range for this swing set?

    This set is generally suitable for children aged 3 to 10 years old. Younger toddlers may need assistance with the belt swings, while older children might outgrow the weight limit or seek more complex climbing structures. It is perfect for early childhood development and active play.

    5. Do I need to anchor the swing set to the ground?

    While the A-frame design is stable, anchoring is highly recommended, especially in windy areas or if you have very active children. You can use ground anchors or pour concrete footings for the legs. This prevents tipping and ensures the set remains level over time.

    Conclusion

    Investing in outdoor play equipment is an investment in your children’s health, happiness, and development. The Five Star Ii Space Saver Swing Set With Wood Roof stands out as a pragmatic yet premium choice for families who do not have expansive lawns but refuse to compromise on quality. Its thoughtful design, durable materials, and protective roofing make it a resilient addition to any backyard.

    By understanding the assembly requirements and committing to regular maintenance, you can ensure this playset remains a safe and cherished part of your home for years to come. Remember, the joy seen on your children’s faces as they swing under the shelter of that wood roof is priceless.

    If you found this review helpful, please share it with other parents on social media who might be struggling to find the perfect playset for their small space. Let’s help more families create memorable outdoor experiences!

  • Can I Go Through A Carwash With A Roof Rack?

    Can I Go Through A Carwash With A Roof Rack?

    We have all been there. You are rushing to get your vehicle clean after a muddy weekend adventure, but that bulky roof rack is staring back at you, raising a critical question: Can I go through a carwash with a roof rack? It is a common dilemma for outdoor enthusiasts, parents with cargo carriers, and daily commuters alike. The short answer is yes, but with significant caveats depending on the type of car wash and the specific design of your rack.

    Choosing the wrong method can lead to scratched paint, bent crossbars, or even catastrophic damage to your cargo. In this guide, we will break down exactly how to clean your vehicle safely without compromising the integrity of your roof rack system. We will explore the differences between touchless and brush-based systems, provide step-by-step cleaning instructions, and answer the most pressing questions from vehicle owners across the US.


    Is It Safe to Use an Automatic Brush Car Wash?

    The biggest risk when asking, “Can I go through a carwash with a roof rack?” lies in the type of machinery used. Traditional automatic car washes often use large rotating brushes or cloth strips to scrub the vehicle. While efficient for bare cars, these mechanisms are notoriously hazardous for roof racks.

    The Danger of Rotating Brushes

    Rotating brushes operate with high torque. If a brush catches on a crossbar, a bike mount, or the edge of a cargo box, it can exert immense pressure. This can result in:

    • Structural Damage: Bent aluminum crossbars or cracked plastic fairings.
    • Paint Scratches: The friction can strip clear coats around the mounting points.
    • Dislodged Cargo: In worst-case scenarios, the force can loosen clamps, leading to items falling off mid-wash.

    According to industry standards, most roof rack manufacturers explicitly void warranties if damage occurs due to automated mechanical washing systems. Therefore, if your only option is an automatic wash, you must ensure it is a “touchless” facility.

    Touchless Car Washes: A Safer Alternative

    Touchless car washes use high-pressure water jets and strong detergents rather than physical contact. These are generally safe for roof racks because there are no moving parts to snag on your equipment. However, even with touchless systems, you should verify that the water pressure is not excessively concentrated on specific mounting points, which could potentially loosen seals over time.


    Hand Washing: The Gold Standard for Roof Racks

    If you want to guarantee the longevity of your roof rack and your vehicle’s paint, hand washing is the superior method. It allows you to control the pressure, the cleaning agents, and the attention given to complex shapes like bike trays or ski mounts.

    Step-by-Step Guide to Hand Washing with a Roof Rack

    Follow this precise protocol to ensure a thorough and safe clean:

    1. Preparation and Cooling Ensure your vehicle has been parked in the shade for at least 30 minutes. Washing a hot surface can cause soap to dry too quickly, leaving residues. Park on a flat, level surface.
    2. Initial Rinse Use a garden hose with a standard nozzle. Do not use a pressure washer on its highest setting directly against rubber seals or plastic clamps. Rinse the entire vehicle, starting from the top down, to remove loose dirt and debris.
    3. Mixing the Solution Fill a bucket with 2 liters of water at a temperature of 22–28°C (72–82°F). Add two capfuls of pH-neutral car wash soap. Avoid household dish detergents, as they can strip wax and degrade rubber seals on your roof rack.
    4. Washing the Rack First Using a soft microfiber mitt, gently wash the roof rack components first. Pay special attention to the joints where the crossbars meet the feet. Dirt tends to accumulate here and can act as an abrasive if left unchecked.
      • Tip: Use a soft-bristled toothbrush to clean tight crevices in bike mounts or lock mechanisms.
    5. Washing the Vehicle Body Proceed to wash the rest of the car using the two-bucket method (one for soapy water, one for rinsing the mitt) to prevent dragging dirt across the paint.
    6. Final Rinse and Dry Rinse thoroughly from top to bottom. Dry the vehicle using a clean, plush microfiber towel. Ensure you dry under the crossbars and around the feet to prevent water spots and corrosion.
    Can I Go Through A Carwash With A Roof Rack

    Specific Considerations for Different Rack Types

    Not all roof racks are created equal. The material and design dictate how you should approach cleaning.

    Rack TypeMaterial SensitivityCleaning Recommendation
    Aluminum CrossbarsModerateSafe for touchless washes. Hand wash to prevent oxidation spots.
    Steel CrossbarsHigh (Rust Risk)Inspect for chips in powder coating. Hand wash recommended.
    Plastic/Cargo BoxesLowGenerally durable, but hinges need lubrication after washing.
    Bike/Ski MountsHigh (Mechanical)Hand wash only. Grease and road grime build up in moving parts.

    For more detailed information on the materials used in automotive accessories, you can refer to general engineering principles found on Wikipedia’s page on Aluminum Alloys, which highlights why certain alloys are chosen for their corrosion resistance and strength-to-weight ratio.


    Maintenance Tips Post-Wash

    Cleaning is only half the battle. Proper maintenance after a wash ensures your rack remains secure and functional.

    • Lubricate Moving Parts: If you have bike trays or ski carriers, apply a silicone-based lubricant to hinges and locks after washing. Water can wash away existing grease, leading to stiffness or rust.
    • Check Torque Settings: Vibrations from driving and the pressure from washing can occasionally loosen bolts. Once a month, check the tightness of your crossbar clamps and foot packs. Refer to your manufacturer’s manual for specific torque specifications (usually measured in Newton-meters or foot-pounds).
    • Inspect Rubber Seals: Look for cracks or brittleness in the rubber pads that sit between the rack and your car’s roof. Replace them if they show signs of wear to prevent leaks and paint damage.

    FAQ Section

    1. Will a touchless car wash damage my roof rack?

    Generally, no. Touchless car washes use high-pressure water and chemicals without physical contact. However, ensure that the detergents used are compatible with your rack’s materials. Some industrial-strength cleaners may be harsh on plastic components or rubber seals over time.

    2. Can I leave my roof rack on during winter?

    Yes, but it requires extra care. Salt and road grime can accelerate corrosion. If you live in an area with heavy snowfall, consider removing the rack if it is not in use. If you keep it on, rinse it frequently to remove salt buildup.

    3. How often should I clean my roof rack?

    You should rinse your roof rack every time you wash your car. A deep clean with soap and lubrication should be performed at least once every three months, or immediately after exposure to saltwater, mud, or heavy pollen.

    4. Is it safe to drive through a car wash with a cargo box attached?

    If the car wash is touchless, yes. If it uses brushes, absolutely not. Cargo boxes often have wider profiles and plastic shells that can easily crack or shatter under the pressure of rotating brushes. Always opt for hand washing or touchless systems when a cargo box is mounted.

    5. What should I do if my roof rack starts making noise after a wash?

    Noise usually indicates a loose component or trapped water. Check all bolts and clamps for tightness. If the noise persists, it may be wind turbulence caused by a misaligned fairing. Ensure all aerodynamic covers are properly seated.


    Conclusion

    So, can you go through a carwash with a roof rack? Yes, but caution is paramount. Avoid traditional brush-based automatic car washes at all costs to prevent structural damage and cosmetic scratches. Instead, opt for touchless automatic systems or, ideally, invest the time in a thorough hand wash.

    By following the steps outlined above, you not only keep your vehicle looking pristine but also extend the lifespan of your roof rack investment. Regular maintenance, proper lubrication, and careful cleaning habits will ensure your gear is ready for your next adventure, whether it is a mountain biking trip or a family road trip.

    Did you find this guide helpful? Share it with your fellow outdoor enthusiasts on social media to help them protect their vehicles too! Stay safe and happy travels.

  • How Do I Get Rid Of Squirrels In My Roof?

    How Do I Get Rid Of Squirrels In My Roof?

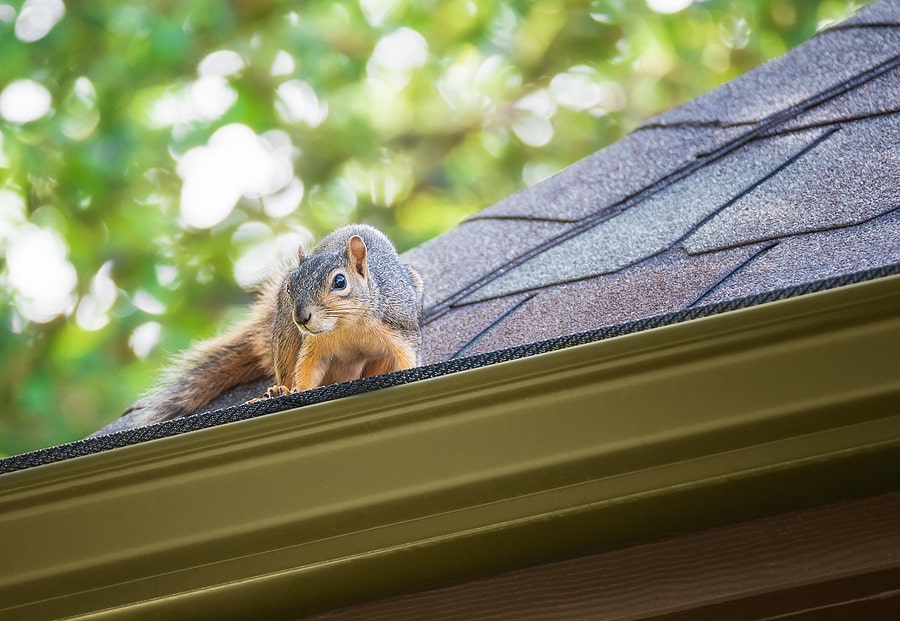
    Hearing scratching, scurrying, or thumping noises in your attic can be incredibly stressful. It disrupts your sleep, raises concerns about property damage, and leaves you feeling helpless in your own home. If you are asking yourself, “How do I get rid of squirrels in my roof?” you are not alone; thousands of homeowners face this exact challenge every year. The good news is that with the right approach, you can resolve this issue humanely and effectively without causing further harm to your property or the animals.

    Why Are Squirrels in Your Attic?

    Before we dive into removal tactics, it is crucial to understand why they chose your roof. Squirrels are not random invaders; they are strategic survivors. They seek three main things: warmth, safety, and nesting materials.

    Your attic provides an ideal environment that mimics a hollow tree but with better insulation. According to wildlife experts, squirrels often enter attics during late winter to breed or in early autumn to prepare for colder months. A single female squirrel can have two litters a year, meaning a small problem can quickly become a large infestation if left unchecked. Understanding their motivation helps you anticipate their behavior and choose the most effective removal strategy.

    Step-by-Step Guide: How to Humanely Remove Squirrels

    Removing squirrels requires patience and adherence to local wildlife laws. In many US states, it is illegal to trap and relocate squirrels without a permit, or to harm them directly. Therefore, the “exclusion method” is widely regarded as the most ethical and effective long-term solution.

    1. Identify All Entry Points

    You cannot fix what you cannot see. Squirrels can squeeze through holes as small as 1.5 inches in diameter. Walk around the exterior of your house and look for:

    • Gaps in the fascia boards.
    • Damaged roof vents.
    • Cracks in the siding near the roofline.
    • Openings around chimney stacks.

    Mark these spots with chalk or tape. It is common to find multiple entry points, even if you only hear noise in one area.

    2. Confirm the Nest is Empty

    This is the most critical step. Never seal an entry point if babies are inside. If you trap nursing mothers outside, the infants will starve and die inside your walls, leading to severe odor and sanitation issues.

    To check if the nest is active:

    • Listen for high-pitched chirping (babies) versus heavy thumping (adults).
    • Use a flashlight to peek into accessible vents.
    • Observe the entry point at dawn and dusk when squirrels are most active.

    If you suspect babies are present, wait until they are old enough to leave the nest (usually 6–8 weeks) or contact a professional wildlife rehabilitator.

    3. Install One-Way Exclusion Devices

    Instead of trapping, use a one-way door. This device allows squirrels to exit your attic to find food but prevents them from re-entering.

    How to install it:

    1. Seal all secondary entry points with steel wool or hardware cloth. Leave only the main entry hole open.
    2. Attach the one-way exclusion cone over the main hole.
    3. Secure it tightly with screws or heavy-duty staples.
    4. Wait 3–5 days. Monitor the device to ensure all squirrels have exited.

    4. Permanently Seal the Entry Points

    Once you are certain the attic is empty, remove the one-way door and permanently seal the hole.

    MaterialEffectivenessDurabilityCost
    Steel Wool + CaulkHighMediumLow
    Hardware Cloth (1/4 inch)Very HighHighMedium
    Expanding FoamLowLowLow
    Wood PlanksMediumMediumMedium

    Pro Tip: Avoid using expanding foam alone. Squirrels can easily chew through dried foam. Always cover foam with metal mesh or use hardware cloth stapled securely over the opening. For more details on rodent-proofing materials, you can refer to general pest management principles outlined on Wikipedia.

    5. Clean and Sanitize the Attic

    Squirrel urine and feces can carry diseases such as leptospirosis and salmonella. After removal:

    • Wear an N95 mask and gloves.
    • Remove contaminated insulation.
    • Disinfect surfaces with an enzymatic cleaner designed for pet waste.
    • Consider replacing insulation to eliminate lingering odors that might attract new pests.
    How Do I Get Rid Of Squirrels In My Roof

    Common Mistakes to Avoid

    Many homeowners try quick fixes that ultimately fail or cause more damage. Here are the top pitfalls:

    • Using Poison: This is inhumane and dangerous. A poisoned squirrel may die in inaccessible wall cavities, causing rot and attracting flies and beetles. Furthermore, poison poses a risk to pets and local wildlife like owls or hawks that may eat the poisoned squirrel.
    • Trapping Without Exclusion: If you trap and remove a squirrel but do not seal the entry points, another squirrel will simply move in. Nature abhors a vacuum, and your warm attic is prime real estate.
    • Ignoring the Landscape: Squirrels are excellent jumpers. Trim tree branches at least 6–8 feet away from your roofline. This removes their “highway” to your home.

    When to Call a Professional

    While DIY methods work for minor cases, some situations require expert intervention. You should call a licensed wildlife control operator if:

    1. You cannot locate the entry point.
    2. There are signs of a large infestation (multiple noises, strong ammonia smell).
    3. You suspect rabies or other diseases (aggressive behavior, disorientation).
    4. The structural damage to your roof is extensive.

    Professional services typically cost between $300 and $600, depending on the complexity of the job. While this is an investment, it ensures the job is done correctly and often includes a warranty on the exclusion work.

    FAQ Section

    Q1: Will mothballs keep squirrels out of my attic?

    A: No, mothballs are not effective for squirrels. They contain naphthalene or paradichlorobenzene, which are toxic to humans and pets but rarely deter determined squirrels. Moreover, using mothballs in an attic can create hazardous air quality levels in your living space below.

    Q2: Can squirrels chew through metal?

    A: Squirrels have incredibly strong teeth and can chew through wood, plastic, vinyl, and even soft metals like aluminum flashing. However, they cannot chew through hardened steel or heavy-gauge hardware cloth (1/4 inch mesh or smaller). Always use steel-based materials for sealing.

    Q3: How long does it take to get rid of squirrels?

    A: Using the exclusion method, it typically takes 3 to 7 days for all squirrels to leave. Afterward, sealing and cleaning may take an additional 1–2 days. If you use trapping, it may take longer depending on how many squirrels are present and their wariness of traps.

    Q4: Is it legal to trap squirrels in my state?

    A: Laws vary significantly by state and municipality. In many places, relocating wildlife is prohibited because it spreads disease and disrupts local ecosystems. Always check with your local Department of Natural Resources (DNR) or fish and wildlife agency before setting traps.

    Q5: What smells do squirrels hate?

    A: Squirrels dislike strong scents such as peppermint oil, cayenne pepper, and garlic. While spraying these around entry points may act as a temporary deterrent, they are not a permanent solution. Rain and wind wash these scents away quickly, and squirrels often become habituated to them.

    Q6: Will removing squirrels damage my roof?

    A: If done correctly, no. The exclusion process involves attaching devices to existing openings. However, improper sealing (like nailing shingles incorrectly) can cause leaks. If you are uncomfortable working on your roof, hire a professional roofer or wildlife expert to handle the physical sealing.

    Conclusion

    Dealing with squirrels in your roof is undeniably frustrating, but it is a solvable problem. By understanding their behavior and using humane exclusion techniques, you can reclaim your home without harming wildlife. Remember, the key to long-term success is not just removal, but prevention. Seal those gaps, trim your trees, and maintain your roof’s integrity.

    If you found this guide helpful, please share it on social media to help friends and neighbors who might be hearing similar noises in their attics. Together, we can promote humane and effective wildlife management practices.

  • Why Roof of Mouth Hurts After Eating?

    Why Roof of Mouth Hurts After Eating?

    Have you ever taken a bite of your favorite meal, only to be greeted by a sharp, stinging pain on the roof of your mouth? It is a frustrating and surprisingly common experience that can turn a enjoyable dinner into an uncomfortable ordeal. If you are asking yourself, “Why does the roof of my mouth hurt after eating,” you are not alone, and understanding the root cause is the first step toward finding relief.

    In this guide, we will explore the most likely culprits behind palate pain, ranging from simple thermal injuries to underlying medical conditions. We will provide actionable advice on how to soothe the discomfort and when it is time to consult a healthcare professional. Let’s dive in to restore your comfort and confidence at the dining table.

    The Most Common Culprit: Thermal Injury (Pizza Palate)

    If you have ever eagerly bitten into a slice of hot pizza or sipped scalding coffee, you may have experienced what dentists colloquially call “pizza palate.” This is technically known as a thermal burn to the hard palate.

    The roof of your mouth is covered by a thin layer of mucous membrane that is highly sensitive to temperature changes. When food exceeds 140°F (60°C), it can cause immediate damage to these tissues. Unlike the skin on your hands, the tissue in your mouth heals quickly but is also more prone to initial injury because we often eat without testing the temperature thoroughly.

    Symptoms of a Thermal Burn

    • Immediate stinging or burning sensation.
    • Redness or swelling on the hard palate.
    • In severe cases, blistering or peeling of the top layer of skin.
    • Temporary loss of taste sensitivity in the affected area.

    According to dental health statistics, minor oral burns are one of the most frequent reasons for emergency dental visits related to soft tissue trauma. The good news? These usually heal on their own within 3 to 7 days.

    Could It Be an Allergic Reaction?

    While burns are physical injuries, pain can also stem from an immune response. Oral Allergy Syndrome (OAS) is a condition where people who are allergic to certain pollens experience itching, tingling, or pain in the mouth after eating raw fruits, vegetables, or nuts.

    For example, if you are allergic to birch pollen, you might feel irritation on the roof of your mouth after eating apples, carrots, or hazelnuts. This happens because the proteins in these foods are structurally similar to the pollen proteins, confusing your immune system.

    Key Differences: Burn vs. Allergy

    FeatureThermal BurnOral Allergy Syndrome
    OnsetImmediate upon contact with hot foodWithin minutes of eating specific raw foods
    SensationSharp pain, stingingItching, tingling, mild swelling
    DurationLasts several daysUsually subsides quickly after swallowing/spitting
    TriggerHigh temperatureSpecific raw plant-based foods

    If you suspect an allergy, it is crucial to identify the trigger. Keeping a food diary can help pinpoint which items cause the reaction. For more detailed information on how allergens affect oral health, you can refer to resources on immune system responses.

    Mechanical Trauma and Abrasive Foods

    Sometimes, the issue isn’t heat or chemistry, but physics. Eating hard, crunchy, or sharp foods can cause mechanical trauma to the delicate tissues of the palate.

    Common offenders include:

    • Tortilla chips and hard tacos.
    • Crusty breads or baguettes.
    • Hard candies.
    • Fish bones or small fragments of shellfish shells.

    These items can scratch or puncture the mucosal lining, leading to localized pain that feels like a cut or abrasion. This type of injury is often mistaken for a burn because the sensation is similar, but upon inspection, you might see a small white or red sore rather than general redness.

    Infections and Underlying Conditions

    If the pain persists for more than a week or occurs frequently without any obvious trigger like hot food, an underlying infection or condition might be to blame.

    1. Candidiasis (Oral Thrush)

    This is a fungal infection caused by an overgrowth of Candida albicans. It often presents as creamy white lesions on the tongue or inner cheeks, but it can also affect the roof of the mouth, causing soreness and a cottony feeling. It is more common in individuals with weakened immune systems, those taking antibiotics, or people with diabetes.

    2. Canker Sores (Aphthous Ulcers)

    While canker sores typically appear on the inside of the cheeks or gums, they can occasionally form on the soft palate. These small, shallow ulcers are painful and can be triggered by stress, minor injury, or acidic foods.

    3. Sinus Issues

    Believe it or not, your sinuses and your mouth are connected. Severe sinus infections or post-nasal drip can cause inflammation in the upper throat and the roof of the mouth, leading to a dull ache that worsens when swallowing or eating.

    Why Does The Roof Of My Mouth Hurt After Eating

    How to Relieve Pain: A Step-by-Step Guide

    If you are currently experiencing pain, here is a practical protocol to speed up healing and reduce discomfort.

    1. Cool Down Immediately: Rinse your mouth with cold water. Do not use ice directly on the tissue as it can cause further damage. Aim for water at a temperature of 10–15°C (50–59°F).
    2. Salt Water Rinse: Mix 1/2 teaspoon of salt into 8 ounces (240 ml) of warm water. Swish gently for 30 seconds and spit out. This helps reduce inflammation and keeps the area clean. Repeat this 2–3 times a day.
    3. Avoid Irritants: Stay away from spicy, acidic (like citrus or tomato sauce), and very hot foods for at least 48 hours. Stick to soft, cool foods like yogurt, pudding, or smoothies.
    4. Over-the-Counter Relief: Consider using an oral gel containing benzocaine for temporary numbing. Ensure you follow the package instructions carefully.
    5. Hydrate: Drink plenty of water to keep the oral mucosa moist. Dry mouth can exacerbate pain and slow healing. Aim for at least 2 liters of water throughout the day.

    When to See a Doctor

    Most cases of palate pain resolve on their own within a week. However, you should seek professional medical advice if:

    • The pain lasts longer than 10 days.
    • You have difficulty swallowing or breathing.
    • You notice pus, excessive bleeding, or large blisters.
    • You have a high fever accompanying the mouth pain.
    • The pain is severe enough to prevent you from eating or drinking adequately.

    FAQ Section

    1. Why does the roof of my mouth hurt after eating spicy food?

    Spicy foods contain capsaicin, which binds to pain receptors in the mouth. If your palate is already sensitive due to a minor burn or abrasion, spicy food will intensify the pain. Additionally, some people may have a mild sensitivity or allergy to specific spices, causing inflammation.

    2. Can dehydration cause pain in the roof of the mouth?

    Yes. Saliva plays a crucial role in protecting the oral tissues. When you are dehydrated, saliva production decreases, leading to a dry mouth (xerostomia). This makes the mucous membranes on the roof of your mouth more susceptible to irritation, friction, and pain during eating.

    3. Is it normal for the roof of my mouth to peel after eating?

    Peeling skin on the roof of the mouth is often a sign of a healing thermal burn. As the damaged tissue regenerates, the top layer may slough off. However, if peeling occurs frequently without burns, it could indicate a reaction to certain oral care products (like whitening toothpaste) or a condition like oral lichen planus.

    4. Why does my palate hurt only when I eat acidic foods?

    Acidic foods (like oranges, lemons, or vinegar-based dressings) can irritate exposed nerve endings if the protective mucosal layer is compromised. This is common if you have a small ulcer, a healing burn, or gum recession. The acid stings the raw tissue, causing sharp pain.

    5. Can braces cause pain on the roof of the mouth?

    Yes. Brackets and wires can sometimes rub against the soft palate, especially if a wire is poking out or if the brackets are positioned high. This causes mechanical irritation and sores. Using orthodontic wax can help cover sharp edges and provide relief.

    Conclusion

    Understanding why does the roof of my mouth hurt after eating is essential for maintaining both your comfort and your oral health. Whether it is a simple case of “pizza palate,” a mild allergic reaction, or mechanical irritation from crunchy snacks, most causes are benign and treatable at home.

    By identifying the trigger—be it temperature, texture, or an underlying condition—you can take proactive steps to prevent future occurrences. Remember to listen to your body; if the pain persists or worsens, do not hesitate to consult a dentist or doctor.

    If you found this guide helpful, please share it with your friends and family on social media. Someone else might be suffering from a mysterious palate pain right now, and your share could provide them with the relief they need!