Blog

  • How Much For A New Roof On A Small House?

    How Much For A New Roof On A Small House?

    Replacing a roof is one of the most significant investments a homeowner can make. It protects your family, enhances curb appeal, and ensures structural integrity. If you are wondering how much for a new roof on a small house, you are likely looking for clarity amidst confusing quotes and varying material prices. This guide breaks down the costs clearly so you can budget with confidence.

    Understanding the Average Cost Range

    When planning a roofing project, the first question is always about the bottom line. For a small house in the United States, typically defined as having a roof area between 1,000 and 1,500 square feet, the costs can vary significantly based on materials and location.

    In 2026, the national average cost to replace a roof on a small home ranges from $5,000 to $12,000. However, this is a broad estimate. Several factors influence where your specific project will fall within this range.

    Breakdown by Material Type

    The choice of roofing material is the single biggest driver of cost. Here is a realistic look at what you might pay for a small house (approx. 1,200 sq. ft. roof area):

    MaterialCost per Sq. Ft.Total Estimated CostLifespan
    Asphalt Shingles$3.50 – $5.50$4,200 – $6,60015–25 Years
    Metal Roofing$7.00 – $12.00$8,400 – $14,40040–70 Years
    Wood Shakes$6.00 – $9.00$7,200 – $10,80020–30 Years
    Clay/Concrete Tile$10.00 – $18.00$12,000 – $21,60050+ Years

    Note: These prices include both materials and labor. Prices may vary by region.

    Asphalt shingles remain the most popular choice for small homes due to their affordability and ease of installation. However, if you plan to stay in your home for decades, investing in metal or tile might offer better long-term value despite the higher upfront cost.

    What Factors Influence Roofing Costs?

    Understanding why prices fluctuate helps you negotiate better with contractors. It is not just about the square footage; several hidden variables play a crucial role.

    Roof Pitch and Complexity

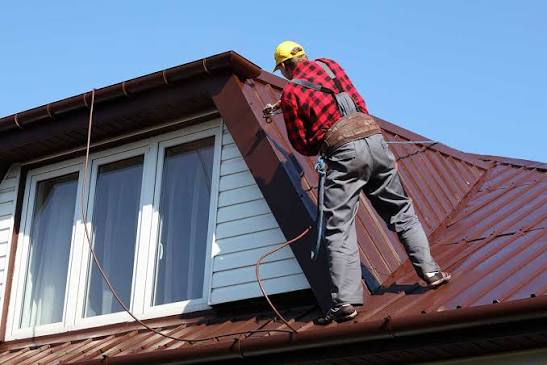
    A “small” house does not always mean a “simple” roof. If your small home has a steep pitch, multiple gables, dormers, or chimneys, the labor cost increases. Roofers charge more for steep roofs because they require special safety equipment and take longer to complete.

    • Low Slope: Easier to walk on, lower labor cost.
    • Steep Slope: Requires harnesses and extra caution, increasing labor by 20–30%.

    Geographic Location

    Labor rates vary wildly across the US. A roof replacement in rural Midwest areas will generally cost less than in major metropolitan hubs like New York City or San Francisco. Additionally, local building codes may require specific materials that withstand regional weather patterns, such as hurricane straps in Florida or ice dams protection in Minnesota.

    Removal of Old Roofing

    Does your quote include tear-off? Removing the existing roof adds to the cost. Most contractors charge between $1.00 and $2.50 per square foot for removal and disposal. If you have multiple layers of old shingles, the weight and labor increase, pushing the price higher. Always confirm if “tear-off” is included in your initial estimate.
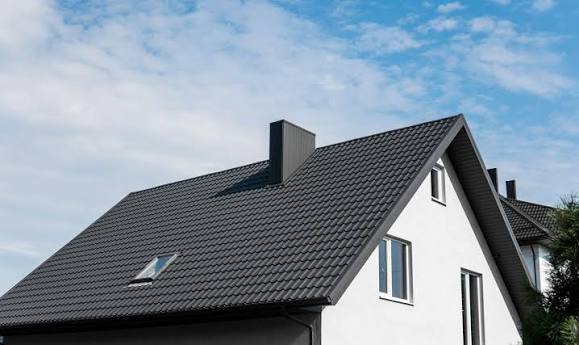
    How Much For A New Roof On A Small House

    How to Calculate Your Specific Roof Size

    Many homeowners mistakenly use their home’s floor plan square footage to estimate roofing costs. This is inaccurate. The roof area is almost always larger than the living area due to overhangs and pitch.

    To get a rough estimate:

    1. Measure the length and width of each section of your roof from the ground.
    2. Multiply length by width to get the flat area.
    3. Apply a pitch multiplier. For example, a 6/12 pitch adds roughly 1.12 times the flat area.

    For precise measurements, professionals use satellite imagery or drone technology. When asking how much for a new roof on a small house, provide contractors with your address so they can pull these accurate measurements before visiting.

    Choosing the Right Contractor

    The lowest bid is not always the best option. Poor installation can void warranties and lead to leaks within years. To ensure quality, follow these steps:

    1. Get Three Quotes: Never settle for the first estimate. Compare line items carefully.
    2. Check Licenses and Insurance: Ensure the contractor is licensed in your state and carries liability and workers’ compensation insurance.
    3. Read Reviews: Look for recent reviews on Google and Bing. Pay attention to comments about cleanliness and communication.
    4. Ask About Warranties: A reputable roofer offers both a manufacturer’s warranty on materials and a workmanship warranty on labor.

    According to industry standards, proper installation is critical for longevity. You can read more about general construction standards on Wikipedia’s Roofing page to understand the technical basics involved.

    Money-Saving Tips for Small Homeowners

    Replacing a roof is expensive, but there are ways to manage the cost without sacrificing quality.

    Time Your Project Strategically

    Roofing demand peaks in late summer and early fall. Scheduling your project during the “shoulder seasons” of late winter or early spring might result in lower prices. Contractors are often eager to fill their schedules during slower months and may offer discounts.

    Consider Overlaying (With Caution)

    In some cases, you can install new shingles over the old ones. This saves on tear-off costs. However, this is only viable if there is only one existing layer and the deck is in good condition. Check local building codes, as many jurisdictions prohibit more than two layers of roofing.

    Choose Standard Colors

    Custom-colored or premium architectural shingles cost more. Sticking to standard colors like black, gray, or brown can save you money because these materials are readily available and do not require special orders.

    FAQ Section

    1. Does homeowners insurance cover roof replacement?

    Insurance typically covers roof replacement if the damage is caused by a sudden, covered peril like a storm, hail, or fire. It usually does not cover wear and tear or age-related deterioration. Review your policy and document any storm damage immediately.

    2. How long does it take to replace a roof on a small house?

    For a small house, a professional crew can typically complete the job in 1 to 2 days. Weather delays or complex roof structures may extend this timeline. Always ask your contractor for a projected schedule.

    3. Is it cheaper to repair or replace a small roof?

    If your roof is less than 10 years old and the damage is localized (e.g., a few missing shingles), repair is more cost-effective. However, if the roof is nearing the end of its lifespan or has widespread leaking, replacement is the smarter financial decision to avoid recurring repair costs.

    4. What is the most durable roofing material for a small house?

    Metal roofing is widely considered the most durable option, lasting 40–70 years. It is resistant to fire, wind, and mildew. While the upfront cost is higher than asphalt, its longevity often makes it cheaper over the life of the home.

    5. Can I install a new roof myself to save money?

    While DIY roofing is possible, it is highly discouraged for most homeowners. Improper installation can lead to severe water damage, voided warranties, and safety hazards. Professional installation ensures compliance with building codes and manufacturer requirements.

    6. How much should I budget for unexpected costs?

    It is wise to set aside an additional 10–15% of your total budget for unforeseen issues. Common surprises include rotten decking wood that needs replacement or outdated flashing that requires upgrading.

    Conclusion

    Knowing how much for a new roof on a small house empowers you to make informed decisions. While the average cost ranges from $5,000 to $12,000, your final price depends on materials, labor, and geographic location. By understanding these factors, getting multiple quotes, and choosing the right materials, you can protect your home without breaking the bank.

    Remember, a roof is not just an expense; it is a vital component of your home’s value and safety. Take your time, do your research, and choose a contractor who values transparency and quality.

    Found this guide helpful? Share it with friends or family who are planning home improvements on social media!

  • Why Does The Roof Of My Mouth Have A Bump?

    Why Does The Roof Of My Mouth Have A Bump?

    Have you ever run your tongue over the roof of your mouth and felt something unexpected? It can be startling to discover a lump or bump on your palate, leading to immediate concern about what it might be. If you are asking yourself, “Why does the roof of my mouth have a bump,” you are not alone; this is a common oral health query with various potential causes, ranging from minor irritations to conditions requiring professional attention.

    In this guide, we will explore the most likely reasons for these bumps, how to identify them, and when you should seek medical advice. Our goal is to provide you with clear, actionable information to ease your mind and help you take the right next steps.

    Common Causes of Bumps on the Roof of Your Mouth

    The roof of your mouth, known medically as the palate, is divided into two sections: the hard palate at the front and the soft palate at the back. Bumps can appear in either area, and their cause often depends on their location, texture, and accompanying symptoms.

    1. Torus Palatinus: A Benign Bone Growth

    One of the most common reasons for a hard, immovable bump in the center of the hard palate is a torus palatinus. This is a benign bony growth that develops slowly over time.

    • Characteristics: Hard, smooth, and located in the midline of the roof of the mouth.
    • Symptoms: Usually painless unless irritated by food or dental appliances.
    • Prevalence: It affects approximately 20-30% of the population, according to various dental studies.

    Torus palatinus is genetic and more common in women and certain ethnic groups. It is generally harmless and does not require treatment unless it interferes with denture fitting or speech.

    2. Burns from Hot Food (Pizza Palate)

    If the bump appeared suddenly after eating, it is likely a thermal burn. This is colloquially known as “pizza palate.”

    • Cause: Consuming food or drinks that are too hot (above 65°C or 149°F).
    • Appearance: Reddened area, blister, or swollen tissue.
    • Healing Time: Typically heals within 3–7 days.

    The tissue on the roof of the mouth is delicate. When burned, it swells as part of the inflammatory response. While painful, these bumps are temporary and resolve on their own with proper care.

    3. Canker Sores (Aphthous Ulcers)

    Canker sores are small, shallow lesions that develop on the soft tissues in your mouth or at the base of your gums. They can also appear on the soft palate.

    • Appearance: White or yellow center with a red border.
    • Sensation: Painful, especially when eating acidic or spicy foods.
    • Trigger: Stress, minor injury, or nutritional deficiencies (like Vitamin B12 or iron).

    Unlike cold sores, canker sores are not contagious. They usually heal within one to two weeks without scarring.

    4. Oral Mucoceles

    A mucocele is a fluid-filled swelling that occurs when a salivary gland becomes blocked or damaged. While more common on the lower lip, they can occur on the roof of the mouth, particularly on the soft palate.

    • Texture: Soft, movable, and filled with clear fluid.
    • Cause: Trauma to the salivary duct, such as biting the area or sucking on the cheek.
    • Outcome: Many rupture and heal on their own, but persistent ones may need minor surgical removal.

    5. Infections: Viral and Bacterial

    Certain infections can cause bumps or blisters on the palate.

    • Herpes Simplex Virus (HSV-1): Causes cold sores, which can appear inside the mouth as clusters of small blisters. These are highly contagious.
    • Hand, Foot, and Mouth Disease: Common in children but can affect adults, causing painful red blisters on the tongue, gums, and inside of the cheeks.
    • Oral Thrush: A fungal infection caused by Candida yeast, leading to creamy white lesions that can be wiped off, leaving a red, bleeding area.

    For more detailed information on oral infections, you can refer to this Wikipedia article on Oral Candidiasis.

    Why Does The Roof Of My Mouth Have A Bump

    Less Common but Serious Conditions

    While most bumps are benign, it is crucial to be aware of rarer, more serious conditions.

    Oral Cancer

    Oral cancer can present as a lump, thickening, or rough spot on the roof of the mouth.

    • Risk Factors: Tobacco use, heavy alcohol consumption, and HPV infection.
    • Warning Signs: A sore that does not heal within two weeks, unexplained bleeding, numbness, or difficulty swallowing.
    • Action: If you have a persistent bump that changes in size or color, see a dentist or doctor immediately. Early detection significantly improves prognosis.

    Nasopalatine Duct Cyst

    This is a rare developmental cyst that forms in the midline of the anterior palate. It arises from remnants of the nasopalatine duct.

    • Symptoms: Swelling, pain, or a salty taste if it drains.
    • Diagnosis: Requires X-ray or CT scan for confirmation.
    • Treatment: Surgical removal is typically recommended to prevent infection.

    How to Identify the Type of Bump

    To help determine the cause, consider the following factors. Use this checklist to assess your symptom:

    FeatureBenign (Likely Safe)Concerning (See a Doctor)
    DurationLess than 2 weeksPersists longer than 2 weeks
    Pain LevelMild or intermittentSevere, worsening, or constant
    TextureSoft, fluid-filled, or hard boneHard, fixed, irregular edges
    ColorSame as surrounding tissue or redWhite, red, or mixed patches
    GrowthStable sizeRapidly increasing in size
    Other SymptomsNoneBleeding, numbness, weight loss

    Home Remedies and Relief Strategies

    If the bump is due to a minor issue like a burn or canker sore, you can manage discomfort at home. Here are effective, safe steps:

    1. Salt Water Rinse: Mix 1 teaspoon of salt in 8 ounces (240 ml) of warm water. Swish gently for 30 seconds and spit out. Do this 2–3 times a day to reduce inflammation and keep the area clean.
    2. Avoid Irritants: Stay away from spicy, acidic, or crunchy foods that can aggravate the bump. Opt for soft, cool foods like yogurt, applesauce, or smoothies.
    3. Cold Compress: Suck on ice chips or eat cold treats like popsicles to numb the area and reduce swelling.
    4. Over-the-Counter Gels: Use oral gels containing benzocaine for temporary pain relief. Follow the package instructions carefully.
    5. Hydration: Drink plenty of water to keep your mouth moist and promote healing. Aim for at least 2 liters of water daily.

    Note: Do not attempt to pop or squeeze any bump on your mouth. This can introduce bacteria and lead to infection.

    When to See a Dentist or Doctor

    You should schedule an appointment with a healthcare provider if:

    • The bump does not heal within two weeks.
    • You experience difficulty breathing, swallowing, or speaking.
    • There is unexplained bleeding from the bump.
    • You have a fever or swollen lymph nodes in your neck.
    • The bump is growing rapidly or changing color.
    • You have a history of tobacco or heavy alcohol use.

    Early intervention is key for serious conditions. A dentist can perform a visual exam and, if necessary, order imaging or a biopsy to determine the exact cause.

    FAQ Section

    1. Can stress cause bumps on the roof of my mouth?

    Yes, stress can weaken your immune system, making you more susceptible to canker sores or viral outbreaks like herpes. Additionally, stress may lead to habits like grinding your teeth or accidentally biting your mouth, causing trauma and subsequent bumps.

    2. Is a bump on the roof of my mouth contagious?

    It depends on the cause. Canker sores, torus palatinus, and burns are not contagious. However, bumps caused by viruses like herpes simplex (cold sores) or hand, foot, and mouth disease are highly contagious. Avoid sharing utensils or kissing until the lesion heals.

    3. How long does it take for a burned roof of the mouth to heal?

    Minor thermal burns usually heal within 3 to 7 days. Deeper burns may take up to two weeks. During this time, keep the area clean and avoid hot or spicy foods to prevent further irritation.

    4. Can allergies cause bumps on the palate?

    Yes, oral allergy syndrome or general allergic reactions can cause swelling or hives on the roof of the mouth. If you suspect an allergy, identify and avoid the trigger. Antihistamines may help reduce swelling, but consult a doctor for severe reactions.

    5. What is the difference between a canker sore and a cold sore?

    Canker sores occur inside the mouth (on the soft palate, gums, or cheeks) and are not contagious. Cold sores typically appear outside the mouth (on the lips) but can occur inside, and they are caused by the herpes virus, making them contagious.

    6. Should I brush over the bump?

    Brush gently around the area to maintain oral hygiene, but avoid scrubbing the bump directly, as this can cause pain and delay healing. Use a soft-bristled toothbrush and mild toothpaste.

    Conclusion

    Discovering a bump on the roof of your mouth can be alarming, but in most cases, it is a benign condition such as a torus palatinus, a minor burn, or a canker sore. By understanding the characteristics of the bump and monitoring its progression, you can often manage it effectively at home.

    However, never ignore a bump that persists for more than two weeks, grows rapidly, or is accompanied by other concerning symptoms. Your oral health is a window into your overall well-being, so regular dental check-ups are essential.

    If you found this article helpful, please share it with friends or family who might be experiencing similar concerns. Knowledge is power, and spreading awareness can help others seek timely care. Stay healthy and keep smiling!

  • The Roof Is On Fire Let The Mother Burn Lyrics

    The Roof Is On Fire Let The Mother Burn Lyrics

    Have you ever found yourself humming along to a classic beat but getting stuck on a specific line that seems to change every time you hear it? You are not alone; many music fans struggle to find the correct version of “The Roof Is On Fire Let The Mother Burn Lyrics“ due to various remixes and misheard phrases over the decades. This guide provides the authentic lyrics and the fascinating story behind this foundational track in hip-hop history.

    Understanding the Iconic Hook: What Are the Real Lyrics?

    When searching for “The Roof Is On Fire Let The Mother Burn Lyrics”, it is crucial to identify the source material correctly. The phrase is most famously associated with the 1984 hit single “The Roof Is on Fire” by Rock Master Scott & the Dynamic Three (often credited alongside Zulu King).

    While the title suggests a literal fire, the lyrics are a metaphorical celebration of party energy, breakdancing, and the vibrant culture of early hip-hop in the Bronx. The hook is repetitive and catchy, designed to keep the dance floor moving.

    The Core Chorus

    The central part of the song, which often causes confusion due to its rapid delivery and heavy bass, goes as follows:

    The roof is on fire The roof is on fire The roof is on fire We don’t need no water Let the motherfer burn* *Let the motherfer burn Let the motherf*er burn

    Note: In radio edits and clean versions, the explicit term is often replaced with “mother” or beeped out, leading to the common search query involving “Let The Mother Burn.” However, the original artistic intent used the explicit expletive to emphasize intensity and rebellion against mainstream norms of the time.

    Verse Breakdown

    The verses typically feature call-and-response patterns typical of old-school rap. Here is a simplified structure of how the lyrics flow:

    1. Introduction: The DJ introduces the crew and sets the stage.
    2. The Build-Up: References to breaking, scratching, and the crowd’s energy.
    3. The Drop: The iconic chorus hits, signaling the peak of the party.

    Unlike modern complex lyricism, the power of this track lies in its rhythm and communal participation rather than intricate storytelling. It is a functional piece of art designed for movement.

    Why Do People Search for “Let The Mother Burn”?

    It is interesting to analyze why users specifically type “The Roof Is On Fire Let The Mother Burn Lyrics” into search engines. There are two primary reasons: censorship and mishearing.

    The Censorship Effect

    In the 1980s, as hip-hop began to enter mainstream radio, record labels often edited explicit content. The word “motherf***er” was frequently cut or replaced. Consequently, many listeners grew up hearing a sanitized version where the line sounded like “Let the mother burn” or “Let the brother burn.” This created a generational gap in lyrical knowledge.

    Auditory Illusions

    The production style of 1980s hip-hop, characterized by heavy drum machines and lower fidelity recording equipment, can obscure vocal clarity. When combined with the high-energy delivery of the MCs, listeners often misinterpret phonetics. This phenomenon is known as mondegreen—the mishearing or misinterpretation of a phrase in a way that gives it a new meaning.

    The Roof Is On Fire Let The Mother Burn Lyrics

    Historical Context: The Birth of a Hip-Hop Anthem

    To truly appreciate the lyrics, one must understand the environment in which they were created. This song is not just a party track; it is a historical document of New York City’s cultural explosion.

    The Role of Rock Master Scott & Zulu King

    Rock Master Scott (Scott La Rock) and Zulu King were pivotal figures in the transition of hip-hop from block parties to recorded media. Their collaboration brought a polished yet raw energy that defined the era. According to historical records, the track was released on Sugar Hill Records, a label instrumental in popularizing hip-hop globally.

    For more detailed historical data on the genre’s evolution, you can refer to the comprehensive overview on Hip Hop History – Wikipedia.

    Cultural Significance of “The Roof Is on Fire”

    The metaphor of the roof being on fire signifies an uncontrollable level of excitement. In the context of 1984, this was revolutionary. It declared that hip-hop was not a passing fad but a blazing force that could not be extinguished by critics or lack of resources (“we don’t need no water”).

    AspectDetail
    Release Year1984
    ArtistRock Master Scott & the Dynamic Three
    LabelSugar Hill Records
    GenreOld School Hip Hop / Electro
    Key ThemeParty Energy, Dance Culture

    Common Misconceptions About the Song

    Despite its popularity, several myths persist around this track. Addressing these helps clarify the search intent for “The Roof Is On Fire Let The Mother Burn Lyrics”.

    Myth 1: It Was Written by Public Enemy

    Many people confuse this track with later politically charged hip-hop. While Public Enemy sampled similar energies, “The Roof Is on Fire” predates their major releases and focuses purely on party aesthetics rather than political commentary.

    Myth 2: The Lyrics Are About Actual Arson

    Some literal interpretations suggest the song encourages criminal activity. However, in hip-hop vernacular, “fire” is almost exclusively used as a metaphor for skill, heat, or intensity. The “roof” refers to the venue or the limit of excitement, not a physical building intended for destruction.

    Myth 3: There Is Only One Version

    There are numerous remixes, live versions, and samples. The most famous sample usage is by Bloodhound Gang in their 1998 hit “Fire Water Burn,” which reused the hook but changed the surrounding context entirely. This often leads to confusion when users search for lyrics, expecting the rock-rap fusion version instead of the original 1984 track.

    How to Use These Lyrics Responsibly

    If you are planning to use these lyrics in a project, performance, or social media post, consider the following guidelines:

    1. Context Matters: Understand that the explicit language reflects the era’s artistic freedom. If using in a family-friendly setting, opt for the clean edit.
    2. Credit the Artists: Always attribute the work to Rock Master Scott & the Dynamic Three. Proper attribution respects the pioneers of the genre.
    3. Educational Value: Use the song to teach about the roots of sampling and the evolution of hip-hop production techniques.

    FAQ Section

    1. Who originally sang “The Roof Is on Fire”?

    The original artists are Rock Master Scott & the Dynamic Three, often featuring Zulu King. The track was released in 1984 under Sugar Hill Records.

    2. What does “Let the motherf***er burn” mean in the song?

    It is an expression of intense enthusiasm and defiance. It means letting the party reach its peak intensity without holding back or trying to calm things down (“no water”). It is a metaphor for unbridled energy.

    3. Did Bloodhound Gang write this song?

    No. Bloodhound Gang sampled the hook for their 1998 song “Fire Water Burn.” While their version is widely known, the original composition and lyrics belong to Rock Master Scott & the Dynamic Three.

    4. Why are there different versions of the lyrics online?

    Variations exist due to radio censors, live performance improvisations, and mishearings. Additionally, cover versions and samples may alter the wording slightly to fit new musical arrangements or to comply with different broadcasting standards.

    5. Is this song considered explicit?

    Yes, the original recording contains explicit language. However, many clean versions replace the expletive with “mother” or instrumental breaks, which is why many people remember the line as “Let the mother burn.”

    6. Can I use these lyrics in my YouTube video?

    Using copyrighted lyrics can lead to content ID claims. It is safer to use short excerpts for commentary or educational purposes under fair use guidelines, or obtain proper licensing if using the audio extensively. Always check current copyright laws in your region.

    Conclusion

    Finding the correct “The Roof Is On Fire Let The Mother Burn Lyrics” is about more than just getting the words right; it is about connecting with a pivotal moment in music history. This track encapsulates the raw energy, creativity, and communal spirit of 1980s hip-hop. By understanding the context, the artists, and the cultural metaphors, we gain a deeper appreciation for the genre’s roots.

    Whether you are a DJ looking to drop a classic beat, a historian studying urban culture, or just a fan wanting to sing along correctly, knowing the true lyrics enhances the experience.

    Did you enjoy this deep dive into hip-hop history? Share this article with your friends on social media and keep the conversation burning! Don’t forget to leave a comment below if you have a favorite memory associated with this track.

  • Best Siding Colors for Red Brick & Black Roof

    Best Siding Colors for Red Brick & Black Roof

    Choosing the right exterior palette can feel overwhelming when you are working with such strong existing elements. You want your home to look cohesive, modern, and inviting, not chaotic or dated. If you are asking what color siding goes with red brick and black roof, you are in the right place to find harmonious and stylish solutions.

    The combination of red brick and a black roof is a classic architectural staple, particularly in traditional, colonial, and farmhouse-style homes. The brick provides warmth and texture, while the black roof adds definition and contrast. However, the siding acts as the bridge between these two dominant features. Get it wrong, and the house can look disjointed; get it right, and you create a stunning visual hierarchy that boosts curb appeal and potentially increases property value.

    In this guide, we will break down the best color theories, specific paint recommendations, and material choices that complement this powerful duo. We will rely on design principles and expert insights to help you make a confident decision.

    Why Neutral Tones Are the Safest Bet

    When dealing with red brick, which already has significant visual weight and color variation, neutrality is often your best friend. The goal is to let the brick be the star while the siding supports it.

    Cream and Off-White

    Creamy whites are arguably the most popular choice for this combination. Unlike stark, bright white—which can sometimes look too clinical against the earthy tones of brick—cream or off-white introduces a subtle warmth. This warmth ties in with the red and orange hues found in the mortar and the bricks themselves.

    • Visual Effect: Creates a clean, crisp look that highlights the black roof lines.
    • Best For: Traditional Colonial and Cape Cod styles.
    • Pro Tip: Look for whites with yellow or beige undertones rather than blue or gray undertones to avoid clashing with the brick.

    Light Gray and Greige

    “Greige” (a mix of gray and beige) has surged in popularity over the last decade. It offers a modern update to the traditional brick-and-black-roof combo. A light greige siding softens the contrast between the dark roof and the warm brick, creating a sophisticated, transitional aesthetic.

    According to recent trends in residential exterior design, neutral palettes account for over 70% of home exterior choices because they appeal to the broadest range of buyers if you plan to sell. A light gray siding provides a contemporary backdrop that makes the red brick pop without competing with it.

    Embracing Bold Contrasts

    If you prefer a more dramatic or modern look, you might consider darker or bolder siding colors. This approach requires confidence but can yield spectacular results.

    Charcoal and Dark Gray

    Using a dark charcoal siding creates a monochromatic feel with the black roof, allowing the red brick to stand out as a vibrant accent. This is particularly effective if you have brick accents only on certain parts of the house (like the front facade) and siding on the rest.

    • Advantage: Hides dirt and maintenance issues better than light colors.
    • Consideration: Dark colors absorb more heat. Ensure your siding material is rated for high thermal performance to prevent warping.

    Navy Blue and Forest Green

    For those who want color without going too wild, deep navy blue or forest green are excellent choices. These colors are analogous to the natural environment and complement the earthy red of the brick.

    • Navy Blue: Offers a nautical or stately vibe. It pairs beautifully with black trim and a black roof.
    • Forest Green: Evokes a craftsman or rustic feel. It harmonizes with the natural origins of clay brick.
    What Color Siding Goes With Red Brick And Black Roof

    Material Matters: Vinyl vs. Fiber Cement vs. Wood

    The color you choose is only half the battle; the material determines how that color ages and looks in different lighting conditions.

    MaterialDurabilityMaintenanceColor RetentionBest Use Case
    VinylHighLowGood (can fade)Budget-friendly updates
    Fiber CementVery HighMediumExcellentHigh-end, custom colors
    WoodModerateHighRequires stainingHistoric preservation
    Engineered WoodHighLow-MediumVery GoodModern farmhouse styles

    Fiber cement, such as HardiePlank, is often recommended by architects for its ability to hold paint longer and resist weathering. It allows for deeper, richer colors that might look flat on vinyl. For more detailed information on building materials and their properties, you can refer to general construction standards on Wikipedia.

    Step-by-Step Guide to Testing Your Color Choice

    Do not rely solely on digital renderings or paint chips. Real-world lighting changes everything. Follow these steps to ensure your choice works:

    1. Buy Sample Pots: Purchase small sample sizes of your top three color choices. Do not skimp here; seeing the actual pigment is crucial.
    2. Prepare Large Swatches: Paint at least a 2×2 foot section on a poster board or directly on an inconspicuous area of your current siding. Small chips are misleading.
    3. Observe at Different Times: Look at the samples in the morning, noon, and evening light. Red brick can look orange in the sunset and deep burgundy in the shade. Your siding needs to work in all these conditions.
    4. Check Against Trim: Ensure the siding color also works with your window trim and door color. If your trim is white, does the siding clash with it?
    5. View from the Street: Stand across the street to see how the house reads as a whole. The black roof should frame the house, not overwhelm it.

    Common Mistakes to Avoid

    Even with good intentions, homeowners often make these errors when pairing siding with red brick and a black roof:

    • Ignoring the Brick’s Undertones: Not all red bricks are the same. Some lean purple, some orange, and some brown. Identify your brick’s dominant undertone before picking a siding color. If your brick is orange-heavy, avoid cool blues. If it is purple-heavy, avoid greens.
    • Using Too Many Colors: Stick to the 60-30-10 rule. 60% dominant color (siding), 30% secondary color (brick), and 10% accent color (trim/door). Adding a fourth major color creates visual chaos.
    • Neglecting the Landscape: Consider your surrounding trees and garden. A green siding might blend too much with heavy foliage, while a cream siding will stand out beautifully against greenery.

    FAQ Section

    What is the most popular siding color for red brick houses?

    Light neutrals, specifically cream, off-white, and light greige, are the most popular choices. They provide a timeless look that balances the warmth of the brick and the severity of the black roof.

    Can I use white siding with a black roof and red brick?

    Yes, but avoid pure, stark white. Opt for a “soft white” or “antique white” with warm undertones. Pure white can create a harsh contrast that makes the brick look dull or dirty by comparison.

    Does dark siding make a house look smaller?

    Visually, yes. Dark colors recede, which can make a large house feel more grounded, but it can make a small house appear smaller. If you have a modest-sized home, lighter siding colors like beige or light gray are generally safer to maintain a sense of volume.

    How do I choose siding if my brick has multiple colors?

    Look at the mortar color and the most dominant brick hue. If the mortar is light, a lighter siding will create a seamless flow. If the brick has varied tones, pick a siding color that matches the lightest or most neutral tone in the brick to unify the look.

    Is it better to match the siding to the roof or the brick?

    It is generally better to coordinate with the brick. The roof is a cap, while the siding and brick make up the bulk of the visual mass. Creating harmony between the vertical surfaces (siding and brick) ensures a cohesive look, while the black roof serves as a defining border.

    Conclusion

    Finding the perfect answer to what color siding goes with red brick and black roof depends on your personal style and the specific undertones of your masonry. However, the safest and most aesthetically pleasing routes are usually warm neutrals like cream, greige, or soft white. For a bolder statement, deep charcoal or navy can create a striking modern contrast.

    Remember to test your colors in natural light and consider the material’s longevity. A well-chosen exterior palette not only enhances your daily living experience but also adds significant value to your property.

    If you found this guide helpful, please share it on social media to help friends and neighbors tackle their own home improvement projects! Which color combination are you leaning towards? Let us know in the comments below.

  • How To Install Roof Drip Edge On An Existing Roof

    How To Install Roof Drip Edge On An Existing Roof

    Water stains on your ceiling or peeling paint on your fascia boards are often silent screams for help from your roofing system. Many homeowners overlook the critical role of metal flashing until significant water damage has already occurred behind the walls. If you are wondering how to install roof drip edge on an existing roof, you are taking a vital step toward protecting your home’s structural integrity without needing a full roof replacement.

    Why Drip Edge Is Non-Negotiable for Roof Health

    Before we dive into the tools and hammers, it is essential to understand why this piece of metal matters. A drip edge is a metal flashing installed at the edges of your roof to direct water away from the fascia and into the gutters. Without it, wind-driven rain can curl back under your shingles, soaking the roof deck and rotting the wooden fascia board behind it.

    According to building science principles, proper water management is the single most important factor in roof longevity. While asphalt shingles get all the attention, the drip edge is the unsung hero that ensures water leaves the roof efficiently. Ignoring this component can lead to costly repairs down the line, including fascia replacement and interior drywall fixes.

    Tools and Materials You Will Need

    Preparation is half the battle in any DIY roofing project. Having the right tools on hand prevents mid-job trips to the hardware store and ensures a professional finish.

    Essential Tools

    • Tin Snips or Aviation Shears: For cutting the aluminum or steel drip edge to length.
    • Hammer: A standard 16-oz claw hammer works best.
    • Roofing Nails: Use 1-1/4 inch galvanized roofing nails with large heads to prevent pull-through.
    • Chalk Line: To ensure straight alignment along the fascia.
    • Ladder: Ensure it is stable and extends at least three feet above the roofline.
    • Safety Gear: Non-slip shoes, gloves, and safety glasses.

    Materials

    • Drip Edge Flashing: Typically sold in 10-foot sections. Choose aluminum for rust resistance or galvanized steel for durability. Match the color to your fascia or trim for aesthetic appeal.
    • Roofing Cement (Optional): For sealing overlaps in high-wind areas.
    How To Install Roof Drip Edge On An Existing Roof

    Step-by-Step Guide: Installing Drip Edge on an Existing Roof

    Installing drip edge on an existing roof is trickier than doing it during a new build because you must work around the existing shingles. However, with patience, it is entirely manageable.

    Step 1: Safety First and Site Preparation

    Never work on a wet or windy roof. Ensure your ladder is on solid ground and use a spotter if possible. Clear any debris, leaves, or old caulk from the fascia board where the drip edge will sit. If there is old, damaged drip edge, carefully remove it using a pry bar, being cautious not to damage the underlying wood.

    Step 2: Measure and Cut the Drip Edge

    Measure the length of your eaves (the horizontal lower edges of the roof). It is better to cut slightly long and trim later than to come up short. Using your tin snips, cut the drip edge sections to size. For corners, you may need to make relief cuts to bend the metal neatly around the angle.

    Step 3: Positioning the Drip Edge

    This is the most critical step for an existing roof. You cannot simply slide the drip edge under the shingles easily without risking breakage. Instead, follow this technique:

    1. Lift the bottom row of shingles gently. Do not force them; asphalt shingles become brittle in cold weather and sticky in hot weather. Ideally, perform this task when temperatures are between 50°F and 70°F.
    2. Slide the upper flange of the drip edge under the existing shingles and over the roof deck.
    3. Ensure the lower flange hangs over the fascia board by about 1/4 to 1/2 inch. This overhang ensures water drips clear of the wood.

    Pro Tip: If lifting the shingles proves too difficult or risky, you can install the drip edge over the existing shingles at the very edge. While not ideal for water shedding compared to going under, it is still significantly better than having no drip edge at all. Seal the top edge with roofing cement to prevent water intrusion.

    Step 4: Securing the Drip Edge

    Once positioned, nail the drip edge in place. Place nails every 8 to 12 inches along the top flange (the part under the shingles). Drive the nails firmly but do not dent the metal excessively. Ensure the nails are placed high enough so that the next row of shingles (if you were adding one) or the existing shingle overlap covers them.

    Step 5: Overlapping Sections

    If your roof edge is longer than 10 feet, you will need to join multiple pieces of drip edge. Overlap the sections by at least 2 inches. Always overlap the upstream piece over the downstream piece (following the direction of water flow) to prevent water from seeping into the joint. Apply a dab of roofing cement under the overlap for added security.

    Step 6: Gutter Alignment

    Ensure the drip edge extends into the gutter channel. If your gutters are already installed, you may need to loosen the gutter hangers slightly to tuck the drip edge behind the gutter’s front lip. This ensures that water flows directly into the gutter rather than running down the face of the fascia.

    Common Mistakes to Avoid

    Even experienced DIYers can stumble here. Avoid these pitfalls to ensure a watertight seal.

    MistakeConsequenceSolution
    Nailing too lowWater can seep behind the drip edgeNail only the top flange, hidden under shingles
    No overhangWater runs down the fascia boardEnsure 1/4–1/2 inch overhang past the fascia
    Gaps at cornersWind-driven rain entryMiter cut corners or use pre-formed corner pieces
    Ignoring slopeWater poolingEnsure drip edge follows the roof’s natural slope

    When to Call a Professional

    While this is a feasible DIY project, certain scenarios require expert intervention. If your roof has a steep pitch (greater than 6:12), the risk of falling increases significantly. Additionally, if you discover rotted fascia wood upon removing the old drip edge, structural repairs are needed before installing new flashing. In such cases, consulting a licensed roofer is wise. For more information on roofing standards, you can refer to general construction guidelines on Wikipedia.

    FAQ Section

    Can I install drip edge without removing shingles?

    Yes, but it is less effective. The ideal method is sliding the drip edge under the shingles. If you cannot lift them, installing it over the shingle edge and sealing it with roofing cement is an acceptable alternative for existing roofs.

    What type of drip edge is best for existing roofs?

    Aluminum drip edge is generally preferred for DIY projects because it is lightweight, easy to cut, and resistant to rust. Galvanized steel is stronger but harder to work with and can rust if the coating is scratched.

    How far should the drip edge hang over the gutter?

    The drip edge should extend into the gutter by about 1/2 inch. It should not touch the bottom of the gutter, as this can cause noise during rainstorms, but it must be deep enough to direct water away from the fascia.

    Do I need drip edge on all sides of the roof?

    Technically, drip edge is required on the eaves (bottom edges). On the rakes (side edges), a different type of flashing called “rake edge” or “gable trim” is used. However, many modern building codes recommend drip edge on all perimeter edges for maximum protection.

    Will installing drip edge void my roof warranty?

    Generally, no. Adding protective flashing is considered maintenance. However, if you damage existing shingles during the process, that specific area might not be covered. Always check your specific manufacturer’s warranty terms.

    Conclusion

    Learning how to install roof drip edge on an existing roof is a powerful skill that can save you thousands in water damage repairs. By directing water away from your fascia and into your gutters, you extend the life of your roof and maintain your home’s curb appeal. Remember to prioritize safety, take your time with the shingle lifting, and ensure proper overlapping of sections.

    If you found this guide helpful, please share it with your neighbors or on social media. Helping others protect their homes creates a stronger, safer community. Have you tackled a roofing project before? Share your experiences in the comments below!

  • How to Get Rid of Moss on Roof Shingles

    How to Get Rid of Moss on Roof Shingles

    Is that green, fuzzy layer creeping up your roof causing you sleepless nights? You are not alone. Moss is more than just an eyesore; it traps moisture against your shingles, leading to premature decay, leaks, and costly repairs. If you are wondering how do you get rid of moss on roof shingles without damaging your home or risking your safety, this guide is for you. We will walk you through safe, effective, and proven methods to restore your roof’s integrity and curb appeal.

    Why Is Moss Bad for Your Roof?

    Before we dive into the removal process, it is crucial to understand why moss is a threat. Many homeowners mistake moss for harmless vegetation, but its impact on roofing materials is significant.

    Moss acts like a sponge. It absorbs rainwater and holds it against the surface of your asphalt shingles. Over time, this constant moisture can cause the granules on the shingles to loosen and wash away. Once the protective granule layer is compromised, the underlying asphalt is exposed to UV rays and weather elements, accelerating aging.

    Furthermore, moss roots (rhizoids) can lift the edges of shingles. This creates gaps where wind-driven rain can penetrate, leading to water damage in your attic or ceiling. According to industry estimates, ignoring moss growth can reduce the lifespan of a standard 20-year asphalt roof by up to 5–7 years.

    Safety First: Preparing for Roof Work

    Removing moss is a physical task that involves working at heights. Before you grab any tools, prioritize safety.

    • Check the Weather: Never work on a wet, icy, or windy day. Dry conditions provide better traction.
    • Use Proper Gear: Wear rubber-soled shoes with good grip. Use a sturdy extension ladder secured at the base.
    • Safety Harness: If your roof has a steep pitch (greater than 6/12), consider hiring a professional. If you proceed, use a fall-arrest system.
    • Protect Your Landscaping: The cleaning solutions we will discuss can harm plants. Cover shrubs and grass below the work area with plastic tarps.
    How Do You Get Rid Of Moss On Roof Shingles

    Method 1: The Manual Removal Technique (Low Moisture)

    For light to moderate moss growth, manual removal is often the safest first step. This method minimizes the risk of water intrusion into your home.

    Step-by-Step Guide:

    1. Sweep Gently: Use a soft-bristle broom or a leaf blower on a low setting. Start from the ridge (top) and work your way down.
      • Critical Tip: Always sweep downward, following the direction of the shingle overlap. Sweeping upward can lift shingles and break the seal.
    2. Scrape Carefully: For stubborn patches, use a plastic putty knife or a specialized roof scraper. Avoid metal tools, as they can gouge the shingles.
    3. Collect Debris: Ensure all moss clumps are removed from the gutters. Clogged gutters contribute to moisture retention, which encourages new moss growth.

    Note: Manual removal does not kill the spores. It only removes the visible plant matter. You must follow up with a treatment to prevent regrowth.

    Method 2: Chemical Treatment with Zinc Sulfate or Bleach Solution

    If manual removal isn’t enough, or if the moss is thick, a chemical treatment is necessary. There are two primary approaches: commercial moss killers and DIY bleach solutions.

    Option A: Commercial Moss Killers (Zinc Sulfate)

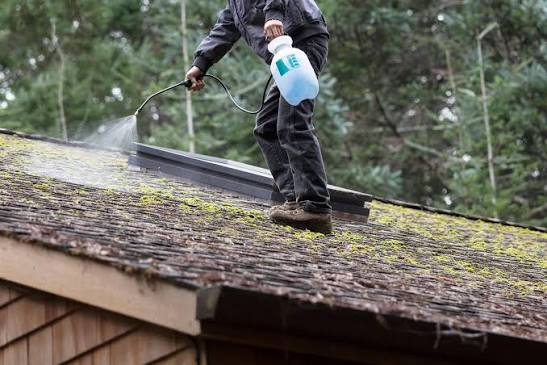
    Products containing zinc sulfate or copper sulfate are highly effective. They work by dehydrating the moss and preventing spore germination.

    • Application: Mix the powder with water according to the manufacturer’s instructions. Spray evenly over the affected areas using a garden sprayer.
    • Wait Time: Allow the solution to sit for 20–30 minutes. Do not rinse immediately.
    • Removal: After the moss turns brown and dies (usually within 24–48 hours), gently sweep it off.

    Option B: DIY Bleach Solution

    A common household remedy is a mixture of chlorine bleach and water.

    • The Ratio: Mix 1 part chlorine bleach with 3 parts water.
    • Application: Apply using a pump sprayer. Avoid high-pressure washing, which can strip granules.
    • Dwell Time: Let it sit for 15–20 minutes.
    • Rinsing: Rinse gently with a garden hose from the top down.

    Comparison: Zinc Sulfate vs. Bleach

    FeatureZinc SulfateBleach Solution
    EffectivenessHigh (Long-lasting)Moderate (Short-term)
    Plant SafetySafer if rinsed properlyHarmful to plants/grass
    Shingle SafetyVery SafeCan degrade seals if overused
    CostModerateLow

    Method 3: Installing Zinc or Copper Strips (Prevention)

    Once you have cleaned your roof, the goal is to keep it clean. The most effective long-term solution is installing metal strips near the roof ridge.

    When it rains, tiny particles of zinc or copper wash down the roof. These metals are toxic to moss, algae, and lichen, creating an inhospitable environment for growth.

    • Installation: Nail 2-inch wide strips of zinc or copper along the peak of the roof.
    • Coverage: Ensure the strips extend under the cap shingles so they are hidden but functional.
    • Longevity: These strips can provide protection for 10–20 years, making them a cost-effective investment.

    For more detailed information on the chemical properties of these metals and their environmental impact, you can refer to this Wikipedia article on Zinc.

    What NOT to Do: Common Mistakes

    Avoid these common pitfalls that can void your roof warranty or cause structural damage.

    1. Never Use a Pressure Washer: High-pressure water (above 1,500 PSI) can blast off the protective granules on asphalt shingles. This exposes the asphalt to sun damage and significantly shortens the roof’s life. Most manufacturers explicitly void warranties if pressure washing is used.
    2. Avoid Walking on Wet Moss: Wet moss is incredibly slippery. Even with safety gear, the risk of falling is high.
    3. Do Not Ignore Gutters: Cleaning the roof while ignoring clogged gutters is futile. Water backup in gutters keeps the roof edge damp, inviting moss back immediately.

    When to Call a Professional

    While DIY methods are effective for many, certain situations require expert intervention:

    • Steep Roofs: If your roof pitch is steep, the risk of injury is too high for amateur work.
    • Extensive Damage: If you notice curled, cracked, or missing shingles during inspection, a roofer should assess structural integrity.
    • Large Surface Area: If more than 30% of your roof is covered, professional cleaning equipment and eco-friendly industrial solutions may be more efficient.

    The average cost for professional roof cleaning ranges from $300 to $600, depending on size and location. Compared to the $10,000+ cost of a full roof replacement, this maintenance is a wise financial decision.

    FAQ Section

    1. Will vinegar kill moss on roof shingles?

    Yes, white vinegar can kill moss due to its acetic acid content. However, it is less effective than zinc sulfate or bleach for large areas. It requires repeated applications and may not prevent regrowth as effectively as metal strips.

    2. How often should I clean moss off my roof?

    Inspect your roof twice a year, ideally in spring and fall. If you live in a shady, damp climate, you may need to treat for moss every 2–3 years. With zinc strips installed, maintenance can be reduced to once every decade.

    3. Does moss removal damage asphalt shingles?

    If done correctly using soft brushes and low-pressure rinsing, it does not damage shingles. However, aggressive scraping, walking heavily on shingles, or using high-pressure washers will cause significant damage.

    4. Can I prevent moss without installing metal strips?

    Yes. You can trim overhanging tree branches to increase sunlight exposure and improve air circulation. Keeping the roof dry and sunny is the best natural deterrent against moss growth.

    5. Is moss harmful to humans?

    Moss itself is not toxic to humans. However, the damp environment it creates can promote mold and mildew growth, which may affect indoor air quality if leaks develop. Additionally, slippery moss poses a fall hazard for anyone accessing the roof.

    Conclusion

    Learning how do you get rid of moss on roof shingles is a vital skill for any homeowner. By combining gentle manual removal with effective chemical treatments and long-term prevention strategies like zinc strips, you can extend the life of your roof and maintain your home’s value.

    Remember, consistency is key. Regular inspections and minor maintenance prevent small problems from becoming expensive disasters. Don’t wait for a leak to appear—take action today.

    Found this guide helpful? Share it with your neighbors on Facebook or Pinterest to help them protect their homes too! A moss-free neighborhood is a safer, more beautiful community.

  • Safe Ways: Remove Roof Leaves From Ground

    Safe Ways: Remove Roof Leaves From Ground

    Climbing a ladder to clear debris is one of the most dangerous household chores you can undertake. Every year, thousands of homeowners end up in emergency rooms due to falls from ladders while attempting basic roof maintenance. If you are looking for how to get leaves off roof without getting on roof, you are making a smart choice for both your safety and your home’s longevity.

    Leaves may seem harmless, but when they accumulate on your roof, they trap moisture, promote moss growth, and clog gutters. This can lead to costly water damage, rotting shingles, and even structural issues over time. The good news? You don’t need to risk your neck to solve this problem. With the right tools and techniques, you can keep your roof clean from the safety of your backyard.

    Why Removing Leaves From Your Roof Is Critical

    Before we dive into the methods, it is essential to understand why this task matters. Many homeowners ignore roof debris until they see a leak. However, prevention is far cheaper than repair.

    According to the National Safety Council, ladder-related incidents account for a significant portion of home injury emergencies. By keeping your feet on the ground, you eliminate this risk entirely. Furthermore, wet leaves decompose and create a sludge that retains water against your shingles. This constant moisture exposure can reduce the lifespan of your asphalt shingles by several years.

    For more detailed information on the biological decomposition process of organic matter on building materials, you can refer to this resource on organic decay. Understanding this process highlights why prompt removal is necessary for maintaining your home’s integrity.

    Method 1: Using a Leaf Blower with Extension Kit

    The most popular and efficient way to clear dry leaves is using a leaf blower. However, standard nozzles often lack the reach or angle needed for roof work.

    Step-by-Step Guide:

    1. Choose the Right Tool: Use a gas-powered or high-voltage cordless leaf blower. Electric corded models may lack the necessary power.
    2. Attach an Extension Wand: Purchase a rigid extension kit specifically designed for roof cleaning. These wands often have a curved tip to direct airflow upward.
    3. Position Yourself Safely: Stand on stable, level ground. Ensure you have a clear line of sight to the roof section you are cleaning.
    4. Start from the Peak: Begin blowing leaves from the top of the roof downward. This prevents you from blowing debris onto areas you have already cleaned.
    5. Use Short Bursts: Do not hold the trigger down continuously. Use short, controlled bursts to dislodge clumps of wet leaves.

    Pro Tip: If the leaves are damp, wait for a sunny day. Dry leaves are significantly lighter and easier to move with air pressure alone.

    Method 2: The Garden Hose with Spray Nozzle

    If you do not own a leaf blower, or if the leaves are stuck due to rain or sap, water pressure is an excellent alternative. This method also helps flush out gutters simultaneously.

    Step-by-Step Guide:

    1. Select a High-Pressure Nozzle: Use a nozzle with a “jet” or “flat fan” setting. Avoid the “mist” setting as it lacks force.
    2. Extend Your Reach: If your hose is too short, use a hose extender or a telescoping wand attachment.
    3. Aim Carefully: Direct the water stream from the edge of the roof toward the center, pushing leaves toward the gutters or off the side.
    4. Watch the Gutters: As leaves wash into the gutters, ensure they are flowing out through the downspouts. If water backs up, you may need to clear the downspout separately.

    Caution: Be mindful of water intrusion. Do not spray water directly under shingles or into vents. Keep the angle shallow and parallel to the roof surface.

    Method 3: Roof Rakes and Specialized Tools

    For heavy, wet debris or thick layers of moss-covered leaves, mechanical tools are often more effective than air or water.

    Top Tools for Ground-Level Cleaning:

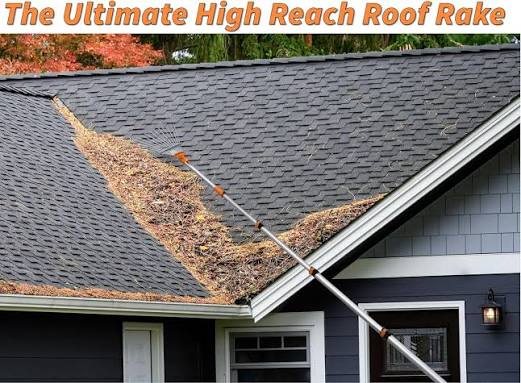
    • Roof Rake: A long-handled rake with a soft rubber or plastic head. It pulls debris down without damaging shingles.
    • Gutter Scoop on a Pole: Specifically designed to pull leaves out of gutters from the ground.
    • Telescoping Brush: Useful for scrubbing away sticky residue after the bulk leaves are removed.

    Comparison: Air vs. Water vs. Mechanical

    FeatureLeaf BlowerGarden HoseRoof Rake
    Best ForDry, loose leavesSticky/wet leavesHeavy debris/moss
    SpeedFastModerateSlow
    Risk of DamageLow (if used correctly)Medium (water intrusion)Low (if soft-headed)
    Effort LevelLowMediumHigh

    Method 4: Preventive Measures to Reduce Future Buildup

    The best way to learn how to get leaves off roof without getting on roof is to minimize the need for frequent cleaning. Prevention saves time and effort in the long run.

    Install Gutter Guards

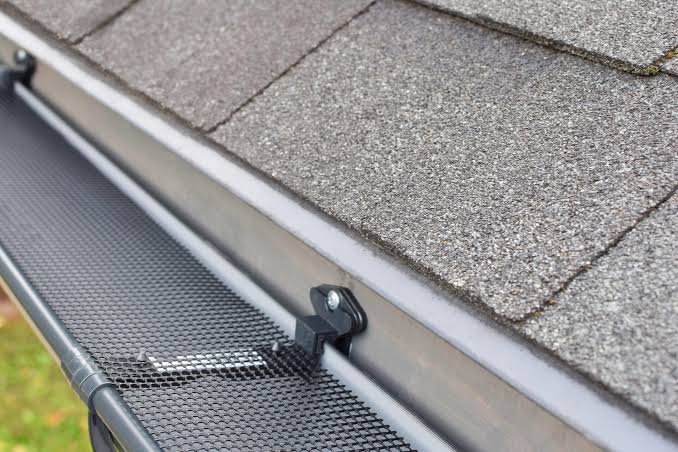
    Gutter guards prevent leaves from entering your gutter system. While they do not stop leaves from landing on the roof surface, they ensure that once leaves blow off the roof, they do not clog the drainage system. Mesh screens, foam inserts, and reverse-curve systems are popular options.

    Trim Overhanging Branches

    Trees are the primary source of roof debris. Trim branches that hang within 6–10 feet of your roof. This reduces the volume of leaves falling directly onto your shingles and minimizes the risk of branch damage during storms.

    Consider Zinc Strips

    If moss is a recurring issue alongside leaves, install zinc or copper strips near the roof peak. When it rains, small amounts of metal wash down the roof, inhibiting moss and algae growth. This keeps the surface smoother, allowing leaves to slide off more easily during wind or rain.

    How To Get Leaves Off Roof Without Getting On Roof

    Common Mistakes to Avoid

    Even when staying on the ground, mistakes can happen. Here are some pitfalls to avoid:

    • Ignoring Weather Conditions: Never attempt to clean a wet or icy roof from the ground. Slippery surfaces make it hard to maintain balance, and wet leaves are heavier and harder to move.
    • Using Metal Tools: Never use a metal rake or sharp objects on your roof. Asphalt shingles are fragile, and metal can tear the granule layer, leading to premature aging.
    • Overlooking Safety Gear: Even though you are on the ground, wear safety glasses and gloves. Debris can fly back at you, and gutter sludge can contain bacteria or sharp objects.

    FAQ Section

    1. Can I use a pressure washer to clean my roof?

    It is generally not recommended to use a high-pressure washer on asphalt shingles. The high pressure can strip away the protective granules, void your warranty, and force water under the shingles, causing leaks. Stick to a standard garden hose with a strong nozzle.

    2. How often should I remove leaves from my roof?

    You should inspect your roof at least twice a year: once in late spring and once in late autumn. If you live near many trees, check monthly during peak leaf-drop seasons. Prompt removal prevents moisture buildup and pest infestations.

    3. What if the leaves are wet and stuck?

    Wet leaves are challenging for leaf blowers. In this case, use a garden hose with a jet nozzle to loosen them, or wait for a few sunny days to let them dry out. Alternatively, use a soft-bristled roof rake to gently pull them down.

    4. Is it safe to stand on a ladder while using a leaf blower?

    No. Standing on a ladder while operating a powerful tool like a leaf blower compromises your balance and increases the risk of falling. Always keep both feet on stable ground. If you cannot reach the area from the ground, hire a professional.

    5. Will walking on the roof damage it?

    Yes, walking on asphalt shingles can crack them or dislodge granules. This is precisely why learning how to get leaves off roof without getting on roof is so important. Foot traffic accelerates wear and tear, potentially leading to leaks.

    6. What should I do with the leaves after they fall?

    Rake them up promptly from your yard and driveway. Leaving them in piles near your foundation can attract pests like rodents and insects. Composting them is an eco-friendly disposal method, provided they are not diseased.

    Conclusion

    Maintaining a clean roof is vital for protecting your home, but it should never come at the cost of your safety. By using tools like leaf blowers with extensions, garden hoses, and specialized roof rakes, you can effectively manage debris without ever climbing a ladder. Remember, consistency is key. Regular inspections and preventive measures like trimming trees and installing gutter guards will reduce the workload significantly.

    Stay safe, keep your feet on the ground, and enjoy the peace of mind that comes with a well-maintained home. If you found this guide helpful, please share it with your friends and neighbors on social media. Together, we can promote safer home maintenance practices for everyone.

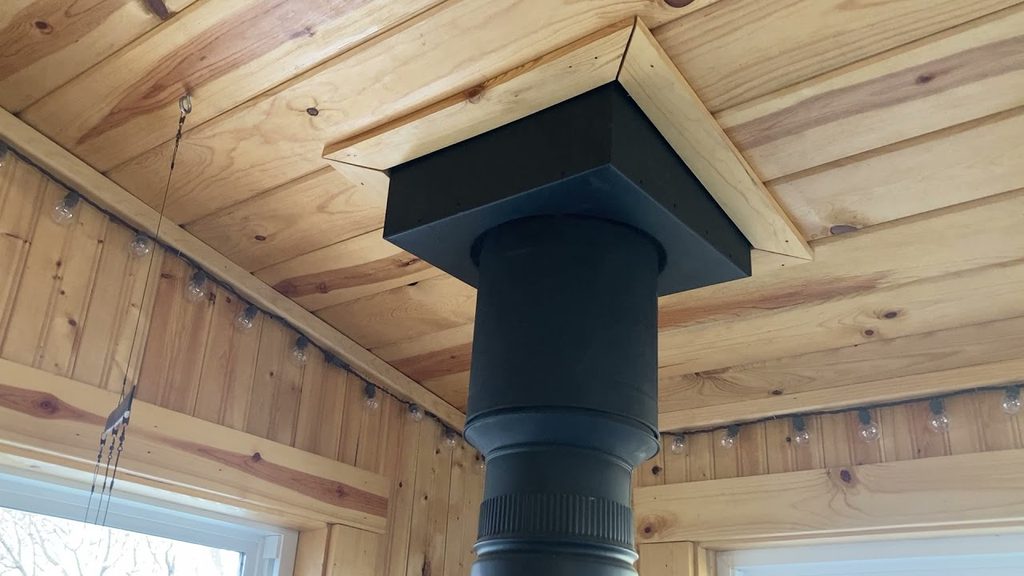
  • How to Install a Wood Stove Chimney Through the Roof

    How to Install a Wood Stove Chimney Through the Roof

    Installing a wood stove can transform your home into a cozy haven during chilly winters, but the installation process often feels daunting. Many homeowners worry about fire safety, structural integrity, and navigating complex building codes. If you are wondering how to install a wood stove chimney through the roof, you are not alone; proper execution is critical for both efficiency and safety.

    This guide breaks down the technical steps into manageable actions, ensuring you understand not just what to do, but why each step matters. We will cover everything from selecting the right components to sealing the roof penetration, helping you achieve a professional-grade result that meets modern safety standards.

    Why Proper Chimney Installation Matters for Safety

    Before picking up a drill, it is vital to understand the stakes. A poorly installed chimney is a leading cause of residential structure fires. According to the National Fire Protection Association (NFPA), heating equipment is involved in a significant percentage of home fire incidents annually, with chimneys and flues being common points of failure due to creosote buildup or improper clearances.

    When you route a chimney through the roof, you are creating a thermal breach in your home’s envelope. This requires precise flashing to prevent water leaks and adequate clearance to prevent heat transfer to combustible roofing materials. Ignoring these details can void your homeowner’s insurance and put your family at risk. Therefore, adherence to local building codes and manufacturer specifications is non-negotiable.

    Choosing the Right Chimney Components

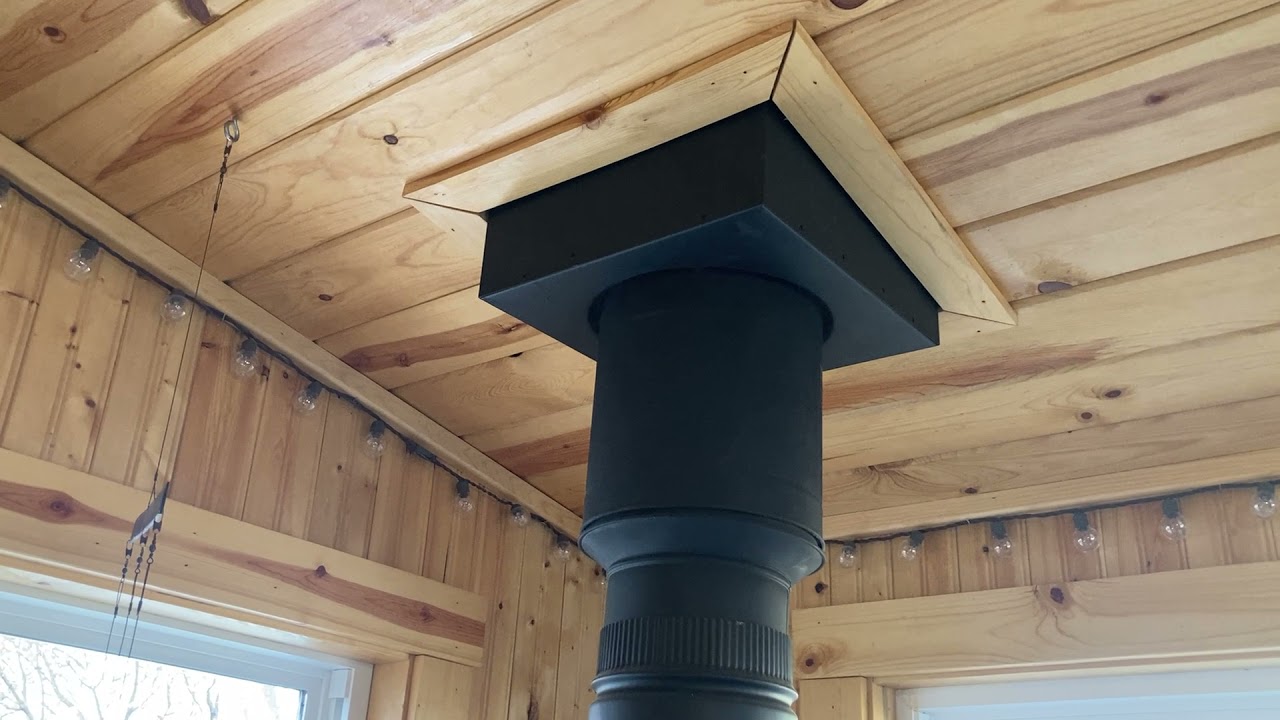
    Not all pipes are created equal. For a roof-through installation, you must use Class A Stainless Steel Chimney Pipe. Unlike single-wall “connector pipe” used inside the house, Class A pipe is double-walled with insulation in between. This design keeps the outer wall cool enough to touch while maintaining high internal temperatures for a strong draft.

    Key Components Checklist:

    • Stainless Steel Chimney Pipe: Ensure it is listed for solid fuel appliances.
    • Roof Support Box: Provides structural support where the pipe passes through the roof.
    • Storm Collar: Diverts rainwater away from the pipe entry point.
    • Flashing Kit: Custom-fitted to your roof’s pitch (e.g., 3/12, 6/12).
    • Chimney Cap: Prevents rain, snow, and animals from entering the flue.
    • Firestop Spacer: Required if passing through any ceiling joists or attic floors before reaching the roof.

    Expert Tip: Always check the National Fire Protection Association guidelines for the latest standards on solid-fuel burning appliances. Compliance with NFPA 211 is the gold standard for chimney safety in the US.

    How To Install A Wood Stove Chimney Through The Roof

    Step-by-Step Guide: Installing the Chimney Through the Roof

    Follow these steps meticulously. If you feel uncomfortable working at heights or cutting into your roof, hire a certified professional.

    Step 1: Plan the Route and Check Clearances

    Identify the location for your stove inside the house. The chimney should rise vertically as much as possible. Horizontal runs reduce draft efficiency and increase creosote accumulation. Use a stud finder to locate rafters in the attic and roof. You must cut through the roof between rafters, not through them, unless you build a framed header box to support the structure.

    Critical Clearance Rule: Maintain at least 2 inches of air space between the chimney pipe and any combustible material (wood framing, insulation, drywall).

    Step 2: Cut the Hole in the Roof

    From the attic, mark the center point where the chimney will exit. Measure the diameter of your chimney pipe plus the required clearance (usually 2 inches on all sides). For a 6-inch pipe, you might need an 10×10 inch hole.

    Go onto the roof and align your mark. Using a reciprocating saw, cut the hole through the roofing shingles and sheathing. Be careful not to cut into the rafters. If you hit a rafter, adjust your plan or frame a new opening.

    Step 3: Install the Roof Support Box

    Place the roof support box over the hole from the outside. This box sits on top of the roof sheathing and provides a stable base for the chimney sections above. Secure it with roofing screws, ensuring it is level. Apply a bead of high-quality roofing sealant under the flange of the support box to create a watertight seal against the shingles.

    Step 4: Assemble the Chimney Sections

    From inside the attic, push the first section of Class A chimney pipe up through the support box. Connect subsequent sections from the roof side. Most systems use a twist-lock mechanism. Ensure each joint is fully engaged and locked.

    Note: Always install chimney sections with the male end (crimped end) facing up. This ensures that any condensation or creosote drips back into the stove rather than leaking out onto the roof or into the walls.

    Step 5: Install Flashing and Storm Collar

    Slide the flashing kit over the chimney pipe. The flashing should sit flat against the roof surface. Secure the flashing with roofing nails, starting from the bottom edge and working your way up to ensure proper water shedding.

    Next, slide the storm collar up the pipe until it rests snugly against the top of the flashing. Tighten the set screw on the collar. Apply a generous amount of silicone-based roofing cement around the gap between the storm collar and the chimney pipe. This is your primary defense against rain intrusion.

    Step 6: Add the Chimney Cap

    Attach the chimney cap to the top of the final pipe section. Secure it with sheet metal screws. The cap prevents downdrafts and keeps debris out. Ensure the cap is rated for high-temperature applications.

    Step 7: Insulate and Firestop in the Attic

    If your chimney passes through an attic space before exiting the roof, you must install a firestop spacer at every ceiling level. Fill the space around the chimney with non-combustible insulation (like mineral wool) if required by local code, but never pack combustible insulation tightly against the pipe. Maintain the 2-inch air gap.

    Common Mistakes to Avoid

    MistakeConsequenceSolution
    Using Single-Wall Pipe OutsideHigh fire risk, rapid coolingUse only Class A Double-Wall pipe for roof penetrations
    Insufficient ClearanceIgnition of roof framingMaintain minimum 2-inch air space on all sides
    Poor Flashing SealWater leaks, rot, moldUse high-temp silicone and proper overlapping techniques
    Too Many ElbowsPoor draft, smoke backupKeep the vertical rise as straight as possible

    FAQ: Common Questions About Roof Chimney Installation

    1. Do I need a permit to install a wood stove chimney?

    Yes, in most jurisdictions in the US, you need a building permit for wood stove installations. Local building departments require inspections to ensure compliance with fire codes and zoning laws. Skipping this step can lead to fines and issues when selling your home.

    2. How high does the chimney need to be above the roof?

    The general rule is the “3-2-10 Rule.” The chimney must extend at least 3 feet above the highest point where it passes through the roof, and at least 2 feet higher than any portion of the building within 10 feet horizontally. This ensures proper draft and prevents wind turbulence from pushing smoke back down.

    3. Can I install the chimney myself?

    While DIY is possible, it is recommended only for those with advanced carpentry and roofing skills. Incorrect installation can lead to house fires. If you are unsure about structural modifications or flashing details, hire a certified chimney sweep or installer.

    4. What type of insulation should I use around the chimney?

    Never use fiberglass or cellulose insulation directly against the chimney pipe. Use non-combustible insulation such as mineral wool or rock wool if filling gaps is necessary. However, maintaining an air gap is usually preferred over filling the space.

    5. How often should I clean the chimney?

    For regular wood stove users, annual cleaning is mandatory. If you burn green wood or use the stove daily, you may need cleaning twice a year. Creosote buildup is highly flammable and is the primary cause of chimney fires.

    Conclusion

    Learning how to install a wood stove chimney through the roof is a rewarding project that combines craftsmanship with safety awareness. By using Class A stainless steel components, maintaining proper clearances, and sealing your roof penetration correctly, you ensure a warm, safe, and efficient heating system for years to come.

    Remember, safety is paramount. Double-check every connection, respect the fire codes, and when in doubt, consult a professional. A well-installed chimney is the heart of a cozy home.

    Did you find this guide helpful? Share it with your friends on social media who are planning their own winter upgrades!

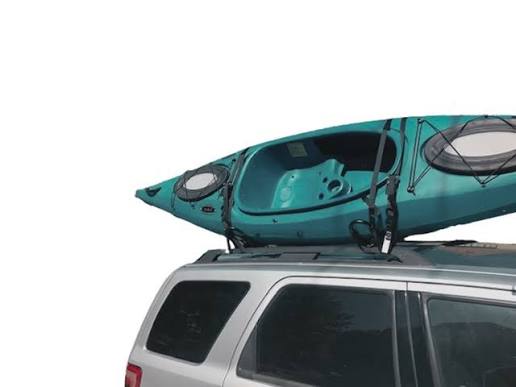
  • Best Way To Strap A Kayak To A Roof Rack

    Best Way To Strap A Kayak To A Roof Rack

    Transporting your kayak can feel daunting, especially if you are worried about damaging your vehicle or losing your expensive gear on the highway. You want peace of mind knowing your vessel is secure, but conflicting advice online often leads to confusion and anxiety. Finding the best way to strap a kayak to a roof rack is essential for both safety and the longevity of your equipment.

    In this comprehensive guide, we will walk you through the exact methods used by professionals and seasoned paddlers. We will cover everything from choosing the right straps to tightening them with precision, ensuring your next adventure starts before you even hit the water.

    Why Proper Strapping Techniques Matter

    Before diving into the “how-to,” it is crucial to understand the “why.” Improperly secured kayaks are not just an inconvenience; they are a significant road hazard. According to data from the National Highway Traffic Safety Administration (NHTSA), unsecured loads contribute to thousands of accidents annually in the United States.

    When a kayak shifts during transit, it creates uneven wind resistance, which can destabilize your vehicle at high speeds. More importantly, excessive movement can crack the hull of your kayak or scratch your car’s paint. By mastering the correct strapping technique, you protect your investment and ensure the safety of everyone on the road.

    Choosing the Right Equipment for the Job

    Not all straps are created equal. Using the wrong gear is the most common mistake beginners make. Here is what you need:

    1. Cam Buckle Straps vs. Ratchet Straps

    • Cam Buckle Straps: These are the gold standard for kayaking. They allow you to tighten the strap manually without the risk of over-tightening. Over-tightening can warp the shape of your kayak, especially plastic rotomolded ones.
    • Ratchet Straps: Avoid these unless absolutely necessary. The mechanical advantage of a ratchet makes it very easy to crush your kayak’s hull. If you must use them, exercise extreme caution.

    2. Quality Matters

    Look for straps made from UV-resistant polyester. Cheap nylon straps stretch when wet or under tension, which can loosen your load mid-drive. Aim for straps with a breaking strength of at least 1,500 lbs, though you will never apply that much force.

    3. Bow and Stern Lines

    Straps hold the kayak down, but bow and stern lines prevent it from sliding forward or backward. These are non-negotiable for highway driving.

    Best Way To Strap A Kayak To A Roof Rack

    Step-by-Step Guide: The Best Way To Strap A Kayak To A Roof Rack

    Follow these precise steps to ensure a secure fit. This method works for most single-person kayaks on crossbar roof racks.

    Step 1: Positioning the Kayak

    Place the kayak upside down (hull up) on the roof rack. This position is more aerodynamic and prevents water from pooling in the cockpit. Center the kayak so that the weight is evenly distributed between the front and rear crossbars.

    • Tip: If you have a partner, lift together using your legs, not your back. If alone, use a loading assist tool or slide the kayak up from the rear bumper carefully.

    Step 2: Attaching the Main Straps

    Take your cam buckle straps. Thread the strap through the cam buckle and place the buckle on the side of the kayak, away from the door frame, to avoid scratching your car when opening doors.

    1. Loop the strap over the crossbar and under the kayak hull.
    2. Bring the strap back up over the other side of the crossbar.
    3. Feed the end through the cam buckle.

    Crucial Detail: Ensure the strap passes under the crossbar, not just resting on top. This prevents the kayak from sliding sideways.

    Step 3: Tightening Correctly

    Pull the loose end of the strap to remove slack. Then, press down on the cam lever to lock it.

    • The “Hand-Tight” Rule: The strap should be tight enough that you cannot twist it more than a quarter turn with your fingers. It should not be drum-tight. If you see the kayak hull deforming or indenting, you have gone too far. Loosen it slightly.

    Step 4: Securing Bow and Stern Lines

    Attach one end of the bow line to the handle or secure point on the front of the kayak. Attach the other end to a sturdy anchor point on your vehicle’s front bumper or tow hook. Repeat this process for the stern (rear) of the kayak.

    • Note: Do not attach these to plastic trim pieces or weak parts of the bumper. Use metal anchor points only. These lines should have slight tension but not pull the kayak down aggressively.

    Common Mistakes to Avoid

    Even experienced paddlers can slip up. Here are the most frequent errors:

    MistakeConsequenceSolution
    Over-tighteningCracked hull, warped shapeUse cam buckles; stop when snug.
    Ignoring Wind DirectionIncreased drag, noisePlace kayak hull-up for aerodynamics.
    No Bow/Stern LinesKayak slides off during brakingAlways use front and rear tie-downs.
    Straps Touching PaintScratches and swirl marksPlace a towel under strap contact points.

    Understanding Wind Resistance and Aerodynamics

    Did you know that a poorly strapped kayak can increase your fuel consumption by up to 15%? Aerodynamics play a huge role in transport efficiency. When you strap a kayak hull-up, you create a smoother surface that cuts through the air.

    If you must transport a kayak right-side up (cockpit up), ensure all hatches are closed tightly. However, this position catches more wind and can cause the kayak to act like a sail, putting immense stress on your straps. For the best way to strap a kayak to a roof rack, always prioritize the hull-up orientation unless specific rack designs dictate otherwise.

    For more detailed information on vehicle aerodynamics and load impact, you can refer to general physics principles outlined on Wikipedia.

    Maintenance Checks During Your Trip

    Security is not a “set it and forget it” task. Vibrations from the road can loosen straps over time.

    1. First Stop: After driving for 15–20 minutes, pull over safely. Check all straps. It is normal for them to settle and loosen slightly. Retighten if necessary.
    2. Regular Intervals: Check your straps every time you stop for gas or restrooms.
    3. Post-Trip Inspection: Inspect your straps for fraying or wear after each use. Replace them if you see any signs of damage.

    FAQ Section

    1. Can I use bungee cords instead of straps?

    No. Bungee cords stretch and bounce, which means they cannot provide the consistent tension needed to keep a heavy kayak secure. They are suitable for light accessories like paddle holders but never for securing the main vessel.

    2. How many straps do I need for one kayak?

    You need a minimum of two main straps (one for each crossbar) and two additional lines for the bow and stern. Total: four attachment points. For longer kayaks (over 14 feet), consider adding a third crossbar or extra support.

    3. Is it safe to leave my kayak on the roof overnight?

    While possible, it is not recommended. Overnight dew can make straps slippery, and temperature changes can affect tension. Additionally, it poses a theft risk. If you must, use a cable lock through the kayak and around the rack for security.

    4. What if my car doesn’t have roof rack crossbars?

    You can use soft rack systems (foam blocks with straps) that sit directly on the roof. However, these are less stable and suitable only for short distances and low speeds. For regular transport, installing proper crossbars is the safest investment.

    5. How do I prevent the straps from flapping in the wind?

    Excess strap length creates noise and drag. Once tightened, roll up the excess strap and secure it with a rubber band or velcro tie. Some high-end straps come with built-in keepers for this purpose.

    Conclusion

    Mastering the best way to strap a kayak to a roof rack is a skill that pays off in safety, equipment longevity, and peace of mind. By using the right equipment—specifically cam buckle straps—and following the hand-tight rule, you can transport your kayak confidently across any distance. Remember to always use bow and stern lines, check your tension after the first few miles, and prioritize aerodynamics.

    Your next adventure awaits, and now you’re ready to hit the road as safely as you hit the water. If you found this guide helpful, please share it with your fellow paddlers on social media. Safe travels and happy paddling!

  • How Much Does It Cost To Paint A Metal Roof?

    How Much Does It Cost To Paint A Metal Roof?

    Have you noticed your once-shiny metal roof looking dull, faded, or even showing signs of rust? You are not alone; many homeowners face this issue as their roofs age, leading them to ask the critical question: how much does it cost to paint a metal roof? Understanding this expense is vital for budgeting effectively while ensuring your home remains protected from the elements.

    In this comprehensive guide, we will break down the costs, explore the factors that influence pricing, and help you decide whether to tackle this project yourself or hire a professional. By the end, you will have a clear roadmap to restoring your roof’s beauty and longevity without breaking the bank.

    Average Cost Breakdown: What to Expect in 2026

    When planning your budget, it is essential to look at both national averages and specific project details. Generally, painting a metal roof is significantly cheaper than replacing it, making it a smart financial move for many homeowners.

    National Average Costs

    According to recent industry data, the average cost to paint a metal roof ranges between $1,500 and $4,500. However, this figure can vary widely based on several variables. Most homeowners pay around $2,500 for a standard-sized residential roof.

    To give you a clearer picture, here is a breakdown by square footage:

    Roof Size (Sq. Ft.)Low-End CostAverage CostHigh-End Cost
    1,000 sq. ft.$800$1,200$1,800
    1,500 sq. ft.$1,200$1,800$2,700
    2,000 sq. ft.$1,600$2,400$3,600
    2,500+ sq. ft.$2,000$3,000$4,500+

    Note: These prices include labor, materials, and basic preparation. Complex roofs may incur additional charges.

    Cost Per Square Foot

    On average, you can expect to pay between $1.20 and $3.00 per square foot. This rate typically covers:

    • Pressure washing and cleaning.
    • Primer application (if necessary).
    • Two coats of high-quality acrylic latex or oil-based alkyd paint.
    • Labor costs for professional painters.

    Key Factors Influencing the Price

    Understanding why costs vary can help you negotiate better rates or adjust your expectations. Here are the primary drivers behind the price tag.

    1. Roof Condition and Preparation

    The state of your current roof is the biggest variable. If your metal roof has significant rust, peeling old paint, or debris accumulation, it requires extensive preparation.

    • Light Cleaning: Only requires pressure washing ($0.20–$0.50 per sq. ft.).
    • Heavy Rust Treatment: Requires sanding, rust converters, and multiple primer coats, which can double the preparation time and cost.

    2. Type of Paint Used

    Not all paints are created equal. Using the wrong type can lead to premature failure, costing you more in the long run.

    • Acrylic Latex: Water-based, flexible, and breathable. Ideal for most climates. Cost: $30–$50 per gallon.
    • Oil-Based Alkyd: Durable and resistant to moisture but less flexible. Can crack over time. Cost: $40–$60 per gallon.
    • Elastomeric Coatings: Thick, rubber-like coatings that bridge small cracks. Best for older roofs. Cost: $50–$80 per gallon.

    3. Roof Pitch and Accessibility

    A steeply pitched roof is dangerous and difficult to work on. Professionals charge more for steep roofs due to the need for special safety equipment, such as harnesses and scaffolding. A flat or low-slope roof is generally cheaper to paint.

    4. Geographic Location

    Labor costs vary by region. Urban areas with a higher cost of living, such as New York or San Francisco, will have higher labor rates compared to rural areas. Additionally, local climate conditions may dictate the type of paint required, influencing material costs.

    How Much Does It Cost To Paint A Metal Roof

    DIY vs. Hiring a Professional: Which Is Right for You?

    Deciding between doing it yourself and hiring a pro is a crucial step. Let’s weigh the pros and cons.

    DIY Painting: The Budget-Friendly Option

    If you are handy and comfortable working at heights, DIY can save you 50–70% on labor costs.

    Pros:

    • Significant cost savings.
    • Control over the schedule and materials.
    • Personal satisfaction.

    Cons:

    • Safety Risks: Falling from a roof is a leading cause of home improvement injuries.
    • Time-Consuming: A typical roof takes 2–4 days for an amateur.
    • Quality Variance: Without proper technique, paint may peel or bubble within a year.

    Hiring a Professional: The Peace-of-Mind Option

    Professionals bring expertise, insurance, and warranties.

    Pros:

    • Expertise: They know how to handle rust, seams, and flashings correctly.
    • Speed: A crew can finish the job in 1–2 days.
    • Warranty: Many offer 5–10 year warranties on workmanship.
    • Safety: They are insured and trained for high-altitude work.

    Cons:

    • Higher upfront cost.
    • Need to vet contractors carefully to avoid scams.

    Expert Tip: Always ask for proof of insurance and check reviews on platforms like Angie’s List or HomeAdvisor before hiring. A cheap quote might mean cut corners on preparation, which is the most critical part of the job.

    Step-by-Step Guide to Painting a Metal Roof

    If you choose the DIY route, follow these steps to ensure a durable finish. Proper preparation is 80% of the success.

    Step 1: Safety First

    Ensure you have a sturdy ladder, non-slip shoes, and a safety harness if the pitch is steep. Work on a dry, calm day with temperatures between 50°F and 90°F (10°C–32°C).

    Step 2: Clean the Roof Thoroughly

    Use a pressure washer with a wide-angle tip to remove dirt, moss, and loose paint. For stubborn grime, use a mixture of water and mild detergent.

    • Tip: Allow the roof to dry completely for at least 24–48 hours before proceeding. Moisture trapped under paint causes blistering.

    Step 3: Treat Rust and Repair Damage

    Scrape off any loose rust with a wire brush. Apply a rust-inhibiting primer to these areas. Check for loose screws or fasteners and tighten them. Seal any gaps with a high-quality roofing sealant.

    Step 4: Apply Primer (If Needed)

    If your roof is bare metal or heavily rusted, apply a bonding primer. For previously painted roofs in good condition, you may skip this step if using a paint-and-primer combo.

    • Application: Use a roller for large areas and a brush for edges and corners. Ensure even coverage.

    Step 5: Paint the Roof

    Apply two thin coats of high-quality metal roof paint rather than one thick coat. Thick coats can sag and crack.

    • First Coat: Let it dry according to the manufacturer’s instructions (usually 4–6 hours).
    • Second Coat: Apply perpendicular to the first coat for uniform coverage.

    For more detailed information on metal roofing materials and standards, you can refer to Wikipedia’s article on Metal Roofing.

    Frequently Asked Questions (FAQ)

    1. How often should I paint my metal roof?

    Typically, a well-painted metal roof lasts 10–15 years before needing repainting. However, this depends on the quality of paint used and local weather conditions. Harsh sun or coastal salt air may require more frequent maintenance.

    2. Can I paint over a rusty metal roof?

    Yes, but you must treat the rust first. Simply painting over rust will trap moisture and accelerate corrosion. Use a wire brush to remove loose rust, apply a rust converter, and then prime before painting.

    3. What is the best paint for a metal roof?

    100% Acrylic Latex paint is widely recommended by experts. It is flexible, allowing it to expand and contract with temperature changes without cracking. It also breathes, allowing moisture vapor to escape.

    4. Does painting a metal roof void the warranty?

    It might. Many manufacturers’ warranties are voided if unauthorized coatings are applied. Always check your warranty terms before painting. Some manufacturers offer specific approved coatings that maintain the warranty.

    5. How long does it take to paint a metal roof?

    For a professional crew, it takes 1–2 days. For a DIYer, it can take 3–5 days, depending on the roof size, condition, and weather delays.

    6. Is it better to replace or paint a metal roof?

    If the roof is structurally sound with no leaks, painting is a cost-effective solution. However, if there are widespread leaks, severe corrosion, or structural damage, replacement is the safer long-term investment.

    Conclusion

    Knowing how much does it cost to paint a metal roof empowers you to make informed decisions about your home’s maintenance. With average costs ranging from $1,500 to $4,500, painting offers a high return on investment by extending the life of your roof and enhancing curb appeal.

    Whether you choose to DIY or hire a professional, prioritize preparation and quality materials. A well-executed paint job can protect your home for over a decade.

    Found this guide helpful? Share it with friends or neighbors who might be facing similar roof issues! Don’t forget to leave a comment below with your own experiences or questions.