Blog

  • Why Is the Roof of My Mouth Sore? Common Causes & Fixes

    Why Is the Roof of My Mouth Sore? Common Causes & Fixes

    Have you ever taken a bite of hot pizza only to regret it seconds later? Or perhaps you woke up with a strange, tender sensation on the top of your mouth that makes eating uncomfortable. You are not alone. Many people experience this irritating condition, often left wondering what causes the roof of the mouth to be sore.

    Understanding the root cause is the first step toward finding relief. Whether it’s a minor thermal burn or a sign of an underlying health issue, identifying the trigger helps you choose the right treatment. In this guide, we will explore the most common reasons for palate pain, effective home remedies, and when you should see a doctor.

    Thermal Burns: The Most Common Culprit

    If you are asking what causes the roof of the mouth to be sore, the most likely answer is a thermal burn. The tissue on the roof of your mouth, known as the palate, is delicate and highly sensitive to temperature changes.

    How It Happens

    When you consume food or beverages that are too hot—such as fresh coffee, melted cheese, or soup—the heat damages the top layer of skin cells on the palate. This results in inflammation, redness, and sometimes blistering.

    Symptoms to Watch For

    • Immediate stinging or burning sensation.
    • Redness or white patches on the hard palate.
    • Peeling skin a few days after the incident.
    • Temporary loss of taste sensitivity in the affected area.

    According to dental health experts, these minor burns usually heal on their own within three to seven days. However, during this period, the area remains vulnerable to further irritation. To speed up healing, avoid spicy or acidic foods and rinse your mouth with cool water immediately after the burn occurs.

    Trauma from Hard or Sharp Foods

    Not all injuries come from heat. Mechanical trauma is another frequent answer to what causes the roof of the mouth to be sore. Eating hard, crunchy, or sharp foods can scratch or bruise the soft tissue of the palate.

    Common Offenders

    • Tortilla chips and hard tacos.
    • Crusty bread or baguettes.
    • Hard candies.
    • Fish bones or sharp fruit seeds.

    These items can create small abrasions or cuts. While they may seem minor, the constant movement of your tongue against the roof of your mouth can prevent these small wounds from healing quickly, leading to prolonged soreness.

    Pro Tip: If you suspect a scratch, maintain excellent oral hygiene. Brush gently and use a mild, alcohol-free mouthwash to prevent bacteria from infecting the wound.

    Canker Sores and Aphthous Ulcers

    Canker sores (aphthous ulcers) are small, shallow lesions that develop on the soft tissues in your mouth or at the base of your gums. Unlike cold sores, they don’t occur on the surface of your lips and aren’t contagious.

    Why They Appear on the Palate

    While canker sores are more common on the inner cheeks and gums, they can appear on the soft palate (the back part of the roof of the mouth). The exact cause is unclear, but several factors contribute to their development:

    • Minor injury to the mouth from dental work, overzealous brushing, or sports accidents.
    • Food sensitivities, particularly to chocolate, coffee, strawberries, eggs, nuts, cheese, and spicy or acidic foods.
    • Nutritional deficiencies, such as vitamin B-12, zinc, folate (folic acid), or iron.
    • Emotional stress.

    A study published in the Journal of Oral Pathology & Medicine suggests that up to 20% of the general population suffers from recurrent aphthous stomatitis. These sores typically heal within one to two weeks without scarring.

    What Causes The Roof Of The Mouth To Be Sore

    Oral Thrush: A Fungal Infection

    Oral thrush is a yeast infection caused by Candida albicans. While it often affects the tongue and inner cheeks, it can also spread to the roof of the mouth, causing significant discomfort.

    Identifying Thrush

    • Creamy white lesions on your tongue, inner cheeks, and sometimes the roof of your mouth.
    • Bleeding if the lesions are scraped.
    • Cotton-like feeling in your mouth.
    • Loss of taste or an unpleasant metallic taste.

    Thrush is more common in infants, the elderly, and individuals with weakened immune systems. It is also frequently seen in people who wear dentures or have taken antibiotics recently, which can disrupt the natural balance of microorganisms in the mouth.

    For more detailed information on fungal infections in the oral cavity, you can refer to this comprehensive overview on Wikipedia.

    Allergic Reactions and Irritants

    Sometimes, the answer to what causes the roof of the mouth to be sore lies in your diet or personal care products. Contact stomatitis is an inflammatory reaction to an allergen or irritant.

    Common Triggers

    1. Toothpaste and Mouthwash: Ingredients like sodium lauryl sulfate (SLS) can irritate sensitive tissues in some individuals.
    2. Foods: Acidic fruits (citrus, tomatoes), spicy foods, and certain preservatives can cause contact irritation.
    3. Dental Materials: Rarely, individuals may have an allergic reaction to materials used in fillings or dentures, such as nickel or acrylics.

    If you notice a pattern of soreness after using a specific product or eating certain foods, try eliminating them temporarily to see if symptoms improve. Switching to an SLS-free toothpaste is a simple first step for many sufferers.

    Sinus Infections and Post-Nasal Drip

    Surprisingly, your nose and mouth are closely connected. Chronic sinusitis or severe allergies can lead to post-nasal drip, where mucus drains down the back of your throat and onto the soft palate.

    The Connection

    The constant presence of mucus can irritate the sensitive tissues of the soft palate, leading to soreness, swelling, and even secondary infections. Additionally, mouth breathing due to nasal congestion can dry out the oral tissues, making them more prone to cracking and soreness.

    If your palate soreness is accompanied by facial pressure, nasal congestion, or a headache, treating the underlying sinus issue may resolve the mouth pain.

    When to See a Doctor

    Most cases of a sore roof of the mouth are benign and resolve on their own. However, you should seek professional medical advice if you experience:

    • Sores that do not heal after two weeks.
    • Difficulty swallowing or breathing.
    • High fever accompanying the mouth sores.
    • White patches that cannot be wiped away.
    • Severe pain that interferes with eating and drinking.

    These symptoms could indicate a more serious condition, such as oral lichen planus, leukoplakia, or even oral cancer. Early diagnosis is crucial for effective treatment.

    Effective Home Remedies for Relief

    While waiting for your palate to heal, you can manage pain and promote healing with these simple steps:

    1. Salt Water Rinse: Mix 1 teaspoon of salt in a glass of warm water. Swish it around your mouth for 30 seconds and spit it out. This helps reduce inflammation and keeps the area clean.
    2. Honey: Apply a small amount of raw honey directly to the sore spot. Honey has natural antibacterial and anti-inflammatory properties.
    3. Cold Compresses: Suck on ice chips or eat cold foods like yogurt or ice cream to numb the area and reduce swelling.
    4. Stay Hydrated: Drink plenty of water to keep your mouth moist. Avoid alcohol and caffeine, which can dehydrate you.
    5. Avoid Irritants: Steer clear of spicy, acidic, and crunchy foods until the soreness subsides.

    FAQ Section

    1. Can stress cause the roof of my mouth to be sore?

    Yes, stress can weaken your immune system, making you more susceptible to canker sores and cold sores. Additionally, stress often leads to unconscious habits like grinding your teeth or pressing your tongue against the roof of your mouth, which can cause mechanical irritation.

    2. How long does a burnt roof of the mouth take to heal?

    A minor thermal burn typically heals within 3 to 7 days. More severe burns that involve blistering may take up to two weeks. Keeping the area clean and avoiding further irritation speeds up the process.

    3. Is a sore roof of the mouth a sign of cancer?

    While oral cancer can present as a non-healing sore, it is rare. Most sore palates are caused by burns, trauma, or minor infections. However, if a sore persists for more than two weeks without improvement, it is essential to see a dentist or doctor for evaluation.

    4. Can dehydration cause palate soreness?

    Yes. Dehydration reduces saliva production, leading to a dry mouth (xerostomia). Saliva is crucial for protecting oral tissues and washing away food particles and bacteria. Without it, the roof of the mouth can become dry, cracked, and sore.

    5. What foods should I avoid when my palate is sore?

    Avoid hot, spicy, acidic (like citrus and tomato-based products), and crunchy or sharp foods (like chips and nuts). Stick to soft, cool, and bland foods like mashed potatoes, smoothies, and yogurt.

    Conclusion

    Dealing with a sore roof of the mouth can be frustrating, but understanding what causes the roof of the mouth to be sore empowers you to take the right steps for relief. Whether it’s a simple pizza burn, a canker sore, or a reaction to a new toothpaste, most cases are temporary and manageable with home care.

    Remember to listen to your body. If simple remedies don’t work or if symptoms persist, don’t hesitate to consult a healthcare professional. Your oral health is a vital part of your overall well-being.

    Did you find this guide helpful? Share it with your friends and family on social media to help them navigate their own oral health challenges!
  • How to Attach 4×4 Post to Existing Deck for Roof

    How to Attach 4×4 Post to Existing Deck for Roof

    Adding a roof to your existing deck is one of the most rewarding home improvement projects you can undertake. It transforms an open outdoor space into a usable sanctuary, protecting you from harsh sun and sudden rainstorms. However, the structural integrity of this addition relies entirely on one critical step: knowing how to attach 4×4 post to existing deck for roof without compromising the safety of your home.

    Many homeowners hesitate at this stage, fearing they might damage their current structure or violate local building codes. You are not alone in this concern. Improperly installed posts can lead to sagging roofs, loose connections, or even catastrophic failure during high winds. This guide will walk you through the professional methods used by contractors, ensuring your new roof is secure, compliant, and built to last.

    Why Proper Attachment Matters for Structural Integrity

    Before we dive into the tools and techniques, it is vital to understand why the connection method matters. A deck roof adds significant “dead load” (the weight of the structure itself) and “live load” (wind, snow, and maintenance weight) to your existing frame.

    According to general engineering principles, vertical loads must be transferred directly to the ground or a reinforced footing. If you simply bolt a post to the side of a deck joist, you risk creating a lever arm that can twist or pull the joist away from the beam. For more detailed information on structural load paths, you can refer to Wikipedia’s article on Load-bearing walls, which explains how forces move through a structure.

    In the United States, the International Residential Code (IRC) generally requires that roof supports be independent of the deck’s lateral stability unless the deck was specifically engineered to handle the additional moment forces. Therefore, the goal is to create a connection that supports vertical weight while allowing the deck to function independently.

    Method 1: The Through-Bolt Method (Best for Strength)

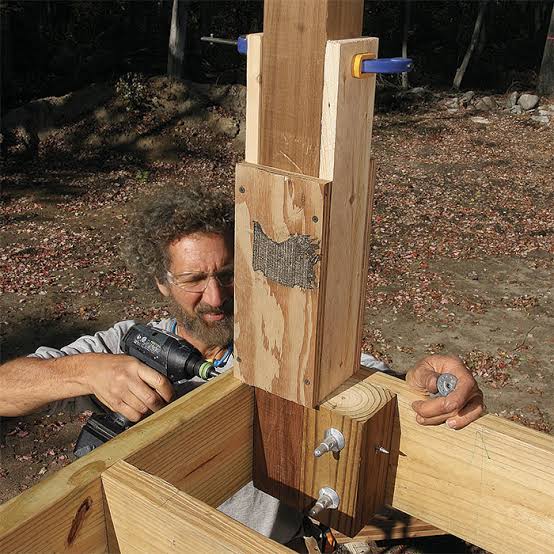
    The most robust way to secure a 4×4 post is by bolting it directly through the rim joist or band board of your deck. This method distributes the shear force across the entire width of the wood, preventing splitting and ensuring a tight fit.

    Step-by-Step Installation Guide

    1. Positioning: Place your 4×4 pressure-treated post against the outside face of the deck’s rim joist. Ensure it is perfectly plumb (vertical) using a 4-foot level.
    2. Drilling Pilot Holes: Mark two holes on the post, aligned with the center of the rim joist. Use a drill bit slightly smaller than your bolt diameter (e.g., if using 1/2-inch bolts, use a 7/16-inch bit). Drill completely through the post and the rim joist.
    3. Inserting Bolts: Insert two galvanized or stainless steel carriage bolts or hex bolts. These should be at least 6 inches long to pass through the 4-inch post and the 1.5-inch rim joist with room for washers and nuts.
    4. Securing: Place a large washer on the bolt end, followed by a nut. Tighten securely with a socket wrench. Do not overtighten to the point of crushing the wood fibers, but ensure there is no wiggle room.
    5. Bracing: For added stability, install diagonal knee braces from the post to the beam below, or use metal post caps if the roof structure sits on top.

    Pro Tip: Always use hot-dipped galvanized or stainless steel hardware. Standard zinc-plated bolts will corrode quickly when exposed to outdoor elements, leading to structural weakness over time.

    Method 2: Using Metal Post Bases (Cleanest Look)

    If you prefer not to drill through your existing deck framing, or if your rim joist is too narrow, heavy-duty metal post bases are an excellent alternative. These connectors are designed to hold the post vertically while transferring the load downward.

    Pros and Cons Comparison

    FeatureThrough-Bolt MethodMetal Post Base
    StrengthExtremely HighHigh (if rated for load)
    AestheticsVisible bolt headsClean, hidden connection
    Installation DifficultyModerate (requires precise drilling)Easy (screw-in application)
    CostLow (bolts and washers)Moderate (specialized hardware)
    Deck ImpactDrills into existing frameMinimal intrusion

    To install a metal post base:

    1. Select a base rated for 4×4 posts and compatible with your roof load requirements.
    2. Position the base on the deck surface or attached to the side of the rim joist, depending on the model.
    3. Secure the base using structural screws (such as Simpson Strong-Tie SDWS) rather than standard deck screws.
    4. Slide the 4×4 post into the base and secure it with the provided nails or screws.
    How To Attach 4X4 Post To Existing Deck For Roof

    Critical Considerations for Footings and Ground Contact

    One common mistake DIYers make is assuming the deck’s existing footings can support the extra roof load. In many cases, they cannot. When you learn how to attach 4×4 post to existing deck for roof, you must also consider where that post ends.

    Do You Need New Footings?

    If your post extends all the way to the ground, it must rest on a proper concrete footing. You cannot simply set a wooden post on dirt or concrete pavers.

    • Frost Line Depth: Check your local building code for the required frost line depth. In northern US states, this may be 3–4 feet deep; in southern states, it may be shallower.
    • Concrete Mix: Use a minimum of 3000 PSI concrete mix for durability.
    • Post Protection: If the post touches concrete, use a post anchor or elevate the wood slightly above the concrete surface to prevent wicking moisture, which leads to rot.

    If you are attaching the post only to the side of the deck (cantilevered style) and it does not touch the ground, ensure the deck’s original footings were oversized or reinforced. If unsure, consult a structural engineer.

    Choosing the Right Lumber and Hardware

    Not all wood is created equal. For outdoor structures, especially those supporting a roof, material selection is non-negotiable.

    • Lumber Grade: Use #1 or #2 Grade Pressure-Treated Southern Yellow Pine or Douglas Fir. Avoid “utility grade” lumber for structural posts.
    • Moisture Content: Allow pressure-treated wood to dry for a few weeks before sealing or painting, but install it while it is still straight to avoid warping later.
    • Hardware Compatibility: Never mix metals. If you use aluminum flashing, do not use copper fasteners nearby, as galvanic corrosion will occur. Stick to stainless steel or hot-dipped galvanized for all connections.

    FAQ: Common Questions About Deck Roof Posts

    1. Can I attach a roof post to the deck railing?

    No. Deck railings are designed for lateral human impact loads, not vertical structural loads. Attaching a roof post to a railing will likely cause the railing to fail and the roof to collapse. Always attach to the main structural frame (rim joist or beam).

    2. What size bolts should I use for a 4×4 post?

    For a standard residential deck roof, 1/2-inch diameter carriage bolts are typically sufficient. Use at least two bolts per post, spaced vertically about 6–8 inches apart. Ensure the bolts are long enough to pass through the post and the framing member with at least 1 inch of thread exposed for the nut.

    3. Do I need a permit to add a roof to my deck?

    In most US jurisdictions, yes. Adding a roof changes the structure’s load profile and wind resistance. Check with your local building department. They may require plans showing how the posts are attached and whether new footings are needed. Ignoring this can lead to fines or issues when selling your home.

    4. How far apart should 4×4 posts be for a deck roof?

    The spacing depends on the roof material and beam size, but a general rule of thumb is 6 to 8 feet on center. Heavier roofing materials (like clay tiles) require closer spacing, while lighter materials (like aluminum or polycarbonate) allow for wider spans. Always consult span tables for your specific lumber grade.

    5. Can I use screws instead of bolts?

    Standard deck screws are not strong enough for structural post attachment. However, structural screws (often labeled as ledger locks or construction screws) can be used if they are specifically rated for shear loads and installed according to the manufacturer’s specifications. Bolts remain the gold standard for reliability.

    Conclusion

    Learning how to attach 4×4 post to existing deck for roof is a pivotal step in creating a safe and durable outdoor living space. By choosing the right method—whether through-bolting for maximum strength or using metal bases for aesthetics—and adhering to local building codes, you ensure your project stands the test of time.

    Remember, the key to success lies in preparation: check your footings, use corrosion-resistant hardware, and prioritize vertical load transfer. If you are ever in doubt about the structural capacity of your existing deck, consulting a licensed professional is a small price to pay for peace of mind.

    Did you find this guide helpful? Share it with your fellow DIY enthusiasts on social media to help them build safer, stronger decks!

  • Can You Put A Metal Roof Over A Metal Roof?

    Can You Put A Metal Roof Over A Metal Roof?

    Have you noticed your existing metal roof showing signs of wear, such as fading paint or minor leaks, and are you dreading the high cost and mess of a full tear-off? Many homeowners in the US face this dilemma, asking themselves, “Can you put a metal roof over a metal roof?” The short answer is yes, but it requires careful planning and adherence to specific structural guidelines to ensure longevity and safety.

    In this comprehensive guide, we will explore the feasibility, benefits, and potential pitfalls of installing a new metal roof over an existing one. We’ll break down the technical requirements so you can make an informed decision that protects your home and your wallet.

    Is It Structurally Safe to Install Metal Over Metal?

    Before picking up a hammer, the most critical question is whether your home’s frame can handle the extra weight. While metal roofing is significantly lighter than traditional asphalt shingles or clay tiles, adding a second layer does increase the load on your roof trusses and walls.

    Generally, a standard standing seam metal roof weighs between 1 to 1.5 pounds per square foot. If you are installing over an existing metal roof, you are adding roughly another pound per square foot. For most modern homes built after the 1970s, this additional load is negligible. However, older homes or those with compromised structural integrity may not support the dual layers.

    Key Structural Considerations:

    • Load Capacity: Consult a structural engineer if your home is older than 40 years.
    • Snow Load: If you live in areas like Minnesota or Maine, consider the cumulative weight of two roof layers plus heavy snowfall.
    • Local Codes: Always check with your local building department. Some municipalities strictly prohibit double-layer roofing regardless of material.

    According to general construction principles outlined by resources like Wikipedia’s entry on Roofing, proper load distribution is essential for any overlay project to prevent long-term structural fatigue.

    What Are the Benefits of a Metal-over-Metal Installation?

    Choosing to install a new metal roof over an old one isn’t just about laziness; it offers several tangible advantages for homeowners looking to maximize value.

    1. Significant Cost Savings

    The most immediate benefit is financial. A full tear-off involves labor costs for removing the old roof, dumpster fees for disposal, and potential repairs to the decking exposed during removal. By skipping the tear-off, you can save 20% to 30% on total project costs.

    2. Enhanced Insulation and Energy Efficiency

    An additional layer of metal, combined with the air gap created by battens or strapping, acts as a thermal break. This can improve your home’s energy efficiency by reducing heat transfer. In hot US climates like Arizona or Texas, this can lead to noticeable reductions in cooling bills.

    3. Environmental Friendliness

    Roofing waste is a major contributor to landfills. By leaving the old roof in place, you keep tons of steel or aluminum out of the waste stream. This “green” approach appeals to eco-conscious homeowners and aligns with sustainable building practices.

    4. Reduced Installation Time

    Without the days spent stripping the old roof, the installation process is faster. This means your home is exposed to the elements for a shorter period, reducing the risk of water damage during unexpected rainstorms.

    Can You Put A Metal Roof Over A Metal Roof

    What Are the Risks and Drawbacks to Consider?

    While the benefits are appealing, ignoring the risks can lead to costly failures. It is crucial to weigh these downsides carefully.

    FeatureProsCons
    CostLower labor and disposal fees.May require expensive furring strips to level the surface.
    DurabilityDouble protection against elements.Trapped moisture can cause hidden corrosion.
    AestheticsFresh look without structural change.Existing wrinkles or dents may telegraph through the new roof.
    MaintenanceEasier initial install.Harder to inspect the lower roof for leaks later.

    The Moisture Trap Danger

    The biggest technical risk is trapping moisture between the two metal layers. If the existing roof has minor leaks or condensation issues, sealing it under a new roof can accelerate corrosion. Metal roofs need to “breathe.” Without proper ventilation strategies, such as using vertical battens, you risk creating a greenhouse effect that rots any underlying wood decking and rusts the old metal.

    Warranty Voidance

    Many manufacturers of new metal roofing panels will void their warranty if installed over an existing roof. They cannot guarantee the performance of their product if the substrate (the old roof) is uneven or unstable. Always read the fine print or choose a manufacturer that explicitly allows overlays.

    How to Properly Install a Metal Roof Over an Existing One

    If you decide to proceed, proper preparation is non-negotiable. Here is a step-by-step approach to ensuring a successful installation.

    Step 1: Inspect and Repair the Existing Roof

    Walk the roof thoroughly. Look for loose fasteners, severe corrosion, or active leaks.

    • Action: Replace any rotten wood decking visible from the attic.
    • Action: Tighten all loose screws on the existing metal roof.
    • Action: Seal any minor gaps with high-quality urethane sealant.

    Step 2: Install Furring Strips (Battens)

    Never install new metal directly flat against old metal. You must create an air gap.

    • Material: Use 1×4 or 2×4 pressure-treated wood battens or metal z-clips.
    • Spacing: Install battens vertically, spaced 24 inches on center (or according to the new panel’s specifications).
    • Purpose: This creates a ventilation channel that allows moisture to escape and prevents the new roof from conforming to the imperfections of the old one.

    Step 3: Add Underlayment (Optional but Recommended)

    While not always required for metal-over-metal, adding a synthetic underlayment over the battens provides an extra layer of protection against wind-driven rain and condensation. Ensure it is breathable to maintain airflow.

    Step 4: Install the New Metal Panels

    Follow the manufacturer’s instructions precisely.

    • Fastening: Use long enough screws to penetrate through the new panel, the batten, the old metal, and into the roof deck. Standard screws will not be long enough. You typically need screws that are at least 1.5 to 2 inches longer than usual.
    • Alignment: Ensure panels are straight to avoid aesthetic issues.

    Frequently Asked Questions (FAQ)

    1. Will putting a metal roof over metal void my homeowner’s insurance?

    Not necessarily, but it depends on your provider. Some insurers view overlays as higher risk due to potential hidden damage. It is vital to disclose the installation method to your insurance agent beforehand to ensure you remain covered.

    2. Can I install metal over metal if the old roof is leaking?

    No. You must fix all active leaks before installing the new roof. Installing a new roof over a leaking one simply traps the water, leading to rapid rot of the roof deck and structural damage. The existing roof must be watertight and structurally sound.

    3. Does the color of the old roof matter?

    The color itself doesn’t affect structural integrity, but a dark old roof can absorb more heat. However, since you are installing battens and a new reflective metal layer, the impact of the old color on your home’s interior temperature will be minimal.

    4. How long does a metal-over-metal roof last?

    If installed correctly with proper ventilation, the new metal roof should last just as long as if it were installed on bare decking—typically 40 to 70 years. The lifespan depends more on the quality of the new metal (gauge and coating) than the presence of the old roof.

    5. Do I need a permit for this type of installation?

    Yes, in most US jurisdictions, replacing a roof requires a building permit, even if you are not tearing off the old material. The permit process ensures that the added weight and installation methods meet local safety codes.

    Conclusion

    So, can you put a metal roof over a metal roof? Yes, you can, and it can be a smart, cost-effective solution for many homeowners. By saving on disposal costs and installation time, you get a durable, energy-efficient upgrade without the hassle of a full tear-off.

    However, success hinges on three factors: structural integrity, moisture management, and proper fastening. Never skip the inspection phase, and always use battens to create a ventilated air gap. If you are unsure about the condition of your current roof, consult a professional roofing contractor who specializes in metal installations.

    Did you find this guide helpful? Share it with your friends on Facebook or Pinterest who might be considering a roof upgrade! Let’s help more homeowners make smarter, safer choices for their properties.

  • Why Gravel on Flat Roofs? Key Benefits Explained

    Why Gravel on Flat Roofs? Key Benefits Explained

    Have you ever looked at a commercial building or an older home and wondered why its flat roof is covered in small stones? It might look like a simple landscaping choice, but there is serious engineering behind it. If you are a property owner or manager trying to understand what is the purpose of gravel on a flat roof, you are asking the right question. This layer of stone is not just decorative; it is a critical component that protects your investment from harsh weather and costly repairs.

    In this guide, we will break down exactly why gravel is used, how it works, and whether it is the right choice for your property. We will move beyond the basics to provide you with actionable insights backed by industry standards.

    The Primary Function: Protection Against UV Rays

    The most significant threat to any flat roofing system is not rain, but the sun. Ultraviolet (UV) radiation is relentless. Over time, UV rays break down the chemical bonds in roofing materials, particularly asphalt-based membranes. This process, known as photodegradation, causes the roof to become brittle, crack, and eventually fail.

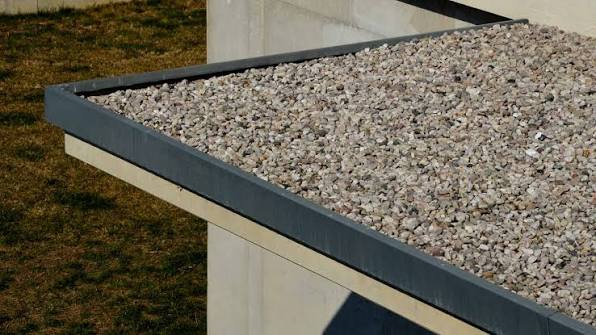
    Gravel acts as a physical shield. By covering the sensitive bitumen or tar layer, the stones absorb and reflect UV radiation before it can penetrate the waterproof membrane. According to industry data, a properly installed gravel layer can extend the lifespan of a built-up roof (BUR) by 10 to 15 years compared to an exposed membrane.

    Think of it like sunscreen for your house. Without it, the “skin” of your roof burns and ages prematurely. With it, the underlying structure remains cool and intact. This is why what is the purpose of gravel on a flat roof often starts with the answer: UV protection.

    Ballast: Keeping the Roof in Place

    Flat roofs are susceptible to wind uplift. When high winds sweep across a flat surface, they create pressure differences that can try to lift the roofing material off the deck. This is especially true for single-ply membranes or loose-laid systems.

    Gravel serves as ballast. The weight of the stones holds the roofing layers firmly against the structural deck. This mechanical anchoring is crucial in areas prone to storms or high winds.

    • Wind Resistance: A standard layer of gravel can withstand wind speeds of up to 90–120 mph, depending on the size and density of the stone.
    • Stability: It prevents shifting and wrinkling of the membrane, which can lead to tears over time.

    For buildings in coastal regions or open plains, this ballasting effect is not optional—it is a necessity for structural integrity.

    Fire Resistance and Safety Standards

    Safety is a non-negotiable aspect of commercial construction. Asphalt and tar are combustible materials. If left exposed, they can contribute to the spread of fire, especially from external sources like nearby wildfires or sparks from adjacent buildings.

    Gravel is naturally fire-resistant. Most roofing gravel consists of crushed stone, such as granite or limestone, which does not burn. By covering the combustible bitumen, the gravel layer creates a fire barrier. This helps buildings meet strict fire codes, such as those set by the National Fire Protection Association (NFPA).

    In many jurisdictions, a gravel-surfaced roof can achieve a Class A fire rating, the highest level of fire resistance. This can also lead to lower insurance premiums for property owners, adding a financial benefit to the safety feature.

    Drainage and Water Management

    While flat roofs are not perfectly flat—they have a slight pitch for drainage—water pooling is still a common issue. Standing water adds immense weight and accelerates wear.

    Gravel improves drainage in two ways:

    1. Surface Texture: The irregular shape of the stones creates tiny channels that allow water to flow more freely toward drains and scuppers.
    2. Preventing Debris Clogs: While gravel can trap some debris, it also prevents larger leaves and branches from sticking directly to the sticky membrane. This makes it easier for wind to blow lighter debris off the roof or for maintenance crews to clean it.

    However, it is important to note that gravel must be installed correctly. If the layer is too thick or uneven, it can actually hinder drainage. Proper installation ensures that water moves efficiently off the roof surface.

    Gravel vs. Other Surfacing Options

    Is gravel the only option? No. Let’s compare it to other common flat roof surfacing methods to see where it stands.

    FeatureGravel SurfaceWhite Coating (Elastomeric)Green Roof
    UV ProtectionExcellent (Physical block)Good (Reflective)Excellent (Vegetation)
    WeightHeavy (Requires strong structure)LightVery Heavy (Soil + Plants)
    MaintenanceLow (Occasional cleaning)Medium (Re-coating every 5-10 yrs)High (Gardening/ Irrigation)
    CostModerateLow to ModerateHigh
    Lifespan20–30 Years10–20 Years20+ Years

    As shown in the table, gravel offers a robust, low-maintenance solution with a long lifespan. However, its weight is a consideration. Not all building structures can support the additional load of several tons of stone. Always consult a structural engineer before adding gravel to an existing roof.

    What Is The Purpose Of Gravel On A Flat Roof

    How Gravel Is Installed: A Step-by-Step Overview

    Understanding the installation process helps clarify why professional application is vital. Here is a simplified overview of how gravel is applied to a built-up roof:

    1. Base Layer Preparation: The roof deck is cleaned and inspected for damage. Any existing leaks are repaired.
    2. Bitumen Application: A hot layer of asphalt or coal tar bitumen is mopped onto the roof. This acts as the adhesive.
    3. Ply Sheets: Multiple layers of roofing felt (ply sheets) are embedded into the hot bitumen. This creates the waterproof membrane.
    4. Flood Coat: A final, thick layer of hot bitumen is applied over the top ply. This is called the flood coat.
    5. Gravel Embedment: While the flood coat is still hot and liquid, gravel is evenly spread across the surface. The stones sink slightly into the bitumen, locking them in place.
    6. Cooling and Setting: The roof is allowed to cool. The bitumen hardens, permanently bonding the gravel to the roof.

    This process requires specialized equipment and skilled labor. DIY attempts are highly discouraged due to the dangers of handling hot bitumen and the precision required for even distribution.

    Common Misconceptions About Roofing Gravel

    Many people believe that gravel damages the roof or causes leaks. Let’s debunk these myths.

    • Myth: Gravel punctures the membrane.
      • Fact: When installed correctly, the gravel is embedded in the bitumen, not resting loosely on top. The rounded edges of river rock or crushed stone are designed to minimize puncture risk.
    • Myth: Gravel makes leaks harder to find.
      • Fact: While it can obscure the exact leak source, experienced roofers use moisture meters and thermal imaging to locate issues without removing large sections of gravel.
    • Myth: All gravel is the same.
      • Fact: Roofing gravel is specifically sized (usually 3/8 to 3/4 inch) and washed to remove dust. Using construction gravel can clog drains and fail to adhere properly.

    For more detailed information on roofing materials and standards, you can refer to Wikipedia’s article on Built-up Roofing, which provides a comprehensive historical and technical overview.

    FAQ Section

    1. Can I remove the gravel from my flat roof?

    Removing gravel is possible but not recommended. It exposes the underlying bitumen to UV rays, which will cause rapid deterioration. If you want to change the surface, it is better to install a new membrane over the existing one or consult a professional for a complete replacement.

    2. How much does gravel weigh on a roof?

    A standard layer of gravel weighs approximately 10–15 pounds per square foot. For a 1,000-square-foot roof, this adds 10,000–15,000 pounds of weight. Ensure your building’s structure can handle this load.

    3. Does gravel help with insulation?

    Gravel itself has minimal insulating value (R-value). Its primary role is protection, not thermal insulation. However, by keeping the roof cooler in summer, it can indirectly reduce cooling costs. For true insulation, rigid foam boards are installed beneath the membrane.

    4. How often should I clean the gravel on my roof?

    Inspect and clean your gravel roof at least twice a year, ideally in spring and fall. Remove debris, leaves, and any standing water. Check for areas where gravel has washed away and replenish it to maintain uniform coverage.

    5. What type of gravel is best for flat roofs?

    Crushed stone or river rock is commonly used. The stones should be clean, dry, and uniformly sized. Avoid using gravel with sharp edges or excessive dust, as these can compromise the adhesion and drainage.

    6. Is a gravel roof better than a white coated roof?

    It depends on your priorities. Gravel offers superior durability and fire resistance. White coatings offer better energy efficiency by reflecting heat. Consider your climate, budget, and structural capacity when choosing between the two.

    Conclusion

    So, what is the purpose of gravel on a flat roof? It is a multifaceted solution that provides UV protection, wind ballast, fire resistance, and improved drainage. While it may seem like an old-fashioned technique, it remains one of the most reliable and cost-effective methods for protecting flat roofing systems.

    By understanding the benefits and maintenance requirements, you can make informed decisions about your property’s roofing needs. Whether you are managing a commercial complex or a residential building, gravel offers a durable shield against the elements.

    If you found this guide helpful, please share it with your network on social media. Helping others understand their roofing systems can save them from costly repairs and extend the life of their buildings. Stay informed, stay protected, and keep your roof in top shape!

  • Pain in Roof of Mouth When Swallowing? Causes & Fixes

    Pain in Roof of Mouth When Swallowing? Causes & Fixes

    Have you ever taken a bite of food or a sip of water, only to be hit with a sharp, unexpected sting in the upper part of your mouth? It is a frustrating and often alarming sensation that can make eating and drinking difficult. If you are currently dealing with pain in the roof of my mouth when I swallow, you are not alone, and there are clear, actionable steps you can take to find relief.

    This guide breaks down the most common causes, from minor burns to infections, and provides expert-backed strategies to soothe the discomfort. We will explore when this symptom is a temporary nuisance and when it might signal a need for professional medical attention.

    Why Does the Roof of My Mouth Hurt When I Swallow?

    The roof of your mouth, medically known as the palate, is sensitive tissue. When it becomes inflamed or injured, the act of swallowing—which involves muscle movement and friction against the palate—can trigger significant pain. Understanding the root cause is the first step toward effective treatment.

    1. Thermal Burns (Pizza Palate)

    One of the most frequent culprits is a thermal burn. This occurs when you consume food or beverages that are too hot. The delicate mucous membrane on the hard and soft palate can blister or peel, leading to rawness.

    • Symptoms: Redness, peeling skin, tenderness, and a burning sensation that worsens with contact.
    • Common Triggers: Hot cheese, coffee, soup, or freshly baked goods.

    According to dental health experts, these minor burns usually heal within three to seven days. However, during this period, swallowing can feel like sandpaper rubbing against an open wound.

    2. Viral and Bacterial Infections

    Infections are a primary reason for persistent pain. Conditions like strep throat, tonsillitis, or oral herpes can cause inflammation that radiates to the roof of the mouth.

    • Strep Throat: Caused by Streptococcus bacteria, this infection often leads to swollen tonsils and white patches. The inflammation can extend to the soft palate, making swallowing painful.
    • Herpes Simplex Virus (HSV-1): Often responsible for cold sores, HSV-1 can also cause lesions inside the mouth, including on the palate. These blisters are highly sensitive and can rupture, causing sharp pain during swallowing.

    For more detailed information on how viral infections affect oral health, you can refer to resources on Oral Herpes from Wikipedia.

    3. Allergic Reactions and Irritants

    Sometimes, the pain is not due to injury or infection but an allergic response. Oral Allergy Syndrome (OAS) can cause itching and swelling in the mouth after eating certain raw fruits or vegetables. Additionally, harsh ingredients in toothpaste or mouthwash, such as alcohol or strong mint flavors, can irritate sensitive tissues.

    Potential IrritantEffect on PalateRecommended Action
    Spicy FoodsChemical irritationAvoid until healed
    Acidic FruitsStinging sensationRinse with water after eating
    Alcohol-based MouthwashDrying and stingingSwitch to alcohol-free variants
    Hard/Crunchy FoodsPhysical abrasionStick to soft diets

    4. Dry Mouth (Xerostomia)

    Saliva plays a crucial role in protecting the oral mucosa. When you have dry mouth, the lack of lubrication increases friction during swallowing. This can lead to micro-tears and general soreness in the palate. Dehydration, certain medications, and breathing through your mouth at night are common causes of xerostomia.

    Pain In The Roof Of My Mouth When I Swallow

    How to Relieve Pain in the Roof of Your Mouth

    Once you have identified the likely cause, you can begin treatment. Most cases of palate pain can be managed at home with simple, effective remedies.

    Step-by-Step Home Care Routine

    If you are dealing with minor burns or irritation, follow this routine to accelerate healing:

    1. Cool Down the Area: Immediately after noticing the pain, rinse your mouth with cool water. Do not use ice directly on the tissue, as this can cause further damage. Instead, sip cold water or suck on ice chips.
    2. Salt Water Rinse: Mix 1 teaspoon of salt into 8 ounces (240 ml) of warm water. Swish this solution gently around your mouth for 30 seconds, then spit it out. This helps reduce inflammation and keeps the area clean. Repeat this 3–4 times a day.
    3. Hydrate Properly: Drink at least 2 liters of water throughout the day. Keep the temperature between 22–28°C (room temperature) to avoid triggering sensitivity. Proper hydration supports saliva production and tissue repair.
    4. Apply Honey: Medical-grade honey has natural antibacterial and soothing properties. Apply a small amount directly to the affected area on the roof of your mouth. Let it sit for a few minutes before swallowing.
    5. Avoid Aggravating Foods: For the next 48 hours, stick to a soft diet. Think yogurt, smoothies, mashed potatoes, and lukewarm soups. Avoid anything spicy, acidic, or crunchy.

    Over-the-Counter Solutions

    If home remedies are not enough, consider these OTC options:

    • Oral Gels: Products containing benzocaine can numb the area temporarily. Use sparingly and follow package instructions.
    • Pain Relievers: Non-prescription anti-inflammatories like ibuprofen can help reduce swelling and pain.
    • Antihistamines: If you suspect an allergic reaction, an oral antihistamine may reduce swelling and discomfort.

    When to See a Doctor

    While most cases of palate pain resolve on their own, some symptoms indicate a more serious underlying issue. You should seek professional medical advice if:

    • The pain persists for more than 10 days without improvement.
    • You have a high fever (above 101°F or 38.3°C).
    • You notice white patches, pus, or bleeding in the mouth.
    • Swelling spreads to your face, neck, or eyes.
    • You have difficulty breathing or swallowing liquids.

    These could be signs of a severe bacterial infection, an abscess, or other conditions requiring prescription medication.

    Frequently Asked Questions (FAQ)

    1. Can stress cause pain in the roof of my mouth?

    Indirectly, yes. High stress levels can weaken your immune system, making you more susceptible to canker sores or viral outbreaks like cold sores. Additionally, stress can lead to teeth grinding (bruxism), which may cause trauma to the palate if the tongue presses hard against the roof of the mouth during sleep.

    2. Is pain in the roof of the mouth a sign of cancer?

    It is rare, but persistent sores that do not heal after two weeks should be evaluated by a dentist or doctor. Oral cancer can present as non-healing ulcers, lumps, or red/white patches. However, pain in the roof of my mouth when I swallow is far more commonly caused by benign issues like burns or infections. Early detection is key, so do not ignore persistent symptoms.

    3. Why does it hurt more when I eat acidic foods?

    Acidic foods, such as citrus fruits, tomatoes, and vinegar-based dressings, can irritate exposed nerve endings in damaged tissue. If the protective layer of the palate is compromised due to a burn or ulcer, acid causes a chemical sting. Avoiding these foods allows the tissue to regenerate without constant irritation.

    4. Can dehydration cause palate pain?

    Yes. Dehydration reduces saliva production, leading to dry mouth. Without sufficient saliva, the tissues in your mouth become dry and sticky. This increases friction when you swallow, potentially causing micro-abrasions and soreness. Ensuring adequate water intake is a simple yet effective preventive measure.

    5. How long does a burned palate take to heal?

    A minor thermal burn typically heals within 3 to 7 days. The mouth has a rich blood supply, which promotes rapid healing. However, if the burn is severe or becomes infected, it may take up to two weeks. Keeping the area clean and avoiding further irritation is crucial for speedy recovery.

    6. Should I brush my teeth if the roof of my mouth hurts?

    Yes, maintaining oral hygiene is important to prevent secondary infections. However, be gentle. Use a soft-bristled toothbrush and avoid scrubbing the affected area. You might also consider switching to a mild, SLS-free (sodium lauryl sulfate) toothpaste, as SLS can sometimes irritate sensitive oral tissues.

    Conclusion

    Experiencing pain in the roof of my mouth when I swallow is uncomfortable, but it is rarely a cause for panic. In most cases, it is a temporary issue resulting from minor burns, mild infections, or irritation. By identifying the cause and following a consistent care routine—including salt water rinses, hydration, and dietary adjustments—you can significantly reduce discomfort and speed up healing.

    Remember, your body is excellent at repairing itself, provided you give it the right environment. Listen to your body, avoid irritants, and stay hydrated. If symptoms persist beyond ten days or worsen, do not hesitate to consult a healthcare professional.

    Found this guide helpful? Share it with friends or family who might be suffering from similar oral discomfort. Your share could help someone find relief today!

  • Flat vs S-Tile Roofs: Florida’s Best Choice?

    Flat vs S-Tile Roofs: Florida’s Best Choice?


    Choosing the right roofing material in the Sunshine State is about more than just curb appeal; it is a critical decision that impacts your home’s safety, energy bills, and longevity. With hurricane seasons becoming more intense and summer temperatures soaring, homeowners are often left debating between traditional styles and modern efficiencies. If you are wondering are flat tile roofs better than S type in Florida, you are asking the right question to protect your investment.

    In this guide, we will break down the technical differences, performance metrics, and aesthetic considerations of both roofing styles. By the end, you will have a clear, data-backed answer tailored specifically for the unique climate challenges of Florida.

    Understanding the Core Differences: Flat vs. S-Tile

    Before diving into performance, it is essential to understand what these terms actually mean in the context of Florida construction.

    S-Tile (Spanish or Mission Tile) The “S” shape is iconic. It features a concave curve followed by a convex curve, resembling the letter S. This design has been used for centuries, dating back to Mediterranean and Spanish colonial architecture. In Florida, this style is synonymous with luxury and historical charm. The interlocking nature of the tiles creates natural channels for water runoff.

    Flat Tile (Shake or Slate Look) Despite the name, “flat” tiles are rarely perfectly flat like a sheet of paper. They usually have a slight texture or ribbing to mimic wood shakes or natural slate. They lie flatter against the roof deck compared to the high-profile curves of S-tiles. This profile offers a more contemporary, streamlined look that is gaining popularity in modern Florida coastal homes.

    How Do They Handle Florida’s Extreme Heat?

    One of the primary concerns for Florida homeowners is thermal performance. A roof that absorbs too much heat can skyrocket your air conditioning costs.

    The Air Gap Advantage

    Both tile types offer superior insulation compared to asphalt shingles, but they achieve it differently. Tiles create an air gap between the roofing material and the underlayment. This gap allows hot air to circulate and escape, preventing heat from transferring directly into your attic.

    • S-Tiles: Due to their high profile, S-tiles often create a larger air volume underneath. This can provide slightly better passive ventilation, keeping the roof deck cooler.
    • Flat Tiles: While the air gap is smaller, modern flat tiles are often engineered with reflective coatings. Many manufacturers now produce “cool roof” certified flat tiles that reflect solar radiation more effectively than traditional clay.

    Expert Insight: According to energy efficiency studies, tile roofs can reduce heat gain by up to 70% compared to standard asphalt shingles. However, the color of the tile matters more than the shape. Lighter colors (terracotta, white, or light gray) perform best in Florida’s subtropical climate, regardless of whether they are flat or S-shaped.

    Wind Resistance and Hurricane Performance

    In Florida, wind resistance is not a luxury; it is a necessity. The shape of the tile plays a significant role in how wind interacts with your roof.

    Aerodynamics and Lift

    Wind does not just blow over a roof; it tries to lift it.

    • S-Tiles: The curved shape can act like a sail if not installed correctly. High winds can get caught under the convex curve, creating uplift pressure. However, when properly secured with mechanical fasteners (not just mortar), S-tiles are incredibly durable. They have survived centuries of storms in the Caribbean.
    • Flat Tiles: These are generally more aerodynamic. Because they sit closer to the roof deck, there is less surface area for the wind to catch. This can result in lower uplift forces during hurricane-force winds.

    Installation Matters Most

    It is crucial to note that installation quality outweighs tile shape. In Florida, building codes require strict adherence to wind mitigation standards. Whether you choose flat or S-tile, ensure your contractor uses:

    1. Mechanical Fasteners: Screws or clips that anchor the tile to the batten or deck.
    2. High-Adhesion Underlayment: Synthetic underlayments that resist tearing.
    3. Proper Edge Detailing: Reinforced edges where wind entry is most likely.

    For more detailed information on building standards, you can refer to general construction principles on Wikipedia.

    Are Flat Tile Roofs Better Than S Type In Florida

    Water Management and Leak Prevention

    Florida experiences heavy, torrential rainstorms. How well does each tile shed water?

    FeatureS-Tile (Spanish)Flat Tile (Shake/Slate)
    Water ChannelingExcellent. The deep curves guide water rapidly off the roof.Good. Relies on overlap and slope rather than channels.
    Debris AccumulationModerate. Leaves can get stuck in the curves.Low. Flatter surface allows wind/rain to wash debris away easier.
    Ice/Water Dam RiskLow. Rapid runoff prevents pooling.Low, provided the slope is adequate (min 4:12 pitch).

    Verdict: S-tiles have a slight edge in pure water shedding capability due to their channel design. However, flat tiles are less prone to trapping organic debris, which can hold moisture and lead to mold or algae growth—a common issue in humid Florida environments.

    Cost Comparison: Initial Investment vs. Long-Term Value

    Let’s talk about the bottom line. Prices vary by manufacturer, but here is a general breakdown for the Florida market.

    Material Costs

    • S-Tiles: Typically range from $10 to $18 per square foot installed. The complexity of manufacturing the double-curve shape often makes them more expensive.
    • Flat Tiles: Typically range from $8 to $15 per square foot installed. They are often simpler to manufacture and lighter, which can reduce structural support costs.

    Maintenance Costs

    • S-Tiles: May require more frequent cleaning to remove debris from the curves. Broken tiles are easy to spot but can be tricky to match if the batch is old.
    • Flat Tiles: Easier to walk on for maintenance (if necessary) and clean. Their uniform appearance makes individual replacements less noticeable.

    Lifespan

    Both options are long-term investments. A well-installed clay or concrete tile roof in Florida can last 50 to 100 years. This dwarfs the 15–20 year lifespan of asphalt shingles, making the higher upfront cost of tile worthwhile over time.

    Aesthetic Appeal: Which Style Fits Your Home?

    Your roof accounts for up to 40% of your home’s visible exterior. The choice between flat and S-tile should complement your architectural style.

    Choose S-Tile If:

    • You have a Mediterranean, Spanish Colonial, or Tuscan-style home.
    • You want a traditional, luxurious look that stands out in historic neighborhoods.
    • You prefer a roof with depth, shadow lines, and visual texture.

    Choose Flat Tile If:

    • You have a Modern, Contemporary, or Craftsman-style home.
    • You prefer a sleek, minimalist aesthetic.
    • You want the durability of tile without the “busy” look of curved profiles.
    • You are looking to mimic the look of wood shakes without the fire risk and rot issues associated with wood in humid climates.

    Environmental Impact and Sustainability

    Florida homeowners are increasingly eco-conscious. Both tile types are sustainable choices, but there are nuances.

    • Recyclability: Concrete and clay tiles are 100% recyclable. At the end of their life, they can be crushed and used as aggregate for road base or new concrete.
    • Energy Efficiency: As mentioned earlier, both contribute to lower energy consumption.
    • Weight Considerations: Tile roofs are heavy. S-tiles are often heavier than flat tiles due to the extra material used in the curves. If you are retrofitting an existing home, a structural engineer may need to verify if your frame can support S-tiles. Flat tiles, being lighter, are often easier to install on existing structures without reinforcement.

    FAQ Section

    1. Are flat tile roofs more expensive than S-tile roofs in Florida?

    Generally, no. Flat tiles are often slightly cheaper than S-tiles because they use less material and are simpler to manufacture. However, installation costs can vary based on the complexity of your roof’s geometry. Always get multiple quotes from licensed Florida contractors.

    2. Which tile style is better for hurricane zones?

    Both styles can withstand hurricane-force winds if installed correctly according to Florida Building Code. However, flat tiles are slightly more aerodynamic, potentially reducing wind uplift. The key factor is not the shape, but the use of mechanical fasteners and proper underlayment.

    3. Do flat tiles leak more than S-tiles?

    Not necessarily. S-tiles have built-in channels that guide water, which is advantageous. However, flat tiles rely on proper overlap and slope. As long as your roof has the minimum recommended pitch (usually 4:12) and is installed by a professional, flat tiles are highly water-resistant.

    4. Can I walk on my tile roof for maintenance?

    You should avoid walking on any tile roof unless absolutely necessary. Tiles are brittle and can crack under foot traffic. If maintenance is required, hire a professional who knows how to distribute their weight using planks or specialized footwear. Flat tiles are slightly more forgiving than S-tiles, but caution is still required.

    5. How do I clean algae off my tile roof in Florida?

    Florida’s humidity promotes algae growth (black streaks). Use a soft wash method with a mixture of water and mild detergent or a specialized roof cleaning solution. Avoid pressure washing, as high pressure can damage the tile glaze and force water under the tiles. Lighter-colored tiles show algae less than dark ones.

    6. Does the weight of S-tiles require extra structural support?

    Often, yes. S-tiles are heavier than flat tiles. If you are replacing an asphalt shingle roof with S-tiles, you will likely need a structural assessment to ensure your roof trusses can handle the added load. Flat tiles are lighter and may be a viable option for homes with marginal structural capacity.

    Conclusion

    So, are flat tile roofs better than S type in Florida? The answer depends on your priorities.

    If you prioritize aerodynamics, lower initial cost, and a modern aesthetic, flat tiles are an excellent choice. They offer superior wind performance due to their low profile and are easier to maintain regarding debris removal.

    If you value traditional beauty, superior water channeling, and don’t mind the higher price tag, S-tiles remain the gold standard for Mediterranean-style homes in Florida. They offer unmatched character and proven longevity.

    Both options are vastly superior to asphalt shingles in terms of lifespan and energy efficiency. Whichever you choose, ensure you work with a licensed, insured contractor who understands Florida’s specific building codes.

    Found this guide helpful? Share it with your neighbors on Facebook or Nextdoor to help them make informed roofing decisions before the next storm season hits!

  • How Much Does It Cost To Recoat An Rv Roof?

    How Much Does It Cost To Recoat An Rv Roof?

    Leaking roofs are the nightmare of every RV owner. One small crack can lead to massive water damage, ruining insulation, wood framing, and your peace of mind. If you are staring at a worn-out roof and wondering how much does it cost to recoat an RV roof, you are not alone. This guide breaks down the real costs, helping you decide whether to grab a brush or call a pro.

    Understanding the Average Cost Breakdown

    The short answer? Recoating an RV roof typically costs between $300 and $1,500. However, this range is broad because it depends heavily on the size of your rig, the type of coating used, and who does the work.

    For a standard Class C motorhome or a large travel trailer (25–30 feet), most owners spend around $600 to $900 for materials if they choose the DIY route. If you hire a professional mobile RV technician, expect to pay between $1,200 and $2,500, including labor and premium materials.

    Why the discrepancy? Labor is the biggest variable. Professional technicians charge for their expertise, insurance, and the convenience of not having to climb onto your roof yourself. However, the material cost remains relatively stable across the board.

    RV SizeDIY Material CostProfessional Service Cost
    Small (Under 20 ft)$250 – $400$800 – $1,200
    Medium (20-30 ft)$400 – $700$1,200 – $1,800
    Large (30+ ft)$700 – $1,000+$1,800 – $2,500+

    What Factors Influence the Price of Recoating?

    Before you budget, you need to understand what drives the price up or down. It is not just about the square footage.

    1. Type of Coating Material

    Not all coatings are created equal. The three most common types are:

    • Acrylic Coatings: These are water-based, eco-friendly, and reflect UV rays well. They are generally the cheapest option but may require reapplication every 3–5 years.
    • Silicone Coatings: Highly durable and waterproof, silicone forms a seamless barrier. It is more expensive than acrylic but lasts longer.
    • Liquid Rubber (EPDM): This is the gold standard for many RVers. It bonds directly to EPDM rubber roofs and is incredibly flexible. It sits in the mid-to-high price range but offers superior longevity.

    2. Roof Condition and Prep Work

    If your roof has minor cracks, a simple cleaning and coat will suffice. However, if there is delamination, significant tears, or old adhesive residue, the prep work increases. You might need to purchase patch kits, primers, or sealants before applying the main coat. Ignoring prep work is the number one reason coatings fail.

    3. Geographic Location

    Labor costs vary by state. A technician in California or New York will charge significantly more than one in the Midwest. Additionally, shipping heavy gallons of coating material can add to your DIY costs if you cannot find them locally.

    DIY vs. Hiring a Pro: Which Is Right for You?

    This is the most critical decision you will make. Let’s look at the pros and cons to help you choose.

    The DIY Approach

    Pros:

    • Cost Savings: You save 50–60% by eliminating labor costs.
    • Control: You choose exactly which products to use.
    • Satisfaction: There is pride in maintaining your own rig.

    Cons:

    • Physical Risk: Climbing on an RV roof can be dangerous, especially if it is slippery or steep.
    • Time-Consuming: Proper cleaning, drying, and application can take a full weekend.
    • Warranty Issues: Some manufacturers void warranties if non-approved products are used.

    The Professional Approach

    Pros:

    • Expertise: Pros know how to handle tricky areas like vents, AC units, and seams.
    • Speed: They can often complete the job in one day.
    • Warranty: Many pros offer a labor warranty on their work.

    Cons:

    • Higher Cost: You pay for convenience and skill.
    • Scheduling: You may have to wait weeks for an appointment during peak season.

    Expert Insight: According to industry standards, proper surface preparation accounts for 80% of the success of any roofing project. Whether you DIY or hire out, never skip the cleaning phase. For more details on roofing materials, you can refer to general construction standards on Wikipedia.

    How Much Does It Cost To Recoat An Rv Roof

    Step-by-Step Guide to Recoating Your RV Roof

    If you decide to tackle this project yourself, follow these steps to ensure a long-lasting finish.

    Step 1: Safety First

    Ensure your RV is parked on level ground. Use a sturdy ladder with stabilizers. Wear non-slip shoes and consider using a safety harness if your roof is high or slippery.

    Step 2: Thorough Cleaning

    You cannot coat over dirt. Use a dedicated RV roof cleaner or a mixture of mild dish soap and water. Scrub the entire surface with a soft-bristle brush. Pay special attention to seams and around fixtures.

    • Tip: Avoid pressure washers on high settings, as they can force water under existing seals.

    Step 3: Inspect and Repair

    Walk the roof (carefully) and look for cracks, bubbles, or loose seams. Use a compatible sealant or patch kit to fix any damage. Allow repairs to cure completely according to the product instructions.

    Step 4: Masking and Priming

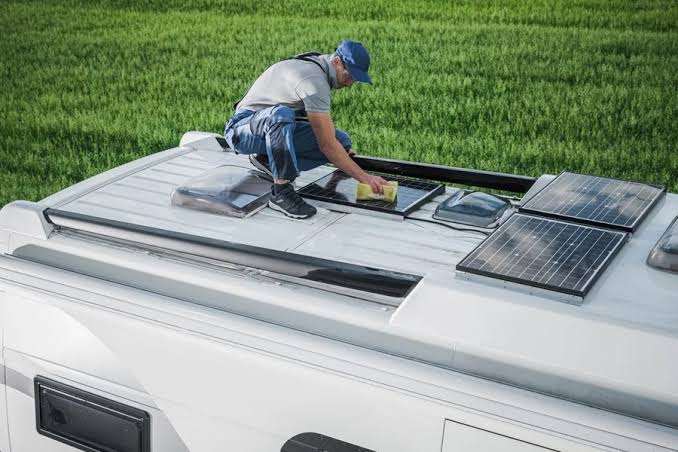
    Use painter’s tape to mask off areas you do not want coated, such as solar panels or AC units. If your chosen coating requires a primer (common for metal or fiberglass roofs), apply it now and let it dry.

    Step 5: Apply the Coating

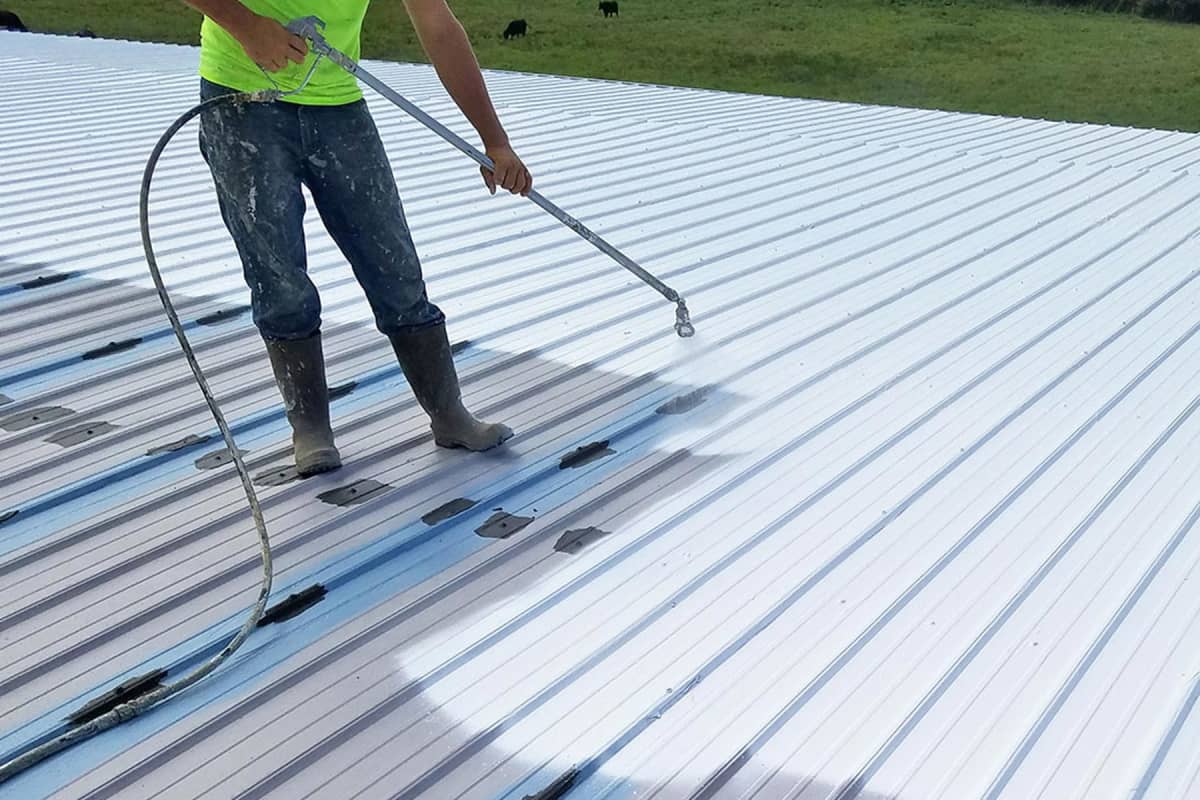
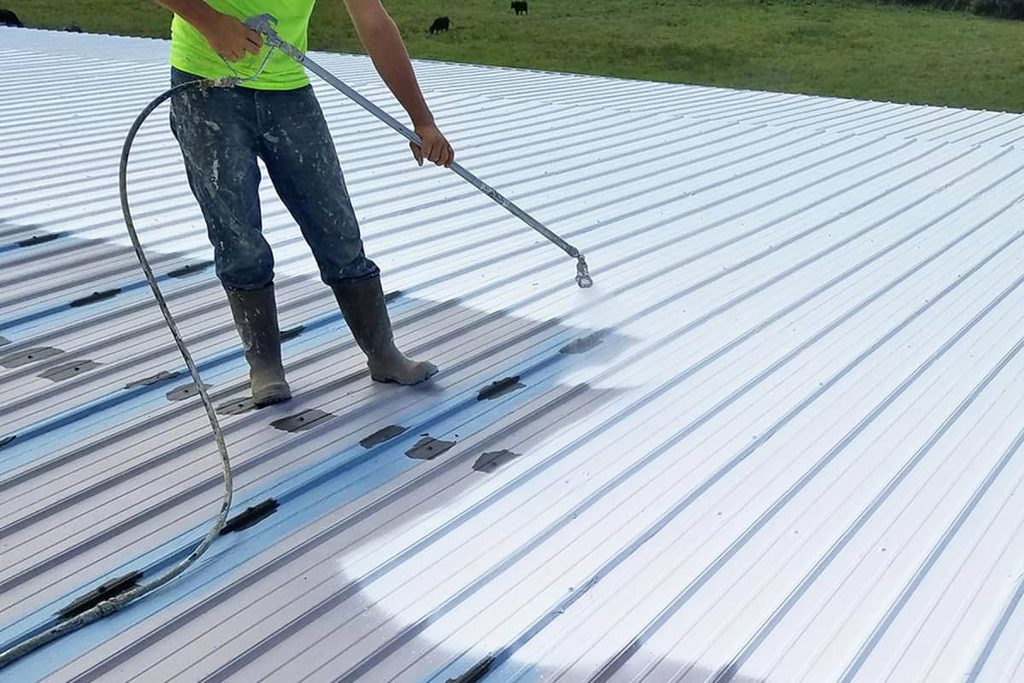
    Stir the coating thoroughly. Using a high-quality roller with an extension pole, apply the first coat evenly. Work in small sections to maintain a “wet edge.”

    • Quantity: Most roofs require two coats. Wait for the first coat to dry (usually 4–6 hours, depending on humidity) before applying the second.

    Step 6: Clean Up and Cure

    Remove the tape while the final coat is still slightly tacky to avoid peeling. Allow the roof to cure for at least 24–48 hours before exposing it to rain or heavy dew.

    Frequently Asked Questions (FAQ)

    How often should I recoat my RV roof?

    Most experts recommend recoating every 3 to 5 years. However, this depends on the climate. If you live in an area with intense sun exposure or harsh winters, you may need to do it more frequently. Annual inspections are crucial to catch wear early.

    Can I recoat over an existing coating?

    Yes, in most cases. However, the existing coating must be firmly adhered, clean, and free of mold or mildew. If the old coating is peeling or flaking, it must be removed entirely before applying a new layer. Check with the manufacturer of your new coating for compatibility.

    What is the best time of year to recoat an RV roof?

    The ideal time is during spring or early fall. You need temperatures between 50°F and 90°F (10°C–32°C) for proper curing. Avoid rainy seasons or extreme heat, as these can affect the bonding and drying process.

    Does recoating void my RV warranty?

    It depends. Some RV manufacturers require specific types of coatings or professional application to maintain the roof warranty. Always check your owner’s manual or contact the manufacturer before starting. Using third-party coatings without approval may void coverage for roof-related leaks.

    How long does the recoating process take?

    For a DIYer, plan for two days. Day one is for cleaning, repairing, and applying the first coat. Day two is for applying the second coat. Professionals can often complete the job in one long day, but curing time remains the same.

    Conclusion

    Knowing how much does it cost to recoat an RV roof empowers you to make the right financial decision for your rig. Whether you spend $400 doing it yourself or $1,500 hiring a pro, the investment is far cheaper than replacing a water-damaged interior.

    Remember, the key to longevity is not just the product you buy, but the preparation you put in. A clean, well-prepped roof ensures your coating bonds correctly and protects your home on wheels for years to come.

    Did you find this guide helpful? Share it with your fellow RVers on Facebook or Pinterest to help them protect their investments too! Safe travels and dry roofs!

  • How Much Does It Cost To Reseal A Camper Roof?

    How Much Does It Cost To Reseal A Camper Roof?

    Leaking roofs are the number one nightmare for any RV owner. A small drip can quickly turn into thousands of dollars in water damage if ignored. If you are wondering how much does it cost to reseal a camper roof, you are not alone; understanding these costs is crucial for budgeting your next maintenance trip and keeping your home-on-wheels dry.

    Understanding the Average Cost Breakdown

    The cost to reseal a camper roof varies significantly based on whether you choose to do it yourself or hire a professional. Generally, you can expect to pay between $300 and $1,500 for a complete resealing job.

    For those opting for a DIY approach, the cost is primarily for materials. You will likely spend between $100 and $300. This covers high-quality sealant, cleaning supplies, primers, and tools like brushes or caulking guns. The price fluctuates depending on the size of your RV and the type of sealant chosen.

    If you hire a professional service, labor becomes the biggest expense. Professional rates typically range from $50 to $100 per hour, with most jobs taking 4 to 8 hours. Consequently, total professional costs often land between $600 and $1,500. While this is more expensive upfront, it comes with the benefit of expertise and warranty coverage.

    Service TypeEstimated Cost RangeWhat’s Included
    DIY Resealing$100 – $300Sealant, cleaner, primer, tools
    Professional Resealing$600 – $1,500Labor, materials, inspection, warranty

    Factors That Influence Resealing Prices

    Several variables affect the final bill. Understanding these helps you predict expenses more accurately.

    1. Size and Type of Your RV

    A small teardrop trailer requires far less material than a 40-foot Class A motorhome. Larger roofs have more surface area, seams, and fixtures (like AC units and vents) that need careful sealing.

    2. Condition of the Existing Roof

    If your roof has minor cracks, a simple reseal suffices. However, if there is significant delamination, rot, or structural damage, you may need repairs before sealing. This adds to the cost. Always inspect thoroughly before starting.

    3. Type of Sealant Used

    Not all sealants are created equal. Silicone-based sealants are cheaper but harder to remove later. Polyurethane and acrylic-based sealants offer better flexibility and longevity but come at a higher price point. Self-leveling lap sealants are popular for horizontal surfaces, while non-sag formulas are best for vertical edges.

    4. Geographic Location

    Labor costs vary by region. Services in urban areas or states with high living costs (like California or New York) will charge more than those in rural areas. Additionally, weather conditions can delay work, potentially increasing labor time.

    DIY vs. Professional: Which Is Right for You?

    Deciding between doing it yourself and hiring a pro depends on your skill level, budget, and time.

    The DIY Route

    Pros:

    • Cost-Effective: You save hundreds on labor.
    • Control: You choose the exact products used.
    • Satisfaction: Completing the job yourself feels rewarding.

    Cons:

    • Time-Consuming: Proper preparation takes days due to drying times.
    • Risk of Error: Missing a spot can lead to leaks.
    • Physical Effort: Working on a roof is physically demanding and potentially dangerous.

    Hiring a Professional

    Pros:

    • Expertise: Professionals spot issues amateurs might miss.
    • Warranty: Many shops offer guarantees on their work.
    • Convenience: You save time and avoid physical strain.

    Cons:

    • Higher Cost: Labor fees add up quickly.
    • Scheduling: You may need to wait weeks for an appointment.

    For most beginners, if the roof is in good condition and only needs routine maintenance, DIY is feasible. However, if you notice soft spots or extensive cracking, consult a professional.

    How Much Does It Cost To Reseal A Camper Roof

    Step-by-Step Guide to Resealing Your Camper Roof

    If you decide to tackle this project yourself, follow these steps for a durable finish.

    Step 1: Gather Your Supplies

    You will need:

    • RV roof sealant (polyurethane or acrylic recommended)
    • Rubber roof cleaner or mild soap
    • Stiff brush and rags
    • Painter’s tape
    • Caulking gun
    • Primer (if required by sealant manufacturer)

    Step 2: Clean the Roof Thoroughly

    Cleanliness is critical for adhesion. Wash the entire roof with a specialized RV roof cleaner. Scrub away dirt, mold, and old sealant residue. Rinse well and let it dry completely. Note: Do not proceed if the roof is damp. Moisture trapped under sealant causes failure.

    Step 3: Inspect and Prepare Surfaces

    Check for cracks, bubbles, or loose seams. Remove old, failing sealant using a plastic scraper to avoid damaging the roof membrane. Apply painter’s tape around vents, AC units, and edges to create clean lines.

    Step 4: Apply Primer (If Needed)

    Some sealants require a primer for optimal bonding. Apply a thin, even coat according to the product instructions. Let it dry for the recommended time, usually 1–2 hours.

    Step 5: Apply the Sealant

    Load your caulking gun. Apply a generous bead of sealant along all seams, edges, and around fixtures. Use a putty knife or gloved finger to smooth the bead, ensuring it fills all gaps. Aim for a uniform thickness of about 1/8 inch.

    Step 6: Let It Cure

    Allow the sealant to cure fully before exposing it to rain or walking on it. Curing times vary by product and temperature but typically range from 24 to 48 hours. Check the manufacturer’s label for specific details.

    When Should You Reseal Your Camper Roof?

    Prevention is cheaper than repair. Most experts recommend resealing your RV roof every 1 to 2 years. However, this depends on usage and exposure.

    Signs you need immediate attention include:

    • Visible cracks or peeling sealant.
    • Water stains on interior ceilings.
    • Soft spots when walking on the roof.
    • Mold or mildew smells inside the camper.

    Regular inspections twice a year—spring and fall—are ideal. Catching small issues early prevents costly water damage. For more detailed information on roof materials, you can refer to Wikipedia’s page on roofing, which provides a broad overview of material properties relevant to various structures, including RVs.

    FAQ Section

    How long does RV roof sealant last?

    Most high-quality RV roof sealants last between 1 to 3 years before needing reapplication. Factors like UV exposure, temperature fluctuations, and physical wear affect longevity. Regular inspections help extend its life.

    Can I reseal over old sealant?

    It is not recommended. Old sealant often loses adhesion and traps moisture. For a lasting fix, remove old sealant completely before applying new material. This ensures a strong bond and prevents future leaks.

    What is the best sealant for EPDM rubber roofs?

    For EPDM rubber roofs, use sealants specifically designed for rubber membranes. Acrylic-based or polyurethane sealants are excellent choices. Avoid silicone unless the manufacturer explicitly approves it, as it can be difficult to remove later.

    Does insurance cover roof resealing?

    Generally, no. Insurance considers resealing routine maintenance, which is the owner’s responsibility. However, if water damage occurs due to a sudden, covered peril (like a storm), insurance might cover the resulting interior damage, but not the roof repair itself.

    How often should I check my camper roof?

    Inspect your roof at least twice a year. Check it in the spring before camping season and in the fall before storage. Also, inspect after any severe weather events or long trips.

    Is it safe to walk on my camper roof?

    Yes, but with caution. Walk softly and avoid sharp objects. Distribute your weight evenly, preferably by kneeling or using a board. Never jump or stand on weak spots. Always ensure the roof is dry and clean to prevent slipping.

    Conclusion

    Knowing how much does it cost to reseal a camper roof empowers you to make smart financial decisions for your RV. Whether you choose the DIY route for savings or hire a pro for peace of mind, regular maintenance is key. Spending a few hundred dollars now can save you thousands in water damage repairs later.

    Don’t wait for a leak to appear. Inspect your roof today, gather your supplies, and keep your adventures dry and worry-free. If you found this guide helpful, please share it with fellow RV enthusiasts on social media! Happy camping!

  • Why Are AC Units on Roofs in Las Vegas?

    Why Are AC Units on Roofs in Las Vegas?

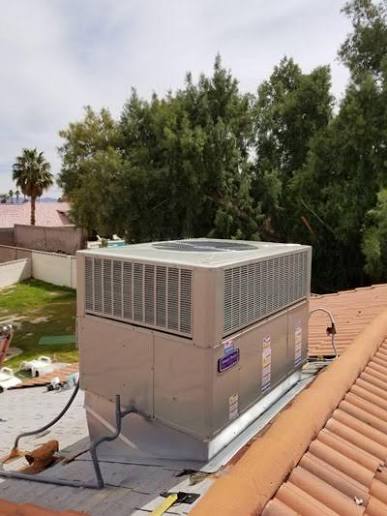
    Have you ever driven through the sprawling suburbs of Nevada and noticed something peculiar? Instead of the familiar humming boxes tucked away in backyards, you see massive units perched precariously on top of homes and businesses. It’s a striking visual that defines the skyline here. If you’ve found yourself asking why are air conditioners on the roof in Las Vegas, you aren’t alone; it is one of the most common questions for newcomers to the Silver State.

    The short answer is a combination of extreme heat management, space optimization, and specific architectural trends. But to truly understand this phenomenon, we need to dig deeper into the engineering logic that keeps Las Vegas cool when temperatures soar above 110°F (43°C).

    The Space-Saving Advantage in Dense Urban Planning

    One of the primary drivers for rooftop installations is simply real estate. In many parts of Las Vegas, particularly in newer master-planned communities like Summerlin or Henderson, lot sizes can be surprisingly compact relative to the square footage of the house.

    Maximizing Yard Utility

    In traditional climates, an outdoor condenser unit sits on a concrete slab in the backyard. However, in Las Vegas:

    • Backyards are premium spaces: Residents want to use their limited outdoor area for pools, patios, and entertainment zones, not industrial machinery.
    • Side yards are narrow: Many modern homes have zero-lot-line designs, leaving no room on the sides for equipment.

    By moving the HVAC system to the roof, homeowners reclaim every inch of ground-level space. This is especially crucial for commercial buildings on the Strip, where every square foot of ground space is valuable for retail or pedestrian traffic.

    Combating the Extreme Desert Heat

    You might think placing an AC unit in the direct sun is counterintuitive. After all, doesn’t heat make ACs work harder? Yes, but the engineering solution lies in airflow and heat dissipation, which are often more efficient at higher elevations.

    Better Air Circulation

    Ground-level units often struggle with “short-cycling” or recirculating their own hot exhaust air if they are boxed in by fences, shrubs, or walls. On the roof:

    1. Unobstructed Airflow: There are no fences or dense landscaping to block air intake.
    2. Wind Assistance: Even slight breezes at roof level help dissipate the heat generated by the condenser coils more effectively than stagnant air at ground level.

    Thermal Separation

    While the roof surface gets hot, the unit itself is elevated. This separation prevents the ground-radiated heat (from asphalt or concrete) from compounding the thermal load on the machine. Modern rooftop units (RTUs) are also built with higher-grade insulation and materials designed to withstand direct UV exposure, unlike some residential split-system condensers.

    Architectural Trends: The Rise of Flat Roofs

    If you look closely, you’ll notice that rooftop ACs are predominantly found on homes with flat or low-slope roofs. This is a distinct architectural style in the Southwest, influenced by:

    • Mid-Century Modernism: A style popularized in Las Vegas during its boom years.
    • Pueblo Revival: Drawing inspiration from traditional adobe structures.
    • Commercial Practicality: Flat roofs are cheaper to build and easier to maintain for large structures.

    Sloped, shingled roofs (common in the Midwest or East Coast) make rooftop installation difficult and prone to leaks. Flat roofs, typically made of torch-down asphalt or foam coating, provide a stable, waterproof platform perfect for heavy HVAC equipment.

    Note: Not all Las Vegas homes have rooftop ACs. Traditional pitched-roof neighborhoods still use ground-mounted split systems. The rooftop trend is specific to flat-roof architecture.

    Why Are Air Conditioners On The Roof In Las Vegas

    Maintenance and Accessibility: A Double-Edged Sword

    From an technician’s perspective, rooftop units offer unique advantages and challenges. Understanding this helps explain why builders continue to choose this method.

    Pros for Technicians

    • No Obstacles: Techs don’t need to navigate around backyard dogs, kids’ toys, or intricate landscaping.
    • Centralized Location: For large commercial buildings, having all units on the roof allows for easier centralized monitoring and maintenance routes.

    Cons for Homeowners

    • Leak Risks: The biggest concern is water intrusion. Every penetration in the roof is a potential leak point. Proper flashing and sealant are critical.
    • Service Difficulty: Technicians require ladders or lifts, which can increase service call costs slightly compared to walking out the back door.

    To mitigate leak risks, reputable HVAC companies in Las Vegas follow strict protocols. They use reinforced curbs and high-quality elastomeric coatings to ensure the roof remains watertight around the unit base.

    Energy Efficiency and Noise Reduction

    Beyond space and heat, there are comfort factors involved.

    Quieter Operations

    An AC compressor is noisy. When placed on the ground near a patio, it can disrupt outdoor conversations. On the roof:

    • Distance: The sound is further away from living areas.
    • Directionality: Noise is directed upward and outward, rather than into a fenced backyard enclosure.

    Efficiency Ratings

    Modern rooftop packaged units often come with high SEER (Seasonal Energy Efficiency Ratio) ratings. Because they are self-contained systems, they eliminate the energy loss associated with long refrigerant lines that run from a ground condenser to an attic air handler. Shorter duct runs from the roof down into the home can sometimes improve overall system efficiency, provided the ductwork is well-insulated against the attic heat.

    Comparison: Rooftop vs. Ground-Mounted AC in Las Vegas

    FeatureRooftop Unit (RTU)Ground-Mounted Split System
    Space UsageSaves yard spaceUses backyard/side yard
    Heat ExposureDirect sun, but better airflowShaded options available
    Noise LevelQuiet at ground levelAudible in backyard
    Maintenance AccessRequires ladder/roof accessEasy ground access
    Leak RiskHigher (roof penetration)None (ground slab)
    Best ForFlat roofs, small lotsPitched roofs, large lots

    External Authority Reference

    For those interested in the broader history of air conditioning technology and its impact on urban development, you can explore detailed historical context on Wikipedia’s page on Air Conditioning. This resource provides insight into how HVAC evolution has shaped modern architecture, including the shift toward integrated rooftop systems in commercial and residential sectors.

    FAQ Section

    1. Do rooftop ACs break down faster in Las Vegas heat?

    Not necessarily. While they are exposed to more sun, they are engineered for it. Most rooftop units have heavy-duty compressors and coils designed for commercial use. With regular maintenance—such as cleaning coils twice a year—they can last just as long as ground units, typically 15–20 years.

    2. Can I install a rooftop AC on my existing pitched roof?

    It is highly discouraged. Installing a heavy unit on a shingled, sloped roof requires significant structural reinforcement and creates a high risk of leaks. It is generally only feasible on flat or very low-slope roofs with proper waterproofing membranes.

    3. Is it more expensive to repair a rooftop AC?

    It can be slightly more expensive. The labor cost may be higher because technicians need to set up ladders or safety harnesses. Additionally, if the unit needs replacement, crane services might be required to lift the new unit onto the roof, adding to the installation cost.

    4. How do I prevent leaks around my rooftop AC unit?

    Regular inspections are key. Ensure your HVAC provider checks the “curb” (the frame the unit sits on) and the flashing annually. Look for cracks in the sealant or pooling water around the base. Applying a fresh coat of elastomeric roof coating every few years can also seal minor gaps.

    5. Why don’t I see rooftop ACs in older Las Vegas neighborhoods?

    Older neighborhoods (built before the 1990s) often feature pitched tile or shingle roofs, which are incompatible with rooftop units. These homes typically use traditional split systems with ground-mounted condensers. The rooftop trend coincided with the rise of flat-roofed, mid-century modern, and contemporary architectural styles in newer developments.

    Conclusion

    So, why are air conditioners on the roof in Las Vegas? It’s a smart adaptation to a unique environment. By moving these essential machines upstairs, residents gain valuable backyard space, reduce noise pollution, and leverage better airflow for cooling efficiency. While it requires diligent maintenance to prevent leaks, the trade-off is a cooler home and a more usable outdoor living area.

    If you’re considering a home in Las Vegas or just curious about the skyline, now you know the logic behind the view. It’s not just an aesthetic choice; it’s a functional necessity born from the desert climate.

    Found this article helpful? Share it with your friends who are planning a move to Vegas or those who are just curious about desert architecture! Let’s keep the conversation going on social media.

  • Why Are AC Units On the Roof in Las Vegas?

    Why Are AC Units On the Roof in Las Vegas?

    If you have ever driven through the sprawling suburbs or the bustling downtown area of Las Vegas, you have likely noticed a distinct architectural feature: large, boxy air conditioning units perched atop flat roofs. It is a sight that often puzzles visitors from cooler climates. You might find yourself asking, why are AC units on the roof in Las Vegas? The answer lies in a unique combination of extreme climate challenges, urban density, and engineering efficiency designed specifically for the Mojave Desert environment.

    In this guide, we will break down the technical and practical reasons behind this common practice. Whether you are a new homeowner, a business owner, or simply curious about desert infrastructure, understanding these systems can help you appreciate the ingenuity required to keep Las Vegas cool when temperatures soar above 110°F (43°C).

    Maximizing Limited Space in Urban Environments

    One of the primary drivers for placing HVAC (Heating, Ventilation, and Air Conditioning) systems on the roof is land scarcity. Las Vegas has experienced explosive growth over the past few decades. As the population swells, commercial buildings, casinos, hotels, and even multi-family residential complexes are built closer together.

    The Ground-Space Premium

    In dense urban areas, every square foot of ground-level real estate is valuable. Placing bulky condenser units on the ground would consume parking spaces, reduce landscaping potential, or limit pedestrian walkways. By moving these units to the roof, building owners free up critical ground space for revenue-generating activities or essential amenities.

    • Commercial Efficiency: Casinos and hotels need vast floor plans for gaming and hospitality. Rooftop units ensure that the interior footprint remains uncluttered.
    • Residential Density: In apartment complexes, ground-level units can be noisy and obstructive. Rooftop placement keeps living areas quiet and accessible.

    Superior Heat Dissipation in the Desert Climate

    While it may seem counterintuitive to place heat-generating machinery under the blazing sun, rooftop placement actually offers significant thermodynamic advantages in Las Vegas’s dry climate.

    Avoiding Ground-Level Heat Islands

    Ground-level surfaces, such as asphalt parking lots and concrete sidewalks, absorb solar radiation throughout the day and re-radiate it as heat. This phenomenon, known as the “urban heat island effect,” means that the air near the ground is often significantly hotter than the air just 20–30 feet up.

    By installing AC units on the roof:

    1. Access to Cooler Air: The units draw in ambient air that is slightly cooler than the ground-level air trapped between buildings.
    2. Better Exhaust Dispersion: Hot air expelled by the condensers dissipates more quickly into the open atmosphere rather than getting trapped in narrow alleys or courtyards.

    According to basic principles of thermodynamics, hot air rises. Rooftop units leverage this natural convection, allowing waste heat to escape upward and away from the building’s intake vents, improving overall system efficiency.

    Enhanced Security and Vandalism Prevention

    Las Vegas is a major tourist destination with millions of visitors annually. While generally safe, high-traffic areas pose risks to exposed infrastructure. Ground-level AC units are vulnerable to theft, vandalism, and accidental damage from vehicles.

    Protecting Critical Infrastructure

    Rooftop placement acts as a natural security barrier.

    • Theft Deterrence: Copper coils and motors are valuable targets for scrap metal thieves. Accessing them on a roof requires specialized equipment and effort, deterring opportunistic crime.
    • Accidental Damage: In busy commercial districts, delivery trucks or careless drivers might strike ground-level units. Rooftop units are completely isolated from traffic hazards.

    For businesses, minimizing downtime is crucial. A damaged AC unit in July can halt operations entirely. Rooftop installation reduces the risk of such disruptive incidents.

    Noise Reduction for Indoor Comfort

    Air conditioning compressors are noisy. In a city that never sleeps, maintaining a quiet indoor environment is essential for both residential comfort and hotel guest satisfaction.

    Sound Barrier Benefits

    Placing the noisiest components of the HVAC system on the roof creates a physical distance between the sound source and the occupants.

    • Vertical Separation: Sound intensity decreases as it travels. By placing the unit above the occupied floors, the noise is directed upward into the sky rather than into living rooms or office spaces.
    • Structural Insulation: The roof structure itself acts as a sound buffer. When combined with proper vibration isolators, rooftop units can operate nearly silently from the perspective of those inside.

    This is particularly important for hotels on the Strip, where guests expect tranquility despite the chaotic energy outside.

    Why Are Ac Units On The Roof In Las Vegas

    Ease of Maintenance and Service Access

    Contrary to popular belief, rooftop units can be easier for technicians to service than ground-level units tucked away in cramped mechanical rooms or fenced-in side yards.

    Streamlined Repair Processes

    HVAC professionals in Las Vegas are accustomed to working at heights. Rooftop units offer several logistical benefits:

    1. Unobstructed Access: Technicians do not need to navigate around furniture, landscaping, or parked cars.
    2. Centralized Location: For large commercial buildings, multiple units can be grouped on the roof, allowing a technician to service several systems in one trip without moving between different sides of the building.
    3. Safety Compliance: Modern roofing standards include dedicated walkways and safety anchors, ensuring that maintenance can be performed safely and efficiently.

    However, it is worth noting that regular maintenance is critical. Dust and sandstorms in Las Vegas can clog filters and coils faster than in other regions. Building owners must schedule frequent cleanings to maintain optimal performance.

    Comparison: Rooftop vs. Ground-Level Units in Las Vegas

    To help you visualize the trade-offs, here is a quick comparison of the two installation methods in the context of the Las Vegas climate.

    FeatureRooftop UnitsGround-Level Units
    Space UsageSaves valuable ground spaceConsumes parking/landscaping area
    Heat ExposureExposed to direct sun, but better airflowTrapped in ground-level heat islands
    SecurityHigh (hard to access)Low (vulnerable to theft/vandalism)
    Noise LevelQuiet indoors (sound travels up)Can be noisy if near windows/patios
    MaintenanceRequires roof access/liftsEasy access, but may be obstructed
    CostHigher initial installation costLower initial installation cost

    Understanding the Technology Behind Rooftop Units

    Most rooftop units in Las Vegas are “Package Units.” Unlike split systems where the compressor is outside and the air handler is inside, a package unit contains all components in a single cabinet. This design is ideal for flat-roofed commercial buildings common in Nevada.

    These units are engineered to withstand extreme temperatures. Standard AC units may struggle when ambient temperatures exceed 100°F, but units installed in Las Vegas are often rated for “high ambient” operation. They feature larger condensers and specialized compressors designed to reject heat effectively even in the scorching desert summer.

    For more detailed information on how HVAC systems function thermodynamically, you can refer to the general principles outlined on Wikipedia’s Heating, Ventilation, and Air Conditioning page.

    FAQ Section

    1. Do rooftop AC units work harder in the summer because they are in the sun?

    While they are exposed to direct sunlight, the benefit of accessing cooler upper-air currents and avoiding ground-level heat traps usually outweighs the solar gain. Additionally, modern units are insulated and designed to handle high solar loads. Proper shading structures or reflective coatings can further mitigate solar heat absorption.

    2. Is it more expensive to install AC units on the roof?

    Yes, the initial installation cost is typically higher due to the need for cranes, structural reinforcement of the roof, and specialized labor. However, the long-term benefits in space utilization, security, and noise reduction often provide a better return on investment for commercial properties.

    3. Can residential homes in Las Vegas have rooftop AC units?

    Yes, but it is less common than in commercial buildings. Single-family homes usually have pitched roofs, making rooftop installation difficult. However, some modern custom homes with flat architectural designs do utilize rooftop package units, especially if lot size is small.

    4. How does sand and dust affect rooftop AC units in Las Vegas?

    Sand and dust can clog coils and filters, reducing efficiency and potentially causing overheating. This is why quarterly maintenance is highly recommended in Las Vegas. Technicians will clean the coils and replace filters to ensure the system runs smoothly despite the dusty environment.

    5. What happens if a rooftop unit leaks?

    Roof penetrations for HVAC units are sealed with flashing and waterproof membranes. If a leak occurs, it is usually due to degraded sealing material rather than the unit itself. Regular roof inspections alongside HVAC maintenance can prevent water damage to the building interior.

    Conclusion

    So, why are AC units on the roof in Las Vegas? It is not just a matter of tradition; it is a strategic response to the city’s unique environmental and urban challenges. From maximizing valuable real estate and enhancing security to leveraging cooler upper-air temperatures and reducing noise pollution, rooftop HVAC systems offer a comprehensive solution for keeping the desert city comfortable.

    As Las Vegas continues to grow and temperatures rise due to climate change, the efficiency and resilience of these rooftop systems will remain vital. If you found this explanation helpful, please share it with your friends or colleagues who are curious about desert living! Understanding our infrastructure helps us appreciate the engineering marvels that make life in the Mojave Desert possible.