Category: homeowner roofing guide

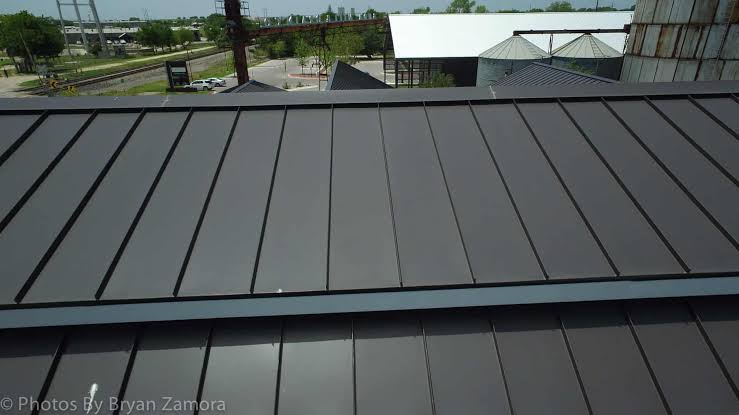
  • How to Install a Metal Roof: The Ultimate DIY Guide

    How to Install a Metal Roof: The Ultimate DIY Guide

    Have you ever looked up at your aging shingle roof and wondered if there was a more durable, energy-efficient alternative? Many homeowners feel overwhelmed by the prospect of replacing their roof, fearing high costs and complex procedures. If you are asking, “How do you install a metal roof on a house,” you are not alone; this guide breaks down the process into manageable, safe, and effective steps for the dedicated DIYer.

    Metal roofing has surged in popularity across the United States, not just for its sleek modern aesthetic but for its longevity. While traditional asphalt shingles may last 15–20 years, a properly installed metal roof can protect your home for 40–70 years. However, installation precision is critical. A minor error in flashing or fastening can lead to leaks that compromise your home’s structural integrity. This article provides a comprehensive, expert-backed roadmap to help you navigate this significant home improvement project with confidence.

    Why Choose Metal Over Traditional Shingles?

    Before diving into the tools and techniques, it is essential to understand why metal is worth the investment. According to the Metal Roofing Alliance, metal roofs reflect solar radiant heat, which can reduce cooling costs by 10–25%. Furthermore, they are non-combustible and highly resistant to wind uplift, making them ideal for areas prone to severe weather.

    FeatureAsphalt ShinglesMetal Roofing
    Lifespan15–20 Years40–70+ Years
    MaintenanceModerate to HighLow
    Energy EfficiencyStandardHigh (Reflective)
    WeightHeavyLightweight
    RecyclabilityLow100% Recyclable

    While the upfront cost of metal is higher, the long-term value proposition is undeniable. But achieving this value requires strict adherence to installation protocols.

    What Tools and Materials Do You Need?

    Preparation is half the battle. Attempting to install a metal roof without the right equipment is a recipe for disaster. You will need specific tools designed for metalwork to ensure clean cuts and secure fastening.

    Essential Tools List

    • Electric Shears or Nibblers: For cutting metal panels without damaging the protective coating. Avoid abrasive saws as they create heat that ruins the galvanized layer.
    • Drill/Driver with Clutch: To prevent over-driving screws, which can strip holes and cause leaks.
    • Seam Roller: For locking standing seam panels together.
    • Chalk Line and Tape Measure: For precise alignment.
    • Safety Gear: Harness, non-slip boots, gloves, and eye protection.

    Material Checklist

    • Metal Panels: Choose between standing seam (hidden fasteners) or exposed fastener panels (corrugated or ribbed).
    • Underlayment: A synthetic, breathable underlayment is crucial for moisture management.
    • Closure Strips: Foam strips that fill gaps at ridges and eaves to prevent pest entry and wind noise.
    • Fasteners: Use only manufacturer-recommended screws with neoprene washers. Never mix metal types (e.g., steel screws on aluminum panels) to avoid galvanic corrosion.

    How Do You Prepare the Existing Roof Structure?

    One of the most common questions beginners ask is whether they need to tear off the old roof. In many cases, you can install metal over existing asphalt shingles, provided the local building code allows it and the roof deck is sound. This method saves time and disposal fees.

    However, inspection is non-negotiable. Walk the roof and check for soft spots, rot, or damaged rafters. Any compromised wood must be replaced before proceeding. If you are installing over shingles, ensure they are flat. Curling or missing shingles should be repaired to create a smooth surface.

    According to Wikipedia’s entry on Roofing, proper ventilation is critical when layering roofing materials. Ensure your attic has adequate intake and exhaust ventilation to prevent heat buildup, which can warp metal panels and degrade underlayment.
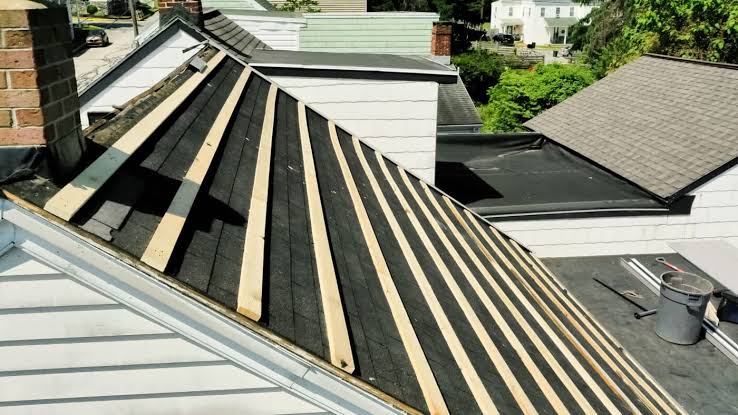
    How Do You Install A Metal Roof On A House

    Step-by-Step: How Do You Install a Metal Roof on a House?

    Now, let’s get into the core of the process. Follow these steps meticulously to ensure a watertight seal.

    Step 1: Install the Drip Edge and Underlayment

    Start at the eaves (the bottom edge of the roof). Install a metal drip edge along the eaves to direct water away from the fascia board. Next, roll out your synthetic underlayment horizontally, starting from the bottom. Overlap each row by at least 6 inches and secure it with cap nails or staples. This layer acts as your secondary water barrier.

    Step 2: Apply Flashing at Valleys and Penetrations

    Valleys are where two roof slopes meet, channeling significant water volume. Install W-shaped metal valley flashing over the underlayment. Seal the edges with high-quality urethane sealant. Similarly, flash around chimneys, vents, and skylights using step flashing or boot flashings designed for metal roofs. Note: Never rely solely on caulk for waterproofing; mechanical flashing is primary.

    Step 3: Install the First Metal Panel

    This is the most critical step. If the first panel is crooked, every subsequent panel will be too. Start at the bottom corner of the roof, ensuring the panel overhangs the drip edge by about 1–2 inches. Use a chalk line to verify it is perfectly square with the eave. Secure the panel with screws, placing them in the flat area of the panel, not the high ribs, unless specified by the manufacturer.

    Step 4: Overlap and Secure Subsequent Panels

    Install the next panel by overlapping the side lap of the previous one. Most panels have a designated overlap width (usually 1–2 inches). Ensure the ribs align perfectly. Continue this process across the roof, checking alignment every few rows. Cut panels to fit around obstacles using electric shears, deburring any sharp edges afterward.

    Step 5: Install Ridge Caps and Trim

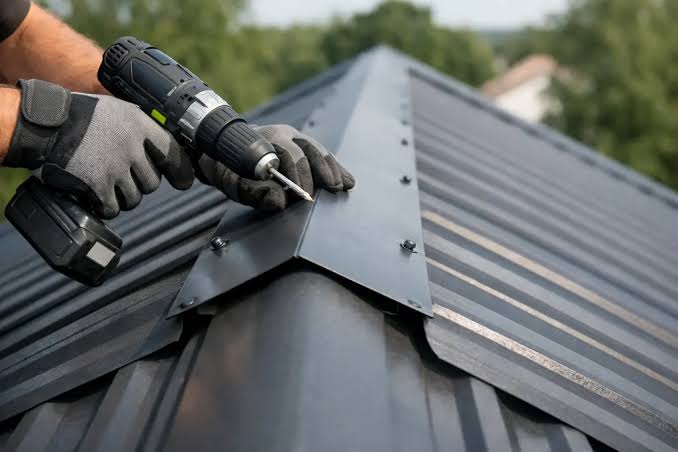
    Once all field panels are installed, finish the roof with ridge caps. These cover the peak of the roof and provide ventilation if you use vented ridge caps. Apply closure strips underneath the ridge cap to block wind-driven rain and pests. Secure the ridge cap with screws spaced evenly along the length. Finally, install gable trim on the sides to give the roof a finished look and protect the edges.

    Common Mistakes to Avoid During Installation

    Even experienced contractors make errors. Here are the top pitfalls to watch out for:

    1. Over-tightening Screws: This compresses the neoprene washer too much, causing it to fail prematurely. Stop drilling when the washer just touches the metal.
    2. Walking on Installed Panels: Metal roofs can dent. Always walk on the screw lines or use distributed weight boards if you must traverse the roof.
    3. Ignoring Thermal Expansion: Metal expands and contracts with temperature changes. Leave slight gaps at end laps and use slotted holes if recommended to allow for movement.
    4. Using Wrong Fasteners: Using standard steel screws on aluminum roofing will cause rapid corrosion. Always match the fastener material to the panel material.

    Frequently Asked Questions (FAQ)

    Can I install a metal roof myself without professional help?

    Yes, but it requires advanced DIY skills, comfort with heights, and strict adherence to safety protocols. If your roof has complex angles, valleys, or turrets, hiring a professional is recommended.

    Do I need a permit to install a metal roof?

    In most US jurisdictions, yes. Roofing is a structural component, and local building codes regulate materials and installation methods. Check with your local building department before starting.

    How long does it take to install a metal roof?

    For a typical 2,000-square-foot home, a professional crew takes 2–3 days. A DIYer should expect 1–2 weeks, depending on experience and helper availability.

    Is metal roofing noisy during rain?

    No. When installed with solid sheathing and proper underlayment, metal roofs are no noisier than asphalt shingles. The insulation and attic space dampen sound significantly.

    What is the best type of metal for residential roofing?

    Galvalume (steel coated with aluminum and zinc) is the most popular due to its balance of cost and durability. Copper and zinc are premium options with unique aesthetics but higher price tags.

    Conclusion

    Learning how do you install a metal roof on a house is a rewarding journey that can significantly enhance your home’s value and resilience. By carefully preparing the structure, using the right tools, and following a meticulous step-by-step process, you can achieve a professional-grade result. Remember, patience and precision are your best friends in this project.

    If you found this guide helpful, please share it on social media to help other homeowners make informed decisions about their roofing projects. Have you installed a metal roof? Share your tips or questions in the comments below!
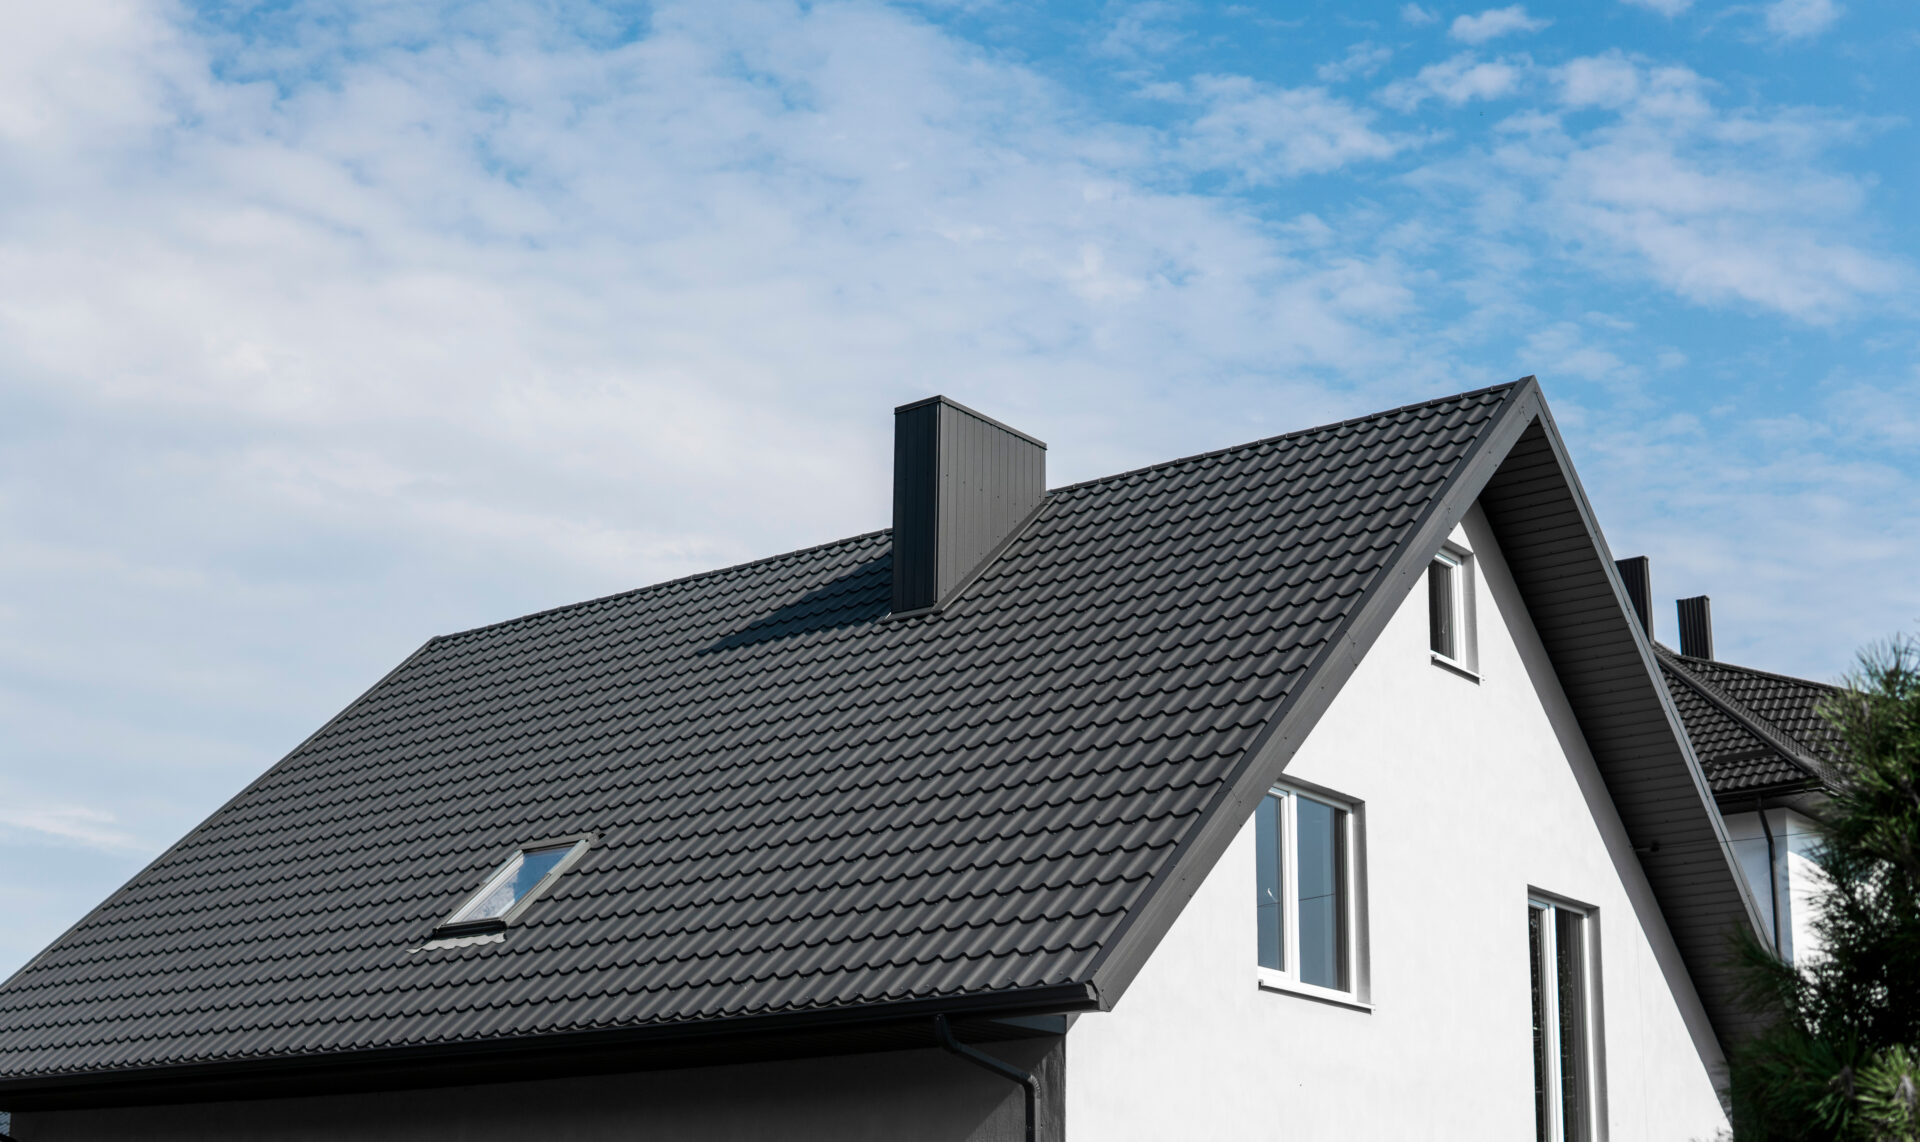
  • How Much Will It Cost To Get A New Roof?

    How Much Will It Cost To Get A New Roof?

    Replacing a roof is one of the most significant investments a homeowner can make. It protects your family, enhances curb appeal, and preserves your property value. However, staring at a blank checkbook while waiting for contractor quotes can be stressful. If you are asking, “How much will it cost to get a new roof,“ you are not alone. This guide breaks down the numbers clearly so you can budget with confidence.

    Understanding the Average Cost of a New Roof in 2026

    The short answer? For an average-sized home in the United States, a new roof typically costs between $8,500 and $14,000. However, this range is broad because every home is unique.

    According to recent industry data from 2025-2026, the national average sits around $11,500 for a standard asphalt shingle replacement on a 2,000-square-foot home. But “average” doesn’t always apply to your specific situation. Costs can dip as low as $5,000 for small repairs or simple materials, or skyrocket past $30,000 for premium materials like slate or copper on large, complex structures.

    Several core factors drive these prices:

    • Roof Size: Measured in “squares” (one square equals 100 square feet).
    • Material Choice: The single biggest variable in your budget.
    • Labor Costs: Varies significantly by region and contractor demand.
    • Complexity: Steep pitches, multiple chimneys, and skylights increase labor time.

    How Material Choice Impacts Your Total Bill

    When calculating how much will it cost to get a new roof, the material you choose is the primary lever you can pull. Here is a breakdown of common roofing materials and their estimated costs per square foot (including installation) in the current market.

    1. Asphalt Shingles (Most Popular)

    • Cost: $4.50 – $8.50 per sq. ft.
    • Pros: Affordable, widely available, easy to repair.
    • Cons: Shorter lifespan (15–25 years), less eco-friendly.
    • Best For: Budget-conscious homeowners and standard suburban homes.

    2. Metal Roofing (Growing Trend)

    • Cost: $9.00 – $16.00 per sq. ft.
    • Pros: Lasts 40–70 years, energy-efficient, fire-resistant.
    • Cons: Higher upfront cost, can be noisy during rain if not insulated properly.
    • Best For: Long-term owners and areas prone to severe weather.

    3. Clay or Concrete Tiles

    • Cost: $10.00 – $20.00+ per sq. ft.
    • Pros: Extremely durable, excellent for hot climates, high aesthetic value.
    • Cons: Very heavy (may require structural reinforcement), fragile if walked on.
    • Best For: Southwestern US styles and Mediterranean architecture.

    4. Slate and Wood Shakes

    • Cost: $15.00 – $30.00+ per sq. ft.
    • Pros: Premium look, natural materials, incredibly long-lasting (slate can last 100+ years).
    • Cons: Expensive, requires specialized installers, heavy weight.
    • Best For: Luxury homes and historic restorations.
    MaterialAvg. Cost per Sq. Ft.LifespanMaintenance Level
    Asphalt Shingles$4.50 – $8.5015-25 YearsModerate
    Metal$9.00 – $16.0040-70 YearsLow
    Clay/Concrete Tile$10.00 – $20.0050+ YearsLow
    Slate$15.00 – $30.00+75-100+ YearsLow

    Note: Prices include materials and professional labor.

    How Much Will It Cost To Get A New Roof

    Hidden Costs You Might Not Expect

    Many homeowners focus solely on the shingles, but the question “How much will it cost to get a new roof” involves more than just the visible layer. Here are common additional expenses that can surprise you:

    Tear-Off and Disposal

    Removing the old roof is labor-intensive. Most contractors charge $1.00 to $5.00 per square foot for tear-off and disposal fees. If your home has multiple layers of old roofing, this cost increases. Always ask if your quote includes “haul-away” fees.

    Underlayment and Decking Repair

    Once the old shingles are gone, contractors inspect the wood decking beneath. If they find rot or water damage, you must pay for plywood replacement. This typically costs $75 to $100 per sheet of plywood, plus labor. It is unpredictable until the job starts, so set aside a 10% contingency fund.

    Permits and Inspections

    Local municipalities often require permits for roof replacements. These fees vary by city but generally range from $150 to $500. While some contractors include this in their bid, others list it separately. Check your local building department requirements early.

    Ventilation and Flashing

    Upgrading ridge vents, soffit vents, or replacing flashing around chimneys and skylights is crucial for longevity. Neglecting these can void warranties. Expect to pay an extra $500 to $1,500 for comprehensive ventilation upgrades.

    Regional Labor Variations Across the US

    Labor accounts for roughly 40–60% of your total roofing cost. Therefore, where you live matters immensely.

    • Northeast & Midwest: Higher labor costs due to union prevalence and shorter working seasons. Winter delays can also impact pricing.
    • South & Southeast: Competitive markets may lower labor costs, but hurricane-resistant codes (like in Florida) may require more expensive installation methods.
    • West Coast: High cost of living areas like California and Washington see premium labor rates, often exceeding $100 per hour for skilled roofers.

    For a deeper understanding of regional construction standards, you can refer to general building code information on Wikipedia.

    Steps to Get an Accurate Quote

    To ensure you are comparing apples to apples, follow these steps when seeking estimates:

    1. Measure Your Roof: Use online satellite tools or ask a contractor for a precise measurement in “squares.” Do not rely on your home’s square footage; the roof area is usually larger due to pitch.
    2. Choose Your Material: Decide on asphalt, metal, or tile before getting quotes. This allows contractors to give fixed prices rather than vague ranges.
    3. Get Three Quotes: Always obtain at least three detailed written estimates. Look for line-item breakdowns, not just a bottom-line number.
    4. Check Credentials: Verify the contractor is licensed, insured, and has good standing with the Better Business Bureau (BBB).
    5. Ask About Warranty: Distinguish between the manufacturer’s warranty (covers materials) and the workmanship warranty (covers installation errors). Aim for at least a 5–10 year workmanship guarantee.

    FAQ Section

    Q: Does homeowners insurance cover a new roof?

    A: Typically, insurance only covers roof replacement if the damage is caused by a sudden, covered peril like a storm, hail, or fire. They do not cover wear and tear or age-related deterioration. Check your policy’s “Actual Cash Value” vs. “Replacement Cost” clauses.

    Q: How long does a roof replacement take?

    A: For an average residential home, the physical installation takes 1 to 3 days. However, scheduling, permit approval, and material delivery can extend the timeline to 2–4 weeks from contract signing.

    Q: Can I install a new roof over the old one?

    A: While possible (“overlay”), it is generally not recommended. It hides potential deck damage, adds unnecessary weight, and often voids manufacturer warranties. Most professional contractors insist on a full tear-off.

    Q: What is the best time of year to replace a roof?

    A: Late spring through early fall is ideal due to dry weather. However, scheduling during the “off-season” (late fall or winter, depending on your region) might yield slight discounts as contractors have fewer jobs.

    Q: How do I know if I need a repair or a full replacement?

    A: If your roof is under 15 years old and damage is localized (less than 30% of the surface), repair is cost-effective. If your roof is nearing its lifespan limit, has widespread leaks, or shows curling/granule loss, a full replacement is the smarter financial move.

    Conclusion

    So, how much will it cost to get a new roof? For most US homeowners, expect to invest between $8,500 and $14,000 for a quality asphalt shingle roof. While this is a significant expense, viewing it as a long-term asset protection strategy helps justify the cost. By choosing the right materials, accounting for hidden fees, and hiring reputable professionals, you ensure your home stays safe and dry for decades.

    Don’t let the sticker shock paralyze you. Start by getting three detailed quotes today. If you found this guide helpful, please share it with friends or neighbors who might be facing similar home improvement decisions. A well-informed homeowner is a protected homeowner!

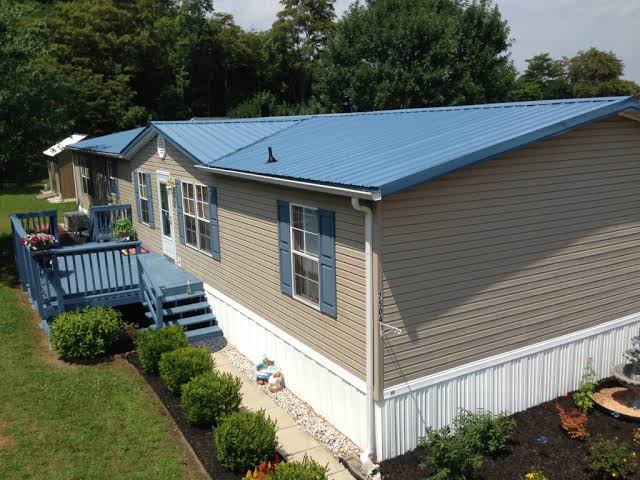
  • How to Install a Metal Roof on a Mobile Home

    How to Install a Metal Roof on a Mobile Home

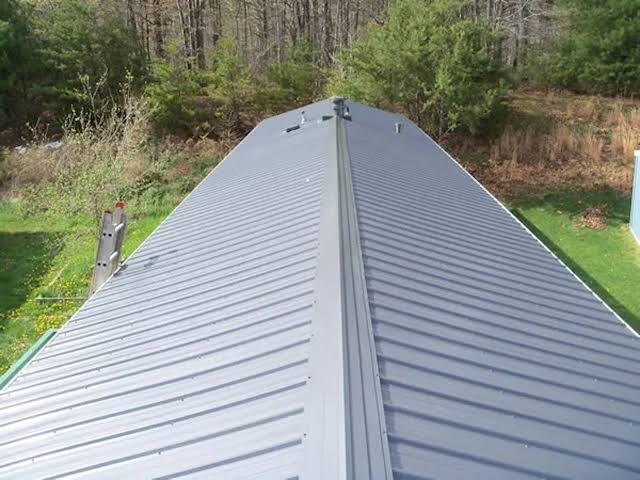
    Replacing the roof on a manufactured home is one of the most critical maintenance tasks you can undertake. Many older mobile homes suffer from leaks due to deteriorating rubber or asphalt shingles that simply weren’t designed to last decades. If you are tired of patching leaks every spring, learning how to install a metal roof on a mobile home can be the permanent solution you need. This guide will walk you through the process with clarity, safety, and precision.

    Why Choose Metal for Your Mobile Home?

    Before diving into the tools and screws, it is vital to understand why metal is superior for manufactured housing. Unlike site-built homes, mobile homes have unique structural considerations. They are lighter, and their frames are designed to flex slightly during transport and settling.

    Traditional asphalt shingles add significant weight and can crack when the home shifts. Metal roofing, particularly aluminum or light-gauge steel, is incredibly lightweight—often weighing less than 1.5 pounds per square foot. This reduces stress on the trusses while providing a lifespan of 40 to 70 years. According to industry data, metal roofs reflect solar radiant heat, which can reduce cooling costs by 10–25%, a massive benefit for mobile homes that often struggle with insulation efficiency.

    Can You Put a Metal Roof Over an Existing Mobile Home Roof?

    This is the most common question homeowners ask. The short answer is: It depends, but usually no.

    While “roof-over” methods are popular for site-built houses, mobile homes present specific risks. Most manufactured homes built before 1980 have low-slope roofs (sometimes as low as 1:12 pitch). Metal roofing generally requires a minimum pitch of 3:12 for water to shed properly without specialized sealing systems.

    Furthermore, adding a second layer traps moisture between the old and new roofs. In a mobile home, where ventilation is already a challenge, this trapped humidity can rot the wooden decking and corrode the steel frame beneath. For long-term integrity, it is highly recommended to remove the old roofing material down to the deck. This allows you to inspect the structural integrity of the plywood or OSB sheathing and repair any soft spots caused by previous leaks.

    Essential Tools and Materials Checklist

    Preparation is half the battle. Having the right tools prevents mid-project delays and ensures a professional finish. Do not skimp on quality here; your roof is your primary defense against the elements.

    Required Tools:

    • Drill/Impact Driver: With a clutch setting to prevent over-driving screws.
    • Metal Snips or Electric Shear: For cutting panels to size. Avoid abrasive saws if possible, as they create hot edges that burn off galvanization.
    • Chalk Line: For ensuring straight panel alignment.
    • Safety Gear: Harness, non-slip boots, gloves, and eye protection. Never work on a roof alone.
    • Sealant Gun: For applying butyl tape and urethane sealant.

    Materials Needed:

    • Metal Panels: Standing seam or corrugated panels (Aluminum is best for coastal areas; Galvalume steel is cost-effective for inland).
    • Screws: Self-tapping metal roofing screws with EPDM washers. Ensure they are long enough to penetrate the purlins or rafters, not just the decking.
    • Closure Strips: Foam strips that fit under the ribs of the metal to block wind and pests.
    • Trim Pieces: Eave trim, gable trim, and ridge caps.
    • Underlayment: A synthetic, breathable roof underlayment is superior to felt paper for moisture management.
    How To Install A Metal Roof On A Mobile Home

    Step-by-Step Installation Guide

    Installing a metal roof requires precision. Follow these steps methodically to ensure a watertight seal.

    Step 1: Remove Old Roofing and Inspect Decking

    Strip away all existing shingles, rubber membranes, or vent pipes. Once exposed, inspect the wood decking. Any board that feels soft or shows signs of rot must be replaced. Use exterior-grade plywood of the same thickness as the existing deck. Nail it securely to the rafters.

    Step 2: Install Drip Edge and Underlayment

    Start at the eaves (the bottom edge). Install a metal drip edge along the eaves to direct water away from the fascia. Next, roll out your synthetic underlayment. Start from the bottom and work your way up, overlapping each row by at least 6 inches. Secure it with roofing nails or staples every 12–18 inches. This layer acts as a secondary barrier against wind-driven rain.

    Step 3: Install Closure Strips and Eave Trim

    If you are using corrugated or ribbed panels, install foam closure strips along the eave. These fill the gaps between the metal ribs and the roof deck, preventing birds, insects, and wind from entering. Snap the eave trim over the closure strip and secure it with screws every 12 inches.

    Step 4: Lay the First Panel

    This is the most critical step. If the first panel is crooked, the entire roof will be crooked. Measure carefully to ensure the panel overhangs the drip edge by about 1–2 inches. Use a chalk line to mark your screw lines. Drill pilot holes if necessary, then drive your screws through the flat part of the panel (not the high rib, unless specified by the manufacturer) into the structural framing below.

    Pro Tip: Do not overtighten screws. The EPDM washer should compress slightly to form a seal, but if you crush it, it will fail. Stop when you feel resistance.

    Step 5: Install Subsequent Panels

    Overlap the next panel according to the manufacturer’s specifications (usually one rib overlap). Check alignment every three panels. Consistency is key. Continue this process until you reach the opposite side of the roof.

    Step 6: Add Ridge Cap and Flashing

    Once the field panels are complete, install the ridge cap along the peak of the roof. Apply a bead of urethane sealant under the ridge cap before screwing it down. This prevents water from penetrating the highest point of your roof. Install gable trim on the sides to finish the edges cleanly.

    For detailed standards on roofing materials and safety, you can refer to general construction guidelines provided by Wikipedia.

    Cost Breakdown: DIY vs. Professional

    Understanding the financial aspect helps you plan better. Here is a realistic comparison for a standard 1,500 sq. ft. mobile home.

    ItemDIY Cost EstimateProfessional Cost Estimate
    Materials$3,000 – $5,000$3,000 – $5,000
    Labor$0 (Your time)$4,000 – $7,000
    Disposal Fees$100 – $300Included
    Total$3,100 – $5,300$7,000 – $12,000

    Note: Prices vary by region and metal type. Aluminum is typically 20% more expensive than steel but offers better corrosion resistance.

    Common Mistakes to Avoid

    Even experienced DIYers make errors. Here are the top pitfalls to watch out for:

    1. Walking on the Ribs: Never step on the high ribs of the metal panels. Always step on the flat areas where the screws are located, or use a plank to distribute your weight. Stepping on ribs can dent the metal and break the seal.
    2. Ignoring Thermal Expansion: Metal expands and contracts with temperature changes. If you screw panels too tightly without allowing for slight movement, the oil-canning effect (popping noises) may occur, and screws can back out over time.
    3. Mixing Metals: Do not use copper flashing with aluminum or steel roofing. The galvanic reaction will cause rapid corrosion. Stick to compatible metals or use isolated barriers.

    Frequently Asked Questions (FAQ)

    1. What is the best type of metal for a mobile home roof?

    Aluminum is often the best choice for mobile homes. It is lightweight, rust-proof, and easy to cut. However, Galvalume steel is a strong, cost-effective alternative if you live in an area without salt air. Avoid heavy copper or zinc unless you have verified your home’s structural capacity.

    2. Do I need a permit to install a metal roof on my mobile home?

    In most jurisdictions, yes. Roofing is considered a structural change. Check with your local county building department. Additionally, if you live in a mobile home park, you must get approval from the park management, as they often have aesthetic guidelines.

    3. How long does it take to install a metal roof on a mobile home?

    For a DIY team of two people, expect the project to take 3 to 5 days. This includes removal of the old roof, repairs, and installation. Professionals can typically complete the job in 1–2 days.

    4. Will a metal roof make my mobile home hotter?

    No, actually the opposite. Metal roofs reflect solar radiation. When installed with proper ventilation and an air gap (if using standing seam), they can significantly keep your home cooler in summer compared to dark asphalt shingles that absorb heat.

    5. Can I install solar panels on a metal mobile home roof?

    Yes, and it is easier than on shingle roofs. You can use clamps that attach directly to the metal seams without drilling holes, preserving the warranty and waterproofing of your roof. Ensure your roof structure can support the additional load.

    Conclusion

    Learning how to install a metal roof on a mobile home is a rewarding project that adds value, durability, and peace of mind to your living space. By removing the old material, preparing the deck correctly, and following precise installation steps, you can achieve a professional-grade result. Remember, safety is paramount—never rush the process, and always double-check your measurements.

    If you found this guide helpful, please share it on social media to help other mobile homeowners tackle their renovation projects with confidence. Have questions or tips of your own? Leave a comment below!

  • Red Roof Plus+ Long Island Garden City Review

    Red Roof Plus+ Long Island Garden City Review

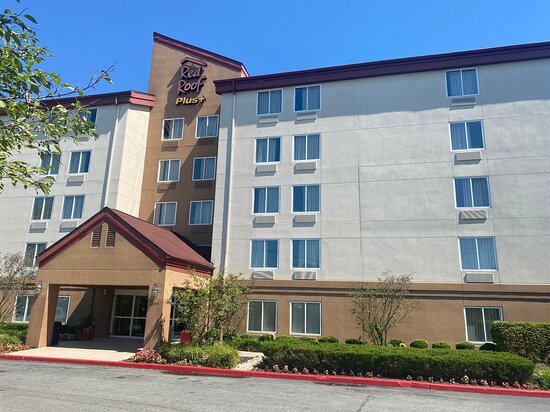
    Finding the right balance between affordability, comfort, and convenience on Long Island can feel like searching for a needle in a haystack. Whether you are visiting family in Garden City, attending business meetings in Westbury, or exploring the Nassau County attractions, you need a reliable base that doesn’t break the bank. This is where Red Roof Plus+ Long Island Garden City Westbury Ny 11590 emerges as a strategic choice for savvy travelers seeking value without sacrificing essential comforts.

    In this comprehensive guide, we will dissect everything you need to know about this property. From its proximity to major transit hubs to its pet-friendly policies, we will help you decide if this is the right fit for your next trip to New York.

    Why Choose Red Roof Plus+ in Westbury?

    When planning a trip to Long Island, location is often the primary decision factor. The Red Roof Plus+ located at 699 Dibble Ave, Westbury, NY 11590, sits in a sweet spot for both leisure and business travelers. But why specifically choose the “Plus+” model over standard budget options?

    The “Plus+” designation signifies an upgraded experience within the Red Roof brand. These properties typically feature refreshed interiors, enhanced bedding, and a more modern aesthetic compared to older iterations of the chain. For travelers heading to Red Roof Plus+ Long Island Garden City Westbury Ny 11590, this means you get the reliability of a national brand with local conveniences that matter.

    Strategic Location Benefits

    Westbury is a central hub in Nassau County. Staying here offers several logistical advantages:

    • Proximity to NYC: You are close to the Long Island Rail Road (LIRR) Westbury station, providing a direct line into Penn Station, Manhattan.
    • Business Access: The hotel is minutes away from the Corporate Plaza in Westbury, making it ideal for corporate travelers.
    • Leisure Connectivity: It serves as a gateway to Jones Beach, the Nassau Veterans Memorial Coliseum, and various shopping centers like the Roosevelt Field Mall.

    According to travel data, staying in suburban hubs like Westbury can save travelers up to 40% on accommodation costs compared to staying directly in New York City, while still maintaining easy access via public transit.

    Red Roof Plus+ Long Island Garden City Westbury Ny 11590

    What Amenities Can Guests Expect?

    One of the most common questions potential guests ask is whether the low price point compromises on quality. Let’s break down what is included in your stay at this specific location.

    Comfort and Room Features

    The rooms at Red Roof Plus+ Long Island Garden City Westbury Ny 11590 are designed for functionality and rest. Key features include:

    • Premium Bedding: Expect plush mattresses and high-thread-count linens, a staple of the Plus+ upgrade.
    • Free High-Speed Wi-Fi: Essential for both remote workers and streaming entertainment.
    • Flat-Screen TVs: Equipped with cable channels for evening relaxation.
    • Climate Control: Individual air conditioning and heating units allow you to customize your room temperature.

    The Pet-Friendly Advantage

    Unlike many hotels in the New York metro area that charge exorbitant fees or ban animals entirely, Red Roof Inn is famously pet-friendly. At this Westbury location, pets stay free. This is a significant cost saver for families traveling with dogs or cats. There are no weight limits or breed restrictions, though standard courtesy rules apply regarding noise and cleanliness.

    Pro Tip: Always inform the front desk upon check-in that you are traveling with a pet to ensure you are assigned a ground-floor room or a room near exit points for easier walks.

    How Does It Compare to Other Local Hotels?

    To help you make an informed decision, let’s look at how Red Roof Plus+ Long Island Garden City Westbury Ny 11590 stacks up against typical competitors in the mid-range budget sector.

    FeatureRed Roof Plus+ WestburyTypical Chain Hotel (Mid-Range)Luxury Boutique (Garden City)
    Avg. Nightly Rate$100 – $160$180 – $250$300+
    Pet PolicyFreeOften $50-$100 feeVaries/Restricted
    BreakfastNot always includedOften IncludedPremium Buffet
    ParkingFree On-SiteOften Paid/LimitedValet Only
    Wi-FiFreeFreeFree

    As seen in the table above, the primary trade-off is breakfast inclusion. However, the savings on parking and pet fees often outweigh the cost of buying breakfast nearby. Westbury has numerous diners and cafes within a 5-minute drive, offering diverse culinary options that might be preferable to a standard continental hotel breakfast.

    Is the Location Safe and Convenient?

    Safety and ease of navigation are paramount for travelers. The area surrounding the hotel on Dibble Avenue is primarily commercial and industrial, which generally translates to lower foot traffic at night but well-lit streets and security presence due to nearby businesses.

    For those relying on public transportation, the Westbury LIRR Station is approximately 2 miles away. While not walking distance for everyone, it is a short 5-7 minute drive or Uber ride. This accessibility is crucial for tourists who want to explore Manhattan during the day but return to a quieter, more affordable suburb at night.

    Furthermore, the hotel is situated near major highways, including the Northern State Parkway and the Meadowbrook State Parkway. This makes it an excellent pit-stop for road trippers exploring Long Island’s North Shore or heading toward the Hamptons.

    For more context on the region’s geography and transport links, you can refer to the detailed overview of Nassau County, New York on Wikipedia.

    Step-by-Step Guide to Booking Your Stay

    To ensure you get the best rate and room preference at Red Roof Plus+ Long Island Garden City Westbury Ny 11590, follow these steps:

    1. Check Dates Early: Prices fluctuate based on local events at the Nassau Coliseum or seasonal tourism. Booking 2-3 weeks in advance usually secures the best rates.
    2. Compare Platforms: Check the official Red Roof website first. They often offer a “Best Price Guarantee” and exclusive member discounts that third-party sites (like Expedia or Booking.com) may not match.
    3. Select Room Type: If you have a pet, select a “Pet Friendly” room type explicitly. If you need quiet, request a room away from the ice machine and elevator.
    4. Review Cancellation Policies: Opt for flexible cancellation if your plans are uncertain. Non-refundable rates are cheaper but risky.
    5. Confirm Amenities: Double-check if breakfast is included for your specific dates, as policies can change seasonally.

    Frequently Asked Questions (FAQ)

    1. Is breakfast included at Red Roof Plus+ Long Island Garden City?

    Typically, standard Red Roof Plus+ locations do not include a full hot breakfast in the base rate, unlike some competitors. However, they may offer coffee and light pastries in the lobby. It is highly recommended to check your specific booking confirmation or call the front desk directly, as promotional packages may vary.

    2. Can I bring my large dog to this hotel?

    Yes. Red Roof Plus+ Long Island Garden City Westbury Ny 11590 welcomes pets of all sizes free of charge. There are no additional cleaning fees or deposits required for pets, making it one of the most budget-friendly options for pet owners in the region.

    3. How far is the hotel from JFK Airport?

    The hotel is approximately 15-20 miles from John F. Kennedy International Airport (JFK). Depending on traffic, the drive takes between 30 to 50 minutes. It is also accessible via shuttle services or ride-sharing apps, though a rental car provides the most flexibility for exploring Long Island.

    4. Is there parking available at the hotel?

    Yes, the hotel offers free on-site parking for guests. This is a significant advantage over many hotels in New York City and even some in Nassau County that charge daily parking fees. The lot is generally secure and well-lit.

    5. What are the check-in and check-out times?

    Standard check-in time is usually 3:00 PM, and check-out is at 11:00 AM. If you arrive early, you can request an early check-in, subject to availability. Late check-out may also be arranged for a small fee or based on occupancy levels.

    6. Is the hotel suitable for business travelers?

    Absolutely. With free high-speed Wi-Fi, desks in rooms, and proximity to the Westbury corporate district, it is well-suited for business trips. The quiet suburban environment also allows for better rest before important meetings.

    Conclusion

    Choosing the right accommodation can make or break your trip. Red Roof Plus+ Long Island Garden City Westbury Ny 11590 offers a compelling mix of affordability, strategic location, and pet-friendly policies that are hard to beat in the Nassau County market. While it may not offer the luxury frills of a five-star resort, it delivers exactly what modern travelers need: a clean, comfortable, and convenient place to sleep without hidden fees.

    Whether you are here for a quick business trip, a family visit, or a pet-friendly vacation, this hotel provides a solid foundation for your Long Island adventures. By leveraging its proximity to the LIRR and major highways, you can easily explore both the bustling energy of New York City and the serene beauty of Long Island’s beaches.

    If you found this review helpful, please share it with your friends and family on social media! Helping others find great travel deals is always a win-win. Have you stayed at this location before? Share your experiences in the comments below to help fellow travelers plan their perfect stay.

  • How To Install The Ridge Cap On A Metal Roof

    How To Install The Ridge Cap On A Metal Roof

    Installing a metal roof is a significant investment in your home’s longevity, but the ridge line remains its most vulnerable point. If not sealed correctly, wind-driven rain can infiltrate your attic, causing costly water damage and mold issues. Knowing how to install the ridge cap on a metal roof properly is the single most critical step in ensuring your roofing system remains watertight for decades.

    Many homeowners feel intimidated by working at heights or handling metal panels, but with the right tools and preparation, this task is manageable. This guide will walk you through the process with precision, focusing on safety, accuracy, and durability. We aren’t just covering up a gap; we are engineering a weather-resistant barrier that protects your biggest asset.

    Why Is the Ridge Cap Critical for Metal Roofs?

    Before diving into the installation, it is essential to understand why this component matters. The ridge cap is not merely decorative; it is the final piece of the roofing puzzle that seals the intersection where two roof slopes meet.

    According to industry standards, improper flashing installation accounts for over 90% of roof leaks. The ridge cap directs water away from the open peak and allows for necessary ventilation if you are using a vented system. Without a properly installed ridge cap, your metal roof is susceptible to:

    • Wind Uplift: Strong gusts can get under loose caps and peel them back.
    • Water Infiltration: Rain driven by wind can enter the gap between panels.
    • Pest Entry: Birds and insects often seek shelter in unprotected roof peaks.

    By mastering how to install the ridge cap on a metal roof, you are effectively securing the integrity of the entire structure. For more detailed information on roofing components and their functions, you can refer to Wikipedia’s article on Roofing.

    What Tools and Materials Do You Need?

    Preparation is half the battle. Having everything within reach before you climb the ladder ensures you stay focused and safe. Here is a comprehensive checklist:

    Essential Tools

    • Drill/Impact Driver: With a clutch setting to avoid over-driving screws.
    • Tin Snips or Electric Shears: For cutting metal caps to length.
    • Chalk Line: To ensure straight alignment along the ridge.
    • Measuring Tape: At least 25 feet long.
    • Caulking Gun: For applying sealant.
    • Safety Harness and Rope: Non-negotiable for steep pitches.

    Materials

    • Ridge Cap Panels: Pre-formed to match your roof profile (e.g., R-panel, corrugated).
    • Closure Strips: Foam strips that fit under the cap to block pests and wind.
    • Butyl Tape or Sealant: High-quality, UV-resistant roofing sealant.
    • Screws: Color-matched, self-tapping metal roofing screws with neoprene washers.
    • Ventilation Strip (Optional): If installing a vented ridge cap.
    How To Install The Ridge Cap On A Metal Roof

    Step-by-Step Guide: How To Install The Ridge Cap On A Metal Roof

    Follow these steps meticulously. Rushing this process can lead to misalignment and leaks.

    Step 1: Prepare the Ridge Line

    Ensure the top edges of your metal roof panels are cut evenly. If the panels extend too far past the ridge beam, trim them so they are symmetrical on both sides. There should be a gap of approximately 2–4 inches at the peak, depending on your specific roof design and ventilation needs.

    Clean the area thoroughly. Remove any metal shavings, dust, or debris. A clean surface is vital for the adhesion of sealants and closure strips.

    Step 2: Install Closure Strips

    Closure strips are foam pieces designed to fill the void between the irregular shape of the metal panel ribs and the flat underside of the ridge cap.

    1. Peel the backing off the adhesive side of the closure strip.
    2. Press the strip firmly onto the top rib of the metal panels on both sides of the ridge.
    3. Ensure there are no gaps. If necessary, use additional pieces to fill larger voids.

    Pro Tip: Do not compress the foam too much during installation; it needs to expand slightly to create a tight seal when the cap is screwed down.

    Step 3: Apply Sealant

    Apply a bead of high-quality butyl sealant or roofing cement along the top of the closure strips and the center of the ridge beam. This acts as a secondary barrier against water.

    • Use a continuous bead, about 1/4 inch thick.
    • Avoid using silicone-based sealants unless specified by the manufacturer, as they can sometimes inhibit paint adhesion or degrade certain rubber washers over time.

    Step 4: Position the First Ridge Cap Piece

    Start at the end of the roof opposite the prevailing wind direction. This prevents wind from getting under the seams as you work.

    1. Place the first ridge cap section over the peak.
    2. Align it carefully using your chalk line as a guide.
    3. Ensure it overhangs the edge of the roof by at least 1–2 inches for proper drip edge function.

    Step 5: Secure the Ridge Cap

    Using your drill, drive screws through the pre-drilled holes in the ridge cap.

    • Screw Placement: Drive screws into the high points of the metal panels below, not into the low valleys.
    • Tightness: Tighten until the neoprene washer is compressed and forms a seal, but do not over-tighten. Over-driving can distort the metal and crack the washer, leading to immediate leaks.
    • Spacing: Follow the manufacturer’s recommendation, typically every 12 to 18 inches.

    Step 6: Overlap Subsequent Sections

    Metal expands and contracts with temperature changes. Therefore, proper overlapping is crucial.

    • Overlap Length: Overlap each subsequent ridge cap piece by at least 6 inches.
    • Sealing the Lap: Apply a generous amount of sealant between the overlapping sections before screwing them down. This prevents water from wicking up into the overlap via capillary action.

    Step 7: Install the End Caps

    Once you reach the end of the ridge, you will need to close off the open ends of the ridge cap.

    1. Cut the end of the ridge cap to fit flush with the roof edge.
    2. Install pre-formed end caps or fabricate them from scrap metal.
    3. Seal all edges with roofing cement and secure with screws.

    Common Mistakes to Avoid

    Even experienced DIYers can stumble. Here are the most frequent errors:

    MistakeConsequenceSolution
    Over-tightening ScrewsCracked washers, distorted metalStop when washer is snug and sealed
    Insufficient OverlapWater infiltration at seamsMaintain minimum 6-inch overlap
    Ignoring Wind DirectionWind uplift damageStart installation against the wind
    Skipping Closure StripsPest entry, whistling noiseAlways use foam closures for fit

    Frequently Asked Questions (FAQ)

    1. Can I install a ridge cap without closure strips?

    While physically possible, it is highly discouraged. Without closure strips, wind can whistle through the gaps, and pests like birds or bats can easily enter your attic. Closure strips provide a critical air and pest barrier.

    2. How often do I need to replace the ridge cap?

    A properly installed metal ridge cap should last as long as the roof itself, typically 40–70 years. However, inspect the sealant and screws every 2–3 years. If you notice cracked washers or dried-out sealant, perform maintenance immediately.

    3. Do I need a vented ridge cap?

    This depends on your attic ventilation strategy. If you have soffit vents, a vented ridge cap creates a natural airflow cycle (stack effect), pulling hot air out of the attic. If your attic is sealed or uses other ventilation methods, a solid cap is sufficient. Check local building codes for requirements.

    4. What type of sealant is best for metal roofs?

    Butyl tape or polyurethane-based roofing sealants are generally recommended. They remain flexible over time, accommodating the thermal expansion and contraction of metal. Avoid cheap acrylic caulks, which tend to crack and shrink after a few seasons.

    5. Is it safe to install a ridge cap on a steep roof?

    If your roof pitch exceeds 6:12 (6 inches of rise for every 12 inches of run), it is considered steep. You must use a proper fall arrest system, including a harness anchored to a secure point. If you are uncomfortable with heights, hire a professional. No DIY project is worth a serious injury.

    Conclusion

    Learning how to install the ridge cap on a metal roof is a valuable skill that can save you thousands in potential repair costs. By following these steps—preparing the surface, using closure strips, applying quality sealant, and securing the caps correctly—you ensure a durable, leak-free finish.

    Remember, patience and attention to detail are your best tools. Take your time with the alignment and sealing processes, and always prioritize safety above all else.

    Did you find this guide helpful? Share it with your friends on social media who might be tackling their own roofing projects! Let’s help everyone build safer, stronger homes.

  • Can I Write Off A New Roof On My Taxes?

    Can I Write Off A New Roof On My Taxes?

    Replacing a roof is one of the most significant financial investments a homeowner can make. It is not just about shingles and nails; it is about protecting your family and your asset from the elements. However, when the bill arrives, many homeowners immediately ask: Can I write off a new roof on my taxes?

    The short answer is nuanced. For most primary residences, you cannot deduct the cost as an immediate expense. However, there are critical exceptions involving energy efficiency, home offices, and rental properties that could put money back in your pocket. This guide breaks down the complex tax code into clear, actionable advice so you know exactly where you stand with the IRS.

    Understanding the Difference Between Repairs and Improvements

    To understand tax implications, you must first distinguish between a “repair” and a “capital improvement.” The Internal Revenue Service (IRS) treats these two categories very differently.

    A repair keeps your property in good working condition but does not add significant value or prolong its life. Think of fixing a few loose shingles or patching a small leak. These costs are generally not deductible for personal residences.

    A replacement, however, is considered a capital improvement. It adds value to your home, prolongs its useful life, or adapts it to new uses. Since a new roof typically lasts 20–30 years, it falls squarely into this category.

    Why This Distinction Matters

    For a personal home, capital improvements are not deducted from your annual income. Instead, they increase your home’s basis. This is crucial when you eventually sell the house, as a higher basis reduces your potential capital gains tax. You can read more about how basis works on Wikipedia, which provides a solid overview of accounting principles relevant to property valuation.

    When Can You Actually Deduct Roof Costs?

    While the general rule says “no immediate deduction,” several specific scenarios allow for tax benefits. Let’s explore who qualifies.

    1. The Home Office Deduction

    If you use part of your home exclusively and regularly for business, you may qualify for the home office deduction. In this case, you can depreciate the portion of the roof that covers your office space.

    • Example: If your home office occupies 10% of your home’s square footage, you can claim 10% of the roof replacement cost.
    • Method: This is usually done through depreciation over 39 years for non-residential property or via the simplified option for home-based businesses.

    2. Rental Properties and Landlords

    If you own a rental property, the rules change significantly. The IRS views rental activities as a business. Therefore, you can recover the cost of a new roof through depreciation.

    • Residential Rental Property: Depreciated over 27.5 years.
    • Commercial Property: Depreciated over 39 years.

    You do not get the full deduction in year one. Instead, you take a portion of the cost each year as an expense against your rental income. This lowers your taxable rental profit annually.

    3. Energy-Efficient Roofing Credits

    This is the most common way homeowners get direct tax relief. The Inflation Reduction Act has expanded credits for energy-efficient home improvements.

    If your new roof includes specific energy-saving materials, you may qualify for the Energy Efficient Home Improvement Credit.

    • Eligible Materials: Metal roofs with appropriate pigmented coatings or asphalt shingles designed to meet strict Energy Star criteria for cooling.
    • Credit Amount: As of recent tax years, you can claim 30% of the cost of qualifying materials, up to a maximum credit of $1,200 per year for various improvements. Note that the credit applies to materials, not necessarily labor, though rules vary by specific program updates.
    Can I Write Off A New Roof On My Taxes

    Step-by-Step: How to Claim Roof-Related Tax Benefits

    If you believe you qualify for a deduction or credit, follow these precise steps to ensure compliance with IRS guidelines.

    1. Verify Eligibility: Confirm your roof meets Energy Star standards or that your home office/rental status is documented.
    2. Keep Detailed Records: Save all invoices, receipts, and manufacturer certifications. The IRS requires proof that the materials meet specific energy efficiency standards.
    3. Calculate the Basis Adjustment: For personal homes, add the total cost of the roof (materials + labor) to your home’s original purchase price. Keep this record for when you sell.
    4. Fill Out Form 5695: If claiming the energy credit, complete IRS Form 5695 (Residential Energy Credits).
    5. Report Rental Depreciation: Use Form 4562 (Depreciation and Amortization) for rental properties.

    Pro Tip: Always consult with a Certified Public Accountant (CPA). Tax laws change frequently, and a professional can ensure you maximize your benefits without triggering an audit.

    Comparison: Personal Home vs. Rental Property

    To clarify the differences, here is a quick comparison table:

    FeaturePrimary ResidenceRental PropertyHome Office
    Immediate DeductionNoNo (Depreciated)Yes (Partial)
    Tax Benefit TypeBasis IncreaseAnnual DepreciationPartial Depreciation
    Energy CreditsYes (If qualified)No (Usually)No (Usually)
    Impact on SaleReduces Capital GainsRecaptured DepreciationN/A

    Common Mistakes to Avoid

    Many taxpayers make errors when handling roof expenses. Here are the top pitfalls:

    • Claiming Full Cost for Personal Use: Never deduct the entire cost of a new roof on your primary home as a medical or charitable expense unless strictly applicable (which is rare).
    • Ignoring Labor Costs in Basis: When adjusting your home’s basis, include both materials and labor. Excluding labor undervalues your investment.
    • Missing Deadlines: Energy credits must be claimed in the tax year the installation was completed. You cannot go back and claim them easily after filing.

    FAQ Section

    Can I write off a new roof on my taxes if it was damaged by a storm?

    Generally, no. Casualty losses from storms are only deductible if they occur in a federally declared disaster area. Even then, you must subtract insurance reimbursements and a $100 floor per event, plus 10% of your adjusted gross income. Most standard storm damage does not meet this high threshold anymore due to recent tax law changes.

    Does a new roof increase my home’s basis?

    Yes. Any capital improvement, including a new roof, increases your home’s cost basis. This is beneficial because when you sell your home, a higher basis means a lower calculated profit, potentially reducing or eliminating capital gains tax if you exceed the exclusion limits ($250k for single filers, $500k for married couples).

    What documents do I need to prove my roof is energy efficient?

    You need the Manufacturer’s Certification Statement. This document confirms that the product meets the Energy Star program requirements. Your contractor should provide this, or you can download it from the manufacturer’s website. Keep this with your tax records for at least three years after filing.

    Can I deduct the cost of a roof repair?

    For a personal residence, routine repairs are not deductible. They are considered maintenance. However, if the repair is part of a larger renovation project that qualifies as a capital improvement, it might be included in the basis adjustment. For rental properties, repairs can often be deducted as current business expenses.

    Is there a limit to how much I can claim for energy-efficient roofing?

    Yes. Under current laws, the Energy Efficient Home Improvement Credit has an annual cap. For example, the credit for building envelope components (like roofs) is limited to $1,200 per year. Always check the latest IRS guidelines for the specific tax year you are filing.

    Conclusion

    So, can I write off a new roof on my taxes? For most homeowners, the answer is no—not as a direct annual deduction. However, you can still benefit financially by increasing your home’s basis for future sales or claiming energy-efficient credits if you choose eco-friendly materials. Landlords and home office users have additional avenues for depreciation.

    Understanding these nuances ensures you don’t leave money on the table while staying compliant with federal laws. Always keep meticulous records and consider consulting a tax professional to navigate your specific situation.

    Found this guide helpful? Share it with your friends on social media who are planning home renovations this year!

  • How To Put A Metal Roof On A Mobile Home

    How To Put A Metal Roof On A Mobile Home

    Is your mobile home’s current roof leaking, sagging, or simply showing its age? You are not alone; many homeowners face the stress of deteriorating roofs that threaten the integrity of their living space. Learning how to put a metal roof on a mobile home can seem daunting, but with the right preparation and guidance, it is a manageable project that offers long-term durability and energy efficiency. This guide will walk you through the process with empathy and clarity, ensuring you feel confident in every step.


    Why Choose Metal for Your Mobile Home?

    Before diving into the tools and nails, it is crucial to understand why metal is often the superior choice for manufactured housing. Unlike traditional asphalt shingles, which can crack under the slight flexing of a mobile home structure, metal roofing panels are lightweight yet incredibly resilient.

    According to industry data, metal roofs can last 40 to 70 years, significantly outlasting asphalt shingles which typically need replacement every 15–20 years. For mobile homes, which often have lighter structural framing, the weight reduction is also a critical safety factor. Metal roofing weighs approximately 1.5 pounds per square foot, compared to 2.5–3.5 pounds for asphalt shingles. This reduces the load on your home’s trusses, minimizing the risk of structural strain.

    Furthermore, metal reflects solar radiant heat, which can reduce cooling costs by 10–25%. For mobile home owners looking to improve energy efficiency without replacing windows or insulation, this is a significant benefit.


    Essential Tools and Materials Checklist

    Preparation is half the battle. Having everything ready before you climb the ladder ensures safety and efficiency. Do not start this project if you are missing key components.

    Tools Required:

    • Drill/Impact Driver: With screwdriver bits specifically designed for roofing screws.
    • Tin Snips or Electric Shears: For cutting metal panels to size.
    • Chalk Line: To ensure straight lines for panel alignment.
    • Measuring Tape: At least 25 feet long.
    • Safety Gear: Non-slip boots, gloves, safety glasses, and a harness if the pitch is steep.
    • Ladder: Sturdy and extended properly beyond the roof edge.

    Materials Needed:

    • Metal Panels: Corrugated or R-panel styles are common. Ensure they are rated for residential use.
    • Underlayment: Synthetic roofing underlayment is preferred over felt for better moisture protection.
    • Roofing Screws: Self-tapping screws with rubber washers (neoprene) to prevent leaks. Note: Use screws specifically labeled for metal roofing.
    • Trim and Flashing: Ridge caps, drip edges, and gable trim.
    • Sealant: High-quality polyurethane roof sealant for extra waterproofing at seams.
    How To Put A Metal Roof On A Mobile Home

    Step 1: Assessing and Preparing the Existing Roof

    You cannot install a new roof over a compromised structure. The first step in learning how to put a metal roof on a mobile home is a thorough inspection.

    Walk the roof carefully. Look for soft spots, rot, or significant water damage in the existing decking. If the underlying wood is spongy, it must be replaced. Mobile homes often use thin plywood or OSB (Oriented Strand Board); if more than 15% of the deck is damaged, consider a full tear-off. However, if the existing roof is sound, you can often install metal directly over it, saving time and disposal costs.

    Critical Check: Ensure the existing roof is clean. Remove any loose shingles, moss, or debris. A smooth surface is vital for the metal panels to lay flat. If there are protruding vents or pipes, note their locations as you will need to flash around them later.


    Step 2: Installing the Underlayment

    The underlayment acts as a secondary barrier against water infiltration. Even though metal is waterproof, condensation can form underneath, and wind-driven rain can penetrate screw holes if not properly sealed.

    1. Roll Out the Underlayment: Start at the bottom edge of the roof (the eave). Roll the synthetic underlayment horizontally across the roof.
    2. Overlap Correctly: Each subsequent row should overlap the previous one by at least 6 inches. This ensures water flows down and off the roof, not under the layers.
    3. Secure It: Use roofing nails or staples to secure the underlayment. Place fasteners every 12–18 inches along the edges and in the field. Avoid creating wrinkles; a smooth underlayment prevents bumps in your metal panels.

    For more detailed information on roofing materials and their properties, you can refer to Wikipedia’s entry on Roofing.


    Step 3: Measuring and Cutting Metal Panels

    Accuracy here prevents headaches later. Measure the length of your roof from the ridge to the eave. Add 1–2 inches to this measurement to allow for an overhang at the eave. This overhang helps direct water away from the fascia and into the gutters.

    Cutting Tips:

    • Use electric shears for long cuts to maintain the protective coating of the metal.
    • If using tin snips, cut slowly to avoid jagged edges.
    • Always wear gloves when handling cut metal, as edges are extremely sharp.
    • Clean any metal shavings immediately. Leftover shavings can rust and stain your new roof within weeks.

    Step 4: Installing the First Panel

    The first panel sets the tone for the entire roof. If it is crooked, every subsequent panel will be crooked.

    1. Start at the Corner: Begin at the bottom corner of the roof, opposite the prevailing wind direction if possible.
    2. Align Carefully: Ensure the panel overhangs the eave by the predetermined amount (usually 1–1.5 inches). Use a chalk line to mark a straight vertical line up the roof to guide your placement.
    3. Square It: Check that the panel is square with the edge of the roof. Use the Pythagorean theorem (measure diagonals) if necessary to ensure perfect alignment.

    Step 5: Fastening the Panels

    This is where many DIYers make mistakes. Over-driving or under-driving screws can lead to leaks.

    • Screw Placement: Drive screws through the flat part of the panel, not the high ribs, unless the manufacturer specifies otherwise. Screwing into the rib can cause the metal to distort.
    • Tightness: Tighten the screw until the rubber washer is compressed and just begins to bulge slightly. Do not overtighten. If the washer is squashed flat or the metal dimples deeply, you have gone too far, which compromises the seal.
    • Spacing: Typically, place screws every 12–24 inches along the purlins (roof supports). Consult your specific panel’s installation guide for exact spacing.

    Step 6: Overlapping and Subsequent Panels

    Most metal panels have a designated “overlap” side. Slide the next panel’s edge under or over the previous panel’s edge, depending on the profile design.

    • Use Sealant Tape: For added security, apply butyl tape or sealant along the overlap seam before laying the next panel. This creates a watertight bond between sheets.
    • Check Alignment: After every third panel, step back and check your lines. Adjust slightly if needed before continuing.

    Step 7: Installing Trim and Flashing

    The edges and peaks are the most vulnerable areas for leaks. Proper flashing is non-negotiable.

    • Drip Edge: Install at the eaves before the panels if not already done. If installing over existing shingles, ensure the metal panels extend over the drip edge.
    • Ridge Cap: Once all panels are installed, cover the peak with a ridge cap. Secure it with screws on both sides, ensuring it overlaps correctly with the wind direction.
    • Vents and Pipes: Use rubber boot flashings for plumbing vents. Cut the metal panel to fit around the vent, slide the boot over, and seal the base with polyurethane sealant.

    Pros and Cons of Metal Roofing on Mobile Homes

    FeatureMetal RoofingAsphalt Shingles
    Lifespan40–70 Years15–20 Years
    WeightLightweight (1.5 lbs/sq ft)Heavier (2.5–3.5 lbs/sq ft)
    CostHigher upfront costLower upfront cost
    MaintenanceLowModerate to High
    Energy EfficiencyHigh (Reflective)Low (Absorbs Heat)
    NoiseCan be noisy during rainQuiet

    Note: Noise can be mitigated with proper insulation and solid decking.


    FAQ Section

    Q1: Can I install a metal roof over my existing shingles? Yes, in most cases, you can install metal roofing over one layer of existing asphalt shingles. This saves on disposal fees and labor. However, ensure the existing roof is structurally sound and free of major leaks. Check local building codes, as some areas restrict multiple layers.

    Q2: Do I need a permit to replace my mobile home roof? Regulations vary by county and state. Most jurisdictions require a permit for roofing replacements, especially if you are changing the material type. Contact your local building department before starting. Failure to obtain a permit can affect your home insurance and resale value.

    Q3: Will a metal roof void my mobile home warranty? If your home is new, check with the manufacturer. Generally, adding a approved roofing system does not void warranties, but improper installation might. Using certified installers or following strict DIY guidelines is essential.

    Q4: How do I prevent condensation under the metal roof? Condensation occurs when warm, moist air from inside the home meets the cold metal surface. To prevent this, ensure you have adequate attic ventilation (soffit and ridge vents) and use a breathable synthetic underlayment. In colder climates, consider adding a vapor barrier.

    Q5: What is the biggest mistake people make when installing metal roofs? The most common mistake is overtightening the screws, which damages the rubber washers and leads to leaks. Another frequent error is failing to square the first panel, resulting in a misaligned roof that looks unprofessional and may leak at the edges.


    Conclusion

    Learning how to put a metal roof on a mobile home is a rewarding project that enhances your home’s value, durability, and energy efficiency. By following these steps—preparing the surface, installing quality underlayment, aligning panels precisely, and sealing flashes correctly—you can achieve a professional-grade result. Remember, patience and attention to detail are your best tools.

    If you found this guide helpful, please share it with fellow mobile home owners on social media. Your experience could help someone else protect their home from the elements! Stay safe, and enjoy your new, durable roof.

  • Best Flat Roof Material? Top Picks for 2026

    Best Flat Roof Material? Top Picks for 2026

    Choosing the right covering for a low-slope structure can feel overwhelming, especially with so many synthetic options flooding the market. You want a solution that stops leaks, lasts decades, and doesn’t break the bank. If you are asking what is the best roofing material for a flat roof, you are not alone; this is one of the most critical decisions for maintaining your property’s integrity.

    Flat roofs are common in modern residential architecture and commercial buildings across the US. Unlike pitched roofs that shed water quickly, flat roofs must withstand pooling water, UV exposure, and temperature fluctuations. Making the wrong choice can lead to costly repairs down the line. Let’s dive into the top contenders to help you make an informed decision.

    Why Flat Roofs Need Specialized Materials

    Before we pick a winner, it is vital to understand why you cannot simply use standard asphalt shingles on a flat surface. Shingles rely on gravity to move water downward. On a flat roof, water sits. This requires materials that are 100% waterproof rather than just water-resistant.

    The primary enemies of a flat roof are:

    • UV Radiation: Breaks down chemical bonds in cheaper materials.
    • Thermal Shock: Expansion and contraction from day/night temperature swings.
    • Ponding Water: Standing water that can seep into microscopic cracks over time.

    According to industry standards, a “flat” roof actually has a slight pitch (usually 1/4 inch per foot) to encourage drainage. However, even with proper slope, the material must be seamless or tightly sealed to prevent intrusion.

    Top Contender 1: TPO (Thermoplastic Polyolefin)

    TPO has rapidly become the go-to choice for many homeowners and contractors in the last decade. It is a single-ply membrane that combines durability with energy efficiency.

    Why TPO is Often the Best Choice

    TPO is a blend of polypropylene and ethylene-propylene rubber. It is typically white, which offers significant reflective properties.

    • Energy Efficiency: The white surface reflects sunlight, reducing cooling costs by up to 20% in hot climates like Arizona or Texas.
    • Durability: It resists punctures and tears better than many older materials.
    • Cost-Effective: It sits in the mid-range price bracket, offering great value for money.

    Lifespan: 20–30 years with proper maintenance.

    What Is The Best Roofing Material For A Flat Roof

    Top Contender 2: EPDM (Ethylene Propylene Diene Monomer)

    Often referred to as “rubber roofing,” EPDM has been a staple in the industry for decades. If you have seen a black, rubber-like sheet on a commercial building, it was likely EPDM.

    The Pros and Cons of Rubber Roofing

    EPDM is incredibly flexible and handles temperature extremes well. It does not become brittle in cold weather, making it ideal for northern states like Minnesota or New York.

    • Pros:
      • Excellent resistance to hail and impact.
      • Easy to repair using liquid adhesives or tape.
      • Long track record of performance (50+ years of history).
    • Cons:
      • The black color absorbs heat, which can increase cooling bills.
      • It can shrink over time, pulling away from flashings if not installed correctly.
      • Vulnerable to damage from oils or certain chemicals.

    Lifespan: 20–30 years.

    Top Contender 3: PVC (Polyvinyl Chloride)

    PVC is the premium option for flat roofs. It is chemically similar to the plastic used in pipes but engineered for roofing. It is known for its strength and resistance to chemicals.

    When to Choose PVC

    If your roof is exposed to industrial pollutants, grease vents (common in restaurants), or standing water, PVC is often the superior choice.

    • Chemical Resistance: It stands up to oils, fats, and industrial fumes better than TPO or EPDM.
    • Seam Strength: PVC seams are heat-welded, creating a bond that is often stronger than the membrane itself. This drastically reduces leak risks.
    • Fire Resistance: PVC has a high fire rating, which can lower insurance premiums in some areas.

    Lifespan: 20–30+ years.

    Comparison Table: Quick Overview

    To help you visualize the differences, here is a breakdown of the three major players.

    FeatureTPOEPDM (Rubber)PVC
    CostModerateLow to ModerateHigh
    Energy EfficiencyHigh (Reflective)Low (Absorbs Heat)High (Reflective)
    InstallationHeat WeldedAdhesive/TapeHeat Welded
    Best ForGeneral ResidentialCold ClimatesChemical Exposure
    DurabilityHighMedium-HighVery High

    Other Options: Modified Bitumen and Built-Up Roofing

    While single-ply membranes dominate the modern market, older methods still exist.

    Modified Bitumen is an asphalt-based product reinforced with fiberglass or polyester. It is often installed in torch-down or self-adhering sheets. It is heavy and durable but requires professional installation due to fire risks during torching.

    Built-Up Roofing (BUR) involves multiple layers of asphalt and felt. It is extremely heavy and labor-intensive. While durable, it is rarely recommended for new residential installations today due to the availability of lighter, more efficient options. For more historical context on roofing evolution, you can refer to Wikipedia’s entry on roofing.

    How to Choose the Right Material for Your Climate

    The “best” material depends heavily on where you live.

    1. Hot and Sunny Climates: Choose TPO or PVC. The reflective white surface will keep your attic cooler and reduce strain on your HVAC system.
    2. Cold and Snowy Climates: EPDM is a strong contender because it remains flexible in sub-zero temperatures. However, modern TPO formulations have also improved in cold-weather performance.
    3. Areas with Heavy Rain: PVC is ideal due to its welded seams, which provide the highest level of water tightness.

    Installation Matters More Than Material

    Even the best material will fail if installed poorly. Flat roofing relies entirely on the quality of the seams and flashings.

    • Hire a Specialist: Do not hire a general handyman. Look for contractors certified by the manufacturer (e.g., GAF, Firestone, or Carlisle).
    • Check the Warranty: Most manufacturers offer 10–20 year warranties, but these are often voided if non-certified installers do the work.
    • Inspect Flashings: 90% of leaks occur at penetrations (vents, chimneys, AC units). Ensure these areas are reinforced with extra layers or metal collars.

    Maintenance Tips to Extend Roof Life

    Regardless of the material you choose, maintenance is key.

    • Keep it Clean: Remove leaves and debris twice a year. Debris holds moisture, which accelerates degradation.
    • Check Drainage: Ensure scuppers and drains are clear. Ponding water adds unnecessary weight and stress.
    • Annual Inspection: Have a professional inspect the roof every spring. Catching a small tear early can save thousands in replacement costs.

    FAQ Section

    What is the cheapest flat roofing material?

    EPDM is generally the most affordable option upfront. However, when considering longevity and energy savings, TPO often provides better long-term value despite a slightly higher initial cost.

    Can I walk on my flat roof?

    Yes, but with caution. Most single-ply membranes (TPO, PVC, EPDM) can handle foot traffic for maintenance. However, you should wear soft-soled shoes to avoid puncturing the membrane. Avoid walking on the roof in extreme heat or cold when the material may be more susceptible to damage.

    How long does a flat roof last?

    A well-installed flat roof made of TPO, PVC, or EPDM typically lasts between 20 and 30 years. Built-up roofs may last 15–20 years, while cheaper roll-roofing options might only last 5–10 years.

    Is TPO better than EPDM?

    For most residential applications, TPO is considered better due to its energy efficiency and ease of installation via heat welding. EPDM is still excellent for cold climates but lacks the reflective properties of TPO.

    Can I install a flat roof myself?

    It is not recommended. Flat roofing requires specific tools (heat welders, rollers) and expertise to ensure seams are watertight. A DIY error can lead to significant interior water damage. Always hire a licensed professional.

    Conclusion

    So, what is the best roofing material for a flat roof? For most homeowners in the US, TPO (Thermoplastic Polyolefin) strikes the best balance between cost, durability, and energy efficiency. Its reflective surface saves money on cooling, and its heat-welded seams provide reliable leak protection.

    However, if you live in an area with extreme chemical exposure, PVC is worth the extra investment. If you are in a very cold climate and budget is a primary concern, EPDM remains a solid, proven choice.

    Don’t let your roof become a headache. Assess your climate, budget, and long-term goals. Share this guide with friends or family who are facing similar roofing decisions, and help them make the right choice for their homes!

  • What Is The Angle On A 4 12 Pitch Roof?

    What Is The Angle On A 4 12 Pitch Roof?

    Are you planning a roofing project or simply curious about the geometry of your home’s structure? Understanding the specific incline of your roof is crucial for everything from material estimation to safety planning during installation. If you have been asking yourself, “What is the angle on a 4 12 pitch roof,” you are in the right place. This common residential slope has unique characteristics that balance water runoff efficiency with ease of construction, making it a favorite among builders in the United States. In this guide, we will break down the math, the practical implications, and the expert insights you need to master this topic.


    Understanding the Basics: What Does “4/12” Mean?

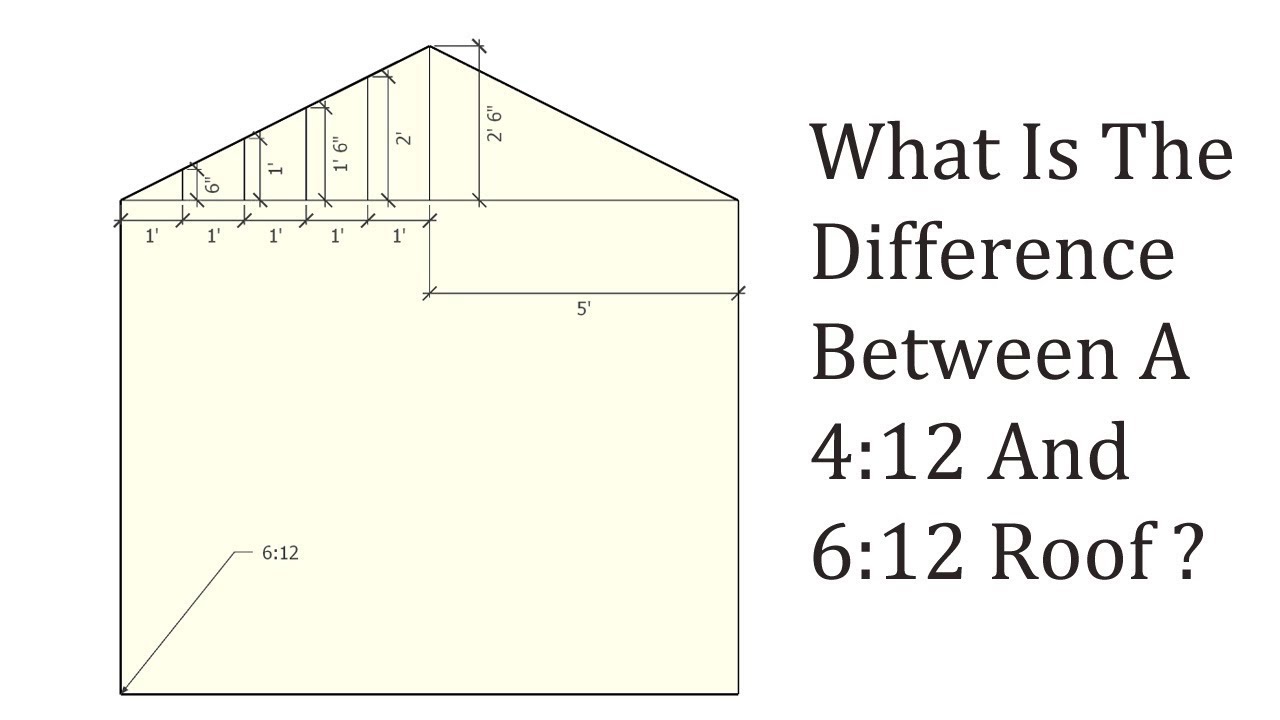
    Before we dive into the specific angle, it is essential to understand the terminology. In the US construction industry, roof pitch is expressed as a ratio of vertical rise to horizontal run.

    • Rise: The vertical height the roof gains.
    • Run: The horizontal distance covered (always measured as 12 inches in standard pitch notation).

    Therefore, a 4/12 pitch means that for every 12 inches you move horizontally across the roof, the roof rises 4 inches vertically. This is considered a “low-slope” or “conventional” pitch, distinct from steep slopes (like 8/12) or flat roofs.

    Why This Ratio Matters

    The ratio is not just a number; it dictates:

    1. Water Drainage: How quickly rain and snow slide off.
    2. Material Compatibility: Which shingles or membranes can be used.
    3. Walkability: How safe it is for contractors to walk on during maintenance.

    The Exact Answer: What Is The Angle On A 4 12 Pitch Roof?

    If you are looking for the precise mathematical answer, here it is:

    The angle of a 4/12 pitch roof is approximately 18.43 degrees.

    This figure is derived using trigonometry, specifically the arctangent function. While you don’t need to be a mathematician to build a roof, understanding how this number is calculated helps in verifying measurements and communicating with architects.

    The Mathematical Breakdown

    To find the angle (θθ), we use the following formula:

    θ=arctan⁡(RiseRun)θ=arctan(RunRise​)

    Plugging in our numbers:

    1. Rise = 4
    2. Run = 12
    3. 412=0.3333…124​=0.3333…
    4. arctan⁡(0.3333…)≈18.4349∘arctan(0.3333…)≈18.4349∘

    For practical construction purposes, this is rounded to 18.43°.

    Pro Tip: When using digital level apps or laser measures, ensure your device is calibrated. A difference of even 1 degree can affect the fit of ridge caps and flashing over long spans.

    What Is The Angle On A 4 12 Pitch Roof

    How to Calculate Roof Angle Without a Calculator

    While knowing the exact degree is helpful, you might often find yourself on a job site without a scientific calculator. Here are two reliable methods to determine or verify the angle.

    Method 1: The Speed Square Technique

    A speed square (or rafter square) is a staple in any roofer’s toolkit.

    1. Place the pivot point of the square on the edge of the rafter.
    2. Align the lip of the square against the bottom edge of the rafter.
    3. Rotate the square until the number 4 on the “Common” scale aligns with the top edge of the rafter.
    4. Read the degree marking where the hypotenuse of the square intersects the degree scale. It should read close to 18.5°.

    Method 2: The String and Level Method

    If you don’t have a speed square:

    1. Hold a 12-inch level horizontally against the roof surface.
    2. Measure exactly 12 inches along the level.
    3. From that 12-inch mark, measure vertically down to the roof surface.
    4. If the distance is 4 inches, you have a 4/12 pitch. You can then refer to a conversion chart to confirm the ~18.43° angle.

    4/12 Pitch vs. Other Common Pitches: A Comparison

    To understand where a 4/12 roof fits in the broader context of residential architecture, let’s compare it to other common slopes.

    Roof PitchApproximate AngleClassificationBest For
    2/129.46°Low SlopeModern styles, requires special membrane
    4/1218.43°ConventionalStandard asphalt shingles, balanced cost
    6/1226.57°ModerateBetter snow shedding, traditional look
    8/1233.69°SteepColonial/Victorian styles, high drainage
    12/1245.00°Very SteepA-frame homes, extreme snow loads

    Key Takeaways from the Table:

    • Cost Efficiency: A 4/12 roof uses less material than steeper pitches because the surface area is smaller relative to the footprint.
    • Safety: At 18.43°, a 4/12 roof is generally considered walkable by professionals with proper footwear, whereas an 8/12 roof requires harnesses and extra caution.

    Practical Implications of an 18.43° Angle

    Knowing the angle is not just academic; it affects real-world decisions. Here is what you need to consider when dealing with a 4/12 pitch.

    1. Material Selection

    Most standard asphalt shingles are rated for pitches of 4/12 and higher.

    • Below 4/12: You typically need modified bitumen or EPDM rubber roofing because water drains too slowly, increasing the risk of leaks under shingles.
    • At 4/12: You are in the “safe zone” for standard three-tab or architectural shingles. However, always check the manufacturer’s warranty requirements. Some may require an ice and water shield underlayment for the entire roof deck at this low pitch.

    2. Snow and Rain Management

    An 18.43° angle is sufficient for rain to run off effectively. However, in heavy snow regions (like the Northeast US or Canada):

    • Snow may accumulate rather than slide off immediately.
    • Ice dams are a higher risk on lower pitches. Proper attic insulation and ventilation are critical to prevent heat loss that melts snow from below, causing refreezing at the eaves.

    3. Aesthetic Appeal

    A 4/12 pitch offers a subtle, modern, or ranch-style appearance. It does not dominate the visual profile of the house like a steep Gothic pitch would. This makes it ideal for:

    • Ranch-style homes
    • Mid-century modern designs
    • Suburban tract housing where cost-efficiency is prioritized

    Expert Insight: Industry Standards

    According to general construction guidelines referenced by authoritative bodies, the minimum slope for water-shedding roofing assemblies is often cited around 2:12, but 4:12 is widely regarded as the standard baseline for optimal performance with conventional materials. For more detailed technical definitions on roof framing, you can refer to resources such as Wikipedia’s article on Roof Pitch, which provides historical context and global variations in measurement standards.

    Experienced roofers often note that while 4/12 is “standard,” precision in framing is vital. A variance of just half an inch in the rise over a 12-foot run can lead to noticeable issues with ridge alignment.


    FAQ Section

    Q1: Can I walk on a 4/12 pitch roof safely?

    A: Yes, generally. A 4/12 pitch (18.43°) is considered one of the safer slopes for walking. However, you should still wear rubber-soled shoes with good traction. Avoid walking on wet roofs or those covered in moss, as the angle is still steep enough to cause a slip.

    Q2: Is a 4/12 roof good for solar panels?

    A: Absolutely. Solar panels perform well on 4/12 roofs. The angle is shallow enough to make installation easier and cheaper (less racking adjustment needed) but still provides adequate exposure to the sun. In many US latitudes, this pitch is close to the optimal angle for year-round energy production.

    Q3: What happens if my roof is slightly less than 4/12?

    A: If your pitch drops below 4/12 (e.g., 3/12), you enter the “low-slope” category. Standard asphalt shingles may void their warranty. You would likely need to install a double layer of underlayment or switch to a rubber membrane system to prevent water infiltration.

    Q4: How do I convert 18.43 degrees back to pitch?

    A: To convert degrees to pitch, take the tangent of the angle. tan⁡(18.43∘)≈0.333tan(18.43∘)≈0.333. Multiply this by 12 (the standard run). 0.333×12=40.333×12=4. Thus, the pitch is 4/12.

    Q5: Does a 4/12 pitch require gutters?

    A: Yes. While the water runs off efficiently, the volume of water directed to the eaves is significant. Without gutters, water can pool near the foundation, leading to erosion or basement flooding. A 4/12 pitch directs water fast enough that robust gutter systems are recommended.


    Conclusion

    Understanding what is the angle on a 4 12 pitch roof is fundamental for homeowners, DIY enthusiasts, and construction professionals alike. At 18.43 degrees, this pitch strikes a perfect balance between aesthetic subtlety, construction cost, and functional water drainage. It allows for the use of standard, cost-effective materials like asphalt shingles while remaining safe enough for routine maintenance.

    Whether you are calculating materials for a new build or assessing the condition of an existing home, keeping this angle in mind will help you make informed decisions. Remember, precision matters—always double-check your measurements before cutting materials.

    Found this guide helpful? Share it with your contractor or post it on your favorite social media platform to help others demystify roof pitches!

  • How Many Squares Are In A Bundle? Roofing Math

    How Many Squares Are In A Bundle? Roofing Math

    Have you ever stood in the aisle of a home improvement store, staring at stacks of asphalt shingles, wondering if you’ve bought enough to cover your roof? It is a common source of anxiety for homeowners and even novice contractors because the terminology can be incredibly misleading. You might ask yourself, “How many squares are in a bundle of roofing shingles?” only to realize that the answer isn’t a whole number, but a fraction that requires careful calculation to avoid budget overruns or project delays.

    Understanding this conversion is critical. Ordering too little means paying for expensive emergency deliveries; ordering too much ties up your cash flow and creates disposal headaches. In this guide, we will break down the math, explain the industry standards, and help you calculate your needs with confidence.

    The Golden Rule: 3 Bundles Equal 1 Square

    To answer the primary question directly: There is not one full square in a single bundle. Instead, the standard industry rule for most traditional three-tab and architectural asphalt shingles is that three bundles equal one roofing square.

    A “square” in roofing terminology does not refer to a geometric shape like a 12×12 inch tile. Rather, it is a unit of measurement representing 100 square feet of roof area. Therefore, if you have a roof section that is 10 feet by 10 feet, you have exactly one square of roofing area.

    Why This Distinction Matters

    Many homeowners mistakenly believe that a “bundle” covers a significant portion of a roof, leading to severe under-ordering. By understanding that 1 Square = 3 Bundles, you can quickly translate your roof’s square footage into the number of packages you need to load into your truck.

    • 1 Roofing Square = 100 sq. ft.
    • 1 Bundle ≈ 33.3 sq. ft. (for standard shingles)
    • 3 Bundles = 1 Roofing Square

    Decoding Roofing Terminology: Squares vs. Bundles

    Before we dive deeper into calculations, it is essential to clarify the language used by contractors and suppliers. Misunderstanding these terms is the root cause of most purchasing errors.

    What Is a “Square”?

    In the construction world, specifically roofing, a square is a standardized unit of area. It is universally accepted as 100 square feet. This standardization allows contractors to quote prices efficiently. For example, if a roofer charges $5.00 per square foot, they might quote you $500 per “square” to simplify the invoice.

    What Is a “Bundle”?

    A bundle is simply the packaging unit used by manufacturers to ship and sell shingles. Because shingles are heavy and cumbersome, they are grouped into manageable lifts. While the weight varies by brand and type, the coverage area per bundle is generally consistent for standard products.

    Expert Insight: According to general construction standards, material quantities are often estimated using these standardized units to ensure consistency across different regions and suppliers. You can read more about standard construction measurements on Wikipedia.

    How Many Squares Are In A Bundle Of Roofing Shingles

    Variations: Not All Shingles Are Created Equal

    While the “3 bundles per square” rule is the gold standard for traditional asphalt shingles, it is not universal. Modern roofing technology has introduced variations that can throw off your calculations if you aren’t careful.

    Standard Three-Tab Shingles

    These are the most common and affordable shingles. They almost strictly adhere to the 3 bundles = 1 square rule. Each bundle typically weighs between 60 to 80 pounds, depending on the manufacturer.

    Architectural (Dimensional) Shingles

    These shingles are thicker and heavier, designed to mimic the look of wood or slate. Despite their increased weight and durability, most architectural shingles still follow the 3 bundles = 1 square guideline. However, always check the label, as some premium heavy-weight versions may require fewer bundles per square due to larger individual shingle sizes, though this is rare.

    Luxury and Designer Shingles

    This is where the math changes. High-end designer shingles are often larger or thicker. For these products, you might find that 2 bundles equal 1 square, or conversely, that a single bundle covers less area due to unique cutting patterns.

    • Check the Label: Always look for the “Coverage Area” printed on the wrapper.
    • Ask the Supplier: Never assume luxury shingles follow the standard rule.

    Quick Comparison Table

    Shingle TypeBundles per SquareApprox. Coverage per BundleWeight Consideration
    Standard 3-Tab333.3 sq. ft.Light to Medium
    Architectural333.3 sq. ft.Medium to Heavy
    Luxury/DesignerVaries (Often 2-4)VariesHeavy
    Wood ShakesVariesVariesLight

    Step-by-Step Guide to Calculating Your Shingle Needs

    Knowing how many squares are in a bundle is only half the battle. You need to know how many bundles to buy for your specific roof. Follow this logical process to ensure accuracy.

    Step 1: Calculate Total Roof Area

    Measure the length and width of each plane of your roof. Multiply these numbers to get the square footage of each section. Add all sections together to get the total square footage.

    • Example: A simple gable roof has two sides, each 40 feet long and 20 feet wide.
    • Calculation: 40 x 20 = 800 sq. ft. per side. Total = 1,600 sq. ft.

    Step 2: Convert to Squares

    Divide your total square footage by 100.

    • Calculation: 1,600 / 100 = 16 Squares.

    Step 3: Convert Squares to Bundles

    Multiply the number of squares by 3 (for standard shingles).

    • Calculation: 16 x 3 = 48 Bundles.

    Step 4: Add Waste Factor

    This is the step most DIYers forget. You will cut shingles to fit ridges, valleys, and edges. This creates waste.

    • Simple Roof: Add 10% waste.
    • Complex Roof (many hips/valleys): Add 15–20% waste.
    • Adjusted Calculation (10% waste): 48 bundles + 4.8 bundles = 52.8 bundles.
    • Final Order: Round up to 53 bundles.

    Common Mistakes to Avoid When Ordering Shingles

    Even with the right formula, errors occur. Here are the most frequent pitfalls:

    1. Ignoring Pitch: Roof pitch affects surface area. A steep roof has more surface area than a flat one with the same footprint. Use a pitch multiplier if your roof is steep (e.g., 6/12 pitch or higher).
    2. Forgetting Starter Strips: Starter shingles are sold separately or in specific bundles. They do not count toward your main field shingle count but are essential for warranty compliance.
    3. Mixing Batches: If you need extra bundles later, they might be from a different manufacturing batch, leading to slight color variations. Always buy 5–10% more than you think you need to keep for future repairs.

    FAQ Section

    Q1: Can I return unused bundles of shingles?

    Most big-box stores allow returns of unopened bundles within a specific timeframe (usually 90 days). However, specialty roofing suppliers may have stricter policies. Always keep your receipt and check the return policy before purchasing. Note that restocking fees may apply.

    Q2: Do ice and water shield rolls count as squares?

    No. Ice and water shield is sold by the roll, not by the square. A typical roll covers 100 square feet (1 square), but it is packaged differently. Do not confuse shingle bundles with underlayment rolls when calculating your cart total.

    Q3: How much does a bundle of shingles weigh?

    A standard bundle of asphalt shingles weighs between 60 and 80 pounds. Architectural shingles tend to be on the heavier end of this spectrum. This is important for logistics; ensure your vehicle can handle the load, and consider delivery if you are buying more than 10 squares (30 bundles).

    Q4: What if my roof has multiple layers?

    If you are reroofing over existing shingles (which is generally not recommended by experts due to weight and warranty issues), you still only need enough new shingles to cover the visible surface area. The underlying layers do not change the surface area calculation, but they do increase the structural load on your home.

    Q5: Are there any shingles where 4 bundles equal a square?

    Yes, some lighter-weight or specialized shingles may require 4 bundles to cover 100 square feet. Conversely, some large-format shingles may only require 2. Always read the coverage specification on the package wrapper. Never rely solely on the “3 bundles” rule for non-standard products.

    Conclusion

    Understanding how many squares are in a bundle of roofing shingles is the foundation of a successful roofing project. Remember the golden rule: for most standard asphalt shingles, 3 bundles equal 1 square (100 sq. ft.). By accurately measuring your roof, converting to squares, and adding a 10–15% waste factor, you can order with precision.

    Don’t let the math intimidate you. Take your time, double-check your measurements, and when in doubt, consult with a local supplier who can verify your calculations based on the specific brand you choose. A little preparation now saves you from the stress of running back to the store mid-project.

    Found this guide helpful? Share it with your friends on Facebook or Pinterest who might be tackling their own home improvement projects!