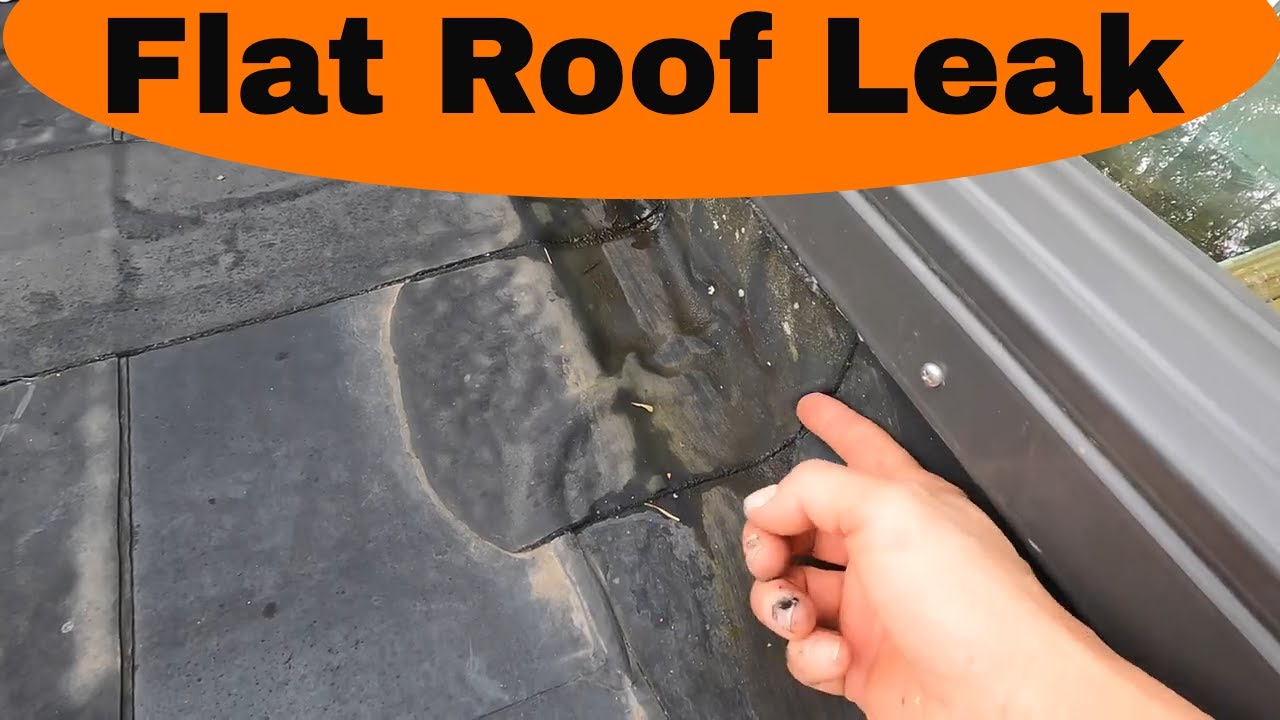
Category: homeowner roofing guide

  • Fix Flat Roof Leaks: A DIY Guide

    Fix Flat Roof Leaks: A DIY Guide

    Water dripping from your ceiling is more than just an annoyance; it is a ticking time bomb for your home’s structural integrity and indoor air quality. If you are staring at a stain on your drywall or hearing the dreaded drip-drip sound, you likely need to know how to fix a roof leak on a flat roof before minor moisture turns into major mold remediation.

    Flat roofs are common in modern architecture and commercial buildings across the US, but they come with unique challenges. Unlike sloped roofs that shed water quickly, flat roofs rely on precise drainage and impermeable membranes. When these fail, water pools, leading to accelerated degradation. This guide will walk you through identifying the source, choosing the right materials, and executing a lasting repair, empowering you to handle this task with confidence.

    Why Do Flat Roofs Leak? Understanding the Root Cause

    Before applying any patch, it is crucial to understand why the leak occurred. Flat roofs do not leak because of gravity pulling water through shingles; they leak due to membrane failure, poor drainage, or installation errors.

    According to industry data, over 90% of flat roof leaks originate from penetrations (vents, pipes, HVAC units) or seams rather than the open field of the roof. Understanding the material type is also essential. Common flat roofing materials include:

    • EPDM (Ethylene Propylene Diene Monomer): A synthetic rubber known for durability.
    • TPO (Thermoplastic Polyolefin): A reflective, heat-weldable membrane.
    • Modified Bitumen: Asphalt-based rolls often used in colder climates.
    • Built-Up Roofing (BUR): Multiple layers of asphalt and felts.

    If you are unsure of your roof type, consult a professional or check previous maintenance records. Misidentifying the material can lead to using incompatible adhesives, causing the repair to fail within months. For a deeper understanding of roofing materials, you can refer to general construction standards on Wikipedia.

    Step 1: Locating the Leak Accurately

    Finding the exact entry point is the most challenging part of flat roof repair. Water travels horizontally under the membrane before dripping down, meaning the stain on your ceiling is rarely directly below the hole.

    The Hose Test Method

    If the leak is not obvious during rain, perform a controlled hose test:

    1. Safety First: Ensure the roof is dry and safe to walk on. Use a harness if the pitch is steep near the edges.
    2. Section Off Areas: Have a helper inside mark where water appears.
    3. Start Low: Begin spraying water at the lowest point of the roof near the suspected area.
    4. Move Up Gradually: Spray each section for 5–10 minutes. If no leak appears, move up the slope.
    5. Pinpoint the Source: Once water appears inside, mark that specific spot on the roof.

    Pro Tip: Look for “ponding water.” If water sits on your roof for more than 48 hours after rainfall, it accelerates membrane breakdown. Addressing drainage issues is part of the long-term fix.

    Step 2: Preparing the Surface for Repair

    A successful repair depends 80% on preparation and only 20% on the application of the patch. Dirt, algae, and loose granules prevent adhesives from bonding.

    1. Clear the Area: Remove any debris, leaves, or standing water around the leak.
    2. Clean Thoroughly: Use a stiff brush and a specialized roof cleaner or a mixture of mild detergent and water. For oily residues, use a degreaser.
    3. Dry Completely: The surface must be bone-dry. Moisture trapped under a patch will cause blistering and eventual failure. Use a leaf blower or wait for a sunny day.
    4. Trim Loose Edges: If the existing membrane is peeling, cut away the loose flaps with a utility knife to create a clean, stable edge.

    Step 3: Choosing the Right Repair Material

    Using the wrong product is a common DIY mistake. Here is a quick comparison to help you choose:

    Material TypeBest ForProsCons
    Liquid Rubber CoatingSmall cracks, seams, EPDMEasy to apply, flexible, seamlessRequires multiple coats, longer cure time
    Self-Adhesive Patch TapePunctures, small holes (<6 inches)Instant bond, no drying timeMay not adhere well to dirty/wet surfaces
    Torch-On MembraneModified Bitumen roofsExtremely durable, professional finishRequires open flame, high skill level
    TPO Welding StripTPO roofsCreates a molecular bond, very strongRequires special welding tool

    For most DIY homeowners dealing with EPDM or general punctures, a high-quality liquid rubber sealant or a self-adhesive EPDM patch kit is the safest and most effective choice.

    Step 4: Executing the Repair Step-by-Step

    Here is how to apply a standard patch repair using a liquid membrane or patch kit.

    For Small Punctures and Cracks

    1. Apply Primer: If using a liquid coating, apply a primer to the cleaned area. This enhances adhesion. Let it dry until tacky (usually 15–30 minutes).
    2. First Coat: Apply a generous layer of liquid rubber over the crack, extending at least 2 inches beyond the damage on all sides.
    3. Embed Mesh: For cracks wider than 1/8 inch, embed a piece of fiberglass mesh into the wet coat. This reinforces the repair and prevents future splitting.
    4. Second Coat: Once the first coat is touch-dry, apply a second layer over the mesh. Feather the edges to blend with the surrounding roof.

    For Larger Holes or Tears

    1. Cut the Patch: Cut a piece of matching membrane (EPDM or TPO) that is at least 3–4 inches larger than the hole on all sides. Round the corners to prevent peeling.
    2. Apply Adhesive: Apply contact cement to both the back of the patch and the roof surface. Wait for the adhesive to become tacky (check manufacturer instructions, usually 10–20 minutes).
    3. Position Carefully: Place the patch over the hole. Start from one side and roll it out to avoid air bubbles.
    4. Seal the Edges: Apply a bead of lap sealant around the entire perimeter of the patch. Smooth it with a putty knife to ensure a watertight seal.
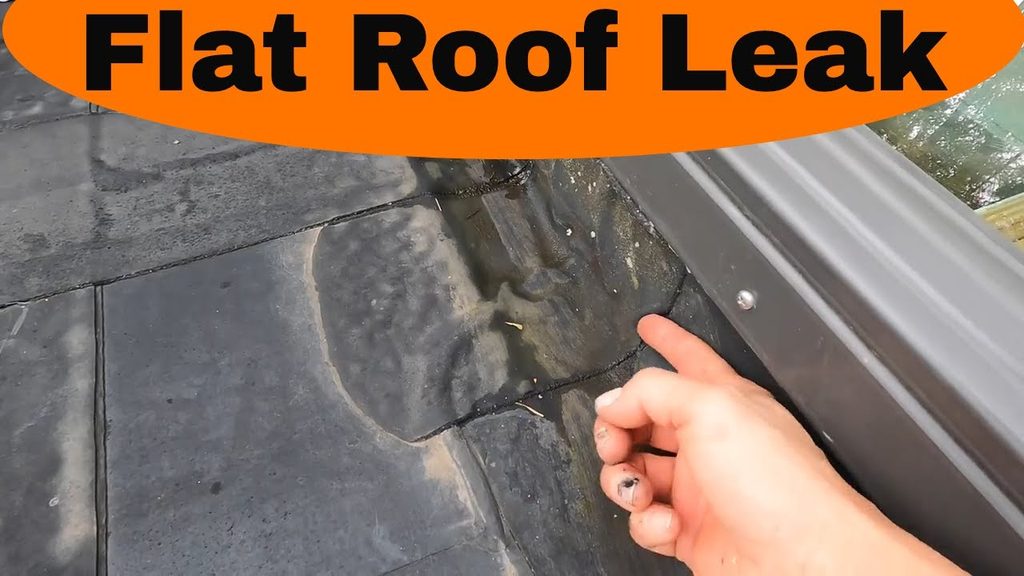
    How To Fix A Roof Leak On A Flat Roof

    Maintenance Tips to Prevent Future Leaks

    Fixing the leak is only half the battle. Regular maintenance extends the life of your flat roof significantly.

    • Keep Drains Clear: Clogged scuppers or drains cause ponding water, which adds weight and degrades the membrane. Clean them twice a year.
    • Inspect After Storms: Check for new debris or displaced flashing after heavy winds.
    • Limit Foot Traffic: Walk only when necessary and wear soft-soled shoes. Consider installing walkway pads if you frequently access rooftop HVAC units.
    • Annual Professional Inspection: Even with DIY repairs, have a certified roofer inspect the roof every 2–3 years to catch underlying issues.

    Frequently Asked Questions (FAQ)

    How much does it cost to fix a flat roof leak?

    DIY repairs typically cost between $50 and $150 for materials like sealants and patches. Professional repairs range from $300 to $1,000 depending on the size of the leak and accessibility. Full roof replacement is significantly more expensive, often costing $5–$10 per square foot.

    Can I fix a flat roof leak in the rain?

    Generally, no. Most adhesives and coatings require a dry surface to bond properly. However, some emergency “wet patch” products exist for temporary stops. These are not permanent solutions and should be replaced with a proper repair once the weather clears.

    How long does a flat roof patch last?

    A properly applied patch using high-quality materials can last 5–10 years. However, the lifespan depends on UV exposure, temperature fluctuations, and foot traffic. Liquid rubber coatings tend to last longer than simple tape patches because they form a seamless barrier.

    Is it better to repair or replace a flat roof?

    If the roof is less than 15 years old and the leak is isolated, repair is cost-effective. If the roof is older, has multiple leaks, or shows widespread blistering and cracking, replacement is the better long-term investment. A rule of thumb: if repair costs exceed 50% of replacement cost, consider replacing.

    What is the best sealant for a flat roof?

    Polyurethane and silicone-based sealants are highly regarded for their flexibility and UV resistance. For EPDM roofs, specifically formulated EPDM liquid rubber is ideal. Always check compatibility with your existing roofing material.

    Conclusion

    Learning how to fix a roof leak on a flat roof is a valuable skill that can save you thousands in water damage restoration and premature roof replacement. By accurately locating the leak, preparing the surface meticulously, and using the right materials, you can achieve a professional-grade repair from your own toolkit.

    Remember, safety is paramount. If the leak is extensive, the roof is steep, or you feel uncomfortable working at heights, do not hesitate to call a licensed roofing contractor. A small investment in maintenance today ensures your home stays dry and secure for years to come.

    Found this guide helpful? Share it with your neighbors on social media to help them protect their homes too!
  • Red Roof Inn El Paso East: Budget Stay Guide

    Red Roof Inn El Paso East: Budget Stay Guide

    Are you planning a trip to the Sun City but worried about breaking the bank on accommodation? Finding a clean, safe, and affordable place to stay shouldn’t be a stressor when you are excited to explore the culture and landscapes of West Texas. If you are searching for Red Roof Inn El Paso East El Paso Tx 79936, you have likely identified a need for value-driven lodging that doesn’t compromise on essential comforts.

    This guide is designed to help you understand exactly what to expect from this property, how to maximize your stay, and why it might be the perfect fit for your travel itinerary. Whether you are passing through on Interstate 10 or staying for a local event, we will break down everything you need to know.

    Why Choose Red Roof Inn El Paso East?

    When travelers look for accommodation in the 79936 zip code, they are often balancing cost against convenience. The Red Roof Inn brand has long been associated with “economy” travel, but what does that actually mean in the context of El Paso?

    Unbeatable Value for Money

    The primary draw of the Red Roof Inn El Paso East is its pricing structure. In an era where hotel rates have surged globally, this location remains competitive. For budget-conscious travelers, such as road-trippers, students visiting nearby universities, or families on a tight schedule, the cost savings can be significant. These savings allow you to allocate more of your budget toward experiences, such as dining at local Tex-Mex favorites or visiting the Franklin Mountains State Park.

    Strategic Location Near I-10

    Location is critical for any hotel stay. This specific property is situated near Interstate 10, which is the main arterial highway cutting through El Paso.

    • Easy Access: You can merge onto the highway quickly, reducing time spent in local traffic.
    • Proximity to Attractions: It is reasonably close to the El Paso International Airport and major shopping centers like Bassett Place.
    • Safety: The area is generally well-lit and patrolled, providing peace of mind for late-night arrivals.

    According to travel industry standards, accessibility to major transport routes is a top three factor for guest satisfaction in economy hotels. By being near I-10, this hotel meets a core logistical need for transient guests.

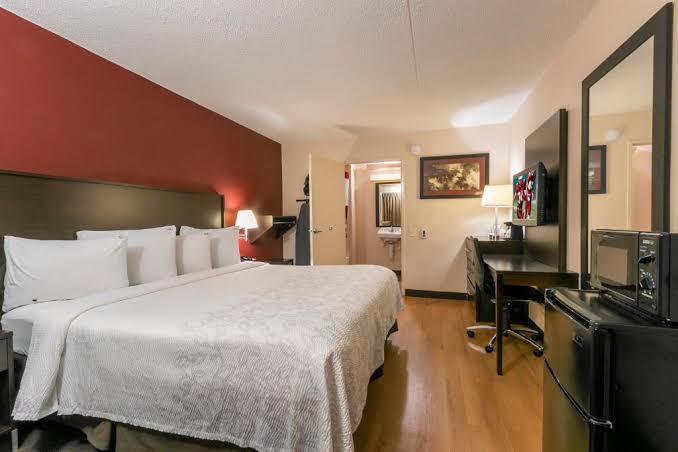
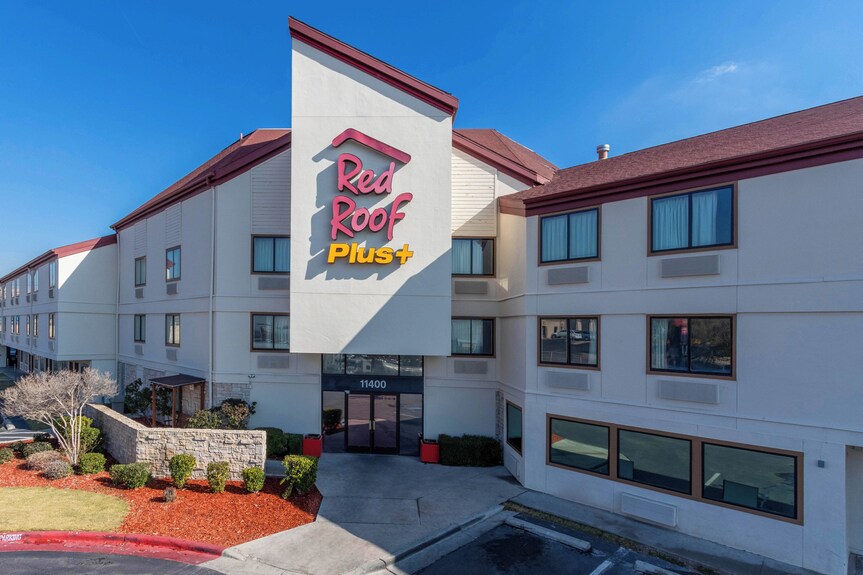
    Red Roof Inn El Paso East El Paso Tx 79936

    What Amenities Can You Expect?

    One common misconception about budget hotels is that they lack essential amenities. While you won’t find a spa or a concierge service, the Red Roof Inn El Paso East focuses on the fundamentals that matter most to practical travelers.

    Core Comforts and Services

    Here is a breakdown of what is typically included in your stay:

    AmenityDetailsWhy It Matters
    Free Wi-FiHigh-speed internet in rooms and lobby.Essential for remote work and streaming.
    Pet-Friendly PolicyOne pet per room stays free.Huge savings for pet owners; no extra fees.
    Flat-Screen TVsCable channels included.Entertainment after a long day of driving.
    24-Hour Front DeskStaff available around the clock.Flexibility for late check-ins or early departures.
    Coffee ServiceComplimentary coffee in the lobby.A quick caffeine fix before hitting the road.

    The Pet-Friendly Advantage

    It is worth highlighting the pet policy again because it is a standout feature. Many hotels charge upwards of $50–$100 per night for pets. At Red Roof Inn, your furry friend stays for free. This makes it one of the most economical choices for pet owners traveling through Texas. However, always call ahead to confirm current availability and specific breed restrictions, as policies can evolve.

    How Does It Compare to Other Local Hotels?

    To make an informed decision, it helps to see how this property stacks up against competitors in the El Paso East area. We aren’t just looking at price, but at value proposition.

    Red Roof Inn vs. Mid-Range Chains

    Mid-range hotels (like Holiday Inn Express or Hampton Inn) often offer free breakfast and newer facilities. However, they come at a premium price point.

    • Choose Red Roof Inn if: Your priority is keeping costs low, you don’t mind buying your own breakfast, and you need a simple, clean place to sleep.
    • Choose a Mid-Range Hotel if: You require a full hot breakfast, a fitness center, or a pool, and are willing to pay 30–50% more per night.

    Cleanliness and Maintenance

    Recent trends in the hospitality industry show that cleanliness is the number one concern for post-pandemic travelers. Red Roof Inn has implemented enhanced cleaning protocols. Guest reviews often highlight that while the furnishings may be dated, the rooms are consistently cleaned to a high standard. This focus on hygiene over luxury aligns with the expectations of their target demographic.

    For more context on the city’s tourism infrastructure, you can refer to the El Paso Wikipedia page, which provides detailed historical and geographical background on the region.

    Tips for Booking Your Stay

    Getting the best rate requires a bit of strategy. Here is a step-by-step approach to securing your room at Red Roof Inn El Paso East El Paso Tx 79936.

    1. Check Directly First: Always visit the official Red Roof Inn website. They often offer member discounts or “best rate guarantees” that third-party booking sites cannot match.
    2. Be Flexible with Dates: If your travel plans allow, try shifting your stay by a day or two. Rates in El Paso can fluctuate based on local events, such as university graduations or festivals.
    3. Call the Front Desk: Sometimes, calling the hotel directly at (915) 594-8888 (note: verify current number on official site) can yield unadvertised deals, especially for last-minute bookings or extended stays.
    4. Join the Loyalty Program: Signing up for their rewards program is free and can lead to points that translate into free nights or upgrades in the future.

    Navigating the Neighborhood: 79936

    The 79936 zip code is part of East El Paso, a rapidly growing area that blends residential comfort with commercial convenience. Understanding the neighborhood can enhance your stay.

    Dining Options Nearby

    You are never far from food. Within a 5-minute drive, you can find:

    • Fast Food Chains: Convenient for quick meals.
    • Local Tex-Mex: El Paso is famous for its Mexican cuisine. Look for local taquerias rather than just chains to experience authentic flavors.
    • Grocery Stores: Useful if you plan to prepare simple meals in your room (if equipped with a microwave/fridge) to save money.

    Safety Considerations

    Like any urban area, it is wise to practice standard safety precautions. Keep your car locked, do not leave valuables visible, and use well-lit paths when walking to your vehicle at night. The hotel staff is usually helpful in providing advice on safe nearby areas for evening walks or dining.

    FAQ Section

    Is the Red Roof Inn El Paso East truly pet-friendly?

    Yes, the hotel allows one pet per room at no additional charge. This is a significant benefit compared to many other hotels that charge hefty pet fees. However, it is recommended to inform the front desk upon booking to ensure they have a pet-friendly room available, as these may be limited in number.

    Does the hotel offer free breakfast?

    Typically, Red Roof Inn locations do not offer a full free breakfast buffet like some mid-range competitors. They usually provide complimentary coffee in the lobby. Guests are advised to plan for breakfast elsewhere or bring their own supplies. There are many affordable eateries nearby.

    Is there a pool at this location?

    Amenities can vary by property and season. Historically, many Red Roof Inn locations do not have pools, focusing instead on core lodging services. It is crucial to check the specific amenities list for the El Paso East location on their official website or call ahead if a pool is a dealbreaker for your trip.

    How far is the hotel from the El Paso International Airport?

    The hotel is approximately 10–15 minutes away from the El Paso International Airport, depending on traffic. This makes it a convenient option for travelers with early morning flights or late-night arrivals who want to avoid expensive airport hotel rates.

    Is Wi-Fi reliable for remote work?

    The hotel offers free high-speed Wi-Fi. While it is generally sufficient for emails, browsing, and video calls, heavy data users or those requiring ultra-high bandwidth for large file transfers might experience variations in speed during peak hours. It is advisable to have a mobile hotspot as a backup if your work is critical.

    What is the check-in and check-out time?

    Standard check-in time is usually 3:00 PM, and check-out is 12:00 PM (noon). If you arrive early, you can request an early check-in, but it is subject to availability. Late check-out may also be possible for a small fee or if occupancy is low.

    Conclusion

    Choosing the right hotel is about aligning your expectations with your budget. The Red Roof Inn El Paso East El Paso Tx 79936 stands out as a pragmatic choice for travelers who prioritize affordability, location, and pet-friendly policies over luxury frills. It serves as a reliable base camp for exploring El Paso, offering clean accommodations and easy access to Interstate 10.

    By understanding what the hotel offers—and what it doesn’t—you can plan your trip more effectively. Remember to book directly for the best rates, pack your own breakfast snacks, and take advantage of the free Wi-Fi to stay connected.

    If you found this guide helpful, please share it with your fellow travelers on social media. Helping others find great deals makes travel more accessible for everyone. Safe travels, and enjoy your stay in El Paso!

  • How to Get Rid of Bats in the Roof Safely

    How to Get Rid of Bats in the Roof Safely

    Finding small, dark droppings on your ceiling or hearing scratching noises at dusk can be terrifying. You are not alone; thousands of homeowners face this issue every year, often feeling helpless against these nocturnal invaders. If you are asking, “How do you get rid of bats in the roof,” you need a solution that is both effective for your home and humane for the wildlife.

    Bats are beneficial creatures that eat thousands of insects nightly, but they do not belong in your living space. Their presence poses health risks and structural damage. This guide will walk you through the professional, legal, and safe steps to reclaim your home.

    Why You Must Act Immediately (But Carefully)

    Before diving into the removal process, it is crucial to understand why speed and caution are vital. Bats are not like mice or rats; they are protected species in many parts of the United States. Furthermore, their waste, known as guano, can harbor Histoplasma capsulatum, a fungus that causes histoplasmosis, a serious respiratory disease.

    According to the Centers for Disease Control and Prevention (CDC), disturbing bat colonies without proper protection can release spores into the air. Therefore, DIY removal without knowledge can be dangerous. However, leaving them there is not an option. A single brown bat can produce over 2,000 droppings per night. Over a few months, this accumulation can saturate insulation, cause foul odors, and even compromise the structural integrity of your drywall.

    Is It Legal to Remove Bats Yourself?

    This is the most critical question most homeowners overlook. In the US, most bat species are protected under state laws and sometimes federal regulations. For example, killing bats is illegal in almost every state. Even eviction during certain times of the year may be prohibited.

    The primary restriction revolves around maternity season. During spring and summer, female bats give birth to pups that cannot fly. If you seal entry points during this time, you will trap the flightless babies inside, leading to their death and creating a severe sanitation nightmare as they decompose.

    • Maternity Season: Typically May through August (varies by state).
    • Safe Exclusion Window: Late fall to early spring (when bats are hibernating or have migrated).

    Always check with your local state wildlife agency before starting. For general biological information on bat species, you can refer to Wikipedia’s entry on Bats to identify what might be roosting in your area.

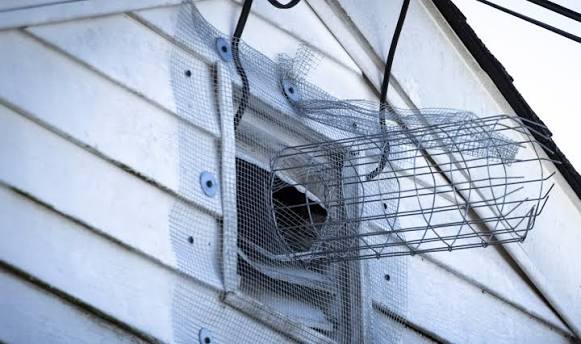
    How Do You Get Rid Of Bats In The Roof

    Step-by-Step Guide: How Do You Get Rid of Bats in the Roof?

    Professional wildlife controllers use a method called exclusion. This is the only humane and permanent way to solve the problem. Poisoning or trapping is ineffective and illegal. Here is the professional workflow.

    Step 1: Inspection and Identification

    You must locate every single entry point. Bats can squeeze through gaps as small as 3/8 of an inch (about the width of a human thumb).

    1. Wait until dusk: Observe your roofline as the sun sets. Watch where the bats exit.
    2. Look for stains: Dark oily streaks around holes indicate frequent use.
    3. Check for guano: Piles of droppings directly below a hole confirm active entry.

    Common entry points include:

    • Ridge vents
    • Soffit gaps
    • Chimney flashing
    • Loose roof shingles

    Step 2: Install One-Way Exclusion Devices

    This is the core of the process. You do not simply “close” the holes; you install devices that allow bats to leave but prevent them from returning.

    Materials Needed:

    • Netting (polypropylene, mesh size < 1/4 inch)
    • Caulk gun and sealant
    • Staple gun
    • Ladder and safety gear (N95 mask, gloves)

    Installation Process:

    1. Identify the main exit points found in Step 1.
    2. Attach netting over the hole, securing it at the top and sides with staples or tape.
    3. Leave the bottom edge loose and hanging down at least 12–18 inches.
    4. Ensure the netting extends far enough out so bats cannot climb back up underneath it.

    When the bats leave at night to feed, they will fly out through the netting. When they return, they will try to land near the hole but will slide down the loose netting, unable to find the entry point again.

    Step 3: Seal Secondary Entry Points

    While the exclusion devices are active, you must seal all other potential entry points. Use high-quality polyurethane caulk or expanding foam for small cracks. For larger gaps, use steel wool packed tightly into the hole, then cover it with caulk or hardware cloth. Bats cannot chew through steel wool.

    Note: Do not seal the main exit points yet. Those must remain open with the exclusion devices.

    Step 4: Monitor and Wait

    Leave the exclusion devices in place for 5–7 days. Monitor the site each evening. If you still see bats exiting, ensure the netting is installed correctly. Weather conditions matter; avoid installing during heavy rain or extreme cold, as this can stress the colony.

    Step 5: Permanent Sealing

    After one week of no bat activity (usually confirmed by no sounds at dusk and no fresh guano), you can permanently seal the main entry points.

    1. Remove the netting carefully.
    2. Seal the hole permanently using wood, metal flashing, or heavy-duty caulk.
    3. Double-check your work. Even a tiny gap left behind will invite new bats next season.

    Cleanup and Sanitation: A Critical Health Step

    Removing the bats is only half the battle. The remaining guano is hazardous.

    Safety Gear Required:

    • N95 Respirator or P100 mask (standard dust masks are insufficient)
    • Disposable coveralls
    • Rubber gloves
    • Goggles

    Cleaning Protocol:

    1. Do not sweep dry guano. This releases spores into the air.
    2. Wet the area: Lightly mist the droppings with a water and bleach solution (1 part bleach to 10 parts water) or a commercial enzymatic cleaner. This keeps the spores damp and heavy.
    3. Shovel carefully: Scoop the waste into heavy-duty plastic bags.
    4. Dispose properly: Seal the bags and dispose of them according to local waste management guidelines.
    5. Replace insulation: If insulation is saturated, it must be removed and replaced. Guano reduces insulation R-value and retains moisture, leading to mold.

    Comparison: DIY vs. Professional Bat Removal

    Deciding whether to handle this yourself or hire a pro depends on several factors.

    FeatureDIY ExclusionProfessional Removal
    Cost$50–$150 (materials)$300–$1,500+
    Safety RiskHigh (falls, disease)Low (insured, trained)
    EffectivenessVariable (depends on skill)High (guaranteed)
    Time CommitmentSeveral days/weeks1–2 visits
    Legal ComplianceYour responsibilityHandled by the pro

    If your attic is difficult to access, or if the colony is large (hundreds of bats), hiring a licensed wildlife control operator is strongly recommended. They have the insurance and expertise to handle complex roof structures safely.

    Preventing Future Infestations

    Once the bats are gone, keep them out. Bats rely on memory and scent to find roosts.

    1. Install Bat Houses: Provide an alternative habitat away from your house. This helps the local ecosystem while keeping your home safe.
    2. Regular Maintenance: Inspect your roof twice a year. Look for loose shingles or separated soffits.
    3. Lighting: Bats prefer dark entry points. Keeping exterior lights on near potential entry spots may deter them, though this is not a guaranteed method.
    4. Trim Trees: Keep tree branches at least 6 feet away from your roofline to prevent easy access.

    FAQ Section

    Q: Can I use mothballs to get rid of bats?

    A: No. Mothballs (naphthalene) are toxic to humans and pets and are not effective against bats. Using them in an attic can create a hazardous chemical environment for your family without solving the bat problem. It is also illegal to use pesticides in a manner inconsistent with their labeling.

    Q: How long does it take to get rid of bats?

    A: The exclusion process typically takes 5 to 7 days for the bats to fully vacate the premises. However, the entire project, including inspection, installation, monitoring, and sealing, can take 2–3 weeks depending on weather and scheduling.

    Q: Will bats come back after removal?

    A: Bats are persistent. If you do not seal every single entry point permanently, they will return. They have excellent spatial memory. Proper exclusion and thorough sealing are the only ways to ensure they do not come back.

    Q: Is bat guano dangerous to touch?

    A: Yes. Dry bat guano can carry histoplasmosis spores. Inhaling these spores can cause severe lung infections. Always wear an N95 mask and gloves when cleaning any area where bats have roosted. Never disturb dry guano without wetting it first.

    Q: What is the best time of year to remove bats?

    A: The best time is late fall to early spring (October to March). During this period, bats are either hibernating or have migrated, and there are no flightless pups. Avoid removal during maternity season (May–August) to comply with wildlife laws and humane practices.

    Conclusion

    Learning how do you get rid of bats in the roof is about balancing effectiveness with empathy and legality. By using exclusion devices rather than harmful traps, you protect your home while respecting local wildlife laws. Remember, the key to success lies in meticulous inspection, proper installation of one-way valves, and thorough cleanup of hazardous waste.

    Don’t let fear paralyze you. With the right tools and patience, you can restore peace to your home. If the task feels too daunting, do not hesitate to call a professional. Your health and safety are worth the investment.

    Found this guide helpful? Share it with your neighbors on social media to help others tackle their bat problems safely!

  • Red Roof Inn Plus Ann Arbor: Top Budget Stay

    Red Roof Inn Plus Ann Arbor: Top Budget Stay

    Are you planning a trip to Ann Arbor but worried about skyrocketing hotel prices eating into your travel budget? You are not alone; finding a balance between affordability, cleanliness, and proximity to the University of Michigan can feel like searching for a needle in a haystack. This guide explores how Red Roof Inn Plus Ann Arbor U Of Michigan North solves this dilemma, offering a reliable sanctuary for students, parents, and sports fans alike without breaking the bank.

    Why Choose Red Roof Inn Plus Ann Arbor U Of Michigan North?

    When visiting a college town like Ann Arbor, accommodation needs are unique. You might be dropping off a freshman, attending a home football game at the Big House, or simply exploring the vibrant local culture. The primary challenge most travelers face is the “college tax”—the significant price surge during peak seasons.

    The Red Roof Inn Plus Ann Arbor U Of Michigan North positions itself as a strategic solution. Located just north of the campus, it offers a sweet spot: close enough to minimize commute times but far enough to avoid the chaotic noise of the immediate downtown area. For budget-conscious travelers, this property represents more than just a bed; it is a logistical advantage.

    Proximity to Key Landmarks

    One of the strongest selling points of this location is its accessibility. While it is not walking distance to the center of campus (which is typical for budget hotels in dense college towns), it is a short drive or ride-share away from major attractions.

    • University of Michigan Central Campus: Approximately 3–4 miles away.
    • Michigan Stadium: Roughly 15 minutes by car, depending on traffic.
    • Ann Arbor Premium Outlets: Less than 10 minutes away, perfect for last-minute shopping.
    • Detroit Metropolitan Wayne County Airport (DTW): About a 30–40 minute drive, making it a convenient layover spot.

    For families visiting students, this distance is often ideal. It provides a quiet retreat after a busy day of orientation events or tailgating, ensuring you get the rest you need.

    What Amenities Can You Expect at This Property?

    A common misconception about budget hotels is that they lack essential comforts. However, the “Plus” designation in the brand name signifies an upgraded experience compared to standard economy lodgings. Let’s break down what you actually get for your money.

    Free Wi-Fi and Workspace Solutions

    In today’s digital age, connectivity is non-negotiable. Whether you are a student finishing a paper or a remote worker checking emails, the hotel provides complimentary high-speed Wi-Fi. While it may not rival fiber-optic business centers, it is generally sufficient for streaming, video calls, and browsing.

    Pet-Friendly Policy: A Major Bonus

    Traveling with pets can be expensive and stressful due to restrictive hotel policies. One of the standout features of the Red Roof Inn brand is its pet-friendly approach.

    • No Extra Fees: Unlike many competitors that charge $50–$100 per stay, Red Roof Inn typically allows one well-behaved pet per room at no additional cost.
    • Convenience: This makes it a top choice for families moving students into dorms who bring their furry companions along for the transition.

    Note: Always confirm the current pet policy directly with the specific location before booking, as rules can evolve.

    Breakfast and Daily Essentials

    While the hotel does not offer a full hot buffet like some mid-range chains, it usually provides a continental breakfast setup. Think bagels, toast, cereal, coffee, and juice. For many travelers, this is enough to fuel up before heading out for a hearty brunch in downtown Ann Arbor.

    FeatureRed Roof Inn Plus Ann ArborTypical Competitor (Budget)
    Pet PolicyFree (1 pet/room)Often $25–$75 fee
    Wi-FiFree High-SpeedSometimes Tiered/Paid
    ParkingFree On-SiteOften Paid in City Centers
    PoolUsually AvailableVaries Widely
    Red Roof Inn Plus Ann Arbor U Of Michigan North

    How Does It Compare to Other Hotels Near U of M?

    To make an informed decision, it helps to see how this property stacks up against alternatives. We analyzed user reviews and pricing trends to provide a clear comparison.

    Versus Downtown Boutique Hotels

    Downtown Ann Arbor hotels offer walkability to restaurants and bars but come with a premium price tag and limited parking. The Red Roof Inn Plus Ann Arbor U Of Michigan North trades walkability for value. You save significantly on the nightly rate, which can then be allocated to dining experiences or event tickets.

    Versus Other Chain Budget Hotels

    When compared to brands like Motel 6 or Super 8, Red Roof Inn Plus often scores higher on recent renovation standards and cleanliness protocols. The “Plus” model indicates newer furnishings and updated bathrooms, addressing common complaints about older economy hotels.

    According to data from various travel aggregators, guest satisfaction scores for this property tend to hover above the industry average for the 2-star segment, particularly citing staff friendliness and ease of check-in.

    Tips for Booking the Best Rate

    Securing the best deal requires a bit of strategy, especially in a market driven by university events. Here is a step-by-step approach to maximizing your savings.

    1. Check the University Calendar: Avoid booking during home football games, graduation week, or parent weekends unless necessary. Prices can triple during these periods.
    2. Book Directly: Sometimes, the hotel’s official website offers member discounts or flexible cancellation policies that third-party sites do not.
    3. Look for “Stay Longer” Deals: If you are moving a student in, consider staying for three nights instead of two. Some locations offer a discount for extended stays.
    4. Verify Room Type: Ensure you are booking a “Plus” room if available, as these have been recently refreshed with modern decor and improved lighting.

    For more context on the University of Michigan’s academic calendar and major events, you can refer to the University of Michigan Wikipedia page to plan your trip around quieter periods.

    Addressing Common Concerns: Safety and Cleanliness

    Safety is a top priority for any traveler, especially parents sending their children off to college. The area north of the university is generally considered safe, with regular police patrols and good street lighting. The hotel itself employs standard security measures, including well-lit parking lots and 24-hour front desk service.

    Regarding cleanliness, post-pandemic hygiene standards have become stricter across the hospitality industry. Red Roof Inn has implemented enhanced cleaning protocols, focusing on high-touch surfaces like door handles, remote controls, and bathroom fixtures. Guest reviews from 2025 and 2026 consistently highlight improvements in housekeeping efficiency, noting that rooms are ready on time and meet basic sanitary expectations.

    FAQ Section

    Is the Red Roof Inn Plus Ann Arbor within walking distance to campus?

    No, it is not within comfortable walking distance. It is located approximately 3–4 miles north of the central campus. You will need a car, rideshare service, or local bus to reach the university grounds efficiently.

    Are there hidden fees I should know about?

    Generally, no. The advertised rate usually includes taxes and fees, but always double-check during checkout. Parking is typically free, which is a significant saving compared to downtown hotels that may charge $20+ per night for parking.

    Can I request a quiet room?

    Yes, when booking, you can add a special request for a room away from the ice machine or elevator. While not guaranteed, the front desk staff is known to be accommodating if availability permits. Calling the hotel directly after booking to reiterate this request often yields better results.

    Is the pool open year-round?

    Most Red Roof Inn Plus locations feature an indoor pool, which remains open year-round. However, maintenance schedules can vary. It is advisable to call ahead if swimming is a critical part of your stay, especially during winter months.

    What is the cancellation policy?

    Policies vary based on the rate type booked. Standard rates usually allow cancellation up to 24–48 hours before check-in without penalty. Non-refundable rates are cheaper but strictly enforce no-cancellation rules. Always read the fine print before confirming.

    Do they offer shuttle services to the airport or campus?

    Typically, no. This property does not offer a complimentary shuttle service to DTW airport or the university campus. You will need to arrange your own transportation via taxi, Uber/Lyft, or rental car.

    Conclusion

    Choosing the right accommodation can make or break your trip to Ann Arbor. The Red Roof Inn Plus Ann Arbor U Of Michigan North stands out as a pragmatic, value-driven option for those who prioritize budget efficiency without sacrificing essential comforts. Its pet-friendly policy, free parking, and decent proximity to key areas make it a strong contender for students, families, and sports fans.

    By understanding what to expect and planning around university events, you can enjoy a stress-free stay that leaves more room in your budget for what truly matters: experiencing the spirit of the Wolverines.

    If you found this guide helpful, please share it with fellow travelers or parents preparing for the upcoming semester on social media. Your insights could help someone else find their perfect home away from home in Ann Arbor!

  • Metal Roof Replacement Cost: 2026 Guide

    Metal Roof Replacement Cost: 2026 Guide

    Replacing a roof is one of the most significant investments a homeowner can make, often causing anxiety about hidden fees and fluctuating material prices. If you are staring at aging shingles or rusted panels, you are likely asking, “How Much Does It Cost To Replace A Metal Roof?” to ensure you get durability without breaking the bank. This guide breaks down the real costs, helping you plan your budget with confidence and clarity.

    Understanding the Average Cost of Metal Roof Replacement

    When planning your renovation, understanding the baseline numbers is crucial. In 2026, the national average cost to replace a metal roof typically ranges between $12,000 and $25,000 for an average-sized home (approximately 2,000 square feet). However, this figure can vary significantly based on location, material choice, and labor complexity.

    On a per-square-foot basis, homeowners generally pay between $8 and $18 per square foot installed. This price includes both materials and labor. While this upfront cost is higher than traditional asphalt shingles, the longevity of metal roofing often makes it more cost-effective over time.

    Key Factors Influencing Price

    • Material Type: Steel is affordable; copper is premium.
    • Roof Complexity: Multiple chimneys, skylights, or steep pitches increase labor time.
    • Geographic Location: Labor rates in urban areas like New York or San Francisco are higher than in rural regions.
    • Removal of Old Roofing: Tearing off existing layers adds to disposal and labor costs.

    Breaking Down Costs by Material Type

    Not all metal roofs are created equal. The type of metal you choose is the single biggest driver of your final bill. Here is a detailed look at the most common options available in the US market today.

    1. Galvanized Steel (G-90)

    This is the most popular choice for residential homes due to its balance of cost and durability. It is coated with zinc to prevent rust.

    • Cost: $8 – $12 per sq. ft.
    • Best For: Budget-conscious homeowners seeking long-term value.

    2. Aluminum

    Aluminum is lightweight and naturally resistant to corrosion, making it ideal for coastal areas where salt air is a concern.

    • Cost: $10 – $14 per sq. ft.
    • Best For: Homes near the ocean or in humid climates.

    3. Zinc

    Zinc is self-healing; minor scratches oxidize and seal themselves over time. It has a distinctive matte gray appearance that ages beautifully.

    • Cost: $14 – $18 per sq. ft.
    • Best For: Modern architectural styles and eco-conscious buyers.

    4. Copper

    The gold standard of roofing. Copper develops a green patina over decades and can last over 100 years. It is extremely expensive but offers unmatched aesthetics.

    • Cost: $20 – $30+ per sq. ft.
    • Best For: Historic restorations and luxury estates.
    MaterialAvg. Cost per Sq. Ft.LifespanMaintenance Level
    Steel$8 – $1240-60 YearsLow
    Aluminum$10 – $1450+ YearsVery Low
    Zinc$14 – $1880-100 YearsLow
    Copper$20 – $30+100+ YearsMinimal

    Labor and Installation Expenses

    Labor typically accounts for 40% to 60% of the total project cost. Installing metal roofing requires specialized skills that differ significantly from laying asphalt shingles. Improper installation can lead to leaks, noise issues, and voided warranties.

    Why Labor Costs Vary

    • Panel Style: Standing seam panels require more precision and time to install than exposed-fastener corrugated panels.
    • Roof Pitch: Steeper roofs require additional safety equipment and slow down the workflow, increasing hourly labor charges.
    • Underlayment Quality: High-quality synthetic underlayment costs more but provides superior protection against ice dams and wind-driven rain.

    According to industry standards, professional installers charge between $4 and $8 per square foot for labor alone. Always verify that your contractor is certified by the manufacturer, as many warranties require professional installation to remain valid.

    How Much Does It Cost To Replace A Metal Roof

    Additional Costs to Consider

    Beyond the basic materials and labor, several “hidden” costs can impact your final invoice. Being aware of these helps avoid sticker shock.

    1. Old Roof Removal

    If your local building code allows it, you might install metal over existing shingles. However, most professionals recommend removing the old roof to inspect the decking for rot.

    • Cost: $1 – $5 per sq. ft. for tear-off and disposal.

    2. Structural Reinforcement

    Metal roofs are generally lighter than tile or slate, but heavier than asphalt. If your home’s framing is old or weak, you may need structural upgrades.

    • Cost: $1,000 – $3,000 depending on extent.

    3. Flashing and Trim

    High-quality flashing around chimneys, vents, and valleys is critical for preventing leaks. Cheap flashings fail quickly.

    • Cost: Included in most quotes, but premium copper flashing adds extra cost.

    4. Permits and Inspections

    Local municipalities require permits for roof replacements to ensure compliance with building codes.

    • Cost: $100 – $500, varying by city.

    For more detailed information on building standards and safety regulations, you can refer to general construction guidelines on Wikipedia.

    Is Metal Roofing Worth the Investment?

    When analyzing how much does it cost to replace a metal roof, it is essential to look at the Return on Investment (ROI). While the initial outlay is high, the long-term benefits are substantial.

    Energy Efficiency

    Metal roofs reflect solar radiant heat, which can reduce cooling costs by 10-25%. Many modern metal roofs come with cool-roof pigments that meet Energy Star standards.

    Durability and Longevity

    Unlike asphalt shingles that need replacement every 15-20 years, a quality metal roof lasts 40-70 years. This means you might never have to replace your roof again during your ownership of the home.

    Insurance Discounts

    Many insurance companies offer discounts of 5-15% on homeowners’ insurance premiums for metal roofs due to their resistance to fire, wind, and hail.

    Step-by-Step Guide to Budgeting Your Project

    To ensure you stay within budget, follow these concrete steps:

    1. Measure Your Roof: Calculate the square footage. A “square” in roofing equals 100 sq. ft. An average home is 15-20 squares.
    2. Get 3-5 Quotes: Never settle for the first bid. Ensure each quote includes the same scope of work (materials, labor, cleanup).
    3. Check Credentials: Verify licenses, insurance, and manufacturer certifications.
    4. Review Warranty Terms: Look for both a workmanship warranty (from the installer) and a material warranty (from the manufacturer).
    5. Plan for Timing: Schedule installation during shoulder seasons (spring or fall) when contractors may offer better rates due to lower demand.

    FAQ Section

    How much does it cost to replace a metal roof on a 2,000 sq. ft. house?

    For a 2,000 sq. ft. home, expect to pay between $16,000 and $36,000. This range depends heavily on whether you choose basic steel panels or premium standing seam aluminum.

    Is it cheaper to put metal roofing over shingles?

    Yes, it can save $1,000 to $3,000 by avoiding tear-off and disposal fees. However, this is only advisable if the existing roof deck is solid and local codes permit it. Trapping moisture between layers can cause rot, so professional assessment is vital.

    Does homeowners insurance cover metal roof replacement?

    Insurance typically covers replacement only if the damage is caused by a covered peril, such as a storm, hail, or fire. It does not cover wear and tear or age-related deterioration. Check your policy for specific exclusions.

    What is the cheapest metal roofing option?

    Corrugated galvanized steel panels with exposed fasteners are the most affordable option. They are durable and functional but lack the sleek aesthetic and leak-resistance of standing seam systems.

    How long does a metal roof last compared to shingles?

    A metal roof lasts 2-3 times longer than asphalt shingles. While shingles last 15-20 years, metal roofs easily last 40-70 years, offering better long-term value despite the higher initial cost.

    Conclusion

    Understanding how much does it cost to replace a metal roof empowers you to make a smart financial decision for your home. While the upfront cost ranges from $8 to $18 per square foot, the durability, energy savings, and increased property value make it a worthy investment. By choosing the right material and hiring a certified professional, you secure a roof that protects your family for decades.

    If you found this guide helpful, please share it on social media to help other homeowners navigate their roofing projects with confidence!

  • When The Roof Caved In And The Truth Came Out

    When The Roof Caved In And The Truth Came Out

    Have you ever felt that sinking feeling in your stomach when a familiar part of your home suddenly fails? For many homeowners, the moment when the roof caved in and the truth came out is not just a physical disaster, but an emotional awakening to neglected maintenance. This article guides you through understanding why this happens, how to prevent it, and what steps to take if you find yourself in this precarious situation.

    Why Do Roofs Suddenly Collapse?

    It is rarely as sudden as it seems. While it may feel like one bad storm caused the disaster, roof collapses are usually the result of cumulative stress over time. Understanding the mechanics behind a collapse is the first step in prevention.

    The Weight of Neglect

    Most residential roofs are designed to hold a specific “live load” (snow, rain, workers) and “dead load” (the weight of the roofing materials themselves). According to engineering standards, most homes in the US are built to withstand significant pressure. However, when maintenance is ignored, these margins of safety shrink.

    Water intrusion is the silent killer. When shingles crack or flashings fail, water seeps into the wooden trusses and rafters. Over months or years, this moisture causes wood rot. A beam that looks solid from the outside may be spongy and weak on the inside. When a heavy snowfall or intense rain event occurs, the compromised structure can no longer support the added weight, leading to catastrophic failure.

    Hidden Structural Defects

    Sometimes, the issue isn’t weather-related at all. Poor construction practices, such as using undersized lumber or improper nailing techniques, can leave a roof vulnerable from day one. In older homes, previous renovations might have removed critical support walls without reinforcing the roof structure above.

    Expert Insight: “A roof is only as strong as its weakest connection,” says structural engineer Mark Davis. “Homeowners often focus on the shingles, but the real danger lies in the attic framing.”

    Signs Your Roof Is About to Fail

    You do not need to be a contractor to spot the warning signs. By paying attention to subtle changes in your home, you can identify problems before they become emergencies.

    Visual Indicators in the Attic

    The attic is the best place to diagnose roof health. If you have access, look for these red flags:

    • Sagging Rafters: Any downward curve in the horizontal beams is a critical warning sign.
    • Water Stains: Dark spots on the wood indicate past or active leaks.
    • Mold Growth: A musty smell or visible black/green patches suggest chronic moisture issues.
    • Daylight Through Cracks: If you can see sunlight coming through the roof deck, water is definitely getting in.

    Interior Ceiling Clues

    Your living space also tells a story. Watch for:

    1. Cracks in Drywall: Especially around corners or where walls meet ceilings.
    2. Bubbling Paint: This indicates moisture trapped behind the surface.
    3. Sagging Ceilings: A ceiling that dips in the center is under severe stress.
    4. Creaking Noises: Unusual sounds during wind or rain storms suggest movement in the framing.
    SignSeverityAction Required
    Minor Water StainLowMonitor and schedule inspection
    Small Crack in DrywallMediumInvestigate source of leak
    Sagging RaftersHighImmediate professional assessment
    Visible DaylightCriticalEmergency repair needed
    When The Roof Caved In And The Truth Came Out

    What To Do Immediately After a Collapse

    If you experience the terrifying moment when the roof caved in and the truth came out, panic is natural, but action must be deliberate. Your priority is safety, followed by documentation and mitigation.

    Step 1: Ensure Safety and Evacuate

    Do not attempt to save possessions if the structure is unstable. Move everyone, including pets, to a safe area away from the collapse zone. If you hear cracking or shifting noises, leave the house immediately and call emergency services.

    Step 2: Document the Damage

    Once it is safe to do so, take photos and videos of the damage from multiple angles. Capture wide shots of the room and close-ups of the broken beams and debris. This evidence is crucial for your insurance claim. Do not throw away any damaged materials until an adjuster has seen them.

    Step 3: Mitigate Further Damage

    If it is raining, cover the exposed area with a heavy-duty tarp secured with ropes or weights. Remove standing water if it is safe to enter the area. This step is often required by insurance policies to prevent “secondary damage,” such as mold growth, which may not be covered if neglected.

    Step 4: Contact Your Insurance Provider

    Call your homeowner’s insurance company as soon as possible. Provide them with the initial details and ask for an adjuster to visit. Be honest about the timeline of events. If you knew about a leak and did nothing, your claim might be denied due to negligence.

    For more detailed information on building codes and safety standards, you can refer to resources like Wikipedia’s page on Building Code to understand the regulatory framework that governs home construction.

    The Financial and Emotional Truth

    The phrase when the roof caved in and the truth came out also refers to the financial reality many homeowners face. Insurance does not always cover everything.

    Understanding Coverage Limits

    Most standard policies cover “sudden and accidental” damage, such as a tree falling on your roof. However, they typically exclude damage resulting from long-term wear and tear or lack of maintenance. If the investigation reveals that the collapse was due to rot that existed for years, you may be responsible for the full cost of repairs.

    • Covered: Storm damage, fire, vandalism, sudden structural failure due to external force.
    • Not Covered: Gradual deterioration, insect damage, poor workmanship, neglect.

    The Cost of Repairs

    Roof replacement and structural repair are expensive. Depending on the size of your home and the extent of the damage, costs can range from $10,000 to over $50,000. This financial shock is often the “truth” that comes out—realizing that the deferred maintenance savings were illusory.

    How to Prevent Future Disasters

    Prevention is far cheaper than cure. Establishing a routine maintenance schedule can extend the life of your roof and keep your family safe.

    Annual Inspections

    Hire a licensed roofing contractor to inspect your roof at least once a year, preferably in the fall before winter sets in. They can identify loose shingles, cracked flashings, and early signs of rot that you might miss.

    Keep Gutters Clean

    Clogged gutters cause water to back up under the shingles, leading to leaks and ice dams in winter. Clean your gutters twice a year to ensure proper drainage.

    Address Leaks Immediately

    Never ignore a small leak. Even a minor drip can saturate insulation and weaken wooden structures over time. Fixing a small leak costs hundreds; fixing a collapsed roof costs thousands.

    Ventilation Matters

    Proper attic ventilation prevents heat and moisture buildup. Excessive heat can warp shingles, while moisture promotes rot. Ensure your attic has adequate intake and exhaust vents.

    FAQ Section

    1. Does homeowners insurance cover a collapsed roof?

    It depends on the cause. If the collapse was due to a covered peril like a storm, fire, or the weight of snow (if specified), it is likely covered. If it was due to neglect, rot, or age, it is typically excluded. Always read your policy details carefully.

    2. How long does it take to repair a collapsed roof?

    Minor repairs may take a few days, but a full structural rebuild can take several weeks or even months. This includes obtaining permits, hiring contractors, and waiting for materials. Temporary housing may be necessary during this period.

    3. Can I stay in my house while the roof is being repaired?

    In cases of partial collapse, it might be possible, but it is often unsafe and uncomfortable. Dust, noise, and exposure to the elements make it difficult. If the structural integrity is compromised, you will likely need to vacate the premises until repairs are complete.

    4. What is the average lifespan of a residential roof?

    Asphalt shingle roofs typically last 15–25 years. Metal roofs can last 40–70 years, and tile or slate roofs can last over 50 years. Regular maintenance can extend these lifespans significantly.

    5. How do I find a reputable roofing contractor?

    Look for contractors who are licensed, insured, and have good reviews on independent platforms. Ask for references from recent jobs and verify their credentials with your local state licensing board. Avoid door-to-door solicitors after storms.

    6. Will a collapsed roof affect my home’s resale value?

    Yes, significantly. A history of structural failure must be disclosed to potential buyers. It can lower the appraised value and make it harder to secure financing. Proper documentation of repairs and warranties can help mitigate this impact.

    Conclusion

    The moment when the roof caved in and the truth came out is a harsh lesson in the importance of home maintenance. It reveals that our homes are complex systems requiring care and attention. By staying vigilant, addressing small issues promptly, and understanding your insurance coverage, you can protect your investment and your family.

    Don’t wait for a disaster to act. Schedule an inspection today and share this article with friends and family to help them avoid similar pitfalls. Stay safe, stay informed, and keep your home secure.

  • How to Tie a Porch Roof Into an Existing Roof

    How to Tie a Porch Roof Into an Existing Roof

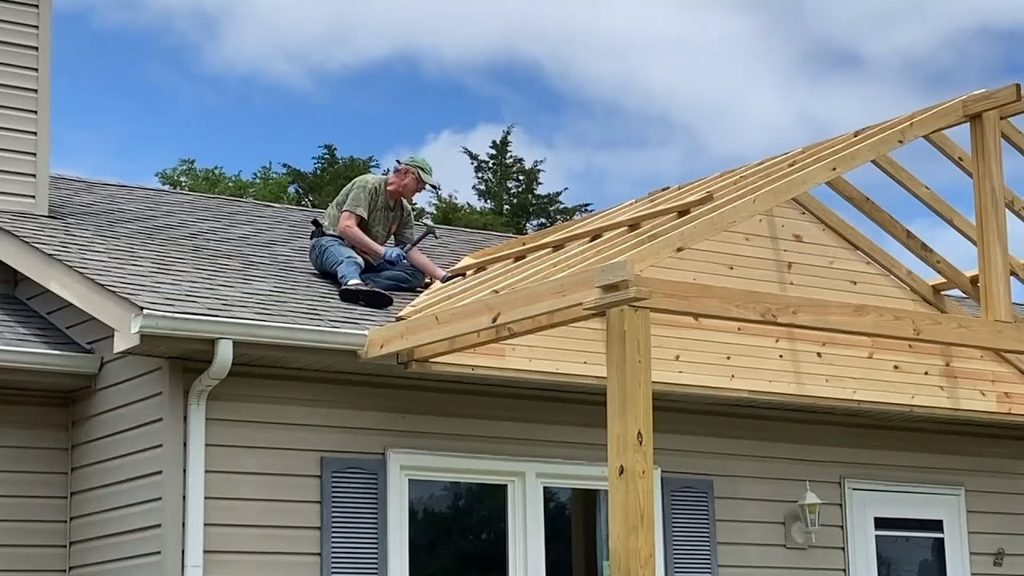
    Adding a covered porch is one of the most rewarding home improvement projects you can undertake. It extends your living space, boosts curb appeal, and provides a sheltered spot to enjoy the outdoors. However, the most critical—and often intimidating—part of this project is connecting the new structure to your home. If done incorrectly, it can lead to disastrous leaks and structural damage.

    Many homeowners hesitate at this stage, wondering if they need to hire a professional or if they can handle it themselves. The good news is that with the right preparation and understanding of building science, you can master this task. This guide will walk you through exactly how to tie a porch roof into an existing roof securely, ensuring a watertight seal that lasts for decades.

    Why Proper Integration Matters for Your Home’s Integrity

    Before we pick up a hammer, it is vital to understand why the connection point is so sensitive. Your existing roof is designed to shed water efficiently. When you interrupt that system with a new roof line, you create a potential entry point for moisture.

    According to the Insurance Institute for Business & Home Safety, water intrusion is the leading cause of residential insurance claims in the United States. A poorly tied-in roof doesn’t just leak; it can rot rafters, damage insulation, and promote mold growth inside your walls. Therefore, the goal isn’t just aesthetic alignment; it is structural continuity and hydrological integrity.

    Assessing Your Existing Roof Structure

    You cannot build a secure connection without knowing what you are connecting to. Every house is different, and assuming your roof structure is standard can lead to costly mistakes.

    Identifying Rafters vs. Trusses

    The first step is to determine if your existing roof uses stick-framed rafters or engineered trusses.

    • Stick-Framed Rafters: These are individual beams cut on-site. They are easier to work with because you can typically cut into the sheathing and attach directly to the rafter tails or add a ledger board.
    • Engineered Trusses: These are pre-fabricated triangular units. Warning: You generally cannot cut or notch trusses without compromising their structural integrity. If you have trusses, you must consult a structural engineer. You will likely need to build a standalone porch roof that sits below the existing eaves rather than tying directly into the slope.

    Checking Local Building Codes

    Building codes vary by municipality, especially regarding snow loads and wind uplift. In the US, most jurisdictions follow the International Residential Code (IRC). Always check with your local building department before starting. You may need a permit, and an inspector will likely want to see the flashing details before the final roofing material is installed.

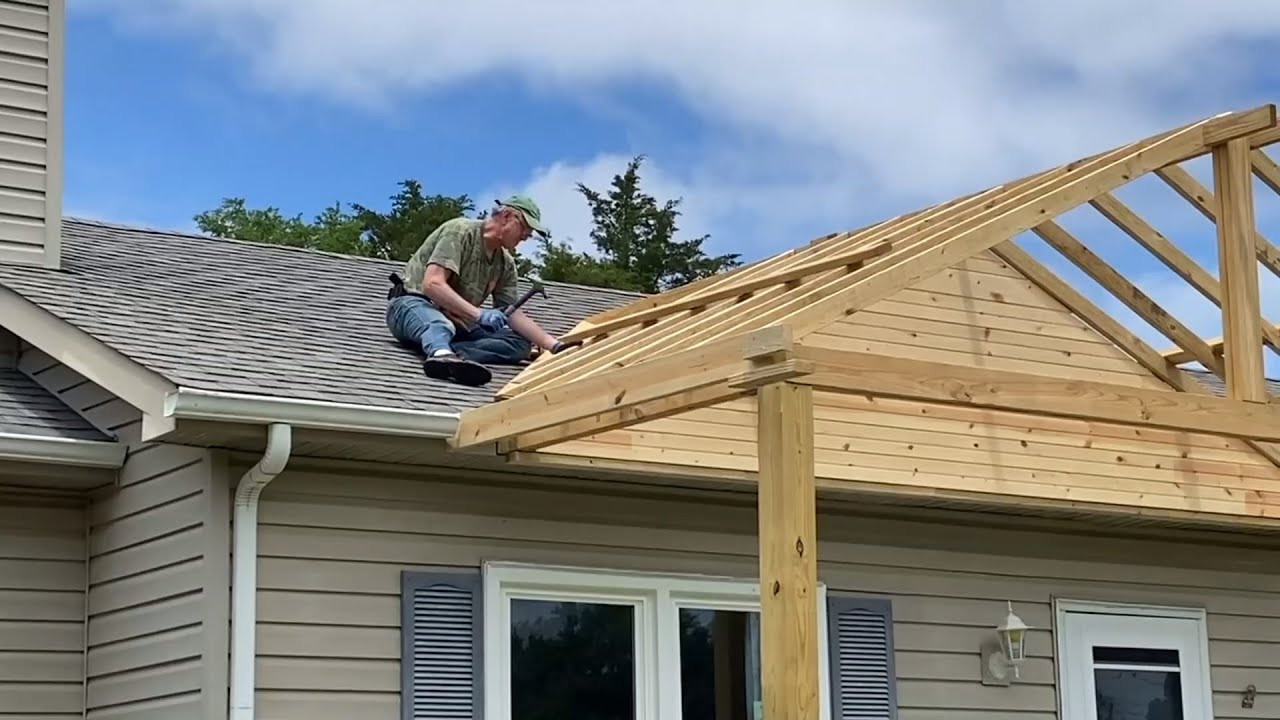
    How To Tie A Porch Roof Into An Existing Roof

    Step-by-Step Guide: How to Tie a Porch Roof Into an Existing Roof

    This tutorial assumes you are attaching a sloped porch roof to a side wall of your house, integrating it under the existing shingles. This is known as a “shed roof” or “lean-to” style connection.

    Step 1: Prepare the Connection Point

    Start by removing the shingles and underlayment from the area where the new roof will meet the house. You need to expose the roof deck (sheathing) and the underlying rafters.

    • Remove shingles approximately 2–3 feet up from the planned connection line.
    • Carefully pry up nails to avoid damaging reusable shingles if you plan to reuse them (though new shingles are recommended).
    • Clean the exposed wood deck of any debris or old adhesive.

    Step 2: Install the Ledger Board

    The ledger board is the horizontal beam that supports the inner edge of your porch roof rafters. It bears the weight of the new structure.

    1. Material Selection: Use pressure-treated lumber (minimum 2×8 or 2×10, depending on span) to resist rot.
    2. Positioning: Level the board against the house wall. It should be positioned so that the top of the porch rafters will sit slightly below the existing roof plane to allow for proper drainage.
    3. Fastening: Bolt the ledger board directly into the house’s rim joist or wall studs using lag screws or through-bolts. Do not rely solely on nails. For brick or stucco homes, you will need masonry anchors. Ensure there is a slight gap (1/4 inch) between the ledger and the siding to allow for drainage behind the flashing.

    Step 3: Frame the Porch Roof

    Install your porch rafters perpendicular to the ledger board, extending out to the outer support posts.

    • Slope: Ensure a minimum slope of 1/4 inch per foot (preferably 1/2 inch per foot) to ensure water runs off quickly.
    • Spacing: Match the spacing of your existing roof rafters (usually 16 or 24 inches on center) if possible, as this simplifies the sheathing process.
    • Hangers: Use heavy-duty metal joist hangers to connect the rafters to the ledger board. This provides superior strength compared to toe-nailing.

    Step 4: Sheathing and Underlayment

    Once the frame is complete, cover it with plywood or OSB sheathing.

    • Leave a 1/8-inch gap between sheets for expansion.
    • Apply a high-quality synthetic roof underlayment. Synthetic underlayment is preferred over felt paper because it is more resistant to tearing and moisture absorption during the construction phase.

    Step 5: The Critical Flashing Process

    This is the most important step in learning how to tie a porch roof into an existing roof. Flashing directs water away from the joint.

    1. Step Flashing: Install L-shaped metal step flashing along the wall intersection. Each piece should slide under the existing shingles above and overlap the shingle below.
    2. Ice and Water Shield: For extra protection, apply a self-adhering ice and water shield membrane over the joint area, extending at least 12 inches up the existing roof and 12 inches down the new porch roof. This creates a rubberized, watertight barrier.
    3. Counter Flashing: If your house has siding, install counter flashing over the step flashing to direct water away from the wall.

    For a deeper understanding of flashing materials and standards, you can refer to general construction principles outlined on Wikipedia’s Roof Flashing page.

    Step 6: Re-shingling and Finishing

    Now, integrate the new roofing material with the old.

    • Start shingling the porch roof from the bottom up.
    • When you reach the junction with the existing roof, weave the new shingles under the existing ones if possible, or use a closed-cut valley method.
    • Apply roofing cement sparingly under the edges where the old and new shingles meet.
    • Install drip edge flashing on the outer edges of the porch roof to direct water into the gutters.

    Common Mistakes to Avoid

    Even experienced DIYers can stumble here. Here is a comparison of right vs. wrong approaches:

    FeatureThe Right WayThe Wrong Way
    FlashingLayered step flashing + Ice/Water shieldCaulk only or single piece of metal
    Ledger AttachmentBolted into structural framingNailed into siding or trim
    SlopeMinimum 1/4″ per footFlat or insufficient pitch
    VentilationSoffit vents aligned with existing flowBlocked eaves causing heat buildup

    FAQ: Common Questions About Tying in Roof Structures

    1. Can I tie a porch roof into an existing roof without removing shingles?

    No. Attempting to flash over existing shingles is a recipe for leaks. You must remove shingles to install proper step flashing and ice/water shield underneath the existing layers. Water travels uphill via capillary action; surface-level caulking will eventually fail.

    2. Do I need a permit to build a porch roof?

    In most US jurisdictions, yes. Any structural alteration to your home’s envelope typically requires a building permit. This ensures your design meets local snow load and wind resistance codes. Skipping this can void your homeowner’s insurance and cause issues when selling your home.

    3. What is the best material for the ledger board?

    Always use pressure-treated lumber for any wood in contact with or near exterior walls. Cedar or redwood are naturally resistant to rot but are more expensive. Pressure-treated pine is the standard, cost-effective choice for structural framing in the US.

    4. How do I handle siding when installing the ledger board?

    You should not sandwich the siding between the ledger and the house. Ideally, remove the siding strip where the ledger will go. Install the ledger against the sheathing/studs, then install flashing over the top edge of the ledger before replacing the siding or installing trim. This prevents water from getting trapped behind the ledger.

    5. What if my existing roof has trusses?

    If your home uses engineered trusses, do not cut them. Instead, build a “standalone” porch roof. This means the porch roof structure is supported entirely by its own posts and beams, and the roofline sits below the existing eaves. You will still need to flash the wall connection, but you won’t be structurally tying into the truss system.

    Conclusion

    Learning how to tie a porch roof into an existing roof is a blend of carpentry skill and understanding water management. By focusing on a solid ledger board attachment, maintaining proper slope, and, most importantly, installing rigorous flashing, you can create a seamless and durable addition to your home.

    Remember, patience is key. Rushing the flashing process is the number one cause of future leaks. Take your time, double-check your levels, and don’t hesitate to consult a professional if your roof structure involves complex trusses.

    Did you find this guide helpful? Share it with your fellow DIY enthusiasts on social media or save it for your next weekend project! If you have questions about specific roofing materials, feel free to leave a comment below.

  • How To Add A Gable Porch Roof To Existing House

    How To Add A Gable Porch Roof To Existing House

    Adding a covered entrance is one of the most effective ways to boost your home’s curb appeal and protect your front door from the elements. However, many homeowners hesitate because they believe integrating a new structure with an old one is too complex or risky. If you are wondering how to add a gable porch roof to existing house structures without compromising integrity, you are in the right place.

    This guide breaks down the process into manageable steps, ensuring you understand the structural requirements, material choices, and aesthetic considerations needed for a professional-looking result. Whether you are a seasoned DIYer or planning to hire a contractor, understanding these fundamentals will save you time, money, and potential headaches.

    Why Choose a Gable Roof for Your Porch?

    Before diving into the construction, it is essential to understand why a gable roof is often the preferred choice for porch additions. A gable roof features two sloping sides that meet at a ridge, creating a triangular extension at each end. This design is not only classic and aesthetically pleasing but also highly functional.

    Advantages vs. Disadvantages

    FeatureGable Porch RoofFlat/Shed Porch Roof
    Water DrainageExcellent; sheds water quicklyModerate; requires precise slope
    Aesthetic AppealTraditional, adds height and grandeurModern, minimalist
    Construction ComplexityModerate; requires precise cuttingLower; simpler framing
    VentilationNatural airflow via gable endsLimited; may need mechanical vents
    CostMid-rangeGenerally lower

    According to architectural trends, gable roofs complement most traditional American home styles, including Colonial, Craftsman, and Farmhouse designs. They provide better ventilation and reduce the risk of water pooling, which is crucial for longevity.

    What Permits and Preparations Are Needed?

    One of the most critical steps in learning how to add a gable porch roof to existing house frameworks is navigating local building codes. Ignoring this step can lead to fines or forced removal of your new structure.

    Checking Local Zoning Laws

    Most municipalities require a building permit for structural additions. You will likely need to submit:

    • Site plans showing the porch location.
    • Structural drawings detailing beam sizes and footing depths.
    • Proof of insurance if hiring a contractor.

    Assessing the Existing Structure

    You must determine where the new roof will attach to your house. There are two primary methods:

    1. Attached to the Wall: The roof ledger board is bolted directly to the house’s framing.
    2. Freestanding: The porch stands independently, merely touching the house. This is often easier for permitting as it doesn’t alter the main home’s structural load.

    Pro Tip: Always consult a structural engineer if you are attaching heavy loads to an older home. Older framing may not support the additional weight without reinforcement.

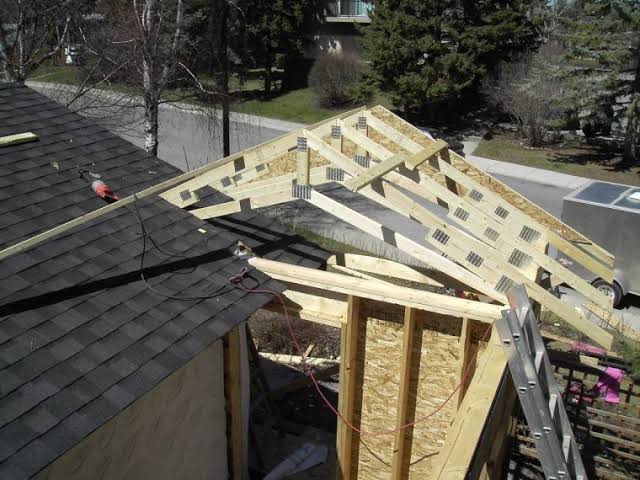
    How To Add A Gable Porch Roof To Existing House

    Step-by-Step Guide: Building the Foundation and Frame

    The stability of your gable porch depends entirely on its foundation. Even a small porch needs solid footings to prevent sinking or shifting during freeze-thaw cycles.

    Step 1: Pouring Concrete Footings

    For a standard wooden porch, you will typically need concrete footings that extend below the frost line in your area.

    • Digging: Use a post-hole digger to create holes approximately 12–16 inches in diameter. Depth varies by region (e.g., 36 inches in northern US states).
    • Mixing: Use pre-mixed concrete bags. For each footing, you might need roughly 2–3 bags depending on depth.
    • Setting Posts: Insert pressure-treated 4×4 or 6×6 posts into wet concrete. Use a level to ensure they are perfectly plumb. Allow 48 hours for curing before adding weight.

    Step 2: Installing the Beam and Ledger

    Once the posts are set, you will install the main support beam across the front posts. If attaching to the house:

    • Locate the wall studs using a stud finder.
    • Install a pressure-treated ledger board using lag screws or through-bolts. Do not rely on nails alone.
    • Ensure the ledger is level with the top of your outer posts.

    Step 3: Framing the Rafters

    This is where the “gable” shape comes to life.

    • Cutting Rafters: Use 2×6 or 2×8 lumber for rafters, depending on the span. The angle of the cut (pitch) should match your main house roof if possible, or be slightly steeper for better drainage. A common pitch is 4:12 (4 inches of rise for every 12 inches of run).
    • Installing Ridge Board: The ridge board runs along the peak. It connects the tops of the opposing rafters.
    • Securing Connections: Use metal rafter ties and hurricane clips to secure rafters to the ledger and beam. These small metal pieces provide crucial resistance against wind uplift.

    For more detailed information on roof framing standards, you can refer to general construction principles outlined on Wikipedia’s Roof page.

    Choosing Materials for Durability and Style

    Selecting the right materials ensures your porch lasts for decades with minimal maintenance.

    Roofing Materials

    • Asphalt Shingles: Cost-effective and easy to match with your existing house roof.
    • Metal Roofing: Highly durable, excellent for shedding snow, and offers a modern farmhouse look.
    • Polycarbonate Panels: Great for letting light through while keeping rain out, though less traditional.

    Trim and Soffits

    Don’t forget the finishing touches. Fascia boards cover the ends of the rafters, while soffits cover the underside. Ventilated soffits are recommended to prevent moisture buildup in the attic space of the porch.

    Common Mistakes to Avoid

    Even experienced DIYers can stumble when figuring out how to add a gable porch roof to existing house structures. Here are the most frequent errors:

    1. Incorrect Pitch: If the porch roof pitch is too flat, water will pool. If it’s too steep, it may look disproportionate to the house.
    2. Poor Flashing: Where the new roof meets the house wall, improper flashing leads to leaks. Use step flashing and counter-flashing integrated with the house siding.
    3. Ignoring Load Paths: Ensure the weight of the roof transfers directly down through the posts to the footings. Never let the weight rest solely on decorative columns.

    FAQ Section

    1. How much does it cost to add a gable porch roof?

    Costs vary widely based on size and materials. On average, homeowners spend between $2,500 and $7,000 for a basic wooden gable porch roof. High-end materials like cedar or metal can push this to $10,000+.

    2. Can I build a gable porch roof myself?

    Yes, if you have intermediate carpentry skills. However, working at heights and handling structural loads requires caution. If you are unsure about load calculations, hire a professional for the framing stage.

    3. Do I need a permit for a small porch roof?

    In most US jurisdictions, yes. Any structure attached to your home or over a certain square footage (often 30–50 sq. ft.) requires a permit. Always check with your local building department first.

    4. What is the best pitch for a porch gable roof?

    A 4:12 or 5:12 pitch is standard. It provides adequate water runoff and matches well with most residential architecture. Steeper pitches (6:12) are better for snowy climates.

    5. How do I seal the connection between the porch roof and the house?

    Use high-quality ice and water shield underlayment beneath the shingles at the junction. Install metal step flashing woven into the siding or brickwork, and finish with a bead of exterior-grade polyurethane caulk.

    6. Will adding a porch roof increase my home value?

    Yes. Curb appeal improvements like a covered porch can offer a high return on investment, often recouping 50–80% of the cost upon sale, according to real estate staging experts.

    Conclusion

    Learning how to add a gable porch roof to existing house structures is a rewarding project that enhances both the functionality and beauty of your home. By carefully planning your foundation, adhering to local codes, and choosing durable materials, you can create a welcoming entrance that stands the test of time.

    Remember, precision in framing and attention to waterproofing details are the keys to success. Take your time, measure twice, and don’t hesitate to seek professional advice for structural concerns.

    Did you find this guide helpful? Share it with your friends on Facebook or Pinterest who might be planning their own home improvement projects! Let’s inspire others to build smarter and safer.

  • Does A Metal Roof Increase Home Value?

    Does A Metal Roof Increase Home Value?

    Buying a new roof is one of the most significant investments a homeowner can make, often costing tens of thousands of dollars. It is natural to wonder if this expense will pay off when it is time to sell your property. Many homeowners ask, “Does a metal roof increase the value of a home?” The short answer is yes, but the extent of that value depends on several factors, including your location, the quality of installation, and current market trends. In this guide, we will break down the financial benefits, aesthetic advantages, and practical considerations to help you make an informed decision.

    Understanding the Return on Investment (ROI)

    When evaluating any home improvement project, the Return on Investment (ROI) is the critical metric. Unlike cosmetic updates like painting a room, a roof replacement is a functional necessity that directly impacts the structural integrity of your house.

    According to various real estate studies and remodeling impact reports, metal roofing typically offers a higher ROI compared to traditional asphalt shingles. While asphalt shingles may need replacement every 15–20 years, a high-quality metal roof can last 40–70 years. This longevity is a major selling point for potential buyers who want to avoid immediate maintenance costs.

    • Average ROI for Metal Roofs: Estimates suggest homeowners can recoup between 85% to 95% of their investment upon sale.
    • Comparison to Asphalt: Traditional asphalt shingles often have a lower ROI because they are viewed as a standard expectation rather than a premium upgrade.

    The key takeaway here is that while you may not get 100% of your money back immediately, the increased perceived value and faster sale time often offset the initial cost.

    How Much Value Does a Metal Roof Add?

    Quantifying the exact dollar amount added to your home’s value can be tricky, as it varies by region and housing market. However, industry experts generally agree that a metal roof can increase a home’s resale value by 1% to 6%.

    For a home valued at $500,000, this could mean an increase of $5,000 to $30,000. In areas prone to severe weather, such as hail-prone regions in the Midwest or hurricane zones in the Southeast, the value addition tends to be on the higher end of that spectrum. Buyers in these areas prioritize durability and risk mitigation, making metal roofs highly desirable.

    Factors Influencing Value Addition

    FactorImpact on Value
    LocationHigher value in areas with extreme weather (snow, hail, heat).
    Style & Curb AppealModern styles (standing seam) add more value than outdated corrugated looks.
    Color ChoiceNeutral, energy-efficient colors appeal to a broader buyer base.
    Installation QualityProfessional installation ensures warranty validity and buyer confidence.

    Why Do Buyers Prefer Metal Roofs?

    To understand why a metal roof boosts value, we must look at it from the buyer’s perspective. What problems does it solve for them?

    1. Exceptional Durability and Longevity

    Buyers are increasingly educated about home maintenance. They know that a metal roof is resistant to cracking, shrinking, and eroding. It can withstand wind gusts of up to 140 mph and does not corrode or crack like some other materials. This peace of mind is a powerful psychological driver in the purchasing process.

    2. Energy Efficiency Savings

    One of the most compelling arguments for metal roofing is its energy efficiency. Metal roofs reflect solar radiant heat, which can reduce cooling costs by 10–25%. For buyers in hot climates like Arizona, Texas, or Florida, this translates to tangible monthly savings. Many modern metal roofs come with special pigment coatings that enhance this reflective capability, further boosting the home’s energy rating.

    3. Low Maintenance Requirements

    Unlike wood shakes that require treatment against moss and rot, or asphalt shingles that may lose granules over time, metal roofs are virtually maintenance-free. Occasional inspections and cleaning of gutters are usually all that is required. For busy professionals or retirees looking to downsize, a “set it and forget it” roof is a major luxury.

    4. Fire and Weather Resistance

    Metal is non-combustible and has a Class A fire rating, the highest available. In regions prone to wildfires, this feature can significantly lower homeowners insurance premiums. Additionally, metal roofs shed snow and rain efficiently, reducing the risk of water damage and ice dams.

    Does A Metal Roof Increase The Value Of A Home

    Metal Roof vs. Asphalt Shingles: A Comparison

    To help you visualize the differences, here is a direct comparison between the two most common roofing materials in the US market.

    FeatureMetal RoofingAsphalt Shingles
    Lifespan40–70+ years15–20 years
    Initial CostHigh ($150–$600 per square)Low ($100–$200 per square)
    MaintenanceVery LowModerate
    Energy EfficiencyHigh (Reflective)Low (Absorbs Heat)
    Resale ValueIncreases ValueNeutral/Standard
    Environmental ImpactRecyclableLandfill Waste

    Note: Costs are estimates and vary by region and material type (e.g., steel, aluminum, copper).

    Potential Drawbacks to Consider

    While the benefits are substantial, it is important to address potential concerns to maintain E-E-A-T (Experience, Expertise, Authoritativeness, and Trustworthiness).

    • Noise: A common myth is that metal roofs are noisy during rain. However, when installed with proper solid sheathing and insulation, a metal roof is no louder than an asphalt roof. In fact, it can be quieter due to the additional layering.
    • Denting: Lower-gauge metals can dent from large hail or falling branches. Opting for a thicker gauge (such as 24-gauge or 26-gauge steel) mitigates this risk.
    • Upfront Cost: The initial investment is significantly higher than asphalt. Homeowners must plan to stay in the home long enough to realize the benefits, or ensure the local market values premium upgrades.

    For more detailed technical specifications on roofing materials, you can refer to general construction standards on Wikipedia.

    Steps to Maximize Value When Installing a Metal Roof

    If you decide to proceed, follow these steps to ensure you get the maximum return on your investment:

    1. Choose the Right Style: Standing seam metal roofs are currently the most popular for residential homes due to their sleek, modern appearance and hidden fasteners. Avoid industrial-looking corrugated panels unless it fits a specific architectural style (like a farmhouse).
    2. Select Neutral Colors: Stick to timeless colors like charcoal, slate gray, bronze, or matte black. Bold colors may limit your pool of potential buyers.
    3. Hire Certified Installers: Ensure your contractor is certified by the manufacturer. This often transfers the warranty to the new homeowner, which is a huge selling point.
    4. Document Everything: Keep all receipts, warranty documents, and before/after photos. Provide these to potential buyers to prove the quality and age of the roof.

    FAQ Section

    1. Does a metal roof affect home insurance rates?

    Yes, in most cases, a metal roof can lower your homeowners insurance premiums. Because metal is fire-resistant and durable against wind and hail, many insurance companies offer discounts ranging from 5% to 35%. Always check with your specific provider for exact figures.

    2. Will a metal roof interfere with Wi-Fi or cell signals?

    This is a common concern, but generally, a metal roof does not significantly disrupt Wi-Fi or cellular signals inside the home. Modern routers are powerful enough to penetrate roofing materials, and cell signals primarily enter through windows and walls. If you have a weak signal, a signal booster is a more effective solution than avoiding a metal roof.

    3. How long does it take to install a metal roof?

    The installation time varies based on the size of the home and the complexity of the roofline. On average, a professional crew can complete a residential metal roof installation in 3 to 7 days. This is comparable to or slightly longer than asphalt shingle installation due to the precision required.

    4. Can I install a metal roof over my existing shingles?

    In many cases, yes. Installing metal over existing shingles can save on disposal costs and labor time. However, this depends on local building codes and the condition of the underlying deck. A professional inspection is necessary to determine if your home is a candidate for this method.

    5. Does the color of the metal roof fade over time?

    High-quality metal roofs use Kynar 500 or similar PVDF resin-based paint systems that are highly resistant to fading, chalking, and UV degradation. Most manufacturers offer warranties against fading for 20–30 years. While slight changes may occur over decades, they are minimal compared to other materials.

    Conclusion

    So, does a metal roof increase the value of a home? Absolutely. It offers a compelling combination of durability, energy efficiency, and aesthetic appeal that resonates with modern homebuyers. While the upfront cost is higher than traditional options, the long-term savings on maintenance and energy, coupled with a higher resale value, make it a smart financial decision for many homeowners.

    If you are planning to sell in the next few years, a metal roof can set your property apart in a competitive market. If you plan to stay longer, you will enjoy the comfort and security it provides.

    Did you find this guide helpful? Share this article with friends or family who are considering a roof replacement, and let us know in the comments if you have experience with metal roofing!

  • Price On A Mixed Air Roof Exhaust Fan Roof Vent

    Price On A Mixed Air Roof Exhaust Fan Roof Vent

    Are you struggling with stagnant air, excessive heat buildup, or moisture issues in your commercial building or large residential space? You are not alone; many property owners face these challenges until they invest in proper ventilation solutions. Understanding the Price On A Mixed Air Roof Exhaust Fan Roof Vent is the first step toward creating a healthier, more energy-efficient environment without breaking the bank.

    In this guide, we will break down exactly what influences the cost, provide realistic price ranges, and help you determine if this investment is right for your property. We aim to simplify the technical jargon so you can make an informed decision with confidence.

    What Is a Mixed Air Roof Exhaust Fan?

    Before diving into the numbers, it is crucial to understand what you are buying. A mixed air roof exhaust fan is not just a simple hole in the roof. It is a sophisticated mechanical device designed to expel stale, hot, or contaminated air from the interior of a building while often integrating with fresh air intake systems.

    Unlike standard static vents, these fans use motorized impellers to actively pull air out. The term “mixed air” often refers to systems that balance exhaust with fresh air intake to maintain positive or neutral pressure, preventing backdrafts and ensuring consistent airflow. This balance is critical for industrial kitchens, manufacturing plants, and large office buildings where air quality directly impacts productivity and health.

    How Much Does a Mixed Air Roof Exhaust Fan Cost?

    The Price On A Mixed Air Roof Exhaust Fan Roof Vent varies significantly based on capacity, brand, and features. Generally, you can expect the following price brackets for the unit itself (excluding installation):

    • Small Residential/Light Commercial (100–500 CFM): $150 – $400
    • Medium Commercial (500–1,500 CFM): $400 – $900
    • Large Industrial (1,500+ CFM): $900 – $2,500+

    Note: CFM stands for Cubic Feet per Minute, which measures the volume of air the fan can move.

    Factors Influencing the Price

    Several key factors drive the cost up or down. Understanding these will help you budget accurately.

    1. Airflow Capacity (CFM): The higher the CFM, the larger the motor and housing required. A fan moving 2,000 CFM will cost significantly more than one moving 500 CFM.
    2. Motor Type: Standard AC motors are cheaper but less efficient. ECM (Electronically Commutated Motors) are more expensive upfront but offer variable speed control and significant energy savings over time.
    3. Material Quality: Fans made from galvanized steel are standard. However, if you are in a coastal area or dealing with corrosive fumes, you may need aluminum or stainless steel housings, which can increase the price by 30–50%.
    4. Features: Added features like weather hoods, bird screens, backdraft dampers, and smart thermostats add to the base cost.

    Installation Costs: What to Expect

    Buying the unit is only half the equation. Professional installation is highly recommended due to the complexities of roofing and electrical work.

    Installation ComponentEstimated Cost Range
    Labor (Per Hour)$75 – $150
    Roof Curb/Flashing$100 – $300
    Electrical Wiring$200 – $600
    Total Installation$500 – $1,500+

    If your roof requires structural reinforcement or if the electrical panel needs an upgrade to handle the new load, costs can rise further. Always get at least three quotes from licensed HVAC contractors.

    People Also Ask: Common Questions Answered

    To help you navigate the purchasing process, we have addressed the most common questions found in search results regarding the Price On A Mixed Air Roof Exhaust Fan Roof Vent.

    1. Is a mixed air exhaust fan better than a standard attic fan?

    Yes, for commercial or large-scale applications. Standard attic fans are typically passive or low-power active units designed for residential attics. A mixed air exhaust fan is engineered for higher static pressure and continuous operation. It integrates better with HVAC systems to manage pressure differentials, which standard fans cannot do effectively. While the initial Price On A Mixed Air Roof Exhaust Fan Roof Vent is higher, the long-term benefits in air quality and system efficiency outweigh the costs for larger buildings.

    2. How does energy efficiency affect the total cost of ownership?

    Energy efficiency is a hidden cost factor. A cheaper fan with a standard motor may consume 30% more electricity than a premium model with an ECM motor. Over a five-year period, the energy savings from a high-efficiency unit can offset the higher upfront purchase price. Look for fans with ENERGY STAR ratings or high efficiency metrics. According to the U.S. Department of Energy, efficient ventilation systems can reduce overall HVAC loads by improving thermal comfort and reducing the need for excessive cooling.

    3. Can I install this myself to save money?

    While DIY installation is possible for handy homeowners, it is generally discouraged for mixed air systems. These units require precise sealing to prevent roof leaks and correct electrical wiring to ensure safety and code compliance. Improper installation can void warranties and lead to costly water damage. If you choose DIY, ensure you have experience with roofing flashing and low-voltage or line-voltage electrical connections. However, for most users, professional installation ensures longevity and performance.

    4. What maintenance costs should I anticipate?

    Maintenance is minimal but essential. You should plan for:

    • Annual Inspection: Check for debris, bird nests, or rust. ($0 if DIY, $100–$200 if professional).
    • Bearing Lubrication: Some models require annual greasing.
    • Belt Replacement: If the fan uses belt-driven motors, belts may need replacement every 2–3 years ($20–$50).

    Regular maintenance extends the lifespan of the fan from 10 years to 15+ years, protecting your initial investment.

    Price On A Mixed Air Roof Exhaust Fan Roof Vent

    Choosing the Right Brand: A Quick Comparison

    Not all fans are created equal. Here is a brief overview of reputable brands in the market:

    • Greenheck: Known for durability and high-performance industrial fans. Higher price point but excellent warranty support.
    • Loren Cook: Offers a wide range of sizes and custom options. Mid-to-high price range.
    • Broan-NuTone: More focused on residential and light commercial. Lower price point, easier to find in local stores.
    • Delta Breez: Innovative designs with smart sensors. Competitive pricing for tech-forward solutions.

    When evaluating the Price On A Mixed Air Roof Exhaust Fan Roof Vent, consider the warranty length. A longer warranty often indicates manufacturer confidence in product durability.

    Step-by-Step Guide to Budgeting for Your Vent

    To ensure you do not overspend, follow this logical budgeting process:

    1. Calculate Required CFM: Determine the volume of your space and the number of air changes per hour needed. For example, a kitchen may need 15–20 air changes per hour, while an office may only need 4–6.
    2. Select the Type: Decide between direct-drive (lower maintenance) or belt-drive (easier motor replacement) based on your technical comfort level.
    3. Get Quotes: Contact three local suppliers for the unit price and three contractors for installation.
    4. Check for Rebates: Many utility companies offer rebates for installing energy-efficient ventilation equipment. This can reduce the net cost by $100–$500.
    5. Factor in Accessories: Do not forget to budget for rain caps, vibration isolators, and control switches.

    Why Investing in Quality Matters

    Opting for the cheapest option can be a false economy. Low-quality fans often suffer from:

    • Noise Issues: Poorly balanced impellers create annoying hums or rattles.
    • Premature Failure: Cheap bearings wear out quickly, especially in extreme weather.
    • Leakage: Inferior flashing kits lead to roof leaks, causing thousands of dollars in interior damage.

    By investing in a reputable brand and professional installation, you ensure reliable performance. This reliability translates to better indoor air quality, which is linked to improved employee productivity and reduced health complaints.

    Conclusion

    Understanding the Price On A Mixed Air Roof Exhaust Fan Roof Vent involves looking beyond the sticker price. You must consider installation, energy efficiency, maintenance, and the specific needs of your building. While prices range from $150 for small units to over $2,500 for industrial giants, the right choice balances cost with performance.

    Remember, a well-ventilated building is a healthy building. By choosing the right fan and installing it correctly, you invest in the longevity of your property and the well-being of its occupants.

    Did you find this guide helpful? Share it with your network on LinkedIn or Facebook to help other property owners make smarter HVAC decisions. If you have specific questions about your project, leave a comment below!