Category: homeowner roofing guide

  • Shingle Roof Replacement Cost Guide

    Shingle Roof Replacement Cost Guide

    Have you noticed curling edges or missing granules on your roof lately? It is a stressful realization, but knowing how much does it cost to replace a shingle roof is the first step toward securing your home’s future. This guide breaks down every expense so you can budget with confidence and avoid surprise bills.

    Understanding the Average Cost of Shingle Roof Replacement

    When homeowners ask about roofing costs, they are usually looking for a ballpark figure to start their financial planning. In 2026, the national average cost to replace an asphalt shingle roof ranges between $8,500 and $14,500 for a standard 2,000-square-foot home. However, this number can fluctuate significantly based on your location, the complexity of your roof structure, and the specific type of shingles you choose.

    It is crucial to understand that “shingle roof” is a broad category. While asphalt is the most common due to its affordability and durability, the price per square foot varies. Generally, you can expect to pay between $4.50 and $9.00 per square foot installed. This includes both materials and labor.

    Labor typically accounts for about 60% of the total cost, while materials make up the remaining 40%. If you live in a high-cost-of-living area like California or New York, expect these figures to be on the higher end. Conversely, in the Midwest or South, prices may lean toward the lower spectrum due to competitive market rates and lower labor costs.

    Factors That Influence Your Final Roofing Bill

    Several variables dictate the final invoice from your contractor. Understanding these factors helps you anticipate where your money is going.

    1. Roof Size and Pitch

    The size of your roof is measured in “squares,” where one square equals 100 square feet. A larger roof naturally requires more materials and labor. Additionally, the pitch (steepness) matters. A steep roof requires special safety equipment, more time, and highly skilled labor, which increases the cost. A low-slope or flat roof is generally cheaper to replace because it is easier and safer to work on.

    2. Type of Asphalt Shingles

    Not all shingles are created equal. Here is a quick breakdown of the three main tiers:

    • 3-Tab Asphalt Shingles: The most economical option. They are thin and have a flat appearance. Cost: $3.50–$5.50 per sq. ft.
    • Architectural (Dimensional) Shingles: The most popular choice. They are thicker, offer better wind resistance, and mimic the look of wood or slate. Cost: $4.50–$7.50 per sq. ft.
    • Premium/Luxury Shingles: High-end options that offer superior durability and aesthetic appeal. Cost: $7.00–$12.00+ per sq. ft.

    3. Removal of Old Roofing

    Does your new roof need to go over the old one, or does the old layer need to be torn off? Most building codes allow only two layers of roofing. If you already have two layers, or if the underlying deck is damaged, a full tear-off is required. Tear-off costs add approximately $1.00 to $2.50 per square foot to your project due to labor and dumpster fees.

    4. Geographic Location

    Local climate conditions influence material choices. For example, homes in hurricane-prone areas may require impact-resistant shingles and additional fastening, which raises the price. Similarly, regions with heavy snowfall may need enhanced ice and water shields.

    Material Breakdown: What Are You Paying For?

    To truly understand how much does it cost to replace a shingle roof, you must look beyond just the shingles themselves. A complete roofing system includes several critical components.

    ComponentDescriptionEstimated Cost Impact
    UnderlaymentA water-resistant barrier placed directly on the roof deck.$0.50–$1.00 per sq. ft.
    Ice & Water ShieldExtra protection for valleys and eaves to prevent leaks.$0.75–$1.50 per sq. ft.
    FlashingMetal pieces used around chimneys, vents, and walls.$20–$50 per linear foot
    VentilationRidge vents or box vents to ensure airflow.$300–$800 total
    Drip EdgeMetal flashing along the edges to direct water away.$1.00–$2.00 per linear foot

    Skipping any of these components to save money is a false economy. Proper ventilation, for instance, extends the life of your shingles by preventing heat buildup in the attic. According to industry standards, proper airflow is non-negotiable for warranty validity.

    For more detailed information on roofing materials and their historical development, you can refer to Wikipedia’s article on Roofing.
    How Much Does It Cost To Replace A Shingle Roof

    Step-by-Step: The Replacement Process

    Knowing the process helps you verify that your contractor is doing the job correctly. Here is what a professional replacement entails:

    1. Site Preparation: The crew will protect your landscaping, set up dumpsters, and ensure safety lines are secure.
    2. Tear-Off: Old shingles, underlayment, and flashing are removed. The roof deck is inspected for rot or damage. Any compromised plywood is replaced at an additional cost (usually $75–$150 per sheet).
    3. Installation of Underlayment: A fresh layer of synthetic or felt underlayment is rolled out and nailed down. Ice and water shield is applied to vulnerable areas.
    4. Flashing Installation: New metal flashing is installed around chimneys, skylights, and wall intersections. This is a critical step for leak prevention.
    5. Shingle Installation: Starting from the bottom edge, shingles are laid in overlapping rows. Starter strips are used at the eaves to prevent wind uplift.
    6. Ventilation and Ridge Cap: Vents are installed to allow hot air to escape. The ridge cap is added last to seal the peak of the roof.
    7. Cleanup: The site is magnetically swept for nails, and debris is hauled away.

    DIY vs. Hiring a Professional: Is It Worth It?

    Some homeowners consider replacing their roof themselves to save on labor costs. While this might seem appealing, roofing is one of the most dangerous home improvement projects.

    Risks of DIY Roofing:

    • Safety Hazards: Falls from heights are a leading cause of home injury.
    • Voided Warranties: Most shingle manufacturers void warranties if the roof is not installed by a certified professional.
    • Code Violations: Incorrect installation can lead to failing home inspections when you sell your house.

    Benefits of Hiring a Pro:

    • Expertise: Professionals spot hidden issues like soft spots in the deck.
    • Speed: A crew can finish in 1–3 days; a DIYer might take weeks.
    • Insurance: Reputable contractors carry liability and workers’ compensation insurance.

    Given the complexity and risk, hiring a licensed contractor is almost always the smarter financial decision in the long run.

    How to Save Money on Your Roof Replacement

    While you should never cut corners on quality, there are legitimate ways to reduce costs:

    • Get Multiple Quotes: Aim for at least three detailed estimates. Ensure each quote includes the same scope of work (materials, tear-off, cleanup).
    • Choose Architectural Shingles: They offer the best balance of cost, durability, and curb appeal. Avoid premium luxury shingles unless necessary for aesthetic matching.
    • Schedule Off-Season: Roofing demand peaks in late summer and early fall. Scheduling your replacement in late winter or early spring (weather permitting) may yield discounts.
    • Check for Insurance Coverage: If your roof was damaged by a recent storm (hail, wind), your homeowner’s insurance might cover part or all of the replacement cost.

    FAQ Section

    1. How long does a shingle roof last?

    Standard 3-tab asphalt shingles typically last 15–20 years. Architectural shingles can last 25–30 years, while premium varieties may last up to 50 years. Regular maintenance and proper ventilation can extend these lifespans.

    2. Does homeowners insurance cover roof replacement?

    Insurance usually covers roof replacement if the damage is caused by a covered peril, such as hail, windstorms, or falling trees. It generally does not cover wear and tear or age-related deterioration. Always review your policy details.

    3. Can I install new shingles over old ones?

    Yes, but only if there is currently only one layer of shingles and the roof deck is in good condition. Most local building codes prohibit more than two layers. Adding a second layer saves on tear-off costs but can hide underlying deck issues.

    4. What is the most expensive part of replacing a roof?

    Labor is typically the largest expense, accounting for roughly 60% of the total cost. Materials, particularly high-end shingles and flashing, make up the rest. Disposal fees for the old roof can also add up if not included in the initial quote.

    5. How do I know if I need a full replacement or just repairs?

    If your roof is over 20 years old, has widespread granule loss, or leaks in multiple areas, a full replacement is likely more cost-effective. If the damage is isolated to a small section and the rest of the roof is young, repairs may suffice. A professional inspection is the best way to decide.

    Conclusion

    Replacing your roof is a significant investment, but it is essential for protecting your home and family. By understanding how much does it cost to replace a shingle roof, you can navigate the process with clarity. Remember, the cheapest quote is not always the best value. Prioritize quality materials, reputable contractors, and proper installation techniques.

    Take the time to research, get multiple quotes, and ask questions. Your roof is your home’s first line of defense against the elements. Make sure it is built to last.

    Found this guide helpful? Share it with friends or neighbors who might be facing similar roofing decisions!
  • Red Roof Inn Near 8201 Ewing Halsell, San Antonio

    Red Roof Inn Near 8201 Ewing Halsell, San Antonio

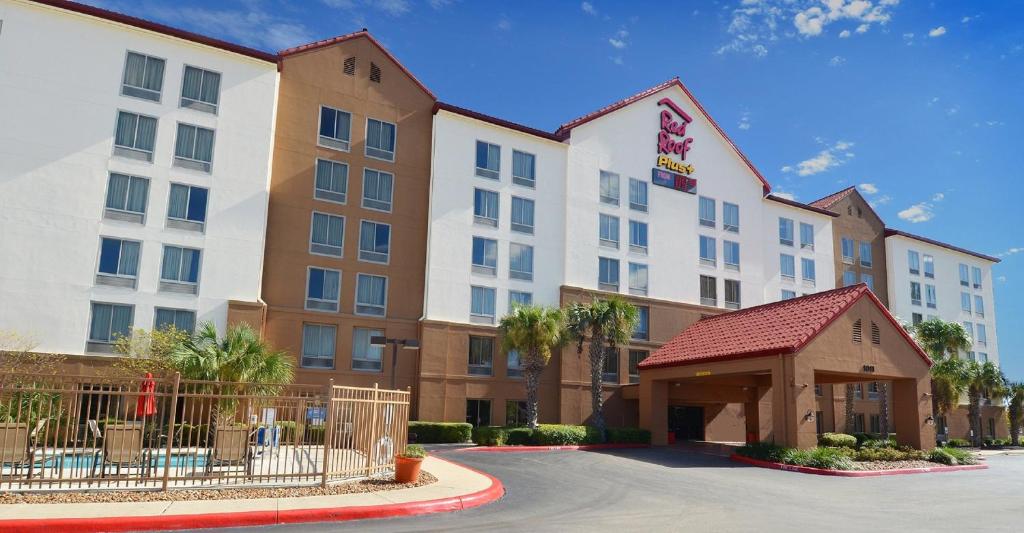
    Finding reliable and affordable accommodation in a sprawling city like San Antonio can be surprisingly stressful, especially when you are on a tight schedule or navigating unfamiliar neighborhoods. You need a place that is not only budget-friendly but also conveniently located to minimize travel time and maximize comfort during your stay. If you are specifically searching for the Red Roof Inn nearest to 8201 Ewing Halsell San Antonio, this guide will help you identify the best options, understand what to expect, and ensure a smooth booking experience.

    Identifying the Closest Red Roof Inn Location

    When analyzing the geographic coordinates of 8201 Ewing Halsell Drive, San Antonio, TX 78239, it is important to understand the local layout. This address is located in the Northeast San Antonio area, near the intersection with I-35 and potentially close to industrial or commercial zones depending on the specific development map updates of 2026.

    The primary goal for travelers in this area is usually proximity to major highways for easy access to downtown San Antonio, the Airport (SAT), or local business districts. Based on current mapping data and hotel distribution in Northeast San Antonio, the most relevant Red Roof Inn property to consider is the Red Roof Inn San Antonio – Fort Sam Houston.

    While there may be other properties in the greater San Antonio metropolitan area, the Fort Sam Houston location is strategically positioned to serve the northeastern quadrant of the city. It offers a balance of accessibility to major thoroughfares and competitive pricing, which is the hallmark of the Red Roof brand.

    Why Location Matters for Your Stay

    Choosing the right hotel based on its distance from your destination—whether it’s a workplace at 8201 Ewing Halsell or a nearby attraction—can save you significant time and fuel costs. Traffic in San Antonio, particularly along I-35 and Loop 1604, can be heavy during peak hours. Staying at a nearby establishment reduces the risk of being stuck in congestion, allowing you to focus on your work or leisure activities.

    Amenities and Services at Red Roof Inn

    Understanding what a hotel offers is just as crucial as knowing where it is. Red Roof Inn is known for providing essential services without the frills of luxury hotels, making it an ideal choice for business travelers, road-trippers, and budget-conscious families.

    Key Features to Expect

    • Free Wi-Fi: Essential for remote workers and staying connected.
    • Pet-Friendly Policy: One of the brand’s standout features is that pets stay free. This is a huge advantage for travelers who do not want to leave their furry friends behind or pay hefty pet fees.
    • 24-Hour Front Desk: Provides flexibility for late arrivals or early departures, which is common for those driving long distances.
    • On-Site Laundry: Useful for extended stays.
    • Complimentary Coffee: A small but appreciated perk for morning starts.

    It is important to note that amenities can vary slightly by location. Always check the specific listing for the Fort Sam Houston branch to confirm current offerings, as renovations and policy updates occur regularly.

    Comparing Red Roof Inn with Competitors

    To help you make an informed decision, here is a quick comparison of Red Roof Inn against typical competitors in the budget sector in San Antonio:

    FeatureRed Roof InnMotel 6Super 8
    Pet PolicyPets Stay FreeLow Fee/VariesVaries by Location
    Wi-FiFreeFreeFree
    BreakfastUsually Not IncludedNot IncludedOften Included
    Price PointBudgetBudgetBudget-Mid
    Cleanliness RatingModerate to GoodVariableVariable

    Note: Ratings and policies are subject to change. Always verify with the specific hotel before booking.

    Red Roof Inn Nwarest To 8201 Ewing Halsell San Antonio

    How to Book the Best Rate

    Securing the best deal requires a bit of strategy. Here is a step-by-step approach to ensuring you get the most value for your money when booking the Red Roof Inn nearest to 8201 Ewing Halsell San Antonio.

    1. Check the Official Website First: Red Roof Inn often offers member discounts or “best rate guarantees” on their official site. Create a free account to access these deals.
    2. Compare Aggregators: Use platforms like Expedia, Booking.com, or Hotels.com to compare prices. Sometimes, third-party sites have bulk-negotiated rates that are lower than direct bookings.
    3. Look for Promo Codes: Search for current promo codes for Red Roof Inn. These can offer 10-15% off standard rates.
    4. Book in Advance: Prices tend to rise as the date approaches, especially if there are local events in San Antonio such as rodeos, festivals, or major conventions.
    5. Call the Hotel Directly: If you find a lower price online, call the front desk of the Fort Sam Houston location. They may match the price or offer additional perks like a room upgrade.

    Understanding the Neighborhood: Northeast San Antonio

    The area around 8201 Ewing Halsell Drive is part of the broader Northeast San Antonio region. This area is characterized by a mix of residential communities, industrial parks, and military installations, including Fort Sam Houston.

    For visitors, this means the area is generally safe and well-patrolled, thanks to the nearby military presence. However, it is less tourist-centric than the Downtown or River Walk areas. This is beneficial for those seeking quiet and affordability but may require a short drive to reach major tourist attractions.

    According to Wikipedia, San Antonio is the seventh-most populous city in the United States, with a diverse economy driven by military, healthcare, petroleum, and tourism industries. Understanding this context helps explain why there is a high demand for budget accommodations in various sectors of the city, including the northeast.

    Safety and Accessibility

    • Lighting: Ensure the hotel parking lot is well-lit, especially if you are arriving late.
    • Access: Check if the hotel has easy access to main roads without navigating complex residential streets.
    • Nearby Dining: While the hotel may not serve full meals, look for nearby fast-food or casual dining options for convenience.

    Frequently Asked Questions (FAQ)

    1. Is there a Red Roof Inn directly at 8201 Ewing Halsell San Antonio?

    No, there is no Red Roof Inn located directly at that specific address. The closest option is typically the Red Roof Inn San Antonio – Fort Sam Houston, which is a short drive away. Always use a GPS app to confirm the exact driving distance and time from your specific destination.

    2. Are pets allowed at the Red Roof Inn near this location?

    Yes, Red Roof Inn is well-known for its pet-friendly policy. At most locations, including those in San Antonio, one well-behaved pet per room stays free. However, it is always recommended to inform the hotel at the time of booking to ensure they have availability for pet-friendly rooms.

    3. What is the check-in and check-out time?

    Standard check-in time is usually 3:00 PM, and check-out is at 11:00 AM. If you plan to arrive earlier or leave later, contact the front desk in advance. They may accommodate early check-in or late check-out based on availability, sometimes for a small fee.

    4. Is breakfast included in the stay?

    Typically, Red Roof Inn does not include a full hot breakfast in the standard room rate. They usually offer complimentary coffee in the lobby. If breakfast is a priority, consider bringing your own snacks or exploring nearby eateries. Some locations may have vending machines with basic food items.

    5. How far is the nearest Red Roof Inn from San Antonio International Airport (SAT)?

    The Red Roof Inn San Antonio – Fort Sam Houston is approximately 15-20 minutes from San Antonio International Airport, depending on traffic. This makes it a convenient option for travelers with early flights or late arrivals who want to avoid downtown traffic.

    6. Can I cancel my reservation for free?

    Cancellation policies vary based on the rate type you book. Flexible rates usually allow free cancellation up to 24-48 hours before check-in. Non-refundable rates are cheaper but do not allow cancellations or changes. Always read the cancellation policy carefully before confirming your booking.

    Conclusion

    Finding the Red Roof Inn nearest to 8201 Ewing Halsell San Antonio is about more than just pinpointing a location on a map; it’s about securing a comfortable, affordable, and convenient base for your travels in Northeast San Antonio. The Red Roof Inn San Antonio – Fort Sam Houston stands out as the most logical choice due to its proximity, pet-friendly policy, and budget-friendly rates.

    By following the booking tips and understanding the local neighborhood dynamics outlined in this guide, you can ensure a stress-free stay. Whether you are visiting for business, military affairs, or leisure, planning ahead will enhance your experience.

    If you found this guide helpful, please share it with fellow travelers on social media. Your friends and colleagues planning trips to San Antonio will appreciate the insider tips on finding the best budget accommodations in the area. Safe travels!

  • Gray Homes: Black Metal Roof & Shutters

    Gray Homes: Black Metal Roof & Shutters

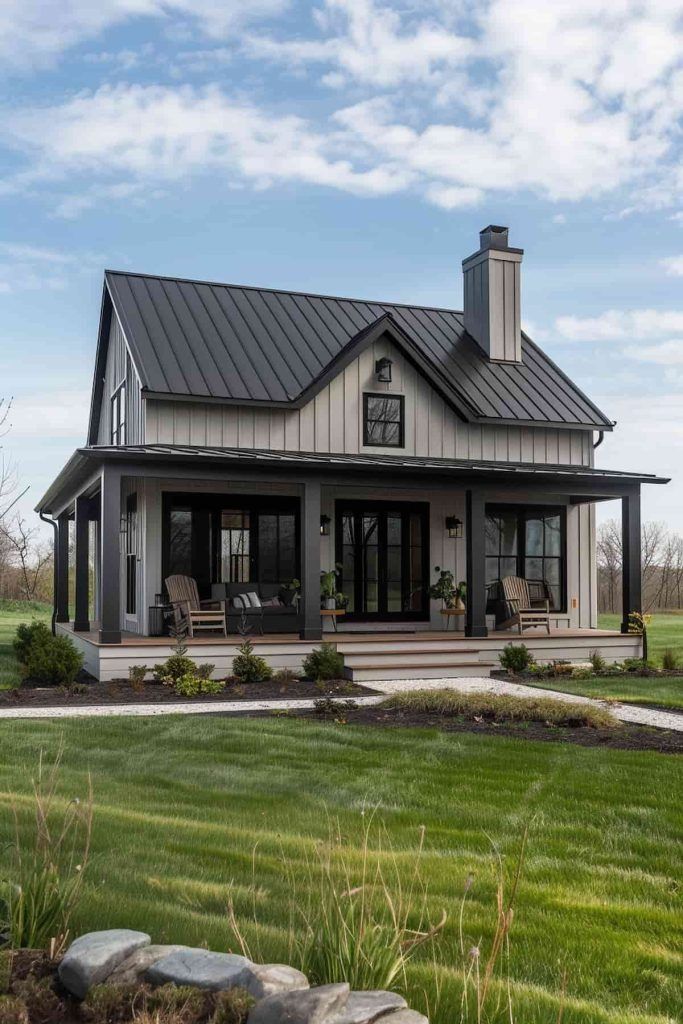
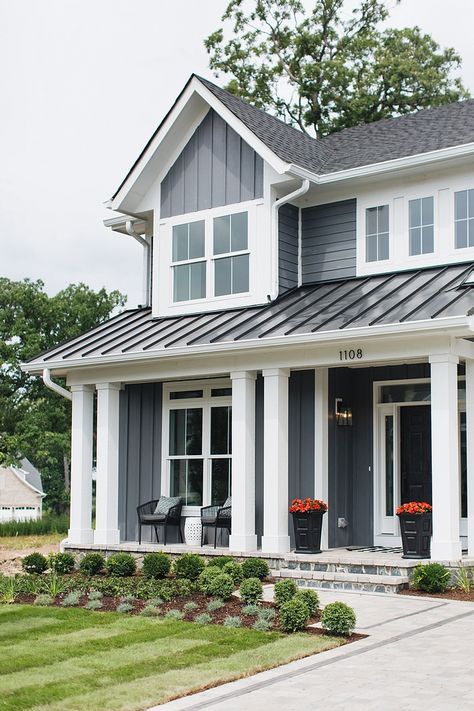
    Finding the perfect exterior color combination can feel overwhelming when you want a look that is both modern and timeless. Many homeowners struggle to balance neutral tones with bold accents without making their property look too dark or cold. If you are searching for pics of gray houses w/ black metal roof and shutters, you are likely looking for inspiration that proves this high-contrast palette is not just trendy, but truly elegant.

    This guide will walk you through why this specific combination works, how to choose the right shades, and provide the visual inspiration you need to make confident design decisions for your home.

    Why Choose Gray Houses with Black Metal Roofs?

    The combination of gray siding and a black metal roof has surged in popularity across the United States, particularly in the Pacific Northwest, New England, and the Midwest. But why is this duo so effective?

    The Power of Contrast

    Gray is a versatile neutral that serves as a perfect canvas. When paired with a black metal roof, it creates a sharp, defined silhouette against the sky. This contrast adds architectural depth, making even simple box-style homes look more sophisticated and custom-designed.

    Durability Meets Aesthetics

    Metal roofing is renowned for its longevity, often lasting 40 to 70 years. According to industry standards, standing seam metal roofs offer superior weather resistance compared to traditional asphalt shingles. By choosing black, you opt for a color that hides minor imperfections better than lighter shades while absorbing heat—a benefit in colder climates during winter months.

    Timeless Appeal

    Unlike bright colors that may fade from trendiness, gray and black are foundational neutrals. They complement various architectural styles, from Modern Farmhouse to Industrial Chic and Contemporary Minimalist.

    How to Select the Right Shade of Gray

    Not all grays are created equal. The success of your exterior design depends heavily on the undertone of the gray siding you choose. Here is a breakdown to help you decide:

    Gray UndertoneBest ForVisual Effect with Black Roof
    Cool Gray (Blue/Purple hints)Coastal or Modern homesCreates a crisp, clean, and icy look. Very striking in snow.
    Warm Gray (Beige/Taupe hints)Traditional or Rustic homesSoftens the harshness of the black roof. Feels more inviting.
    True Neutral GrayAny styleBalanced and safe. Lets the black roof be the star feature.

    Expert Tip: Always view paint swatches outside in natural light. Indoor lighting can distort how gray appears, leading to choices that look purple or green once applied to the entire house.

    The Role of Black Shutters in This Design

    Adding black shutters to a gray house with a black metal roof ties the entire exterior together. Without them, the roof might feel disconnected from the rest of the facade.

    Creating Visual Balance

    Black shutters act as a bridge between the dark roof and the lighter walls. They frame the windows, drawing the eye upward and adding symmetry. This is especially important for larger homes where vast expanses of gray siding might otherwise look flat.

    Material Matters

    While vinyl shutters are common, consider composite wood or aluminum for a more premium look. Matte black finishes are currently preferred over glossy ones, as they reduce glare and align with the modern, understated aesthetic of metal roofing.

    Pics Of Gray Houses W/ Black Metal Roof And Shutters

    Top Architectural Styles for This Look

    When browsing pics of gray houses w/ black metal roof and shutters, you will notice this combination shines in specific architectural contexts.

    1. The Modern Farmhouse

    This is arguably the most popular style for this color palette. White trim is often added to break up the gray and black, creating a classic tri-color scheme. The black metal roof adds an industrial edge to the rustic farmhouse shape.

    2. Contemporary Box

    For homes with flat or low-slope roofs, black standing seam metal provides a sleek, linear look. Gray stucco or fiber cement siding enhances the geometric shapes. Black shutters may be omitted here in favor of black window frames for a cleaner line.

    3. Craftsman Bungalow

    Traditional Craftsman homes benefit from the durability of metal roofing. A deep charcoal gray siding with true black shutters respects the historical integrity while updating the home for modern durability standards.

    Step-by-Step Guide to Visualizing Your Project

    If you are ready to move from inspiration to action, follow these steps to ensure your vision matches reality.

    1. Gather Inspiration: Save at least 10–15 images of homes similar in architecture to yours. Note the specific shade of gray used.
    2. Sample the Siding: Order large samples of your top two gray choices. Attach them to the side of your house and observe them at morning, noon, and evening.
    3. Choose the Roof Profile: Decide between standing seam (visible raised seams, very modern) or corrugated (more industrial/rustic). Standing seam is generally preferred for residential aesthetics.
    4. Select Finish: Opt for a matte or satin finish for the black metal. Glossy black can show oil-canning (minor rippling) more easily and may look too reflective.
    5. Coordinate Trim: Ensure your window trim and door colors complement the gray. White trim offers high contrast; black trim creates a monochromatic, moody look.

    For more information on the history and composition of metal roofing materials, you can refer to Wikipedia’s article on Metal Roofing, which provides technical details on material types like steel, aluminum, and copper.

    Maintenance Tips for Black Metal Roofs

    One concern homeowners have is whether black shows dirt or fades. Here is the reality:

    • Fading: High-quality Kynar 500® or Hylar 5000® painted metal roofs are designed to resist UV fading. While black may lighten slightly over decades, it remains significantly darker than other colors.
    • Cleaning: Black roofs show dust and pollen more than gray ones. However, rain usually washes away most debris. An annual gentle rinse with a garden hose is typically sufficient.
    • Scratches: Be careful during installation or tree trimming. Scratches on black metal can reveal the silver substrate underneath. Touch-up pens are available from manufacturers for minor repairs.

    FAQ Section

    1. Does a black metal roof make the house hotter?

    Yes, black absorbs more heat than lighter colors. However, modern metal roofs often include reflective pigments and air gaps between the roof deck and the metal panels that provide insulation. In hot climates, consider a “cool roof” rated black coating or ensure proper attic ventilation to mitigate heat gain.

    2. Can I use black shutters if my house is dark gray?

    Yes, but you must ensure there is enough contrast. If the gray is very dark (charcoal), black shutters might blend in too much. In this case, consider using a slightly lighter gray for the siding or choosing white trim to separate the elements.

    3. Is metal roofing noisy during rain?

    This is a common myth. When installed correctly with solid sheathing and proper underlayment, metal roofs are no noisier than asphalt shingles. The insulation and structure of the home dampen the sound effectively.

    4. How much does a black metal roof cost compared to asphalt?

    Metal roofing is typically 2–3 times more expensive upfront than asphalt shingles. However, considering its 50+ year lifespan versus the 15–20 year lifespan of asphalt, the long-term value and reduced replacement costs often make it a smarter financial investment.

    5. What trim color goes best with gray siding and a black roof?

    White is the most popular choice as it creates a crisp, clean look that brightens the facade. Black trim creates a dramatic, monochromatic effect. Natural wood stains can also work well for a warmer, rustic vibe, especially in farmhouse styles.

    6. Will a black roof hurt my resale value?

    Generally, no. A well-installed metal roof is a selling point due to its durability and low maintenance. The gray and black color scheme is widely appealing to modern buyers, potentially increasing curb appeal and marketability.

    Conclusion

    Choosing pics of gray houses w/ black metal roof and shutters as your inspiration is a step toward a home exterior that is both stylish and resilient. This combination offers a perfect blend of modern elegance and practical durability. By selecting the right shade of gray, coordinating your shutters, and investing in quality metal roofing, you create a curb appeal that stands out in any neighborhood.

    Remember, the key is balance. Use trim and landscaping to soften the high-contrast look if needed, and always prioritize quality materials for long-term satisfaction.

    Did you find this guide helpful? Share this article with your friends on Facebook or Pinterest who are also planning their home exterior makeover! Let’s inspire each other to build beautiful, lasting homes.

  • Peanut Butter on Roof of Mouth: Ricky Bobby’s Guide

    Peanut Butter on Roof of Mouth: Ricky Bobby’s Guide

    Have you ever taken a bite of something so deliciously thick that it immediately adhered to the soft palate, leaving you unable to speak or swallow comfortably? This awkward culinary moment is famously immortalized in pop culture by the phrase “Peanut Butter On The Roof Of Your Mouth Ricky Bobby,” referencing a hilarious scene from the 2006 comedy Talladega Nights. While it makes for great cinema, experiencing this in real life can be frustrating, uncomfortable, and sometimes even alarming if you don’t know how to resolve it quickly.

    In this guide, we will explore why this happens, the cultural impact of Will Ferrell’s iconic line, and most importantly, provide you with scientifically backed methods to remove stubborn peanut butter from the roof of your mouth without panic. Whether you are a fan of NASCAR comedies or just someone who loves nut butters, understanding the mechanics behind this sticky situation will save your day.

    Why Does Peanut Butter Stick to the Roof of Your Mouth?

    To solve the problem, we must first understand the physics and biology behind it. It isn’t just bad luck; it is a combination of food chemistry and human anatomy.

    The Science of Adhesion

    Peanut butter is a non-Newtonian fluid with high viscosity. Its primary components—ground peanuts and oil—create a dense matrix. When you eat it, especially if it is natural peanut butter with less added stabilizers, the oils separate slightly, and the solid particles become tacky.

    The “roof” of your mouth is technically called the hard palate (front) and the soft palate (back). The mucous membranes here are sensitive and slightly moist. When dry, dense peanut butter meets this moisture, it creates a suction effect similar to a wet rubber stamp sticking to paper.

    The Role of Saliva

    Saliva is essential for swallowing, but it can sometimes worsen the initial stickiness. If your mouth is dry (xerostomia), the peanut butter has nothing to lubricate its passage, causing it to adhere firmly to the palatal tissues. Conversely, if you have too much saliva initially, it might mix with the peanut butter to create an even thicker paste before it clears.

    Expert Insight: According to general food science principles, fats and proteins in nut butters bind to oral tissues more strongly than water-based foods. This is why you rarely get juice stuck to the roof of your mouth, but you often get peanut butter, caramel, or thick cheese stuck there.

    The Cultural Phenomenon: Ricky Bobby and Talladega Nights

    The phrase “Peanut Butter On The Roof Of Your Mouth Ricky Bobby“ is not just a description of a physical sensation; it is a cultural touchstone for millennials and Gen Z who grew up with mid-2000s comedy.

    Context of the Scene

    In the movie Talladega Nights: The Ballad of Ricky Bobby, Will Ferrell plays the titular character, a naive and incredibly successful NASCAR driver. In one memorable dinner scene, Ricky Bobby struggles to eat his meal due to the overwhelming texture of the food, leading to muffled speech and confusion. While the exact quote varies in internet memory, the imagery of him struggling with sticky food while trying to maintain his composure has become a meme template for awkward social situations.

    This scene resonates because it highlights a universal human vulnerability: the loss of dignity while eating. It reminds us that even confident individuals can be defeated by a simple jar of peanut butter.

    For more context on the film’s impact on comedy, you can check its Wikipedia page which details its box office success and cultural reception.

    Peanut Butter On The Roof Of Your Mouth Ricky Bobby

    How to Remove Peanut Butter From the Roof of Your Mouth

    If you find yourself in a real-life Ricky Bobby situation, do not panic. Using force or excessive tongue movement can irritate the soft palate. Instead, follow these step-by-step solutions.

    Method 1: The Liquid Solvent Approach

    The most effective way to break down the adhesive bond of peanut butter is through hydration and emulsification.

    1. Take a Small Sip of Water: Do not gulp. Take about 10–15 ml of room-temperature water.
    2. Swish Gently: Move the water around the upper part of your mouth. Focus on the area where the peanut butter is stuck.
    3. Tilt Your Head Back: Slightly tilt your head back to let gravity help pool the water against the roof of your mouth.
    4. Swallow or Spit: Once the peanut butter loosens, swallow safely.

    Note: Warm water works faster than cold water because heat lowers the viscosity of the fats in the peanut butter.

    Method 2: The Bread Trick

    If water alone isn’t working, use a mechanical absorber.

    1. Take a small piece of soft white bread or a cracker.
    2. Place it on your tongue.
    3. Press your tongue firmly against the roof of your mouth.
    4. The bread will absorb the oils and lift the peanut butter particles away from the mucosa.

    Method 3: The Crunch Factor

    Eating something crunchy can mechanically scrape the residue off.

    • Apple Slices: The crisp texture acts as a gentle scraper.
    • Carrot Sticks: Firm enough to dislodge sticky bits without hurting the tissue.
    MethodEffectivenessSpeedComfort Level
    Warm WaterHighFastHigh
    Cold WaterMediumModerateHigh
    Bread/CrackerHighModerateHigh
    Finger (Not Recommended)LowSlowLow (Hygiene risk)

    Preventing the “Ricky Bobby” Effect

    Prevention is always better than cure. Here are some tips to enjoy peanut butter without the aftermath.

    • Choose Creamy Over Natural: Natural peanut butter separates more and tends to be drier. Commercial creamy brands often contain hydrogenated oils that keep the texture smoother and less likely to clump.
    • Pair with Liquids: Always have a beverage nearby when eating dense nut butters. Taking a sip between bites keeps the oral cavity lubricated.
    • Mix It Up: Stir your peanut butter thoroughly before eating. If the oil is well-integrated, the texture is less likely to form dry, sticky clumps.
    • Smaller Bites: Avoid stuffing your mouth. Smaller amounts are easier for saliva to manage and swallow.

    FAQ: Common Questions About Sticky Food Situations

    1. Is it dangerous to have peanut butter stuck on the roof of my mouth?

    Generally, no. It is uncomfortable and may trigger a gag reflex if it blocks the airway slightly, but it is not toxic. However, if you have a peanut allergy, any residual contact should be rinsed out immediately to prevent allergic reactions. If you feel difficulty breathing, seek medical attention instantly.

    2. Why does it feel like I can’t breathe when peanut butter is stuck?

    This is often a psychological response known as “globus sensation,” combined with the physical blockage of the nasopharynx. The sticky mass can obstruct the airflow slightly, causing panic. Stay calm, breathe through your nose if possible, and use the water method to clear it.

    3. Can hot tea help remove peanut butter faster?

    Yes. Hot tea is excellent because the heat melts the fats in the peanut butter more effectively than cold water. Additionally, the tannins in tea can help cut through the richness. Ensure the temperature is safe to avoid burning your palate.

    4. Is the “Peanut Butter On The Roof Of Your Mouth Ricky Bobby” quote accurate to the movie?

    While fans widely associate this specific phrasing with Will Ferrell’s character, the actual dialogue in Talladega Nights involves various comedic struggles with food and speech. The phrase has evolved into an internet meme that encapsulates the spirit of the scene rather than being a verbatim transcript. It represents the chaotic energy of Ricky Bobby’s character.

    5. What other foods cause this issue?

    Besides peanut butter, other high-viscosity foods include:

    • Caramel and toffee
    • Thick cheese spreads
    • Marshmallow fluff
    • Dense hummus
    • Mashed bananas (when very ripe and dry)

    6. Should I use my finger to remove it?

    It is not recommended. Fingers introduce bacteria into the mouth, and the nail can scratch the delicate soft palate, leading to infection or soreness. Stick to liquids, bread, or crunchy foods.

    Conclusion

    The phrase “Peanut Butter On The Roof Of Your Mouth Ricky Bobby” serves as a humorous reminder of the little mishaps we all face while eating. While Will Ferrell’s portrayal in Talladega Nights exaggerates the struggle for comedic effect, the physical reality of sticky food is a common annoyance. By understanding the science behind adhesion and using simple remedies like warm water or bread, you can handle these situations with grace and speed.

    Next time you enjoy a spoonful of peanut butter, remember to take small bites and stay hydrated. And if you do get stuck, just channel your inner Ricky Bobby—laugh it off, grab some water, and keep moving forward.

    Did this guide help you solve your sticky situation? Share this article with your friends who love peanut butter (and movies) on social media!

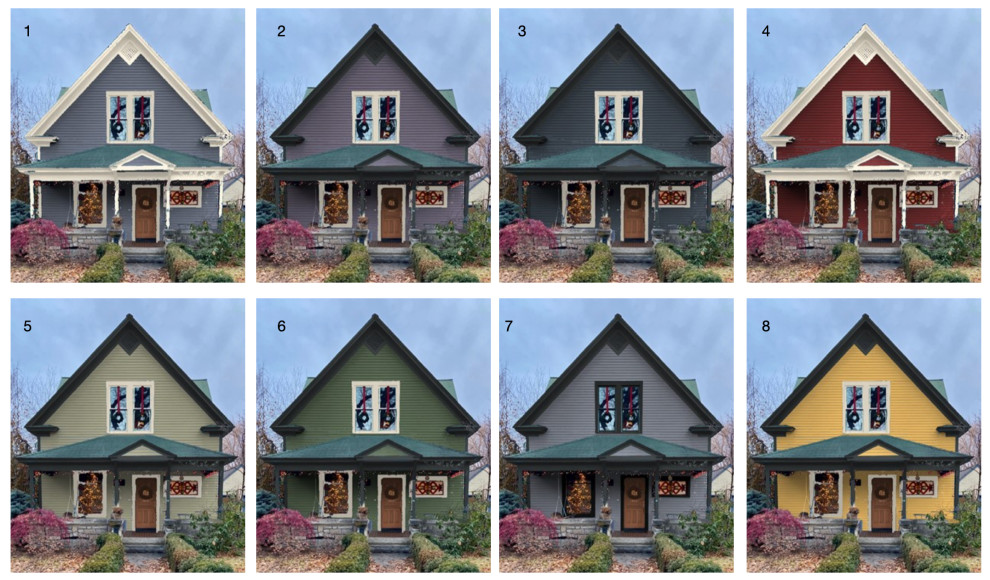
  • Best Paint Colors for a House With a Green Roof

    Best Paint Colors for a House With a Green Roof

    Choosing the right exterior paint when you have a distinctive roofing material can feel overwhelming. A green roof is a bold architectural statement, and pairing it with the wrong siding color can clash rather than complement. If you are asking what color to paint a house with a green roof, you are looking for harmony, balance, and timeless curb appeal.

    In this guide, we will break down the science of color theory, explore trending palettes, and provide actionable advice to help your home look its absolute best. Whether your roof is a deep forest green, a muted sage, or a vibrant emerald, there is a perfect paint match waiting for you.

    Why Is Choosing the Right Paint Color Crucial for Green Roofs?

    A green roof is not just a covering; it is a dominant visual element. Unlike standard black, gray, or brown shingles, green introduces a strong hue that interacts dynamically with sunlight and surrounding landscaping.

    According to color psychology, green represents nature, tranquility, and renewal. However, in exterior design, it can easily overpower other elements if not balanced correctly. The goal is to create a cohesive look where the roof and siding work together, not against each other.

    • Resale Value: Homes with coordinated exterior colors often sell faster. A clashing color scheme can deter potential buyers who perceive the home as needing immediate updates.
    • Architectural Integrity: The right color highlights your home’s architectural details, such as trim, columns, and porches.
    • Environmental Harmony: A well-chosen palette helps your home blend seamlessly with its natural surroundings, especially if you live in a wooded or rural area.

    What Are the Best Neutral Colors for a Green Roof?

    When in doubt, neutrals are your safest and most sophisticated bet. They allow the green roof to shine without creating visual chaos. Here are the top neutral contenders:

    1. Crisp White and Off-White

    White is the classic partner for green. It creates a fresh, clean, and airy aesthetic that works particularly well with cottage, farmhouse, and colonial styles.

    • Pure White: Offers high contrast and a modern look. Best for dark green roofs.
    • Cream or Ivory: Softens the contrast and adds warmth. Ideal for lighter sage or olive green roofs.

    Pro Tip: Avoid stark, blue-toned whites if your green roof has yellow undertones, as this can create a jarring visual vibration. Stick to warm whites.

    2. Warm Beige and Taupe

    Beige tones bridge the gap between the natural world and your home’s structure. They echo the earthiness of the green roof while providing a subtle backdrop.

    • Greige (Gray-Beige): A modern favorite that works with both cool and warm green tones.
    • Sandstone: Adds texture and warmth, perfect for homes in arid or coastal regions.

    3. Light to Medium Gray

    Gray is versatile, but you must choose the right undertone. Since green is a cool color on the spectrum, cool grays often pair beautifully.

    • Light Gray: Creates a soft, contemporary look.
    • Charcoal: For a dramatic, high-contrast effect, pair a light green roof with dark charcoal siding. This is a bold choice that exudes modern elegance.

    Can You Use Earth Tones With a Green Roof?

    Absolutely. Earth tones are nature’s own palette, making them a logical and harmonious choice for homes with green roofs. This approach is often referred to as “biophilic design,” which seeks to connect building occupants more closely to nature.

    Brown and Tan Variations

    Brown siding can create a rustic, cabin-like feel. However, caution is required:

    • Avoid Matching Undertones: If your roof is an olive green (yellow undertone), avoid a reddish-brown siding, as they may clash. Instead, opt for a chocolate brown or a muted taupe.
    • Contrast is Key: Ensure there is enough difference in value (lightness/darkness) between the roof and the siding. A medium brown roof needs either a very light tan siding or a very dark chocolate siding to stand out.

    Stone and Brick Accents

    If you are not painting the entire house, consider using stone or brick veneer. Natural stone often contains flecks of green, gray, and beige, which naturally tie into a green roof.

    What Color To Paint A House With A Green Roof

    How Do Bold Colors Compare to Neutrals?

    While neutrals are safe, bold colors can make a stunning statement if executed correctly. This is where understanding color theory becomes essential.

    Color FamilyBest Green Roof ShadeEffectRisk Level
    Navy BlueForest GreenRich, traditional, nauticalLow
    Soft YellowSage GreenCheerful, cottage-core, brightMedium
    Slate BlueOlive GreenCool, calming, sophisticatedLow
    Red/BurgundyDark GreenTraditional, holiday-esqueHigh

    The Case for Navy and Slate Blue

    Blue and green are analogous colors on the color wheel, meaning they sit next to each other. This creates a harmonious, soothing effect. A deep navy blue house with a dark green roof is a popular choice in coastal and New England-style architecture.

    The Risk of Red and Orange

    Red and green are complementary colors (opposite on the color wheel). While this creates high contrast, it can easily look like a Christmas decoration if not carefully managed. If you love red, opt for a muted brick red or burgundy rather than a bright fire-engine red.

    What Role Does Trim and Accent Color Play?

    The trim is the frame of your home’s picture. It defines the edges and adds depth. When dealing with a green roof, your trim choice can make or break the overall look.

    1. White Trim: The universal solver. It crisps up the edge between the siding and the roof, regardless of the siding color. It is especially effective with beige, gray, or blue siding.
    2. Matching Trim: Painting the trim the same color as the siding (monochromatic look) is a modern trend. It makes the house appear larger and sleeker. However, ensure your roof color provides enough contrast so the house doesn’t look flat.
    3. Contrasting Trim: If your siding is dark, use a lighter trim. If your siding is light, you can experiment with a darker trim, but avoid using green trim unless it is an exact match to the roof, which is difficult to achieve.

    Step-by-Step Guide to Testing Your Color Choice

    Do not rely solely on digital renderings or paint chips. Real-world lighting changes everything. Follow these steps to ensure you make the right choice:

    1. Identify Your Roof’s Undertone: Look at your green roof in direct sunlight. Is it blue-based (cool) or yellow-based (warm)? This determines whether you should choose cool or warm siding colors.
    2. Buy Sample Pots: Purchase small sample sizes of your top 3 color choices.
    3. Paint Large Swatches: Paint at least a 2×2 foot section on different sides of your house (north, south, east, west).
    4. Observe at Different Times: Check the colors in the morning, noon, and evening. Note how the green roof looks against the siding in shadow versus direct sun.
    5. Check Against Landscaping: Ensure the new color doesn’t clash with your permanent landscaping features, such as large trees or stone pathways.

    For more information on color theory principles, you can refer to the comprehensive overview on Color Theory at Wikipedia.org.

    Frequently Asked Questions (FAQ)

    1. What is the best white paint for a house with a dark green roof?

    For a dark green roof, Sherwin-Williams Extra White or Benjamin Moore Chantilly Lace are excellent choices. These bright whites provide a crisp contrast that prevents the dark roof from making the house look too heavy or gloomy.

    2. Can I paint my house green if I have a green roof?

    Yes, but it is tricky. You must use a significantly different shade. For example, pair a dark forest green roof with a very pale sage or mint green siding. Using the same shade will make your home look monotonous and lack dimension.

    3. Does the style of my house affect the color choice?

    Absolutely. Victorian homes can handle bolder, multi-color palettes, while Ranch-style homes often look best with simple, two-tone schemes (siding and trim). Colonial homes traditionally pair well with white, gray, or beige siding.

    4. How do I maintain the appearance of my green roof and painted siding?

    Regular cleaning is key. Green roofs can show pollen and dirt more easily than darker roofs. Wash your siding annually with a mild detergent to keep the colors vibrant. Consider using UV-resistant paint to prevent fading, which can alter the color balance over time.

    5. What if my green roof is metal instead of shingles?

    Metal roofs often have a more reflective, industrial finish. They pair exceptionally well with modern, minimalist colors like charcoal, slate gray, and stark white. Avoid overly rustic textures like faux wood grain, as they may clash with the sleekness of metal.

    Conclusion

    Deciding what color to paint a house with a green roof is about balancing boldness with harmony. While the roof is a significant feature, it doesn’t have to dictate your entire design. By choosing neutrals like white, beige, or gray, you create a timeless backdrop. If you’re feeling adventurous, earthy tones or deep blues can offer a unique, sophisticated charm.

    Remember to test your colors in natural light and consider the architectural style of your home. The right combination will not only enhance your curb appeal but also bring you joy every time you pull into your driveway.

    Did you find this guide helpful? Share this article with friends who are planning their next exterior renovation, or pin it to your Pinterest board for future reference! Let’s make every home beautiful, one color at a time.

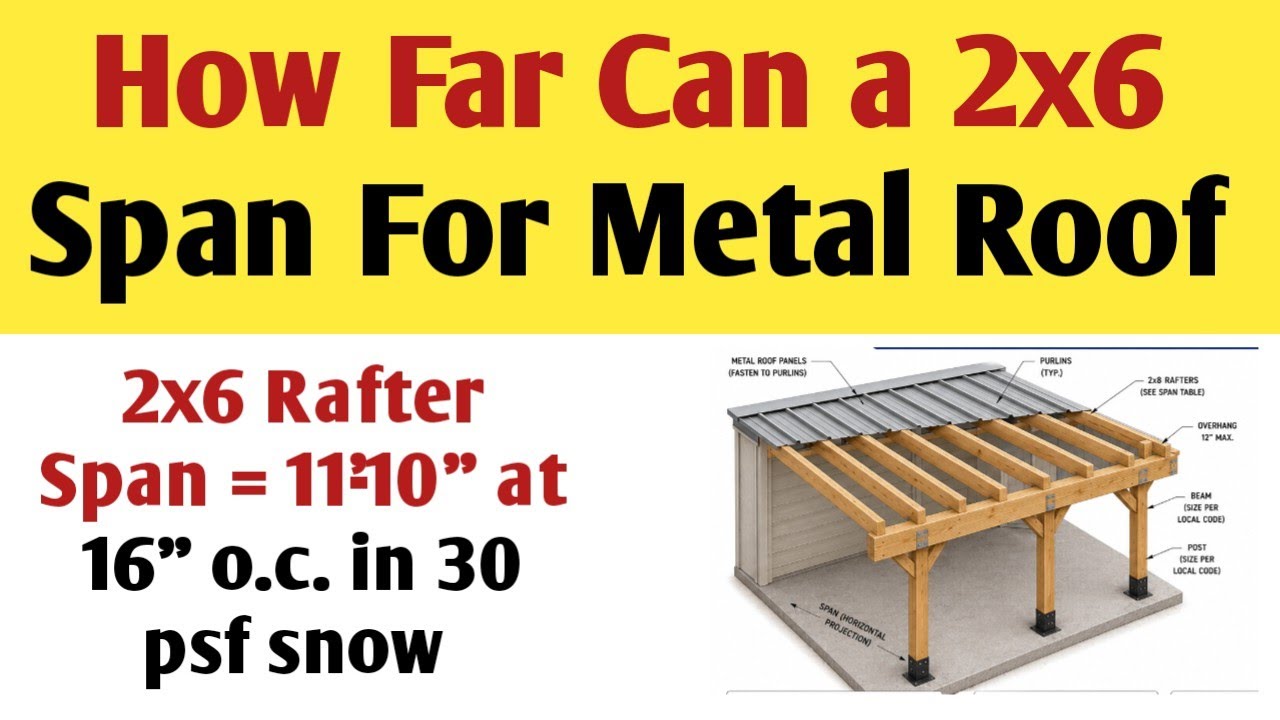
  • How Far Can You Span A 2X6 For A Roof?

    How Far Can You Span A 2X6 For A Roof?

    Have you ever stared at a pile of lumber, wondering if that stack of 2x6s is strong enough to hold up your new shed or porch roof? It is a common dilemma for DIY enthusiasts and homeowners alike. Getting the span wrong isn’t just an aesthetic issue; it is a critical safety concern. Understanding exactly how far can you span a 2×6 for a roof is the first step toward building a structure that is both durable and compliant with local building codes.

    In this guide, we will break down the engineering basics, variable factors, and standard limits to help you make informed decisions for your next project.

    Understanding the Basics of Lumber Spans

    Before we dive into specific numbers, it is crucial to understand what “span” actually means in construction terms. The span refers to the horizontal distance between two supports, such as walls or beams. When we ask how far can you span a 2×6 for a roof, we are essentially asking how much weight that piece of wood can support over a specific distance without sagging excessively or failing structurally.

    A 2×6 nominal dimension is actually 1.5 inches by 5.5 inches after planing. While this seems small, engineered correctly, it is surprisingly robust for light-duty roofing applications. However, wood is not a uniform material. Its strength varies based on species, grade, and moisture content. Therefore, there is no single “magic number” that applies to every situation. Instead, we look at ranges based on standardized testing and building codes.

    Key Factors That Determine Your Maximum Span

    You cannot determine the span length in a vacuum. Several dynamic variables interact to dictate the safe limit of your rafters. Ignoring these can lead to catastrophic failure.

    1. Wood Species and Grade

    Not all 2x6s are created equal. Southern Pine, for example, is generally stronger than Spruce-Pine-Fir (SPF). Furthermore, the “grade” of the lumber matters.

    • #1 Grade: Has fewer knots and defects, offering higher structural integrity.
    • #2 Grade: The most common standard for residential framing, allowing for more natural defects.
    • Select Structural: The highest quality, used for heavy loads.

    For most DIY projects, you will likely be using #2 SPF or Hem-Fir. Always check the stamp on the wood for its specific grade and species.

    2. Rafter Spacing (On-Center)

    The distance between your rafters significantly impacts how far each individual 2×6 can reach. The closer the rafters are, the less load each one carries. Common spacing includes:

    • 12 inches on-center (OC): Strongest option, allows for the longest span.
    • 16 inches OC: The industry standard for most residential roofing.
    • 24 inches OC: Weaker configuration, drastically reduces the maximum span.

    3. Load Requirements

    Your roof must support two types of loads:

    • Dead Load: The weight of the roof itself (shingles, plywood, insulation).
    • Live Load: External forces like snow, wind, and maintenance workers.

    If you live in a region with heavy snowfall, your 2x6s will need to span a shorter distance compared to someone in a dry, mild climate.

    Standard Span Limits for 2×6 Roof Rafters

    While you should always consult a structural engineer for unique projects, we can look at general guidelines provided by the American Wood Council and typical building codes. These figures assume a standard live load of 20-30 pounds per square foot (psf) and a dead load of 10 psf.

    Rafter SpacingMax Span (No. 2 SPF)Max Span (Southern Pine No. 2)Best Use Case
    12″ OC~10 feet 9 inches~12 feet 6 inchesHeavy snow areas / High durability
    16″ OC~9 feet 11 inches~11 feet 6 inchesStandard residential sheds/patios
    24″ OC~8 feet 7 inches~10 feet 0 inchesLight duty / Covered porches

    Note: These are approximate values. Always verify with local codes.

    As you can see, switching from 16″ OC to 12″ OC can gain you nearly a foot of span capacity. Conversely, moving to 24″ OC sacrifices significant strength. If you are trying to maximize how far can you span a 2×6 for a roof, reducing the spacing is often more effective than upgrading the wood grade.

    How Far Can You Span A 2X6 For A Roof

    Calculating Deflection and Safety Margins

    Strength is not the only factor; stiffness matters too. Building codes typically limit deflection (sagging) to L/240 for live loads and L/180 for total loads. This means if your span is 10 feet (120 inches), the roof should not sag more than 0.5 inches under live load.

    Even if a 2×6 doesn’t break, excessive sagging can crack drywall, cause water pooling, and ruin the aesthetic of your project. This is why many professionals recommend staying under the maximum calculated span. A good rule of thumb is to aim for 80-90% of the maximum allowable span to ensure a rigid, long-lasting roof.

    For deeper technical definitions on structural load paths and engineering standards, you can refer to resources like Wikipedia’s article on Structural Load to understand the physics behind these requirements.

    Step-by-Step Guide to Determining Your Span

    If you are ready to start framing, follow these steps to ensure accuracy:

    1. Check Local Building Codes: Visit your municipal building department website. Snow load maps vary wildly between states. A 2×6 that works in Florida may fail in Colorado.
    2. Identify Your Lumber: Look at the stamp on your 2x6s. Note the species (e.g., SPF, Douglas Fir) and the grade (No. 2, No. 1).
    3. Determine Spacing: Decide if you will space rafters at 12″, 16″, or 24″ OC. Remember, 16″ is the default for compatibility with standard plywood sheets.
    4. Consult a Span Chart: Use a reputable span table specific to your lumber species. Do not guess.
    5. Add a Safety Buffer: If the chart says the max span is 10 feet, try to design your structure so the span is 9 feet. This accounts for any imperfections in the wood or unexpected heavy snow.

    Pros and Cons of Using 2×6 Rafters

    To help you decide if a 2×6 is the right choice, consider this comparison:

    Advantages:

    • Cost-Effective: 2x6s are cheaper than 2x8s or 2x10s.
    • Lightweight: Easier for one person to lift and install.
    • Sufficient for Small Structures: Ideal for sheds, gazebos, and carports.

    Disadvantages:

    • Limited Span: Not suitable for large open rooms without intermediate support.
    • Insulation Limits: A 2×6 cavity offers less room for thick insulation compared to larger dimensions, potentially affecting energy efficiency in conditioned spaces.

    FAQ Section

    1. Can I use a 2×6 for a flat roof?

    Flat roofs require careful consideration because they do not shed water as efficiently as pitched roofs. Water pooling adds significant weight. While a 2×6 can be used for small flat sections, it is generally recommended to use larger lumber (like 2×8 or 2×10) or reduce the span significantly to prevent sagging and water accumulation.

    2. Does the type of roofing material affect the span?

    Yes. Heavy materials like clay tiles or slate increase the “dead load,” requiring shorter spans or stronger lumber. Lightweight asphalt shingles or metal roofing place less stress on the rafters, allowing you to utilize the maximum span limits more safely.

    3. What is the maximum span for a 2×6 ceiling joist vs. a roof rafter?

    Ceiling joists often have different load requirements than roof rafters. Ceiling joists primarily support the ceiling material and attic storage (live load), while rafters support the roof covering and weather loads. Generally, ceiling joists can span slightly further than rafters if they are not tied into the roof load path, but this depends heavily on whether the attic is used for storage.

    4. Can I sister a 2×6 to increase the span?

    “Sistering” involves attaching another piece of lumber alongside the existing one. Yes, you can sister a 2×6 with another 2×6 to effectively create a 2×12 equivalent in strength, which significantly increases the span capability. Ensure they are glued and nailed/screwed together properly according to code.

    5. Is pressure-treated 2×6 weaker than untreated?

    Pressure-treated lumber can sometimes have a slightly lower bending strength rating due to the chemical treatment process and higher moisture content when installed. However, for outdoor structures where rot resistance is needed, it is essential. Always check the specific grade stamp on treated lumber, as manufacturers adjust ratings accordingly.

    Conclusion

    Determining how far can you span a 2×6 for a roof is not about finding a single universal number, but rather understanding the interplay between wood species, spacing, and environmental loads. For most standard DIY projects using #2 SPF lumber spaced 16 inches on center, you can safely expect a span of roughly 10 feet. However, always prioritize local building codes and add a safety margin to your calculations.

    By respecting the limitations of your materials and planning carefully, you can build a roof that is not only cost-effective but also safe and durable for years to come. If you found this guide helpful, please share it with your fellow DIY community on social media to help others build smarter and safer!

  • Best Quiet & Powerful Roof Exhaust Fan Guide

    Best Quiet & Powerful Roof Exhaust Fan Guide

    Is your attic turning into a sauna during the summer, or are you struggling with stubborn moisture buildup in the winter? Poor ventilation doesn’t just make your home uncomfortable; it can lead to costly structural damage and skyrocketing energy bills. Finding a good roof fan to extract most air quietly while maintaining powerful performance is the ultimate solution for homeowners who value both efficiency and peace. In this guide, we will break down exactly what to look for, how to choose the right model, and why silence doesn’t mean sacrificing power.

    Why Your Home Needs a High-Performance Roof Fan

    Before diving into specific models, it is crucial to understand why extraction matters. Many US homeowners underestimate the role of attic ventilation. According to the U.S. Department of Energy, proper ventilation can significantly reduce cooling loads by removing superheated air that radiates down into living spaces.

    A high-quality roof exhaust fan serves three primary purposes:

    1. Heat Reduction: It pulls out hot air that accumulates under the roof deck.
    2. Moisture Control: It prevents condensation that leads to mold and rot.
    3. Air Quality: It removes stale air, pollutants, and odors from the home ecosystem.

    However, the common complaint with traditional fans is noise. A fan that sounds like a jet engine is rarely used consistently. This is where the balance of “quiet” and “powerful” becomes critical.

    What Makes a Roof Fan “Good” for Maximum Air Extraction?

    When searching for a good roof fan to extract most air quietly, you need to look beyond the price tag. The engineering behind the motor and the blade design dictates performance.

    Key Metrics to Watch

    • CFM (Cubic Feet per Minute): This measures volume. For an average 2,000 sq. ft. home, you generally need a fan capable of moving at least 1,000–1,500 CFM depending on the climate zone.
    • Sones (Noise Level): This is the standard unit for measuring sound. A quiet fan should operate below 1.5 sones. For context, a whisper is about 0.5 sones, while a normal conversation is around 4 sones.
    • Static Pressure: This determines how well the fan can push air through resistance (like ducts or screens). High static pressure capability ensures consistent airflow even in complex roofing structures.

    Pro Tip: Always check the AMCA (Air Movement and Control Association) certified ratings. These provide unbiased data on performance, ensuring the manufacturer’s claims are backed by testing.

    Quiet vs. Powerful: Can You Have Both?

    Historically, there was a trade-off: high power meant high noise. However, advancements in motor technology have changed the game. Modern fans use DC (Direct Current) motors or advanced AC induction motors with variable speed controls.

    Comparison: Traditional AC Fans vs. Modern DC Fans

    FeatureTraditional AC FanModern DC Fan
    Noise LevelModerate to High (2.5+ Sones)Very Low (<1.0 Sone)
    Energy EfficiencyStandardHigh (Up to 70% less energy)
    Speed ControlLimited (On/Off or 3-speed)Precise (Variable Speed)
    Lifespan10–15 Years15–20+ Years
    Initial CostLowerHigher

    For those seeking a good roof fan to extract most air quietly, investing in a DC motor model is often the best long-term strategy. The initial cost is higher, but the energy savings and noise reduction provide immediate comfort.

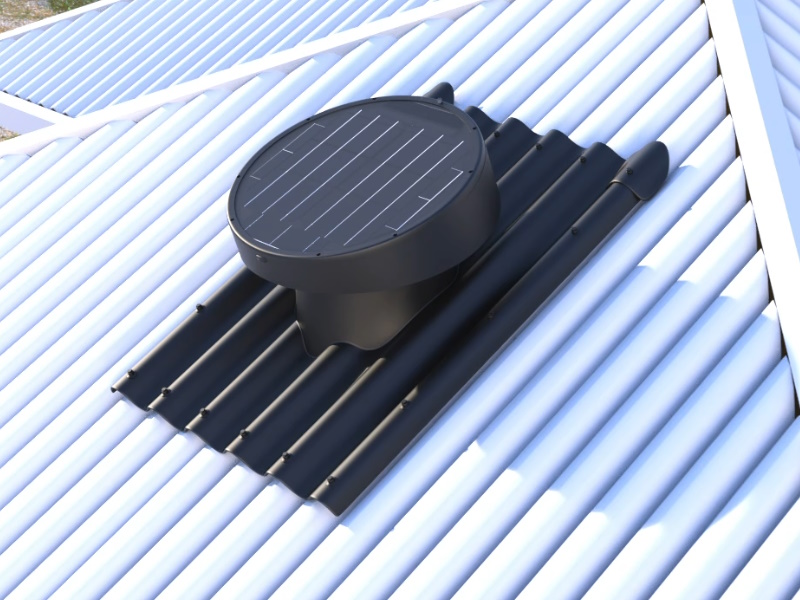
    Good Roof Fan To Extract Most Air Quiet Powerful Exhaust

    Top Features to Look for in a Silent Exhaust Fan

    To ensure you get the best performance, prioritize these features during your selection process:

    1. Aerodynamic Blade Design

    Look for fans with curved or angled blades rather than flat paddles. Curved blades cut through the air more smoothly, reducing turbulence—the primary cause of fan noise.

    2. Insulated Housing

    Some premium roof fans come with insulated housings or vibration-dampening mounts. These features absorb the mechanical hum of the motor, preventing it from resonating through the roof structure.

    3. Weather-Resistant Construction

    Since the fan is exposed to the elements, it must be built to last. Look for materials like powder-coated aluminum or high-grade UV-resistant plastics. Rust can unbalance the fan over time, leading to increased noise and decreased efficiency.

    4. Smart Thermostat Integration

    A powerful fan is useless if it runs when not needed. Models with built-in thermostats or humidity sensors automatically adjust speed based on real-time conditions. This ensures maximum extraction only when necessary, keeping noise levels low during mild weather.

    Installation Tips for Optimal Performance

    Even the best fan will underperform if installed incorrectly. Proper installation is key to achieving the “quiet powerful exhaust” goal.

    Step-by-Step Installation Overview

    1. Choose the Right Location: Place the fan near the peak of the roof but away from obstructions like chimneys or trees. Ensure it is centered over the attic space for balanced airflow.
    2. Cut the Opening Carefully: Measure twice, cut once. Use a reciprocating saw to cut the hole in the roof deck. Ensure the opening matches the fan’s flange size exactly to prevent leaks.
    3. Seal Thoroughly: Apply a high-quality roofing cement or butyl tape around the flange before securing the fan. This prevents water intrusion, which can cause electrical shorts and corrosion.
    4. Secure Electrical Connections: Follow local electrical codes. If you are not comfortable working with wiring, hire a licensed electrician. Improper wiring can lead to motor failure or fire hazards.
    5. Test for Vibration: Once installed, turn the fan on. If you hear excessive rattling, check the mounting screws. Tighten them evenly to ensure the fan sits flush against the roof.

    For more detailed information on building science and ventilation standards, you can refer to resources provided by Wikipedia regarding architectural ventilation principles.

    Common Mistakes to Avoid

    • Undersizing the Fan: Buying a fan with too low CFM for your attic size will result in inadequate ventilation. Always calculate your attic’s square footage first.
    • Ignoring Intake Vents: Exhaust fans need intake vents (soffits or gables) to work effectively. Without proper intake, the fan creates negative pressure, which can pull conditioned air from your living space, increasing energy costs.
    • Neglecting Maintenance: Dust and debris can accumulate on blades, causing imbalance and noise. Clean your fan blades annually to maintain optimal performance.

    FAQ Section

    Q1: How many sones is considered “quiet” for a roof fan?

    A fan rated at 1.0 sone or lower is considered very quiet. Anything above 2.5 sones will be noticeable inside the home, especially in quiet rooms like bedrooms or libraries.

    Q2: Can I install a roof fan myself?

    While DIY installation is possible for those with roofing and electrical experience, it is often recommended to hire a professional. Improper sealing can lead to roof leaks, which are far more expensive to fix than the cost of professional installation.

    Q3: Do solar-powered roof fans offer enough power?

    Solar fans have improved significantly, but they depend on sunlight. On cloudy days or at night, their performance drops. For consistent, powerful extraction regardless of weather, a hardwired electric fan with a thermostat is usually a better choice for maximizing air removal.

    Q4: How often should I replace my roof exhaust fan?

    Most high-quality roof fans last between 10 to 15 years. However, if you notice a significant increase in noise, a drop in airflow, or frequent motor failures, it may be time to replace it sooner.

    Q5: Will a powerful roof fan cool my house?

    A roof fan does not directly cool the air like an AC unit. Instead, it removes superheated air from the attic, reducing the heat load on your ceiling. This allows your air conditioner to work more efficiently, potentially lowering indoor temperatures by several degrees.

    Conclusion

    Finding a good roof fan to extract most air quietly is about balancing technical specifications with smart design choices. By prioritizing low sone ratings, high CFM output, and durable construction, you can transform your attic from a heat trap into a well-ventilated space. Remember, the right fan not only protects your home’s structure but also enhances your daily comfort.

    Don’t let noise and inefficiency dictate your home’s climate control. Evaluate your current setup, consider upgrading to a modern DC motor model, and enjoy the benefits of a cooler, quieter home.

    Did you find this guide helpful? Share it with your friends on social media who might be struggling with attic heat or moisture issues. Let’s help everyone breathe easier!

  • Gray Homes, Black Roofs: Top Design Pics & Tips

    Gray Homes, Black Roofs: Top Design Pics & Tips

    Are you struggling to visualize how different shades of gray interact with the stark contrast of a black metal roof? You are not alone; many homeowners find it challenging to balance these bold elements without making their home look too dark or industrial. In this guide, we curate the best pics of gray houses with black metal roof and shutters to help you find the perfect aesthetic for your property.

    Why This Combination Is Trending in US Architecture

    The combination of gray siding and black roofing has moved from a niche trend to a mainstream favorite across the United States. According to recent housing market analyses, neutral exteriors with high-contrast accents tend to have higher curb appeal ratings. This specific palette offers a modern yet timeless look that fits various architectural styles, from Modern Farmhouse to Contemporary Industrial.

    The visual weight of a black metal roof grounds the structure, while gray siding provides a versatile canvas. When you add black shutters, you create a cohesive frame that draws the eye upward and defines the home’s character. But why does this work so well? It comes down to contrast and balance. The darkness of the roof and shutters anchors the lighter or mid-tone gray walls, preventing the house from looking “floating” or unfinished.

    Choosing the Right Shade of Gray

    Not all grays are created equal. When browsing through pics of gray houses with black metal roof and shutters, you will notice a wide spectrum of wall colors. Selecting the right undertone is crucial for achieving the desired mood.

    Cool vs. Warm Grays

    • Cool Grays: These have blue, green, or purple undertones. They pair exceptionally well with black metal roofs in coastal or modern urban settings. Cool grays can make a home feel crisp and clean. However, in areas with heavy overcast skies, they might appear slightly dull.
    • Warm Grays: Also known as “greige” (gray-beige), these have brown or yellow undertones. They offer a softer, more inviting appearance. Warm grays are ideal for Traditional or Farmhouse styles because they mitigate the harshness of the black roof, creating a welcoming vibe.

    Expert Tip: Always test paint samples on your actual siding material. Metal, vinyl, and wood absorb light differently. A gray that looks perfect on a digital screen may look drastically different under natural sunlight.

    The Impact of Black Shutters on Curb Appeal

    Black shutters are not just functional; they are a major design statement. In the context of gray houses with black metal roof and shutters, the shutters serve as a bridge between the roof and the walls.

    Visual Cohesion

    When your roof is black, adding black shutters creates a vertical line that connects the top of the home to the windows. This symmetry is pleasing to the human eye and adds a sense of order and elegance. Without black shutters, a gray house with a black roof might look top-heavy. The shutters distribute the visual weight evenly.

    Material Matters

    While vinyl shutters are common, consider upgrading to composite or wood for a higher-end look. Matte black finishes are currently preferred over glossy ones, as they reduce glare and hide dust better, maintaining a sleek appearance with less maintenance.

    Pics Of Gray Houses With/ Black Metal Roof And Shutters

    Architectural Styles That Shine With This Palette

    This color scheme is versatile, but it shines brightest in specific architectural styles. Here is a breakdown of where this combination works best:

    Architectural StyleRecommended Gray ToneShutter StyleRoof Profile
    Modern FarmhouseLight to Mid Warm GrayBoard-and-BattenStanding Seam
    ContemporaryDark Charcoal or SlateMinimalist/FlatCorrugated or Flat Lock
    CraftsmanMedium Cool GrayLouveredRibbed Panel
    Colonial RevivalLight Dove GrayRaised PanelStanding Seam

    Modern Farmhouse Appeal

    The Modern Farmhouse style is perhaps the most popular driver for this trend. The rustic charm of the farmhouse is updated with the industrial edge of a metal roof. In this style, you often see light gray siding paired with a black standing seam metal roof. The black shutters add a traditional touch that keeps the home from feeling too cold.

    Contemporary Edge

    For contemporary homes, darker grays are often used. A charcoal gray exterior with a black metal roof creates a monochromatic, sophisticated look. Here, the shutters might be omitted entirely or replaced with black window frames to maintain clean lines. If shutters are used, they are typically simple and unadorned.

    Maintenance and Durability Benefits

    One of the primary reasons homeowners choose metal roofs is durability. A black metal roof can last 40–70 years, significantly outlasting traditional asphalt shingles. This longevity makes the initial investment worthwhile.

    Heat Absorption Concerns

    A common question is whether black roofs make houses hotter. While black surfaces do absorb more heat, modern metal roofing systems often include reflective pigments or cool-roof coatings. These technologies help reflect solar energy, keeping your home cooler. Additionally, proper attic ventilation plays a critical role in managing heat transfer.

    According to Wikipedia, metal roofing is highly recyclable and energy-efficient, contributing to sustainable building practices. This eco-friendly aspect is a significant selling point for environmentally conscious buyers.

    Step-by-Step Guide to Visualizing Your Project

    If you are ready to transform your home, follow these steps to ensure you get the best results:

    1. Assess Your Current Siding: Determine if your current gray siding is cool or warm-toned. If you are repainting, choose a shade that complements your landscape.
    2. Select the Roof Profile: Decide between standing seam (smooth, modern) or corrugated (rustic, industrial). Standing seam is generally preferred for residential homes due to its sleek appearance.
    3. Choose Shutter Style: Match the shutter style to your home’s architecture. Louvered shutters suit traditional styles, while board-and-batten fits Farmhouse designs.
    4. Create a Digital Mockup: Use online tools or hire a designer to create a rendering. Look for pics of gray houses with black metal roof and shutters that match your home’s shape to get a realistic preview.
    5. Get Samples: Order physical samples of the roof color, siding paint, and shutter material. View them together at different times of the day.

    FAQ Section

    1. Does a black metal roof fade over time?

    High-quality metal roofs with Kynar 500 or Hylar 5000 finishes are designed to resist fading. While slight chalking may occur over decades, significant color change is rare. Black tends to show chalk residue less than lighter colors.

    2. Can I install black shutters on a dark gray house?

    Yes, but ensure there is enough contrast. If the gray is very dark (charcoal), black shutters might blend in too much. In such cases, consider using a slightly lighter gray for the shutters or adding white trim around the windows to create separation.

    3. Is a metal roof noisy during rain?

    No. When installed correctly with solid sheathing and proper insulation, a metal roof is no noisier than an asphalt shingle roof. The sound is dampened by the underlying structure.

    4. How do I clean a black metal roof?

    Black roofs show dust and pollen more easily. Clean them gently with a soft brush and mild soap solution twice a year. Avoid pressure washers, which can damage the protective coating.

    5. Will this color combination increase my home’s value?

    Yes. Neutral exteriors with high-contrast accents are broadly appealing to buyers. They suggest a well-maintained, modern home, which can positively influence appraisal and sale speed.

    6. What trim color works best with gray siding and a black roof?

    White trim is the classic choice, offering crisp contrast. However, cream or off-white can soften the look for Farmhouse styles. For a ultra-modern look, you can even use black trim to match the roof and shutters, creating a seamless monochromatic effect.

    Conclusion

    Choosing pics of gray houses with black metal roof and shutters as your inspiration is a smart move for any homeowner looking to boost curb appeal. This combination offers a perfect blend of modern sophistication and timeless elegance. By carefully selecting the right shade of gray, choosing durable materials, and ensuring visual balance with black shutters, you can create a home exterior that stands out for all the right reasons.

    Remember, the key is in the details. Take your time to sample colors and consult with professionals to ensure your vision becomes a reality. If you found this guide helpful, please share it on social media to help others discover the beauty of this striking architectural trend!

  • Stop Insurance Cancellation: Fix Your CA Roof Deck

    Stop Insurance Cancellation: Fix Your CA Roof Deck

    Receiving a notice that your provider is dropping you is one of the most stressful experiences a homeowner can face. It feels personal, but it is often a calculated risk assessment by the insurer. If you are dealing with Insurance Company Threats To Cancel Due To Roof Deck California, you are not alone in this struggle. This guide will walk you through exactly why this is happening, how to respond effectively, and what steps you can take to keep your home protected.

    Why Are Insurers Targeting Roof Decks in California?

    To solve the problem, we must first understand the root cause. The insurance landscape in California has shifted dramatically in recent years. Major carriers like State Farm, Allstate, and Farmers have restricted new policies or canceled existing ones due to rising reinsurance costs and increased wildfire risks. However, the “roof deck” issue is specific and technical.

    The roof deck is the structural layer (usually plywood or OSB boards) that sits beneath your shingles or tiles. It is the foundation of your roofing system. In California, insurers are increasingly using aerial imagery and drone technology to inspect homes without visiting them. If their algorithms detect sagging, water stains, or aged materials on the roof deck, they flag it as a high-risk liability.

    According to industry data, wind-driven rain and wildfire embers can easily penetrate compromised roof decks. For an insurer, a weak roof deck means a higher probability of a total loss claim. Therefore, when they issue a threat to cancel, they are essentially saying your home no longer meets their underwriting standards for structural integrity.

    What Does a “4-Point Inspection” Reveal About Your Roof?

    When an insurer threatens cancellation, they often require a 4-Point Inspection. This is not a full home inspection; it focuses strictly on four critical areas: Roof, Electrical, Plumbing, and HVAC. For the roof portion, the inspector is looking for specific red flags related to the deck.

    Key Red Flags Inspectors Look For

    • Sagging Lines: Visible dips in the roofline indicate the deck may be rotting or structurally weak.
    • Water Stains: From the attic side, dark spots on the deck suggest active leaks.
    • Delamination: Plywood layers separating due to moisture exposure.
    • Age: Most insurers have a hard cap on roof age (often 15–20 years). If the deck is original to an older home, it is likely deemed “end of life.”

    If the inspection report notes “deferred maintenance” or “immediate repair needed” for the roof deck, the insurer will likely proceed with cancellation unless proof of repair is provided.

    How to Respond to a Notice of Non-Renewal

    Time is your most valuable asset here. In California, insurers are generally required to give you at least 45 days’ notice before non-renewal takes effect. Do not ignore this letter. Here is a step-by-step plan to handle the threat.

    Step 1: Verify the Reason

    Read the notice carefully. Does it explicitly mention the “roof deck” or general “roof condition”? Sometimes, generic reasons are used. Call your agent and ask for the specific underwriting guideline that triggered the flag. Ask if they have photos from their aerial inspection.

    Step 2: Get a Professional Roof Certification

    Do not rely on a general handyman. Hire a licensed C-39 roofing contractor in California. Ask for a Roof Certification Letter. This document states that the roof, including the deck, has a remaining useful life of at least 3–5 years.

    • Note: If the deck is damaged, the contractor must repair or replace the affected sections before issuing this letter.

    Step 3: Submit Proof of Repair

    If repairs were made, submit the following to your insurer’s underwriting department:

    1. The contractor’s invoice showing scope of work (specifically mentioning deck repair/replacement).
    2. Before-and-after photos.
    3. The final Roof Certification Letter.

    Step 4: Request a Re-inspection

    Once you submit the documents, formally request a re-evaluation. Many cancellations are automated. A human underwriter reviewing fresh evidence may reverse the decision.

    Insurance Company Threats To Cancel Due To Roof Deck Califiornia

    Comparing Your Options: Repair vs. Replace vs. Switch

    When facing Insurance Company Threats To Cancel Due To Roof Deck California, you have three main paths. Each has pros and cons regarding cost and speed.

    OptionEstimated Cost (CA Avg)TimeframeInsurance Impact
    Partial Deck Repair$1,500 – $4,0001–3 DaysMay satisfy current insurer if damage is localized.
    Full Roof Replacement$15,000 – $30,000+1–2 WeeksBest long-term solution; resets roof age clock.
    Switch to FAIR PlanVaries (Often Higher)ImmediateLast resort; provides basic fire coverage only.

    Data Note: Costs vary significantly by county and material type. Always get three quotes.

    If your roof deck is largely intact but has minor issues, partial repair is cost-effective. However, if the deck is over 20 years old, most insurers will not accept a patch job. They want a new system.

    Understanding the California FAIR Plan

    If your private insurer cancels your policy and you cannot find another private carrier, you may need to turn to the California FAIR Plan. This is a state-mandated pool of last resort for homeowners who cannot obtain coverage in the standard market.

    While the FAIR Plan provides essential fire and lightning coverage, it is not a complete homeowners policy. It does not cover liability, theft, or water damage. Most homeowners must purchase a separate “Difference in Conditions” (DIC) policy to fill these gaps. This route is more expensive and offers less protection, so it should only be used if all other options fail.

    Preventing Future Issues: Maintenance Tips

    Once you have secured your insurance, maintain your roof deck to prevent future threats.

    1. Clean Gutters Regularly: Clogged gutters cause water to back up under shingles, rotting the deck edge.
    2. Trim Overhanging Branches: Trees rubbing against the roof can wear down materials and drop debris that traps moisture.
    3. Attic Ventilation: Ensure your attic is properly ventilated. Excessive heat and humidity can warp the roof deck from the inside out.
    4. Annual Inspections: Have a professional inspect your roof every two years, especially after heavy rain seasons.

    FAQ: Common Questions About Roof Deck Insurance Issues

    1. Can my insurer cancel my policy mid-term?

    Generally, no. In California, insurers cannot cancel a policy mid-term unless there is fraud, non-payment, or a significant increase in hazard (like storing explosives). They usually must wait until the renewal date to non-renew.

    2. Does homeowners insurance cover roof deck replacement?

    Only if the damage was caused by a covered peril, such as a storm, falling tree, or fire. Wear and tear, age, and lack of maintenance are never covered. You pay out-of-pocket for maintenance-related deck repairs.

    3. What if I disagree with the insurer’s inspection?

    You have the right to appeal. Provide a counter-inspection report from a licensed contractor. If the insurer still refuses, you can file a complaint with the California Department of Insurance.

    4. Will a new roof lower my premiums?

    It might not lower the base rate, but it will make you eligible for coverage again. Some insurers offer discounts for new roofs or impact-resistant materials, which can offset the cost over time.

    5. How long does a roof deck last in California?

    A well-maintained plywood or OSB deck can last 20–30 years. However, in coastal areas with salt air or inland areas with extreme heat, the lifespan may be shorter. Regular inspections are key to maximizing longevity.

    Conclusion

    Dealing with Insurance Company Threats To Cancel Due To Roof Deck California is daunting, but it is manageable with the right approach. The key is to act quickly, gather professional documentation, and communicate clearly with your insurer. Remember, insurers are looking for risk mitigation. By proving your roof deck is sound through certified inspections and repairs, you can often reverse their decision or find a new carrier willing to protect your home.

    Don’t let bureaucracy leave your home vulnerable. Take control of your property’s health today. If you found this guide helpful, please share it with your neighbors on social media—many Californians are facing similar challenges, and knowledge is our best defense.

  • Spot Roof Hail Damage Fast: A Homeowner’s Guide

    Spot Roof Hail Damage Fast: A Homeowner’s Guide

    Storm season can be stressful for any homeowner. One minute the sky is clear, and the next, ice pellets are battering your home, leaving you wondering about the structural integrity of your most important asset. If you are asking yourself, “How Can You Tell If Your Roof Has Hail Damage,” you are not alone. Many homeowners miss subtle signs until a leak appears, leading to costly repairs that could have been prevented with early detection. This guide will walk you through exactly what to look for, helping you protect your investment and peace of mind.


    Why Early Detection of Hail Damage Matters

    Hail damage is often deceptive. Unlike wind damage, which might tear off shingles immediately, hail damage can compromise the protective granule layer of your roof without causing an immediate leak. Over time, UV rays penetrate these weakened spots, causing the asphalt to dry out, crack, and eventually fail.

    According to the Insurance Information Institute, weather-related incidents account for a significant portion of property insurance claims in the United States. Identifying damage early ensures you can file a claim within the statute of limitations and prevent minor issues from becoming major structural failures.


    What Does Hail Damage Look Like on Different Roof Types?

    Not all roofs react to hail the same way. The material of your roof dictates the type of evidence you should look for. Here is a breakdown of common roofing materials and their specific vulnerability signs.

    1. Asphalt Shingles (Most Common in the US)

    Asphalt shingles are susceptible to bruising and granule loss. When hail hits, it knocks off the ceramic granules that protect the shingle from the sun.

    • Black Spots: Look for dark, circular marks where the granules have been knocked away, exposing the black asphalt underneath.
    • Soft Spots: If you gently press on a suspect area (safely from a ladder), it may feel soft or spongy compared to surrounding shingles. This indicates the matting beneath has been fractured.
    • Shiny Edges: Fresh impacts often leave a shiny appearance on the exposed asphalt before it oxidizes and turns dull gray.

    2. Metal Roofs

    Metal roofs are durable but not immune. Hail can cause cosmetic dents that may affect the coating over time.

    • Dents: Look for round depressions that match the size of the hailstones.
    • Paint Chipping: Check for areas where the protective paint or coating has chipped off around the dent, which can lead to rust.

    3. Wood Shakes and Shingles

    Wood is brittle and can split upon impact.

    • Fresh Splits: Look for orange or light-colored wood fibers inside cracks. Old splits will be gray and weathered.
    • Impact Marks: Circular bruises or indentations where the hail struck the wood surface.

    Key Signs: How Can You Tell If Your Roof Has Hail Damage?

    To accurately assess your roof, you need to know the specific indicators. Here are the primary red flags that suggest hail has compromised your roofing system.

    Random Pattern of Impact

    Unlike wear and tear, which follows a pattern (such as near valleys or ridges), hail damage is random. You will see marks scattered across the roof slope without a logical geometric arrangement. If you see damage only on one side of the house, it likely corresponds to the direction the storm was blowing.

    Granule Loss in Gutters

    One of the easiest ways to check for damage without climbing onto the roof is to inspect your gutters and downspouts.

    • Accumulation: After a storm, if you find an unusual amount of sand-like granules in your gutters, it is a strong indicator that your shingles have taken a beating.
    • Clogging: Excessive granules can clog drainage systems, leading to water backup and potential interior damage.

    Dented Flashing and Vents

    Your roof accessories are often more vulnerable than the shingles themselves. Check the metal flashing around chimneys, vents, and skylights.

    • Dents: Soft metals like aluminum or copper will show clear dents.
    • Loose Seals: Impact can loosen the sealant around these fixtures, creating entry points for water.

    Comparison Table: Hail Damage vs. Normal Wear

    FeatureHail DamageNormal Aging/Wear
    PatternRandom, scatteredUniform, consistent
    Granule LossSharp, circular bare spotsGradual thinning over time
    Shingle ConditionBruised, soft spotsCurling, cracking at edges
    TimingOccurs suddenly after a stormDevelops over years
    Color of ExposureShiny/black initiallyDull/gray throughout
    How Can You Tell If Your Roof Has Hail Damage
    Roof shingles with large hailstones after hail storm

    Step-by-Step: How to Inspect Your Roof Safely

    Safety is paramount. Never climb onto a wet or steep roof. Follow these steps to conduct a preliminary inspection from the ground and a safe vantage point.

    1. Wait for Clear Weather: Ensure the storm has completely passed and the roof is dry. Wet roofs are slippery and dangerous.
    2. Use Binoculars: Stand at a distance where you can see the entire roof slope. High-quality binoculars allow you to spot missing granules or dents without risking a fall.
    3. Check Ground Level Evidence: Look for dings on your siding, window screens, air conditioning units, and mailbox. If these items are damaged, your roof likely is too. For more context on how hail forms and its physical properties, you can refer to Wikipedia’s article on Hail.
    4. Inspect the Gutters: Use a sturdy ladder to look inside your gutters. Wear gloves to protect your hands from sharp metal edges. Look for the “sand” of lost granules.
    5. Look for Interior Signs: Check your attic for water stains, daylight coming through the roof deck, or damp insulation. These are late-stage signs of damage.

    When to Call a Professional Roofer

    While DIY inspections are useful, they have limitations. You should contact a licensed roofing contractor if:

    • You see visible cracks or missing shingles.
    • You notice water stains on your ceiling or walls.
    • The storm involved hail larger than 1 inch in diameter (quarter-sized).
    • You are unsure about the extent of the damage.

    Professional roofers have the training to distinguish between hail damage and manufacturer defects or installation errors. This distinction is crucial for insurance claims, as insurers may deny coverage for pre-existing conditions.


    FAQ Section

    1. Will my insurance cover hail damage to my roof?

    Most standard homeowners’ insurance policies cover hail damage. However, coverage depends on your deductible and the age of your roof. Some policies have separate wind/hail deductibles, which may be higher than your standard deductible. Always review your policy details or speak with your agent.

    2. Can hail damage cause leaks immediately?

    Not always. Hail often causes “bruising” that weakens the shingle. It may take months or even years of UV exposure and thermal cycling for the damaged area to crack and leak. This is why immediate inspection is vital, even if you don’t see water inside.

    3. How big does hail need to be to damage a roof?

    Hail as small as 1 inch (the size of a quarter) can cause damage to asphalt shingles, especially if they are older or brittle. Larger hail (1.5 inches or more) can cause significant structural damage to almost any roofing material.

    4. Should I repair or replace my roof after hail damage?

    This depends on the severity. If less than 30% of the roof is damaged, repairs might suffice. However, if the damage is widespread, or if the shingles are old, a full replacement is often more cost-effective and ensures uniform protection. A professional assessment is necessary to make this call.

    5. How long do I have to file a hail damage claim?

    Time limits vary by state and insurance provider, but generally, you should file a claim as soon as possible. Most insurers require notification within one year of the event, but waiting too long can complicate the proof of causation.


    Conclusion

    Knowing how can you tell if your roof has hail damage empowers you to act quickly and protect your home. By looking for random patterns of granule loss, checking your gutters, and inspecting metal fixtures, you can identify potential issues before they become expensive leaks. Remember, early detection is key to maximizing your insurance claim and extending the life of your roof.

    If you suspect damage, don’t wait for the next rainstorm to reveal the problem. Schedule a professional inspection today. Found this guide helpful? Share it with your neighbors on social media to help them protect their homes too!