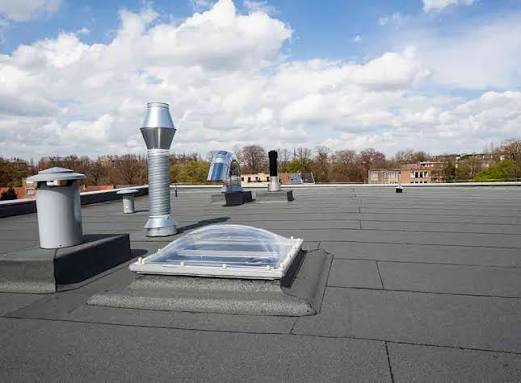
Water stains on your ceiling are more than just an eyesore; they are a distress signal from your building’s most vulnerable barrier. For homeowners and property managers in the US, ignoring these signs can lead to costly structural damage and mold issues. Finding the best way to find a leak on a flat roof is crucial for preserving your investment and ensuring a dry, safe interior environment.
Flat roofs are notorious for being tricky when it comes to leak detection. Unlike sloped roofs where gravity quickly directs water away, flat roofs allow water to pool, making the entry point difficult to pinpoint. However, with the right approach, you can identify the source without tearing apart your entire roofing system.
Why Is Locating a Flat Roof Leak So Difficult?
Before diving into the solution, it is essential to understand why flat roofs behave differently. According to basic principles of physics and hydrology, water seeks the path of least resistance. On a flat surface, this means water can travel horizontally along decking or insulation layers before dripping down.
This phenomenon is known as “lateral migration.” You might see a stain in your living room, but the actual hole in the roof could be ten feet away. This disconnect between the symptom (the indoor stain) and the cause (the roof breach) is why random patching rarely works. To effectively solve the problem, we must rely on systematic detection methods rather than guesswork.
The Best Way to Find a Leak on a Flat Roof: The Flood Test
While there are high-tech solutions involving infrared cameras and moisture meters, the most reliable, cost-effective, and accessible method for most property owners is the Controlled Flood Test. This method simulates rainfall in a controlled manner, allowing you to isolate specific sections of the roof.
Step-by-Step Guide to Performing a Flood Test
This process requires two people: one on the roof and one inside the building. Communication is key, so ensure you have working cell phones or walkie-talkies.
- Preparation and Safety
- Ensure the roof is clean of debris. Leaves and twigs can block drains and skew results.
- Check the weather forecast. You need a dry day with no rain expected for at least 24 hours.
- Wear proper safety gear: non-slip shoes and a harness if the roof edge is unprotected.
- Sectioning the Roof
- Do not flood the entire roof at once. Divide the roof into manageable sections, approximately 10×10 feet.
- Start with the area directly above the visible interior water stain.
- The Water Application
- Use a garden hose with a spray nozzle.
- Specific Detail: Apply water gently. Do not use a high-pressure jet, as this can force water under shingles or membranes that wouldn’t normally leak. Use approximately 2 liters of water per minute over the test area.
- Maintain a water temperature between 22–28°C (ambient temperature) to avoid thermal shock to certain roofing materials like EPDM or PVC, which can contract or expand rapidly with extreme temperatures.
- Observation Period
- The person inside should watch the ceiling closely.
- Wait at least 15–20 minutes per section. Water may take time to saturate insulation before dripping.
- If no leak appears, move the hose to the next adjacent section.
- Marking the Spot
- Once the drip starts inside, the person on the roof marks the exact location where the water was being applied.
- Note: Remember lateral migration. The leak source is likely near the marked spot, but you may need to inspect a small radius around it.
Alternative Methods: When the Flood Test Isn’t Enough
If the flood test does not reveal the leak, or if the roof is too large to test manually, consider these professional-grade alternatives.
Electronic Moisture Meters
These devices detect changes in electrical resistance. Wet insulation conducts electricity differently than dry insulation. By scanning the roof surface, you can map out “wet spots” beneath the membrane.
- Pros: Non-destructive, quick coverage of large areas.
- Cons: Requires expensive equipment; can give false positives if there is condensation rather than a leak.
Infrared Thermography
Thermal imaging cameras detect temperature differences. Wet areas retain heat differently than dry areas. At sunset, wet insulation will cool down slower than dry insulation, showing up as “hot spots” on the camera.
- Pros: Excellent for finding trapped moisture over large commercial roofs.
- Cons: Highly dependent on weather conditions; requires professional interpretation.
Comparison: Detection Methods
| Method | Cost | Accuracy | DIY Friendly? | Best For |
|---|---|---|---|---|
| Flood Test | Low | High | Yes | Small to medium residential roofs |
| Moisture Meter | Medium | Medium-High | No | Pinpointing saturation extent |
| Infrared Camera | High | High | No | Large commercial flat roofs |
| Visual Inspection | Free | Low | Yes | Obvious punctures or blisters |
Common Causes of Flat Roof Leaks
Understanding where to look is half the battle. Most leaks do not occur in the middle of the field (the open flat area). They happen at the details.
1. Flashing Failures
Flashing is the metal or rubber material used to seal joints where the roof meets walls, chimneys, or vents. Over time, UV exposure causes these materials to crack or separate. According to industry data, over 60% of roof leaks originate at flashing points.
2. Ponding Water
If your roof does not drain properly, water pools. This standing water adds immense weight and accelerates the degradation of roofing membranes. It also allows algae and moss to grow, which can root into tiny cracks and widen them.
3. Punctures and Blisters
Foot traffic from HVAC maintenance or satellite installation can puncture the membrane. Additionally, trapped air or moisture under the roof surface can form blisters. When these blister pop, they create an open wound for water to enter.
For more detailed information on roofing materials and their properties, you can refer to Wikipedia’s article on Roofing.
When to Call a Professional
While the flood test is a powerful DIY tool, there are times when you should call in a licensed roofer:
- The Leak is Intermittent: If it only leaks during heavy wind-driven rain, the issue might be related to siding or wall cladding, not just the roof.
- Structural Concerns: If the roof deck feels soft or spongy when you walk on it, the structural integrity may be compromised.
- Warranty Preservation: Many flat roof warranties are voided if unlicensed individuals perform repairs or invasive testing. Always check your warranty terms first.
FAQ Section
Q: Can I find a leak on a flat roof during the rain?
A: It is possible, but not recommended. Rain makes the roof slippery and dangerous. Furthermore, widespread rain makes it difficult to isolate the specific entry point using the flood test method. It is safer and more accurate to test on a dry day.
Q: How much does it cost to repair a flat roof leak?
A: Costs vary widely based on material and size. A simple patch job might cost between $300 and $600. However, if the insulation is wet and needs replacement, costs can rise to $1,500 or more. Early detection via the best way to find a leak on a flat roof saves significant money.
Q: Does homeowners insurance cover flat roof leaks?
A: Typically, insurance covers sudden and accidental damage (like a storm blowing off a vent). It usually does not cover leaks caused by lack of maintenance, wear and tear, or old age. Regular inspections are vital to ensure coverage.
Q: How often should I inspect my flat roof?
A: Experts recommend inspecting your flat roof at least twice a year: once in the spring and once in the fall. Additionally, inspect it after any severe weather event, such as a hailstorm or heavy snowfall.
Q: What is the lifespan of a flat roof?
A: Depending on the material, flat roofs last between 10 to 30 years. EPDM rubber roofs typically last 20–30 years, while built-up gravel roofs may last 15–20 years. Proper drainage and regular maintenance are key to reaching the upper end of this range.
Conclusion
Finding the source of a leak on a flat roof doesn’t have to be a guessing game. By using the best way to find a leak on a flat roof—the controlled flood test—you can systematically isolate the problem area without unnecessary demolition. Remember, the key is patience and precision. Start small, communicate with your partner, and focus on the details like flashing and drains.
Early detection prevents minor drips from becoming major structural failures. If you found this guide helpful, please share it with your friends or on social media to help others protect their homes. Stay dry and stay safe!
Leave a Reply