Tag: Flat Roof Repair

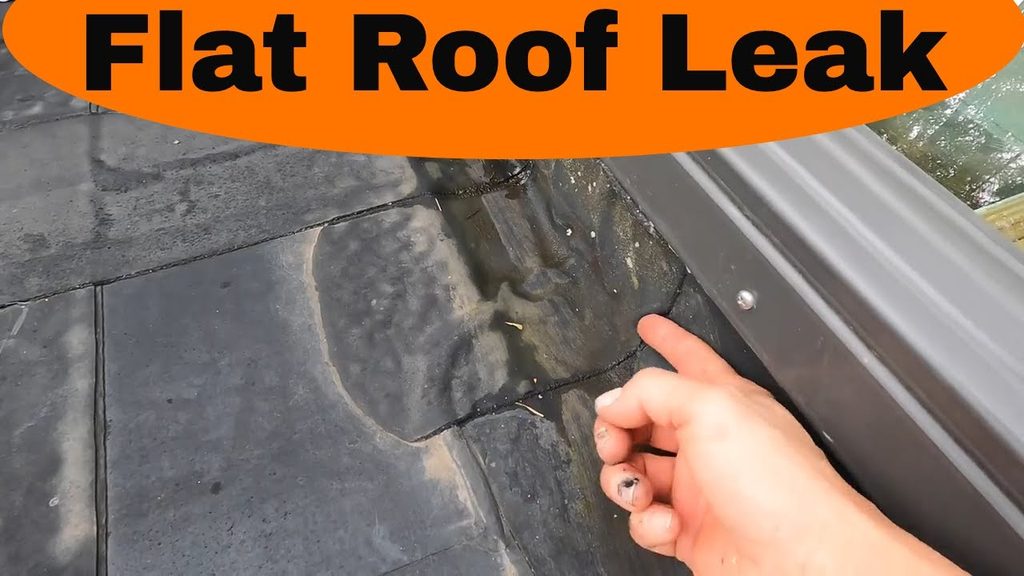
  • How To Find A Roof Leak On A Flat Roof

    How To Find A Roof Leak On A Flat Roof

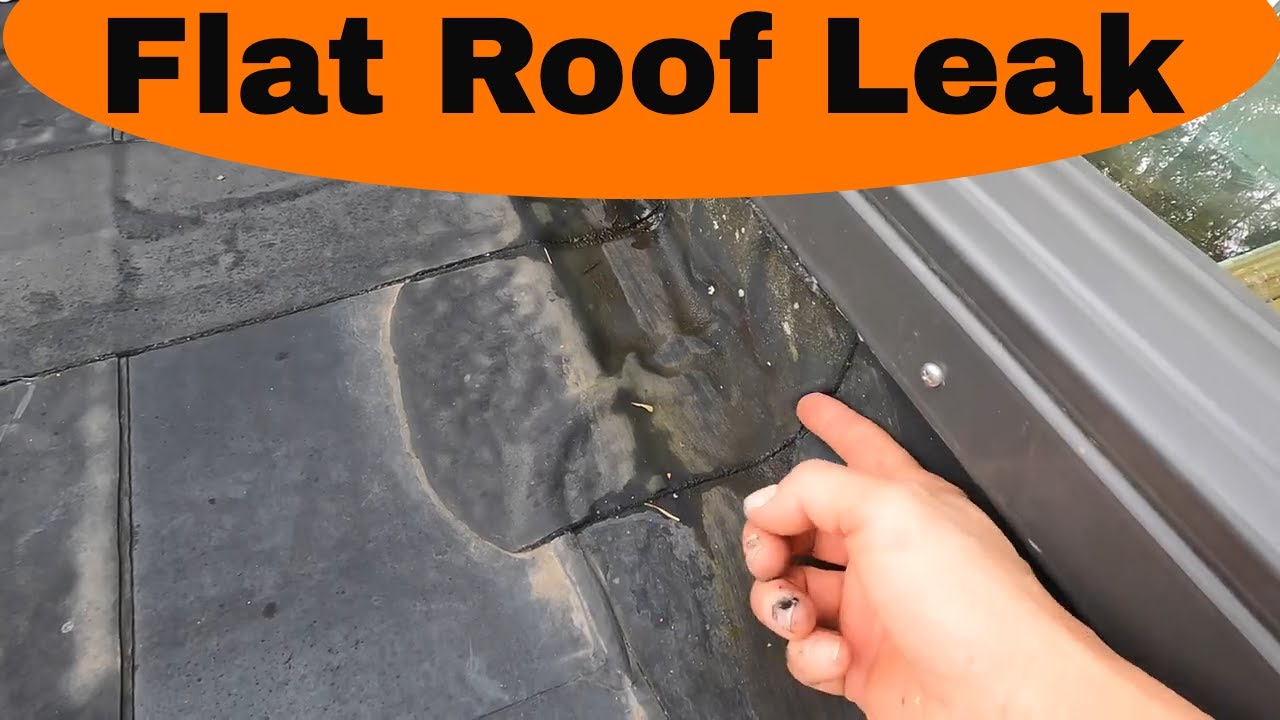
    Water dripping from your ceiling is one of the most stressful sights for any homeowner or property manager. It signals immediate damage, potential mold growth, and costly repairs if left unchecked. If you are staring at a wet spot and wondering how to find a roof leak on a flat roof, you are not alone; flat roofs are notorious for hiding the source of water intrusion due to their unique drainage dynamics.

    Unlike sloped roofs where gravity quickly directs water away, flat roofs allow water to pool, making the entry point difficult to trace. However, with a systematic approach and the right tools, you can identify the culprit before it causes structural harm. This guide will walk you through professional inspection techniques, safety protocols, and common failure points specific to flat roofing systems.

    Why Is Finding Leaks on Flat Roofs So Difficult?

    Before diving into the detection process, it is crucial to understand why flat roofs behave differently than pitched roofs. In the roofing industry, we often say that “water finds its own level,” but on a flat roof, water also finds every tiny imperfection in the membrane.

    According to data from the National Roofing Contractors Association (NRCA), improper installation and lack of maintenance account for over 60% of premature roof failures. On a flat roof, a leak occurring at point A might manifest as a stain at point B, several feet away. This phenomenon, known as “water migration,” happens because water travels along insulation boards, decking, or vapor barriers before dripping through the ceiling drywall.

    Understanding this migration is key. You are not just looking for a hole; you are looking for the path the water took. For more detailed information on roofing materials and their properties, you can refer to the comprehensive overview on Wikipedia’s Roofing page.
    How To Find A Roof Leak On A Flat Roof

    Step 1: Prioritize Safety and Preparation

    Never compromise safety for the sake of curiosity. Flat roofs can be slippery, especially when wet or covered in debris. Before you climb up, ensure you have the proper gear:

    • Non-slip footwear: Rubber-soled shoes with good traction.
    • Safety harness: If the roof is more than one story high, a fall protection system is mandatory.
    • Clear weather: Never inspect a roof during rain, high winds, or immediately after a storm when surfaces are slick.
    • Helper: Always have someone on the ground who knows you are on the roof.

    Once safe, clear the roof of any loose debris like leaves, branches, or trash. Debris can hold moisture against the membrane, accelerating wear and masking the actual leak source.

    Step 2: Visual Inspection of Common Failure Points

    Most leaks originate from specific weak points rather than the middle of an open field. Start your inspection by examining these high-risk areas:

    1. Flashing and Penetrations

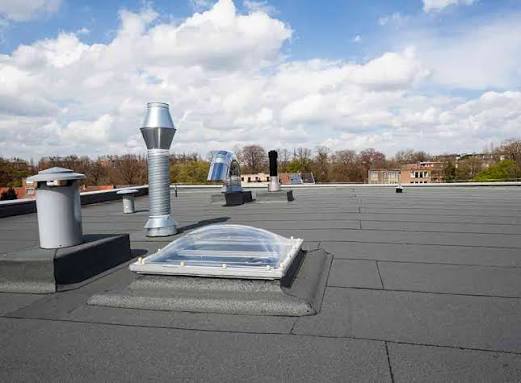
    Flashing is the metal or rubber material used to seal joints around protrusions. Check around:

    • HVAC units
    • Vent pipes
    • Skylights
    • Chimneys

    Look for cracks, rust, or separated seams in the flashing. If the sealant looks brittle or cracked, water is likely entering there.

    2. Roof Drains and Scuppers

    Clogged drains cause water to pool, increasing the hydrostatic pressure on the membrane. Ensure all drains are free of debris. Look for signs of standing water (ponding) that remains more than 48 hours after rainfall. Ponding water accelerates membrane degradation and is a primary cause of leaks.

    3. Membrane Seams and Blisters

    Walk the perimeter and the field of the roof. Look for:

    • Blisters: Bubble-like formations indicating trapped air or moisture beneath the membrane.
    • Alligatoring: A pattern of cracks resembling alligator skin, common in older asphalt-based roofs.
    • Open Seams: Areas where the roofing plies have separated.

    Step 3: The Water Hose Test (Controlled Testing)

    If visual inspection doesn’t reveal the source, you may need to perform a controlled water test. This method requires two people: one on the roof with a hose and one inside the building watching the ceiling.

    Procedure:

    1. Isolate Sections: Divide the roof into manageable sections (e.g., 10×10 feet).
    2. Start Low: Begin testing the area closest to the interior leak, not the highest point. Water flows down, so the source is often lower than you think.
    3. Apply Water Slowly: Use a garden hose to gently soak the section for 5–10 minutes. Do not use high pressure, which can force water into intact seams and create false positives.
    4. Wait and Observe: The person inside should watch for drips. If no leak appears, move to the next section uphill.
    5. Mark the Spot: Once the leak reproduces, mark the exact area on the roof with chalk or tape.

    Note: This process can take several hours. Patience is essential.

    Step 4: Advanced Detection Methods

    For complex leaks or large commercial buildings, professional tools may be necessary. While DIYers can rent some of these, others require certified technicians.

    MethodHow It WorksBest For
    Infrared ThermographyDetects temperature differences; wet insulation retains heat differently than dry insulation.Locating hidden moisture under the membrane.
    Electronic Leak DetectionUses electrical current to find breaches in the membrane.Single-ply membranes (EPDM, TPO).
    Dye TestingFluorescent dye is added to water; UV light reveals the path.Tracing complex water migration paths.

    Infrared cameras are particularly effective because they can “see” wet insulation that is not yet visible on the surface. Wet spots appear as dark or light anomalies depending on the time of day and ambient temperature.

    Common Causes of Flat Roof Leaks

    Understanding why leaks happen helps prevent future issues. Here are the top offenders:

    • Poor Installation: Improperly adhered seams or insufficient flashing height.
    • Material Aging: UV exposure breaks down chemical bonds in roofing materials over time.
    • Foot Traffic: Excessive walking on the roof can puncture membranes or dislodge gravel.
    • Vegetation: Roots from weeds or trees can penetrate the roofing layers.

    FAQ Section

    Q1: Can I patch a flat roof leak myself?

    A: Small punctures or minor seam separations can often be patched with roofing cement or a patch kit designed for your specific membrane type (EPDM, TPO, etc.). However, if the leak is near flashing or involves large areas of blistering, professional repair is recommended to ensure a watertight seal.

    Q2: How long does it take to find a leak on a flat roof?

    A: A simple visual inspection might take 30–60 minutes. If a water hose test is required, it can take several hours or even a full day, depending on the roof’s size and the complexity of the water migration.

    Q3: Why is my ceiling leaking when it hasn’t rained recently?

    A: This could be due to condensation from poor attic ventilation, a burst pipe, or residual water from a previous storm that was trapped in the insulation and is slowly releasing. It is crucial to rule out plumbing issues before assuming it is a roof leak.

    Q4: What is the lifespan of a typical flat roof?

    A: Most modern flat roofs last between 15 to 30 years, depending on the material. EPDM and TPO roofs tend to last longer (20–30 years), while built-up roofing (BUR) may require more frequent maintenance. Regular inspections can extend this lifespan significantly.

    Q5: Should I walk on my flat roof?

    A: Only when necessary and with proper safety precautions. Frequent foot traffic can damage the membrane. If you must access the roof, wear soft-soled shoes and avoid dragging equipment across the surface.

    Q6: How much does professional leak detection cost?

    A: Costs vary by region and roof size, but professional leak detection typically ranges from $300 to $1,000. This fee often includes a detailed report and thermal imaging, which can save thousands in unnecessary tear-off costs.

    Conclusion

    Learning how to find a roof leak on a flat roof is a valuable skill that can save you significant money and stress. By prioritizing safety, conducting thorough visual inspections, and using systematic testing methods like the hose test, you can pinpoint the source of water intrusion with confidence. Remember, early detection is key to preventing extensive structural damage and mold growth.

    If the leak proves elusive or the repair seems beyond your comfort level, do not hesitate to call a licensed roofing professional. Their expertise and specialized tools can provide a definitive solution.

    Did you find this guide helpful? Share it with your friends on social media to help them protect their homes too!
  • Best Way to Repair a Flat Roof: Expert Guide

    Best Way to Repair a Flat Roof: Expert Guide

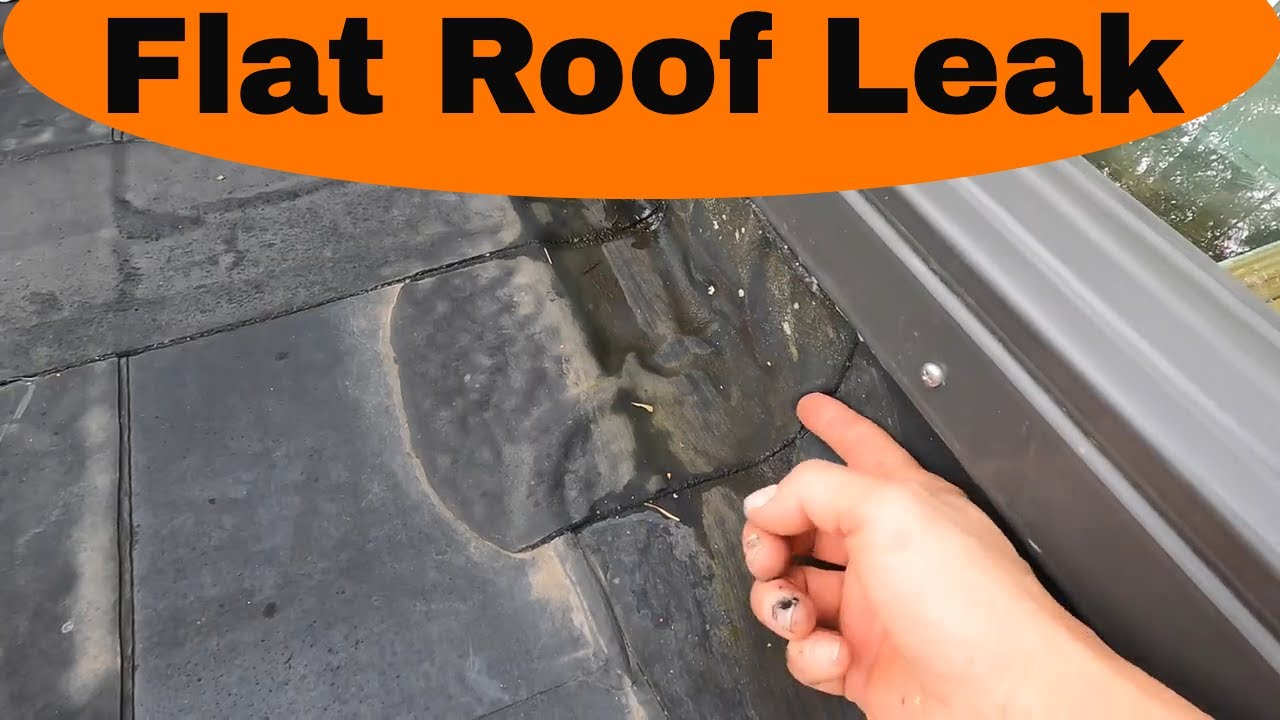
    Leaking roofs are every homeowner’s nightmare, but flat roofs present unique challenges that sloped roofs simply don’t have. If you are staring at a puddle on your ceiling or noticing bubbling material on your rooftop, you are likely wondering what is the best way to repair a flat roof without breaking the bank or causing further damage. This guide provides clear, actionable steps to help you tackle common issues safely and effectively.

    Understanding Your Flat Roof Material

    Before you pick up a trowel or a roll of tape, you must identify what your roof is made of. Using the wrong repair method can void warranties or cause immediate failure. Most residential and commercial flat roofs in the US fall into three categories:

    1. EPDM (Rubber): A black, synthetic rubber membrane. It is durable and flexible.
    2. TPO (Thermoplastic Polyolefin): Usually white or light gray, known for reflecting heat.
    3. Built-Up Roofing (BUR) or Modified Bitumen: Layers of asphalt and fabric, often covered with gravel or a mineral surface.

    According to industry standards, the longevity of these materials varies significantly. For detailed technical specifications on roofing membranes, you can refer to general construction resources like Wikipedia’s entry on Roofing. However, for practical repairs, knowing the material dictates the adhesive or patch kit you must buy.

    What Is the Best Way to Repair a Flat Roof?

    The “best” way depends entirely on the severity of the damage. However, for 80% of minor issues, the most effective method is cleaning the area thoroughly and applying a compatible self-adhering patch or liquid coating.

    Quick fixes like silicone caulk often fail because they do not bond well with UV-exposed roofing materials over time. A proper repair requires mechanical adhesion or chemical welding, depending on the membrane type.

    Step-by-Step: Repairing Small Punctures and Cracks

    If you have a small hole (less than 6 inches) or a hairline crack, follow this precise protocol. This method works best for EPDM and TPO roofs.

    1. Clean the Area: Use a specialized roof cleaner or a mixture of mild dish soap and water. Scrub the area within a 6-inch radius of the damage. Crucial: The surface must be 100% dry. Moisture prevents adhesion.
    2. Round the Corners: If cutting a patch, round the corners. Sharp corners are prone to peeling under thermal expansion and contraction.
    3. Apply Primer (If Required): Some patches require a primer pen. Apply it evenly and let it tack up for 5–10 minutes.
    4. Install the Patch: Peel the backing off the self-adhering patch. Center it over the damage.
    5. Roll It Out: Use a J-roller or a heavy hand roller. Apply firm pressure from the center outward to remove air bubbles. Ensure there are no wrinkles.

    Pro Tip: Always repair on a day when the temperature is between 50°F and 90°F (10°C–32°C). Extreme cold makes membranes brittle; extreme heat makes them too soft to handle properly.

    How Do You Fix a Blister on a Flat Roof?

    Blisters are bubbles trapped under the roofing membrane, caused by moisture turning into steam or poor initial installation. Ignoring them can lead to ruptures.

    The Repair Process:

    • Cut an X: Use a sharp utility knife to cut an “X” shape into the blister. Do not cut through the underlying deck.
    • Dry It Out: Lift the flaps and allow the area to dry completely. You may use a heat gun on a low setting to accelerate drying, but be careful not to burn the membrane.
    • Apply Adhesive: Inject roofing cement or compatible adhesive under the flaps.
    • Press Down: Firmly press the flaps back into place.
    • Patch Over: For added security, place a small patch over the “X” cut using the method described above.
    What Is The Best Way To Repair A Flat Roof

    Dealing with Ponding Water Issues

    Ponding water is water that remains on the roof for more than 48 hours after rainfall. This is not just a cosmetic issue; the weight can stress the structure, and standing water accelerates membrane degradation.

    Why It Happens:

    • Structural sagging.
    • Clogged drains or scuppers.
    • Improper slope during installation.

    The Fix: While re-sloping a roof is a major construction project, you can mitigate minor ponding by:

    1. Clearing Drains: Ensure all drains are free of leaves and debris.
    2. Installing Drainage Mats: These are porous layers placed under the membrane to channel water to drains.
    3. Using Tapered Insulation: In severe cases, adding tapered foam insulation boards can create a slight slope toward drains. This is usually a job for professionals.

    Comparison: DIY Patch Kits vs. Professional Replacement

    When deciding how to proceed, consider the scope of the damage. Here is a quick comparison to help you decide.

    FeatureDIY Patch/CoatingProfessional Replacement
    Cost$50 – $300$5,000 – $15,000+
    Time2 – 4 hours3 – 7 days
    Longevity2 – 5 years (if done correctly)15 – 30 years
    Best ForSmall holes, minor cracks, blistersLarge tears, widespread aging, structural issues
    Skill LevelBeginner to IntermediateExpert Required

    Note: If more than 25% of your roof is damaged, replacement is often more cost-effective than repeated repairs.

    When Should You Call a Professional?

    While DIY repairs are satisfying and economical, some situations demand expert intervention. You should call a licensed roofer if:

    • The Leak Source is Unknown: Water travels. The drip inside your house may be 10 feet away from the actual roof breach. Professionals use moisture meters and infrared cameras to locate hidden leaks.
    • Structural Damage: If the roof deck feels soft or spongy when you walk on it, the wood beneath is rotting. This requires deck replacement, not just membrane repair.
    • Warranty Concerns: Many flat roof manufacturers void warranties if unauthorized repairs are performed. Check your warranty terms before applying any aftermarket products.
    • Large Scale Damage: If you have multiple large blisters or tears spanning several feet, a patch job will likely fail quickly.

    Frequently Asked Questions (FAQ)

    1. Can I use regular tar to repair my flat roof?

    No. Regular asphalt tar is not compatible with modern single-ply membranes like EPDM or TPO. It can cause chemical reactions that degrade the membrane further. Always use manufacturer-approved adhesives or coatings.

    2. How long does a flat roof repair last?

    A properly executed DIY patch can last 3 to 5 years. Professional repairs using heat-welded seams or high-grade coatings can last 10 years or more, depending on weather conditions and maintenance.

    3. What is the best sealant for a flat roof?

    For EPDM roofs, use EPDM-specific splice adhesive or seam tape. For TPO, use TPO-compatible weldable patches. For general maintenance, acrylic or silicone-based roof coatings are popular, but ensure they are compatible with your specific membrane type.

    4. Why is my flat roof leaking after rain?

    Flat roofs leak due to punctures, failed seams, blistering, or clogged drains. Because water does not run off quickly, even a tiny pinhole can allow significant water ingress over time. Regular inspection of seams and drains is critical.

    5. Is it safe to walk on a flat roof?

    Generally, yes, but with caution. Avoid walking on the roof in extreme heat (it can become slippery) or when wet. Always wear soft-soled shoes to avoid puncturing the membrane. If the roof is old or shows signs of sagging, do not walk on it.

    Conclusion

    Knowing what is the best way to repair a flat roof empowers you to maintain your home’s integrity and avoid costly emergency replacements. For minor issues, a clean, dry surface and a compatible patch kit are your best friends. For structural issues or widespread damage, professional assessment is non-negotiable.

    Regular maintenance—clearing drains, inspecting seams, and addressing small punctures immediately—can extend the life of your flat roof by decades. Don’t wait for a major leak to take action.

    Found this guide helpful? Share it with your neighbors or on social media to help others protect their homes from water damage!

  • Fix Flat Roof Leaks: A DIY Guide

    Fix Flat Roof Leaks: A DIY Guide

    Water dripping from your ceiling is more than just an annoyance; it is a ticking time bomb for your home’s structural integrity and indoor air quality. If you are staring at a stain on your drywall or hearing the dreaded drip-drip sound, you likely need to know how to fix a roof leak on a flat roof before minor moisture turns into major mold remediation.

    Flat roofs are common in modern architecture and commercial buildings across the US, but they come with unique challenges. Unlike sloped roofs that shed water quickly, flat roofs rely on precise drainage and impermeable membranes. When these fail, water pools, leading to accelerated degradation. This guide will walk you through identifying the source, choosing the right materials, and executing a lasting repair, empowering you to handle this task with confidence.

    Why Do Flat Roofs Leak? Understanding the Root Cause

    Before applying any patch, it is crucial to understand why the leak occurred. Flat roofs do not leak because of gravity pulling water through shingles; they leak due to membrane failure, poor drainage, or installation errors.

    According to industry data, over 90% of flat roof leaks originate from penetrations (vents, pipes, HVAC units) or seams rather than the open field of the roof. Understanding the material type is also essential. Common flat roofing materials include:

    • EPDM (Ethylene Propylene Diene Monomer): A synthetic rubber known for durability.
    • TPO (Thermoplastic Polyolefin): A reflective, heat-weldable membrane.
    • Modified Bitumen: Asphalt-based rolls often used in colder climates.
    • Built-Up Roofing (BUR): Multiple layers of asphalt and felts.

    If you are unsure of your roof type, consult a professional or check previous maintenance records. Misidentifying the material can lead to using incompatible adhesives, causing the repair to fail within months. For a deeper understanding of roofing materials, you can refer to general construction standards on Wikipedia.

    Step 1: Locating the Leak Accurately

    Finding the exact entry point is the most challenging part of flat roof repair. Water travels horizontally under the membrane before dripping down, meaning the stain on your ceiling is rarely directly below the hole.

    The Hose Test Method

    If the leak is not obvious during rain, perform a controlled hose test:

    1. Safety First: Ensure the roof is dry and safe to walk on. Use a harness if the pitch is steep near the edges.
    2. Section Off Areas: Have a helper inside mark where water appears.
    3. Start Low: Begin spraying water at the lowest point of the roof near the suspected area.
    4. Move Up Gradually: Spray each section for 5–10 minutes. If no leak appears, move up the slope.
    5. Pinpoint the Source: Once water appears inside, mark that specific spot on the roof.

    Pro Tip: Look for “ponding water.” If water sits on your roof for more than 48 hours after rainfall, it accelerates membrane breakdown. Addressing drainage issues is part of the long-term fix.

    Step 2: Preparing the Surface for Repair

    A successful repair depends 80% on preparation and only 20% on the application of the patch. Dirt, algae, and loose granules prevent adhesives from bonding.

    1. Clear the Area: Remove any debris, leaves, or standing water around the leak.
    2. Clean Thoroughly: Use a stiff brush and a specialized roof cleaner or a mixture of mild detergent and water. For oily residues, use a degreaser.
    3. Dry Completely: The surface must be bone-dry. Moisture trapped under a patch will cause blistering and eventual failure. Use a leaf blower or wait for a sunny day.
    4. Trim Loose Edges: If the existing membrane is peeling, cut away the loose flaps with a utility knife to create a clean, stable edge.

    Step 3: Choosing the Right Repair Material

    Using the wrong product is a common DIY mistake. Here is a quick comparison to help you choose:

    Material TypeBest ForProsCons
    Liquid Rubber CoatingSmall cracks, seams, EPDMEasy to apply, flexible, seamlessRequires multiple coats, longer cure time
    Self-Adhesive Patch TapePunctures, small holes (<6 inches)Instant bond, no drying timeMay not adhere well to dirty/wet surfaces
    Torch-On MembraneModified Bitumen roofsExtremely durable, professional finishRequires open flame, high skill level
    TPO Welding StripTPO roofsCreates a molecular bond, very strongRequires special welding tool

    For most DIY homeowners dealing with EPDM or general punctures, a high-quality liquid rubber sealant or a self-adhesive EPDM patch kit is the safest and most effective choice.

    Step 4: Executing the Repair Step-by-Step

    Here is how to apply a standard patch repair using a liquid membrane or patch kit.

    For Small Punctures and Cracks

    1. Apply Primer: If using a liquid coating, apply a primer to the cleaned area. This enhances adhesion. Let it dry until tacky (usually 15–30 minutes).
    2. First Coat: Apply a generous layer of liquid rubber over the crack, extending at least 2 inches beyond the damage on all sides.
    3. Embed Mesh: For cracks wider than 1/8 inch, embed a piece of fiberglass mesh into the wet coat. This reinforces the repair and prevents future splitting.
    4. Second Coat: Once the first coat is touch-dry, apply a second layer over the mesh. Feather the edges to blend with the surrounding roof.

    For Larger Holes or Tears

    1. Cut the Patch: Cut a piece of matching membrane (EPDM or TPO) that is at least 3–4 inches larger than the hole on all sides. Round the corners to prevent peeling.
    2. Apply Adhesive: Apply contact cement to both the back of the patch and the roof surface. Wait for the adhesive to become tacky (check manufacturer instructions, usually 10–20 minutes).
    3. Position Carefully: Place the patch over the hole. Start from one side and roll it out to avoid air bubbles.
    4. Seal the Edges: Apply a bead of lap sealant around the entire perimeter of the patch. Smooth it with a putty knife to ensure a watertight seal.
    How To Fix A Roof Leak On A Flat Roof

    Maintenance Tips to Prevent Future Leaks

    Fixing the leak is only half the battle. Regular maintenance extends the life of your flat roof significantly.

    • Keep Drains Clear: Clogged scuppers or drains cause ponding water, which adds weight and degrades the membrane. Clean them twice a year.
    • Inspect After Storms: Check for new debris or displaced flashing after heavy winds.
    • Limit Foot Traffic: Walk only when necessary and wear soft-soled shoes. Consider installing walkway pads if you frequently access rooftop HVAC units.
    • Annual Professional Inspection: Even with DIY repairs, have a certified roofer inspect the roof every 2–3 years to catch underlying issues.

    Frequently Asked Questions (FAQ)

    How much does it cost to fix a flat roof leak?

    DIY repairs typically cost between $50 and $150 for materials like sealants and patches. Professional repairs range from $300 to $1,000 depending on the size of the leak and accessibility. Full roof replacement is significantly more expensive, often costing $5–$10 per square foot.

    Can I fix a flat roof leak in the rain?

    Generally, no. Most adhesives and coatings require a dry surface to bond properly. However, some emergency “wet patch” products exist for temporary stops. These are not permanent solutions and should be replaced with a proper repair once the weather clears.

    How long does a flat roof patch last?

    A properly applied patch using high-quality materials can last 5–10 years. However, the lifespan depends on UV exposure, temperature fluctuations, and foot traffic. Liquid rubber coatings tend to last longer than simple tape patches because they form a seamless barrier.

    Is it better to repair or replace a flat roof?

    If the roof is less than 15 years old and the leak is isolated, repair is cost-effective. If the roof is older, has multiple leaks, or shows widespread blistering and cracking, replacement is the better long-term investment. A rule of thumb: if repair costs exceed 50% of replacement cost, consider replacing.

    What is the best sealant for a flat roof?

    Polyurethane and silicone-based sealants are highly regarded for their flexibility and UV resistance. For EPDM roofs, specifically formulated EPDM liquid rubber is ideal. Always check compatibility with your existing roofing material.

    Conclusion

    Learning how to fix a roof leak on a flat roof is a valuable skill that can save you thousands in water damage restoration and premature roof replacement. By accurately locating the leak, preparing the surface meticulously, and using the right materials, you can achieve a professional-grade repair from your own toolkit.

    Remember, safety is paramount. If the leak is extensive, the roof is steep, or you feel uncomfortable working at heights, do not hesitate to call a licensed roofing contractor. A small investment in maintenance today ensures your home stays dry and secure for years to come.

    Found this guide helpful? Share it with your neighbors on social media to help them protect their homes too!