Category: homeowner roofing guide

  • How To Get Insurance To Pay For A New Roof

    How To Get Insurance To Pay For A New Roof

    Have you looked up after a storm and noticed missing shingles or a suspicious leak? Dealing with home repairs is stressful enough without the added headache of navigating complex insurance policies. If you are wondering how to get insurance to pay for a new roof, you are not alone; thousands of homeowners face this challenge every year, often feeling overwhelmed by the bureaucracy.

    The good news is that with the right preparation and knowledge, you can significantly increase your chances of a successful claim. This guide will walk you through the process, ensuring you understand your rights and the steps necessary to secure the funding you need for a safe, secure home.

    Understanding When Insurance Covers Roof Replacement

    Before filing a claim, it is crucial to understand why insurance companies approve or deny requests. Homeowners insurance is designed to cover “sudden and accidental” damage, not wear and tear.

    Covered Perils vs. Exclusions

    Most standard HO-3 policies (the most common type in the US) cover damage caused by specific events, known as perils. These typically include:

    • Windstorms: High winds that lift or tear off shingles.
    • Hail: Dents or cracks caused by hailstones.
    • Fire and Lightning: Structural damage from burns or strikes.
    • Falling Objects: Trees or branches falling onto the roof.
    • Weight of Ice/Snow: Collapse due to heavy accumulation.

    However, insurance will generally not cover damage resulting from:

    • Neglect: Failure to maintain the roof.
    • Age: Normal deterioration over time.
    • Poor Installation: Errors made during the original roofing job.

    According to the Insurance Information Institute, understanding your policy’s exclusions is the first step in managing expectations. If your roof is 20 years old and simply leaking due to age, a replacement is unlikely to be covered. However, if a storm accelerated that deterioration, you may have a case.
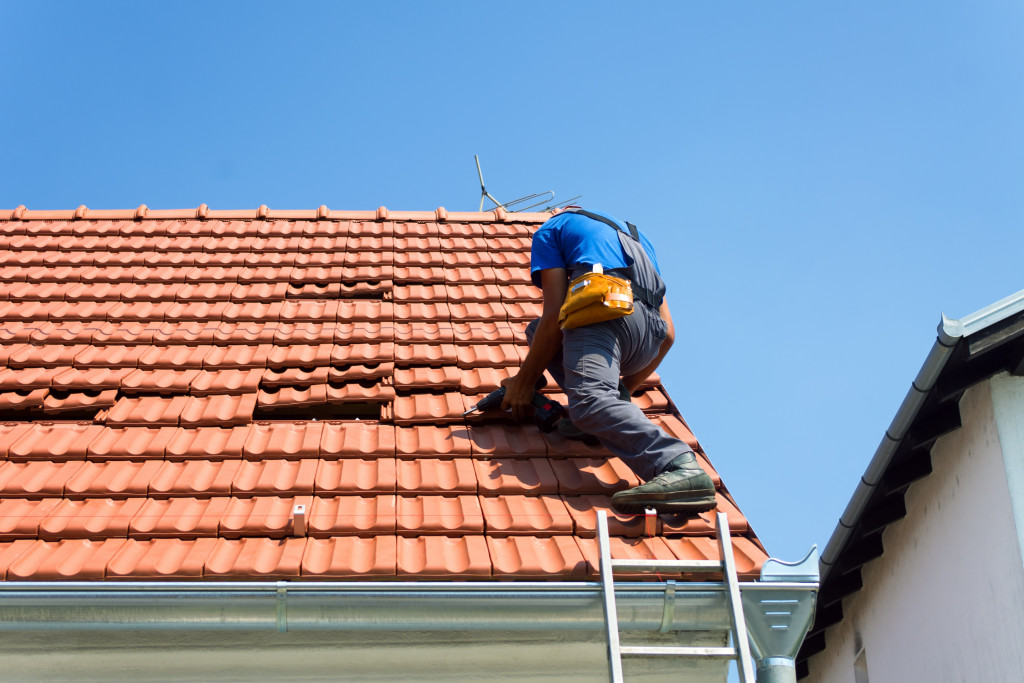
    How To Get Insurance To Pay For A New Roof

    Step 1: Document the Damage Thoroughly

    Evidence is everything in an insurance claim. Do not wait for the adjuster to arrive before gathering proof. The sooner you document the issue, the stronger your position will be.

    What to Photograph and Record

    1. Exterior Shots: Take clear, high-resolution photos of the damage from multiple angles. Use a drone if possible, or take photos from a safe vantage point. Capture close-ups of missing shingles, dents, or cracks.
    2. Interior Signs: Photograph water stains on ceilings, walls, or around windows. These prove that the exterior damage is affecting the livability of your home.
    3. Date and Time: Ensure your camera settings include timestamps. This proves the damage occurred recently, ideally correlating with a specific weather event.
    4. Temporary Repairs: If you had to put up a tarp to prevent further water intrusion, photograph this too. Keep receipts for any materials purchased for these emergency fixes.

    Pro Tip: Create a digital folder specifically for this claim. Back up all photos to cloud storage immediately to prevent data loss.

    Step 2: Review Your Policy Details

    Not all roofs are treated equally. Your payout depends heavily on the type of coverage you selected when purchasing your policy.

    ACV vs. RCV: Know the Difference

    FeatureActual Cash Value (ACV)Replacement Cost Value (RCV)
    DefinitionPays the current value of the roof minus depreciation.Pays the full cost to replace the roof with similar materials.
    DepreciationSignificant deduction based on age and condition.No depreciation deducted initially.
    Payout TimingSingle payment (lower amount).Two payments: Initial deposit + recoverable depreciation after work is done.
    Best ForOlder roofs where full replacement isn’t feasible.Newer roofs or those wanting full restoration.

    If you have an ACV policy, the insurance company will calculate the value of your roof based on its age. For example, if your roof has a 20-year lifespan and is 10 years old, they may only cover 50% of the replacement cost. With RCV, you get the full amount needed to replace it, provided you complete the repairs.

    Step 3: Hire a Reputable Roofing Contractor

    One of the most critical mistakes homeowners make is relying solely on the insurance adjuster’s assessment. Insurance adjusters work for the insurance company, not for you. Their goal is to minimize costs.

    Why You Need Your Own Estimate

    A licensed roofing contractor can provide an independent assessment of the damage. They can identify issues that an adjuster might miss, such as underlying deck damage or compromised flashing.

    • Get Multiple Quotes: Aim for at least three detailed estimates.
    • Check Credentials: Ensure the contractor is licensed, insured, and has good reviews in your local area.
    • Avoid “Storm Chasers”: Be wary of out-of-state contractors who appear immediately after a storm. They often lack local accountability and may perform subpar work.

    Your contractor can also meet with the insurance adjuster during the inspection. Having a professional present ensures that all damage is noted and discussed in real-time.

    Step 4: File the Claim and Meet the Adjuster

    Once you have your documentation and contractor estimates, it is time to file the claim. Call your insurance provider and provide them with the date of loss and a brief description of the damage.

    The Adjuster Inspection

    The insurance company will send an adjuster to inspect your property. Here is how to handle this meeting:

    1. Be Present: Always be home during the inspection. Walk the property with the adjuster.
    2. Point Out Damage: Show them the photos you took and point out specific areas of concern.
    3. Provide Your Contractor’s Report: Hand over the estimate from your roofer. This serves as a benchmark for the adjuster’s own estimate.
    4. Stay Calm and Factual: Avoid emotional arguments. Stick to the facts and the physical evidence.

    If the adjuster denies the claim or offers a lowball settlement, do not accept it immediately. You have the right to dispute the decision.

    Step 5: Negotiate the Settlement

    It is common for the initial offer to be lower than expected. This is where your preparation pays off.

    How to Counter a Low Offer

    • Request a Detailed Breakdown: Ask for the line-item estimate the adjuster used. Compare it with your contractor’s quote. Look for missing items, such as underlayment, flashing, or waste factors.
    • Submit Supplemental Claims: If you find discrepancies, submit a supplemental claim with photos and contractor notes explaining why additional funds are needed.
    • Invoke Appraisal Clause: If you cannot agree on the amount, most policies have an appraisal clause. This involves hiring an independent appraiser to resolve the dispute. Note that this can be costly, so use it as a last resort.

    Remember, negotiation is a standard part of the process. Insurance companies expect some pushback. Being polite but persistent is key to getting a fair settlement.

    FAQ Section

    1. Will my insurance premiums go up after a roof claim?

    Yes, in most cases, filing a claim can lead to higher premiums. However, this varies by state and insurer. Some states prohibit rate hikes for first-time weather-related claims. It is wise to ask your agent about potential rate impacts before filing.

    2. Can I choose my own roofing contractor?

    Absolutely. Your insurance company cannot force you to use their preferred vendor. You have the right to hire any licensed contractor you trust. Just ensure they are willing to work within the insurance guidelines for billing.

    3. What if my roof is old and the insurance says it’s just wear and tear?

    If the denial is based on age, it is difficult to overturn. However, if you can prove that a specific storm event caused new damage beyond normal wear, you may still get partial coverage. A professional roofing inspection report is essential here to distinguish between age-related issues and storm damage.

    4. How long do I have to file a roof insurance claim?

    Most policies require you to file “promptly,” but there is no universal federal deadline. State laws vary, but generally, you should file within one year of the damage. Delaying too long can give the insurer grounds to deny the claim due to lack of evidence.

    5. What is “recoverable depreciation”?

    If you have an RCV policy, the insurer initially pays the Actual Cash Value (depreciated amount). Once you complete the repairs and provide proof (invoices/receipts), they release the remaining balance, known as recoverable depreciation. This ensures the money is used for repairs.

    Conclusion

    Learning how to get insurance to pay for a new roof requires patience, documentation, and assertiveness. By understanding your policy, documenting damage thoroughly, and leveraging professional help from reputable contractors, you can navigate the claims process successfully.

    Remember, you are not just asking for a favor; you are claiming what you are entitled to under your contract. Stay organized, keep records of every communication, and do not hesitate to negotiate for a fair settlement.

    If you found this guide helpful, please share it on social media to help other homeowners navigate their insurance challenges. A well-informed community is better equipped to protect their homes and finances.

  • Red Roof Inn SFO: Budget Stay in Burlingame

    Red Roof Inn SFO: Budget Stay in Burlingame

    Traveling through the San Francisco Bay Area can be both exciting and exhausting, especially when you are dealing with tight flight schedules or a limited travel budget. Finding a place that balances affordability with convenience near the airport is often the biggest hurdle for savvy travelers. This guide focuses on the Red Roof Inn San Francisco Airport Airport Boulevard Burlingame Ca, helping you determine if this budget-friendly option is the right choice for your upcoming stay.

    Whether you are catching an early morning flight out of SFO or arriving late at night, knowing exactly what to expect from your accommodation can save you stress and money. Let’s dive into the details of this popular lodging option.

    Is the Red Roof Inn in Burlingame Convenient for SFO Travelers?

    Location is arguably the most critical factor when choosing an airport hotel. The property located on Airport Boulevard in Burlingame is strategically positioned just minutes away from San Francisco International Airport (SFO). For travelers, this proximity translates to less time spent in traffic and more time resting.

    The hotel is situated near major highways, including US-101 and I-280, making it accessible not just for flyers, but also for those driving into the city for business or leisure. However, being “near” the airport does not always mean “inside” the terminal complex. It is important to manage expectations regarding transit times.

    Shuttle Service Details

    One of the primary reasons guests choose this specific Red Roof Inn is the complimentary airport shuttle. Here is what you need to know:

    • Frequency: Shuttles typically run every 30–45 minutes, though this can vary based on demand and time of day.
    • Hours: Service usually operates 24/7, but it is highly recommended to confirm the current schedule upon check-in.
    • Pick-up/Drop-off: The shuttle picks up guests directly at the hotel entrance and drops them off at designated airline terminals at SFO.

    While the shuttle is free, during peak travel seasons (such as holidays), wait times may increase. If you have a very early flight (before 6:00 AM), consider arranging a rideshare or taxi as a backup plan to ensure you don’t miss your check-in window.

    What Amenities Can You Expect at This Budget Hotel?

    When staying at a budget-tier hotel like Red Roof Inn, understanding the amenity package is crucial to avoiding surprises. This property focuses on providing the essentials rather than luxury frills.

    Core Amenities List

    • Free Wi-Fi: Available throughout the property. Speeds are generally sufficient for checking emails and browsing, but may struggle with heavy streaming or large file uploads.
    • Pet-Friendly Policy: One of the standout features of Red Roof Inn is its pet policy. They allow one well-behaved pet per room at no extra charge. This is a significant cost-saver for pet owners who often face high fees at other hotels.
    • In-Room Features: Rooms typically include a flat-screen TV with cable, a mini-fridge, microwave, and coffee maker. Note that air conditioning is standard, which is vital given California’s varying temperatures.
    • Parking: Free parking is available for guests. This is a rare perk in the Bay Area, where parking fees can easily exceed $30–$50 per night at other establishments.

    What Is Missing?

    To maintain low rates, certain amenities are not included:

    • No full-service restaurant (though vending machines and nearby eateries are available).
    • No fitness center or pool at this specific location.
    • No room service.

    For many travelers, these trade-offs are acceptable given the price point. If you prioritize a gym or a hot breakfast buffet, you might need to look at mid-range competitors. However, for a clean place to sleep and shower, this hotel delivers on its core promise.

    Red Roof Inn San Francisco Airport Airport Boulevard Burlingame Ca

    How Does It Compare to Other Nearby Hotels?

    To help you make an informed decision, let’s compare the Red Roof Inn San Francisco Airport Airport Boulevard Burlingame Ca with typical alternatives in the area.

    FeatureRed Roof Inn BurlingameMid-Range Chain (e.g., Hilton/Hyatt)Budget Motel (Non-Chain)
    Price Range$$$$
    Pet FeeFreeHigh ($50–$100+)Varies
    ShuttleFreeFreeOften Paid
    CleanlinessGood (Variable)ExcellentPoor to Fair
    ParkingFreeOften PaidFree

    As shown in the table, the Red Roof Inn occupies a unique niche. It offers the reliability of a national chain with the pricing of a motel. While mid-range hotels offer superior comfort and services, they come at a significantly higher cost. Non-chain motels might be cheaper, but they often lack the consistent security and cleanliness standards that Red Roof Inn maintains through its corporate guidelines.

    According to industry data, budget hotels in the San Francisco area have seen a surge in demand due to rising travel costs. Travelers are increasingly seeking value-driven options that do not compromise on basic safety and hygiene.

    Is the Neighborhood Safe and Accessible?

    Burlingame is generally considered a safe and affluent suburb of San Francisco. The area around Airport Boulevard is commercial, featuring various restaurants, gas stations, and shopping centers. This means you are never far from food options if you arrive hungry.

    For dining, you will find several fast-casual and sit-down restaurants within a 5-minute drive. Popular choices include local diners and national chains. Having these options nearby is convenient since the hotel itself does not serve meals.

    Safety-wise, the hotel employs standard security measures, including well-lit parking lots and front desk staff available 24 hours. However, as with any urban-adjacent area, it is wise to keep valuables secure and lock your vehicle. The presence of other travelers and business professionals in the area contributes to a generally secure environment.

    For more context on the geography of the region, you can refer to Burlingame, California on Wikipedia to understand its position relative to San Francisco and Silicon Valley.

    Tips for Getting the Best Rate and Experience

    Booking smartly can enhance your stay and save you money. Here are actionable steps to optimize your experience at this location.

    1. Book Directly: While third-party sites are useful for comparison, booking directly through the Red Roof Inn website often yields the best cancellation policies and occasional member discounts.
    2. Request a Quiet Room: Since the hotel is near Airport Boulevard and flight paths, noise can be an issue. When checking in, politely ask for a room facing away from the street or on a higher floor to minimize traffic and airplane noise.
    3. Check for Renovations: Red Roof Inn has been undergoing a brand-wide renovation program called “Red Roof Renewed.” Ask if the property has recently updated rooms, as these will offer fresher decor and potentially better-functioning fixtures.
    4. Bring Your Own Toiletries: To keep costs down, the hotel provides basic soap and shampoo. If you have specific preferences, bring your own kit.
    5. Verify Shuttle Times: As mentioned earlier, always double-check the shuttle schedule upon arrival. Print out or screenshot the confirmation number for your shuttle pickup if required.

    FAQ Section

    1. Does the Red Roof Inn in Burlingame offer a free breakfast?

    No, this specific location does not provide a complimentary hot or continental breakfast. However, there are numerous cafes and fast-food options within walking distance or a short drive. Many guests choose to grab coffee and pastries nearby before heading to the airport.

    2. Is there a fee for pets?

    One of the major advantages of this hotel is its pet policy. They allow one well-behaved pet per room at no additional charge. This makes it an excellent choice for travelers moving with their dogs or cats who want to avoid the hefty pet fees charged by many other hotels in the Bay Area.

    3. How far is the hotel from downtown San Francisco?

    The hotel is approximately 12–15 miles from downtown San Francisco. Depending on traffic, the drive can take anywhere from 20 minutes (late at night) to over an hour (during rush hour). Using public transit like Caltrain from the nearby Burlingame station is often a smarter and cheaper alternative to driving into the city.

    4. Is the Wi-Fi reliable for work?

    The free Wi-Fi is suitable for general browsing, email, and video calls. However, if you need to upload large files or require high-speed stability for critical business tasks, you might experience some limitations. It is advisable to have a mobile hotspot as a backup if your work is mission-critical.

    5. Can I park my car for free while I fly?

    Yes, guests staying at the hotel can park their vehicles in the hotel lot for free during their stay. However, long-term parking for non-guests is not typically offered. If you are looking for long-term airport parking, there are dedicated lots near SFO that offer competitive rates.

    6. What is the check-in and check-out time?

    Standard check-in time is usually 3:00 PM, and check-out is at 11:00 AM. Early check-in or late check-out may be available upon request, subject to availability. It is best to call the front desk in advance if you anticipate arriving very early or leaving very late.

    Conclusion

    The Red Roof Inn San Francisco Airport Airport Boulevard Burlingame Ca stands out as a pragmatic choice for budget-conscious travelers, pet owners, and those who prioritize location and free parking over luxury amenities. It effectively solves the problem of finding affordable, safe, and convenient lodging near SFO without breaking the bank.

    While it may not offer the plush comforts of a four-star hotel, it delivers on the essentials: a clean bed, a reliable shuttle, and a pet-friendly environment. By managing your expectations and utilizing the tips provided above, you can ensure a smooth and cost-effective stay.

    If you found this guide helpful, please share it with your fellow travelers on social media. Helping others find great deals makes travel easier for everyone! Safe travels!

  • How Much Does It Cost To Build A Patio Roof?

    How Much Does It Cost To Build A Patio Roof?

    Have you ever looked at your backyard during a scorching summer afternoon or a sudden rainstorm and wished for a shaded, protected space to relax? You are not alone. Many homeowners face the same dilemma: they want to extend their living space outdoors but are unsure about the financial commitment. Understanding how much does it cost to build a patio roof is the first critical step in turning that dream into a reality without breaking the bank.

    In this comprehensive guide, we will break down the costs, materials, and labor factors involved in building a patio cover. Whether you are considering a simple DIY project or hiring a professional contractor, this article will provide the clarity you need to make an informed decision.

    What Is the Average Cost of Building a Patio Roof?

    When asking “how much does it cost to build a patio roof,” the answer varies significantly based on size, materials, and location. However, having a baseline helps you set a realistic budget.

    As of 2026, the national average cost to install a patio roof ranges between $4,000 and $12,000. For high-end custom structures with integrated lighting and fans, costs can easily exceed $20,000.

    To give you a clearer picture, here is a general price breakdown by size:

    Patio Size (ft)Average Material CostAverage Labor CostTotal Estimated Cost
    10 x 10$1,500 – $3,000$1,000 – $2,000$2,500 – $5,000
    12 x 16$3,000 – $5,500$2,000 – $3,500$5,000 – $9,000
    16 x 20$5,000 – $8,000$3,500 – $5,000$8,500 – $13,000

    Note: These figures are estimates. Local labor rates and material availability in your specific region will heavily influence the final price.

    The primary driver of these costs is the type of structure. A simple lean-to attached to your house is generally cheaper than a freestanding gazebo or a complex hip-roof structure. Additionally, the foundation work required—whether it’s concrete footings or attaching to an existing slab—adds to the bottom line.

    How Do Different Materials Impact the Price?

    One of the most significant variables in determining how much does it cost to build a patio roof is the choice of material. Each option offers different aesthetics, durability, and maintenance requirements.

    1. Wood

    Wood is a classic choice that blends seamlessly with natural landscapes. Cedar and redwood are popular for their resistance to rot and insects.

    • Cost: Moderate ($15–$25 per square foot).
    • Pros: Beautiful aesthetic, easy to customize.
    • Cons: Requires regular staining or sealing; susceptible to warping if not maintained.

    2. Aluminum

    Aluminum has gained massive popularity in recent years due to its durability and low maintenance.

    • Cost: Low to Moderate ($10–$20 per square foot).
    • Pros: Rust-resistant, lightweight, often comes in pre-fabricated kits.
    • Cons: Can look less “premium” than wood; may dent under heavy impact.

    3. Vinyl

    Vinyl is another low-maintenance option that mimics the look of wood without the upkeep.

    • Cost: Moderate ($12–$22 per square foot).
    • Pros: Never needs painting, resistant to moisture and insects.
    • Cons: Limited color options; can become brittle in extreme cold.

    4. Polycarbonate Panels

    Often used for modern, translucent roofs that allow light in while blocking UV rays.

    • Cost: Low ($8–$15 per square foot for panels only).
    • Pros: Excellent light transmission, lightweight.
    • Cons: Can be noisy during rain; may yellow over time if not UV-coated.

    For more detailed information on construction materials and their properties, you can refer to this Wikipedia article on building materials.

    How Much Does It Cost To Build A Patio Roof

    What Are the Hidden Costs You Should Anticipate?

    Many homeowners focus solely on the materials and labor, but several hidden costs can inflate your budget. Being aware of these ensures you are financially prepared.

    • Permits and Inspections: Most municipalities require a building permit for structural additions. Fees typically range from $100 to $500, depending on your local jurisdiction. Failure to obtain a permit can result in fines and issues when selling your home.
    • Site Preparation: If your ground is uneven, you may need grading or excavation services. Removing old decks or trees also adds to the cost.
    • Electrical Work: If you plan to add ceiling fans, recessed lighting, or outdoor outlets, you will need a licensed electrician. This can add $500 to $1,500 to your project.
    • Gutter Integration: Proper drainage is crucial. Integrating gutters into your new roof structure prevents water damage to your foundation and landscaping. Expect to pay an additional $200–$600.

    DIY vs. Hiring a Professional: Which Is Cheaper?

    A common question is whether saving on labor by doing it yourself is worth the risk. Let’s compare the two approaches.

    The DIY Route

    • Cost Savings: You save 30–50% on total costs by eliminating labor.
    • Time Commitment: A typical patio roof project takes a weekend warrior 2–4 weeks.
    • Risk: Structural errors can lead to safety hazards and failed inspections. You are also responsible for sourcing all materials and tools.

    Hiring a Professional

    • Cost: Higher upfront cost due to labor and overhead.
    • Benefits: Professionals handle permits, ensure code compliance, and offer warranties. They complete the job faster, usually in 3–5 days.
    • Peace of Mind: You avoid the physical strain and potential mistakes of a complex construction project.

    Verdict: If you have advanced carpentry skills and time, DIY is viable for simple aluminum or kit-based structures. For complex wooden designs or large spans, hiring a pro is safer and often more cost-effective in the long run due to durability and warranty coverage.

    How Long Does It Take to Build a Patio Roof?

    Timeline expectations are crucial for planning. Here is a realistic breakdown:

    1. Planning and Permits (1–4 Weeks): This phase includes designing the roof, selecting materials, and waiting for municipal approval.
    2. Material Delivery (1–2 Weeks): Depending on supply chain conditions, some materials may have lead times.
    3. Construction (3–7 Days): Actual building time. This includes setting posts, installing beams, and adding the roofing material.
    4. Finishing Touches (1–2 Days): Painting, staining, or installing accessories like lights and fans.

    Total project time from start to finish is typically 4 to 8 weeks.

    Frequently Asked Questions (FAQ)

    1. Does a patio roof increase home value?

    Yes, a well-built patio roof can increase your home’s resale value by expanding usable living space. Appraisers often view it as an improvement similar to a deck or porch, potentially offering a 50–70% return on investment depending on the quality and market demand.

    2. Do I need a permit to build a patio roof?

    In most cases, yes. If the structure is attached to your home or exceeds a certain size (often 100 square feet), a permit is required. Always check with your local building department before starting. Ignoring this can lead to costly fines and mandatory removal.

    3. What is the cheapest way to cover a patio?

    The most affordable options are shade sails or polycarbonate panel kits. Shade sails cost between $100–$300 and require minimal installation. Polycarbonate kits offer more protection and start around $500–$1,000 for small areas.

    4. Can I build a patio roof myself?

    Yes, if you choose a pre-fabricated kit (aluminum or vinyl) and have basic DIY skills. However, complex wooden structures or those requiring electrical work should be left to professionals to ensure safety and code compliance.

    5. How do I maintain my patio roof?

    Maintenance depends on the material. Wood requires annual cleaning and resealing every 2–3 years. Aluminum and vinyl need occasional washing with soap and water to remove dirt and prevent mold buildup. Always clear debris from gutters to ensure proper drainage.

    Conclusion

    Understanding how much does it cost to build a patio roof empowers you to plan a project that enhances your home without financial stress. While the average cost ranges from $4,000 to $12,000, your final price will depend on material choices, size, and labor preferences.

    By weighing the pros and cons of DIY versus professional installation and accounting for hidden costs like permits and electrical work, you can create a beautiful, functional outdoor sanctuary. Remember, a patio roof is not just an expense; it’s an investment in your lifestyle and home value.

    If you found this guide helpful, please share it with friends or family who are planning their own outdoor renovations. Your next backyard barbecue could be under a brand-new roof!

  • What Temperature Is Too Cold To Put On A Roof?

    What Temperature Is Too Cold To Put On A Roof?

    Have you ever stared at a leaking roof in the dead of winter, wondering if you can patch it up yourself before the snow gets worse? It’s a stressful situation, but rushing into a repair without knowing the limits can lead to costly mistakes. Understanding what temperature is too cold to put on a roof is essential for both your safety and the longevity of your home’s protection.

    The Critical Threshold: Why 40°F Matters

    When professional roofers discuss cold weather limitations, one number comes up repeatedly: 40°F (4°C).

    Generally, most roofing manufacturers and industry experts agree that installing asphalt shingles below this temperature is risky. However, this isn’t just an arbitrary rule; it is based on the chemical and physical properties of the materials used.

    Asphalt shingles rely on heat to activate the adhesive strips that seal them together. When the ambient temperature drops below 40°F, these adhesives fail to bond properly. Furthermore, the shingles themselves become brittle. Instead of bending around nails or conforming to the roof’s shape, they are prone to cracking under pressure.

    While some specialized “cold-weather” adhesives exist, standard residential roofing materials are not designed for sub-freezing installation. If you ignore this threshold, you risk creating a roof that looks fine initially but fails during the first strong wind or heavy rain of spring.

    How Cold Affects Different Roofing Materials

    Not all roofs are created equal. The impact of cold weather varies significantly depending on the material you are using. Understanding these differences helps you make informed decisions.

    Asphalt Shingles

    As mentioned, asphalt is the most common roofing material in the US, and it is highly sensitive to cold.

    • Brittleness: Below 40°F, the fiberglass mat and asphalt coating lose flexibility. Walking on them or hammering nails can cause immediate micro-cracks.
    • Sealing Failure: The self-sealing strip requires solar heat or ambient warmth to activate. In winter, this process may take months, leaving shingles vulnerable to wind uplift.

    Metal Roofing

    Metal is more forgiving than asphalt but still has limitations.

    • Thermal Contraction: Metal expands and contracts with temperature changes. Installing panels in extreme cold without accounting for expansion gaps can lead to buckling when temperatures rise.
    • Slippery Surfaces: Frost or ice on metal panels makes them incredibly dangerous to walk on, increasing the risk of falls.

    Rubber (EPDM) and TPO Membranes

    Common on flat roofs, these materials also suffer in the cold.

    • Adhesive Issues: Most adhesives for single-ply membranes require temperatures above 50°F to cure correctly.
    • Stiffness: Like asphalt, rubber becomes stiff and difficult to seam properly in freezing conditions.
    MaterialMinimum Recommended TempPrimary Risk in Cold
    Asphalt Shingles40°F (4°C)Cracking & Seal Failure
    Metal Panels20°F (-6°C)*Slippery Surface & Contraction
    EPDM/TPO50°F (10°C)Adhesive Cure Failure
    Clay/Concrete Tiles40°F (4°C)Breakage from Impact

    *Note: While metal can be installed at lower temps, safety risks increase dramatically.

    What Temperature Is Too Cold To Put On A Roof

    Safety Risks: More Than Just Broken Shingles

    When asking what temperature is too cold to put on a roof, many homeowners focus on the materials. However, the human element is far more critical. Cold weather introduces severe safety hazards that can lead to life-threatening accidents.

    1. Slip and Fall Hazards

    Roofs accumulate frost, dew, and ice long before the ground does. Even if it hasn’t snowed recently, morning frost can make shingles as slippery as ice. According to the Occupational Safety and Health Administration (OSHA), falls are the leading cause of death in construction. Winter conditions exponentially increase this risk.

    2. Reduced Dexterity

    Cold hands lose sensation and grip strength. Handling hammers, nail guns, and heavy bundles of shingles becomes difficult when your fingers are numb. This lack of dexterity increases the likelihood of dropping tools or missing nails, which compromises the roof’s integrity.

    3. Hypothermia and Fatigue

    Working outdoors in temperatures near freezing drains your body’s energy reserves faster than you might expect. Wind chill on an open roof can make 35°F feel like 20°F. Fatigue leads to poor judgment and slower reaction times, both of which are dangerous when working at heights.

    Best Practices for Winter Roofing Repairs

    If you absolutely must address a roof issue in cold weather, follow these expert-approved steps to minimize risk and damage.

    Step 1: Check the Forecast

    Never start a roofing project if snow, ice, or rain is expected within 24 hours. You need dry conditions for any adhesive to have a chance of bonding, even with special products.

    Step 2: Use Cold-Weather Adhesives

    Standard roofing cement won’t work well in the cold. Purchase adhesives specifically labeled for “cold weather application.” These formulas remain pliable at lower temperatures.

    Step 3: Hand-Seal Every Shingle

    Since the sun won’t activate the self-sealing strips, you must manually apply roofing cement under the tabs of every shingle. This ensures they stay down until warmer weather arrives.

    Step 4: Warm the Materials

    Store shingles in a warm garage or heated space before installation. Bringing them up to room temperature makes them less brittle and easier to handle. Do not leave them outside overnight before use.

    Step 5: Prioritize Safety Gear

    • Wear rubber-soled boots with deep treads for better grip.
    • Use a harness and secure anchor points.
    • Keep hands warm with gloves that still allow for dexterity.

    People Also Ask: Common Questions Answered

    To help you fully understand the nuances of winter roofing, here are answers to the most common questions found in search results.

    Can I install shingles if it’s 35 degrees?

    It is not recommended. At 35°F, asphalt shingles are brittle and likely to crack when nailed. If you must proceed, you need to hand-seal every shingle with cold-weather adhesive and handle the materials with extreme care. However, waiting for a warmer day is always the safer choice.

    Does rain affect roofing in cold weather?

    Yes, significantly. Rain combined with cold temperatures creates ice hazards and prevents adhesives from bonding entirely. Never attempt to install roofing materials during active precipitation or when the roof surface is wet.

    What happens if shingles don’t seal in the winter?

    If shingles do not seal, they are vulnerable to wind uplift. Strong gusts can lift the unsealed edges, tear the shingles, or expose the underlayment to water intrusion. This often leads to leaks and the need for premature replacement.

    Is it better to wait until spring?

    In most cases, yes. Waiting for temperatures to consistently stay above 40°F ensures proper sealing, reduces the risk of material breakage, and provides a safer working environment. Emergency patches should be temporary until a full repair can be done in warmer weather.

    Can I walk on my roof in winter?

    Walking on a cold roof is dangerous due to slip hazards and the risk of breaking brittle shingles. If you must inspect it, use extreme caution, wear proper footwear, and consider using binoculars from the ground instead.

    Conclusion

    Knowing what temperature is too cold to put on a roof is about more than just following manufacturer guidelines; it’s about protecting your investment and your safety. The general rule of thumb is to avoid installation below 40°F. Below this threshold, materials become brittle, adhesives fail, and the risk of personal injury skyrockets.

    While emergency patches are sometimes necessary, major roofing projects should ideally be scheduled for warmer months. If you must work in the cold, use specialized adhesives, warm your materials, and prioritize safety gear above all else.

    Did you find this guide helpful? Share it with your neighbors or on social media to help others stay safe and keep their homes dry this winter!

  • Why The Roof Of My Mouth Is Sore When I Swallow

    Why The Roof Of My Mouth Is Sore When I Swallow

    Have you ever taken a bite of hot pizza or a sip of scalding coffee, only to feel a sharp, lingering sting every time you swallow? It is a frustrating and uncomfortable sensation that can make even drinking water feel like a chore. If you are currently thinking, “The roof of my mouth is sore when I swallow,” you are not alone, and there are clear, medical reasons behind this discomfort.

    In this guide, we will explore why this happens, how to treat it at home, and when it is time to seek professional medical advice. We aim to provide you with actionable, empathetic advice to help you heal faster and eat comfortably again.

    Why Does the Roof of My Mouth Hurt When I Swallow?

    The roof of your mouth, medically known as the palate, is covered in delicate mucous membranes. These tissues are highly sensitive to temperature, texture, and infection. When you experience pain specifically during swallowing, it is often because the act of swallowing creates friction or pressure against an already inflamed area.

    Understanding the root cause is the first step toward relief. Here are the most common culprits:

    1. Thermal Burns (Pizza Palate)

    This is the most frequent cause. The hard palate has less protective tissue than other parts of the mouth. Consuming food or drinks above 60°C (140°F) can cause first-degree burns.

    • Symptoms: Redness, blistering, and raw sensitivity.
    • Healing Time: Typically 3–7 days.

    2. Abrasive Food Trauma

    Hard foods like tortilla chips, crusty bread, or hard candies can scratch the soft tissue. Unlike a burn, this is a mechanical injury.

    • Symptoms: A localized scratch or cut that stings when saliva or food passes over it.

    3. Oral Infections

    Viral or fungal infections can cause widespread inflammation.

    • Cold Sores (Herpes Simplex): Can appear on the hard palate, causing painful blisters.
    • Thrush (Candidiasis): A yeast infection that creates white patches and soreness, often exacerbated by swallowing.

    4. Allergic Reactions

    Oral Allergy Syndrome (OAS) can cause itching and swelling in the mouth after eating certain raw fruits or vegetables. This inflammation can make swallowing painful.

    Immediate Home Remedies for Relief

    If the roof of my mouth is sore when I swallow, you do not always need prescription medication. Most minor cases resolve with consistent home care. Here is a step-by-step protocol to reduce pain and accelerate healing.

    Step 1: Cool Down the Area

    Heat increases inflammation. Switch to cold or room-temperature foods.

    • Action: Suck on ice chips or eat plain yogurt.
    • Avoid: Hot soups, coffee, or spicy dishes for at least 48 hours.

    Step 2: Salt Water Rinses

    Salt water is a natural disinfectant and helps reduce swelling.

    • Recipe: Mix 1/2 teaspoon of salt into 240 ml (8 ounces) of warm water. Ensure the water is lukewarm, not hot.
    • Method: Swish gently for 30 seconds, then spit out. Repeat 3–4 times a day.

    Step 3: Hydration is Key

    A dry mouth exacerbates pain. Saliva acts as a natural lubricant and healing agent.

    • Target: Drink at least 2 liters of water daily.
    • Tip: Use a straw to bypass the roof of your mouth if direct contact is too painful.

    Step 4: Over-the-Counter Pain Relief

    If the pain is interfering with your ability to eat, consider topical anesthetics.

    • Options: Gels containing benzocaine can numb the area temporarily. Always follow the package instructions.
    Remedy TypeBest ForFrequency
    Ice ChipsImmediate numbingAs needed
    Salt Water RinseCleaning & Healing3-4 times/day
    HoneyCoating & Soothing2-3 times/day
    OTC GelSevere PainMax 4 times/day
    The Roof Of My Mouth Is Sore When I Swallow

    When Should You See a Doctor?

    While most cases of a sore palate are benign and self-limiting, some symptoms indicate a more serious underlying issue. According to general medical guidelines, you should consult a healthcare provider if:

    1. The pain persists for more than 10 days. Most minor burns and scratches heal within a week.
    2. You have difficulty breathing or swallowing liquids. This could indicate severe swelling or an allergic reaction.
    3. You notice white patches that bleed when scraped. This may be oral thrush, which requires antifungal medication.
    4. You have a high fever. This suggests a systemic infection rather than a local injury.

    For more detailed information on oral conditions, you can refer to reputable sources like Wikipedia’s page on Oral Mucosa to understand the anatomy involved.

    People Also Ask: Common Questions Answered

    Can stress cause the roof of my mouth to be sore?

    Indirectly, yes. Stress weakens the immune system, making you more susceptible to cold sores or canker sores. Additionally, stress can lead to unconscious habits like pressing your tongue against the roof of your mouth, causing irritation.

    Is it safe to pop a blister on the roof of my mouth?

    No. Popping a blister introduces bacteria and increases the risk of infection. It also delays healing. Let the blister rupture naturally or absorb back into the tissue.

    Why does it hurt more in the morning?

    During sleep, saliva production decreases, leading to a drier mouth. If you breathe through your mouth while sleeping, the delicate tissues on the palate can become dry and cracked, making them more sensitive when you swallow upon waking.

    Can acid reflux cause palate soreness?

    Yes. Gastroesophageal Reflux Disease (GERD) can bring stomach acid up into the throat and mouth. This acid can irritate the soft palate, causing a burning sensation that worsens when swallowing.

    What foods should I avoid while healing?

    Avoid the “Three H’s”:

    • Hot: Temperature-wise.
    • Hard: Crunchy textures like nuts or chips.
    • Highly Acidic: Citrus fruits, tomatoes, and vinegar-based dressings.

    Preventing Future Palate Pain

    Prevention is always better than cure. Once your mouth has healed, consider these lifestyle adjustments to protect your palate:

    • Test Temperature First: Always blow on hot beverages or take a small test sip before consuming fully.
    • Chew Thoroughly: Ensure hard foods are broken down before they reach the back of your mouth.
    • Stay Hydrated: Keep your oral tissues moist to maintain their elasticity and resistance to injury.
    • Manage Allergies: If you suspect Oral Allergy Syndrome, keep a food diary to identify triggers and cook fruits/vegetables to break down the allergenic proteins.

    Conclusion

    Dealing with a sore palate can be incredibly annoying, but understanding why the roof of my mouth is sore when I swallow empowers you to take the right steps for relief. In most cases, simple home remedies like salt water rinses, cold compresses, and dietary adjustments will resolve the issue within a week.

    Remember, your mouth is a resilient part of your body, but it requires gentle care when injured. Listen to your body, avoid irritants, and stay hydrated.

    Did you find this guide helpful? Share this article with friends or family who might be suffering from similar discomfort. Spreading awareness about simple oral care tips can help others find relief faster. Don’t forget to leave a comment below if you have any other questions or personal remedies that worked for you!

  • Get Insurance to Pay for Roof Replacement in Florida

    Get Insurance to Pay for Roof Replacement in Florida

    Living in the Sunshine State means enjoying beautiful weather, but it also means facing the harsh reality of hurricanes, hail, and intense UV exposure that can wreak havoc on your home’s most critical shield. If you are staring at leaks or missing shingles, you are likely wondering how to get insurance to pay for roof replacement Florida without getting denied or underpaid. This guide is designed to walk you through the complex claims process with clarity, empathy, and professional insight, ensuring you receive the coverage you deserve.

    Understanding Your Policy: The First Step to Approval

    Before you pick up the phone to call your insurer, you must understand what you are actually covered for. In Florida, insurance policies are not one-size-fits-all, and knowing the specifics can make or break your claim.

    Actual Cash Value vs. Replacement Cost Value

    The most critical distinction in your policy is between Actual Cash Value (ACV) and Replacement Cost Value (RCV).

    • Replacement Cost Value (RCV): The insurer pays the full cost to replace your roof with new materials of similar kind and quality, minus your deductible. This is the gold standard for homeowners.
    • Actual Cash Value (ACV): The insurer pays what your old roof was worth at the time of damage, accounting for depreciation. If your roof is 10 years old, they may only pay a fraction of the replacement cost, leaving you with a massive out-of-pocket bill.

    Pro Tip: Check your declarations page immediately. If you have an ACV policy, consider upgrading to RCV during your next renewal if financially feasible. For many Florida homeowners, this single clause determines whether a claim is affordable or catastrophic.

    The “Windstorm” Deductible

    In Florida, wind/hail damage often carries a separate, higher deductible than other perils like fire or theft. This is usually calculated as a percentage of your dwelling coverage (e.g., 2% to 5%) rather than a flat fee. For a home insured for $300,000, a 2% windstorm deductible means you pay the first $6,000 before insurance kicks in.

    Identifying Covered Perils: What Triggers a Payout?

    Insurance companies do not pay for roofs simply because they are old. They pay for sudden, accidental damage caused by specific “covered perils.”

    Common Covered Causes in Florida

    1. Hurricane and Tropical Storm Winds: High winds can lift shingles, tear off flashing, or cause structural failure.
    2. Hail: While less common than in the Midwest, hail does occur in Florida and can bruise or crack shingles.
    3. Falling Objects: Trees or branches falling onto your roof during a storm.
    4. Water Damage from Wind-Driven Rain: If wind creates an opening in your roof and rain enters, the resulting interior damage and roof repair are typically covered.

    What Is Typically Excluded?

    • Normal Wear and Tear: Gradual deterioration over time is considered maintenance, which is the homeowner’s responsibility.
    • Neglect: If you knew about a small leak and ignored it for months, leading to major rot, the claim will likely be denied.
    • Cosmetic Damage: Some policies exclude damage that affects appearance but not functionality.

    For a deeper understanding of property insurance standards, you can refer to general principles outlined on Wikipedia.

    How To Get Insurance To Pay For Roof Replacement Florida

    Step-by-Step Guide: How to File a Successful Claim

    Navigating the bureaucracy requires precision. Follow these steps to build a bulletproof case.

    Step 1: Document Everything Immediately

    Do not wait for an adjuster. As soon as it is safe to do so:

    • Take high-resolution photos of the damage from multiple angles (ground level and drone shots if available).
    • Photograph any interior water damage, stained ceilings, or damaged personal property.
    • Keep a log of dates and times regarding when the damage occurred and when you noticed it.

    Step 2: Mitigate Further Damage

    Florida law and most insurance policies require you to prevent further damage.

    • Place tarps over holes.
    • Move furniture away from leaks.
    • Save all receipts for these temporary repairs. These costs are often reimbursable.

    Step 3: Hire a Reputable Local Roofer

    Before meeting the insurance adjuster, hire a licensed Florida roofing contractor to inspect the damage.

    • Ask for a detailed written estimate.
    • Ensure they use current pricing for materials and labor, which fluctuates frequently in Florida due to supply chain issues.
    • Crucial: Do not let the roofer “negotiate” with the insurance company on your behalf unless they are a public adjuster. However, their estimate serves as your baseline for negotiation.

    Step 4: File the Claim Promptly

    Contact your insurance carrier to initiate the claim. Provide them with:

    • Your policy number.
    • Date and cause of loss.
    • A brief description of the damage.
    • Photos you took in Step 1.

    Step 5: Meet the Insurance Adjuster

    The adjuster works for the insurance company, not you. Be present during the inspection.

    • Walk the roof with them if possible.
    • Point out every piece of damage, including subtle signs like cracked seals around vents.
    • Provide the estimate from your independent roofer.

    Navigating Denials and Lowball Offers

    It is common for initial offers to be lower than expected. Here is how to handle it.

    Review the Adjuster’s Report Carefully

    Look for errors in:

    • Square Footage: Did they measure your roof correctly?
    • Material Quality: Did they price in basic 3-tab shingles when you have architectural shingles?
    • Scope of Work: Did they miss flashing, drip edges, or vent replacements?

    The Appeal Process

    If the offer is insufficient:

    1. Submit a Supplement: Provide additional photos and your contractor’s detailed line-item breakdown showing why the initial offer is inadequate.
    2. Request a Re-inspection: If there are factual errors in the report, demand a second look.
    3. Hire a Public Adjuster: For large or complex claims, a public adjuster works for you. They take a percentage of the settlement (usually 10–20%) but often secure significantly higher payouts.
    FeatureIndependent Contractor EstimateInsurance Adjuster Estimate
    Primary GoalFull restoration to pre-loss conditionMinimize payout within policy limits
    Pricing BasisCurrent local market ratesProprietary software (often outdated)
    Detail LevelHigh (includes waste factor, permits)Variable (may miss code upgrades)

    Frequently Asked Questions (FAQ)

    1. Will my insurance rates go up after a roof claim in Florida?

    Yes, it is highly likely. Florida has some of the highest homeowners insurance premiums in the US. Filing a claim, especially for wind damage, marks you as a higher risk. However, if the damage is severe, paying out-of-pocket for a $20,000 roof might be worse than a rate increase. Always calculate the long-term cost.

    2. Can I choose my own roofing contractor?

    Absolutely. Your insurance company cannot force you to use their “preferred” vendors. You have the right to hire any licensed and insured contractor in Florida. Be wary of insurers who push specific vendors aggressively; this may indicate a conflict of interest.

    3. What if my roof is older than 15 years?

    Many insurers in Florida have age restrictions. If your roof is over 15–20 years old, you might only be eligible for an ACV payout, or the insurer may require a full replacement rather than repairs. Some carriers may even refuse to renew your policy if the roof exceeds a certain age without replacement.

    4. How long do I have to file a roof claim in Florida?

    Under Florida Statute 627.70132, you generally have two years from the date of the loss to file a claim. However, waiting too long can complicate the proof of causation. It is best to file as soon as possible after the storm passes.

    5. What is “Code Upgrade” coverage?

    Building codes in Florida change frequently, especially after major hurricanes. Code Upgrade coverage (or Ordinance or Law coverage) pays for the extra cost required to bring your roof up to current building codes during replacement. Without this, you might have to pay thousands out-of-pocket for mandatory upgrades like stronger hurricane straps or improved underlayment.

    Conclusion

    Learning how to get insurance to pay for roof replacement Florida is less about luck and more about preparation, documentation, and persistence. By understanding your policy type (RCV vs. ACV), documenting damage thoroughly, and leveraging professional estimates, you can shift the balance of power back in your favor. Remember, the insurance adjuster’s first offer is rarely the final word.

    Don’t let bureaucratic hurdles leave your home vulnerable. Take control of your claim today, ensure your family’s safety, and protect your biggest investment. If you found this guide helpful, please share it with your neighbors and community groups on social media—because in Florida, we’re all in this together against the storms.

  • Roof Coating Dry Time Before Rain?

    Roof Coating Dry Time Before Rain?

    Have you ever watched dark clouds roll in just after you’ve finished applying a fresh layer of roof coating? It is a homeowner’s worst nightmare. You have invested time, money, and effort into protecting your home, only to worry that a sudden downpour might wash away all your hard work. Understanding exactly how long does roof coating need to dry before rain is critical to ensuring your investment lasts for years, not just days.

    In this guide, we will break down the science behind curing times, offer practical tips for emergency weather protection, and help you avoid costly mistakes. Whether you are using acrylic, silicone, or asphalt-based coatings, knowing the rules of engagement with Mother Nature is essential.

    The Critical Difference Between “Dry to Touch” and “Fully Cured”

    Before we dive into specific timelines, it is vital to understand two distinct phases in the life of a wet roof coating: drying and curing. Many homeowners confuse these terms, leading to premature exposure to moisture.

    Drying refers to the evaporation of water or solvents from the coating. When a coating is “dry to touch,” it means the surface has formed a skin. However, underneath that skin, the material may still be soft and vulnerable.

    Curing is the chemical process where the coating reaches its full strength, elasticity, and waterproofing capabilities. This process takes significantly longer than simple drying.

    If rain hits your roof while it is merely “dry to touch” but not cured, the water can re-emulsify the coating. This leads to:

    • White streaks or discoloration.
    • Reduced adhesion to the roof substrate.
    • Premature failure of the waterproofing layer.

    According to general industry standards, most water-based acrylic coatings require at least 24 to 48 hours of dry weather to fully cure. However, this is a baseline, not a guarantee.

    How Long Does Roof Coating Need to Dry Before Rain?

    The short answer is: It depends. But for most standard residential applications, you should aim for a minimum of 24 hours of completely dry weather. For optimal results, 48 hours is the gold standard.

    However, several factors influence this timeline. Let’s look at the specifics based on coating type.

    1. Acrylic Coatings (Water-Based)

    Acrylics are popular due to their reflectivity and ease of application. Because they are water-based, they are highly susceptible to rain before they cure.

    • Minimum Dry Time: 4–6 hours to become rain-resistant (light mist).
    • Ideal Dry Time: 24–48 hours for full cure.
    • Risk Factor: High. If it rains heavily within the first 12 hours, you will likely need to reapply.

    2. Silicone Coatings

    Silicone coatings cure through a different chemical reaction and are generally more water-resistant once set.

    • Minimum Dry Time: 2–4 hours to become water-resistant.
    • Ideal Dry Time: 24 hours for full cure.
    • Risk Factor: Moderate. They handle light moisture better than acrylics but still need time to bond.

    3. Asphalt/Aluminum Coatings

    These are solvent-based and typically dry faster than water-based options.

    • Minimum Dry Time: 2–4 hours.
    • Ideal Dry Time: 12–24 hours.
    • Risk Factor: Low to Moderate. The strong smell indicates solvents evaporating quickly, but heavy rain can still cause blistering.
    Coating TypeTouch Dry TimeRain-Resistant TimeFully Cured Time
    Acrylic2–4 Hours12–24 Hours48–72 Hours
    Silicone1–3 Hours4–8 Hours24–48 Hours
    Asphalt1–2 Hours4–6 Hours24 Hours

    Note: These times assume ideal conditions (70°F/21°C and 50% humidity).

    How Long Does Roof Coating Need To Dry Before Rain

    What Factors Affect Drying Time?

    You cannot rely solely on the clock. Environmental conditions play a massive role in how quickly your roof coating sets. Ignoring these variables is the most common cause of coating failure.

    Temperature Matters

    Heat accelerates evaporation. If you are applying coating in the summer when temperatures are above 80°F (27°C), your coating may dry in half the time. Conversely, if you are working in late autumn with temperatures dipping below 50°F (10°C), the chemical reactions slow down significantly.

    Pro Tip: Never apply roof coating if the temperature is expected to drop below 40°F (4°C) within the first 24 hours. The coating may freeze before it cures, ruining its integrity.

    Humidity is the Silent Killer

    High humidity slows down evaporation. Even if it is hot, if the relative humidity is above 85%, the water in acrylic coatings has nowhere to go. It stays trapped in the film, extending the drying time dramatically.

    Wind and Airflow

    A gentle breeze helps carry away moisture-laden air from the roof surface. However, strong winds can blow debris onto the wet coating or cause it to dry too unevenly, leading to cracks.

    Thickness of Application

    Did you apply a thick, heavy coat hoping for better protection? Think again. Thicker layers take much longer to dry because the moisture from the bottom layers has to travel through the top layers to escape. Always follow the manufacturer’s recommended spread rate, usually measured in gallons per 100 square feet.

    What If It Rains Before the Coating Is Dry?

    Despite our best efforts, weather is unpredictable. If you find yourself in this situation, do not panic. Here is a step-by-step guide on what to do.

    1. Assess the Damage: Wait until the roof is completely dry again. Do not inspect it while it is wet.
    2. Look for Wash-Off: Check for areas where the coating has been washed away, leaving bare spots.
    3. Check for Blistering: Look for bubbles or raised areas where water got trapped under the coating.
    4. Test Adhesion: Gently press on the coating. If it feels tacky or sticky after 48 hours of dry weather, it has not cured properly.

    If the damage is minor, you may be able to spot-repair the affected areas. If the entire roof looks streaky or white (a sign of re-emulsification in acrylics), you will likely need to clean the surface and reapply the coating. For more detailed information on polymer chemistry and water resistance, you can refer to resources like Wikipedia’s page on Polymer Coatings to understand the material science behind these failures.

    How to Protect Fresh Roof Coating from Unexpected Rain

    Prevention is always cheaper than cure. Here are actionable strategies to minimize risk.

    Check the Long-Range Forecast

    Do not just check tomorrow’s weather. Look at the 7-day forecast. Ensure there is a clear window of at least 48 hours with no precipitation predicted.

    Start Early in the Day

    Begin your application early in the morning. This gives the coating the maximum amount of daylight and warmth to start the drying process before nightfall, when dew and cooler temperatures can hinder curing.

    Use Fast-Drying Primers

    Some manufacturers offer fast-drying primers that can reduce the overall waiting time. Ask your supplier if this is an option for your specific roof type.

    Have Tarps Ready

    For small roofs or specific sections, keep heavy-duty tarps on hand. If rain threatens, you can carefully cover the wet areas. Warning: Do not place tarps directly on wet coating without spacers, as they will stick and peel off the new layer when removed. Use wooden battens to create a gap between the tarp and the roof.

    Frequently Asked Questions (FAQ)

    1. Can I apply roof coating if it rained yesterday?

    Yes, but only if the roof is completely dry. Moisture trapped in the roof substrate will prevent the coating from adhering properly. Use a moisture meter or wait at least 24–48 hours after heavy rain before applying.

    2. What happens if it rains 2 hours after application?

    If it rains heavily within 2 hours, the coating will likely wash off or become severely compromised. You will probably need to rinse the roof and reapply once it is dry. Light mist might be survivable for silicone coatings, but acrylics will likely stain.

    3. Does sun exposure help roof coating dry faster?

    Yes, direct sunlight provides heat which accelerates evaporation. However, extreme heat can cause the top layer to skin over too quickly, trapping moisture underneath. Ideal drying conditions are warm, sunny, and breezy.

    4. How can I tell if my roof coating is fully cured?

    Perform a simple touch test. If the coating feels hard, non-tacky, and uniform in color, it is likely cured. If it feels soft, sticky, or leaves residue on your finger, it needs more time.

    5. Is there a way to speed up the drying process?

    You cannot safely “force” dry roof coating with heaters or fans as you might with indoor paint. The best way to speed it up is to apply thin, even coats and choose a day with low humidity and good airflow.

    Conclusion

    Knowing how long does roof coating need to dry before rain is the difference between a durable, protective shield and a costly redo. While 24 to 48 hours is the general rule of thumb, always consider temperature, humidity, and coating type.

    By planning your project around a solid weather window and understanding the signs of proper curing, you can protect your home effectively. Don’t let a surprise shower ruin your hard work. Plan ahead, apply correctly, and enjoy the peace of mind that comes with a well-sealed roof.

    Found this guide helpful? Share it with your neighbors or on social media to help others protect their homes from weather damage!

  • Can You Put A Metal Roof On A Flat Roof?

    Can You Put A Metal Roof On A Flat Roof?

    Have you ever looked at your home’s flat or low-slope roof and dreamed of the durability and sleek aesthetic of metal? It is a common dilemma for homeowners who want the longevity of steel or aluminum but are stuck with a structure that wasn’t originally designed for it. The short answer to the question “Can you put a metal roof on a flat roof“ is yes, but it comes with significant engineering caveats that you cannot ignore.

    Water is the enemy of any roofing system, and flat roofs are particularly vulnerable because they lack the natural gravity-assisted drainage of steep pitches. Installing metal on such a surface requires precise planning, specific materials, and often, a structural modification to ensure water sheds effectively rather than pools. In this guide, we will break down exactly how to do it right, avoiding costly leaks and structural failures.

    Understanding the Critical Role of Roof Pitch

    Before you buy a single sheet of metal, you must understand the concept of “pitch.” In roofing terms, pitch refers to the steepness of the roof. Traditional metal roofing panels, such as corrugated or exposed-fastener panels, rely heavily on gravity to move water off the roof quickly.

    What Is the Minimum Slope for Metal Roofing?

    Most manufacturers and building codes require a minimum slope for standard metal roofing. Typically, this is 3:12, meaning the roof rises 3 inches for every 12 inches of horizontal run. However, some specialized standing seam systems can go as low as 1/4:12 or 0.5:12 if installed with sealed seams and strict adherence to manufacturer guidelines.

    If your roof is truly “flat” (0:12 pitch), you generally cannot install standard metal panels directly. Water will pool, leading to inevitable leaks, corrosion, and eventual collapse under the weight of standing water or snow.

    Expert Insight: According to general construction principles detailed on Wikipedia’s Roof page, proper drainage is the primary function of any roof covering. Without adequate slope, the roofing material becomes secondary to the waterproofing membrane beneath it.

    Methods to Install Metal on Low-Slope Roofs

    If you are determined to have a metal look on a flat or near-flat roof, you have three primary pathways. Each varies in cost, complexity, and effectiveness.

    1. Creating a Slope with Framing (The Best Option)

    The most effective way to install a metal roof on a flat structure is to change the geometry of the roof itself. This involves building a new frame over the existing flat roof to create the necessary pitch.

    • Step 1: Assess the structural integrity of your current roof to ensure it can hold the added weight of lumber and metal.
    • Step 2: Install tapered insulation or wooden sleepers (framing) that are higher at the back and lower at the front (or vice versa) to create a slope.
    • Step 3: Ensure the new slope meets the minimum 3:12 requirement for standard panels or 1/4:12 for specialized standing seam systems.
    • Step 4: Install the metal roofing over this new framed structure.

    This method ensures that water runs off efficiently, mimicking a traditional pitched roof while sitting atop your flat structure.

    2. Using Standing Seam Metal Roofing

    Standing seam metal roofs are different from traditional corrugated panels. The fasteners are hidden under the raised “seams,” and the panels are often mechanically locked or sealed. This design allows them to handle lower slopes better than exposed-fastener panels.

    • Pros: Superior watertightness, thermal expansion accommodation, and sleek modern look.
    • Cons: Higher cost, requires professional installation, and still requires some slope (usually minimum 1/4:12).

    Note: Even with standing seam, a completely flat (0:12) roof is risky. Most engineers recommend a slight taper even for these systems.

    3. Hybrid Systems: Metal Over Membrane

    In some commercial applications, a metal roof is installed over a rigid insulation board that provides both thermal resistance and a slight slope. This is often called a “tapered insulation system.” The metal acts as the weather barrier, but the underlying insulation directs water to drains.

    Can You Put A Metal Roof On A Flat Roof

    Comparison: Standard Panels vs. Standing Seam for Flat Roofs

    To help you decide which route to take, here is a quick comparison of the two most common metal roofing types in the context of low-slope applications.

    FeatureExposed-Fastener (Corrugated)Standing Seam
    Min. Slope Required3:12 (Recommended)1/4:12 to 1/2:12
    Water TightnessModerate (relies on gaskets)High (mechanical locks/sealants)
    CostLowerHigher
    Installation DifficultyDIY-friendlyProfessional Only
    Suitability for FlatPoorGood (with minimal slope)
    Lifespan20–30 Years40–50+ Years

    As you can see, if you are working with a very low slope, standing seam is the only viable metal option. Trying to force corrugated panels onto a flat roof is a recipe for disaster.

    Step-by-Step Guide to Preparing Your Flat Roof for Metal

    If you have decided to proceed, follow these general steps to ensure a high-quality installation. Remember, local building codes vary, so always consult a structural engineer first.

    1. Inspect the Existing Deck: Ensure the current flat roof deck is solid, dry, and free of rot. Repair any structural weaknesses.
    2. Install Vapor Barrier: Place a vapor barrier over the existing deck to prevent moisture from trapping between the old roof and the new metal system.
    3. Create the Slope: Install tapered rigid foam insulation or wood framing. Start with a thickness of 2 inches at the drain edge and increase by 1 inch for every foot of run until you reach your desired pitch.
    4. Add Sheathing: Install plywood or OSB sheathing over the tapered insulation to provide a nailing base for the metal panels.
    5. Apply Underlayment: Use a high-quality synthetic underlayment. For low slopes, consider an ice and water shield for extra protection against wind-driven rain.
    6. Install Metal Panels: Begin at the eave and work your way up. For standing seam, use a mechanical seamer to lock the panels together tightly.
    7. Seal All Penetrations: Use high-grade urethane sealant around vents, chimneys, and edges. Pay special attention to the ridge cap.

    Common Mistakes to Avoid

    Even with the best intentions, homeowners and contractors make errors that compromise the roof.

    • Ignoring Drainage: Never assume water will evaporate. You must have scuppers, gutters, or internal drains.
    • Using Wrong Fasteners: On low slopes, water moves slower. If you use screws with poor sealing washers, water will wick into the screw holes. Always use color-matched, rubber-washed screws designed for metal roofing.
    • Skipping the Engineer: Flat roofs often have different load-bearing capacities than pitched roofs. Adding framing and metal adds weight. Always get a structural sign-off.

    FAQ Section

    1. Can I put metal roofing directly on a 0:12 flat roof?

    No, it is highly discouraged. Without any slope, water will pool, leading to leaks, corrosion, and potential structural damage. You must create a slope using framing or tapered insulation before installing metal.

    2. What is the cheapest way to put a metal roof on a flat roof?

    The cheapest method is usually installing a standing seam system over a minimal tapered insulation layer. However, “cheap” can be relative; fixing leaks later is far more expensive. Avoid using cheap corrugated panels on low slopes as they will fail.

    3. Does a metal roof make a flat roof hotter?

    Metal reflects solar radiant heat, which can actually keep your attic or top floor cooler compared to asphalt membranes, especially if you choose a light-colored or “cool roof” coated metal. However, without proper ventilation and insulation, heat can still transfer.

    4. How long does a metal roof last on a flat structure?

    If installed correctly with adequate slope and drainage, a standing seam metal roof can last 40 to 70 years. This is significantly longer than traditional flat roof materials like EPDM or TPO, which typically last 15–25 years.

    5. Do I need a permit to install a metal roof on my flat roof?

    Yes, almost certainly. Changing the roofing material and potentially altering the structure (by adding framing for slope) requires a building permit. Check with your local municipality to ensure compliance with zoning and safety codes.

    6. Can I install metal roofing over an existing EPDM rubber roof?

    You should not install metal directly over EPDM. The rubber membrane needs to breathe, and friction between the metal and rubber can cause wear. Instead, remove the EPDM or install a separation layer and a new substrate (like plywood over framing) before installing the metal.

    Conclusion

    So, can you put a metal roof on a flat roof? Yes, but not directly. The key lies in creating adequate drainage through structural modifications like tapered insulation or framing. By opting for a standing seam metal roof and ensuring a minimum slope of 1/4:12, you can enjoy the durability, aesthetic appeal, and longevity of metal without the risk of water pooling.

    Investing in professional design and installation is crucial. While the upfront cost may be higher than traditional flat roofing materials, the lifespan and low maintenance of metal make it a smart long-term investment for your home.

    Found this guide helpful? Share it with your friends on Facebook or Pinterest who are considering their next roofing project!

  • Watch 2024 Rackley Roofing 200 In Australia On Fox Sports

    Watch 2024 Rackley Roofing 200 In Australia On Fox Sports

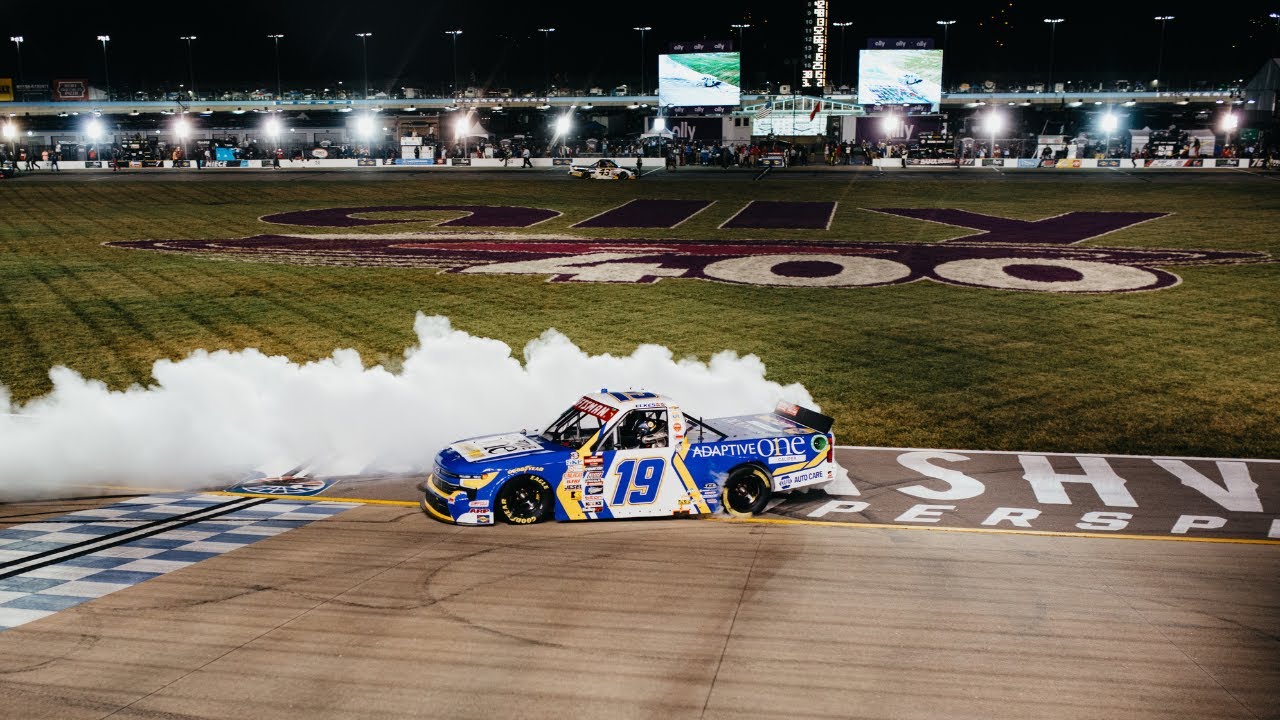
    Are you an expat or a traveler currently down under, desperately missing the roar of engines and the thrill of NASCAR? It can be incredibly frustrating when your favorite race is scheduled, but geo-restrictions block your usual streaming services. If you are trying to watch 2024 Rackley Roofing 200 in Australia on Fox Sports, you have likely encountered significant hurdles regarding broadcast rights and regional blackouts.

    This guide is designed specifically for you. We will break down exactly how to navigate these digital barriers legally and efficiently, ensuring you don’t miss a single lap of the Craftsman Truck Series action at Milwaukee Mile. Whether you are a seasoned cord-cutter or new to international streaming, this article provides the technical clarity and practical steps you need.

    Understanding the Broadcast Challenge: Why Is It Hard to Watch?

    Before we dive into the solutions, it is essential to understand why accessing US sports content from Australia is difficult. This knowledge helps you choose the right tool for the job and avoids wasted subscriptions.

    The Geo-Resting Reality

    Fox Sports holds the exclusive broadcasting rights for NASCAR in the United States. However, these rights are territorial. When you are in Australia, your IP address identifies your location as outside the US licensing agreement zone. Consequently, platforms like Fox Sports App, NASCAR.com, and even cable provider apps will deny access or redirect you to local Australian broadcasters who may not carry the specific Truck Series race.

    The Time Zone Factor

    The 2024 Rackley Roofing 200 took place at The Milwaukee Mile. For Australian viewers, the timing is often inconvenient. Races that air in the afternoon or evening in Wisconsin typically broadcast in the early morning hours (AM) in Australia. This means you aren’t just fighting technology; you are fighting your sleep schedule.

    Pro Tip: Always double-check the start time in AEST (Australian Eastern Standard Time) or AEDT (Daylight Saving Time), depending on the month. A 2:00 PM ET start translates to roughly 4:00 AM or 5:00 AM in Sydney/Melbourne.

    Method 1: Using a Premium VPN Service (The Most Reliable Option)

    For most users in Australia, the most effective way to access US-based Fox Sports content is through a Virtual Private Network (VPN). A VPN masks your real IP address and makes it appear as though you are browsing from within the United States.

    Step-by-Step Guide to Setting Up Your Stream

    1. Choose a Reputable VPN Provider: Not all VPNs work with streaming services. Fox Sports has sophisticated detection systems. Look for providers known for high-speed servers and “streaming-optimized” nodes. Popular choices include NordVPN, ExpressVPN, and Surfshark.
    2. Install the Application: Download the VPN app on your device (Smart TV, Laptop, Tablet, or Phone). Ensure your device meets the minimum system requirements for smooth HD playback.
    3. Connect to a US Server: Open the app and select a server located in the United States. For the best latency, choose a server on the East Coast (e.g., New York or Washington D.C.) as it is geographically closer to the broadcast source.
    4. Clear Your Browser Cache: Before logging in, clear your cookies and cache. This ensures that previous location data does not conflict with your new US IP address.
    5. Log In to Your Fox Sports Provider: Navigate to the Fox Sports website or app. Log in using your existing US cable or satellite TV credentials (such as Xfinity, DirecTV, or Spectrum).
    6. Start Streaming: Search for the “Rackley Roofing 200” replay or live feed. The geo-block should now be bypassed.

    Performance Expectations

    When using a VPN, expect a slight increase in latency. To mitigate buffering:

    • Use a wired Ethernet connection instead of Wi-Fi if possible.
    • Close background applications consuming bandwidth.
    • Select a VPN server with low load percentages.

    Method 2: International Streaming Packages

    If you do not have a US cable subscription, you might consider streaming services that offer international packages. While direct access to Fox Sports from Australia is limited, some global sports platforms occasionally secure rights for specific NASCAR events.

    Comparison of Streaming Options

    ServiceAvailability in AustraliaNASCAR CoverageCost Estimate (USD)Best For
    Fox Sports via VPNHigh (with US Login)Full Live & Replay$15–$70/mo (Cable)Die-hard fans with US ties
    NASCAR InternationalVariableSelected RacesVaries by RegionCasual viewers
    Kayo Sports (AU)NativeLimited/None~$25 AUD/moLocal AU sports fans
    Stan Sport (AU)NativeLimited/None~$10 AUD/moGeneral sports fans

    Note: As of 2024, Australian domestic providers like Kayo or Stan rarely carry the Craftsman Truck Series live. They focus more on Supercars, AFL, and NRL.

    For the most comprehensive coverage, referring to the official NASCAR Wikipedia page can provide historical context on broadcasting rights evolution, helping you understand why certain regions are excluded.

    Watch 2024 Rackley Roofing 200 In Australia On Fox Sports

    Technical Requirements for Optimal Viewing

    To ensure you watch 2024 Rackley Roofing 200 in Australia on Fox Sports without interruption, your hardware and internet connection must meet specific standards. Core Web Vitals and user experience metrics suggest that buffering is the primary reason viewers abandon streams.

    Internet Speed Recommendations

    • Standard Definition (SD): Minimum 3 Mbps.
    • High Definition (HD 1080p): Minimum 5–8 Mbps.
    • 4K Ultra HD: Minimum 25 Mbps.

    Given that you are routing traffic through a VPN, which adds encryption overhead, we recommend having a base connection of at least 20 Mbps to comfortably stream HD content without lag.

    Device Compatibility

    • Smart TVs: Samsung, LG, and Android TVs support most major VPN apps directly.
    • Streaming Sticks: Amazon Fire Stick and Roku devices allow VPN installation or router-level integration.
    • Mobile Devices: iOS and Android apps are highly optimized for mobile data usage, allowing you to watch on the go.

    Common Pitfalls to Avoid

    Even with the right tools, users often face issues. Here is how to troubleshoot common problems:

    • “Proxy Detected” Error: This means Fox Sports has identified your VPN IP as a data center rather than a residential IP. Switch to a different US server or contact your VPN support for “obfuscated” servers.
    • Audio Sync Issues: If the audio lags behind the video, try lowering the stream quality from 1080p to 720p. This reduces the processing load on your device.
    • Blackout Restrictions: Even with a US IP, if you are logged into a provider that has local blackout rules for Milwaukee, you might be blocked. Ensure your account settings reflect a non-local zip code if permissible by your provider’s terms.

    FAQ Section

    1. Can I watch the 2024 Rackley Roofing 200 live on Fox Sports in Australia?

    Directly, no. Fox Sports is a US-based channel. To watch it live from Australia, you must use a VPN to mask your location as being in the US and have valid login credentials for a US TV provider that includes Fox Sports.

    2. Is it legal to use a VPN to watch Fox Sports in Australia?

    Using a VPN is legal in Australia. However, violating the Terms of Service of your streaming provider by bypassing geo-restrictions may result in account suspension. Always check the specific terms of your subscription service.

    3. What time did the 2024 Rackley Roofing 200 start in Australia?

    The race typically starts in the afternoon ET. For Australian viewers, this usually means waking up very early in the morning (around 4:00 AM – 6:00 AM AEST/AEDT). Always verify the specific date’s time conversion.

    4. Are there any free ways to watch NASCAR in Australia?

    Legitimate free options are extremely rare for live NASCAR races due to expensive broadcasting rights. Some highlights may be available on YouTube or the official NASCAR social media channels after the event, but live full-race access generally requires a paid subscription.

    5. Will my US cable subscription work while I am traveling in Australia?

    Yes, provided you use a VPN to appear as if you are in the US. Most US cable providers allow authentication from abroad, but they may flag unusual login locations. It is advisable to notify your provider of your travel plans beforehand.

    6. What if the stream keeps buffering?

    Buffering is often caused by slow VPN servers or insufficient internet speed. Try switching to a different US server with lower load, close other bandwidth-heavy applications, or downgrade the video quality setting in the player.

    Conclusion

    Watching the 2024 Rackley Roofing 200 in Australia on Fox Sports is entirely possible, but it requires a strategic approach to bypass geo-restrictions. By utilizing a high-quality VPN and ensuring your internet connection is robust, you can enjoy the adrenaline of the Craftsman Truck Series regardless of your physical location.

    Remember, preparation is key. Test your VPN connection before race day, confirm the time zone differences, and ensure your login credentials are active. Don’t let distance dampen your passion for motorsports.

    Did you find this guide helpful? Share it with your fellow racing enthusiasts on Facebook, Twitter, or Reddit who might also be struggling to catch the race from Down Under. Let’s keep the NASCAR community connected, no matter where we are in the world!

  • Sore on Roof of Mouth? Causes, Relief & When to Worry

    Sore on Roof of Mouth? Causes, Relief & When to Worry

    Waking up with pain in your mouth can ruin your entire day, making eating, drinking, and even speaking uncomfortable. If you are thinking, “I have a sore on the roof of my mouth,” you are not alone; this is a very common complaint that affects millions of people annually due to various triggers ranging from minor burns to viral infections. In this guide, we will explore why this happens, how to treat it safely at home, and exactly when you need professional medical attention.

    Why Does the Roof of My Mouth Hurt? Common Causes

    Understanding the root cause is the first step toward effective treatment. The roof of your mouth, known medically as the palate, is sensitive tissue that can be irritated by heat, trauma, or underlying health conditions.

    1. Thermal Burns (Pizza Palate)

    This is arguably the most frequent culprit. The hard palate has thin mucous membranes that are easily damaged by hot foods and beverages.

    • The Mechanism: When you consume food hotter than 60°C (140°F), it can cause first-degree or second-degree burns.
    • Common Triggers: Hot pizza cheese, fresh coffee, or microwaved soups.
    • Symptoms: Immediate stinging pain, redness, and potentially blistering or peeling skin within 24 hours.

    2. Canker Sores (Aphthous Ulcers)

    Unlike cold sores, which appear on the lips, canker sores develop inside the mouth. While they more commonly appear on the inner cheeks or gums, they can occasionally form on the soft palate.

    • Appearance: Small, shallow lesions with a white or yellow center and a red border.
    • Triggers: Stress, minor injury from brushing, acidic foods, or vitamin deficiencies (B12, iron, folate).

    3. Trauma and Abrasion

    Hard foods can physically scratch the delicate tissue of the palate.

    • Examples: Crunchy tortilla chips, hard crusts of bread, or accidental biting.
    • Result: A raw, tender spot that feels like a cut or abrasion.

    4. Viral and Bacterial Infections

    Certain infections manifest as sores in the oral cavity.

    • Herpes Simplex Virus (HSV-1): Can cause clusters of painful blisters on the hard or soft palate.
    • Hand, Foot, and Mouth Disease: Common in children but can affect adults, causing painful red spots or blisters.
    • Thrush (Candidiasis): A fungal infection that creates creamy white lesions, which may bleed slightly when scraped.

    For a deeper understanding of oral anatomy and related conditions, you can refer to the detailed overview on Wikipedia’s page on the Human Mouth.

    Immediate Relief: How to Heal a Sore on the Roof of Your Mouth

    If you are dealing with pain right now, here are actionable steps to reduce discomfort and speed up healing. Most minor sores heal within 7–10 days, but proper care can make this period much more bearable.

    Step-by-Step Home Remedies

    1. Rinse with Salt Water
      • Mix 1/2 teaspoon of salt into 8 ounces (240 ml) of warm water.
      • Swish gently for 30 seconds and spit out.
      • Repeat 3–4 times a day. This reduces inflammation and keeps the area clean.
    2. Apply Honey
      • Use raw, medical-grade honey if available.
      • Dab a small amount directly onto the sore.
      • Honey has natural antibacterial and anti-inflammatory properties that can coat the wound and promote healing.
    3. Use Over-the-Counter Gels
      • Look for products containing benzocaine or hydrogen peroxide.
      • Apply according to package instructions to numb the area temporarily before eating.
    4. Cold Compresses
      • Suck on ice chips or eat cold yogurt/smoothies.
      • Cold temperatures constrict blood vessels, reducing swelling and numbing pain.

    What to Avoid During Healing

    To prevent further irritation, strictly avoid the following until the sore heals:

    • Spicy Foods: Chili, hot sauce, and curry can aggravate open wounds.
    • Acidic Foods: Citrus fruits (lemons, oranges), tomatoes, and vinegar-based dressings.
    • Crunchy/Hard Foods: Chips, nuts, and toast can scratch the healing tissue.
    • Alcohol-Based Mouthwashes: These can sting and dry out the tissue, delaying recovery.
    I Have A Sore On The Roof Of My Mouth

    Comparison: Burn vs. Canker Sore vs. Infection

    It can be difficult to distinguish between different types of sores. Use this table to help identify what you might be experiencing.

    FeatureThermal BurnCanker SoreViral Infection (e.g., Herpes)
    OnsetImmediate after eating hot foodGradual (1-2 days)Often preceded by tingling/itching
    AppearanceRed, blistered, or peeling skinWhite/yellow center, red borderCluster of fluid-filled blisters
    Pain LevelSharp, stingingThrobbing, sensitive to touchIntense, burning pain
    Healing Time3–7 days7–14 days10–14 days
    Contagious?NoNoYes

    When to See a Doctor: Red Flags

    While most palatal sores are benign and self-limiting, some symptoms indicate a more serious underlying issue. You should consult a healthcare provider or dentist if:

    • Duration: The sore does not heal after two weeks.
    • Size: The sore is unusually large (greater than 1 cm) or spreading.
    • Recurrence: You frequently get sores multiple times a year.
    • Systemic Symptoms: You experience fever, difficulty swallowing, or swollen lymph nodes in the neck.
    • White Patches: You notice persistent white patches that cannot be wiped away (potential sign of leukoplakia or thrush).

    Early diagnosis is crucial for conditions like oral lichen planus or, in rare cases, oral cancer. Never ignore a persistent lesion.

    Prevention Tips for Long-Term Oral Health

    Preventing future sores involves a combination of dietary adjustments and good oral hygiene practices.

    • Let Food Cool: Wait at least 2–3 minutes after microwaving food before eating. Test the temperature with your lip first.
    • Soft-Bristled Toothbrush: Use a soft-bristled brush to avoid accidentally scratching the palate while brushing.
    • Manage Stress: High stress levels are linked to canker sores. Practice mindfulness, exercise, or adequate sleep.
    • Balanced Diet: Ensure you are getting enough Vitamin B12, Zinc, Folate, and Iron. Consider a multivitamin if your diet is restrictive.
    • Stay Hydrated: Dry mouth (xerostomia) increases the risk of irritation. Drink at least 2 liters of water daily.

    FAQ Section

    1. Can a sore on the roof of the mouth be a sign of cancer?

    While rare, persistent sores that do not heal within two weeks can be a sign of oral cancer. Other signs include loose teeth, numbness, or lumps in the neck. If a sore persists beyond 14 days, see a dentist for an examination.

    2. Is it safe to pop a blister on the roof of my mouth?

    No. Popping a blister increases the risk of bacterial infection and delays healing. Let the blister rupture naturally or reabsorb. If it is painful, use a saltwater rinse to keep it clean.

    3. Why does my sore hurt more when I eat acidic foods?

    Acidic foods lower the pH level in your mouth, which irritates exposed nerve endings in the open sore. This causes a sharp, stinging sensation. Avoiding acids allows the tissue to regenerate without constant chemical irritation.

    4. Can toothpaste cause sores on the roof of the mouth?

    Yes, some people are sensitive to Sodium Lauryl Sulfate (SLS), a foaming agent found in many toothpastes. SLS can strip the protective lining of the mouth, leading to irritation or canker sores. Try switching to an SLS-free toothpaste.

    5. How long does a burned roof of the mouth take to heal?

    Minor first-degree burns typically heal within 3 to 7 days. More severe second-degree burns involving blistering may take up to two weeks. Keeping the area clean and avoiding irritants speeds up this process.

    Conclusion

    Dealing with the thought “I have a sore on the roof of my mouth“ is stressful, but in most cases, it is a temporary and manageable condition. Whether caused by a hot slice of pizza, a stray chip, or a minor viral bug, most palatal sores respond well to simple home remedies like saltwater rinses and avoiding irritants.

    Remember, patience is key. Give your body time to heal, and prioritize gentle oral care. If the pain persists beyond two weeks or worsens, do not hesitate to seek professional advice.

    Found this guide helpful? Share it with friends and family on social media to help them navigate their next mouth sore with confidence!