Category: homeowner roofing guide

  • Why Are People In China Putting Blue On Their Roofs?

    Why Are People In China Putting Blue On Their Roofs?

    If you have recently scrolled through social media feeds or watched travel documentaries featuring modern Chinese cities, you may have noticed a striking visual pattern: vast expanses of bright blue rooftops. It is not just an aesthetic choice; it is a complex phenomenon driven by policy, economics, and environmental necessity. Many observers find themselves asking, why are people in China putting blue on their roofs, and what does this color signify for the future of urban living in the region?

    This article dives deep into the practical and regulatory forces behind this trend, offering clear insights for anyone interested in global urban planning, sustainability, or cultural shifts in East Asia.

    The Regulatory Push: Government Mandates and Urban Renewal

    To understand the prevalence of blue roofs, one must first look at the top-down approach to urban management in China. Unlike many Western countries where roofing choices are largely dictated by individual homeowner preference or local historic preservation societies, Chinese urban development is heavily influenced by municipal directives.

    The “Blue Roof” Campaigns

    In various provinces, particularly in industrial hubs and rapidly expanding tier-2 and tier-3 cities, local governments have launched campaigns to standardize building appearances. The goal is often twofold: aesthetic uniformity and pollution control.

    1. Visual Order: Rapid urbanization can lead to chaotic cityscapes with mismatched materials and colors. By mandating blue roofingโ€”often made from color-coated steel sheetsโ€”municipalities create a sense of order and modernity.
    2. Dust Suppression: In construction-heavy areas, loose debris and dust are major pollutants. Blue tarps and rigid blue panels are frequently used to cover unfinished structures or storage yards to prevent dust from spreading into the air. Over time, these temporary measures sometimes become permanent fixtures due to cost-efficiency.

    According to urban planning reports, these mandates are part of broader “Civilized City” evaluations, where cities compete for national recognition based on cleanliness, order, and infrastructure quality. A uniform blue roof is an easy, visible metric for inspectors to verify compliance.

    Economic Factors: Cost-Effectiveness and Material Availability

    While government policy sets the stage, economics drives the adoption. For developers, factory owners, and even rural homeowners, blue roofing materials offer significant financial advantages.

    Why Color-Coated Steel?

    The material most commonly associated with the “blue roof” phenomenon is color-coated steel sheeting (also known as prepainted galvanized steel). Here is why it dominates the market:

    • Low Initial Cost: Compared to traditional clay tiles, concrete, or asphalt shingles, color-coated steel is significantly cheaper to produce and install.
    • Lightweight Structure: Steel sheets are light, meaning buildings do not require heavy structural support for the roof. This reduces overall construction costs.
    • Mass Production: China is the worldโ€™s largest producer of steel. The domestic supply chain for these materials is robust, efficient, and inexpensive, making blue panels readily available across the country.
    FeatureTraditional Clay TilesColor-Coated Steel (Blue)
    CostHighLow
    Installation SpeedSlowFast
    WeightHeavyLight
    DurabilityHigh (but brittle)Moderate (prone to fading)
    AestheticTraditional/ClassicIndustrial/Modern

    For many small business owners and rural residents, the choice is not about styleโ€”it is about affordability. The blue roof represents a pragmatic solution to shelter needs in a fast-paced economy.
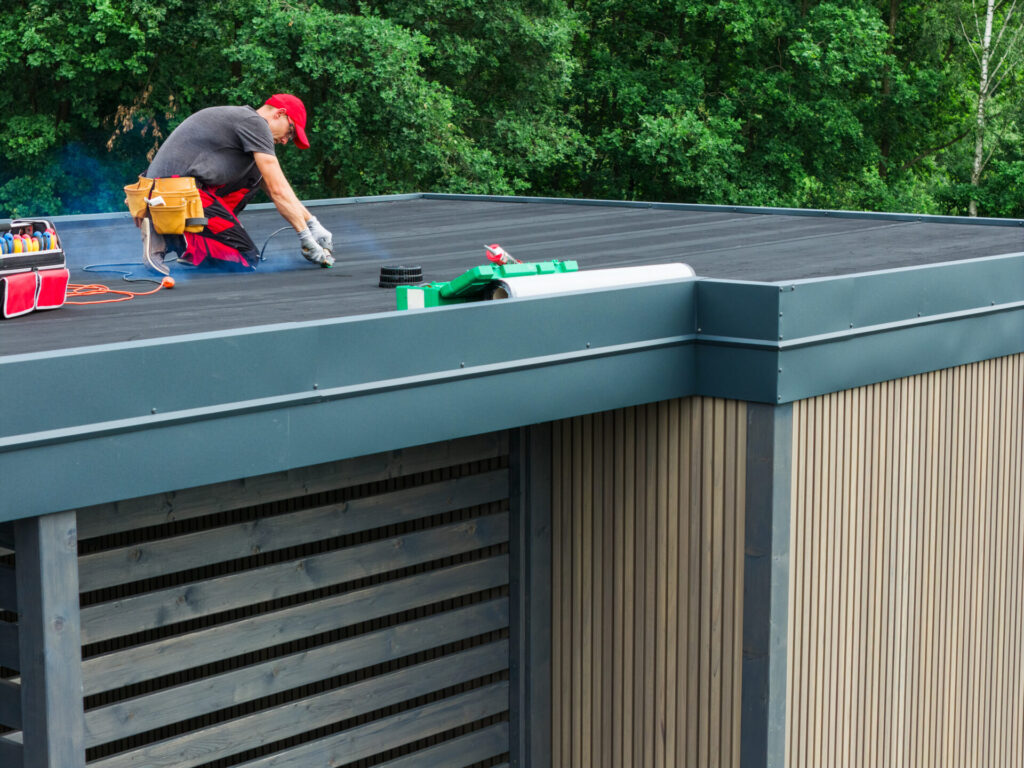
    Why Are People In China Putting Blue On Their Roofs

    Environmental and Functional Benefits

    Beyond cost and regulation, there are functional reasons why this specific type of roofing has gained traction. While critics argue that the aesthetic is monotonous, proponents point to several practical benefits.

    Heat Reflection and Energy Efficiency

    Bright blue roofs, particularly those with reflective coatings, can help mitigate the urban heat island effect. Darker roofs absorb more solar radiation, heating up the building and the surrounding air. Lighter colors, including bright blue, reflect more sunlight.

    • Temperature Reduction: Studies suggest that reflective roofing can lower roof surface temperatures by up to 30ยฐC (54ยฐF) compared to traditional dark asphalt.
    • Energy Savings: Lower roof temperatures mean less heat transfer into the building interior, reducing the load on air conditioning systems during Chinaโ€™s hot summers.

    Durability in Humid Climates

    Many parts of China experience high humidity and heavy rainfall. Traditional materials like wood or untreated metal corrode quickly. Color-coated steel is treated with zinc and polymer layers that resist rust and corrosion, making it a durable option for wet climates.

    The Controversy: Aesthetics vs. Practicality

    The trend is not without its detractors. Many architects and cultural critics argue that the sea of blue roofs erodes regional architectural identity.

    Loss of Cultural Heritage

    Traditional Chinese architecture features distinctive curved eaves and gray or red tiles, symbolizing harmony with nature and historical continuity. The widespread adoption of industrial blue steel is seen by some as a break from this heritage, replacing cultural nuance with utilitarian uniformity.

    Environmental Concerns of Disposal

    While the roofs are durable, they are not immortal. When these steel sheets eventually degrade or are replaced, they contribute to metal waste. Recycling infrastructure is improving, but the sheer volume of replacement materials poses a long-term environmental challenge.

    For a deeper understanding of Chinaโ€™s urbanization challenges and policies, you can refer to this Wikipedia overview on Urbanization in China, which provides context on the scale of migration and construction driving these trends.

    Step-by-Step: How Blue Roofs Are Installed

    For those curious about the technical process, here is how these roofs are typically installed in commercial and residential settings:

    1. Structural Assessment: Engineers verify that the existing roof frame can support the new material. Since steel is light, reinforcement is rarely needed.
    2. Insulation Layer: A layer of foam or fiberglass insulation is laid down to improve thermal performance.
    3. Underlayment: A waterproof membrane is installed to prevent leaks.
    4. Panel Installation: Pre-cut blue steel panels are screwed directly into the roof purlins. Overlaps are sealed with rubber gaskets to ensure water tightness.
    5. Trim and Flashing: Edges and corners are fitted with matching blue trim to prevent wind uplift and water ingress.

    This process can be completed in days, compared to weeks for traditional tiling, further explaining its popularity in rapid-development zones.

    FAQ Section

    1. Is the blue roof trend mandatory everywhere in China?

    No, it is not a nationwide mandate. It is more common in specific provinces and cities undergoing urban renewal or industrial cleanup. Major metropolitan centers like Beijing and Shanghai have stricter aesthetic guidelines that may favor other materials, though blue industrial roofing is still prevalent in suburban industrial zones.

    2. Do blue roofs actually help with cooling?

    Yes. Light-colored roofs, including blue, have higher solar reflectance than dark roofs. This helps reduce the amount of heat absorbed by the building, leading to lower indoor temperatures and reduced energy consumption for cooling.

    3. What material are these blue roofs made of?

    They are primarily made from color-coated galvanized steel. This material is chosen for its low cost, lightweight nature, and resistance to corrosion. In some cases, blue plastic tarps are used temporarily, but rigid steel panels are the standard for permanent structures.

    4. Will this trend continue in the future?

    The trend is evolving. As China focuses more on “green building” standards and cultural preservation, there is a shift toward more diverse and sustainable materials. However, due to the economic advantages, blue steel roofing will likely remain common in industrial and lower-cost residential sectors for the foreseeable future.

    5. Are there environmental downsides to blue roofs?

    The primary concern is end-of-life disposal. While steel is recyclable, the coating materials can complicate the recycling process. Additionally, if not properly insulated, metal roofs can be noisy during rain and may conduct heat if the reflective coating degrades over time.

    6. Can homeowners choose other colors?

    In regulated zones, choices may be limited to maintain uniformity. However, in rural areas or less strictly controlled districts, homeowners can choose from a variety of colors, including red, green, and gray. Blue remains popular due to its availability and cost.

    Conclusion

    So, why are people in China putting blue on their roofs? The answer is a blend of government regulation, economic pragmatism, and functional efficiency. It is a visual symbol of Chinaโ€™s rapid urbanization, reflecting a prioritization of speed, cost-effectiveness, and order over traditional aesthetics.

    While the sea of blue may seem monotonous to some, it represents a practical solution to the challenges of housing millions of people in a rapidly developing economy. As sustainability standards rise, we may see a shift toward more diverse and eco-friendly materials, but for now, the blue roof remains a defining feature of the modern Chinese landscape.

    Found this insight helpful? Share this article on your favorite social media platforms to spark a conversation about global urban trends and sustainable architecture!
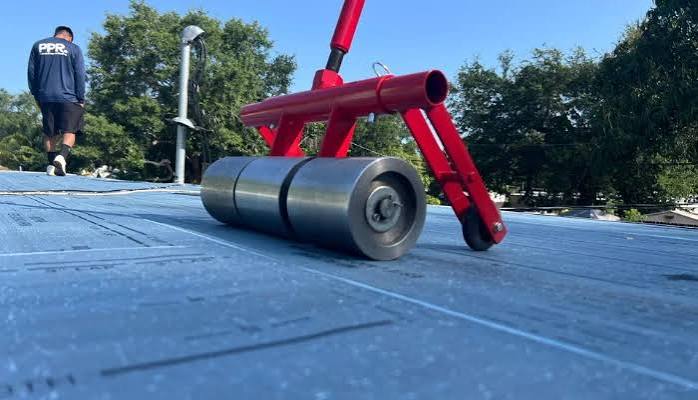
  • Best Tool for Cutting Composite Roofing?

    Best Tool for Cutting Composite Roofing?

    Renovating your roof or tackling a new installation project can feel overwhelming, especially when you stare at a stack of durable composite shingles and wonder how to shape them precisely. You want a clean cut that seals properly, but you also want to avoid wasting expensive materials or damaging your tools. If you are asking yourself, “Which Is The Best Tool For Cutting Through Composite Roofing,” you are not alone; this is one of the most common questions among homeowners and professional roofers alike.

    In this guide, we will break down the most effective tools for the job, explain why certain blades matter more than the saw itself, and provide step-by-step instructions to ensure your cuts are safe, accurate, and efficient. Whether you are a seasoned DIYer or a first-time homeowner, this article will help you make the right choice for your specific needs.

    Why Composite Roofing Requires Specific Cutting Tools

    Composite roofing, often referred to as synthetic slate or rubber roofing, is engineered to be incredibly durable. Unlike traditional asphalt shingles, composite materials are designed to resist impact, weather, and fire. This durability, however, makes them harder to cut.

    Using the wrong tool can lead to jagged edges, cracked tiles, or excessive dust that clogs your workspace. According to industry standards, the density of composite materials requires high-speed cutting instruments with specialized teeth configurations to prevent chipping. Understanding the material composition is the first step toward selecting the right equipment.

    Top Contenders: Which Is The Best Tool For Cutting Through Composite Roofing?

    When it comes to cutting composite roofing, there is no single “magic bullet,” but there are clear frontrunners depending on the scale of your project. Here are the three most effective tools used by professionals.

    1. The Circular Saw (The Professionalโ€™s Choice)

    For large-scale installations or long straight cuts, a circular saw is widely considered the best tool for cutting through composite roofing. It offers speed, precision, and consistency.

    • Why it works: A circular saw provides the high RPM (revolutions per minute) needed to slice through dense synthetic materials cleanly.
    • Best Blade: Use a fine-toothed carbide-tipped blade. A blade with 60 to 80 teeth is ideal for minimizing chipping.
    • Pro Tip: Always cut with the good side of the shingle facing down if using a standard circular saw, as the blade exits from the bottom, which can cause tear-out on the top surface.

    2. The Oscillating Multi-Tool (The Detail Master)

    If you are working around vents, chimneys, or complex angles, an oscillating multi-tool is indispensable. While slower than a circular saw, it offers unmatched control.

    • Why it works: It allows for plunge cuts and intricate shapes without the risk of kicking back.
    • Best Blade: Look for a bi-metal or carbide-grit edge blade designed for hard plastics and composites.
    • Limitation: Not suitable for long, straight cuts due to the small blade size and slower speed.

    3. Heavy-Duty Utility Knife (The Budget Option)

    For thinner composite shingles or minor adjustments, a sharp utility knife with a hook blade can work. However, this method requires significant physical effort and is prone to uneven edges.

    • Why it works: No electricity required, silent, and produces zero dust.
    • Limitation: Only recommended for soft composites or emergency fixes. It is generally not the best tool for heavy-duty synthetic slate.

    Comparison Table: Choosing Your Weapon

    To help you decide, here is a quick comparison of the top tools based on key performance metrics.

    FeatureCircular SawOscillating Multi-ToolUtility Knife
    SpeedFastSlowVery Slow
    PrecisionHigh (Straight Lines)Very High (Curves)Low
    Dust ProductionHighMediumNone
    Ease of UseModerateEasyHard (Physical Effort)
    Best ForLarge batches, straight cutsVents, corners, detailsMinor trims, thin shingles
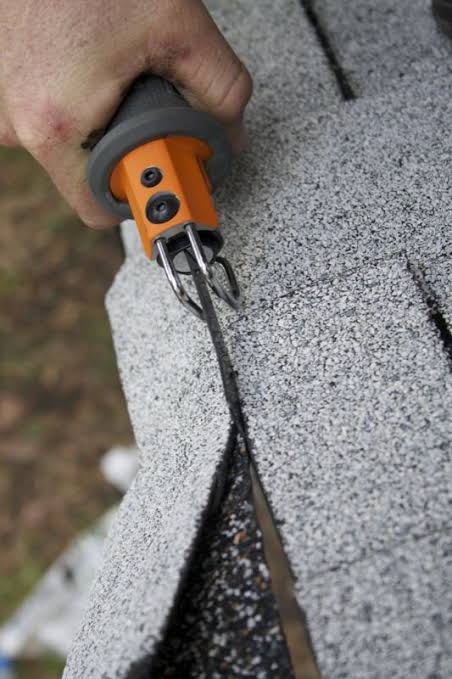
    Which Is The Best Tool For Cutting Through Composite Roofing

    Step-by-Step Guide: How to Cut Composite Roofing Safely

    Now that you know which is the best tool for cutting through composite roofing, letโ€™s look at how to use it effectively. We will focus on the circular saw method, as it is the most common for full installations.

    Step 1: Prepare Your Workspace

    Set up a stable work surface. Use two sawhorses with a piece of plywood across them to create a cutting table. Ensure the area is well-ventilated, as cutting composites can release fine particles.

    Step 2: Measure and Mark

    Use a chalk line or a straight edge to mark your cut line. Accuracy is crucial because composite shingles do not forgive misalignments like asphalt shingles might. Double-check your measurements before making any cuts.

    Step 3: Select the Right Blade

    Install a carbide-tipped fine-tooth blade (minimum 60 teeth). Avoid using old or dull blades, as they generate heat and can melt the composite material rather than cutting it.

    Step 4: Secure the Shingle

    Clamp the shingle firmly to your work surface. Never hold the material with your hand while cutting. Safety first: wear safety glasses, a dust mask (N95 rating), and hearing protection.

    Step 5: Make the Cut

    Start the saw and let it reach full speed before touching the material. Guide the saw along the marked line steadily. Do not force the saw; let the blade do the work. If you hear the motor bogging down, you are pushing too hard.

    Step 6: Clean the Edges

    After cutting, inspect the edge. If there are minor burrs, use a sanding block or a file to smooth them out. This ensures the shingle sits flat against the roof deck.

    Expert Insight: The Importance of Blade Quality

    Many homeowners blame the saw when they get poor results, but the blade is often the culprit. According to general engineering principles regarding material science, cutting hardened polymers requires blades that maintain sharpness under high friction. You can read more about the properties of composite materials on Wikipedia to understand why standard wood blades fail.

    Investing in a high-quality blade specifically rated for “laminate” or “composite” materials will save you money in the long run by reducing waste and extending the life of your tool.

    Common Mistakes to Avoid

    1. Using a Coarse Blade: A blade with fewer than 24 teeth will chip and crack the shingle.
    2. Cutting Too Fast: Rushing leads to inaccurate cuts and potential safety hazards.
    3. Ignoring Dust Control: Composite dust can be irritating. Use a shop vacuum with a HEPA filter nearby to capture particles.
    4. Not Wearing PPE: Always protect your eyes and lungs. The particles generated are small and can be harmful if inhaled.

    FAQ Section

    Q1: Can I use a jigsaw to cut composite roofing?

    A: Yes, a jigsaw can be used, particularly for curved cuts. However, it is slower than a circular saw and may vibrate enough to cause micro-cracks in brittle composite slates. Use a fine-toothed metal-cutting blade for best results.

    Q2: Do I need a special blade for synthetic slate?

    A: Yes. Standard wood blades will dull quickly and produce rough edges. A carbide-tipped blade with a high tooth count (60+) is essential for a clean cut on synthetic slate.

    Q3: Is it better to cut composite shingles on the roof or on the ground?

    A: It is highly recommended to cut them on the ground. Cutting on the roof is dangerous, unstable, and makes dust cleanup difficult. Pre-cutting your shingles on a stable surface ensures accuracy and safety.

    Q4: How do I prevent chipping when cutting composite roofing?

    A: To prevent chipping, use a sharp, fine-toothed blade, cut slowly, and support the shingle fully on both sides of the cut line. Some professionals also place painter’s tape over the cut line to hold the surface fibers together.

    Q5: What is the safest way to dispose of composite roofing scraps?

    A: Check with your local waste management facility. Many composite materials are recyclable, but they cannot go in standard curbside recycling bins. Some manufacturers have take-back programs for installation waste.

    Conclusion

    Finding the right equipment can make the difference between a frustrating weekend and a professional-looking roof. So, which is the best tool for cutting through composite roofing? For most projects, a circular saw with a fine-toothed carbide blade is the ultimate winner, offering the best balance of speed and precision. For detailed work, pair it with an oscillating multi-tool.

    By following the steps outlined above and prioritizing safety, you can achieve clean, precise cuts that ensure your roof looks great and lasts for decades. Donโ€™t forget to share this guide with your fellow DIY enthusiasts on social media if you found it helpful! Happy roofing!

  • What Is Surgical Repair Of The Roof Of The Mouth?

    What Is Surgical Repair Of The Roof Of The Mouth?

    Have you or a loved one recently received a diagnosis requiring surgery on the palate, leaving you confused by complex medical jargon? It is completely normal to feel overwhelmed when navigating healthcare terminology, especially when it involves delicate oral structures. Understanding the surgical repair of the roof of the mouth medical term is the first step toward gaining confidence and preparing for a successful recovery journey.

    In this comprehensive guide, we will demystify the clinical language used by surgeons, explain what the procedure entails, and provide actionable advice for pre-and post-operative care. Whether you are a parent preparing for a childโ€™s cleft palate repair or an adult addressing a congenital defect, this article is designed to provide clarity, comfort, and authoritative information.

    Decoding the Medical Term: What Is Palatoplasty?

    When doctors discuss the surgical repair of the roof of the mouth medical term, they are almost exclusively referring to palatoplasty.

    The word itself is derived from two Greek roots: palato- (referring to the palate) and -plasty (meaning surgical repair or molding). Therefore, palatoplasty literally translates to the surgical reconstruction of the palate.

    Why Is This Surgery Performed?

    The primary reason for this surgery is to correct a cleft palate, a birth defect where there is an opening in the roof of the mouth. However, it is not limited to infants. Adults may also require palatoplasty for:

    • Repairing fistulas (holes) that remain after previous surgeries.
    • Correcting velopharyngeal insufficiency (VPI), where the soft palate does not close properly against the back of the throat during speech.
    • Reconstructing tissue damaged by trauma or tumor removal.

    According to the Centers for Disease Control and Prevention (CDC), cleft lip and cleft palate are among the most common birth defects in the United States, affecting approximately 1 in every 1,600 babies. Early intervention through palatoplasty is crucial for proper speech development, eating abilities, and dental health.

    Expert Insight: “Timing is critical. Most surgeons recommend performing palatoplasty between 9 and 12 months of age, before the child begins to develop significant speech patterns.” โ€“ American Society of Plastic Surgeons

    How Does Palatoplasty Differ from Cheiloplasty?

    A common source of confusion for patients is distinguishing between repairs of the lip and the roof of the mouth. While often performed in conjunction, they are distinct procedures.

    FeaturePalatoplastyCheiloplasty
    Target AreaRoof of the mouth (Hard & Soft Palate)Upper Lip
    Primary GoalImprove speech and feedingImprove appearance and lip function
    Medical Term Root-plasty (Palate)-cheilo (Lip)
    Typical Age9โ€“12 Months3โ€“6 Months

    Understanding this distinction helps in communicating effectively with your healthcare team. If your concern is specifically about the surgical repair of the roof of the mouth medical term, you are focusing on palatoplasty, not cheiloplasty.

    Surgical Repair Of The Roof Of The Mouth Medical Term

    The Step-by-Step Procedure: What Happens During Surgery?

    Knowing what to expect can significantly reduce anxiety. Here is a generalized overview of how a standard palatoplasty is performed. Note that techniques may vary based on the surgeonโ€™s preference and the patientโ€™s specific anatomy.

    1. Anesthesia and Preparation

    The patient is placed under general anesthesia. This ensures they are completely asleep and feel no pain during the procedure. The surgical team will monitor vital signs continuously throughout the operation.

    2. Incision and Muscle Repair

    The surgeon makes incisions along both sides of the cleft. The goal is not just to close the skin but to reconstruct the underlying muscles. The levator veli palatini muscles, which are responsible for lifting the soft palate, are detached and repositioned to create a functional sling. This muscle repair is vital for future speech clarity.

    3. Closing the Gap

    The tissue flaps are moved toward the center of the mouth and stitched together. Special absorbable sutures are typically used, meaning they do not need to be removed later. These stitches will dissolve naturally over 7โ€“10 days.

    4. Hemostasis and Recovery Room

    Once the repair is complete, the surgeon ensures there is no excessive bleeding. The patient is then moved to a recovery area where nurses monitor them as they wake up from anesthesia.

    For more detailed anatomical references regarding the palate structure, you can refer to Wikipediaโ€™s entry on the Palate.

    Recovery Timeline: What to Expect After Surgery

    Recovery from palatoplasty requires patience and careful adherence to post-operative instructions. The healing process generally follows this timeline:

    Week 1: The Critical Phase

    • Pain Management: Mild to moderate discomfort is normal. Prescribed pain medication should be used as directed.
    • Diet: Strictly liquid diet. No straws, spoons, or cups with hard rims. Use a syringe or special cleft feeder to deliver breast milk, formula, or clear liquids.
    • Activity: Keep the patient calm. Crying can increase pressure on the surgical site.

    Weeks 2โ€“3: Tissue Healing

    • Diet Transition: You may gradually introduce pureed foods (applesauce, yogurt). Avoid crunchy, sharp, or hot foods.
    • Hygiene: Gentle oral hygiene is essential. Do not brush the surgical site directly. Use a water pick on a low setting if recommended by your surgeon.

    Month 1 and Beyond: Long-Term Care

    • Speech Therapy: Many patients will require speech therapy to maximize the benefits of the surgery.
    • Follow-up Appointments: Regular check-ups ensure the palate is healing correctly and there are no fistulas forming.

    Risks and Complications: Being Informed

    While palatoplasty is a safe and routine procedure, like all surgeries, it carries risks. Being aware of these allows for early detection and management.

    • Bleeding: Minor oozing is common; significant bleeding requires immediate medical attention.
    • Infection: Signs include fever, increased redness, or foul-smelling discharge. Antibiotics are sometimes prescribed prophylactically.
    • Velopharyngeal Insufficiency (VPI): In some cases, the palate may still not close fully during speech, leading to hypernasality. This may require further speech therapy or secondary surgery.
    • Fistula Formation: A small hole may reopen in the palate. This occurs in about 5โ€“10% of cases and may require minor repair.

    Frequently Asked Questions (FAQ)

    1. Is palatoplasty painful for children?

    Most children experience mild to moderate discomfort rather than severe pain. Pediatric surgeons prescribe appropriate pain relief, and children often recover faster than adults due to their resilience. Keeping the child distracted and comfortable is key.

    2. Will my child need speech therapy after the surgical repair of the roof of the mouth?

    Yes, in many cases. While surgery fixes the structural defect, speech therapy helps the brain and muscles learn how to use the new palate structure correctly for clear speech. Starting therapy early yields the best results.

    3. Can adults undergo palatoplasty?

    Absolutely. Adults who were not treated as children, or those who have developed issues later in life, can undergo palatoplasty. The procedure is similar, but recovery may take slightly longer, and speech therapy is almost always required post-surgery.

    4. How long does the surgery take?

    A typical palatoplasty takes between 1.5 to 2.5 hours, depending on the complexity of the cleft and the specific technique used by the surgeon.

    5. Are there non-surgical alternatives for cleft palate?

    No. A cleft palate is a physical structural defect that cannot be corrected with medication or therapy alone. Surgery is the only effective treatment to close the gap and restore function. However, prosthetic devices (speech bulbs) can be used in rare cases where surgery is not an option.

    6. What is the success rate of palatoplasty?

    The success rate is very high, with over 90% of patients achieving significant improvement in speech and feeding functions after a single procedure. Some may require minor revisions, but the overall prognosis is excellent.

    Conclusion

    Navigating the world of craniofacial surgery can be daunting, but understanding the surgical repair of the roof of the mouth medical termโ€”palatoplastyโ€”empowers you to make informed decisions. This procedure is a cornerstone of modern reconstructive surgery, offering life-changing improvements in speech, nutrition, and quality of life for both children and adults.

    By knowing what to expect during the procedure and recovery, you can better support yourself or your loved one through this journey. Remember, you are not alone; a dedicated team of surgeons, speech therapists, and pediatricians is there to guide you every step of the way.

    Did you find this guide helpful? Share this article with friends or family members who might be facing similar challenges. Spreading accurate, empathetic information helps build a supportive community for those undergoing oral surgery.


    Disclaimer: This article is for informational purposes only and does not constitute medical advice. Always consult with a qualified healthcare provider for diagnosis and treatment options tailored to your specific condition.

  • How Much Does It Cost To Start A Roofing Business?

    How Much Does It Cost To Start A Roofing Business?

    Starting a contracting trade is one of the most rewarding entrepreneurial paths you can take, but the financial barrier to entry often causes hesitation. Many aspiring contractors get stuck in the planning phase because they are unsure about the initial capital required to launch legally and safely. If you are asking how much does it cost to start a roofing business, you are looking for clarity amidst varying estimates online.

    The truth is, the cost varies significantly based on your location, the scale of your operations, and whether you are starting as a solo operator or hiring a crew immediately. However, understanding the breakdown of these costs is the first step toward building a profitable enterprise. In this guide, we will dissect every expense category, from insurance premiums to truck down payments, giving you a realistic roadmap for 2026.

    What Are the Average Startup Costs for a Roofing Company?

    Before diving into specific line items, it is helpful to look at the big picture. According to industry data and small business administration resources, the cost to start a roofing business typically ranges between $10,000 and $50,000 for a lean startup model. If you plan to hire employees and buy new vehicles immediately, that number can easily exceed $100,000.

    Here is a realistic breakdown of where that money goes:

    Expense CategoryLow-End Estimate (Solo)High-End Estimate (Crew)
    Legal & Licensing$500 – $1,500$2,000 – $5,000
    Insurance (Annual)$3,000 – $5,000$8,000 – $15,000
    Vehicle & Trailer$5,000 (Used)$40,000+ (New Truck/Trailer)
    Tools & Equipment$2,000 – $3,000$10,000 – $15,000
    Marketing & Website$500 – $1,000$5,000 – $10,000
    Working Capital$2,000$20,000+
    Total Estimated Cost~$13,000~$90,000+

    Note: These figures are estimates for the US market in 2026. Prices may vary by state due to local regulations and cost of living.

    Which Licenses and Permits Do You Need?

    You cannot legally nail a single shingle without proper authorization. The regulatory landscape for roofing is strict because it involves public safety and significant property value.

    State Contractor Licenses

    Most states require a specific roofing contractor license. The cost here isn’t just the application fee; it often includes proving years of experience or passing a rigorous exam. For example, in states like Florida or California, the licensing process is complex and may require hiring a lawyer or consultant to help with paperwork, adding to your initial spend.

    Local Business Permits

    Beyond the state level, your city or county will require a general business operating permit. This is usually affordable, often under $200, but failing to secure it can result in hefty fines that eat into your startup budget.

    Workers’ Compensation Insurance

    If you hire even one employee, workers’ comp is mandatory in almost every US state. Roofing is classified as a “high-risk” trade, meaning premiums are higher than for office-based businesses. Expect to pay significantly more for this than general liability insurance. For more details on how occupational safety standards impact insurance classifications, you can refer to general industry guidelines on Wikipedia.

    How Much Does It Cost To Start A Roofing Business

    What Essential Equipment Do You Need to Buy?

    One of the biggest mistakes new roofers make is underestimating the cost of tools. You don’t need the most expensive brand on day one, but you do need reliable gear.

    Hand Tools and Safety Gear

    Your initial toolkit should include:

    • Roofing Shovels and Tear-off Bars: Essential for removing old materials.
    • Hammer Hatchets: Specifically designed for driving roofing nails.
    • Chalk Lines and Tape Measures: For precise layout.
    • Safety Harnesses and Fall Protection: Non-negotiable. OSHA regulations require fall protection for any work above 6 feet. Skimping here is not only illegal but life-threatening.

    Power Tools and Machinery

    • Nail Guns: Coil-fed nail guns are the industry standard for speed.
    • Air Compressor: A high-CFM compressor is needed to run multiple nail guns simultaneously.
    • Dump Trailers: If you are doing tear-offs, you need a way to haul away old shingles. Buying a used dump trailer is a smart mid-range investment that saves on rental fees.

    Vehicle Requirements

    You need a vehicle capable of towing a trailer loaded with tons of shingles. A half-ton pickup might struggle; a three-quarter-ton or one-ton truck is ideal. If you donโ€™t have cash to buy outright, factor in a down payment and monthly lease or loan payments into your startup costs.

    How Much Should You Budget for Insurance?

    Insurance is arguably the most critical ongoing expense for a roofing business. Clients will not hire you without proof of coverage, and suppliers may refuse to sell you materials on credit.

    General Liability Insurance protects you if you damage a clientโ€™s property (e.g., dropping a hammer through their skylight). For a new roofing business, expect to pay between $3,000 and $6,000 annually for a standard policy with $1 million in coverage.

    Commercial Auto Insurance is required for your work truck. Since the vehicle is used for business purposes, personal auto policies will not cover accidents that occur while working. This can add another $1,500 to $3,000 per year depending on your driving record and location.

    What Are the Marketing Costs to Get Your First Clients?

    Having the best tools means nothing if no one knows you exist. In 2026, digital presence is paramount.

    Website and SEO

    You need a professional website that loads fast and looks good on mobile devices. You donโ€™t need to spend $10,000 on a custom build. Using platforms like WordPress or Squarespace, you can launch a credible site for under $500. However, investing in local SEO (Search Engine Optimization) is crucial. You want to appear when someone searches “roofer near me.”

    Lead Generation Services

    Many new roofers use lead generation services like Angi or HomeAdvisor. While effective, these leads can be expensive, ranging from $20 to $60 per lead. A better long-term strategy is building your own brand through Google Business Profile optimization and local networking, which has a lower direct cost but requires time investment.

    Traditional Marketing

    Donโ€™t ignore yard signs and truck wraps. A magnetic sign for your truck is cheap ($50โ€“$100), while a full vinyl wrap costs $2,000+. Yard signs placed at job sites are one of the highest ROI marketing tools for roofers, costing only $10โ€“$20 per sign.

    How Can You Finance Your Roofing Startup?

    If you donโ€™t have $20,000 sitting in a savings account, how do you fund this venture?

    1. Small Business Administration (SBA) Loans: These offer favorable terms but require a solid business plan and good credit. The application process can take months.
    2. Equipment Financing: Instead of paying cash for your truck or nail guns, you can finance them. The equipment itself serves as collateral, making approval easier.
    3. Credit Cards: Many entrepreneurs use business credit cards for initial expenses to earn points and manage cash flow. Warning: Only do this if you have a clear repayment plan, as interest rates can be high.
    4. Supplier Credit Accounts: Once you have your license and insurance, apply for accounts with major suppliers (like ABC Supply or Beacon Building Products). They may offer net-30 terms, allowing you to buy materials and pay after the job is complete.

    Frequently Asked Questions (FAQ)

    1. Can I start a roofing business with no money?

    Technically, no. You need at least enough capital for licensing, basic insurance, and essential hand tools. However, you can minimize costs by starting as a subcontractor for established companies, using their insurance and vehicles, while you save up to launch your own independent brand.

    2. Do I need a degree to start a roofing business?

    No, a college degree is not required. However, many states require you to demonstrate practical experience (often 2โ€“5 years) and pass a trade exam to obtain a contractorโ€™s license. Apprenticeships or working under a licensed roofer are the best ways to gain this experience.

    3. How much profit margin should a roofing business aim for?

    A healthy net profit margin for a roofing business is between 15% and 20%. Gross margins should be higher, around 35โ€“45%, to account for overhead costs like insurance, marketing, and administrative expenses. Pricing too low is a common mistake that leads to business failure.

    4. Is roofing insurance expensive for startups?

    Yes, compared to other industries, roofing insurance is costly due to the high risk of falls and property damage. However, shopping around with brokers who specialize in construction trades can help you find competitive rates. Maintaining a clean safety record will also lower your premiums over time.

    5. What is the cheapest way to market a new roofing company?

    The cheapest and most effective method is leveraging your personal network and asking for referrals. Additionally, claiming and optimizing your Google Business Profile is free and crucial for local visibility. Encouraging satisfied customers to leave reviews can drive significant organic traffic without ad spend.

    Conclusion

    So, how much does it cost to start a roofing business? While you can scrape by with $10,000 if you are resourceful and already own a truck, a more comfortable and sustainable launch budget is closer to $25,000โ€“$40,000. This buffer allows you to handle unexpected costs, secure proper insurance, and invest in marketing that actually brings in clients.

    Remember, the goal isn’t just to start; it’s to stay in business. Prioritize safety, legal compliance, and customer satisfaction from day one. These foundations will protect your investment and help your reputation grow through word-of-mouth.

    If you found this guide helpful, please share it with other aspiring contractors on LinkedIn or Facebook. Building a community of informed business owners helps everyone succeed in this tough but rewarding industry.

  • How Can I Get A New Roof With No Money?

    How Can I Get A New Roof With No Money?

    Leaking ceilings and missing shingles are more than just an eyesore; they are a source of constant stress and potential danger to your homeโ€™s structural integrity. If you are staring at water stains and wondering, “How can I get a new roof with no money,” you are not alone, and there are viable paths forward. This guide explores legitimate financial aids, government programs, and strategic financing options designed to help homeowners secure a safe roof without upfront cash.

    Understanding the Urgency: Why You Canโ€™t Wait

    Before diving into solutions, it is crucial to understand that delaying roof repairs often increases the final cost. Water damage can lead to mold growth, electrical hazards, and compromised insulation. According to the Federal Emergency Management Agency (FEMA), even minor leaks can escalate into major structural failures if left unaddressed for more than a few weeks.

    The phrase “no money” usually means “no immediate liquid cash,” not necessarily a lack of resources entirely. By leveraging credit, aid, or equity, you can bridge the gap between your current financial state and a secure home.

    1. Does Homeowners Insurance Cover a New Roof?

    The first place most homeowners should look is their insurance policy. However, coverage depends heavily on the cause of the damage.

    When Insurance Pays

    Insurance typically covers roof replacement if the damage is sudden and accidental. Common covered perils include:

    • Storm Damage: Hail, high winds, or falling trees.
    • Fire or Lightning: Direct strikes or fire spread.
    • Vandalism: Malicious damage by third parties.

    When Insurance Denies Claims

    Claims are frequently denied for wear and tear. If your roof is old (typically over 20โ€“25 years) and simply failing due to age, insurers view this as a maintenance issue, not an insurable event.

    Pro Tip: Always document damage immediately. Take clear photos from multiple angles and keep records of any temporary repairs you make to prevent further water intrusion.

    2. Government Grants and Assistance Programs

    For low-income homeowners, seniors, or veterans, government assistance can be a lifeline. These programs do not require repayment, making them the ideal solution for those asking how can I get a new roof with no money in the traditional sense.

    USDA Section 504 Home Repair Program

    The United States Department of Agriculture (USDA) offers grants to very-low-income homeowners in rural areas.

    • Eligibility: Income below 50% of the area median income.
    • Benefit: Grants up to $10,000 to remove health and safety hazards.
    • Requirement: You must own and occupy the home.

    HUD Title I Property Improvement Loans

    While technically a loan, the U.S. Department of Housing and Urban Development (HUD) facilitates programs that often have lower interest rates and more flexible terms than private banks. These are insured by the FHA, making lenders more willing to approve applicants with lower credit scores.

    State and Local Energy Efficiency Grants

    Many states offer rebates or grants for roofing if you upgrade to energy-efficient materials (like cool roofs or solar-ready structures). Check the Database of State Incentives for Renewables & Efficiency for opportunities in your region.

    3. Financing Options When Cash Is Tight

    If you do not qualify for grants and insurance denies your claim, financing is the next best step. The goal here is to minimize upfront costs.

    Home Equity Loans or HELOCs

    If you have built equity in your home, a Home Equity Line of Credit (HELOC) allows you to borrow against that value.

    • Pros: Lower interest rates compared to personal loans; interest may be tax-deductible.
    • Cons: Your home serves as collateral. Risk of foreclosure if you default.

    Personal Loans for Home Improvement

    Unsecured personal loans do not require collateral. While interest rates are higher, approval is faster.

    • Strategy: Look for lenders specializing in “bad credit” home improvement loans if your credit score is below 600.

    Contractor Financing

    Many reputable roofing companies partner with financial institutions like GreenSky or Mosaic to offer promotional financing.

    • Common Offer: “0% interest for 12 months” or “No payments for 6 months.”
    • Caution: Read the fine print. Deferred interest can skyrocket if the balance is not paid in full by the end of the term.

    4. Non-Profit and Community Resources

    Several non-profit organizations focus on housing stability. These entities often rely on volunteers and donated materials, significantly reducing labor and material costs.

    Habitat for Humanity

    Habitat for Humanity does not just build new homes; many local affiliates offer critical home repair services. They prioritize elderly, disabled, or veteran homeowners who cannot afford commercial rates.

    ReBuilding Centers

    Organizations like ReStore sell donated building materials at a fraction of retail price. While this doesnโ€™t cover labor, sourcing shingles, underlayment, and flashing here can cut material costs by 50โ€“70%.

    How Can I Get A New Roof With No Money

    Comparison: Funding Sources at a Glance

    Funding SourceUpfront CostRepayment Required?Best For
    Insurance ClaimDeductible OnlyNoStorm/Accidental Damage
    USDA GrantNoneNoLow-income/Rural Owners
    HELOCClosing FeesYes (Low Interest)Homeowners with Equity
    Contractor FinanceNone (Often)Yes (Variable Rate)Quick Repairs/Good Credit
    Habitat for HumanityMinimal DonationNo (Sweat Equity)Seniors/Veterans/Low Income

    Step-by-Step Guide to Securing Funding

    If you are ready to take action, follow this logical sequence to maximize your chances of approval.

    1. Assess the Damage: Hire a licensed inspector or roofer to provide a written estimate. Do not rely on visual guesses.
    2. Review Insurance Policy: Check your declarations page for coverage limits and deductibles. File a claim only if the damage exceeds your deductible significantly.
    3. Check Eligibility for Grants: Visit Benefits.gov or your local housing authority website to search for “home repair assistance.”
    4. Get Three Quotes: Contact three licensed roofing contractors. Ask specifically if they offer financing or payment plans.
    5. Apply for Financing: If grants are unavailable, apply for a HELOC or personal loan. Pre-approval gives you negotiating power with contractors.
    6. Schedule the Work: Once funding is secured, schedule the repair during the off-season (late fall or winter) if possible, as contractors may offer discounts during slower periods.

    FAQ: Common Questions About Roofing with No Money

    Q: Can I get a free roof replacement if I am disabled?

    A: Yes, potentially. Organizations like Habitat for Humanity and local Area Agencies on Aging often prioritize disabled homeowners. Additionally, some state-specific vocational rehabilitation programs may assist if the home environment impacts your disability.

    Q: What if my credit score is too low for a loan?

    A: Focus on grant programs (USDA, local charities) or contractor financing that does not require a hard credit check initially. You might also consider a “lease-to-own” arrangement for materials, though this is rare for roofing.

    Q: Is it cheaper to patch or replace the roof?

    A: Patching is cheaper short-term but often leads to higher long-term costs if the underlying structure is compromised. If more than 30% of the roof is damaged, replacement is usually more cost-effective and adds value to your home.

    Q: How long does it take to get approved for a USDA roof grant?

    A: The process can take several months. It involves income verification, property appraisal, and availability of funds in your specific rural area. Apply as early as possible.

    Q: Can I use crowdfunding to pay for a new roof?

    A: While platforms like GoFundMe exist, they are generally unreliable for large expenses like roofing. Success depends heavily on your social network size. It should be a last resort, not a primary strategy.

    Conclusion

    Facing the question “How can I get a new roof with no money“ is daunting, but it is not an impossible situation. By systematically exploring insurance claims, government grants like the USDA Section 504 program, and specialized financing options, you can find a pathway to a secure home. Remember, the key is acting quickly to prevent further damage and thoroughly researching every available resource.

    Donโ€™t let financial constraints compromise your safety. Start by contacting your insurance provider and local housing authority today. If you found this guide helpful, please share it on social media to help other homeowners navigate these challenging times.

  • How Long Does It Take To Install A Metal Roof?

    How Long Does It Take To Install A Metal Roof?

    Have you ever stared at your aging shingle roof and wondered if switching to metal is worth the hassle? Many homeowners hesitate because they fear their lives will be turned upside down for weeks on end. The good news is that modern installation techniques are faster than you might think. If you are asking, “How long does it take to install a metal roof,” the short answer is usually between two to five days for an average-sized home. However, several variables can shift this timeline, and understanding them is key to planning your renovation without stress.

    Understanding the Average Timeline

    When contractors give you an estimate, they aren’t just guessing. The duration of a metal roof installation depends heavily on the complexity of your homeโ€™s architecture and the type of metal system chosen. For a standard 2,000-square-foot home with a simple gable roof, a professional crew can often complete the job in 3 to 4 days.

    This speed is one of metal roofing’s biggest selling points. Unlike traditional asphalt shingles, which require nailing down thousands of individual pieces, metal panels cover large surface areas quickly. However, “quick” does not mean “rushed.” Proper installation is critical for longevity, weatherproofing, and warranty validation.

    Factors That Influence Installation Speed

    Before we dive into the day-by-day breakdown, it is essential to understand what speeds up or slows down the process. Here are the primary variables:

    • Roof Complexity: A simple gable roof is fast. A roof with multiple valleys, dormers, chimneys, and skylights requires intricate flashing work, which adds time.
    • Installation Method: Are they installing over existing shingles (retrofit) or tearing off the old roof? Tear-offs add 1โ€“2 days.
    • Crew Size: A team of 4โ€“6 professionals works significantly faster than a smaller crew.
    • Weather Conditions: Rain, high winds, or extreme heat can halt work for safety reasons.
    • Material Type: Standing seam panels often take longer to lock together than exposed-fastener corrugated panels.
    How Long Does It Take To Install A Metal Roof

    Step-by-Step: The Installation Process Breakdown

    To truly answer how long does it take to install a metal roof, letโ€™s look at what happens each day. This assumes a standard residential project where the old roof is being removed.

    Day 1: Preparation and Tear-Off

    The first day is often the loudest and most disruptive. The crew arrives early to set up safety equipment, including scaffolding and fall protection systems. They will also place a dumpster or debris trailer on your property.

    1. Site Protection: Landscaping and windows are covered to protect against falling nails and debris.
    2. Removal: The old roofing material (shingles, underlayment, and sometimes decking) is stripped away.
    3. Inspection: Once bare, the roof deck is inspected for rot or damage. Any compromised plywood must be replaced immediately.

    Note: If your roof deck is in poor condition, this phase can extend into a second day.

    Day 2: Underlayment and Flashing Prep

    With a clean deck, the focus shifts to waterproofing. This stage is crucial for preventing leaks and ensuring the metal performs well for decades.

    • Synthetic Underlayment: High-quality synthetic felt is rolled out and stapled down. This acts as a secondary moisture barrier.
    • Drip Edge and Trim: Metal drip edges are installed along the eaves and rakes.
    • Flashing Installation: Critical areas like chimneys, vent pipes, and wall intersections receive initial flashing work. Precision here prevents future water intrusion.

    According to industry standards, proper underlayment installation is non-negotiable. You can read more about the importance of roofing underlayment materials on Wikipedia to understand why this layer matters for your homeโ€™s envelope.

    Day 3: Panel Installation Begins

    This is where your new roof starts to take shape. The crew begins laying the metal panels, starting from the eaves and working upward toward the ridge.

    • Alignment: Panels must be perfectly straight. Even a slight deviation can cause issues at the ridge cap.
    • Fastening: Depending on the system, screws are driven through the flat part of the panel (for exposed fastener systems) or hidden within the seams (for standing seam systems).
    • Cutting: Panels are cut on-site to fit around obstacles like vents or chimneys.

    For a medium-sized home, a skilled crew can cover 60โ€“70% of the roof area on this day.

    Day 4: Completion and Ridge Cap

    The final panels are installed, and the ridge capโ€”the piece that covers the peak of the roofโ€”is secured. This is a detail-oriented task that ensures wind and rain cannot penetrate the highest point of your roof.

    • Sealing: All seams and fasteners are checked. Sealant may be applied to specific joints depending on the manufacturerโ€™s guidelines.
    • Cleanup: The crew uses magnetic sweepers to pick up stray screws and nails from your yard and driveway. This is vital for the safety of your family and pets.

    Day 5 (If Needed): Final Inspection and Touch-Ups

    Complex roofs or larger homes may require a fifth day. This buffer allows for:

    • Completing intricate flashing around multiple chimneys.
    • Addressing any unexpected structural repairs found during tear-off.
    • A final walk-through with the homeowner to ensure satisfaction.

    Standing Seam vs. Exposed Fastener: Which Is Faster?

    Not all metal roofs are created equal. The type of system you choose impacts the installation timeline significantly.

    FeatureExposed Fastener (Corrugated/R-Panel)Standing Seam
    Installation SpeedFasterSlower
    MethodScrews go directly through the panel into the deck.Panels clip together; fasteners are hidden.
    Labor IntensityLowerHigher (requires precision locking)
    Typical Timeline2โ€“3 Days3โ€“5 Days
    DurabilityGood (screws may loosen over time)Excellent (no penetration in field of panel)

    Exposed fastener systems are generally quicker to install because the learning curve is lower, and the mechanical action of screwing down panels is straightforward. Standing seam roofs, while more expensive and time-consuming, offer superior longevity and aesthetic appeal. The extra time spent on standing seam installation is an investment in a roof that can last 50+ years with minimal maintenance.

    Why Professional Installation Matters

    You might be tempted to ask if you can speed up the process by DIYing or hiring a handyman. However, metal roofing requires specialized tools and knowledge. Improper installation can lead to:

    • Oil Canning: Visible waviness in the panels due to improper handling or fastening.
    • Leaks: Incorrect flashing or sealant application.
    • Voided Warranties: Most manufacturers require certified installers to validate the warranty.

    Hiring a certified professional ensures that the timeline is met without sacrificing quality. They have the crew size and expertise to handle unexpected challenges efficiently.

    FAQ Section

    1. Can you install a metal roof over existing shingles?

    Yes, in many cases, you can. This is called a “retrofit” or “overlay.” It can save 1โ€“2 days because there is no tear-off. However, local building codes may limit this to one layer of existing roofing. Always check with your contractor and local authorities first.

    2. Does weather affect the installation timeline?

    Absolutely. Metal roofing installation cannot proceed during heavy rain, lightning, or high winds (usually above 20โ€“25 mph). Wet decks can also trap moisture, leading to mold issues later. A reputable contractor will build weather delays into their schedule.

    3. How long does it take to install a metal roof on a large commercial building?

    Commercial projects vary widely. While a residential home takes days, a large commercial facility can take weeks or even months. The principles are the same, but the scale, logistics, and safety requirements are much more complex.

    4. Will the installation noise disturb my neighbors?

    Metal roofing installation involves hammering, drilling, and walking on the roof. It is louder than shingle installation. However, since the process only takes a few days, the disturbance is temporary. Informing neighbors beforehand is a courteous gesture.

    5. What is the longest part of the installation process?

    For most homes, the tear-off and deck preparation are the most time-consuming phases. Once the deck is ready, the actual metal panel installation goes relatively quickly. If your deck needs significant repair, this will add the most time to your project.

    Conclusion

    So, how long does it take to install a metal roof? For most homeowners, you can expect your project to be completed in 2 to 5 days. This relatively short timeframe is a major advantage of metal roofing, minimizing disruption to your daily life while providing a durable, energy-efficient upgrade to your home.

    By choosing the right type of metal system and hiring a certified professional, you ensure that the job is done right the first time. Remember, the slight variation in time between different systems is a small price to pay for a roof that could last a lifetime.

    If you found this guide helpful, please share it with friends or family who are considering a roof replacement. Helping others make informed decisions is always a good deed!

  • Stop Icicle Lights From Blowing Up On Roof

    Stop Icicle Lights From Blowing Up On Roof

    Have you ever spent hours untangling a massive spool of lights, only to hear a terrifying pop or see a spark flash just as you plug them in? It is a nightmare scenario for any homeowner who wants their house to look festive without becoming a hazard. If you are wondering how to keep icicle lights from blowing up on roof, you are not alone; thousands of Americans face this issue every December due to moisture, poor connections, or overloaded circuits.

    In this guide, we will walk you through proven strategies to ensure your display stays bright, safe, and intact throughout the winter season. We will cover everything from pre-installation checks to smart wiring techniques that prevent overheating and electrical failure.

    Why Do Icicle Lights Fail or “Blow Up”?

    Before we dive into the solutions, it is crucial to understand the root causes of failure. When people say lights “blow up,” they usually mean one of three things: a bulb shatters, a fuse blows instantly, or the plastic housing melts due to excessive heat.

    According to the U.S. Consumer Product Safety Commission (CPSC), decorative lighting causes an estimated 160 home fires each year in the United States. The primary culprits are often damaged insulation, water intrusion, and daisy-chaining too many strands together.

    The Role of Moisture and Ice

    Icicle lights are designed for outdoor use, but they are not invincible. When snow melts and refreezes around the socket, it can create a conductive path between the hot and neutral wires. This causes a short circuit. If the breaker does not trip immediately, the resistance generates intense heat, potentially melting the wire casing or shattering the bulb.

    Overloading the Circuit

    Many homeowners make the mistake of plugging multiple high-wattage incandescent strands into a single extension cord. This draws more amperage than the wire can handle, leading to overheating. Modern LED lights mitigate this risk significantly, but improper usage can still cause failures.

    Step-by-Step Guide to Safe Installation

    To ensure your lights survive the winter, follow this detailed installation protocol. These steps are designed to minimize stress on the bulbs and electrical connections.

    1. Pre-Installation Inspection

    Never skip this step. Even if your lights worked last year, weather exposure degrades materials over time.

    • Check for Fraying: Look closely at the first 3โ€“5 feet of the cord. This area suffers the most wear from being pulled out of storage boxes.
    • Inspect Bulbs: Ensure no bulbs are cracked or loose in their sockets. A loose bulb allows moisture to enter the socket, causing corrosion and shorts.
    • Test Indoors First: Plug the strands into an indoor outlet before climbing the ladder. If they flicker or donโ€™t light up, troubleshoot now, not while standing on a icy roof.

    2. Choose the Right Hardware

    Using the wrong clips or fasteners is a leading cause of physical damage to the wires.

    Hardware TypeProsConsVerdict
    Plastic Gutter ClipsEasy to install, cheapCan crack in extreme coldGood for mild winters
    Shingle TabsNo damage to guttersHarder to removeBest for asphalt roofs
    Adhesive HooksVersatile placementAdhesive fails in cold/wetAvoid for heavy strands
    Cable Ties (Zip Ties)Secure holdCan cut into wire insulationAvoid directly on wire

    Pro Tip: Always use UV-resistant plastic clips. Standard plastic becomes brittle in freezing temperatures and may snap, dropping your lights onto the ground or leaving jagged edges that cut the wire.

    3. Proper Hanging Technique

    How you hang the lights affects their longevity. Tension is the enemy of electrical integrity.

    • Leave Slack: Do not pull the strand tight. Leave a small amount of slack between clips. This allows for thermal contraction when temperatures drop below freezing. If the wire is taut, the copper inside can stretch and break.
    • Protect the Connectors: The male and female ends of the strands are the most vulnerable points. Ensure these connectors are elevated slightly above the gutter line so they do not sit in pooled water or ice buildup.
    • Use Drip Loops: When running extension cords from the outlet to the roof, create a “drip loop.” This is a U-shape in the cord that ensures rainwater runs off the bottom of the loop rather than traveling down the wire into the electrical outlet.
    How To Keep Icicle Lights From Blowing Up On Roof

    Managing Power and Preventing Overloads

    One of the most common reasons lights fail catastrophically is power mismanagement. Understanding the electrical load is key to knowing how to keep icicle lights from blowing up on roof.

    Calculate Your Wattage

    Check the tag on your light strands.

    • Incandescent Strands: Typically use 40โ€“60 watts per strand. Most standard outlets can handle 15 amps (1,800 watts). However, for safety, you should never exceed 80% of capacity (1,440 watts). This means you can safely connect roughly 20โ€“25 incandescent strands end-to-end.
    • LED Strands: Typically use 2โ€“5 watts per strand. You can connect significantly more, often up to 40โ€“50 strands, depending on the manufacturerโ€™s specifications.

    Warning: Never mix LED and incandescent strands in the same series. They have different voltage requirements and can cause one type to burn out prematurely or fail entirely.

    Use Outdoor-Rated Extension Cords

    Not all extension cords are created equal. Using an indoor-rated cord outside is a fire hazard. Look for cords marked with “W-A” or “W” on the jacket, indicating they are suitable for wet locations. These cords have thicker insulation and grounded plugs to prevent shock and short circuits.

    For more detailed information on electrical safety standards, you can refer to the National Electrical Code overview on Wikipedia to understand the regulatory background of safe wiring practices.

    Maintenance During the Season

    Once your lights are up, your job isnโ€™t done. Winter weather is dynamic, and regular checks can prevent disasters.

    Clear Snow and Ice Buildup

    Heavy snow can weigh down the strands, pulling them away from the clips and stressing the wires. Gently brush off excess snow using a soft broom. Never use sharp objects like ice picks to clear ice near the lights, as you risk piercing the insulation.

    Monitor for Flickering

    If you notice a section of lights flickering, it is often a sign of a loose connection or impending bulb failure. Address this immediately. A flickering light creates arcing, which generates heat and can ignite nearby dry leaves or debris trapped in the gutters.

    Check Connections Weekly

    Wind and thermal expansion can loosen plugs. Once a week, visually inspect the connection points between strands. Ensure they are tightly seated and, if possible, covered with electrical tape or a silicone sealant cap to keep moisture out.

    FAQ Section

    Q: Can I leave my icicle lights up all year?

    A: It is not recommended. Prolonged exposure to UV rays, rain, and temperature fluctuations will degrade the plastic housing and wire insulation, significantly increasing the risk of failure next season. Store them in a cool, dry place during the off-season.

    Q: Why do my lights work indoors but fail when I put them on the roof?

    A: This is usually due to moisture or temperature. Cold temperatures make wires brittle, and moisture can seep into micro-cracks that aren’t apparent indoors. Additionally, the physical tension of hanging them on the roof may expose weak points in the wiring.

    Q: Is it safe to use staple guns to attach lights?

    A: No. Stapling directly into the wire can pierce the insulation, creating a direct path for electricity to escape. This can cause shorts, shocks, or fires. Always use purpose-built plastic clips or shingle tabs.

    Q: How do I store icicle lights to prevent tangling and damage?

    A: Wrap each strand individually around a piece of cardboard or a dedicated light reel. Place them in a rigid plastic bin with a lid to protect them from pests and moisture. Avoid stuffing them loosely into bags, as this causes wire fatigue and bulb breakage.

    Q: What should I do if a bulb burns out?

    A: Replace it immediately with a bulb of the same voltage and wattage. Leaving an empty socket can disrupt the circuit in older series-wired lights, causing the entire strand to go out. In parallel-wired LED lights, it may not affect the rest, but it leaves the socket open to moisture.

    Conclusion

    Keeping your holiday display safe doesnโ€™t have to be complicated. By understanding how to keep icicle lights from blowing up on roof, you are taking proactive steps to protect your home and your family. Remember to inspect your gear before installation, use the right clips to avoid physical stress, manage your electrical load carefully, and perform regular maintenance throughout the season.

    A beautiful holiday display is one that shines brightly without posing a risk. Take the time to do it right, and your lights will last for many seasons to come.

    Did you find these tips helpful? Share this article with your neighbors and friends on social media to help everyone have a safer, brighter holiday season!

  • Five Star II Space Saver Swing Set Review

    Five Star II Space Saver Swing Set Review

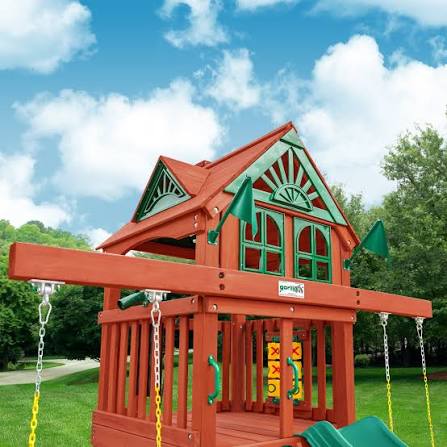
    Is your backyard feeling cramped, but you still want to give your children the joy of outdoor play? Many parents struggle to find high-quality play equipment that fits into limited spaces without sacrificing safety or fun. The Five Star Ii Space Saver Swing Set With Wood Roof offers a brilliant solution, combining compact design with robust construction to maximize play value in minimal square footage.

    In this comprehensive guide, we will explore why this specific model has become a top choice for US homeowners with smaller lots. We will dive into its features, assembly requirements, safety standards, and long-term durability to help you make an informed decision.

    Why Choose a Space-Saver Design?

    Urban and suburban living often means compromising on yard size. However, the desire for children to engage in physical activity outdoors remains non-negotiable for many families. Traditional swing sets can dominate a landscape, leaving little room for gardening, pets, or other activities.

    The concept behind the “Space Saver” design is efficient footprint utilization. By positioning swings and accessories closer together and utilizing vertical space effectively, these sets provide a full play experience without requiring a massive clearing. According to landscape architects, optimizing vertical space is key to small-yard design, allowing for multi-functional areas that do not feel cluttered.

    The Five Star Ii Space Saver Swing Set With Wood Roof exemplifies this philosophy. It is engineered to fit into corners or narrow strips of land, making it an ideal candidate for townhouses or homes with modest backyards.

    Key Features of the Five Star II Model

    When evaluating any playset, it is crucial to look beyond the aesthetic appeal. The structural integrity and material quality are paramount. Here is what sets this model apart:

    1. The Protective Wood Roof

    One of the standout features is the included wood roof. Unlike canvas covers that degrade quickly under UV exposure, a wooden roof provides lasting protection. It shields children from harsh sun rays and light rain, extending the lifespan of the plastic components and keeping the seating area cooler during summer months. This feature also adds a rustic, premium look that blends well with most home exteriors.

    2. Compact Yet Sturdy Frame

    Despite its smaller footprint, the frame is constructed from high-quality, pressure-treated lumber. This treatment is essential for resisting rot, decay, and insect damage, which are common issues in humid climates across the United States. The A-frame design provides inherent stability, reducing the wobble often associated with lighter, metal-based swing sets.

    3. Versatile Play Options

    Do not let the word “space saver” fool you into thinking it lacks features. Typically, this model includes:

    • Two belt swings for classic swinging fun.
    • A trapeze bar for developing upper body strength.
    • Sometimes configured with a small slide or glider, depending on the specific retailer package.

    This variety ensures that children of different ages and interests can enjoy the set simultaneously, promoting social play and coordination.

    Assembly and Installation Guide

    One of the most common concerns for buyers is the complexity of assembly. While professional installation is always an option, many DIY enthusiasts choose to build it themselves. Here is a realistic overview of what to expect.

    Step-by-Step Overview

    1. Site Preparation: Choose a flat area with at least 6 feet of clearance on all sides. Ensure the ground is free of rocks and roots.
    2. Unpacking and Inventory: Lay out all parts. Check against the manual to ensure no hardware is missing. Tip: Organize bolts by size in separate bowls to save time.
    3. Frame Assembly: Begin with the A-frames. Use a power drill with a socket attachment for efficiency, but hand-tighten the final turns to prevent stripping the wood.
    4. Beam Installation: Lift the main beam onto the A-frames. This step usually requires two adults. Ensure the beam is level before securing.
    5. Roof Construction: Assemble the roof trusses and attach shingles or roofing material as per the instructions. This adds significant weight, so ensure the frame is fully secured first.
    6. Hanging Accessories: Attach swings and bars using the provided hardware. Ensure chains are not twisted and seats hang evenly.

    Tools Required

    • Power drill/driver
    • Socket set (typically 1/2 inch)
    • Level
    • Tape measure
    • Ladder

    Time Estimate: For two average-handiness adults, expect the assembly to take between 6 to 8 hours. Rushing this process can compromise safety, so patience is key.

    Five Star Ii Space Saver Swing Set With Wood Roof

    Safety Standards and Maintenance

    Safety is the primary concern for any parent purchasing playground equipment. The Five Star Ii Space Saver Swing Set With Wood Roof is designed with safety in mind, but proper maintenance is required to keep it secure over the years.

    Understanding Safety Certifications

    Reputable swing sets should adhere to guidelines set by organizations like the ASTM (American Society for Testing and Materials). While specific certifications vary by manufacturer batch, looking for compliance with ASTM F1148 standards is a good benchmark for consumer safety. These standards cover everything from the height of fall surfaces to the spacing of swing hangers to prevent entrapment.

    Routine Maintenance Checklist

    To ensure longevity and safety, perform these checks seasonally:

    Maintenance TaskFrequencyWhy It Matters
    Tighten HardwareEvery 3 monthsWood expands and contracts with weather, loosening bolts.
    Inspect WoodAnnuallyLook for splinters, cracks, or signs of rot. Sand and seal as needed.
    Check Chains/RopesMonthlyLook for rust, wear, or sharp edges that could injure hands.
    Clean Plastic PartsBi-annuallyRemove dirt and mold to prevent slippery surfaces.

    Pro Tip: Apply a water-repellent stain or sealant to the wood every 1โ€“2 years. This not only preserves the color but also adds a layer of protection against moisture intrusion, which is the biggest enemy of wooden playsets.

    Pros and Cons: An Honest Assessment

    No product is perfect. Here is a balanced view to help you decide if this set is right for your family.

    Advantages

    • Space Efficiency: Ideal for yards under 10×10 feet of usable play space.
    • Aesthetic Appeal: The wood roof and natural timber look more sophisticated than plastic-only sets.
    • Durability: Pressure-treated wood lasts significantly longer than untreated pine or cheap metal.
    • Weather Protection: The roof extends the playing season by providing shade and slight rain protection.

    Disadvantages

    • Assembly Complexity: It is not a “plug-and-play” item; requires significant time and effort to build.
    • Weight Limit: Due to its compact nature, it may have lower weight limits compared to massive commercial-grade sets. Always check the specific manual for max user weight (usually around 110 lbs per swing).
    • Initial Cost: Higher upfront cost than basic metal frames, though better long-term value.

    Frequently Asked Questions (FAQ)

    1. How much space do I actually need for the Five Star II Space Saver?

    You typically need a flat area of approximately 8×8 feet for the footprint, but you must add a safety zone. We recommend a total clear area of at least 14×14 feet to account for the swinging arc and safe landing zones. Always measure twice before purchasing.

    2. Can I leave the swing set outside during winter?

    Yes, the Five Star Ii Space Saver Swing Set With Wood Roof is designed for year-round outdoor use. However, it is advisable to remove removable accessories like swings or tarps if heavy snow is expected, to prevent excessive weight load on the beams. Covering the seat cushions can also prolong their life.

    3. Is the wood treated with harmful chemicals?

    Most modern pressure-treated woods used in reputable playsets are treated with micronized copper azole (MCA) or similar low-toxicity preservatives, rather than the older, more hazardous CCA treatments. Always check the manufacturerโ€™s label for specific chemical information and wear gloves during assembly.

    4. What is the maximum age range for this swing set?

    This set is generally suitable for children aged 3 to 10 years old. Younger toddlers may need assistance with the belt swings, while older children might outgrow the weight limit or seek more complex climbing structures. It is perfect for early childhood development and active play.

    5. Do I need to anchor the swing set to the ground?

    While the A-frame design is stable, anchoring is highly recommended, especially in windy areas or if you have very active children. You can use ground anchors or pour concrete footings for the legs. This prevents tipping and ensures the set remains level over time.

    Conclusion

    Investing in outdoor play equipment is an investment in your childrenโ€™s health, happiness, and development. The Five Star Ii Space Saver Swing Set With Wood Roof stands out as a pragmatic yet premium choice for families who do not have expansive lawns but refuse to compromise on quality. Its thoughtful design, durable materials, and protective roofing make it a resilient addition to any backyard.

    By understanding the assembly requirements and committing to regular maintenance, you can ensure this playset remains a safe and cherished part of your home for years to come. Remember, the joy seen on your childrenโ€™s faces as they swing under the shelter of that wood roof is priceless.

    If you found this review helpful, please share it with other parents on social media who might be struggling to find the perfect playset for their small space. Letโ€™s help more families create memorable outdoor experiences!

  • What Do You Call A Conservatory With A Tiled Roof?

    What Do You Call A Conservatory With A Tiled Roof?

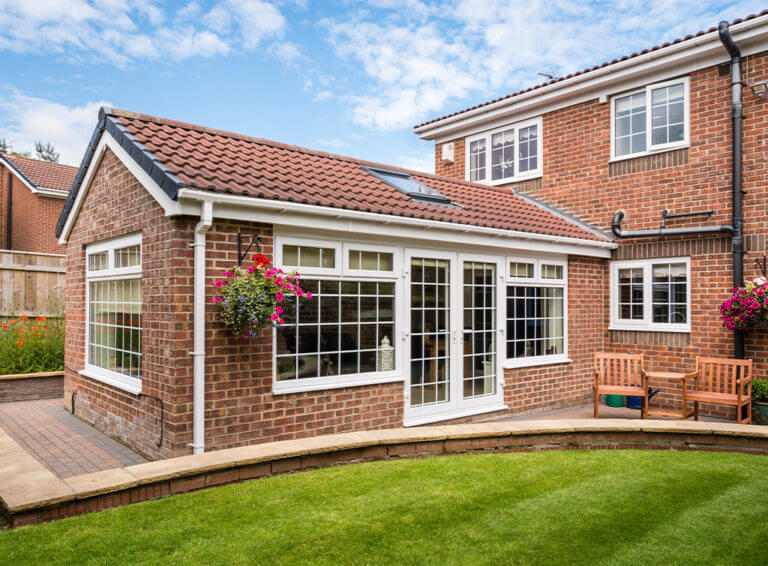
    Have you ever looked at a traditional glass-roofed sunroom and thought, “Itโ€™s beautiful, but isnโ€™t it going to be an oven in summer and a freezer in winter?” You are not alone. Many homeowners struggle with the temperature fluctuations inherent in all-glass structures. If you are searching for what do you call a conservatory with a tiled roof, the answer is typically a Solid Roof Conservatory or a Tiled Roof Extension.

    This modern adaptation combines the light-filled aesthetics of a conservatory with the thermal efficiency and durability of a standard home extension. In this guide, we will break down everything you need to know about this popular home improvement trend, from terminology to installation benefits.

    What Is the Official Name for This Structure?

    When people ask, “What do you call a conservatory with a tiled roof?”, they are usually referring to a hybrid structure. While there is no single legal definition, the industry standard terms are:

    1. Solid Roof Conservatory: This is the most common term used by contractors and architects. It implies the base structure (walls and windows) remains similar to a traditional conservatory, but the roof is replaced with insulated panels and tiles.
    2. Tiled Roof Extension: Some professionals prefer this term because it distinguishes the structure from older, poorly insulated conservatories. It suggests a higher build quality closer to a main house extension.
    3. Warm Roof Conservatory: This refers specifically to the insulation technology used beneath the tiles to maintain consistent indoor temperatures.

    Unlike traditional polycarbonate or glass roofs, these structures use lightweight composite tiles that mimic the look of slate or clay without the heavy structural load. This allows them to be retrofitted onto existing conservatory frames in many cases.

    Why Are Homeowners Switching to Tiled Roofs?

    The shift from glass to tile is driven by practicality. According to recent housing trends, energy efficiency has become a top priority for US homeowners. A traditional glass conservatory can lose heat up to three times faster than a standard brick wall.

    The Thermal Efficiency Advantage

    A solid roof conservatory uses multi-layered insulation. Typically, this includes:

    • A waterproof outer layer (tiles).
    • A breathable membrane.
    • Rigid insulation boards (often PIR or PUR foam).
    • An internal plasterboard finish.

    This construction creates a thermal break, preventing heat escape in winter and blocking solar gain in summer. You can finally use the room year-round, not just during mild spring days.

    Noise Reduction Benefits

    If you live near a busy street, airport, or in an area prone to heavy rain or hail, a glass roof can be noisy. A tiled roof acts as a significant sound barrier. Studies suggest that solid roofs can reduce external noise by up to 40 decibels compared to single-glazed glass, creating a peaceful sanctuary inside your home.

    What Do You Call A Conservatory With A Tiled Roof

    Conservatory vs. Solid Roof Extension: A Comparison

    To help you decide if this upgrade is right for you, letโ€™s look at the key differences between a traditional conservatory and one with a tiled roof.

    FeatureTraditional Glass/Polycarbonate RoofSolid/Tiled Roof Conservatory
    Temperature ControlPoor (Hot in summer, cold in winter)Excellent (Year-round comfort)
    Noise InsulationLow (Rain noise is prominent)High (Significant sound dampening)
    Light LevelsMaximum natural lightReduced direct overhead light
    Energy EfficiencyLow U-Value (High heat loss)High U-Value (Low heat loss)
    MaintenanceHigh (Cleaning glass, sealing leaks)Low (Tile durability, minimal cleaning)
    Aesthetic AppealLooks like an add-onBlends seamlessly with main house

    Note: U-Value measures how effective a material is as an insulator. The lower the U-Value, the better the insulation.

    How Does It Affect Natural Light?

    One common concern is that replacing glass with tiles will make the room dark. However, modern design mitigates this effectively.

    Strategic Glazing Solutions

    You do not have to sacrifice all natural light. Most solid roof conservatories incorporate:

    • Roof Lanterns: A raised glass section in the center of the tiled roof that floods the room with light.
    • Velux Windows: Skylights integrated into the tiled slope.
    • Bi-Fold Doors: Large glass walls that connect the interior to the garden, maintaining an airy feel.

    By combining a tiled roof with strategic glazing, you achieve a balance of ambient light without the harsh glare and heat associated with full glass roofs.

    Installation Process: What to Expect

    If you are considering this renovation, understanding the process helps manage expectations. While every project is unique, here is a general step-by-step overview.

    1. Structural Assessment: A professional must check if your existing conservatory frame can support the weight of a tiled roof. Most modern lightweight tiles are designed to be retrofitted, but older frames may need reinforcement.
    2. Removal of Old Roof: The existing glass or polycarbonate panels are carefully removed and disposed of responsibly.
    3. Installation of Insulation Layer: High-performance insulation boards are fitted between the rafters. This is crucial for meeting energy standards.
    4. Fitting the Tiles: Lightweight composite tiles are secured over the insulation. These tiles often interlock for quick installation and weatherproofing.
    5. Internal Finishing: The interior ceiling is plastered and painted, making the room look like a natural extension of your home rather than an afterthought.

    The entire process typically takes 5 to 7 days for an average-sized conservatory, minimizing disruption to your daily life.

    Cost Considerations and ROI

    While a solid roof conservatory is more expensive upfront than a simple glass replacement, it offers a better return on investment (ROI).

    • Initial Cost: Expect to pay between $15,000 and $30,000 depending on size, materials, and location. This is higher than a basic glass repair but comparable to a small brick extension.
    • Energy Savings: Improved insulation can reduce heating bills by 15โ€“20% for that specific zone of the house.
    • Property Value: A usable, year-round living space adds more value to your home than a seasonal sunroom. Real estate experts note that functional square footage is a key driver in home appraisals.

    For more detailed information on building standards and insulation materials, you can refer to resources on building insulation to understand the technical specifications involved.

    Frequently Asked Questions (FAQ)

    1. Do I need planning permission for a tiled roof conservatory?

    In many jurisdictions, replacing a conservatory roof with a solid one falls under “permitted development” rights, meaning you do not need full planning permission. However, this depends on local zoning laws, the height of the structure, and its proximity to boundaries. Always check with your local building department before starting work.

    2. Can I put a tiled roof on my existing conservatory?

    Yes, in most cases. Modern lightweight tile systems are specifically engineered for retrofitting. They are significantly lighter than traditional slate or clay tiles, reducing the load on the existing frame. However, a structural survey is essential to ensure your current foundations and frames are sound.

    3. Will a tiled roof make my conservatory too dark?

    Not necessarily. By incorporating roof lanterns, skylights, or larger glass doors, you can maintain ample natural light. The light quality changes from harsh direct sunlight to softer, diffused ambient light, which many homeowners find more comfortable for reading or watching TV.

    4. How long does a tiled conservatory roof last?

    High-quality composite tiles are designed to last 20 to 30 years or more. They are resistant to UV degradation, moss, and algae, requiring far less maintenance than glass roofs, which need regular cleaning to prevent green slime buildup.

    5. Is a solid roof conservatory warmer in winter?

    Absolutely. The primary benefit of a tiled roof is thermal efficiency. With proper insulation, the room retains heat much better, allowing you to use it comfortably even in freezing temperatures. It effectively becomes an extra living room rather than a seasonal accessory.

    Conclusion

    So, what do you call a conservatory with a tiled roof? Whether you call it a Solid Roof Conservatory or a Tiled Roof Extension, the name matters less than the transformation it brings to your home.

    This upgrade solves the classic problems of overheating, heat loss, and noise, turning a underused space into a valuable, year-round living area. It blends the aesthetic appeal of a conservatory with the practicality of a traditional extension.

    If you are tired of shivering in winter or sweating in summer, a tiled roof might be the perfect solution. Share this article with friends who are considering home renovations, or save it for your next planning meeting with a contractor. Your future selfโ€”and your energy billโ€”will thank you!

  • How Long to Replace a Flat Roof?

    How Long to Replace a Flat Roof?

    Replacing a flat roof is often a source of significant anxiety for homeowners and business owners alike. The fear of water damage, structural issues, and the sheer disruption to daily life can be overwhelming. If you are currently staring at a leaking ceiling or planning ahead, you are likely asking yourself: how long does it take to replace a flat roof? Understanding the timeline is crucial for minimizing inconvenience and managing expectations effectively.

    The Short Answer: Typical Timelines

    For most standard residential or small commercial properties, a complete flat roof replacement typically takes between 1 to 3 days. However, this is a general estimate. Larger commercial buildings or complex residential structures may require 3 to 5 days, or even up to two weeks for massive industrial projects.

    The duration depends heavily on the size of the roof, the material chosen, and the condition of the existing structure. Weather conditions also play a pivotal role; rain or high winds can halt work entirely, extending the project timeline significantly.

    Key Factors Influencing Replacement Duration

    Several variables determine whether your roofing crew will finish in a day or a week. Understanding these factors helps you plan better.

    1. Size and Complexity of the Roof

    Square footage is the most obvious factor. A 1,000-square-foot garage roof is vastly different from a 10,000-square-foot warehouse. However, complexity matters just as much. Roofs with numerous penetrations (vents, HVAC units, skylights) require meticulous flashing work, which is time-consuming.

    • Simple Rectangle: Fastest installation.
    • Multiple Levels/Obstacles: Slower due to detailed sealing requirements.

    2. Type of Roofing Material

    Not all flat roofing materials are installed at the same speed. Here is a breakdown of common materials and their typical installation speeds:

    MaterialInstallation SpeedDurabilityBest For
    EPDM (Rubber)FastHigh (20+ years)Residential & Commercial
    TPO/PVCModerateVery HighEnergy Efficiency
    Modified BitumenSlowModerateBudget-Conscious
    Built-Up Roof (BUR)Very SlowHighHeavy Traffic Areas

    EPDM is often the fastest to install because it comes in large sheets that can be rolled out quickly. In contrast, Built-Up Roofing involves layering tar and gravel, which requires curing time between layers.

    3. Condition of the Existing Roof

    Does the old roof need to be torn off completely?

    • Tear-Off Required: This adds 1โ€“2 days to the project. The crew must remove old materials, haul them away, and inspect the deck.
    • Overlay Possible: If the existing roof is in decent condition, some materials can be installed directly over the old layer. This saves time but may void warranties or hide underlying deck issues.

    4. Weather Conditions

    Flat roofing adhesives and membranes require specific temperatures to bond correctly. Most manufacturers recommend installation when temperatures are above 40ยฐF (4ยฐC). Rain is a major disruptor; wet decks cannot be sealed properly. Always check the forecast before scheduling.

    How Long Does It Take To Replace A Flat Roof

    Step-by-Step Breakdown of the Process

    To give you a clearer picture, here is what happens during those few days.

    Day 1: Preparation and Tear-Off

    The crew arrives early to set up safety equipment and protect your landscaping. They begin removing the old roofing material. This is the noisiest and messiest part of the process. Once the old material is gone, they inspect the wood decking for rot or damage. Any compromised sections are replaced immediately.

    Day 2: Installation of Underlayment and Membrane

    With a clean, dry deck, the team installs the insulation boards and underlayment. Then, the main roofing membrane (such as EPDM or TPO) is rolled out. Seams are either glued, heat-welded, or taped, depending on the material. This step requires precision to ensure watertight seals.

    Day 3: Flashing and Final Details

    The edges of the roof, vents, and drains are sealed with flashing. This is critical for preventing leaks. The crew performs a final inspection, cleans up debris, and removes dumpsters. Some contractors may wait a day for adhesives to fully cure before walking on the roof extensively.

    Why Professional Expertise Matters (E-E-A-T)

    While DIY might seem tempting, flat roofing requires specialized knowledge. According to industry standards, improper seam welding is the leading cause of premature flat roof failure. A professional roofer brings experience, proper tools, and warranty protection.

    For more detailed technical specifications on roofing materials, you can refer to authoritative sources like Wikipediaโ€™s entry on Built-up Roofing, which outlines the historical and technical evolution of these systems. Trusting certified professionals ensures compliance with local building codes and manufacturer warranties.

    Common Mistakes That Delay Projects

    Avoid these pitfalls to keep your project on schedule:

    • Ignoring Permits: Failing to secure necessary permits can halt work indefinitely. Ensure your contractor handles this.
    • Poor Communication: Not clarifying access points or parking for crews can cause daily delays.
    • Choosing the Lowest Bidder: Cheap contractors may lack the manpower to finish quickly, dragging a 2-day job into a week.

    FAQ Section

    How long does it take to replace a flat roof on a house?

    For an average-sized home (1,500โ€“2,500 sq. ft.), a flat roof replacement usually takes 1 to 2 days. This assumes a full tear-off and standard weather conditions.

    Can I stay in my house during flat roof replacement?

    Yes, in most cases. However, expect noise and vibration. If you have sensitive health conditions or work from home, you might consider staying elsewhere for the peak noise periods (tear-off and nailing).

    Does rain delay flat roof replacement?

    Yes. Most roofing adhesives and membranes cannot be applied to wet surfaces. Even light drizzle can pause work for 24 hours until the deck dries completely.

    What is the fastest flat roof material to install?

    EPDM rubber roofing is generally the fastest to install due to its large sheet sizes and simple adhesion methods. TPO is also relatively quick if heat-welding equipment is used efficiently.

    How long does a flat roof last after replacement?

    A properly installed flat roof lasts between 15 to 30 years, depending on the material. EPDM and TPO often reach the 20โ€“25 year mark, while built-up roofs may last 15โ€“20 years.

    Do I need to replace the insulation too?

    It is highly recommended. Old insulation may be compressed or wet, reducing its R-value. Replacing it improves energy efficiency and provides a smooth surface for the new membrane.

    Conclusion

    Knowing how long it takes to replace a flat roof empowers you to plan your life around the renovation. While most projects wrap up within a few days, preparation is key. Choose the right material, hire a reputable contractor, and keep an eye on the weather.

    A new flat roof not only protects your property but can also enhance energy efficiency and curb appeal. Donโ€™t let the prospect of construction stress you outโ€”with the right team, itโ€™s a quick and worthwhile investment.

    Found this guide helpful? Share it with friends or neighbors who might be facing similar roofing decisions!