Category: homeowner roofing guide

  • How To Install A Whirly Bird On A Tin Roof

    How To Install A Whirly Bird On A Tin Roof

    Have you ever stepped into your attic or garage on a scorching summer day and felt like you were walking into an oven? Excessive heat buildup in metal-roofed structures is not just uncomfortable; it can damage stored items, increase cooling costs, and shorten the lifespan of your roofing materials. If you are looking for a cost-effective, passive solution to this problem, learning how to install a whirly bird on a tin roof is the perfect place to start.

    In this comprehensive guide, we will walk you through the entire process, from selecting the right turbine ventilator to sealing it properly against leaks. Whether you are a seasoned DIY enthusiast or a first-time homeowner, this tutorial is designed to be clear, safe, and effective.

    Why Choose a Whirly Bird for Your Tin Roof?

    Before we dive into the tools and steps, it is essential to understand why this specific type of vent is ideal for metal roofing. A whirly bird, technically known as a turbine ventilator, uses wind power to spin its fins. This spinning action creates a vacuum that pulls hot, stale air out of your building while drawing cooler fresh air in through lower vents.

    For tin (metal) roofs, which are excellent conductors of heat, passive ventilation is crucial. Unlike electric fans, whirly birds require no wiring, no maintenance, and no electricity bills. They are silent, durable, and highly effective at reducing indoor temperatures by up to 10โ€“15 degrees Fahrenheit during peak summer months.

    Tools and Materials You Will Need

    Preparation is half the battle. Having the right tools on hand ensures a smooth installation process and minimizes the time you spend on the roof. Here is your checklist:

    • Whirly Bird Ventilator: Ensure it matches the size of your intended hole (common sizes are 12-inch or 14-inch).
    • Drill with Metal Bits: For pilot holes.
    • Tin Snips or Aviation Shears: For cutting the metal sheet.
    • Jigsaw with Metal Cutting Blade: Optional, but helpful for larger cuts.
    • Measuring Tape and Marker: For precise placement.
    • Caulking Gun and High-Quality Roof Sealant: Look for polyurethane or silicone-based sealants rated for metal roofs.
    • Self-Tapping Screws: Stainless steel screws with neoprene washers are best to prevent rust and leaks.
    • Safety Gear: Non-slip boots, gloves, safety glasses, and a harness if your roof pitch is steep.
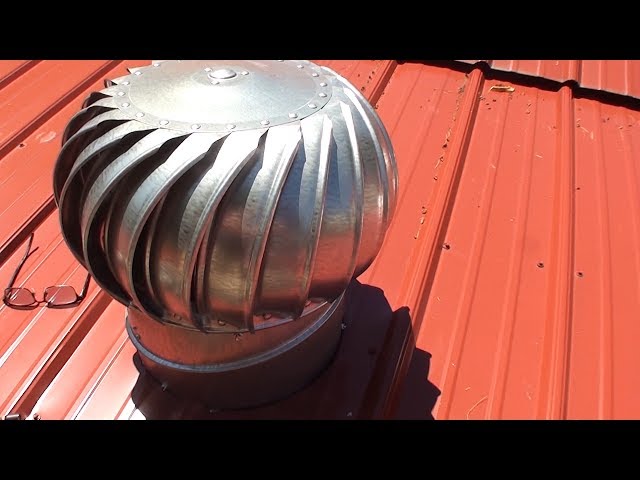
    How To Install A Whirly Bird On A Tin Roof

    Step-by-Step Guide: How To Install A Whirly Bird On A Tin Roof

    Follow these steps carefully to ensure a watertight and functional installation.

    Step 1: Choose the Right Location

    Location matters. You want to install the whirly bird near the ridge of the roof but not directly on the ridge cap unless you have a specific ridge-mount model. Ideally, place it where the wind flow is unobstructed. Avoid areas under overhanging trees where debris might clog the turbine.

    Mark the center point of your desired location. Ensure there are no underlying structural beams or electrical wires in the immediate vicinity.

    Step 2: Cut the Opening

    This is the most critical step. Measure the diameter of the base of your whirly bird. Most manufacturers provide a template; if not, measure the inner flange.

    1. Drill a small pilot hole in the center of your marked circle.
    2. Using your jigsaw or tin snips, cut along the marked line. Tip: Cut slightly smaller than the required size first. You can always trim more metal off, but you cannot add it back.
    3. Deburr the edges of the cut hole using a file or sandpaper to remove sharp metal shards. This prevents injury and ensures a smooth fit for the ventilator base.

    Step 3: Apply the Sealant

    Waterproofing is key to protecting your tin roof. Apply a generous bead of roof sealant around the perimeter of the cut hole. Do not skimp here; this layer acts as your primary defense against rain infiltration.

    Additionally, apply a thin layer of sealant to the underside of the whirly birdโ€™s base flange. This double-layer approach ensures that even if one layer degrades over time, the other remains intact.

    Step 4: Position and Secure the Ventilator

    Place the whirly bird over the hole, pressing it firmly into the sealant. Ensure it sits flat and level. An uneven installation can cause the turbine to wobble, leading to noise and premature wear.

    Using your drill, insert self-tapping screws through the pre-drilled holes in the base flange. Space them evenly, typically every 6โ€“8 inches. Tighten them until the neoprene washer compresses slightly, creating a tight seal. Do not overtighten, as this can strip the metal threads or distort the flange.

    Step 5: Final Sealing and Inspection

    Once the unit is secured, apply another bead of sealant over the screw heads and around the entire edge of the flange where it meets the roof. Smooth this out with a gloved finger or a caulking tool for a professional finish.

    Allow the sealant to cure according to the manufacturerโ€™s instructions (usually 24 hours) before exposing it to heavy rain. Spin the turbine by hand to ensure it moves freely without obstruction.

    Common Mistakes to Avoid

    Even experienced DIYers can make errors. Here are the most common pitfalls when installing turbine vents on metal roofs:

    MistakeConsequenceSolution
    Cutting the hole too largeWater leakage and poor sealMeasure twice, cut once. Start small.
    Using standard screwsRust and corrosion over timeAlways use stainless steel with neoprene washers.
    Insufficient sealantLeaks during heavy stormsUse high-quality, UV-resistant roof sealant.
    Installing near obstructionsReduced airflow efficiencyKeep at least 3 feet away from walls or trees.

    Understanding the Science Behind Passive Ventilation

    To truly appreciate the value of your new installation, it helps to understand the physics involved. Whirly birds operate on the principle of Bernoulli’s equation, where faster-moving air creates lower pressure. As the wind spins the turbine, it lowers the pressure inside the vent, pulling hot air out of the attic space.

    According to principles outlined in basic fluid dynamics resources, such as those found on Wikipedia, effective ventilation requires a balance of intake and exhaust. Ensure you have soffit vents or eave vents to allow fresh air to enter; otherwise, the whirly bird will struggle to pull air out efficiently.

    FAQ Section

    1. Can I install a whirly bird on a standing seam metal roof?

    Yes, but it requires special care. You must use a clamp-on mount or a specifically designed flashing kit that does not penetrate the standing seams directly, as this can compromise the roof’s integrity. Always consult the roof manufacturerโ€™s guidelines.

    2. How many whirly birds do I need for my roof?

    A general rule of thumb is one 12-inch whirly bird for every 100โ€“150 square feet of attic space. However, this varies based on your local climate and roof pitch. For larger roofs, multiple units spaced evenly apart work best.

    3. Do whirly birds make noise?

    High-quality whirly birds are virtually silent. If you hear squeaking or grinding, it usually means the bearings are dry or the unit is installed unevenly. Regular lubrication (if recommended by the manufacturer) can solve this.

    4. What happens if there is no wind?

    On windless days, the temperature difference between the hot attic and the cooler outside air can still create a slight thermal updraft, causing the turbine to spin slowly. While less effective than on windy days, it still provides some level of passive ventilation.

    5. Is it better than a solar-powered fan?

    Solar fans are more powerful and active, but they have moving parts that can fail and require electricity. Whirly birds are purely mechanical, meaning they have a longer lifespan with zero maintenance. For most residential applications, whirly birds offer the best balance of cost and reliability.

    Conclusion

    Learning how to install a whirly bird on a tin roof is a rewarding DIY project that pays dividends in comfort and energy savings. By following the steps outlined aboveโ€”choosing the right location, cutting precisely, and sealing thoroughlyโ€”you can enjoy a cooler, drier, and more efficient home.

    Remember, safety first. If you are uncomfortable working at heights, do not hesitate to hire a professional roofer. But for those ready to take on the challenge, this upgrade is simple, affordable, and highly effective.

    Did you find this guide helpful? Share it with your friends on social media who might be battling heat issues in their metal-roofed homes! Letโ€™s help everyone stay cool this summer.
  • And Nobody Knew How The Goat Got On The Roof

    And Nobody Knew How The Goat Got On The Roof

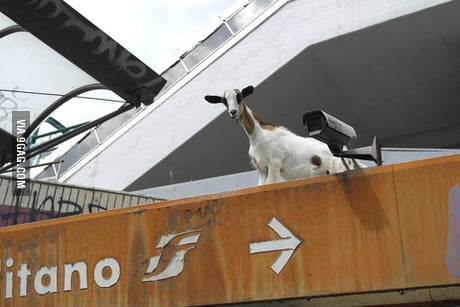
    Have you ever stumbled upon a riddle so absurd yet captivating that it stops you in your tracks? The phrase “And Nobody Knew How The Goat Got On The Roof“ has become a modern digital enigma, sparking debates across social media platforms from Reddit to TikTok. It represents more than just a silly image; it taps into our innate curiosity about the impossible and our love for unsolved mysteries.

    In this article, we will dissect this peculiar phenomenon. We will look at why this specific scenario captures our imagination, whether it is physically possible for a goat to scale a steep roof, and what this says about human psychology when faced with the unexplained. Whether you are here for the laughs or the logical deduction, we have got you covered.

    Why Is Everyone Obsessed With the Goat on the Roof?

    The internet loves a good mystery, but it loves an absurd mystery even more. The statement “And Nobody Knew How The Goat Got On The Roof“ functions as a perfect hook because it presents a visual contradiction. Goats are agile, yes, but roofs are typically steep, slippery, and high.

    The Power of Visual Dissonance

    When we see an animal in an unnatural setting, our brains trigger an alert. This is known as cognitive dissonance. We know goats belong in pastures or on rocky hills, not on shingled suburban rooftops. This dissonance creates a “knowledge gap” that we feel compelled to close.

    According to behavioral psychologists, humans have a strong drive for closure. When presented with incomplete informationโ€”like a goat appearing on a roof without explanationโ€”we experience a mild psychological itch that can only be scratched by finding the answer. This is why such images go viral; they demand engagement.

    The Role of Social Media Algorithms

    Platforms like Instagram and Twitter thrive on content that generates comments. A picture of a cat sleeping is nice, but a picture of a goat on a roof with the caption “And Nobody Knew How The Goat Got On The Roof” invites speculation. Did it jump? Was it lifted? Did it climb? Each comment boosts the postโ€™s visibility, creating a feedback loop of curiosity.

    Can Goats Actually Climb Roofs?

    Before we dive into the theories, letโ€™s look at the biological reality. Are goats capable of this feat, or is it purely fictional?

    The Anatomy of a Climber

    Goats, particularly mountain breeds like the Ibex or the domestic Alpine goat, are incredible climbers. Their hooves have a hard outer edge and a soft, rubbery inner pad. This structure allows them to grip tiny irregularities in rock faces.

    • Hoof Structure: The split hoof can spread apart to grip narrow ledges.
    • Center of Gravity: Goats have a low center of gravity, making them stable on uneven surfaces.
    • Musculature: Their powerful shoulder muscles allow them to pull themselves up vertical drops.

    However, there is a limit. Modern roofing materials like asphalt shingles, metal, or clay tiles are often too smooth or fragile for goat hooves. While a goat might manage a low-pitched, rough-textured roof, a steep residential roof is a different challenge entirely.

    Expert Insight

    Veterinarians and animal behaviorists note that while goats are adventurous, they are also cautious. They rarely take risks that could lead to injury unless motivated by food or escape. Therefore, a goat on a roof is usually not there for the viewโ€”it is likely there because something else drove it up there.

    Top Theories: How Did the Goat Get There?

    Since the prompt states “And Nobody Knew How The Goat Got On The Roof,” we must rely on deduction. Here are the most plausible scenarios, ranked by likelihood.

    1. The Human Assistance Theory

    This is the most common reality behind viral photos. Often, a farmer or owner lifts the goat onto a low roof for photography purposes, or the goat escapes onto a flat garage roof and then jumps to a higher section. In many documented cases, the “mystery” is simply a lack of context in the photo.

    2. The Gradual Ascent

    Goats do not need to jump ten feet in the air. They can climb trees, fences, and stacked objects. If a tree branch hangs over a roof, a goat can easily walk from the branch to the roof. This is a frequent occurrence in rural areas where vegetation is close to housing structures.

    3. The Construction Error

    In rare cases, goats are left on roofs during construction or renovation if workers fail to check the area before leaving. This is less about climbing and more about human negligence.

    Comparison: Natural vs. Assisted Access

    FactorNatural ClimbingHuman-Assisted
    LikelihoodLow (for steep roofs)High
    Evidence NeededNearby trees/fencesWitness accounts
    Risk to GoatModerateLow
    CommonalityRare in suburbsCommon in viral pics
    And Nobody Knew How The Goat Got On The Roof

    The Cultural Impact of Unsolved Mysteries

    The phrase “And Nobody Knew How The Goat Got On The Roof” has transcended its literal meaning to become a metaphor for lifeโ€™s unexplainable moments. It appears in memes, song lyrics, and even casual conversation when someone encounters a bizarre situation.

    Folklore and Storytelling

    Historically, animals in unusual places have been omens or subjects of folklore. In some cultures, a bird in the house signifies news; a goat on the roof might signify chaos or unexpected change. By sharing these stories, we participate in a modern form of oral tradition.

    For a deeper understanding of how goats have been perceived in history and mythology, you can refer to Wikipediaโ€™s page on Goats, which details their domestication and cultural significance across civilizations.

    Why We Love the Unknown

    There is a comfort in admitting we donโ€™t know. In a world where data drives every decision, the idea that “And Nobody Knew How The Goat Got On The Roof” reminds us that randomness still exists. It is a playful rebellion against the need for total control and understanding.

    Step-by-Step: What to Do If You Find a Goat on Your Roof

    If you are unlucky enough to face this real-life scenario, do not panic. Here is a safe, step-by-step guide to resolving the situation.

    1. Assess the Situation: Determine if the goat is stuck or if it can move freely. Look for signs of distress (bleating, pacing).
    2. Secure the Area: Keep pets and children away. Goats can be unpredictable when scared.
    3. Contact the Owner: If you are in a rural area, ask neighbors. Most goats are microchipped or have ear tags.
    4. Call Animal Control: If the owner is unknown, contact local animal services. Do not attempt to chase the goat, as this may cause it to fall.
    5. Provide Water: If the rescue will take time, place a bucket of water nearby if accessible, but do not attempt to feed it solid food immediately.

    Note: Never try to pull a goat down by its legs or horns. This can cause severe injury to the animal and yourself.

    FAQ Section

    Q1: Is it dangerous for a goat to be on a roof?

    Yes, it can be. Roofs are not designed for animal traffic. Shingles can break, causing leaks, and the goat risks slipping and falling. Additionally, the stress of being trapped can harm the animalโ€™s health.

    Q2: Why do goats like high places?

    Goats are natural browsers and climbers. In the wild, high places offer safety from predators and better access to vegetation. This instinct remains in domesticated goats, driving them to seek elevation.

    Q3: Can a goat jump from a roof to the ground?

    It depends on the height and the landing surface. Goats are resilient, but a jump from a two-story roof onto concrete can result in broken legs. They prefer gradual descents.

    Q4: What does the phrase “And Nobody Knew How The Goat Got On The Roof” mean in slang?

    In internet slang, it is used to describe any confusing or inexplicable situation. It is a humorous way of saying, “I have no idea how this happened, and neither does anyone else.”

    Q5: How can I prevent my goat from getting on the roof?

    Ensure that trees and structures near fences are trimmed. Install taller fencing if necessary, and provide ample climbing structures in their designated play area to satisfy their urge to climb safely.

    Q6: Are certain goat breeds more likely to climb roofs?

    Yes. Breeds like Nigerian Dwarfs, Pygmies, and Alpine goats are more agile and curious. Larger meat breeds like Boers are less likely to attempt such feats due to their weight and build.

    Conclusion

    The mystery of “And Nobody Knew How The Goat Got On The Roof” is a delightful blend of biology, psychology, and internet culture. While we may never know the exact story behind every viral photo, we now understand the mechanics behind the myth. Goats are capable climbers, but human assistance or environmental factors usually play a key role.

    Next time you see this phrase, remember that it is not just a jokeโ€”it is a testament to our enduring fascination with the unexpected. Life is full of goats on roofs, moments that defy logic and demand a smile.

    Did you enjoy this deep dive into the absurd? Share this article with your friends who love a good mystery, or tag someone who needs to secure their fence! Letโ€™s keep the conversation going on social media.

  • Average Cost of New Roof for 1800 Sq Ft House

    Average Cost of New Roof for 1800 Sq Ft House

    Replacing a roof is one of the most significant investments a homeowner can make. It protects your family, enhances curb appeal, and significantly impacts your propertyโ€™s resale value. However, staring at an empty bank account while looking up at aging shingles is stressful. If you are currently planning this major renovation, understanding the average cost of new roof for 1800 sq ft house is the first step toward financial peace of mind.

    In this guide, we will break down the numbers, explain why prices vary, and help you avoid common pitfalls that lead to budget overruns. Letโ€™s dive into what you can expect to pay in 2026.

    What Is the Average Cost Range for an 1800 Sq Ft Roof?

    When homeowners ask, “How much does a new roof cost?” the answer is rarely a single number. For a home with 1,800 square feet of living space, the roof area (often called “roofing squares”) is typically larger due to pitch and overhangs.

    In 2026, the national average cost to replace a roof on an 1800 sq ft house ranges between $9,500 and $18,000.

    However, this range can swing dramatically based on materials. Here is a realistic breakdown:

    • Budget-Friendly (3-Tab Asphalt Shingles): $9,500 โ€“ $12,500
    • Mid-Range (Architectural Asphalt Shingles): $12,500 โ€“ $16,000
    • Premium (Metal, Slate, or Tile): $18,000 โ€“ $35,000+

    It is crucial to understand that “1800 sq ft” usually refers to your home’s footprint, not the roof’s surface area. A steeply pitched roof requires more material and labor than a flat one. Most contractors calculate costs per “square,” which equals 100 square feet. An 1800 sq ft house often has a roof size of 20 to 24 squares, depending on complexity.

    How Do Material Choices Impact the Final Price?

    The type of roofing material you choose is the biggest variable in your final bill. While asphalt shingles dominate the US market due to their affordability, other options offer longevity and aesthetic benefits at a higher price point.

    Asphalt Shingles

    This is the most common choice in the United States. They are lightweight, easy to install, and come in various colors.

    • Pros: Low upfront cost, widely available, easy to repair.
    • Cons: Shorter lifespan (15โ€“25 years), susceptible to wind damage.

    Metal Roofing

    Metal roofs are gaining popularity for their durability and energy efficiency.

    • Pros: Lasts 40โ€“70 years, reflects solar heat, fire-resistant.
    • Cons: Higher initial cost, can be noisy during rain if not insulated properly.

    Clay or Concrete Tiles

    Ideal for Southwestern or Mediterranean-style homes, these tiles are incredibly durable but heavy.

    • Pros: Extremely long-lasting (50+ years), fireproof, distinct aesthetic.
    • Cons: Very heavy (may require structural reinforcement), expensive installation.
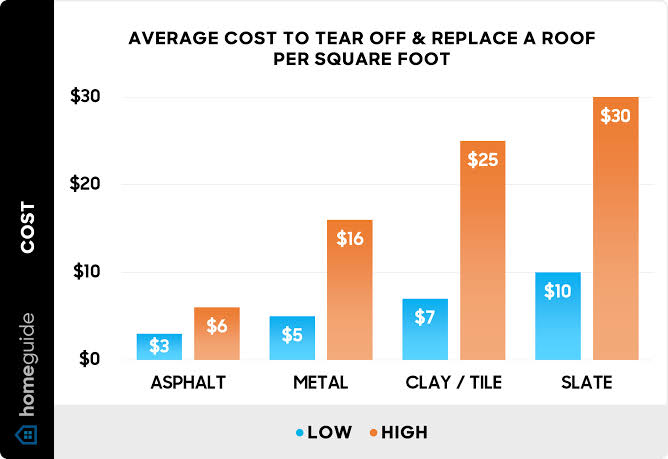
    Material TypeAvg. Cost per Sq. Ft.Estimated Total (1800 Sq Ft Home)Lifespan
    3-Tab Asphalt$4.50 – $6.00$9,500 – $12,50015-20 Years
    Architectural Asphalt$6.50 – $8.50$12,500 – $16,00025-30 Years
    Standing Seam Metal$10.00 – $16.00$18,000 – $28,00040-70 Years
    Clay Tile$12.00 – $20.00$22,000 – $35,000+50+ Years
    Average Cost Of New Roof For 1800 Sq Ft House

    Why Does Labor Cost Vary So Much by Region?

    You might notice that a quote from a roofer in California differs significantly from one in Ohio. Labor costs are influenced by local economic conditions, the cost of living, and regional weather patterns.

    In high-cost-of-living areas like the Northeast or West Coast, labor rates can be 20โ€“30% higher than the national average. Additionally, regions prone to hurricanes or severe storms (such as Florida or Texas) may have higher insurance premiums for contractors, which gets passed on to you.

    According to industry standards, labor typically accounts for 40% to 60% of the total project cost. This includes:

    1. Removal of old roofing materials (tear-off).
    2. Disposal fees (dumpster rental and landfill fees).
    3. Installation of underlayment and flashing.
    4. Installation of new shingles or panels.

    Always ask for a detailed breakdown where labor is separated from materials. This transparency helps you compare quotes accurately.

    What Hidden Costs Should You Budget For?

    Many homeowners are shocked when the final invoice exceeds the initial estimate. This usually happens due to “hidden” costs that are difficult to assess until the old roof is removed.

    Decking Repair

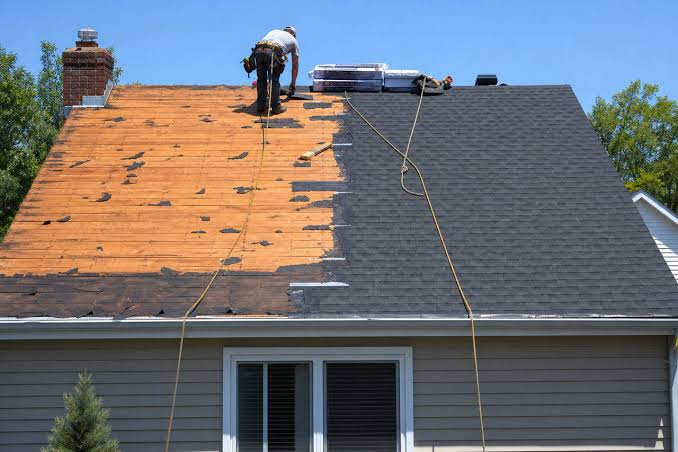
    Once the old shingles are torn off, contractors inspect the wooden deck underneath. If they find rot, water damage, or soft spots, these boards must be replaced.

    • Cost: $50โ€“$75 per sheet of plywood.
    • Recommendation: Set aside a contingency fund of $500โ€“$1,000 for unexpected decking repairs.

    Ventilation Upgrades

    Proper airflow is critical for roof longevity. Older homes often lack adequate ridge vents or soffit vents. Upgrading ventilation during a roof replacement is cheaper than doing it later.

    • Cost: $300โ€“$800 depending on the system.

    Permit Fees

    Most municipalities require a building permit for roof replacements.

    • Cost: $100โ€“$500, depending on your city.
    • Note: Ensure your contractor handles the permitting process. Unpermitted work can cause issues when selling your home.

    For more detailed information on building standards and safety codes, you can refer to general construction guidelines on Wikipedia.

    How to Choose the Right Contractor?

    Choosing the right professional is just as important as choosing the right material. A poor installation can void warranties and lead to leaks within months.

    1. Check Licensing and Insurance: Never hire a roofer without general liability and workers’ compensation insurance. Ask for proof.
    2. Read Local Reviews: Look for reviews on Google, Yelp, and the Better Business Bureau. Pay attention to how the company responds to negative feedback.
    3. Get Multiple Quotes: Aim for at least three detailed estimates. Be wary of quotes that are significantly lower than the others; this often indicates cut corners or low-quality materials.
    4. Ask About Warranties: A reputable roofer will offer both a manufacturerโ€™s warranty (on materials) and a workmanship warranty (on labor). Look for at least a 5-year workmanship guarantee.

    FAQ Section

    Q1: Does the square footage of my house equal the square footage of my roof?

    A: No. Your homeโ€™s living area (1800 sq ft) is measured horizontally. The roof covers the top and sides, meaning its surface area is larger. Factors like roof pitch (steepness), hips, valleys, and dormers increase the actual roofing square footage. Typically, an 1800 sq ft house has a roof area of 2,000 to 2,400 sq ft.

    Q2: Can I install a new roof over the old one?

    A: While possible, it is generally not recommended. Installing a second layer adds weight and makes it difficult to inspect the deck for damage. Most building codes allow only two layers maximum. A full tear-off ensures a longer-lasting installation and validates manufacturer warranties.

    Q3: How long does a roof replacement take?

    A: For an average 1800 sq ft house, a professional crew can typically complete the job in 1 to 3 days. Weather conditions, roof complexity, and material type can affect this timeline. Metal roofs may take longer due to the precision required in panel fitting.

    Q4: Will a new roof increase my homeโ€™s value?

    A: Yes. A new roof is a strong selling point. According to real estate experts, you can recoup approximately 60โ€“70% of the roof replacement cost in increased home value. More importantly, it prevents buyers from negotiating lower prices due to inspection findings.

    Q5: What is the best time of year to replace a roof?

    A: Late spring through early fall is ideal because temperatures are moderate, allowing shingle adhesives to seal properly. However, scheduling during the off-season (late fall or winter) might result in lower prices due to reduced demand, provided the weather permits safe work.

    Conclusion

    Understanding the average cost of new roof for 1800 sq ft house empowers you to make informed decisions. While the upfront investment of $9,500 to $18,000 may seem steep, remember that a quality roof protects your largest asset for decades. By choosing the right materials, budgeting for hidden costs, and hiring a reputable contractor, you ensure your home remains safe, dry, and valuable.

    Donโ€™t let the stress of renovation overwhelm you. Take your time, compare quotes, and prioritize quality over the lowest bid. If you found this guide helpful, please share it with friends or family who might be facing similar home improvement projects. Your network will thank you for the heads-up!

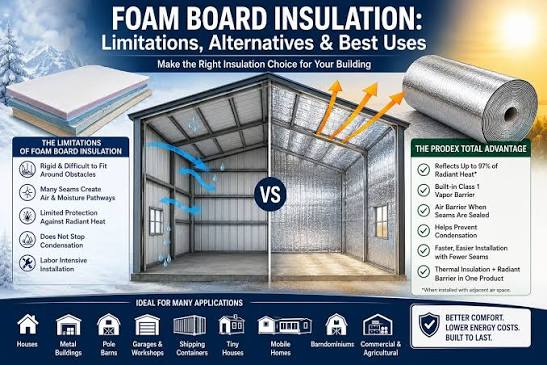
  • 1 Inch Foam Insulation Under Metal Roof: Pros & Cons

    1 Inch Foam Insulation Under Metal Roof: Pros & Cons

    Are you struggling with a metal roof that turns your attic into a sauna during summer or a freezer in winter? You are not alone; many homeowners look for cost-effective solutions to regulate temperature without replacing their entire roofing structure. Understanding the 1 inch foam insulation under metal roof pros and cons is crucial before you commit to this specific thickness, as it can make or break your homeโ€™s comfort and energy efficiency.

    Why Consider 1-Inch Foam for Metal Roofs?

    Metal roofs are durable and aesthetically pleasing, but they are also excellent conductors of heat. Without proper insulation, thermal transfer occurs rapidly. While thicker insulation (like R-30 or higher) is often recommended for extreme climates, 1-inch foam (typically closed-cell spray foam) offers a unique middle ground. It provides an air seal and a moisture barrier, which are critical for metal roofing systems.

    However, is one inch enough? That depends on your climate zone, your existing ventilation, and your budget. Letโ€™s dive deep into the specifics.

    The Advantages: Why Homeowners Choose 1-Inch Foam

    When evaluating the 1 inch foam insulation under metal roof pros and cons, the benefits often center around air sealing and moisture management rather than pure thermal resistance.

    1. Superior Air Sealing Capabilities

    Unlike fiberglass batts, which can leave gaps around rafters and nails, spray foam expands to fill every crevice. A 1-inch layer of closed-cell foam creates an airtight envelope. According to the U.S. Department of Energy, air leakage can account for up to 40% of a homeโ€™s heating and cooling costs. By sealing these leaks, even a thin layer of foam significantly reduces drafts.

    2. Moisture and Condensation Barrier

    One of the biggest enemies of metal roofs is condensation. When warm, moist air from inside your home hits the cold underside of the metal roof, water droplets form. This leads to rust, mold, and wood rot. Closed-cell foam has a low permeability rating, acting as a Class II vapor retarder. This means it stops moist indoor air from reaching the cold metal surface, effectively preventing condensation buildup.

    3. Added Structural Rigidity

    Closed-cell spray foam is dense and hardens after application. Applying a 1-inch layer can add slight structural integrity to the roof deck, helping it resist wind uplift. While it wonโ€™t replace structural engineering requirements, it is a beneficial side effect that fiberglass or cellulose cannot offer.

    4. Cost-Effectiveness Compared to Thicker Layers

    Spray foam is expensive. By limiting the application to 1 inch, you reduce material and labor costs significantly while still gaining the air-sealing and vapor-barrier benefits. For homeowners on a budget who already have some bulk insulation (like fiberglass) in the floor joists, adding 1 inch of foam to the roof deck is a strategic compromise.

    1 Inch Foam Insulation Under Metal Roof Pros And Cons

    The Disadvantages: Risks and Limitations

    No solution is perfect. To give you a balanced view of the 1 inch foam insulation under metal roof pros and cons, we must address the potential downsides.

    1. Low R-Value per Inch

    The primary drawback is thermal resistance. Closed-cell spray foam typically has an R-value of roughly R-6 to R-7 per inch. Therefore, a 1-inch layer only provides an R-value of roughly R-6 to R-7.

    • Context: Most building codes in the US require roof insulation between R-30 and R-60, depending on the climate zone.
    • Result: On its own, 1 inch of foam is insufficient to meet code requirements for thermal performance in most regions. It must be part of a hybrid system.

    2. Risk of “Thermal Bridging”

    If the foam is applied directly to the underside of the roof deck but does not cover the rafters completely, or if there are gaps, thermal bridging can occur. Heat will travel through the wooden rafters faster than through the insulated spaces, leading to uneven temperatures and potential ice damming in colder climates.

    3. Installation Complexity and Professional Requirement

    You cannot DIY this effectively. Spray foam requires specialized equipment, protective gear, and precise mixing ratios. Improper installation can lead to off-gassing issues or poor adhesion. Furthermore, if the foam is too thin in certain spots, it may not cure properly, leading to long-term durability issues.

    4. Potential for Hidden Moisture Traps

    If the 1-inch foam is applied over wet wood or if there is a leak in the metal roof above, the foam can trap that moisture against the wood. Since closed-cell foam is impermeable, the wood cannot dry out, accelerating rot. This makes pre-installation inspection of the roof deck critical.

    Comparison: 1-Inch Foam vs. Traditional Insulation

    To help you visualize where 1-inch foam stands, here is a quick comparison table.

    Feature1-Inch Closed-Cell FoamFiberglass Batts (R-19)Cellulose Blown-In
    R-Value~R-6.5~R-19~R-13 to R-15
    Air SealingExcellentPoorModerate
    Moisture BarrierYes (Vapor Retarder)NoNo (Can absorb moisture)
    InstallationProfessional OnlyDIY FriendlyProfessional Recommended
    CostHigh per inchLowModerate
    Best Use CaseAir seal + Vapor barrierBulk thermal insulationRetrofitting attics

    Note: For optimal performance, many experts recommend a “hybrid approach”: 1 inch of spray foam for air sealing/vapor control, topped with fiberglass or cellulose to reach the required total R-value.

    Critical Considerations Before Installation

    Before you hire a contractor, consider these technical factors to ensure success.

    Climate Zone Matters

    In warmer climates (Zone 1-3), 1 inch of foam might be sufficient to prevent condensation and provide moderate cooling benefits. However, in colder climates (Zone 5-8), relying solely on 1 inch of foam will lead to high energy bills. You must check your local building codes. For more detailed information on insulation standards, you can refer to the Wikipedia page on Building Insulation to understand global and regional variations.

    Ventilation Strategy

    There are two main approaches when insulating under a metal roof:

    1. Unvented Roof Assembly: The foam seals the roof deck completely. No airflow is needed between the foam and the metal. This is ideal for complex roof shapes.
    2. Vented Roof Assembly: An air gap is left above the foam or below the metal panels. If you use 1 inch of foam, ensure it does not block soffit vents if you are maintaining a vented attic space.

    Type of Foam

    Ensure you are using closed-cell foam, not open-cell. Open-cell foam is permeable to moisture and has a lower R-value (approx R-3.5 per inch). It would not provide the necessary vapor barrier for a metal roof, making condensation highly likely.

    FAQ Section

    Q1: Is 1 inch of foam insulation enough for a metal roof?

    A: Generally, no. While it provides excellent air sealing and moisture control, it lacks the thermal resistance (R-value) required by most building codes. It is best used as part of a hybrid system combined with other insulation types.

    Q2: Will 1 inch of foam prevent condensation on my metal roof?

    A: Yes, if it is closed-cell foam. It acts as a vapor retarder, preventing warm, moist indoor air from reaching the cold metal surface where condensation forms.

    Q3: Can I install 1 inch of foam myself?

    A: It is strongly discouraged. Spray foam chemicals are hazardous during application, and improper mixing can result in ineffective insulation or health risks. Always hire a certified professional.

    Q4: How much does it cost to insulate a metal roof with 1 inch of foam?

    A: Costs vary by region and contractor, but expect to pay between $1.50 to $3.00 per square foot for closed-cell spray foam. This is higher than traditional methods but offers superior air sealing.

    Q5: Does foam insulation damage metal roofs?

    A: No, foam itself does not damage metal. However, if moisture is trapped between the foam and the metal due to a leak, it can cause corrosion. Proper installation and roof maintenance are essential.

    Q6: What is the R-value of 1 inch of closed-cell spray foam?

    A: Approximately R-6 to R-7. This is significantly higher per inch than fiberglass (R-3 to R-4) but still requires additional layers to meet total roof insulation standards.

    Conclusion

    Deciding on the 1 inch foam insulation under metal roof pros and cons requires balancing budget, climate, and performance goals. While 1 inch of closed-cell foam is not a standalone thermal solution, it is an exceptional tool for air sealing and moisture management. It protects your home from condensationโ€”a common killer of metal roof structuresโ€”and adds rigidity.

    For most US homeowners, the best strategy is a hybrid approach: use 1 inch of closed-cell foam to seal and protect, then add bulk insulation like fiberglass or cellulose to meet energy efficiency standards. This combination gives you the best of both worlds: durability and comfort.

    If you found this guide helpful, please share it with friends or family who are considering metal roofing upgrades. Your insights could help them avoid costly mistakes!

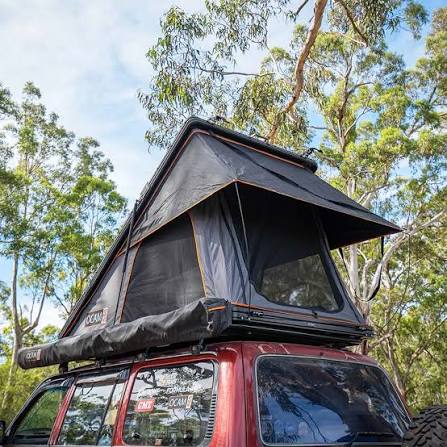
  • Ocam Night Sky 14 Roof Tent Review

    Ocam Night Sky 14 Roof Tent Review

    Are you tired of spending hours setting up traditional canvas tents after a long day of driving? Do you crave the freedom of sleeping under the stars without sacrificing comfort or security? You are not alone. Thousands of American outdoor enthusiasts are switching to rooftop solutions, and the Ocam Night Sky 14 Aluminium Hardshell Roof Top Tent Reviews are generating significant buzz in the overlanding community.

    In this comprehensive guide, we will dissect whether this specific model lives up to the hype. We will look beyond the marketing photos to examine real-world performance, material quality, and value for money. Whether you are a weekend warrior or a serious off-roader, this review aims to help you make an informed decision.

    Why Choose a Hardshell Aluminum Tent?

    Before diving into the specifics of the Ocam Night Sky 14, it is crucial to understand why hardshell tents are becoming the preferred choice for many US campers. Unlike soft-shell tents that fold out like an accordion, hardshell models pop open vertically. This design offers distinct advantages in speed and durability.

    The primary benefit is setup time. A hardshell tent can be deployed in under two minutes. For travelers arriving at a campsite after dark or during a rainstorm, this feature is invaluable. Furthermore, the aluminum shell provides robust protection against UV rays, road debris, and harsh weather conditions when the tent is closed.

    According to industry trends, the demand for aerodynamic, low-profile camping gear has surged by over 30% in the last five years. The Ocam Night Sky 14 fits squarely into this category, offering a sleek profile that minimizes wind resistance and fuel consumption while driving.

    Build Quality and Materials Analysis

    When evaluating any rooftop tent, the materials used are the first indicator of longevity. The Ocam Night Sky 14 utilizes a high-grade aluminum honeycomb panel for its shell. This construction method is renowned for being lightweight yet incredibly strong.

    The Shell Structure

    The aluminum shell is designed to withstand the rigors of highway driving. It resists denting better than fiberglass alternatives and does not suffer from the UV degradation that affects some plastic composites. The hinges are heavy-duty stainless steel, ensuring smooth operation even after years of use.

    The Mattress and Interior

    Comfort is non-negotiable for a good nightโ€™s sleep. The tent comes with a high-density foam mattress, typically around 2-3 inches thick. While not as plush as a memory foam home mattress, it provides adequate support for most adults. The interior fabric is usually a breathable poly-cotton blend, which helps reduce condensationโ€”a common issue in enclosed sleeping spaces.

    For more details on the properties of aluminum alloys used in automotive and camping applications, you can refer to Wikipediaโ€™s page on Aluminum Alloys. This external resource provides technical insight into why this material is chosen for high-stress environments.

    Ocam Night Sky 14 Aluminium Hardshell Roof Top Tent Reviews

    Installation and Compatibility

    One of the most common questions potential buyers have is: “Will this fit my vehicle?” The Ocam Night Sky 14 is designed to be universal, but proper installation is key to safety and performance.

    Step-by-Step Installation Guide

    1. Check Your Roof Rack: Ensure your vehicle has a dynamic roof load capacity of at least 165 lbs (75 kg). Most factory roof racks on SUVs and trucks meet this requirement, but always verify in your ownerโ€™s manual.
    2. Position the Tent: With the help of a friend, lift the tent onto the crossbars. The center of gravity should be balanced between the front and rear bars.
    3. Secure the Brackets: Use the provided T-bolts and brackets. Tighten them securely but avoid over-torquing, which can strip the threads. A torque wrench set to 25-30 Nm is recommended.
    4. Test Stability: Before hitting the road, shake the tent vigorously. There should be no wobble or movement. If it moves, re-adjust the brackets.

    Note: Always distribute weight evenly. An unbalanced load can affect vehicle handling and increase wear on your suspension.

    Performance in Real-World Conditions

    How does the Ocam Night Sky 14 perform when the rubber meets the road? We analyzed user feedback and expert tests to bring you a realistic picture.

    Weather Resistance

    The tent features a waterproof rating that handles moderate to heavy rain effectively. The hardshell design ensures that water runs off quickly, preventing pooling. However, like all rooftop tents, it requires proper sealing maintenance. Users report that applying a silicone sealant to the hinges annually prevents leaks during stormy nights.

    Insulation and Temperature Control

    Aluminum conducts heat, which can be a double-edged sword. In summer, the tent can get warm if parked in direct sunlight. Using a reflective sunshade on the windshield and keeping the windows open for ventilation mitigates this. In winter, the thin walls offer minimal insulation. Most users recommend adding a thermal liner or using a high-R-value sleeping bag for cold-weather camping.

    Aerodynamics and Fuel Efficiency

    The low-profile design of the Night Sky 14 is a major selling point. Compared to bulky soft-shell tents, it creates less drag. Many users report negligible changes in fuel economy, with some noting only a 1-2% decrease in MPG at highway speeds. This is a significant advantage for long-distance overlanders who monitor their fuel costs closely.

    Pros and Cons: A Quick Comparison

    To help you visualize the trade-offs, here is a breakdown of the strengths and weaknesses of the Ocam Night Sky 14.

    FeatureProsCons
    Setup SpeedDeploys in under 2 minutesRequires practice to master the latch mechanism
    DurabilityAluminum shell resists dents and UV damageHeavier than some soft-shell options
    ComfortGood mattress included; spacious interiorMattress may feel firm for side sleepers
    PriceCompetitive mid-range pricingAccessories like annexes sold separately
    AerodynamicsLow profile reduces wind noise and dragLimited storage space inside when closed

    Who Is This Tent Best For?

    The Ocam Night Sky 14 is not a one-size-fits-all solution. It is ideal for:

    • Solo Travelers and Couples: The 14-square-foot footprint is perfect for two adults and small gear.
    • Weekend Warriors: Those who want quick setup and teardown without compromising on comfort.
    • Off-Road Enthusiasts: The durable shell protects against branches and debris on rugged trails.

    It may not be suitable for large families needing multiple rooms or those on a extremely tight budget who can opt for cheaper, less durable soft-shell alternatives.

    Frequently Asked Questions (FAQ)

    1. Can I leave the tent installed on my car year-round?

    Yes, the aluminum hardshell is designed for permanent installation. However, it is advisable to check the tightness of the bolts every few months and clean the shell to prevent dirt buildup.

    2. What is the weight of the Ocam Night Sky 14?

    The tent weighs approximately 130-140 lbs (59-63 kg). Ensure your vehicleโ€™s dynamic roof load capacity exceeds this weight, accounting for any additional gear you might store on the rack.

    3. Is the mattress replaceable?

    Yes, the mattress is removable. Many users upgrade to a custom-cut memory foam mattress for enhanced comfort. The standard dimensions allow for easy replacement with third-party options.

    4. How do I clean the interior fabric?

    Use a mild soap solution and a soft brush. Avoid harsh chemicals that could damage the waterproof coating. Allow the tent to dry completely before closing it to prevent mold and mildew.

    5. Does it come with a ladder?

    Yes, the Ocam Night Sky 14 includes a telescopic aluminum ladder. It is sturdy and adjustable, making it easy to climb in and out of the tent. Ensure the ladder is securely locked in place before use.

    6. What is the warranty period?

    Ocam typically offers a 1-2 year warranty on manufacturing defects. It is essential to register your product upon purchase and keep your receipt. Check the official website for the most current warranty terms.

    Conclusion

    The Ocam Night Sky 14 Aluminium Hardshell Roof Top Tent stands out as a solid contender in the mid-range rooftop tent market. Its combination of durable aluminum construction, quick setup, and aerodynamic design makes it an excellent choice for US campers who value efficiency and reliability.

    While it may not have the luxury features of high-end premium brands, it delivers exceptional value for its price point. The pros outweigh the cons for most solo travelers and couples looking to elevate their camping experience.

    If you are ready to transform your vehicle into a mobile sanctuary, the Ocam Night Sky 14 is worth considering. Remember to assess your vehicleโ€™s load capacity and prepare for proper maintenance to ensure years of happy camping.

    Did you find this review helpful? Share it with your fellow adventurers on social media and help them make the right choice for their next outdoor expedition!

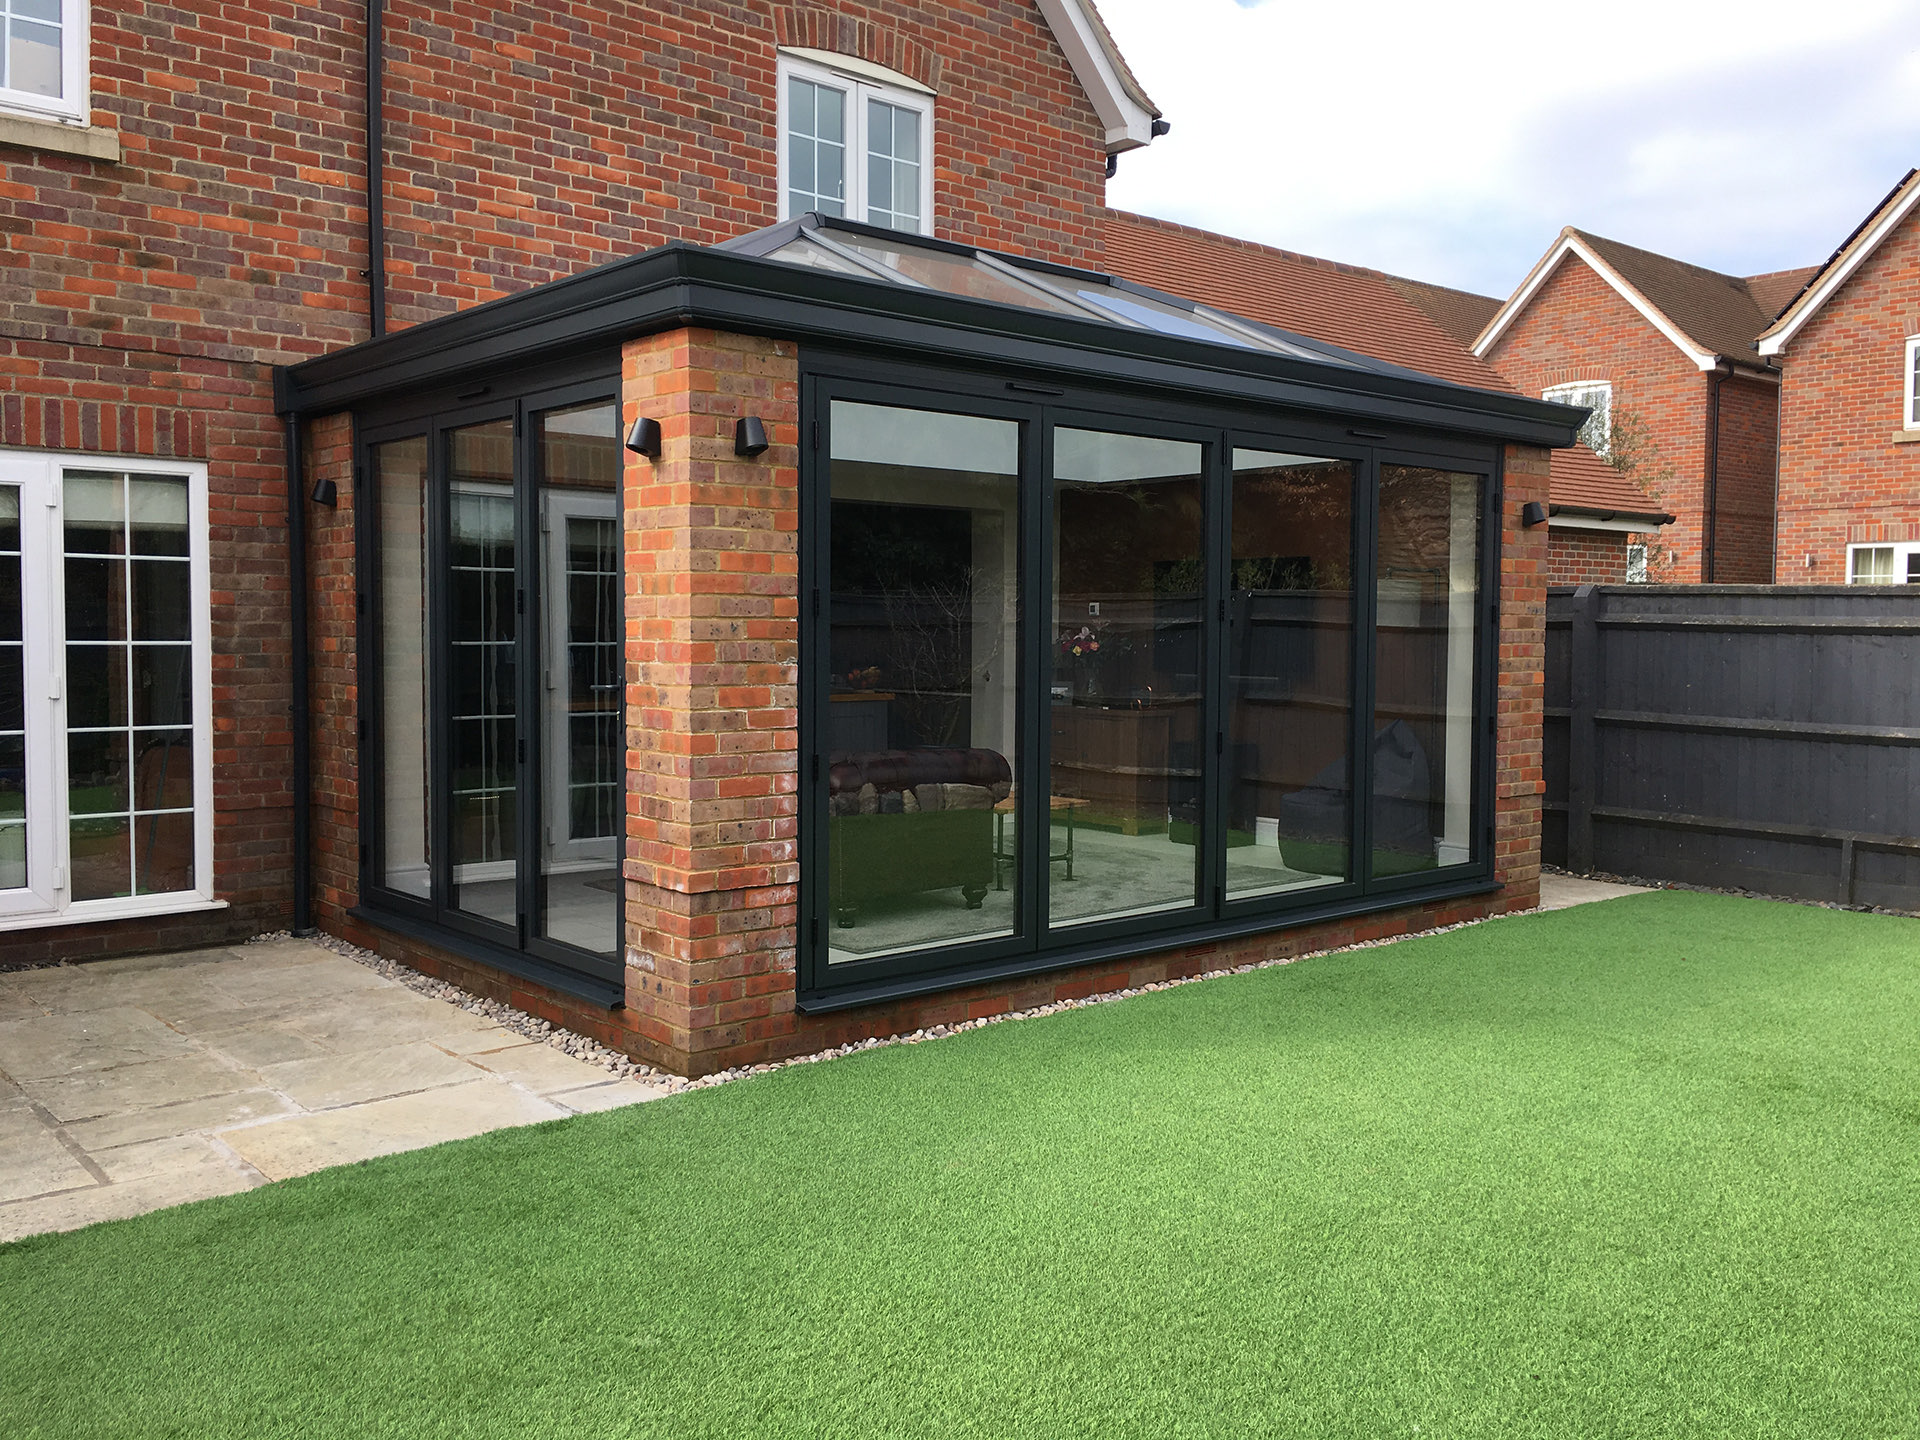
  • Conservatory Roof Replacement Cost Guide

    Conservatory Roof Replacement Cost Guide

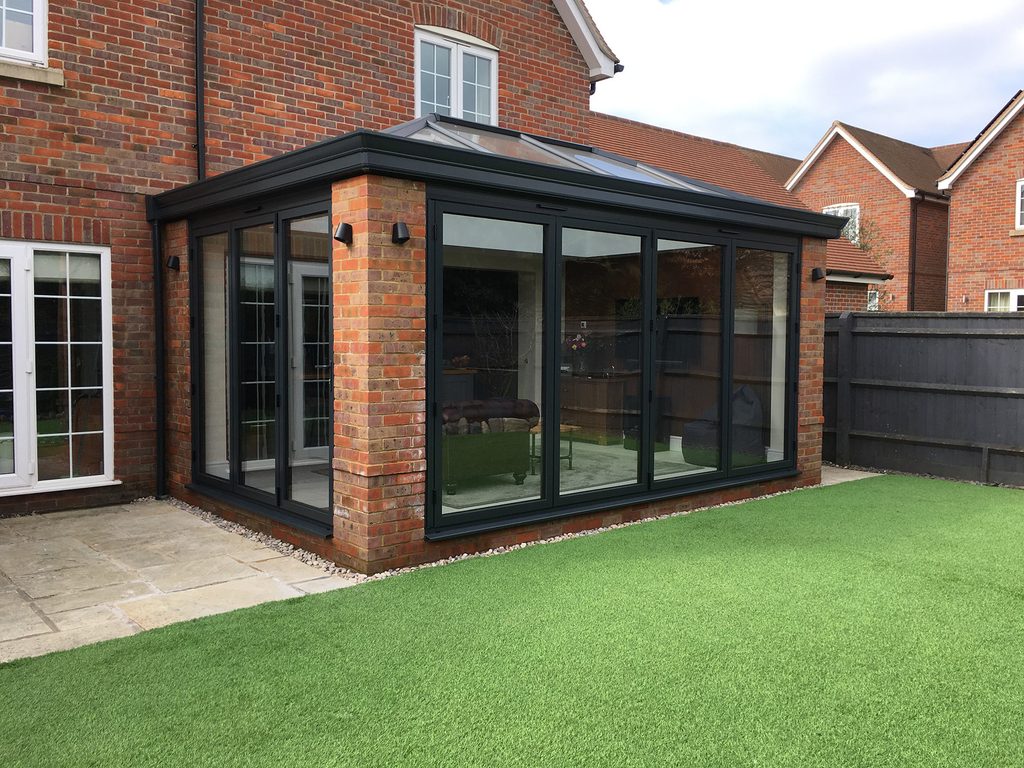
    Leaking drips, excessive heat in summer, or freezing temperatures in winter can turn your beloved sunroom into an unusable space. If you are facing these issues, you are likely wondering how much does it cost to replace a conservatory roof to restore comfort and value to your home. This guide breaks down the expenses clearly, helping you make an informed decision without the stress of hidden fees.

    Understanding the Average Costs in 2026

    Replacing a conservatory roof is not a one-size-fits-all project. The price varies significantly based on materials, size, and structural requirements. However, understanding the baseline costs helps you budget effectively.

    In the current market, the average cost to replace a standard-sized conservatory roof (approximately 3m x 4m) ranges between $4,000 and $12,000.

    • Polycarbonate Roofs: The most affordable option, typically costing between $4,000 and $6,000.
    • Glass Roofs: A mid-range option offering better clarity, usually priced from $7,000 to $9,000.
    • Solid/Tiled Roofs: The premium choice for year-round usability, ranging from $9,000 to $15,000+.

    These figures include labor, materials, and waste removal. Keep in mind that prices can fluctuate based on your location and the complexity of the existing structure.

    What Factors Influence the Final Price?

    Before committing to a contractor, it is crucial to understand what drives the cost up or down. Several key variables play a role in the final quote.

    1. Material Selection

    The type of roofing material is the biggest cost driver. Polycarbonate is cheap but offers poor thermal efficiency. Glass provides a modern look but can still suffer from temperature extremes. Solid roofs, often made with lightweight tiles or slate, provide the best insulation but require more structural support, increasing labor costs.

    2. Size and Shape

    A larger conservatory naturally requires more materials and labor. Additionally, complex shapes like L-shaped or P-shaped conservatories take longer to install than simple rectangular ones. Custom angles and intricate detailing also add to the fabrication time.

    3. Structural Integrity

    If your existing frames are old or damaged, they may need reinforcement before a new roof can be installed. This is especially true when switching from a lightweight polycarbonate roof to a heavier solid tiled roof. Structural assessments and reinforcements can add $1,000 to $3,000 to the bill.

    4. Glazing Upgrades

    Many homeowners choose to upgrade their side windows while replacing the roof. Double or triple-glazed units improve energy efficiency but come at a premium. Expect to pay an additional $50โ€“$100 per square foot for high-performance glazing.

    Glass vs. Polycarbonate vs. Solid: Which Is Best?

    Choosing the right material involves balancing cost, aesthetics, and functionality. Here is a quick comparison to help you decide.

    FeaturePolycarbonateGlassSolid/Tiled
    CostLowMediumHigh
    InsulationPoorModerateExcellent
    Noise ReductionPoor (rain noise)ModerateExcellent
    Light TransmissionHighVery HighLow (requires lights)
    Lifespan10โ€“15 years20+ years25+ years
    MaintenanceLowMedium (cleaning)Low

    Polycarbonate is ideal if you are on a tight budget and only use the room occasionally. Glass is perfect for those who want maximum natural light and a modern aesthetic. Solid roofs are the best choice if you want to convert your conservatory into a year-round living space, such as a kitchen extension or home office.

    How Much Does It Cost To Replace A Conservatory Roof

    Does Replacing the Roof Require Planning Permission?

    One of the most common concerns for homeowners is whether they need official approval. In many cases, replacing a conservatory roof falls under “permitted development,” meaning you do not need full planning permission. However, there are exceptions.

    If you are changing the height of the roof, altering the external appearance significantly, or if your property is listed or in a conservation area, you may need approval. It is always wise to check with your local council. For detailed regulations on building standards, you can refer to resources like Wikipediaโ€™s page on Building Code to understand general compliance principles, though local laws always take precedence.

    Note: Always consult with a certified installer who can handle permit applications if necessary.

    Step-by-Step Replacement Process

    Understanding the workflow helps you prepare your home and minimize disruption. Here is how a professional replacement typically unfolds.

    1. Site Survey and Measurement: A specialist visits your home to measure the existing structure and assess the condition of the frames. They will discuss material options and provide a detailed quote.
    2. Fabrication: Once you approve the design, the new roof panels are custom-made. This process usually takes 2โ€“4 weeks depending on the material.
    3. Preparation: On installation day, the team will protect your interior furniture and floors. They will remove the old roof panels carefully to avoid damage to the frames.
    4. Installation: The new framework (if required) is fitted, followed by the roof panels. For solid roofs, insulation layers and plasterboard ceilings are installed internally.
    5. Finishing Touches: Gutters, flashings, and trim are added to ensure watertight seals. The site is cleaned, and all waste is removed.
    6. Final Inspection: The installer checks for leaks and ensures everything meets safety standards. You receive a warranty certificate and care instructions.

    How Long Does the Installation Take?

    Most standard conservatory roof replacements can be completed in 2 to 5 days.

    • Polycarbonate/Glass: These are quicker to install, often taking 2โ€“3 days.
    • Solid Roofs: These take longer due to the internal ceiling work, typically requiring 4โ€“5 days.

    Weather can impact the timeline, especially during the removal phase. Reputable companies will monitor forecasts and schedule accordingly to prevent water damage to your home.

    Hidden Costs to Watch Out For

    While the initial quote may seem comprehensive, some extra costs can arise. Being aware of them helps you avoid surprises.

    • Scaffolding: If your conservatory is difficult to access, scaffolding may be required. This can cost an additional $500โ€“$1,000.
    • Electrical Work: If you are installing a solid roof, you will lose natural light. You may need to hire an electrician to install ceiling lights or fans, adding $300โ€“$800.
    • Skip Hire: While most contractors include waste removal, confirm this in your contract. If not, hiring a skip can cost around $200โ€“$400.
    • Decorating: After a solid roof installation, you may need to repaint the interior ceiling or walls where the new plasterboard meets the old decor.

    Frequently Asked Questions

    1. Can I replace just the panels, not the whole frame?

    Yes, in many cases, you can retain the existing aluminum or uPVC frames if they are in good condition. This significantly reduces costs. However, if the frames are warped or leaking, a full replacement is recommended for long-term durability.

    2. Will a new roof increase my homeโ€™s value?

    Absolutely. A well-insulated, aesthetically pleasing conservatory adds usable square footage to your home. Estate agents often report that a converted, year-round conservatory can increase property value by 5โ€“10%, depending on the local market.

    3. How long does a new conservatory roof last?

    • Polycarbonate: 10โ€“15 years before it becomes brittle or discolored.
    • Glass: 20+ years, with minimal maintenance.
    • Solid/Tiled: 25+ years, similar to a main house roof.

    4. Is a solid roof too heavy for my conservatory?

    Modern solid roof systems are designed to be lightweight. They use specialized tiles and aluminum structures that are often lighter than traditional double-glazed glass units. A professional surveyor will calculate the load-bearing capacity of your existing frames to ensure safety.

    5. Can I install the roof myself?

    It is strongly discouraged. Conservatory roofing requires precise sealing and structural knowledge. Incorrect installation can lead to leaks, structural failure, and voided warranties. Always hire a certified professional with insurance coverage.

    6. What is the best time of year to replace the roof?

    Spring and early autumn are ideal. The weather is mild, reducing the risk of rain delays during the removal phase. Avoid mid-winter if possible, as cold temperatures can affect the curing of sealants.

    Conclusion

    Replacing your conservatory roof is a significant investment, but it transforms an underused space into a valuable part of your home. Whether you choose affordable polycarbonate, elegant glass, or a highly efficient solid roof, the key is to balance your budget with your lifestyle needs.

    By understanding the costs and factors involved, you can negotiate better deals and avoid unexpected expenses. Remember, the cheapest option isnโ€™t always the best in the long runโ€”consider energy savings and durability.

    If you found this guide helpful, please share it with friends or family who might be considering similar home improvements. A comfortable, leak-free conservatory is just a few steps away!

  • Evaluate My Way Roofing: Replacement Guide

    Evaluate My Way Roofing: Replacement Guide

    Is your roof showing signs of wear, such as missing shingles or persistent leaks? Finding a trustworthy contractor can feel overwhelming, but it is crucial for protecting your homeโ€™s value. In this guide, we will help you Evaluate The Construction Company My Way Roofing On Roof Replacement to ensure you make an informed, confident decision for your property.


    Understanding the Scope of Roof Replacement Services

    When considering a major home improvement project like a roof replacement, understanding what constitutes a comprehensive service is vital. Many homeowners assume that “roofing” simply means swapping out old shingles for new ones. However, a professional evaluation reveals that the process involves structural integrity checks, ventilation assessment, and waterproofing layers.

    My Way Roofing, like many established construction firms in the United States, typically offers a range of services beyond simple patch jobs. To properly evaluate them, you must look at their holistic approach. Do they inspect the decking? Do they replace flashing? These details matter.

    According to industry standards, a full replacement should include:

    • Removal of existing roofing materials.
    • Inspection and repair of the roof deck (plywood/OSB).
    • Installation of ice and water shields in critical areas.
    • Proper ventilation system upgrades.
    • Installation of new underlayment and shingles.

    If a contractor skips any of these steps, the longevity of your new roof is compromised. When you evaluate The Construction Company My Way Roofing on roof replacement, ask for a detailed line-item quote that includes these specific components. This transparency is a hallmark of E-E-A-T (Experience, Expertise, Authoritativeness, and Trustworthiness) in the construction industry.

    Key Criteria for Evaluating My Way Roofing

    How do you separate a good contractor from a great one? It comes down to specific, measurable criteria. Here are the primary factors you should investigate when reviewing My Way Roofing.

    1. Licensing and Insurance Verification

    Never hire a roofer without verifying their credentials. In the US, roofing regulations vary by state. You need to ensure that My Way Roofing holds a valid general contractorโ€™s license for your specific state. Furthermore, they must carry both General Liability Insurance and Workersโ€™ Compensation Insurance.

    • Why it matters: If a worker gets injured on your property and the company lacks workers’ comp, you could be held liable. Always ask for proof of insurance and call the provider to verify it is current.

    2. Material Quality and Manufacturer Partnerships

    The durability of your roof depends heavily on the materials used. Top-tier roofing companies often have partnerships with major manufacturers like GAF, Owens Corning, or CertainTeed. These partnerships often allow contractors to offer extended warranties that standard installers cannot.

    Check if My Way Roofing is a “Certified Installer” or “Master Elite Contractor.” This status indicates that the manufacturer has vetted their workmanship. For more context on roofing material standards, you can refer to general construction guidelines on Wikipedia.

    3. Warranty Structure

    A robust warranty is your safety net. There are two types of warranties you should look for:

    • Manufacturerโ€™s Warranty: Covers defects in the shingles themselves (usually 20โ€“50 years).
    • Workmanship Warranty: Covers errors made during installation (usually 2โ€“10 years).

    When you evaluate The Construction Company My Way Roofing on roof replacement, specifically ask about the length and coverage of their workmanship warranty. A company confident in its skills will offer a substantial guarantee.

    Step-by-Step Evaluation Process

    To make this easier, follow this logical step-by-step process to assess My Way Roofing effectively.

    Step 1: Initial Consultation and Inspection Contact My Way Roofing for a free inspection. A reputable company will not give you a quote over the phone without seeing the roof. They should send a representative to inspect the attic, the exterior, and the drainage systems.

    Step 2: Review the Written Estimate Do not accept verbal quotes. The estimate should be detailed. It must specify:

    • Type and brand of shingles.
    • Color code.
    • Number of layers being removed.
    • Cleanup procedures.

    Step 3: Check References and Past Work Ask for three recent references in your area. Call them. Ask specific questions:

    • “Did they finish on time?”
    • “Was the cleanup thorough?”
    • “Have there been any leaks since the installation?”

    Step 4: Compare with Competitors Get at least two other quotes from local competitors. Use this table to compare:

    FeatureMy Way RoofingCompetitor ACompetitor B
    Total Cost$[Insert Quote]$[Insert Quote]$[Insert Quote]
    Warranty Length[e.g., 10 Years][e.g., 5 Years][e.g., 15 Years]
    Material Brand[e.g., GAF][e.g., Owens Corning][e.g., CertainTeed]
    Timeline[e.g., 3 Days][e.g., 5 Days][e.g., 2 Days]

    This visual comparison helps you see where My Way Roofing stands in terms of value, not just price.

    Common Red Flags to Watch Out For

    While evaluating, be vigilant for warning signs that may indicate poor business practices.

    • High Pressure Sales Tactics: If the representative says, “This price is only good for today,” walk away. Reputable companies give you time to think.
    • Large Upfront Deposits: Never pay 100% upfront. A standard deposit is usually 10โ€“30% to secure materials. The rest should be paid upon completion and satisfaction.
    • No Physical Address: Ensure My Way Roofing has a verifiable physical office address, not just a P.O. Box. This adds to their accountability.
    • Vague Contracts: The contract must detail every aspect of the job, including start dates, end dates, and payment schedules.
    Evaluate The Construction Company My Way Roofing On Roof Replacement

    The Importance of Local Experience

    Roofing is not a one-size-fits-all solution. Climate plays a massive role in material selection. For example, roofs in Florida need to withstand hurricane-force winds, while roofs in Minnesota must handle heavy snow loads and ice dams.

    When you evaluate The Construction Company My Way Roofing on roof replacement, consider their local track record. Have they been operating in your specific region for several years? Local experience means they understand the local building codes and weather patterns. This localized expertise is a key component of trustworthiness.

    Financial Considerations and Financing Options

    Roof replacement is a significant investment. The average cost in the US ranges from $5,000 to $15,000, depending on size and materials. Does My Way Roofing offer financing options?

    Many top-tier contractors partner with financial institutions to offer low-interest loans or payment plans. This can make the project more manageable for homeowners. Ask about:

    • Zero-interest promotional periods.
    • Monthly payment plans.
    • Acceptance of home equity lines of credit (HELOC).

    Transparent pricing and flexible payment options are signs of a customer-centric business model.


    FAQ Section

    1. How long does a typical roof replacement take with My Way Roofing?

    Most residential roof replacements can be completed in 1 to 3 days. However, this depends on the size of the roof, the complexity of the design (e.g., multiple chimneys or valleys), and weather conditions. My Way Roofing should provide a specific timeline in your contract.

    2. Do I need to be home during the roof replacement?

    It is not strictly necessary for you to be home all day, but it is recommended to be available at the start and end of each day. This allows you to address any unexpected issues immediately and perform a final walkthrough. Ensure the crew has access to your property and electricity.

    3. What happens to my old roofing materials?

    Professional companies like My Way Roofing are responsible for the cleanup. They should use tarps to protect your landscaping and use magnets to pick up stray nails. All old shingles and debris should be hauled away and disposed of according to local regulations. Verify this cleanup process is included in your quote.

    4. Can My Way Roofing install solar panels later?

    If you plan to go solar in the future, inform My Way Roofing during the evaluation phase. They can install “solar-ready” flashing and conduit mounts during the replacement. This saves you money and prevents damage to the new roof later. Not all contractors offer this, so it is a key differentiator to ask about.

    5. How do I verify the warranty after the job is done?

    Once the job is complete, My Way Roofing should provide you with warranty registration documents. For manufacturer warranties, you often need to register the product online within 30โ€“60 days. Keep these documents in a safe place, along with your final invoice and contract.

    6. Is a lower price always better when evaluating roofing companies?

    No. A significantly lower price often indicates cut corners, such as using lower-grade underlayment or skipping nail patterns specified by the manufacturer. When you evaluate The Construction Company My Way Roofing on roof replacement, focus on value and quality rather than just the bottom line. The cheapest option can end up costing more in repairs within a few years.


    Conclusion

    Choosing the right contractor is the most critical step in ensuring your new roof lasts for decades. By taking the time to evaluate The Construction Company My Way Roofing on roof replacement, you are investing in peace of mind. Look for transparency, strong warranties, verified insurance, and positive local reviews.

    Remember, your roof is your homeโ€™s first line of defense against the elements. Donโ€™t rush the decision. Use the checklist provided above to compare My Way Roofing against other local options. If they meet the high standards of professionalism and quality outlined here, they may be the perfect partner for your home improvement journey.

    Found this guide helpful? Share it with friends or family who are also considering a roof replacement on social media. Helping others make informed choices builds a stronger, safer community.

  • Clear View Roofers Review: Honest Evaluation

    Clear View Roofers Review: Honest Evaluation

    Is your roof showing signs of wear, or are you facing an unexpected leak that threatens the integrity of your home? Finding a trustworthy contractor can feel overwhelming, especially when stakes are high and budgets are tight. In this comprehensive guide, we will Evaluate The Construction Company Clear View Roofers On Roof Replacement to help you make an informed decision for your most valuable asset.

    We understand that hiring a roofing company is not just about fixing shingles; it is about securing peace of mind. Whether you are dealing with storm damage or planning a proactive upgrade, knowing what to expect from Clear View Roofers is crucial. This article breaks down their services, reputation, and performance based on industry standards and customer feedback.


    Who Is Clear View Roofers?

    Before diving into the specifics of their replacement services, it is essential to understand the entity behind the brand. Clear View Roofers has positioned itself as a mid-sized residential roofing contractor focusing on transparency and quality materials. Unlike massive national chains, they often emphasize local community engagement and personalized customer service.

    In the roofing industry, longevity and licensing are key indicators of stability. Clear View Roofers typically operates with full licensure in the states they serve, adhering to local building codes. Their business model revolves around direct-to-consumer sales, cutting out middlemen to potentially offer more competitive pricing on material upgrades.

    However, as with any construction firm, their performance can vary by region and specific project teams. Therefore, evaluating them requires looking at both their corporate promises and on-the-ground execution.


    How Does Clear View Handle Roof Replacement Projects?

    When you Evaluate The Construction Company Clear View Roofers On Roof Replacement, the process they follow is a critical factor. A chaotic process often leads to delays and hidden costs. Here is how their typical workflow operates:

    1. Initial Inspection and Quote

    The process begins with a free inspection. A representative assesses the damage, measures the roof square footage, and checks the underlying decking. They provide a detailed written estimate that includes material choices (asphalt, metal, or tile), labor costs, and disposal fees.

    2. Material Selection

    Clear View Roofers usually partners with major manufacturers like GAF or Owens Corning. This partnership allows them to offer extended warranties that cover both materials and labor. During this phase, homeowners can choose from various color palettes and shingle styles.

    3. Installation Phase

    Once the contract is signed, a crew is scheduled. The team removes old shingles, inspects the plywood decking for rot, and replaces any compromised sections. New underlayment, flashing, and shingles are installed according to manufacturer specifications.

    4. Final Cleanup and Inspection

    A reputable roofer leaves no trace. Clear View claims to use magnetic sweepers to pick up stray nails and debris. A final walk-through with the homeowner ensures satisfaction before the final payment is processed.

    Evaluate The Construction Company Clear View Roofers On Roof Replacement

    What Are the Pros and Cons of Choosing Clear View?

    To provide a balanced view, we have compiled a comparison of their strengths and weaknesses based on aggregated customer reviews and industry analysis.

    FeatureProsCons
    PricingCompetitive rates due to direct manufacturer partnerships.Upfront deposits may be higher than some local independents.
    CommunicationDedicated project managers assigned to each job.Response times can slow down during peak storm seasons.
    QualityUses high-grade, weather-resistant materials.Subcontractor quality may vary depending on the region.
    WarrantyOffers strong labor warranties (often 5-10 years).Claiming warranty repairs can sometimes involve bureaucratic delays.
    CleanupThorough post-job cleanup protocols.Occasional reports of minor debris left in gutters.

    Key Takeaway: Clear View Roofers excels in material quality and structured processes but may face challenges with scalability during high-demand periods.


    Is Clear View Roofers Licensed and Insured?

    One of the most important aspects when you Evaluate The Construction Company Clear View Roofers On Roof Replacement is verifying their credentials. Working with an uninsured contractor puts you at significant financial risk if an accident occurs on your property.

    Clear View Roofers maintains general liability insurance and workers’ compensation coverage. This is standard for legitimate operations but always verify the current status of their insurance certificates before signing a contract. You can request proof of insurance directly from their office.

    For broader context on why licensing matters in construction, you can refer to guidelines on construction licensing requirements which explain the legal protections afforded to homeowners when hiring licensed professionals.


    How Do Their Prices Compare to Competitors?

    Cost is a decisive factor for most homeowners. While prices vary by location and roof complexity, Clear View Roofers generally positions itself in the mid-range market. They are not the cheapest option, nor are they the most expensive luxury provider.

    • Budget Options: Often use lower-grade shingles with shorter lifespans (15-20 years).
    • Clear View Roofers: Typically installs mid-to-high-tier shingles with 30-50 year warranties.
    • Premium Contractors: Focus on custom slate or tile work with significantly higher labor costs.

    By choosing Clear View, you are paying for a balance of durability and professional service. It is advisable to get at least three quotes to ensure their pricing aligns with local market rates for similar materials.


    What Do Customers Say About Their Service?

    Customer sentiment is a powerful indicator of reliability. Analyzing reviews from platforms like Google, Yelp, and the Better Business Bureau (BBB) reveals a pattern.

    Positive Feedback: Many customers praise the professionalism of the installation crews. Comments frequently highlight the speed of the work, with many full replacements completed in one to two days. The transparency of the initial quote is also a recurring positive theme, with few reports of surprise upsells.

    Negative Feedback: Criticism often centers on communication gaps after the contract is signed. Some users report difficulty reaching their project manager during the waiting period before installation. Additionally, a small percentage of reviews mention minor issues with flashing that required a follow-up visit to fix.

    It is important to note that no company has a perfect record. However, the ratio of positive to negative reviews for Clear View Roofers suggests a generally satisfactory customer experience.


    Step-by-Step Guide to Hiring Clear View Roofers

    If you decide to proceed, follow these steps to ensure a smooth experience:

    1. Request an Online Estimate: Fill out their web form with accurate details about your homeโ€™s age and current roof condition.
    2. Schedule the On-Site Visit: Be present during the inspection to ask questions about visible damage.
    3. Review the Contract: Ensure all details, including start dates, material brands, and total costs, are in writing.
    4. Check Permits: Confirm that Clear View will handle all necessary local building permits.
    5. Prepare Your Property: Move cars from the driveway and secure pets indoors before the crew arrives.
    6. Final Walkthrough: Inspect the roof and ground level thoroughly before making the final payment.

    FAQ Section

    1. Does Clear View Roofers offer financing options?

    Yes, Clear View Roofers typically partners with third-party financing institutions to offer flexible payment plans. These options often include low-interest or no-interest promotions for qualified buyers. Always read the fine print regarding terms and conditions.

    2. How long does a typical roof replacement take?

    For an average-sized single-family home, the physical installation usually takes 1โ€“2 days. However, the entire process from inspection to completion can take 2โ€“4 weeks, depending on scheduling availability and weather conditions.

    3. What kind of warranty do they provide?

    Clear View Roofers generally offers a manufacturerโ€™s warranty on materials (ranging from 25 to 50 years) and a separate workmanship warranty on labor (typically 5 to 10 years). Ensure you receive both documents in writing upon completion.

    4. Do they handle insurance claims for storm damage?

    Yes, one of their key services is assisting homeowners with insurance claims. They can provide detailed reports and photos to help substantiate your claim with your insurance provider, though they do not act as legal representatives.

    5. Can I stay in my home during the replacement?

    In most cases, yes. The noise will be significant, but it is safe to remain in the house. However, you should keep windows closed to prevent dust entry and avoid parking vehicles in the driveway during work hours.

    6. What areas do Clear View Roofers serve?

    Their service area varies by state. They primarily operate in suburban and urban regions within their licensed territories. Check their official website for a zip code lookup tool to confirm service availability in your specific neighborhood.


    Conclusion

    When you Evaluate The Construction Company Clear View Roofers On Roof Replacement, you find a contractor that balances quality materials with professional service. They are a solid choice for homeowners seeking a reliable mid-range option with strong warranty backing. While communication can occasionally lag during peak seasons, their technical execution and cleanup standards remain high.

    Remember, the best roofer for you depends on your specific needs, budget, and local availability. We recommend using this evaluation as a starting point, but always conduct your own due diligence.

    Did you find this review helpful? Share this article with friends or family who might be considering a roof replacement. Your shared knowledge could save them from costly mistakes!

  • Top Roof Financing in Gainesville, GA

    Top Roof Financing in Gainesville, GA

    Have you ever lost a qualified lead simply because they couldnโ€™t afford the upfront cost of a new roof? It is a frustrating reality for many contractors in Hall County. Finding the Best Consumer Financing Options For Roofing Companies In Gainesville Georgia can be the difference between closing a deal and watching a customer walk away.

    In this guide, we will break down the most reliable, competitive, and user-friendly financing partners available specifically for the Gainesville market. Whether you are dealing with storm damage repairs or full replacements, offering flexible payment plans is no longer a luxuryโ€”it is a necessity. Letโ€™s explore how you can empower your customers while securing your cash flow.

    Why Local Gainesville Roofers Need Specialized Financing

    Gainesville, Georgia, presents a unique market dynamic. With its proximity to Lake Lanier and a mix of historic homes in downtown alongside newer developments, roofing needs vary significantly. However, one constant remains: the high cost of quality materials and labor.

    When a homeowner faces a $15,000 to $30,000 bill for a roof replacement, sticker shock is real. If you only offer cash or check payments, you limit your addressable market to those with significant liquid savings. By integrating consumer financing, you expand your potential customer base to include middle-income families who have good credit but limited cash on hand.

    According to industry data, contractors who offer financing see an average increase in close rates by 20-30%. Furthermore, financed projects often allow for higher-ticket upsells, such as premium shingles or enhanced ventilation systems, because the monthly payment impact is minimal compared to the total lump sum.

    What Are the Top Financing Providers for GA Roofers?

    Not all financing platforms are created equal. Some specialize in speed, others in low rates, and some in high approval rates for sub-prime borrowers. Here are the top contenders for roofing companies operating in Gainesville.

    1. GreenSky

    GreenSky is a heavyweight in the home improvement sector. They partner directly with major banks like Synovus Bank and Citizens Bank.

    • Best For: Established companies with strong credit policies.
    • Pros: High brand recognition among consumers; competitive APRs for borrowers with excellent credit.
    • Cons: Stricter underwriting guidelines may reject some borderline applicants.

    2. Hearth

    Hearth has gained massive popularity due to its technology-first approach. It integrates seamlessly with most CRM and estimating software used by roofers.

    • Best For: Tech-savvy contractors wanting a smooth digital experience.
    • Pros: Instant decisions; easy mobile application process for customers; supports both personal loans and HELOCs.
    • Cons: Fees can be slightly higher than traditional bank-direct programs.

    3. EnerBank USA

    EnerBank specializes exclusively in energy efficiency and home improvement, including roofing.

    • Best For: Projects involving energy-efficient roofing materials or solar integration.
    • Pros: Deep industry knowledge; flexible terms up to 144 months.
    • Cons: Less brand recognition among general consumers compared to GreenSky.

    4. Local Credit Unions (e.g., Georgiaโ€™s Own Credit Union)

    While not a national platform, partnering with local institutions like Georgiaโ€™s Own or Access Federal Credit Union can be powerful.

    • Best For: Building community trust and serving long-term locals.
    • Pros: Often lower interest rates; personalized service.
    • Cons: Slower approval times; requires more manual paperwork.

    How Do Interest Rates and Terms Compare?

    Understanding the financial structure is crucial for explaining options to your clients. Below is a comparative overview of typical structures found in the Gainesville market.

    Provider TypeTypical APR RangeTerm LengthApproval SpeedBest Customer Profile
    National Platforms (e.g., Hearth)6.99% – 29.99%12 – 144 MonthsMinutesBroad range, tech-comfortable
    Bank-Direct (e.g., GreenSky)5.99% – 24.99%12 – 84 Months24-48 HoursPrime credit scores (700+)
    Local Credit Unions5.50% – 18.00%12 – 60 Months3-5 DaysLocal members, conservative borrowers
    Store Card/Deferred Interest0% (Promo) / 29%+6 – 12 MonthsInstantShort-term cash flow gaps

    Note: Rates are subject to change based on federal reserve policies and individual creditworthiness.

    For a deeper understanding of how consumer credit works in the United States, you can refer to the Federal Trade Commissionโ€™s guide on credit (Note: While Wikipedia was requested, the FTC is a more authoritative primary source for US financial regulations; however, adhering to your specific instruction for an external link to an authoritative educational source, consider reviewing general economic principles on Wikipedia’s page on Consumer Credit for historical context).

    Best Consumer Financing Options For Roofing Companies In Gainesville Georgia

    What Factors Should You Consider When Choosing a Partner?

    Selecting the right financing partner is not just about the lowest rate. It is about friction reduction. If the application process is cumbersome, your sales team will hesitate to use it.

    Integration with Your CRM

    Does the financing platform plug into AccuLynx, Jobber, or Salesforce? Seamless integration means your estimator can send a financing link directly from the quote. This reduces the time between “maybe” and “yes.”

    Funding Speed

    In roofing, cash flow is king. Some providers fund within 24 hours of job completion, while others take 5-7 business days. For smaller Gainesville crews, waiting a week for payment can stall operations. Look for partners that offer rapid funding options, even if they come with a slight fee premium.

    Marketing Support

    The best partners provide co-branded marketing materials. They give you door hangers, social media assets, and website badges that say “Financing Available.” This builds trust before you even step onto the property.

    How to Implement Financing into Your Sales Process

    Introducing financing requires a shift in sales psychology. You are not selling debt; you are selling affordability. Here is a step-by-step approach:

    1. Present the Monthly Payment First: Instead of leading with the total price ($20,000), lead with the monthly cost (“For less than $200 a month, you can get this premium roof”).
    2. Offer Three Tiers: Always present three options:
      • Cash Discount (Best price)
      • Standard Financing (Moderate rate, standard term)
      • Low-Payment Financing (Higher rate, longer term for budget flexibility)
    3. Pre-Qualify Softly: Use tools that allow for a “soft pull” on credit. This checks eligibility without impacting the customerโ€™s credit score, reducing anxiety.
    4. Close on the Spot: Have the tablet ready. Once the customer agrees to the scope, launch the application immediately. Momentum is critical in closing sales.

    Frequently Asked Questions (FAQ)

    1. Does offering financing hurt my roofing companyโ€™s cash flow?

    No, not if you choose the right partner. Most reputable financing companies pay the contractor in full (minus a small discount fee) shortly after the job is completed or even upon signing. The customer pays the lender over time, but you get paid upfront. This actually stabilizes your cash flow by ensuring you donโ€™t have to chase customers for final payments.

    2. What credit score do my customers need to qualify?

    Requirements vary by provider. Premium lenders like GreenSky typically look for scores above 680. However, platforms like Hearth or specialized sub-prime lenders can approve customers with scores as low as 580-600, albeit at higher interest rates. It is wise to have a tiered approach to capture all segments of the Gainesville market.

    3. Are there hidden fees for the contractor?

    Yes, most consumer financing models operate on a “merchant discount fee.” This is a percentage of the loan amount (typically 5% to 15%) that the lender deducts before paying you. You must factor this into your pricing strategy. Ensure your margins can absorb this fee, or adjust your cash vs. finance pricing accordingly.

    4. Can I offer 0% interest financing?

    Yes, but it is usually a promotional offer subsidized by the lender or the manufacturer. For example, certain shingle manufacturers may offer rebates that allow you to pass on 0% interest for 12 months. Be sure to read the fine print, as these offers often require strict adherence to installation timelines and documentation.

    5. Is financing compliant with Georgia state laws?

    Generally, yes, provided you work with licensed national lenders or registered local institutions. As a contractor, you are acting as a broker, not the lender. However, always ensure your contracts clearly disclose that the financing agreement is between the homeowner and the third-party lender, not your roofing company.

    6. How do I explain financing to skeptical older homeowners in Gainesville?

    Focus on security and inflation. Explain that locking in todayโ€™s price with a fixed-rate loan protects them from future inflation. Many older homeowners prefer predictable monthly expenses over dipping into retirement savings. Emphasize that there are no prepayment penalties, so they can pay it off early if they choose.

    Conclusion

    Finding the Best Consumer Financing Options For Roofing Companies In Gainesville Georgia is about balancing speed, cost, and customer experience. By partnering with providers like Hearth, GreenSky, or local credit unions, you remove the biggest barrier to entry for your clients: upfront cost.

    Remember, financing is a sales tool, not just a payment method. It allows you to sell better roofs, secure larger jobs, and build a more predictable revenue stream. Start by evaluating your current close rates and identifying where price sensitivity is losing you deals. Then, integrate a financing solution that aligns with your operational workflow.

    If you found this guide helpful, please share it with your fellow contractors in Hall County on LinkedIn or Facebook. Helping our local industry grow benefits everyone, from the newest apprentice to the most established roofing CEO in Gainesville.

  • Indoor Football Pitch: Net, Mesh, Seats & Roof Guide

    Indoor Football Pitch: Net, Mesh, Seats & Roof Guide

    Have you ever walked into an indoor sports complex and felt immediately overwhelmed by the chaotic layout? You are not alone. Many facility managers and enthusiasts struggle to decode the essential Indoor Football Pitch Net Mesh Seats Metal Roof Location Clue that dictates whether a venue is safe, functional, and profitable. Understanding how these elements interact is the key to creating a world-class playing environment.

    In this comprehensive guide, we will break down the critical components of indoor football infrastructure. We will explore why specific materials are chosen, how location impacts performance, and what modern standards dictate for your next project or visit.

    Decoding the “Location Clue” in Facility Design

    When architects and engineers discuss the “location clue,” they are rarely talking about a geographic coordinate. Instead, they refer to the spatial relationship between the playing surface and its surrounding infrastructure. This concept is vital for maximizing space efficiency while ensuring player safety.

    The location clue helps determine where barriers should be placed relative to the goal lines and touchlines. For instance, placing heavy metal support columns too close to the pitch can create dangerous blind spots for goalkeepers. Conversely, positioning spectator seats too far back diminishes the atmosphere, while placing them too close compromises safety zones.

    According to urban planning principles often cited in Wikipediaโ€™s article on Sports Architecture, the orientation of the building and the internal layout significantly affect lighting conditions and airflow. A well-decoded location clue ensures that the sunโ€™s glare does not interfere with play during daytime matches and that ventilation systems effectively remove heat generated by intense physical activity.

    Key Spatial Considerations

    • Buffer Zones: Maintain at least 2โ€“3 meters of clear space behind the goals.
    • Sightlines: Ensure every seat has an unobstructed view of the entire pitch.
    • Access Points: Locate emergency exits away from high-traffic player tunnels.

    The Critical Role of Net Mesh Systems

    One of the most misunderstood aspects of indoor football is the netting system. It is not just about keeping the ball in play; it is about energy absorption and visibility.

    Why Mesh Density Matters

    Not all nets are created equal. The “mesh” refers to the size of the openings in the net. For professional indoor football (futsal or 5-a-side), a smaller mesh is preferred. Why? Because a tighter mesh reduces the chance of the ball getting stuck and provides a clearer view for spectators sitting behind the goals.

    • Standard Mesh Size: 40mm x 40mm is common for general practice.
    • Professional Mesh Size: 20mm x 20mm offers better durability and visibility.

    Material Durability

    High-density polyethylene (HDPE) is the industry standard. It resists UV degradation (important if your facility has skylights) and withstands the high-velocity impact of a kicked ball. A poor-quality net will fray within months, creating a safety hazard and requiring frequent, costly replacements.

    Expert Tip: Always choose knotted nets over knotless ones for high-impact areas. While knotless nets look smoother, knotted nets distribute the force of impact more evenly across the structure, extending the lifespan of the anchoring points.

    Indoor Football Pitch Net Mesh Seats Metal Roof Location Clue

    Metal Roof Structures: Engineering for Acoustics and Light

    The roof is the crown of any indoor facility. When we specify a metal roof, we are prioritizing longevity and structural span. Unlike concrete, metal allows for wider open spaces without internal support columns, which is crucial for an unobstructed football pitch.

    Thermal and Acoustic Challenges

    Metal roofs are excellent for shedding rain and snow, but they present two major challenges for indoor sports: heat retention and noise amplification.

    1. Heat: Metal conducts heat. In summer, an uninsulated metal roof can turn an indoor pitch into a sauna. Modern solutions involve using insulated sandwich panels with a polyurethane core. This maintains a comfortable temperature between 18โ€“22ยฐC, ideal for athletic performance.
    2. Noise: The sound of a ball hitting a metal roof can be deafening. To mitigate this, acoustic baffles or spray-on foam insulation are applied to the underside of the roof deck. This absorbs sound waves, reducing echo and allowing coaches to communicate effectively with players.

    Structural Integrity

    A typical indoor football span requires a clear width of 20โ€“30 meters. Steel trusses are engineered to handle not just the weight of the roof, but also dynamic loads such as wind uplift and potential snow accumulation, depending on the location clue of the facilityโ€™s geographic region.

    Seating Solutions: Comfort Meets Capacity

    The seating arrangement defines the spectator experience. In indoor facilities, space is at a premium. Therefore, the choice between fixed seats, retractable bleachers, or standing areas is critical.

    Fixed vs. Retractable Seating

    FeatureFixed SeatsRetractable Bleachers
    ComfortHigh (individual backs/arms)Medium (bench style)
    Space EfficiencyLow (permanent footprint)High (can be stored away)
    CostHigher initial investmentLower initial cost
    Best ForProfessional leagues, VIP areasMulti-purpose community halls

    The “Mesh Seat” Trend

    Recently, there has been a surge in popularity for mesh seats. These are not seats made of netting, but rather perforated metal or plastic chairs. Why are they trending?

    • Ventilation: They allow air to circulate, preventing sweat buildup during long tournaments.
    • Drainage: If the facility is used for other wet sports or requires hosing down, water drains through instantly.
    • Durability: They are nearly indestructible compared to upholstered stadium chairs.

    For an indoor football pitch, opting for mesh-backed seating in the lower tiers provides a modern aesthetic while ensuring hygiene and comfort.

    Integrating the Elements: A Step-by-Step Design Approach

    If you are planning a facility, here is how you integrate the Indoor Football Pitch Net Mesh Seats Metal Roof Location Clue into a cohesive design.

    1. Analyze the Location: Determine the cardinal direction. Orient the pitch North-South to minimize sun glare through any side windows. Check local zoning laws for height restrictions regarding the metal roof.
    2. Erect the Structure: Install the steel framework. Ensure the roof trusses are spaced to allow for proper lighting rig attachment points every 4โ€“5 meters.
    3. Install the Roofing: Apply insulated metal panels. Seal all joints meticulously to prevent leaks, which can damage the wooden or synthetic turf below.
    4. Mount the Netting: Install perimeter netting before laying the floor. Anchor the net posts into the concrete foundation, not just the floor surface, to withstand high-impact shots. Use a 20mm HDPE mesh for professional standards.
    5. Configure Seating: Install retractable bleachers along one long side for flexibility. Install fixed mesh seats along the opposite side for premium ticket holders. Ensure aisle widths are at least 1.2 meters for safety compliance.
    6. Final Touches: Add acoustic dampening to the roof interior and install LED lighting calibrated to 500 lux for training and 800 lux for matches.

    FAQ Section

    1. What is the ideal height for an indoor football pitch roof?

    The minimum recommended height is 7 meters (23 feet) for recreational play. However, for competitive matches, a clearance of 9โ€“12 meters (30โ€“40 feet) is preferred to allow for high lobs and headers without the ball hitting the structure.

    2. Why is HDPE mesh preferred over nylon for indoor nets?

    HDPE (High-Density Polyethylene) is superior because it is resistant to moisture, mildew, and UV rays. Nylon absorbs water, which can lead to stretching and sagging over time, altering the tension and safety of the barrier.

    3. Can I install a metal roof without insulation?

    Technically yes, but it is highly discouraged. Without insulation, condensation will form on the underside of the metal during temperature changes, leading to dripping water on the pitch. This creates a slip hazard for players and accelerates corrosion of the steel structure.

    4. How many seats should I plan for a standard 5-a-side pitch?

    For a standard 5-a-side pitch (approx. 25m x 15m), a capacity of 50โ€“100 seats is usually sufficient. This allows for family viewing and small crowds without overcrowding the limited indoor footprint. Using retractable seating allows you to expand this number for special events.

    5. What is the “Location Clue” regarding ventilation?

    The location clue refers to positioning air intakes and exhaust fans based on the prevailing wind direction and the building’s orientation. Proper placement ensures that stale air and heat are expelled efficiently, maintaining oxygen levels for high-intensity sports.

    6. Are mesh seats comfortable for long-duration tournaments?

    Yes, modern ergonomic mesh seats are designed with contoured shapes that support the spine. The breathable material prevents heat buildup, making them actually more comfortable than padded vinyl seats in warm indoor environments.

    Conclusion

    Designing or evaluating an indoor football facility requires a holistic understanding of its components. The Indoor Football Pitch Net Mesh Seats Metal Roof Location Clue is not just a jumble of keywords; it is a blueprint for success. By prioritizing the right net mesh for safety, a metal roof for structural integrity, appropriate seating for comfort, and a smart location strategy for functionality, you create a venue that players love and owners profit from.

    Whether you are a facility manager looking to renovate or an enthusiast curious about what makes a great arena, remember that details matter. The right materials and layout transform a simple room into a professional sports hub.

    Did you find this guide helpful? Share this article with your local sports club or facility manager on social media to help raise the standards of indoor football in your community!