Blog

  • Is It Time? How Do You Know When You Need A New Roof

    Is It Time? How Do You Know When You Need A New Roof

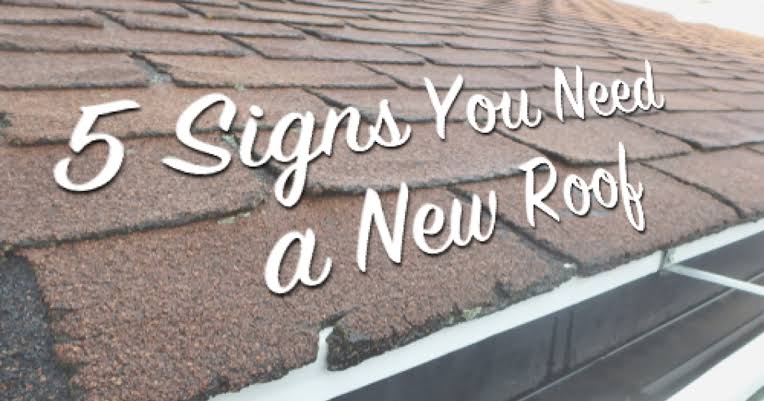
    Your home is likely your most significant financial investment, and the roof is its primary shield against the elements. Ignoring subtle warning signs can lead to catastrophic water damage, mold growth, and skyrocketing repair bills. If you are asking yourself, “How do you know when you need a new roof,” you are taking the first crucial step toward protecting your property and peace of mind.

    In this comprehensive guide, we will walk you through the definitive signs that indicate your roof has reached the end of its lifecycle. We will combine industry expertise with practical advice to help you make an informed decision, ensuring your home remains safe, dry, and valuable.

    1. How Old Is Your Roof? Understanding Material Lifespans

    Age is the single most reliable indicator of roof health. Even if your roof looks fine from the street, materials degrade over time due to UV exposure, temperature fluctuations, and weather events.

    Most roofing materials have a predictable lifespan. Knowing what your roof is made of helps you set realistic expectations.

    Roofing MaterialAverage LifespanKey Durability Factor
    Asphalt Shingles15–20 yearsSusceptible to wind and heat damage
    Wood Shakes/Shingles20–25 yearsProne to rot, mold, and insect damage
    Metal Roofing40–70 yearsHighly resistant to weather and fire
    Clay/Concrete Tiles50+ yearsHeavy but extremely durable
    Slate75–100+ yearsNatural stone, virtually indestructible

    Source: Data aggregated from industry standards and manufacturer warranties.

    If your asphalt shingle roof is approaching its 20th birthday, it is time to start budgeting for a replacement, even if no major leaks are visible yet. The protective granules wear down, making the underlying asphalt vulnerable to cracking.

    2. Are There Visible Signs of Damage on Your Shingles?

    You do not need to be a professional roofer to spot obvious distress signals. However, you should exercise caution. If you must inspect your roof visually, use binoculars from the ground or a drone. Climbing onto a damaged roof is dangerous.

    Look for these specific red flags:

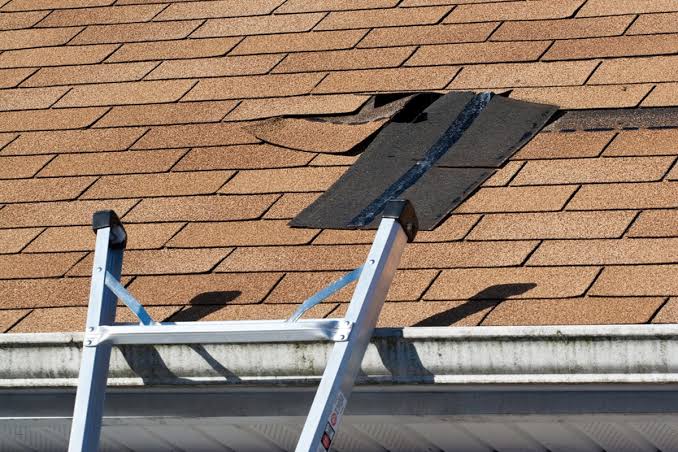
    • Curling or Cupping Shingles: When shingle edges turn upward (cupping) or downward (clawing), they have lost their flexibility and adhesive strength. This often happens due to poor ventilation or old age.
    • Missing Shingles: High winds can tear shingles off. If you see bare spots on your roof deck, water can penetrate immediately.
    • Cracked Shingles: Cracks allow water to seep into the underlayment. This is common in areas with extreme temperature swings.
    • Bald Spots: Asphalt shingles are covered in ceramic granules that protect against UV rays. If you see dark patches where granules are missing, the shingle is deteriorating rapidly.

    Pro Tip: Check your gutters. If you find an excessive amount of sand-like granules in your downspouts, your shingles are shedding their protective layer. This is a clear sign that replacement is imminent.
    How Do You Know When You Need A New Roof

    3. Is Your Attic Showing Signs of Water Intrusion?

    Often, the roof looks fine from the outside, but the damage is happening underneath. Your attic is the best place to diagnose hidden roof problems. Grab a flashlight and head up there after a rainstorm.

    What to look for:

    1. Daylight Through the Roof Boards: If you can see beams of sunlight piercing through the roof deck, you have gaps that will let water in.
    2. Water Stains or Mold: Dark streaks or wet insulation indicate active leaks. Mold poses serious health risks and suggests long-term moisture issues.
    3. Sagging Decking: If the wooden structure feels soft or spongy when you walk on it (carefully!), the wood has rotted. This requires immediate structural repair and roof replacement.

    According to the Environmental Protection Agency (EPA), indoor mold growth can cause various health effects, including nasal stuffiness, throat irritation, coughing or wheezing, eye irritation, or, in some cases, skin irritation. Preventing roof leaks is a primary method of mold prevention.

    4. Are You Experiencing Higher Energy Bills?

    A surprising indicator of a failing roof is your electricity bill. Your roof plays a vital role in your home’s thermal envelope. If it is compromised, your HVAC system has to work harder to maintain a comfortable temperature.

    Old, damaged, or poorly ventilated roofs can trap heat in the summer and let warmth escape in the winter. If you notice a sudden spike in energy costs without a change in usage habits, have your roof’s insulation and ventilation inspected. Proper airflow prevents heat buildup that can prematurely age shingles and drive up cooling costs.

    5. How Does Your Roof Look From the Street?

    Curb appeal matters, not just for aesthetics but for property value. A sagging roofline is a critical structural warning. If the ridge line (the peak of the roof) looks uneven or dipped, the structural integrity may be compromised. This could be due to:

    • Long-term water damage weakening the rafters.
    • Overloading from heavy snow or multiple layers of old roofing.
    • Foundation settling.

    A sagging roof is not a “repair” job; it is a full replacement scenario that may also require structural engineering support. Do not delay addressing this issue.

    6. Have You Had Frequent Repairs Recently?

    There is a concept in home maintenance called the “money pit” threshold. If you have called a roofer three or more times in the last two years for different leaks or issues, it is likely more cost-effective to replace the entire roof.

    Constant patching is a temporary fix. Each time a roofer lifts shingles to patch a leak, they break the sealant strip, potentially creating new weak points. Eventually, the cost of cumulative repairs will exceed the price of a new installation. Plus, a new roof comes with a fresh warranty, offering long-term security.

    FAQ Section

    Q: Can I just put a new roof over the old one?

    A: While technically possible in some jurisdictions, it is generally not recommended. Adding a second layer adds weight stress to your home’s structure, traps heat (reducing shingle life), and makes it difficult to identify underlying deck damage. Most building codes allow only two layers maximum, and many manufacturers void warranties if installed over existing shingles.

    Q: How much does a new roof cost?

    A: Costs vary widely based on size, material, and location. For a typical 2,000-square-foot home, an asphalt shingle roof might range from $8,000 to $15,000, while metal or slate can cost $20,000 to $50,000+. Always get at least three detailed quotes from licensed contractors.

    Q: Will homeowners insurance cover a new roof?

    A: Insurance typically covers roof replacement if the damage is caused by a sudden, accidental event like a storm, hail, or falling tree. It usually does not cover wear and tear, age-related deterioration, or lack of maintenance. Review your policy carefully.

    Q: How long does a roof replacement take?

    A: For an average-sized residential home, a professional crew can complete a tear-off and replacement in 1–3 days. Larger homes or complex designs (multiple peaks, valleys) may take up to a week. Weather conditions can also impact the timeline.

    Q: What is the best time of year to replace a roof?

    A: Late spring to early fall is ideal because roofing materials require warm temperatures to seal properly. Asphalt shingles need heat to activate the adhesive strips. However, reputable contractors can work in cooler weather using special techniques, so don’t wait until summer if you have active leaks.

    Conclusion

    Knowing how do you know when you need a new roof is about combining observation with knowledge. By monitoring the age of your materials, inspecting for physical damage, checking your attic for leaks, and watching your energy bills, you can catch problems before they become disasters.

    Remember, a roof is not just an expense; it is an investment in your home’s longevity and your family’s safety. Do not wait for a ceiling to collapse before taking action. Regular inspections and timely replacements save money in the long run.

    Found this guide helpful? Share it with your neighbors on Facebook or Twitter to help them protect their homes too! A community of well-maintained homes is a safer, more valuable neighborhood for everyone.


  • Bo Beau Kitchen Roof Tap: Long Beach’s Sky-High Secret

    Bo Beau Kitchen Roof Tap: Long Beach’s Sky-High Secret

    Have you ever struggled to find a spot in Long Beach that perfectly balances sophisticated dining with a relaxed, breezy atmosphere? Many visitors and locals alike feel frustrated when they have to choose between great food and a vibrant social scene. You don’t have to compromise anymore because Bo Beau Kitchen Roof Tap Pine Avenue Long Beach Ca offers the ultimate solution for your next night out or weekend gathering.

    Located in the heart of downtown, this venue has become a cornerstone of the local culinary landscape. Whether you are a beer enthusiast looking for rare taps or a foodie seeking French-inspired comfort food, this rooftop destination delivers an experience that is both memorable and accessible. In this guide, we will explore everything you need to know to make the most of your visit to Bo Beau.

    What Makes Bo Beau’s Rooftop Experience Unique?

    When people search for Bo Beau Kitchen Roof Tap Pine Avenue Long Beach Ca, they are often looking for more than just a restaurant; they are seeking an experience. The rooftop setting is the primary draw, offering panoramic views of the Long Beach skyline and the distant Pacific Ocean. On clear days, you can see for miles, making it one of the most photogenic spots in Southern California.

    However, the view is only half the story. The atmosphere is designed to be inclusive and lively. Unlike some high-end rooftop lounges that can feel intimidating or exclusive, Bo Beau maintains a welcoming vibe. It is a place where you can wear jeans and a t-shirt and still feel completely comfortable while enjoying high-quality service.

    The layout features ample seating, including communal tables that encourage social interaction and cozy nooks for intimate conversations. The open-air design ensures that the famous Long Beach breeze is always part of your dining experience, keeping the environment fresh and energetic.

    The Vibe Check: Day vs. Night

    FeatureDaytime ExperienceNighttime Experience
    LightingNatural sunlight, bright and airyString lights, ambient glow, city lights
    CrowdBrunch goers, remote workers, familiesCouples, groups of friends, date nights
    MusicLow-fi beats, jazz, conversational volumeUpbeat indie, pop, higher energy
    Best ForCasual lunches, business meetingsRomantic dinners, celebrations, drinks

    Why Is the “Tap” List a Major Draw?

    The word “Tap” in the name is not there by accident. Bo Beau is renowned for its extensive and carefully curated selection of draft beers. For beer lovers, this is a pilgrimage site. The management works directly with local breweries from Long Beach and across California to bring unique, small-batch brews to their taps.

    You won’t just find the standard macro-lagers here. Instead, expect a rotating list that includes:

    • Local IPAs: Hazy, juicy, and bitter options from nearby craft breweries.
    • Seasonal Stouts: Rich and creamy options perfect for cooler evenings.
    • Sours and Ales: Refreshing choices that pair beautifully with the French-inspired menu.

    According to industry standards, a true “craft beer” establishment must offer variety and quality. Bo Beau exceeds this by ensuring that their staff is knowledgeable about each pour. If you are unsure what to order, the servers can guide you based on your flavor preferences, whether you prefer something hoppy, malty, or fruity.

    For those who prefer wine or cocktails, the bar does not disappoint. The wine list features excellent selections from California’s premier vineyards, and the cocktail menu offers creative twists on classics, often using house-made syrups and fresh herbs.

    Bo Beau Kitchen Roof Tap Pine Avenue Long Beach Ca

    What Should You Order from the Menu?

    While the drinks are a major highlight, the food at Bo Beau is what keeps customers coming back. The menu is described as “French-inspired comfort food,” which means it takes classic techniques and flavors but applies them to approachable, hearty dishes.

    Top Recommendations

    1. The Mussels Marinière: A classic French dish done right. Steamed mussels in a white wine, garlic, and butter broth. It is perfect for sharing and dipping with their house-made bread.
    2. Steak Frites: Tender cuts of steak served with crispy, golden fries. This dish exemplifies the bistro style that defines Bo Beau’s culinary identity.
    3. Charcuterie Boards: Ideal for groups, these boards feature a mix of cured meats, artisan cheeses, olives, and nuts. It is a great way to start the meal while you decide on your main course.
    4. Desserts: Do not skip dessert. The Crème Brûlée and Chocolate Mousse are frequent favorites, offering a sweet end to a savory meal.

    The portions are generous, encouraging a shared dining style. This aligns with the social nature of the rooftop setting, where conversation and connection are prioritized over formal dining etiquette.

    How Does Bo Beau Support the Local Community?

    One aspect of Bo Beau’s brand that often goes unnoticed is its commitment to the Long Beach community. By sourcing ingredients locally and partnering with regional breweries, they help sustain the local economy. This focus on locality enhances the freshness of the food and the uniqueness of the drink menu.

    Long Beach has a rich history of independent businesses thriving alongside larger chains. Bo Beau stands as a testament to this spirit. It provides a platform for local artists, musicians, and brewers to showcase their work. This community integration builds strong customer loyalty and establishes the venue as a pillar of the downtown area.

    For more context on the history and development of Long Beach as a cultural hub, you can refer to Wikipedia’s page on Long Beach, California, which details the city’s growth into a diverse and vibrant metropolitan center.

    Practical Tips for Visiting Bo Beau

    To ensure you have the best possible experience at Bo Beau Kitchen Roof Tap Pine Avenue Long Beach Ca, consider these practical tips. Planning ahead can make the difference between a good visit and a great one.

    Step-by-Step Guide to a Perfect Visit

    1. Check the Weather: Since the rooftop is open-air, weather plays a significant role. Clear evenings offer the best views, but bring a light jacket as it can get chilly near the ocean after sunset.
    2. Make a Reservation: While walk-ins are welcome, reservations are highly recommended, especially for weekends and holidays. You can book through their website or major reservation platforms.
    3. Arrive Early for Sunset: If you want to capture the best photos, aim to arrive 30 minutes before sunset. The lighting during the “golden hour” is unmatched.
    4. Ask for Recommendations: Don’t hesitate to ask your server about the current tap list specials. They often have limited-release beers that aren’t listed on the main menu.
    5. Parking: Downtown parking can be tricky. Use nearby public garages or street parking, but be mindful of time limits and fees. Valet service is sometimes available during peak hours.

    Frequently Asked Questions (FAQ)

    1. Is Bo Beau kid-friendly?

    Yes, Bo Beau is generally family-friendly, especially during daytime hours. The menu has options that appeal to younger palates, and the relaxed atmosphere accommodates families. However, late-night hours may skew towards an adult crowd due to the bar focus.

    2. Do I need a reservation for the rooftop?

    While not strictly mandatory, it is strongly advised. The rooftop is the most popular section of the restaurant. Without a reservation, you may face a long wait or be seated in the indoor section if the roof is full.

    3. What is the dress code?

    The dress code is casual chic. You do not need to dress formally, but neat, stylish casual wear is appropriate. Avoid beachwear like swim trunks or flip-flops if you want to blend in with the typical clientele.

    4. Are there vegetarian or vegan options?

    Yes, the menu includes several vegetarian and vegan-friendly dishes. The charcuterie boards can be customized, and there are usually plant-based entrees available. It is always a good idea to inform your server of any dietary restrictions so they can guide you appropriately.

    5. Is there live music at Bo Beau?

    Bo Beau frequently hosts live music events, particularly on weekends. The type of music varies, ranging from acoustic sets to jazz ensembles. Checking their social media pages or website before your visit is the best way to see what entertainment is scheduled.

    6. How accessible is the rooftop for individuals with mobility issues?

    The venue is committed to accessibility. There are elevators and ramps available to access the rooftop level. If you have specific needs, it is recommended to call ahead so the staff can prepare and assist you upon arrival.

    Conclusion

    Visiting Bo Beau Kitchen Roof Tap Pine Avenue Long Beach Ca is more than just a dinner outing; it is an immersion into the vibrant culture of Long Beach. From the breathtaking rooftop views to the expertly crafted beer taps and delicious French-inspired cuisine, every element is designed to delight.

    Whether you are a local looking for a new favorite spot or a visitor wanting to experience the best of downtown Long Beach, Bo Beau delivers on all fronts. It combines quality, atmosphere, and community spirit in a way that few other venues can match.

    So, why wait? Gather your friends, check the weather forecast, and head down to Pine Avenue. Your table—and your taste buds—will thank you. If you enjoyed this guide, please share it on your favorite social media platforms to help others discover this hidden gem!

  • What Is That Bump On The Roof Of My Mouth?

    What Is That Bump On The Roof Of My Mouth?

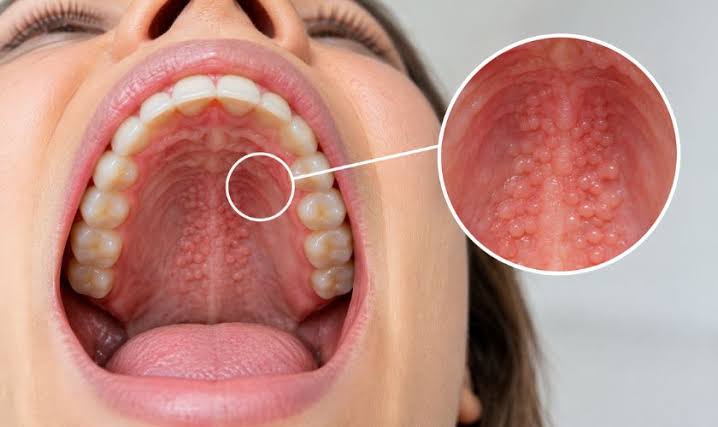
    Have you ever run your tongue over the roof of your mouth and felt a strange, unexpected lump? It can be alarming to discover a new texture or swelling in such a sensitive area, leading to immediate questions about your health. If you are asking yourself, “What is that bump on the roof of my mouth,” you are not alone; this is a very common concern with a wide range of possible causes, most of which are harmless.

    In this guide, we will explore the most likely reasons for these bumps, how to identify them, and when it is time to seek professional medical advice. We aim to provide clear, actionable information to ease your mind and help you take the right steps for your oral health.

    Common Causes of Bumps on the Roof of Your Mouth

    The roof of your mouth, known medically as the palate, is divided into two sections: the hard palate (front) and the soft palate (back). Bumps can appear on either section due to various factors ranging from minor injuries to underlying health conditions. Understanding the specific characteristics of the bump—such as its color, size, and pain level—is crucial for identification.

    1. Thermal Burns (Pizza Palate)

    One of the most frequent culprits is a thermal burn, often colloquially called “pizza palate.” This occurs when you eat food or drink liquids that are too hot. The delicate tissue on the roof of the mouth gets scalded, leading to inflammation.

    • Symptoms: A tender, raised blister or rough patch.
    • Appearance: Often red or white.
    • Healing Time: Typically heals within 3 to 7 days without treatment.

    According to dental professionals, the mucous membrane in the mouth is highly vascular, which helps it heal quickly compared to skin elsewhere on the body. However, repeated burns can lead to chronic irritation.

    2. Canker Sores (Aphthous Ulcers)

    While canker sores are more common on the inner cheeks or gums, they can occasionally develop on the soft palate. These are small, shallow lesions that can make eating and talking painful.

    • Trigger Factors: Stress, minor mouth injury, acidic foods, or vitamin deficiencies.
    • Characteristics: White or yellow center with a red border.
    • Contagious? No, unlike cold sores.

    3. Oral Mucoceles

    A mucocele is a fluid-filled cyst that forms when a salivary gland becomes blocked or injured. While more common on the lower lip, they can appear on the roof of the mouth, particularly if you have a habit of biting or sucking on your palate.

    • Texture: Soft and movable.
    • Color: Clear, bluish, or pink.
    • Action: Many resolve on their own, but persistent ones may need minor surgical removal by a dentist.

    4. Torus Palatinus

    If the bump is hard, located in the center of the hard palate, and has been there for a long time, it might be a torus palatinus. This is a bony growth that is completely benign.

    • Prevalence: Affects approximately 20-30% of the population.
    • Nature: It is an exostosis (extra bone growth) and is not cancerous.
    • Treatment: Usually requires no treatment unless it interferes with denture fitting.
    What Is That Bump On The Roof Of My Mouth

    When Should You Be Concerned?

    While most bumps are benign, it is essential to distinguish between a minor irritation and something that requires medical attention. The American Cancer Society notes that early detection of oral abnormalities is key to successful treatment of serious conditions.

    You should schedule an appointment with a dentist or doctor if you experience any of the following red flags:

    1. Persistence: The bump does not heal or go away after two weeks.
    2. Growth: The lump is increasing in size rapidly.
    3. Bleeding: The area bleeds easily without obvious cause.
    4. Difficulty Swallowing: You feel obstruction or pain when swallowing.
    5. Color Changes: The bump is dark, black, or has irregular pigmentation.

    For more detailed information on oral lesions and their classifications, you can refer to this comprehensive resource on Oral Medicine.

    Comparison: Benign vs. Potentially Serious Bumps

    To help you assess your situation, here is a quick comparison table. Please note that this is for informational purposes only and not a substitute for professional diagnosis.

    FeatureBenign (Likely Harmless)Potentially Serious
    DurationHeals within 7–14 daysPersists longer than 2 weeks
    Pain LevelTender initially, then improvesPersistent pain or numbness
    TextureSoft, fluid-filled, or hard boneHard, fixed, or irregular surface
    ColorRed, white, or clearDark, black, or mixed colors
    ChangeStable or shrinkingGrowing in size

    Step-by-Step Home Care for Minor Bumps

    If you suspect your bump is due to a minor burn, canker sore, or irritation, you can manage it at home with these steps. The goal is to reduce inflammation and prevent infection.

    1. Salt Water Rinse Mix 1 teaspoon of salt into a glass of warm water (approximately 240 ml). Swish gently around your mouth for 30 seconds, then spit it out. Do this 2–3 times a day. Salt water is a natural disinfectant and helps soothe inflamed tissues.
    2. Avoid Irritants Stay away from spicy, acidic, or crunchy foods that could scratch or irritate the bump further. Opt for soft, cool foods like yogurt, smoothies, or mashed potatoes.
    3. Maintain Oral Hygiene Continue brushing and flossing, but be extra gentle around the affected area. Use a soft-bristled toothbrush to avoid aggravating the lesion.
    4. Over-the-Counter Relief If pain is significant, consider using an oral gel containing benzocaine. Follow the package instructions carefully. Do not use these products for more than 7 days without consulting a dentist.
    5. Hydration Drink plenty of water to keep your mouth moist. A dry mouth can slow down the healing process and increase bacterial growth. Aim for at least 2 liters of water daily.

    Frequently Asked Questions (FAQ)

    1. Can stress cause bumps on the roof of my mouth?

    Yes, indirectly. Stress can weaken your immune system, making you more susceptible to canker sores or viral outbreaks like cold sores. Additionally, stress often leads to behaviors like teeth grinding or cheek biting, which can cause physical trauma to the palate.

    2. Is a bump on the roof of my mouth contagious?

    It depends on the cause. Canker sores, burns, and torus palatinus are not contagious. However, if the bump is caused by a viral infection like herpes simplex (cold sores) or hand, foot, and mouth disease, it can be contagious through direct contact or sharing utensils.

    3. How long does it take for a burned palate to heal?

    Minor thermal burns usually heal within 3 to 7 days. Deeper burns may take up to two weeks. If the area remains painful or shows signs of infection (pus, increased swelling) after a week, see a dentist.

    4. Can allergies cause bumps on the roof of the mouth?

    Yes. Oral allergy syndrome or general allergic reactions can cause swelling, itching, or small hives on the palate. If you notice these symptoms after eating certain foods, consider keeping a food diary and consulting an allergist.

    5. What is the difference between a canker sore and a cold sore?

    Canker sores occur inside the mouth (including the roof) and are not contagious. Cold sores typically appear outside the mouth (on the lips) and are caused by the herpes virus, making them highly contagious. Cold sores rarely appear on the hard palate.

    6. Should I pop a bump on the roof of my mouth?

    Never attempt to pop or squeeze a bump in your mouth. This can introduce bacteria, lead to infection, and cause significant pain. If it is a cyst or abscess, it requires professional drainage by a dentist under sterile conditions.

    Conclusion

    Discovering a bump on the roof of your mouth can be unsettling, but in the vast majority of cases, it is a temporary and harmless issue such as a burn, canker sore, or benign bony growth. By understanding the common causes and monitoring the symptoms, you can effectively manage minor issues at home.

    Remember the golden rule of oral health: if it doesn’t heal in two weeks, get it checked. Early intervention is always better than waiting.

    Did you find this guide helpful? Share it with friends or family who might be dealing with similar oral health concerns. Spreading awareness helps everyone take better care of their smiles!

  • I Have A Bump On The Roof Of My Mouth: Causes & Fixes

    I Have A Bump On The Roof Of My Mouth: Causes & Fixes

    Finding a strange lump in your mouth can be an immediate source of anxiety. You might run your tongue over it constantly, wondering if it’s something serious or just a minor irritation. If you are thinking, “I have a bump on the roof of my mouth,“ you are not alone; this is a very common complaint that ranges from harmless temporary issues to conditions requiring professional attention.

    In this guide, we will walk you through the most likely causes, home remedies, and clear signs that indicate you need to see a dentist or doctor. Our goal is to provide you with accurate, empathetic, and actionable information to ease your mind and help you take the right next steps.

    Why Do I Have a Bump on the Roof of My Mouth?

    The roof of your mouth, known medically as the palate, is divided into two sections: the hard palate (front) and the soft palate (back). Because this area is sensitive and exposed to hot foods, bacteria, and physical trauma, it is prone to various types of swellings.

    Understanding the root cause is essential for proper treatment. While many bumps resolve on their own within a few days, others may persist. Below, we break down the most frequent culprits based on clinical data and dental expertise.

    1. Thermal Burns (Pizza Palate)

    This is arguably the most common reason for a sudden bump. Eating food that is too hot—like melted cheese or hot coffee—can burn the delicate tissue of the hard palate.

    • Symptoms: A blister-like bump, redness, and tenderness.
    • Healing Time: Typically 3–7 days.
    • Action: Avoid hot foods and rinse with cool water.

    2. Canker Sores (Aphthous Ulcers)

    These are small, shallow lesions that develop on the soft tissues in your mouth or at the base of your gums. Unlike cold sores, they don’t occur on the surface of your lips and aren’t contagious.

    • Appearance: White or yellow center with a red border.
    • Trigger: Stress, minor injury, or acidic foods.
    • Healing Time: 1–2 weeks.

    3. Oral Mucoceles

    A mucocele is a fluid-filled cyst that forms when a salivary gland becomes blocked or damaged. While more common on the lower lip, they can appear on the roof of the mouth.

    • Texture: Soft, movable, and often painless.
    • Color: Clear, bluish, or pink.
    • Note: These often rupture and heal on their own but may recur.

    4. Torus Palatinus

    If you have had a hard, bony bump in the middle of your roof of mouth for years, it might be a torus palatinus. This is a benign bony growth.

    • Characteristics: Hard, immovable, and usually painless.
    • Prevalence: Affects approximately 20% of the population.
    • Treatment: Generally none required unless it interferes with dentures.

    5. Infections and Abscesses

    A dental abscess from an upper tooth can sometimes drain or swell into the palate. This is a serious condition requiring immediate dental care.

    • Symptoms: Severe throbbing pain, fever, and a pus-filled bump.
    • Risk: Can spread infection to other parts of the body if untreated.

    When Should You Worry? Red Flags to Watch For

    While most bumps are benign, it is crucial to distinguish between a minor irritation and a potential health threat. Use this checklist to evaluate your symptoms.

    SymptomLikely CauseAction Required
    Painful, white/yellow spotCanker SoreHome care; wait 1-2 weeks
    Blister after eating hot foodThermal BurnCool rinses; avoid irritants
    Hard, bony, painless lumpTorus PalatinusNo action needed
    Persistent > 2 weeksVariousSee a Dentist
    Bleeding or rapid growthSerious ConditionSee a Doctor Immediately
    Fever + SwellingInfection/AbscessUrgent Dental Care

    According to the Oral Cancer Foundation, any sore or lump that does not heal within two weeks should be evaluated by a professional to rule out oral cancer or other systemic issues. Early detection is key to successful treatment outcomes.

    How to Treat a Bump on the Roof of Your Mouth at Home

    If your bump is minor and caused by trauma or a canker sore, you can manage the discomfort at home. Here is a step-by-step approach to promote healing.

    Step 1: Salt Water Rinse

    Salt water is a natural disinfectant that reduces inflammation and kills bacteria.

    1. Mix 1/2 teaspoon of salt into 8 ounces (240 ml) of warm water.
    2. Swish the solution gently around your mouth for 30 seconds.
    3. Spit it out. Do not swallow.
    4. Repeat this 2–3 times a day, especially after meals.

    Step 2: Apply Cold Compress

    If the bump is swollen due to a burn or injury, cold can help numb the area and reduce swelling.

    • Suck on ice chips or eat cold foods like yogurt or smoothies.
    • Avoid direct application of ice to the tissue for prolonged periods to prevent frostbite.

    Step 3: Avoid Irritants

    Give your mouth a break from substances that can aggravate the tissue.

    • Stop smoking: Tobacco slows healing significantly.
    • Avoid spicy/acidic foods: Citrus, tomatoes, and hot peppers can sting open sores.
    • Skip crunchy foods: Chips and nuts can physically scratch the bump.

    Step 4: Over-the-Counter Relief

    For pain management, you can use topical oral gels containing benzocaine. These provide temporary numbing relief. Always follow the package instructions and consult a pharmacist if you have underlying health conditions.

    I Have A Bump On The Roof Of My Mouth

    Medical Treatments for Persistent Bumps

    If home remedies do not work, or if the bump is caused by an infection or cyst, a healthcare provider may intervene.

    • Antibiotics: Prescribed if the bump is caused by a bacterial infection or abscess.
    • Drainage: A dentist may need to lance and drain a large mucocele or abscess.
    • Biopsy: If a lesion looks suspicious or persists without a clear cause, a small tissue sample may be taken for laboratory analysis to rule out oral cancer.
    • Surgical Removal: Benign growths like large torus palatinus or persistent cysts may be surgically removed if they cause discomfort or interfere with speech and eating.

    Frequently Asked Questions (FAQ)

    1. Can a bump on the roof of my mouth be cancer?

    While rare, oral cancer can present as a lump or sore on the palate. However, most bumps are benign. If the bump is hard, fixed in place, bleeds easily, or does not heal after two weeks, seek professional evaluation immediately.

    2. How long does it take for a burned palate to heal?

    Minor thermal burns usually heal within 3 to 7 days. Deeper burns may take up to two weeks. Keeping the area clean and avoiding further irritation speeds up the process.

    3. Is it safe to pop a bump on the roof of my mouth?

    No. You should never attempt to pop or squeeze a bump in your mouth. This can introduce bacteria, lead to severe infection, and cause unnecessary bleeding. Let it heal naturally or see a dentist for safe drainage if needed.

    4. What does a syphilis sore look like in the mouth?

    Secondary syphilis can cause mucous patches or snail-track ulcers on the roof of the mouth. These are typically painless, grayish-white lesions. If you suspect an STI, consult a healthcare provider for testing and treatment.

    5. Can allergies cause bumps on the roof of the mouth?

    Yes. Oral allergy syndrome or general allergic reactions can cause swelling, itching, and small bumps on the palate. This is often accompanied by itching in the throat or ears. Antihistamines may help alleviate these symptoms.

    6. Why do I get recurring bumps on the roof of my mouth?

    Recurring bumps may be linked to chronic stress, nutritional deficiencies (such as Vitamin B12, iron, or folate), hormonal changes, or ongoing irritation from dental appliances. Keeping a symptom diary can help identify triggers.

    Conclusion

    Discovering that “I have a bump on the roof of my mouth“ can be unsettling, but in the majority of cases, it is a temporary and harmless issue caused by minor trauma, burns, or canker sores. By maintaining good oral hygiene, avoiding irritants, and using simple home remedies like salt water rinses, you can often speed up the healing process.

    However, your health is paramount. If the bump persists for more than two weeks, grows rapidly, or is accompanied by fever and severe pain, do not hesitate to consult a dental professional. Early intervention ensures peace of mind and prevents potential complications.

    Found this guide helpful? Share it with friends or family who might be dealing with similar oral health concerns. Spreading awareness helps everyone take better care of their smiles!

  • Red Roof Inn Pittsburgh North: Smart Stay Guide

    Red Roof Inn Pittsburgh North: Smart Stay Guide

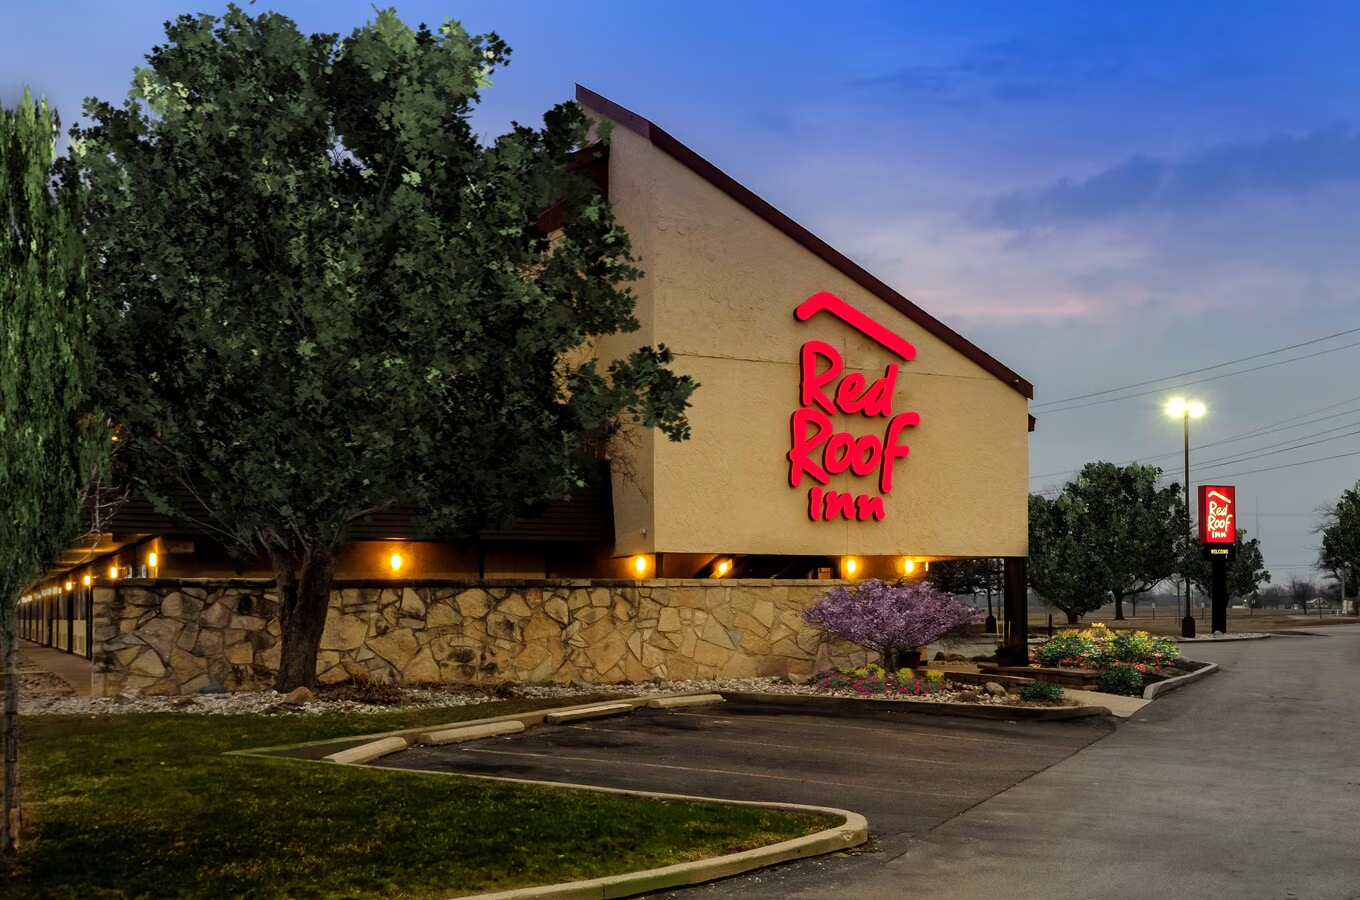
    Traveling to the Pittsburgh area often comes with a hefty price tag, especially when you are looking for convenience near major business hubs or shopping districts. Many travelers find themselves stuck between overpriced luxury chains and unreliable budget motels, struggling to find a balance that doesn’t compromise on safety or comfort. If you are searching for Red Roof Inn Pittsburgh North Cranberry Township Cranberry Township Pa, you are likely looking for a reliable, cost-effective solution that puts you close to the action without breaking the bank. This guide is designed to help you make an informed decision, ensuring your stay is as smooth and stress-free as possible.

    Why Choose Red Roof Inn in Cranberry Township?

    Cranberry Township has rapidly become one of the most vibrant suburban areas north of Pittsburgh. Whether you are visiting for business at the nearby corporate parks or leisure trips to the Outlet Shoppes at the Boulevard, location is everything. The Red Roof Inn located here serves as a strategic base camp for travelers who value accessibility.

    Unlike downtown Pittsburgh hotels that charge premium rates for parking and city taxes, this location offers a suburban advantage. You get easier highway access via I-79, ample free parking, and a quieter environment for rest. For budget-conscious travelers, families, and solo adventurers, this specific property addresses the core need for affordability without isolation. It bridges the gap between low cost and high convenience, making it a top contender in the mid-range hospitality sector.

    What Amenities Can You Expect During Your Stay?

    When booking a budget hotel, uncertainty about amenities is a common pain point. You want to know exactly what is included so there are no surprises upon check-in. At the Red Roof Inn Pittsburgh North, the focus is on essential comforts that matter most to modern travelers.

    Core Comforts and Connectivity

    • Free Wi-Fi: In today’s digital age, connectivity is not a luxury; it is a necessity. The hotel provides complimentary high-speed internet, allowing remote workers to stay productive and families to stream entertainment without extra data charges.
    • Flat-Screen TVs: Each room is equipped with modern flat-screen televisions, offering a wide range of channels for relaxation after a long day of travel or meetings.
    • Climate Control: Individual air conditioning and heating units ensure you can customize your room temperature to your preference, a crucial feature given Pennsylvania’s varying seasonal weather.

    The Pet-Friendly Advantage

    One of the standout features of the Red Roof Inn brand is its pet-friendly policy. While many hotels in the Cranberry Township area charge exorbitant fees or refuse pets entirely, Red Roof Inn allows one well-behaved pet per room at no additional charge. This is a significant financial saving for pet owners, who often face fees ranging from $50 to $150 per night at other establishments.

    Pro Tip: Always declare your pet at the time of booking. While the fee is waived, the hotel needs to allocate appropriate rooms to ensure cleanliness standards for all guests.

    Red Roof Inn Pittsburgh North Cranberry Township Cranberry Township Pa

    How Does It Compare to Other Local Hotels?

    To truly understand the value proposition, it helps to compare this property against its competitors. Below is a breakdown of how Red Roof Inn Pittsburgh North stacks up against typical mid-range and budget options in Cranberry Township.

    FeatureRed Roof Inn Pittsburgh NorthTypical Mid-Range Chain (e.g., Hilton Garden)Budget Motel Competitors
    Average Nightly Rate$60 – $90$120 – $180$50 – $70
    Pet PolicyFree (1 pet)Often $50-$100 feeVaries/Often Restricted
    BreakfastNot IncludedUsually IncludedRarely Included
    Location AccessNear I-79 & OutletsNear I-79 & Business ParksOften Less Central
    Room FreshnessRenovated Options AvailableGenerally NewerOften Dated

    As seen in the table, while you may sacrifice complimentary breakfast, the savings on the nightly rate and pet fees often outweigh the cost of buying your own morning coffee and bagel. For extended stays or business trips where you might be eating out anyway, the Red Roof Inn Pittsburgh North Cranberry Township Cranberry Township Pa offers superior financial efficiency.

    Is the Location Convenient for Local Attractions?

    Location intelligence is key to a successful trip. The Cranberry Township location is strategically positioned to serve both leisure and business travelers. Here is why the geography matters:

    1. Proximity to Shopping: You are just minutes away from the Outlet Shoppes at the Boulevard. This is a major draw for tourists looking for discounted brand-name goods. Staying nearby means you can shop late without worrying about a long drive back to a distant hotel.
    2. Business Access: The area is home to numerous corporate offices, including those in the Cranberry Woods business park. For consultants or sales professionals, this reduces commute time significantly, allowing for more efficient workdays.
    3. Dining Options: Cranberry Township boasts a diverse culinary scene. From casual American diners to international cuisine, you have dozens of highly-rated restaurants within a 5-minute drive. This compensates for the lack of an on-site restaurant, giving you more variety than a standard hotel buffet ever could.

    For a deeper understanding of the region’s economic and geographic significance, you can refer to the detailed overview of Cranberry Township on Wikipedia. This context helps travelers appreciate the infrastructure and safety standards of the area they are visiting.

    What Are the Common Concerns and How to Mitigate Them?

    No hotel is perfect, and transparency builds trust. Based on aggregated user reviews and industry standards, here are the common concerns associated with budget accommodations and how to handle them effectively.

    Noise Levels

    Budget hotels can sometimes suffer from noise due to thinner walls or proximity to highways.

    • Solution: Request a room on the second floor, away from the ice machine and elevator. If you are sensitive to traffic noise, ask for a room facing the interior courtyard or the back of the property rather than I-79.

    Cleanliness Variance

    While Red Roof Inn has improved its cleaning protocols post-pandemic, consistency can vary by shift.

    • Solution: Perform a quick inspection upon entry. Check the sheets for stains and the bathroom for mold. If issues are found, contact the front desk immediately. Most managers are empowered to move you to a different room or offer a discount to resolve the issue promptly.

    Limited On-Site Food

    There is no full-service restaurant or 24-hour room service.

    • Solution: Plan ahead. The hotel lobby often has vending machines for snacks. However, for meals, utilize the nearby dining options. Keep a list of 2-3 nearby restaurants saved on your phone before arrival to avoid decision fatigue when you are tired.

    Step-by-Step Guide to Booking the Best Rate

    Securing the best deal requires a bit of strategy. Follow these steps to maximize value when booking your stay at Red Roof Inn Pittsburgh North Cranberry Township Cranberry Township Pa.

    1. Check Direct vs. OTA Prices: Start by checking the official Red Roof Inn website. Then, compare it with Online Travel Agencies (OTAs) like Expedia or Booking.com. Sometimes, direct bookings offer member discounts or flexible cancellation policies that OTAs do not.
    2. Look for “Senior” or “AAA” Discounts: If you qualify, these discounts can reduce the rate by 10-15%. Always have your ID ready at check-in to verify eligibility.
    3. Book in Advance for Peak Seasons: Cranberry Township gets busy during holiday shopping seasons (November-December) and local festival times. Booking at least two weeks in advance ensures availability and better rates.
    4. Join the Loyalty Program: The Red Roof Inn loyalty program is free to join. Accumulating points can lead to free nights in the future, making it a worthwhile investment for frequent travelers.

    FAQ Section

    Q1: Is the Red Roof Inn in Cranberry Township truly pet-friendly?

    A: Yes, it is one of the most pet-friendly options in the area. They allow one well-behaved pet per room at no additional charge. However, pets must not be left unattended in the room, and owners are responsible for any damages.

    Q2: Does the hotel provide breakfast?

    A: No, the Red Roof Inn Pittsburgh North does not offer a complimentary continental breakfast. This is a trade-off for the lower nightly rates. However, there are numerous breakfast cafes and fast-food options within a 2-mile radius.

    Q3: Is the hotel safe for solo female travelers?

    A: Cranberry Township is generally considered a safe suburb. The hotel features exterior corridors, which some travelers prefer for easy exit, but others may find less secure than interior corridor hotels. It is recommended to request a room closer to the main office or well-lit areas and to use standard safety precautions like locking deadbolts.

    Q4: How far is the hotel from downtown Pittsburgh?

    A: The hotel is approximately 20-25 miles north of downtown Pittsburgh. Depending on traffic, the drive takes about 25-35 minutes via I-79 South. This makes it a viable option for visitors who want to explore the city but prefer quieter, cheaper accommodation outside the urban core.

    Q5: Are there meeting rooms available for business use?

    A: This specific location is primarily designed for transient stays and does not typically offer large conference facilities. For small informal meetings, the lobby area may suffice, but for formal business presentations, you should look for dedicated event spaces in nearby corporate centers.

    Q6: What is the check-in and check-out time?

    A: Standard check-in time is usually 3:00 PM, and check-out is at 11:00 AM. Early check-in or late check-out may be available upon request, subject to availability and potentially an extra fee.

    Conclusion

    Choosing the right accommodation can make or break your travel experience. The Red Roof Inn Pittsburgh North Cranberry Township Cranberry Township Pa stands out as a pragmatic choice for travelers who prioritize budget efficiency, pet-friendly policies, and strategic location over luxury frills. By understanding what to expect and planning accordingly, you can enjoy a comfortable stay that leaves more room in your budget for exploring what Pittsburgh and Cranberry Township have to offer.

    If you found this guide helpful, please share it with your fellow travelers on social media. Helping others find great deals creates a community of smart, savvy explorers. Safe travels!

  • Red Roof Inn Lansing East MSU: Best Budget Stay?

    Red Roof Inn Lansing East MSU: Best Budget Stay?

    Are you struggling to find affordable, clean, and convenient accommodation near Michigan State University? Whether you are a prospective student touring the campus, a parent visiting for graduation, or a sports fan heading to Spartan Stadium, finding the right place to stay can be stressful. You need a location that balances cost with comfort, and that is exactly where Red Roof Inn Lansing East Michigan State University Lansing Mi comes into play as a top contender for budget-conscious travelers.

    In this comprehensive guide, we will break down everything you need to know about this specific property. We will cover its proximity to key landmarks, amenity quality, and how it compares to other local options, ensuring you make an informed decision for your next trip to East Lansing.

    Why Choose Red Roof Inn Lansing East for Your MSU Visit?

    When planning a trip to East Lansing, location is often the primary driver for hotel selection. The Red Roof Inn Lansing East Michigan State University Lansing Mi is strategically positioned to serve visitors who want easy access to the university without paying premium downtown prices.

    Proximity to Key Landmarks

    One of the most significant advantages of this property is its distance from major attractions. It is located just a short drive from the heart of the MSU campus. For those attending events at the Breslin Center or watching a football game at Spartan Stadium, this location offers a manageable commute, especially when compared to hotels further out in Okemos or Dimondale.

    • Distance to MSU Campus: Approximately 3–4 miles (5–10 minute drive).
    • Distance to Spartan Stadium: Roughly 4 miles.
    • Nearby Dining: Close to local favorites along Grand River Avenue and Lake Lansing Road.

    This proximity means you spend less time in traffic and more time enjoying your visit. For parents dropping off freshmen, every minute counts during move-in weekend, and being close by reduces logistical stress.

    Value for Money

    In the hospitality industry, value is defined by what you get for the price you pay. Red Roof Inn has built its brand on providing essential comforts at a fraction of the cost of full-service hotels. According to recent travel data, budget hotels in college towns like East Lansing see a 20-30% price surge during peak university events. However, Red Roof Inn typically remains more affordable than its competitors, such as Hilton or Marriott properties in the area.

    By choosing this inn, you are prioritizing practicality. You are not paying for a concierge or a spa; you are paying for a clean bed, a hot shower, and a safe place to sleep. This aligns perfectly with the needs of students and families who plan to spend their day on campus rather than in the hotel room.

    What Amenities Can You Expect at This Location?

    Understanding what is included in your stay is crucial for managing expectations. While this is a budget-friendly option, it does not mean the amenities are lacking. Here is a detailed breakdown of what guests typically experience.

    Essential Comforts and Services

    The property focuses on the fundamentals. Guests can expect:

    1. Free Wi-Fi: Essential for students checking emails or parents coordinating schedules. The connection is generally reliable for browsing and streaming.
    2. Pet-Friendly Policy: One of the standout features of the Red Roof Inn brand is its pet-friendly approach. Most locations allow one well-behaved pet per room at no extra charge. This is a huge benefit for families moving students into dorms who need to bring their furry friends along for the transition.
    3. Flat-Screen TVs: Each room is equipped with modern entertainment options.
    4. Air Conditioning and Heating: Given Michigan’s variable weather, from humid summers to snowy winters, climate control is vital. The units are individually controlled, allowing you to set your preferred temperature.

    What Is Not Included?

    To maintain low rates, certain luxury amenities are omitted. It is important to note that there is no free breakfast provided at this specific location. Unlike some competitors like Hampton Inn or Holiday Inn Express, you will need to plan for your morning meal. However, this also gives you the freedom to explore local cafes in East Lansing, such as Biggby Coffee or Sparrow Café, which are highly rated by locals.

    Additionally, while there is parking available, it is typically surface-level parking rather than a heated garage. In winter months, you may need to brush snow off your vehicle, but the lot is usually plowed promptly.

    Red Roof Inn Lansing East Michigan State University Lansing Mi

    How Does It Compare to Other Hotels Near MSU?

    To help you decide if this is the right choice for you, let’s look at a comparison between Red Roof Inn and other common lodging types in the area.

    FeatureRed Roof Inn Lansing EastMid-Range Chain (e.g., Courtyard)Luxury Hotel (e.g., Kellogg Center)
    Price Range$$$$
    BreakfastNot IncludedOften IncludedOften Included
    Pet PolicyFree (1 pet)Fee Usually AppliesVaries/High Fee
    Room SizeCompactStandardSpacious
    Best ForBudget TravelersBusiness/FamilySpecial Occasions

    As shown in the table, the Red Roof Inn Lansing East Michigan State University Lansing Mi wins on price and pet policy. If your primary goal is to save money for tickets, meals, or souvenirs, this is the logical choice. However, if you require a full-service gym or a business center, you might need to look elsewhere.

    For more context on the university itself and its surrounding community, you can visit the Michigan State University Wikipedia page to understand the scale of the campus and the volume of visitors it attracts annually.

    Tips for Booking the Best Rate

    Securing the best deal requires a bit of strategy, especially in a college town where demand fluctuates wildly.

    1. Book Early for Game Days

    Football season and graduation weekends book up months in advance. Rates can double or triple during these periods. Aim to book at least 3–4 months ahead for fall football games.

    2. Join the RediRewards Program

    Red Roof Inn offers a loyalty program called RediRewards. Signing up is free and can provide member-only discounts, faster check-in, and points toward free nights. Even for a single stay, the member rate is often lower than the public rate.

    3. Check for Student or Alumni Discounts

    Sometimes, specific corporate or educational discounts apply. If you are an MSU alum or have a corporate code, check if it applies to this location. It doesn’t always work for budget brands, but it is worth verifying during the booking process.

    4. Be Flexible with Dates

    If you are visiting for a conference or a non-sporting event, try to stay mid-week (Tuesday–Thursday). Weekend rates in East Lansing are higher due to leisure travelers and sporting events.

    Frequently Asked Questions (FAQ)

    Here are answers to the most common questions travelers ask about this property.

    1. Is the Red Roof Inn Lansing East within walking distance to MSU?

    No, it is not within comfortable walking distance. It is approximately 3–4 miles away. You will need a car, rideshare service (Uber/Lyft), or taxi to reach the campus efficiently. Walking would take over an hour and may not be safe depending on the time of day and weather conditions.

    2. Are there restaurants nearby?

    Yes, there are several dining options within a 5-minute drive. You can find fast-food chains, casual dining spots, and local eateries along Lake Lansing Road and Grand River Avenue. Since the hotel does not offer breakfast, having nearby options is a significant plus.

    3. Is the hotel safe for families?

    The property maintains standard security measures, including well-lit parking areas and secure door locks. As with any hotel, it is recommended to keep valuables in your car trunk or with you. The neighborhood is generally quiet, being slightly removed from the bustling college nightlife district.

    4. Can I check in late?

    Yes, the front desk typically operates 24/7. However, it is always wise to call ahead if you are arriving very late (after midnight) to ensure your reservation is held and to get specific instructions for entry if the main entrance is locked.

    5. Is there a pool at this location?

    Most Red Roof Inn locations, including this one, do not have a swimming pool. This is part of their cost-saving model. If a pool is a mandatory requirement for your stay, you may need to consider a different hotel brand in the area.

    6. How clean are the rooms?

    Cleanliness standards have improved significantly across the brand in recent years. Guest reviews generally highlight that rooms are tidy and functional. However, because it is a budget property, do not expect luxury finishes. If you notice any issues upon arrival, report them immediately to the front desk for a quick resolution or room change.

    Conclusion

    Choosing the right accommodation can make or break your trip to East Lansing. The Red Roof Inn Lansing East Michigan State University Lansing Mi offers a compelling blend of affordability, convenience, and pet-friendly policies that are hard to beat in the area. It is ideal for those who prioritize location and budget over luxury amenities like pools or complimentary breakfast.

    By understanding what to expect and planning ahead, you can enjoy a stress-free stay while exploring all that Michigan State University has to offer. Whether you are there for the sports, the academics, or family visits, this hotel serves as a practical home base.

    Did you find this guide helpful? Share it with your fellow Spartans, friends, or family members who are planning their next visit to Lansing. Don’t forget to bookmark this page for future reference when booking your next stay!

  • How to Tie In a Roof to an Existing Roof

    How to Tie In a Roof to an Existing Roof

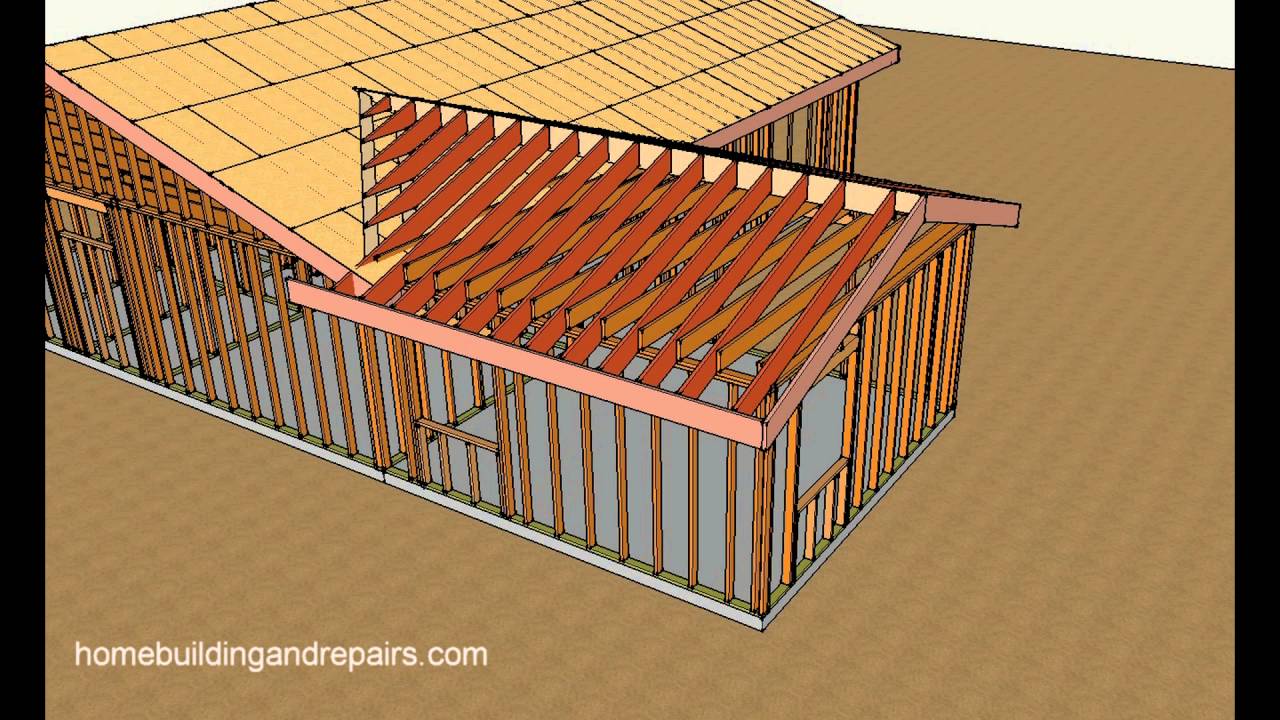
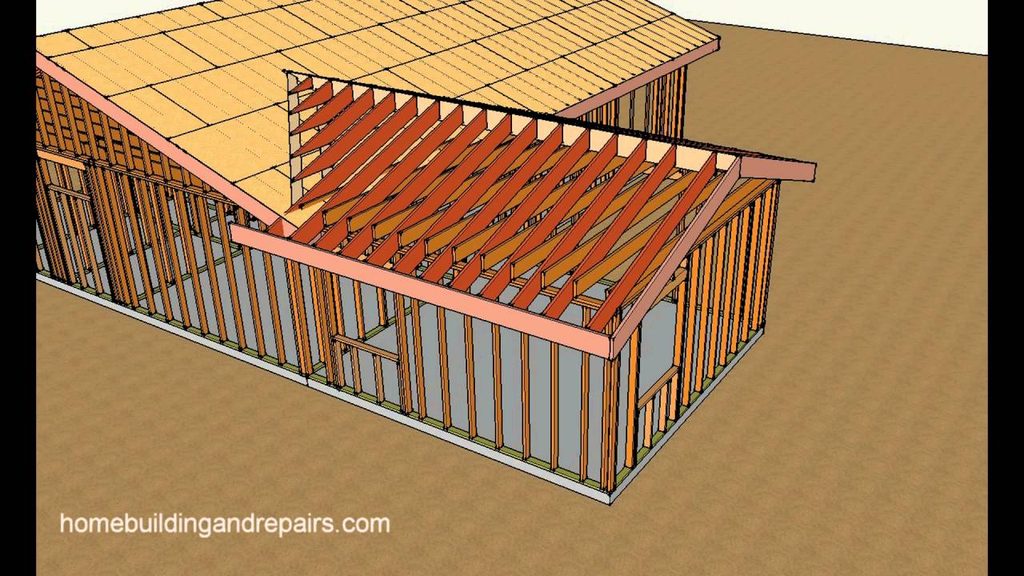
    Adding space to your home is an exciting milestone, but it brings a complex construction challenge: connecting the new structure to the old one. If done incorrectly, this junction becomes the most vulnerable point for water intrusion, leading to costly interior damage and mold growth. Understanding how to tie in a roof to an existing roof is critical for ensuring the longevity and structural integrity of your home expansion.

    This guide will walk you through the professional standards required to create a watertight seal between two roof planes. Whether you are hiring a contractor or managing the project yourself, knowing the correct methodology ensures your investment remains protected against the elements.

    Why Proper Roof Integration Matters

    Before diving into the tools and techniques, it is essential to understand why this specific task requires precision. A roof is not just a covering; it is a system designed to shed water efficiently. When you interrupt that system with an addition, you create a “valley” or a intersection where water flow changes direction.

    According to industry data, improper flashing accounts for over 90% of roof leaks in residential additions. The goal is not just to cover the gap, but to integrate the new roofing materials with the existing ones so that they function as a single, cohesive unit. This involves matching pitch, aligning underlayment, and installing multi-layered flashing systems that adhere to local building codes.

    Step-by-Step Guide: How to Tie In a Roof to an Existing Roof

    Tying in a new roof section is not a simple matter of nailing down shingles next to old ones. It requires a systematic approach to ensure durability. Here is the professional workflow used by experienced roofers.

    1. Assess Structural Compatibility and Pitch

    The first step is determining if the new roof can physically connect to the old one. The ideal scenario is when both roofs share the same pitch (slope). If the pitches differ significantly, you will need to construct a hip or valley, which complicates the waterproofing process.

    • Same Pitch: Allows for a straightforward ridge-to-ridge or side-wall tie-in.
    • Different Pitch: Requires custom framing and specialized flashing to manage water runoff speed differences.

    Ensure your local building department approves the structural load. The existing wall must be able to support the new roof’s weight and any potential snow loads.

    2. Prepare the Existing Roof Surface

    You cannot simply build over dirty or damaged shingles. Preparation is key to adhesion and longevity.

    • Remove Shingles: Carefully remove the shingles from the area where the new roof will intersect. Typically, you need to clear a strip at least 12–18 inches wide along the connection line.
    • Inspect Decking: Check the exposed roof deck (plywood or OSB) for rot, soft spots, or water damage. Replace any compromised sections immediately.
    • Clean the Area: Sweep away all debris, nails, and granules. A clean surface ensures that underlayment adhesives bond correctly.

    3. Install Ice and Water Shield

    In cold climates, ice dams are a major threat. Even in warmer regions, an ice and water protective membrane provides an extra layer of security at critical junctions.

    Apply a self-adhering rubberized asphalt membrane over the exposed decking and extend it up the vertical wall of the existing structure (if applicable) by at least 6 inches. This layer acts as a secondary barrier if water gets past the shingles.

    4. Apply High-Quality Underlayment

    Once the membrane is in place, install your synthetic or felt underlayment. Overlap the new underlayment with the existing roof’s underlayment by at least 4–6 inches.

    • Pro Tip: Use roofing cement or compatible adhesive tape to seal the overlap edge. This prevents wind-driven rain from getting underneath the layers.

    5. Install Step Flashing or Valley Metal

    This is the most critical step in learning how to tie in a roof to an existing roof. Flashing directs water away from the joint.

    • For Side-Wall Tie-Ins: Use step flashing. These are L-shaped metal pieces (usually aluminum or galvanized steel) that are woven into each course of shingles. Each piece should overlap the previous one by at least 2 inches.
    • For Valley Intersections: Install a W-valley metal or closed-cut valley lining. Ensure the metal extends under the existing shingles and over the new underlayment.

    Note: Never use caulk as the primary waterproofing method. Caulk dries out and cracks over time. Mechanical overlapping and proper flashing are the only reliable long-term solutions. For more details on roofing materials and standards, you can refer to general construction principles on Wikipedia.

    6. Weave in the New Shingles

    Now, you integrate the new shingles with the old ones.

    1. Start from the bottom and work your way up.
    2. If using step flashing, place a shingle, then slide the next piece of flashing under the shingle above it.
    3. Nail the shingles securely, but ensure nails do not penetrate the flashing below.
    4. Trim the existing shingles if necessary to create a clean line, but avoid cutting into the structural integrity of the old roof.

    7. Seal and Inspect

    Once all shingles are installed, apply a small bead of roofing sealant under the edges of any cut shingles. However, rely primarily on the physical overlap. Conduct a water test if possible, or wait for the next rainstorm to inspect for leaks from the inside attic space.

    How To Tie In A Roof To An Existing Roof

    Common Mistakes to Avoid

    Even seasoned DIYers can stumble on these pitfalls. Avoiding them saves time and money.

    MistakeConsequenceSolution
    Nailing through flashingCreates immediate leak pathsAlways nail above the flashing piece, never through it.
    Ignoring ventilationTraps heat and moistureEnsure soffit and ridge vents are continuous across the tie-in.
    Using mismatched materialsUneven wear and aesthetic issuesTry to match shingle brand and color; if unavailable, use a contrasting accent deliberately.
    Skipping ice/water shieldHigh risk of ice dam leakageAlways use membrane at intersections, regardless of climate zone.

    Frequently Asked Questions (FAQ)

    1. Can I tie in a new roof without removing existing shingles?

    While it is technically possible to flash over existing shingles, it is not recommended. Building codes in most US jurisdictions require removing shingles at the intersection to inspect the deck and ensure proper underlayment integration. Skipping this step voids warranties and increases leak risks.

    2. What is the best material for roof flashing?

    Aluminum is the most common choice due to its cost-effectiveness and resistance to rust. However, copper is superior for longevity and aesthetics, though it is significantly more expensive. Galvanized steel is also an option but requires painting to prevent corrosion over time.

    3. Do I need a permit to tie in a new roof section?

    Yes, almost certainly. Adding square footage or altering the structural load of your home requires a building permit. Local inspectors will check the framing, flashing, and electrical connections. Failing to pull a permit can lead to fines and issues when selling your home.

    4. How long does it take to tie in a roof?

    For a professional crew, a standard side-wall tie-in might take 1–2 days. For a DIYer, it could take 3–5 days depending on weather, complexity, and experience level. Rushing this process often leads to errors.

    5. What if the existing roof is old and brittle?

    If the existing shingles are near the end of their life (15+ years), consider replacing the entire roof section adjacent to the addition. Tying new, flexible shingles into old, brittle ones is difficult and may cause the old shingles to crack during installation.

    Conclusion

    Learning how to tie in a roof to an existing roof is about more than just carpentry; it is about mastering water management. By following the steps outlined above—preparing the surface, installing robust underlayment, and weaving in proper flashing—you create a durable, leak-free connection that protects your home for decades.

    Remember, while DIY is rewarding, roofing involves significant safety risks and technical nuances. If you are unsure about structural loads or complex flashing details, consulting a licensed professional is a wise investment.

    Did you find this guide helpful? Share it with your friends on social media who might be planning their own home expansions, and let us know in the comments if you have any questions about your specific roofing project!

  • How Much Does It Cost To Fix A Roof Leak?

    How Much Does It Cost To Fix A Roof Leak?

    Discovering a water stain on your ceiling is every homeowner’s nightmare. It triggers immediate anxiety about structural damage, mold growth, and, most pressingly, the financial burden of repairs. If you are staring at that damp patch and asking, “How much does it cost to fix a roof leak,” you are not alone. This guide breaks down the costs clearly, helping you budget effectively and avoid unnecessary expenses.

    Understanding the Average Cost of Roof Leak Repairs

    The short answer is that fixing a roof leak typically costs between $400 and $1,000, with the national average hovering around $750. However, this figure can vary significantly depending on the severity of the leak, the type of roofing material, and your location.

    Minor repairs, such as replacing a few missing shingles or resealing a vent pipe, might cost as little as $150 to $400. On the other hand, if the leak has caused structural damage to the decking or requires extensive flashing replacement, costs can skyrocket to $2,500 or more.

    It is crucial to understand that ignoring a small leak often leads to exponentially higher costs later. Water damage is insidious; what starts as a minor drip can rot wooden beams, ruin insulation, and promote hazardous mold growth within weeks.

    Key Factors That Influence Repair Prices

    When contractors provide a quote, they are evaluating several specific variables. Understanding these factors will help you determine if a quote is fair.

    1. Type of Roofing Material

    Different materials require different labor skills and replacement parts.

    • Asphalt Shingles: The most common and affordable option. Repairs are generally quick and inexpensive.
    • Metal Roofing: Durable but requires specialized tools for sealing seams. Costs are moderate.
    • Tile or Slate: These are premium materials. Breaking a tile during repair is a risk, and matching old tiles can be difficult, driving up labor and material costs.
    • Flat Roofs (EPDM/TPO): Common in commercial buildings or modern homes. Repairs often involve chemical sealants or patching membranes, which varies in price based on square footage.

    2. Accessibility and Roof Pitch

    Safety is a major cost driver. A steeply pitched roof requires harnesses, scaffolding, and more time to navigate safely. Similarly, if your roof is multi-storied or surrounded by obstacles like trees or power lines, contractors may charge a premium for the increased risk and difficulty.

    3. Extent of Water Damage

    The visible leak is only part of the problem. Contractors must assess:

    • Roof Decking: Is the wood beneath the shingles rotted?
    • Insulation: Has water saturated the attic insulation?
    • Interior Damage: Do ceilings or walls need drywall repair and repainting?

    If the water has compromised the structural integrity of the roof deck, you are no longer just paying for a “leak fix”; you are paying for structural restoration.

    4. Location and Labor Rates

    Labor costs vary wildly across the United States. In high-cost-of-living areas like California or New York, hourly rates for licensed roofers can be 30-50% higher than in the Midwest. Additionally, emergency repairs after a storm often incur surge pricing due to high demand.

    How Much Does It Cost To Fix A Roof Leak

    Common Causes of Roof Leaks and Their Specific Costs

    Identifying the source of the leak is half the battle. Here is a breakdown of common issues and their typical repair costs.

    Cause of LeakTypical Repair ActionEstimated Cost Range
    Missing ShinglesReplace 1-3 shingles$150 – $350
    Damaged FlashingReseal or replace metal flashing around chimneys/vents$200 – $600
    Clogged GuttersCleaning and realigning gutters$100 – $250
    Vent Pipe Boot FailureReplace rubber boot around plumbing vent$150 – $400
    Valley LeaksRepairing the intersection of two roof slopes$300 – $800
    Skylight LeaksResealing or replacing skylight gaskets$400 – $1,000+

    Note: These prices include both labor and materials but exclude interior damage repair.

    DIY vs. Professional Repair: What Should You Choose?

    Many homeowners wonder if they can save money by fixing the leak themselves. While DIY is tempting, it comes with significant risks.

    When DIY Might Work

    If the issue is purely cosmetic or minor, such as a single loose shingle on a low-pitch roof, you might handle it. You would need:

    • A sturdy ladder
    • Roofing cement
    • Replacement shingles
    • Safety gear (non-slip shoes)

    However, even minor DIY errors can void your manufacturer’s warranty.

    When to Call a Professional

    You should always hire a licensed contractor if:

    • The roof is steep or high.
    • The source of the leak is not obvious.
    • There is signs of mold or structural rot.
    • The roof is under warranty.

    According to industry standards, professional roofers carry liability insurance and workers’ compensation. If you fall off your roof while attempting a DIY fix, your homeowner’s insurance may not cover the medical bills. Furthermore, professionals have moisture meters and thermal imaging cameras to detect hidden water pockets that the naked eye cannot see.

    For more detailed information on roofing materials and standards, you can refer to Wikipedia’s entry on Roofing.

    Step-by-Step: What to Expect During a Professional Repair

    Knowing the process helps reduce anxiety and ensures you are getting quality service.

    1. Inspection: The roofer will climb onto the roof to visually inspect shingles, flashing, and vents. They may also check the attic for water trails.
    2. Diagnosis: They will identify the exact entry point. Note: Water often enters far from where it appears on the ceiling due to runoff along rafters.
    3. Quote Presentation: You receive a detailed breakdown of labor, materials, and timeline.
    4. Preparation: The crew sets up safety equipment and protects your landscaping from falling debris.
    5. Repair Execution:
      • Damaged shingles are removed.
      • Rotted decking is cut out and replaced.
      • New flashing is installed with proper sealant.
      • Matching shingles are nailed in place.
    6. Cleanup and Water Test: The area is cleaned, and the roofer may simulate rain with a hose to ensure the leak is sealed.

    FAQ Section

    1. Does homeowners insurance cover roof leak repairs?

    Generally, yes, but only if the leak is caused by a sudden, accidental event like a storm, wind, or falling tree. Insurance typically does not cover leaks resulting from lack of maintenance, wear and tear, or age. Always review your policy details.

    2. How long does it take to fix a roof leak?

    Minor repairs usually take 2 to 4 hours. More complex issues involving decking replacement or flashing reconstruction can take 1 to 2 days. Weather conditions can also cause delays.

    3. Can I patch a roof leak from the inside?

    While you can use temporary sealants from the attic to stop active dripping, this is not a permanent solution. Water will continue to pool and rot the structure. Proper repair must always be done from the exterior to address the root cause.

    4. How do I find a trustworthy roofing contractor?

    Look for contractors who are licensed, insured, and have positive reviews on platforms like Google or BBB. Ask for local references and verify their physical address. Avoid door-to-door solicitors who demand full payment upfront.

    5. What is the lifespan of a typical roof repair?

    A high-quality professional repair should last 10 to 15 years, or until the rest of the roof needs replacement. However, if the surrounding shingles are brittle and old, further leaks may occur nearby soon after.

    Conclusion

    Addressing a roof leak promptly is one of the smartest investments you can make in your home. While the question “How much does it cost to fix a roof leak“ has a variable answer, knowing the average ranges ($400–$1,000) empowers you to negotiate better and spot unfair quotes. Remember, the cost of prevention is always lower than the cost of restoration.

    Don’t let a small drip turn into a major renovation project. Inspect your roof regularly, maintain your gutters, and act quickly when signs of water appear.

    Found this guide helpful? Share it with your friends on social media to help them protect their homes too! Your network might just thank you for saving them from a costly surprise.

  • Best Trim Paint for a Black Roof: Top Picks

    Best Trim Paint for a Black Roof: Top Picks

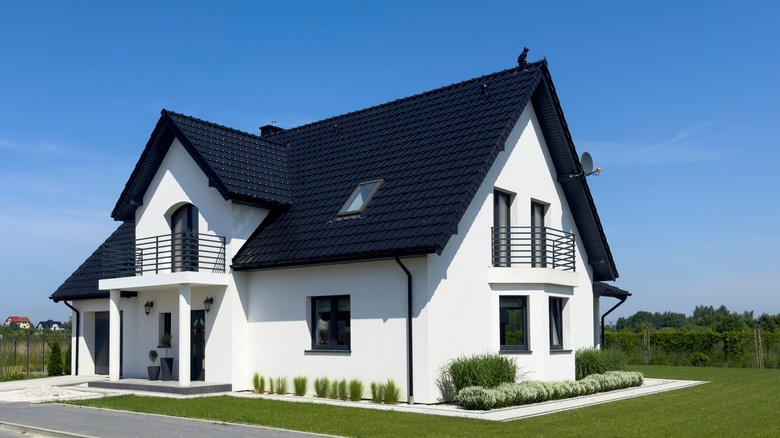
    Have you ever stood back to look at your home, only to feel that something is slightly “off” with the color balance? A sleek black roof is a bold, modern choice, but it can easily overwhelm a house if the trim doesn’t provide the right visual anchor. Finding what is the best trim paint for with black roof is crucial to achieving that sharp, professional finish that boosts curb appeal and protects your investment.

    In this guide, we will break down the science of contrast, the durability requirements for exterior trim, and the specific paint brands that professionals trust. Whether you are renovating a historic colonial or updating a modern farmhouse, getting this combination right is the difference between a house that looks dated and one that looks timeless.

    Why Contrast Matters: The Visual Impact of Black Roofs

    Before diving into specific paint cans, it is essential to understand why the trim color matters so much when paired with a black roof. A black roof absorbs more heat and visually “weighs down” the top of the structure. If your trim is too dark or blends in with the siding, the house can appear flat, heavy, or even smaller than it actually is.

    The goal of your trim paint is to create a frame. Just like a picture frame highlights the art inside, white or light-colored trim highlights the architecture of your home against the dark backdrop of the roof. This creates a crisp boundary that draws the eye upward and defines the roofline.

    According to architectural design principles, high-contrast exteriors tend to have higher perceived value. A study by Zillow on home resale value indicated that homes with high-contrast exterior schemes often sell faster because they photograph better and stand out in listings. When you pair a black roof with the right trim, you are not just painting; you are staging your home for success.

    What Is The Best Trim Paint For With Black Roof? Top Recommendations

    When experts ask what is the best trim paint for with black roof, the answer usually revolves around three key factors: brightness, durability, and sheen. Here are the top contenders in the US market that consistently deliver professional results.

    1. Benjamin Moore Advance (White Dove or Chantilly Lace)

    Benjamin Moore’s Advance line is a water-borne alkyd. This means it has the leveling properties of an oil-based paint but cleans up with water.

    • Why it works: It dries to an incredibly hard, smooth finish that resists dents and scratches.
    • Best Color: White Dove offers a warm, soft white that prevents the “hospital sterile” look, while Chantilly Lace is a crisp, clean white for maximum contrast.
    • Durability: Excellent resistance to yellowing, which is critical for white trim under strong sunlight.

    2. Sherwin-Williams Emerald Urethane Trim Enamel

    This is a favorite among professional painters for its self-leveling capabilities.

    • Why it works: It provides a furniture-grade finish that is tough enough to withstand weather extremes.
    • Best Color: Extra White or Pure White. These shades have no underlying yellow or blue tones, ensuring they pop against the black roof without clashing.
    • Durability: Highly resistant to dirt pickup and mildew, keeping your trim looking fresh for years.

    3. Behr Premium Plus Ultra (Ultra Pure White)

    For DIYers on a budget, Behr offers a compelling option available at Home Depot.

    • Why it works: It includes primer and paint in one, saving time on preparation.
    • Best Color: Ultra Pure White is their brightest option, designed specifically for high-visibility areas.
    • Durability: Good stain resistance and a lifetime warranty on many substrates, making it a safe choice for residential projects.
    BrandProduct LineBest FeatureIdeal SheenPrice Range
    Benjamin MooreAdvanceHard, smooth finishSemi-GlossPremium
    Sherwin-WilliamsEmerald UrethaneSelf-levelingSatin/Semi-GlossPremium
    BehrPremium Plus UltraAll-in-one PrimerSemi-GlossMid-Range
    Farrow & BallExterior EggshellDeep, rich pigmentEggshellLuxury
    What Is The Best Trim Paint For With Black Roof

    Choosing the Right Sheen: Gloss vs. Semi-Gloss vs. Satin

    The color is only half the battle. The sheen (or gloss level) determines how the light reflects off your trim, which dramatically affects how it looks against a matte or textured black roof.

    • Semi-Gloss: This is the gold standard for exterior trim. It reflects enough light to highlight architectural details like window casings and corner boards. It is also easier to clean than flat finishes. When paired with a black roof, semi-gloss trim creates a dynamic interplay of light and shadow.
    • Satin: Offers a softer glow. If your home has intricate woodwork that you don’t want to look too “plastic,” satin is a good compromise. However, it may not provide the same sharp contrast as semi-gloss.
    • High Gloss: While striking, high gloss can highlight imperfections in the wood or installation. Use this only if your trim work is flawless.

    Pro Tip: If your black roof has a high-shine finish (like certain metal roofs), opt for a satin trim to avoid competing reflections. If the roof is matte asphalt shingles, semi-gloss trim will provide the necessary pop.

    Step-by-Step Guide to Painting Trim for Maximum Durability

    To ensure your paint job lasts, follow this precise application process. Proper preparation is 80% of the result.

    1. Clean the Surface: Use a mixture of 1 part bleach to 3 parts water to remove mildew and dirt. Rinse thoroughly and let dry for 24 hours.
    2. Sand Lightly: Use 120-grit sandpaper to scuff the existing surface. This helps the new paint adhere. Wipe away dust with a tack cloth.
    3. Prime (If Necessary): If you are painting over bare wood or stained wood, apply a high-quality exterior primer. For previously painted surfaces in good condition, you may skip this step if using a paint-primer combo.
    4. Apply First Coat: Use a high-quality synthetic bristle brush for corners and a mini-roller for flat areas. Maintain a wet edge to avoid lap marks. Let dry according to the manufacturer’s instructions (usually 4–6 hours).
    5. Apply Second Coat: A second coat is non-negotiable for exterior trim. It ensures uniform color and adds a layer of protection against UV rays and moisture.
    6. Cure Time: Avoid washing or scrubbing the trim for at least 30 days to allow the paint to fully cure and harden.

    Common Mistakes to Avoid

    Even with the best paint, errors in application can ruin the effect. Here are pitfalls to watch out for:

    • Ignoring Undertones: Not all whites are created equal. A white with blue undertones might look cold against a warm-toned brick, while a creamy white might look dirty against a cool gray siding. Always test samples on your actual house at different times of day.
    • Painting in Direct Sunlight: Painting trim when the sun is beating down causes the paint to dry too quickly, leading to brush marks and poor adhesion. Aim for shaded areas or overcast days.
    • Skipping Caulk: Gaps between trim and siding allow water intrusion. Use a high-quality exterior silicone-latex caulk to seal joints before painting. This prevents rot and keeps the lines crisp.

    For more information on the chemical composition of exterior paints and their environmental impact, you can refer to this Wikipedia article on Paint.

    FAQ Section

    1. Can I use interior paint for exterior trim?

    No. Interior paint lacks the UV stabilizers and mildewcides found in exterior formulas. It will chalk, fade, and peel within months when exposed to rain and sun. Always use 100% acrylic latex or alkyd exterior paint.

    2. How often should I repaint exterior trim?

    High-quality exterior trim paint typically lasts 5–7 years. However, factors like direct sunlight, humidity, and proximity to sprinklers can reduce this lifespan. Inspect your trim annually for signs of cracking or peeling.

    3. Does a black roof make the house hotter?

    Yes, black roofs absorb more solar radiation than lighter colors. However, proper attic ventilation and insulation can mitigate this heat transfer. Using light-colored trim does not significantly affect the thermal performance of the roof but helps reflect some light away from the walls.

    4. What is the best white paint for a modern farmhouse with a black roof?

    Benjamin Moore’s Simply White or Sherwin-Williams’ Alabaster are popular choices for modern farmhouses. They are warm whites that complement natural wood accents and stone, providing a soft yet distinct contrast against the black roof.

    5. Should I match my trim to my windows?

    If you have white vinyl windows, matching your trim to the window color creates a seamless, integrated look. If you have black or bronze windows, you can either match the trim to the windows for a monochromatic look or use white trim to create a traditional framed appearance. With a black roof, white trim generally offers the best balance.

    Conclusion

    Choosing what is the best trim paint for with black roof is about more than just picking a white can off the shelf. It requires balancing aesthetic contrast with practical durability. By opting for high-quality brands like Benjamin Moore Advance or Sherwin-Williams Emerald, and selecting the right sheen, you can transform your home’s exterior into a striking statement piece.

    Remember, the right trim paint frames your home, protects it from the elements, and significantly boosts its curb appeal. Don’t rush the selection process—test samples, prepare your surfaces meticulously, and enjoy the fresh, crisp look of a well-executed exterior paint job.

    Did you find this guide helpful? Share it with your friends on Facebook or Pinterest who are planning their next home improvement project!

  • How Many Solar Panels Fit On My Roof?

    How Many Solar Panels Fit On My Roof?

    Are you staring at your rooftop, wondering if it’s big enough to power your entire home with clean energy? You are not alone; this is the most common question homeowners ask when considering the switch to renewable power. Determining how many solar panels can I fit on my roof is the critical first step in understanding your potential savings and environmental impact.

    Let’s break down the math, the physical constraints, and the smart strategies to maximize your solar potential without overwhelming you with jargon.

    Understanding Your Available Roof Space

    Before we talk about kilowatts or efficiency ratings, we need to look at the physical reality of your home. Not every square foot of your roof is usable for solar installation.

    Calculating Usable Square Footage

    The total area of your roof is not the same as your usable solar area. Installers must leave space around the edges (known as “setbacks”) for safety, maintenance access, and wind uplift compliance. Additionally, any permanent structures like chimneys, vent pipes, or skylights reduce the available surface area.

    A good rule of thumb for US homeowners is that only about 70% to 80% of your total roof area is actually usable for solar panels.

    Roof FeatureImpact on Solar Capacity
    Chimneys & VentsReduces usable space; requires shading analysis.
    DormersCreates complex angles; may reduce panel count.
    SetbacksMandatory clearance from edges (usually 1-2 feet).
    ShadingTrees or neighboring buildings can render areas useless.

    Standard Solar Panel Dimensions

    To calculate the number of panels, you need to know the size of the hardware. Most residential solar panels in the US market today follow standard dimensions:

    • Standard 60-cell panel: Approximately 3.25 feet by 5.5 feet (17.8 sq ft).
    • High-efficiency 72-cell panel: Approximately 3.25 feet by 6.4 feet (20.8 sq ft).

    For this guide, we will use the standard 17.8 square feet per panel as our baseline. This is the most common size for modern monocrystalline panels used in residential settings.

    Factors That Influence Panel Count

    It is not just about physical space. Several technical and environmental factors dictate how many panels you should install versus how many you can install.

    Roof Orientation and Tilt

    In the Northern Hemisphere, south-facing roofs are ideal because they receive the most direct sunlight throughout the day. However, east and west-facing roofs are also viable, though they may produce slightly less energy during peak hours.

    • South-Facing: Maximum production.
    • East/West-Facing: Good for morning/evening usage; may require 10-20% more panels to match south-facing output.
    • North-Facing: Generally not recommended for solar in the US due to low efficiency.

    The tilt (pitch) of your roof also matters. A pitch between 15 and 40 degrees is considered optimal for most US latitudes. If your roof is flat, installers will use racking systems to tilt the panels, which requires more spacing between rows to prevent shading.

    Local Climate and Sunlight Hours

    Your geographic location plays a massive role. A home in Arizona receives significantly more “peak sun hours” than a home in Seattle.

    • High Sunlight States (AZ, CA, NV): You may need fewer panels to meet your energy needs because each panel produces more electricity.
    • Lower Sunlight States (WA, NY, MA): You might need to maximize your roof space with more panels to compensate for lower daily irradiance.

    You can check your specific location’s solar potential using tools provided by the National Renewable Energy Laboratory, which offers detailed insolation maps for the United States.

    How Many Solar Panels Can I Fit On My Roof

    Step-by-Step Calculation Guide

    Let’s do the math together. Here is a simple, three-step process to estimate your capacity.

    Step 1: Measure Your Usable Roof Area

    Take your total roof square footage and subtract non-usable areas.

    • Example: Total Roof = 2,000 sq ft.
    • Subtract 20% for setbacks/obstructions = 400 sq ft.
    • Usable Area = 1,600 sq ft.

    Step 2: Divide by Panel Size

    Divide your usable area by the size of a standard panel (17.8 sq ft).

    • 1,600 sq ft / 17.8 sq ft = 89.8 panels.

    Note: This is the theoretical maximum. In reality, you will likely fit fewer due to irregular roof shapes.

    Step 3: Adjust for Energy Needs

    Just because you can fit 89 panels doesn’t mean you need them. Check your electric bill for your annual kWh usage.

    • Average US home uses ~10,500 kWh/year.
    • A typical 400-watt panel produces ~600-800 kWh/year depending on location.
    • 10,500 kWh / 700 kWh (avg production) = 15 panels needed.

    In this scenario, even though you could fit 89 panels, you only need 15 to offset your bill. This leaves room for future expansion, such as adding an electric vehicle charger.

    Optimizing for Efficiency vs. Quantity

    When space is limited, quality matters more than quantity.

    High-Efficiency Panels

    If you have a small roof but high energy demands, consider high-efficiency panels (22%+ efficiency). Brands like Maxeon or SunPower offer panels that produce more wattage per square foot. While they cost more upfront, they allow you to generate more power in a smaller footprint.

    Microinverters vs. String Inverters

    Shading is the enemy of solar production. If your roof has partial shading from trees:

    • String Inverters: If one panel is shaded, the whole string’s performance drops.
    • Microinverters: Each panel operates independently. Shading on one panel does not affect the others.

    For complex roofs with multiple angles or shading issues, microinverters are often the better choice to maximize the output of every single panel you fit.

    Common Mistakes to Avoid

    1. Ignoring Future Loads: Are you planning to buy an EV or install a heat pump? If so, calculate your future energy needs, not just current ones.
    2. Overlooking HOA Rules: Some Homeowners Associations have restrictions on panel visibility. Check your covenants before designing your system.
    3. Forgetting Maintenance Access: You need space to walk on your roof for cleaning and repairs. Never cover 100% of the usable space.

    FAQ Section

    How much weight will solar panels add to my roof?

    Solar panels typically add about 2 to 4 pounds per square foot. Most modern US roofs are built to withstand much heavier loads (such as snow), but a structural assessment is always recommended for older homes.

    Can I add more panels later if I have space left?

    Yes, but it is easier and cheaper to install all planned panels at once. Adding panels later may require upgrading your inverter or electrical panel, which adds cost. However, leaving physical space on the roof is a smart strategy for future expansion.

    Do solar panels work on flat roofs?

    Yes, they do. Flat roofs require ballasted racking systems that tilt the panels toward the sun. These systems take up more space because you need gaps between rows to prevent panels from shading each other.

    What happens if my roof is too small for my energy needs?

    If your roof cannot accommodate enough panels to offset 100% of your usage, you can still offset a portion (e.g., 50-70%) and pay for the remainder. Alternatively, you might consider community solar programs if available in your state.

    Does the color of my roof matter?

    Dark roofs absorb more heat, which can slightly reduce panel efficiency since panels perform better in cooler temperatures. However, modern panels are designed to handle heat, and the difference is usually marginal compared to the benefits of going solar.

    Conclusion

    Determining how many solar panels can I fit on my roof is a balance of physics, geography, and personal energy goals. By measuring your usable space, understanding your local sunlight conditions, and choosing the right equipment, you can create a system that maximizes both your roof’s potential and your wallet’s health.

    Remember, you don’t need to cover every inch of your roof to see significant savings. Often, a strategically placed, smaller system is more cost-effective than a massive one.

    Ready to take the next step? Share this guide with friends who are curious about solar, or drop a comment below with your roof’s approximate square footage—we’d love to help you estimate your potential!