Blog

  • How To Put On A Metal Roof On A Shed

    How To Put On A Metal Roof On A Shed

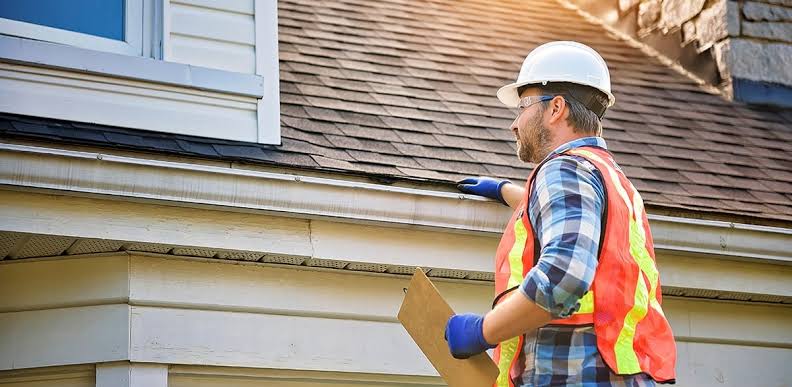
    Installing a new roof is often the most daunting part of any shed building project. Many homeowners worry about leaks, complex measurements, or the sheer physical effort required to lift heavy materials. However, learning how to put on a metal roof on a shed can transform this chore into a satisfying weekend project that adds decades of life to your structure.

    Metal roofing is no longer just for barns and industrial warehouses. It has become the gold standard for residential outbuildings due to its longevity, aesthetic appeal, and resistance to harsh weather. If you are ready to swap out rotting shingles or cover a new frame, this guide will walk you through the process with clarity and confidence. We will focus on safety, precision, and best practices to ensure your shed stays dry for years to come.

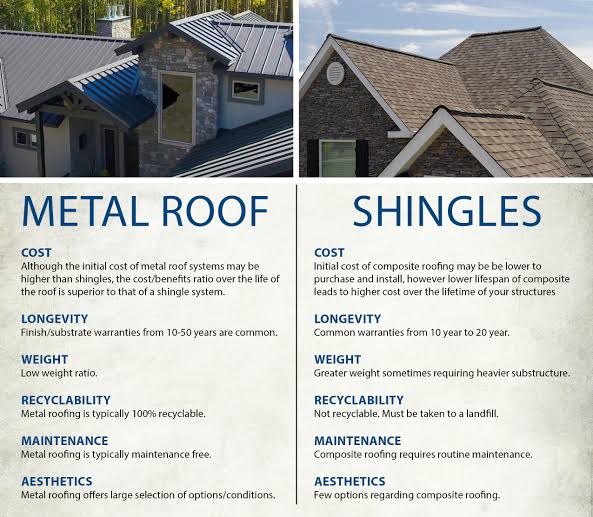
    Why Choose Metal Over Traditional Shingles?

    Before diving into the tools and steps, it is crucial to understand why metal is the superior choice for many shed owners. While asphalt shingles are cheap upfront, they typically last only 15–20 years. In contrast, a properly installed metal roof can last 40–70 years.

    According to industry data, metal roofs reflect solar radiant heat, which can reduce cooling costs by 10–25%. For a shed used as a workshop or storage space, this temperature regulation helps protect sensitive tools and equipment from extreme heat buildup.

    FeatureAsphalt ShinglesMetal Roofing
    Lifespan15–20 Years40–70+ Years
    MaintenanceHigh (prone to moss/curling)Low (occasional cleaning)
    Weather ResistanceModerateExcellent (wind/fire/hail)
    WeightHeavyLightweight
    Cost Over TimeHigher (replacement needed)Lower (one-time install)

    What Tools and Materials Do You Need?

    Preparation is half the battle. Having the right gear prevents mid-project trips to the hardware store and ensures a cleaner, safer installation.

    Essential Tools

    • Circular Saw or Tin Snips: For cutting metal panels to size. Tin snips are better for small adjustments; a saw with a metal-cutting blade is faster for long cuts.
    • Drill/Impact Driver: With a hex-head bit for driving screws.
    • Measuring Tape & Chalk Line: For precise alignment.
    • Safety Gear: Gloves (metal edges are sharp), safety glasses, and non-slip boots.
    • Ladder & Scaffolding: Ensure stable access to the roof peak.

    Materials Checklist

    • Metal Panels: Corrugated or R-panel styles are common for sheds. Calculate square footage plus 10% for waste.
    • Roofing Underlayment: A synthetic felt or peel-and-stick membrane to prevent condensation and leaks.
    • Screws: Use self-tapping roofing screws with rubber washers (neoprene seals). Never use standard wood screws.
    • Trim Pieces: Drip edge, ridge cap, and gable trim.
    • Closure Strips: Foam strips that fit under the ribs of the metal to block pests and wind.
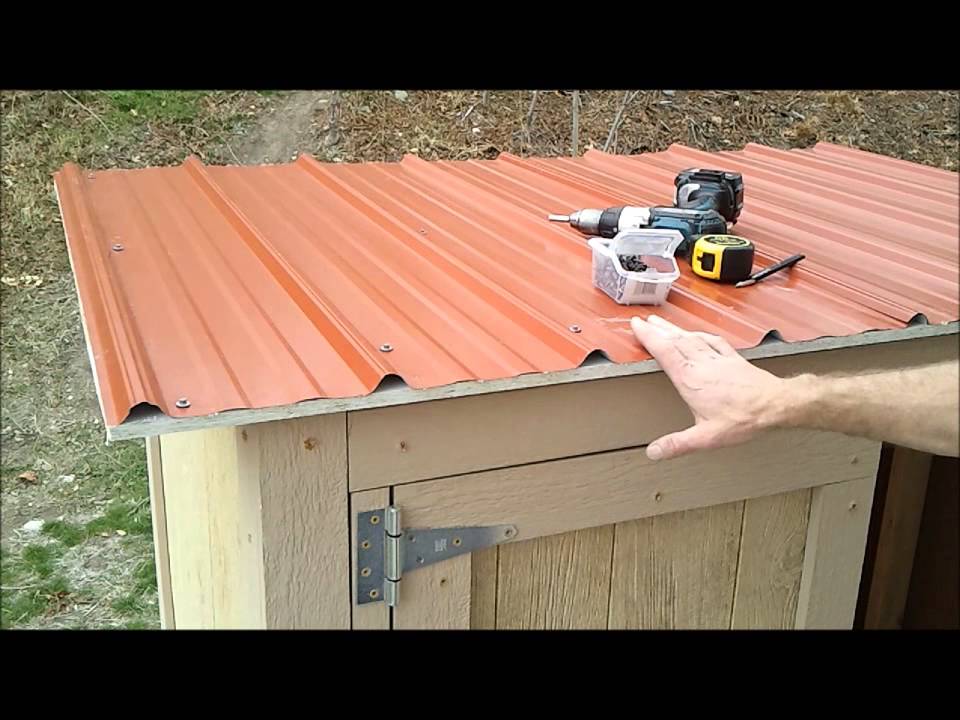
    How To Put On A Metal Roof On A Shed

    Step-by-Step Guide: How To Put On A Metal Roof On A Shed

    Follow these steps meticulously. Rushing the preparation phase is the number one cause of leaks in metal roofing.

    1. Prepare the Roof Deck

    If you are replacing an old roof, remove all existing shingles and nails. The deck must be clean, dry, and structurally sound. Inspect the plywood or OSB sheathing for rot. Replace any soft spots.

    If building new, ensure your rafters are spaced correctly (usually 16 or 24 inches on center) to support the metal panels without sagging.

    2. Install the Underlayment

    Roll out your roofing underlayment horizontally across the roof deck. Start at the eaves (bottom edge) and work your way up to the ridge.

    • Overlap each row by at least 4–6 inches.
    • Secure the underlayment with cap nails or staples, following the manufacturer’s spacing guidelines.
    • This layer acts as a secondary barrier against water infiltration if wind-driven rain gets under the metal seams.

    3. Attach the Drip Edge

    Install the drip edge along the eaves first. This metal flashing directs water away from the fascia board and into the gutters.

    • Place the drip edge over the underlayment.
    • Secure it with roofing nails every 12 inches.
    • For the sides (rake edges), install the gable trim later, after the panels are up, or install side drip edges now depending on your specific trim profile.

    4. Measure and Cut Your First Panel

    Accuracy here determines the success of the entire roof. Measure the width of your shed. Most metal panels have a “covering width” (e.g., 36 inches) which is slightly less than the total width due to overlapping ribs.

    • Lay the first panel on the ground to measure.
    • Mark your cut line with a straight edge.
    • Cut using tin snips or a circular saw. Pro Tip: Cut with the finished side down if using a saw to prevent chipping, or wear protective film if cutting side-up.

    5. Install the First Panel

    Lift the first panel onto the roof. It is highly recommended to have a helper for this step.

    • Align the panel so it overhangs the drip edge by about 1–2 inches.
    • Ensure the panel is square with the eave. If it is off by even an inch at the start, it will be off by several inches at the ridge.
    • Temporarily secure the panel with one screw at the top corner to hold it in place while you adjust.

    6. Fasten the Panels Correctly

    This is the most critical technical step. Improper screwing leads to leaks and stripped holes.

    • Where to screw: Drive screws through the flat part of the panel, not the high ribs (unless specified by the manufacturer). Screwing into the ribs can cause the metal to dimple and break the seal.
    • Tightness: Tighten the screw until the rubber washer is compressed and flush with the metal. Do not overtighten. If you see the washer bulging out excessively or the metal dimpling deeply, you have gone too far. This compromises the watertight seal.
    • Spacing: Typically, place screws every 12–24 inches along the purlins (roof supports).

    7. Overlap and Install Subsequent Panels

    Place the second panel next to the first, overlapping the side lap (the ribbed edge).

    • Check alignment frequently with your chalk line.
    • Secure the overlap according to the panel’s instructions. Some systems require screws in the overlap; others rely on the rib interlock.
    • Continue this process across the entire roof width.

    8. Install Ridge Cap and Trim

    Once all field panels are installed, finish the roof with the ridge cap.

    • Apply closure strips (foam filler) under the ridge cap to seal the gap between the panel ribs and the cap.
    • Screw the ridge cap into the high points of the metal panels.
    • Install gable trim on the sides to cover the exposed edges of the metal and underlayment.

    For more detailed information on material properties and sustainability, you can refer to Metal Roofing on Wikipedia.

    Common Mistakes to Avoid

    Even experienced DIYers can stumble on these pitfalls. Being aware of them saves time and money.

    • Walking on the Ribs: Always step on the flat parts of the panel where the screws are. Walking on the ribs can dent the metal and break the seal.
    • Ignoring Thermal Expansion: Metal expands and contracts with temperature changes. Do not drive screws in too tightly, and allow for slight movement as recommended by the manufacturer.
    • Mixing Metals: Never use aluminum flashings with steel roofing without proper separation. Galvanic corrosion can occur, eating away at the metal over time. Stick to compatible metals or use coated fasteners.

    FAQ Section

    Can I install a metal roof over existing shingles?

    Yes, in many cases, you can install metal roofing over one layer of existing asphalt shingles. This saves disposal costs and labor. However, check your local building codes first. Ensure the roof deck is solid and the shingles are flat. You must still use underlayment between the shingles and the new metal.

    What is the best slope for a metal roof on a shed?

    Metal roofing can be installed on low-slope roofs, but a minimum pitch of 3:12 (3 inches of rise for every 12 inches of run) is recommended for standard lapped panels. For lower slopes, you may need a standing seam system or special sealants to prevent water backup.

    Do I need special screws for metal roofing?

    Absolutely. You must use self-tapping screws with a neoprene or EPDM rubber washer. These washers create a watertight seal around the screw hole. Standard wood or deck screws will rust quickly and leak, leading to structural damage.

    How do I cut metal roofing panels without damaging them?

    Use tin snips for small cuts and notches. For long straight cuts, use a circular saw with a fine-toothed metal-cutting blade or a nibbler tool. Avoid using abrasive grinding wheels, as the heat generated can damage the protective coating (galvanization or paint) on the metal, leading to premature rust.

    Is a metal roof noisy during rain?

    This is a common myth. When installed correctly with solid sheathing (plywood/OSB) and proper underlayment, a metal roof is no louder than an asphalt shingle roof. The solid deck dampens the sound significantly. Without solid decking (e.g., on open purlins), it can be louder, but sheds usually have solid decks.

    Conclusion

    Learning how to put on a metal roof on a shed is a rewarding investment in your property. By choosing durable materials, preparing the deck thoroughly, and following precise installation steps, you create a shelter that withstands the elements with minimal maintenance. Remember, patience during the alignment and screwing phases is key to a leak-free result.

    Now that you have the knowledge, it’s time to gather your tools and get started. If you found this guide helpful, please share it with your fellow DIY enthusiasts on social media. Happy building!
  • Find 1980 Shay Model A Hard Roof Kit on Craigslist

    Find 1980 Shay Model A Hard Roof Kit on Craigslist

    Finding the perfect finishing touch for your classic car restoration can feel like searching for a needle in a haystack. If you are specifically hunting for a 1980 Shay Model A hard roof kit for sale Craigslist, you know that patience and precision are key. This guide will help you navigate the murky waters of online classifieds to secure this rare component without falling victim to scams or poor-quality reproductions.

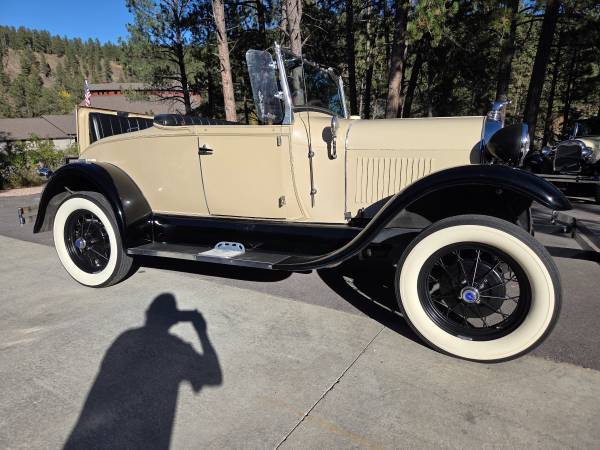
    The Shay Model A is a unique piece of automotive history, blending the nostalgic aesthetics of the 1930s Ford Model A with modern (for the time) Volkswagen mechanics. Because these vehicles were produced in limited numbers during the late 1970s and early 1980s, finding original parts—especially structural components like a hard top—is challenging. Craigslist remains one of the most viable platforms for locating such niche items, but it requires a strategic approach.

    Why Is the Shay Model A Hard Top So Rare?

    To understand why you are struggling to find a listing, you must first understand the vehicle itself. The Shay Model A was not mass-produced by Ford; it was a “kit car” or specialty vehicle manufactured by Shay Motors Corporation.

    According to historical records, Shay Motors produced approximately 2,500 to 3,000 units between 1978 and 1982. You can read more about the history of kit cars and their impact on the automotive industry on Wikipedia. Because production numbers were low, the survival rate of these vehicles is even lower. Many were scrapped, modified beyond recognition, or lost to rust over the last four decades.

    The hard roof kit, specifically for the 1980 model year, is particularly scarce because:

    • Material Degradation: Many early hard tops were made from fiberglass or early composite materials that become brittle and crack over time.
    • Owner Modifications: Many owners preferred the open-air roadster experience and never installed the hard top, meaning fewer were sold originally.
    • Storage Issues: Hard tops require significant storage space. When owners passed away or moved, these large items were often the first to be discarded.

    How to Effectively Search Craigslist for Rare Parts

    Searching Craigslist is not as simple as typing in a keyword and hitting enter. The platform’s search algorithm is basic, and listings are often poorly titled. To find a 1980 Shay Model A hard roof kit for sale Craigslist, you need to broaden your net while maintaining specificity.

    1. Expand Your Geographic Radius

    Do not limit your search to your immediate city. Set your radius to at least 500 miles. Since this is a large item, shipping will be expensive regardless, so picking it up within a day’s drive is often more cost-effective than paying for freight from across the country.

    2. Use Varied Search Terms

    Sellers may not use the exact terminology you expect. Try the following variations in the search bar:

    • “Shay Model A top”
    • “Shay replica Ford hard top”
    • “VW based Model A kit”
    • “Shay Motors parts”
    • “Classic kit car roof”

    3. Check the “Auto Parts” and “Cars & Trucks” Sections

    Sometimes, sellers list the entire car because they cannot sell the part separately. Other times, they list the part under general auto accessories. Check both sections regularly.

    1980 Shay Model A Hard Roof Kit For Sale Craigslist

    Verifying Authenticity and Condition

    Once you find a potential listing, do not rush to send money. The market for classic car parts is rife with reproductions, damaged goods, and misidentified items. Here is a checklist to verify the item before committing.

    FeatureOriginal 1980 Shay Hard TopCommon Reproduction/Damage
    MaterialHigh-quality fiberglass, smooth finishRough gel coat, visible air bubbles, plastic feel
    FitmentDesigned specifically for Shay chassisUniversal fit, requires significant modification
    HardwareIncludes original latches and hingesMissing hardware, rusted brackets
    MarkingsMay have Shay Motors mold marksNo markings, generic manufacturer labels

    Request Detailed Photos

    Ask the seller for specific photos:

    • Close-ups of the mounting points.
    • The interior side of the roof (to check for cracks or repairs).
    • Any serial numbers or mold marks.
    • Photos of the seals and weather stripping.

    If the seller refuses to provide additional photos, consider it a red flag. Legitimate sellers of rare parts are usually enthusiastic about proving the condition of their item.

    Safety Tips for Buying High-Value Items on Craigslist

    Transactions involving rare automotive parts can attract scammers. Protect yourself by following these golden rules.

    Never Wire Money: Legitimate sellers will not ask for Western Union, MoneyGram, or cryptocurrency payments. Stick to cash for local pickups or secure payment platforms like PayPal Goods and Services if shipping is involved.

    Meet in Public Places: If possible, meet at a well-lit public location. However, given the size of a hard roof kit, you may need to visit the seller’s home or garage. Bring a friend with you and let someone else know where you are going.

    Inspect Before Paying: Physically inspect the item. Look for hairline cracks in the fiberglass, which can be difficult to see in photos. Check if the locking mechanisms work smoothly. If you are not knowledgeable about fiberglass repair, consider bringing a specialist or asking a local classic car club member for advice.

    Alternatives If Craigslist Fails

    If you cannot find a 1980 Shay Model A hard roof kit for sale Craigslist, do not lose hope. There are other avenues to explore.

    Specialized Online Forums

    Communities like The Shay Owners Club or general kit car forums are invaluable. Members often sell parts among themselves or know who has spare parts stored away. Posting a “Want to Buy” ad in these communities can yield results faster than passive searching.

    eBay and Bring a Trailer

    While Craigslist is local, eBay offers national reach. Set up saved searches with email alerts. Additionally, auction sites like Bring a Trailer sometimes feature Shay Model A cars. Even if you don’t buy the car, you can contact the seller to inquire if they would part out the hard top.

    Custom Fabrication

    If an original part is truly unavailable, consider custom fabrication. Several shops specialize in creating fiberglass molds for classic cars. While this option is more expensive, it ensures a perfect fit and allows you to upgrade the material quality for better durability.

    FAQ Section

    Q: Can I use a Ford Model A hard top on a Shay Model A?

    A: Generally, no. While the Shay looks like a Ford Model A, its chassis and body dimensions are different, often based on a Volkswagen Beetle or similar platform. The windshield frame and mounting points will not align correctly without significant modification.

    Q: How much should I expect to pay for a used Shay hard top?

    A: Prices vary widely based on condition. A project-grade top might cost $300–$600, while a restored, ready-to-install unit could fetch $1,000–$2,000. Always compare prices with recent sales data before negotiating.

    Q: Is it difficult to install a Shay hard roof kit?

    A: Installation is moderately difficult. It typically requires two people to lift and align the top. You will need basic hand tools and possibly some adjustment of the latch mechanisms to ensure a watertight seal. Consult the original owner’s manual if available.

    Q: What should I do if the hard top has small cracks?

    A: Small hairline cracks in fiberglass can be repaired using a fiberglass repair kit. Clean the area, apply resin and cloth, sand, and repaint. For structural cracks or large holes, professional repair is recommended to maintain integrity.

    Q: Are there reproduction hard tops available new?

    A: New reproductions are extremely rare due to the low demand and high cost of creating molds. Most available units are used originals. Keep an eye on specialized kit car manufacturers, but do not expect mass-market availability.

    Conclusion

    Finding a 1980 Shay Model A hard roof kit for sale Craigslist is a challenge, but it is not impossible. By expanding your search radius, using varied keywords, and rigorously verifying the condition of the part, you can secure this elusive piece of automotive history. Remember to prioritize safety during transactions and consider alternative communities if Craigslist does not yield results.

    Restoring a Shay Model A is a labor of love. Securing the correct hard top not only protects your investment from the elements but also completes the authentic look of this unique classic car. If you found this guide helpful, please share it with fellow classic car enthusiasts on social media. Your share might help another restorer find their missing piece!

  • Red Roof Inn Las Vegas: Budget Stay Guide

    Red Roof Inn Las Vegas: Budget Stay Guide

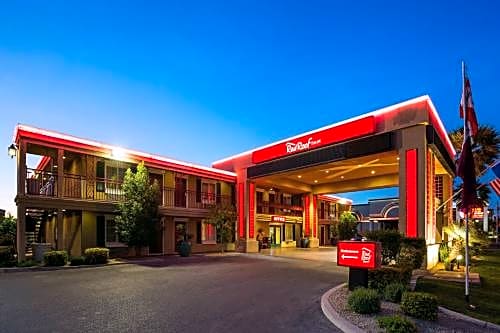
    Finding affordable accommodation in a city known for its luxury resorts can be challenging. You want comfort without breaking the bank, especially when you plan to spend most of your time exploring the vibrant entertainment scene. This guide provides a detailed look at Red Roof Inn 4350 Paradise Road Las Vegas Nv 89169, helping you decide if it is the right base for your next trip.

    Why Choose Red Roof Inn on Paradise Road?

    Las Vegas is synonymous with high-end casinos and five-star suites, but not every traveler needs or wants that level of extravagance. Many visitors are looking for a clean, safe, and convenient place to sleep after a long day of sightseeing. The Red Roof Inn 4350 Paradise Road Las Vegas Nv 89169 positions itself as a practical solution for budget-conscious travelers, families, and business guests who prioritize value.

    Located just off the main tourist drag, this property offers a quieter atmosphere while remaining accessible to major attractions. Understanding what this specific location offers can save you money and enhance your travel experience. Let’s dive into the specifics of what makes this hotel a viable option for your Nevada getaway.

    Location Analysis: Proximity to the Strip and Airport

    One of the primary concerns for any Las Vegas visitor is location. How far is the hotel from the action? The address, 4350 Paradise Road, places the hotel in a strategic spot. It is situated east of the famous Las Vegas Strip, which often means lower room rates compared to properties directly on Las Vegas Boulevard.

    Distance to Key Landmarks

    • Harry Reid International Airport (LAS): The hotel is approximately 2–3 miles from the airport. This translates to a short 5–10 minute drive, making it an excellent choice for late arrivals or early departures.
    • The Las Vegas Strip: You are roughly 1.5 to 2 miles from the center of the Strip. While not walking distance for everyone, it is a quick $10–$15 rideshare trip or a manageable bus ride.
    • Convention Center: For business travelers, the Las Vegas Convention Center is nearby, offering easy access for trade shows and conferences.

    Being on Paradise Road also means you have access to local dining options that are often more affordable than those inside the casino resorts. You can find genuine local eateries, grocery stores, and pharmacies within walking distance, adding convenience to your stay.

    Amenities and Room Features

    When booking a budget hotel, knowing exactly what is included is crucial. Red Roof Inn is known for providing essential comforts without unnecessary frills. Here is what you can generally expect at this location.

    Standard Room Inclusions

    Most rooms at this property are designed for functionality. You can typically expect:

    • Free Wi-Fi: Essential for staying connected, checking maps, and sharing photos.
    • Flat-screen TV: With cable channels for evening relaxation.
    • Air Conditioning: A non-negotiable feature in the desert heat of Las Vegas.
    • Private Bathroom: Clean and stocked with basic toiletries.
    • Work Desk: Useful for business travelers or planning your next day’s itinerary.

    Pet-Friendly Policy

    A standout feature of the Red Roof Inn brand is its pet-friendly policy. Unlike many hotels in Las Vegas that charge exorbitant fees or prohibit pets entirely, this location often welcomes well-behaved pets. Note: Always confirm the current pet policy and any associated fees directly with the hotel before booking, as policies can change.

    This feature makes it an attractive option for road-trippers traveling through Nevada with their furry companions. It removes the stress of finding kennels or leaving pets behind.

    Red Roof Inn 4350 Paradise Road Las Vegas Nv 89169

    Value Proposition: Cost vs. Experience

    To help you make an informed decision, let’s compare the experience of staying at a budget inn versus a mid-range Strip hotel.

    FeatureRed Roof Inn (Paradise Rd)Mid-Range Strip Hotel
    Room RateLow ($50–$90/night avg)Moderate to High ($150–$300+/night)
    Resort FeesNoneOften $30–$50/night extra
    ParkingUsually FreeOften Paid ($15–$30/day)
    Noise LevelQuietCan be loud due to casinos/clubs
    Pool AccessLimited or NoneExtensive pool complexes
    Dining On-siteLimitedNumerous restaurants

    As shown in the table, the savings at Red Roof Inn 4350 Paradise Road Las Vegas Nv 89169 are significant. The absence of resort fees is a major financial advantage. In Las Vegas, resort fees can add hundreds of dollars to a week-long stay. By choosing this property, you keep that money for entertainment, dining, or shopping.

    However, you must be prepared for fewer on-site amenities. There will likely be no grand pool complex, spa, or multiple gourmet restaurants. If these are priorities for you, this may not be the best fit. But if you view your hotel primarily as a place to sleep and shower, the value proposition is strong.

    Safety and Neighborhood Context

    Safety is a top priority for travelers. The area around Paradise Road is generally considered safe, especially compared to some parts of downtown or the deeper ends of the Strip late at night. However, as with any urban area, it is wise to practice standard safety precautions.

    Keep your valuables secure in your room or the hotel safe. When walking at night, stick to well-lit areas. The hotel itself typically has security measures in place, such as key-card access to floors and surveillance cameras in common areas. For more general information on Las Vegas geography and safety zones, you can refer to Wikipedia’s page on Las Vegas to understand the broader city layout.

    Guest reviews often highlight the staff’s helpfulness in providing local safety tips and directions. Engaging with the front desk can yield valuable insights into which areas to avoid and the safest routes to popular attractions.

    How to Book for the Best Rate

    Securing the best deal requires a bit of strategy. Here are steps to ensure you get the most value when booking Red Roof Inn 4350 Paradise Road Las Vegas Nv 89169.

    1. Compare Platforms: Check the official Red Roof Inn website alongside major travel aggregators like Expedia, Booking.com, and Hotels.com. Sometimes, direct bookings offer member discounts or free cancellation policies that third-party sites do not.
    2. Check for Hidden Fees: Confirm that there are no unexpected cleaning fees or service charges. As mentioned, this hotel typically does not charge resort fees, but always verify.
    3. Book in Advance: Las Vegas prices fluctuate wildly based on conventions and holidays. Booking weeks or months in advance can lock in lower rates.
    4. Join Loyalty Programs: If you travel frequently, signing up for the Red Roof Inn loyalty program can lead to discounts and faster check-in processes.
    5. Read Recent Reviews: Look at reviews from the last three months. This gives you the most accurate picture of current cleanliness standards and staff performance.

    FAQ Section

    Is there a pool at Red Roof Inn 4350 Paradise Road?

    Most Red Roof Inn locations, including this one, do not feature a swimming pool. If having a pool is essential for your trip, you may need to consider other options or plan to visit a public pool or a day-pass club on the Strip.

    Is breakfast included in the stay?

    Typically, Red Roof Inn does not include a full hot breakfast in the standard room rate. However, they may offer coffee and light pastries in the lobby. It is advisable to budget for breakfast at nearby local cafes or grab-and-go spots on Paradise Road.

    How far is the hotel from the Fremont Street Experience?

    The Fremont Street Experience in Downtown Las Vegas is approximately 3–4 miles away. This is about a 10–15 minute drive depending on traffic. Rideshare services are readily available and affordable for this distance.

    Does the hotel offer shuttle service to the airport or Strip?

    Most Red Roof Inn locations do not provide complimentary shuttle services. You will need to arrange your own transportation via rideshare apps (Uber/Lyft), taxis, or public buses. The RTC bus system serves Paradise Road and can be a cost-effective way to reach the Strip.

    Can I cancel my reservation for free?

    Cancellation policies vary based on the rate type you select. “Flexible” rates usually allow free cancellation up to 24–48 hours before check-in. “Non-refundable” rates are cheaper but cannot be canceled. Always read the specific terms during the booking process.

    Is the hotel suitable for large groups?

    The hotel offers standard rooms, which are typically designed for two to four guests. For large groups, you would need to book multiple rooms. It is best to contact the hotel directly to see if they can block adjacent rooms for your party.

    Conclusion

    Choosing Red Roof Inn 4350 Paradise Road Las Vegas Nv 89169 is a smart move for travelers who prioritize budget efficiency and convenience over luxury amenities. Its proximity to the airport and the Strip, combined with the lack of resort fees, makes it a financially sound choice. While it may not offer the glitz of a casino resort, it provides a clean, safe, and comfortable environment for rest.

    By understanding what to expect and planning your transportation and dining accordingly, you can enjoy a fantastic Las Vegas trip without overspending on accommodation. Remember to book early, check for pet policies if applicable, and explore the local dining scene on Paradise Road.

    If you found this guide helpful, please share it with your friends and family who are planning their next Vegas adventure. Your shared knowledge could help them save money and travel smarter!

  • Lennox 2 Ton Roof Unit & Air Handler Cost

    Lennox 2 Ton Roof Unit & Air Handler Cost

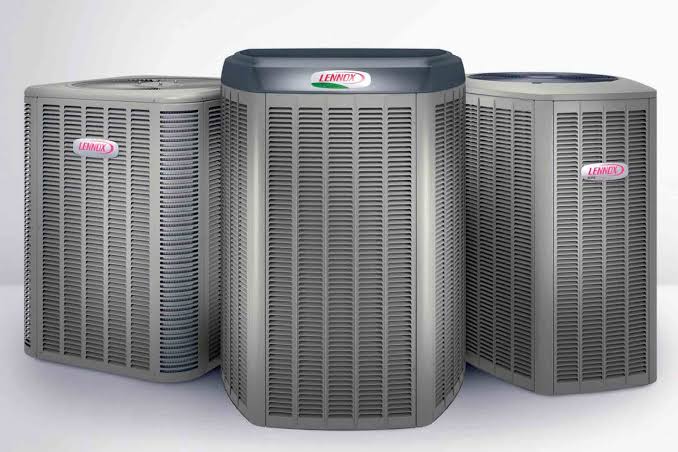
    Are you struggling with an aging cooling system that no longer keeps your home comfortable? Understanding the Lennox 2 ton roof unit and inside air handler cost is the first step toward making a smart, budget-friendly upgrade for your property.

    Replacing an HVAC system is one of the most significant home investments you will make. It is not just about buying a box; it is about securing years of comfort, energy efficiency, and peace of mind. Many homeowners feel overwhelmed by the opaque pricing structures in the HVAC industry. You might hear quotes ranging from $3,000 to $8,000 and wonder where the truth lies.

    This guide cuts through the noise. We will break down exactly what you should expect to pay for a Lennox 2-ton system, including both the outdoor rooftop unit and the indoor air handler. We will also explore the factors that swing these prices, helping you negotiate better with contractors and choose the right model for your specific needs.

    What Is the Average Cost of a Lennox 2-Ton System?

    When budgeting for a new HVAC system, it is crucial to distinguish between the equipment cost and the total installed cost. For a Lennox 2-ton system, which typically includes a rooftop condenser unit and an indoor air handler, the total price usually falls between $4,500 and $7,500.

    However, this range is not arbitrary. It depends heavily on the efficiency rating (SEER) of the unit you choose. Lennox offers three primary tiers of equipment: Merit, Elite, and Dave Lennox Signature Collection.

    Price Breakdown by Efficiency Tier

    Lennox SeriesSEER Rating RangeEstimated Equipment CostEstimated Installed Cost
    Merit Series13–14 SEER$1,800 – $2,500$4,500 – $5,500
    Elite Series16–18 SEER$2,500 – $3,500$5,500 – $6,500
    Signature Collection20+ SEER$3,500 – $4,500+$6,500 – $7,500+

    Note: Prices are estimates for the US market as of 2026 and can vary by region and contractor.

    The Merit Series is the entry-level option. It provides reliable cooling but lacks advanced features like variable-speed compressors. The Elite Series strikes a balance between performance and price, often featuring two-stage cooling. The Signature Collection represents the pinnacle of Lennox technology, offering ultra-quiet operation and maximum energy savings, though at a premium price point.

    Why Does the Inside Air Handler Matter for Total Cost?

    Many homeowners focus solely on the rooftop unit, forgetting that the inside air handler is equally critical. The air handler contains the blower motor, evaporator coil, and heating elements (if it is a heat pump system). If your existing air handler is old or incompatible with a new high-efficiency rooftop unit, it must be replaced.

    Upgrading the air handler adds approximately $1,000 to $2,000 to the total project cost. However, this investment is often necessary to realize the full efficiency benefits of a new Lennox rooftop unit.

    Matching Components for Efficiency

    A high-SEER rooftop unit paired with an outdated, single-speed air handler will not perform efficiently. The blower motor in the air handler must be able to modulate its speed to match the compressor’s output. This is why modern Lennox systems often pair a variable-capacity rooftop unit with a compatible variable-speed air handler.

    If you skip upgrading the air handler, you may experience:

    • Reduced humidity control.
    • Higher electricity bills than anticipated.
    • Uneven temperatures throughout your home.
    • Potential warranty voids if components are deemed incompatible.

    What Factors Influence the Installation Price?

    The sticker price of the Lennox unit is only part of the equation. Labor and site-specific challenges significantly impact the final bill. Here are the primary variables that contractors consider when quoting your job.

    1. Roof Accessibility and Structure

    Installing a rooftop unit requires safe access. If your roof is steep, high, or fragile, contractors may need special equipment or additional labor hours to ensure safety. Reinforcing the roof structure to support the weight of a new 2-ton unit can also add costs.

    2. Ductwork Modifications

    If your current ductwork is leaky, undersized, or damaged, it needs repair or replacement before the new system is installed. Poor ductwork can reduce system efficiency by up to 30%. Adding new duct runs or sealing existing ones typically costs between $500 and $1,500.

    3. Electrical Upgrades

    Newer, high-efficiency Lennox models may require different electrical amperage or dedicated circuits. If your home’s electrical panel is outdated, an electrician may need to upgrade it, adding $500 to $2,000 to the project.

    4. Regional Labor Rates

    HVAC labor costs vary widely across the United States. In major metropolitan areas like New York or San Francisco, labor rates are significantly higher than in rural Midwest regions. Always get at least three local quotes to gauge the prevailing rate in your area.

    Lennox 2 Ton Roof Unit And Inside Air Handler Cost

    How Does Lennox Compare to Other Brands?

    Lennox is known for its durability and innovation, but how does it stack up against competitors like Trane, Carrier, or Goodman? Understanding this helps you justify the cost.

    Lennox units are often praised for their quiet operation and robust build quality. The Dave Lennox Signature Collection, for instance, uses proprietary technology that minimizes vibration and noise. While brands like Goodman offer lower upfront costs, they may lack the long-term reliability and advanced features found in Lennox Elite or Signature models.

    For a deeper understanding of HVAC efficiency standards and how they apply to different brands, you can refer to the U.S. Department of Energy’s guidelines on central air conditioning. This resource provides unbiased information on SEER ratings and energy savings potential.

    Step-by-Step Guide to Getting an Accurate Quote

    To avoid surprise costs, follow this structured approach when hiring an HVAC contractor.

    1. Assess Your Current System: Note the age, model number, and any recurring issues with your current unit. Take photos of the rooftop unit and the indoor air handler.
    2. Calculate Your Load Requirements: Ensure you actually need a 2-ton unit. A professional should perform a Manual J calculation to determine the correct size based on your home’s square footage, insulation, and window exposure. Oversizing or undersizing leads to inefficiency.
    3. Request Detailed Quotes: Ask for itemized quotes that separate equipment costs from labor, materials, and permits. Look for specific Lennox model numbers.
    4. Check Credentials: Verify that the contractor is licensed, insured, and NATE-certified. Ask if they are an authorized Lennox dealer, as this affects warranty validity.
    5. Review Warranty Terms: Lennox offers strong warranties, but they often require professional registration within 60 days of installation. Confirm who handles this registration.

    Frequently Asked Questions

    How long does a Lennox 2-ton rooftop unit last?

    With proper maintenance, a Lennox rooftop unit can last between 15 and 20 years. Regular cleaning of coils, changing filters, and annual professional tune-ups are essential to reaching this lifespan.

    Can I install the unit myself to save money?

    No. HVAC installation involves handling refrigerants, high-voltage electricity, and heavy machinery on roofs. It requires specialized licenses and tools. DIY installation is dangerous, likely illegal in many jurisdictions, and will void the manufacturer’s warranty.

    Is a higher SEER rating worth the extra cost?

    If you live in a hot climate and plan to stay in your home for more than five years, yes. A 20 SEER unit can save you 20–30% on cooling costs compared to a 13 SEER unit. The break-even point is typically 5–7 years.

    What maintenance is required for a rooftop unit?

    You should schedule professional maintenance twice a year: once in spring for cooling and once in fall for heating. Homeowners should visually inspect the unit for debris, ensure the area around it is clear, and change indoor filters every 1–3 months.

    Does replacing the air handler improve air quality?

    Yes. Newer air handlers come with better filtration options and tighter seals, preventing dust and allergens from bypassing the filter. Some models also support UV lights or advanced air purification systems.

    Conclusion

    Investing in a Lennox 2 ton roof unit and inside air handler is a decision that impacts your comfort and wallet for nearly two decades. While the upfront cost of $4,500 to $7,500 may seem significant, the long-term savings in energy bills and reduced repair frequency make it a wise choice for many US homeowners.

    Remember, the cheapest quote is not always the best value. Prioritize proper sizing, quality installation, and compatible components. By choosing the right Lennox series for your needs and working with a certified professional, you ensure your home remains a sanctuary of comfort regardless of the weather outside.

    If you found this guide helpful, please share it with friends or family who are considering an HVAC upgrade. Spreading knowledge helps everyone make smarter home improvement decisions!

  • Metal Roof Cost Per Sq Ft: 2026 Price Guide

    Metal Roof Cost Per Sq Ft: 2026 Price Guide

    Replacing your roof is one of the most significant investments you will make in your home, and it is natural to feel overwhelmed by the varying price quotes. You want durability and style without breaking the bank, but finding clear, transparent pricing can be frustratingly difficult. If you are asking how much does a metal roof cost per square foot, you are not alone; this guide breaks down the real numbers for 2026 to help you budget with confidence.


    Understanding the Real Cost of Metal Roofing

    When homeowners search for roofing prices, they often encounter a wide range of figures. This variability exists because “metal roofing” is not a single product. It encompasses various materials, styles, and installation complexities. In the United States, the national average for a metal roof typically ranges between $9 and $14 per square foot for professional installation. However, this figure can dip as low as $7 for basic exposed-fastener panels or rise above $25 for premium copper or zinc systems.

    To understand these costs, we must look beyond the sticker price of the metal sheets. The final bill includes removal of the old roof, underlayment, flashings, labor, and local permit fees. According to recent industry data, labor accounts for approximately 40% to 60% of the total project cost. Therefore, while the material itself might seem affordable, the skilled craftsmanship required to install it correctly drives the price up.

    Breakdown by Material Type

    Not all metals are created equal. The type of metal you choose significantly impacts the cost per square foot. Here is a detailed look at the most common options available in the US market today.

    1. Galvanized Steel (The Budget-Friendly Option)

    Steel is the most common metal roofing material due to its affordability and strength. It is usually coated with zinc (galvanized) or a mixture of aluminum and zinc (Galvalume) to prevent rust.

    • Cost: $7 – $10 per sq. ft. installed.
    • Best For: Homeowners on a tight budget who still want the longevity of metal.
    • Note: Ensure it has a high-quality paint system (like Kynar 500) to maintain color and resist fading.

    2. Aluminum (The Coastal Choice)

    Aluminum is naturally resistant to corrosion, making it ideal for homes near the ocean or in areas with high humidity. It is lighter than steel but generally more expensive.

    • Cost: $9 – $13 per sq. ft. installed.
    • Best For: Coastal regions where salt spray is a concern.
    • Advantage: It does not rust, even if the paint coating is scratched.

    3. Zinc and Copper (The Premium Luxury)

    These materials are considered the “gold standard” of roofing. They develop a beautiful patina over time and can last over 100 years. However, they require specialized installers and come with a hefty price tag.

    • Cost: $15 – $30+ per sq. ft. installed.
    • Best For: Historic homes, luxury estates, or architectural landmarks.
    • Insight: While expensive upfront, their lifespan often outlasts the structure of the house itself.
    MaterialAvg. Cost Per Sq. Ft.LifespanBest Use Case
    Steel$7 – $1040-60 YearsStandard Residential
    Aluminum$9 – $1350+ YearsCoastal/Humid Areas
    Zinc$15 – $2580-100 YearsModern Architecture
    Copper$20 – $30+100+ YearsHistoric/Luxury Homes

    Installation Styles: Standing Seam vs. Exposed Fastener

    Another major factor influencing how much does a metal roof cost per square foot is the profile of the panel. There are two primary styles: exposed fastener and standing seam.

    Exposed Fastener Panels These are the corrugated sheets you often see on barns or agricultural buildings. The screws go directly through the metal face into the roof deck.

    • Pros: Lower material cost, easier DIY potential.
    • Cons: Screws can loosen over time due to thermal expansion, leading to leaks. Aesthetic is less refined.
    • Cost Impact: Keeps prices on the lower end ($7-$9/sq. ft.).

    Standing Seam Panels This is the preferred choice for residential homes. The fasteners are hidden beneath the raised seams of the panels, creating a sleek, modern look. The panels are also allowed to “float,” expanding and contracting with temperature changes without stressing the fasteners.

    • Pros: Superior weather resistance, cleaner look, longer lifespan.
    • Cons: Requires highly skilled labor and specialized machinery for forming.
    • Cost Impact: Increases price to the $12-$18/sq. ft. range.

    For a deeper understanding of the metallurgy behind these materials, you can refer to the general properties of metals on Wikipedia.

    How Much Does A Metal Roof Cost Per Square Foot

    Hidden Costs and Additional Factors

    When budgeting, do not just look at the base price. Several variables can inflate your final invoice.

    • Roof Complexity: A simple gable roof is cheap to cover. A roof with multiple valleys, dormers, chimneys, and skylights requires more labor and custom flashing work. Expect to pay 20-30% more for complex rooflines.
    • Old Roof Removal: Removing existing shingles adds $1 to $3 per square foot to the project. Some metal roofs can be installed over existing shingles, which saves money but may void warranties or violate local building codes.
    • Underlayment: High-quality synthetic underlayment is crucial for metal roofs to prevent condensation issues. Do not skimp here; it costs roughly $0.50 to $1.00 per sq. ft. but protects your investment.
    • Geographic Location: Labor rates vary wildly. Installing a roof in New York City or San Francisco will cost significantly more than in rural Midwest areas due to labor demand and insurance costs.

    Long-Term Value: Is It Worth the Investment?

    While the upfront cost of metal is higher than asphalt shingles (which average $4-$6 per sq. ft.), the long-term value proposition is strong.

    1. Longevity: Asphalt shingles last 15-20 years. Metal lasts 40-70 years. You will likely replace an asphalt roof 2-3 times before replacing your metal roof once.
    2. Energy Efficiency: Metal roofs reflect solar radiant heat, reducing cooling costs by 10-25%. Look for “Cool Roof” rated products for maximum savings.
    3. Resale Value: Homes with metal roofs often see a boost in resale value. Buyers appreciate the low maintenance and durability.
    4. Insurance Discounts: Many insurance companies offer discounts (up to 15%) for metal roofs due to their fire resistance and ability to withstand hail and high winds.

    How to Get Accurate Quotes

    To ensure you are getting a fair price, follow these steps:

    1. Get Three Quotes: Never settle for the first bid. Prices can vary by thousands of dollars between contractors.
    2. Check Credentials: Ensure the installer is certified by the metal manufacturer (e.g., MBCI, Fabral, or Petersen). Manufacturer certification often ensures better warranty coverage.
    3. Ask for a Detailed Breakdown: The quote should separate material costs, labor, removal fees, and permit costs. Vague quotes are a red flag.
    4. Verify Insurance: Confirm the contractor has general liability and workers’ compensation insurance.

    FAQ Section

    Q: Can I install a metal roof myself to save money? A: While possible for exposed fastener systems on simple structures like sheds, it is not recommended for residential homes. Standing seam systems require specialized tools and expertise. Improper installation can lead to leaks, voided warranties, and structural damage. The labor savings are rarely worth the risk of costly repairs.

    Q: Does a metal roof make noise when it rains? A: This is a common myth. When installed correctly with solid sheathing and proper insulation/underlayment, a metal roof is no louder than an asphalt shingle roof during rain. In fact, many homeowners find the sound soothing.

    Q: How much does it cost to repair a metal roof? A: Minor repairs, such as replacing a loose screw or sealing a small leak, typically cost between $300 and $800. Major repairs involving panel replacement can range from $1,000 to $3,000 depending on accessibility and material matching.

    Q: Will a metal roof affect my home’s resale value? A: Yes, positively. A study by Remodeling Magazine indicates that metal roofing has a high return on investment (ROI), often recouping 60-85% of the cost upon sale. It is viewed as a premium upgrade by potential buyers.

    Q: What is the cheapest way to get a metal roof? A: The most cost-effective method is choosing galvanized steel with an exposed fastener profile. Additionally, installing it over existing shingles (if local codes allow) can save on disposal and labor costs. However, always prioritize quality installation over the lowest possible price.


    Conclusion

    Understanding how much does a metal roof cost per square foot is the first step toward making a smart home improvement decision. While the initial investment of $9 to $14 per square foot is higher than traditional asphalt, the durability, energy efficiency, and aesthetic appeal of metal roofing offer unparalleled long-term value. By choosing the right material for your climate and hiring a certified professional, you are not just buying a roof; you are investing in decades of peace of mind.

    If you found this guide helpful, please share it with friends or family who are considering a roof replacement. Knowledge is power when it comes to protecting your home!

  • How to Get Rid of Pigeons on Your Roof Fast

    How to Get Rid of Pigeons on Your Roof Fast

    Dealing with a flock of pigeons roosting on your home is more than just a nuisance; it is a genuine health hazard and a threat to your property’s structural integrity. If you have found yourself asking, “How can I get rid of pigeons on my roof,” you are not alone in this frustrating battle. This guide provides actionable, humane, and effective strategies to reclaim your space from these persistent urban pests.

    Why Are Pigeons Choosing Your Roof?

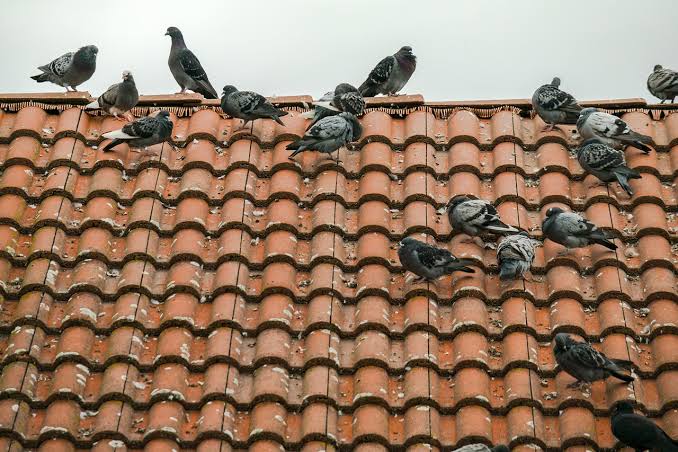
    Before we dive into removal tactics, it is crucial to understand why your roof has become a pigeon hotspot. Pigeons, scientifically known as Columba livia, are creatures of habit. They seek three primary things: safety, shelter, and proximity to food sources.

    Your roof offers an elevated vantage point that protects them from ground-level predators like cats and raccoons. Furthermore, flat roofs, chimneys, and HVAC units provide ideal nesting spots that mimic the cliff ledges they inhabit in the wild. According to urban wildlife studies, once a pair of pigeons establishes a nest, they will return to the same spot repeatedly, often bringing their offspring back to the same location.

    Understanding this behavior is key. You cannot simply shoo them away once; you must make the environment permanently unattractive to them.

    Top 5 Proven Methods to Remove Pigeons

    When considering how can I get rid of pigeons on my roof, you have several options ranging from DIY fixes to professional installations. Here are the most effective methods, ranked by efficacy and longevity.

    1. Install Bird Spikes (The Physical Barrier)

    Bird spikes are arguably the most reliable long-term solution for flat surfaces, ledges, and roof peaks. These devices do not harm the birds; instead, they make landing physically impossible.

    • How it works: Spikes create an uneven surface that prevents pigeons from gaining footing.
    • Installation Tip: Ensure the spikes cover the entire landing zone. Gaps larger than two inches may still allow bold pigeons to squeeze through.
    • Material Choice: Stainless steel spikes last longer than plastic ones, which can degrade under UV exposure after a few years.

    2. Use Bird Netting for Large Areas

    If you have a large, open roof area or recessed balconies, netting is the superior choice. It creates a physical barrier that blocks access entirely.

    • Best For: Covering eaves, solar panels, or large flat sections.
    • Durability: Look for UV-stabilized polyethylene netting. Cheap netting will rot within a season.
    • Professional Note: Improperly installed netting can sag, creating a trap for birds. Tensioning the net correctly is vital.

    3. Apply Visual and Auditory Deterrents

    Pigeons are wary of predators and sudden movements. Reflective objects, such as old CDs, reflective tape, or specialized predator decoys (like owls or hawks), can work temporarily.

    • The Limitation: Pigeons are intelligent. They quickly realize that a plastic owl that never moves is not a threat.
    • Pro Tip: Move decoys every few days and combine them with auditory deterrents, such as ultrasonic repellers or distress call emitters, to maintain effectiveness.

    4. Seal Entry Points and Nesting Sites

    Prevention is better than cure. Inspect your roof for any gaps, broken tiles, or open vents where pigeons might enter to nest inside the attic or roof cavity.

    • Action Step: Use hardware cloth or steel wool to block small openings. Avoid using foam alone, as pigeons can peck through it.
    • Safety Warning: Always wear a mask and gloves when sealing areas with existing droppings due to the risk of histoplasmosis, a fungal infection linked to bird waste.

    5. Hire Professional Pest Control

    If the infestation is severe, or if you are uncomfortable working at heights, professional help is the safest route. Experts can assess the extent of the damage and install commercial-grade exclusion systems.

    For more detailed information on the biological behavior of feral pigeons and their impact on urban environments, you can refer to this comprehensive resource on Wikipedia.

    How Can I Get Rid Of Pigeons On My Roof

    Comparison: DIY vs. Professional Pigeon Removal

    Choosing between doing it yourself and hiring a pro depends on your budget, the severity of the issue, and your comfort level.

    FeatureDIY MethodsProfessional Services
    CostLow ($50–$200)High ($500–$2,000+)
    EffectivenessVariable; requires maintenanceHigh; often comes with warranties
    Safety RiskHigh (working on roofs)Low (insured professionals)
    Time CommitmentHigh (research & install)Low (you just schedule it)
    LongevityShort to Medium termLong term

    Step-by-Step Guide: Cleaning Up After Pigeons

    Once you have addressed how can I get rid of pigeons on my roof, you must deal with the aftermath. Pigeon droppings are acidic and can corrode roofing materials, not to mention the health risks.

    Step 1: Safety First Put on an N95 respirator mask, heavy-duty gloves, and protective eyewear. Wet the droppings with a mixture of water and disinfectant to prevent dust particles from becoming airborne.

    Step 2: Removal Use a plastic scraper to remove thick layers of waste. Do not use a pressure washer initially, as this can spray contaminated water into the air and onto your siding.

    Step 3: Disinfection Apply a enzymatic cleaner or a bleach solution (1 part bleach to 10 parts water) to the affected area. Let it sit for 15 minutes to kill bacteria and fungi.

    Step 4: Rinse and Dry Rinse the area gently with a garden hose. Allow the roof to dry completely before installing any deterrents like spikes or netting.

    Frequently Asked Questions (FAQ)

    1. Is it legal to remove pigeons from my roof?

    In the United States, feral pigeons are generally not protected under the Migratory Bird Treaty Act. However, local ordinances may vary. It is illegal to use poison or cruel traps in many jurisdictions. Always check your local city regulations before taking action.

    2. Will mothballs keep pigeons away?

    Mothballs contain naphthalene or paradichlorobenzene, which are toxic chemicals. While the smell may deter birds temporarily, using them outdoors is often illegal due to environmental contamination risks. They are not a recommended or safe solution for roof use.

    3. How long does it take to see results after installing deterrents?

    Results vary. Visual deterrents may work immediately but lose effectiveness over weeks. Physical barriers like spikes and netting work instantly upon installation. Behavioral changes in the flock usually take 2–4 weeks as they search for new roosting sites.

    4. Can pigeons damage my roof structure?

    Yes. Their droppings are highly acidic and can eat through metal flashing, shingles, and paint. Additionally, the weight of accumulated nests and debris can clog gutters, leading to water damage and mold growth inside your home.

    5. What is the most humane way to get rid of pigeons?

    Exclusion methods are the most humane. By using spikes, netting, or sealing entry points, you prevent them from accessing your roof without harming them. Avoid glue traps or poisons, which cause unnecessary suffering and are often ineffective for long-term control.

    Conclusion

    Learning how can I get rid of pigeons on my roof is about consistency and using the right tools for the job. While no single method works perfectly for every situation, combining physical barriers like spikes or netting with regular maintenance offers the best protection. Remember, the goal is not to harm the birds, but to encourage them to find a more suitable home elsewhere.

    By taking action now, you protect your health, your property value, and your peace of mind. Don’t let the cooing and mess dictate your home life.

    Did you find this guide helpful? Share this article with your neighbors on social media—pigeon problems are often community-wide, and solving them together is more effective!

  • Best Exterior Trim Color With Black Roof

    Best Exterior Trim Color With Black Roof

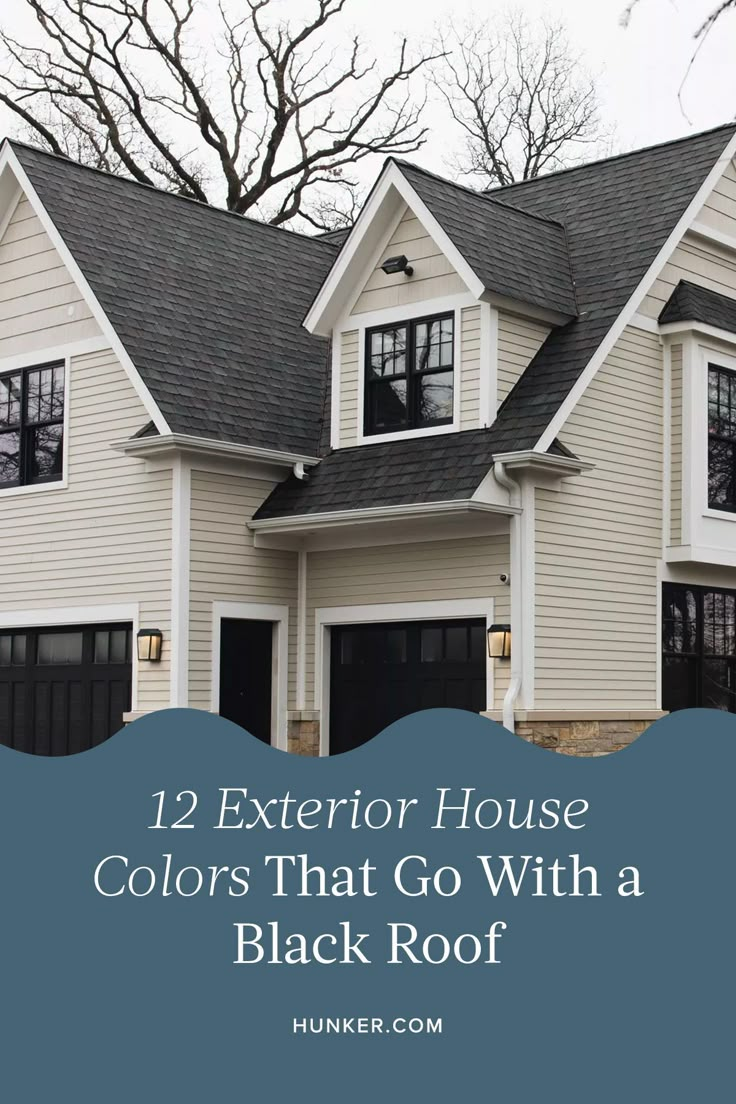
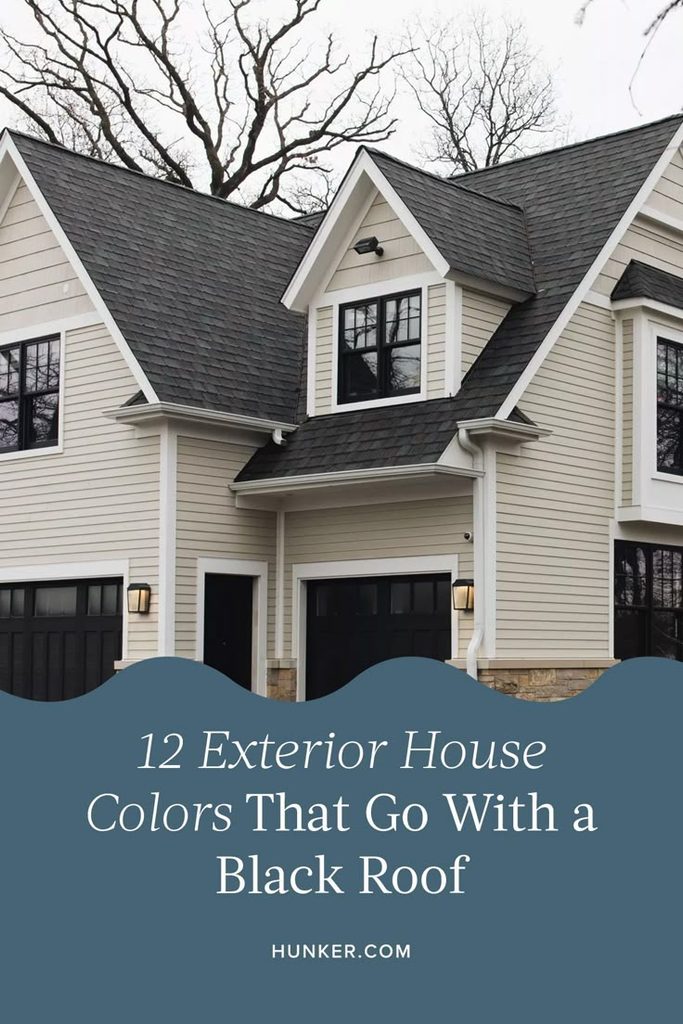
    Choosing the right exterior palette can feel overwhelming, especially when you have made a bold choice like installing a black roof. You want your home to look sophisticated, not gloomy or disjointed. If you are asking yourself, “What Is The Best Exterior Trim Color With Black Roof,” you are not alone; this is one of the most common dilemmas for homeowners aiming for modern elegance.

    A black roof acts as a powerful anchor for your home’s aesthetic. It demands attention and sets a dramatic tone. However, without the right trim color, that drama can turn into visual chaos. In this guide, we will break down the science of color theory, explore trending combinations, and provide actionable advice to help you create a cohesive and striking exterior that boosts your property’s value.

    Why White Trim Remains the Timeless Champion

    When considering contrast, nothing beats the classic combination of a black roof with crisp white trim. This pairing is the gold standard in American architecture for a reason: it offers maximum visibility and a clean, sharp finish.

    The Psychology of High Contrast

    Human eyes are naturally drawn to high-contrast areas. According to basic principles of visual perception, the juxtaposition of black and white creates a sense of order and clarity. For homes with complex rooflines or multiple gables, white trim helps define the architectural details that might otherwise get lost against a dark background.

    • Pros:
      • Creates a fresh, clean look that never goes out of style.
      • Makes windows pop, enhancing natural light perception.
      • Works with almost any siding color (brick, vinyl, wood, stucco).
    • Cons:
      • White trim requires more frequent maintenance to prevent yellowing or dirt buildup.
      • Can feel too stark if not balanced with warm siding tones.

    If you choose white, consider the shade carefully. Pure bright white can sometimes look plastic-like on vinyl. Opting for an “off-white” or “cream” can soften the blow while maintaining the necessary contrast.

    Embracing Modernity: Black-on-Black Aesthetics

    In recent years, the “monochromatic” look has surged in popularity, particularly in modern farmhouse and contemporary industrial designs. This involves pairing a black roof with black or charcoal trim.

    Creating Depth Without Color

    You might worry that black-on-black will look flat. The secret lies in texture and sheen. By using different finishes—for example, a matte black roof with semi-gloss black trim—you create subtle depth. This approach is incredibly sophisticated and signals a high-end, custom-designed home.

    Expert Insight: Architectural designers often note that monochromatic schemes make smaller homes appear larger because the eye travels smoothly across the surface without stopping at contrasting lines.

    However, this look is risky. If your home lacks architectural detail, it may look like a shadow. Ensure your home has distinct features like columns, porch rails, or window grids to break up the mass of dark color.

    What Is The Best Exterior Trim Color With Black Roof

    The Warmth Factor: Earth Tones and Beige Trims

    Not everyone wants high contrast or moody darkness. For a more inviting, traditional, or rustic feel, earth-toned trims are excellent companions for a black roof.

    Balancing Cool and Warm

    A black roof is inherently “cool” and heavy. Pairing it with warm trim colors like beige, tan, or greige (gray-beige) creates a balanced temperature profile. This is particularly effective for homes with stone or brick accents.

    • Best Siding Pairings:
      • Light Gray Siding: Use a warm beige trim to prevent the house from looking cold.
      • White Siding: A cream or ivory trim softens the harshness of the black roof.
      • Brick Homes: Choose a trim color that matches the mortar or the lightest brick tone for harmony.

    This combination is forgiving regarding dirt and weathering, making it a practical choice for families who prefer low-maintenance exteriors.

    Bold Choices: Navy, Forest Green, and Dark Blue Trims

    For those willing to take a design risk, colored trims can yield spectacular results. While less common, deep navy or forest green trim can complement a black roof beautifully, provided the siding is neutral.

    When to Use Colored Trim

    Colored trim works best when you want to highlight specific architectural elements rather than outlining the entire house. For instance, painting only the window frames and door casings in a deep navy blue while keeping the fascia and soffits white or black can create a curated, boutique-hotel vibe.

    Trim ColorBest Siding MatchVibe CreatedMaintenance Level
    Crisp WhiteAny (Gray, Brick, Wood)Classic, Clean, SharpHigh
    Black/CharcoalWhite, Light Gray, WoodModern, Sleek, MoodyMedium
    Beige/CreamGray, Blue, Green SidingWarm, Traditional, InvitingLow
    Navy BlueWhite, Light GrayNautical, Unique, BoldMedium

    Critical Factors Beyond Color Choice

    Selecting the color is only half the battle. To truly answer “what is the best exterior trim color with black roof,” you must consider environmental and material factors.

    1. Climate and Heat Absorption

    Dark colors absorb heat. While this is less of an issue for trim than roofing, black trim in direct sunlight can expand and contract more than lighter colors. If you live in a hot climate like Arizona or Texas, ensure your trim material is high-quality vinyl or fiber cement designed to withstand thermal movement. Poor quality paint on black trim may peel faster due to heat stress.

    2. Architectural Style Consistency

    Your home’s style should dictate your trim choice.

    • Victorian Homes: Often feature intricate trim work that looks best in white or historical pastels to highlight the detail.
    • Craftsman Bungalows: Typically use earth tones or dark greens to blend with nature.
    • Modern Minimalist: Favors black, gray, or white for a seamless look.

    Ignoring these stylistic norms can result in a home that feels “off” to potential buyers or neighbors. For more on architectural styles, you can refer to general definitions on Wikipedia to ensure your color choice aligns with your home’s historical or design roots.

    3. Lighting Conditions

    Always test your paint samples at different times of day. A trim color that looks perfect in the morning sun might look muddy in the afternoon shade. Black roofs cast shadows differently than lighter roofs, so observe how the shadow line interacts with your proposed trim color.

    Step-by-Step Guide to Testing Your Palette

    Don’t commit to a gallon of paint immediately. Follow these steps to ensure satisfaction:

    1. Buy Sample Pots: Purchase small samples of your top three trim colors.
    2. Paint Large Swatches: Paint at least a 2×2 foot section on different sides of your house (north, south, east, west).
    3. Observe for 3 Days: Look at the samples in morning, noon, and evening light.
    4. Check Against Fixed Elements: Ensure the trim color complements your brick, stone, or landscaping, not just the roof.
    5. Get a Second Opinion: Ask friends or neighbors for unbiased feedback. Sometimes we become “color blind” to our own homes after staring at them for too long.

    FAQ Section

    Q: Does a black roof make a house hotter?

    A: Yes, black roofs absorb more solar radiation than lighter roofs. However, modern roofing materials often come with reflective coatings or proper attic ventilation can mitigate heat transfer into the living space. The trim color itself has a negligible impact on internal temperature compared to the roof material.

    Q: Can I use gray trim with a black roof?

    A: Absolutely. Gray is a versatile neutral. Light gray trim offers a softer contrast than white, while dark charcoal gray can create a near-monochromatic look. It is an excellent middle-ground option for those who find white too stark and black too dark.

    Q: What siding color goes best with a black roof and white trim?

    A: This trio is incredibly flexible. Light gray, navy blue, sage green, and even natural wood tones look fantastic with a black roof and white trim. Avoid very dark siding unless you are aiming for a fully monochromatic modern look, as it may compete with the roof.

    Q: How often do I need to repaint white trim?

    A: White trim shows dirt, pollen, and mildew more easily than darker colors. Depending on your climate, you may need to wash it annually and repaint every 5–7 years. Using high-quality acrylic latex paint can extend this lifespan.

    Q: Is it expensive to change trim color?

    A: Painting trim is generally more labor-intensive than painting walls due to the precision required, but it is far cheaper than replacing siding or roofing. It is one of the most cost-effective ways to refresh your home’s curb appeal.

    Conclusion

    Finding the best exterior trim color with black roof depends on your personal style, home architecture, and local environment. Whether you choose the timeless elegance of white, the modern sophistication of black, or the warmth of beige, the key is consistency and contrast.

    Remember, your home’s exterior is the first impression you make on the world. A well-chosen trim color not only enhances beauty but also protects your investment. Don’t be afraid to experiment with samples and seek professional advice if needed.

    Did you find this guide helpful? Share this article with friends who are renovating their homes, or pin it to your Pinterest board for future reference! Let’s help everyone achieve the perfect curb appeal.

  • Roofing Contractor Ruined Property? Can You File A Lien?

    Roofing Contractor Ruined Property? Can You File A Lien?

    Has your home improvement project turned into a nightmare? It is incredibly stressful when a trusted professional causes significant damage to your most valuable asset. If you are asking, “Roofing Contractor Ruined My Property Can I File A Lein,“ you are likely looking for immediate legal recourse and financial protection. This guide will clarify your rights, explain the legal mechanisms available, and help you navigate this difficult situation with confidence.

    Understanding the Legal Landscape: Liens vs. Claims

    Before diving into the specific question of filing a lien, it is crucial to understand the terminology. In construction law, the term “lien” is often misunderstood by homeowners. Typically, a Mechanic’s Lien (or Construction Lien) is a tool used by contractors to ensure they get paid by placing a claim on the property.

    However, as a homeowner, you generally do not “file a lien” against a contractor in the same way they file one against you. Instead, you have other powerful legal remedies. Let’s break down what you can actually do when a roofing contractor ruins your property.

    What Is a Mechanic’s Lien?

    A mechanic’s lien is a security interest in the title to property for the benefit of those who have supplied labor or materials that improve the property. While contractors use this to force payment, homeowners usually use lawsuits, insurance claims, or bond claims to recover damages.

    For a deeper understanding of property rights and legal definitions, you can refer to general legal principles outlined on Wikipedia.

    Can You Actually File a Lien Against a Contractor?

    The short answer is: No, not directly. Homeowners do not file liens against contractors. However, you can place a lis pendens (notice of pending action) if you sue them, which alerts potential buyers that the property is involved in litigation. But more commonly, you pursue compensation through:

    1. Small Claims Court: For damages under a certain threshold (varies by state, typically $5,000–$10,000).
    2. Civil Lawsuit: For larger damages involving breach of contract and negligence.
    3. Insurance Claim: Filing against the contractor’s liability insurance.
    4. License Board Complaint: Reporting the contractor to your state’s licensing board.

    Why the Confusion Exists

    Many homeowners confuse “filing a lien” with “placing a hold on funds.” If you have not yet paid the final balance, you may have the right to withhold payment until the damage is repaired. This is not a lien, but it is a powerful leverage tool.

    Immediate Steps to Take After Property Damage

    If your roofing contractor has ruined your property—whether by damaging siding, breaking windows, or causing interior water damage—act quickly. Documentation is your best friend in any legal dispute.

    Step 1: Document Everything Thoroughly

    Take high-resolution photos and videos of all damage. Do not clean up or repair anything yet unless it is an emergency safety hazard. If you must make emergency repairs, document the condition extensively first.

    • Date and Time: Ensure your camera settings include timestamps.
    • Wide and Close-Up Shots: Capture the overall context and specific details of the damage.
    • Communication Logs: Save all texts, emails, and voicemails from the contractor.

    Step 2: Review Your Contract

    Check your signed agreement for clauses related to:

    • Damage Liability: Who is responsible for accidental damage?
    • Dispute Resolution: Does it require mediation or arbitration?
    • Insurance Requirements: Did the contractor provide proof of general liability insurance?

    Step 3: Notify the Contractor in Writing

    Send a formal letter (via certified mail) detailing the damage. Include:

    • A description of the incident.
    • Photos of the damage.
    • A request for a repair plan or compensation.
    • A deadline for response (e.g., 7–10 days).

    This step is critical for establishing a paper trail that shows you attempted to resolve the issue amicably before taking legal action.

    Roofing Contractor Ruined My Property Can I File A Lein

    Evaluating Your Options for Compensation

    When a roofing contractor ruined my property, your path to recovery depends on the severity of the damage and the contractor’s responsiveness. Here is a comparison of your main options:

    OptionBest ForProsCons
    Insurance ClaimSignificant structural damageFaster payout; less legal hassleMay increase your premiums; deductible applies
    Small Claims CourtMinor damages (<$10k)Low cost; no lawyer neededLimited monetary recovery; time-consuming
    Civil LawsuitMajor damages & negligencePotential for full compensation + legal feesExpensive; lengthy process; requires attorney
    License Board ComplaintUnlicensed or unethical behaviorCan revoke contractor’s licenseDoes not directly recover money for you

    The Role of Insurance

    Most reputable roofing contractors carry General Liability Insurance. This policy covers property damage caused by their work. Before suing, ask for their insurance information and file a claim directly with their provider. This is often the fastest way to get your property repaired without going to court.

    How to Prevent Future Issues with Contractors

    Prevention is always better than cure. When hiring a roofing contractor, take these precautions to protect your property:

    1. Verify Licensing and Insurance: Never hire a contractor who cannot provide current proof of general liability and workers’ compensation insurance.
    2. Check References: Look for reviews on multiple platforms (Google, Yelp, BBB). Ask past clients about cleanliness and damage handling.
    3. Detailed Contract: Ensure the contract specifies who is liable for damages to landscaping, siding, windows, and interiors.
    4. Walkthrough Before Work Begins: Document the pre-existing condition of your property with photos. This prevents disputes about whether damage was new or pre-existing.

    Frequently Asked Questions (FAQ)

    1. Can I sue a roofing contractor for emotional distress?

    Generally, no. Courts rarely award damages for emotional distress in property damage cases unless there was intentional infliction of harm or extreme negligence. Focus on recovering the cost of repairs and diminished property value.

    2. What if the contractor has no insurance?

    If the contractor is uninsured, your options are limited to suing them personally. If they have no assets, collecting money may be difficult. This is why verifying insurance before hiring is critical. You may also check if your homeowner’s insurance covers “uninsured motorist/contractor” scenarios, though this is rare.

    3. How long do I have to file a claim for property damage?

    This varies by state and is known as the Statute of Limitations. For property damage, it is typically between 2 to 6 years from the date of the incident. Consult a local attorney immediately to ensure you do not miss this deadline.

    4. Can I withhold payment if the job is incomplete or damaged?

    Yes, in most jurisdictions, you can withhold payment for unfinished or defective work. However, you must follow specific notice procedures outlined in your state’s construction laws. Improper withholding can sometimes lead to the contractor filing a lien against your home.

    5. What is a “Counter-Lien”?

    A counter-lien is not a standard legal term for homeowners. However, if a contractor files a mechanic’s lien against your home for non-payment, and you believe the work was defective, you can challenge the lien in court. You may need to post a bond to remove the lien while the dispute is resolved.

    Conclusion

    Dealing with a roofing contractor who has ruined your property is undeniably stressful, but you are not powerless. While you cannot technically “file a lien” against the contractor in the traditional sense, you have robust legal tools at your disposal. By documenting damage, notifying the contractor formally, and leveraging their insurance or small claims court, you can seek fair compensation.

    Remember, the key to resolving this issue lies in prompt action and thorough documentation. Do not let intimidation stop you from seeking what is rightfully yours. If the damage is significant, consult with a construction attorney to explore your best legal options.

    Found this guide helpful? Share it with friends or family who might be planning home improvements. Spreading awareness helps everyone avoid costly mistakes and protects our community from unethical practices.

  • Free 12×20 Wooden Porch Roof Plans PDF Download

    Free 12×20 Wooden Porch Roof Plans PDF Download

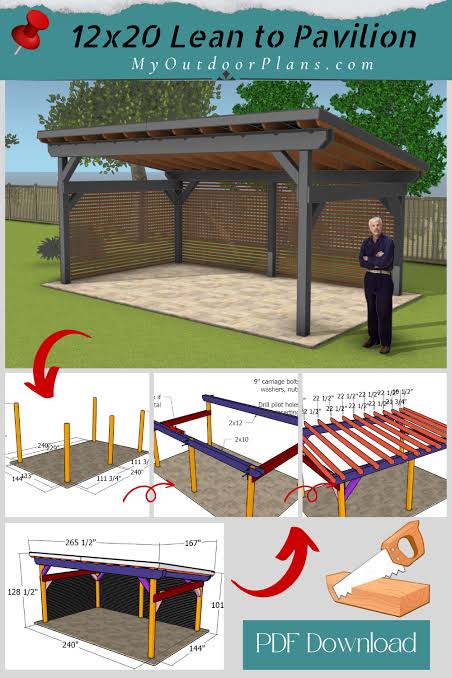
    Building a covered outdoor space transforms your home’s curb appeal and provides a sanctuary for relaxation. However, finding reliable, structurally sound blueprints without paying premium fees can be frustrating for DIY enthusiasts. This guide helps you navigate the process of securing a 12 X 20 Wooden Porch Roof Plans Pdf Free Download while ensuring your project meets safety standards.

    Why Choose a 12×20 Wooden Porch?

    A 12×20 footprint is one of the most versatile dimensions for residential additions. It offers enough space for a comfortable seating area, a small dining set, or even an outdoor kitchen prep station, without overwhelming a standard backyard.

    Wood remains the preferred material for many homeowners due to its aesthetic warmth and ease of customization. Unlike metal or vinyl, wood can be stained or painted to match your home’s existing trim perfectly.

    The Value of Professional Plans

    Many beginners underestimate the complexity of roof framing. A proper plan isn’t just a sketch; it is a mathematical guarantee of stability. Using a verified 12 X 20 Wooden Porch Roof Plans Pdf Free Download ensures you have:

    • Accurate load calculations.
    • Correct rafter spacing.
    • Proper attachment details to the main house.

    Without these, you risk structural failure, water leakage, or code violations.

    Understanding Structural Requirements

    Before you download any PDF, you must understand what makes a roof safe. A porch roof is not just about aesthetics; it is a structural extension of your home.

    Load-Bearing Considerations

    Your roof must handle two types of loads:

    1. Dead Load: The weight of the materials (wood, shingles, beams).
    2. Live Load: Snow, wind, and maintenance workers.

    In the United States, building codes vary by region. For example, a home in Maine requires a much higher snow load capacity than a home in Florida. Always check your local municipal codes before starting.

    Expert Insight: According to general engineering principles, a standard gable roof should have a minimum slope of 4:12 to ensure proper water runoff. Flatter pitches require specialized membrane roofing to prevent leaks.

    For more detailed information on structural engineering basics, you can refer to Wikipedia’s article on Roof Construction.

    Key Components of Your 12×20 Plan

    When reviewing your downloaded PDF, look for these specific elements. If they are missing, the plan may be incomplete or unsafe.

    1. The Ledger Board Attachment

    This is the most critical connection point. The ledger board attaches the porch roof to your house.

    • Material: Use pressure-treated lumber.
    • Fasteners: Use lag screws or through-bolts, not just nails.
    • Flashing: Essential to prevent water from rotting your home’s siding.

    2. Rafters and Beams

    For a 12-foot span, you typically need substantial beams.

    • Common Size: 2×8 or 2×10 rafters, depending on snow load.
    • Spacing: Usually 16 inches or 24 inches on center.

    3. Support Posts

    If your design is not fully attached to the house, you will need support posts.

    • Placement: Typically at the corners and mid-span for a 20-foot length.
    • Footings: Must extend below the frost line to prevent heaving.

    Step-by-Step Guide to Using Your Plans

    Once you have secured your 12 X 20 Wooden Porch Roof Plans Pdf Free Download, follow this logical workflow to ensure success.

    Phase 1: Preparation and Permitting

    1. Review Local Codes: Visit your local building department. Submit your PDF plans for approval.
    2. Call Before You Dig: Contact utility companies to mark underground lines if you are installing footings.
    3. Gather Materials: Create a shopping list based on the bill of materials in your PDF.

    Phase 2: Framing the Structure

    1. Install the Ledger Board:
      • Measure and mark the height on your house wall.
      • Ensure it is perfectly level.
      • Bolt it securely into the house framing studs.
    2. Set the Posts:
      • Dig holes for post footings (typically 12-18 inches wide).
      • Pour concrete and set post anchors.
      • Install vertical posts, ensuring they are plumb (vertically straight).
    3. Install the Beam:
      • Lift the main beam onto the posts and ledger.
      • Secure with metal brackets or carriage bolts.

    Phase 3: Roofing Installation

    1. Cut and Install Rafters:
      • Use the angles provided in your PDF.
      • Space them evenly (e.g., 16 inches apart).
    2. Add Sheathing:
      • Nail plywood or OSB boards over the rafters.
    3. Apply Underlayment and Shingles:
      • Start from the bottom edge and work up.
      • Overlap each row according to manufacturer instructions.
    12 X 20 Wooden Porch Roof Plans Pdf Free Download

    Common Mistakes to Avoid

    Even with the best 12 X 20 Wooden Porch Roof Plans Pdf Free Download, errors can occur. Here is a comparison of common pitfalls versus best practices.

    MistakeBest Practice
    Ignoring local snow load codesChecking municipal requirements first
    Using untreated wood for postsUsing pressure-treated or cedar lumber
    Skipping flashing behind ledgerInstalling heavy-duty metal flashing
    Nailing rafters without bracketsUsing hurricane ties for wind resistance

    Material List Estimate for 12×20 Porch

    While your PDF will provide exact numbers, here is a general estimate to help you budget. Prices vary by location and lumber quality.

    • Ledger Board: 1 piece of 2x10x20 (pressure-treated).
    • Beam: 1 piece of 2x10x20 or double 2x8s.
    • Rafters: Approx. 13-15 pieces of 2x8x14 (depending on overhang).
    • Posts: 2-4 pieces of 6x6x10 (pressure-treated).
    • Sheathing: 10-12 sheets of 4×8 plywood.
    • Roofing: 3-4 bundles of asphalt shingles.
    • Hardware: Lag screws, carriage bolts, hurricane ties, and joist hangers.

    FAQ Section

    1. Do I need a permit for a 12×20 porch roof?

    Yes, in most US jurisdictions, a structure of this size requires a building permit. It involves structural changes to your home and electrical work if you add lighting. Always check with your local building department.

    2. Can I use the free PDF plans for commercial construction?

    No. Most free downloads are for residential, personal use only. Commercial projects require stamped drawings from a licensed structural engineer to meet stricter liability and safety codes.

    3. What is the best wood type for a porch roof?

    Pressure-treated pine is the most cost-effective and rot-resistant option for structural framing. For visible beams, Cedar or Redwood offers natural beauty and resistance to insects, though at a higher cost.

    4. How steep should the roof pitch be?

    A minimum pitch of 4:12 (4 inches of rise for every 12 inches of run) is recommended for asphalt shingles. If you want a flatter look, you must use rubber membrane roofing or metal standing seam panels.

    5. Is it difficult to attach the roof to an existing house?

    It can be challenging if you do not locate the studs correctly. You must bolt the ledger board into the house’s framing, not just the siding or sheathing. Using a stud finder and verifying with small pilot holes is crucial.

    6. Where can I find a reliable 12 X 20 Wooden Porch Roof Plans Pdf Free Download?

    Reliable sources include university agricultural extension websites, government housing resources, and reputable DIY construction blogs that offer vetted templates. Be cautious of random file-sharing sites, as they may contain outdated or unsafe designs.

    Conclusion

    Building a 12×20 wooden porch roof is a rewarding project that adds significant value to your home. By starting with a high-quality 12 X 20 Wooden Porch Roof Plans Pdf Free Download, you lay the foundation for a safe and beautiful structure.

    Remember, preparation is key. Take the time to understand your local codes, gather the right materials, and follow the steps methodically. Don’t rush the framing phase; precision here prevents headaches later.

    If you found this guide helpful, please share it with your friends on social media who might be planning their own outdoor improvements. Happy building!

  • Roof Done? Your Home Insurance Next Steps

    Roof Done? Your Home Insurance Next Steps

    Congratulations! The heavy machinery is gone, the nail guns have fallen silent, and your home now sports a fresh, protective layer of shingles or metal. It is a massive relief to know that your home is secure against the elements again. However, many homeowners make the mistake of thinking the process ends when the last shingle is nailed down. In reality, the administrative and financial wrap-up is just as critical as the installation itself.

    If you are wondering what to do after ur roof is done with homeinsurance, you are not alone. This phase involves verifying the quality of work, ensuring your insurance carrier has released all due funds, and updating your policy records. Missing a step here could cost you thousands in future repairs or leave you underinsured. Let’s walk through exactly what you need to do to close this chapter properly and securely.

    1. Conduct a Thorough Final Inspection

    Before you sign off on the job or release the final payment to your contractor, you must verify the quality of the work. Do not rely solely on a visual glance from the ground. While you may not be a roofing expert, there are specific things you can check to ensure the job meets industry standards.

    What to Look For During Inspection

    • Cleanliness: The yard and gutters should be free of old shingles, nails, and debris. Magnetic nail sweepers should have been used around the perimeter.
    • Flashing Integrity: Check around chimneys, vents, and skylights. Flashing should be tight, sealed, and free of gaps. This is where most leaks occur later.
    • Shingle Alignment: Shingles should be straight, with consistent exposure (the part of the shingle visible to the eye). No shingles should be cracked or missing granules.
    • Ventilation: Ensure ridge vents or soffit vents were not blocked during installation. Proper airflow extends the life of your roof significantly.

    It is highly recommended to hire an independent third-party inspector if you feel unsure. According to the National Roofing Contractors Association, proper installation is the single most important factor in roof longevity. An unbiased opinion can save you from headaches down the road.

    2. Understand the “Holdback” and Final Payment

    Insurance companies rarely pay the full amount upfront. Typically, they issue an initial payment for the Actual Cash Value (ACV) of the roof, minus your deductible. The remaining balance, known as Recoverable Depreciation, is paid only after the work is complete and verified.

    The Payment Flow Table

    Payment StageWho Pays?What It CoversAction Required
    Initial PaymentInsuranceACV minus DeductiblePay deposit to contractor (if required).
    CompletionYou/HomeownerLabor & Materials BalanceVerify work is done.
    Final ClaimInsuranceRecoverable DepreciationSubmit proof of completion.

    Crucial Step: Do not pay your contractor the full balance until you are satisfied with the inspection. Once you pay, you lose leverage. Most reputable contractors understand this and will wait for the insurance company’s final check before demanding the last portion of their fee, provided you have communicated this clearly.

    What To Do After Ur Roof Is Done With Homeinsurance

    3. Gather and Submit Proof of Completion

    To trigger the release of the recoverable depreciation from your insurance provider, you need to provide specific documentation. This is often where delays happen because homeowners assume the insurer knows the job is done. They do not. You must prove it.

    Required Documents Checklist

    1. Final Invoice: A detailed bill from your contractor marked “Paid in Full” or showing a zero balance.
    2. Photos: Clear, high-resolution photos of the completed roof from multiple angles. Include close-ups of flashing and valleys.
    3. Certificate of Completion: Some insurers require a specific form signed by the contractor stating the work adheres to local building codes.
    4. Lien Waiver: This document protects you from subcontractors placing a lien on your home if the general contractor fails to pay them. Always ask for this.

    Submit these documents via your insurance company’s online portal or directly to your adjuster. Keep digital copies of everything. Email confirmations are your best friend in case documents get lost in the mail.

    4. Update Your Homeowners Insurance Policy

    A new roof increases the value of your home and reduces the risk profile for your insurer. However, if you do not update your policy, you might be paying for outdated coverage or missing out on potential discounts.

    Contact your insurance agent immediately after the claim is closed. Provide them with:

    • The date of installation.
    • The type of materials used (e.g., architectural shingles, metal, tile).
    • The warranty details.

    Many insurers offer a new roof discount, which can range from 5% to 20% off your premium. Additionally, ensure your dwelling coverage limit reflects any increase in home value due to the upgrade. If you upgraded from basic 3-tab shingles to premium impact-resistant ones, your home’s replacement cost may have risen.

    5. Secure Your Warranties

    There are two types of warranties you need to manage after a roof replacement. Confusing them is common, but both are vital for long-term protection.

    Manufacturer vs. Workmanship Warranty

    • Manufacturer Warranty: Covers defects in the materials themselves (e.g., shingles cracking prematurely). These often last 20–50 years but require proper registration.
    • Workmanship Warranty: Covers errors made by the installer (e.g., improper nailing, poor flashing). These typically last 2–10 years, depending on the contractor.

    Action Item: Ask your contractor for the manufacturer warranty registration paperwork. Often, the contractor handles this, but you should receive a copy. Verify that the warranty is transferable if you plan to sell your home in the future. Store these documents in a fireproof safe or a secure cloud storage folder labeled “Home Maintenance.”

    6. Maintain Records for Future Resale

    When it comes time to sell your home, a documented roof replacement is a major selling point. Buyers and their inspectors will want proof that the roof was installed correctly and permitted properly.

    Keep a dedicated folder containing:

    • The original insurance claim number.
    • All invoices and receipts.
    • Permits issued by your local municipality.
    • Warranty certificates.
    • Before-and-after photos.

    This transparency builds trust with potential buyers and can speed up the closing process. It proves that you were a responsible homeowner who maintained the property diligently.


    FAQ Section

    Q1: How long does it take to get the final insurance payment after the roof is done?

    A: Typically, it takes 7–14 business days after you submit the proof of completion (invoice and photos). However, this varies by insurer. If you haven’t received it within two weeks, follow up with your adjuster immediately.

    Q2: Can I keep the extra money if the repair cost less than the estimate?

    A: Generally, no. Insurance policies are indemnity contracts, meaning they restore you to your pre-loss condition, not profit you. If the actual cost is significantly lower than the estimate, the insurer may ask for the difference back. Always be honest with your adjuster about final costs.

    Q3: What if I find a leak a week after the roof is finished?

    A: Contact your roofer immediately. This should be covered under their workmanship warranty. Do not attempt to fix it yourself, as this may void the warranty. Document the leak with photos and dates before calling.

    Q4: Do I need a permit for my roof replacement?

    A: In most US jurisdictions, yes. Your contractor should pull this permit. Ensure the permit is closed out by the local building department after inspection. An open permit can cause issues when selling your home.

    Q5: Will my insurance premiums go up after a claim?

    A: It depends. For weather-related claims (hail, wind), premiums often do not increase. However, filing multiple claims in a short period can label you as high-risk. Since you’ve just installed a new roof, you may actually qualify for discounts, offsetting any potential rate hikes.

    Q6: What happens if the contractor goes out of business before finishing?

    A: This is why you should never pay 100% upfront. If this happens, contact your insurance adjuster immediately. They may be able to reassign the remaining funds to a new contractor. This is also why checking a contractor’s license and insurance before hiring is non-negotiable.


    Conclusion

    Navigating the aftermath of a roof replacement can feel overwhelming, but taking these systematic steps ensures you are fully protected. By conducting a thorough inspection, managing your paperwork meticulously, and updating your insurance policy, you turn a stressful event into a solid investment in your home’s future.

    Remember, the goal isn’t just to fix the leak; it’s to ensure peace of mind for the next 20+ years. Don’t let the administrative side slip through the cracks. Take action today to secure your warranties and finalize your claim.

    Found this guide helpful? Share it with friends or neighbors who might be facing similar home improvement challenges. A well-informed community is a resilient one!