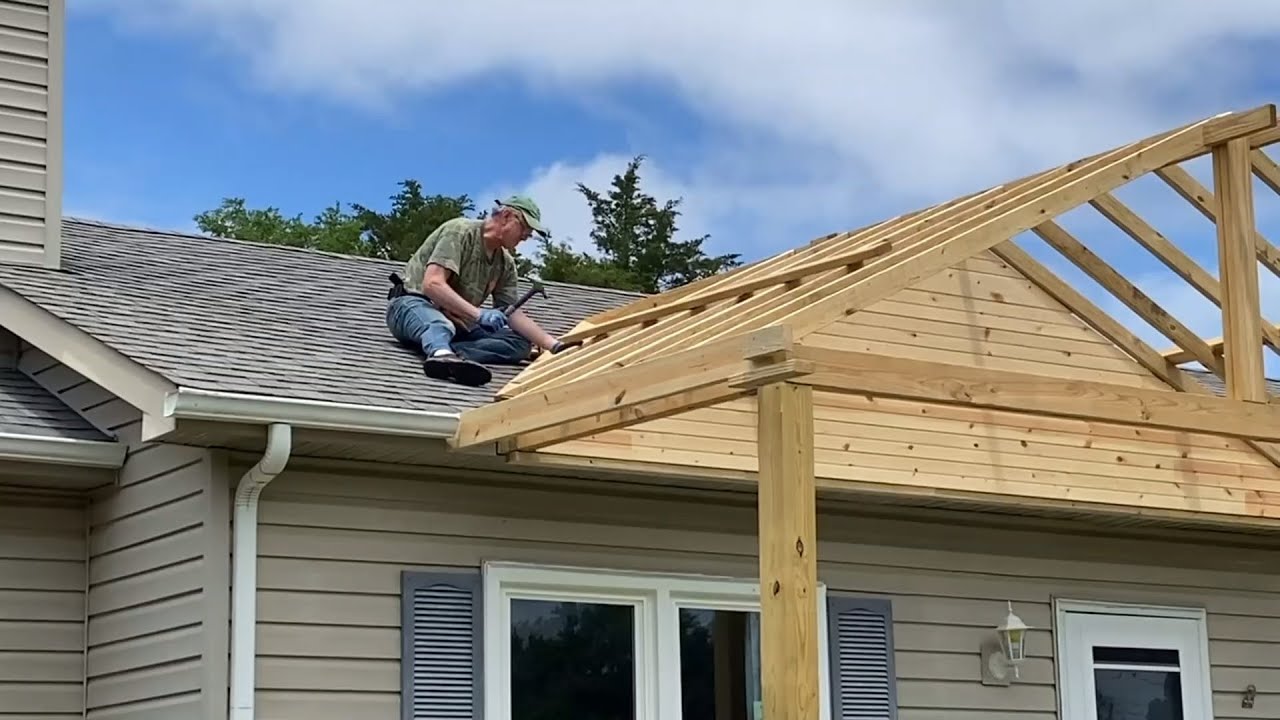
Adding a covered entryway is one of the most impactful ways to enhance your home’s exterior, yet many homeowners hesitate due to perceived complexity. You want that welcoming shelter from rain and sun, but you are unsure where to start or how to integrate it with your current structure. This guide simplifies the process, showing you exactly how to add a front porch roof to existing house frameworks without compromising structural integrity or breaking the bank.
Why Install a Front Porch Roof?
Before diving into the nuts and bolts, it is essential to understand the value proposition. A front porch roof is not just an aesthetic upgrade; it is a functional investment. According to recent real estate trends, homes with covered porches often see a higher return on investment (ROI) because they expand usable living space.
Beyond property value, a roof protects your front door from weather damage, reduces energy costs by shading entryways, and provides a cozy spot for morning coffee. However, the key to success lies in proper planning and execution.
Understanding Structural Requirements and Permits
The first step in learning how to add a front porch roof to existing house walls is navigating the legal and structural landscape. In the United States, building codes vary significantly by state and municipality. Ignoring these can lead to costly fines or forced removal of your new structure.
Do You Need a Permit?
In most US jurisdictions, any permanent structure attached to your home requires a building permit. This ensures that the roof can withstand local wind loads, snow weights, and seismic activity.
- Check Local Codes: Visit your city’s building department website.
- HOA Rules: If you live in a community with a Homeowners Association, review their architectural guidelines.
- Utility Lines: Ensure no power lines interfere with the proposed roof height.
Load-Bearing Considerations
Your existing house wall may not be designed to hold the extra weight of a roof. You must determine if the attachment point is load-bearing. If you are attaching the roof to a non-load-bearing wall, you will need to install additional support columns or reinforce the framing. For detailed definitions of structural terms, you can refer to Wikipedia’s article on Load-bearing walls to better understand the engineering principles involved.
Choosing the Right Roof Style
Not all roofs fit every home. The style you choose should complement your home’s architecture while meeting your budget.
| Roof Style | Best For | Pros | Cons |
|---|---|---|---|
| Gable Roof | Traditional/Craftsman Homes | Excellent water runoff, classic look | Requires more material, complex framing |
| Hip Roof | Modern/Ranch Styles | Stable in high winds, elegant appearance | More expensive, less headroom at edges |
| Shed Roof | Contemporary/Budget Projects | Simple construction, cost-effective | Can look too plain, potential drainage issues if pitch is low |
| Flat Roof | Modern Minimalist | Easy to build, usable space above | Higher maintenance, prone to leaking if not sealed properly |
For most DIYers adding a roof to an existing facade, a shed roof (single-slope) is the most manageable option. It attaches directly to the house wall and slopes downward toward the front columns.
Step-by-Step Guide: How to Add a Front Porch Roof
This section breaks down the physical construction process. Please note that this is a general guide. Always consult a structural engineer for specific load calculations.
Step 1: Planning and Measurement
Measure the width of your desired porch. Standard depths range from 6 to 10 feet. Mark the height where the roof will attach to the house. A minimum slope of 1/4 inch per foot is recommended for proper water drainage.
Step 2: Installing the Ledger Board
The ledger board is the horizontal beam that attaches to your house. This is the most critical structural component.
- Remove siding where the board will sit to expose the sheathing and studs.
- Use a level to mark a straight line across the studs.
- Secure a pressure-treated 2×8 or 2×10 lumber board directly into the wall studs using lag screws or through-bolts. Do not rely on nails alone.
Step 3: Setting the Support Posts
Determine the location of your front columns. These typically align with the outer edge of the porch floor.
- Dig post holes below the frost line (varies by region, often 24–48 inches deep).
- Pour concrete footings and insert post anchors.
- Cut pressure-treated 4×4 or 6×6 posts to height. The top of the post should meet the outer edge of your future rafters.
Step 4: Framing the Rafters
Rafters connect the ledger board to the front beam (which sits atop your posts).
- Cut rafters from 2×6 or 2×8 lumber, depending on the span.
- Use metal rafter ties to secure one end to the ledger board and the other to the front header beam.
- Space rafters 16 inches or 24 inches on center, consistent with your local code.
Step 5: Adding Sheathing and Underlayment
Once the frame is secure:
- Nail plywood or OSB sheathing over the rafters.
- Apply a waterproof roofing underlayment (felt paper or synthetic membrane). This layer is crucial for preventing leaks where the new roof meets the old house.
Step 6: Installing Roofing Material
Match your new roof to your existing home if possible. Asphalt shingles are the most common choice for US homes due to their affordability and ease of installation.
- Start from the bottom edge and work your way up.
- Use drip edge flashing along the eaves.
- Install step flashing where the new roof intersects with the house wall to direct water away from the joint.
Common Mistakes to Avoid
Even experienced DIYers can stumble. Here are the most frequent errors when figuring out how to add a front porch roof to existing house structures:
- Ignoring Water Proofing: Failing to install proper flashing between the new roof and the house wall is the number one cause of leaks. Water will seep behind the siding and rot the framing.
- Incorrect Slope: A flat-looking roof needs a minimum pitch. If the slope is too shallow, water will pool, leading to premature deterioration and ice dams in winter.
- Undersized Lumber: Using 2x4s for long spans can cause sagging. Always check span tables for your specific lumber grade and roof load.
Maintenance Tips for Longevity
Once your project is complete, maintenance is key to preserving your investment.
- Clean Gutters: If you install gutters, clean them twice a year to prevent overflow.
- Inspect Flashing: Check the sealant around the house connection annually. Re-caulk if you see cracks.
- Paint or Stain: Protect wooden posts and beams from UV damage and moisture by applying a fresh coat of sealant every 2–3 years.
FAQ Section
1. How much does it cost to add a front porch roof?
Costs vary widely based on size and materials. On average, homeowners in the US spend between $3,000 and $8,000 for a basic covered porch roof. High-end materials like cedar or metal can push this figure higher.
2. Can I attach the roof to my brick house?
Yes, but it requires special masonry anchors. You cannot simply screw into brick. You must drill into the mortar joints or use wedge anchors designed for masonry. It is often easier to attach to the wooden framing behind the brick veneer if accessible.
3. Do I need a professional roofer?
While framing can be a DIY project, installing the final roofing material (shingles, metal, tile) is best left to professionals if you are uncomfortable with heights or waterproofing techniques. Improper installation can void warranties and cause leaks.
4. What is the best roofing material for a porch?
Asphalt shingles are cost-effective and match most homes. Metal roofing is durable and sheds snow well but can be noisy during rain. Polycarbonate panels are great for letting light in but offer less insulation.
5. How long does the construction take?
For a skilled DIYer, framing and sheathing might take a weekend. Adding roofing materials and finishing touches can take another 2–3 days. Weather permitting, the entire project can be completed in under a week.
6. Will adding a porch roof increase my home insurance premium?
Generally, no. In fact, it might lower it slightly by protecting your entryway. However, you must notify your insurance provider of any structural changes to ensure you remain covered.
Conclusion
Learning how to add a front porch roof to existing house structures is a rewarding journey that blends creativity with practical construction skills. By following proper permitting procedures, choosing the right materials, and ensuring watertight connections, you can create a beautiful, functional space that enhances your home’s curb appeal and value.
Remember, safety comes first. If at any point you feel unsure about the structural integrity of your design, consult a licensed contractor or structural engineer.
Did you find this guide helpful? Share it with your friends on Facebook or Pinterest who might be planning their own home improvement projects! Let’s build better homes together.
Leave a Reply