Tag: DIY Home Improvement

  • How to Add a Front Porch Roof to Your Home

    How to Add a Front Porch Roof to Your Home

    Adding a covered entryway is one of the most impactful ways to enhance your home’s exterior, yet many homeowners hesitate due to perceived complexity. You want that welcoming shelter from rain and sun, but you are unsure where to start or how to integrate it with your current structure. This guide simplifies the process, showing you exactly how to add a front porch roof to existing house frameworks without compromising structural integrity or breaking the bank.

    Why Install a Front Porch Roof?

    Before diving into the nuts and bolts, it is essential to understand the value proposition. A front porch roof is not just an aesthetic upgrade; it is a functional investment. According to recent real estate trends, homes with covered porches often see a higher return on investment (ROI) because they expand usable living space.

    Beyond property value, a roof protects your front door from weather damage, reduces energy costs by shading entryways, and provides a cozy spot for morning coffee. However, the key to success lies in proper planning and execution.

    Understanding Structural Requirements and Permits

    The first step in learning how to add a front porch roof to existing house walls is navigating the legal and structural landscape. In the United States, building codes vary significantly by state and municipality. Ignoring these can lead to costly fines or forced removal of your new structure.

    Do You Need a Permit?

    In most US jurisdictions, any permanent structure attached to your home requires a building permit. This ensures that the roof can withstand local wind loads, snow weights, and seismic activity.

    • Check Local Codes: Visit your city’s building department website.
    • HOA Rules: If you live in a community with a Homeowners Association, review their architectural guidelines.
    • Utility Lines: Ensure no power lines interfere with the proposed roof height.

    Load-Bearing Considerations

    Your existing house wall may not be designed to hold the extra weight of a roof. You must determine if the attachment point is load-bearing. If you are attaching the roof to a non-load-bearing wall, you will need to install additional support columns or reinforce the framing. For detailed definitions of structural terms, you can refer to Wikipedia’s article on Load-bearing walls to better understand the engineering principles involved.

    Choosing the Right Roof Style

    Not all roofs fit every home. The style you choose should complement your home’s architecture while meeting your budget.

    Roof StyleBest ForProsCons
    Gable RoofTraditional/Craftsman HomesExcellent water runoff, classic lookRequires more material, complex framing
    Hip RoofModern/Ranch StylesStable in high winds, elegant appearanceMore expensive, less headroom at edges
    Shed RoofContemporary/Budget ProjectsSimple construction, cost-effectiveCan look too plain, potential drainage issues if pitch is low
    Flat RoofModern MinimalistEasy to build, usable space aboveHigher maintenance, prone to leaking if not sealed properly

    For most DIYers adding a roof to an existing facade, a shed roof (single-slope) is the most manageable option. It attaches directly to the house wall and slopes downward toward the front columns.
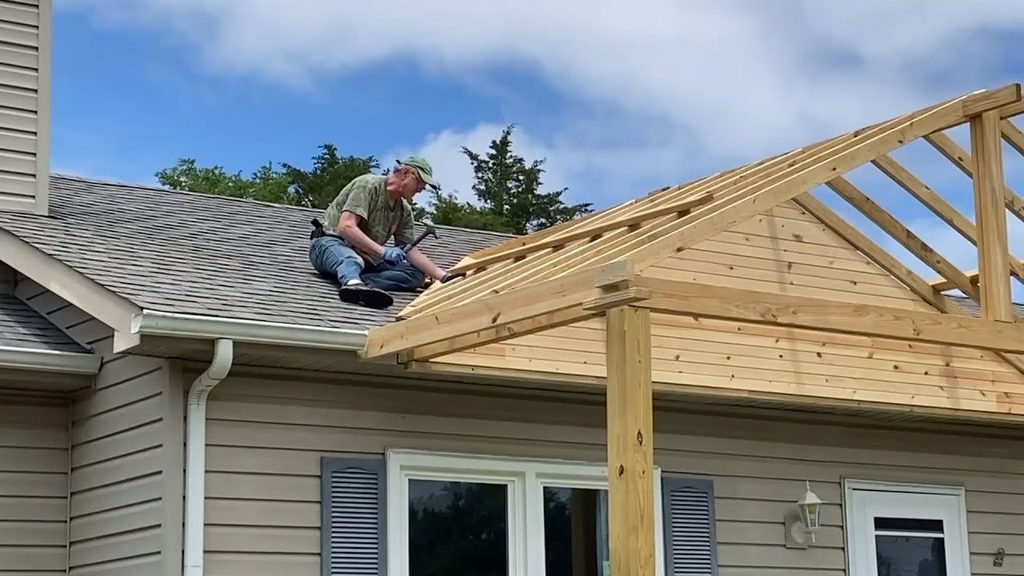
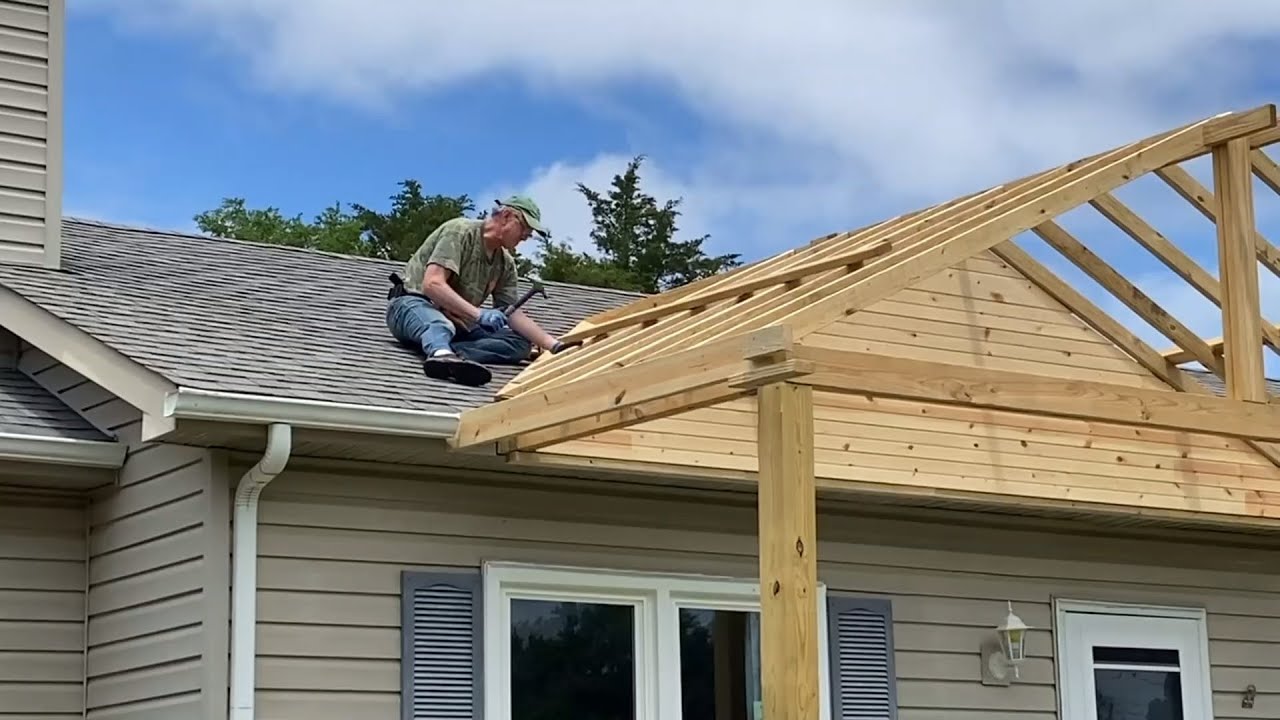
    How To Add A Front Porch Roof To Existing House

    Step-by-Step Guide: How to Add a Front Porch Roof

    This section breaks down the physical construction process. Please note that this is a general guide. Always consult a structural engineer for specific load calculations.

    Step 1: Planning and Measurement

    Measure the width of your desired porch. Standard depths range from 6 to 10 feet. Mark the height where the roof will attach to the house. A minimum slope of 1/4 inch per foot is recommended for proper water drainage.

    Step 2: Installing the Ledger Board

    The ledger board is the horizontal beam that attaches to your house. This is the most critical structural component.

    1. Remove siding where the board will sit to expose the sheathing and studs.
    2. Use a level to mark a straight line across the studs.
    3. Secure a pressure-treated 2×8 or 2×10 lumber board directly into the wall studs using lag screws or through-bolts. Do not rely on nails alone.

    Step 3: Setting the Support Posts

    Determine the location of your front columns. These typically align with the outer edge of the porch floor.

    1. Dig post holes below the frost line (varies by region, often 24–48 inches deep).
    2. Pour concrete footings and insert post anchors.
    3. Cut pressure-treated 4×4 or 6×6 posts to height. The top of the post should meet the outer edge of your future rafters.

    Step 4: Framing the Rafters

    Rafters connect the ledger board to the front beam (which sits atop your posts).

    1. Cut rafters from 2×6 or 2×8 lumber, depending on the span.
    2. Use metal rafter ties to secure one end to the ledger board and the other to the front header beam.
    3. Space rafters 16 inches or 24 inches on center, consistent with your local code.

    Step 5: Adding Sheathing and Underlayment

    Once the frame is secure:

    1. Nail plywood or OSB sheathing over the rafters.
    2. Apply a waterproof roofing underlayment (felt paper or synthetic membrane). This layer is crucial for preventing leaks where the new roof meets the old house.

    Step 6: Installing Roofing Material

    Match your new roof to your existing home if possible. Asphalt shingles are the most common choice for US homes due to their affordability and ease of installation.

    • Start from the bottom edge and work your way up.
    • Use drip edge flashing along the eaves.
    • Install step flashing where the new roof intersects with the house wall to direct water away from the joint.

    Common Mistakes to Avoid

    Even experienced DIYers can stumble. Here are the most frequent errors when figuring out how to add a front porch roof to existing house structures:

    • Ignoring Water Proofing: Failing to install proper flashing between the new roof and the house wall is the number one cause of leaks. Water will seep behind the siding and rot the framing.
    • Incorrect Slope: A flat-looking roof needs a minimum pitch. If the slope is too shallow, water will pool, leading to premature deterioration and ice dams in winter.
    • Undersized Lumber: Using 2x4s for long spans can cause sagging. Always check span tables for your specific lumber grade and roof load.

    Maintenance Tips for Longevity

    Once your project is complete, maintenance is key to preserving your investment.

    • Clean Gutters: If you install gutters, clean them twice a year to prevent overflow.
    • Inspect Flashing: Check the sealant around the house connection annually. Re-caulk if you see cracks.
    • Paint or Stain: Protect wooden posts and beams from UV damage and moisture by applying a fresh coat of sealant every 2–3 years.

    FAQ Section

    1. How much does it cost to add a front porch roof?

    Costs vary widely based on size and materials. On average, homeowners in the US spend between $3,000 and $8,000 for a basic covered porch roof. High-end materials like cedar or metal can push this figure higher.

    2. Can I attach the roof to my brick house?

    Yes, but it requires special masonry anchors. You cannot simply screw into brick. You must drill into the mortar joints or use wedge anchors designed for masonry. It is often easier to attach to the wooden framing behind the brick veneer if accessible.

    3. Do I need a professional roofer?

    While framing can be a DIY project, installing the final roofing material (shingles, metal, tile) is best left to professionals if you are uncomfortable with heights or waterproofing techniques. Improper installation can void warranties and cause leaks.

    4. What is the best roofing material for a porch?

    Asphalt shingles are cost-effective and match most homes. Metal roofing is durable and sheds snow well but can be noisy during rain. Polycarbonate panels are great for letting light in but offer less insulation.

    5. How long does the construction take?

    For a skilled DIYer, framing and sheathing might take a weekend. Adding roofing materials and finishing touches can take another 2–3 days. Weather permitting, the entire project can be completed in under a week.

    6. Will adding a porch roof increase my home insurance premium?

    Generally, no. In fact, it might lower it slightly by protecting your entryway. However, you must notify your insurance provider of any structural changes to ensure you remain covered.

    Conclusion

    Learning how to add a front porch roof to existing house structures is a rewarding journey that blends creativity with practical construction skills. By following proper permitting procedures, choosing the right materials, and ensuring watertight connections, you can create a beautiful, functional space that enhances your home’s curb appeal and value.

    Remember, safety comes first. If at any point you feel unsure about the structural integrity of your design, consult a licensed contractor or structural engineer.

    Did you find this guide helpful? Share it with your friends on Facebook or Pinterest who might be planning their own home improvement projects! Let’s build better homes together.
  • How to Install a Wood Stove Chimney Through the Roof

    How to Install a Wood Stove Chimney Through the Roof

    Installing a wood stove can transform your home into a cozy haven during chilly winters, but the installation process often feels daunting. Many homeowners worry about fire safety, structural integrity, and navigating complex building codes. If you are wondering how to install a wood stove chimney through the roof, you are not alone; proper execution is critical for both efficiency and safety.

    This guide breaks down the technical steps into manageable actions, ensuring you understand not just what to do, but why each step matters. We will cover everything from selecting the right components to sealing the roof penetration, helping you achieve a professional-grade result that meets modern safety standards.

    Why Proper Chimney Installation Matters for Safety

    Before picking up a drill, it is vital to understand the stakes. A poorly installed chimney is a leading cause of residential structure fires. According to the National Fire Protection Association (NFPA), heating equipment is involved in a significant percentage of home fire incidents annually, with chimneys and flues being common points of failure due to creosote buildup or improper clearances.

    When you route a chimney through the roof, you are creating a thermal breach in your home’s envelope. This requires precise flashing to prevent water leaks and adequate clearance to prevent heat transfer to combustible roofing materials. Ignoring these details can void your homeowner’s insurance and put your family at risk. Therefore, adherence to local building codes and manufacturer specifications is non-negotiable.

    Choosing the Right Chimney Components

    Not all pipes are created equal. For a roof-through installation, you must use Class A Stainless Steel Chimney Pipe. Unlike single-wall “connector pipe” used inside the house, Class A pipe is double-walled with insulation in between. This design keeps the outer wall cool enough to touch while maintaining high internal temperatures for a strong draft.

    Key Components Checklist:

    • Stainless Steel Chimney Pipe: Ensure it is listed for solid fuel appliances.
    • Roof Support Box: Provides structural support where the pipe passes through the roof.
    • Storm Collar: Diverts rainwater away from the pipe entry point.
    • Flashing Kit: Custom-fitted to your roof’s pitch (e.g., 3/12, 6/12).
    • Chimney Cap: Prevents rain, snow, and animals from entering the flue.
    • Firestop Spacer: Required if passing through any ceiling joists or attic floors before reaching the roof.

    Expert Tip: Always check the National Fire Protection Association guidelines for the latest standards on solid-fuel burning appliances. Compliance with NFPA 211 is the gold standard for chimney safety in the US.

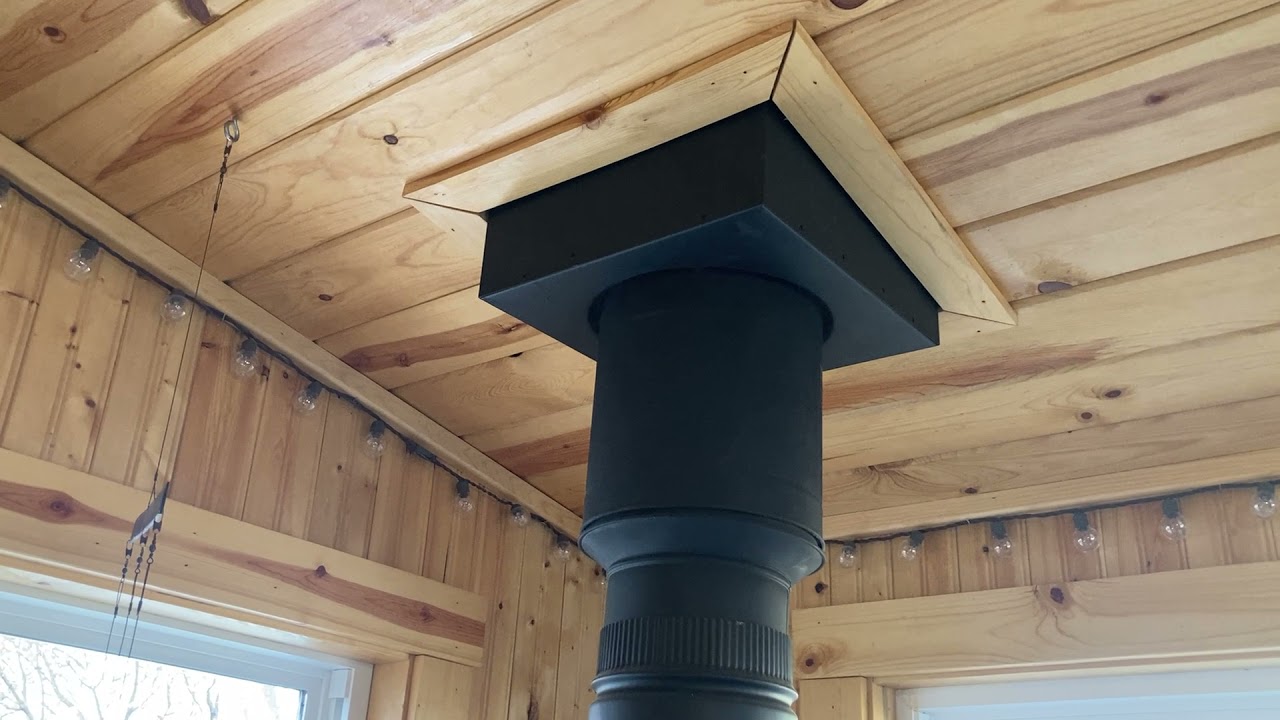
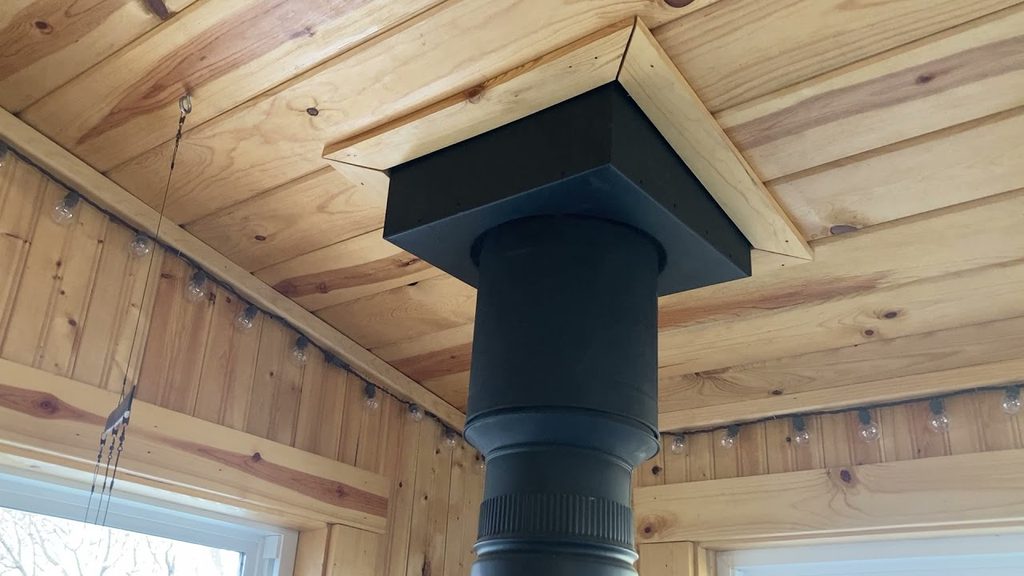
    How To Install A Wood Stove Chimney Through The Roof

    Step-by-Step Guide: Installing the Chimney Through the Roof

    Follow these steps meticulously. If you feel uncomfortable working at heights or cutting into your roof, hire a certified professional.

    Step 1: Plan the Route and Check Clearances

    Identify the location for your stove inside the house. The chimney should rise vertically as much as possible. Horizontal runs reduce draft efficiency and increase creosote accumulation. Use a stud finder to locate rafters in the attic and roof. You must cut through the roof between rafters, not through them, unless you build a framed header box to support the structure.

    Critical Clearance Rule: Maintain at least 2 inches of air space between the chimney pipe and any combustible material (wood framing, insulation, drywall).

    Step 2: Cut the Hole in the Roof

    From the attic, mark the center point where the chimney will exit. Measure the diameter of your chimney pipe plus the required clearance (usually 2 inches on all sides). For a 6-inch pipe, you might need an 10×10 inch hole.

    Go onto the roof and align your mark. Using a reciprocating saw, cut the hole through the roofing shingles and sheathing. Be careful not to cut into the rafters. If you hit a rafter, adjust your plan or frame a new opening.

    Step 3: Install the Roof Support Box

    Place the roof support box over the hole from the outside. This box sits on top of the roof sheathing and provides a stable base for the chimney sections above. Secure it with roofing screws, ensuring it is level. Apply a bead of high-quality roofing sealant under the flange of the support box to create a watertight seal against the shingles.

    Step 4: Assemble the Chimney Sections

    From inside the attic, push the first section of Class A chimney pipe up through the support box. Connect subsequent sections from the roof side. Most systems use a twist-lock mechanism. Ensure each joint is fully engaged and locked.

    Note: Always install chimney sections with the male end (crimped end) facing up. This ensures that any condensation or creosote drips back into the stove rather than leaking out onto the roof or into the walls.

    Step 5: Install Flashing and Storm Collar

    Slide the flashing kit over the chimney pipe. The flashing should sit flat against the roof surface. Secure the flashing with roofing nails, starting from the bottom edge and working your way up to ensure proper water shedding.

    Next, slide the storm collar up the pipe until it rests snugly against the top of the flashing. Tighten the set screw on the collar. Apply a generous amount of silicone-based roofing cement around the gap between the storm collar and the chimney pipe. This is your primary defense against rain intrusion.

    Step 6: Add the Chimney Cap

    Attach the chimney cap to the top of the final pipe section. Secure it with sheet metal screws. The cap prevents downdrafts and keeps debris out. Ensure the cap is rated for high-temperature applications.

    Step 7: Insulate and Firestop in the Attic

    If your chimney passes through an attic space before exiting the roof, you must install a firestop spacer at every ceiling level. Fill the space around the chimney with non-combustible insulation (like mineral wool) if required by local code, but never pack combustible insulation tightly against the pipe. Maintain the 2-inch air gap.

    Common Mistakes to Avoid

    MistakeConsequenceSolution
    Using Single-Wall Pipe OutsideHigh fire risk, rapid coolingUse only Class A Double-Wall pipe for roof penetrations
    Insufficient ClearanceIgnition of roof framingMaintain minimum 2-inch air space on all sides
    Poor Flashing SealWater leaks, rot, moldUse high-temp silicone and proper overlapping techniques
    Too Many ElbowsPoor draft, smoke backupKeep the vertical rise as straight as possible

    FAQ: Common Questions About Roof Chimney Installation

    1. Do I need a permit to install a wood stove chimney?

    Yes, in most jurisdictions in the US, you need a building permit for wood stove installations. Local building departments require inspections to ensure compliance with fire codes and zoning laws. Skipping this step can lead to fines and issues when selling your home.

    2. How high does the chimney need to be above the roof?

    The general rule is the “3-2-10 Rule.” The chimney must extend at least 3 feet above the highest point where it passes through the roof, and at least 2 feet higher than any portion of the building within 10 feet horizontally. This ensures proper draft and prevents wind turbulence from pushing smoke back down.

    3. Can I install the chimney myself?

    While DIY is possible, it is recommended only for those with advanced carpentry and roofing skills. Incorrect installation can lead to house fires. If you are unsure about structural modifications or flashing details, hire a certified chimney sweep or installer.

    4. What type of insulation should I use around the chimney?

    Never use fiberglass or cellulose insulation directly against the chimney pipe. Use non-combustible insulation such as mineral wool or rock wool if filling gaps is necessary. However, maintaining an air gap is usually preferred over filling the space.

    5. How often should I clean the chimney?

    For regular wood stove users, annual cleaning is mandatory. If you burn green wood or use the stove daily, you may need cleaning twice a year. Creosote buildup is highly flammable and is the primary cause of chimney fires.

    Conclusion

    Learning how to install a wood stove chimney through the roof is a rewarding project that combines craftsmanship with safety awareness. By using Class A stainless steel components, maintaining proper clearances, and sealing your roof penetration correctly, you ensure a warm, safe, and efficient heating system for years to come.

    Remember, safety is paramount. Double-check every connection, respect the fire codes, and when in doubt, consult a professional. A well-installed chimney is the heart of a cozy home.

    Did you find this guide helpful? Share it with your friends on social media who are planning their own winter upgrades!

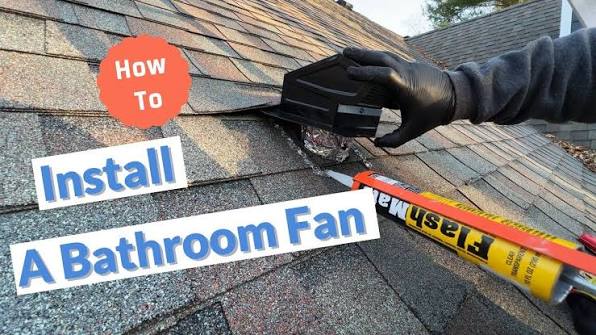
  • How To Install A Roof Vent For A Bathroom Fan

    How To Install A Roof Vent For A Bathroom Fan

    Moisture buildup in your bathroom isn’t just uncomfortable; it’s a silent destroyer of your home’s structural integrity. If you are tired of peeling paint and moldy caulking, learning how to install a roof vent for a bathroom fan is the most effective long-term solution. This guide will walk you through the process with clarity and confidence, ensuring your home stays dry and your ventilation system works efficiently.

    Why Roof Venting Is Superior to Side-Wall Venting

    Before we pick up our tools, it is crucial to understand why routing your exhaust through the roof is often the best choice. Many homeowners opt for side-wall vents because they seem easier, but this can lead to significant issues over time.

    According to building science principles, hot, moist air rises. By venting through the roof, you utilize natural convection to help expel humid air more effectively. Furthermore, side-wall vents are prone to staining the exterior siding of your house with mineral deposits from the condensation. A roof vent keeps this moisture away from your home’s facade.

    However, the primary concern for most DIYers is the fear of leaks. It is a valid concern. A poorly installed roof penetration is a recipe for water damage. But with the right materials and technique, a roof vent can be just as watertight as the shingles surrounding it. The key lies not in the hole you cut, but in how you seal it.

    Essential Tools and Materials You Will Need

    Preparation is half the battle. Having the right tools on hand before you climb onto the roof ensures safety and efficiency. Do not attempt this project if the roof is wet or if winds exceed 15 mph.

    The Tool Kit

    • Reciprocating Saw (Sawzall): For cutting through roofing nails and sheathing.
    • Hammer and Pry Bar: To remove existing shingles carefully.
    • Utility Knife: For trimming shingles and opening packaging.
    • Caulking Gun: Loaded with high-quality roofing cement or polyurethane sealant.
    • Tape Measure and Pencil: For precise markings.
    • Safety Gear: Non-slip shoes, a sturdy extension ladder, and a safety harness if your roof pitch is steep.

    The Materials

    • Roof Vent Cap: Choose a model compatible with your duct size (usually 4-inch or 6-inch). Look for one with a built-in backdraft damper.
    • Flashing Kit: Ideally, use a “step flashing” kit or a specialized pipe boot flashing designed for your specific vent diameter.
    • Rigid Metal Ductwork: Avoid flexible plastic or foil ducts inside the attic if possible, as they trap moisture and restrict airflow. Rigid metal is smoother and more durable.
    • Roofing Nails: Galvanized nails that match your existing roof nails.
    How To Install A Roof Vent For A Bathroom Fan

    Step-by-Step Guide: How To Install A Roof Vent For A Bathroom Fan

    This process involves working in two distinct areas: the attic and the roof surface. We will start from the inside out.

    Step 1: Plan Your Route in the Attic

    Locate your bathroom fan housing in the attic. You need to determine the shortest, straightest path to the roof. Remember, every bend in the duct reduces airflow efficiency.

    1. Identify a rafter bay where you can cut a hole without hitting structural beams.
    2. Measure the distance from the fan outlet to the proposed roof exit point.
    3. Ensure there are no electrical wires, plumbing pipes, or HVAC ducts in the way.

    If your current fan uses a flexible duct, replace it with rigid galvanized steel or aluminum ducting. Secure all joints with metal foil tape (not duct tape, which degrades over time).

    Step 2: Mark and Cut the Roof Hole

    This is the most critical step for accuracy. Go up onto the roof with a helper if possible.

    1. From the attic, drive a long nail up through the center of the chosen rafter bay. This nail will poke through the roof deck, marking your exact center point from above.
    2. On the roof, locate the protruding nail tip.
    3. Place your vent cap or flashing template over the nail. Trace the outline of the required hole with a pencil.
    4. Using your reciprocating saw, cut along the traced line. Be careful to cut only through the sheathing and shingles, avoiding any underlying rafters.

    Pro Tip: If you hit a rafter, do not cut it. Shift your hole location slightly to the next bay. Structural integrity is non-negotiable.

    Step 3: Prepare the Shingle Bed

    Water flows down the roof, so we must layer our materials like shingles do—upper layers overlapping lower layers.

    1. Remove the shingles directly above the area where the vent will sit. You may need to gently lift and pull out the nails holding them.
    2. Clear away any debris from the exposed sheathing.
    3. Apply a generous bead of roofing cement around the perimeter of the hole you just cut. This creates an initial water-resistant barrier.

    Step 4: Install the Flashing and Vent Pipe

    Proper flashing is what separates a professional job from an amateur leak.

    1. Slide the vent pipe through the hole from the attic side.
    2. From the roof, slide the flashing base under the shingles above the hole. The top edge of the flashing must go under the upper row of shingles, while the sides and bottom go over the lower shingles.
    3. If you are using a step-flashing kit, interleave the metal strips with the shingles as you reinstall them.
    4. Secure the flashing base with roofing nails. Do not nail into the flat part of the flashing where water pools; nail only at the edges where shingles will cover the heads.

    Step 5: Connect the Duct and Seal

    Back in the attic, connect the rigid ductwork to the bottom of the roof vent pipe. Use metal screws or rivets to secure the connection, then seal the joint with foil tape.

    Return to the roof. Apply a thick layer of roofing cement under the edges of the flashing and over any exposed nail heads. Smooth it out with a putty knife to ensure there are no gaps for water to seep in. Reinstall the shingles you removed earlier, nailing them down securely.

    Common Mistakes to Avoid

    Even experienced DIYers can stumble here. Here is a comparison of right vs. wrong approaches.

    FeatureThe Right WayThe Wrong Way
    Duct MaterialRigid metal ductingFlexible plastic vinyl (crinkles trap moisture)
    SealingPolyurethane roof sealantStandard silicone caulk (fails under UV exposure)
    PlacementBetween rafters, clear of obstructionsCutting through rafters or near chimneys
    InsulationInsulated duct in cold climatesUninsulated duct leading to condensation drip

    Using the wrong sealant is a frequent error. Standard bathroom silicone cannot withstand the extreme temperature fluctuations of a roof. Always use a product rated for roofing applications. For more information on building standards regarding ventilation, you can refer to general guidelines on Wikipedia’s page on Mechanical Ventilation.

    Maintenance and Long-Term Care

    Once you have successfully learned how to install a roof vent for a bathroom fan, maintenance becomes simple but essential.

    • Annual Inspection: Once a year, preferably in spring, check the vent cap for bird nests or debris.
    • Check the Damper: Ensure the backdraft damper opens freely when the fan is on and closes tightly when it is off. This prevents cold air from entering your home in winter.
    • Inspect Sealant: Look for cracking or shrinking in the roofing cement. Reapply if necessary to maintain the waterproof seal.

    FAQ Section

    1. Can I vent my bathroom fan into the attic instead of the roof?

    No. Venting into the attic is a code violation in most jurisdictions. It releases moist air into the attic space, leading to mold growth, wood rot, and reduced insulation effectiveness. Always vent to the exterior.

    2. What size roof vent do I need?

    Most residential bathroom fans use a 4-inch or 6-inch duct. Check the outlet collar on your fan housing. If you are upgrading your fan, consider upsizing to a 6-inch duct for better airflow and quieter operation, provided your new fan supports it.

    3. Is it difficult to install a roof vent on a metal roof?

    It is more challenging than on asphalt shingles. You will need a specific metal roof flashing kit and possibly a rubber gasket seal. It is highly recommended to consult a professional if you have a standing-seam metal roof to avoid compromising the warranty.

    4. How do I prevent ice dams around the vent?

    In cold climates, ensure the duct running through the attic is well-insulated. This keeps the warm, moist air from cooling down too quickly and condensing inside the duct before it exits the roof. Also, ensure the vent cap has a thermal break or is designed for cold weather.

    5. Do I need a permit to install a roof vent?

    Regulations vary by location. Many municipalities require a permit for structural changes or electrical work associated with fan installation. Check with your local building department before starting. It ensures your work meets safety codes and protects your home insurance coverage.

    Conclusion

    Learning how to install a roof vent for a bathroom fan empowers you to protect your home from moisture damage while improving indoor air quality. While the task requires attention to detail—especially regarding flashing and sealing—it is entirely manageable for a diligent DIYer. By following these steps, you ensure a leak-free, efficient ventilation system that will serve your home for years.

    Did you find this guide helpful? Share it with your friends on social media who might be tackling their own home improvement projects! Let’s build smarter, drier homes together.

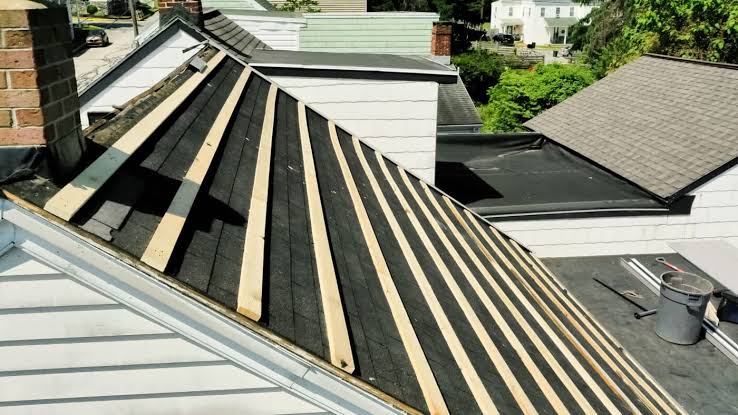
  • How to Install a Metal Roof: The Ultimate DIY Guide

    How to Install a Metal Roof: The Ultimate DIY Guide

    Have you ever looked up at your aging shingle roof and wondered if there was a more durable, energy-efficient alternative? Many homeowners feel overwhelmed by the prospect of replacing their roof, fearing high costs and complex procedures. If you are asking, “How do you install a metal roof on a house,” you are not alone; this guide breaks down the process into manageable, safe, and effective steps for the dedicated DIYer.

    Metal roofing has surged in popularity across the United States, not just for its sleek modern aesthetic but for its longevity. While traditional asphalt shingles may last 15–20 years, a properly installed metal roof can protect your home for 40–70 years. However, installation precision is critical. A minor error in flashing or fastening can lead to leaks that compromise your home’s structural integrity. This article provides a comprehensive, expert-backed roadmap to help you navigate this significant home improvement project with confidence.

    Why Choose Metal Over Traditional Shingles?

    Before diving into the tools and techniques, it is essential to understand why metal is worth the investment. According to the Metal Roofing Alliance, metal roofs reflect solar radiant heat, which can reduce cooling costs by 10–25%. Furthermore, they are non-combustible and highly resistant to wind uplift, making them ideal for areas prone to severe weather.

    FeatureAsphalt ShinglesMetal Roofing
    Lifespan15–20 Years40–70+ Years
    MaintenanceModerate to HighLow
    Energy EfficiencyStandardHigh (Reflective)
    WeightHeavyLightweight
    RecyclabilityLow100% Recyclable

    While the upfront cost of metal is higher, the long-term value proposition is undeniable. But achieving this value requires strict adherence to installation protocols.

    What Tools and Materials Do You Need?

    Preparation is half the battle. Attempting to install a metal roof without the right equipment is a recipe for disaster. You will need specific tools designed for metalwork to ensure clean cuts and secure fastening.

    Essential Tools List

    • Electric Shears or Nibblers: For cutting metal panels without damaging the protective coating. Avoid abrasive saws as they create heat that ruins the galvanized layer.
    • Drill/Driver with Clutch: To prevent over-driving screws, which can strip holes and cause leaks.
    • Seam Roller: For locking standing seam panels together.
    • Chalk Line and Tape Measure: For precise alignment.
    • Safety Gear: Harness, non-slip boots, gloves, and eye protection.

    Material Checklist

    • Metal Panels: Choose between standing seam (hidden fasteners) or exposed fastener panels (corrugated or ribbed).
    • Underlayment: A synthetic, breathable underlayment is crucial for moisture management.
    • Closure Strips: Foam strips that fill gaps at ridges and eaves to prevent pest entry and wind noise.
    • Fasteners: Use only manufacturer-recommended screws with neoprene washers. Never mix metal types (e.g., steel screws on aluminum panels) to avoid galvanic corrosion.

    How Do You Prepare the Existing Roof Structure?

    One of the most common questions beginners ask is whether they need to tear off the old roof. In many cases, you can install metal over existing asphalt shingles, provided the local building code allows it and the roof deck is sound. This method saves time and disposal fees.

    However, inspection is non-negotiable. Walk the roof and check for soft spots, rot, or damaged rafters. Any compromised wood must be replaced before proceeding. If you are installing over shingles, ensure they are flat. Curling or missing shingles should be repaired to create a smooth surface.

    According to Wikipedia’s entry on Roofing, proper ventilation is critical when layering roofing materials. Ensure your attic has adequate intake and exhaust ventilation to prevent heat buildup, which can warp metal panels and degrade underlayment.

    How Do You Install A Metal Roof On A House

    Step-by-Step: How Do You Install a Metal Roof on a House?

    Now, let’s get into the core of the process. Follow these steps meticulously to ensure a watertight seal.

    Step 1: Install the Drip Edge and Underlayment

    Start at the eaves (the bottom edge of the roof). Install a metal drip edge along the eaves to direct water away from the fascia board. Next, roll out your synthetic underlayment horizontally, starting from the bottom. Overlap each row by at least 6 inches and secure it with cap nails or staples. This layer acts as your secondary water barrier.

    Step 2: Apply Flashing at Valleys and Penetrations

    Valleys are where two roof slopes meet, channeling significant water volume. Install W-shaped metal valley flashing over the underlayment. Seal the edges with high-quality urethane sealant. Similarly, flash around chimneys, vents, and skylights using step flashing or boot flashings designed for metal roofs. Note: Never rely solely on caulk for waterproofing; mechanical flashing is primary.

    Step 3: Install the First Metal Panel

    This is the most critical step. If the first panel is crooked, every subsequent panel will be too. Start at the bottom corner of the roof, ensuring the panel overhangs the drip edge by about 1–2 inches. Use a chalk line to verify it is perfectly square with the eave. Secure the panel with screws, placing them in the flat area of the panel, not the high ribs, unless specified by the manufacturer.

    Step 4: Overlap and Secure Subsequent Panels

    Install the next panel by overlapping the side lap of the previous one. Most panels have a designated overlap width (usually 1–2 inches). Ensure the ribs align perfectly. Continue this process across the roof, checking alignment every few rows. Cut panels to fit around obstacles using electric shears, deburring any sharp edges afterward.

    Step 5: Install Ridge Caps and Trim

    Once all field panels are installed, finish the roof with ridge caps. These cover the peak of the roof and provide ventilation if you use vented ridge caps. Apply closure strips underneath the ridge cap to block wind-driven rain and pests. Secure the ridge cap with screws spaced evenly along the length. Finally, install gable trim on the sides to give the roof a finished look and protect the edges.

    Common Mistakes to Avoid During Installation

    Even experienced contractors make errors. Here are the top pitfalls to watch out for:

    1. Over-tightening Screws: This compresses the neoprene washer too much, causing it to fail prematurely. Stop drilling when the washer just touches the metal.
    2. Walking on Installed Panels: Metal roofs can dent. Always walk on the screw lines or use distributed weight boards if you must traverse the roof.
    3. Ignoring Thermal Expansion: Metal expands and contracts with temperature changes. Leave slight gaps at end laps and use slotted holes if recommended to allow for movement.
    4. Using Wrong Fasteners: Using standard steel screws on aluminum roofing will cause rapid corrosion. Always match the fastener material to the panel material.

    Frequently Asked Questions (FAQ)

    Can I install a metal roof myself without professional help?

    Yes, but it requires advanced DIY skills, comfort with heights, and strict adherence to safety protocols. If your roof has complex angles, valleys, or turrets, hiring a professional is recommended.

    Do I need a permit to install a metal roof?

    In most US jurisdictions, yes. Roofing is a structural component, and local building codes regulate materials and installation methods. Check with your local building department before starting.

    How long does it take to install a metal roof?

    For a typical 2,000-square-foot home, a professional crew takes 2–3 days. A DIYer should expect 1–2 weeks, depending on experience and helper availability.

    Is metal roofing noisy during rain?

    No. When installed with solid sheathing and proper underlayment, metal roofs are no noisier than asphalt shingles. The insulation and attic space dampen sound significantly.

    What is the best type of metal for residential roofing?

    Galvalume (steel coated with aluminum and zinc) is the most popular due to its balance of cost and durability. Copper and zinc are premium options with unique aesthetics but higher price tags.

    Conclusion

    Learning how do you install a metal roof on a house is a rewarding journey that can significantly enhance your home’s value and resilience. By carefully preparing the structure, using the right tools, and following a meticulous step-by-step process, you can achieve a professional-grade result. Remember, patience and precision are your best friends in this project.

    If you found this guide helpful, please share it on social media to help other homeowners make informed decisions about their roofing projects. Have you installed a metal roof? Share your tips or questions in the comments below!

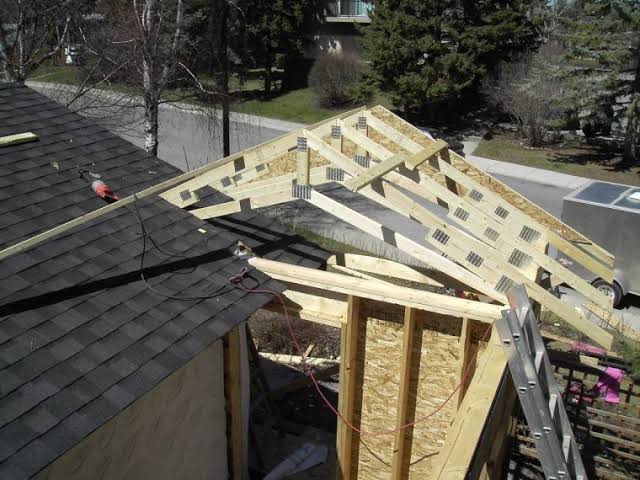
  • How to Tie a Porch Roof Into an Existing Roof

    How to Tie a Porch Roof Into an Existing Roof

    Adding a covered porch is one of the most rewarding home improvement projects you can undertake. It extends your living space, boosts curb appeal, and provides a sheltered spot to enjoy the outdoors. However, the most critical—and often intimidating—part of this project is connecting the new structure to your home. If done incorrectly, it can lead to disastrous leaks and structural damage.

    Many homeowners hesitate at this stage, wondering if they need to hire a professional or if they can handle it themselves. The good news is that with the right preparation and understanding of building science, you can master this task. This guide will walk you through exactly how to tie a porch roof into an existing roof securely, ensuring a watertight seal that lasts for decades.

    Why Proper Integration Matters for Your Home’s Integrity

    Before we pick up a hammer, it is vital to understand why the connection point is so sensitive. Your existing roof is designed to shed water efficiently. When you interrupt that system with a new roof line, you create a potential entry point for moisture.

    According to the Insurance Institute for Business & Home Safety, water intrusion is the leading cause of residential insurance claims in the United States. A poorly tied-in roof doesn’t just leak; it can rot rafters, damage insulation, and promote mold growth inside your walls. Therefore, the goal isn’t just aesthetic alignment; it is structural continuity and hydrological integrity.

    Assessing Your Existing Roof Structure

    You cannot build a secure connection without knowing what you are connecting to. Every house is different, and assuming your roof structure is standard can lead to costly mistakes.

    Identifying Rafters vs. Trusses

    The first step is to determine if your existing roof uses stick-framed rafters or engineered trusses.

    • Stick-Framed Rafters: These are individual beams cut on-site. They are easier to work with because you can typically cut into the sheathing and attach directly to the rafter tails or add a ledger board.
    • Engineered Trusses: These are pre-fabricated triangular units. Warning: You generally cannot cut or notch trusses without compromising their structural integrity. If you have trusses, you must consult a structural engineer. You will likely need to build a standalone porch roof that sits below the existing eaves rather than tying directly into the slope.

    Checking Local Building Codes

    Building codes vary by municipality, especially regarding snow loads and wind uplift. In the US, most jurisdictions follow the International Residential Code (IRC). Always check with your local building department before starting. You may need a permit, and an inspector will likely want to see the flashing details before the final roofing material is installed.

    How To Tie A Porch Roof Into An Existing Roof

    Step-by-Step Guide: How to Tie a Porch Roof Into an Existing Roof

    This tutorial assumes you are attaching a sloped porch roof to a side wall of your house, integrating it under the existing shingles. This is known as a “shed roof” or “lean-to” style connection.

    Step 1: Prepare the Connection Point

    Start by removing the shingles and underlayment from the area where the new roof will meet the house. You need to expose the roof deck (sheathing) and the underlying rafters.

    • Remove shingles approximately 2–3 feet up from the planned connection line.
    • Carefully pry up nails to avoid damaging reusable shingles if you plan to reuse them (though new shingles are recommended).
    • Clean the exposed wood deck of any debris or old adhesive.

    Step 2: Install the Ledger Board

    The ledger board is the horizontal beam that supports the inner edge of your porch roof rafters. It bears the weight of the new structure.

    1. Material Selection: Use pressure-treated lumber (minimum 2×8 or 2×10, depending on span) to resist rot.
    2. Positioning: Level the board against the house wall. It should be positioned so that the top of the porch rafters will sit slightly below the existing roof plane to allow for proper drainage.
    3. Fastening: Bolt the ledger board directly into the house’s rim joist or wall studs using lag screws or through-bolts. Do not rely solely on nails. For brick or stucco homes, you will need masonry anchors. Ensure there is a slight gap (1/4 inch) between the ledger and the siding to allow for drainage behind the flashing.

    Step 3: Frame the Porch Roof

    Install your porch rafters perpendicular to the ledger board, extending out to the outer support posts.

    • Slope: Ensure a minimum slope of 1/4 inch per foot (preferably 1/2 inch per foot) to ensure water runs off quickly.
    • Spacing: Match the spacing of your existing roof rafters (usually 16 or 24 inches on center) if possible, as this simplifies the sheathing process.
    • Hangers: Use heavy-duty metal joist hangers to connect the rafters to the ledger board. This provides superior strength compared to toe-nailing.

    Step 4: Sheathing and Underlayment

    Once the frame is complete, cover it with plywood or OSB sheathing.

    • Leave a 1/8-inch gap between sheets for expansion.
    • Apply a high-quality synthetic roof underlayment. Synthetic underlayment is preferred over felt paper because it is more resistant to tearing and moisture absorption during the construction phase.

    Step 5: The Critical Flashing Process

    This is the most important step in learning how to tie a porch roof into an existing roof. Flashing directs water away from the joint.

    1. Step Flashing: Install L-shaped metal step flashing along the wall intersection. Each piece should slide under the existing shingles above and overlap the shingle below.
    2. Ice and Water Shield: For extra protection, apply a self-adhering ice and water shield membrane over the joint area, extending at least 12 inches up the existing roof and 12 inches down the new porch roof. This creates a rubberized, watertight barrier.
    3. Counter Flashing: If your house has siding, install counter flashing over the step flashing to direct water away from the wall.

    For a deeper understanding of flashing materials and standards, you can refer to general construction principles outlined on Wikipedia’s Roof Flashing page.

    Step 6: Re-shingling and Finishing

    Now, integrate the new roofing material with the old.

    • Start shingling the porch roof from the bottom up.
    • When you reach the junction with the existing roof, weave the new shingles under the existing ones if possible, or use a closed-cut valley method.
    • Apply roofing cement sparingly under the edges where the old and new shingles meet.
    • Install drip edge flashing on the outer edges of the porch roof to direct water into the gutters.

    Common Mistakes to Avoid

    Even experienced DIYers can stumble here. Here is a comparison of right vs. wrong approaches:

    FeatureThe Right WayThe Wrong Way
    FlashingLayered step flashing + Ice/Water shieldCaulk only or single piece of metal
    Ledger AttachmentBolted into structural framingNailed into siding or trim
    SlopeMinimum 1/4″ per footFlat or insufficient pitch
    VentilationSoffit vents aligned with existing flowBlocked eaves causing heat buildup

    FAQ: Common Questions About Tying in Roof Structures

    1. Can I tie a porch roof into an existing roof without removing shingles?

    No. Attempting to flash over existing shingles is a recipe for leaks. You must remove shingles to install proper step flashing and ice/water shield underneath the existing layers. Water travels uphill via capillary action; surface-level caulking will eventually fail.

    2. Do I need a permit to build a porch roof?

    In most US jurisdictions, yes. Any structural alteration to your home’s envelope typically requires a building permit. This ensures your design meets local snow load and wind resistance codes. Skipping this can void your homeowner’s insurance and cause issues when selling your home.

    3. What is the best material for the ledger board?

    Always use pressure-treated lumber for any wood in contact with or near exterior walls. Cedar or redwood are naturally resistant to rot but are more expensive. Pressure-treated pine is the standard, cost-effective choice for structural framing in the US.

    4. How do I handle siding when installing the ledger board?

    You should not sandwich the siding between the ledger and the house. Ideally, remove the siding strip where the ledger will go. Install the ledger against the sheathing/studs, then install flashing over the top edge of the ledger before replacing the siding or installing trim. This prevents water from getting trapped behind the ledger.

    5. What if my existing roof has trusses?

    If your home uses engineered trusses, do not cut them. Instead, build a “standalone” porch roof. This means the porch roof structure is supported entirely by its own posts and beams, and the roofline sits below the existing eaves. You will still need to flash the wall connection, but you won’t be structurally tying into the truss system.

    Conclusion

    Learning how to tie a porch roof into an existing roof is a blend of carpentry skill and understanding water management. By focusing on a solid ledger board attachment, maintaining proper slope, and, most importantly, installing rigorous flashing, you can create a seamless and durable addition to your home.

    Remember, patience is key. Rushing the flashing process is the number one cause of future leaks. Take your time, double-check your levels, and don’t hesitate to consult a professional if your roof structure involves complex trusses.

    Did you find this guide helpful? Share it with your fellow DIY enthusiasts on social media or save it for your next weekend project! If you have questions about specific roofing materials, feel free to leave a comment below.

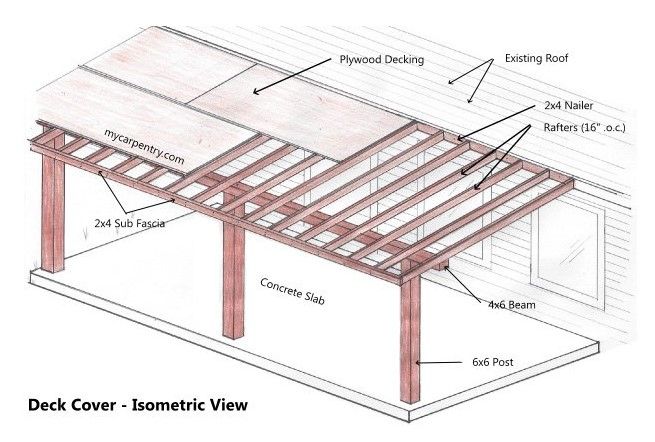
  • How to Attach a Patio Roof to Your House

    How to Attach a Patio Roof to Your House

    Adding an outdoor living space is one of the most rewarding home improvement projects you can undertake. It extends your usable square footage, increases property value, and creates a perfect spot for relaxation. However, the structural integrity of this addition depends entirely on one critical factor: the connection point. Knowing how to attach a patio roof to an existing house correctly is vital to prevent water damage, structural failure, and costly repairs down the line.

    Many homeowners underestimate the complexity of integrating a new structure with an old one. If done incorrectly, you risk compromising your home’s envelope, leading to leaks that rot framing and ruin interior finishes. This guide will walk you through the essential steps, safety considerations, and best practices to ensure your patio roof is secure, weatherproof, and built to last.

    Why Proper Attachment Matters for Structural Integrity

    Before picking up a drill, it is crucial to understand why the attachment method is so significant. A patio roof is not just a decorative element; it is a structural load that must be transferred safely to your home’s foundation.

    According to general building principles, any addition must handle three types of loads:

    1. Dead Load: The weight of the structure itself (beams, rafters, roofing material).
    2. Live Load: Weight from people, furniture, or snow accumulation.
    3. Wind Load: Uplift and lateral forces from wind.

    If the connection to the existing house is weak, these forces can pull the roof away from the wall or cause it to sag. Furthermore, improper sealing at the junction is the number one cause of water intrusion in home additions. By following strict building codes and using high-quality materials, you protect your investment and your family’s safety.

    Step 1: Check Local Building Codes and Permits

    One of the most common mistakes DIYers make is skipping the permitting process. Building codes vary significantly by region, especially regarding snow loads and wind resistance.

    • Contact Your Local Building Department: Ask specifically about requirements for attached structures.
    • Determine Setback Requirements: Ensure your patio doesn’t violate property line distances.
    • Review HOA Rules: If you live in a community with a Homeowners Association, check their aesthetic guidelines.

    Ignoring permits can lead to fines, forced removal of the structure, or issues when selling your home. For a deeper understanding of why building standards exist, you can refer to resources on building code enforcement to see how these regulations protect public safety.

    Step 2: Choose the Right Attachment Method

    There are two primary ways to attach a patio roof to an existing house. The right choice depends on your home’s construction and aesthetic goals.

    Option A: Ledger Board Attachment

    This is the most common and cost-effective method. A heavy-duty timber (ledger board) is bolted directly to the house’s rim joist or wall studs.

    • Pros: Easier to install, lower cost, allows for adjustable height.
    • Cons: Requires precise flashing to prevent leaks; relies on the strength of the existing wall framing.

    Option B: Beam-to-Column Support

    In this method, the patio roof beams rest on posts near the house, rather than attaching directly to the wall. A small gap is left between the roof and the house, covered by a separate flashing piece.

    • Pros: Eliminates the risk of leaking into the house wall; easier to waterproof.
    • Cons: Requires more posts, which may obstruct views or foot traffic; slightly higher material cost.

    Expert Tip: For most standard wood-frame homes, the ledger board method is preferred for its clean look, provided you use proper flashing techniques.

    Step 3: Gather Tools and Materials

    Preparation is key to a smooth installation. Here is what you will need:

    CategoryItems Needed
    ToolsCircular saw, impact driver, level (4ft), chalk line, ladder, safety glasses, caulk gun
    Fasteners½-inch galvanized lag screws or through-bolts, structural screws, roofing nails
    MaterialsPressure-treated lumber (for ledger), LED flashings, butyl rubber tape, silicone sealant, drip edge

    Note: Always use corrosion-resistant fasteners (galvanized or stainless steel) when attaching to pressure-treated wood, as the chemicals in the wood can accelerate rust.

    Step 4: Installation Process – Step-by-Step

    Follow these steps carefully to ensure a secure and watertight connection.

    1. Locate and Mark the Studs

    Use a stud finder to locate the wall studs behind your siding. Mark the center of each stud clearly. You must anchor the ledger board into the structural framing, not just the sheathing or siding.

    2. Prepare the Wall Surface

    Remove the siding where the ledger board will sit. Do not simply screw over the siding, as this creates a gap that traps moisture and leads to rot. Cut the siding cleanly using a circular saw set to the depth of the siding material.

    3. Install the Ledger Board

    Cut a pressure-treated 2×8 or 2×10 board to length. Apply a bead of exterior-grade polyurethane sealant to the back of the board. Position it against the exposed studs, ensuring it is perfectly level.

    Drill pilot holes through the ledger and into the center of each stud. Secure the board using ½-inch lag screws or through-bolts with washers. Tighten securely, but do not overtighten to the point of crushing the wood fibers.

    4. Apply Flashing (The Critical Step)

    This is where most failures occur. You must create a water-shedding barrier.

    • Step A: Apply self-adhering butyl rubber flashing tape over the top edge of the ledger board, extending it up the wall sheathing by at least 6 inches.
    • Step B: Install metal Z-flashing or step flashing over the butyl tape. The top leg of the metal should go under the existing siding (or house wrap), and the bottom leg should overlap the top of the ledger.
    • Step C: Seal all edges with high-quality silicone or urethane caulk.

    5. Attach Rafters or Beams

    Once the ledger is secure and flashed, you can attach your patio roof rafters. Use hurricane ties or rafter hangers to connect the rafters to the ledger board. Ensure the spacing matches your roofing material requirements (typically 16 or 24 inches on center).

    How To Attach A Patio Roof To An Existing House

    Common Mistakes to Avoid

    Even experienced DIYers can stumble on these pitfalls. Avoid them to save time and money.

    • Skipping the Drip Edge: Without a drip edge on the ledger, water will run down the face of the board, staining it and potentially seeping into the joint.
    • Using Interior Screws: Never use drywall or interior wood screws for structural connections. They lack the shear strength required for roof loads.
    • Ignoring Slope: Your patio roof must have a minimum slope (usually 1/4 inch per foot) to allow water to drain away from the house. A flat roof will pool water, leading to leaks and premature material failure.

    FAQ: Frequently Asked Questions

    1. Can I attach a patio roof to vinyl siding?

    No. You must remove the vinyl siding in the area where the ledger board will be attached. Attaching directly to vinyl prevents a tight seal against the house sheathing, creating a pathway for water and pests.

    2. What is the minimum slope for a patio roof?

    Most building codes require a minimum slope of 1/4 inch per foot for solid roofing materials like shingles or metal. For translucent polycarbonate panels, check the manufacturer’s specifications, as some require a steeper pitch for proper drainage.

    3. Do I need a permit for a small patio cover?

    In most jurisdictions, yes. Even small structures often require permits if they are attached to the house. Unpermitted work can void your homeowner’s insurance policy in the event of damage. Always check with your local building department first.

    4. How far apart should the support posts be?

    The spacing depends on the size of the beam and the roof load. Generally, for a standard 12-foot deep patio, posts can be spaced 8 to 10 feet apart. However, you should consult a structural engineer or use a span calculator specific to your lumber grade and local snow load requirements.

    5. What is the best roofing material for a DIY patio roof?

    Corrugated metal or polycarbonate panels are popular for DIYers because they are lightweight, easy to cut, and require less structural support than heavy clay tiles or asphalt shingles. Metal roofs also shed snow and rain efficiently.

    Conclusion

    Learning how to attach a patio roof to an existing house is a manageable project for a confident DIYer, provided you prioritize structural safety and waterproofing. By securing a proper ledger board, using high-quality flashing, and adhering to local building codes, you can create a beautiful and durable outdoor space.

    Remember, the connection point is the heart of the structure. Take your time with the flashing and anchoring steps, as these are the elements that will determine the longevity of your patio. Once completed, you’ll have a seamless extension of your home that you can enjoy for years to come.

    Did you find this guide helpful? Share it with your friends on Facebook or Pinterest who are planning their own outdoor renovations! If you have questions or tips from your own experience, leave a comment below.