Leaking roofs are every RVer’s nightmare. One small drip can quickly turn into mold, structural damage, and thousands of dollars in repairs if ignored. If you are staring at water stains on your ceiling, you are likely asking the critical question: how much does it cost to replace an RV roof?
The short answer is that costs vary significantly based on your rig’s size and the material chosen. However, understanding the breakdown can help you budget effectively and avoid overpaying. In this guide, we will break down the real costs for 2026, compare materials, and help you decide whether to tackle this project yourself or hire a pro.
Understanding the Average Cost Breakdown
When planning your budget, it is essential to look beyond just the price of the roofing material. The total expense includes labor, removal of the old roof, sealants, and potential structural repairs.
For most standard Class A, B, or C motorhomes and travel trailers, the cost to replace an RV roof typically ranges between $1,000 and $5,000. However, luxury fifth-wheels or large motorhomes can see costs upwards of $7,000 to $10,000 if premium materials and professional installation are required.
Here is a general estimate based on RV type:
| RV Type | Estimated Cost Range (Materials + Labor) |
|---|---|
| Small Travel Trailer / Camper | $800 – $1,500 |
| Mid-Size Fifth Wheel | $1,500 – $3,500 |
| Large Class A Motorhome | $3,000 – $6,000+ |
| Luxury/Custom Rig | $6,000 – $10,000+ |
Note: These prices reflect market averages in late 2025 and early 2026. Prices may fluctuate based on your location and the availability of contractors.
Material Matters: EPDM vs. TPO vs. Fiberglass
The single biggest factor influencing the answer to “how much does it cost to replace an RV roof” is the material you choose. Not all roofs are created equal, and each has distinct pros, cons, and price points.
1. EPDM (Ethylene Propylene Diene Monomer)
EPDM is a synthetic rubber roofing membrane. It has been the industry standard for decades due to its durability and flexibility.
- Cost: Moderate ($4–$8 per square foot installed).
- Pros: Excellent resistance to UV rays and ozone; flexible in cold weather; easy to patch.
- Cons: Can absorb heat (making the RV hotter); prone to shrinking over time if not maintained; black color attracts dirt.
2. TPO (Thermoplastic Polyolefin)
TPO is a newer, single-ply reflective membrane that is gaining massive popularity in the RV community.
- Cost: Slightly Higher than EPDM ($5–$9 per square foot installed).
- Pros: Reflects sunlight (keeps RV cooler); resistant to punctures and tears; does not shrink like EPDM; environmentally friendly.
- Cons: Can be stiffer in extreme cold; requires specific adhesives for installation.
3. Fiberglass
Often found on higher-end motorhomes, fiberglass roofs are rigid and durable.
- Cost: High ($8–$12+ per square foot).
- Pros: Extremely durable; can be walked on easily; sleek appearance.
- Cons: Heavy; expensive to repair if cracked; prone to delamination if water gets underneath.
Expert Insight: According to industry trends, many owners are switching from EPDM to TPO during replacements. While TPO costs about 10-15% more upfront, the energy savings from reduced air conditioning use and lower maintenance needs often offset the cost within three years.
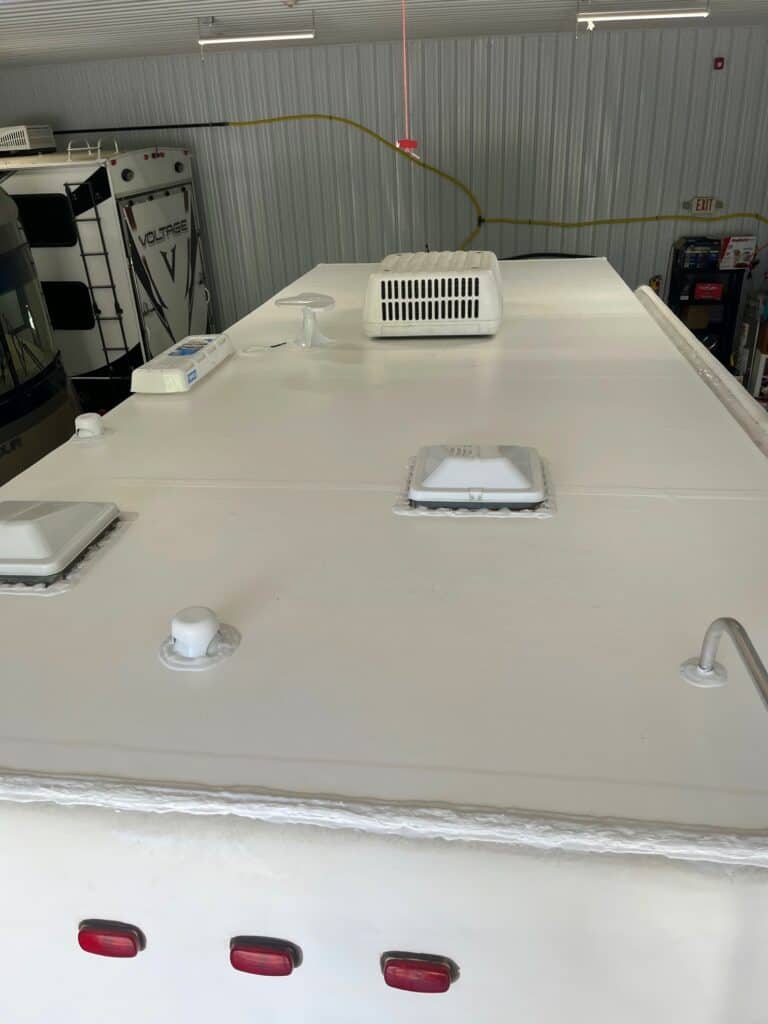
Labor Costs: DIY vs. Professional Installation
Should you do it yourself or hire a professional? This decision drastically impacts your final bill.
Professional Installation
Hiring a certified RV technician ensures the job is done correctly, often with a warranty. Labor typically accounts for 50% to 60% of the total cost.
- Hourly Rate: $75–$150 per hour.
- Flat Rate: Many shops charge by the foot or a flat project fee.
- Benefit: They handle unexpected issues like rotten wood decking, which is common in older RVs.
DIY Installation
If you are handy, you can save thousands. However, you must be meticulous.
- Cost: You only pay for materials and tools.
- Risk: Improper sealing leads to leaks, voiding warranties.
- Time Commitment: Expect to spend 2–3 full weekends on a mid-sized RV.
If you choose DIY, ensure you have the right tools: a high-quality roller, sharp utility knives, and industrial-grade adhesive. Always follow the manufacturer’s instructions precisely. For detailed technical specifications on roofing membranes, you can refer to resources like Wikipedia’s entry on Roofing to understand the chemical composition and longevity of different materials.
Hidden Costs You Might Forget
When calculating how much does it cost to replace an RV roof, do not forget these hidden expenses:
- Decking Repair: Once the old roof is removed, you may find rotted plywood. Replacing a 4×8 sheet of marine-grade plywood costs $50–$100, plus labor.
- Vent and Skylight Replacement: Old seals around vents often fail. It is wise to replace vent covers and reseal skylights while the roof is off. Budget an extra $200–$500.
- Disposal Fees: Getting rid of the old rubber or fiberglass roof requires proper disposal, which may incur a fee at your local landfill.
- Sealants and Adhesives: High-quality lap sealant and edge tape are not optional. Skimping here causes future leaks. Budget $100–$200 for premium supplies.
Step-by-Step Overview of the Replacement Process
Whether you hire a pro or do it yourself, knowing the process helps you verify the quality of work.
- Removal: The old roofing material is cut away and removed. All old sealant is scraped off the edges.
- Inspection: The wooden deck is inspected for soft spots, rot, or water damage. Any damaged wood is replaced.
- Cleaning: The surface is thoroughly cleaned and dried. Any residue prevents proper adhesion.
- Installation: The new membrane (EPDM or TPO) is rolled out. Adhesive is applied to the deck and/or the back of the membrane.
- Sealing: Edges, vents, and seams are sealed with specialized tape and liquid sealant.
- Curing: The roof needs 24–48 hours to cure before it can be exposed to rain or heavy foot traffic.
FAQ Section
1. How long does an RV roof replacement take?
For a professional team, a standard replacement takes 1 to 2 days. If you are doing it yourself, expect it to take 3 to 5 days, depending on your experience level and the size of the RV. Weather conditions also play a crucial role; you need dry, mild temperatures for adhesives to set properly.
2. Can I put a new roof over the old one?
Generally, no. Most manufacturers and experts recommend removing the old roof. Adding a second layer adds weight, traps moisture between layers (leading to rot), and makes it difficult to seal edges properly. Some minor patch jobs can be done over existing roofs, but a full replacement requires removal.
3. Does insurance cover RV roof replacement?
It depends on your policy and the cause of the damage. If the leak was caused by a sudden event like a falling tree branch or hail storm, comprehensive coverage may pay for it. However, if the leak is due to wear and tear or lack of maintenance, insurance will likely deny the claim. Always check your specific policy details.
4. What is the cheapest way to fix a leaking RV roof?
If the roof is not fully failed, you might not need a full replacement. Using a high-quality liquid rubber coating or sealant tape on specific leaks can cost as little as $50–$150. This is a temporary fix or a maintenance strategy, not a permanent solution for a deteriorating roof.
5. How often should I replace my RV roof?
Most RV roofs last between 10 to 20 years. EPDM roofs tend to last toward the lower end of that spectrum if not meticulously maintained, while TPO and fiberglass can last longer. Regular inspections twice a year (spring and fall) can extend the life of your roof significantly.
Conclusion
So, how much does it cost to replace an RV roof? For most owners, budgeting between $1,500 and $3,500 is a safe bet for a quality job using modern materials like TPO. While the upfront cost may seem steep, it is far cheaper than repairing water-damaged interiors, flooring, and walls later on.
Remember, your roof is your RV’s first line of defense. Investing in high-quality materials and proper installation ensures your adventures remain dry and comfortable.
Did you find this guide helpful? Share it with your fellow RVers on Facebook or Pinterest to help them protect their investments too! If you have questions about your specific RV model, drop a comment below—we love hearing from our community.
Leave a Reply