Blog

  • Can I Put a Mechanic’s Lien on a Roofing Company?

    Can I Put a Mechanic’s Lien on a Roofing Company?

    Have you completed a roofing project only to face silence when it’s time to get paid? It is a frustrating and stressful situation that many subcontractors and suppliers face in the construction industry. If you are asking, “Can I put a mechanic’s lien on a roofing company,” the short answer is yes, but the process is strict, state-specific, and time-sensitive.

    In this guide, we will break down exactly how mechanic’s liens work, the specific challenges when dealing with roofing companies, and the step-by-step process to protect your financial interests. We aim to provide clear, actionable advice based on current US construction laws to help you recover what you are owed.

    Understanding the Basics: What Is a Mechanic’s Lien?

    Before diving into the “how,” it is crucial to understand the “what.” A mechanic’s lien (also known as a construction lien or property lien) is a legal claim against a property for unpaid labor or materials. It is not a lawsuit; rather, it is a security interest in the real estate itself.

    When you file a lien, you are essentially telling the world, “This property owner owes me money for work done on this building.” This cloud on the title makes it difficult for the owner to sell, refinance, or transfer the property until the debt is settled.

    Why Roofing Companies Are Unique Targets

    Roofing projects often involve multiple layers: the homeowner (property owner), the general contractor (if applicable), and the roofing subcontractor or supplier. If you supplied shingles or performed labor for a roofing company that failed to pay you, you generally have the right to lien the property they worked on, not just sue the company.

    However, the liability can shift depending on whether the roofing company was hired directly by the owner or as a subcontractor to a larger general contractor. This distinction is vital for your strategy.

    Key Requirements to File a Valid Lien

    You cannot simply decide to file a lien because you are angry about non-payment. To ensure your lien is enforceable in court, you must meet specific statutory requirements. These vary by state, but common elements include:

    1. Valid Contract: You must have a written or verbal agreement (though written is far easier to prove) for the work or materials.
    2. Performance of Work: You must have actually provided labor, materials, or equipment.
    3. Non-Payment: The amount claimed must be genuinely owed and undisputed, or at least partially undisputed.
    4. Timeliness: This is the most critical factor. Missing a deadline by even one day can invalidate your entire claim.

    Expert Insight: According to the Legal Information Institute, mechanic’s lien laws are strictly construed by courts. This means if you make a procedural error, judges often rule against the lien filer, regardless of the merit of the unpaid bill.

    Step-by-Step Guide: How to Place a Lien on a Roofing Project

    If you have determined that you have a valid claim, follow these general steps. Note: Always consult with a local construction attorney, as deadlines differ significantly between states like California, Texas, and New York.

    Step 1: Send a Preliminary Notice (If Required)

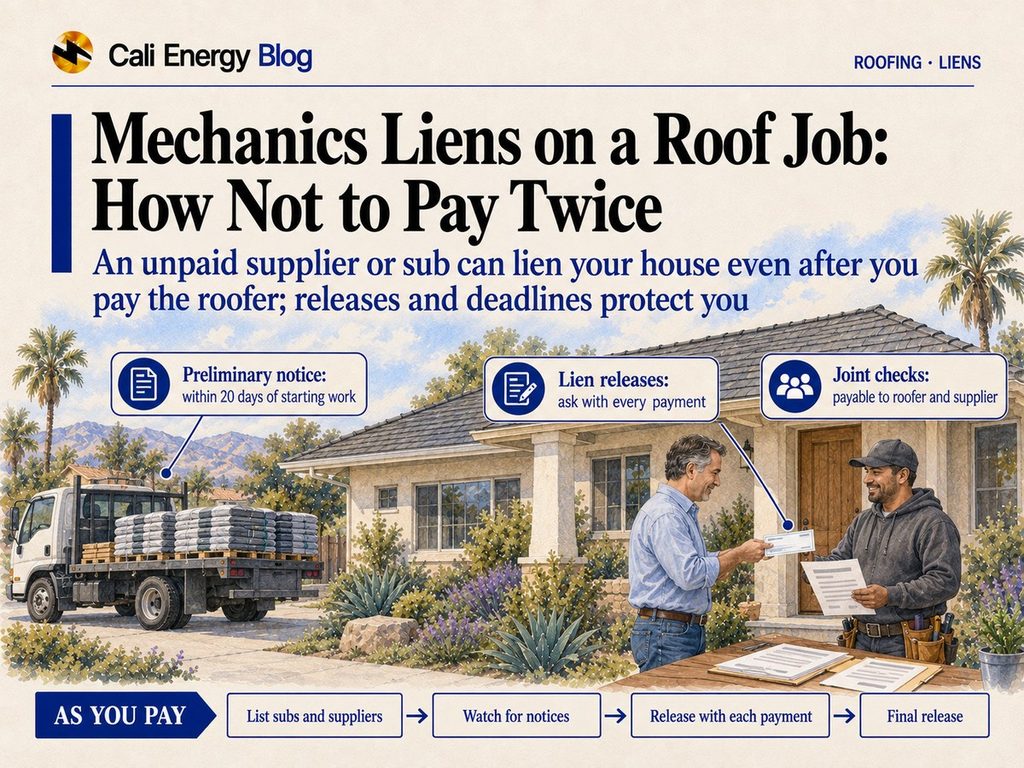
    In many states (such as California, Arizona, and Nevada), you must send a “Preliminary Notice” or “Notice to Owner” within a specific window after starting work (often 20–45 days). This notice informs the property owner that you are contributing to their project and reserve your right to lien if not paid.

    • Action: Check your state’s statute. If you missed this window, you may lose your lien rights entirely, even if you weren’t paid.

    Step 2: Wait for the Payment Due Date

    Ensure the payment is officially late. Review your contract terms. If no specific date is listed, standard industry practice often allows 30 days from invoice submission.

    Step 3: Prepare the Claim of Lien

    This is the formal legal document. It must include:

    • Your name and address.
    • The property owner’s name.
    • A legal description of the property (not just the street address).
    • The amount owed.
    • A description of the work/materials provided.

    Step 4: File and Serve the Lien

    Once prepared, you must:

    1. File the document with the county recorder’s office where the property is located.
    2. Serve a copy to the property owner and the general contractor (if applicable) via certified mail or personal delivery, as required by state law.

    Step 5: Enforce the Lien (Foreclosure)

    Filing the lien is not the end. It puts pressure on the owner, but to actually get paid through the sale of the property, you must file a lawsuit to “foreclose” on the lien. This usually must be done within 90 days to one year after filing the lien, depending on the state.
    Can I Put A Mechanics Lein On A Roofing Company

    Common Challenges When Liening a Roofing Company

    While the process sounds straightforward, practical hurdles often arise. Here is a comparison of common scenarios:

    ScenarioChallengeRecommended Action
    Roofing Co. is BankruptThe company has no assets.Focus on the lien against the property, not the company. The property value secures your debt.
    Homeowner Already PaidThe owner paid the roofing company, who didn’t pay you.In some states, you can still lien the property. In others, the owner is protected. Check “trust fund” statutes.
    Disputed QualityThe roofing company claims your work was defective.Gather evidence immediately: photos, signed delivery tickets, and email approvals.
    Residential vs. CommercialResidential laws are often stricter for consumer protection.Ensure you followed all pre-lien notice requirements strictly for residential jobs.

    People Also Ask: Critical Questions Answered

    1. Can I put a mechanic’s lien on a roofing company if there was no written contract?

    Yes, in most states, verbal contracts are enforceable for mechanic’s liens. However, proving the scope of work and agreed-upon price is much harder without written documentation. You will need strong supporting evidence like text messages, emails, invoices, and witness testimony.

    2. How long do I have to file a lien after completing the roofing work?

    This varies wildly by state. For example:

    • California: 90 days after completion.
    • Texas: 4th month after the month work was completed (for original contractors).
    • Florida: 90 days from final furnishing of labor/materials.
    • New York: 8 months for private improvements. Always verify your specific state’s deadline. Missing this window waives your right to lien forever.

    3. Does filing a lien hurt the roofing company’s credit?

    Indirectly, yes. While the lien is attached to the property, public records of liens can signal financial instability. If the roofing company fails to resolve the lien, it may lead to a judgment against them, which definitely impacts their business credit score and ability to secure bonds or insurance.

    4. What if the property owner says they already paid the roofing contractor?

    This is a common defense. In many jurisdictions, if the owner paid the general contractor in good faith before receiving your preliminary notice, they may not be liable for your claim. However, if you sent proper preliminary notices, the owner is often legally required to withhold funds to pay you directly. This is why Step 1 (Preliminary Notice) is so critical.

    5. Can I lien the property if the roofing company is an LLC?

    Yes. The lien is against the real estate, not the business entity. Whether the roofing company is a sole proprietorship, LLC, or Corporation, the debt is secured by the improvement made to the land. The legal structure of the debtor does not prevent you from filing a lien on the property they improved.

    Strategic Tips for Success

    To maximize your chances of getting paid without going to court, consider these professional tips:

    • Communicate Early: Let the property owner know you haven’t been paid. Often, owners will withhold payment from the roofing company once they realize a lien is imminent. They want a clean title.
    • Be Accurate: Only lien for the exact amount owed. Overstating the claim can lead to penalties and legal fees against you.
    • Use Certified Mail: Always keep proof of delivery for every notice you send.
    • Consult a Lawyer: For amounts over $5,000, the cost of a consultation with a construction lawyer is usually worth it to ensure your paperwork is flawless.

    Conclusion

    So, can you put a mechanic’s lien on a roofing company? Yes, you can place a lien on the property they worked on to secure payment for your unpaid services or materials. It is a powerful tool designed to protect those who build and supply our infrastructure.

    However, it is not a magic bullet. It requires strict adherence to deadlines, proper notice, and accurate documentation. By understanding the process and acting quickly, you can turn the tables on non-paying clients and ensure your hard work is compensated.

    If you found this guide helpful, please share it with your fellow contractors and suppliers on social media. Knowledge is power in the construction industry, and helping others protect their rights strengthens our entire community.
  • Who Built Bank One Ballpark’s Steel Roof?

    Who Built Bank One Ballpark’s Steel Roof?

    Have you ever sat under a massive retractable roof, watching a baseball game in perfect comfort regardless of the scorching Arizona sun or unexpected rain? It is easy to take these architectural miracles for granted, but behind every great stadium lies a complex web of engineering decisions and specialized contractors. If you are researching the history of Major League Baseball infrastructure or specifically looking for the company that provided steel roofing for Bank One Ball Park, you have come to the right place. This article dives deep into the construction history, the key players involved, and the technical brilliance that made this venue possible.

    The Primary Contractor: Who Built the Structure?

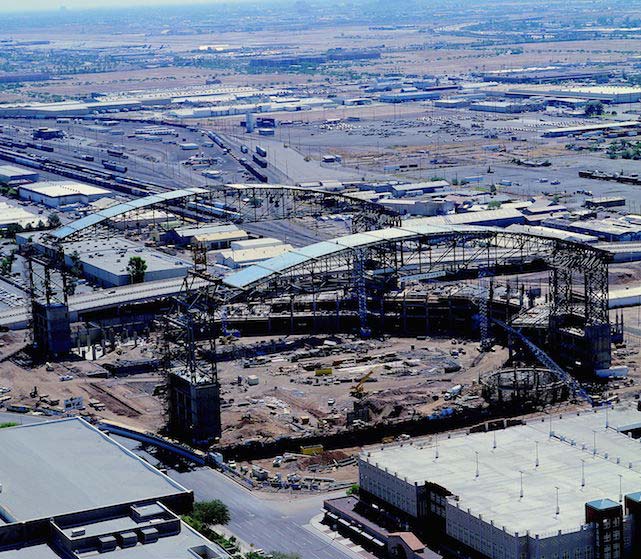
    When discussing the “company” responsible for the steel roofing, it is crucial to distinguish between the architectural designers, the general contractors, and the specialized steel fabricators. Bank One Ballpark (now known as Chase Field) was a monumental project completed in 1998.

    The primary entity responsible for the overall design and delivery of the stadium, including its iconic retractable roof system, was HOK Sport (now part of Populous) in collaboration with Ellerbe Becket. However, the physical construction and the installation of the massive steel structure were led by the general contractor Del E. Webb Construction Company (a subsidiary of Mortenson Construction at various points, but primarily associated with the local Arizona firm Del E. Webb for this specific era and project management).

    While many specialized subcontractors handled the actual metal paneling and truss fabrication, the overarching responsibility for delivering the steel roof structure as part of the ballpark’s core shell fell to this joint venture and leadership team. The roof itself is not just a simple cover; it is a complex mechanical and structural system.

    Key Players in the Project

    RoleCompany/EntityResponsibility
    ArchitectHOK Sport / Ellerbe BecketDesign and Engineering Plans
    General ContractorDel E. Webb Construction Co.Overall Construction Management
    Structural EngineerWalter P Moore & AssociatesStructural Integrity of Steel Trusses
    Roof System SpecialistVarious SubcontractorsFabrication and Installation of Panels

    It is important to note that in large-scale construction projects like this, the “provider” is often a consortium. However, for historical records and SEO clarity, Del E. Webb Construction Company is frequently cited as the primary builder who executed the steel erection plans designed by HOK.

    Why Was a Steel Retractable Roof Necessary?

    Arizona’s climate presents a unique challenge for outdoor sports. Summer temperatures regularly exceed 100°F (38°C), making daytime baseball games nearly unplayable for athletes and uncomfortable for fans. Conversely, the monsoon season brings sudden, heavy rains.

    The decision to install a retractable steel roof was driven by two main factors:

    1. Climate Control: To allow for day games during the hot summer months by providing shade and ventilation.
    2. Weather Protection: To ensure games could proceed during rainstorms without delay.

    The steel structure had to be lightweight enough to move efficiently yet robust enough to withstand high winds and the weight of potential maintenance equipment. This required advanced high-strength steel alloys and precise engineering.

    Company That Provided Steel Roofing For Bank One Ball Park.

    How Does the Retractable Roof Mechanism Work?

    Understanding the mechanics helps appreciate the complexity of the steel roofing provider’s task. The roof at Bank One Ballpark consists of two large panels that slide open and closed.

    Step-by-Step Operation Overview

    1. Initiation: The process begins with a signal from the control center. Hydraulic systems engage.
    2. Unlocking: Massive locks securing the roof panels to the stationary structure are released.
    3. Movement: The panels, each weighing hundreds of tons, slide along giant steel tracks. The movement is slow and deliberate, taking approximately 4 to 5 minutes to fully open or close.
    4. Sealing: When closed, the panels meet in the middle, creating a weather-tight seal using rubber gaskets and overlapping steel edges.
    5. Locking: Once in position, the hydraulic locks re-engage to secure the roof against wind loads.

    This system requires regular maintenance. The steel tracks must be kept clean and lubricated, and the structural integrity of the trusses is inspected annually. The precision required for this movement meant that the steel components had to be fabricated with extremely tight tolerances.

    What Materials Were Used in the Roofing System?

    The term “steel roofing” can be misleading. It is not just sheets of metal nailed to a frame. The system involves several layers of material:

    • Structural Steel Trusses: These form the skeleton. They are made from high-grade carbon steel, chosen for its strength-to-weight ratio.
    • Metal Decking: Attached to the trusses, this provides the base for the roofing materials.
    • Insulation: Critical for temperature control, thick layers of insulation are placed above the decking to prevent heat transfer into the stadium bowl.
    • Membrane Roofing: A waterproof layer, often made of TPO (Thermoplastic Polyolefin) or PVC, is applied over the insulation. This is the actual “weatherproof” layer.
    • Steel Cladding/Panels: The visible exterior is often clad in aluminum or steel panels for aesthetic appeal and additional protection.

    The combination of these materials ensures durability, energy efficiency, and water resistance. The choice of materials was influenced by the need to reflect sunlight, reducing the cooling load inside the stadium when the roof is closed.

    Impact on Modern Stadium Design

    Bank One Ballpark set a new standard for MLB venues. Before its construction, most stadiums were either fully open-air or fully enclosed domes. The success of its retractable steel roof influenced subsequent projects like Minute Maid Park in Houston and Globe Life Field in Texas.

    According to industry analysis, the ability to control the environment significantly increased ticket sales and fan satisfaction. It allowed the Arizona Diamondbacks to host day games comfortably, expanding their scheduling flexibility. This model has since become a benchmark for stadiums in extreme climates.

    For more detailed historical context on the stadium’s development, you can refer to the comprehensive overview on Wikipedia – Chase Field.

    Challenges Faced During Construction

    Building such a complex structure was not without its hurdles. The construction team faced several significant challenges:

    • Weight Distribution: Ensuring the stadium’s foundation could support the massive moving roof required innovative engineering solutions.
    • Precision Alignment: The two roof halves had to meet perfectly in the center. Even a small misalignment could cause leaks or mechanical failure.
    • Timeline Pressure: The stadium had to be ready for the 1998 MLB season. This tight deadline required round-the-clock work and efficient coordination between the steel erectors and other trades.
    • Budget Constraints: Like many large public projects, staying within budget was a constant concern. The use of standardized steel components helped mitigate some costs, but the custom nature of the retractable mechanism added expense.

    Despite these challenges, the project was completed on time and became an instant icon of Phoenix’s skyline.

    FAQ Section

    1. Who was the main architect of Bank One Ballpark?

    The primary architects were HOK Sport (now Populous) and Ellerbe Becket. They designed the overall structure, including the iconic retractable roof system.

    2. Is the roof made entirely of steel?

    No. While the structural framework and trusses are made of high-strength steel, the actual waterproofing layer consists of synthetic membranes (like TPO or PVC), and the exterior cladding may include aluminum or other metals for aesthetics and corrosion resistance.

    3. How long does it take to open or close the roof?

    It typically takes between 4 to 5 minutes for the roof to fully open or close. The process is automated and monitored by a dedicated control team to ensure safety.

    4. Can the roof be opened partially?

    Yes, the roof can be opened partially. This allows for ventilation and natural light while still providing some shade or protection, depending on the weather conditions and game requirements.

    5. What is the current name of Bank One Ballpark?

    Bank One Ballpark was renamed Chase Field in 2005 after Chase Bank acquired Bank One. It remains the home of the Arizona Diamondbacks.

    6. How much did the steel roof weigh?

    The total weight of the retractable roof structure is estimated to be over 1,000 tons. This immense weight requires powerful hydraulic systems and robust steel tracks to move smoothly.

    Conclusion

    Identifying the company that provided steel roofing for Bank One Ball Park leads us to a collaborative effort led by Del E. Webb Construction Company as the general contractor, with design by HOK Sport and Ellerbe Becket. This project was not just about putting a lid on a stadium; it was a pioneering feat of engineering that changed how we think about sports venues in extreme climates.

    The steel roof of Chase Field stands as a testament to human ingenuity, combining strength, precision, and functionality. It has provided decades of comfortable viewing experiences for fans and has set a high bar for future stadium constructions.

    If you found this article helpful, please consider sharing it on your favorite social media platforms. Whether you are a baseball fan, an architecture enthusiast, or a construction professional, the story of Bank One Ballpark’s roof is one worth remembering and discussing.

  • Why Is the Roof of Your Mouth Sore?

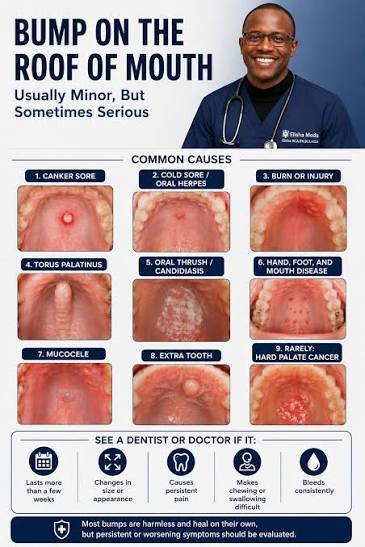
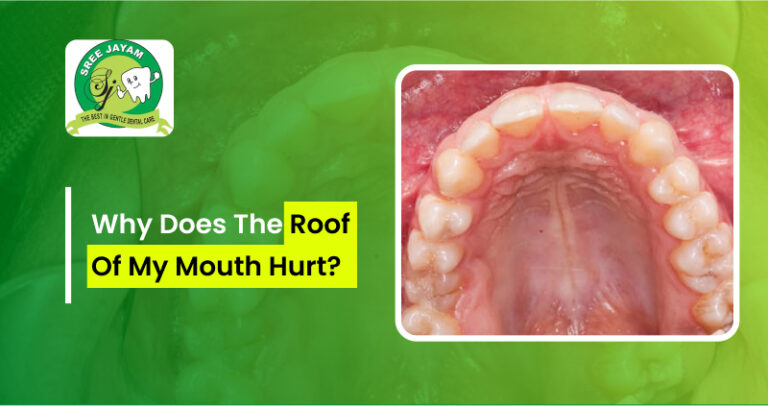
    Why Is the Roof of Your Mouth Sore?

    Have you ever taken a bite of hot pizza only to spend the next two days wincing every time your tongue touches the top of your mouth? It is a surprisingly common and frustrating experience. If you are currently asking yourself, “What causes the roof of your mouth to be sore,” you are not alone. This discomfort can range from a mild annoyance to a sharp pain that makes eating and drinking difficult.

    In this guide, we will explore the most frequent culprits behind palate pain, offer practical home remedies, and help you determine when it is time to see a doctor. Let’s get to the bottom of that sting so you can enjoy your food again.

    Common Causes of Palate Pain

    The roof of your mouth, medically known as the palate, is sensitive tissue. Because it is directly exposed to everything you eat, drink, and breathe, it is vulnerable to various irritants. Understanding the root cause is the first step toward effective treatment.

    1. Thermal Burns (The Pizza Palate)

    This is the most frequent cause of a sore roof of the mouth. The hard palate has a thin layer of mucous membrane covering the bone. When you consume food or liquids that are too hot (typically above 140°F or 60°C), this delicate tissue can scald instantly.

    • Symptoms: Redness, blistering, peeling skin, and a raw, tender feeling.
    • Healing Time: Minor burns usually heal within 3–7 days as the mouth regenerates cells faster than other parts of the body.

    2. Physical Trauma and Abrasion

    Sometimes, the damage isn’t from heat but from friction or sharp objects. Eating crunchy foods like tortilla chips, hard crusts, or candy can scratch the palate. Additionally, dental appliances such as retainers, dentures, or braces can rub against the roof of the mouth if they are ill-fitting.

    3. Canker Sores and Cold Sores

    While cold sores (herpes simplex virus) typically appear on the lips, they can occasionally occur on the hard palate. More commonly, you might develop canker sores (aphthous ulcers). These are small, shallow lesions that develop on the soft tissues in your mouth or at the base of your gums.

    • Trigger Factors: Stress, minor injury to the inside of your mouth, acidic foods, or vitamin deficiencies.
    • Appearance: White or yellow center with a red border.

    4. Oral Thrush (Yeast Infection)

    Oral thrush is a fungal infection caused by an overgrowth of Candida albicans. It is more common in infants, the elderly, and individuals with weakened immune systems or those taking antibiotics.

    • Symptoms: Creamy white lesions on the tongue or inner cheeks, which can spread to the roof of the mouth. Bleeding may occur if these lesions are scraped.
    • Sensation: A cotton-like feeling in the mouth, loss of taste, or cracking at the corners of the mouth.

    5. Allergic Reactions and Irritants

    Your palate may react to certain ingredients in toothpaste, mouthwash, or specific foods. Sodium lauryl sulfate (SLS), a foaming agent found in many toothpastes, is a known irritant for some people. Similarly, highly acidic foods (like citrus fruits or tomatoes) or spicy dishes can inflame the tissue.

    When to See a Doctor

    Most cases of a sore roof of the mouth resolve on their own within a week. However, persistent pain could indicate a more serious underlying condition. You should consult a healthcare provider if:

    • The soreness lasts longer than two weeks.
    • You have a high fever accompanying the mouth pain.
    • You notice white patches that do not wipe away.
    • You have difficulty swallowing or breathing.
    • There is unexplained bleeding.

    For more detailed information on oral conditions, you can refer to general medical resources like Wikipedia’s entry on Stomatitis to understand broader inflammatory conditions affecting the mouth.

    What Causes The Roof Of Your Mouth To Be Sore

    Effective Home Remedies for Relief

    While your mouth heals, you can manage the pain with these simple, effective strategies.

    1. Cool Down the Area

    If you have just burned your palate, act quickly. Sip cold water or suck on ice chips. This helps reduce inflammation and numbs the nerve endings temporarily. Avoid extremely cold items if you have sensitive teeth, but cool liquids are generally soothing.

    2. Salt Water Rinses

    A salt water rinse is a classic, dentist-recommended remedy. It helps clean the area, reduces bacteria, and promotes healing.

    How to make it:

    1. Mix 1/2 teaspoon of salt into 8 ounces (1 cup) of warm water.
    2. Swish the solution gently around your mouth for 30 seconds.
    3. Spit it out. Do not swallow.
    4. Repeat 2–3 times a day.

    3. Honey Application

    Honey has natural antibacterial and anti-inflammatory properties. Applying a small amount of raw honey directly to the sore spot can create a protective barrier and speed up healing. Ensure you use pure, raw honey rather than processed syrup for maximum benefit.

    4. Over-the-Counter Pain Relievers

    Topical oral gels containing benzocaine can provide temporary numbness. Alternatively, non-prescription pain relievers like ibuprofen or acetaminophen can help manage overall discomfort and reduce inflammation. Always follow the dosage instructions on the label.

    Prevention Tips: Keeping Your Palate Healthy

    Preventing a sore roof of your mouth is often easier than treating it. Here are some proactive steps you can take:

    Prevention StrategyAction Item
    Temperature CheckLet hot beverages and foods cool for 2–3 minutes before consuming. Test a small bite first.
    Dental HygieneSwitch to an SLS-free toothpaste if you experience frequent irritation. Brush gently.
    HydrationDrink plenty of water to keep oral tissues moist and resilient. Dry mouth increases susceptibility to injury.
    Dietary AwarenessLimit overly acidic or spicy foods if you are prone to canker sores. Identify and avoid personal trigger foods.
    Appliance CareEnsure dentures, retainers, or braces fit properly. Visit your dentist for adjustments if you feel rubbing.

    Frequently Asked Questions (FAQ)

    1. How long does it take for a burned roof of the mouth to heal?

    Minor thermal burns typically heal within 3 to 7 days. The mouth has a rich blood supply, which aids in rapid tissue regeneration. If the burn is severe or becomes infected, it may take up to two weeks. Keep the area clean and avoid further irritation during this period.

    2. Can stress cause the roof of my mouth to be sore?

    Yes, indirectly. Stress weakens the immune system, making you more susceptible to canker sores and cold sores. Additionally, stress can lead to behaviors like teeth grinding (bruxism) or nervous chewing, which might physically irritate the palate. Managing stress through relaxation techniques can help reduce the frequency of these outbreaks.

    3. Is a sore roof of the mouth a sign of cancer?

    While oral cancer can present as a sore that does not heal, it is rare for a sudden, acute soreness to be cancer. Oral cancer lesions are typically persistent, lasting more than two weeks, and may be accompanied by lumps, thickened patches, or difficulty moving the jaw. If you have a sore that does not heal after two weeks, see a dentist or doctor for evaluation to rule out serious conditions.

    4. What foods should I avoid when the roof of my mouth is sore?

    Avoid foods that are:

    • Hot in temperature: Soups, coffee, tea.
    • Acidic: Citrus fruits (lemons, oranges), tomatoes, vinegar-based dressings.
    • Spicy: Hot peppers, curry, salsa.
    • Crunchy/Sharp: Chips, nuts, hard crackers. Stick to soft, cool, and bland foods like yogurt, pudding, smoothies, and mashed potatoes until the pain subsides.

    5. Can dehydration cause palate pain?

    Yes. Saliva plays a crucial role in protecting the oral mucosa. When you are dehydrated, your mouth becomes dry (xerostomia), making the tissues more fragile and prone to irritation, cracking, and infection. Ensuring you drink at least 2 liters of water daily can help maintain healthy oral tissue integrity.

    Conclusion

    Dealing with a sore roof of your mouth is uncomfortable, but it is rarely a cause for panic. In most cases, the culprit is a minor burn, a scratch from food, or a small canker sore. By identifying what causes the roof of your mouth to be sore, you can take targeted steps to relieve the pain and prevent future occurrences.

    Remember to keep your mouth clean, stay hydrated, and give your body time to heal. If the pain persists beyond two weeks or worsens, do not hesitate to seek professional medical advice.

    Found this guide helpful? Share it with your friends on social media who might be suffering from “pizza palate” or other mouth mishaps. Your share could help someone find relief today!

  • Do I Have To Cut Tree Down Going Over Roof?

    Do I Have To Cut Tree Down Going Over Roof?

    Having a large tree branch hanging over your roof can feel like a ticking time bomb. Every gust of wind or heavy rainstorm brings a wave of anxiety about potential damage to your shingles or even the structural integrity of your home. If you are asking yourself, “Do I have to cut tree down going over roof,” you are not alone; this is one of the most common dilemmas for homeowners in the US.

    The short answer is: Not always. Complete tree removal is often a last resort. In many cases, strategic pruning or cabling can mitigate the risk while preserving the beauty and environmental benefits of your tree. However, ignoring the issue is never an option. Below, we will explore the risks, legal considerations, and professional solutions to help you make an informed decision that balances safety with cost-effectiveness.

    Assessing the Risk: When Is It Dangerous?

    Before calling a crew with chainsaws, you need to evaluate the specific threat level. Not all trees over roofs are created equal. The danger depends on the tree’s health, species, and proximity to your home.

    Signs of Immediate Danger

    You should consider immediate action if you notice any of the following red flags:

    • Dead or Dying Branches: Known as “widowmakers,” these can fall without warning.
    • Cracks or Splits: Visible fractures in the main trunk or large limbs.
    • Leaning Trunk: A sudden lean may indicate root failure.
    • Fungal Growth: Mushrooms at the base suggest internal decay.

    According to the USDA Forest Service, urban trees provide significant economic and environmental benefits, including energy conservation and stormwater management. Therefore, preservation should be the primary goal unless safety is compromised.

    The “Touch Test”

    A general rule of thumb used by arborists is the distance factor. If branches are physically touching your roof, they are causing abrasion to your shingles every time the wind blows. This friction wears down the protective granules on asphalt shingles, leading to premature leaks. Even if the tree is healthy, physical contact requires intervention.

    Alternatives to Full Removal: Pruning and Cabling

    Many homeowners assume that if a tree is problematic, it must go. This is a costly misconception. Professional arborists often recommend less invasive methods first.

    Crown Reduction and Thinning

    Crown reduction involves selectively removing branches to reduce the weight and wind resistance of the tree. This technique pulls the canopy back from the roofline without killing the tree.

    • Benefit: Maintains the tree’s health and aesthetic.
    • Cost: Typically 10–20% of the cost of full removal.
    • Frequency: Needs maintenance every 3–5 years.

    Cabling and Bracing

    For trees with weak unions (where two large stems meet), steel cables or rods can be installed to provide structural support. This prevents limbs from splitting apart during storms.

    • Best For: Multi-stemmed trees like oaks or maples.
    • Limitation: Does not fix decay; only supports structure.
    MethodCost EstimateLifespanBest Use Case
    Pruning$300 – $8003-5 YearsBranches touching roof
    Cabling$500 – $1,50010+ YearsWeak branch unions
    Removal$1,000 – $3,000+PermanentDead/diseased trees

    Note: Costs vary significantly based on tree size, location, and accessibility.

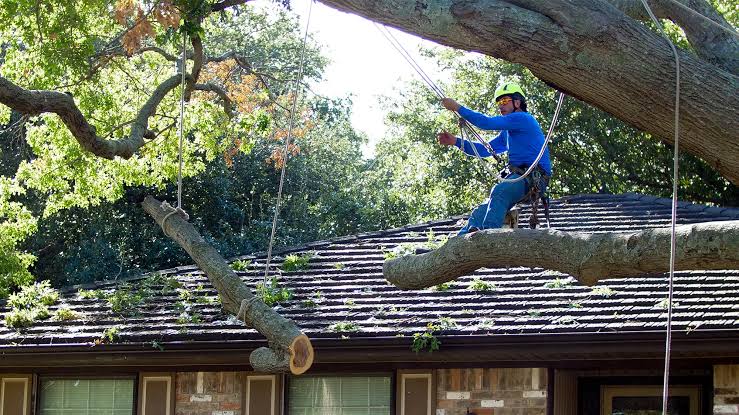
    Do I Have To Cut Tree Down Going Over Roof

    Legal and Insurance Implications

    Understanding your liability is crucial before making any cuts. In the US, property laws vary by state, but general principles apply.

    Who Owns the Tree?

    If the tree trunk is entirely on your property, you are responsible for its maintenance. If it straddles the property line, ownership may be shared. Cutting a neighbor’s tree without permission can lead to significant legal penalties, sometimes triple the value of the tree.

    Homeowners Insurance Coverage

    Does insurance cover tree removal? It depends on the event.

    • Covered: If a healthy tree falls on your house due to a named peril (like a hurricane or lightning strike), your policy usually covers the damage and removal.
    • Not Covered: If a dead or diseased tree falls because you neglected it, insurance may deny the claim, citing “lack of maintenance.”

    Pro Tip: Document the health of your tree with photos annually. This proves you were proactive in case of an insurance dispute.

    Step-by-Step: How to Hire the Right Professional

    If you decide that action is needed, hiring the right expert is critical. Never attempt to cut large branches over a roof yourself. The risk of falling or damaging the roof is too high.

    1. Verify Credentials: Look for an ISA (International Society of Arboriculture) Certified Arborist. This certification ensures they have passed rigorous exams on tree biology and safety.
    2. Check Insurance: Ensure they carry both liability insurance and workers’ compensation. If a worker gets injured on your property and they aren’t insured, you could be liable.
    3. Get Three Quotes: Prices can vary wildly. Get detailed written estimates that specify exactly what work will be done (e.g., “remove 3 upper limbs” vs. “top the tree”).
    4. Ask About Cleanup: Does the price include hauling away debris? Some companies charge extra for this.
    5. Review the Contract: Ensure it includes start and end dates, total cost, and cleanup details.

    FAQ Section

    1. Can I just cut the branches myself?

    While small branches can be trimmed by homeowners, anything over a roofline is dangerous. You risk falling, dropping heavy limbs on the roof (causing more damage than the tree did), or hitting power lines. Professional equipment and training are essential for overhead work.

    2. Will cutting the top off the tree (topping) solve the problem?

    No. Topping is considered bad arboricultural practice. It stresses the tree, leading to rapid, weak regrowth that is more likely to break in the future. It also makes the tree susceptible to disease and pests. Always opt for crown reduction instead.

    3. How close can a tree be to my house?

    Ideally, large trees should be planted at least 20 feet away from your home. For existing trees, branches should be kept at least 6–10 feet away from the roof surface to prevent abrasion and allow for proper airflow, which reduces moss and algae growth.

    4. Does a tree over my roof increase my home insurance premium?

    Not necessarily. However, if an inspector notes dead or hazardous trees, they may require you to remove them to maintain coverage. Proactive maintenance shows insurers you are a low-risk homeowner.

    5. What is the best time of year to trim trees over a roof?

    Late winter or early spring is generally best, as the tree is dormant. This minimizes stress on the tree and reduces the spread of diseases. However, dead branches can be removed safely at any time of year.

    Conclusion

    So, do you have to cut the tree down going over your roof? In most cases, no. Complete removal is rarely the first or best option. By opting for professional pruning, cabling, or regular maintenance, you can protect your home from damage while keeping the shade and beauty of your mature trees.

    Ignoring the issue, however, is a gamble with your home’s safety and your wallet. Take action now by assessing the tree’s health and consulting a certified arborist. Remember, a small investment in maintenance today can save you thousands in roof repairs tomorrow.

    Found this guide helpful? Share it with your neighbors on Facebook or Twitter to help them protect their homes too! Let’s keep our communities safe and green.

  • Can You Write Off A New Roof On Your Taxes?

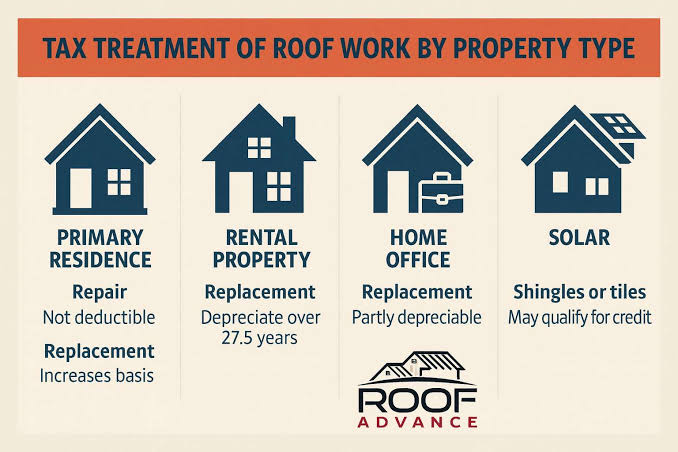
    Can You Write Off A New Roof On Your Taxes?

    Replacing a roof is one of the most significant home maintenance expenses a homeowner can face. It is a massive financial hit that often comes unexpectedly, leaving many people scrambling to manage their budget. Naturally, you might be asking yourself: Can you write off a new roof on your taxes? The short answer is complex because it depends entirely on how you use the property. For most primary residences, the answer is no, but there are crucial exceptions and strategies for landlords and energy-efficient upgrades that can significantly reduce your tax liability.

    In this guide, we will break down the intricate rules set by the Internal Revenue Service (IRS). We will explore the difference between repairs and improvements, explain how depreciation works for rental properties, and highlight potential tax credits for green energy roofing materials. By the end of this article, you will have a clear understanding of your options and know exactly what documentation you need to keep.

    Understanding the Difference Between Repairs and Improvements

    To understand tax implications, you must first distinguish between a “repair” and an “improvement” in the eyes of the IRS. This distinction is the foundation of all real estate tax deductions.

    A repair keeps your property in good working condition but does not add significant value or prolong its life. Examples include fixing a few missing shingles or patching a small leak. These costs are generally not deductible for personal homes.

    An improvement, however, adds value to the property, prolongs its useful life, or adapts it to new uses. A full roof replacement is almost always classified as an improvement. According to IRS guidelines on capital improvements, these costs cannot be deducted immediately from your taxable income for a primary residence. Instead, they are added to the basis of your home.

    Why Does Basis Matter?

    When you eventually sell your home, a higher basis reduces your capital gains tax. While you do not get an immediate tax break, you may pay less tax when you sell the property. However, if you are renting out the property, the rules change dramatically.

    Tax Rules for Primary Residences

    For the majority of Americans who live in the homes they own, the news regarding roof replacements is often disappointing. You generally cannot deduct the cost of a new roof on your federal income tax return in the year you pay for it.

    The IRS views personal living expenses as non-deductible. Since a roof is part of the structure you live in, it falls under personal maintenance. However, there is a silver lining related to energy efficiency, which we will discuss later.

    Key Takeaways for Homeowners:

    • No Immediate Deduction: You cannot subtract the cost from your annual income.
    • Adjust Your Basis: Keep all receipts. Add the cost of the roof to your home’s original purchase price. This lowers your profit margin when you sell, potentially saving you money on capital gains tax if your profit exceeds the exclusion limits ($250,000 for single filers, $500,000 for married couples filing jointly).
    • Medical Necessity Exception: In rare cases, if a doctor prescribes a specific home modification for medical reasons, it might be deductible as a medical expense. However, a standard roof replacement rarely qualifies unless it involves specific structural changes for accessibility.

    Tax Benefits for Rental Property Owners

    If you own a rental property, the answer to “Can you write off a new roof on your taxes?” becomes a resounding yes, but not all at once. Rental properties are considered business assets, and the IRS allows you to recover the cost of improvements through depreciation.

    How Depreciation Works

    Depreciation lets you deduct a portion of the roof’s cost each year over its “useful life.” For residential rental property, the IRS typically assigns a useful life of 27.5 years to the building structure, including the roof.

    Here is a simplified example:

    1. You spend $15,000 on a new roof for your rental duplex.
    2. You divide $15,000 by 27.5 years.
    3. You can deduct approximately $545 per year from your rental income for nearly three decades.

    This annual deduction reduces your taxable rental income, lowering your overall tax bill. It is crucial to start depreciating the asset in the year it is placed in service.

    Bonus Depreciation and Section 179

    In recent years, tax laws have allowed for “Bonus Depreciation,” which permits businesses to deduct a large percentage of the cost of qualified property in the first year. However, tax laws change frequently. As of recent updates, bonus depreciation percentages have been phasing down. Always consult with a CPA to see if your specific roof replacement qualifies for accelerated depreciation under current laws.

    Can You Write Off A New Roof On Your Taxes

    Energy-Efficient Roof Tax Credits

    While you may not get a direct deduction for a standard asphalt shingle roof, you might qualify for a tax credit if you install energy-efficient roofing materials. Tax credits are more valuable than deductions because they reduce your tax bill dollar-for-dollar.

    The Residential Clean Energy Credit (formerly part of the Nonbusiness Energy Property Credit) offers incentives for installing solar roofing tiles or other renewable energy systems. Additionally, certain metal roofs with pigmented coatings or asphalt roofs with cooling granules may qualify if they meet specific Energy Star standards.

    Requirements for Energy Credits:

    • The product must meet specific energy-efficiency criteria set by the Department of Energy.
    • You must install it in your existing primary residence.
    • You must have a manufacturer’s certification statement.

    For example, if you install a solar roof that generates electricity, you could claim a credit worth 30% of the total installation cost through 2032 under the Inflation Reduction Act. This is a massive potential saving compared to a standard deduction.

    Step-by-Step Guide: Documenting Your Roof Replacement

    Whether you are a landlord depreciating the cost or a homeowner adjusting your basis, documentation is vital. The IRS requires proof of expenditure. Follow these steps to ensure you are audit-proof:

    1. Get Itemized Invoices: Do not just keep a final receipt. Request an itemized invoice from your contractor that breaks down labor, materials, and disposal fees.
    2. Save Proof of Payment: Keep canceled checks, credit card statements, or bank transfer records showing the payment was made.
    3. Before and After Photos: Take dated photos of the old roof and the new installation. This proves the work was completed and helps distinguish between a repair and a full replacement.
    4. Manufacturer Warranties: Keep copies of warranties for materials used. This helps establish the “useful life” of the asset for depreciation purposes.
    5. Store Digitally and Physically: Scan all documents and store them in a secure cloud folder. Keep physical copies in a fireproof safe for at least seven years after you file the tax return for the year you sell the property.

    Comparison: Personal Home vs. Rental Property

    To clarify the differences, here is a quick comparison table:

    FeaturePrimary ResidenceRental Property
    Immediate DeductionNoNo (usually depreciated)
    Tax Benefit TypeAdjusted Basis (Capital Gains)Depreciation Expense
    Energy CreditsYes (if qualified)Generally No (business rules apply)
    Documentation NeedHigh (for future sale)Very High (annual audits)
    Useful Life SpanN/A27.5 Years

    Frequently Asked Questions (FAQ)

    1. Can I deduct a partial roof repair?

    For a primary residence, no. Partial repairs are considered personal maintenance. For a rental property, routine repairs can often be deducted fully in the year they occur, unlike replacements which must be depreciated. The line between repair and improvement is thin, so consult a tax professional.

    2. Does a new roof increase my home’s value for tax purposes?

    It increases your basis, not your immediate taxable income. A higher basis means you recognize less profit when you sell the home, which can protect you from capital gains taxes if your home’s value has appreciated significantly.

    3. What if I use my home for business (Home Office)?

    If you have a qualified home office, you may be able to depreciate a portion of the roof. For example, if your home office takes up 10% of your home’s square footage, you might be able to depreciate 10% of the roof’s cost over 39 years (commercial property rate) or 27.5 years, depending on specific IRS interpretations for mixed-use property. This is complex; professional advice is recommended.

    4. Are there state-level tax deductions for roofs?

    Yes. Some states offer additional rebates or tax credits for energy-efficient improvements or storm-resistant roofing. Check with your state’s department of revenue or local utility companies for specific programs.

    5. How long should I keep my roof replacement records?

    Keep records for at least three years from the date you filed your original return or two years from the date you paid the tax, whichever is later. However, for home improvements affecting basis, keep them until you sell the home plus three years.

    Conclusion

    So, can you write off a new roof on your taxes? For most homeowners, the answer is no—not as an immediate deduction. However, it is not a total loss. By adding the cost to your home’s basis, you reduce future capital gains tax. For rental property owners, depreciation offers a steady, long-term tax benefit. And for those willing to invest in green technology, energy tax credits can provide substantial immediate savings.

    Navigating tax laws can be tricky, and mistakes can be costly. Always keep meticulous records and consider consulting with a certified public accountant (CPA) to tailor these strategies to your specific financial situation.

    Did you find this guide helpful? Share it with your friends and family on social media to help them save money on their next home improvement project!

  • Metal Roof Cost for Mobile Homes: 2026 Price Guide

    Metal Roof Cost for Mobile Homes: 2026 Price Guide

    Replacing the roof on your mobile home is one of the most significant investments you can make to protect your asset. It is not just about aesthetics; it is about security, energy efficiency, and peace of mind during storm season. If you are currently researching how much is a metal roof on a mobile home, you are likely looking for a durable solution that won’t break the bank but will last for decades.

    Many mobile home owners struggle with aging asphalt shingles that crack under heat or leak during heavy rains. Metal roofing offers a superior alternative, but the upfront cost can seem daunting without a clear breakdown. In this guide, we will demystify the pricing, explain the hidden factors that affect your final bill, and help you decide if this upgrade is right for your budget.

    What Is the Average Cost of a Metal Roof on a Mobile Home?

    When asking how much is a metal roof on a mobile home, the answer varies based on size, material type, and labor rates in your area. However, we can provide a reliable national average for 2026.

    Generally, homeowners can expect to pay between $7,500 and $15,000 for a complete metal roof replacement on a standard single-wide or double-wide mobile home. This translates to approximately $9 to $14 per square foot installed.

    To give you a clearer picture, here is a breakdown by home size:

    Mobile Home SizeApproximate Square FootageEstimated Low-End CostEstimated High-End Cost
    Single-Wide (14×70)~980 sq. ft.$7,500$11,500
    Double-Wide (28×40)~1,120 sq. ft.$9,000$13,500
    Large Double-Wide~1,400+ sq. ft.$11,000$16,000+

    Note: These prices include materials and professional labor. DIY projects will significantly reduce costs but require advanced skills.

    The price fluctuation depends heavily on the type of metal chosen. Galvanized steel is the most affordable option, while aluminum and copper command higher prices due to their corrosion resistance and aesthetic appeal. For mobile homes, steel panels with a Kynar 500 finish are the industry standard because they balance durability with cost-effectiveness.

    Why Choose Metal Over Traditional Shingles?

    Before diving deeper into costs, it is crucial to understand why so many experts recommend metal for manufactured housing. Mobile homes have unique structural considerations compared to site-built houses. They are lighter, and their roof trusses may not support the heavy weight of concrete tiles or multiple layers of old shingles.

    Weight and Structural Integrity

    Metal roofing is incredibly lightweight. A typical metal panel weighs only 1 to 1.5 pounds per square foot, whereas asphalt shingles can weigh up to 3 pounds per square foot, especially when wet. This reduced load places less stress on the mobile home’s frame, reducing the risk of structural sagging over time.

    Longevity and Durability

    While asphalt shingles typically last 15–20 years, a properly installed metal roof can last 40 to 70 years. This means you might never need to replace your roof again. According to industry data, metal roofs also offer superior resistance to high winds, which is critical for mobile homes often located in open areas or storm-prone regions.

    Energy Efficiency

    One of the biggest complaints from mobile home owners is temperature regulation. Metal roofs reflect solar radiant heat, which can reduce cooling costs by 10–25%. In hot US states like Texas, Arizona, and Florida, this energy savings can partially offset the initial installation cost within a few years.

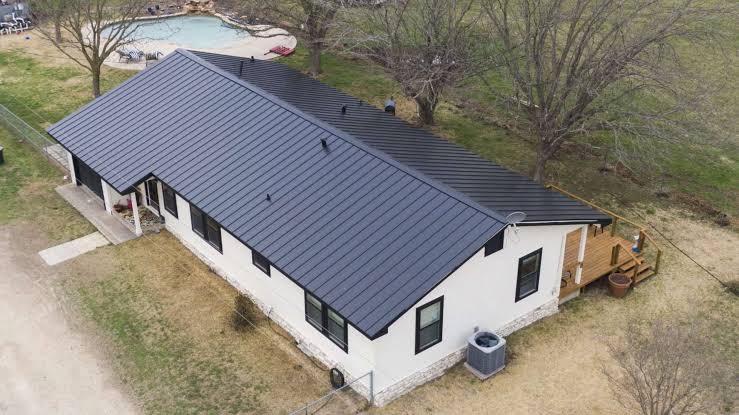
    How Much Is A Metal Roof On A Mobile Home

    Factors That Influence Your Final Quote

    Understanding how much is a metal roof on a mobile home requires looking beyond the base material price. Several variables can cause your quote to swing by thousands of dollars.

    1. Roof Complexity and Pitch

    Mobile homes usually have low-slope roofs. While this makes installation slightly easier in terms of safety, it requires specific sealing techniques to prevent water pooling. If your home has dormers, skylights, or complex angles, labor costs will increase because the installer must cut and seal more panels.

    2. Removal of Old Roofing

    Does your current roof need to be torn off? Most contractors will charge an additional $1,000 to $2,500 for removal and disposal of old shingles. Some metal roofs can be installed over existing asphalt if the structure is sound, which saves money. However, you must check local building codes and ensure there is no trapped moisture or mold underneath.

    3. Insulation Upgrades

    Since you are already investing in a new roof, it is the perfect time to upgrade insulation. Adding rigid foam board or spray foam under the metal panels can dramatically improve comfort. Expect to add $1.50 to $3.00 per square foot for high-quality insulation materials.

    4. Geographic Location

    Labor rates vary significantly across the US. Installing a roof in rural Midwest areas may cost less than in coastal cities like Seattle or Miami due to differences in union rates, insurance costs for contractors, and general cost of living.

    Step-by-Step Installation Overview

    If you are hiring a professional, knowing the process helps you verify that the job is done correctly. If you are considering a DIY approach, please note that roofing a mobile home is complex and dangerous. Here is how professionals typically handle it:

    1. Inspection and Measurement: The contractor measures the exact square footage and inspects the roof deck for rot or damage. Any soft spots must be repaired before proceeding.
    2. Preparation: If removing old shingles, the crew tears them off and hauls them away. The roof deck is cleaned thoroughly.
    3. Underlayment Installation: A synthetic underlayment or ice-and-water shield is rolled out. This layer acts as a secondary barrier against leaks. This step is critical for mobile homes.
    4. Flashing and Trim: Drip edges and valley flashing are installed. Proper flashing prevents water from seeping under the panels at the edges.
    5. Panel Installation: Metal panels are laid starting from the eave (bottom) and working up to the ridge. Screws with rubber washers are used to secure the panels. Crucial: Screws must not be over-tightened, or the washers will fail.
    6. Ridge Cap Installation: The final piece is the ridge cap, which seals the peak of the roof. Sealant is applied generously here.

    For more technical details on roofing standards, you can refer to general construction guidelines on Wikipedia.

    Pros and Cons of Metal Roofing for Mobile Homes

    To help you make an informed decision, let’s look at the trade-offs.

    Pros:

    • Long Lifespan: Lasts 2–3 times longer than shingles.
    • Low Maintenance: Requires occasional cleaning but no frequent repairs.
    • Fire Resistant: Metal is non-combustible, potentially lowering insurance premiums.
    • Eco-Friendly: Most metal roofs contain recycled material and are 100% recyclable at the end of their life.

    Cons:

    • Higher Upfront Cost: Initial investment is significantly higher than asphalt.
    • Noise: Rain and hail can be louder without proper insulation.
    • Expansion/Contraction: Metal expands and contracts with temperature changes, requiring specialized fasteners to avoid loosening over time.

    Frequently Asked Questions (FAQ)

    1. Can I install a metal roof over my existing shingles?

    Yes, in many cases, you can install metal over one layer of existing asphalt shingles. This saves on disposal fees and labor. However, you must ensure the roof deck is structurally sound and that local building codes permit it. Never install metal over two or more layers of shingles.

    2. Does a metal roof void my mobile home warranty?

    Generally, no. In fact, many manufacturers view metal roofing as an upgrade. However, you should always check with your specific home manufacturer or warranty provider. Ensure the installer uses non-penetrating clips where possible to avoid damaging the original structure.

    3. How long does the installation take?

    For a standard single-wide or double-wide mobile home, a professional crew can typically complete the installation in 1 to 3 days. Weather conditions and the complexity of the roof will affect this timeline.

    4. Will a metal roof increase my home’s resale value?

    Absolutely. A new metal roof is a major selling point. It signals to buyers that the home has been well-maintained and that they will not face immediate roofing expenses. Appraisers often recognize the added value of durable, energy-efficient materials.

    5. What is the best type of metal for a mobile home?

    Galvalume steel or aluminum are the top choices. Steel is stronger and cheaper, while aluminum is lighter and naturally rust-resistant, making it ideal for coastal areas. Avoid copper unless budget is no object, as it is excessively expensive for mobile home applications.

    Conclusion

    So, how much is a metal roof on a mobile home? While the initial price tag of $7,500 to $15,000 may seem steep, it is an investment in longevity, safety, and energy efficiency. When you consider that you may never need to replace your roof again, the cost-per-year value is unbeatable compared to traditional shingles.

    By choosing metal, you are protecting your home from the elements while potentially lowering your monthly energy bills. It transforms a vulnerable part of your home into its strongest asset.

    If you found this guide helpful, please share it with other mobile home owners on Facebook or Twitter who might be struggling with their roofing decisions. Have questions or experiences to share? Leave a comment below!

  • Is It Safe To Use Roofing Tiles In Your Garden?

    Is It Safe To Use Roofing Tiles In Your Garden?

    Have you ever looked at a pile of leftover roofing materials after a renovation and wondered if they could find a new life among your flowers? Repurposing building materials is a fantastic way to save money and reduce waste, but health concerns often arise. Many homeowners ask, “Is it safe to use roofing tiles in your garden?” before starting their next DIY project.

    The short answer is: it depends heavily on the material, age, and condition of the tiles. While many modern tiles are perfectly safe, older ones may contain hazardous substances like asbestos or heavy metals. In this comprehensive guide, we will break down everything you need to know to make an informed, safe, and beautiful decision for your outdoor space.

    Understanding the Risks: What Are Roofing Tiles Made Of?

    To determine safety, we must first identify the material. Roofing tiles generally fall into three main categories: clay, concrete, and slate. Each has different chemical compositions and potential risks when placed in soil or near edible plants.

    Clay and Terracotta Tiles

    Clay tiles are made from natural earth minerals fired at high temperatures. They are generally inert, meaning they do not react chemically with soil or water.

    • Safety Level: High.
    • Best For: Raised beds, pathway edging, and decorative mulch.
    • Concerns: Minimal. However, ensure they are not glazed with lead-based paints (common in very old antique tiles).

    Concrete Tiles

    Concrete tiles are a mixture of cement, sand, and water. Modern concrete tiles are usually safe, but they are highly alkaline when new.

    • Safety Level: Moderate to High.
    • Best For: Hardscaping, patios, and non-edible garden borders.
    • Concerns: Fresh concrete can raise soil pH significantly. Over time, they may leach lime, which can affect acid-loving plants like blueberries or azaleas.

    Slate Tiles

    Natural slate is a metamorphic rock. It is durable and chemically stable.

    • Safety Level: High.
    • Best For: Water features, stepping stones, and rock gardens.
    • Concerns: Physical sharpness rather than chemical toxicity. Ensure edges are smoothed if used in high-traffic areas.

    The Asbestos Danger (Crucial Warning)

    If your home was built or renovated before the 1980s, there is a risk that fiber-cement roofing sheets or tiles contain asbestos. Asbestos is a known carcinogen when its fibers are inhaled.

    • Action: If you suspect your tiles contain asbestos, do not break, cut, or drill them. Consult a professional hazardous material tester. Never use asbestos-containing materials in a garden where soil disturbance occurs.

    People Also Ask: Common Safety Questions Answered

    When considering reusing roofing materials, users often have specific concerns about contamination and plant health. Let’s address the most frequent questions found in search results.

    Can Chemicals Leach from Roofing Tiles into Soil?

    For standard clay and natural slate, leaching is negligible. However, concrete tiles can release calcium hydroxide (lime) during the first few months of exposure to rain. This can temporarily alter the soil chemistry.

    • Solution: Wash new concrete tiles thoroughly and let them weather outdoors for a few weeks before placing them directly against sensitive plant roots.

    Are Old Roofing Tiles Safe for Vegetable Gardens?

    Using reclaimed tiles for vegetable raised beds requires caution.

    1. Avoid Lead Glazes: Older decorative clay tiles might have lead-based glazes. If the glaze is chipping, do not use it near food crops.
    2. Avoid Treated Wood Backing: Sometimes tiles are attached to wooden battens treated with arsenic or copper compounds. Remove all wood attachments before using the tiles.
    3. Use a Barrier: For peace of mind, line the inside of your raised bed with heavy-duty landscape fabric before placing the tiles as edging. This prevents direct soil contact with any potential residual contaminants.

    Do Roofing Tiles Affect Soil pH?

    Yes, particularly concrete. Concrete is alkaline (pH 12–13 when fresh). If you are growing acid-loving plants, place concrete tiles away from the root zones or use clay/slate instead. You can test your soil pH using a simple kit available at any garden center. If the pH rises above 7.5 near the tiles, consider amending the soil with sulfur or peat moss.

    Is It Safe To Use Roofing Tiles In Your Garden

    Step-by-Step Guide: How to Safely Prepare Reclaimed Tiles

    If you have determined your tiles are safe (non-asbestos, non-lead), follow these steps to prepare them for garden use. Proper preparation ensures longevity and minimizes any minor chemical risks.

    1. Inspection and Cleaning
      • Wear gloves and a dust mask (N95 recommended) to avoid inhaling silica dust or mold spores.
      • Scrub the tiles with a stiff brush and a solution of water and mild vinegar (1 part vinegar to 10 parts water). This helps neutralize surface alkalinity on concrete tiles.
      • Rinse thoroughly with a hose.
    2. Smoothing Sharp Edges
      • Broken tiles can be dangerous. Use a masonry file or wet sandpaper to smooth any jagged edges.
      • Tip: Keep the stone wet while sanding to suppress dust.
    3. Weathering Period
      • Lay the cleaned tiles out in a sunny, rainy area of your yard for 2–4 weeks. This allows rain to naturally wash away any remaining loose particles and stabilizes the pH of concrete tiles.
    4. Installation
      • Dig a trench slightly deeper than the tile height.
      • Add a 2-inch layer of gravel for drainage.
      • Place the tiles firmly into the soil. For vertical edging, backfill with soil and tamp down gently.

    Pros and Cons: Is It Worth the Effort?

    Before you start hauling tiles, weigh the benefits against the drawbacks.

    FeatureBenefitsDrawbacks
    CostFree or very cheap if reclaimed from your own roof.Labor-intensive to clean and transport.
    AestheticsRustic, charming, and unique look. Adds texture.Can look messy if not arranged neatly.
    DurabilityExtremely long-lasting; resistant to rot and pests.Heavy; difficult to move once installed.
    EnvironmentalReduces landfill waste; lowers carbon footprint.None significant, provided materials are safe.
    Plant HealthClay retains moisture well for nearby plants.Concrete may alter soil pH initially.

    Expert Insight: Sustainability in Landscaping

    According to sustainable landscaping principles, reusing materials is one of the most effective ways to reduce the environmental impact of gardening. By keeping roofing tiles out of landfills, you are participating in the circular economy.

    For more information on the environmental impact of construction materials, you can refer to resources on Sustainable Construction Materials which highlight the importance of reuse and recycling in modern building practices.

    Experts suggest that while buying new, certified garden-safe pavers is easier, the carbon footprint of manufacturing and transporting new concrete or clay products is significantly higher than repurposing existing materials. Therefore, if your tiles are clean and safe, using them is an eco-friendly choice.

    Creative Ways to Use Roofing Tiles in Your Garden

    Once you have confirmed safety, here are some stylish applications:

    • Raised Bed Edging: Stand clay tiles vertically to create a rustic border for vegetable patches. The terracotta color complements green foliage beautifully.
    • Pathway Steppers: Use large, flat slate or concrete tiles as stepping stones. Embed them in grass or gravel for a natural look.
    • Rock Garden Features: Break larger tiles into irregular shapes to mimic natural rock formations. Use them to create crevices for alpine plants.
    • Bird Bath Base: Stack flat tiles to create a sturdy, elevated platform for a bird bath bowl.
    • Mulch Alternative: Crushed clay tiles (terracotta chips) can be used as a decorative, weed-suppressing mulch. They do not decompose like wood chips, making them a permanent solution.

    FAQ Section

    1. Can I use broken roofing tiles in my compost bin?

    No, it is not recommended. Tiles do not decompose and will contaminate your compost. Additionally, if the tiles contain any hazardous materials, you risk spreading those contaminants throughout your garden when you use the compost. Stick to organic materials for composting.

    2. How do I know if my tiles contain asbestos?

    You cannot tell by looking alone. If your home was built before 1990 (and especially before 1980), assume they might contain asbestos until proven otherwise. Contact a local environmental testing lab or a professional roofing contractor to take a sample for analysis. Do not attempt to test it yourself by breaking the tile.

    3. Will roofing tiles crack in freezing weather?

    Clay and slate are generally frost-resistant if they are dense and low-porosity. However, cheap concrete tiles can absorb water, which expands when frozen, leading to cracking. If you live in a climate with harsh freeze-thaw cycles, ensure your concrete tiles are sealed or choose clay/slate options.

    4. Can I paint roofing tiles for my garden?

    Yes, but use exterior-grade, non-toxic masonry paint. Avoid paints with high VOCs (Volatile Organic Compounds) if the tiles are near vegetable gardens. Painting can also help seal porous concrete tiles, reducing lime leaching.

    5. Do roofing tiles attract pests?

    Unlike wood mulch, roofing tiles do not attract termites or carpenter ants. However, the gaps between tiles can provide shelter for slugs, snails, or spiders. If this is a concern, keep the area around the tiles clear of debris and consider using diatomaceous earth as a natural barrier.

    Conclusion

    So, is it safe to use roofing tiles in your garden? Yes, in most cases, it is a safe, sustainable, and aesthetically pleasing choice—provided you take the necessary precautions. By identifying the material, checking for asbestos in older homes, and preparing the tiles correctly, you can transform waste into a garden feature that lasts for decades.

    Repurposing materials not only saves you money but also contributes to a healthier planet. Whether you are creating a rustic pathway or defining your vegetable beds, reclaimed tiles offer a charm that new materials simply cannot replicate.

    Did you find this guide helpful? Share this article with your fellow gardening enthusiasts on social media to help them upcycle safely! Let’s build greener, safer gardens together.

  • Why Is the Roof of Your Mouth Sore?

    Why Is the Roof of Your Mouth Sore?

    Have you ever taken a bite of hot pizza or crunchy chips, only to wince in pain as your tongue touches the top of your mouth? It is a surprisingly common annoyance that can make eating, drinking, and even speaking uncomfortable. If you are asking yourself, “What cause the roof of your mouth to be sore,” you are not alone, and understanding the root issue is the first step toward finding relief.

    In this guide, we will break down the most frequent culprits behind palate pain, offer practical home remedies, and explain when it is time to seek professional medical advice. Let’s dive in to get your smile back on track.

    Understanding the Anatomy of Palate Pain

    The roof of your mouth, medically known as the palate, is divided into two sections: the hard palate at the front and the soft palate at the back. This area is lined with delicate mucous membranes that are sensitive to temperature, texture, and infection. Because it is constantly exposed to food and drink, it is prone to various types of trauma and irritation.

    When patients ask doctors about palate pain, they are often experiencing inflammation or minor tissue damage. While usually temporary, persistent soreness can signal underlying health issues. According to general medical consensus, identifying whether the pain is acute (sudden) or chronic (long-lasting) helps narrow down the diagnosis significantly.

    Common Causes of a Sore Roof of the Mouth

    To answer the question of what cause the roof of your mouth to be sore, we must look at both external injuries and internal conditions. Here are the primary reasons why your palate might be hurting.

    1. Thermal Burns from Hot Food

    This is the number one cause of sudden palate pain. Foods like hot cheese, coffee, or soup can reach temperatures that instantly scald the delicate skin on the roof of your mouth.

    • Symptoms: Redness, blistering, and a raw, tender feeling.
    • Healing Time: Typically 3–7 days.

    2. Physical Trauma from Crunchy Foods

    Hard foods such as tortilla chips, crusty bread, or popcorn kernels can scratch or abrade the palate. This is often referred to as “pizza palate” when associated with sharp crusts.

    • Symptoms: Localized tenderness, minor bleeding, or a rough patch.
    • Prevention: Chew slowly and allow sharp foods to soften with saliva before swallowing.

    3. Canker Sores (Aphthous Ulcers)

    Canker sores are small, shallow lesions that develop on the soft tissues in your mouth or at the base of your gums. Unlike cold sores, they don’t occur on the surface of your lips and aren’t contagious.

    • Triggers: Stress, minor injury, acidic foods, or vitamin deficiencies.
    • Appearance: White or yellow center with a red border.

    4. Oral Thrush (Candidiasis)

    Oral thrush is a fungal infection caused by an overgrowth of Candida albicans. It is more common in infants, the elderly, and those with compromised immune systems.

    • Symptoms: Creamy white lesions, cotton-like feeling in the mouth, and loss of taste.
    • Risk Factors: Antibiotic use, diabetes, or wearing dentures.

    5. Allergic Reactions

    Food allergies or sensitivities to certain ingredients (such as cinnamon, citrus, or specific preservatives) can cause contact stomatitis, leading to swelling and soreness on the palate.

    People Also Ask: Specific Questions Answered

    Google’s “People Also Ask” feature highlights what users are truly curious about. Here are detailed answers to those specific queries.

    Why Does It Hurt When I Eat Acidic Foods?

    If your palate is already compromised due to a minor burn or scratch, acidic foods like tomatoes, oranges, or vinegar-based dressings will sting intensely. The acid irritates the exposed nerve endings in the damaged tissue. It is best to avoid these foods until the tissue has healed completely.

    Can Dehydration Cause a Sore Palate?

    Yes. Saliva plays a crucial role in protecting the oral mucosa. When you are dehydrated, your mouth becomes dry (xerostomia), reducing the natural lubrication and protective barrier against bacteria and friction. This can lead to a general feeling of soreness or stickiness on the roof of the mouth.

    What Cause The Roof Of Your Mouth To Be Sore

    Is a Sore Roof of the Mouth a Sign of Cancer?

    While it is natural to worry, oral cancer is rare compared to benign causes like burns or canker sores. However, if you have a sore that does not heal within two weeks, bleeds easily, or is accompanied by a lump, you should see a dentist or doctor immediately. Early detection is key for any oral health issue.

    How Do I Know If It’s an Infection?

    Signs of infection include:

    • Pus or discharge.
    • Fever.
    • Swelling that spreads to the face or neck.
    • Persistent bad breath despite brushing.

    If you experience these symptoms, consult a healthcare provider promptly. For more detailed information on oral infections, you can refer to Wikipedia’s page on Oral Health.

    Quick Relief: Step-by-Step Home Remedies

    If you are dealing with a minor burn or irritation, you can manage the pain at home. Follow these steps for effective relief.

    1. Cool Down Immediately Sip cold water or suck on ice chips. Avoid extremely cold items if you have sensitivity, but cool temperatures help reduce inflammation. Aim for water at a refreshing, cool temperature (around 10–15°C).
    2. Salt Water Rinse Mix 1/2 teaspoon of salt into 8 ounces (240 ml) of warm water. Swish this solution around your mouth for 30 seconds and spit it out. This helps clean the area and reduces bacterial load. Repeat 2–3 times a day.
    3. Honey Application Honey has natural antibacterial and wound-healing properties. Apply a small amount of raw honey directly to the sore spot. Let it sit for a few minutes before rinsing gently.
    4. Avoid Irritants Stay away from spicy, acidic, or crunchy foods for at least 48 hours. Stick to soft, bland foods like yogurt, mashed potatoes, or smoothies.
    5. Over-the-Counter Gels Consider using an oral gel containing benzocaine for temporary numbness. Use strictly according to the package instructions.

    Comparison: Burn vs. Canker Sore vs. Thrush

    It can be tricky to distinguish between different causes. Use this table to help identify your issue.

    FeatureThermal BurnCanker SoreOral Thrush
    OnsetImmediate after eating hot foodGradual (1-2 days)Gradual (days to weeks)
    AppearanceRed, blistered, or peeled skinSmall ulcer with white/yellow centerWhite patches, creamy lesions
    Pain LevelSharp, stingingThrobbing, sensitive to touchMild discomfort, burning sensation
    Contagious?NoNoYes (can spread via contact)
    Healing Time3–7 days1–2 weeksRequires treatment

    When to See a Doctor

    While most cases of palate soreness resolve on their own, you should seek professional care if:

    • The pain persists for more than two weeks.
    • You have difficulty swallowing or breathing.
    • You notice unexplained weight loss.
    • You have a high fever accompanying the mouth sore.
    • Over-the-counter remedies provide no relief.

    Dentists and primary care physicians can perform a visual exam and, if necessary, take a swab to test for fungal or bacterial infections.

    FAQ Section

    1. How long does a burnt roof of the mouth take to heal?

    Most minor thermal burns heal within 3 to 7 days. The mouth has a rich blood supply, which promotes faster healing than skin on other parts of the body. Keep the area clean and avoid further irritation to speed up the process.

    2. Can stress cause sores on the roof of my mouth?

    Indirectly, yes. Stress weakens the immune system, making you more susceptible to canker sores and viral outbreaks like cold sores. Additionally, stress can lead to habits like teeth grinding or cheek biting, which may cause accidental trauma to the palate.

    3. Is it safe to pop a blister on the roof of my mouth?

    No. Popping a blister can introduce bacteria into the open wound, leading to infection. It also delays healing. Let the blister rupture naturally or reabsorb into the body. If it is large and painful, see a dentist for safe drainage.

    4. What vitamins help heal mouth sores?

    Deficiencies in Vitamin B12, Iron, Folate, and Zinc are linked to recurrent canker sores. Ensuring a balanced diet or taking supplements (under medical guidance) can help prevent future occurrences.

    5. Can toothpaste cause a sore roof of the mouth?

    Yes, some people are sensitive to sodium lauryl sulfate (SLS), a foaming agent found in many toothpastes. Switching to an SLS-free toothpaste may reduce irritation and frequency of sores.

    Conclusion

    Dealing with a sore roof of the mouth is uncomfortable, but in most cases, it is temporary and manageable. By understanding what cause the roof of your mouth to be sore—whether it’s a simple pizza burn, a canker sore, or a fungal infection—you can take the right steps to heal quickly. Remember to keep your mouth clean, stay hydrated, and avoid irritants while your tissue repairs itself.

    If you found this guide helpful, please share it with friends or family who might be suffering from similar discomfort. A quick share on social media could help someone find the relief they need today!

  • Can You Use Roof Gutters for a T1N Rack?

    Can You Use Roof Gutters for a T1N Rack?

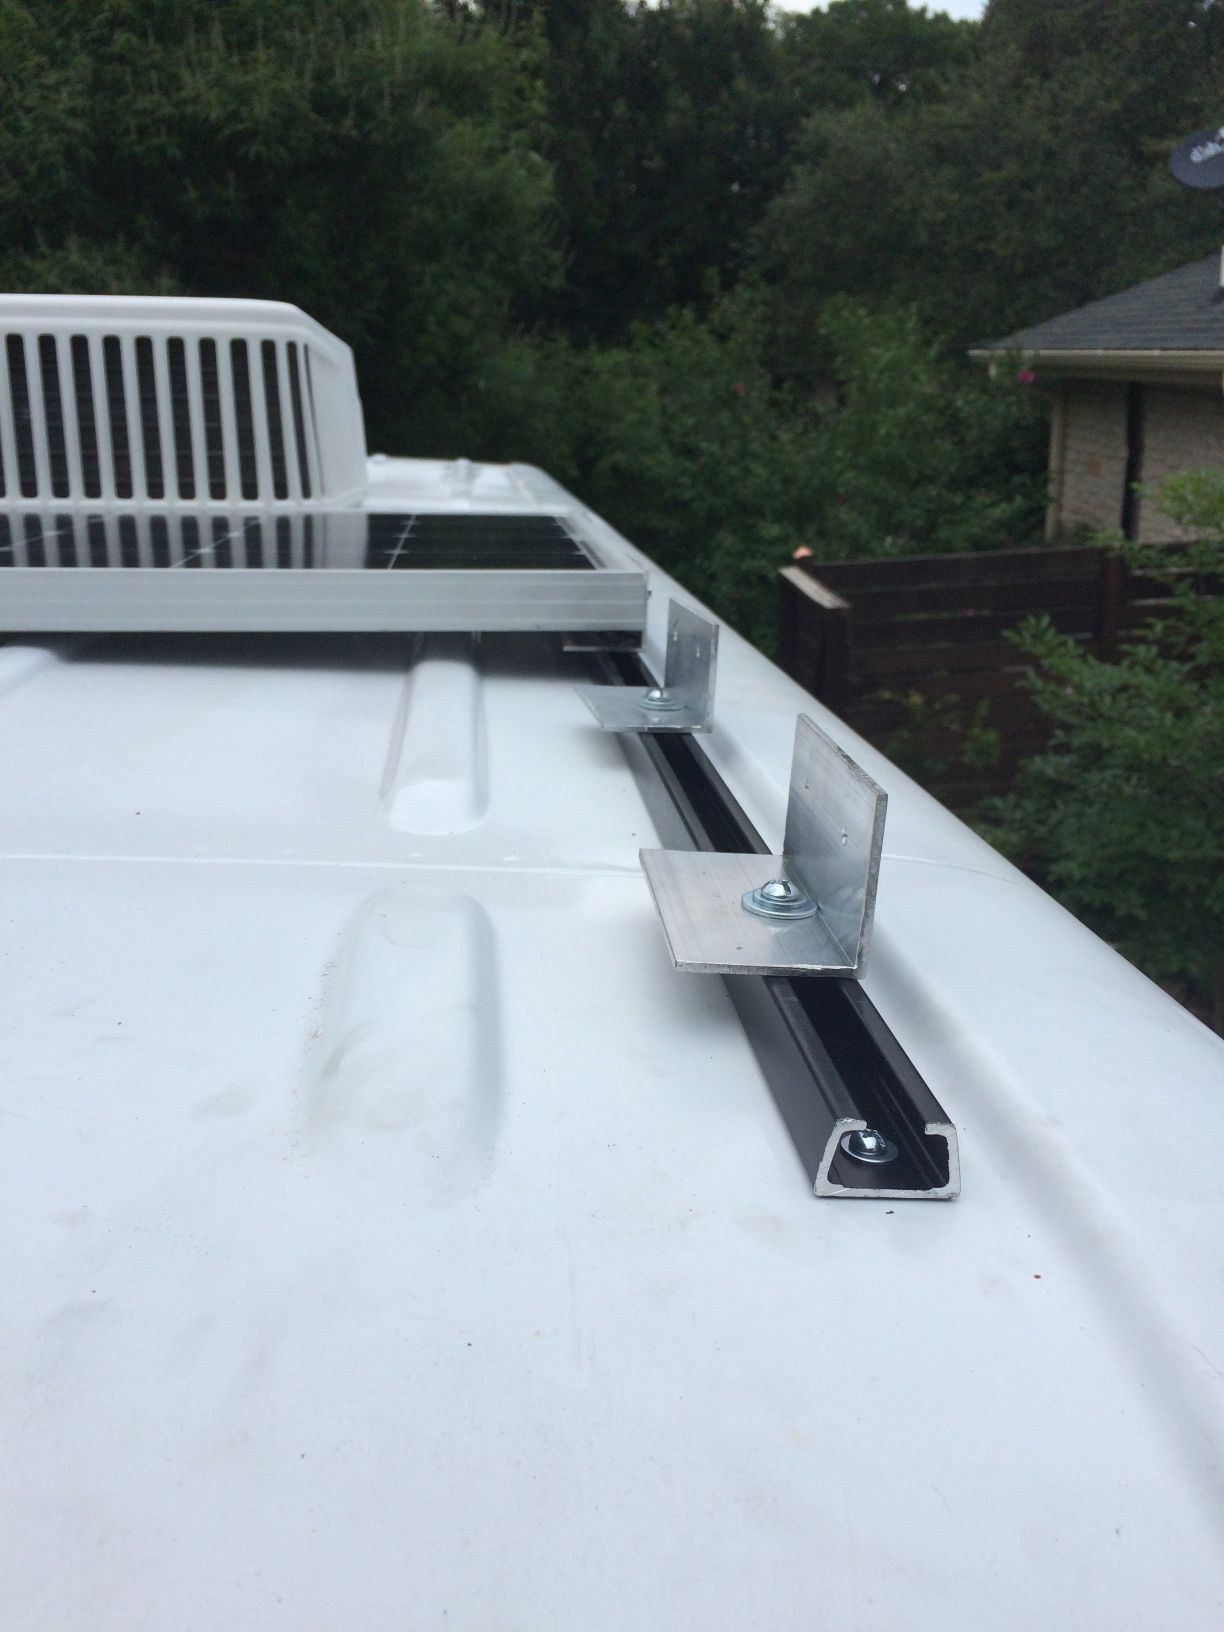
    Have you ever looked at the sleek rain gutters on your Volkswagen T1N (Transporter) and wondered if they could double as sturdy anchor points for your gear? It is a common question among van lifers and outdoor enthusiasts who want to maximize storage without drilling into their vehicle’s roof. The short answer regarding whether T1N can you use roof gutters to mount roof rack is complex: while physically possible with specific adapters, it is generally discouraged by experts due to significant structural and safety risks.

    In this guide, we will dismantle the myths, explore the engineering realities, and provide you with safe, reliable alternatives to keep your adventures secure and your warranty intact.

    Why Do People Want to Use Rain Gutters for Mounting?

    The appeal is obvious. Drilling holes into the roof of a brand-new or well-maintained van feels invasive. Many owners fear leaks, rust, and voided warranties. The rain gutter, which runs along the edge of the roof, seems like a pre-existing, robust metal channel designed to handle weight and weather.

    However, automotive design does not always align with aftermarket accessory needs. To understand why this is a contentious topic, we must look at how these components are engineered.

    The Engineering Mismatch

    Vehicle rain gutters are primarily designed for water management, not structural load-bearing. Their main job is to channel rainwater away from the doors and windows. While they are made of steel or aluminum, they are often thin-gauge metals attached to the body panel with spot welds or adhesives.

    According to general automotive engineering principles, structural integrity relies on the vehicle’s frame and reinforced pillars, not the exterior trim. When you clamp a heavy roof rack onto a gutter, you introduce two dangerous forces:

    1. Vertical Load: The weight of the rack and cargo pushing down.
    2. Leverage/Torque: Wind resistance and dynamic movement while driving create a prying effect that can rip the gutter away from the roof skin.

    Is It Safe to Clamp a Roof Rack to T1N Gutters?

    If you are searching for “T1N can you use roof gutters to mount roof rack“, you are likely looking for a non-invasive solution. However, safety must come first.

    The Risk of Structural Damage

    Most modern vans, including the VW T1N series, have roofs made of relatively thin sheet metal to save weight and improve fuel efficiency. The gutters are often just folded edges of this sheet metal or separate strips welded on.

    • Deformation: Heavy clamps can crush the gutter, leading to poor water drainage and eventual rust.
    • Detachment: In high-wind conditions or during off-road driving, the vibration can loosen clamps. If the gutter tears, you are left with a damaged roof that requires expensive bodywork.
    • Warranty Voidance: Most manufacturers, including Volkswagen, explicitly state that modifications causing damage to body panels are not covered. If a gutter rips off because of an improperly mounted rack, your insurance may deny the claim.

    Expert Insight: Automotive safety engineers consistently recommend using designated mounting points. As noted in general vehicle safety standards documented on Wikipedia, roof racks should be anchored to the vehicle’s structural frame to withstand dynamic loads during emergency maneuvers.

    T1N Can You Use Roof Gutters To Mount Roof Rack
    brackets for the solar panels

    Better Alternatives: How to Properly Mount a Rack on a T1N

    Instead of risking your gutters, consider these proven methods that offer superior safety and stability.

    1. Door Jamb Clamps (Gutterless Mounts)

    If your T1N has a seamless roof without visible gutters, or if you want to avoid the gutter entirely, door jamb mounts are the industry standard.

    • How it works: These racks use rubber-padded claws that grip the top edge of the door frame.
    • Pros: No drilling required; distributes weight across the stronger door pillar structure.
    • Cons: Requires opening doors to install/remove; slight gap between rack and roof.

    2. Fixed Point Mounts (Drill-In)

    For permanent solutions, fixed point mounts are the gold standard.

    • How it works: You identify the reinforced areas of the roof (usually marked by dimples or specified in the owner’s manual) and drill through the inner and outer roof skins to bolt directly into the internal frame.
    • Pros: Maximum strength; aerodynamic profile; no movement.
    • Cons: Permanent modification; requires professional installation to ensure waterproof sealing.

    3. Track Systems

    Some T1N models come with pre-installed tracks or rails.

    • How it works: Slide-in feet lock into existing channels.
    • Pros: Easy to adjust; uses factory-engineered strong points.
    • Cons: Limited to specific rack brands compatible with the track profile.

    Comparison: Gutter Mount vs. Recommended Methods

    To help you decide, here is a quick breakdown of the options.

    FeatureGutter Clamp MountDoor Jamb MountFixed Point (Drilled)
    Installation DifficultyEasyModerateHard (Professional Rec.)
    Structural SafetyLowHighVery High
    Risk of LeaksMedium (if gutter damages)LowLow (if sealed properly)
    AerodynamicsPoor (bulky)GoodExcellent
    ReversibilityYesYesNo
    CostLowModerateHigh

    Step-by-Step: Installing a Safe Door Jamb Rack

    Since we advise against using gutters, here is how to safely install a door-jamb style rack on your T1N.

    1. Clean the Contact Points: Wipe the top edge of your door frames with isopropyl alcohol. Dirt can cause slippage.
    2. Position the Feet: Place the rack feet on the door jambs, ensuring they are centered over the strongest part of the pillar (usually near the hinges or latch).
    3. Adjust Width: Extend the crossbars to match the width of your van. Ensure they are parallel.
    4. Tighten Gradually: Tighten the clamps evenly. Do not overtighten one side before the other. Use a torque wrench if specified by the manufacturer (typically 5–7 Nm).
    5. Check Clearance: Open and close all doors to ensure the rack does not interfere with door movement.
    6. Load Test: Before hitting the highway, place a moderate load on the rack and drive at low speeds to check for shifting or noise.

    Frequently Asked Questions (FAQ)

    1. Can I use soft straps to tie a rack to my T1N gutters?

    While soft straps are less likely to crush the metal than hard clamps, they are not recommended for securing a rigid roof rack. Straps can stretch, loosen over time, and abrade the paint. They are suitable for temporary cargo tying, not for mounting the rack structure itself.

    2. Will using gutter clips void my Volkswagen warranty?

    It depends on the damage. If the clips cause dents, tears, or rust in the gutter area, Volkswagen will likely deny warranty coverage for those specific repairs. Always consult your dealer before modifying attachment points.

    3. What is the weight limit for a T1N roof?

    Most VW Transporter models have a dynamic roof load limit (while driving) of around 75 kg (165 lbs) and a static limit (when parked) of 300–500 kg. Always check your specific owner’s manual, as this varies by model year and roof type.

    4. Are there any adapter kits specifically for T1N gutters?

    Some third-party manufacturers produce “gutter-mounted” feet, but they are rare for modern T1Ns because the gutters are often too narrow or fragile. Most reputable brands (like Thule, Yakima, or Front Runner) have moved away from gutter mounts for newer vans in favor of door-jamb or fixed-point systems.

    5. How do I prevent rust if I have already used gutter clamps?

    If you have already used clamps, inspect the gutters regularly. Apply a silicone-based lubricant to prevent moisture trapping. If you see paint chipping, touch it up immediately with automotive-grade paint to prevent oxidation.

    Conclusion

    So, T1N can you use roof gutters to mount roof rack? Technically, you might find a way to clamp something on there, but it is a gamble with your vehicle’s integrity and your safety. The rain gutters on your VW Transporter are designed for water, not wind resistance and heavy loads.

    By choosing door jamb mounts or fixed-point systems, you ensure that your gear stays secure, your roof remains leak-free, and your van retains its value. Don’t let a cheap shortcut ruin your adventure—or your vehicle.

    Found this guide helpful? Share it with your fellow van life community on social media to help them make safer choices on the road!

  • Does Home Warranty Cover Roof Moss?

    Does Home Warranty Cover Roof Moss?

    Finding green patches spreading across your shingles can be alarming, not just for your home’s curb appeal but for your wallet. Many homeowners panic, asking themselves the critical question: If My Roof Has Moss Does Homeowner Warranty Cover It? The short answer is often complex, but understanding the distinction between maintenance and sudden damage is key to saving money. In this guide, we will break down exactly what is covered, what isn’t, and how you can handle moss before it becomes a costly disaster.

    Understanding the Difference: Warranty vs. Insurance

    Before diving into the specifics of moss coverage, it is vital to clarify a common misconception. Most people confuse homeowners insurance with a home warranty. These are two entirely different products serving different purposes.

    Homeowners insurance typically covers sudden, accidental events like storm damage, fire, or falling trees. A home warranty, on the other hand, is a service contract that covers the repair or replacement of major home systems and appliances due to normal wear and tear.

    However, roofs are a unique category. Standard home warranties rarely cover the entire roof structure. Instead, they might offer limited “roof leak” coverage as an add-on. Even then, the presence of moss introduces a layer of complexity regarding negligence and maintenance.

    Why Moss Is Considered a Maintenance Issue

    Moss does not appear overnight. It grows slowly over months or years due to moisture, shade, and lack of sunlight. Because its growth is gradual, insurance companies and warranty providers classify it as a maintenance issue.

    According to general industry standards, homeowners are expected to perform regular upkeep. If damage results from a failure to maintain the property, coverage is usually denied. This is why knowing if my roof has moss does homeowner warranty cover it often leads to a “no,” unless specific conditions are met.

    Does a Home Warranty Cover Moss Removal?

    The direct answer is generally no. Most standard home warranty contracts explicitly exclude cosmetic issues and routine maintenance tasks. Moss removal falls squarely into the category of routine maintenance.

    What Standard Contracts Say

    When you read the fine print of a typical home warranty provider (such as American Home Shield or Choice Home Warranty), you will find clauses related to “pre-existing conditions” and “lack of maintenance.”

    • Cosmetic Exclusions: Moss is often viewed as a cosmetic blemish until it causes structural damage.
    • Preventative Care: Removing moss is considered preventative care, which is the homeowner’s responsibility, not the warranty company’s.

    However, if the moss has caused a leak and you have purchased a specific Roof Leak Protection add-on, the scenario changes slightly. The warranty might cover the cost to repair the leak itself, but they will likely still refuse to pay for the moss removal or the replacement of the shingles damaged by the moss’s long-term presence.

    Will Homeowners Insurance Pay for Moss Damage?

    If a home warranty won’t touch it, will your homeowners insurance step in? Unfortunately, the outlook is similar but for different reasons.

    Insurance policies are designed to cover sudden and accidental perils. Moss growth is neither sudden nor accidental; it is a gradual process. Therefore, most standard HO-3 policies (the most common type of homeowners insurance) will deny a claim for moss removal or damage caused directly by moss accumulation.

    The “Neglect” Clause

    Insurance adjusters look for signs of neglect. If they see thick layers of moss, they may argue that the homeowner failed to mitigate known risks. Wikipedia provides a detailed overview of how standard home insurance policies define covered perils versus exclusions, highlighting that gradual deterioration is almost universally excluded.

    FeatureHome WarrantyHomeowners Insurance
    Primary FocusSystems & Appliances (Wear & Tear)Sudden Accidents & Disasters
    Moss RemovalNot Covered (Maintenance)Not Covered (Gradual Damage)
    Leak RepairPossibly (with Add-on)Possibly (if sudden cause)
    Shingle ReplacementRarelyOnly if storm/wind damaged

    When Might You Get Coverage?

    While the general rule is exclusion, there are nuanced scenarios where you might receive some financial assistance.

    1. The Leak Connection

    If you have a roof leak endorsement on your home warranty, and the moss has trapped moisture leading to a leak, the warranty might cover the interior water damage repair or the patching of the leak source. However, they will likely deduct the cost of the moss cleanup from your payout or require you to clean it first.

    2. Storm Damage Synergy

    If a heavy storm blows off shingles that were already weakened by moss, your homeowners insurance might cover the storm damage. They will pay for the wind damage, but they may cite “betterment” clauses, meaning they won’t pay to upgrade your roof or fix pre-existing moss rot.

    3. New Roof Warranties

    If your roof is new, it might be under a manufacturer’s warranty or a workmanship warranty from the roofing contractor. Some high-end shingle manufacturers offer algae and moss resistance guarantees. Check your original installation documents. If the shingles were advertised as “algae-resistant” and failed prematurely, the manufacturer might cover the replacement.

    If My Roof Has Moss Does Homeowner Warranty Cover It

    How to Prevent and Remove Moss Safely

    Since coverage is unlikely, the best strategy is proactive management. Here is a step-by-step guide to handling moss without voiding any existing warranties or damaging your roof.

    Step 1: Safety First

    Never walk on a wet, mossy roof. It is incredibly slippery. Use a sturdy ladder with stabilizers and wear rubber-soled shoes. If the roof is steep, hire a professional.

    Step 2: The Gentle Cleaning Method

    Avoid pressure washing, which can strip the granules off asphalt shingles and void manufacturer warranties. Instead, use a chemical treatment.

    1. Mix Solution: Combine 50% water and 50% bleach, or use a specialized roof moss killer containing zinc sulfate.
    2. Apply: Use a garden sprayer to apply the solution evenly over the mossy areas. Do not rinse immediately.
    3. Wait: Let the solution sit for 15–20 minutes. The moss will turn orange or brown, indicating it is dying.
    4. Rinse Gently: Use a low-pressure hose to gently rinse the dead moss away. Work from the top down to avoid forcing water under the shingles.

    Step 3: Install Zinc Strips

    For long-term prevention, install zinc or copper strips near the roof ridge. When it rains, tiny particles of metal wash down the roof, creating an environment where moss cannot grow. This is a cost-effective, one-time investment that protects your roof for years.

    FAQ Section

    1. Can I claim moss removal as a medical necessity if I have allergies?

    No. Home warranties and insurance policies do not cover environmental hazards or health-related maintenance issues. Moss removal remains a structural maintenance task regardless of health impacts.

    2. Does trimming trees help prevent moss?

    Yes. Moss thrives in shade and dampness. Trimming overhanging branches allows more sunlight to hit your roof, drying out the surface and making it less hospitable for moss growth. This is a highly recommended preventative measure.

    3. Will removing moss myself void my roof warranty?

    It can, if you use high-pressure washing or harsh chemicals not approved by the shingle manufacturer. Always check your shingle manufacturer’s maintenance guidelines before applying any treatments. Using soft-wash techniques is usually safe.

    4. How often should I inspect my roof for moss?

    You should inspect your roof at least twice a year, ideally in spring and fall. Look for dark patches or green growth, especially on the north-facing side of your home where sunlight is scarce.

    5. Is there a specific type of home warranty that covers roofs?

    Some premium home warranty plans offer “Roof Leak” coverage as an optional add-on. While this does not cover moss removal, it may cover the repair costs if the moss leads to a leak. Always read the exclusions carefully.

    6. What is the average cost of professional moss removal?

    Professional moss removal typically costs between $300 and $600, depending on the roof size and severity of the growth. While this seems high, it is significantly cheaper than replacing a roof section damaged by rot.

    Conclusion

    So, if my roof has moss does homeowner warranty cover it? In most cases, the answer is no. Both home warranties and homeowners insurance view moss as a maintenance issue resulting from gradual wear and environmental factors, rather than a sudden, covered peril.

    However, this doesn’t mean you are helpless. By understanding the limitations of your coverage, you can take proactive steps to protect your investment. Regular inspections, gentle cleaning methods, and preventive measures like zinc strips can save you thousands in the long run. Don’t wait for a leak to appear; address moss early to keep your home safe and your wallet happy.

    If you found this guide helpful, please share it with your neighbors on social media. Many homeowners are unaware of these distinctions, and spreading knowledge can help everyone protect their homes better!