Have you ever noticed water staining on your fascia boards or peeling paint under your roof’s eaves after a heavy storm? It is a frustrating and costly issue that many homeowners face, often because a small but critical component was overlooked during installation. If you are asking yourself, “Do I need drip edge on all sides of roof,“ the short answer is yes, and understanding why can save your home from significant structural damage.
In this guide, we will break down exactly what drip edge is, why comprehensive coverage is non-negotiable for a healthy roof, and how proper installation protects your investment. Whether you are planning a new roof replacement or inspecting an existing one, this information is vital for maintaining your home’s integrity.
What Is Drip Edge and Why Does It Matter?
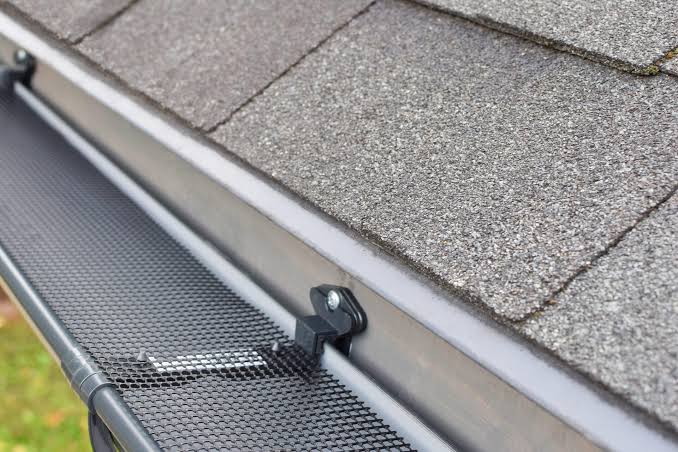
Before diving into the specifics of placement, let’s clarify what we are talking about. Drip edge is a type of metal flashing installed along the edges of your roof. Its primary function is to direct water away from the fascia and into the gutters. Without it, water can wick back under the shingles, rotting the wood decking and damaging the interior of your home.
Think of drip edge as the raincoat for your roof’s edges. Just as a raincoat keeps you dry by shedding water outward, drip edge ensures that rainwater follows a controlled path off the roof and into your gutter system.
The Science Behind Water Movement
Water is persistent. Due to surface tension and wind-driven rain, water does not always fall straight down. It can climb upward under shingles or blow sideways onto your fascia boards. According to basic physics principles regarding fluid dynamics, water seeks the path of least resistance. Without a metal barrier to break this tension, water will seep into the porous wood materials of your roof structure.
For a deeper understanding of how building envelopes manage moisture, you can refer to general construction principles outlined on Wikipedia.
Do I Need Drip Edge On All Sides Of Roof? The Definitive Answer
The question “Do I need drip edge on all sides of roof” is one of the most common inquiries in residential roofing. The definitive answer is yes. You should install drip edge on all four sides of a standard gable or hip roof: the two eaves (bottom horizontal edges) and the two rakes (side sloping edges).
Here is why partial installation is a risky gamble:
- Eaves (Bottom Edges): This is where the majority of water runoff occurs. Drip edge here prevents water from rotting the fascia board and dripping behind the gutters.
- Rakes (Side Edges): While less water flows down the sides, wind-driven rain can easily push water under the shingles on the rake edges. Without drip edge, this moisture can infiltrate the roof deck and cause leaks in your attic or walls.
Industry Standards and Building Codes
Most modern building codes, including the International Residential Code (IRC), require drip edge installation on all eaves and rakes. Ignoring this requirement can not only lead to damage but may also void your roofing manufacturer’s warranty. Major shingle manufacturers like GAF and Owens Corning explicitly state in their installation instructions that drip edge must be used on all perimeter edges to validate their warranty coverage.
Eaves vs. Rakes: Understanding the Difference
To fully grasp why all sides need protection, it helps to distinguish between the two types of roof edges.
| Feature | Eaves | Rakes |
|---|---|---|
| Location | The lower, horizontal edge of the roof. | The sloped, vertical edge on the side of the roof. |
| Water Flow | High volume of direct runoff. | Lower volume, but susceptible to wind-driven rain. |
| Primary Risk | Rotting fascia, gutter overflow, ice dams. | Water infiltration under shingles, siding damage. |
| Drip Edge Role | Directs water into gutters. | Seals the edge to prevent lateral water entry. |
Why Skipping the Rakes Is a Mistake
Some older homes or budget-conscious contractors might skip the rake edges to save money. However, this is a false economy. Wind storms can drive rain horizontally against the side of your house. If the rake edge is not sealed with drip edge, water can bypass the shingles entirely, soaking the roof deck and leading to mold growth inside your attic.
Consequences of Missing Drip Edge
If you choose to ignore the advice and ask, “Do I need drip edge on all sides of roof?” only to decide “no,” you risk several serious issues:
- Wood Rot: The fascia and rafters are typically made of wood. Constant exposure to moisture leads to decay, compromising the structural integrity of the roof overhang.
- Pest Infestation: Rotting wood attracts termites, carpenter ants, and other pests that can spread into your home’s framing.
- Paint Peeling and Staining: Water running down the fascia will cause exterior paint to bubble and peel, requiring frequent and expensive repainting.
- Ice Dam Formation: In colder climates, missing drip edge at the eaves can contribute to ice dams. When snow melts and refreezes at the edge, it can back up under shingles, causing massive interior leaks.
How to Install Drip Edge Correctly
If you are a DIY enthusiast or want to verify your contractor’s work, here is a step-by-step overview of proper installation. Note that local codes may vary, so always check with your local building department.
Step 1: Prepare the Roof Deck
Ensure the roof deck is clean and dry. If you are replacing an old roof, remove any old, rusted flashing.
Step 2: Install Drip Edge on the Eaves First
Start with the bottom edges (eaves). Place the drip edge so that the vertical flange goes up against the fascia board, and the horizontal flange lies flat on the roof deck.
- Tip: The drip edge should extend slightly into the gutter to ensure water drops directly into it, not behind it.
Step 3: Secure the Eave Flashing
Nail the drip edge every 12 to 16 inches using roofing nails. Ensure the nails are driven flush but not too deep to dent the metal.
Step 4: Install Underlayment
Roll out your roofing underlayment (felt or synthetic) over the eave drip edge. This creates a secondary water barrier.
Step 5: Install Drip Edge on the Rakes
Now, move to the side edges (rakes). Place the drip edge over the underlayment. This layering is crucial because it ensures that any water getting under the shingles hits the drip edge and is directed away, rather than getting trapped under the underlayment.
Step 6: Secure and Seal
Nail the rake drip edge securely. Use roofing cement to seal any overlaps or corners to prevent wind uplift.
FAQ Section
1. Can I install drip edge after the shingles are already on?
It is highly recommended to install drip edge before the shingles. Installing it afterward requires lifting shingles, which can break the seal strips and compromise the warranty. If you must add it later, it should be done by a professional to minimize damage.
2. What material is best for drip edge?
Aluminum is the most common choice due to its rust resistance and affordability. Galvanized steel is stronger but can rust over time if the coating is damaged. Copper is premium, durable, and aesthetically pleasing but significantly more expensive.
3. Does drip edge help with ice dams?
Yes, indirectly. By ensuring water flows freely into the gutters and away from the fascia, drip edge reduces the likelihood of water pooling and freezing at the roof’s edge. However, proper attic insulation and ventilation are the primary defenses against ice dams.
4. How much does it cost to install drip edge?
The material cost is relatively low, typically ranging from $1 to $3 per linear foot. Labor costs vary by region, but since it is usually part of a full roof replacement, the incremental cost is minimal compared to the protection it offers.
5. Can I use caulk instead of drip edge?
No. Caulk is not a substitute for mechanical flashing. It will crack, shrink, and fail over time due to UV exposure and temperature fluctuations. Drip edge provides a permanent, physical barrier that caulk cannot match.
Conclusion
So, do you need drip edge on all sides of roof? Absolutely. It is not an optional accessory; it is a fundamental component of a weather-resistant roofing system. Installing drip edge on both the eaves and rakes protects your fascia, prevents wood rot, keeps pests at bay, and ensures your roofing warranty remains valid.
Ignoring this small detail can lead to thousands of dollars in repairs down the line. By investing in proper drip edge installation, you are investing in the longevity and safety of your home.
If you found this guide helpful, please share it with your friends and family on social media. Helping others understand the importance of proper roofing details can save them from costly headaches in the future!