Blog

  • How Many Solar Panels Fit on My Roof?

    How Many Solar Panels Fit on My Roof?

    Have you ever looked at your electricity bill and wondered if your roof could actually power your entire home? It is a common question among homeowners looking to cut costs and reduce their carbon footprint. Determining exactly how many solar panels can I put on my roof is the critical first step in your solar journey, balancing physical space with energy needs.

    Understanding the Basics: Size Matters

    Before we dive into complex calculations, we need to establish a baseline. Not all solar panels are created equal. In the current US market, residential solar panels typically range from 15 to 20 square feet each.

    The most common standard panel size is approximately 65 inches by 39 inches (about 17.5 square feet). However, high-efficiency models might be slightly larger or smaller depending on the manufacturer.

    Why Panel Efficiency Counts

    Efficiency refers to how much sunlight a panel converts into electricity. Higher efficiency panels (20%+) produce more power per square foot. This means if you have a small roof, you might need fewer, more expensive high-efficiency panels to meet your energy goals compared to using standard, lower-efficiency modules.

    Calculating Your Available Roof Space

    The physical dimensions of your roof are the hard limit. You cannot install panels where there is no roof. However, “total roof area” is not the same as “usable solar area.”

    The Usable Area Rule of Thumb

    Professional installers rarely use 100% of your roof surface. Here is why:

    • Obstructions: Chimneys, vents, skylights, and HVAC units take up space.
    • Setbacks: Fire codes often require clear pathways (setbacks) along the edges of the roof and around obstacles for firefighter access.
    • Shading: Areas shaded by trees or neighboring buildings are inefficient for solar production.

    A good rule of thumb is that only 70–80% of your total roof area is usable for solar installations.

    Quick Calculation Example:

    If you have a 1,500 square foot roof:

    1. Calculate usable space: 1,500×0.75=1,1251,500×0.75=1,125 square feet.
    2. Divide by panel size: 1,125/17.5≈641,125/17.5≈64 panels.

    Note: This is a theoretical maximum. Your actual number will depend on your energy needs, which we will discuss next.

    Matching Panels to Your Energy Consumption

    Just because you can fit 64 panels doesn’t mean you should. The goal is to offset your electricity usage, not necessarily to cover every inch of shingle.

    Step 1: Check Your Kilowatt-Hours (kWh)

    Look at your past 12 months of electricity bills. Find your average monthly kWh usage. For example, the average US household uses about 899 kWh per month (according to the U.S. Energy Information Administration).

    Step 2: Determine System Size Needed

    To calculate the system size (in kilowatts, kW) you need: System Size (kW)=Monthly kWh UsageAverage Peak Sun Hours×30System Size (kW)=Average Peak Sun Hours×30Monthly kWh Usage​

    • Peak Sun Hours: This varies by location. Arizona might get 6 hours, while Washington might get 3.5 hours.
    • Example: If you use 900 kWh/month and live in an area with 4.5 peak sun hours: 9004.5×30=900135≈6.67 kW system4.5×30900​=135900​≈6.67 kW system

    Step 3: Convert kW to Number of Panels

    Most residential panels today are between 350 to 400 watts. Let’s assume you choose 400-watt panels. Number of Panels=System Size (Watts)Panel WattageNumber of Panels=Panel WattageSystem Size (Watts)​ 6,670 Watts400 Watts≈17 panels400 Watts6,670 Watts​≈17 panels

    So, while your roof could hold 64 panels, you only need 17 to cover your bill. This leaves plenty of room for future expansion or battery storage integration.
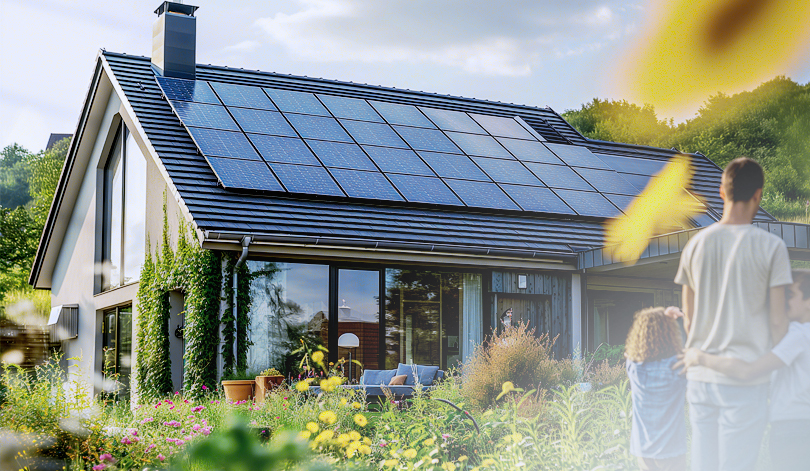
    How Many Solar Panels Can I Put On My Roof

    Roof Orientation and Tilt Impact

    The direction your roof faces significantly impacts how many panels you need to generate the same amount of power.

    Roof DirectionEfficiency ImpactNotes
    South-Facing100% (Baseline)Ideal for maximum sun exposure in the Northern Hemisphere.
    East/West-Facing~80-85%Good for morning/evening production; may require 15-20% more panels.
    North-Facing~60-70%Generally not recommended unless high-efficiency panels are used.

    If your roof is East-West facing, you might need to install more panels to achieve the same energy output as a South-facing roof. This is a crucial factor when asking, “How many solar panels can I put on my roof to meet my specific goals?”

    Structural Integrity and Weight Limits

    Solar panels are not heavy, but they do add load to your structure. A typical solar panel weighs about 40–50 pounds. When you add the racking system, the weight increases to roughly 2–4 pounds per square foot.

    Most modern roofs are built to handle this additional load. However, if your home was built before 1990, or if your roof is nearing the end of its life, you must have a structural engineer or a certified solar installer assess your roof’s integrity.

    Expert Tip: Never install solar panels on a roof that needs replacement within the next 5 years. Removing and reinstalling solar arrays to fix a leak or replace shingles is costly and inconvenient.

    Local Regulations and HOA Rules

    Even if your roof has space and structural strength, local laws may limit your installation.

    1. Permits: Every municipality has different building codes. Some require specific setbacks from the roof edge.
    2. HOA Restrictions: While many states have “solar rights” laws that prevent HOAs from banning solar, they may still dictate aesthetics, such as requiring black-on-black panels or hiding wiring.
    3. Grid Interconnection: Your local utility company may have limits on how much excess energy you can send back to the grid (net metering caps).

    For more detailed information on solar technology standards and safety, you can refer to resources like Wikipedia’s page on Photovoltaics, which provides a broad overview of the scientific principles behind solar energy generation.

    Cost vs. Benefit: Is More Always Better?

    Installing the maximum number of panels possible isn’t always the best financial decision.

    • Diminishing Returns: If you produce far more energy than you use, your utility company might not credit you at the full retail rate.
    • Upfront Cost: More panels mean higher initial investment.
    • Maintenance: Larger systems have more components that could potentially require maintenance.

    It is often smarter to right-size your system to cover 80–100% of your historical usage rather than maximizing roof coverage.

    Frequently Asked Questions (FAQ)

    1. Can I add more solar panels later if I need them?

    Yes, but it depends on your inverter capacity. If you have a string inverter, it may be maxed out. Microinverters or power optimizers make adding panels easier in the future. Always ask your installer about “future-proofing” your system.

    2. Do solar panels damage my roof?

    When installed correctly by licensed professionals, solar panels do not damage your roof. In fact, they can protect the shingles underneath from UV rays and weather elements. Proper flashing and sealing are key to preventing leaks.

    3. What if my roof is too small for the panels I need?

    If your roof space is limited, consider high-efficiency panels (like monocrystalline silicon). They produce more power per square foot. Alternatively, you can supplement with a community solar program or ground-mounted panels if you have yard space.

    4. How much weight can my roof hold?

    Most residential roofs can support an additional load of 20–30 pounds per square foot. Solar arrays typically add only 2–4 pounds per square foot. However, a professional assessment is mandatory to confirm your specific roof’s capacity, especially for older homes.

    5. Does snow affect how many panels I need?

    In snowy regions, solar production drops in winter. You may need to oversize your system slightly (add 10–15% more panels) to compensate for lower winter production and ensure you meet your annual energy goals.

    Conclusion

    Determining how many solar panels can I put on my roof is a blend of physics, geometry, and personal energy habits. While your roof’s physical dimensions set the upper limit, your electricity usage and local sun exposure determine the optimal number.

    By calculating your usable roof space, understanding your kWh needs, and considering orientation, you can design a system that maximizes savings without wasting space. Remember, the goal is energy independence and cost reduction, not just filling up your roof.

    Ready to go solar? Share this guide with friends who are curious about renewable energy, or leave a comment below with your roof’s approximate square footage—we’d love to help you estimate your potential!
  • Metal Roof vs Shingles: Which Is Cheaper?

    Metal Roof vs Shingles: Which Is Cheaper?

    Choosing the right roofing material is one of the most significant financial decisions a homeowner can make. It protects your largest asset from the elements while defining your home’s curb appeal. Many homeowners find themselves stuck in a dilemma, asking the critical question: is it cheaper to get a metal roof or shingles?

    The answer isn’t as simple as looking at the price tag at the hardware store. While asphalt shingles are famously affordable upfront, metal roofing offers durability that can save you money over decades. In this guide, we will dissect the true costs, longevity, and value proposition of both options to help you make an informed choice for your US home.

    Understanding the Upfront Costs: The Initial Price Tag

    When most people ask if metal or shingles are cheaper, they are referring to the installation cost. This is the “sticker shock” phase of any roofing project.

    Asphalt Shingles: The Budget-Friendly Entry Point

    Asphalt shingles remain the most popular roofing material in the United States, primarily due to their low initial cost. They are lightweight, easy to install, and widely available.

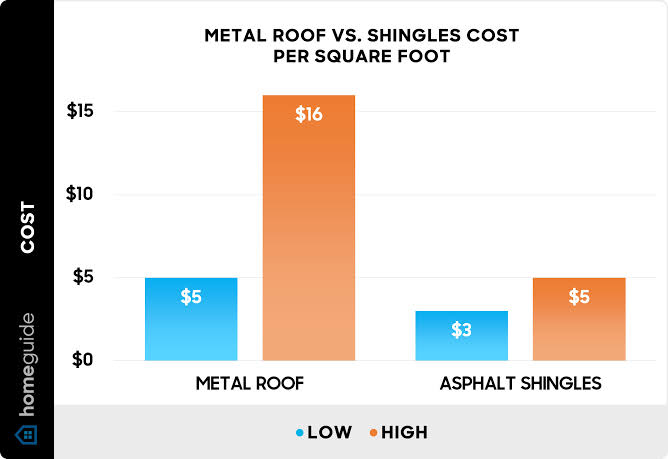
    • Average Cost: Between $3.50 and $5.50 per square foot installed.
    • Total Project Cost: For an average 2,000-square-foot home, you might pay between $7,000 and $11,000.

    The labor required for shingles is less specialized, which keeps contractor fees lower. Additionally, the materials themselves are mass-produced at a very low cost.

    Metal Roofing: The Premium Investment

    Metal roofing (including steel, aluminum, and copper) requires more specialized labor and higher-quality materials. The installation process is more complex, often requiring specific fasteners and underlayment systems to prevent noise and condensation.

    • Average Cost: Between $8.00 and $14.00+ per square foot installed.
    • Total Project Cost: For the same 2,000-square-foot home, expect to pay between $16,000 and $28,000.

    At first glance, metal appears to be two to three times more expensive than shingles. However, this is only half of the financial story. To truly understand which is cheaper, we must look beyond the installation day.

    Long-Term Value: Lifespan and Replacement Cycles

    This is where the math begins to shift in favor of metal. The concept of “cost per year” is far more accurate than “total installation cost.”

    The Lifespan Gap

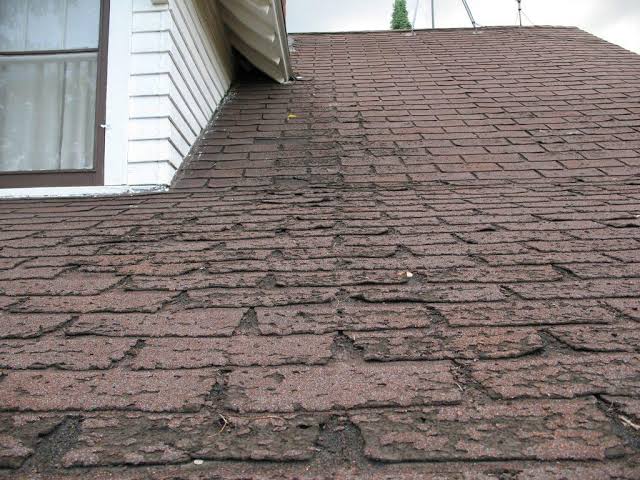
    • Asphalt Shingles: Typically last 15 to 25 years, depending on climate and quality (3-tab vs. architectural). In hotter climates like Arizona or Texas, UV radiation can degrade them faster.
    • Metal Roofs: Can last 40 to 70 years. High-quality standing seam metal roofs often come with warranties of 50 years or more.

    The Replacement Factor

    If you choose asphalt shingles, you will likely need to replace your roof two or even three times during the lifespan of a single metal roof.

    Let’s do a quick calculation over a 50-year period:

    1. Metal Roof: One installation at $20,000. Total cost: $20,000.
    2. Asphalt Shingles: Three installations at $9,000 each (assuming slight inflation adjustments). Total cost: $27,000+.

    In this scenario, the metal roof becomes the cheaper option over time, despite the higher initial barrier. Furthermore, you avoid the hassle, debris, and potential interior damage associated with multiple tear-off projects.

    Is It Cheaper To Get A Metal Roof Or Shingles

    Maintenance and Repair Costs Over Time

    Beyond replacement, daily maintenance plays a role in the total cost of ownership.

    FeatureAsphalt ShinglesMetal Roofing
    Wind DamageProne to lifting/curling in high winds.Highly resistant to wind uplift.
    Impact ResistanceCan crack from hail or falling branches.Dents may occur, but rarely leaks.
    Moss/AlgaeSusceptible; requires cleaning/treatment.Resistant; rain usually cleans it.
    Repair ComplexityEasy to patch individual shingles.Harder to match panels; may require pro.

    While individual shingle repairs are cheap and DIY-friendly, metal roofs generally require less frequent attention. However, if a metal panel is severely damaged, repair costs can be higher because entire sections may need replacement to maintain aesthetic uniformity.

    Energy Efficiency: Hidden Savings on Utility Bills

    One often-overlooked factor in the “cheaper” debate is energy efficiency. Your roof acts as a massive solar collector, influencing your home’s internal temperature.

    Metal roofs reflect solar radiant heat rather than absorbing it. According to studies, this can reduce cooling costs by 10–25%. In states with hot summers, this translates to significant annual savings.

    Asphalt shingles, particularly darker ones, absorb heat. This increases the load on your air conditioning system. While cool-roof shingles exist, standard asphalt does not offer the same reflective properties as bare or coated metal.

    If you live in a warm climate, the monthly utility savings from a metal roof can help offset the higher initial investment within the first decade of ownership.

    Resale Value and Return on Investment (ROI)

    Does a new roof add value to your home? Absolutely. But buyers perceive metal and shingles differently.

    • Curb Appeal: Metal roofs are often associated with premium, modern, or rustic luxury homes. They can significantly boost curb appeal.
    • Buyer Confidence: A home with a 10-year-old metal roof is seen as having “zero future liability” for roofing. A home with a 10-year-old shingle roof is seen as needing replacement soon.

    Real estate data suggests that metal roofing can increase a home’s resale value by 1% to 6%. More importantly, it makes the property easier to sell. Buyers are willing to pay a premium for a home that won’t require a major capital expenditure immediately after purchase.

    For more detailed information on roofing materials and their historical usage, you can refer to Wikipedia’s entry on Roofing.

    Environmental Impact and Sustainability

    For eco-conscious homeowners, “cost” also includes environmental impact.

    • Asphalt Shingles: Are petroleum-based and contribute heavily to landfill waste. Approximately 11 million tons of asphalt shingle waste end up in US landfills annually. Recycling options exist but are not universally available.
    • Metal Roofing: Often contains 25–95% recycled content. At the end of its life, metal is 100% recyclable.

    Choosing metal reduces your carbon footprint and supports a circular economy. While this doesn’t put cash directly in your pocket today, it aligns with growing market trends and potential future green building incentives.

    FAQ: Common Questions About Roofing Costs

    1. Is metal roofing louder than shingles during rain?

    This is a common myth. When installed correctly with solid sheathing and proper insulation, a metal roof is no louder than an asphalt shingle roof. In fact, many homeowners report that the sound of rain on metal is soothing rather than disruptive.

    2. Will a metal roof interfere with my Wi-Fi or cell signal?

    Generally, no. Modern metal roofs do not block signals significantly more than other building materials. If you have issues, they are likely due to other structural factors. However, if you have a weak signal, a signal booster may be helpful regardless of roofing type.

    3. Can I install a metal roof over existing shingles?

    In many cases, yes. This is called a “retrofit” or “overlay.” It saves on tear-off costs and landfill fees. However, local building codes vary, and you must ensure the roof structure can support the additional weight (though metal is lightweight). Always consult a local professional.

    4. Do insurance companies offer discounts for metal roofs?

    Yes, many insurance providers offer discounts ranging from 5% to 15% for metal roofs. This is because metal is fire-resistant and withstands severe weather better than shingles, reducing the insurer’s risk of paying out claims.

    5. What is the cheapest type of metal roofing?

    Corrugated galvanized steel is typically the most affordable metal roofing option. It is durable and functional, though it may not have the sleek aesthetic of standing seam aluminum or zinc. It is a great middle-ground option for budget-conscious buyers wanting metal benefits.

    6. How does hail affect metal roofs compared to shingles?

    Hail can dent metal roofs, but it rarely punctures them. Asphalt shingles, however, can lose granules or crack under hail impact, leading to immediate leaks and reduced lifespan. Most insurance policies cover hail damage for both, but metal is less likely to need a full replacement after a storm.

    Conclusion: Making the Right Choice for Your Wallet

    So, is it cheaper to get a metal roof or shingles?

    If you are looking at the short term (next 1–5 years) and have a tight budget, asphalt shingles are the cheaper option. They allow you to protect your home with minimal upfront cash flow impact.

    However, if you view your home as a long-term investment (15+ years), metal roofing is often the cheaper choice when factoring in longevity, energy savings, insurance discounts, and avoided replacement costs. It transforms a recurring expense into a one-time investment.

    Consider your plans for the home. If you plan to sell in five years, shingles might make more financial sense. If you plan to stay for decades, metal pays for itself.

    Found this guide helpful? Share it with friends who are planning home renovations on Facebook or Pinterest, and let us know in the comments which roofing style you prefer!

  • How Often Should a Roof Be Replaced?

    How Often Should a Roof Be Replaced?

    Most homeowners dread the thought of a major home renovation, but ignoring your roof can lead to catastrophic water damage and costly repairs. If you are staring at curling shingles or worrying about the age of your home, you are likely asking: how often should a roof be replaced on a house? The answer isn’t one-size-fits-all, but understanding the variables can save you thousands of dollars and significant stress.

    In this guide, we will break down the average lifespans of common roofing materials, identify the critical warning signs that indicate it’s time for a replacement, and provide actionable advice on how to extend the life of your current roof. Whether you are buying a new home or maintaining your current one, this information is essential for protecting your biggest investment.

    Understanding Average Roof Lifespans by Material

    The primary factor determining when you need to replace your roof is the material used. Different materials have vastly different durability levels, resistance to weather, and maintenance requirements. Here is a breakdown of what you can expect from the most common roofing types in the United States.

    1. Asphalt Shingles

    Asphalt shingles are the most popular roofing material in North America due to their affordability and ease of installation. However, they also have the shortest lifespan among common materials.

    • 3-Tab Asphalt Shingles: These basic shingles typically last 15 to 20 years. They are prone to wind damage and thermal cracking.
    • Architectural (Dimensional) Shingles: These are thicker and more durable, lasting 25 to 30 years. Many come with warranties up to 30 years, but real-world performance depends heavily on ventilation and climate.

    2. Metal Roofing

    Metal roofs are gaining popularity for their longevity and energy efficiency.

    • Steel or Aluminum: With proper coating and maintenance, these can last 40 to 70 years.
    • Copper or Zinc: These premium metals can last 100+ years, often outliving the structure itself. While the upfront cost is higher, the long-term value is undeniable.

    3. Wood Shakes and Shingles

    Wood offers a rustic, natural aesthetic but requires significant maintenance.

    • Lifespan: Approximately 20 to 30 years.
    • Considerations: Wood is susceptible to mold, moss, and fire. In humid climates, regular treatment is necessary to prevent rot.

    4. Slate and Tile

    These are the heavyweights of roofing, known for extreme durability and classic beauty.

    • Clay/Concrete Tiles: Last 50 to 100 years. They are fire-resistant and excellent for hot climates.
    • Natural Slate: Can last 100+ years. Slate is incredibly durable but heavy, requiring reinforced roof framing.
    MaterialAverage LifespanCost LevelMaintenance Need
    Asphalt (3-Tab)15–20 YearsLowModerate
    Asphalt (Architectural)25–30 YearsMediumLow
    Metal40–70 YearsHighLow
    Wood Shake20–30 YearsMedium-HighHigh
    Slate/Tile50–100+ YearsVery HighLow

    Key Factors That Shorten Roof Life

    Even the highest quality materials can fail prematurely if external factors are not managed. Understanding these variables helps you assess your specific situation accurately.

    Climate and Weather Exposure

    Your geographic location plays a massive role. Homes in areas with frequent hail storms, high winds, or extreme temperature fluctuations will see faster degradation. For instance, UV radiation breaks down the asphalt binders in shingles, causing them to become brittle. Conversely, constant moisture in rainy climates promotes algae and moss growth, which can lift shingles and trap water underneath.

    Ventilation and Insulation

    This is often the most overlooked factor. A poorly ventilated attic traps heat and moisture. In summer, this “bakes” the shingles from underneath, shortening their life. In winter, poor insulation can lead to ice dams, which force water under the shingles. According to building science principles, proper airflow is critical to maintaining the structural integrity of both the roof deck and the covering material. You can read more about the physics of building envelopes on Wikipedia.

    Installation Quality

    A roof is only as good as its installation. Improper nailing patterns, inadequate flashing around chimneys and vents, or poor underlayment installation can lead to leaks within just a few years, regardless of the material quality. Always hire licensed, insured, and highly-reviewed contractors.

    How Often Should A Roof Be Replaced On A House

    Warning Signs It’s Time for a Replacement

    How do you know if it’s time to call a professional? Look for these definitive signs.

    1. Age of the Roof

    If your asphalt shingle roof is approaching the 20-year mark, start planning for a replacement. Even if it looks okay from the ground, the materials may be nearing the end of their functional life.

    2. Curling or Cupping Shingles

    Shingles should lie flat. If you see edges curling upward (cupping) or downward (clawing), the shingles are losing their integrity. This is often caused by moisture imbalance or age.

    3. Missing Granules

    Check your gutters. If you find an accumulation of sand-like granules, your shingles are shedding their protective UV layer. This exposes the asphalt to the sun, accelerating deterioration. Bald spots on the roof are a clear red flag.

    4. Daylight Through the Roof Boards

    If you can see sunlight coming through your attic ceiling, you have gaps in your roof deck. This indicates severe structural issues or missing shingles that require immediate attention.

    5. Sagging Roof Deck

    A sagging roof is a critical structural issue. It usually indicates problems with the rafters or trusses, often due to long-term water damage or excessive weight. This requires immediate professional assessment.

    Step-by-Step: How to Assess Your Roof’s Condition

    You don’t need to be a contractor to perform a basic visual inspection. Follow these steps twice a year, ideally in spring and fall.

    1. Ground-Level Inspection: Use binoculars to walk around your house. Look for missing, cracked, or curled shingles. Check for rusted flashing around chimneys and vents.
    2. Gutter Check: Clean out your gutters and look for granule buildup. Excessive granules suggest the shingles are wearing out.
    3. Attic Inspection: Go into your attic during the day. Look for any pinpoints of light. Check for water stains, dark spots, or mold on the underside of the roof deck. Smell for musty odors, which indicate trapped moisture.
    4. Professional Evaluation: If you notice any of the above issues, or if your roof is over 15 years old, hire a certified roof inspector. They can provide a detailed report on the remaining life expectancy of your roof.

    Frequently Asked Questions (FAQ)

    1. Can I replace just part of my roof?

    While technically possible, it is generally not recommended. Matching new shingles to old ones is difficult due to fading and weathering. Furthermore, mixing old and new materials can create uneven surfaces that are prone to leaks. Most professionals recommend a full replacement for consistency and warranty purposes.

    2. Does homeowners insurance cover roof replacement?

    Insurance typically covers roof replacement if the damage is caused by a sudden, covered peril like a storm, hail, or falling tree. However, they usually do not cover wear and tear, age-related deterioration, or lack of maintenance. Always review your policy specifics.

    3. How much does a roof replacement cost?

    Costs vary widely based on size, material, and location. For an average 2,000-square-foot home, an asphalt shingle roof might cost between $8,000 and $15,000. Metal roofs can range from $15,000 to $30,000+, while slate and tile can exceed $50,000. Always get at least three quotes from reputable contractors.

    4. How can I extend the life of my roof?

    Regular maintenance is key. Keep gutters clean to prevent water backup. Trim overhanging tree branches to reduce debris and shade (which promotes moss). Ensure your attic is properly ventilated and insulated. Schedule professional inspections every 2–3 years.

    5. What is the best time of year to replace a roof?

    Late spring to early fall is ideal because roofing materials (especially asphalt) require warm temperatures to seal properly. However, reputable contractors work year-round. Avoid replacing roofs during heavy rain or extreme cold if possible, as it can affect the quality of the installation.

    Conclusion

    Knowing how often should a roof be replaced on a house is crucial for maintaining your home’s value and safety. While asphalt shingles typically last 20–30 years, metal, slate, and tile options offer significantly longer lifespans. By recognizing the warning signs—such as curling shingles, granule loss, and attic leaks—you can plan for replacement before minor issues become major disasters.

    Remember, proactive maintenance and professional inspections are your best tools for extending your roof’s life. Don’t wait for a leak to appear; take action today to protect your home.

    Found this guide helpful? Share it with your friends on social media to help them protect their homes too!

  • How to Add a Front Porch Roof to Your Home

    How to Add a Front Porch Roof to Your Home

    Adding a covered entryway is one of the most impactful ways to enhance your home’s exterior, yet many homeowners hesitate due to perceived complexity. You want that welcoming shelter from rain and sun, but you are unsure where to start or how to integrate it with your current structure. This guide simplifies the process, showing you exactly how to add a front porch roof to existing house frameworks without compromising structural integrity or breaking the bank.

    Why Install a Front Porch Roof?

    Before diving into the nuts and bolts, it is essential to understand the value proposition. A front porch roof is not just an aesthetic upgrade; it is a functional investment. According to recent real estate trends, homes with covered porches often see a higher return on investment (ROI) because they expand usable living space.

    Beyond property value, a roof protects your front door from weather damage, reduces energy costs by shading entryways, and provides a cozy spot for morning coffee. However, the key to success lies in proper planning and execution.

    Understanding Structural Requirements and Permits

    The first step in learning how to add a front porch roof to existing house walls is navigating the legal and structural landscape. In the United States, building codes vary significantly by state and municipality. Ignoring these can lead to costly fines or forced removal of your new structure.

    Do You Need a Permit?

    In most US jurisdictions, any permanent structure attached to your home requires a building permit. This ensures that the roof can withstand local wind loads, snow weights, and seismic activity.

    • Check Local Codes: Visit your city’s building department website.
    • HOA Rules: If you live in a community with a Homeowners Association, review their architectural guidelines.
    • Utility Lines: Ensure no power lines interfere with the proposed roof height.

    Load-Bearing Considerations

    Your existing house wall may not be designed to hold the extra weight of a roof. You must determine if the attachment point is load-bearing. If you are attaching the roof to a non-load-bearing wall, you will need to install additional support columns or reinforce the framing. For detailed definitions of structural terms, you can refer to Wikipedia’s article on Load-bearing walls to better understand the engineering principles involved.

    Choosing the Right Roof Style

    Not all roofs fit every home. The style you choose should complement your home’s architecture while meeting your budget.

    Roof StyleBest ForProsCons
    Gable RoofTraditional/Craftsman HomesExcellent water runoff, classic lookRequires more material, complex framing
    Hip RoofModern/Ranch StylesStable in high winds, elegant appearanceMore expensive, less headroom at edges
    Shed RoofContemporary/Budget ProjectsSimple construction, cost-effectiveCan look too plain, potential drainage issues if pitch is low
    Flat RoofModern MinimalistEasy to build, usable space aboveHigher maintenance, prone to leaking if not sealed properly

    For most DIYers adding a roof to an existing facade, a shed roof (single-slope) is the most manageable option. It attaches directly to the house wall and slopes downward toward the front columns.

    How To Add A Front Porch Roof To Existing House

    Step-by-Step Guide: How to Add a Front Porch Roof

    This section breaks down the physical construction process. Please note that this is a general guide. Always consult a structural engineer for specific load calculations.

    Step 1: Planning and Measurement

    Measure the width of your desired porch. Standard depths range from 6 to 10 feet. Mark the height where the roof will attach to the house. A minimum slope of 1/4 inch per foot is recommended for proper water drainage.

    Step 2: Installing the Ledger Board

    The ledger board is the horizontal beam that attaches to your house. This is the most critical structural component.

    1. Remove siding where the board will sit to expose the sheathing and studs.
    2. Use a level to mark a straight line across the studs.
    3. Secure a pressure-treated 2×8 or 2×10 lumber board directly into the wall studs using lag screws or through-bolts. Do not rely on nails alone.

    Step 3: Setting the Support Posts

    Determine the location of your front columns. These typically align with the outer edge of the porch floor.

    1. Dig post holes below the frost line (varies by region, often 24–48 inches deep).
    2. Pour concrete footings and insert post anchors.
    3. Cut pressure-treated 4×4 or 6×6 posts to height. The top of the post should meet the outer edge of your future rafters.

    Step 4: Framing the Rafters

    Rafters connect the ledger board to the front beam (which sits atop your posts).

    1. Cut rafters from 2×6 or 2×8 lumber, depending on the span.
    2. Use metal rafter ties to secure one end to the ledger board and the other to the front header beam.
    3. Space rafters 16 inches or 24 inches on center, consistent with your local code.

    Step 5: Adding Sheathing and Underlayment

    Once the frame is secure:

    1. Nail plywood or OSB sheathing over the rafters.
    2. Apply a waterproof roofing underlayment (felt paper or synthetic membrane). This layer is crucial for preventing leaks where the new roof meets the old house.

    Step 6: Installing Roofing Material

    Match your new roof to your existing home if possible. Asphalt shingles are the most common choice for US homes due to their affordability and ease of installation.

    • Start from the bottom edge and work your way up.
    • Use drip edge flashing along the eaves.
    • Install step flashing where the new roof intersects with the house wall to direct water away from the joint.

    Common Mistakes to Avoid

    Even experienced DIYers can stumble. Here are the most frequent errors when figuring out how to add a front porch roof to existing house structures:

    • Ignoring Water Proofing: Failing to install proper flashing between the new roof and the house wall is the number one cause of leaks. Water will seep behind the siding and rot the framing.
    • Incorrect Slope: A flat-looking roof needs a minimum pitch. If the slope is too shallow, water will pool, leading to premature deterioration and ice dams in winter.
    • Undersized Lumber: Using 2x4s for long spans can cause sagging. Always check span tables for your specific lumber grade and roof load.

    Maintenance Tips for Longevity

    Once your project is complete, maintenance is key to preserving your investment.

    • Clean Gutters: If you install gutters, clean them twice a year to prevent overflow.
    • Inspect Flashing: Check the sealant around the house connection annually. Re-caulk if you see cracks.
    • Paint or Stain: Protect wooden posts and beams from UV damage and moisture by applying a fresh coat of sealant every 2–3 years.

    FAQ Section

    1. How much does it cost to add a front porch roof?

    Costs vary widely based on size and materials. On average, homeowners in the US spend between $3,000 and $8,000 for a basic covered porch roof. High-end materials like cedar or metal can push this figure higher.

    2. Can I attach the roof to my brick house?

    Yes, but it requires special masonry anchors. You cannot simply screw into brick. You must drill into the mortar joints or use wedge anchors designed for masonry. It is often easier to attach to the wooden framing behind the brick veneer if accessible.

    3. Do I need a professional roofer?

    While framing can be a DIY project, installing the final roofing material (shingles, metal, tile) is best left to professionals if you are uncomfortable with heights or waterproofing techniques. Improper installation can void warranties and cause leaks.

    4. What is the best roofing material for a porch?

    Asphalt shingles are cost-effective and match most homes. Metal roofing is durable and sheds snow well but can be noisy during rain. Polycarbonate panels are great for letting light in but offer less insulation.

    5. How long does the construction take?

    For a skilled DIYer, framing and sheathing might take a weekend. Adding roofing materials and finishing touches can take another 2–3 days. Weather permitting, the entire project can be completed in under a week.

    6. Will adding a porch roof increase my home insurance premium?

    Generally, no. In fact, it might lower it slightly by protecting your entryway. However, you must notify your insurance provider of any structural changes to ensure you remain covered.

    Conclusion

    Learning how to add a front porch roof to existing house structures is a rewarding journey that blends creativity with practical construction skills. By following proper permitting procedures, choosing the right materials, and ensuring watertight connections, you can create a beautiful, functional space that enhances your home’s curb appeal and value.

    Remember, safety comes first. If at any point you feel unsure about the structural integrity of your design, consult a licensed contractor or structural engineer.

    Did you find this guide helpful? Share it with your friends on Facebook or Pinterest who might be planning their own home improvement projects! Let’s build better homes together.

  • How To Pay For A New Roof With No Money

    How To Pay For A New Roof With No Money

    Facing a leaking or damaged roof is one of the most stressful situations a homeowner can encounter. It threatens the safety of your family and the structural integrity of your most valuable asset, yet finding the funds often feels impossible when your savings are depleted. If you are wondering how to pay for a new roof with no money, you are not alone, and there are viable pathways to secure the repairs you need without upfront cash.


    Understanding the Urgency and Your Options

    A compromised roof is not just an aesthetic issue; it is a critical failure point for your home. Water intrusion can lead to mold growth, electrical hazards, and significant depreciation in property value. According to industry data, ignoring minor roof damage can increase repair costs by up to 300% within a year due to secondary structural damage.

    However, the barrier to entry—cost—is real. The average cost of a new roof in the United States ranges from $5,000 to $15,000, depending on materials and size. For many, this sum is unattainable in liquid cash. The good news is that “no money down” does not mean “no solution.” It means shifting from immediate cash payment to strategic financial leveraging.

    Can You Really Get a New Roof With Zero Down?

    The short answer is yes. Many roofing contractors and financial institutions offer programs specifically designed for homeowners who lack immediate liquidity but have steady income or equity. The key is understanding which avenue fits your financial profile.

    1. Home Equity Loans and HELOCs

    If you have owned your home for several years, you likely have built up equity. A Home Equity Line of Credit (HELOC) allows you to borrow against this equity.

    • How it works: You use your home as collateral.
    • Pros: Lower interest rates compared to personal loans; interest may be tax-deductible if used for home improvement.
    • Cons: Your home is at risk if you default; requires closing costs and appraisal.

    2. Personal Loans for Home Improvement

    Unsecured personal loans are a popular option for those who do not want to put their home at risk or do not have sufficient equity.

    • How it works: A bank or online lender provides a lump sum based on your credit score and income.
    • Pros: Fast funding (often within 24–48 hours); no collateral required.
    • Cons: Higher interest rates for lower credit scores; strict debt-to-income ratio requirements.

    3. Contractor Financing Programs

    Many reputable roofing companies partner with third-party lenders like GreenSky or EnerBank to offer in-house financing.

    • How it works: You apply through the roofer, and if approved, the lender pays the contractor directly.
    • Pros: Often offers promotional periods with 0% interest for 6–12 months; streamlined application process.
    • Cons: High penalty fees if the promotional period is missed; potentially higher standard APRs after the promo ends.

    Leveraging Insurance Claims

    Before seeking loans, determine if your roof damage is covered by insurance. This is the most effective way to get a new roof with “no money” out of pocket, aside from your deductible.

    Step-by-Step Guide to Filing a Claim:

    1. Document the Damage: Take clear, high-resolution photos of the damage from multiple angles. Include date stamps if possible.
    2. Review Your Policy: Check for “Actual Cash Value” vs. “Replacement Cost Value.” Replacement Cost is preferable as it covers the full cost of new materials.
    3. Hire a Public Adjuster (Optional): If the claim is complex, a public adjuster can negotiate with the insurance company on your behalf, though they take a percentage of the settlement.
    4. File the Claim: Contact your insurer immediately. Delays can lead to denials based on “neglect.”
    5. Get Multiple Estimates: Insurance companies will send an adjuster, but having independent contractor estimates strengthens your case.

    Note: Most policies do not cover wear and tear. The damage must be sudden and accidental (e.g., storm, hail, fallen tree). For more details on standard home insurance coverage, you can refer to Wikipedia’s page on Home Insurance.

    How To Pay For A New Roof With No Money

    Government Grants and Assistance Programs

    While federal grants for individual home repairs are rare, there are specific programs for low-income homeowners, veterans, and rural residents.

    • USDA Section 504 Home Repair Program: Provides loans and grants to very-low-income homeowners in rural areas to repair, improve, or modernize their homes. Grants are available for elderly homeowners to remove health and safety hazards.
    • HUD Title I Property Improvement Loan Insurance: This program insures loans made by private lenders for home improvements. It doesn’t provide the money directly but makes lenders more willing to offer favorable terms to borrowers with lower credit scores.
    • Local State and Municipal Programs: Many states have energy efficiency programs that offer rebates or low-interest loans for roofing if you upgrade to energy-efficient materials (like cool roofs). Check your state’s energy office website for local opportunities.

    Comparison: Financing Options at a Glance

    FeatureHome Equity LoanPersonal LoanContractor FinancingInsurance Claim
    Upfront CostLow (Closing Costs)NoneNoneDeductible Only
    Interest RateLow (Secured)Medium/HighVariable (Promo Available)N/A
    Credit CheckRequiredRequiredRequiredNot Applicable
    RiskHome ForeclosureCredit Score ImpactHigh APR laterClaim Denial
    Best ForHigh Equity OwnersQuick Cash NeedsShort-term RepaymentStorm/Accident Damage

    Steps to Secure Funding When You Have Bad Credit

    Having a low credit score does not disqualify you from getting a new roof, but it limits your options. Here is how to navigate this challenge:

    1. Seek Co-Signers: If you have a family member with good credit, they may co-sign a loan, significantly lowering the interest rate.
    2. Look for “No Credit Check” Local Programs: Some non-profit organizations and community development blocks offer assistance based on income rather than credit history.
    3. Negotiate Payment Plans: Some smaller, local roofing contractors may agree to a phased payment plan (e.g., 30% start, 40% mid-way, 30% completion) without involving a bank, though this is becoming rarer.
    4. Improve Your Score Quickly: Pay down small credit card balances before applying. Even a 20-point increase in your FICO score can change your loan eligibility.

    Avoiding Scams and Predatory Lenders

    When you are desperate for a roof, you are a target for scams. Protect yourself by following these rules:

    • Never Pay Full Upfront: Legitimate contractors never ask for 100% payment before work begins. A deposit of 10–30% is standard.
    • Verify Licensing: Check the contractor’s license with your state’s licensing board.
    • Get Everything in Writing: Verbal promises about financing terms are worthless. Ensure all interest rates, fees, and payment schedules are in the contract.
    • Beware of “Door Knockers”: After storms, scammers often go door-to-door offering “leftover materials” deals. These are almost always fraudulent.

    FAQ Section

    Q1: Can I get a new roof if I have bad credit? Yes, but your options are limited. You may need to look into contractor-specific financing which sometimes has more flexible criteria, or seek a co-signer. Interest rates will be higher, so focus on paying off the balance quickly.

    Q2: Does homeowners insurance cover a new roof due to age? Generally, no. Insurance covers sudden and accidental damage, not gradual wear and tear or old age. If your roof is simply old, you will need to rely on financing or savings.

    Q3: What is the cheapest way to replace a roof? Asphalt shingles are typically the most affordable material. Additionally, obtaining multiple quotes and timing your replacement during the off-season (late fall or winter, weather permitting) can result in lower labor costs.

    Q4: Are there tax credits for replacing a roof? Standard roof replacements are not tax-deductible. However, if you install energy-efficient roofing materials that meet specific IRS criteria, you may qualify for residential energy efficiency tax credits. Always consult a tax professional.

    Q5: How long does contractor financing approval take? It varies, but many specialized roofing lenders offer instant or same-day approvals. The entire process from application to funding can often be completed within 24 to 72 hours.

    Conclusion

    Learning how to pay for a new roof with no money is about leveraging the resources you already have: your home’s equity, your insurance policy, or specialized financing tools. While the situation is stressful, taking proactive steps to explore HELOCs, insurance claims, and government assistance can provide a clear path forward.

    Do not let financial constraints compromise your home’s safety. Evaluate your options, compare lenders, and choose the solution that best fits your long-term financial health. If you found this guide helpful, please share it on social media to help other homeowners navigate this challenging process.

  • How to Build a Roof Deck on a Flat Roof

    How to Build a Roof Deck on a Flat Roof

    Have you ever looked out your window at your unused flat roof and imagined sipping coffee there while watching the sunrise? You are not alone. Many homeowners in urban areas sit on potential outdoor oases that remain neglected due to uncertainty about construction complexity. Learning how to build a roof deck on a flat roof can transform this dead space into a vibrant extension of your living area, adding significant value and enjoyment to your home.

    However, building above your head is vastly different from building on the ground. It requires precision, respect for structural limits, and an understanding of weatherproofing. This guide will walk you through the essential steps, safety considerations, and material choices to ensure your project is both beautiful and durable.

    Is Your Roof Structurally Ready for a Deck?

    Before you buy a single plank of wood or composite board, you must answer the most critical question: Can my roof hold the weight?

    A standard residential flat roof is designed to support “dead loads” (the roof itself) and minimal “live loads” (snow or maintenance workers). It is rarely engineered to support the dynamic load of people, furniture, planters, and decking materials.

    The Weight Calculation

    According to general engineering standards, a residential roof might be rated for 20 pounds per square foot (psf). A proper deck, however, often requires a capacity of 60 to 100 psf.

    • Dead Load of Decking: Approximately 5–10 psf (depending on material).
    • Live Load (People/Furniture): Approximately 40–60 psf.

    Action Step: Hire a licensed structural engineer. Do not skip this. They will inspect your joists, beams, and columns. If reinforcement is needed, they will provide a stamped plan. This document is also crucial for obtaining building permits.

    Expert Insight: Ignoring structural integrity is the number one cause of catastrophic roof deck failures. As noted in structural engineering literature, load distribution is key to maintaining the Structural integrity of any building modification.

    What Permits and Codes Do You Need?

    Building a roof deck is not a “fly under the radar” project. Most municipalities in the US require strict adherence to local building codes, particularly the International Residential Code (IRC).

    Key Regulatory Considerations

    1. Building Permit: Required for structural changes. Submit your engineer’s plans here.
    2. Zoning Laws: Check setback requirements. Some cities prohibit decks that overlook neighbors’ windows for privacy reasons.
    3. Fire Codes: If you live in an attached multi-unit building, fire ratings for materials may be stricter.

    Failure to permit your work can lead to hefty fines, forced removal of the deck, and issues when selling your home. Always check with your local building department first.

    How To Build A Roof Deck On A Flat Roof

    Choosing the Right Materials for Longevity

    Your material choice dictates maintenance, cost, and lifespan. Since the deck is exposed to harsh sun, rain, and wind, durability is paramount.

    MaterialProsConsEstimated Cost (per sq. ft.)
    CompositeLow maintenance, rot-resistant, uniform colorHigher upfront cost, can get hot in sun$30 – $45
    Pressure-Treated WoodAffordable, widely availableRequires annual sealing, prone to warping$15 – $25
    Tropical Hardwood (Ipe)Naturally rot-resistant, beautiful grainExpensive, hard to cut, needs oiling$40 – $60
    Aluminum/Steel TilesFireproof, lightweight, modern lookIndustrial aesthetic, noisy in rain$50 – $70

    Recommendation: For most DIYers, composite decking offers the best balance of ease of installation and long-term low maintenance. It does not splinter, fade, or rot, which is crucial when repairs are difficult to access.

    Step-by-Step: How to Build the Framework

    Once you have approval and materials, it is time to build. The goal is to create a stable frame without penetrating the waterproof membrane unnecessarily.

    Step 1: Protect the Waterproof Membrane

    Your flat roof likely has an EPDM, TPO, or modified bitumen membrane. Never drill directly into this layer without proper flashing.

    • Lay down protective mats or rubber pavers where your posts will sit.
    • If you must anchor into the roof structure, use pre-fabricated pedestal systems designed for flat roofs. These distribute weight and seal penetrations professionally.

    Step 2: Install the Joist System

    Use pressure-treated 2×6 or 2×8 lumber for your joists.

    • Spacing: Place joists 16 inches on center (OC) for standard decking. If using composite, check the manufacturer’s spec; some allow 24 inches OC.
    • Leveling: Flat roofs often have a slight slope (1/4 inch per foot) for drainage. Use adjustable plastic pedestals or shims to ensure your deck surface is perfectly level, while maintaining the roof’s underlying drainage slope.

    Step 3: Secure the Frame

    Attach joists to rim boards or beams using galvanized steel joist hangers. Ensure all hardware is stainless steel or hot-dip galvanized to prevent rust stains on your roof.

    How to Ensure Proper Drainage and Ventilation

    Water is the enemy of flat roof decks. Trapped water leads to rot, mold, and membrane failure.

    The Gap Rule

    When laying your decking boards, leave a 1/4-inch gap between each board. This allows rainwater to drain through the deck onto the roof membrane below, where it can flow to the drains.

    Ventilation Space

    Ensure there is at least a 1.5-inch air gap between the bottom of your joists and the roof surface. This airflow prevents heat buildup and moisture accumulation, which can degrade the roof membrane over time. You can achieve this using adjustable pedestal supports rather than direct wood-to-roof contact.

    Finishing Touches: Railings and Lighting

    Safety and ambiance complete the project.

    Railings are Mandatory

    If your deck is more than 30 inches above the ground (or adjacent surface), railings are required by code.

    • Height: Typically 36 to 42 inches high.
    • Baluster Spacing: No more than 4 inches apart to prevent children from slipping through.
    • Material: Glass panels offer unobstructed views, while aluminum or wood matches traditional styles.

    Lighting Integration

    Plan your lighting during the framing stage. Run conduit for low-voltage LED strip lights under the railing or recessed lights in the deck boards. This enhances safety at night and creates a cozy atmosphere.

    Frequently Asked Questions (FAQ)

    1. Can I build a roof deck myself, or do I need a contractor?

    While a skilled DIYer can handle the decking installation, the structural assessment and waterproofing penetrations should ideally involve professionals. If your engineer requires significant structural reinforcement, hire a licensed contractor.

    2. How much does it cost to build a roof deck on a flat roof?

    Costs vary widely based on size and materials. On average, expect to pay between $100 and $200 per square foot. This includes structural engineering, permits, high-quality materials, and labor if hired. A small 10×10 deck could start around $10,000.

    3. Will a roof deck leak?

    Not if installed correctly. The key is using non-penetrating support systems or properly flashed penetrations. Never screw directly into the roof membrane without a certified flashing kit. Regular inspection of the roof drains is also essential to prevent water pooling.

    4. What is the best flooring for a flat roof deck?

    Composite decking is highly recommended for its durability and low maintenance. Aluminum tiles are excellent for fire resistance and weight savings. Avoid solid wood unless you are committed to annual maintenance, as trapped moisture can cause rapid decay.

    5. How do I handle wind on a high roof deck?

    Wind uplift is a serious concern. Ensure your railing posts are securely anchored to the structural frame, not just the decking boards. Use wind-resistant furniture and consider installing windbreaks or glass panels if you live in a high-wind zone.

    Conclusion

    Learning how to build a roof deck on a flat roof is a rewarding journey that blends engineering precision with creative design. By prioritizing structural safety, respecting waterproofing integrity, and choosing durable materials, you can create an outdoor sanctuary that lasts for decades.

    Remember, the foundation of a great deck is not just the wood or composite—it’s the planning. Invest in a structural engineer, secure your permits, and take your time with the waterproofing details.

    Ready to start your transformation? Share this guide with your partner or friends who are dreaming of their own rooftop retreat. Don’t forget to pin this article to your Pinterest board for future reference!

  • Fortified Roof Cost: Price Per Sq Ft Guide

    Fortified Roof Cost: Price Per Sq Ft Guide

    Have you ever looked at your ceiling during a storm and wondered if it would hold up against the next big hurricane? For millions of homeowners in hurricane-prone regions like Florida, Texas, and the Gulf Coast, this anxiety is a daily reality. Understanding how much does a fortified roof cost per square foot is the first step toward securing your home and potentially lowering your insurance premiums.

    In this guide, we will break down the exact costs, explain the different levels of fortification, and help you determine if this investment is right for your budget and safety needs.

    What Is the Average Cost of a Fortified Roof?

    When planning your budget, it is crucial to understand that “fortified” is not a single product but a construction standard. The cost varies significantly based on the level of certification you choose. Generally, homeowners can expect to pay between $15 and $30+ per square foot for a fully fortified roofing system, compared to $8–$12 for standard asphalt shingles.

    However, this price tag includes more than just shingles. It encompasses enhanced underlayment, sealed roof decks, and reinforced attachment methods. According to industry data from 2025-2026, the premium for fortification typically adds 20% to 40% to the total cost of a standard roof replacement.

    Breakdown by Fortification Level

    The Insurance Institute for Business & Home Safety (IBHS) defines three levels of the FORTIFIED Standard™. Here is what you can expect to pay per square foot for each:

    Fortification LevelEstimated Cost Per Sq. Ft.Key Features
    FORTIFIED Bronze$12 – $16Enhanced shingle attachment, basic water barrier.
    FORTIFIED Silver$16 – $22Sealed roof deck, improved flashing, impact-resistant shingles.
    FORTIFIED Gold$22 – $30+Full structural reinforcement, highest wind/uplift resistance, premium materials.

    Note: Prices vary by region, material availability, and labor rates in your specific zip code.

    Why Does a Fortified Roof Cost More Per Square Foot?

    You might be asking, “Why is there such a price difference?” The answer lies in the materials and labor intensity. A fortified roof is engineered to resist wind uplift, water intrusion, and debris impact.

    1. Enhanced Underlayment

    Standard roofs often use felt paper. Fortified roofs require synthetic, high-tensile underlayment that acts as a secondary water barrier. If shingles blow off, this layer keeps the rain out. This material alone can cost $0.50 to $1.00 more per square foot than traditional felt.

    2. Sealed Roof Deck

    This is the game-changer. In a FORTIFIED Silver or Gold roof, the seams of the plywood or OSB sheathing are sealed with adhesive tape or foam. This prevents wind-driven rain from entering your attic even if the outer covering is damaged. This labor-intensive process adds significant value but also increases installation time and cost.

    3. Superior Fastening

    Instead of standard nails, fortified standards often require ring-shank nails or screws, applied in specific patterns (such as 6-nail per shingle instead of 4). This ensures the roof stays attached during winds exceeding 130 mph.

    Factors Influencing Your Final Quote

    While the per-square-foot average gives you a baseline, several variables will affect your final invoice.

    • Roof Complexity: A simple gable roof is cheaper to fortify than a complex hip roof with multiple valleys, dormers, and chimneys. More angles mean more flashing and sealing work.
    • Material Choice: Asphalt shingles are the most common for fortified roofs due to cost-effectiveness. However, choosing metal, tile, or slate will push the cost per square foot well above $30.
    • Local Labor Rates: In high-demand areas like Miami or Houston, labor shortages can drive up installation costs by 15–20%.
    • Existing Deck Condition: If your current roof deck is rotten or damaged, it must be replaced before fortification can begin. This adds $5–$10 per square foot for new plywood/OSB.
    How Much Does A Fortified Roof Cost Per Square Foot

    Is a Fortified Roof Worth the Extra Cost?

    This is the most critical question for any homeowner. While the upfront cost is higher, the long-term financial benefits are substantial.

    Insurance Premium Discounts

    Many insurance carriers in coastal states offer significant discounts for FORTIFIED-certified homes. In Florida, for example, homeowners can see premium reductions of 15% to 45%. Over a 10-year period, these savings can offset a large portion of the initial installation cost.

    Increased Resale Value

    Homes with a verified FORTIFIED designation are more attractive to buyers. They offer peace of mind and lower ongoing costs. Real estate studies suggest that certified homes can sell for 3% to 5% more than non-certified counterparts in hurricane zones.

    Durability and Longevity

    A fortified roof is built to last. The enhanced attachment methods reduce the risk of shingle loss during minor storms, meaning fewer repairs over the life of the roof. You aren’t just buying a roof; you are buying resilience.

    For more detailed technical definitions of building standards and disaster resilience, you can refer to general engineering principles outlined on Wikipedia.

    How to Get an Accurate Estimate

    To get a precise quote for your home, follow these steps:

    1. Find a Certified Contractor: Not all roofers are trained in FORTIFIED standards. Look for contractors certified by IBHS.
    2. Request a Detailed Breakdown: Ask for a line-item quote that separates materials, labor, and disposal fees. Ensure they specify the type of underlayment and fastening method.
    3. Check for Rebates: Some local governments and utility companies offer rebates for hurricane-resistant upgrades.
    4. Get Three Quotes: Prices can vary wildly. Compare at least three estimates to ensure you are getting a fair market rate.

    FAQ Section

    Q1: Does homeowners insurance cover the cost of a fortified roof?

    Standard homeowners insurance typically covers roof damage from covered perils (like wind), but it does not pay for the upgrade to a fortified standard during a routine replacement. However, some policies offer “Ordinance or Law” coverage that may help with code-required upgrades. Always check with your agent about specific discounts for installing a fortified roof.

    Q2: How long does it take to install a fortified roof?

    The installation timeline is similar to a standard roof but may take 1–2 days longer due to the additional steps like sealing the roof deck and enhanced nailing patterns. For an average 2,000 sq. ft. home, expect the project to take 3–5 days depending on weather and crew size.

    Q3: Can I fortify my existing roof without replacing it?

    Generally, no. The core components of fortification, such as the sealed roof deck and enhanced underlayment, require access to the sheathing. You must remove the existing shingles to properly install these layers. Partial retrofits are possible for specific elements like ridge vents, but full certification requires a full replacement.

    Q4: What is the difference between “impact-resistant” and “fortified”?

    Impact-resistant refers specifically to the shingles’ ability to withstand hail or debris hits (often rated UL 2218 Class 4). “Fortified” is a holistic system that includes impact-resistant shingles plus sealed decks, better flashing, and stronger attachment. A roof can be impact-resistant without being FORTIFIED certified, but a FORTIFIED roof will always include impact resistance.

    Q5: Do I need an inspector to certify my roof?

    Yes. To receive the official FORTIFIED Certificate, an independent, IBHS-trained evaluator must inspect the roof during and after installation. This third-party verification is what unlocks insurance discounts and adds credibility to your home’s resale value.

    Conclusion

    Investing in a fortified roof is more than a construction project; it is a strategic financial decision for homeowners in storm-prone areas. While learning how much does a fortified roof cost per square foot reveals a higher upfront price tag—ranging from $15 to $30+—the long-term benefits are undeniable. From substantial insurance discounts to increased property value and, most importantly, the safety of your family, the ROI is clear.

    Don’t wait for the next storm season to start planning. Reach out to certified contractors today, get your quotes, and secure your home against the elements.

    Found this guide helpful? Share it with your neighbors on Facebook or Twitter to help them prepare for hurricane season too!

  • Can You Put Ice And Water Shield On Entire Roof?

    Can You Put Ice And Water Shield On Entire Roof?

    Have you ever worried about ice dams damaging your roof or leaks sneaking into your attic during heavy storms? Many homeowners ask, “Can you put ice and water shield on entire roof“ to achieve maximum peace of mind. While traditional building codes only require it in specific vulnerable areas, covering the whole deck is becoming a popular choice for those seeking superior durability.

    In this article, we will break down whether this upgrade is worth the investment, how it compares to standard felt paper, and what professional roofers recommend for long-term home protection.

    Is It Code-Compliant to Cover the Whole Roof?

    One of the first questions homeowners face is legality and compliance. The short answer is: Yes, you generally can.

    Most building codes in the United States, such as the International Residential Code (IRC), mandate ice and water shield in specific high-risk zones. These typically include:

    • Eaves (the edge of the roof).
    • Valleys (where two roof planes meet).
    • Around chimneys, skylights, and vent pipes.

    However, codes rarely prohibit using it everywhere. In fact, many modern roofing manufacturers encourage full coverage to validate their extended warranties. If you live in an area with severe weather—whether it’s heavy snow in the North or hurricane-driven rain in the South—going beyond the minimum code requirements is often seen as a smart insurance policy for your home.

    Always check with your local building department, but in most US jurisdictions, upgrading your underlayment is perfectly acceptable and often praised by inspectors.

    Ice and Water Shield vs. Traditional Felt Paper

    To understand why you might want full coverage, you need to know what makes this material different from the black felt paper (tar paper) used for decades.

    How Ice and Water Shield Works

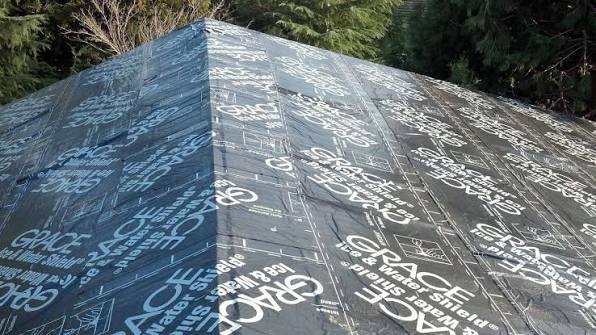
    Ice and water shield is a self-adhering, rubberized asphalt membrane. Unlike felt, which is merely nailed down, this shield sticks directly to the roof deck. This creates a watertight seal around nail penetrations. When a roofer nails shingles through the shield, the material wraps around the nail shaft, preventing water from seeping in through those tiny holes.

    Comparison Table

    FeatureTraditional Felt (#15 or #30)Ice and Water Shield
    Water ResistanceWater-resistant (can absorb moisture over time)Waterproof (forms a sealed barrier)
    InstallationStapled or nailed looselySelf-adhering (sticks to deck)
    Nail SealingNo (water can enter nail holes)Yes (self-seals around nails)
    CostLow ($)High ($)
    LifespanDegrades faster if exposedHighly durable against elements

    According to industry data, roofs with full synthetic or rubberized underlayment tend to have fewer leak-related insurance claims in the first ten years of installation compared to those with standard felt.

    What Are the Benefits of Full-Roof Coverage?

    If you are considering this upgrade, here are the primary advantages that justify the higher cost.

    1. Superior Leak Protection

    The biggest benefit is security. Standard underlayment is designed to shed water, not stop it completely if wind drives rain upward under the shingles. Ice and water shield acts as a secondary roof. If a shingle blows off during a storm, your home remains dry because the shield underneath is waterproof.

    2. Extended Shingle Life

    By providing a smoother, more uniform surface, ice and water shield can help shingles lay flatter. Additionally, because it seals out moisture from the attic side, it prevents the wood deck from rotting. A dry deck means your shingles last longer because they aren’t buckling due to underlying structural decay.

    3. Better Warranty Coverage

    Many major shingle manufacturers (such as GAF, Owens Corning, and CertainTeed) offer enhanced warranties if you use their proprietary or approved ice and water shields across the entire roof deck. This can extend your warranty from 10 years to 25 or even lifetime coverage on labor and materials.

    Can You Put Ice And Water Shield On Entire Roof

    What Are the Downsides and Costs?

    It is important to be realistic about the trade-offs. While effective, this method is not without its challenges.

    Higher Material Costs

    Ice and water shield is significantly more expensive than felt or even synthetic underlayment. You can expect to pay 2 to 3 times more for materials alone. For an average 2,000-square-foot roof, this could add several hundred to over a thousand dollars to your total project cost.

    Installation Complexity

    This material is sticky. Very sticky.

    • Heat Sensitivity: In hot summer months, the adhesive can become too soft, making it difficult to handle and potentially causing it to tear when unrolled.
    • Cold Weather: In freezing temperatures, the adhesive may not bond properly unless the roof deck is warmed up or a primer is used.
    • Labor Intensive: Because it adheres immediately, mistakes are costly. If you lay it crooked, you cannot simply lift and reposition it easily like felt paper. This increases labor time and, consequently, labor costs.

    Moisture Trapping Concerns

    There is a debate among some builders about vapor permeability. Standard felt allows the roof deck to “breathe” slightly. Ice and water shield is a vapor barrier. If your attic ventilation is poor, moisture from inside your home could get trapped between the insulation and the roof deck, potentially leading to condensation issues. Proper attic ventilation is non-negotiable if you choose full coverage.

    Step-by-Step: How Is It Installed?

    If you decide to proceed, here is how professionals typically install ice and water shield on the entire roof. Note that this is a job best left to certified roofing contractors due to the complexity.

    1. Prep the Deck: Ensure the roof deck (plywood or OSB) is clean, dry, and free of protruding nails. Any moisture present must be dried out before application.
    2. Start at the Eaves: Begin at the bottom edge of the roof. Unroll the first strip along the eave.
    3. Peel and Stick: Remove the release film from the back of the membrane. Press it firmly onto the deck. Use a hand roller to ensure there are no air bubbles or wrinkles.
    4. Overlap Correctly: Subsequent rows should overlap the previous row by at least 2 to 4 inches (check manufacturer specs). This ensures water flows over the seam, not under it.
    5. Seal Penetrations: Cut precise holes for vents and chimneys. Use additional patches of shield or compatible flashing tape to seal around these openings tightly.
    6. Cap with Shingles: Once the entire deck is covered, proceed with standard shingle installation. The nails will penetrate the shield, which will self-seal around them.

    For more detailed technical specifications on roofing materials, you can refer to general construction standards on Wikipedia.

    FAQ Section

    1. Does ice and water shield expire?

    Yes, but usually only if left exposed. If kept in its original packaging and stored in a cool, dry place, it can last for several years. However, once installed, it is designed to last as long as the roof itself. Do not leave it exposed to sunlight for more than 30–90 days (depending on the brand) before covering it with shingles, as UV rays can degrade the adhesive.

    2. Can I install it myself?

    While technically possible, it is not recommended for DIYers. The material is heavy, sticky, and unforgiving. Improper installation can lead to wrinkles, poor adhesion, and voided warranties. Professional roofers have the tools and experience to handle the material efficiently.

    3. Will it make my roof hotter?

    No. Ice and water shield is installed under the shingles. It does not affect the solar reflectance of your roof. The temperature of your attic is determined by your ventilation and insulation, not the underlayment type.

    4. Is it necessary in warm climates?

    Even in warm climates like Florida or Texas, ice and water shield is beneficial. While you won’t have ice dams, you do have wind-driven rain from hurricanes and tropical storms. The waterproofing benefit protects against horizontal rain entry, which is common in severe storms.

    5. Can I put it over existing shingles?

    No. Ice and water shield must be applied directly to the solid roof deck (wood). It cannot be installed over old shingles or existing underlayment. A complete tear-off is required.

    Conclusion

    So, can you put ice and water shield on entire roof? Absolutely. And for many homeowners, it is one of the best upgrades they can make.

    While it comes with a higher price tag and requires professional installation, the benefits are clear: superior leak protection, extended shingle life, and enhanced warranty coverage. If you plan to stay in your home for a long time, or if you live in an area prone to severe weather, the extra investment pays for itself in peace of mind.

    However, ensure your attic ventilation is up to par to prevent moisture trapping, and always hire a licensed, insured roofing contractor to handle the installation.

    Found this guide helpful? Share it with your friends on Facebook or Pinterest who are planning their next home improvement project! Protecting your home starts with making informed decisions.

  • Negotiate a New Roof When Buying a Home

    Negotiate a New Roof When Buying a Home

    Buying a house is one of the most significant financial decisions you will ever make, but discovering an aging or damaged roof during the process can quickly turn excitement into anxiety. You are not alone in this dilemma; many buyers face the daunting question of how to negotiate a new roof when buying a home without losing the deal or breaking the bank. This guide will walk you through strategic steps to handle this situation with confidence, ensuring you get a fair deal while securing your future investment.

    Why the Roof Matters More Than You Think

    The roof is often referred to as the “fifth wall” of a house, yet it is frequently overlooked until problems arise. A compromised roof doesn’t just mean leaks; it can lead to mold growth, structural damage, and significantly higher insurance premiums.

    According to recent data from the National Association of Realtors (NAR), home inspections reveal issues in nearly 80% of transactions, with roofing being among the top five concerns. Understanding the severity of the issue is the first step in effective negotiation.

    The Cost of Ignoring the Issue

    If you proceed without addressing a faulty roof, you risk:

    • Immediate Repair Costs: Average roof replacement costs in the US range from $5,000 to $15,000, depending on materials and size.
    • Insurance Hurdles: Many insurers refuse to cover homes with roofs older than 20 years.
    • Resale Value Drop: A known roof issue can lower your home’s market value by 5–10%.

    Step 1: Get a Professional Roof Inspection

    Before you even start negotiating, you need hard data. A general home inspector might note “shingles are curling,” but they are not roofing specialists.

    Hire a licensed roofing contractor to perform a detailed inspection. Ask for a written report that includes:

    1. Estimated remaining lifespan of the current roof.
    2. Photos of specific damage (missing shingles, rusted flashing, soft spots).
    3. A detailed quote for repair vs. full replacement.

    This documentation is your leverage. Without it, your request for concessions may seem arbitrary to the seller.

    Step 2: Determine Your Negotiation Strategy

    Once you have the inspection report, you need to decide what you want. There are three primary ways to handle a roof issue during negotiations.

    Option A: Request a Price Reduction

    Asking for a lower purchase price is often the cleanest method. You reduce the mortgage amount and potentially lower long-term interest costs. However, remember that you will need cash on hand immediately after closing to fix the roof.

    Option B: Ask for Seller Credits (Closing Costs)

    This is often the most popular choice for buyers who are short on cash. You ask the seller to provide a credit at closing, which can be used toward closing costs or prepaid items. This frees up your cash reserves to pay the roofer directly after you take ownership.

    Option C: Require Repairs Before Closing

    You can ask the seller to fix the roof before the sale finalizes. While this sounds ideal, it comes with risks:

    • The seller may choose the cheapest contractor.
    • Workmanship may be poor.
    • It can delay the closing date.

    Expert Tip: Most real estate agents recommend Option B. It gives you control over the quality of the work and the choice of contractor.

    How To Negotiate A New Roof When Buying A Home

    Comparison: Negotiation Methods

    MethodProsConsBest For
    Price ReductionLowers loan amount; simple transaction.Requires cash on hand post-closing.Buyers with extra savings.
    Seller CreditFrees up cash for repairs; easy to process.May not cover full cost if underestimated.Buyers tight on liquid cash.
    Seller RepairNo immediate out-of-pocket expense.Risk of poor quality; delays closing.Minor repairs only.

    How to Present Your Case to the Seller

    Negotiation is not about demanding; it is about problem-solving. Approach the conversation with empathy but firmness.

    1. Share the Evidence: Provide the professional inspection report and the contractor’s quote. Transparency builds trust.
    2. Be Reasonable: If the roof has 5 years of life left, do not ask for a full replacement. Ask for a repair credit based on the remaining depreciation.
    3. Use the “Walk-Away” Power: If the seller refuses to budge on a major safety issue, be prepared to walk away. Often, the fear of losing a qualified buyer motivates sellers to compromise.

    “In my 10 years of experience, I’ve found that sellers are more willing to offer credits when presented with a specific, third-party estimate rather than a vague request for ‘roof help.’” — Senior Real Estate Analyst.

    For more context on property standards and consumer rights, you can refer to general housing guidelines on Wikipedia.

    Common Pitfalls to Avoid

    • Lowballing the Estimate: Do not guess the cost. If the roofer says $12,000, ask for $12,000. Underestimating leaves you paying the difference.
    • Ignoring Local Market Conditions: In a hot seller’s market, you may need to accept a smaller credit. In a buyer’s market, you have more leverage to demand full coverage.
    • Focusing Only on Shingles: Ensure the inspection covers gutters, flashing, vents, and the underlying decking. These hidden components can be costly to fix.

    FAQ Section

    1. Can I back out of the contract if the roof is bad?

    Yes, most purchase agreements include an inspection contingency. If the inspection reveals significant defects and you cannot reach an agreement with the seller on repairs or credits, you can typically cancel the contract and retrieve your earnest money deposit. Always check your specific contract terms.

    2. What if the seller refuses to replace the roof?

    If the seller refuses a full replacement, negotiate for a substantial credit. You can then use that money to patch the roof now and plan for a full replacement in a few years. Alternatively, you can ask for a warranty transfer if the existing roof is relatively new.

    3. Does homeowners insurance cover roof replacement?

    Generally, no. Insurance covers sudden, accidental damage (like a storm or fallen tree). It does not cover wear and tear, age, or lack of maintenance. This is why negotiating the cost during the purchase is critical.

    4. How old is too old for a roof?

    Most asphalt shingle roofs last 15–25 years. If the roof is over 20 years old, even if it looks fine, it is near the end of its life. Use this as leverage to negotiate a replacement credit, as you will likely need to replace it soon anyway.

    5. Should I get multiple quotes?

    Absolutely. Get at least two or three quotes from licensed local roofers. This ensures the price you are asking for is accurate and defensible during negotiations. Sellers are more likely to agree if they see consistent pricing from multiple professionals.

    Conclusion

    Learning how to negotiate a new roof when buying a home is a crucial skill that can save you thousands of dollars and prevent future headaches. By relying on professional inspections, choosing the right negotiation strategy (preferably seller credits), and maintaining clear communication, you can turn a potential deal-breaker into a manageable part of the buying process.

    Remember, knowledge is your best leverage. Don’t rush the inspection phase, and don’t be afraid to ask for what you need to feel secure in your new home.

    Found this guide helpful? Share it with friends or family who are currently house hunting! Let’s help everyone buy with confidence. 🏠🔨

  • Metal Roofs: Pros, Cons & True Cost

    Metal Roofs: Pros, Cons & True Cost

    Are you standing in your backyard, looking up at your aging shingles, and wondering if it’s time for a change? You are not alone. Many homeowners face the dilemma of choosing between traditional asphalt and modern alternatives. If you have been researching what are the advantages and disadvantages of a metal roof, you likely want a clear, unbiased answer before making a significant investment.

    This guide cuts through the marketing hype. We will explore the real-world performance, financial implications, and aesthetic considerations of metal roofing to help you make an informed decision for your US home.

    Why Are Homeowners Switching to Metal?

    The roofing industry in the United States has seen a steady shift toward metal over the last decade. According to the Metal Roofing Alliance, metal roofs now account for a growing percentage of the residential market, driven by demand for longevity and sustainability.

    But is it just a trend, or is it a superior building material? To understand this, we must look beyond the initial price tag.

    The Top Advantages of Metal Roofing

    When evaluating what are the advantages and disadvantages of a metal roof, the benefits often outweigh the drawbacks for long-term homeowners. Here is why many experts recommend making the switch.

    1. Unmatched Longevity and Durability

    The most compelling argument for metal is its lifespan. While traditional asphalt shingles typically last 15 to 20 years, a properly installed metal roof can last 40 to 70 years.

    • Weather Resistance: Metal roofs are rated for high wind speeds (often up to 140 mph) and are non-combustible, offering superior protection against wildfires.
    • Material Integrity: Unlike wood that rots or asphalt that cracks under UV exposure, metal panels resist degradation. High-quality coatings prevent rust and corrosion, even in coastal areas with salt air.

    2. Energy Efficiency and Cost Savings

    Metal roofs reflect solar radiant heat rather than absorbing it. This can reduce cooling costs by 10–25%, according to studies cited by the Department of Energy.

    If you live in a hot climate like Arizona, Texas, or Florida, this reflective property is a game-changer. Many metal roofs also come with “cool roof” pigments that further enhance energy efficiency, potentially qualifying you for local utility rebates.

    3. Low Maintenance Requirements

    Once installed, a metal roof requires minimal upkeep. There is no need for annual sealing or frequent repairs due to cracked shingles. Occasional inspections to clear debris from valleys and gutters are usually sufficient. This “install and forget” nature appeals to busy homeowners who do not want to climb ladders every few years.

    4. Environmental Sustainability

    For the eco-conscious homeowner, metal is a top choice. Most metal roofing products contain 25–95% recycled content. Furthermore, at the end of its life, the material is 100% recyclable. In contrast, billions of pounds of asphalt shingles end up in US landfills annually. Choosing metal reduces your carbon footprint significantly.

    Expert Insight: “A metal roof is not just a covering; it is a long-term asset. When you calculate the cost per year of service, metal often becomes cheaper than asphalt despite the higher upfront price.” — Senior Construction Analyst, Industry Review Board.

    What Are The Advantages And Disadvantages Of A Metal Roof

    The Disadvantages: What You Need to Know

    No building material is perfect. To fully understand what are the advantages and disadvantages of a metal roof, we must address the common concerns honestly.

    1. Higher Upfront Cost

    The biggest barrier to entry is the price. Metal roofing can cost two to three times more than asphalt shingles initially.

    • Asphalt Shingles: $3–$5 per square foot.
    • Metal Roofing: $8–$14+ per square foot (depending on material).

    However, this is an investment in longevity. If you plan to stay in your home for less than 10 years, the return on investment (ROI) may not be realized. But for long-term residents, the lack of replacement costs balances the scale.

    2. Noise Concerns (And How to Fix Them)

    A common myth is that metal roofs are loud during rain or hail. In reality, when installed correctly with solid sheathing and proper insulation, a metal roof is no louder than an asphalt roof.

    The key is the underlayment. Without adequate attic insulation or solid decking, rain can sound like a drum. Ensure your contractor uses acoustic dampening underlayment to mitigate this issue completely.

    3. Expansion and Contraction

    Metal expands and contracts with temperature changes. If the roofing system is not designed with this movement in mind, fasteners can loosen over time, leading to leaks. This is why hiring a specialized installer is crucial. DIY installation is generally not recommended for standing seam metal roofs due to the precision required.

    4. Denting Potential

    While durable, thinner gauge metals can dent from large hail or falling branches.

    • Steel: Strong but can rust if the coating is compromised.
    • Aluminum: Softer and dents easier, but never rusts.
    • Copper/Zinc: Very soft but develop a protective patina.

    If you live in an area prone to severe hailstorms, opt for a thicker gauge (24-gauge or lower number) or stone-coated steel, which offers better impact resistance.

    Comparison: Metal vs. Asphalt Shingles

    To visualize the trade-offs, refer to the table below:

    FeatureMetal RoofingAsphalt Shingles
    Lifespan40–70 Years15–20 Years
    Initial CostHigh ($8–$14/sq ft)Low ($3–$5/sq ft)
    MaintenanceVery LowModerate
    Energy EfficiencyHigh (Reflective)Low (Absorbs Heat)
    Recyclability100% RecyclableMostly Landfill Waste
    InstallationRequires SpecialistWidely Available

    For more detailed technical specifications on materials, you can review general standards on Wikipedia.

    Types of Metal Roofing Materials

    Not all metal roofs are created equal. The material you choose affects both the pros and cons.

    1. Galvanized Steel: The most common and affordable. Coated with zinc to prevent rust. Great for most climates.
    2. Aluminum: Ideal for coastal regions because it does not rust. It is lighter but more expensive than steel.
    3. Copper: The premium option. It lasts over 100 years and develops a beautiful green patina. However, it is very expensive and soft.
    4. Stone-Coated Steel: Looks like tile or shingle but has the strength of steel. Excellent for hail-prone areas.

    Installation Considerations

    If you decide to proceed, follow these steps to ensure quality:

    1. Check Local Codes: Some HOAs or historic districts have restrictions on metal roofing styles.
    2. Choose the Right Profile: Standing seam is modern and sleek; corrugated is rustic and economical.
    3. Verify Insurance Discounts: Many US insurance companies offer discounts (up to 15%) for metal roofs due to their fire and wind resistance. Ask your provider for a quote adjustment.
    4. Hire Certified Installers: Look for contractors certified by manufacturers like MBCI or Fabral. Improper installation voids warranties.

    FAQ: Common Questions About Metal Roofs

    1. Does a metal roof interfere with Wi-Fi or cell signals?

    Generally, no. While metal blocks radio waves, most homes have windows and other entry points for signals. If you have a whole-home mesh system, the impact is negligible. However, if you rely solely on an outdoor antenna mounted directly on the roof, you may need to adjust its position.

    2. Can I install a metal roof over my existing shingles?

    In many cases, yes. This is called a “retrofit” installation. It saves on disposal costs and labor. However, you must check local building codes. Some jurisdictions allow only one layer of roofing, while others permit two. Always consult a structural engineer to ensure your roof framing can support the added weight, although metal is surprisingly light.

    3. Will a metal roof increase my home’s resale value?

    Yes. According to Remodeling Magazine’s Cost vs. Value Report, metal roofing has a high resale value. Buyers appreciate the low maintenance and longevity, making your home more attractive in the real estate market.

    4. How do I repair a scratched metal roof?

    Small scratches can be touched up with manufacturer-matched paint pens. For deeper gouges, it is best to call a professional to prevent moisture intrusion. Never use abrasive cleaners, as they can damage the protective coating.

    5. Is metal roofing slippery in the snow?

    Metal sheds snow easily due to its smooth surface. This is an advantage in heavy snowfall areas as it prevents ice dams. However, it means you should install snow guards if you have walkways or decks below the roofline to prevent sudden avalanches of snow.

    Conclusion

    So, what are the advantages and disadvantages of a metal roof? The advantages—longevity, energy efficiency, and low maintenance—are substantial and offer long-term financial benefits. The disadvantages—higher upfront cost and the need for specialized installation—are manageable with proper planning.

    If you plan to stay in your home for decades, a metal roof is arguably the best investment you can make for your property’s structure and value. It transforms your home into a resilient, energy-efficient sanctuary.

    Did this guide help clarify your decision? Share this article with friends or family who are considering a roof replacement, and let us know in the comments if you have experienced metal roofing firsthand!