Blog

  • Parachutist Rescued From Toulouse Stadium Roof

    Parachutist Rescued From Toulouse Stadium Roof

    Have you ever wondered what happens when an extreme sport stunt goes wrong in the heart of a bustling city? It is a terrifying scenario that captures immediate global attention and raises serious questions about urban safety regulations. Recently, the world watched in suspense as a parachutist was rescued from a stadium roof in Toulouse, highlighting the delicate balance between adrenaline-fueled adventure and public security.

    This incident serves as a stark reminder of the unpredictable nature of BASE jumping and unauthorized skydiving stunts. In this article, we will break down exactly what happened, how emergency teams executed the rescue, and what this means for the future of extreme sports in urban environments. Whether you are an enthusiast of aerial sports or simply concerned about public safety, understanding the mechanics of this rescue provides valuable insights into modern emergency response capabilities.

    What Happened During the Toulouse Stadium Incident?

    The incident occurred at the iconic Stadium de Toulouse, a venue known for hosting major football matches and international events. The parachutist, whose identity has been protected by local authorities pending further investigation, attempted an unauthorized jump onto the structure. However, due to miscalculated wind currents and technical difficulties with the canopy deployment, the individual became stranded on the high, sloping roof of the stadium.

    Unlike a standard landing zone, the stadium roof presented a unique set of hazards. The surface was slippery, steep, and lacked secure anchor points. The individual was unable to descend safely on their own, triggering an immediate emergency response. Local police cordoned off the area surrounding the stadium to ensure the safety of spectators and passersby, while fire and rescue units were dispatched to the scene.

    The visual of a lone figure stranded high above the ground sparked widespread concern on social media. Yet, it also showcased the professionalism of French emergency services. The situation was not just a rescue mission; it was a complex logistical challenge requiring coordination between aerial specialists, structural engineers, and medical teams.

    Key Timeline of Events

    • Initial Jump: The parachutist attempts to land on the stadium roof during daylight hours.
    • Stranding: The canopy fails to provide a safe descent, leaving the jumper trapped on the slick surface.
    • Emergency Call: Witnesses alert authorities; police secure the perimeter within 15 minutes.
    • Rescue Deployment: Specialized high-angle rescue teams arrive with ropes, harnesses, and stabilization equipment.
    • Extraction: The individual is secured and lowered safely to the ground.
    • Medical Check: Immediate medical evaluation is conducted on-site.

    How Did Emergency Teams Execute the Rescue?

    Rescuing someone from a high, inaccessible structure like a stadium roof requires more than just bravery; it demands precision engineering and rigorous training. The French fire brigade, known as Sapeurs-Pompiers, utilized high-angle rescue techniques typically reserved for mountain climbing accidents or industrial emergencies.

    The primary challenge was the instability of the roof. Rescue teams could not simply walk out to the individual. Instead, they deployed a system of anchors and pulleys from a safer, higher vantage point or via helicopter support, depending on the specific structural access points available. The rescuers were equipped with full-body harnesses, helmets, and cut-resistant gloves to handle the parachute lines safely.

    One critical aspect of the operation was calming the stranded parachutist. Panic can lead to erratic movements, which might cause a fall or compromise the rescue equipment. Communicators maintained constant verbal contact, guiding the individual to remain still while the rescue team approached. Once the rescuer reached the parachutist, they secured them into a secondary harness, effectively creating a “double-up” system for redundancy.

    Rescue Equipment Used

    EquipmentPurposeImportance Level
    Static RopesPrimary line for lowering/raisingCritical
    CarabinersConnecting harnesses to ropesCritical
    DescendersControlled lowering speedHigh
    Helmet CamReal-time visual feedback for commandMedium
    Medical KitImmediate trauma care upon landingHigh

    The success of this operation underscores the importance of specialized training. According to general safety standards outlined in resources like Wikipedia’s page on High-Angle Rescue, such operations require certified technicians who understand load dynamics and rope management. The Toulouse team’s adherence to these strict protocols ensured that no additional injuries occurred during the extraction.

    A Parachutist Was Rescued From A Stadium Roof In Toulouse.

    Why Do Parachutists Target Urban Structures?

    To understand why a parachutist was rescued from a stadium roof in Toulouse, we must look at the motivations behind urban BASE jumping. For many enthusiasts, cities offer the ultimate canvas for their sport. Skyscrapers, bridges, and stadiums provide the height and visibility that natural landscapes sometimes lack.

    However, this trend comes with significant risks. Urban environments are unpredictable. Wind tunnels created by buildings can change direction instantly, making canopy control difficult. Furthermore, landing zones are rarely clear. Power lines, antennas, and slippery surfaces like glass or metal roofs pose severe threats.

    Risks vs. Rewards of Urban Jumping

    • Adrenaline Rush: The proximity to structures increases the perceived danger and thrill.
    • Visibility: Stunts in famous locations gain rapid social media attention.
    • Legal Consequences: Unauthorized jumps often result in heavy fines, equipment confiscation, and potential jail time.
    • Physical Danger: Higher risk of collision, entanglement, or injury due to hard surfaces.

    Experts argue that the glorification of these stunts on social media encourages inexperienced jumpers to attempt dangerous feats without adequate preparation. This incident in Toulouse is a case study in why regulation and designated landing zones are crucial for the sustainability of the sport.

    What Are the Legal and Safety Implications?

    The rescue of the parachutist in Toulouse opens a broader discussion about legal liability and public safety. In France, unauthorized entry into private or public infrastructure for the purpose of extreme sports is illegal. The individual involved faces potential charges related to trespassing, endangering public safety, and consuming emergency resources unnecessarily.

    From a safety perspective, this incident highlights the need for better dialogue between city planners and the extreme sports community. Some cities have begun to designate specific times or areas for legal BASE jumping, which helps reduce unauthorized incidents. By providing safe, regulated outlets for these athletes, municipalities can mitigate risks while respecting the culture of the sport.

    Moreover, the cost of such rescues is significant. While emergency services are funded to help citizens, repeated misuse of these resources for preventable, illegal activities strains public budgets. This raises ethical questions about whether repeat offenders should be billed for their rescue operations, a policy already implemented in some regions for hikers who ignore safety warnings.

    FAQ Section

    1. Is BASE jumping legal in Toulouse?

    No, unauthorized BASE jumping from public structures like stadiums is illegal in Toulouse and throughout France. It is considered trespassing and a violation of public safety laws. Permits are rarely granted for such activities in dense urban areas.

    2. How long did the rescue operation take?

    While exact minute-by-minute logs vary by report, typical high-angle rescues of this complexity take between 45 minutes to two hours. This includes securing the scene, setting up rigging, approaching the subject, and lowering them safely.

    3. Was the parachutist injured?

    In most reported cases of this nature, if the individual is stranded rather than having fallen, injuries are minor or non-existent. The primary risk is hypothermia or shock from the stress of the situation. Medical teams always perform a thorough check upon landing.

    4. What happens to the parachute equipment?

    Equipment used in illegal stunts is often confiscated by police as evidence. Depending on the severity of the legal charges, the gear may be returned after fines are paid, or it may be destroyed if deemed part of a criminal act endangering public safety.

    5. Can I watch videos of the rescue?

    Official footage is usually released by local news outlets or emergency service press releases. However, sharing unverified user-generated content can sometimes interfere with ongoing investigations or violate privacy rights of the individuals involved.

    6. How can urban skydiving be made safer?

    Safety can be improved through designated jump zones, stricter enforcement of existing laws, and educational programs that highlight the dangers of unauthorized stunts. Collaboration between athletes and city officials can lead to safer, regulated events.

    Conclusion

    The dramatic event where a parachutist was rescued from a stadium roof in Toulouse is more than just a viral news story; it is a critical lesson in risk management and emergency preparedness. It demonstrates the incredible skill of French rescue teams and the inherent dangers of unauthorized urban extreme sports.

    For enthusiasts, the takeaway is clear: the thrill of the jump is never worth the risk to public safety or personal life. For the general public, it reinforces confidence in the ability of emergency services to handle complex, high-stakes scenarios with professionalism and care.

    If you found this analysis insightful, please share it on your social media channels to spread awareness about urban safety and the realities of extreme sports. Let’s keep the conversation going—what are your thoughts on regulating BASE jumping in cities?
  • How Do I Estimate The Cost Of A New Roof?

    How Do I Estimate The Cost Of A New Roof?

    Replacing a roof is one of the most significant investments a homeowner can make. It protects your family, enhances curb appeal, and boosts property value. However, staring at blank contractor quotes can be overwhelming. If you are asking yourself, “How do I estimate the cost of a new roof,“ you are not alone. This guide breaks down the variables so you can approach negotiations with confidence and clarity.

    Understanding the Basics: What Drives Roofing Costs?

    Before diving into numbers, it is crucial to understand that no two roofs are priced exactly alike. The total cost is a combination of materials, labor, removal of old materials, and geographic location.

    In the United States, the average cost to replace a roof typically ranges from $5,000 to $15,000, but high-end projects can easily exceed $30,000. To get an accurate estimate, you must look beyond the sticker price of shingles.

    The “Square” Measurement

    Roofers do not measure in square feet; they measure in squares. One square equals 100 square feet of roof area.

    • Example: A 2,000 sq. ft. house does not have a 2,000 sq. ft. roof. Due to pitch and overhangs, the actual roof area might be 2,400 sq. ft., which equals 24 squares.

    Always ask contractors if their quote is based on the footprint of the house or the actual roof surface area. This distinction alone can change your budget by thousands of dollars.

    Key Factors That Influence Your Final Bill

    When calculating your budget, consider these four primary pillars. Each plays a distinct role in the final invoice.

    1. Material Selection

    This is the most variable cost. Materials range from economical asphalt shingles to premium slate or copper.

    Material TypeAverage Cost per Square (Materials Only)LifespanBest For
    3-Tab Asphalt$100 – $15015-20 YearsBudget-conscious homeowners
    Architectural Asphalt$150 – $25025-30 YearsMost US homes (Best Value)
    Metal Roofing$300 – $60040-70 YearsSnowy climates & longevity
    Clay/Concrete Tile$600 – $90050+ YearsSouthwest US aesthetics
    Slate$900 – $1,200+75-100+ YearsHistoric/Luxury homes

    Note: These prices fluctuate based on raw material markets and regional availability.

    2. Labor and Complexity

    Labor typically accounts for 40% to 60% of the total project cost. Why such a wide range?

    • Roof Pitch: A steep roof requires special safety equipment, harnesses, and more time. Expect to pay 20-40% more for steep pitches compared to walkable roofs.
    • Obstacles: Chimneys, skylights, vent pipes, and valleys require detailed flashing work. Each penetration adds time and material cost.
    • Accessibility: If trucks cannot park close to the house, workers must carry materials further, increasing labor hours.

    3. Removal and Disposal

    Do you need a “tear-off”? Most building codes allow only two layers of roofing. If you have two existing layers, they must be removed before installing the new one.

    • Tear-off Cost: Typically $1.50 to $3.00 per square foot.
    • Dumpster Fees: Disposal fees vary by county but generally range from $300 to $600 per dumpster load.

    4. Geographic Location

    Labor rates in New York City or San Francisco will be significantly higher than in rural Midwest areas. Additionally, local building codes may require specific underlayment or fastening patterns due to wind or snow loads, which impacts material usage.

    How Do I Estimate The Cost Of A New Roof

    Step-by-Step Guide: How to Calculate Your Estimate

    If you want to create a preliminary budget before calling contractors, follow this logical process.

    Step 1: Measure Your Roof’s Surface Area

    You can use satellite tools like Google Earth or specialized apps like RoofSnap. Alternatively, measure the length and width of each plane of your roof from the ground.

    • Formula: Length × Width = Area in Sq. Ft.
    • Add all planes together.
    • Divide by 100 to get the number of Squares.

    Step 2: Choose Your Material Tier

    Decide whether you want basic protection (3-tab), standard durability (architectural), or premium longevity (metal/slate). Refer to the table above for baseline material costs.

    Step 3: Factor in Additional Components

    A roof is more than just shingles. Ensure your estimate includes:

    • Underlayment: Synthetic or felt barrier beneath shingles.
    • Flashing: Metal strips around chimneys and vents.
    • Drip Edge: Metal edging to direct water away from fascia.
    • Ventilation: Ridge vents or soffit vents to prevent mold.

    Step 4: Apply the Labor Multiplier

    A general rule of thumb for a standard architectural shingle roof is that the total installed cost is roughly 2.5 to 3 times the material cost.

    • Example: If materials cost $3,000, expect the total job to be between $7,500 and $9,000.

    For more detailed technical standards on roofing assemblies, you can refer to industry guidelines provided by organizations such as those documented on Wikipedia’s Roofing page for historical context and basic definitions.

    Common Mistakes When Estimating Roof Costs

    Even savvy homeowners make errors in budgeting. Avoid these pitfalls:

    1. Ignoring Waste Factor: You never buy exact square footage. Contractors add 10-15% for waste (cuts, mistakes, starter strips). If you forget this, you will run short.
    2. Overlooking Permit Fees: Most municipalities require permits for re-roofing. Fees range from $100 to $500 depending on the city.
    3. Choosing the Lowest Bid: A bid significantly lower than others often means the contractor is cutting corners on underlayment, using inferior nails, or lacks proper insurance.

    FAQ: Frequently Asked Questions

    1. How much should I budget for a 2,000 sq. ft. house?

    For a standard 2,000 sq. ft. home with a moderate pitch, using architectural asphalt shingles, you should budget between $8,000 and $12,000. This includes tear-off, disposal, new underlayment, and installation.

    2. Does insurance cover roof replacement?

    Homeowners insurance typically covers roof damage caused by sudden events like hail, windstorms, or falling trees. It does not cover wear and tear or age-related deterioration. Check your policy’s “Actual Cash Value” vs. “Replacement Cost Value” clauses.

    3. Is it cheaper to overlay shingles or tear off the old roof?

    Overlaying (installing new shingles over old) is cheaper upfront because it saves on labor and disposal fees. However, it voids many manufacturer warranties, hides potential deck rot, and adds weight. Most professionals recommend a full tear-off for long-term value.

    4. How long does a roof estimate take to remain valid?

    Due to fluctuating oil prices (which affect asphalt and transportation), most roofing quotes are valid for 30 to 60 days. After that, prices may be subject to adjustment.

    5. What is the best time of year to replace a roof?

    Late spring to early fall is peak season, meaning prices may be higher due to demand. Winter can offer discounts, but cold weather makes asphalt shingles brittle and harder to seal properly. Early fall is often the “sweet spot” for pricing and weather conditions.

    Conclusion

    Knowing how do I estimate the cost of a new roof empowers you to make smart financial decisions. By understanding the impact of materials, labor complexity, and geographic factors, you can avoid sticker shock and identify fair quotes. Remember, a roof is a long-term investment in your home’s integrity.

    Don’t rush the process. Get at least three detailed written estimates, check references, and verify insurance. Once you’ve secured your new roof, share this guide with friends or neighbors who might be facing similar home improvement projects. Knowledge is power, especially when it comes to protecting your biggest asset.

  • How to Get Insurance to Pay for Roof Replacement: Reddit Tips

    How to Get Insurance to Pay for Roof Replacement: Reddit Tips

    Have you ever stared at your ceiling after a storm, wondering if your insurance company will actually cover the damage, or if you’ll be left footing the bill? It is a stressful situation that thousands of homeowners face every year, often feeling overwhelmed by complex policies and adjuster jargon. If you are searching for how to get insurance to pay for roof replacement Reddit threads are filled with real-world advice, but separating the noise from the actionable strategy is key to getting your claim approved.

    This guide synthesizes the most effective strategies shared by experienced homeowners, contractors, and public adjusters on community forums. We will walk you through the exact steps to document damage, communicate with your insurer, and ensure you receive the fair compensation you deserve.

    Understanding Why Claims Get Denied

    Before diving into the “how-to,” it is crucial to understand why insurance companies deny roof claims in the first place. According to industry data, a significant portion of denials stems from a lack of proper documentation or misclassification of the damage type.

    Insurance policies typically cover “sudden and accidental” damage, such as hail, wind, or falling trees. They generally do not cover wear and tear, lack of maintenance, or old age. This distinction is where many homeowners stumble.

    The “Wind vs. Wear” Debate

    One of the most common topics discussed in online communities is the difference between wind damage and natural deterioration. Adjusters are trained to look for specific patterns. For example, wind damage often shows up as missing shingles or creased tabs, while wear and tear might look like granule loss or curling edges.

    If an adjuster labels your damage as “maintenance-related,” your claim will likely be denied. This is why understanding the terminology and having proof of sudden impact is vital. You need to prove that a specific event caused the damage, not just the passage of time.

    How To Get Insurance To Pay For Roof Replacement Reddit

    Step-by-Step Guide to Filing a Successful Claim

    Getting your insurance to pay requires a methodical approach. Here is a breakdown of the process, optimized with tips frequently highlighted by successful claimants on discussion boards.

    1. Document Everything Immediately

    Do not wait for the insurance adjuster to arrive. The moment you suspect damage, start documenting.

    • Take Photos: Use a high-resolution camera. Take wide shots of the entire roof (if safe) and close-ups of specific damage points. Include photos of the surrounding area, such as fallen branches or debris, which can serve as context for the cause of damage.
    • Video Walkthrough: Record a video walking around your property, pointing out visible issues from the ground.
    • Interior Damage: Don’t forget to photograph any water stains on ceilings or walls inside your home. This links exterior roof damage to interior consequences, strengthening your claim.

    2. Review Your Policy Details

    Many homeowners skip this step, but it is critical. Look for the “Declarations Page” of your policy. Key terms to identify include:

    • Deductible: The amount you must pay out-of-pocket.
    • Coverage Limit: The maximum amount the insurer will pay.
    • Exclusions: Specific scenarios not covered (e.g., certain types of windstorms in hurricane-prone areas).

    Understanding these details prevents surprises later. If your deductible is $1,000 and the repair cost is estimated at $800, filing a claim might not be worth it due to potential premium increases.

    3. Hire a Reputable Roofing Contractor

    While you can file a claim yourself, having a professional opinion carries weight. Most reputable roofing companies offer free inspections.

    • Get a Detailed Report: Ask the roofer to provide a written report with photos, diagrams, and an estimate.
    • Look for Specific Language: The report should explicitly state that the damage was caused by a covered peril (like hail or wind), not age.
    • Avoid “Storm Chasers”: Be wary of contractors who door-knock immediately after a storm. Choose a local, established business with good reviews.

    4. File the Claim Promptly

    Once you have your documentation and contractor’s report, contact your insurance company. Provide them with:

    1. Date and time of the incident.
    2. Description of the weather event (e.g., “Hailstorm with golf-ball-sized hail”).
    3. Your photo evidence and the contractor’s preliminary report.

    Be honest and consistent in your description. Inconsistencies can raise red flags for fraud detection algorithms.

    Dealing with the Insurance Adjuster

    The insurance adjuster is the person who will inspect your roof and determine the payout. Their goal is to minimize the company’s loss, while your goal is to get full coverage. This dynamic often leads to tension.

    Tips for the Inspection Day

    • Be Present: Always be home during the inspection. Walk with the adjuster and point out the damage you documented.
    • Provide Your Evidence: Hand over your printed photos and the roofer’s report. Do not assume they will find everything on their own.
    • Stay Calm and Professional: Emotional outbursts rarely help. Stick to the facts.

    What If the Adjuster Denies the Claim?

    If the initial assessment results in a denial or a lowball offer, do not accept it immediately. Many Reddit users suggest requesting a re-inspection or hiring a public adjuster.

    A public adjuster works for you, not the insurance company. They charge a percentage of the settlement (usually 10-20%), but they often secure significantly higher payouts that cover their fee and then some. For large claims, this can be a worthwhile investment.

    Common Mistakes to Avoid

    Based on collective experiences shared in online forums, here are the pitfalls that lead to failed claims:

    MistakeConsequenceSolution
    Waiting too long to fileDamage worsens; policy deadlines missedFile within 24-48 hours of discovery
    Poor documentationLack of proof for causationTake timestamped, high-res photos immediately
    Admitting faultClaim denied based on negligenceStick to factual descriptions of weather events
    Using unlicensed contractorsInsurer rejects estimatesVerify license and insurance of your roofer

    External Resource for Further Reading

    For a deeper understanding of how property insurance works legally and structurally, you can refer to the general overview on Property Insurance – Wikipedia. This resource provides a broad context on risk management and indemnity principles that underpin your specific policy.

    FAQ Section

    1. Will my insurance premiums go up after a roof claim?

    In most cases, yes. Filing a claim signals to the insurer that you are a higher risk. However, if the damage was caused by a widespread natural disaster (like a hurricane affecting thousands of homes), insurers may be more lenient with rate hikes. Always weigh the cost of repair against the potential premium increase.

    2. Can I choose my own roofing contractor?

    Yes, you have the right to choose your own contractor. Insurance companies may recommend vendors from their network, but you are not obligated to use them. Ensure your chosen contractor is licensed, bonded, and insured.

    3. What if the insurance check is less than the repair cost?

    This is known as “depreciation.” Initially, insurers often pay the Actual Cash Value (ACV), which deducts for age and wear. Once repairs are complete and you submit receipts, they usually release the remaining Recoverable Depreciation to bring the total to the Replacement Cost Value (RCV). Make sure your policy includes RCV coverage.

    4. How long do I have to file a roof damage claim?

    Policy timelines vary, but most insurers require you to report damage “promptly” or within one year of the incident. Some states have specific statutes of limitations. Check your policy documents for the exact timeframe, but sooner is always better.

    5. Is it worth hiring a public adjuster?

    For small claims (under $5,000), it may not be cost-effective due to their fee structure. For large, complex claims involving total roof replacements or structural damage, a public adjuster can often negotiate a much higher settlement, making their fee worthwhile.

    6. What if my roof is old? Does insurance still cover it?

    Age alone does not void coverage, but it affects the payout. If your roof is near the end of its lifespan, the insurer may argue that the damage is due to wear and tear rather than a specific event. Strong evidence of sudden impact (like hail dents) is crucial in these cases.

    Conclusion

    Navigating the insurance claims process can feel like a battle, but being prepared changes the odds in your favor. By documenting damage thoroughly, understanding your policy, and communicating effectively with adjusters, you can significantly increase your chances of getting your roof replacement fully covered.

    Remember, the insights found when searching for how to get insurance to pay for roof replacement Reddit highlight one universal truth: knowledge is power. Don’t let the insurance company dictate the outcome without a fight. Gather your evidence, know your rights, and don’t hesitate to seek professional help if needed.

    If you found this guide helpful, please share it on social media to help other homeowners navigate their claims successfully. Have you had a recent experience with a roof claim? Share your story in the comments below!

  • Can You Put A Metal Roof On A Mobile Home?

    Can You Put A Metal Roof On A Mobile Home?

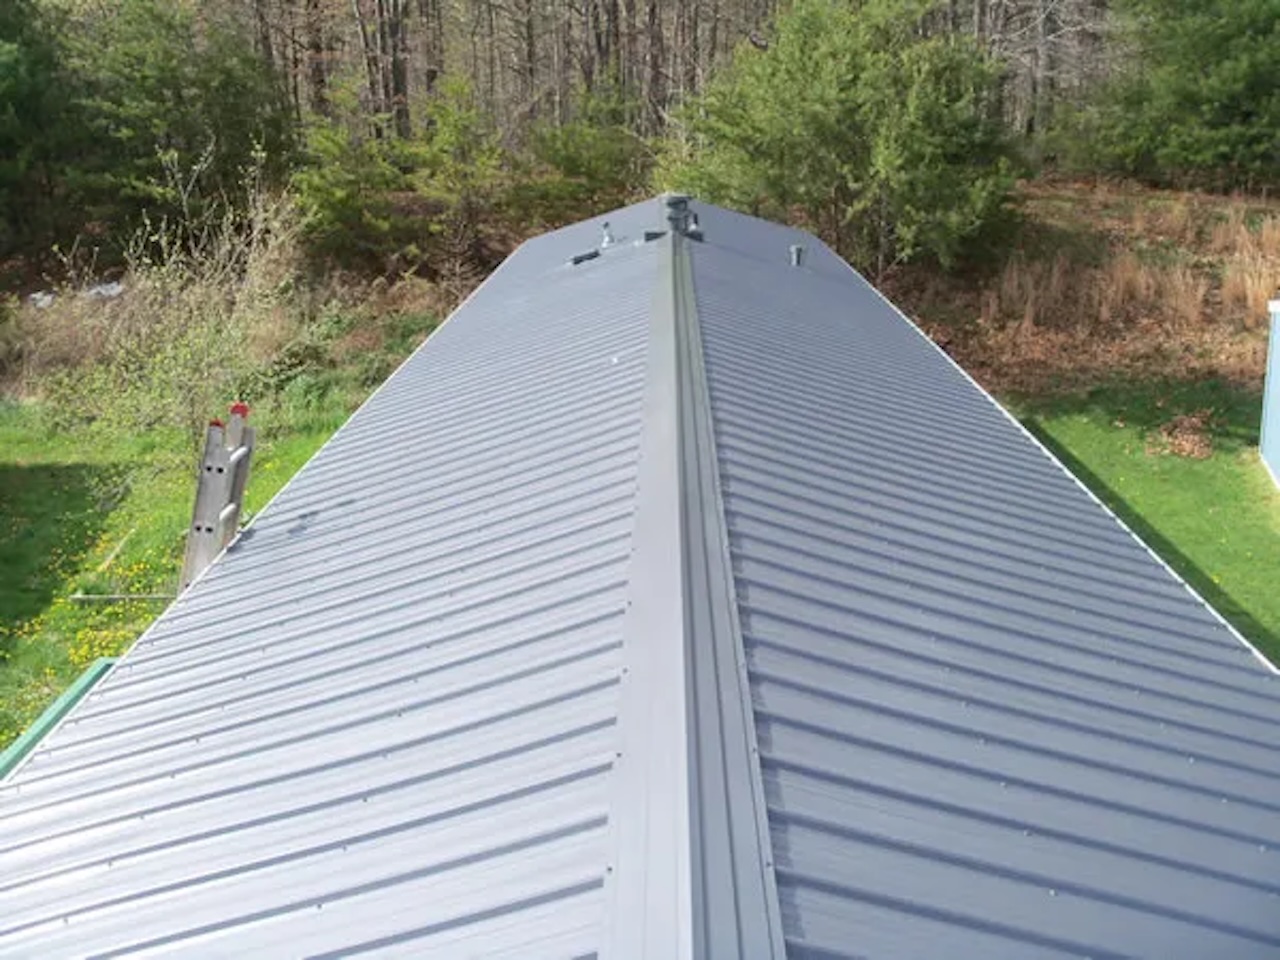
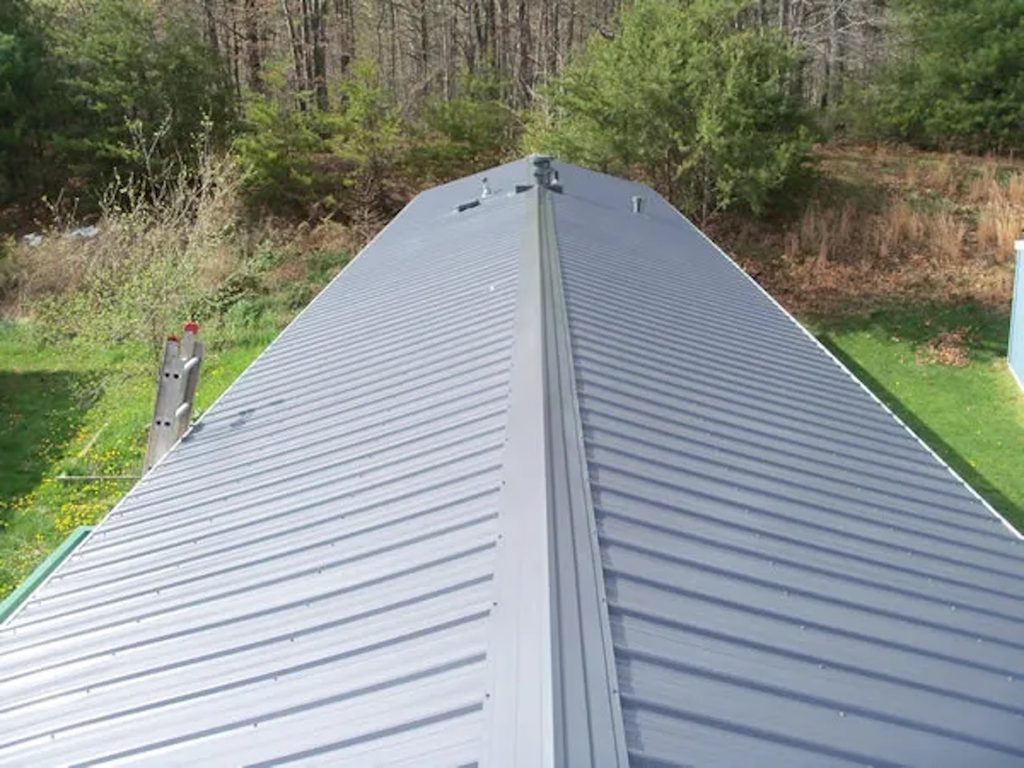
    Have you noticed your current shingle roof leaking or deteriorating faster than expected? Many manufactured housing owners face this dilemma, leading them to ask: Can you put a metal roof on a mobile home? The short answer is yes, and it is often one of the smartest investments you can make for your property’s longevity and energy efficiency.

    Unlike traditional site-built houses, mobile homes have unique structural considerations. However, with the right approach, a metal roof can transform your living space, offering superior protection against harsh weather while significantly boosting curb appeal. In this guide, we will break down everything you need to know, from structural integrity to cost analysis, ensuring you make an informed decision.

    Is It Structurally Safe to Install Metal on a Mobile Home?

    The primary concern for any homeowner considering this upgrade is safety. Mobile homes, also known as manufactured homes, are built on a steel chassis and designed to be lightweight. This leads many to worry that the added weight of metal panels might overwhelm the structure.

    Fortunately, modern standing-seam metal roofing is surprisingly lightweight. In fact, it often weighs less than traditional asphalt shingles. A typical square (100 square feet) of asphalt shingles can weigh between 200 to 350 pounds, whereas a square of metal roofing typically weighs only 50 to 150 pounds, depending on the gauge and type.

    However, “lightweight” does not mean “no preparation needed.” Before installation, a professional must inspect the existing roof trusses and decking. Older mobile homes may have weakened wood due to moisture intrusion. If the underlying structure is compromised, it must be repaired before any new roofing material is applied. According to general construction standards, the roof must be able to support not just the static weight of the metal, but also dynamic loads like snow and wind uplift.

    For peace of mind, always consult with a structural engineer or a certified roofing contractor who specializes in manufactured housing. They can verify that your specific home model can handle the transition without requiring extensive reinforcement.

    What Are the Benefits of Choosing Metal Over Shingles?

    Why are so many mobile home owners making the switch? The advantages go beyond just aesthetics. Here is a breakdown of why metal is becoming the preferred choice for manufactured homes.

    1. Exceptional Durability and Lifespan

    Asphalt shingles on mobile homes often last only 10–15 years due to the flexible nature of the structure and exposure to elements. In contrast, a properly installed metal roof can last 40 to 70 years. It resists cracking, shrinking, and eroding, making it ideal for long-term residency.

    2. Energy Efficiency

    Mobile homes are notorious for poor insulation. Metal roofs reflect solar radiant heat, which can reduce cooling costs by 10–25%. This is particularly beneficial in hotter climates where air conditioning bills can skyrocket during summer months.

    3. Weather Resistance

    Manufactured homes are often located in areas prone to high winds or heavy rain. Metal roofing systems, especially those with standing seams, offer superior resistance to wind uplift (often rated for winds up to 140 mph) and shed snow and rain effectively, preventing water pooling and leaks.

    4. Low Maintenance

    Unlike shingles that require periodic inspection for missing granules or curling edges, metal roofs require minimal maintenance. An occasional rinse with a garden hose is usually sufficient to keep them looking new.

    Metal Roof vs. Asphalt Shingles: A Quick Comparison

    To help you visualize the differences, here is a comparative table of the two most common roofing materials for mobile homes.

    FeatureMetal RoofingAsphalt Shingles
    Lifespan40–70+ Years10–20 Years
    WeightLight (50–150 lbs/sq)Heavy (200–350 lbs/sq)
    Cost (Initial)Higher ($9–$14 per sq. ft.)Lower ($3–$5 per sq. ft.)
    MaintenanceVery LowModerate to High
    Energy EfficiencyHigh (Reflective)Low (Absorbs Heat)
    Resale ValueIncreases SignificantlyMinimal Impact

    Note: Costs are estimates and vary by region and material quality.

    Can You Put A Metal Roof On A Mobile Home

    How Much Does It Cost to Put a Metal Roof on a Mobile Home?

    Budgeting is a critical part of the decision-making process. While the upfront cost of metal roofing is higher than asphalt, the long-term savings often justify the investment.

    On average, installing a metal roof on a single-wide mobile home (approximately 1,000–1,200 square feet) can range from $9,000 to $14,000. For a double-wide home (1,500–2,000 square feet), expect to pay between $13,500 and $28,000.

    Several factors influence this price:

    • Material Type: Galvanized steel is more affordable, while aluminum or copper commands a premium.
    • Roof Complexity: A simple gable roof is cheaper to install than a hip roof with multiple valleys.
    • Removal of Old Roof: If the existing shingles must be torn off, add $1,000–$3,000 to the total cost.
    • Labor Rates: Prices vary significantly by location and contractor availability.

    Despite the higher initial price tag, consider the Return on Investment (ROI). A metal roof can increase your home’s resale value and eliminate the need for replacement every 15 years. Over a 30-year period, you might replace asphalt shingles twice, whereas the metal roof remains intact.

    Step-by-Step Installation Guide

    If you are hiring a professional, understanding the process helps you monitor quality. If you are a skilled DIYer, these steps outline the general procedure. Note: Always check local building codes and warranty requirements before proceeding.

    1. Inspection and Permitting: Obtain necessary permits from your local municipality. Inspect the existing roof deck for rot or damage. Replace any compromised plywood or OSB sheathing.
    2. Preparation of the Surface: Clean the existing roof thoroughly. If installing over existing shingles (check local codes first), ensure they are flat and secure. Install a high-quality synthetic underlayment to provide a secondary water barrier.
    3. Installing Drip Edge and Flashing: Attach drip edges along the eaves and rakes. Install step flashing around any chimneys, vents, or skylights. This is crucial for preventing leaks.
    4. Panel Installation: Start at the bottom edge of the roof. Align the first metal panel carefully, ensuring it overhangs the drip edge by about 1–2 inches. Secure panels using screws with rubber washers to prevent water intrusion.
    5. Seaming and Overlapping: Overlap subsequent panels according to the manufacturer’s specifications (usually 1–2 inches). Use sealant tape or butyl rubber between laps for extra waterproofing.
    6. Ridge Cap Installation: Once all field panels are in place, install the ridge cap along the peak of the roof. This covers the gap between the two sides and allows for ventilation if using a vented ridge system.
    7. Final Inspection: Check all screws for tightness. Ensure no metal shavings are left on the roof, as they can rust and stain the finish.

    For more detailed technical specifications on roofing materials, you can refer to resources like Wikipedia’s entry on Metal Roofing to understand the different alloys and coatings available.

    Frequently Asked Questions (FAQ)

    1. Do I need to remove my old shingles before installing metal?

    Not always. Many metal roofs can be installed directly over existing asphalt shingles, provided the old roof is in good condition and local building codes allow it. This saves on disposal costs and labor. However, if the old roof is uneven or damaged, removal is recommended to ensure a flat, stable surface.

    2. Will a metal roof make my mobile home hotter in the summer?

    No, quite the opposite. Metal roofs reflect solar radiation rather than absorbing it. When paired with proper attic ventilation and insulation, a metal roof can keep your home cooler than traditional shingles, reducing air conditioning loads.

    3. Is it noisy when it rains on a metal roof?

    This is a common myth. Modern metal roofing is installed over solid sheathing and underlayment, which acts as a sound buffer. Most homeowners report that the noise level is comparable to, or even quieter than, asphalt shingles during rainstorms.

    4. Can I walk on a metal roof for maintenance?

    Yes, but with caution. You should wear soft-soled shoes and walk on the lower parts of the panels where they are supported by the decking. Avoid walking on the ribs or high points, as this can dent the metal. Always use proper safety harnesses if the pitch is steep.

    5. What is the best type of metal for a mobile home?

    Galvalume (a zinc-aluminum coated steel) is highly recommended for its balance of cost, durability, and corrosion resistance. Aluminum is also excellent, especially in coastal areas prone to salt air, as it does not rust.

    Conclusion

    So, can you put a metal roof on a mobile home? Absolutely. Not only is it possible, but it is also a highly beneficial upgrade that enhances durability, energy efficiency, and property value. While the initial investment is higher than asphalt, the long-term savings and peace of mind make it a worthwhile consideration for any manufactured home owner.

    By choosing metal, you are investing in a roof that protects your home for decades, not just years. Whether you are dealing with frequent leaks or simply want to modernize your home’s appearance, metal roofing offers a robust solution tailored to the unique needs of mobile homes.

    Found this guide helpful? Share it with your friends on social media who might be considering a roof upgrade! Let’s help more mobile home owners make smarter, safer choices for their habitats.

  • Can You Put Metal Over Shingles? Pros, Cons & Guide

    Can You Put Metal Over Shingles? Pros, Cons & Guide

    Homeowners often face a daunting dilemma when their aging asphalt shingles start to leak or curl: tear everything off or cover it up? The question “Can you put a metal roof over a shingle roof“ is one of the most common inquiries we receive at roofing consultancies. It’s a valid concern because nobody wants to pay for unnecessary demolition, yet everyone fears compromising their home’s structural integrity.

    The short answer is yes, you generally can, but it is not always the best choice for every home. This decision involves balancing cost savings against potential long-term maintenance issues. In this comprehensive guide, we will break down the technical requirements, benefits, and hidden risks so you can make an informed decision that protects your investment and your peace of mind.

    Is It Structurally Safe to Install Metal Over Shingles?

    Before diving into aesthetics or cost, we must address safety. The primary concern when adding a new roofing layer is the weight load on your home’s framing.

    Weight Comparison: Metal vs. Asphalt

    One of the biggest advantages of metal roofing is its lightweight nature.

    • Asphalt Shingles: Weigh approximately 2.5 to 4 pounds per square foot.
    • Metal Roofing: Weighs roughly 1 to 1.5 pounds per square foot (depending on the material, such as steel or aluminum).

    Because metal is significantly lighter than asphalt, adding a metal layer over existing shingles rarely exceeds the structural load capacity of a standard residential roof frame. However, this assumes your roof was built to code and has no pre-existing structural damage.

    The “Two-Layer” Rule

    Most building codes in the United States allow for a maximum of two layers of roofing material. If you already have two layers of shingles, you cannot install a third layer (metal or otherwise) without a complete tear-off. Always check with your local building department, as regulations vary by state and municipality.

    What Are the Benefits of Installing Metal Over Shingles?

    Choosing to overlay your roof offers several compelling advantages that go beyond just saving money on labor.

    1. Cost Savings on Demolition

    Tearing off an old roof is expensive. It involves labor costs for removal, dumpster fees for disposal, and potential repairs to the decking if damage is found during removal. By installing metal over shingles, you eliminate these demolition costs entirely. According to industry estimates, this can save homeowners between $1,000 and $2,500 depending on the roof size.

    2. Enhanced Insulation and Energy Efficiency

    The existing layer of shingles acts as an additional thermal barrier. When combined with the reflective properties of modern metal roofing (especially those with cool-roof coatings), this double layer can significantly reduce heat transfer into your attic. This leads to lower air conditioning bills during hot summer months.

    3. Environmental Friendliness

    Roofing waste is a major contributor to landfills. By leaving the old shingles in place, you keep tons of non-biodegradable asphalt out of the environment. Furthermore, metal roofs are 100% recyclable at the end of their life cycle, making this a sustainable choice for eco-conscious homeowners.

    Can You Put A Metal Roof Over A Shingle Roof

    What Are the Risks and Drawbacks?

    While the benefits are attractive, ignoring the downsides can lead to costly mistakes. Here is what you need to watch out for.

    Trapped Moisture and Rot

    This is the single biggest risk. If your existing shingles have any moisture trapped beneath them, covering them with metal seals that moisture in. Without proper ventilation, this can lead to:

    • Wood rot in the decking.
    • Mold growth in the attic.
    • Corrosion of the metal panels from the inside out.

    Expert Tip: Never install metal over wet or damaged shingles. A thorough inspection is mandatory.

    Voided Warranties

    Many metal roofing manufacturers will void their warranty if their product is installed over existing shingles. They require a clean, solid deck to ensure proper fastening and performance. Always read the fine print of your warranty before proceeding.

    Difficulty in Future Repairs

    If a leak develops five years from now, locating the source becomes a detective game. Is the leak coming from the metal seam? Or is it water traveling laterally under the metal from a failed spot in the old shingle layer? This complexity can increase repair costs and time.

    Key Considerations Before You Start

    If you decide to proceed, you must adhere to strict preparation guidelines to ensure longevity.

    Inspection and Repair

    You cannot simply screw metal panels over curled or missing shingles. The surface must be relatively flat.

    1. Replace Missing Shingles: Fill in any gaps to create a uniform surface.
    2. Secure Loose Shingles: Nail down any lifted tabs.
    3. Check Decking: If you find soft spots in the roof deck, you must cut out the metal/shingle section and repair the wood, even if you are doing an overlay.

    Ventilation Requirements

    Proper airflow is critical. You must ensure that your attic has adequate intake and exhaust ventilation. Many professionals recommend installing a vented batten system or using standing seam metal roofs with raised clips. This creates an air gap between the shingles and the metal, allowing heat and moisture to escape.

    Local Building Codes

    As mentioned earlier, codes vary. Some jurisdictions require a complete tear-off if the existing roof is older than a certain age or if specific fire ratings are required. For more detailed information on building standards, you can refer to general construction guidelines on Wikipedia.

    Step-by-Step Installation Overview

    While we strongly recommend hiring a certified professional, understanding the process helps you vet contractors.

    1. Preparation: Clean the roof surface of debris, moss, and loose granules.
    2. Underlayment Installation: Install a high-quality synthetic underlayment over the existing shingles. This acts as a secondary water barrier. Note: Do not use felt paper as it can trap too much moisture.
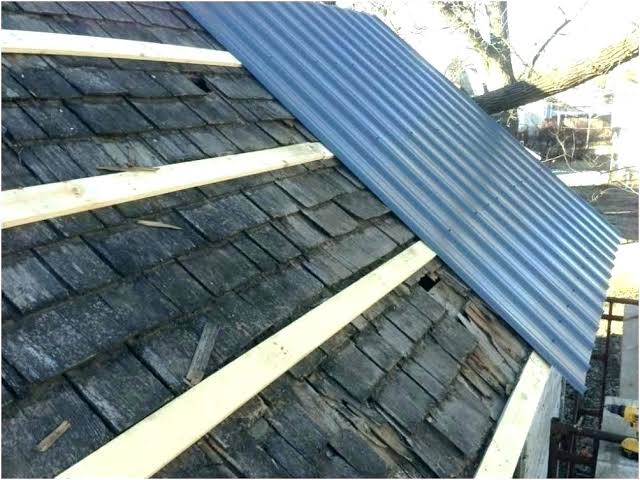
    3. Batten System (Optional but Recommended): Install horizontal or vertical battens (strips of wood or metal) over the underlayment. This ensures the metal panels do not sit directly on the uneven shingle surface and promotes airflow.
    4. Panel Installation: Begin installing the metal panels from the eave upward, following the manufacturer’s overlap instructions.
    5. Fastening: Use screws with rubber washers designed for metal roofing. Ensure they are driven straight to prevent leaks.
    6. Flashing and Trim: Install new drip edges, ridge caps, and flashing around chimneys and vents. Crucial: Old flashing should not be reused; it must be replaced to match the new roof profile.

    Comparison: Tear-Off vs. Overlay

    FeatureTear-Off and ReplaceInstall Over Shingles
    CostHigher (Labor + Disposal)Lower (No Demo Costs)
    TimeLonger (3-5 days)Faster (1-3 days)
    InspectionFull deck inspection possibleLimited visibility of deck
    WarrantyUsually full manufacturer warrantyMay be limited or voided
    LongevityMaximum potential lifespanSlightly reduced due to underlying variables
    Eco-ImpactHigh waste generationLow waste generation

    FAQ Section

    1. Will putting a metal roof over shingles void my homeowner’s insurance?

    Generally, no. Most insurance companies accept metal roofs installed over shingles as long as the installation meets local building codes and is performed by a licensed contractor. However, it is wise to notify your insurer before starting the project.

    2. How long does a metal roof last if installed over shingles?

    A properly installed metal roof can last 40–70 years. However, installing it over shingles might slightly reduce this lifespan if moisture issues arise. Ensuring proper ventilation and a dry substrate is key to reaching the maximum lifespan.

    3. Can I install metal roofing over two layers of shingles?

    In most cases, no. Most US building codes prohibit having more than two layers of roofing material. If you already have two layers of shingles, you must tear them all off before installing metal.

    4. Does the color of the old shingles matter?

    Not directly for structural reasons, but dark shingles absorb more heat. If you live in a hot climate, the extra heat trapped between the shingles and the metal could potentially affect energy efficiency. Lighter-colored underlayments can help mitigate this.

    5. What type of metal roof is best for overlays?

    Standing seam metal roofs are often preferred for overlays because they use concealed fasteners and raised seams, which allow for better expansion/contraction and ventilation compared to exposed-fastener corrugated panels.

    Conclusion

    So, can you put a metal roof over a shingle roof? Yes, you can, and for many homeowners, it is a cost-effective, eco-friendly solution that provides excellent durability. However, it is not a shortcut. It requires meticulous preparation, strict adherence to ventilation standards, and a honest assessment of your current roof’s condition.

    If your existing shingles are dry, flat, and structurally sound, an overlay can be a brilliant upgrade. If there is any sign of rot, moisture, or multiple existing layers, a full tear-off is the safer, albeit more expensive, route.

    Did you find this guide helpful? Share it with friends who are considering a roof upgrade on Facebook or Pinterest, and leave a comment below with your own roofing questions!

  • How Many Sq Ft In A Bundle Of Roof Shingles?

    How Many Sq Ft In A Bundle Of Roof Shingles?

    Have you ever stood in the aisle of a home improvement store, staring at stacks of asphalt shingles, wondering if you bought enough? It is a common dilemma for homeowners tackling DIY repairs or managing a contractor’s estimate. Knowing exactly how many sq ft in a bundle of roof shingles is the first step to avoiding costly overages or frustrating shortages.

    In this guide, we will break down the math, explain industry standards, and provide actionable tips to ensure your roofing project runs smoothly. Whether you are replacing a small shed roof or a large suburban home, understanding these measurements is crucial for budgeting and logistics.

    The Standard Answer: Coverage Per Bundle

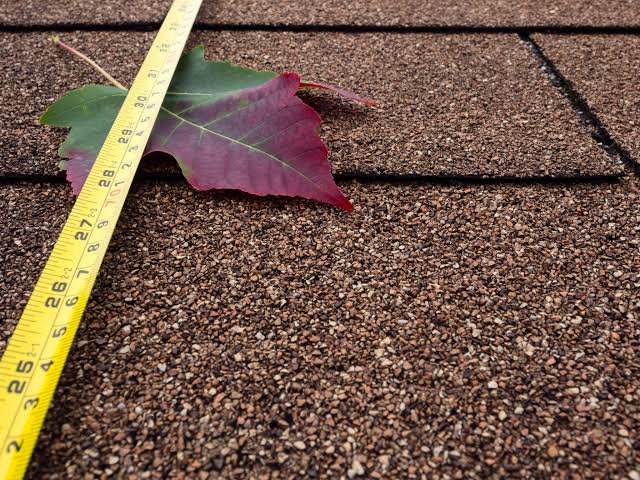
    Let’s get straight to the point. For the vast majority of standard three-tab asphalt shingles found in the United States, one bundle covers approximately 33.3 square feet.

    However, there is a catch. Roofing materials are not sold by the individual bundle for coverage calculations; they are sold by the “square.” In roofing terminology, one square equals 100 square feet of roof area.

    Because it takes roughly three bundles to make one square, the math looks like this:

    • 1 Square = 100 sq. ft.
    • 1 Square = 3 Bundles (standard)
    • 1 Bundle = ~33.3 sq. ft.

    This 3-to-1 ratio is the industry golden rule for standard architectural and three-tab shingles. However, before you head to the checkout counter, you must understand that not all shingles are created equal. Weight, thickness, and brand specifications can alter this ratio slightly.

    Why Do Some Bundles Cover Less Area?

    While 33.3 sq. ft. is the standard, you may encounter bundles that cover only 25 sq. ft. or even less. This discrepancy usually comes down to two factors: weight and shingle type.

    Heavyweight and Architectural Shingles

    Premium architectural shingles (also known as dimensional or laminate shingles) are thicker and heavier than basic three-tab shingles. They often come with a higher wind rating and better aesthetic depth. Because they are denser, manufacturers may pack fewer shingles per bundle to keep the weight manageable for human handling.

    • Standard Three-Tab: ~33.3 sq. ft. per bundle.
    • Architectural/Laminate: Often ~33.3 sq. ft., but some heavy-duty variants may require 4 bundles per square (25 sq. ft. per bundle).
    • Luxury/Designer Shingles: These can vary significantly. Always check the label.

    The Importance of Reading the Label

    Never assume. Before purchasing, look for the “Coverage Area” printed on the wrapper of the bundle. It will explicitly state the square footage. If the label is missing or unclear, ask the store associate for the specification sheet.

    How Many Sq Ft In A Bundle Of Roof Shingles

    How to Calculate Your Total Shingle Needs

    Knowing how many sq ft in a bundle of roof shingles is useless if you don’t know the total size of your roof. Here is a step-by-step guide to calculating your material needs accurately.

    Step 1: Measure Your Roof’s Footprint

    If you have blueprints, use them. If not, you can measure from the ground. Measure the length and width of each section of your house. Multiply these numbers to get the square footage of the footprint.

    Example: A house section is 40 feet long and 30 feet wide. 40×30=1,20040×30=1,200 sq. ft.

    Step 2: Adjust for Roof Pitch

    A flat roof is rare. Most roofs have a slope (pitch), which increases the surface area compared to the flat footprint. You need to apply a pitch multiplier.

    Roof PitchMultiplier
    4/12 (Low)1.054
    6/12 (Medium)1.118
    8/12 (Steep)1.202
    12/12 (Very Steep)1.414

    Calculation: If your footprint is 1,200 sq. ft. and your pitch is 6/12: 1,200×1.118=1,341.61,200×1.118=1,341.6 sq. ft.

    Step 3: Add Waste Factor

    You cannot use every single shingle. Cutting around vents, chimneys, and valleys creates waste. Additionally, mistakes happen.

    • Simple Roof (Gable): Add 10% waste.
    • Complex Roof (Hip, Valleys, Dormers): Add 15–20% waste.

    Continuing the example: 1,341.6 sq. ft.+10% waste=1,475.76 sq. ft.1,341.6 sq. ft.+10% waste=1,475.76 sq. ft.

    Step 4: Convert to Bundles

    Now, divide your total adjusted square footage by the coverage per bundle (33.3 sq. ft.).

    1,475.76/33.3=44.321,475.76/33.3=44.32 bundles.

    Since you cannot buy 0.32 of a bundle, round up to 45 bundles. It is always better to have a few extra shingles for future repairs than to run short mid-project.

    Key Factors That Influence Shingle Efficiency

    Beyond the raw math, several practical factors affect how efficiently you use your shingles. Understanding these can save you money and time.

    Starter Strips and Ridge Caps

    Your calculation for field shingles (the main part of the roof) does not include starter strips or ridge caps.

    • Starter Strips: These go along the eaves and rakes. Some contractors cut the first row of field shingles to use as starters, but buying pre-made starter strips is often more efficient and watertight.
    • Ridge Caps: These cover the peak of the roof. They are sold separately or in specific bundles. Do not forget to calculate linear feet for ridges and hips.

    Color and Batch Consistency

    Shingles can vary slightly in color between production batches. If you need to return unused bundles, ensure they are from the same batch number as the ones installed. Mixing batches can result in a patchy, uneven appearance on your roof. For more information on roofing material standards, you can refer to Wikipedia’s article on Asphalt Shingles.

    Storage Matters

    If you are buying materials in advance, store them correctly. Shingles should be kept flat, dry, and out of direct sunlight. Stacking them too high can cause the bottom bundles to deform, making them difficult to install properly.

    Common Mistakes to Avoid

    Even experienced DIYers make errors when estimating shingle quantities. Here are the most frequent pitfalls:

    1. Ignoring the Pitch: Calculating based on floor plan square footage alone is the #1 error. This leads to buying 10–20% less material than needed.
    2. Forgetting Waste: Assuming 100% efficiency is unrealistic. Complex roofs with many valleys and chimneys generate significant scrap.
    3. Mixing Shingle Types: Assuming all bundles cover 33.3 sq. ft. without checking the label. Luxury shingles may require 4 or 5 bundles per square.
    4. Underestimating Accessories: Forgetting to buy enough roofing nails, underlayment, and flashing. A lack of these items can halt your project just as surely as running out of shingles.

    FAQ Section

    Q: Can I return unused bundles of shingles?

    A: Most major home improvement stores allow returns of unopened, undamaged bundles within a specific timeframe (usually 90 days). Keep your receipt! However, custom-order colors or special orders may be non-refundable. Always check the store’s policy before purchasing.

    Q: How much does a bundle of shingles weigh?

    A: A standard bundle of three-tab shingles weighs between 50 and 80 pounds. Architectural shingles are heavier, often weighing 65 to 80+ pounds per bundle. This is important for transportation and ensuring your roof structure can support the load, especially if adding a second layer.

    Q: What is the difference between 3-tab and architectural shingles?

    A: Three-tab shingles are flat, lightweight, and economical. They have a uniform look. Architectural shingles are multi-layered, creating a dimensional, textured appearance. They are more durable, have longer warranties (often 30–50 years vs. 15–20 years), and are more resistant to wind uplift.

    Q: Do I need underlayment if I’m replacing old shingles?

    A: Yes. Even if you are tearing off old shingles, new underlayment (felt paper or synthetic) is required by building codes in most US jurisdictions. It provides a secondary water barrier and protects the roof deck. Do not skip this step.

    Q: How many nails do I need per shingle?

    A: Standard practice requires 4 nails per shingle for normal wind zones. In high-wind coastal areas, manufacturers often require 6 nails per shingle. Check the installation instructions on the bundle wrapper for specific requirements. Using too few nails can void your warranty.

    Conclusion

    Understanding how many sq ft in a bundle of roof shingles is fundamental to any successful roofing project. Remember the magic number: 33.3 square feet for standard bundles, with three bundles making up one square (100 sq. ft.).

    By accurately measuring your roof’s pitch, adding a waste factor, and double-checking manufacturer specifications, you can avoid the stress of running out of materials or overspending on excess. Roofing is an investment in your home’s safety and curb appeal, so taking the time to plan correctly pays off in the long run.

    Did you find this guide helpful? Share it with your friends on social media who might be planning their own home improvements! If you have more questions about roofing or home maintenance, leave a comment below—we love hearing from our readers.

  • How To Find A Roof Leak On A Flat Roof

    How To Find A Roof Leak On A Flat Roof

    Water dripping from your ceiling is one of the most stressful sights for any homeowner or property manager. It signals immediate damage, potential mold growth, and costly repairs if left unchecked. If you are staring at a wet spot and wondering how to find a roof leak on a flat roof, you are not alone; flat roofs are notorious for hiding the source of water intrusion due to their unique drainage dynamics.

    Unlike sloped roofs where gravity quickly directs water away, flat roofs allow water to pool, making the entry point difficult to trace. However, with a systematic approach and the right tools, you can identify the culprit before it causes structural harm. This guide will walk you through professional inspection techniques, safety protocols, and common failure points specific to flat roofing systems.

    Why Is Finding Leaks on Flat Roofs So Difficult?

    Before diving into the detection process, it is crucial to understand why flat roofs behave differently than pitched roofs. In the roofing industry, we often say that “water finds its own level,” but on a flat roof, water also finds every tiny imperfection in the membrane.

    According to data from the National Roofing Contractors Association (NRCA), improper installation and lack of maintenance account for over 60% of premature roof failures. On a flat roof, a leak occurring at point A might manifest as a stain at point B, several feet away. This phenomenon, known as “water migration,” happens because water travels along insulation boards, decking, or vapor barriers before dripping through the ceiling drywall.

    Understanding this migration is key. You are not just looking for a hole; you are looking for the path the water took. For more detailed information on roofing materials and their properties, you can refer to the comprehensive overview on Wikipedia’s Roofing page.

    How To Find A Roof Leak On A Flat Roof

    Step 1: Prioritize Safety and Preparation

    Never compromise safety for the sake of curiosity. Flat roofs can be slippery, especially when wet or covered in debris. Before you climb up, ensure you have the proper gear:

    • Non-slip footwear: Rubber-soled shoes with good traction.
    • Safety harness: If the roof is more than one story high, a fall protection system is mandatory.
    • Clear weather: Never inspect a roof during rain, high winds, or immediately after a storm when surfaces are slick.
    • Helper: Always have someone on the ground who knows you are on the roof.

    Once safe, clear the roof of any loose debris like leaves, branches, or trash. Debris can hold moisture against the membrane, accelerating wear and masking the actual leak source.

    Step 2: Visual Inspection of Common Failure Points

    Most leaks originate from specific weak points rather than the middle of an open field. Start your inspection by examining these high-risk areas:

    1. Flashing and Penetrations

    Flashing is the metal or rubber material used to seal joints around protrusions. Check around:

    • HVAC units
    • Vent pipes
    • Skylights
    • Chimneys

    Look for cracks, rust, or separated seams in the flashing. If the sealant looks brittle or cracked, water is likely entering there.

    2. Roof Drains and Scuppers

    Clogged drains cause water to pool, increasing the hydrostatic pressure on the membrane. Ensure all drains are free of debris. Look for signs of standing water (ponding) that remains more than 48 hours after rainfall. Ponding water accelerates membrane degradation and is a primary cause of leaks.

    3. Membrane Seams and Blisters

    Walk the perimeter and the field of the roof. Look for:

    • Blisters: Bubble-like formations indicating trapped air or moisture beneath the membrane.
    • Alligatoring: A pattern of cracks resembling alligator skin, common in older asphalt-based roofs.
    • Open Seams: Areas where the roofing plies have separated.

    Step 3: The Water Hose Test (Controlled Testing)

    If visual inspection doesn’t reveal the source, you may need to perform a controlled water test. This method requires two people: one on the roof with a hose and one inside the building watching the ceiling.

    Procedure:

    1. Isolate Sections: Divide the roof into manageable sections (e.g., 10×10 feet).
    2. Start Low: Begin testing the area closest to the interior leak, not the highest point. Water flows down, so the source is often lower than you think.
    3. Apply Water Slowly: Use a garden hose to gently soak the section for 5–10 minutes. Do not use high pressure, which can force water into intact seams and create false positives.
    4. Wait and Observe: The person inside should watch for drips. If no leak appears, move to the next section uphill.
    5. Mark the Spot: Once the leak reproduces, mark the exact area on the roof with chalk or tape.

    Note: This process can take several hours. Patience is essential.

    Step 4: Advanced Detection Methods

    For complex leaks or large commercial buildings, professional tools may be necessary. While DIYers can rent some of these, others require certified technicians.

    MethodHow It WorksBest For
    Infrared ThermographyDetects temperature differences; wet insulation retains heat differently than dry insulation.Locating hidden moisture under the membrane.
    Electronic Leak DetectionUses electrical current to find breaches in the membrane.Single-ply membranes (EPDM, TPO).
    Dye TestingFluorescent dye is added to water; UV light reveals the path.Tracing complex water migration paths.

    Infrared cameras are particularly effective because they can “see” wet insulation that is not yet visible on the surface. Wet spots appear as dark or light anomalies depending on the time of day and ambient temperature.

    Common Causes of Flat Roof Leaks

    Understanding why leaks happen helps prevent future issues. Here are the top offenders:

    • Poor Installation: Improperly adhered seams or insufficient flashing height.
    • Material Aging: UV exposure breaks down chemical bonds in roofing materials over time.
    • Foot Traffic: Excessive walking on the roof can puncture membranes or dislodge gravel.
    • Vegetation: Roots from weeds or trees can penetrate the roofing layers.

    FAQ Section

    Q1: Can I patch a flat roof leak myself?

    A: Small punctures or minor seam separations can often be patched with roofing cement or a patch kit designed for your specific membrane type (EPDM, TPO, etc.). However, if the leak is near flashing or involves large areas of blistering, professional repair is recommended to ensure a watertight seal.

    Q2: How long does it take to find a leak on a flat roof?

    A: A simple visual inspection might take 30–60 minutes. If a water hose test is required, it can take several hours or even a full day, depending on the roof’s size and the complexity of the water migration.

    Q3: Why is my ceiling leaking when it hasn’t rained recently?

    A: This could be due to condensation from poor attic ventilation, a burst pipe, or residual water from a previous storm that was trapped in the insulation and is slowly releasing. It is crucial to rule out plumbing issues before assuming it is a roof leak.

    Q4: What is the lifespan of a typical flat roof?

    A: Most modern flat roofs last between 15 to 30 years, depending on the material. EPDM and TPO roofs tend to last longer (20–30 years), while built-up roofing (BUR) may require more frequent maintenance. Regular inspections can extend this lifespan significantly.

    Q5: Should I walk on my flat roof?

    A: Only when necessary and with proper safety precautions. Frequent foot traffic can damage the membrane. If you must access the roof, wear soft-soled shoes and avoid dragging equipment across the surface.

    Q6: How much does professional leak detection cost?

    A: Costs vary by region and roof size, but professional leak detection typically ranges from $300 to $1,000. This fee often includes a detailed report and thermal imaging, which can save thousands in unnecessary tear-off costs.

    Conclusion

    Learning how to find a roof leak on a flat roof is a valuable skill that can save you significant money and stress. By prioritizing safety, conducting thorough visual inspections, and using systematic testing methods like the hose test, you can pinpoint the source of water intrusion with confidence. Remember, early detection is key to preventing extensive structural damage and mold growth.

    If the leak proves elusive or the repair seems beyond your comfort level, do not hesitate to call a licensed roofing professional. Their expertise and specialized tools can provide a definitive solution.

    Did you find this guide helpful? Share it with your friends on social media to help them protect their homes too!

  • How Much Does It Cost To Get A Tin Roof?

    How Much Does It Cost To Get A Tin Roof?

    Are you staring at your aging shingles and wondering if switching to metal is worth the investment? You are not alone; many homeowners are making the switch for durability, but the upfront price tag can be intimidating. If you are asking, “How much does it cost to get a tin roof,“ you have come to the right place to break down the numbers clearly and honestly.

    In this guide, we will dissect the real costs associated with installing a tin (metal) roof in 2026. We will move beyond vague estimates to provide you with actionable data, helping you make an informed decision that balances your budget with long-term value.

    Understanding the True Cost of Tin Roofing

    When homeowners ask about the cost of a tin roof, they are often surprised to learn that “tin” is a colloquial term. Modern residential roofs are rarely made of pure tin. Instead, they are typically made of steel coated with zinc (galvanized) or a mixture of zinc and aluminum (Galvalume), often finished with a protective paint system.

    Understanding this distinction is crucial because the material quality directly impacts the price. In 2026, the national average cost to install a metal roof ranges significantly based on materials and labor complexity.

    Average Cost Breakdown by Square Footage

    To give you a realistic expectation, here is a general pricing structure for professional installation in the United States:

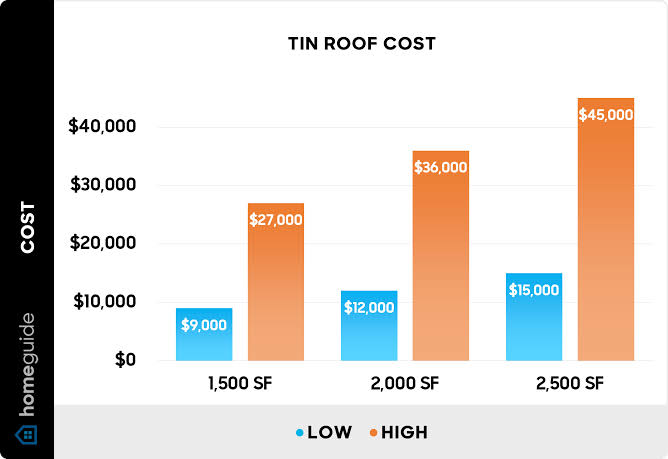
    • Low-End (Corrugated Steel Panels): $7.50 – $10.50 per square foot.
    • Mid-Range (Standing Seam Aluminum/Steel): $12.00 – $18.00 per square foot.
    • High-End (Copper or Zinc Alloy): $20.00 – $35.00+ per square foot.

    For an average-sized home of 2,000 square feet, you can expect the total project cost to fall between $15,000 and $36,000. While this is higher than traditional asphalt shingles (which typically cost $4–$7 per square foot installed), the lifespan difference is monumental.

    What Factors Influence the Price of a Metal Roof?

    Several variables can cause your final quote to fluctuate. Understanding these factors will help you negotiate better with contractors and avoid hidden fees.

    1. Material Type and Gauge

    Not all metal is created equal. The “gauge” refers to the thickness of the metal. A lower gauge number means thicker, more durable metal.

    • 29-Gauge: Thinner, less expensive, prone to denting. Best for sheds or low-traffic areas.
    • 26-Gauge: The standard for most residential homes. Good balance of cost and durability.
    • 24-Gauge: Thicker, heavier, and more expensive. Ideal for areas with heavy hail or snow loads.

    2. Roof Complexity and Pitch

    A simple gable roof is far cheaper to install than a roof with multiple valleys, dormers, chimneys, and skylights. Steeper pitches also require more safety equipment and labor time, increasing the cost. Contractors often charge a premium for roofs with a pitch greater than 6:12.

    3. Removal of Old Roofing

    Does your old roof need to come off? Most local building codes allow for one layer of existing shingles to remain under the new metal roof, which can save you $1,000–$3,000 in disposal and labor fees. However, if there is rot or structural damage, a full tear-off is mandatory, adding to the total cost.

    4. Geographic Location

    Labor rates vary wildly across the US. Installing a roof in rural Ohio will generally cost less than in San Francisco or New York City due to differences in union labor rates, insurance costs, and local demand.

    How Much Does It Cost To Get A Tin Roof

    Tin Roof vs. Shingles: A Cost-Benefit Analysis

    Many homeowners hesitate because of the initial sticker shock. However, when you look at the lifecycle cost, metal often wins. Let’s compare the two over a 50-year period.

    FeatureAsphalt ShinglesMetal (Tin) Roof
    Initial CostLow ($4–$7/sq. ft.)High ($7–$18+/sq. ft.)
    Lifespan15–25 years40–70+ years
    MaintenanceModerate (prone to wind/algae)Low (occasional inspection)
    Energy EfficiencyStandardHigh (reflects solar heat)
    Resale ValueNeutralIncreases home value
    Replacements Needed2–3 times in 50 years0–1 times in 50 years

    Note: Over 50 years, you might spend $15,000 initially on metal, whereas you could spend $12,000 initially on shingles, plus another $12,000–$15,000 to replace them twice. The metal roof becomes the cheaper option in the long run.

    Step-by-Step: How to Budget for Your Project

    If you are ready to move forward, follow these steps to ensure you get a fair price and high-quality work.

    1. Measure Your Roof Area: Use online satellite tools or hire a pro to get an accurate square footage measurement. Remember, roofing is measured in “squares” (100 sq. ft.).
    2. Choose Your Profile: Decide between exposed fastener (cheaper, industrial look) and standing seam (expensive, sleek, hidden fasteners). Standing seam is recommended for residential homes due to better leak protection.
    3. Get Three Quotes: Never accept the first bid. Ensure each contractor is licensed, insured, and has specific experience with metal roofing.
    4. Check for Warranties: Look for a manufacturer’s warranty on the paint finish (usually 20–40 years) and a separate workmanship warranty from the installer (usually 5–10 years).
    5. Verify Substrate Requirements: Metal roofs often require specific underlayment. Ensure your quote includes high-quality synthetic underlayment, not just felt paper.

    For more detailed technical specifications on metal alloys and their properties, you can refer to this comprehensive resource on Metal Alloys and Properties to understand what you are buying.

    Frequently Asked Questions (FAQ)

    1. Is a tin roof louder than shingles during rain?

    This is a common myth. When installed correctly with solid sheathing (plywood or OSB) and proper insulation, a metal roof is no louder than a shingle roof. In fact, many homeowners find the sound of rain on metal to be soothing rather than noisy. The key is ensuring there is an air gap or solid deck beneath the metal panels.

    2. Does a tin roof attract lightning?

    No, metal roofs do not attract lightning. Lightning strikes are determined by height and location, not material. However, if a house is struck, a metal roof is non-combustible and can actually dissipate the energy safely, reducing the risk of fire compared to wood shingles.

    3. Can I walk on my tin roof?

    It is not recommended. Walking on metal panels can cause dents, especially if they are thinner gauges (29 or 26). It can also void your warranty if you damage the protective coating. If maintenance is required, hire a professional who knows how to walk on metal roofs without causing damage.

    4. How long does it take to install a tin roof?

    For an average-sized home (2,000 sq. ft.), a professional crew can typically complete the installation in 2 to 4 days. This is often faster than shingle replacement because metal panels cover larger areas quickly. However, complex roofs with many penetrations (vents, chimneys) may take longer.

    5. Will a metal roof interfere with my cell phone or Wi-Fi signal?

    Generally, no. While metal can block radio waves, modern homes have signals entering through windows and other non-metallic parts of the structure. Most homeowners report no noticeable change in signal strength after switching to a metal roof. If you have a dedicated outdoor antenna, ensure it is mounted correctly.

    Conclusion

    So, how much does it cost to get a tin roof? While the initial investment of $15,000 to $36,000 for an average home is significant, it is essential to view it as a long-term asset rather than just an expense. With a lifespan that can exceed 50 years, minimal maintenance requirements, and potential energy savings, a metal roof offers unparalleled value.

    By choosing the right gauge, profile, and installer, you can protect your home for decades while boosting its curb appeal and resale value. Don’t let the upfront cost deter you from a solution that could save you money in the long run.

    Found this guide helpful? Share it with your friends on Facebook or Pinterest who are also considering a roof upgrade! If you have more questions about specific metal types, leave a comment below—we love hearing from our readers.

  • How To Get A Free Night At Red Roof Inn

    How To Get A Free Night At Red Roof Inn

    Traveling on a budget doesn’t mean you have to sacrifice comfort or sleep quality. Many Americans are looking for smart ways to stretch their travel dollars further without compromising on safety and cleanliness. If you are wondering how to get a free night at Red Roof Inn, you are in the right place to discover legitimate, proven strategies that work.

    Red Roof Inn has long been a staple for budget-conscious travelers across the United States. Known for its “Pet Friendly” policy and affordable rates, it is a go-to choice for road trippers and business travelers alike. However, getting a room for free requires more than just luck; it requires strategy, knowledge of their loyalty program, and understanding customer service protocols. In this guide, we will break down exactly how you can secure a complimentary stay using ethical and effective methods.

    Understanding the Red Roof Inn Rewards Program

    The most straightforward and reliable method to earn a free night is through their official loyalty program. Unlike some complex hotel chains that require hundreds of points for a single night, Red Roof Inn keeps things relatively simple.

    How Points Accumulate

    Red Roof Inn operates under the RediRewards program. Every time you book a stay directly through their website or app, you earn points. While the accumulation rate may seem slow compared to luxury brands, the threshold for redemption is also lower.

    • Earning Rate: Typically, members earn 10 points per dollar spent.
    • Redemption Threshold: You generally need around 10,000 to 15,000 points for a free night, depending on the location and season. This translates to roughly $1,000–$1,500 in qualified stays.

    For frequent business travelers or those who take multiple road trips a year, this adds up quickly. It is crucial to always book directly rather than using third-party sites like Expedia or Booking.com, as these external bookings often do not qualify for points.

    Tips to Maximize Points

    1. Book Directly: Always use the Red Roof Inn official site or mobile app.
    2. Look for Promotions: Occasionally, they run “Double Points” promotions during off-peak seasons.
    3. Corporate Rates: If your employer has a corporate code, use it. You still earn points, and the base rate is lower, meaning you reach the point threshold faster relative to the cash value.

    Leveraging Customer Service for Compensation

    While earning points takes time, there are situations where you can receive a free night immediately as compensation. This is not a “hack” to be abused, but a legitimate consumer right when service fails.

    When Compensation Applies

    Hotels, including budget chains like Red Roof Inn, aim to maintain customer satisfaction. If you experience significant issues during your stay, you may be eligible for a refund or a voucher for a future free night. Common scenarios include:

    • Cleanliness Issues: If the room is not cleaned to standard upon arrival.
    • Maintenance Failures: Broken AC in summer, no hot water, or non-functional locks.
    • Overbooking: If the hotel accidentally overbooks and cannot provide you with a room despite a confirmed reservation.

    How to Request Compensation Professionally

    If you encounter these issues, remain calm and document everything. Take photos of the issue immediately. Approach the front desk manager politely but firmly.

    Expert Tip: According to hospitality industry standards, resolving a complaint on-site is cheaper for the hotel than dealing with negative online reviews. A polite request for a “service recovery” voucher is often granted.

    Do not demand a free night aggressively. Instead, say: “I was really looking forward to my stay, but due to [specific issue], I couldn’t use the room as intended. Is there anything you can do to make this right, such as a voucher for a future stay?”

    How To Get A Free Night At Red Roof Inn

    Utilizing Credit Card Rewards and Travel Portals

    Another effective avenue on how to get a free night at Red Roof Inn is by leveraging external reward systems. Many credit cards offer travel portals where you can redeem points for hotel stays.

    Chase Ultimate Rewards and Amex Membership Rewards

    If you hold a premium travel credit card, you might be able to book Red Roof Inn through their travel portals.

    1. Log in to your credit card’s travel portal.
    2. Search for Red Roof Inn locations.
    3. Use your points to cover the entire cost of the booking.

    While this isn’t a “free” night in the sense that the hotel gave it to you, it is free out-of-pocket for you. This is particularly useful if you have accumulated sign-up bonuses from credit cards.

    Cashback Apps

    Some cashback apps like Rakuten or Ibotta occasionally offer cashback for hotel bookings. While this doesn’t give you a free night instantly, accumulating enough cashback can effectively fund your next stay. For example, if you get 5% cashback on a $100 stay, you earn $5. Over 20 stays, that’s $100—enough for a cheap night at many Red Roof locations.

    Watching for Error Fares and Special Promotions

    Occasionally, hotels or booking engines make pricing errors. These are known as “error fares.” While rare, they do happen.

    What Are Error Fares?

    An error fare occurs when a hotel accidentally lists a room for $0.00 or an extremely low price like $1.00 due to a technical glitch.

    How to Capitalize on Them

    1. Follow Deal Forums: Websites like FlyerTalk or Slickdeals often have threads dedicated to hotel glitches.
    2. Act Fast: If you see a deal, book it immediately.
    3. Be Prepared for Cancellation: Note that hotels are not legally obligated to honor error fares in many jurisdictions. They may cancel the booking and offer a small goodwill gesture instead. However, sometimes they do honor it to avoid bad PR.

    For more information on consumer rights regarding digital contracts and pricing errors, you can refer to general legal principles outlined on Wikipedia.

    Comparison: Methods to Get a Free Night

    To help you decide which strategy fits your lifestyle, here is a quick comparison table.

    MethodEffort LevelTime to RewardReliabilityBest For
    RediRewards LoyaltyLowLong TermHighFrequent Travelers
    Service CompensationMediumImmediateVariableThose encountering issues
    Credit Card PointsLowMediumHighCredit Card Churners
    Error FaresHighImmediateLowDeal Hunters

    Step-by-Step Guide to Joining RediRewards

    If you haven’t already, here is how to start earning toward your free night today:

    1. Visit the Website: Go to the official Red Roof Inn website.
    2. Click Sign Up: Locate the “RediRewards” tab, usually at the top of the homepage.
    3. Enter Details: Provide your name, email, and create a password. It takes less than 2 minutes.
    4. Link Your Account: Ensure your membership number is attached to every future booking.
    5. Track Progress: Log in periodically to check your point balance.

    FAQ Section

    1. Can I get a free night at Red Roof Inn just for signing up?

    No, currently Red Roof Inn does not offer a free night solely for signing up for their loyalty program. You must accumulate points through paid stays. Be wary of third-party sites claiming otherwise, as they may be phishing scams.

    2. Do points expire in the RediRewards program?

    Yes, typically points expire if there is no account activity for a certain period, usually 12 to 24 months. To keep your points active, make sure to book a stay or engage with the program at least once a year.

    3. Can I combine points with cash for a stay?

    Most hotel loyalty programs, including Red Roof Inn, allow you to use points for a full redemption. Partial redemptions (points + cash) vary by policy updates. It is best to check the current terms on their official site before booking.

    4. Is it better to book via phone or online for points?

    Booking online is generally safer for ensuring points are credited automatically. If you book via phone, always ask the agent to confirm that your RediRewards number has been attached to the reservation and ask for a confirmation email.

    5. Does Red Roof Inn offer free nights for military or first responders?

    Red Roof Inn offers discounted rates for military and first responders, but not necessarily free nights. However, combining these discounts with loyalty points can help you reach a free night faster since the lower rate means you spend less cash per point earned.

    6. What if I don’t receive my points after a stay?

    If points are missing, wait 7–10 days after checkout. If they still haven’t appeared, contact Red Roof Inn customer support with your folio number and receipt. They are usually prompt in correcting missing points.

    Conclusion

    Learning how to get a free night at Red Roof Inn is entirely possible with the right approach. The most sustainable method is consistently using the RediRewards loyalty program for direct bookings. For immediate needs, understanding your rights regarding service compensation can save the day when things go wrong. Additionally, leveraging credit card rewards provides a flexible alternative for those who do not stay at hotels frequently enough to earn points directly.

    Remember, the key is consistency and awareness. Always book direct, keep your eyes open for promotions, and treat staff with respect to maximize your chances of receiving goodwill gestures.

    Did you find this guide helpful? Share it with your fellow travelers on Facebook or Twitter to help them save on their next road trip! Safe travels!

  • Metal vs. Shingles: Roof Lifespan Revealed

    Metal vs. Shingles: Roof Lifespan Revealed

    Choosing a new roof is one of the most significant investments you will make for your home. It protects your family, your belongings, and your biggest asset from the elements. However, standing in the showroom or reading online quotes can be overwhelming, especially when trying to determine how long does a metal roof last compared to shingles. This question isn’t just about numbers; it’s about peace of mind, long-term value, and avoiding the hassle of frequent repairs. In this guide, we will break down the facts, myths, and financial realities to help you make the best choice for your specific situation.

    The Short Answer: A Decades-Long Difference

    If you are looking for a quick summary, the difference is stark. Traditional asphalt shingles typically last between 15 to 30 years, depending on the quality and climate. In contrast, a properly installed metal roof can last 40 to 70 years, with some high-end copper or zinc systems lasting over 100 years.

    This means that while you might replace an asphalt roof two or even three times during your ownership of a home, a metal roof could potentially last for the entire lifetime of the structure. But why is there such a massive gap? Let’s dive deeper into the materials.

    Understanding Asphalt Shingle Longevity

    Asphalt shingles are the most common roofing material in the United States, primarily due to their low upfront cost and ease of installation. However, their lifespan is heavily influenced by environmental factors and material composition.

    Types of Asphalt Shingles

    1. 3-Tab Shingles: These are the basic, economical option. They usually last 15–20 years. They are thinner and more susceptible to wind uplift and thermal cracking.
    2. Architectural (Dimensional) Shingles: These are thicker, heavier, and more durable. They mimic the look of wood or slate and typically last 25–30 years. Some premium versions come with warranties up to 50 years, but real-world performance often falls short of this mark due to weathering.

    Why Do Shingles Fail?

    Asphalt is a petroleum-based product. Over time, UV rays bake the oils out of the shingles, causing them to become brittle. Once brittle, they crack under thermal expansion and contraction. Additionally, granule loss—the tiny stones on the surface—exposes the asphalt to further degradation. In hot climates like Arizona or Texas, shingles may degrade faster than in cooler regions like the Pacific Northwest.

    How Long Does A Metal Roof Last Compared To Shingles

    The Durability of Metal Roofing Systems

    Metal roofing has evolved significantly from the corrugated tin barns of the past. Today’s metal roofs are engineered systems made from steel, aluminum, copper, or zinc, often coated with advanced reflective paints and protective layers.

    Material Breakdown

    • Steel (Galvalume or Galvanized): The most common type. With a proper coating (like Kynar 500), it resists rust and fading for 40–60 years.
    • Aluminum: Ideal for coastal areas because it does not rust. It lasts 50+ years and is lightweight.
    • Copper and Zinc: Premium materials that develop a patina over time. These can last 80–100+ years and are often seen on historic buildings or luxury homes.

    Why Does Metal Last Longer?

    Metal is inorganic. It does not rot, warp, or crack like organic materials. It is impervious to UV damage in the same way asphalt is. While the paint finish may eventually fade or chalk after several decades, the metal substrate itself remains intact. According to the Metal Roofing Alliance, metal roofs are designed to withstand extreme weather, including hail, high winds, and heavy snow loads, which contributes to their extended service life.

    Head-to-Head Comparison: Metal vs. Shingles

    To visualize the differences, let’s look at a direct comparison. This table highlights key factors beyond just lifespan.

    FeatureAsphalt ShinglesMetal Roofing
    Average Lifespan15–30 Years40–70+ Years
    Upfront CostLow ($3–$5 per sq. ft.)High ($7–$12+ per sq. ft.)
    MaintenanceModerate (cleaning moss, replacing tabs)Low (occasional inspection)
    Weather ResistanceModerate (vulnerable to hail/wind)High (impact resistant)
    Energy EfficiencyLow (absorbs heat)High (reflects solar radiant heat)
    RecyclabilityLow (mostly landfill waste)High (100% recyclable)
    Warranty20–30 Years (prorated)30–50 Years (often non-prorated)

    Cost Analysis: Is Metal Worth the Investment?

    The sticker shock of metal roofing is real. A metal roof can cost two to three times more than asphalt shingles initially. However, when you ask how long does a metal roof last compared to shingles, you must calculate the lifecycle cost.

    The Rule of Replacement

    If you choose asphalt shingles with a 20-year lifespan, and you plan to stay in your home for 40 years, you will pay for:

    1. Initial installation.
    2. Removal and disposal of the old roof.
    3. Second installation.

    With metal, you pay once. When you factor in the rising costs of labor and materials over time, the second replacement of asphalt shingles will likely cost significantly more than the first. Furthermore, metal roofs often increase resale value. A study by Remodeling Magazine’s Cost vs. Value Report indicates that metal roofing recoups a higher percentage of its cost upon sale compared to asphalt.

    Energy Savings

    Metal roofs reflect solar radiant heat, which can reduce cooling costs by 10–25%. Over a 40-year period, these savings add up, partially offsetting the higher initial investment. Asphalt shingles, particularly dark ones, absorb heat, transferring it into your attic and increasing your air conditioning load.

    Installation Matters: The Hidden Variable

    A roof is only as good as its installation. This is a critical point often overlooked by homeowners.

    • Shingle Installation: Requires precise nailing patterns. If nails are driven too deep or too shallow, or if the underlayment is poor, leaks can occur within a few years.
    • Metal Installation: Requires specialized training. Metal expands and contracts with temperature changes. If the fasteners are not installed correctly to allow for this movement, the panels can buckle or pull loose. Always hire a contractor who specializes in metal roofing, not just a general roofer who “also does metal.”

    Environmental Impact

    For eco-conscious homeowners, the lifespan difference is crucial. Asphalt shingles contribute millions of tons of waste to landfills annually in the US alone. Because they need replacing every two decades, this cycle of waste is continuous.

    Metal roofs, on the other hand, are often made from 25–95% recycled content. At the end of their life, they are 100% recyclable. Choosing a longer-lasting roof is one of the most effective ways to reduce your home’s environmental footprint.

    FAQ Section

    1. Does a metal roof dent easily from hail?

    Modern metal roofs are rated for impact resistance. Most residential metal roofs use 24-gauge or 26-gauge steel, which is quite strong. While a massive hailstone can dent metal, it is less likely to puncture it compared to shingles, which can crack and lose granules, leading to immediate leaks. Look for Class 4 impact-resistant ratings for maximum protection.

    2. Will a metal roof void my homeowner’s insurance?

    No, in fact, it may lower your premiums. Many insurance companies offer discounts (often 5–15%) for metal roofs because they are fire-resistant and durable against wind and hail. Always check with your provider, but generally, metal is viewed as a lower-risk material.

    3. Can I install a metal roof over existing shingles?

    In many cases, yes. This is called a “retrofit” or “overlay.” It saves on disposal costs and labor. However, you must ensure the existing roof deck is structurally sound and that local building codes allow it. A professional inspection is required to determine if your home can support the added weight and if ventilation issues need to be addressed.

    4. How much maintenance does a metal roof require?

    Very little. You should inspect it once or twice a year, preferably in spring and fall. Check for loose fasteners, clear debris from valleys and gutters, and rinse off any dirt or pollen with a garden hose. Avoid using pressure washers, as they can damage the paint finish.

    5. Is a metal roof noisy when it rains?

    This is a common myth. When installed correctly with solid sheathing and proper insulation, a metal roof is no noisier than an asphalt shingle roof. The insulation and attic space dampen the sound. In fact, many homeowners find the sound of rain on metal soothing rather than disruptive.

    6. What affects the lifespan of a metal roof the most?

    The quality of the paint system (coating) is the primary factor. The metal itself won’t fail, but the paint protects it from corrosion and UV rays. High-quality coatings like Kynar 500 or Hylar 5000 offer superior chalk and fade resistance. Additionally, the local environment matters; coastal salt air requires aluminum or specially coated steel to prevent corrosion.

    Conclusion

    So, how long does a metal roof last compared to shingles? The answer is clear: metal lasts significantly longer, often doubling or tripling the lifespan of traditional asphalt shingles. While the upfront cost is higher, the long-term benefits—including lower maintenance, energy savings, increased home value, and reduced environmental impact—make it a compelling investment for many homeowners.

    If you plan to stay in your home for more than 15 years, metal roofing offers superior value and peace of mind. If you are selling soon or have strict budget constraints, high-quality architectural shingles remain a viable, albeit shorter-term, solution.

    Did you find this guide helpful? Share this article with friends or family who are considering a roof replacement. Helping others make informed decisions is the first step toward smarter home improvement!