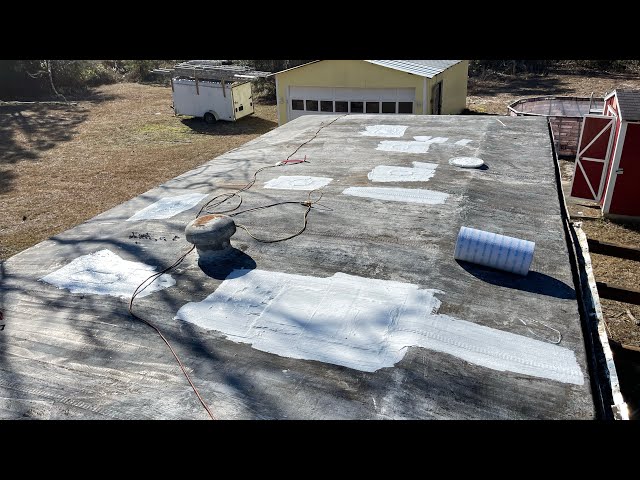
Water dripping from your ceiling is more than just an annoyance; it is a ticking time bomb for mold, structural rot, and costly repairs. If you are staring at a wet spot and wondering how to fix a leaky roof on a mobile home, you are not alone. This guide provides clear, actionable steps to seal leaks effectively, helping you restore peace of mind and dryness to your living space without breaking the bank.
Why Do Mobile Home Roofs Leak?
Before grabbing a toolbox, it is crucial to understand why the leak is happening. Mobile homes (also known as manufactured homes) have unique roofing systems compared to traditional stick-built houses. They often feature low-pitch roofs made of metal or asphalt shingles, which are susceptible to specific types of wear and tear.
The primary culprit is usually the failure of sealants around protrusions. Vents, skylights, and air conditioning units create breaks in the roofing membrane. Over time, exposure to UV rays, extreme temperature fluctuations, and wind causes these sealants to crack, shrink, or peel away. According to industry data, nearly 80% of roof leaks originate not from the main field of the roof, but from these flashings and penetrations.
Additionally, mobile homes can shift slightly over time due to foundation settling. This movement can stress the roof seams, particularly in older models with rubberized or TPO (Thermoplastic Olefin) membranes, leading to micro-tears that eventually become significant leaks.
Tools and Materials You Will Need
To successfully repair your roof, you need the right equipment. Using inferior materials may save money upfront but will lead to recurring leaks. Here is a checklist of essentials:
- Safety Gear: Non-slip shoes, safety harness (if the pitch is steep), and sturdy gloves.
- Cleaning Supplies: A stiff-bristle brush, mild detergent, and a garden hose.
- Repair Materials:
- High-quality roofing cement or elastomeric sealant (specifically designed for mobile homes/RVs).
- Roofing tape or patch fabric (fiberglass mesh).
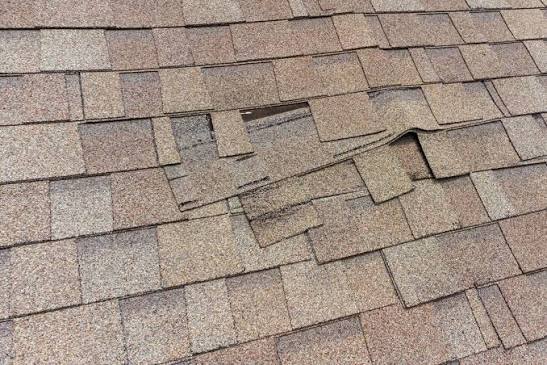
- Replacement shingles or metal panels (if physical damage exists).
- Tools: Putty knife, caulk gun, utility knife, and a ladder.
Pro Tip: Always choose a sealant that remains flexible after curing. Mobile homes expand and contract with temperature changes; rigid sealants will crack within months.
Step-by-Step Guide: How To Fix A Leaky Roof On A Mobile Home
Fixing a leak requires methodical preparation. Rushing this process often results in trapping moisture under the patch, which accelerates rot. Follow these precise steps for a lasting repair.
Step 1: Locate the Source of the Leak
Water travels. The drip inside your home may be several feet away from the actual entry point on the roof. Go into your attic or crawl space (if accessible) during a rainstorm or have someone spray water on the roof while you inspect from below. Look for water stains, dark spots, or damp insulation. Mark the area directly above the interior leak on the exterior roof.
Step 2: Clean the Area Thoroughly
Adhesion is the key to any waterproof repair. Dirt, moss, algae, and old, flaking sealant must be removed.
- Sweep the area around the leak with a stiff brush.
- Wash the surface with a mixture of water and mild detergent.
- Rinse thoroughly and allow it to dry completely. This is critical. Applying sealant to a damp surface will cause it to fail. Wait at least 24 hours after cleaning if it has rained recently.
Step 3: Prepare the Surface
If there is old caulking or cracked tar, scrape it away using a putty knife. For metal roofs, lightly sand the area around the leak to create a “tooth” for the new sealant to grip. If you are repairing a rubber (EPDM) roof, use a specialized primer recommended by the manufacturer to ensure chemical bonding.
Step 4: Apply the Patch or Sealant
For small cracks or holes around vents:
- Load your caulk gun with high-grade elastomeric sealant.
- Apply a generous bead of sealant over the crack, extending at least 2 inches beyond the damage on all sides.
- Smooth it out with a putty knife dipped in soapy water to prevent sticking.
For larger tears or holes:
- Cut a piece of roofing patch fabric or fiberglass mesh slightly larger than the damaged area.
- Apply a layer of roofing cement to the roof surface.
- Press the patch firmly into the wet cement.
- Apply another thick layer of cement over the top of the patch, feathering the edges to blend with the surrounding roof. This creates a watertight “sandwich.”
Step 5: Inspect and Maintain
Once the repair is complete, monitor it during the next few rainstorms. Check the interior ceiling for any new signs of moisture. Regular maintenance, such as clearing debris from roof valleys and re-applying sealant every 2–3 years, can extend the life of your mobile home roof significantly.
Common Mistakes to Avoid
Even experienced DIYers can make errors when dealing with mobile home roofing. Here are the most frequent pitfalls:
| Mistake | Consequence | Solution |
|---|---|---|
| Ignoring Vent Boots | Water enters through cracked rubber boots around plumbing vents. | Replace rubber boots entirely rather than just sealing cracks. |
| Using Silicone Caulk | Silicone does not adhere well to many roofing materials and cannot be painted over. | Use polyurethane or elastomeric roofing sealants instead. |
| Patch Over Wet Wood | Traps moisture, leading to rapid rot and mold growth. | Ensure the substrate is bone-dry before applying any patch. |
| Walking on Weak Spots | Can puncture the roof further, especially on older aluminum skins. | Distribute weight using plywood boards or walk only on supported rafters. |
When to Call a Professional
While many leaks are manageable DIY projects, some situations require expert intervention. If the leak is widespread, if the roof deck feels soft or spongy when walked on, or if the structural integrity of the trusses is compromised, do not attempt a repair yourself.
According to general construction guidelines, significant water damage can affect the electrical systems within the walls of a mobile home, posing a fire hazard. For complex issues, refer to resources like Wikipedia’s article on Roofing to understand the broader technical standards and material classifications used in the industry.
FAQ Section
1. Can I use regular house roof shingles on a mobile home?
It depends on the pitch. Most mobile homes have low-slope roofs (less than 3:12 pitch). Standard asphalt shingles require a steeper pitch to shed water effectively. Using them on a low-slope roof can lead to water backing up under the shingles. Instead, use modified bitumen, EPDM rubber, or metal roofing systems designed for low slopes.
2. How much does it cost to fix a mobile home roof?
A minor DIY patch job using sealant and tape typically costs between $50 and $150. However, a full roof replacement can range from $3,000 to $8,000 depending on the size of the home and materials used. Hiring a professional for a localized repair usually averages $300–$600.
3. What is the best sealant for a mobile home roof?
Elastomeric liquid roof coatings or polyurethane-based sealants are widely considered the best options. They remain flexible in extreme temperatures, adhere well to metal and rubber, and provide UV protection. Brands like Dicor or Eternabond are popular choices in the mobile home community.
4. How often should I inspect my mobile home roof?
You should perform a visual inspection at least twice a year: once in the spring after winter storms and once in the fall before heavy rains or snow. Additionally, check the roof after any severe weather event, such as hail or high winds.
5. Is it better to patch or replace the roof?
If the roof is less than 10 years old and the damage is isolated to a small area (like a vent boot), patching is cost-effective. However, if the roof is over 15 years old, shows signs of widespread oxidation (chalky residue), or has multiple leaks, a full replacement is often more economical in the long run.
Conclusion
Learning how to fix a leaky roof on a mobile home empowers you to protect your biggest asset. By identifying the source early, using the right flexible materials, and following a thorough cleaning and application process, you can stop leaks in their tracks. Remember, consistency is key—regular inspections prevent small cracks from becoming catastrophic failures.
Did this guide help you dry out your home? Share this article with fellow mobile home owners on social media to help them save money and avoid water damage. Stay dry and safe!