Tag: Metal Roofing Installation

  • Can You Put Metal Over Shingles? Pros, Cons & Guide

    Can You Put Metal Over Shingles? Pros, Cons & Guide

    Homeowners often face a daunting dilemma when their aging asphalt shingles start to leak or curl: tear everything off or cover it up? The question “Can you put a metal roof over a shingle roof“ is one of the most common inquiries we receive at roofing consultancies. It’s a valid concern because nobody wants to pay for unnecessary demolition, yet everyone fears compromising their home’s structural integrity.

    The short answer is yes, you generally can, but it is not always the best choice for every home. This decision involves balancing cost savings against potential long-term maintenance issues. In this comprehensive guide, we will break down the technical requirements, benefits, and hidden risks so you can make an informed decision that protects your investment and your peace of mind.

    Is It Structurally Safe to Install Metal Over Shingles?

    Before diving into aesthetics or cost, we must address safety. The primary concern when adding a new roofing layer is the weight load on your home’s framing.

    Weight Comparison: Metal vs. Asphalt

    One of the biggest advantages of metal roofing is its lightweight nature.

    • Asphalt Shingles: Weigh approximately 2.5 to 4 pounds per square foot.
    • Metal Roofing: Weighs roughly 1 to 1.5 pounds per square foot (depending on the material, such as steel or aluminum).

    Because metal is significantly lighter than asphalt, adding a metal layer over existing shingles rarely exceeds the structural load capacity of a standard residential roof frame. However, this assumes your roof was built to code and has no pre-existing structural damage.

    The “Two-Layer” Rule

    Most building codes in the United States allow for a maximum of two layers of roofing material. If you already have two layers of shingles, you cannot install a third layer (metal or otherwise) without a complete tear-off. Always check with your local building department, as regulations vary by state and municipality.

    What Are the Benefits of Installing Metal Over Shingles?

    Choosing to overlay your roof offers several compelling advantages that go beyond just saving money on labor.

    1. Cost Savings on Demolition

    Tearing off an old roof is expensive. It involves labor costs for removal, dumpster fees for disposal, and potential repairs to the decking if damage is found during removal. By installing metal over shingles, you eliminate these demolition costs entirely. According to industry estimates, this can save homeowners between $1,000 and $2,500 depending on the roof size.

    2. Enhanced Insulation and Energy Efficiency

    The existing layer of shingles acts as an additional thermal barrier. When combined with the reflective properties of modern metal roofing (especially those with cool-roof coatings), this double layer can significantly reduce heat transfer into your attic. This leads to lower air conditioning bills during hot summer months.

    3. Environmental Friendliness

    Roofing waste is a major contributor to landfills. By leaving the old shingles in place, you keep tons of non-biodegradable asphalt out of the environment. Furthermore, metal roofs are 100% recyclable at the end of their life cycle, making this a sustainable choice for eco-conscious homeowners.
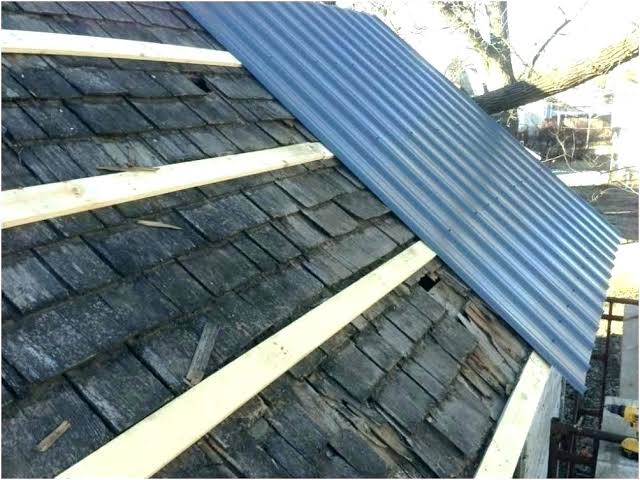
    Can You Put A Metal Roof Over A Shingle Roof

    What Are the Risks and Drawbacks?

    While the benefits are attractive, ignoring the downsides can lead to costly mistakes. Here is what you need to watch out for.

    Trapped Moisture and Rot

    This is the single biggest risk. If your existing shingles have any moisture trapped beneath them, covering them with metal seals that moisture in. Without proper ventilation, this can lead to:

    • Wood rot in the decking.
    • Mold growth in the attic.
    • Corrosion of the metal panels from the inside out.

    Expert Tip: Never install metal over wet or damaged shingles. A thorough inspection is mandatory.

    Voided Warranties

    Many metal roofing manufacturers will void their warranty if their product is installed over existing shingles. They require a clean, solid deck to ensure proper fastening and performance. Always read the fine print of your warranty before proceeding.

    Difficulty in Future Repairs

    If a leak develops five years from now, locating the source becomes a detective game. Is the leak coming from the metal seam? Or is it water traveling laterally under the metal from a failed spot in the old shingle layer? This complexity can increase repair costs and time.

    Key Considerations Before You Start

    If you decide to proceed, you must adhere to strict preparation guidelines to ensure longevity.

    Inspection and Repair

    You cannot simply screw metal panels over curled or missing shingles. The surface must be relatively flat.

    1. Replace Missing Shingles: Fill in any gaps to create a uniform surface.
    2. Secure Loose Shingles: Nail down any lifted tabs.
    3. Check Decking: If you find soft spots in the roof deck, you must cut out the metal/shingle section and repair the wood, even if you are doing an overlay.

    Ventilation Requirements

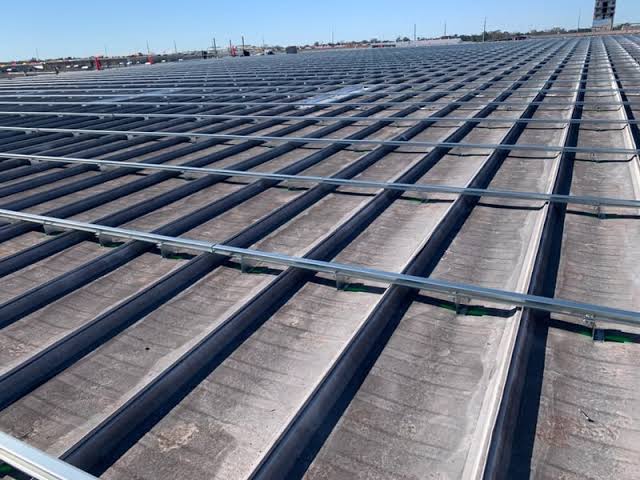
    Proper airflow is critical. You must ensure that your attic has adequate intake and exhaust ventilation. Many professionals recommend installing a vented batten system or using standing seam metal roofs with raised clips. This creates an air gap between the shingles and the metal, allowing heat and moisture to escape.

    Local Building Codes

    As mentioned earlier, codes vary. Some jurisdictions require a complete tear-off if the existing roof is older than a certain age or if specific fire ratings are required. For more detailed information on building standards, you can refer to general construction guidelines on Wikipedia.

    Step-by-Step Installation Overview

    While we strongly recommend hiring a certified professional, understanding the process helps you vet contractors.

    1. Preparation: Clean the roof surface of debris, moss, and loose granules.
    2. Underlayment Installation: Install a high-quality synthetic underlayment over the existing shingles. This acts as a secondary water barrier. Note: Do not use felt paper as it can trap too much moisture.
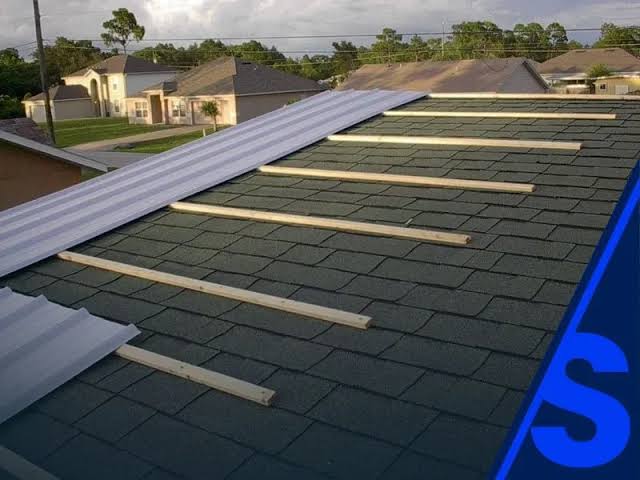
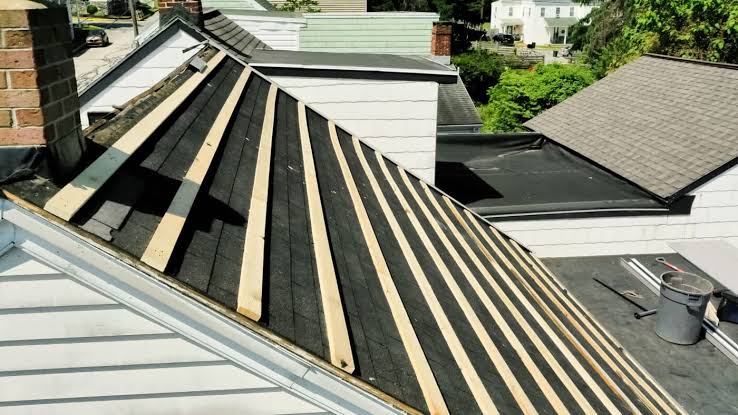
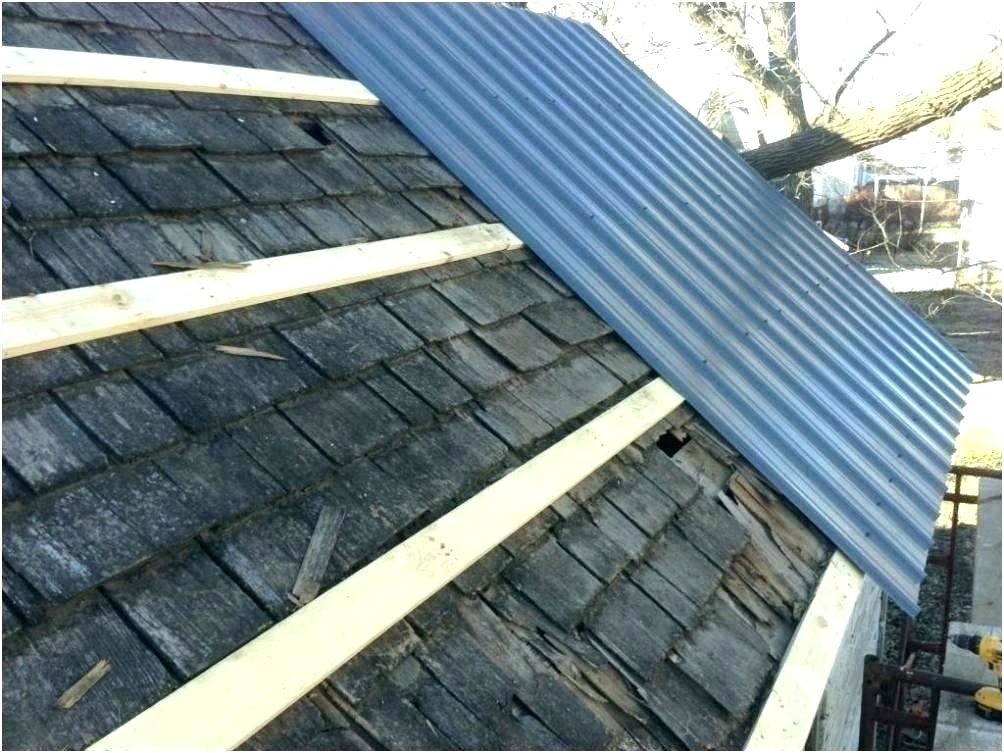
    3. Batten System (Optional but Recommended): Install horizontal or vertical battens (strips of wood or metal) over the underlayment. This ensures the metal panels do not sit directly on the uneven shingle surface and promotes airflow.
    4. Panel Installation: Begin installing the metal panels from the eave upward, following the manufacturer’s overlap instructions.
    5. Fastening: Use screws with rubber washers designed for metal roofing. Ensure they are driven straight to prevent leaks.
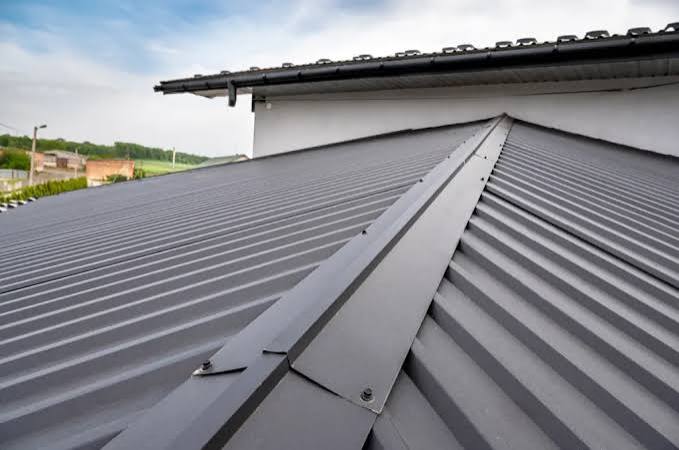
    6. Flashing and Trim: Install new drip edges, ridge caps, and flashing around chimneys and vents. Crucial: Old flashing should not be reused; it must be replaced to match the new roof profile.

    Comparison: Tear-Off vs. Overlay

    FeatureTear-Off and ReplaceInstall Over Shingles
    CostHigher (Labor + Disposal)Lower (No Demo Costs)
    TimeLonger (3-5 days)Faster (1-3 days)
    InspectionFull deck inspection possibleLimited visibility of deck
    WarrantyUsually full manufacturer warrantyMay be limited or voided
    LongevityMaximum potential lifespanSlightly reduced due to underlying variables
    Eco-ImpactHigh waste generationLow waste generation

    FAQ Section

    1. Will putting a metal roof over shingles void my homeowner’s insurance?

    Generally, no. Most insurance companies accept metal roofs installed over shingles as long as the installation meets local building codes and is performed by a licensed contractor. However, it is wise to notify your insurer before starting the project.

    2. How long does a metal roof last if installed over shingles?

    A properly installed metal roof can last 40–70 years. However, installing it over shingles might slightly reduce this lifespan if moisture issues arise. Ensuring proper ventilation and a dry substrate is key to reaching the maximum lifespan.

    3. Can I install metal roofing over two layers of shingles?

    In most cases, no. Most US building codes prohibit having more than two layers of roofing material. If you already have two layers of shingles, you must tear them all off before installing metal.

    4. Does the color of the old shingles matter?

    Not directly for structural reasons, but dark shingles absorb more heat. If you live in a hot climate, the extra heat trapped between the shingles and the metal could potentially affect energy efficiency. Lighter-colored underlayments can help mitigate this.

    5. What type of metal roof is best for overlays?

    Standing seam metal roofs are often preferred for overlays because they use concealed fasteners and raised seams, which allow for better expansion/contraction and ventilation compared to exposed-fastener corrugated panels.

    Conclusion

    So, can you put a metal roof over a shingle roof? Yes, you can, and for many homeowners, it is a cost-effective, eco-friendly solution that provides excellent durability. However, it is not a shortcut. It requires meticulous preparation, strict adherence to ventilation standards, and a honest assessment of your current roof’s condition.

    If your existing shingles are dry, flat, and structurally sound, an overlay can be a brilliant upgrade. If there is any sign of rot, moisture, or multiple existing layers, a full tear-off is the safer, albeit more expensive, route.

    Did you find this guide helpful? Share it with friends who are considering a roof upgrade on Facebook or Pinterest, and leave a comment below with your own roofing questions!
  • Metal Over Shingles: The Ultimate Guide

    Metal Over Shingles: The Ultimate Guide

    Have you ever looked up at your aging asphalt shingle roof and wondered if there was a faster, less messy way to replace it? Many homeowners face this dilemma, fearing the high cost and disruption of a full tear-off. You are likely asking yourself: Can you put a metal roof over an existing roof? The short answer is yes, but it requires careful planning and adherence to strict building codes to ensure longevity and safety.

    In this comprehensive guide, we will walk you through everything you need to know about installing metal roofing over shingles. We will cover the structural requirements, cost benefits, potential pitfalls, and step-by-step considerations to help you make an informed decision for your home.

    Is It Structurally Safe to Install Metal Over Shingles?

    Before diving into the aesthetics or cost savings, we must address the most critical factor: structural integrity. Your home’s framing was designed to hold a specific weight load. Adding a new layer of roofing material adds weight, even if metal is lighter than many other materials.

    Understanding the Weight Load

    Asphalt shingles typically weigh between 2.5 to 4 pounds per square foot. Standing seam metal roofs, by comparison, weigh only 1 to 1.5 pounds per square foot. This means that in many cases, replacing heavy shingles with light metal actually reduces the overall load on your roof structure. However, if you are leaving the old shingles in place, you are adding that 1–1.5 lbs/sq ft on top of the existing 3 lbs/sq ft.

    For most modern homes built after 1970, the framing can easily support this additional weight. However, older homes, particularly those with historical timber framing or previous water damage, may not be as robust.

    Expert Tip: Always hire a licensed structural engineer or a certified roofing contractor to inspect your attic and rafters before proceeding. They can determine if your roof deck can handle the combined load of two roofing systems.

    The Condition of the Existing Deck

    The “deck” is the wooden surface (usually plywood or OSB) that holds your shingles. If your current roof has soft spots, rot, or significant water damage, you cannot simply cover it up. Trapping moisture under a new metal roof will accelerate decay and lead to catastrophic failure within a few years. Any compromised sections of the deck must be replaced before installation begins.

    What Are the Benefits of Roofing Over Existing Shingles?

    Why do so many contractors and homeowners choose this method? The advantages go beyond just convenience. Here is a breakdown of why this approach is gaining popularity across the United States.

    1. Significant Cost Savings

    The most immediate benefit is financial. A full roof tear-off involves labor-intensive removal, dumpster rentals, and disposal fees. By skipping the tear-off, you can save between $1,000 and $2,500 depending on the size of your home and local landfill fees. Additionally, the installation process is faster, which reduces labor costs.

    2. Enhanced Insulation and Energy Efficiency

    Leaving the existing shingle layer in place creates an additional thermal barrier. This extra layer can improve your home’s R-value (resistance to heat flow), helping to keep your house cooler in summer and warmer in winter. When combined with proper ventilation strategies, this can lead to noticeable reductions in energy bills.

    3. Reduced Noise and Weather Protection

    During the installation process, your home remains protected from the elements. Since the old roof stays in place, there is no risk of rain leaking into your attic while workers are stripping the old material. Furthermore, the solid base of the old shingles can help dampen the sound of rain or hail hitting the metal panels, addressing a common concern among homeowners.

    4. Environmental Friendliness

    Roofing waste is a major contributor to landfills. According to the EPA, construction and demolition debris accounts for a significant portion of total waste generated in the US. By avoiding a tear-off, you keep tons of asphalt shingles out of the landfill, making this a more sustainable choice for eco-conscious homeowners.

    What Are the Risks and Drawbacks to Consider?

    While the benefits are appealing, it is not all smooth sailing. There are specific risks associated with “roof-over” installations that you must understand to avoid costly mistakes.

    FeatureTear-Off ReplacementRoof-Over Installation
    CostHigher (Labor + Disposal)Lower (No Disposal Fees)
    InspectionFull deck visibilityLimited visibility
    WarrantyOften longer/full coverageMay be voided or limited
    LongevityMaximum potential lifespanSlightly reduced due to heat trap
    Future RepairsEasier to diagnose leaksHarder to locate leak source

    Voided Manufacturer Warranties

    This is a critical point often overlooked. Many metal roofing manufacturers will void their warranty if their product is installed over more than one layer of existing roofing. Always read the fine print of your chosen metal brand. Some may allow it if specific underlayment and ventilation protocols are followed, while others strictly prohibit it.

    Trapped Moisture and Heat

    If the existing shingles are curled or uneven, they can create air pockets. Without proper ventilation, heat and moisture can get trapped between the two layers. This “greenhouse effect” can cause the wood deck to rot from the inside out, even if the metal roof looks perfect from the outside. Proper airflow is non-negotiable.

    Difficulty in Future Inspections

    If you develop a leak five years down the road, identifying the source becomes much harder. Water can travel laterally between the shingles and the metal before dripping into your attic. This makes repairs more complex and potentially more expensive in the long run.

    Can You Put A Metal Roof Over An Existing Roof

    How Is the Installation Process Different?

    Installing metal over shingles is not the same as installing it on a bare deck. The process requires specific techniques to ensure a flat, secure, and ventilated finish.

    Step 1: Preparation and Repair

    First, remove any loose shingles, protruding nails, or vent pipes that are no longer needed. Secure any loose shingles with roofing cement. Ensure the roof surface is as flat as possible.

    Step 2: Installing Furring Strips (Battens)

    You should never screw metal panels directly into old shingles. Instead, install horizontal or vertical furring strips (also known as battens). These are usually 1×4 or 2×4 wooden strips spaced 24 inches apart.

    • Why? Battens create a level surface over the uneven shingles.
    • Ventilation: They create an air channel between the old roof and the new metal, allowing heat and moisture to escape. This is crucial for preventing condensation buildup.

    Step 3: Adding Underlayment

    A high-quality synthetic underlayment should be installed over the battens or directly over the shingles (depending on the batten system used). This acts as a secondary water barrier. For more details on roofing materials and standards, you can refer to general construction guidelines on Wikipedia.

    Step 4: Panel Installation

    The metal panels are then screwed into the battens, not the deck. Use screws with rubber washers designed for metal roofing to prevent leaks. Ensure that the screws are driven straight and not over-tightened, which can damage the washer.

    Frequently Asked Questions (FAQ)

    1. Can I put a metal roof over two layers of shingles?

    Generally, no. Most building codes in the US limit roofing to two layers total. If you already have two layers of shingles, you must tear them off before installing metal. Even if code allows it, the unevenness and weight make it highly inadvisable.

    2. Will my homeowner’s insurance cover a roof-over installation?

    Most insurance companies accept metal roofs installed over shingles, provided the installation meets local building codes and manufacturer specifications. However, some insurers may offer lower premiums for a full tear-off because it eliminates the risk of hidden deck damage. Always check with your provider.

    3. Does installing metal over shingles affect resale value?

    Yes, positively. Metal roofs are known for their durability (40–70 years) and energy efficiency. As long as the installation is professional and disclosed properly, it can increase your home’s curb appeal and market value. Buyers appreciate the low maintenance aspect.

    4. How long does a metal roof last when installed over shingles?

    A properly installed metal roof can last 40 to 70 years. However, the underlying shingles will eventually degrade. While the metal protects them from rain, heat buildup can shorten the life of the organic materials beneath. The metal itself will remain intact, but the system’s overall performance relies on the initial condition of the shingles.

    5. Do I need a permit to install a metal roof over my existing roof?

    Yes, in almost all jurisdictions in the US, you need a building permit for re-roofing. The inspector will check the structural load and ensure the installation meets fire and wind resistance codes. Skipping permits can lead to fines and issues when selling your home.

    Conclusion

    So, can you put a metal roof over an existing roof? Absolutely. It is a viable, cost-effective, and environmentally friendly option for many homeowners. By saving on disposal costs and gaining an extra layer of insulation, you can upgrade your home’s protection without breaking the bank.

    However, success depends on execution. You must ensure your roof structure is sound, use furring strips for ventilation, and choose a metal manufacturer that supports this installation method. Never cut corners on inspection or preparation.

    If you are considering this upgrade, take the time to get multiple quotes from certified metal roofing specialists. Ask them specifically about their experience with roof-over installations and request references.

    Found this guide helpful? Share it with your friends on Facebook or Pinterest who might be contemplating their own roofing projects. Knowledge is power when it comes to protecting your biggest investment—your home!

  • How To Install A Ridge Cap On A Metal Roof

    How To Install A Ridge Cap On A Metal Roof

    Water leaking through the peak of your roof is one of the most stressful issues a homeowner can face. It threatens the structural integrity of your home and can lead to costly interior damage if not addressed immediately. If you are looking for a reliable, weather-tight solution, learning how to install a ridge cap on a metal roof is the critical final step in ensuring your roofing system performs as designed.

    Many DIY enthusiasts hesitate at this stage, fearing they might compromise the warranty or create new leaks. However, with the right tools, preparation, and attention to detail, installing a ridge cap is a manageable task that significantly enhances both the durability and aesthetic appeal of your metal roof. This guide will walk you through the process with professional precision, ensuring you get it right the first time.

    Why Is the Ridge Cap Critical for Metal Roofs?

    Before diving into the tools and steps, it is essential to understand why this component matters. The ridge cap is not merely decorative; it is the primary defense against wind-driven rain and snow entering the gap where two roof planes meet.

    According to industry standards, the ridge is the highest point of vulnerability on any roof. Without a properly sealed ridge cap, water can easily bypass the overlapping metal panels. A well-installed cap directs water away from the seam and allows for necessary ventilation, preventing heat buildup and moisture condensation in your attic.

    Expert Insight: “The ridge cap is the handshake between your two roof slopes. If that handshake isn’t firm and sealed, the entire system fails.” – National Roofing Contractors Association (NRCA) Guidelines

    Tools and Materials You Will Need

    Preparation is half the battle. Gathering the correct materials before you climb the ladder ensures a smooth workflow and reduces the time spent exposed to the elements.

    Essential Tools

    • Drill/Impact Driver: With a clutch setting to avoid over-driving screws.
    • Metal Snips or Electric Shears: For cutting the ridge cap to length.
    • Caulking Gun: For applying sealant.
    • Chalk Line: To ensure straight alignment.
    • Safety Gear: Non-slip boots, gloves, safety glasses, and a harness if the pitch is steep.

    Materials Checklist

    • Ridge Cap Flashing: Match the profile and color of your existing metal panels.
    • Closure Strips (Foam or Rubber): These fill the gap between the ribbed panel and the flat ridge cap.
    • Butyl Tape or Sealant: High-quality, UV-resistant roofing sealant.
    • Screws: Color-matched, self-tapping metal screws with neoprene washers.
    • Ventilation Strip (Optional): If you are installing a vented ridge cap for airflow.

    For more detailed information on metal roofing components and their engineering standards, you can refer to the general overview on Wikipedia’s Metal Roofing page.

    How To Install A Ridge Cap On A Metal Roof

    Step-by-Step Guide: How To Install A Ridge Cap On A Metal Roof

    Follow these steps meticulously. Rushing this process is the most common cause of future leaks.

    Step 1: Prepare the Roof Surface

    Ensure the area along the ridge is clean and dry. Remove any debris, old sealant, or loose screws. If you have existing closure strips from the panel installation, check that they are intact. If not, you will need to install new ones.

    • Tip: Work on a cool day. Metal expands in heat, which can make alignment difficult. Ideal temperatures are between 10°C and 25°C (50°F–77°F).

    Step 2: Install Closure Strips

    Closure strips are foam or rubber pieces that match the contour of your metal panels. They sit under the ridge cap to block wind, dust, and insects.

    1. Measure the length of your ridge.
    2. Cut the closure strips to fit snugly into the ribs of the metal panels along the entire ridge line.
    3. Press them firmly into place. Some professionals use a dab of adhesive to keep them from shifting during cap installation.

    Step 3: Apply Sealant Tape

    Apply a continuous bead of butyl tape or high-grade roofing sealant along the top of the closure strips. This creates a secondary water barrier.

    • Do not skimp here. Use a bead approximately 6mm (1/4 inch) thick. Ensure it is centered so it will be compressed evenly when the cap is screwed down.

    Step 4: Position the First Ridge Cap Piece

    Start at the end of the roof opposite the prevailing wind direction. This prevents wind from getting under the seams of the caps.

    1. Place the first piece of ridge cap over the closure strips.
    2. Ensure it overhangs the edge of the roof by at least 2–3 inches (5–7 cm) for proper drip edge function.
    3. Check for squareness using your chalk line if necessary.

    Step 5: Secure the Ridge Cap

    Using your drill, drive screws through the pre-drilled holes (or mark your own) in the ridge cap.

    • Screw Placement: Screws should go through the high points of the metal panels, not the flat areas, to ensure a tight seal.
    • Spacing: Place screws every 12 to 18 inches (30–45 cm) along the ridge.
    • Torque Control: Tighten until the neoprene washer is compressed and forms a seal, but do not over-tighten. Over-tightening can distort the metal or crush the closure strip, creating gaps.

    Step 6: Overlap Subsequent Pieces

    If your ridge is longer than one piece of flashing, you will need to overlap them.

    1. Apply sealant to the end of the first piece where the next one will sit.
    2. Overlap the second piece by at least 6 inches (15 cm).
    3. Screw down the second piece, ensuring the overlap is tight and sealed.
    4. Continue this process until you reach the other end of the ridge.

    Step 7: Final Inspection and Cleanup

    Once all pieces are installed, walk the ridge (safely) or inspect from a ladder.

    • Check for any visible gaps in the sealant.
    • Ensure all screw heads are flush and sealed.
    • Wipe away any excess sealant that squeezed out for a clean look.

    Common Mistakes to Avoid

    Even experienced DIYers can stumble on these pitfalls. Here is a comparison of right vs. wrong approaches:

    MistakeConsequenceCorrect Approach
    Over-tightening ScrewsCrushes foam strips, distorts metal, causes leaks.Tighten until washer seals, then stop.
    Ignoring Wind DirectionWind lifts cap edges, allowing water ingress.Start installation against the prevailing wind.
    Skipping Closure StripsLeaves gaps for pests and drafts.Always use profile-matched closure strips.
    Insufficient OverlapWater seeps through joints during heavy rain.Maintain minimum 6-inch overlap with sealant.

    FAQ: Frequently Asked Questions

    1. Can I install a ridge cap without closure strips?

    While technically possible, it is highly discouraged. Without closure strips, there is no barrier against wind-driven rain, insects, or dust entering the attic space. The ridge cap will also rattle in the wind, potentially loosening screws over time.

    2. What type of sealant is best for metal roofs?

    Use a high-quality, UV-resistant polyurethane or butyl-based sealant. Avoid standard silicone caulk, as it may not adhere well to certain metal coatings and can degrade faster under UV exposure. Look for products specifically labeled for “metal roofing” or “extreme weather.”

    3. How often do I need to replace the ridge cap?

    A properly installed metal ridge cap should last as long as the roof itself, typically 40–70 years. However, you should inspect the sealant and screws every 2–3 years. If you notice cracking sealant or loose screws, address them immediately to prevent leaks.

    4. Do I need a vented ridge cap?

    It depends on your attic ventilation design. If your roof relies on passive airflow, a vented ridge cap can significantly improve energy efficiency by allowing hot air to escape. If you already have sufficient soffit and gable vents, a solid cap may be sufficient. Consult your local building codes or an HVAC specialist.

    5. Can I install a ridge cap in the rain?

    No. Never install ridge caps or apply sealant on a wet surface. Moisture prevents proper adhesion of sealants and tapes, leading to immediate failure. Wait for a dry forecast with at least 24 hours of no rain after installation.

    Conclusion

    Learning how to install a ridge cap on a metal roof is a valuable skill that protects your biggest investment. By following these steps—preparing the surface, using closure strips, applying quality sealant, and securing the cap correctly—you ensure a watertight, durable finish that withstands the harshest weather conditions.

    Remember, patience and precision are key. Take your time with the alignment and sealing, and your roof will reward you with decades of reliable performance.

    Did you find this guide helpful? Share it with your friends on Facebook or Pinterest who might be tackling their own roofing projects. If you have questions or tips of your own, leave a comment below!

  • Can You Put A Metal Roof Over A Metal Roof?

    Can You Put A Metal Roof Over A Metal Roof?

    Have you noticed your existing metal roof showing signs of wear, such as fading paint or minor leaks, and are you dreading the high cost and mess of a full tear-off? Many homeowners in the US face this dilemma, asking themselves, “Can you put a metal roof over a metal roof?” The short answer is yes, but it requires careful planning and adherence to specific structural guidelines to ensure longevity and safety.

    In this comprehensive guide, we will explore the feasibility, benefits, and potential pitfalls of installing a new metal roof over an existing one. We’ll break down the technical requirements so you can make an informed decision that protects your home and your wallet.

    Is It Structurally Safe to Install Metal Over Metal?

    Before picking up a hammer, the most critical question is whether your home’s frame can handle the extra weight. While metal roofing is significantly lighter than traditional asphalt shingles or clay tiles, adding a second layer does increase the load on your roof trusses and walls.

    Generally, a standard standing seam metal roof weighs between 1 to 1.5 pounds per square foot. If you are installing over an existing metal roof, you are adding roughly another pound per square foot. For most modern homes built after the 1970s, this additional load is negligible. However, older homes or those with compromised structural integrity may not support the dual layers.

    Key Structural Considerations:

    • Load Capacity: Consult a structural engineer if your home is older than 40 years.
    • Snow Load: If you live in areas like Minnesota or Maine, consider the cumulative weight of two roof layers plus heavy snowfall.
    • Local Codes: Always check with your local building department. Some municipalities strictly prohibit double-layer roofing regardless of material.

    According to general construction principles outlined by resources like Wikipedia’s entry on Roofing, proper load distribution is essential for any overlay project to prevent long-term structural fatigue.

    What Are the Benefits of a Metal-over-Metal Installation?

    Choosing to install a new metal roof over an old one isn’t just about laziness; it offers several tangible advantages for homeowners looking to maximize value.

    1. Significant Cost Savings

    The most immediate benefit is financial. A full tear-off involves labor costs for removing the old roof, dumpster fees for disposal, and potential repairs to the decking exposed during removal. By skipping the tear-off, you can save 20% to 30% on total project costs.

    2. Enhanced Insulation and Energy Efficiency

    An additional layer of metal, combined with the air gap created by battens or strapping, acts as a thermal break. This can improve your home’s energy efficiency by reducing heat transfer. In hot US climates like Arizona or Texas, this can lead to noticeable reductions in cooling bills.

    3. Environmental Friendliness

    Roofing waste is a major contributor to landfills. By leaving the old roof in place, you keep tons of steel or aluminum out of the waste stream. This “green” approach appeals to eco-conscious homeowners and aligns with sustainable building practices.

    4. Reduced Installation Time

    Without the days spent stripping the old roof, the installation process is faster. This means your home is exposed to the elements for a shorter period, reducing the risk of water damage during unexpected rainstorms.

    Can You Put A Metal Roof Over A Metal Roof

    What Are the Risks and Drawbacks to Consider?

    While the benefits are appealing, ignoring the risks can lead to costly failures. It is crucial to weigh these downsides carefully.

    FeatureProsCons
    CostLower labor and disposal fees.May require expensive furring strips to level the surface.
    DurabilityDouble protection against elements.Trapped moisture can cause hidden corrosion.
    AestheticsFresh look without structural change.Existing wrinkles or dents may telegraph through the new roof.
    MaintenanceEasier initial install.Harder to inspect the lower roof for leaks later.

    The Moisture Trap Danger

    The biggest technical risk is trapping moisture between the two metal layers. If the existing roof has minor leaks or condensation issues, sealing it under a new roof can accelerate corrosion. Metal roofs need to “breathe.” Without proper ventilation strategies, such as using vertical battens, you risk creating a greenhouse effect that rots any underlying wood decking and rusts the old metal.

    Warranty Voidance

    Many manufacturers of new metal roofing panels will void their warranty if installed over an existing roof. They cannot guarantee the performance of their product if the substrate (the old roof) is uneven or unstable. Always read the fine print or choose a manufacturer that explicitly allows overlays.

    How to Properly Install a Metal Roof Over an Existing One

    If you decide to proceed, proper preparation is non-negotiable. Here is a step-by-step approach to ensuring a successful installation.

    Step 1: Inspect and Repair the Existing Roof

    Walk the roof thoroughly. Look for loose fasteners, severe corrosion, or active leaks.

    • Action: Replace any rotten wood decking visible from the attic.
    • Action: Tighten all loose screws on the existing metal roof.
    • Action: Seal any minor gaps with high-quality urethane sealant.

    Step 2: Install Furring Strips (Battens)

    Never install new metal directly flat against old metal. You must create an air gap.

    • Material: Use 1×4 or 2×4 pressure-treated wood battens or metal z-clips.
    • Spacing: Install battens vertically, spaced 24 inches on center (or according to the new panel’s specifications).
    • Purpose: This creates a ventilation channel that allows moisture to escape and prevents the new roof from conforming to the imperfections of the old one.

    Step 3: Add Underlayment (Optional but Recommended)

    While not always required for metal-over-metal, adding a synthetic underlayment over the battens provides an extra layer of protection against wind-driven rain and condensation. Ensure it is breathable to maintain airflow.

    Step 4: Install the New Metal Panels

    Follow the manufacturer’s instructions precisely.

    • Fastening: Use long enough screws to penetrate through the new panel, the batten, the old metal, and into the roof deck. Standard screws will not be long enough. You typically need screws that are at least 1.5 to 2 inches longer than usual.
    • Alignment: Ensure panels are straight to avoid aesthetic issues.

    Frequently Asked Questions (FAQ)

    1. Will putting a metal roof over metal void my homeowner’s insurance?

    Not necessarily, but it depends on your provider. Some insurers view overlays as higher risk due to potential hidden damage. It is vital to disclose the installation method to your insurance agent beforehand to ensure you remain covered.

    2. Can I install metal over metal if the old roof is leaking?

    No. You must fix all active leaks before installing the new roof. Installing a new roof over a leaking one simply traps the water, leading to rapid rot of the roof deck and structural damage. The existing roof must be watertight and structurally sound.

    3. Does the color of the old roof matter?

    The color itself doesn’t affect structural integrity, but a dark old roof can absorb more heat. However, since you are installing battens and a new reflective metal layer, the impact of the old color on your home’s interior temperature will be minimal.

    4. How long does a metal-over-metal roof last?

    If installed correctly with proper ventilation, the new metal roof should last just as long as if it were installed on bare decking—typically 40 to 70 years. The lifespan depends more on the quality of the new metal (gauge and coating) than the presence of the old roof.

    5. Do I need a permit for this type of installation?

    Yes, in most US jurisdictions, replacing a roof requires a building permit, even if you are not tearing off the old material. The permit process ensures that the added weight and installation methods meet local safety codes.

    Conclusion

    So, can you put a metal roof over a metal roof? Yes, you can, and it can be a smart, cost-effective solution for many homeowners. By saving on disposal costs and installation time, you get a durable, energy-efficient upgrade without the hassle of a full tear-off.

    However, success hinges on three factors: structural integrity, moisture management, and proper fastening. Never skip the inspection phase, and always use battens to create a ventilated air gap. If you are unsure about the condition of your current roof, consult a professional roofing contractor who specializes in metal installations.

    Did you find this guide helpful? Share it with your friends on Facebook or Pinterest who might be considering a roof upgrade! Let’s help more homeowners make smarter, safer choices for their properties.

  • How to Put a Ridge Cap on a Metal Roof

    How to Put a Ridge Cap on a Metal Roof

    Water leaking through the peak of your roof is a homeowner’s nightmare, often leading to costly interior damage and mold growth. If you are looking for a reliable solution, learning how to put a ridge cap on a metal roof is the most effective way to seal that vulnerable gap while enhancing your home’s aesthetic. This guide will walk you through the process safely and efficiently, ensuring a watertight finish that lasts for decades.

    Why Is the Ridge Cap Critical for Your Metal Roof?

    Before we dive into the tools and techniques, it is essential to understand why this component matters. The ridge cap is not just a decorative trim; it is the primary defense mechanism for the highest point of your roof.

    Metal roofs expand and contract with temperature changes. Without a properly installed ridge cap, wind-driven rain and snow can easily penetrate the gap between the two sloping roof panels. According to industry standards, the ridge area accounts for a significant percentage of potential leak points in metal roofing systems if not sealed correctly.

    By installing a high-quality ridge cap, you are:

    • Preventing Water Intrusion: Blocking rain, snow, and ice from entering the attic.
    • Allowing Ventilation: Many ridge caps are designed to work with ventilation systems, allowing hot air to escape.
    • Enhancing Durability: Protecting the exposed edges of your metal panels from wind uplift.

    For more detailed technical definitions of roofing components, you can refer to Wikipedia’s entry on Roofing.

    Tools and Materials You Will Need

    Preparation is half the battle. Having the right tools on hand before you climb the ladder will save you time and ensure a professional-looking result. Do not attempt to cut corners here; using the wrong fasteners or sealants can void your warranty.

    Essential Tools

    • Safety Gear: Non-slip boots, safety harness, and gloves (metal edges are sharp!).
    • Drill/Impact Driver: With a clutch setting to avoid over-driving screws.
    • Tin Snips or Electric Shears: For cutting the metal ridge cap to length.
    • Caulking Gun: For applying sealant.
    • Chalk Line: To ensure straight alignment.
    • Measuring Tape: For precise measurements.

    Materials

    • Ridge Cap Pieces: Matched to your metal roof profile (e.g., R-panel, corrugated).
    • Closure Strips: Foam strips that fit under the ridge cap to block pests and weather.
    • Butyl Tape or Sealant: High-quality roofing sealant compatible with metal.
    • Screws: Color-matched, self-tapping screws with neoprene washers. Note: Never use standard wood screws.
    How To Put A Ridge Cap On A Metal Roof

    Step-by-Step Guide: How to Install a Ridge Cap

    Follow these steps carefully. Safety is paramount—never work on a wet or windy roof.

    Step 1: Prepare the Ridge Area

    Clean the ridge line thoroughly. Remove any debris, old sealant, or loose screws. If you have existing closure strips from the panel installation, ensure they are intact. If not, you will need to install new foam closure strips along the top edge of the metal panels on both sides of the ridge.

    • Pro Tip: Measure the width of the gap at the peak. It should be consistent. If the gap varies significantly, you may need to adjust the underlying panels before proceeding.

    Step 2: Install Closure Strips

    Closure strips are vital. They fill the void between the corrugated or ribbed metal panels and the flat underside of the ridge cap.

    1. Cut the foam closure strips to the length of your roof ridge.
    2. Peel off the backing (if adhesive-backed) or apply a bead of butyl tape.
    3. Press the strips firmly onto the top ribs of the metal panels on both sides of the ridge.
    4. Ensure there are no gaps between the strips. Overlap them slightly if necessary.

    Step 3: Apply Sealant

    Apply a continuous bead of high-quality urethane or silicone roofing sealant along the top of the closure strips. This creates a secondary water barrier.

    • Amount: Use a bead approximately 1/4 inch thick. Too much sealant can cause mess; too little may leave gaps.

    Step 4: Position the First Ridge Cap Piece

    Start at the end of the roof opposite the prevailing wind direction. This prevents wind from getting under the seams.

    1. Place the first piece of ridge cap over the center of the ridge.
    2. Ensure it overlaps the closure strips evenly on both sides.
    3. Check for straightness using your chalk line as a guide.

    Step 5: Secure the Ridge Cap

    Using your drill, drive the color-matched screws through the ridge cap and into the high points of the metal panels below.

    • Spacing: Place screws every 12 to 18 inches, or as recommended by the manufacturer.
    • Technique: Drive the screw until the neoprene washer is compressed and forms a seal, but do not over-tighten. Over-tightening can distort the metal and break the washer, leading to leaks.

    Step 6: Overlap Subsequent Pieces

    If your roof is longer than one ridge cap piece, you will need to overlap them.

    1. Apply sealant to the end of the installed piece.
    2. Slide the next piece over the previous one, ensuring an overlap of at least 6 inches.
    3. Secure with screws, ensuring you screw through both layers of metal at the overlap point for maximum stability.

    Step 7: Finish the Ends

    At the ends of the ridge, you may need to cut the ridge cap to fit or install end caps. Seal these ends generously with roofing cement or sealant to prevent birds and insects from nesting inside the ridge vent.

    Common Mistakes to Avoid

    Even experienced DIYers can make errors. Here are the most common pitfalls when learning how to put a ridge cap on a metal roof:

    MistakeConsequenceSolution
    Over-tightening ScrewsCracked washers, distorted metalStop when the washer just begins to bulge slightly.
    Skipping Closure StripsWater infiltration, pest entryAlways use foam strips matched to your panel profile.
    Wrong Overlap DirectionWind-driven rain entryAlways overlap away from the prevailing wind.
    Using Incorrect SealantChemical reaction, failureUse neutral-cure silicone or urethane rated for metal.

    Maintenance Tips for Longevity

    Once installed, your ridge cap requires minimal maintenance, but regular checks are wise.

    • Inspect Annually: Check for loose screws or cracked sealant after severe storms.
    • Clean Debris: Leaves and twigs can accumulate in the ridge vent, blocking airflow.
    • Re-seal if Necessary: If you notice the sealant drying out or cracking after 5–7 years, apply a fresh layer.

    FAQ Section

    1. Can I install a ridge cap on an existing metal roof?

    Yes, you can retrofit a ridge cap on an existing metal roof. However, you must ensure the underlying structure is sound and that you can access the ridge safely. You may need to remove any old, failing flashing before installing the new cap.

    2. What is the best sealant for metal roof ridge caps?

    Polyurethane-based sealants or neutral-cure silicone are generally recommended. Avoid acid-cure silicone, as it can corrode certain types of metal over time. Always check the manufacturer’s recommendation for your specific metal type (e.g., galvanized steel, aluminum).

    3. Do I need ventilation under the ridge cap?

    It depends on your attic setup. If you have a vented attic, a ventilated ridge cap is highly recommended to allow hot air to escape, reducing cooling costs and preventing moisture buildup. If your attic is unvented (sealed), you can use a solid ridge cap.

    4. How long does a metal ridge cap last?

    A properly installed metal ridge cap should last as long as the roof itself, typically 40–70 years. However, the sealant and washers may need replacement every 10–15 years depending on climate exposure.

    5. Can I walk on the ridge cap during installation?

    No. Ridge caps are not designed to support human weight. Walking on them can dent the metal, break the seal, and compromise the integrity of the installation. Always use a safety harness and distribute your weight on the lower, supported parts of the roof panels.

    Conclusion

    Learning how to put a ridge cap on a metal roof is a valuable skill that can save you thousands in repair costs and extend the life of your roofing system. By following these steps—preparing the surface, using closure strips, applying the right sealant, and securing the cap correctly—you ensure a durable, watertight seal.

    Remember, safety comes first. If you are uncomfortable working at heights, do not hesitate to hire a professional. But for those ready to tackle the project, the satisfaction of a job well done is unmatched.

    Did you find this guide helpful? Share it with your friends on Facebook or Pinterest who might be planning their own roofing projects! Let’s help everyone keep their homes dry and secure.

  • Is It Ok To Put A Metal Roof Over Shingles?

    Is It Ok To Put A Metal Roof Over Shingles?

    Have you been staring at your aging asphalt shingles, dreading the mess, cost, and hassle of a full tear-off? You are not alone; many homeowners look for shortcuts that save time without compromising quality. The burning question on everyone’s mind is: Is it ok to put a metal roof over shingles? The short answer is yes, but with significant caveats that can make or break your investment.

    In this comprehensive guide, we will dive deep into the structural, financial, and practical implications of installing metal roofing directly over existing shingles. We will help you decide if this method is right for your home, ensuring you avoid costly mistakes while maximizing the lifespan of your new roof.

    Why Consider Installing Metal Over Shingles?

    Before we get into the technical “how-to,” let’s address the “why.” For many US homeowners, the primary driver is convenience. Removing old asphalt shingles is a labor-intensive process that generates massive amounts of waste. By leaving the old layer in place, you skip the demolition phase entirely.

    However, it is not just about laziness. There are legitimate benefits to this approach, provided your home is a good candidate. Let’s explore the advantages and disadvantages to give you a balanced view.

    The Pros: Speed and Savings

    • Cost Efficiency: You save money on labor costs associated with tear-off and dumpster fees for debris disposal. According to industry estimates, skipping the tear-off can reduce total project costs by 10–15%.
    • Time-Saving: Without the removal process, installation can be completed in half the time. This means less exposure to the elements for your home’s interior.
    • Added Insulation: The existing shingle layer acts as an additional thermal barrier, potentially improving your home’s energy efficiency slightly.
    • Less Mess: No nails flying everywhere, no dust clouds, and no heavy dumpsters blocking your driveway for weeks.

    The Cons: Hidden Risks

    • Trapped Moisture: If there is any existing water damage or rot, covering it up traps the problem. This can lead to accelerated decay of the roof deck.
    • Weight Load: While metal is light, adding it to existing shingles adds weight. Most modern homes can handle this, but older structures might need an engineering assessment.
    • Voided Warranties: Some metal roofing manufacturers will void their warranty if installed over more than one layer of existing roofing. Always check the fine print.
    • Aesthetic Issues: If the old shingles are curled or uneven, the new metal roof may not lie flat, leading to visible waves or “oil-canning” effects.

    Critical Pre-Installation Checks

    You cannot simply screw metal panels onto old shingles and hope for the best. Proper preparation is vital. Before you hire a contractor or start a DIY project, you must verify three key conditions.

    1. Structural Integrity Assessment

    Your roof deck (the wood beneath the shingles) must be solid. If the previous roof had leaks, the plywood or OSB sheathing might be soft or rotted.

    • Action Step: Walk the attic space. Look for dark stains, sagging beams, or daylight coming through cracks.
    • Rule of Thumb: If more than 10% of the deck shows signs of rot, a full tear-off is recommended to replace the damaged wood.

    2. Local Building Codes

    Building codes vary significantly across the United States. Some municipalities strictly prohibit more than two layers of roofing material.

    • Check First: Contact your local building department. Ignoring code can result in fines or issues when selling your home later.
    • Reference: For general standards on roofing materials and safety, you can refer to guidelines outlined by organizations like the International Code Council or basic material properties found on Wikipedia.

    3. Condition of Existing Shingles

    The existing shingles must be relatively flat. If they are severely curled, buckled, or missing in large patches, they do not provide a stable base.

    • Fix It First: Replace any missing shingles and nail down any lifted edges before installing the metal underlayment.
    Is It Ok To Put A Metal Roof Over Shingles

    Step-by-Step Installation Overview

    If you have cleared the checks above, here is how the process generally works. Note that this is a simplified overview; professional installation is highly recommended for warranty purposes.

    1. Prepare the Surface: Clean the roof of moss, debris, and loose granules. Secure any loose shingles with roofing nails.
    2. Install Furring Strips (Battens): This is crucial. You should never install metal panels directly against asphalt shingles. Install horizontal or vertical wooden furring strips (usually 1x4s) over the shingles. This creates an air gap that allows moisture to escape and prevents heat buildup.
    3. Apply Underlayment: Place a high-quality synthetic underlayment over the battens or directly over the shingles (depending on the specific system used). This acts as a secondary water barrier.
    4. Install Metal Panels: Start from the eave and work your way up. Use screws with rubber washers designed specifically for metal roofing. Ensure screws penetrate into the roof deck, not just the shingles.
    5. Flashings and Trim: Pay extra attention to valleys, chimneys, and vents. Proper flashing is where most leaks occur in overlay jobs.

    Metal Roof vs. Tear-Off: A Comparison

    To help you visualize the trade-offs, here is a quick comparison table.

    FeatureMetal Over ShinglesFull Tear-Off & Replace
    CostLower (Save on labor/disposal)Higher
    TimeFast (1-3 days)Slow (3-7 days)
    InspectionCannot inspect deck fullyFull deck inspection possible
    WarrantyMay be limitedFull manufacturer warranty
    LongevityGood (if prep is done right)Excellent (best practice)

    People Also Ask: Common Questions Answered

    Does putting metal over shingles void the warranty?

    It depends on the manufacturer. Many top-tier metal roofing brands require a clean deck for their premium warranties. However, some offer specific “retrofit” warranties for overlay installations. Always read the warranty documentation before purchasing materials.

    Will the extra weight damage my house?

    In most cases, no. Asphalt shingles weigh about 2–3 pounds per square foot, while standing seam metal roofs weigh about 1–1.5 pounds per square foot. Even combined, the load is typically well within the design limits of standard residential framing. However, if you live in an area with heavy snow loads, consult a structural engineer.

    Can I do this myself (DIY)?

    While technically possible, it is not recommended for beginners. Metal roofing requires precise cutting, flashing details, and understanding of thermal expansion. A mistake in flashing can lead to leaks that are difficult to trace because the water is trapped between two layers.

    How long will a metal roof last over shingles?

    A properly installed metal roof can last 40–70 years. However, if moisture is trapped underneath due to poor ventilation or existing leaks, the lifespan could be reduced. Ensuring proper airflow via furring strips is key to maximizing longevity.

    What type of metal roof is best for overlays?

    Standing seam metal roofs are generally preferred over corrugated or exposed-fastener panels for overlays. They are more durable, handle thermal expansion better, and have fewer penetration points where leaks can occur.

    Expert Insight: The Importance of Ventilation

    One of the biggest myths is that metal roofs “breathe.” They do not. Asphalt shingles also do not breathe. When you combine them, you create a sandwich that can trap heat and moisture.

    According to roofing experts, the single most important factor in a successful overlay is ventilation. By using furring strips (battens), you create a channel for air to flow from the eave to the ridge. This airflow prevents condensation from forming on the underside of the metal panels, which could otherwise drip onto your shingles and cause rot.

    Pro Tip: If your current attic ventilation is poor, fix it before installing the new roof. Add ridge vents or soffit vents to ensure your attic stays dry and cool.

    Conclusion

    So, is it ok to put a metal roof over shingles? Yes, it is a viable, cost-effective option for many homeowners, provided the existing roof is in decent condition and local codes allow it. It offers speed, savings, and added insulation. However, it requires meticulous preparation, particularly regarding ventilation and flashing, to avoid trapping moisture.

    If your current shingles are flat, dry, and securely attached, an overlay can be a smart move. But if you suspect hidden rot or major structural issues, bite the bullet and pay for the tear-off. Your future self will thank you for the peace of mind.

    Found this guide helpful? Share it with your neighbors who might be considering a roof upgrade! Don’t forget to bookmark this page for future reference as you plan your home improvement projects.

  • How to Install a Metal Roof: The Ultimate DIY Guide

    How to Install a Metal Roof: The Ultimate DIY Guide

    Have you ever looked up at your aging shingle roof and wondered if there was a more durable, energy-efficient alternative? Many homeowners feel overwhelmed by the prospect of replacing their roof, fearing high costs and complex procedures. If you are asking, “How do you install a metal roof on a house,” you are not alone; this guide breaks down the process into manageable, safe, and effective steps for the dedicated DIYer.

    Metal roofing has surged in popularity across the United States, not just for its sleek modern aesthetic but for its longevity. While traditional asphalt shingles may last 15–20 years, a properly installed metal roof can protect your home for 40–70 years. However, installation precision is critical. A minor error in flashing or fastening can lead to leaks that compromise your home’s structural integrity. This article provides a comprehensive, expert-backed roadmap to help you navigate this significant home improvement project with confidence.

    Why Choose Metal Over Traditional Shingles?

    Before diving into the tools and techniques, it is essential to understand why metal is worth the investment. According to the Metal Roofing Alliance, metal roofs reflect solar radiant heat, which can reduce cooling costs by 10–25%. Furthermore, they are non-combustible and highly resistant to wind uplift, making them ideal for areas prone to severe weather.

    FeatureAsphalt ShinglesMetal Roofing
    Lifespan15–20 Years40–70+ Years
    MaintenanceModerate to HighLow
    Energy EfficiencyStandardHigh (Reflective)
    WeightHeavyLightweight
    RecyclabilityLow100% Recyclable

    While the upfront cost of metal is higher, the long-term value proposition is undeniable. But achieving this value requires strict adherence to installation protocols.

    What Tools and Materials Do You Need?

    Preparation is half the battle. Attempting to install a metal roof without the right equipment is a recipe for disaster. You will need specific tools designed for metalwork to ensure clean cuts and secure fastening.

    Essential Tools List

    • Electric Shears or Nibblers: For cutting metal panels without damaging the protective coating. Avoid abrasive saws as they create heat that ruins the galvanized layer.
    • Drill/Driver with Clutch: To prevent over-driving screws, which can strip holes and cause leaks.
    • Seam Roller: For locking standing seam panels together.
    • Chalk Line and Tape Measure: For precise alignment.
    • Safety Gear: Harness, non-slip boots, gloves, and eye protection.

    Material Checklist

    • Metal Panels: Choose between standing seam (hidden fasteners) or exposed fastener panels (corrugated or ribbed).
    • Underlayment: A synthetic, breathable underlayment is crucial for moisture management.
    • Closure Strips: Foam strips that fill gaps at ridges and eaves to prevent pest entry and wind noise.
    • Fasteners: Use only manufacturer-recommended screws with neoprene washers. Never mix metal types (e.g., steel screws on aluminum panels) to avoid galvanic corrosion.

    How Do You Prepare the Existing Roof Structure?

    One of the most common questions beginners ask is whether they need to tear off the old roof. In many cases, you can install metal over existing asphalt shingles, provided the local building code allows it and the roof deck is sound. This method saves time and disposal fees.

    However, inspection is non-negotiable. Walk the roof and check for soft spots, rot, or damaged rafters. Any compromised wood must be replaced before proceeding. If you are installing over shingles, ensure they are flat. Curling or missing shingles should be repaired to create a smooth surface.

    According to Wikipedia’s entry on Roofing, proper ventilation is critical when layering roofing materials. Ensure your attic has adequate intake and exhaust ventilation to prevent heat buildup, which can warp metal panels and degrade underlayment.

    How Do You Install A Metal Roof On A House

    Step-by-Step: How Do You Install a Metal Roof on a House?

    Now, let’s get into the core of the process. Follow these steps meticulously to ensure a watertight seal.

    Step 1: Install the Drip Edge and Underlayment

    Start at the eaves (the bottom edge of the roof). Install a metal drip edge along the eaves to direct water away from the fascia board. Next, roll out your synthetic underlayment horizontally, starting from the bottom. Overlap each row by at least 6 inches and secure it with cap nails or staples. This layer acts as your secondary water barrier.

    Step 2: Apply Flashing at Valleys and Penetrations

    Valleys are where two roof slopes meet, channeling significant water volume. Install W-shaped metal valley flashing over the underlayment. Seal the edges with high-quality urethane sealant. Similarly, flash around chimneys, vents, and skylights using step flashing or boot flashings designed for metal roofs. Note: Never rely solely on caulk for waterproofing; mechanical flashing is primary.

    Step 3: Install the First Metal Panel

    This is the most critical step. If the first panel is crooked, every subsequent panel will be too. Start at the bottom corner of the roof, ensuring the panel overhangs the drip edge by about 1–2 inches. Use a chalk line to verify it is perfectly square with the eave. Secure the panel with screws, placing them in the flat area of the panel, not the high ribs, unless specified by the manufacturer.

    Step 4: Overlap and Secure Subsequent Panels

    Install the next panel by overlapping the side lap of the previous one. Most panels have a designated overlap width (usually 1–2 inches). Ensure the ribs align perfectly. Continue this process across the roof, checking alignment every few rows. Cut panels to fit around obstacles using electric shears, deburring any sharp edges afterward.

    Step 5: Install Ridge Caps and Trim

    Once all field panels are installed, finish the roof with ridge caps. These cover the peak of the roof and provide ventilation if you use vented ridge caps. Apply closure strips underneath the ridge cap to block wind-driven rain and pests. Secure the ridge cap with screws spaced evenly along the length. Finally, install gable trim on the sides to give the roof a finished look and protect the edges.

    Common Mistakes to Avoid During Installation

    Even experienced contractors make errors. Here are the top pitfalls to watch out for:

    1. Over-tightening Screws: This compresses the neoprene washer too much, causing it to fail prematurely. Stop drilling when the washer just touches the metal.
    2. Walking on Installed Panels: Metal roofs can dent. Always walk on the screw lines or use distributed weight boards if you must traverse the roof.
    3. Ignoring Thermal Expansion: Metal expands and contracts with temperature changes. Leave slight gaps at end laps and use slotted holes if recommended to allow for movement.
    4. Using Wrong Fasteners: Using standard steel screws on aluminum roofing will cause rapid corrosion. Always match the fastener material to the panel material.

    Frequently Asked Questions (FAQ)

    Can I install a metal roof myself without professional help?

    Yes, but it requires advanced DIY skills, comfort with heights, and strict adherence to safety protocols. If your roof has complex angles, valleys, or turrets, hiring a professional is recommended.

    Do I need a permit to install a metal roof?

    In most US jurisdictions, yes. Roofing is a structural component, and local building codes regulate materials and installation methods. Check with your local building department before starting.

    How long does it take to install a metal roof?

    For a typical 2,000-square-foot home, a professional crew takes 2–3 days. A DIYer should expect 1–2 weeks, depending on experience and helper availability.

    Is metal roofing noisy during rain?

    No. When installed with solid sheathing and proper underlayment, metal roofs are no noisier than asphalt shingles. The insulation and attic space dampen sound significantly.

    What is the best type of metal for residential roofing?

    Galvalume (steel coated with aluminum and zinc) is the most popular due to its balance of cost and durability. Copper and zinc are premium options with unique aesthetics but higher price tags.

    Conclusion

    Learning how do you install a metal roof on a house is a rewarding journey that can significantly enhance your home’s value and resilience. By carefully preparing the structure, using the right tools, and following a meticulous step-by-step process, you can achieve a professional-grade result. Remember, patience and precision are your best friends in this project.

    If you found this guide helpful, please share it on social media to help other homeowners make informed decisions about their roofing projects. Have you installed a metal roof? Share your tips or questions in the comments below!

  • How To Install The Ridge Cap On A Metal Roof

    How To Install The Ridge Cap On A Metal Roof

    Installing a metal roof is a significant investment in your home’s longevity, but the ridge line remains its most vulnerable point. If not sealed correctly, wind-driven rain can infiltrate your attic, causing costly water damage and mold issues. Knowing how to install the ridge cap on a metal roof properly is the single most critical step in ensuring your roofing system remains watertight for decades.

    Many homeowners feel intimidated by working at heights or handling metal panels, but with the right tools and preparation, this task is manageable. This guide will walk you through the process with precision, focusing on safety, accuracy, and durability. We aren’t just covering up a gap; we are engineering a weather-resistant barrier that protects your biggest asset.

    Why Is the Ridge Cap Critical for Metal Roofs?

    Before diving into the installation, it is essential to understand why this component matters. The ridge cap is not merely decorative; it is the final piece of the roofing puzzle that seals the intersection where two roof slopes meet.

    According to industry standards, improper flashing installation accounts for over 90% of roof leaks. The ridge cap directs water away from the open peak and allows for necessary ventilation if you are using a vented system. Without a properly installed ridge cap, your metal roof is susceptible to:

    • Wind Uplift: Strong gusts can get under loose caps and peel them back.
    • Water Infiltration: Rain driven by wind can enter the gap between panels.
    • Pest Entry: Birds and insects often seek shelter in unprotected roof peaks.

    By mastering how to install the ridge cap on a metal roof, you are effectively securing the integrity of the entire structure. For more detailed information on roofing components and their functions, you can refer to Wikipedia’s article on Roofing.

    What Tools and Materials Do You Need?

    Preparation is half the battle. Having everything within reach before you climb the ladder ensures you stay focused and safe. Here is a comprehensive checklist:

    Essential Tools

    • Drill/Impact Driver: With a clutch setting to avoid over-driving screws.
    • Tin Snips or Electric Shears: For cutting metal caps to length.
    • Chalk Line: To ensure straight alignment along the ridge.
    • Measuring Tape: At least 25 feet long.
    • Caulking Gun: For applying sealant.
    • Safety Harness and Rope: Non-negotiable for steep pitches.

    Materials

    • Ridge Cap Panels: Pre-formed to match your roof profile (e.g., R-panel, corrugated).
    • Closure Strips: Foam strips that fit under the cap to block pests and wind.
    • Butyl Tape or Sealant: High-quality, UV-resistant roofing sealant.
    • Screws: Color-matched, self-tapping metal roofing screws with neoprene washers.
    • Ventilation Strip (Optional): If installing a vented ridge cap.
    How To Install The Ridge Cap On A Metal Roof

    Step-by-Step Guide: How To Install The Ridge Cap On A Metal Roof

    Follow these steps meticulously. Rushing this process can lead to misalignment and leaks.

    Step 1: Prepare the Ridge Line

    Ensure the top edges of your metal roof panels are cut evenly. If the panels extend too far past the ridge beam, trim them so they are symmetrical on both sides. There should be a gap of approximately 2–4 inches at the peak, depending on your specific roof design and ventilation needs.

    Clean the area thoroughly. Remove any metal shavings, dust, or debris. A clean surface is vital for the adhesion of sealants and closure strips.

    Step 2: Install Closure Strips

    Closure strips are foam pieces designed to fill the void between the irregular shape of the metal panel ribs and the flat underside of the ridge cap.

    1. Peel the backing off the adhesive side of the closure strip.
    2. Press the strip firmly onto the top rib of the metal panels on both sides of the ridge.
    3. Ensure there are no gaps. If necessary, use additional pieces to fill larger voids.

    Pro Tip: Do not compress the foam too much during installation; it needs to expand slightly to create a tight seal when the cap is screwed down.

    Step 3: Apply Sealant

    Apply a bead of high-quality butyl sealant or roofing cement along the top of the closure strips and the center of the ridge beam. This acts as a secondary barrier against water.

    • Use a continuous bead, about 1/4 inch thick.
    • Avoid using silicone-based sealants unless specified by the manufacturer, as they can sometimes inhibit paint adhesion or degrade certain rubber washers over time.

    Step 4: Position the First Ridge Cap Piece

    Start at the end of the roof opposite the prevailing wind direction. This prevents wind from getting under the seams as you work.

    1. Place the first ridge cap section over the peak.
    2. Align it carefully using your chalk line as a guide.
    3. Ensure it overhangs the edge of the roof by at least 1–2 inches for proper drip edge function.

    Step 5: Secure the Ridge Cap

    Using your drill, drive screws through the pre-drilled holes in the ridge cap.

    • Screw Placement: Drive screws into the high points of the metal panels below, not into the low valleys.
    • Tightness: Tighten until the neoprene washer is compressed and forms a seal, but do not over-tighten. Over-driving can distort the metal and crack the washer, leading to immediate leaks.
    • Spacing: Follow the manufacturer’s recommendation, typically every 12 to 18 inches.

    Step 6: Overlap Subsequent Sections

    Metal expands and contracts with temperature changes. Therefore, proper overlapping is crucial.

    • Overlap Length: Overlap each subsequent ridge cap piece by at least 6 inches.
    • Sealing the Lap: Apply a generous amount of sealant between the overlapping sections before screwing them down. This prevents water from wicking up into the overlap via capillary action.

    Step 7: Install the End Caps

    Once you reach the end of the ridge, you will need to close off the open ends of the ridge cap.

    1. Cut the end of the ridge cap to fit flush with the roof edge.
    2. Install pre-formed end caps or fabricate them from scrap metal.
    3. Seal all edges with roofing cement and secure with screws.

    Common Mistakes to Avoid

    Even experienced DIYers can stumble. Here are the most frequent errors:

    MistakeConsequenceSolution
    Over-tightening ScrewsCracked washers, distorted metalStop when washer is snug and sealed
    Insufficient OverlapWater infiltration at seamsMaintain minimum 6-inch overlap
    Ignoring Wind DirectionWind uplift damageStart installation against the wind
    Skipping Closure StripsPest entry, whistling noiseAlways use foam closures for fit

    Frequently Asked Questions (FAQ)

    1. Can I install a ridge cap without closure strips?

    While physically possible, it is highly discouraged. Without closure strips, wind can whistle through the gaps, and pests like birds or bats can easily enter your attic. Closure strips provide a critical air and pest barrier.

    2. How often do I need to replace the ridge cap?

    A properly installed metal ridge cap should last as long as the roof itself, typically 40–70 years. However, inspect the sealant and screws every 2–3 years. If you notice cracked washers or dried-out sealant, perform maintenance immediately.

    3. Do I need a vented ridge cap?

    This depends on your attic ventilation strategy. If you have soffit vents, a vented ridge cap creates a natural airflow cycle (stack effect), pulling hot air out of the attic. If your attic is sealed or uses other ventilation methods, a solid cap is sufficient. Check local building codes for requirements.

    4. What type of sealant is best for metal roofs?

    Butyl tape or polyurethane-based roofing sealants are generally recommended. They remain flexible over time, accommodating the thermal expansion and contraction of metal. Avoid cheap acrylic caulks, which tend to crack and shrink after a few seasons.

    5. Is it safe to install a ridge cap on a steep roof?

    If your roof pitch exceeds 6:12 (6 inches of rise for every 12 inches of run), it is considered steep. You must use a proper fall arrest system, including a harness anchored to a secure point. If you are uncomfortable with heights, hire a professional. No DIY project is worth a serious injury.

    Conclusion

    Learning how to install the ridge cap on a metal roof is a valuable skill that can save you thousands in potential repair costs. By following these steps—preparing the surface, using closure strips, applying quality sealant, and securing the caps correctly—you ensure a durable, leak-free finish.

    Remember, patience and attention to detail are your best tools. Take your time with the alignment and sealing processes, and always prioritize safety above all else.

    Did you find this guide helpful? Share it with your friends on social media who might be tackling their own roofing projects! Let’s help everyone build safer, stronger homes.

  • Metal Over Shingles: The Ultimate Guide

    Metal Over Shingles: The Ultimate Guide

    Are you staring at your aging asphalt shingle roof, dreading the messy, expensive process of tearing it off? You are not alone. Many homeowners in the US face this dilemma every year, looking for a solution that saves time, money, and hassle. The burning question on everyone’s mind is: Can you put a metal roof on top of shingles?

    The short answer is yes, in most cases, you absolutely can. However, it is not a simple “slap it on and forget it” situation. There are structural, legal, and technical factors you must consider before hiring a contractor or starting a DIY project. In this guide, we will break down everything you need to know about installing metal roofing over existing shingles, ensuring you make an informed decision that protects your biggest investment—your home.

    Is It Structurally Safe to Add Metal Over Shingles?

    Before you buy materials, you must address the weight load. One of the biggest myths about metal roofing is that it is heavy. In reality, modern standing seam metal roofs or metal shingles are significantly lighter than traditional asphalt shingles, clay tiles, or slate.

    Weight Comparison

    • Asphalt Shingles: Approx. 2–3.5 lbs per square foot.
    • Metal Roofing: Approx. 1–1.5 lbs per square foot.

    When you install metal over shingles, you are adding the weight of the metal panels plus the fastening system (battens or strapping). While this is generally less than the weight of a new layer of heavy architectural shingles, your roof deck must still be sound.

    Critical Check: If your current roof has multiple layers of shingles (some older homes have 2 or 3 layers), the combined weight might exceed the design load of your roof trusses. Always consult a structural engineer or a licensed roofing contractor to inspect your attic and framing if you suspect your roof is old or has been re-roofed before.

    What Do Local Building Codes Say?

    Just because it can be done physically doesn’t mean it is legal in your area. Building codes vary significantly by state, county, and even municipality in the US.

    Most jurisdictions follow the International Residential Code (IRC), which typically allows for two layers of roofing material. However, some strict areas prohibit any overlay to ensure inspectors can verify the condition of the roof deck.

    Pro Tip: Never assume. Call your local building department or check their website. Ignoring code requirements can lead to fines, forced removal of the new roof, and issues when selling your home.

    For a deeper understanding of building standards and safety regulations, you can refer to general construction guidelines on Wikipedia.

    Can You Put A Metal Roof On Top Of Shingles

    Pros and Cons of Installing Metal Over Shingles

    To help you decide, let’s look at the clear advantages and disadvantages of this method.

    The Advantages

    1. Cost Savings: You save on labor and disposal fees. Tearing off old shingles is labor-intensive and requires paying for dumpster rentals and landfill fees. By skipping this step, you can reduce the total project cost by 15–25%.
    2. Less Mess and Noise: Tear-offs create massive amounts of dust, debris, and noise. Installing over shingles keeps your yard clean and reduces disturbance to your neighbors.
    3. Added Insulation: The existing shingle layer acts as an additional thermal barrier, potentially improving your home’s energy efficiency slightly.
    4. Protection During Installation: Your home remains protected from rain during the installation process since the old roof stays intact until the new one is fully secured.

    The Disadvantages

    1. Hidden Damage: You cannot inspect the wood decking for rot, mold, or water damage. If there is underlying decay, covering it up will only worsen the problem over time.
    2. Voided Warranties: Some metal roofing manufacturers may void their warranty if installed over existing shingles. Always read the fine print.
    3. Aesthetic Issues: If the old shingles are curled or uneven, the new metal roof may not lie perfectly flat, leading to visible waviness or “telegraphing.”
    4. Ventilation Challenges: Proper airflow is crucial for metal roofs to prevent condensation. Adding a layer over shingles can complicate ventilation if not done correctly.

    Step-by-Step Installation Overview

    If you decide to proceed, here is how professionals typically approach the installation. Note that this is a complex job; improper installation can lead to leaks and wind damage.

    Step 1: Inspection and Preparation

    Walk the roof and secure any loose shingles. Replace any visibly damaged flashing around chimneys and vents. Ensure the roof surface is as flat as possible.

    Step 2: Install Furring Strips (Battens)

    Do not screw metal panels directly into the shingles. You must create a flat, ventilated surface.

    • Use 1×4 or 2×4 wooden furring strips (battens).
    • Attach them vertically through the shingles and into the roof rafters/trusses using long screws.
    • Space them according to the metal panel manufacturer’s specifications (usually 24 inches on center).

    Step 3: Add Drip Edge and Flashing

    Install new drip edges along the eaves and rakes. This ensures water flows away from the fascia board. Update all pipe boots and valley flashings.

    Step 4: Install the Metal Panels

    Start from the bottom corner and work your way up and across.

    • Use screws with rubber washers designed for metal roofing.
    • Follow the specific overlap instructions for your panel type (standing seam vs. corrugated).
    • Ensure screws are driven straight—not too tight (which crushes the washer) and not too loose.

    Step 5: Ridge Cap and Final Inspection

    Install the ridge cap to seal the peak of the roof. Conduct a final inspection to ensure all fasteners are secure and no gaps exist.

    Cost Comparison: Tear-Off vs. Overlay

    Understanding the financial impact is key. Here is a simplified breakdown for an average 2,000 sq. ft. home.

    ItemTear-Off & ReplaceMetal Over Shingles
    Labor (Removal)$1,000 – $2,000$0
    Disposal Fees$300 – $600$0
    Deck RepairVariable (High Risk)$0 (Hidden Risk)
    Material CostSameSame + Battens
    Installation LaborStandardSlightly Faster
    Total Estimated SavingsN/A$1,500 – $3,000

    Note: Prices vary by region and material quality.

    Frequently Asked Questions (FAQ)

    1. Will putting metal over shingles void my homeowner’s insurance?

    Generally, no. Most insurance companies care more about the age and condition of the roof rather than the installation method. However, you should notify your insurer after the upgrade, as metal roofs often qualify for discounts due to their durability and fire resistance.

    2. Can I install metal roofing over two layers of shingles?

    It is risky. Most building codes allow only two layers total. If you already have two layers of shingles, you likely cannot add a third layer (the metal). You would need to tear off at least one layer. Always check local codes.

    3. Does metal roofing cause interference with Wi-Fi or cell signals?

    This is a common concern. While metal can block signals, most modern homes have routers inside the house, and cell towers are powerful enough to penetrate roofs. If you have a weak signal, a simple Wi-Fi extender or a cellular repeater can solve the issue. It is rarely a dealbreaker.

    4. How long does a metal roof last compared to shingles?

    Asphalt shingles typically last 15–25 years. A properly installed metal roof can last 40–70 years. Even if installed over shingles, the metal itself will outlast the shingles beneath it, providing decades of protection.

    5. What type of metal roofing is best for overlaying?

    Standing seam metal roofs are often preferred for overlays because they are lightweight and have concealed fasteners, reducing the risk of leaks. Corrugated metal is also popular but requires careful sealing of exposed fasteners.

    Conclusion

    So, can you put a metal roof on top of shingles? Yes, you can, and for many homeowners, it is a smart, cost-effective choice. It saves money on disposal, reduces installation time, and adds a durable, long-lasting layer of protection to your home.

    However, it is not without risks. You must ensure your roof structure is sound, your local codes permit it, and you hire a qualified installer who understands the nuances of overlay installations. If your current shingles are severely damaged or curled, a tear-off might be the safer route despite the higher cost.

    Take the time to get multiple quotes, ask about warranties, and inspect your attic for any signs of existing leaks. Your roof is your home’s first line of defense against the elements—make sure it’s built to last.

    Found this guide helpful? Share it with your friends on Facebook or Pinterest who are considering a roof upgrade! Don’t forget to leave a comment below if you have more questions about metal roofing.

  • Where Do You Put Screws on a Metal Roof?

    Where Do You Put Screws on a Metal Roof?

    Have you ever stared at a sheet of metal roofing, drill in hand, only to freeze because you’re terrified of drilling into the wrong spot? It is a common anxiety for DIYers and even some new contractors, as one misplaced screw can lead to costly leaks down the road. Knowing exactly where do you put the screws on a metal roof is the single most critical factor in ensuring your roof remains watertight, durable, and aesthetically pleasing for decades.

    In this guide, we will break down the science and best practices behind screw placement. We will move beyond guesswork and provide you with a clear, step-by-step framework that aligns with manufacturer specifications and industry standards across the United States. Whether you are installing corrugated panels or standing seam systems, getting this right starts with understanding the anatomy of your roof panel.

    The Golden Rule: Flat vs. High Rib Placement

    When discussing metal roofing, the type of panel determines the rule. However, for the vast majority of residential exposed-fastener roofs (like corrugated or R-panel), there is one golden rule: Always screw into the flat area, never the high rib.

    Why the Flat Area?

    You might think that screwing into the highest point (the rib) provides more structural support. While it does offer grip, it creates a significant vulnerability. When you drive a screw through the top of a rib, the rubber washer (neoprene seal) must compress over a curved surface. This often leads to:

    • Incomplete Sealing: The washer cannot form a perfect circle around the curve, leaving micro-gaps for water entry.
    • Oil Canning: As the metal expands and contracts with temperature changes, the screw head on the high rib can cause the metal to dimple or “oil can,” breaking the seal over time.
    • Wind Uplift Damage: Screws on the high rib are more susceptible to being pulled out or damaged during high winds compared to those secured in the flat plane against the purlin.

    By placing screws in the flat valley or the flat pan directly above the structural support (purlin or girt), the washer compresses evenly against a flat surface, creating a hermetic seal.

    Expert Insight: According to general engineering principles regarding fastener mechanics, load distribution is most effective when the fastener is perpendicular to a flat surface. For more on structural fastening basics, you can refer to Wikipedia’s article on Fasteners to understand the mechanical importance of proper seating.

    Where Do You Put The Screws On A Metal Roof

    Step-by-Step Guide: Exact Screw Placement

    To ensure you never ask “where do you put the screws on a metal roof” again, follow this precise workflow. This method applies primarily to corrugated and trapezoidal rib panels, which are common in the US market.

    1. Identify the Structural Support

    Before you even pick up your drill, you must know where your framing members (purlins) are located.

    • Mark Your Lines: Use a chalk line to mark the center of every purlin across the entire roof deck.
    • Why? You cannot screw into thin air. The screw must penetrate the metal panel and bite firmly into the wood or steel structure beneath. Missing the purlin means the screw has no holding power, leading to panel loosening during storms.

    2. Determine the Side Lap

    Metal panels overlap each other. This overlap is called the side lap.

    • The Rule: Screws should generally be placed in the flat area of the panel, roughly 1 to 2 inches away from the side lap edge.
    • Avoid the Edge: Do not place screws too close to the overlapping edge, as this can distort the metal and prevent the next panel from laying flat.

    3. Drilling Technique

    • Angle: Hold the drill perfectly perpendicular (90 degrees) to the roof surface. An angled screw will tear the neoprene washer and create a leak path.
    • Speed: Use a low to medium speed. High speeds generate heat, which can burn the rubber washer before it seals, rendering it useless.
    • Torque: Stop driving the screw as soon as the washer is compressed and slightly bulges out. Do not over-tighten. If the washer looks squashed flat or the metal dimples significantly, you have gone too far.

    Spacing Guidelines: How Many Screws Per Panel?

    One of the most frequent questions following placement is quantity. Using too few screws compromises wind resistance; using too many increases the risk of human error and leaks.

    Panel TypeRecommended Screw SpacingScrews Per Sheet (Standard 8ft width)
    CorrugatedEvery 12–18 inches along purlins3–4 screws per purlin line
    R-Panel / TrapezoidalEvery 12–24 inches along purlins2–3 screws per purlin line
    Eave & RidgeEvery 6–12 inches (High Wind Zones)Increased density at edges

    Note: Always check your specific local building codes. In hurricane-prone areas like Florida or the Gulf Coast, spacing requirements are often stricter.

    The “End Lap” Consideration

    Where panels overlap end-to-end (vertical overlap), you need additional fasteners.

    • Place screws in the flat area near the overlap.
    • Ensure the overlap is at least 6 inches for slopes less than 3:12, and 4 inches for steeper slopes.
    • Use sealant tape or butyl rubber in the end lap for added security against capillary action (water wicking uphill).

    Common Mistakes That Cause Leaks

    Even when you know where do you put the screws on a metal roof, execution errors can ruin the installation. Here are the top three pitfalls to avoid:

    1. The “Starved” Washer: Failing to tighten the screw enough leaves the washer loose. Water will wiggle its way under the head.
    2. The “Crushed” Washer: Over-tightening splits the rubber or thins it out so much that it loses its memory (ability to bounce back). Once the metal expands in the sun, the seal breaks.
    3. Missing the Purlin: This is the most common DIY error. If you miss the frame, the screw spins freely. Never leave a missed hole open. Fill it immediately with a color-matched rivet or a specialized plug screw designed for metal repair.

    Choosing the Right Screw: Not All Screws Are Equal

    Placement is irrelevant if the hardware is inferior. For US climates, you must use:

    • Material: Stainless steel or galvanized steel with a heavy-duty coating.
    • Head Type: Hex-head wafer heads are standard as they allow for better torque control than Phillips heads.
    • Washer: EPDM (Ethylene Propylene Diene Monomer) rubber washers are superior to standard neoprene for UV resistance and longevity. They last longer under the harsh American sun.

    FAQ Section

    1. Can I put screws in the high ribs of a metal roof?

    Generally, no. For exposed fastener systems (like corrugated), screws should go in the flat valleys. Some specific architectural standing seam systems hide clips on the ribs, but these do not use penetrating screws through the top of the rib. Always follow the specific manufacturer’s instruction sheet for your panel profile.

    2. What happens if I miss the purlin when screwing?

    If you miss the structural support, the screw will not hold. Do not leave the hole empty. You should fill the hole with a waterproof sealant and install a larger diameter screw or a rivet specifically designed for patching metal roofing. Leaving it open guarantees a leak.

    3. How tight should the screws be?

    The screw should be tight enough that the rubber washer is compressed and forms a slight “doughnut” shape around the screw shaft. It should not be so tight that the washer is flattened completely or the metal panel is dimpled inward. A good rule of thumb is to stop when you feel significant resistance after the washer contacts the metal.

    4. Do I need to pre-drill holes for metal roofing screws?

    Most modern metal roofing screws are self-drilling (tek screws) and do not require pre-drilling for standard gauge steel (26–29 gauge). However, if you are working with thicker structural steel or aluminum, pre-drilling may be necessary to prevent thread stripping. Check the screw packaging specifications.

    5. How often should I check my roof screws?

    It is recommended to inspect your metal roof screws annually, preferably in the spring or fall. Look for loose screws, cracked washers, or rust streaks. Tighten any loose screws carefully, replacing any that have damaged washers.

    Conclusion

    Understanding where do you put the screws on a metal roof transforms a daunting DIY project into a manageable, professional-grade installation. By adhering to the principle of screwing into the flat areas over structural supports, maintaining proper torque, and using high-quality EPDM-washed screws, you ensure your roof withstands the elements for years to come.

    Remember, patience is key. Rushing the placement leads to leaks, while precision leads to longevity. If you found this guide helpful, please share it with your fellow DIY enthusiasts on social media. A well-informed community builds better roofs!