Tag: Emergency Roof Repair

  • Stop Roof Leaks in Heavy Rain: Fast Fixes

    Stop Roof Leaks in Heavy Rain: Fast Fixes

    Water dripping from your ceiling during a storm is every homeowner’s nightmare. It creates immediate stress, potential property damage, and a sense of helplessness as you watch the water accumulate. If you are frantically searching for how do I stop my roof leaking in heavy rain, you are not alone, and there are safe, effective steps you can take right now to mitigate the damage until professional help arrives.

    Immediate Safety Steps Before You Act

    Before we dive into the repairs, we must address the most critical aspect: your safety. A wet roof is slippery, and heavy rain often comes with wind or lightning.

    • Never climb onto a wet roof. The risk of slipping and falling is extremely high. Most emergency “fixes” should be done from inside the attic or from the ground using a ladder if absolutely necessary and safe.
    • Turn off electricity. If water is near light fixtures, outlets, or electrical panels, shut off the power to that area immediately to prevent electrocution.
    • Protect your belongings. Move furniture, electronics, and valuables away from the leak. Place buckets under the drip and use towels to soak up standing water.

    According to the Federal Emergency Management Agency (FEMA), water damage is one of the most common and costly home insurance claims. Taking immediate, safe action can significantly reduce the final repair bill.

    How Can I Temporarily Stop a Roof Leak from Inside?

    If you cannot go outside due to the severity of the storm, your best bet is to manage the leak from the interior. This won’t fix the roof, but it will stop water from spreading across your ceiling and causing structural rot.

    Step-by-Step Interior Diversion Method

    1. Locate the Source: Go into your attic with a flashlight. Look for water trails on the rafters or insulation. Remember, water often travels along beams before dripping down, so the entry point might be higher up than the drip.
    2. Create a Drainage Path: If you see water pooling on a beam, do not just poke a hole randomly.
      • Take a small nail or screw.
      • Gently push it through the center of the water trail on the drywall or ceiling material below.
      • This relieves pressure and prevents the ceiling from collapsing under the weight of the water.
    3. The Bucket and String Trick: This is an old roofer’s secret.
      • Place a large bucket under the drip.
      • Tie a piece of string to the nail or the edge of the hole.
      • Let the string hang down into the bucket.
      • Why this works: The water will follow the string down silently, preventing the loud drip-drip-drip noise that drives homeowners crazy and reducing splash-out.
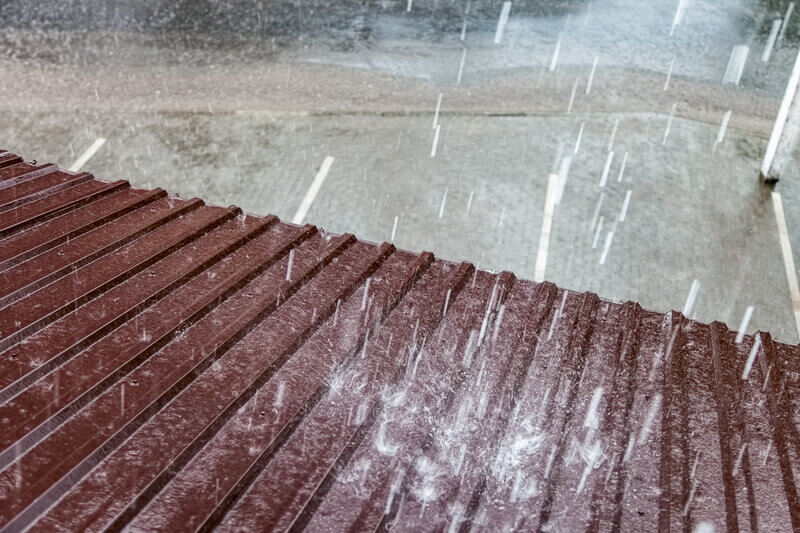
    How Do I Stop My Roof Leaking In Heavy Rain

    What Are the Best Emergency External Fixes?

    Once the rain subsides or if it is safe to access the roof from a stable ladder, you can apply temporary external patches. These are not permanent solutions but are crucial for stopping active leaks.

    Option 1: Roofing Tar and Mesh (For Small Holes)

    Roofing tar (also known as bitumen) is widely available at hardware stores. It is thick, sticky, and water-resistant.

    • Clean the Area: Use a wire brush to remove loose debris, moss, or granules around the leak. The surface must be as dry as possible for adhesion.
    • Apply the Tar: Using a putty knife, spread a generous layer of roofing tar over the crack or hole. Extend it at least 2–3 inches beyond the damaged area.
    • Reinforce with Mesh: For better durability, press a piece of fiberglass mesh or even a patch of old shingle into the wet tar. Cover it with another layer of tar.

    Option 2: Tarping the Roof (For Large Damage)

    If a tree branch has torn off shingles or there is significant structural damage, tar won’t suffice. You need a tarp.

    • Choose the Right Tarp: Use a heavy-duty, UV-resistant tarp (at least 6 mil thickness). Blue painter’s tarps are too thin; look for construction-grade materials.
    • Secure Properly:
      • Drape the tarp over the damaged section, ensuring it extends at least 4 feet above the leak point. Water flows down, so the cover must start higher than the damage.
      • Do not nail through the tarp if you can avoid it, as this creates new holes. Instead, use 2×4 wooden boards placed over the edges of the tarp and screw the boards into the roof deck. This distributes pressure and holds the tarp securely against wind.
    MethodBest ForDurabilityDifficulty
    Roofing TarSmall cracks, vent boots, minor shingle damageShort-term (Weeks)Easy
    TarpingLarge holes, missing shingles, storm damageMedium-term (Months)Moderate
    Caulk/SealantFlashing gaps, chimney basesShort-term (Days)Very Easy

    Why Is My Roof Leaking Only During Heavy Rain?

    It is common for roofs to leak only during intense storms. This phenomenon usually points to specific issues that mild rain doesn’t trigger.

    1. Wind-Driven Rain

    In heavy storms, wind pushes rain horizontally. This forces water under shingles that would normally shed vertical rain. If your shingles are curled, lifted, or improperly nailed, wind-driven rain will penetrate the underlayment.

    2. Clogged Gutters and Ice Dams

    If your gutters are full of leaves, water backs up. During heavy rain, this overflow can seep under the roof edge (fascia) and into the attic. In colder climates, ice dams create a similar barrier, forcing melting snow and rain back under the shingles.

    3. Compromised Flashing

    Flashing is the metal strip used to seal joints around chimneys, vents, and valleys. Over time, thermal expansion and contraction can crack the sealant or loosen the nails. Heavy rain overwhelms these weak points quickly.

    When Should I Call a Professional Roofer?

    While DIY fixes are great for emergencies, they are not substitutes for proper repair. You should contact a licensed roofing contractor if:

    • The leak persists after applying temporary patches.
    • There is visible sagging in the roof deck or ceiling, indicating structural water damage.
    • Mold is present. If you see black spots or smell a musty odor, professional remediation is needed to protect your health.
    • The damage is extensive. If more than 10% of your shingles are missing or damaged, a partial or full replacement may be necessary.

    According to industry standards, most asphalt shingle roofs last 20–25 years. If your roof is approaching this age, repeated leaks may signal that it is time for a replacement rather than a repair.

    Frequently Asked Questions (FAQ)

    1. Can I use silicone caulk to stop a roof leak?

    Silicone caulk can work for very small gaps in flashing or around vent pipes, but it is not ideal for large areas or shingles. It lacks the flexibility and adhesion strength of roofing tar or specialized roof cement. Use it only as a last-resort temporary fix for tiny cracks.

    2. How much does it cost to fix a leaking roof?

    Costs vary widely based on damage extent. A minor patch job might cost $150–$400. However, if water has damaged the decking, insulation, or drywall, costs can rise to $1,000–$3,000 or more. Always get multiple quotes from insured contractors.

    3. Will homeowners insurance cover roof leaks?

    It depends on the cause. Insurance typically covers “sudden and accidental” damage, such as a tree falling on your roof during a storm. However, they often deny claims for leaks caused by lack of maintenance, wear and tear, or old age. Review your policy carefully.

    4. How can I prevent roof leaks in the future?

    Prevention is key. Schedule bi-annual inspections (spring and fall). Keep gutters clean, trim overhanging tree branches, and check for missing or curled shingles after major storms. Ensuring proper attic ventilation also prevents moisture buildup that can degrade roofing materials from the inside out.

    5. Is it safe to walk on my roof to check for leaks?

    No, not during or immediately after heavy rain. Wet shingles are incredibly slippery. Even when dry, older roofs can be fragile. It is safer to inspect your roof from the ground using binoculars or to hire a professional who has the proper safety equipment and insurance.

    Conclusion

    Dealing with a leak during a storm is stressful, but knowing how do I stop my roof leaking in heavy rain empowers you to act quickly and safely. Remember, interior diversion methods like the bucket-and-string trick are your safest first line of defense. Once the weather clears, apply temporary external patches like roofing tar or tarps to prevent further damage.

    However, these are only band-aids. Water damage can compromise the structural integrity of your home and lead to mold growth if left unchecked. Prioritize your safety, mitigate the immediate damage, and schedule a professional inspection as soon as possible.

    Did this guide help you save your home from water damage? Share this article with your neighbors on social media—they might need these tips during the next storm!
  • Tarp Roof Without Nails: The Safe Guide

    Tarp Roof Without Nails: The Safe Guide

    Discovering a leak in your roof during a storm is every homeowner’s nightmare. The stress of water damaging your ceilings and belongings can be overwhelming, especially when you don’t have immediate access to professional roofing services or the right tools. You need a solution that is fast, effective, and won’t cause further damage to your shingles. This guide will show you exactly how to put a tarp on a roof without nails, ensuring your home stays dry while you wait for permanent repairs.

    We understand the urgency. Water intrusion can lead to mold growth within 24–48 hours, according to the EPA. Therefore, acting quickly with the right technique is crucial. By avoiding nails, you prevent creating new holes in your roof, which could complicate future repairs. Let’s dive into the safest, most reliable methods to secure your roof temporarily.

    Why Avoid Nails When Tarping a Roof?

    Before we get into the “how,” it is essential to understand the “why.” Many homeowners instinctively reach for a hammer and nails because it seems like the most secure option. However, this approach carries significant risks.

    The Risk of Additional Damage

    Every nail you drive into your roof creates a new potential entry point for water. If the tarp shifts due to wind, these nail holes can widen, leading to more severe leaks than the original problem. Furthermore, removing nails later often leaves behind gaps that require immediate sealing with roofing cement.

    Insurance and Warranty Concerns

    Some homeowner insurance policies and roofing manufacturer warranties may be voided if improper temporary repairs cause additional damage. Using non-penetrating methods is generally viewed as a responsible, low-risk mitigation strategy by adjusters.

    Essential Tools and Materials

    To successfully learn how to put a tarp on a roof without nails, you need the right gear. Do not attempt this with flimsy materials. Here is what you need:

    • Heavy-Duty Polyethylene Tarp: Look for a tarp with a thickness of at least 6 mils. It should be large enough to cover the damaged area plus an extra 3–4 feet on all sides.
    • Rope or Bungee Cords: Use UV-resistant polypropylene rope (at least ½ inch thick) or heavy-duty bungee cords with hooks.
    • Sandbags or Weight Bags: These are crucial for holding the tarp down without penetration. You can buy pre-filled sandbags or fill durable bags with sand or gravel.
    • Ladder: A sturdy, extension ladder with slip-resistant feet.
    • Safety Gear: Non-slip rubber-soled shoes, gloves, and a safety harness if the roof pitch is steep.
    • Roofing Cement (Optional): For sealing the edges of the tarp if you choose a hybrid method, though we will focus on non-penetrating methods here.
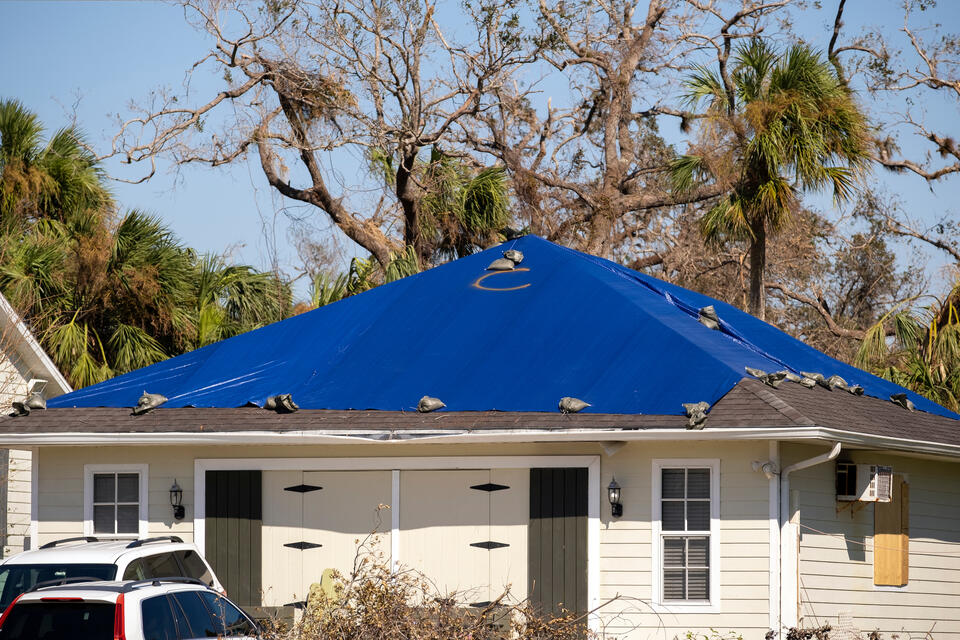
    How To Put A Tarp On A Roof Without Nails

    Step-by-Step Guide: How To Put A Tarp On A Roof Without Nails

    Follow these steps carefully. Safety is your top priority. If the roof is wet, icy, or the wind is exceeding 20 mph, wait for conditions to improve or call a professional.

    Step 1: Assess the Damage and Measure

    From the ground or a safe position on the ladder, identify the source of the leak. Measure the area to determine the size of the tarp needed. Remember, the tarp must extend well beyond the damaged spot. For example, if the hole is 2×2 feet, use a tarp that covers at least 6×6 feet around that point.

    Step 2: Prepare the Surface

    Clear any debris, such as branches or loose shingles, from the area where the tarp will sit. A clean surface ensures the tarp lies flat and reduces the risk of punctures from underneath. Note: Do not walk directly on damaged areas.

    Step 3: Position the Tarp

    Unfold the tarp on the ground first to remove wrinkles. Then, carefully pull it up onto the roof. Start from the ridge (top) and work your way down. This orientation helps water shed off the tarp rather than pooling under it. Ensure the tarp extends over the ridge if the damage is near the top, or at least 4 feet up-slope from the leak.

    Step 4: Secure with Sandbags (The Key Step)

    This is the core of learning how to put a tarp on a roof without nails. Place sandbags along the edges of the tarp.

    • Top Edge: Place sandbags every 2–3 feet along the top edge.
    • Side Edges: Place sandbags along the sides, ensuring they are heavy enough to withstand wind uplift.
    • Bottom Edge: Leave the bottom edge slightly loose or lightly weighted to allow water to flow out, preventing pooling.

    According to structural engineering principles, distributed weight is more effective than single-point anchoring for flexible membranes like tarps. The friction between the sandbags, the tarp, and the roof shingles holds the system in place.

    Step 5: Use Ropes for Extra Security

    If wind is a concern, tie ropes around the sandbags and anchor them to sturdy parts of the house, such as chimney bases (if safe) or heavy vent pipes. Do not tie ropes to gutters, as they can easily rip off under tension. Create a “cross-hatch” pattern over the tarp with ropes if the area is large, placing additional sandbags at the intersections.

    Comparing Securing Methods

    To help you decide the best approach, here is a comparison of common temporary securing methods.

    MethodDamage RiskWind ResistanceEase of InstallationCost
    Nails/StrapsHigh (New holes)HighModerateLow
    Sandbags OnlyNoneModerateEasyLow
    Rope + SandbagsNoneHighModerateLow
    Adhesive TapeLow (Residue)LowVery EasyModerate

    Table 1: Comparison of Temporary Roof Tarping Methods

    As shown, combining ropes with sandbags offers the best balance of safety and effectiveness without causing damage. For more information on roofing materials and their properties, you can refer to Wikipedia’s page on Roofing.

    Common Mistakes to Avoid

    Even with the right tools, errors can compromise the repair.

    1. Using a Tarp That Is Too Small: A small tarp may stop the direct leak but allows water to seep under the edges via capillary action. Always go bigger.
    2. Ignoring Wind Direction: Install the tarp so that the prevailing wind blows over the tarp, not under it. If the wind gets under the edge, it will act like a sail and tear the tarp away.
    3. Walking on Wet Roofs: Asphalt shingles become extremely slippery when wet. Use a ladder to position the tarp from the edge whenever possible.
    4. Leaving Pools of Water: Ensure the tarp has a slight slope. Standing water adds weight and can eventually breach the tarp material.

    FAQ Section

    Q1: How long can a tarp stay on a roof without nails?

    A tarp secured with sandbags and ropes is a temporary solution. It should ideally remain in place for no more than 30–90 days. Prolonged exposure to UV rays can degrade the tarp, and weather conditions may shift the weights. Schedule permanent repairs as soon as possible.

    Q2: Can I use bricks instead of sandbags?

    While bricks are heavy, they are not recommended. Bricks have hard, sharp edges that can crack shingles or puncture the tarp. Sandbags conform to the roof’s shape and distribute weight evenly, making them a safer choice.

    Q3: What if my roof is too steep to walk on?

    If your roof pitch is greater than 6:12 (steep), do not attempt to walk on it. Instead, use a long pole to push the tarp into position from a ladder. Anchor the ropes from the ground or eaves if possible. If this is not feasible, hire a professional roofer immediately.

    Q4: Will this method work in heavy snow?

    Snow adds significant weight. While sandbags provide good friction, heavy snow accumulation can slide the tarp. In snowy climates, it is better to clear snow from the affected area first (safely) before applying the tarp. Monitor the tarp regularly during snowfall.

    Q5: Can I use duct tape to seal the edges?

    Duct tape is not designed for long-term outdoor exposure on roofs. It loses adhesion in cold weather and leaves a messy residue. If you need to seal edges, use specialized roofing tape or flashing cement, but remember that the primary security should come from weights and ropes, not adhesives.

    Conclusion

    Learning how to put a tarp on a roof without nails is a valuable skill for any homeowner. It allows you to protect your property from water damage without risking further harm to your roof structure. By using heavy-duty tarps, sandbags, and ropes, you create a secure, non-penetrating barrier that withstands moderate weather conditions.

    Remember, this is a temporary fix. Prioritize your safety, assess the situation calmly, and act quickly. Once the immediate threat is managed, contact a licensed roofing professional to assess the damage and perform permanent repairs.

    Did you find this guide helpful? Share it with your friends and family on social media to help them prepare for unexpected home emergencies. Stay safe and keep your home dry!

  • Insurance First or Roofer? The Right Order

    Insurance First or Roofer? The Right Order

    Storms are unpredictable, and discovering damage to your roof can be an immediate source of stress and anxiety for any homeowner. You want the problem fixed quickly, but you also want to ensure you aren’t paying out of pocket for something your policy should cover. This dilemma often leads to the critical question: Do I contact insurance first or contact a roofing company? Getting this order wrong can lead to claim denials, delayed repairs, or unnecessary out-of-pocket expenses. In this guide, we will walk you through the optimal strategy to protect your home and your wallet.

    Why the Order of Operations Matters

    Many homeowners assume that calling their insurance provider is the automatic first step. While communication with your insurer is vital, contacting them before having a professional assessment can sometimes put you at a disadvantage. Insurance adjusters are trained to minimize payouts, while roofing contractors are trained to identify all visible and hidden damage.

    If you call your insurance company first without a professional opinion, you might inadvertently describe the damage incorrectly or miss critical details that justify a full replacement rather than a minor repair. Conversely, if you hire a roofer before notifying your insurer, you risk starting work that hasn’t been approved, potentially voiding coverage.

    The goal is to strike a balance: gather evidence, understand the scope, and then navigate the claims process with confidence.

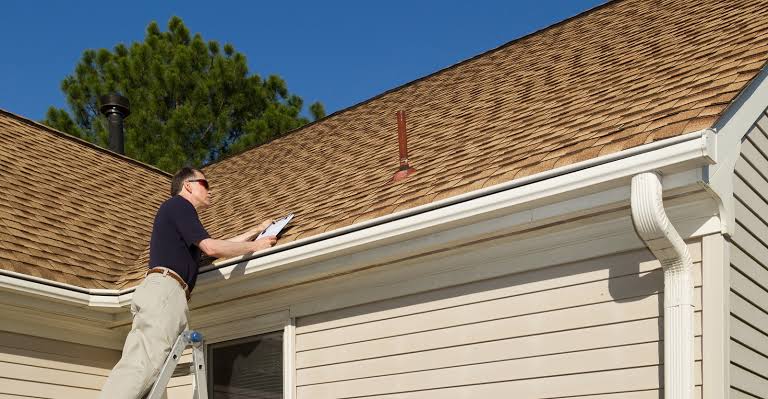
    Do I Contact Insurance First Or Contact A Roofing Company

    Step 1: Ensure Safety and Document the Damage

    Before making any calls, your priority is safety. If there is active leaking, place buckets under the drips and move valuables away from water damage. Do not climb onto the roof yourself, especially if it is wet or steep.

    Once safe, document everything from the ground. Use your smartphone to take high-resolution photos and videos of:

    • Missing or curled shingles.
    • Dents in gutters or downspouts.
    • Granule accumulation in gutters (a sign of hail damage).
    • Interior water stains on ceilings or walls.

    This documentation serves as your initial evidence. It prevents the “he-said-she-said” scenario later in the claims process. According to the Insurance Information Institute, maintaining a detailed home inventory and photographic evidence significantly speeds up the claims process and reduces disputes.

    Step 2: Contact a Reputable Roofing Company for an Inspection

    Here is where the answer to “Do I contact insurance first or contact a roofing company” becomes clear: Contact a roofing company first for a free inspection.

    A licensed roofing contractor can provide an unbiased assessment of the damage. They will determine if the damage is cosmetic, repairable, or severe enough to warrant a full replacement. More importantly, they can tell you if the damage is likely covered by insurance (e.g., storm/hail/wind) or if it is due to wear and tear (which is typically not covered).

    What to Look for in a Roofer

    • Local Reputation: Choose a company with strong local reviews. Avoid “storm chasers” who appear only after disasters.
    • Licensing and Insurance: Ensure they are fully licensed and carry liability insurance.
    • Experience with Claims: Ask if they have experience working with insurance adjusters. A roofer who understands the language of insurance policies can be invaluable.

    During the inspection, ask the roofer to provide a detailed written estimate. This document should break down labor, materials, and code upgrades. This estimate is not a commitment to hire them yet; it is a tool for your insurance negotiation.

    Step 3: File Your Insurance Claim

    Armed with the roofer’s inspection report and your own photos, now is the time to contact your insurance company. When you file the claim, be factual and concise. State that you suspect storm damage and have had a preliminary inspection by a professional.

    Provide the date of the loss and a brief description. Do not speculate on the cost or the extent of the damage beyond what you know. Let the adjuster do their job, but be prepared to advocate for yourself using the data provided by your roofer.

    Understanding the Deductible

    Remember, you will be responsible for your deductible. If the repair cost is close to or less than your deductible, it may not make financial sense to file a claim. Your roofer can help you run these numbers. Filing small claims can also lead to higher premiums or even non-renewal of your policy, so use this step wisely.

    Comparison: DIY Assessment vs. Professional Inspection

    To help you understand why skipping the professional inspection is risky, consider this comparison:

    FeatureDIY/Homeowner AssessmentProfessional Roofer Inspection
    AccuracyLow. Misses hidden structural issues.High. Identifies underlying deck damage.
    Insurance KnowledgeNone. May misclassify damage type.High. Knows what insurers look for.
    Cost EstimateGuesswork. Often inaccurate.Detailed line-item estimate.
    Negotiation PowerWeak. Easy for adjusters to lowball.Strong. Contractor can meet adjuster.
    Safety RiskHigh. Climbing ladders is dangerous.Zero. Professionals have safety gear.

    Step 4: The Adjuster’s Visit and Negotiation

    After you file the claim, the insurance company will send an adjuster to inspect the property. It is highly recommended that your roofing contractor be present during this inspection.

    Why? Because adjusters are generalists, while roofers are specialists. An adjuster might see a few missing shingles and approve a repair. However, your roofer might point out that the hail impact has compromised the seal strips on the entire roof, necessitating a replacement to prevent future leaks.

    Having your contractor present allows for real-time discussion. They can point out specific damage codes and explain the technical necessity of certain repairs. This collaborative approach often results in a more accurate settlement offer.

    Common Mistakes to Avoid

    1. Signing Over Benefits: Never sign a “Direction to Pay” or assignment of benefits form until you have read it carefully and trust the contractor implicitly. Some unscrupulous companies use these to take control of your claim entirely.
    2. Waiting Too Long: Most insurance policies have a statute of limitations for filing claims, often ranging from one to two years. However, delaying can allow water damage to worsen, leading to mold or structural rot, which insurers may argue was caused by negligence.
    3. Accepting the First Offer Blindly: The initial check from the insurance company is often for the “Actual Cash Value” (ACV), which includes depreciation. You are usually entitled to the “Replacement Cost Value” (RCV) once the work is completed. Understand the difference between these two terms.

    FAQ Section

    Q1: Can I choose my own roofing company, or does insurance assign one?

    You have the right to choose your own roofing contractor. Insurance companies may recommend vendors from their network, but you are not obligated to use them. Choosing your own trusted local roofer often ensures better quality control and advocacy during the claims process.

    Q2: Will filing a roof claim increase my insurance premium?

    It depends on your carrier and state regulations. Generally, if the damage was caused by a natural disaster (like a hurricane or hail storm) that affected many homes in your area, your premium may not increase. However, frequent claims or claims for preventable maintenance issues can lead to higher rates or non-renewal. Always ask your agent about the potential impact before filing.

    Q3: What if the insurance adjuster denies my claim?

    If your claim is denied, do not panic. Request a detailed explanation in writing. Often, denials happen because the adjuster attributed the damage to “wear and tear” rather than a specific storm event. You can appeal the decision by providing additional evidence, such as dated weather reports from the National Weather Service and a second opinion from your roofing contractor.

    Q4: How long does the roof insurance claim process take?

    The timeline varies based on the severity of the storm and the volume of claims in your area. Typically, it takes 1–2 weeks for an adjuster to visit, and another 1–2 weeks for the final settlement approval. Once approved, roofing repairs can take anywhere from a few days to several weeks depending on material availability.

    Q5: Should I pay the roofer upfront?

    Reputable roofing companies typically do not require full payment upfront. A common structure is a deposit for materials (often equal to your deductible or a percentage of the total) upon signing the contract, with the remainder paid upon completion and final inspection. Be wary of contractors demanding 100% payment before starting work.

    Conclusion

    Navigating roof damage is stressful, but knowing the correct sequence of actions empowers you. To answer the question, “Do I contact insurance first or contact a roofing company,” the best practice is to contact a reputable roofing company for an inspection first, then file your insurance claim with their professional estimate in hand.

    This approach ensures you have accurate data, professional advocacy during the adjuster’s visit, and a clearer understanding of your financial responsibility. By following these steps, you protect your home’s integrity and ensure a fair settlement.

    If you found this guide helpful, please share it with your neighbors or on social media. Storms don’t discriminate, and sharing knowledge helps our entire community recover faster and smarter.