Category: homeowner plumbing guide

  • How Much Extra Heat For A Darker Color Metal Roof?

    How Much Extra Heat For A Darker Color Metal Roof?

    Have you ever stood outside on a summer day and noticed how much hotter a black car feels compared to a white one? The same physics applies to your home. Many homeowners worry that choosing a sleek, dark-colored metal roof will turn their attic into an oven, leading to skyrocketing air conditioning bills. Understanding exactly how much extra heat for a darker color metal roof is crucial for making an informed decision that balances aesthetics with energy efficiency.

    In this guide, we will break down the science of solar reflectance, provide real-world temperature data, and offer practical solutions to keep your home cool without sacrificing the look you love.

    The Science Behind Solar Absorption

    To understand the heat difference, we first need to look at two key metrics: Solar Reflectance and Thermal Emittance. These factors determine how much sunlight a roof reflects and how efficiently it releases absorbed heat.

    Dark colors have low solar reflectance. This means they absorb a significant portion of the solar spectrum, converting light energy into thermal energy (heat). Light colors, conversely, reflect more sunlight. However, metal roofing behaves differently than traditional asphalt shingles due to its material properties.

    According to the U.S. Department of Energy, “cool roofs” are designed to reflect more sunlight and absorb less heat than standard roofs. While color plays a massive role, the material itself is equally important. Metal is highly conductive, but it also has high thermal emittance, meaning it can release heat quickly once the sun goes down.

    Key Terminology

    • Albedo: The measure of diffuse reflection of solar radiation out of total solar radiation.
    • Emissivity: The ability of a surface to emit absorbed energy.

    Temperature Differences: Dark vs. Light Metal Roofs

    So, what are the actual numbers? How much hotter does it really get?

    While exact temperatures depend on geography, humidity, and specific paint formulations, industry studies provide a clear baseline. On a typical sunny day with ambient temperatures around 90°F (32°C):

    • Light-Colored Metal Roofs: Surface temperatures typically range from 100°F to 120°F (38°C–49°C).
    • Dark-Colored Metal Roofs: Surface temperatures can soar to 140°F to 160°F (60°C–71°C) or higher.

    This means a dark metal roof can be 20°F to 40°F hotter on the surface than a light-colored one. However, it is vital to distinguish between surface temperature and attic temperature. The heat transfer into your living space is not a 1:1 ratio due to insulation and ventilation.

    Comparative Data Table

    Roof TypeColorApprox. Surface Temp (90°F Day)Solar Reflectance Index (SRI)Relative Heat Gain
    Metal PanelWhite/Cream105°F – 115°FHigh (80-90%)Low
    Metal PanelTerracotta/Red125°F – 135°FMedium (40-50%)Moderate
    Metal PanelBlack/Charcoal145°F – 165°FLow (10-20%)High
    Asphalt ShingleBlack150°F – 170°FVery Low (<10%)Very High

    Note: Data represents average conditions; specific coatings can alter these values significantly.
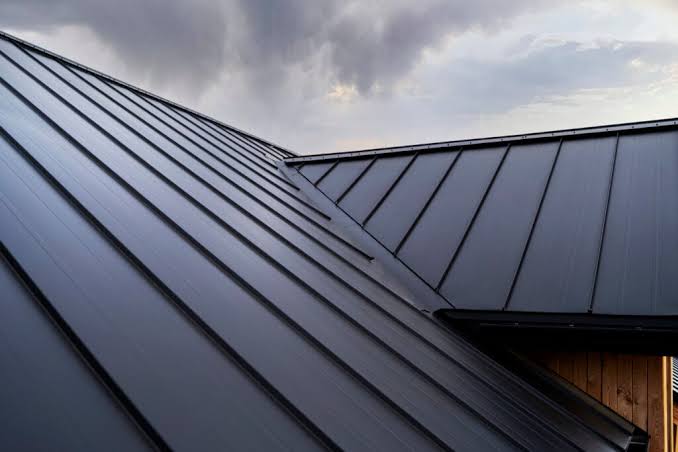
    How Much Extra Heat For A Darker Color Metal Roof

    Does Roof Color Impact Energy Bills?

    The primary concern for most US homeowners is the wallet. Does a darker roof actually cost more to cool?

    The answer is yes, but often less than you might think.

    Because metal roofs are installed with an air gap (battens or purlins) and usually over solid sheathing with insulation, the heat absorbed by the dark pigment does not immediately radiate into your home. The air gap allows for ventilation, which helps dissipate heat before it penetrates the thermal barrier.

    Studies suggest that while a dark roof absorbs more heat, the difference in annual cooling costs between a dark and light metal roof is often marginal—typically ranging from 5% to 10% in hot climates. In colder climates, a dark roof can actually be beneficial in winter by helping to melt snow and providing slight passive heating.

    Expert Insight

    “The color of the roof is only one part of the equation. Proper attic ventilation and adequate insulation (R-value) are far more critical to indoor comfort than the shade of your roof panels.” — Senior Building Scientist, National Roofing Contractors Association

    Modern Technology: Cool Pigments and Coatings

    Here is the good news: You do not have to choose between a beautiful dark roof and energy efficiency anymore. Advances in coating technology have changed the game.

    Manufacturers now use “Cool Pigment” technology. Traditional dark paints use carbon black, which absorbs heat across the entire solar spectrum. Cool pigments use specialized infrared-reflective particles. These particles allow the paint to appear dark to the human eye (visible spectrum) while reflecting a significant amount of near-infrared radiation (which carries the heat).

    Benefits of Cool-Coated Dark Metal Roofs:

    1. Lower Surface Temperatures: Can reduce surface heat by up to 50°F compared to standard dark paints.
    2. Energy Star Ratings: Many dark metal roofs now meet Energy Star criteria for steep-slope roofs.
    3. Durability: These coatings are often thicker and more resistant to fading and chalking.

    When shopping for a dark metal roof, look for products labeled as “Energy Star Certified” or those with a high Solar Reflectance Index (SRI) value, even if they are black or bronze.

    Mitigation Strategies for Dark Roofs

    If you have your heart set on a dark roof but live in a hot climate like Arizona, Texas, or Florida, you can take additional steps to minimize heat gain.

    1. Optimize Attic Ventilation

    Ensure your roof system includes ridge vents and soffit vents. This creates a chimney effect, pulling hot air out from under the metal panels before it heats up the decking.

    2. Increase Insulation R-Value

    Upgrade your attic insulation. In southern US states, an R-value of R-30 to R-60 is recommended. This acts as a shield, preventing whatever heat does penetrate from entering your living space.

    3. Install a Radiant Barrier

    A radiant barrier is a reflective material (usually aluminum foil) installed in the attic. It reflects radiant heat away from the living space. This is particularly effective for metal roofs because it addresses the radiant heat transfer directly.

    4. Choose Matte Finishes Over Glossy

    Counterintuitively, glossy dark finishes can sometimes feel hotter to the touch due to direct reflection angles, but matte finishes often disperse heat slightly better and hide imperfections. More importantly, matte finishes tend to have better long-term durability against UV degradation.

    FAQ Section

    1. Will a black metal roof fade faster than a white one?

    Yes, dark colors are more susceptible to UV degradation and fading over time. However, high-quality Kynar 500® or Hylar 5000® fluoropolymer coatings used in premium metal roofing are designed to resist fading for 20–30 years, regardless of color.

    2. Is a dark metal roof hotter than a dark asphalt shingle roof?

    Generally, no. While both absorb similar amounts of solar radiation, metal has higher thermal emittance. This means it releases heat faster once the sun sets. Asphalt shingles tend to hold heat longer, keeping the attic warmer into the night.

    3. Can I paint my existing dark metal roof to make it cooler?

    Yes, you can apply elastomeric cool-roof coatings. These are thick, reflective paints that can be rolled or sprayed onto existing metal roofs. They can significantly lower surface temperatures and extend the life of the roof.

    4. Does the extra heat damage the metal panels?

    No. Metal roofing is designed to withstand extreme temperature fluctuations. The expansion and contraction caused by heating and cooling are accounted for in the installation method (using sliding clips rather than fixed screws).

    5. How much extra heat for a darker color metal roof in winter?

    In winter, the “extra heat” is actually a benefit. A dark roof can help melt snow and ice dams faster than a light roof, reducing the risk of water backup under the eaves. This can lower heating bills slightly in cold climates.

    Conclusion

    Choosing a roof color is a balance of aesthetics, performance, and budget. So, how much extra heat for a darker color metal roof? Typically, expect surface temperatures to be 20°F to 40°F higher than light counterparts. However, thanks to modern insulation, ventilation, and cool-pigment technology, this does not necessarily translate to uncomfortable indoor temperatures or exorbitant energy bills.

    By selecting high-quality coatings with high SRI ratings and ensuring your attic is properly ventilated, you can enjoy the sophisticated look of a dark metal roof without the thermal penalty.

    Did you find this guide helpful? Share it with your friends on Facebook or Pinterest who are considering a new roof! Let’s help everyone make smarter, cooler choices for their homes.
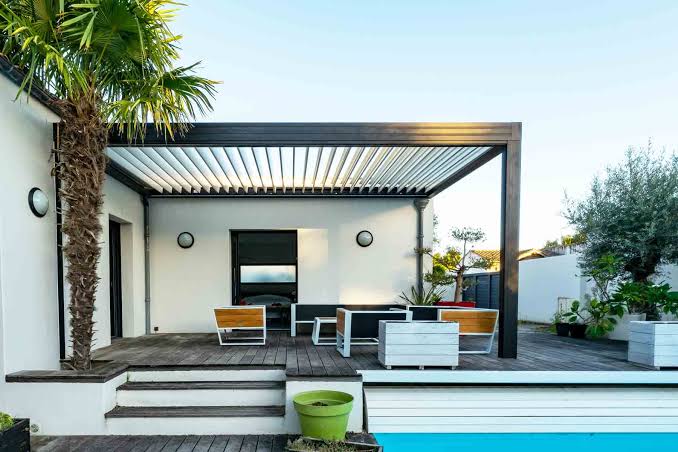

  • Louvered Roof Cost: 2026 Price Guide

    Louvered Roof Cost: 2026 Price Guide

    Have you ever stared at your backyard, wishing for a space that feels like an extension of your home but remains open to the fresh air? Many homeowners struggle with the dilemma of wanting shade without sacrificing sunlight or ventilation. Understanding how much does it cost for a louvered roof system is the first step toward transforming your outdoor area into a versatile, all-weather sanctuary.

    Understanding the Investment: What Drives the Price?

    When planning an outdoor renovation, budget clarity is essential. A louvered roof system is not a one-size-fits-all product; it is a customizable architectural feature. The cost varies significantly based on materials, size, automation levels, and installation complexity.

    In 2026, the average cost for a professionally installed louvered roof system in the United States ranges between $15,000 and $45,000. However, high-end custom projects can exceed $60,000, while smaller, DIY-friendly kits may start around $8,000.

    To help you budget accurately, let’s break down the primary cost drivers.

    1. Material Quality and Durability

    The material you choose dictates both the upfront cost and long-term maintenance expenses.

    • Aluminum (Most Popular): High-grade, powder-coated aluminum is the industry standard. It is rust-resistant, lightweight, and requires minimal upkeep. Expect to pay a premium for marine-grade aluminum if you live in coastal areas.
    • Wood: While aesthetically pleasing, wood louvered systems are rare due to maintenance issues (warping, rotting). If available, they often require more frequent sealing and care, potentially increasing long-term costs.
    • Composite Materials: A newer entrant to the market, composites offer a wood-like look with aluminum’s durability, though they often come at a higher price point due to manufacturing complexity.

    2. Size and Dimensions

    Pricing is frequently calculated per square foot. A standard 12×12 foot (144 sq. ft.) structure will cost significantly less than a 20×20 foot (400 sq. ft.) entertainment zone.

    Size (Feet)Approximate Square FootageEstimated Cost Range (Installed)
    10 x 10100 sq. ft.$12,000 – $18,000
    12 x 12144 sq. ft.$15,000 – $22,000
    12 x 16192 sq. ft.$20,000 – $30,000
    14 x 20280 sq. ft.$30,000 – $45,000

    Note: These figures include standard installation and basic motorization. Complex structural requirements may increase these estimates.

    3. Automation and Smart Features

    The “brain” of your louvered roof adds considerable value—and cost.

    • Manual Crank Systems: The most affordable option. You physically turn a handle to adjust the louvers. Best for small areas or tight budgets.
    • Motorized Systems: Standard in most modern installations. Allows for remote control operation.
    • Smart Home Integration: In 2026, integration with systems like Apple HomeKit, Google Home, or Amazon Alexa is common. Sensors that automatically close the roof when rain is detected or when wind speeds exceed safe limits add to the initial investment but provide peace of mind.

    4. Installation Complexity

    Labor costs vary by region. Urban areas with higher living costs (like New York or San Francisco) will have higher labor rates than rural areas. Additionally, if your patio requires new footings, electrical wiring for motors, or reinforcement of existing structures, these preparatory steps will add to the final bill.

    People Also Ask: Specific Cost Questions Answered

    How much does a motorized louvered roof cost compared to manual?

    The difference is primarily in the hardware and electrical work. A motorized system typically adds $2,000 to $5,000 to the total project cost. This includes the motor itself, wiring, switches, and the labor required to connect it to your home’s power supply. While more expensive upfront, motorized systems offer superior convenience and are essential for larger roofs where manual operation would be physically difficult.

    Are there hidden costs in louvered roof installation?

    Yes, it is crucial to account for potential hidden expenses:

    • Permits: Most municipalities require building permits for permanent structures. Fees range from $100 to $1,000 depending on your location.
    • Electrical Work: If you do not have an existing outdoor outlet near the installation site, hiring a licensed electrician can cost $500–$1,500.
    • Site Preparation: Removing old decking, leveling ground, or pouring concrete footings can add $1,000–$3,000.

    Does a louvered roof increase home value?

    Absolutely. Outdoor living spaces are a top priority for homebuyers in 2026. According to real estate trends, a well-installed louvered roof can offer a ROI (Return on Investment) of 70–80%. It transforms unused yard space into functional square footage, effectively increasing the livable area of your home without the cost of a full indoor addition.

    How Much Does It Cost For A Louvered Roof System

    Comparing Options: Louvered Roof vs. Traditional Pergola

    To understand the value proposition, let’s compare louvered roofs with traditional fixed pergolas.

    FeatureLouvered Roof SystemTraditional Fixed Pergola
    Weather ControlFull control (open, closed, angled)None (fixed shade only)
    Rain ProtectionYes, when closedNo
    VentilationAdjustable airflowConstant airflow
    MaintenanceLow (aluminum)Medium/High (wood staining/sealing)
    Initial CostHigher ($15k+)Lower ($3k–$8k)
    Lifespan20+ years10–15 years (with maintenance)

    While a traditional pergola is cheaper initially, it lacks the versatility of a louvered system. You cannot stop the rain or block the harsh midday sun completely with a fixed structure. For homeowners seeking true all-season usability, the louvered roof is the superior choice despite the higher entry price.

    Step-by-Step: How to Budget for Your Project

    If you are ready to move forward, follow this logical path to ensure you stay within budget.

    1. Measure Your Space: Determine the exact dimensions. Remember, larger spans may require additional support beams, which increases material costs.
    2. Define Your Needs: Do you need rain sensors? Do you want LED lighting integrated into the beams? List your “must-haves” versus “nice-to-haves.”
    3. Get Three Quotes: Contact local reputable installers. Ensure each quote includes:
      • Material specifications (brand, gauge of aluminum).
      • Labor costs.
      • Permit fees.
      • Warranty details.
    4. Check for Rebates: In some US states, energy-efficient outdoor structures that reduce cooling loads may qualify for local green energy rebates. Check with your local utility provider.
    5. Plan for Electrical: Decide early if you need an electrician. Integrating lighting and motors during the initial build is far cheaper than retrofitting later.

    For more detailed information on building codes and structural standards, you can refer to general construction guidelines on Wikipedia, which provides a broad overview of pergola and patio cover structures.

    FAQ Section

    Q: How long does it take to install a louvered roof system?

    A: Most professional installations take between 2 to 5 days. This includes framing, attaching the louvers, installing the motor, and testing the system. Weather delays or complex electrical work may extend this timeline.

    Q: Can I install a louvered roof myself?

    A: While DIY kits exist, they are generally recommended only for experienced builders. The system requires precise alignment to ensure the louvers seal correctly against rain. Incorrect installation can lead to leaks and void warranties. Professional installation is strongly advised for optimal performance.

    Q: What is the warranty period for these systems?

    A: High-quality manufacturers typically offer a 10 to 15-year warranty on the frame and louvers, and a 2 to 5-year warranty on the motor and electronic components. Always read the fine print regarding what constitutes “normal wear and tear.”

    Q: Do louvered roofs make noise when it rains?

    A: Modern aluminum louvered roofs are designed with insulation and tight seals to minimize noise. While you will hear the rain, it is generally a soothing sound rather than a deafening drumming. Some systems even include acoustic dampening strips for quieter operation.

    Q: How do I maintain my louvered roof?

    A: Maintenance is minimal. Rinse the louvers with a garden hose twice a year to remove debris. Check the tracks for leaves or twigs that might obstruct movement. Lubricate moving parts annually as per the manufacturer’s instructions.

    Conclusion

    Investing in a louvered roof system is more than just buying a shade structure; it is an investment in your lifestyle. By understanding how much does it cost for a louvered roof system, you can plan a project that balances luxury with practicality. With prices ranging from $15,000 to $45,000+, the key is to prioritize quality materials and professional installation to ensure longevity and performance.

    Whether you want to host dinner parties rain or shine, or simply enjoy a quiet morning coffee protected from the glare, a louvered roof delivers unmatched versatility.

    Did you find this guide helpful? Share it with your friends on social media who are planning their next backyard upgrade! Let’s help everyone create their perfect outdoor oasis.

  • How Many Balloons Float Above The Roof?

    How Many Balloons Float Above The Roof?

    Have you ever stared at a whimsical illustration or a viral social media video and found yourself puzzled by a seemingly simple question? You are not alone; many people are searching for the answer to how many balloons float above the roof of the meadow, often as part of a riddle, a physics problem, or an event planning scenario. Understanding the answer requires more than just counting; it involves grasping the principles of buoyancy, volume, and environmental factors.

    In this comprehensive guide, we will break down the science, the math, and the practical realities behind floating balloons. Whether you are a student solving a homework problem, an event planner calculating lift, or simply curious about the physics of party decorations, this article provides the clarity you need.

    The Science Behind Floating Balloons

    To determine how many balloons can float above a specific area, such as the roof of a structure in a meadow, we must first understand why they float in the first place. It is not magic; it is physics.

    Archimedes’ Principle in Action

    The core concept governing floating balloons is Archimedes’ Principle. This principle states that any object submerged in a fluid (in this case, air) experiences an upward buoyant force equal to the weight of the fluid it displaces.

    For a balloon to float:

    1. The gas inside the balloon must be lighter (less dense) than the surrounding air.
    2. The total weight of the balloon (including the latex/rubber skin, the string, and the gas) must be less than the weight of the air it displaces.

    Most floating balloons use helium because it is inert and significantly lighter than air. Hydrogen is lighter but highly flammable and generally unsafe for consumer use.

    The Role of Air Density

    Air density plays a crucial role in lifting capacity. Air density changes based on:

    • Temperature: Warm air is less dense than cold air.
    • Altitude: Higher altitudes have lower air pressure and density.
    • Humidity: Moist air is slightly less dense than dry air.

    If you are calculating how many balloons float above a roof in a high-altitude meadow versus a sea-level garden, the numbers will differ significantly.

    Calculating the Lift: The Math Breakdown

    Let’s get into the specifics. If you are trying to solve the riddle or plan an installation, you need concrete numbers. We will use standard party-sized balloons for this calculation.

    Standard Latex Balloon Specifications

    • Diameter: 11 inches (approx. 28 cm) when fully inflated.
    • Volume: Approximately 0.5 cubic feet (14 liters).
    • Weight of Latex: ~3 grams.
    • Lift Capacity: A standard 11-inch helium balloon lifts approximately 14 grams (0.5 ounces) of net weight.

    Note: This “net lift” accounts for the weight of the helium itself and the balloon material. It is the remaining force available to lift additional weight, such as a ribbon or a small tag.

    Step-by-Step Calculation Guide

    If you are attempting to calculate a specific scenario, follow these steps:

    1. Determine the Total Weight to Be Lifted: Are you just lifting the balloons themselves, or are they attached to a banner, a photo frame, or a decorative arch? Let’s assume for the “meadow roof” scenario that we are looking at free-floating balloons tethered loosely or simply observing a cluster.
    2. Calculate Individual Lift: Use the standard 14 grams per balloon metric.
    3. Account for Environmental Factors: Reduce lift capacity by 10–15% if the location is at high altitude or if the temperature is extremely hot (which expands the gas but may cause premature bursting) or cold (which reduces volume and lift).

    Example Calculation Table

    VariableStandard ConditionHigh Altitude/ColdImpact on Count
    Lift per Balloon14 grams~12 gramsNeed ~15% more balloons
    Helium Purity95%+90%Reduced float time & lift
    Balloon Size11 inches11 inchesConsistent volume
    How Many Balloons Float Above The Roof Of The Meadow
    A beautiful vista of tulips with colorful large air balloons above the field and amazing blue sky with clouds

    Interpreting “Above The Roof Of The Meadow”

    The phrase “How Many Balloons Float Above The Roof Of The Meadow” is often interpreted in two ways: as a literal physics problem or as a reference to pop culture and riddles.

    1. The Literal Event Planning Perspective

    If you are decorating a gazebo, barn, or pavilion in a meadow, you might want a “cloud” of balloons floating above the roofline.

    • Visual Density: To create a visible “cluster” that looks like it is hovering, you typically need a minimum of 20–30 balloons grouped together. Fewer than this may look sparse against a large sky backdrop.
    • Tethering Strategy: You cannot simply let them go if you want them to stay “above the roof.” You must use clear fishing line or weighted ribbons anchored to the roof structure.
    • Wind Considerations: Meadows are often windy. A single balloon has little resistance. A cluster of 50 balloons acts as a larger sail and may require stronger anchoring.

    2. The Riddle or Pop Culture Reference

    This specific phrasing often appears in online riddles or references to movies like Up or Cloudy with a Chance of Meatballs. In many riddle contexts, the answer is not a number derived from physics, but a play on words.

    • Common Riddle Answer: Sometimes the answer is “None” because balloons tied to a roof do not “float above” it freely; they are tethered. Or, if the question implies unattached balloons, they drift away immediately, so the number staying above is zero.
    • Context Matters: Always check if the question is a trick. If it is a math problem, use the physics data above. If it is a brain teaser, look for linguistic traps.

    Safety and Environmental Responsibility

    As an expert in content and safety standards, it is vital to address the environmental impact of balloons. While they are beautiful, they pose risks.

    The Danger of Microplastics

    Latex balloons are biodegradable, but the process takes a long time (up to four years or more depending on conditions). During this time, they can be mistaken for food by wildlife.

    • Wildlife Risk: Birds and marine animals often ingest balloon fragments, leading to fatal blockages.
    • Helium Conservation: Helium is a non-renewable resource. It is extracted from natural gas deposits and is critical for medical (MRI machines) and scientific research. Wasting it on single-use decorations is increasingly frowned upon.

    Best Practices for Eco-Friendly Floating Displays

    If you must use balloons above your meadow roof, consider these alternatives:

    1. Use Air-Filled Balloons on Stands: Create the illusion of floating using clear acrylic rods or sticks attached to the roof railing. This eliminates helium use and litter risk.
    2. Biodegradable Confetti Alternatives: Use dried flower petals or leaf confetti instead of balloon releases.
    3. Strict Retrieval Policy: If using helium, ensure every single balloon is retrieved after the event. Never release them into the atmosphere.

    For more information on the environmental impact of plastic pollution, you can refer to Wikipedia’s article on Marine Debris, which highlights the broader context of waste management in natural spaces like meadows.

    FAQ Section

    1. How much does a standard helium balloon lift?

    A standard 11-inch latex helium balloon lifts approximately 14 grams (0.5 ounces). This net lift is enough to hold up the balloon’s own weight and a small ribbon, but not much else. Larger balloons (3 feet wide) can lift several pounds.

    2. Do foil balloons float better than latex balloons?

    Foil (Mylar) balloons are less porous than latex, meaning they hold helium longer (often 1–2 weeks vs. 12–24 hours for latex). However, their lift-to-weight ratio is similar. They are better for longevity, not necessarily for greater lifting power per dollar.

    3. Why do balloons lose their ability to float over time?

    Helium atoms are very small and can escape through the microscopic pores in latex rubber. This process is called permeation. Foil balloons have fewer pores, so they retain helium longer. Temperature also affects this; cold temperatures cause the gas to contract, making the balloon appear deflated, while heat causes expansion and potential bursting.

    4. Is it legal to release balloons into the sky?

    In many jurisdictions, including several U.S. states and countries like the UK and Australia, mass balloon releases are illegal or heavily regulated due to environmental concerns and risks to aviation and power lines. Always check local laws before planning a release.

    5. How many balloons would it take to lift a person?

    This is a common curiosity. An average adult weighs around 70 kg (154 lbs). Since one balloon lifts ~14 grams, you would need approximately 5,000 to 6,000 standard 11-inch balloons to lift an average adult. This was famously demonstrated in real-life experiments, though it is extremely dangerous and not recommended.

    6. What happens to balloons that float away?

    Balloons that escape tethering eventually lose helium and fall back to earth. They can land in trees, water bodies, or remote natural areas like meadows, contributing to litter and posing hazards to wildlife. This is why responsible anchoring is critical.

    Conclusion

    Determining how many balloons float above the roof of the meadow depends entirely on your intent. If you are solving a physics problem, remember that each standard balloon provides roughly 14 grams of lift, and environmental factors like altitude and temperature will adjust this number. If you are planning an event, a cluster of 20–30 balloons creates a visually appealing effect, provided they are securely anchored.

    However, beyond the math and aesthetics, we must consider our responsibility to the environment. Helium is a precious resource, and balloon litter poses a threat to wildlife. By choosing eco-friendly alternatives or ensuring strict retrieval of all decorations, you can enjoy the beauty of floating displays without harming the meadow you love.

    Did you find this guide helpful? Share this article with your friends who are planning events or studying physics! Let’s spread knowledge and responsible practices together.

  • How Long To Depreciate A New Roof On Commercial Property

    How Long To Depreciate A New Roof On Commercial Property

    Installing a new roof on your commercial building is a significant capital investment. It protects your assets, improves energy efficiency, and enhances curb appeal. However, beyond the physical installation, many business owners struggle with the financial aftermath, specifically asking: how long to depreciate a new roof on commercial property?

    Understanding the correct depreciation timeline is crucial for accurate bookkeeping and maximizing your tax benefits. Getting this wrong can lead to missed deductions or, worse, audits from the Internal Revenue Service (IRS). In this guide, we will break down the complex tax codes into simple, actionable steps so you can manage your commercial real estate finances with confidence.

    The Standard Depreciation Timeline: 39 Years

    For most commercial real estate in the United States, the standard recovery period for non-residential real property is 39 years. This rule applies to buildings placed in service after May 12, 1993.

    When you install a new roof, it is generally considered part of the building’s structure. Therefore, under the Modified Accelerated Cost Recovery System (MACRS), you must spread the cost of that roof over 39 years using the straight-line method.

    Why 39 Years?

    The IRS views the roof as an integral component of the commercial building. Since the building itself has a useful life of 39 years for tax purposes, its major structural components share this timeline. This means if you spend $100,000 on a new roof, you cannot deduct the entire amount in year one. Instead, you deduct approximately $2,564 per year ($100,000 / 39) over nearly four decades.

    While this seems like a long time, it provides a consistent, predictable deduction that lowers your taxable income annually.

    Can You Depreciate a Roof Faster? The 15-Year Rule

    There is a common misconception that all building improvements must follow the 39-year rule. However, there is a specific exception known as Qualified Improvement Property (QIP).

    Under the Tax Cuts and Jobs Act (TCJA) of 2017, certain improvements made to the interior or exterior of non-residential real property may qualify for a 15-year recovery period. To qualify as QIP, the improvement must meet three criteria:

    1. It is made to an interior portion of a building that is non-residential real property.
    2. It is placed in service more than two years after the building was first placed in service.
    3. It is not an enlargement of the building, an elevator/escalator, or a change to the internal structural framework.

    Does a Roof Qualify as QIP?

    This is where it gets tricky. Generally, a roof replacement is considered a structural component of the building envelope, not an interior improvement. Therefore, most standard roof replacements do not qualify for the 15-year QIP schedule. They remain on the 39-year schedule.

    However, if the roof work is part of a larger renovation that includes qualified interior improvements, or if specific local tax laws offer incentives for energy-efficient roofing, there might be nuances. Always consult with a Certified Public Accountant (CPA) to see if your specific project has any qualifying elements.

    Bonus Depreciation and Section 179: Immediate Write-Offs?

    Many business owners hope to use Section 179 or Bonus Depreciation to write off the entire cost of a new roof in the first year. Let’s clarify how these apply to commercial roofs.

    Section 179 Deduction

    Section 179 allows businesses to deduct the full purchase price of qualifying equipment and software purchased or financed during the tax year. Unfortunately, structural components of a building, such as roofs, HVAC systems, and plumbing, generally do not qualify for Section 179. This deduction is reserved for tangible personal property like machinery, vehicles, and office equipment.

    Bonus Depreciation

    Bonus depreciation allows you to deduct a large percentage of the cost of eligible property in the first year. Historically, this was 100%, but it is phasing out.

    • 2023: 80%
    • 2024: 60%
    • 2025: 40%
    • 2026: 20%

    Crucially, bonus depreciation typically applies to property with a recovery period of 20 years or less. Since a commercial roof is usually depreciated over 39 years, it does not qualify for bonus depreciation unless it is reclassified as personal property or land improvement (which is rare for a standard roof).

    Expert Insight: “While the immediate cash flow benefit of a full write-off is tempting, the IRS strictly defines structural components. Misclassifying a roof as personal property to claim bonus depreciation is a red flag for auditors.” – Source: General IRS Guidelines on MACRS

    How Long To Depreciate A New Roof On Commercial Property

    Repair vs. Replacement: A Critical Distinction

    One of the most effective ways to manage the cost of roof maintenance is to correctly classify the work as a repair rather than a replacement.

    • Repairs: Costs incurred to keep the property in efficient operating condition. These are fully deductible in the year they are incurred. Examples include patching a small leak, replacing a few shingles, or cleaning gutters.
    • Replacements (Capital Improvements): Costs that add value to the property, prolong its life, or adapt it to a new use. These must be depreciated over time. Examples include installing a completely new roofing system, adding a new layer of insulation that extends the roof’s life significantly, or changing the roofing material type.

    The “Betterment” Test

    The IRS uses the “Betterment, Restoration, and Adaptation” standards to determine if an expense is a repair or a capital improvement. If your roof work materially adds to the value or substantially prolongs the useful life of the roof, it is a capital improvement subject to depreciation.

    FeatureRepairReplacement (Capital Improvement)
    Tax Treatment100% Deductible Current YearDepreciated Over 39 Years
    ScopeMinor patches, leak fixesFull tear-off and new install
    Impact on ValueMaintains current valueIncreases value/life
    DocumentationInvoice for serviceCapital asset record

    Step-by-Step Guide to Calculating Roof Depreciation

    If you have determined that your new roof is a capital improvement, follow these steps to calculate your annual deduction.

    1. Determine the Basis: Calculate the total cost of the roof. Include materials, labor, permits, and any architectural fees. Do not include land value.
    2. Identify the Placed-in-Service Date: This is the date the roof is ready and available for use. For commercial property, this triggers the start of depreciation.
    3. Apply the Mid-Month Convention: Under MACRS, real property uses the mid-month convention. This means you get half a month’s depreciation for the month the property is placed in service, regardless of the actual day.
    4. Use the Straight-Line Method: Divide the basis by 39 years.
    5. Calculate the First Year: Adjust for the mid-month convention. For example, if the roof is installed in June, you get depreciation for 6.5 months (January–May is full, June is half).

    Example Calculation:

    • Cost: $130,000
    • Annual Depreciation: $130,000 / 39 = $3,333.33
    • First Year (Installed in July): $3,333.33 × (5.5/12) = ~$1,527.78

    Frequently Asked Questions (FAQ)

    1. Can I depreciate a residential rental property roof differently?

    Yes. Residential rental properties are depreciated over 27.5 years, not 39. If your commercial property has mixed-use spaces, you may need to allocate costs between commercial (39 years) and residential (27.5 years) portions based on square footage.

    2. What happens if I sell the property before the 39 years are up?

    When you sell the property, you must recapture the depreciation. The accumulated depreciation is taxed as ordinary income up to a maximum rate of 25%, known as Depreciation Recapture. Any gain above the original purchase price is treated as capital gains.

    3. Does an energy-efficient roof qualify for tax credits?

    While it may not change the depreciation schedule, installing an energy-efficient roof might qualify you for the Energy Efficient Commercial Buildings Deduction (Section 179D). This can provide a significant immediate deduction unrelated to depreciation. Check the latest IRS guidelines for current credit amounts.

    4. Can I change my depreciation method after starting?

    Changing from an incorrect method to a correct one is allowed via Form 3115, “Application for Change in Accounting Method.” However, changing from a correct method (like 39-year straight-line) to a faster method without valid justification is generally not permitted and can trigger an audit.

    5. Is there a difference between flat roofs and shingle roofs for depreciation?

    No. The IRS does not differentiate depreciation schedules based on the type of roofing material (flat, shingle, metal, tile). The classification depends on whether the property is commercial or residential and whether the work is a repair or a capital improvement.

    Conclusion

    Knowing how long to depreciate a new roof on commercial property is essential for smart financial planning. For most US business owners, the answer is 39 years under the MACRS straight-line method. While opportunities for faster write-offs like Section 179 or Bonus Depreciation are limited for structural roofs, understanding the distinction between repairs and replacements can help you optimize your tax strategy.

    Always keep detailed records of your roofing expenses and consult with a tax professional to ensure compliance with the latest IRS regulations. Proper depreciation not only keeps you compliant but also ensures you are taking every legitimate deduction available to your business.

    Found this guide helpful? Share it with your network on LinkedIn or Twitter to help other business owners navigate commercial property taxes!

  • How Long Is A Roof Warranty On A New Home?

    How Long Is A Roof Warranty On A New Home?

    Buying a new home is one of the most significant financial milestones in life, filled with excitement and, inevitably, a few anxieties. One of the biggest concerns for new homeowners is understanding what protections are in place for major structural components, particularly the roof. You might be asking yourself, how long is a roof warranty on a new home, and does it actually cover everything you think it does?

    The answer is not as straightforward as a single number because roof warranties are typically split into two distinct categories: material coverage from the manufacturer and labor coverage from the installer. Understanding this distinction is crucial to avoiding unexpected repair bills down the line. In this guide, we will break down exactly what you are covered for, how long those protections last, and how to ensure your new home’s roof remains secure for decades.

    The Two Main Types of Roof Warranties

    To truly understand the lifespan of your coverage, you must distinguish between the two primary types of warranties that come with a new construction roof. Most homeowners mistakenly believe they have one all-encompassing policy, but in reality, you are dealing with two separate agreements.

    1. Manufacturer’s Material Warranty

    This warranty is provided by the company that produced your roofing materials (e.g., GAF, Owens Corning, CertainTeed). It covers defects in the shingles or roofing materials themselves. If the shingles crack, curl, or lose granules prematurely due to manufacturing errors, this warranty kicks in.

    • Typical Duration: 20 to 50 years, sometimes “lifetime.”
    • What it Covers: Defective materials only.
    • What it Excludes: Installation errors, wind damage, or normal wear and tear.

    2. Contractor’s Workmanship Warranty

    This warranty is provided by the roofing contractor who installed the roof. It covers errors made during the installation process. If the roofer failed to seal flashing correctly or nailed shingles improperly, leading to leaks, this warranty is your safety net.

    • Typical Duration: 1 to 10 years (varies significantly by contractor).
    • What it Covers: Labor and installation errors.
    • What it Excludes: Material defects (covered by the manufacturer) and storm damage.

    How Long Do These Warranties Last?

    When searching for how long is a roof warranty on a new home, the timeline depends heavily on the quality of materials chosen by the builder and the reputation of the contracting company.

    Standard Asphalt Shingle Warranties

    For most new homes in the US, asphalt shingles are the standard. Here is a general breakdown of duration based on tier:

    Shingle TierMaterial Warranty LengthTypical Workmanship Coverage
    3-Tab (Basic)20–25 Years1–2 Years
    Architectural (Mid)30–50 Years2–5 Years
    Premium/LuxuryLifetime (50+ Years)5–10+ Years

    The “Lifetime” Misconception

    Many builders advertise a “lifetime warranty.” However, in the roofing industry, “lifetime” usually refers to the useful life of the product, not the homeowner’s life. For asphalt shingles, this is often defined as 30 to 50 years. For slate or tile, it may be longer. Always read the fine print to see if the warranty is prorated.

    How Long Is A Roof Warranty On A New Home

    What Does a Prorated Warranty Mean?

    One of the most critical aspects of roof warranties is whether they are non-prorated or prorated. This distinction can save you thousands of dollars.

    • Non-Prorated Period: For the first 10 to 15 years (depending on the brand), the manufacturer will replace defective materials at no cost to you. They cover both the materials and sometimes the labor to install them.
    • Prorated Period: After the initial non-prorated period ends, the coverage decreases annually. If a defect occurs in year 20 of a 30-year warranty, the manufacturer may only cover 33% of the material cost. You would be responsible for the remaining 67% plus all labor costs.

    According to industry standards, a prorated warranty offers diminishing returns over time. It is essential to check when your specific warranty transitions from full coverage to prorated coverage.

    Factors That Can Void Your Roof Warranty

    Even with a robust warranty in place, certain actions can nullify your protection. Being aware of these pitfalls is vital for maintaining your coverage.

    1. Poor Ventilation: This is the number one cause of voided warranties. If your attic is not properly ventilated, heat buildup can cook the shingles from the inside out. Manufacturers often require specific ventilation ratios (e.g., 1 sq. ft. of vent per 150 sq. ft. of attic space).
    2. Unauthorized Repairs: If you hire an unlicensed handyman to fix a minor leak or install satellite dishes without following manufacturer guidelines, you may void the warranty.
    3. Pressure Washing: Cleaning your roof with high-pressure water can strip away protective granules. Most manufacturers explicitly forbid this practice.
    4. Layering Shingles: Installing new shingles over old ones (overlay) is rarely covered under new home warranties. Proper installation requires tearing off the old layer.

    For more detailed information on roofing standards and definitions, you can refer to general construction guidelines available on Wikipedia.

    Steps to Verify and Maintain Your Warranty

    If you have just bought a new home, follow these steps to ensure your roof warranty is active and valid:

    1. Locate the Documents: Ask your builder or real estate agent for the specific warranty certificates. There should be one from the manufacturer and one from the contractor.
    2. Register the Warranty: Some manufacturers require the homeowner or builder to register the warranty online within 30–60 days of installation. Failure to do so may reduce coverage.
    3. Inspect Annually: Perform a visual inspection twice a year (spring and fall). Look for missing shingles, damaged flashing, or clogged gutters.
    4. Keep Records: Save all receipts for maintenance, inspections, and repairs. If you need to file a claim, proof of regular maintenance is often required.
    5. Hire Certified Contractors: For any repairs, use contractors certified by the shingle manufacturer. This ensures that the work meets the specific standards required to keep the warranty intact.

    FAQ Section

    1. Is a roof warranty transferable if I sell my home?

    Yes, most manufacturer warranties are transferable to subsequent homeowners, but there is usually a small fee involved (often between $50 and $100). The workmanship warranty from the contractor is typically non-transferable unless specified otherwise in the contract. Always check the transferability clause before selling.

    2. Does a roof warranty cover storm damage?

    Generally, no. Roof warranties cover manufacturing defects and installation errors. Storm damage (wind, hail, falling trees) is typically covered by your homeowners insurance policy, not the roof warranty. However, some premium manufacturer warranties offer optional “wind coverage” upgrades.

    3. What is the difference between a system warranty and a standard warranty?

    A standard warranty covers only the shingles. A system warranty (or enhanced warranty) covers the entire roofing system, including underlayment, flashing, and ventilation components, provided they are all from the same manufacturer. System warranties often offer longer non-prorated periods and better labor coverage.

    4. How do I know if my roof warranty is still valid?

    Check the installation date on your warranty certificate. Count the years from that date to the current year. If you are within the timeframe, the warranty is likely valid, provided you have adhered to maintenance requirements and haven’t performed unauthorized modifications. Contact the manufacturer directly with your serial numbers if you are unsure.

    5. Who should I contact if I have a leak: the builder or the manufacturer?

    Start with the roofing contractor (builder). Since leaks are most often caused by installation errors (workmanship) rather than material defects, the contractor is usually the first point of contact. If they determine the issue is a material defect, they will help you file a claim with the manufacturer.

    6. Does walking on the roof void the warranty?

    Occasional, careful walking by professionals for inspection or maintenance does not void the warranty. However, frequent foot traffic, especially by untrained individuals, can damage shingles and may give the manufacturer grounds to deny a claim if damage is evident. Always hire professionals for roof access.

    Conclusion

    Understanding how long is a roof warranty on a new home is about more than just knowing a number; it’s about recognizing the layers of protection involving both materials and labor. While material warranties can last up to 50 years, the critical workmanship coverage is often much shorter, typically ranging from 2 to 10 years.

    By distinguishing between these two types, keeping up with maintenance, and ensuring proper attic ventilation, you can maximize the lifespan of your roof and the validity of your warranty. Don’t let the paperwork gather dust—locate your documents today, register if necessary, and schedule your first annual inspection.

    If you found this guide helpful, please share it with other new homeowners on social media to help them protect their biggest investment!

  • How Long Does It Take To Open NRG Stadium Roof?

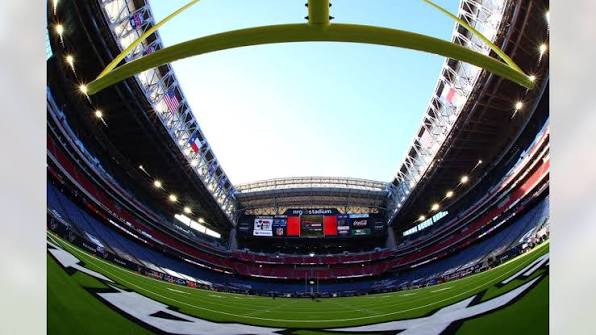
    How Long Does It Take To Open NRG Stadium Roof?

    Have you ever sat in the stands at an NFL game in Houston, watching the sky above, and wondered about the massive engineering feat hovering over your head? For many fans, the transition from a closed dome to an open-air arena is one of the most magical moments of the game day experience. If you are planning a trip to Houston or are simply a curious football fan, you likely want to know exactly how long does it take to open NRG Stadium roof.

    The short answer is that it takes approximately 12 to 15 minutes for the entire operation to complete. However, this process is not as simple as pressing a single button. It involves complex hydraulic systems, strict weather protocols, and precise timing coordinated with the NFL schedule. In this comprehensive guide, we will break down the mechanics, the rules, and the fascinating details behind one of the most iconic features in professional sports.

    The Exact Timing: Breaking Down the 12-Minute Miracle

    When the decision is made to open the roof, the spectacle begins. While fans often perceive it as a seamless glide, the operation is a carefully choreographed sequence of heavy machinery.

    The total time required to fully retract the two massive roof panels is typically between 12 and 15 minutes. This duration can vary slightly depending on wind conditions and the specific maintenance status of the hydraulic motors, but 12 minutes is the standard benchmark cited by stadium operations teams.

    Why Does It Take This Long?

    You might wonder why such a powerful system doesn’t move faster. The primary reason is safety and structural integrity. The roof panels weigh thousands of tons. Moving them too quickly could create dangerous wind tunnels, stress the steel tracks, or pose a risk to spectators and staff below. The slow, steady pace ensures that the movement is smooth, quiet, and safe for everyone in the vicinity.

    Pro Tip: If you are attending a game, arrive at least 20 minutes before the scheduled roof opening time. This gives you enough time to find your seat, grab a snack, and witness the entire transformation without rushing.

    The Mechanics Behind the Magic

    To truly appreciate the time it takes, you must understand what is actually moving. The NRG Stadium (formerly Reliant Stadium) was the first NFL facility to feature a retractable roof, setting a precedent for modern stadium design.

    Key Components of the System

    • Two Massive Panels: The roof consists of two independent panels. Each panel is roughly the size of a football field.
    • Hydraulic Motors: The system uses powerful hydraulic motors to drive the wheels along the tracks.
    • Steel Tracks: The panels glide on massive steel rails embedded in the stadium’s superstructure.
    • Counterweights: These help balance the immense weight of the roof, reducing the energy required to move it.

    According to Wikipedia’s entry on NRG Stadium, the roof structure is made of translucent fabric stretched over a steel frame. This design allows natural light to filter in even when the roof is partially closed, but the full opening provides the authentic outdoor atmosphere that Houstonians crave during the cooler months.

    How Long Does It Take To Open Nrg Stadium Roof

    Weather Rules: When Can the Roof Actually Open?

    Just because the mechanism can open in 12 minutes doesn’t mean it will. The NFL and stadium management have strict guidelines regarding weather conditions. This is perhaps the most critical factor for fans wondering if the roof will be open for their specific game.

    The NFL’s Retractable Roof Policy

    The NFL has a unified policy for all stadiums with retractable roofs, including NRG Stadium, AT&T Stadium in Dallas, and SoFi Stadium in Los Angeles. The decision is typically made 90 minutes before kickoff.

    Here are the general rules:

    1. Temperature Threshold: If the temperature is below 40°F (4°C) or above 80°F (27°C), the roof usually remains closed to maintain climate control.
    2. Precipitation: If there is rain, lightning, or high winds, the roof stays closed.
    3. Wind Speed: Sustained winds above 15–20 mph can prevent the roof from opening due to safety concerns.

    The “Home Team” Advantage

    While the NFL sets the baseline, the home team (in this case, the Houston Texans) has some discretion. If the weather is borderline—say, 78°F and sunny—the team may choose to open the roof to enhance the fan experience. Conversely, if it is humid and muggy, they may keep it closed to ensure player comfort and optimal field conditions.

    Step-by-Step: The Opening Procedure

    For those interested in the technical workflow, here is how the operation unfolds step-by-step. This process is managed by a dedicated team of engineers and stadium operators.

    1. Pre-Check (T-minus 60 minutes): Engineers inspect the tracks, hydraulic fluid levels, and weather data. Any debris on the tracks is cleared.
    2. Notification (T-minus 30 minutes): Fans are announced that the roof will open shortly. Security ensures no one is in restricted zones near the roof mechanisms.
    3. Initial Movement (T-minus 15 minutes): The locking mechanisms disengage. You might hear a loud “clunk” as the seals break.
    4. Retraction (The 12-Minute Window): Both panels begin to move simultaneously toward the ends of the stadium. They move at a speed of roughly 10–15 feet per minute.
    5. Final Locking: Once fully retracted, the panels are locked into their storage positions.
    6. All-Clear: The system signals that the roof is fully open, and the game proceeds under the open sky.

    Comparison: NRG Stadium vs. Other Retractable Roofs

    Not all retractable roofs operate the same way. Understanding how NRG compares to other major stadiums can provide context on its efficiency.

    FeatureNRG Stadium (Houston)AT&T Stadium (Dallas)State Farm Stadium (Arizona)
    Opening Time~12–15 Minutes~12–15 Minutes~15–20 Minutes
    Roof TypeTwo sliding panelsTwo sliding panelsSingle rotating panel
    MaterialTranslucent FabricTranslucent FabricTranslucent Fabric
    Year Opened200220092006
    Unique FactFirst NFL retractable roofLargest video boardRotates 90 degrees

    As seen in the table, NRG Stadium is among the fastest in terms of operation time, thanks to its dual-panel sliding design. Arizona’s State Farm Stadium, for instance, takes slightly longer because its single massive panel must rotate rather than just slide back.

    Common Misconceptions About the Roof

    There are several myths surrounding the NRG Stadium roof that often confuse new visitors.

    • Myth 1: The roof can open mid-game.
      • Fact: No. The roof must be fully open or fully closed before kickoff. It cannot move during play due to safety regulations and distraction concerns.
    • Myth 2: It opens instantly.
      • Fact: As established, it takes over 10 minutes. It is a gradual process, not an instant switch.
    • Myth 3: The roof opens for every game.
      • Fact: Due to Houston’s hot and humid climate, the roof is closed for the majority of early-season games. It is most commonly open during late fall and winter games when the weather is pleasant.

    FAQ Section

    1. Can the roof be opened partially?

    No, the NRG Stadium roof operates in an all-or-nothing manner. It is either fully closed, fully open, or in the process of moving between these two states. There is no “half-open” setting for ventilation purposes; the HVAC system handles air circulation when the roof is closed.

    2. What happens if it starts raining after the roof is opened?

    If rain begins after the roof is fully open, it generally stays open unless there is lightning or severe weather warnings. Light rain is considered part of the outdoor experience. However, if lightning is detected within a certain radius, the game may be delayed, but the roof will not be closed mid-event due to the time it takes and the risk involved.

    3. Is the roof noisy when it opens?

    Yes, you will hear mechanical sounds. The disengagement of locks produces a loud bang, and the motors emit a low hum. However, once the panels are moving, the noise is relatively moderate and does not interfere with stadium announcements or music.

    4. Who decides if the roof opens?

    The decision is a collaborative effort involving the NFL league office, the Houston Texans’ management, and stadium operations. They review real-time weather data from the National Weather Service. The final call is usually made by the stadium’s general manager in consultation with NFL officials.

    5. Does the roof affect the TV broadcast?

    Interestingly, yes. When the roof is open, lighting conditions change rapidly. Broadcast crews must adjust camera settings to account for natural sunlight versus stadium lights. Additionally, shadows from the roof structure can move across the field, which directors must manage visually.

    Conclusion

    Understanding how long does it take to open NRG Stadium roof adds a layer of appreciation to the game day experience. That 12-to-15-minute window is not just a mechanical procedure; it is a testament to human ingenuity and engineering precision. Whether you are a die-hard Houston Texans fan or a tourist visiting for the first time, witnessing the roof retract is a memorable moment that connects you to the unique culture of Houston sports.

    Next time you are in the stands, keep an eye on the clock. When the announcement comes, you’ll know exactly what is happening behind the scenes. Don’t forget to share this article with your fellow football fans who might be planning their next trip to NRG Stadium! Have you ever seen the roof open in person? Share your stories on social media and tag us—we’d love to hear about your experience.

  • How Long to Open Cowboys Stadium Roof?

    How Long to Open Cowboys Stadium Roof?

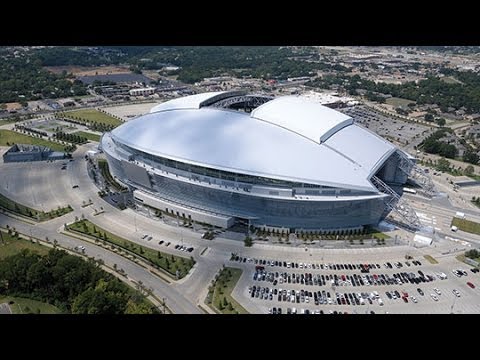
    Have you ever sat in the stands at AT&T Stadium, looking up at the massive translucent panels, and wondered just how much engineering power it takes to move them? It is a common curiosity for fans attending games or concerts, especially when the Texas weather turns unpredictable. If you are asking how long it takes to open Cowboys Stadium roof, the answer might surprise you with its precision and speed.

    This iconic venue, home to the Dallas Cowboys, features one of the most complex retractable roof systems in the world. Understanding the timing and mechanics behind this operation not only satisfies your curiosity but also helps you plan your visit better. Whether you are hoping for a breeze on a hot September afternoon or worrying about a sudden thunderstorm, knowing the roof’s operational window is key.

    The Exact Timeframe: Speed Meets Precision

    So, what is the magic number? According to official specifications and operational records, it takes approximately 12 to 15 minutes to fully open or close the roof of AT&T Stadium.

    This timeframe is remarkably fast considering the sheer scale of the structure. The roof consists of two massive panels, each weighing thousands of tons. To put this in perspective, many older retractable roof stadiums, such as the original Minute Maid Park in Houston, could take up to 20–30 minutes to complete the same action. The engineers behind AT&T Stadium prioritized efficiency to ensure that game delays due to weather changes are minimized.

    Why Does It Take This Long?

    You might think, “Why not make it faster?” The answer lies in safety and mechanical integrity. Moving a structure of this magnitude requires synchronized movement of hundreds of motors and gears. Rushing the process could lead to mechanical stress, misalignment, or safety hazards for the spectators below. The 12–15 minute window is the “sweet spot” where speed meets structural safety.

    Understanding the Mechanics Behind the Magic

    To truly appreciate the time it takes, we need to look under the hood. The roof isn’t just sliding on a simple track; it is a feat of modern civil engineering.

    The Weight and Scale

    Each of the two roof panels weighs approximately 4,500 tons. That is roughly equivalent to the weight of 3,000 average-sized cars. These panels are made of a translucent ETFE (Ethylene Tetrafluoroethylene) plastic, which is lightweight compared to glass but still incredibly heavy in such large sheets. They allow natural light to flood the stadium when closed, reducing the need for artificial lighting during day games.

    The Motor System

    The movement is powered by a series of electric motors. Specifically, the system uses:

    • 8 main drive units per panel.
    • Each unit contains multiple high-torque motors.
    • The system operates on a rack-and-pinion mechanism, ensuring smooth, linear motion.

    The synchronization of these motors is controlled by a central computer system that monitors wind speed, position, and load distribution in real-time. If any sensor detects an anomaly, the system halts immediately to prevent damage.

    How Long Does It Take To Open Cowboys Stadium Roof

    Weather Rules: When Can the Roof Actually Move?

    One of the most critical factors affecting the roof’s operation is the weather. You cannot simply open the roof whenever you feel like it. There are strict protocols in place.

    Wind Speed Limits

    The primary enemy of a retractable roof is wind. If the wind speed exceeds 20–25 mph, the roof will remain closed. High winds can create lift forces that could destabilize the panels or damage the tracking system. Even if it is a beautiful sunny day, a gusty breeze will keep the lid on.

    Rain and Lightning

    While the roof is designed to shed water, operating it during heavy rain is generally avoided to prevent water ingress into the mechanical pits. More importantly, lightning protocols take precedence. If lightning is detected within a certain radius, all outdoor operations cease, and the roof status is locked for safety.

    Weather ConditionRoof StatusReason
    Clear Sky, Low WindOpen/ClosedOperational
    Wind > 25 mphClosedSafety/Stability
    Heavy RainClosedMechanical Protection
    Lightning NearbyClosedFan/Staff Safety

    Step-by-Step: The Opening Process

    If you are lucky enough to witness the roof opening, here is what happens behind the scenes, step by step:

    1. Pre-Check Sequence: The control room initiates a diagnostic check. Sensors verify that the tracks are clear, the locking pins are disengaged, and wind speeds are within limits.
    2. Unlocking Mechanism: Hydraulic locks that secure the roof panels in the closed position are released. You might hear a distinct mechanical “clunk” as these disengage.
    3. Initial Movement: The motors engage slowly. The first few feet of movement are the slowest to ensure proper alignment with the guide rails.
    4. Acceleration Phase: Once aligned, the panels accelerate to their standard operating speed. This is the phase where the 12–15 minute timer really counts down.
    5. Mid-Travel Monitoring: As the panels slide over the stadium bowl, sensors continuously monitor for any obstruction or uneven movement.
    6. Final Positioning: As the panels reach the fully open position (stored at either end of the stadium), they slow down again.
    7. Locking and Confirmation: The panels lock into their open storage position. The system sends a “All Clear” signal to the stadium operations team.

    For more detailed technical specifications on large-scale retractable structures, you can refer to general engineering principles documented on Wikipedia.

    Common Misconceptions About the Roof

    There are several myths surrounding the AT&T Stadium roof. Let’s clear them up.

    • Myth 1: The roof opens partially.
      • Fact: The roof is an all-or-nothing system. It does not have a “half-open” setting for partial ventilation. It is either fully closed, fully open, or in transit.
    • Myth 2: It can open during a game easily.
      • Fact: While it can open during a game, it rarely does so unless there is a significant break in play (like halftime) and the weather conditions are perfect. Opening it during active play can be distracting and poses a slight risk if debris were to fall (though highly unlikely).
    • Myth 3: It is made of glass.
      • Fact: As mentioned, it is made of ETFE plastic. This material is durable, self-cleaning, and allows UV light to pass through while blocking heat, making it ideal for Texas summers.

    Why This Matters for Your Visit

    Knowing how long it takes to open Cowboys Stadium roof can enhance your experience as a fan.

    • Timing Your Arrival: If you want to see the roof open, arrive early. The decision to open the roof is usually made 2–3 hours before kickoff. If you arrive 30 minutes before the game, the roof status is likely already set.
    • Comfort Planning: If the roof is closed, the stadium relies on its massive HVAC system. It is one of the largest air-conditioned spaces in the world. If the roof is open, expect ambient noise from outside and potential temperature changes.
    • Photography Opportunities: The transition period offers unique photo opportunities as the light changes inside the bowl. The 12-minute window provides a dynamic backdrop for social media content.

    FAQ Section

    1. Can the roof be opened during a football game?

    Yes, technically it can, but it is rare. It usually requires a stoppage in play and favorable weather conditions. Most often, the roof status is decided before the gates open to the public.

    2. What happens if it starts raining while the roof is open?

    The stadium has advanced weather monitoring systems. If rain is imminent, the crew will begin the closing process immediately. Since it takes 12–15 minutes, they rely on accurate forecasts to start the process before the rain hits. If caught off guard, the panels are water-resistant, but the priority is to close them as fast as safely possible.

    3. Is the roof soundproof when closed?

    Not entirely. While the ETFE panels and the enclosed structure reduce outside noise significantly, you can still hear some ambient sound from outside, especially during loud events like fireworks or nearby highway traffic. However, the acoustic design focuses on keeping crowd noise in to enhance the home-field advantage.

    4. How often is the roof maintained?

    The roof undergoes regular maintenance checks weekly. Major mechanical inspections happen during the NFL off-season. The motors, tracks, and sensors are lubricated and tested to ensure the 12–15 minute operation time remains consistent.

    5. Does the roof affect the Wi-Fi or cell service in the stadium?

    No. The ETFE material is transparent to radio waves. AT&T Stadium is known for having some of the best cellular connectivity in the NFL, regardless of whether the roof is open or closed. The network infrastructure is designed to handle high-density usage independently of the roof status.

    Conclusion

    The next time you find yourself gazing up at the massive panels of AT&T Stadium, you will know exactly what is happening behind the scenes. The answer to how long it takes to open Cowboys Stadium roof is a precise 12 to 15 minutes, a testament to the incredible engineering that keeps thousands of tons of material moving smoothly and safely.

    This blend of speed, safety, and spectacle is part of what makes attending a Dallas Cowboys game such a unique experience. Whether the roof is open to let in the Texas sun or closed to keep out the storm, the stadium remains a marvel of modern architecture.

    Did you find this guide helpful? Share this article with your fellow football fans on social media so they can impress their friends with these cool facts at the next tailgate! Don’t forget to comment below if you’ve ever seen the roof in action.

  • Metal Roof Furring Strip Spacing Guide

    Metal Roof Furring Strip Spacing Guide

    Installing a metal roof is one of the best investments you can make for your home’s longevity and energy efficiency. However, the difference between a roof that lasts 50 years and one that fails prematurely often comes down to the hidden framework beneath the panels. If you are wondering how far apart should furring strips be for metal roof, you are asking the right question to ensure structural integrity and proper drainage.

    Getting this spacing wrong can lead to noisy roofs, oil-canning (visible waviness in the metal), or even structural failure during heavy snow loads. In this guide, we will break down the industry standards, explain why spacing matters, and provide a step-by-step approach to installing your substructure correctly. Whether you are a seasoned DIYer or hiring a contractor, understanding these fundamentals is crucial for a professional-grade finish.

    What Is the Standard Spacing for Furring Strips?

    When planning your metal roof installation, the most common question is about the distance between supports. For the vast majority of residential and light commercial applications, the standard spacing for furring strips (also known as purlins or battens) is 24 inches on center.

    However, “on center” (OC) is the key phrase here. This means you measure 24 inches from the center of one strip to the center of the next. This spacing aligns perfectly with standard lumber dimensions and provides adequate support for most 26-gauge and 24-gauge metal roofing panels.

    When to Use 16 Inches On Center

    While 24 inches is the standard, there are specific scenarios where you must tighten the spacing to 16 inches on center:

    • Heavy Snow Loads: If you live in an area with significant annual snowfall, closer spacing prevents the metal from sagging under weight.
    • Thinner Gauge Metal: If you are using lighter gauge metal (such as 29-gauge), it requires more frequent support to prevent flexing.
    • Wide Panel Profiles: Some standing seam profiles with wider flat areas may require closer support to maintain aesthetic straightness.
    • High Wind Zones: In coastal areas or regions prone to hurricanes, tighter spacing adds rigidity against uplift forces.

    Always check your local building codes. In many US jurisdictions, the International Residential Code (IRC) dictates minimum requirements based on your specific geographic load zones.

    Why Does Furring Strip Spacing Matter?

    You might think that as long as the screws hit wood, the spacing doesn’t matter much. However, improper spacing leads to three major issues that can compromise your roof.

    1. Prevention of Oil-Canning

    Oil-canning is a phenomenon where the flat areas of the metal panel appear wavy or distorted. This happens when the metal expands and contracts with temperature changes but lacks sufficient backing to remain flat. Properly spaced furring strips provide the necessary tension and support to keep the panels looking sleek and professional.

    2. Structural Integrity Under Load

    Metal roofs are strong, but they are not structural beams themselves. They transfer the load (snow, rain, workers walking on the roof) to the furring strips, which then transfer it to the rafters. If the strips are too far apart, they can bow or break, leading to leaks or collapse.

    3. Noise Reduction

    A common complaint about metal roofs is noise during rain or hail. Properly secured furring strips create a solid base that dampens vibration. If strips are spaced too widely, the metal acts like a drumhead, amplifying sound rather than absorbing it.

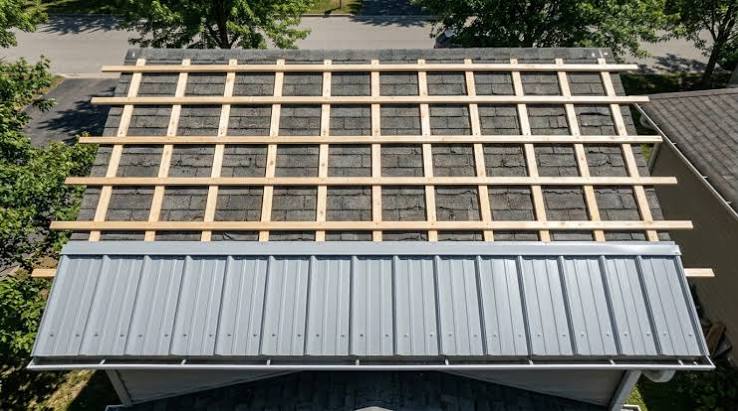
    How Far Apart Should Furring Strips Be For Metal Roof

    Furring Strips vs. Solid Sheathing: A Comparison

    Before you buy lumber, you need to decide between using furring strips over open rafters or installing them over solid sheathing (plywood/OSB). Here is a quick comparison to help you decide.

    FeatureFurring Strips Only (Open Rafter)Furring Strips Over Sheathing
    CostLower (less material)Higher (requires plywood/OSB)
    VentilationExcellent natural airflowRequires ridge/soffit vents
    InsulationHarder to insulate effectivelyEasier to add rigid foam or batts
    WalkabilityDangerous (steps only on strips)Safer (solid surface)
    Best ForBarns, sheds, patiosResidential homes, conditioned spaces

    For most residential homes in the US, building codes require solid sheathing underneath the metal for fire rating and wind uplift resistance. In these cases, the furring strips are installed on top of the sheathing to create a ventilation gap.

    Step-by-Step Installation Guide

    Proper installation is just as important as the spacing. Follow these steps to ensure your furring strips are aligned and secure.

    Step 1: Prepare the Surface

    Ensure your rafters or sheathing are clean, dry, and free of debris. If you are installing over existing shingles, check local codes to see if this is permitted. Usually, removing old roofing is recommended to inspect the deck.

    Step 2: Install Drip Edge and Underlayment

    Before laying any wood, install your drip edge along the eaves. Then, roll out your synthetic underlayment. This layer acts as a secondary water barrier. Secure it with cap nails or staples according to the manufacturer’s instructions.

    Step 3: Mark Your Layout

    Do not guess the spacing. Use a chalk line to mark every 24 inches (or 16 inches, depending on your plan) from the eave up to the ridge.

    • Tip: Start measuring from the bottom edge of the fascia board to ensure your first strip is perfectly aligned.

    Step 4: Install the First Strip

    Place the first furring strip (usually a 1×4 or 2×4 pressure-treated lumber) along the eave line. Ensure it is straight. Secure it into the rafters or sheathing using corrosion-resistant screws.

    • Screw Type: Use #10 or #12 hex-head structural screws. Do not use standard drywall screws; they lack the shear strength needed for roofing.

    Step 5: Continue Up the Roof

    Install subsequent strips along your chalk lines. Check for straightness every few rows. If a strip is bowed, replace it. A crooked furring strip will result in a crooked metal roof.

    Step 6: Handle the Ridge

    The final strip at the ridge may need to be cut to fit. Ensure there is enough room for your ridge cap ventilation system.

    Material Selection: What Wood to Use?

    Not all wood is created equal for roofing applications. Since this layer is trapped between the metal and the house, it needs to resist moisture and rot.

    • Pressure-Treated Lumber: This is the gold standard for furring strips. Look for lumber treated with ACQ (Alkaline Copper Quaternary) or similar preservatives. It resists rot and insect damage.
    • Cedar or Redwood: These naturally rot-resistant woods are excellent alternatives if you want to avoid chemicals, though they are more expensive.
    • Avoid Untreated Pine: Standard white pine or spruce will rot quickly when condensation forms under the metal panels, leading to premature failure.

    According to Wikipedia’s entry on Roofing, proper substrate preparation is critical for the longevity of any roofing material, especially metal which interacts dynamically with thermal changes.

    FAQ Section

    How thick should furring strips be for a metal roof?

    The standard thickness is 1 inch nominal (which is actually 3/4 inch thick). Common sizes are 1×4 or 2×4. The 2×4 is often preferred because it provides a deeper cavity for better ventilation and allows for thicker insulation if needed.

    Can I install metal roofing directly to plywood without furring strips?

    Yes, you can, but it is not recommended for most climates. Installing directly to plywood traps heat and moisture, leading to condensation issues inside the attic. Furring strips create an air gap that allows moisture to escape and reduces heat transfer, improving energy efficiency.

    Do furring strips need to be vented?

    The strips themselves do not need vents, but the space they create does. You must ensure there is intake ventilation at the eaves (soffits) and exhaust ventilation at the ridge. This airflow carries away warm, moist air that accumulates under the metal.

    What screws should I use to attach furring strips?

    Use structural wood screws or lag screws that are rated for exterior use. Galvanized or stainless steel is best to prevent rust. Ensure the screws are long enough to penetrate at least 1.5 inches into the roof rafters or trusses.

    How do I calculate how many furring strips I need?

    Measure the length of your roof from eave to ridge. Divide this number by your spacing interval (e.g., 2 feet for 24″ OC). Add one extra strip for the starting eave strip. For example, if your roof is 20 feet long: 20 / 2 = 10 spaces + 1 start strip = 11 strips per bay width. Multiply by the number of bays across the house.

    Conclusion

    Knowing how far apart should furring strips be for metal roof is the foundation of a successful roofing project. For most homeowners, sticking to 24 inches on center with pressure-treated 1×4 or 2×4 lumber will provide the perfect balance of support, ventilation, and cost-efficiency. However, always adjust to 16 inches if you are dealing with heavy snow loads or thinner metal gauges.

    By following these guidelines, you ensure your roof remains quiet, dry, and structurally sound for decades. Don’t cut corners on the substructure; it is the unsung hero of your metal roof system.

    Did you find this guide helpful? Share it with your friends on Facebook or Pinterest who are planning their own roofing projects! If you have questions about your specific roof setup, leave a comment below—we love helping fellow DIYers succeed.

  • Must Wood Stove Pipe Go Above Roof Line?

    Must Wood Stove Pipe Go Above Roof Line?

    Installing a wood stove is one of the most rewarding upgrades you can make to your home, offering both cozy warmth and potential energy savings. However, the difference between a safe, efficient fire and a hazardous situation often comes down to one critical detail: proper venting. Many homeowners find themselves asking, does wood stove pipe have to be above roof line? The short answer is yes, but the specific height requirements are governed by strict safety codes designed to prevent fires and ensure your stove draws correctly. In this guide, we will break down exactly how high your pipe needs to go, why it matters, and how to get it right the first time.

    Why Height Matters: The Science of Draft and Safety

    Before diving into the specific measurements, it is essential to understand why the height of your chimney or stove pipe is so critical. It isn’t just about following rules; it is about physics and safety.

    The Chimney Effect

    Wood stoves rely on natural convection, often called the “chimney effect,” to pull smoke out of your home. Hot air rises because it is less dense than cold air. If your stove pipe terminates too low, it may not create enough vertical distance to generate the necessary suction (draft) to pull combustion gases out efficiently. A weak draft leads to smoky rooms, poor burning efficiency, and increased creosote buildup.

    Fire Safety and Spark Arrestors

    Beyond airflow, height is a primary defense against house fires. When wood burns, it emits sparks and embers. If your stove pipe ends below the roofline or too close to combustible materials like shingles, eaves, or nearby trees, those sparks can ignite a fire. Proper height ensures that hot embers cool down before they land on any surface.

    The Golden Rule: The 3-2-10 Formula

    When determining if your wood stove pipe has to be above roof line, you cannot simply guess. You must follow the universal standard known as the 3-2-10 Rule. This rule is widely accepted by building inspectors, insurance companies, and the National Fire Protection Association (NFPA).

    Here is how it works:

    1. 3 Feet Above the Roof Penetration: The chimney must extend at least 3 feet above the point where it passes through the roof surface.
    2. 2 Feet Higher Than Any Obstruction: The top of the chimney must be at least 2 feet higher than any part of the building structure (such as a ridge beam, parapet wall, or adjacent roof section) within a horizontal distance of 10 feet.
    3. 10 Feet Horizontal Radius: The “2 feet higher” rule applies to any obstruction within a 10-foot horizontal radius of the chimney.

    Visualizing the Rule

    Imagine drawing a circle with a 10-foot radius around your chimney. Look at everything inside that circle. Is there a roof peak, a dormer, or a tree branch? Your chimney tip must be at least 2 feet higher than the highest point of any of those objects. If there are no obstructions within 10 feet, you still must maintain the minimum 3-foot height above the roof penetration point.

    Does This Apply to All Stove Pipes?

    It is important to distinguish between different types of piping, as this often causes confusion among DIY installers.

    Class A Chimneys vs. Single-Wall Pipe

    The strict 3-2-10 rule generally applies to Class A insulated chimneys that pass through the roof. These are permanent installations designed for long-term use.

    If you are using a single-wall stove pipe that exits through a wall (not the roof), the rules are slightly different but equally strict. Wall-exit pipes must typically extend vertically outside the house before turning upward, and they must still clear the roofline by a significant margin to prevent downdrafts and spark hazards. However, roof penetrations are generally preferred for better draft and safety.

    Expert Note: Always check your local building codes. While the NFPA provides national standards, some municipalities in the US have stricter requirements due to local weather conditions or historical preservation laws.

    Does Wood Stove Pipe Have To Be Above Roof Line

    Common Mistakes Homeowners Make

    Even with the best intentions, many installations fail inspection or perform poorly due to common errors. Here are the most frequent pitfalls:

    • Ignoring the Ridge Line: Many homeowners measure from the spot where the pipe hits the roof but forget that the ridge line (the peak of the roof) is an “obstruction.” If your chimney is within 10 feet of the ridge, it must be 2 feet higher than the ridge, not just 3 feet above the penetration point.
    • Using Elbows Excessively: Every elbow in your pipe reduces draft. While not strictly a “height” issue, a complex pipe route often requires more height to compensate for the loss of suction. Keep the path as straight and vertical as possible.
    • Neglecting Wind Patterns: If you live in a particularly windy area, your chimney may need to be taller than the minimum code requirements to avoid wind-induced downdrafts, which can blow smoke back into the house.

    Step-by-Step: How to Measure Your Required Height

    To ensure your installation is compliant, follow these concrete steps. You will need a tape measure, a level, and possibly a ladder.

    1. Identify the Penetration Point: Locate exactly where your chimney pipe will exit the roof. Mark this spot.
    2. Measure the 10-Foot Radius: From your marked spot, measure 10 feet horizontally in all directions. Identify any structures (roof peaks, walls, vents) within this zone.
    3. Find the Highest Obstruction: Determine the highest point among the structures identified in step 2. Let’s call this Height A.
    4. Calculate Minimum Height:
      • If there are no obstructions within 10 feet, your minimum height is 3 feet above the roof surface at the penetration point.
      • If there are obstructions, your chimney top must be Height A + 2 feet.
    5. Compare and Choose: Whichever calculation results in a greater height is your required minimum. Always round up to be safe.

    Comparison: Roof Exit vs. Wall Exit

    FeatureRoof Exit (Class A Chimney)Wall Exit (Single/Double Wall Pipe)
    Draft EfficiencyExcellent (Vertical rise creates strong draft)Good (Requires vertical exterior section)
    Installation ComplexityModerate (Requires flashing and roof work)Easier (No roof penetration needed)
    Code StrictnessStrict 3-2-10 Rule appliesMust clear eaves and roofline significantly
    MaintenanceEasier to clean from topHarder to access for cleaning
    AestheticsTraditional lookVisible pipe on exterior wall

    For more detailed technical specifications on chimney construction, you can refer to the general standards outlined on Wikipedia’s Chimney page, which provides a broad overview of historical and modern construction techniques.

    FAQ Section

    1. Can I terminate my wood stove pipe flush with the roof?

    No. Terminating a stove pipe flush with the roof is dangerous and illegal under almost all building codes. It creates a severe fire hazard due to spark emission and will likely cause smoke to back up into your home due to poor draft and wind turbulence.

    2. What happens if my chimney is too short?

    If your chimney is too short, you will experience poor draft. This means the fire will struggle to stay lit, produce excessive smoke, and burn inefficiently. More dangerously, it increases the risk of creosote buildup, a highly flammable substance that can lead to chimney fires.

    3. Do I need a rain cap on my wood stove pipe?

    Yes, it is highly recommended. A rain cap prevents water, snow, and debris from entering the flue. Water inside the chimney can mix with creosote to form acidic compounds that corrode the liner. Ensure the cap is spark-arresting as well.

    4. Does the type of wood I burn affect the required height?

    Indirectly, yes. Burning wet or unseasoned wood produces more smoke and creosote. While this doesn’t change the legal height requirement, a taller chimney with better draft can help mitigate some of the negative effects of burning less-than-ideal fuel by ensuring gases are expelled more quickly.

    5. Can I use a existing fireplace chimney for my wood stove?

    Often, yes, but it must be inspected and likely relined. Old masonry chimneys may have cracks or gaps that allow heat to escape into wooden framing. You must install a certified stainless steel liner that meets current size and insulation standards. Never connect a wood stove directly to an unlined masonry chimney.

    Conclusion

    So, does wood stove pipe have to be above roof line? Absolutely. Adhering to the 3-2-10 rule is not just about passing inspection; it is about ensuring your home remains safe and your heating system works efficiently. By keeping your chimney at the correct height, you protect your family from fire hazards, prevent smoke damage, and enjoy the full warmth of your wood stove.

    Remember, when in doubt, always consult with a certified chimney sweep or HVAC professional. They can provide site-specific advice that accounts for your home’s unique architecture and local wind patterns.

    Found this guide helpful? Share it with your fellow DIY enthusiasts on social media to help keep homes safe and warm this winter!

  • Can You Put Solar Panels On A Flat Roof UK?

    Can You Put Solar Panels On A Flat Roof UK?

    Living in the United Kingdom offers unique architectural challenges, especially when it comes to maximizing renewable energy potential. Many homeowners with modern builds or extensions face a common dilemma: can you put solar panels on a flat roof UK? The short answer is a resounding yes, but the method differs significantly from traditional pitched roof installations.

    If you are worried that your property’s design limits your ability to go green, rest assured. With the right technology and installation approach, flat roofs can be highly efficient platforms for solar energy generation. This guide will walk you through everything you need to know, from mounting systems to local regulations, ensuring you make an informed decision for your home.

    Why Flat Roofs Are Viable for Solar in the UK

    For years, there was a misconception that flat roofs were unsuitable for solar power. However, advancements in mounting technology have changed the landscape. In fact, flat roofs offer distinct advantages that pitched roofs do not.

    Unlike sloped roofs, which are fixed at a specific angle determined by the builder, flat roofs allow for optimal orientation. You can adjust the tilt and direction of your panels to capture the maximum amount of sunlight throughout the year. In the UK, where the sun’s path is lower in the sky during winter, this flexibility is crucial for maintaining consistent energy production.

    According to recent data from the Department for Energy Security and Net Zero, residential solar adoption has surged, with flat-roofed properties contributing significantly to this growth. The key lies not in if you can install them, but how you install them.

    How Are Solar Panels Mounted on Flat Roofs?

    The most critical aspect of installing solar on a flat roof is the mounting system. You cannot simply screw panels directly into the surface as you might with a tiled roof. Instead, specialized frameworks are used to hold the panels at an optimal angle.

    1. Ballasted Mounting Systems

    This is the most popular method for commercial and residential flat roofs in the UK. These systems use weight (ballast) to keep the structure in place rather than penetrating the roof membrane.

    • How it works: Concrete blocks or gravel trays are placed on the roof to weigh down the aluminum frame holding the panels.
    • Benefit: No drilling means no risk of leaks, preserving your roof’s warranty.
    • Consideration: Your roof must be structurally sound enough to support the extra weight.

    2. Penetrating Mounts

    In some cases, particularly with smaller domestic roofs where weight is a concern, installers may use penetrating mounts.

    • How it works: The frame is bolted directly into the roof’s structural beams.
    • Benefit: Lighter overall load on the roof.
    • Risk: Requires expert waterproofing around the penetration points to prevent leaks.

    3. Adhesive Bonding

    A newer, less common method involves using high-strength industrial adhesives to bond frames to the roof surface. This is typically reserved for specific roofing materials like EPDM rubber and requires professional assessment.

    Can You Put Solar Panels On A Flat Roof Uk

    What Is the Best Angle for Solar Panels on a Flat Roof?

    Angle is everything when it comes to efficiency. For a flat roof, you aren’t stuck with the roof’s angle; you create your own.

    In the UK, the ideal tilt angle for solar panels is generally between 30 and 40 degrees. This angle ensures that:

    1. Rainwater runs off easily, keeping the panels clean (self-cleaning effect).
    2. The panels capture the maximum solar irradiance throughout the year.

    However, spacing is vital. If you tilt panels too steeply, they cast long shadows on the rows behind them, reducing overall output. A professional installer will calculate the “pitch” and “row spacing” to ensure no panel shades another during peak sunlight hours.

    Pro Tip: Avoid laying panels completely flat (0 degrees). While it looks sleek, dust and debris accumulate quickly, and rain does not wash them away efficiently, leading to a significant drop in performance over time.

    Do You Need Planning Permission for Solar Panels on a Flat Roof?

    One of the most frequent questions UK homeowners ask is about bureaucracy. Under current Permitted Development Rights, most domestic solar installations do not require full planning permission. However, there are strict conditions for flat roofs:

    • Height Restriction: The panels must not protrude more than 200mm above the highest part of the roof (excluding the chimney).
    • Visibility: If your property is in a conservation area or a World Heritage Site, you may need to consult your local planning authority.
    • Listed Buildings: If your home is a listed building, you will almost certainly need Listed Building Consent.

    It is always wise to check with your local council before proceeding. While many installations fall under permitted development, rules can vary slightly by locality. For detailed national guidelines, you can refer to the UK Government’s Planning Portal or general resources on Solar Energy to understand the broader context of renewable infrastructure.

    Cost vs. Benefit: Is It Worth It?

    Installing solar on a flat roof can be slightly more expensive than a standard pitched roof due to the cost of the mounting framework. However, the long-term benefits often outweigh the initial outlay.

    FeaturePitched Roof SolarFlat Roof Solar
    Installation ComplexityLower (standard rails)Higher (custom framing)
    OptimizationFixed angleFully adjustable angle
    Maintenance AccessDifficult (requires scaffolding)Easy (walkable surface)
    AestheticsBlends with rooflineVisible structure
    Average Cost (4kW)£5,000 – £7,000£6,000 – £8,500

    Note: Prices are estimates based on 2026 market rates and can vary based on panel quality and roof condition.

    Despite the higher upfront cost, the ability to optimize the angle means flat roof systems can sometimes generate 5-10% more energy annually than a poorly oriented pitched roof. Additionally, maintenance is easier and cheaper since technicians can safely walk on the roof without expensive scaffolding.

    Step-by-Step Installation Process

    If you decide to proceed, here is what the typical installation journey looks like:

    1. Structural Survey: An engineer assesses your roof’s load-bearing capacity. This is non-negotiable for ballasted systems.
    2. Design & Simulation: Installers use software to model sun paths and shadow analysis, determining the optimal tilt and layout.
    3. Roof Preparation: The roof surface is cleaned and inspected for any existing damage. Any repairs are made before installation begins.
    4. Framework Installation: The aluminum racking system is assembled. If using ballast, weights are positioned precisely according to the design.
    5. Panel Mounting: Solar panels are secured to the frames and wired together.
    6. Inverter Connection: The DC electricity from the panels is converted to AC via an inverter (usually mounted on a wall nearby).
    7. Testing & Commissioning: The system is tested for safety and efficiency before being handed over to you.

    Frequently Asked Questions (FAQ)

    1. Will solar panels damage my flat roof?

    No, not if installed correctly. Ballasted systems do not penetrate the roof, eliminating leak risks. Even penetrating systems, when installed by certified professionals with proper flashing and sealants, are safe and often come with workmanship warranties.

    2. How long do solar panels last on a flat roof?

    High-quality solar panels typically come with a 25-30 year performance warranty. The mounting structures are usually made of aluminum or stainless steel, designed to withstand UK weather conditions for decades.

    3. Can I install solar panels myself on a flat roof?

    While DIY kits exist, it is strongly discouraged. Incorrect weighting can collapse a roof, and improper electrical wiring poses fire risks. Furthermore, you need MCS (Microgeneration Certification Scheme) certification to qualify for smart export guarantees (SEG) payments.

    4. Do flat roof solar panels work in cloudy UK weather?

    Yes. Modern photovoltaic panels are designed to generate electricity even in diffuse light. While they produce less energy on cloudy days compared to sunny ones, they still contribute to your household’s power needs.

    5. What maintenance is required?

    Flat roof solar systems require minimal maintenance. You should inspect them twice a year for debris buildup. Because they are tilted, rain usually keeps them clean. Ensure the area around the ballast remains clear of leaves or moss.

    Conclusion

    So, can you put solar panels on a flat roof UK? Absolutely. Not only is it possible, but it can also be a highly efficient way to harness renewable energy. By utilizing ballasted mounting systems and optimizing the tilt angle, you can overcome the limitations of a flat surface and enjoy significant savings on your energy bills.

    The key to success lies in professional installation and a thorough structural assessment. Don’t let the shape of your roof deter you from joining the green energy revolution. With the right setup, your flat roof can become a powerful asset for your home and the environment.

    If you found this guide helpful, please share it with friends or neighbors who might be considering solar power. Together, we can make the UK a greener place, one roof at a time!