Category: DIY plumbing repair

  • Roof Material Pulley Platform Guide

    Roof Material Pulley Platform Guide

    Have you ever struggled with dragging heavy shingles or bundles of tiles across your roof, only to worry about damaging the underlying structure or slipping on loose granules? It is a common frustration for both professional roofers and ambitious DIY homeowners. Using a pulley platform to hold materials off of the roof is the smartest solution to keep your workspace clean, safe, and efficient.

    Why You Need a Pulley Platform for Roofing Projects

    Roofing is physically demanding work. Beyond the physical exertion of lifting, the logistics of getting materials from the ground to the working area can be a bottleneck. Many people assume that simply throwing bundles up or carrying them up the ladder one by one is the only way. However, this method is inefficient and risky.

    A pulley system designed specifically for roofing does more than just lift; it organizes. By using a platform, you create a staging area that keeps materials elevated above the roof surface. This distinction is critical. When materials sit directly on shingles, they can trap heat, cause indentations, or slide unexpectedly during wind gusts. A suspended or elevated platform mitigates these risks while keeping your primary work zone clear for movement.

    How Does a Roofing Pulley Platform Work?

    At its core, the system is simple mechanics applied to construction needs. It typically consists of a sturdy frame (the platform), high-tensile ropes or cables, and a set of pulleys anchored securely at the roof’s peak or eave.

    The Mechanics of Lift and Hold

    The platform acts as a counterbalance or a direct lift mechanism. Once the materials are loaded onto the platform at ground level, the user pulls the rope to hoist the load up. The “hold” feature is usually managed by a cleat, a friction brake, or a locking pulley system that allows the platform to remain suspended at a desired height without constant tension from the operator.

    This design ensures that the weight of the materials is transferred to the anchor points rather than the roof deck itself. For those interested in the physics behind simple machines, understanding mechanical advantage can help you choose the right gear ratio for heavier loads. You can read more about the basic principles of pulleys on Wikipedia.

    Key Components

    • The Platform: Usually made of aluminum or heavy-duty plastic to resist weather and impact.
    • The Pulleys: Must be rated for the total weight of the materials plus the platform.
    • The Anchor: A secure point at the roof ridge or a specialized stand that does not damage the roofing material.

    What Are the Benefits of Keeping Materials Off the Roof?

    You might wonder if the extra setup time is worth it. The data suggests it is. Here is why separating your materials from the roof surface is a game-changer.

    1. Protection of Roofing Integrity

    Asphalt shingles, clay tiles, and metal panels are durable but not invincible. Dragging heavy bundles across them can scrape off protective granules or crack tiles. By using a pulley platform to hold materials off of the roof, you eliminate friction damage entirely. This preserves the warranty of your roofing material and extends its lifespan.

    2. Enhanced Safety and Stability

    Loose materials on a sloped surface are a hazard. They can slide down, striking workers below or causing tripping hazards above. A secured platform keeps the center of gravity stable. Furthermore, it reduces the number of trips up and down the ladder, which is statistically one of the most dangerous aspects of roofing work.

    3. Improved Workflow Efficiency

    Time is money in construction. With a pulley system, you can pre-load multiple bundles. While one bundle is being installed, the next is already hoisted and waiting. This continuous workflow can reduce project time by up to 20%, according to industry estimates for small to mid-sized residential roofs.
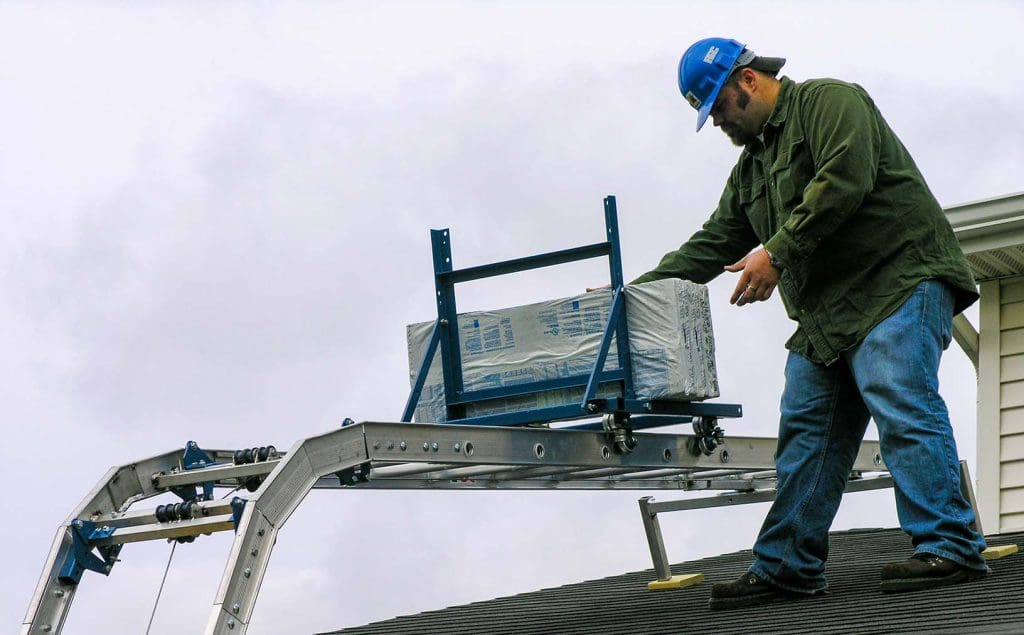
    A Pulley Platform To Hold Materials Off Of The Roof

    Comparison: Traditional Methods vs. Pulley Platform

    To help you decide, let’s look at a direct comparison between traditional hauling and using a dedicated platform system.

    FeatureTraditional Ladder CarryThrow-and-Catch MethodPulley Platform System
    Physical StrainHigh (Repetitive lifting)Medium (Erratic movements)Low (Mechanical advantage)
    Risk of DamageModerate (Dropping items)High (Impact damage)Minimal (Controlled lift)
    SpeedSlowFast but chaoticConsistent and Fast
    Safety RatingLowVery LowHigh
    Setup TimeNoneNone15–30 Minutes

    As shown above, while the pulley platform requires initial setup, the long-term benefits in safety and speed outweigh the upfront investment of time.

    Step-by-Step Guide to Setting Up Your System

    Setting up a pulley platform to hold materials off of the roof requires precision. Follow these steps to ensure stability and safety.

    Step 1: Choose Your Anchor Point

    Identify a secure location at the ridge of your roof. If you have a chimney or a sturdy vent pipe, ensure it is not used as an anchor unless specifically rated for it. Ideally, use a ridge anchor strap that wraps over the peak and distributes weight evenly without piercing the roof membrane.

    Step 2: Install the Pulleys

    Attach the primary pulley to the anchor point. Ensure it is aligned with the path of the lift. If you are using a multi-pulley system for heavier loads, install the secondary pulleys according to the manufacturer’s diagram. Check that all carabiners and hooks are locked.

    Step 3: Prepare the Platform

    Inspect the platform for any cracks or wear. Attach the lifting ropes securely to the four corners of the platform to ensure it remains level during the ascent. Uneven lifting can cause materials to slide off.

    Step 4: Load and Lift

    Place your materials on the platform at ground level. Do not exceed the weight rating of the ropes or pulleys. For standard asphalt shingles, a platform can typically hold 3–4 bundles safely. Pull the rope steadily. Use a gloved hand to guide the platform as it approaches the roof edge to prevent swinging.

    Step 5: Secure the Load

    Once the platform reaches the desired height, engage the locking mechanism. If your system uses a cleat, wrap the rope in a figure-eight pattern to create friction. Test the hold by applying slight downward pressure before releasing the rope completely.

    Frequently Asked Questions (FAQ)

    1. Can I use a regular boat pulley for roofing?

    While boat pulleys are strong, they are not always designed for the abrasive nature of construction ropes or the specific angular stresses of roofing lifts. It is highly recommended to use pulleys specifically rated for construction or lifting applications to ensure safety and durability.

    2. How much weight can a typical roofing pulley platform hold?

    Most consumer-grade roofing platforms are rated between 150 to 300 pounds. Professional industrial systems can handle significantly more. Always check the manufacturer’s weight limit and never exceed it. Remember to account for the weight of the platform itself in your calculations.

    3. Is it safe to use a pulley system on a steep roof?

    Yes, it is often safer than climbing a steep roof with heavy loads. However, the anchor point must be exceptionally secure. On very steep pitches (over 8/12), consider using a ridge stabilizer to prevent the anchor from sliding down the slope.

    4. What type of rope should I use?

    Use a static kernmantle rope or a high-quality synthetic braided rope with low stretch. Avoid elastic bungee cords or old garden hoses. The rope should have a diameter compatible with your pulleys (usually 3/8 inch to 1/2 inch) and be rated for at least three times the maximum load you intend to lift.

    5. Can one person operate this system alone?

    Yes, one of the main advantages of a pulley platform to hold materials off of the roof is that it is designed for single-person operation. However, having a spotter on the ground to guide the platform during the initial lift can prevent swinging and improve accuracy.

    Conclusion

    Implementing a pulley platform to hold materials off of the roof is a small change that yields significant results. It protects your investment, safeguards your health, and streamlines your workflow. Whether you are a professional contractor looking to optimize your crew’s efficiency or a homeowner tackling a weekend project, this tool is indispensable.

    Don’t let heavy lifting slow you down or compromise the integrity of your new roof. Set up your system, lift with confidence, and enjoy a smoother roofing experience. If you found this guide helpful, please share it with your fellow builders or DIY enthusiasts on social media to help spread the word about safer roofing practices!
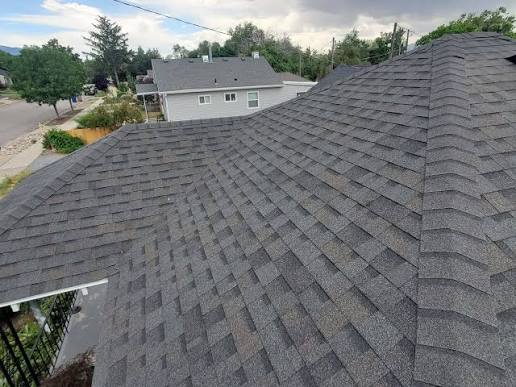
  • How Many Shingles for 1884 Sq Ft Roof?

    How Many Shingles for 1884 Sq Ft Roof?

    Have you ever stared at a quote from a contractor and wondered if the numbers actually add up? Or perhaps you are planning a DIY roof replacement and need to order materials without ending up with too much leftover waste or, worse, running short mid-project. Knowing exactly how many shingles is needed for 1884 sq ft roof is the first step toward a budget-friendly and stress-free renovation.

    In this guide, we will break down the math, explain the concept of “roofing squares,” and provide a clear checklist to ensure you buy the right amount of material for your 1,884 square foot home.

    Understanding the Basics: Square Feet vs. Roofing Squares

    Before we dive into the specific calculation for your 1,884 square foot area, it is crucial to understand how roofing materials are sold. This is where most homeowners get confused.

    When you measure your home’s footprint, you get the floor area. However, roofing contractors and suppliers do not sell shingles by the individual piece or even by the standard square foot. They sell them by the “Roofing Square.”

    What is a Roofing Square?

    One roofing square equals 100 square feet of roof area.

    This distinction is vital because your roof is rarely flat. It has slopes, peaks, valleys, and overhangs. Therefore, the surface area of your roof is almost always larger than the floor area of your house.

    For a house with a floor area of 1,884 sq ft, your actual roof surface area will likely be higher. However, for the sake of this specific query, we will assume that 1,884 sq ft refers to the actual measured surface area of the roof itself (not the footprint). If 1,884 sq ft is your footprint, please note that you will need significantly more shingles due to the pitch factor, which we will discuss later.

    The Core Calculation: How Many Bundles Do You Need?

    Now, let’s answer the main question: How many shingles is needed for 1884 sq ft roof?

    Most standard asphalt shingles (3-tab or architectural) come packaged in bundles. Typically, three bundles equal one roofing square (100 sq ft).

    Here is the step-by-step breakdown:

    1. Convert Square Feet to Squares: 1,884 sq ft/100=18.84 Squares1,884 sq ft/100=18.84 Squares
    2. Calculate Base Bundles: Since 1 Square = 3 Bundles: 18.84 SquaresĂ—3 Bundles/Square=56.52 Bundles18.84 SquaresĂ—3 Bundles/Square=56.52 Bundles

    So, theoretically, you need roughly 57 bundles to cover the exact area. But wait! You cannot buy 0.52 of a bundle, and you should never buy the exact amount.

    The Critical Factor: Waste Percentage

    You must account for waste. Waste occurs due to:

    • Cutting shingles to fit hips and ridges.
    • Starter strips along the eaves.
    • Mistakes during installation.
    • Pattern matching (if using architectural shingles).

    Industry standards recommend adding a waste factor:

    • Simple Gable Roof: Add 10% waste.
    • Complex Roof (Hips, Valleys, Dormers): Add 15–20% waste.

    Let’s calculate for a moderately complex roof with a 15% waste factor:

    1. Total Squares with Waste: 18.84 SquaresĂ—1.15=21.66 Squares18.84 SquaresĂ—1.15=21.66 Squares
    2. Total Bundles Needed: 21.66 SquaresĂ—3 Bundles/Square=64.98 Bundles21.66 SquaresĂ—3 Bundles/Square=64.98 Bundles

    Final Recommendation: You should purchase 65 bundles of shingles.

    Pro Tip: Always round up. It is much easier to return unopened bundles to a local supplier than to pay for a second delivery fee because you ran short.

    Does Roof Pitch Change the Number of Shingles?

    Yes, significantly. If your 1,884 sq ft figure is based on your home’s floor plan rather than a direct measurement of the roof surface, you must apply a Pitch Multiplier.

    Roof pitch is the steepness of the roof. The steeper the roof, the more surface area exists compared to the flat footprint.

    Roof PitchMultiplier FactorExample Calculation (1,884 sq ft footprint)
    Low (4/12)1.054~1,985 sq ft actual roof area
    Medium (6/12)1.118~2,106 sq ft actual roof area
    Steep (9/12)1.250~2,355 sq ft actual roof area

    If you have a medium-pitch roof (6/12) and your house is 1,884 sq ft, your actual roof area is roughly 2,106 sq ft. Using the previous logic:

    • 2,106 sq ft = 21.06 Squares.
    • With 15% waste: 24.2 Squares.
    • Bundles needed: ~73 Bundles.

    Always verify whether your 1,884 number is footprint or surface area. When in doubt, consult a professional roofer or use an aerial measurement tool. For more detailed information on roof geometry, you can refer to Wikipedia’s article on Roof Pitch.

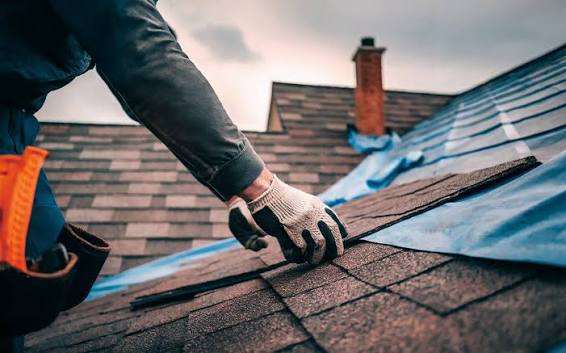
    How Many Shingles Is Needed For 1884 Sq Ft Roof

    Additional Materials: Don’t Forget the Underlayment and Nails

    Shingles are only part of the equation. A proper roofing system requires several other components. Ignoring these can lead to leaks and voided warranties.

    1. Underlayment

    This is the water-resistant barrier installed directly onto the roof deck.

    • Coverage: One roll of synthetic underlayment typically covers 10 squares (1,000 sq ft).
    • For 18.84 Squares: You will need 2 rolls of synthetic underlayment.

    2. Starter Strips

    These are specialized shingles used at the eaves and rakes to prevent wind uplift and water infiltration.

    • Rule of Thumb: 1 bundle of starter strip per 100 linear feet of edge.
    • Estimate: For an average home, plan for 3–5 bundles of starter strips.

    3. Roofing Nails

    • Standard: Use galvanized roofing nails with a minimum 12-gauge shank and 3/8-inch head.
    • Quantity: Approximately 4 nails per shingle for standard installation, 6 nails for high-wind areas.
    • Estimate: For 65 bundles, you will need roughly 40–50 lbs of nails.

    4. Ridge Cap Shingles

    These cover the peak of the roof.

    • Estimate: Measure the total length of your ridges. One bundle of ridge cap usually covers about 33–35 linear feet.

    Step-by-Step Guide to Ordering Your Materials

    To ensure you get the right materials for your 1,884 sq ft roof, follow this checklist:

    1. Verify Measurements: Double-check if 1,884 sq ft is the footprint or the actual roof surface. If it’s the footprint, apply the pitch multiplier.
    2. Choose Your Shingle Type: Architectural shingles are heavier and may require different bundling counts (sometimes 4 bundles per square for premium brands). Check the manufacturer’s spec sheet.
    3. Calculate Squares: Divide total surface area by 100.
    4. Add Waste: Multiply by 1.10 (simple) or 1.15 (complex).
    5. Convert to Bundles: Multiply final squares by 3 (or 4, depending on brand).
    6. Round Up: Always round up to the nearest whole bundle.
    7. Order Accessories: Include underlayment, starter strips, nails, and ridge caps.

    FAQ Section

    Q1: Can I use leftover shingles from a previous project?

    A: It is generally not recommended. Shingles from different batches may have slight color variations due to manufacturing differences. Additionally, old shingles may have become brittle or damaged during storage. For a seamless look and optimal performance, use new shingles from the same batch.

    Q2: How much does it cost to shingle a 1,884 sq ft roof?

    A: Costs vary by region and material quality. On average, asphalt shingles cost between $3.50 and $5.50 per square foot installed. For 1,884 sq ft, expect to pay between $6,500 and $10,500 for materials and labor. DIY costs will be lower, primarily covering materials ($2,500–$4,000).

    Q3: Do I need a permit to replace my roof?

    A: In most US jurisdictions, yes. Roof replacement involves structural and safety considerations. Check with your local building department. Failure to obtain a permit can result in fines and issues when selling your home.

    Q4: What is the lifespan of asphalt shingles?

    A: Standard 3-tab shingles last 15–20 years. Architectural (dimensional) shingles typically last 25–30 years. Premium luxury shingles can last 50 years or more. Proper ventilation and installation are key to reaching these lifespans.

    Q5: Should I remove the old shingles before installing new ones?

    A: While it is possible to layer new shingles over old ones (if local codes allow and there is only one existing layer), removal is preferred. Removing old shingles allows you to inspect the roof deck for rot or damage, ensuring a solid foundation for the new roof.

    Conclusion

    Determining how many shingles is needed for 1884 sq ft roof comes down to precise math and accounting for waste. For a direct surface area of 1,884 sq ft, you will need approximately 65 bundles of standard asphalt shingles, assuming a 15% waste factor.

    Remember, accurate measurements are the backbone of a successful roofing project. Whether you are hiring a pro or tackling this as a DIY weekend warrior, buying slightly more than you think you need is the safest bet.

    Did you find this guide helpful? Share it with your friends on Facebook or Pinterest who might be planning their own home improvements! If you have more questions about roofing materials, leave a comment below.

  • How Many Sq Ft in a Bundle of Shingles?

    How Many Sq Ft in a Bundle of Shingles?

    Have you ever stood in your driveway, staring at a stack of roofing materials, and felt completely overwhelmed by the math? You are not alone. One of the most common questions homeowners and DIY enthusiasts ask is exactly how many square feet in a bundle of roofing shingles. Getting this number wrong can lead to costly mid-project trips to the hardware store or, worse, having hundreds of dollars worth of unused material cluttering your garage.

    Understanding the coverage of a single bundle is the foundational step in planning any roofing project, whether it’s a small shed repair or a full home replacement. In this guide, we will break down the industry standards, explain the difference between a “bundle” and a “square,” and provide you with the precise calculations you need to buy with confidence.

    The Standard Answer: 33.3 Square Feet Per Bundle

    If you are looking for a quick answer, here it is: Most standard asphalt shingle bundles cover approximately 33.3 square feet.

    However, in the roofing industry, professionals do not usually think in terms of individual bundles when estimating large jobs. Instead, they use a unit of measurement called a “Square.”

    What is a “Roofing Square”?

    A roofing square is equal to 100 square feet of roof area. It is crucial to distinguish this from a standard architectural square foot. When a contractor says your roof is “20 squares,” they mean it is 2,000 square feet, not 20 square feet.

    The Magic Number: Three Bundles per Square

    Because one bundle covers roughly 33.3 square feet, it takes exactly three bundles to cover one roofing square (100 sq ft).

    • 1 Bundle = ~33.3 sq ft
    • 3 Bundles = ~100 sq ft (1 Square)

    This 3:1 ratio is the industry standard for traditional 3-tab asphalt shingles and most architectural shingles. However, before you head to the store, you must understand that not all shingles are created equal. Weight, thickness, and brand specifications can slightly alter these numbers.

    Why Do Shingle Sizes Vary?

    While 33.3 square feet is the golden rule, several factors can influence the actual coverage of a bundle. Understanding these variables helps you avoid estimation errors.

    1. Shingle Type and Weight

    Shingles are often categorized by their weight per square. A standard 3-tab shingle might weigh 200–250 lbs per square, while premium architectural shingles can weigh 300–400 lbs per square.

    • Lighter Shingles: May sometimes have slightly different dimensions but still adhere to the 3-bundle-per-square rule for logistical consistency.
    • Heavier/Premium Shingles: Some high-end laminated shingles may require four or five bundles to cover a single square because each individual shingle is thicker and heavier. Always check the manufacturer’s spec sheet.

    2. Manufacturer Specifications

    Different brands like GAF, Owens Corning, and CertainTeed may have slight variations in shingle dimensions. For example, a shingle might be 12 inches wide by 36 inches long, but the “exposure” (the part visible after installation) might differ.

    Pro Tip: Never assume. Always look for the “Coverage Per Bundle” label on the packaging or the manufacturer’s website. If it says 33.3 sq ft, you are safe. If it says 25 sq ft, you will need four bundles per square.

    How Many Square Feet In A Bundle Of Roofing Shingles

    Step-by-Step: How to Calculate Your Shingle Needs

    Knowing how many square feet are in a bundle is only half the battle. You need to know how many bundles you need. Follow this logical process to calculate your material requirements accurately.

    Step 1: Measure Your Roof’s Footprint

    Measure the length and width of each plane of your roof. If your roof is simple and flat, multiply the length by the width.

    • Example: A roof section that is 20 feet long and 15 feet wide equals 300 square feet.

    Step 2: Account for Roof Pitch

    Roofs are rarely flat. The steeper the pitch (slope), the more surface area there is. A steep roof has more square footage than its footprint suggests.

    • Use a roof pitch multiplier if you are calculating from the ground.
    • For accurate results, measure directly on the roof if safe to do so, or use satellite measurement tools provided by many roofing supply companies.

    Step 3: Convert to Squares

    Divide your total square footage by 100 to get the number of “squares.”

    • Example: 2,400 sq ft Ă· 100 = 24 Squares.

    Step 4: Calculate Bundles

    Multiply the number of squares by 3 (for standard shingles).

    • Example: 24 Squares Ă— 3 Bundles/Square = 72 Bundles.

    Step 5: Add Waste Factor

    This is the step most beginners miss. You cannot use every scrap of shingle. You need extra material for:

    • Cutting around vents, chimneys, and valleys.
    • Starter strips along the eaves.
    • Mistakes and broken shingles during installation.

    Standard Waste Factors:

    • Simple Gable Roof: Add 10%
    • Complex Roof (Multiple hips, valleys, turrets): Add 15–20%

    Using our previous example of 72 bundles:

    • 10% Waste: 72 Ă— 0.10 = 7.2 (Round up to 8 bundles)
    • Total Needed: 72 + 8 = 80 Bundles

    Comparison: Standard vs. Premium Shingles

    To help you visualize the differences, here is a comparison table of common shingle types and their bundle coverage.

    Shingle TypeApprox. Sq Ft per BundleBundles per SquareWeight per Square (lbs)Best For
    3-Tab Asphalt33.3 sq ft3200–250Budget-friendly, simple roofs
    Architectural33.3 sq ft3250–350Durability, aesthetic appeal
    Premium/Laminated20–25 sq ft4–5350–450+High-end homes, luxury look
    Impact Resistant33.3 sq ft3300+Hail-prone areas

    Note: Always verify specific product data sheets as technology evolves.

    Expert Insight: The Importance of Accurate Estimation

    According to industry standards referenced by organizations such as the National Roofing Contractors Association (NRCA), improper estimation is a leading cause of project delays and budget overruns. Buying too little means paying for another delivery fee and potentially facing color lot mismatches (where the new shingles don’t quite match the old ones due to manufacturing batches). Buying too much ties up your capital and creates disposal issues.

    By mastering the concept of how many square feet in a bundle of roofing shingles, you take control of your project’s logistics. It allows you to negotiate better with suppliers and ensures that your crew (or you) never has to stop working to wait for materials.

    Frequently Asked Questions (FAQ)

    1. Can I return unused bundles of shingles?

    Most major home improvement stores and roofing supply yards allow returns of unopened bundles, but policies vary. Some may charge a restocking fee (usually 10–15%). Always keep your receipt and ask about the return policy before you buy. Note that custom-order colors are often non-returnable.

    2. Does the color of the shingle affect the square footage per bundle?

    No. The color is determined by the granules applied to the surface, which adds negligible weight and does not change the physical dimensions of the shingle. A black bundle and a red bundle of the same model will cover the same 33.3 square feet.

    3. How much does a bundle of shingles weigh?

    A standard bundle of asphalt shingles typically weighs between 60 and 80 pounds. This varies based on the type (3-tab vs. architectural) and moisture content. Always ensure you have enough help or mechanical assistance to lift bundles onto the roof to prevent injury.

    4. What is the difference between “exposed” and “total” square footage?

    The “total” square footage includes the part of the shingle that gets covered by the next row. The “exposed” square footage is what you actually see on your roof. Manufacturers calculate bundle coverage based on the exposed area, ensuring that when installed correctly, three bundles will cover 100 square feet of visible roof.

    5. Do I need special shingles for low-slope roofs?

    Yes. Standard asphalt shingles are generally recommended for roofs with a pitch of 2:12 or greater. For lower slopes, you may need modified bitumen or specific low-slope application methods involving double layers of underlayment. Check local building codes and manufacturer warranties.

    Conclusion

    Knowing how many square feet in a bundle of roofing shingles is the key to a smooth, budget-friendly roofing project. Remember the magic number: 33.3 square feet per bundle, which translates to 3 bundles per roofing square.

    By accurately measuring your roof, choosing the right shingle type, and adding a 10–15% waste factor, you can purchase the exact amount of material you need. This preparation saves you money, time, and the headache of mid-project supply runs.

    Are you planning a roofing project soon? Share this guide with your friends or family who might be tackling their own DIY repairs. Accurate information is the best tool in your toolbox!

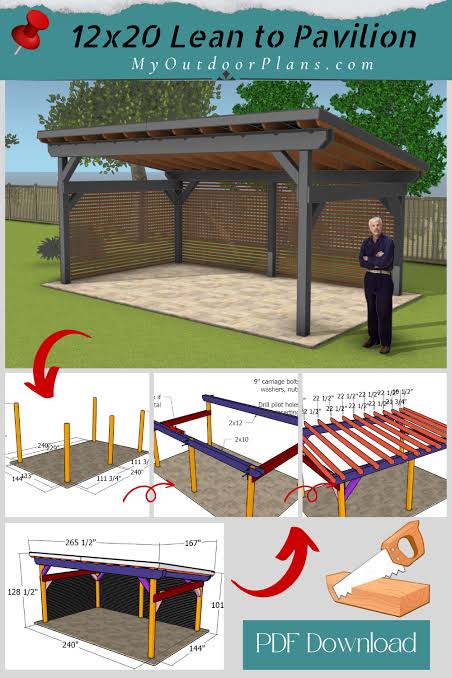
  • Free 12×20 Wooden Porch Roof Plans PDF Download

    Free 12×20 Wooden Porch Roof Plans PDF Download

    Building a covered outdoor space transforms your home’s curb appeal and provides a sanctuary for relaxation. However, finding reliable, structurally sound blueprints without paying premium fees can be frustrating for DIY enthusiasts. This guide helps you navigate the process of securing a 12 X 20 Wooden Porch Roof Plans Pdf Free Download while ensuring your project meets safety standards.

    Why Choose a 12×20 Wooden Porch?

    A 12×20 footprint is one of the most versatile dimensions for residential additions. It offers enough space for a comfortable seating area, a small dining set, or even an outdoor kitchen prep station, without overwhelming a standard backyard.

    Wood remains the preferred material for many homeowners due to its aesthetic warmth and ease of customization. Unlike metal or vinyl, wood can be stained or painted to match your home’s existing trim perfectly.

    The Value of Professional Plans

    Many beginners underestimate the complexity of roof framing. A proper plan isn’t just a sketch; it is a mathematical guarantee of stability. Using a verified 12 X 20 Wooden Porch Roof Plans Pdf Free Download ensures you have:

    • Accurate load calculations.
    • Correct rafter spacing.
    • Proper attachment details to the main house.

    Without these, you risk structural failure, water leakage, or code violations.

    Understanding Structural Requirements

    Before you download any PDF, you must understand what makes a roof safe. A porch roof is not just about aesthetics; it is a structural extension of your home.

    Load-Bearing Considerations

    Your roof must handle two types of loads:

    1. Dead Load: The weight of the materials (wood, shingles, beams).
    2. Live Load: Snow, wind, and maintenance workers.

    In the United States, building codes vary by region. For example, a home in Maine requires a much higher snow load capacity than a home in Florida. Always check your local municipal codes before starting.

    Expert Insight: According to general engineering principles, a standard gable roof should have a minimum slope of 4:12 to ensure proper water runoff. Flatter pitches require specialized membrane roofing to prevent leaks.

    For more detailed information on structural engineering basics, you can refer to Wikipedia’s article on Roof Construction.

    Key Components of Your 12×20 Plan

    When reviewing your downloaded PDF, look for these specific elements. If they are missing, the plan may be incomplete or unsafe.

    1. The Ledger Board Attachment

    This is the most critical connection point. The ledger board attaches the porch roof to your house.

    • Material: Use pressure-treated lumber.
    • Fasteners: Use lag screws or through-bolts, not just nails.
    • Flashing: Essential to prevent water from rotting your home’s siding.

    2. Rafters and Beams

    For a 12-foot span, you typically need substantial beams.

    • Common Size: 2×8 or 2×10 rafters, depending on snow load.
    • Spacing: Usually 16 inches or 24 inches on center.

    3. Support Posts

    If your design is not fully attached to the house, you will need support posts.

    • Placement: Typically at the corners and mid-span for a 20-foot length.
    • Footings: Must extend below the frost line to prevent heaving.

    Step-by-Step Guide to Using Your Plans

    Once you have secured your 12 X 20 Wooden Porch Roof Plans Pdf Free Download, follow this logical workflow to ensure success.

    Phase 1: Preparation and Permitting

    1. Review Local Codes: Visit your local building department. Submit your PDF plans for approval.
    2. Call Before You Dig: Contact utility companies to mark underground lines if you are installing footings.
    3. Gather Materials: Create a shopping list based on the bill of materials in your PDF.

    Phase 2: Framing the Structure

    1. Install the Ledger Board:
      • Measure and mark the height on your house wall.
      • Ensure it is perfectly level.
      • Bolt it securely into the house framing studs.
    2. Set the Posts:
      • Dig holes for post footings (typically 12-18 inches wide).
      • Pour concrete and set post anchors.
      • Install vertical posts, ensuring they are plumb (vertically straight).
    3. Install the Beam:
      • Lift the main beam onto the posts and ledger.
      • Secure with metal brackets or carriage bolts.

    Phase 3: Roofing Installation

    1. Cut and Install Rafters:
      • Use the angles provided in your PDF.
      • Space them evenly (e.g., 16 inches apart).
    2. Add Sheathing:
      • Nail plywood or OSB boards over the rafters.
    3. Apply Underlayment and Shingles:
      • Start from the bottom edge and work up.
      • Overlap each row according to manufacturer instructions.
    12 X 20 Wooden Porch Roof Plans Pdf Free Download

    Common Mistakes to Avoid

    Even with the best 12 X 20 Wooden Porch Roof Plans Pdf Free Download, errors can occur. Here is a comparison of common pitfalls versus best practices.

    MistakeBest Practice
    Ignoring local snow load codesChecking municipal requirements first
    Using untreated wood for postsUsing pressure-treated or cedar lumber
    Skipping flashing behind ledgerInstalling heavy-duty metal flashing
    Nailing rafters without bracketsUsing hurricane ties for wind resistance

    Material List Estimate for 12×20 Porch

    While your PDF will provide exact numbers, here is a general estimate to help you budget. Prices vary by location and lumber quality.

    • Ledger Board: 1 piece of 2x10x20 (pressure-treated).
    • Beam: 1 piece of 2x10x20 or double 2x8s.
    • Rafters: Approx. 13-15 pieces of 2x8x14 (depending on overhang).
    • Posts: 2-4 pieces of 6x6x10 (pressure-treated).
    • Sheathing: 10-12 sheets of 4×8 plywood.
    • Roofing: 3-4 bundles of asphalt shingles.
    • Hardware: Lag screws, carriage bolts, hurricane ties, and joist hangers.

    FAQ Section

    1. Do I need a permit for a 12×20 porch roof?

    Yes, in most US jurisdictions, a structure of this size requires a building permit. It involves structural changes to your home and electrical work if you add lighting. Always check with your local building department.

    2. Can I use the free PDF plans for commercial construction?

    No. Most free downloads are for residential, personal use only. Commercial projects require stamped drawings from a licensed structural engineer to meet stricter liability and safety codes.

    3. What is the best wood type for a porch roof?

    Pressure-treated pine is the most cost-effective and rot-resistant option for structural framing. For visible beams, Cedar or Redwood offers natural beauty and resistance to insects, though at a higher cost.

    4. How steep should the roof pitch be?

    A minimum pitch of 4:12 (4 inches of rise for every 12 inches of run) is recommended for asphalt shingles. If you want a flatter look, you must use rubber membrane roofing or metal standing seam panels.

    5. Is it difficult to attach the roof to an existing house?

    It can be challenging if you do not locate the studs correctly. You must bolt the ledger board into the house’s framing, not just the siding or sheathing. Using a stud finder and verifying with small pilot holes is crucial.

    6. Where can I find a reliable 12 X 20 Wooden Porch Roof Plans Pdf Free Download?

    Reliable sources include university agricultural extension websites, government housing resources, and reputable DIY construction blogs that offer vetted templates. Be cautious of random file-sharing sites, as they may contain outdated or unsafe designs.

    Conclusion

    Building a 12×20 wooden porch roof is a rewarding project that adds significant value to your home. By starting with a high-quality 12 X 20 Wooden Porch Roof Plans Pdf Free Download, you lay the foundation for a safe and beautiful structure.

    Remember, preparation is key. Take the time to understand your local codes, gather the right materials, and follow the steps methodically. Don’t rush the framing phase; precision here prevents headaches later.

    If you found this guide helpful, please share it with your friends on social media who might be planning their own outdoor improvements. Happy building!

  • Is It Safe To Use Roofing Tiles In Your Garden?

    Is It Safe To Use Roofing Tiles In Your Garden?

    Have you ever looked at a pile of leftover roofing materials after a renovation and wondered if they could find a new life among your flowers? Repurposing building materials is a fantastic way to save money and reduce waste, but health concerns often arise. Many homeowners ask, “Is it safe to use roofing tiles in your garden?” before starting their next DIY project.

    The short answer is: it depends heavily on the material, age, and condition of the tiles. While many modern tiles are perfectly safe, older ones may contain hazardous substances like asbestos or heavy metals. In this comprehensive guide, we will break down everything you need to know to make an informed, safe, and beautiful decision for your outdoor space.

    Understanding the Risks: What Are Roofing Tiles Made Of?

    To determine safety, we must first identify the material. Roofing tiles generally fall into three main categories: clay, concrete, and slate. Each has different chemical compositions and potential risks when placed in soil or near edible plants.

    Clay and Terracotta Tiles

    Clay tiles are made from natural earth minerals fired at high temperatures. They are generally inert, meaning they do not react chemically with soil or water.

    • Safety Level: High.
    • Best For: Raised beds, pathway edging, and decorative mulch.
    • Concerns: Minimal. However, ensure they are not glazed with lead-based paints (common in very old antique tiles).

    Concrete Tiles

    Concrete tiles are a mixture of cement, sand, and water. Modern concrete tiles are usually safe, but they are highly alkaline when new.

    • Safety Level: Moderate to High.
    • Best For: Hardscaping, patios, and non-edible garden borders.
    • Concerns: Fresh concrete can raise soil pH significantly. Over time, they may leach lime, which can affect acid-loving plants like blueberries or azaleas.

    Slate Tiles

    Natural slate is a metamorphic rock. It is durable and chemically stable.

    • Safety Level: High.
    • Best For: Water features, stepping stones, and rock gardens.
    • Concerns: Physical sharpness rather than chemical toxicity. Ensure edges are smoothed if used in high-traffic areas.

    The Asbestos Danger (Crucial Warning)

    If your home was built or renovated before the 1980s, there is a risk that fiber-cement roofing sheets or tiles contain asbestos. Asbestos is a known carcinogen when its fibers are inhaled.

    • Action: If you suspect your tiles contain asbestos, do not break, cut, or drill them. Consult a professional hazardous material tester. Never use asbestos-containing materials in a garden where soil disturbance occurs.

    People Also Ask: Common Safety Questions Answered

    When considering reusing roofing materials, users often have specific concerns about contamination and plant health. Let’s address the most frequent questions found in search results.

    Can Chemicals Leach from Roofing Tiles into Soil?

    For standard clay and natural slate, leaching is negligible. However, concrete tiles can release calcium hydroxide (lime) during the first few months of exposure to rain. This can temporarily alter the soil chemistry.

    • Solution: Wash new concrete tiles thoroughly and let them weather outdoors for a few weeks before placing them directly against sensitive plant roots.

    Are Old Roofing Tiles Safe for Vegetable Gardens?

    Using reclaimed tiles for vegetable raised beds requires caution.

    1. Avoid Lead Glazes: Older decorative clay tiles might have lead-based glazes. If the glaze is chipping, do not use it near food crops.
    2. Avoid Treated Wood Backing: Sometimes tiles are attached to wooden battens treated with arsenic or copper compounds. Remove all wood attachments before using the tiles.
    3. Use a Barrier: For peace of mind, line the inside of your raised bed with heavy-duty landscape fabric before placing the tiles as edging. This prevents direct soil contact with any potential residual contaminants.

    Do Roofing Tiles Affect Soil pH?

    Yes, particularly concrete. Concrete is alkaline (pH 12–13 when fresh). If you are growing acid-loving plants, place concrete tiles away from the root zones or use clay/slate instead. You can test your soil pH using a simple kit available at any garden center. If the pH rises above 7.5 near the tiles, consider amending the soil with sulfur or peat moss.

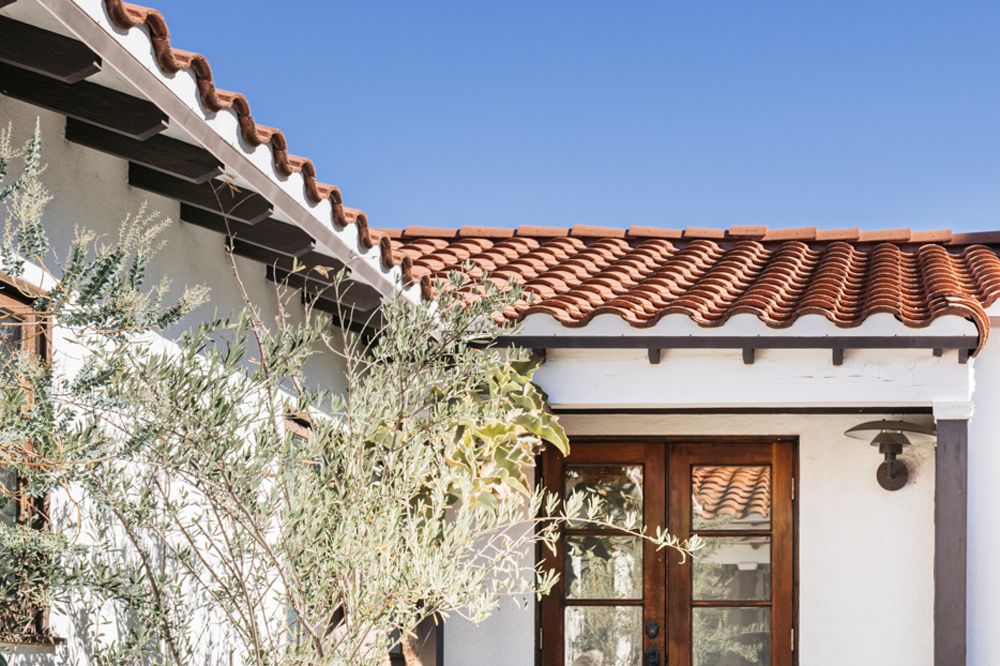
    Is It Safe To Use Roofing Tiles In Your Garden

    Step-by-Step Guide: How to Safely Prepare Reclaimed Tiles

    If you have determined your tiles are safe (non-asbestos, non-lead), follow these steps to prepare them for garden use. Proper preparation ensures longevity and minimizes any minor chemical risks.

    1. Inspection and Cleaning
      • Wear gloves and a dust mask (N95 recommended) to avoid inhaling silica dust or mold spores.
      • Scrub the tiles with a stiff brush and a solution of water and mild vinegar (1 part vinegar to 10 parts water). This helps neutralize surface alkalinity on concrete tiles.
      • Rinse thoroughly with a hose.
    2. Smoothing Sharp Edges
      • Broken tiles can be dangerous. Use a masonry file or wet sandpaper to smooth any jagged edges.
      • Tip: Keep the stone wet while sanding to suppress dust.
    3. Weathering Period
      • Lay the cleaned tiles out in a sunny, rainy area of your yard for 2–4 weeks. This allows rain to naturally wash away any remaining loose particles and stabilizes the pH of concrete tiles.
    4. Installation
      • Dig a trench slightly deeper than the tile height.
      • Add a 2-inch layer of gravel for drainage.
      • Place the tiles firmly into the soil. For vertical edging, backfill with soil and tamp down gently.

    Pros and Cons: Is It Worth the Effort?

    Before you start hauling tiles, weigh the benefits against the drawbacks.

    FeatureBenefitsDrawbacks
    CostFree or very cheap if reclaimed from your own roof.Labor-intensive to clean and transport.
    AestheticsRustic, charming, and unique look. Adds texture.Can look messy if not arranged neatly.
    DurabilityExtremely long-lasting; resistant to rot and pests.Heavy; difficult to move once installed.
    EnvironmentalReduces landfill waste; lowers carbon footprint.None significant, provided materials are safe.
    Plant HealthClay retains moisture well for nearby plants.Concrete may alter soil pH initially.

    Expert Insight: Sustainability in Landscaping

    According to sustainable landscaping principles, reusing materials is one of the most effective ways to reduce the environmental impact of gardening. By keeping roofing tiles out of landfills, you are participating in the circular economy.

    For more information on the environmental impact of construction materials, you can refer to resources on Sustainable Construction Materials which highlight the importance of reuse and recycling in modern building practices.

    Experts suggest that while buying new, certified garden-safe pavers is easier, the carbon footprint of manufacturing and transporting new concrete or clay products is significantly higher than repurposing existing materials. Therefore, if your tiles are clean and safe, using them is an eco-friendly choice.

    Creative Ways to Use Roofing Tiles in Your Garden

    Once you have confirmed safety, here are some stylish applications:

    • Raised Bed Edging: Stand clay tiles vertically to create a rustic border for vegetable patches. The terracotta color complements green foliage beautifully.
    • Pathway Steppers: Use large, flat slate or concrete tiles as stepping stones. Embed them in grass or gravel for a natural look.
    • Rock Garden Features: Break larger tiles into irregular shapes to mimic natural rock formations. Use them to create crevices for alpine plants.
    • Bird Bath Base: Stack flat tiles to create a sturdy, elevated platform for a bird bath bowl.
    • Mulch Alternative: Crushed clay tiles (terracotta chips) can be used as a decorative, weed-suppressing mulch. They do not decompose like wood chips, making them a permanent solution.

    FAQ Section

    1. Can I use broken roofing tiles in my compost bin?

    No, it is not recommended. Tiles do not decompose and will contaminate your compost. Additionally, if the tiles contain any hazardous materials, you risk spreading those contaminants throughout your garden when you use the compost. Stick to organic materials for composting.

    2. How do I know if my tiles contain asbestos?

    You cannot tell by looking alone. If your home was built before 1990 (and especially before 1980), assume they might contain asbestos until proven otherwise. Contact a local environmental testing lab or a professional roofing contractor to take a sample for analysis. Do not attempt to test it yourself by breaking the tile.

    3. Will roofing tiles crack in freezing weather?

    Clay and slate are generally frost-resistant if they are dense and low-porosity. However, cheap concrete tiles can absorb water, which expands when frozen, leading to cracking. If you live in a climate with harsh freeze-thaw cycles, ensure your concrete tiles are sealed or choose clay/slate options.

    4. Can I paint roofing tiles for my garden?

    Yes, but use exterior-grade, non-toxic masonry paint. Avoid paints with high VOCs (Volatile Organic Compounds) if the tiles are near vegetable gardens. Painting can also help seal porous concrete tiles, reducing lime leaching.

    5. Do roofing tiles attract pests?

    Unlike wood mulch, roofing tiles do not attract termites or carpenter ants. However, the gaps between tiles can provide shelter for slugs, snails, or spiders. If this is a concern, keep the area around the tiles clear of debris and consider using diatomaceous earth as a natural barrier.

    Conclusion

    So, is it safe to use roofing tiles in your garden? Yes, in most cases, it is a safe, sustainable, and aesthetically pleasing choice—provided you take the necessary precautions. By identifying the material, checking for asbestos in older homes, and preparing the tiles correctly, you can transform waste into a garden feature that lasts for decades.

    Repurposing materials not only saves you money but also contributes to a healthier planet. Whether you are creating a rustic pathway or defining your vegetable beds, reclaimed tiles offer a charm that new materials simply cannot replicate.

    Did you find this guide helpful? Share this article with your fellow gardening enthusiasts on social media to help them upcycle safely! Let’s build greener, safer gardens together.