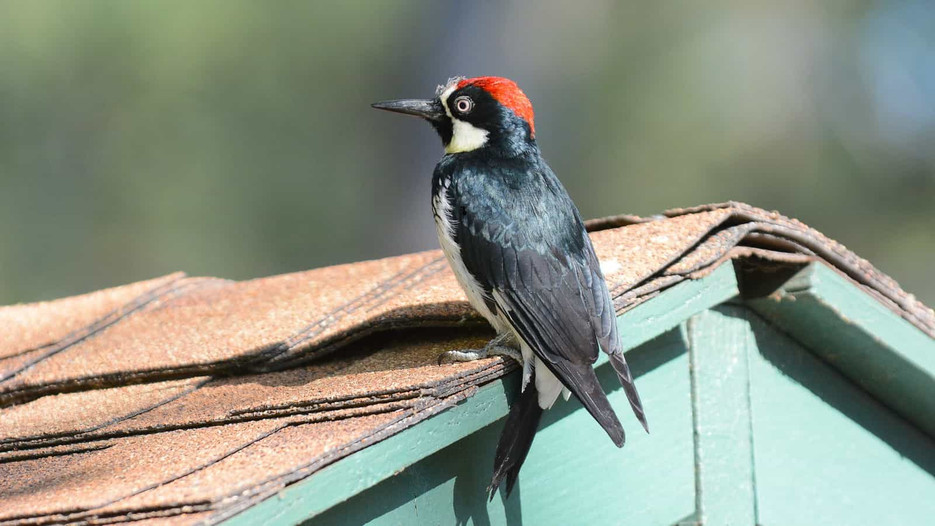
Tag: Roof Protection

  • Stop Roof Damage: Get Rid of Woodpeckers Now

    Stop Roof Damage: Get Rid of Woodpeckers Now

    Have you ever woken up to the relentless tap-tap-tap echoing through your attic, only to realize a feathered intruder is treating your home like its personal drum set? It is frustrating, loud, and potentially damaging to your property. If you are wondering how to get rid of a woodpecker on my roof, you are not alone; thousands of homeowners face this noisy nuisance every spring and fall.

    Woodpeckers are protected by federal law in the United States under the Migratory Bird Treaty Act, which means lethal force or trapping without a permit is illegal. Therefore, the solution lies in effective, humane deterrents that encourage the bird to move elsewhere. In this guide, we will explore science-backed strategies to protect your roof, silence the noise, and restore peace to your home without harming these fascinating birds.

    Why Is a Woodpecker Pecking at My Roof?

    Before implementing solutions, it is crucial to understand the why. Woodpeckers do not peck at roofs out of malice; they are driven by specific biological instincts. Identifying the motive helps you choose the right deterrent.

    1. Foraging for Food

    Your roof or siding may harbor insects. Carpenter bees, termites, or larvae living under the eaves or in the wood trim are a delicacy for woodpeckers. If you see small, irregular holes, the bird is likely hunting.

    2. Drumming for Communication

    “Drumming” is a non-vocal form of communication used to establish territory and attract mates. Unlike foraging, drumming creates rapid, rhythmic bursts of sound. They prefer resonant surfaces, and unfortunately, hollow vinyl siding, metal gutters, or loose roof shingles create the perfect echo chamber.

    3. Roosting or Nesting

    If you notice a large, round hole, the bird may be attempting to excavate a nest cavity. This usually happens in softer woods or decaying sections of your roof structure.

    Expert Insight: According to ornithological studies, woodpeckers can strike a tree up to 20 times per second. This force, equivalent to hitting a wall at 15 mph, can quickly compromise roofing materials if left unchecked.

    Immediate Visual Deterrents That Work

    Visual scares are the first line of defense. Woodpeckers are wary of predators and sudden movements. However, they are also intelligent and can habituate to static objects quickly. Rotation is key.

    Reflective Objects

    Shiny, moving objects disorient birds and mimic the eyes of predators.

    • Aluminum Foil Strips: Hang strips of aluminum foil from the eaves. The wind causes them to flutter and reflect sunlight, creating an unpredictable visual environment.
    • Old CDs or DVDs: String these together near the problem area. The rainbow reflection is highly effective during sunny days.
    • Reflective Tape: Specialized bird scare tape is available commercially. It combines visual flash with a crinkling sound when the wind blows.

    Predator Decoys

    Plastic owls, hawks, or snakes can work, but only if moved regularly. A static plastic owl becomes part of the scenery within 48 hours.

    • Tip: Move the decoy to a different spot on the roof or porch every two days.
    • Enhancement: Add realistic movement by attaching the decoy to a spring-loaded mount so it bobs in the wind.
    How To Get Rid Of A Woodpecker On My Roof

    Physical Barriers: The Most Effective Long-Term Solution

    If visual deterrents fail, physical exclusion is the gold standard. This method prevents the woodpecker from accessing the specific surface it targets.

    Bird Netting

    Netting is highly effective for covering large areas like eaves or entire roof sections.

    1. Measure the Area: Determine the square footage of the affected zone.
    2. Choose the Right Mesh: Use netting with a mesh size of no more than 3/4 inch to prevent the bird from getting stuck or reaching through.
    3. Installation: Attach the netting to the roofline using hooks or clips. Ensure there is a gap of at least 3 inches between the netting and the roof surface. This gap prevents the bird from landing on the roof through the net.

    Metal Flashing

    For localized damage, such as a specific beam or corner where the bird drums, cover the area with sheet metal or hardware cloth. Woodpeckers cannot peck through metal, and the change in texture and sound often discourages them.

    Auditory and Taste Repellents

    Sometimes, you need to attack the problem from multiple sensory angles.

    Sound Deterrents

    • Distress Calls: Playing recorded woodpecker distress calls can signal danger. However, use this sparingly to avoid disturbing neighbors.
    • Wind Chimes: Heavy metal wind chimes create unpredictable noises that can disrupt the rhythmic drumming pattern woodpeckers seek.

    Taste Repellents

    If the bird is foraging for insects, making the surface taste bad can help.

    • Hot Pepper Spray: Mix water with cayenne pepper or capsaicin-based sprays. Apply this to the affected wood trim (test on a small area first to ensure it doesn’t stain).
    • Note: Taste repellents wash away with rain and need frequent reapplication. They are less effective for drumming, as the bird is not eating the surface.

    Addressing the Root Cause: Insect Control

    If your woodpecker problem is driven by hunger, no amount of shiny tape will solve it permanently. You must eliminate the food source.

    Sign of InfestationLikely PestAction Required
    Small, round holes in woodCarpenter BeesApply insecticidal dust into holes
    Mud tubes on foundation/sidingTermitesProfessional extermination required
    Sawdust piles near eavesCarpenter AntsUse bait stations and seal entry points

    For severe infestations, consult a licensed pest control professional. Eliminating the insects removes the primary motivation for the woodpecker to return. For more information on common wood-boring insects, you can refer to this Wikipedia article on Woodpeckers which details their ecological role and feeding habits.

    Legal Considerations and Ethical Removal

    It is vital to remember that woodpeckers are protected species.

    • Do Not: Trap, poison, or shoot woodpeckers.
    • Do Not: Destroy active nests with eggs or chicks. This is a federal offense.
    • Do: Focus on exclusion and harassment techniques before nesting season begins (early spring).

    If a woodpecker has already established a nest, you must wait until the fledglings have left the nest (usually late summer) before sealing any holes. Sealing a hole with babies inside is illegal and inhumane.

    FAQ: Common Questions About Woodpecker Removal

    1. Will mothballs keep woodpeckers away?

    While some homeowners swear by mothballs, their effectiveness is anecdotal and limited. The smell may deter birds temporarily, but mothballs contain naphthalene or paradichlorobenzene, which are toxic chemicals. They are not recommended for outdoor use due to environmental contamination and potential harm to pets and children.

    2. How long does it take for deterrents to work?

    There is no fixed timeline. Some woodpeckers may leave within 24 hours of seeing reflective tape, while others may take two weeks of consistent harassment. Consistency is crucial. If you stop the deterrents too early, the bird will return.

    3. Can I use ultrasonic repellers?

    Ultrasonic devices emit high-frequency sounds intended to annoy pests. However, scientific evidence suggests they are largely ineffective against birds. Birds do not rely heavily on the frequency ranges targeted by these devices, and most experts consider them a waste of money for woodpecker control.

    4. What if the woodpecker is damaging my solar panels?

    Woodpeckers may peck at the edges of solar panels if insects are nesting underneath. Install mesh screening around the perimeter of the solar array to block access. This protects both the panels and the wiring from pecking damage.

    5. Is it safe to climb on my roof to install netting?

    Roof work can be dangerous. If your roof is steep, high, or slippery, hire a professional wildlife removal service or a roofer. Safety should always be your priority over DIY savings.

    Conclusion

    Dealing with a woodpecker on your roof is a test of patience, but it is entirely manageable. By understanding how to get rid of a woodpecker on my roof through a combination of visual deterrents, physical barriers, and insect control, you can protect your home without harming wildlife.

    Remember, the key is consistency. Rotate your visual scares, maintain your physical barriers, and address any underlying insect problems. With these steps, you can enjoy a quiet home and an intact roof.

    Found this guide helpful? Share it with your neighbors on Facebook or Twitter who might be dealing with similar noisy visitors. Let’s help each other keep our homes peaceful and woodpecker-free!

  • Can You Put Ice And Water Shield On Entire Roof?

    Can You Put Ice And Water Shield On Entire Roof?

    Have you ever worried about ice dams damaging your roof or leaks sneaking into your attic during heavy storms? Many homeowners ask, “Can you put ice and water shield on entire roof“ to achieve maximum peace of mind. While traditional building codes only require it in specific vulnerable areas, covering the whole deck is becoming a popular choice for those seeking superior durability.

    In this article, we will break down whether this upgrade is worth the investment, how it compares to standard felt paper, and what professional roofers recommend for long-term home protection.

    Is It Code-Compliant to Cover the Whole Roof?

    One of the first questions homeowners face is legality and compliance. The short answer is: Yes, you generally can.

    Most building codes in the United States, such as the International Residential Code (IRC), mandate ice and water shield in specific high-risk zones. These typically include:

    • Eaves (the edge of the roof).
    • Valleys (where two roof planes meet).
    • Around chimneys, skylights, and vent pipes.

    However, codes rarely prohibit using it everywhere. In fact, many modern roofing manufacturers encourage full coverage to validate their extended warranties. If you live in an area with severe weather—whether it’s heavy snow in the North or hurricane-driven rain in the South—going beyond the minimum code requirements is often seen as a smart insurance policy for your home.

    Always check with your local building department, but in most US jurisdictions, upgrading your underlayment is perfectly acceptable and often praised by inspectors.

    Ice and Water Shield vs. Traditional Felt Paper

    To understand why you might want full coverage, you need to know what makes this material different from the black felt paper (tar paper) used for decades.

    How Ice and Water Shield Works

    Ice and water shield is a self-adhering, rubberized asphalt membrane. Unlike felt, which is merely nailed down, this shield sticks directly to the roof deck. This creates a watertight seal around nail penetrations. When a roofer nails shingles through the shield, the material wraps around the nail shaft, preventing water from seeping in through those tiny holes.

    Comparison Table

    FeatureTraditional Felt (#15 or #30)Ice and Water Shield
    Water ResistanceWater-resistant (can absorb moisture over time)Waterproof (forms a sealed barrier)
    InstallationStapled or nailed looselySelf-adhering (sticks to deck)
    Nail SealingNo (water can enter nail holes)Yes (self-seals around nails)
    CostLow ($)High ($)
    LifespanDegrades faster if exposedHighly durable against elements

    According to industry data, roofs with full synthetic or rubberized underlayment tend to have fewer leak-related insurance claims in the first ten years of installation compared to those with standard felt.

    What Are the Benefits of Full-Roof Coverage?

    If you are considering this upgrade, here are the primary advantages that justify the higher cost.

    1. Superior Leak Protection

    The biggest benefit is security. Standard underlayment is designed to shed water, not stop it completely if wind drives rain upward under the shingles. Ice and water shield acts as a secondary roof. If a shingle blows off during a storm, your home remains dry because the shield underneath is waterproof.

    2. Extended Shingle Life

    By providing a smoother, more uniform surface, ice and water shield can help shingles lay flatter. Additionally, because it seals out moisture from the attic side, it prevents the wood deck from rotting. A dry deck means your shingles last longer because they aren’t buckling due to underlying structural decay.

    3. Better Warranty Coverage

    Many major shingle manufacturers (such as GAF, Owens Corning, and CertainTeed) offer enhanced warranties if you use their proprietary or approved ice and water shields across the entire roof deck. This can extend your warranty from 10 years to 25 or even lifetime coverage on labor and materials.

    Can You Put Ice And Water Shield On Entire Roof

    What Are the Downsides and Costs?

    It is important to be realistic about the trade-offs. While effective, this method is not without its challenges.

    Higher Material Costs

    Ice and water shield is significantly more expensive than felt or even synthetic underlayment. You can expect to pay 2 to 3 times more for materials alone. For an average 2,000-square-foot roof, this could add several hundred to over a thousand dollars to your total project cost.

    Installation Complexity

    This material is sticky. Very sticky.

    • Heat Sensitivity: In hot summer months, the adhesive can become too soft, making it difficult to handle and potentially causing it to tear when unrolled.
    • Cold Weather: In freezing temperatures, the adhesive may not bond properly unless the roof deck is warmed up or a primer is used.
    • Labor Intensive: Because it adheres immediately, mistakes are costly. If you lay it crooked, you cannot simply lift and reposition it easily like felt paper. This increases labor time and, consequently, labor costs.

    Moisture Trapping Concerns

    There is a debate among some builders about vapor permeability. Standard felt allows the roof deck to “breathe” slightly. Ice and water shield is a vapor barrier. If your attic ventilation is poor, moisture from inside your home could get trapped between the insulation and the roof deck, potentially leading to condensation issues. Proper attic ventilation is non-negotiable if you choose full coverage.

    Step-by-Step: How Is It Installed?

    If you decide to proceed, here is how professionals typically install ice and water shield on the entire roof. Note that this is a job best left to certified roofing contractors due to the complexity.

    1. Prep the Deck: Ensure the roof deck (plywood or OSB) is clean, dry, and free of protruding nails. Any moisture present must be dried out before application.
    2. Start at the Eaves: Begin at the bottom edge of the roof. Unroll the first strip along the eave.
    3. Peel and Stick: Remove the release film from the back of the membrane. Press it firmly onto the deck. Use a hand roller to ensure there are no air bubbles or wrinkles.
    4. Overlap Correctly: Subsequent rows should overlap the previous row by at least 2 to 4 inches (check manufacturer specs). This ensures water flows over the seam, not under it.
    5. Seal Penetrations: Cut precise holes for vents and chimneys. Use additional patches of shield or compatible flashing tape to seal around these openings tightly.
    6. Cap with Shingles: Once the entire deck is covered, proceed with standard shingle installation. The nails will penetrate the shield, which will self-seal around them.

    For more detailed technical specifications on roofing materials, you can refer to general construction standards on Wikipedia.

    FAQ Section

    1. Does ice and water shield expire?

    Yes, but usually only if left exposed. If kept in its original packaging and stored in a cool, dry place, it can last for several years. However, once installed, it is designed to last as long as the roof itself. Do not leave it exposed to sunlight for more than 30–90 days (depending on the brand) before covering it with shingles, as UV rays can degrade the adhesive.

    2. Can I install it myself?

    While technically possible, it is not recommended for DIYers. The material is heavy, sticky, and unforgiving. Improper installation can lead to wrinkles, poor adhesion, and voided warranties. Professional roofers have the tools and experience to handle the material efficiently.

    3. Will it make my roof hotter?

    No. Ice and water shield is installed under the shingles. It does not affect the solar reflectance of your roof. The temperature of your attic is determined by your ventilation and insulation, not the underlayment type.

    4. Is it necessary in warm climates?

    Even in warm climates like Florida or Texas, ice and water shield is beneficial. While you won’t have ice dams, you do have wind-driven rain from hurricanes and tropical storms. The waterproofing benefit protects against horizontal rain entry, which is common in severe storms.

    5. Can I put it over existing shingles?

    No. Ice and water shield must be applied directly to the solid roof deck (wood). It cannot be installed over old shingles or existing underlayment. A complete tear-off is required.

    Conclusion

    So, can you put ice and water shield on entire roof? Absolutely. And for many homeowners, it is one of the best upgrades they can make.

    While it comes with a higher price tag and requires professional installation, the benefits are clear: superior leak protection, extended shingle life, and enhanced warranty coverage. If you plan to stay in your home for a long time, or if you live in an area prone to severe weather, the extra investment pays for itself in peace of mind.

    However, ensure your attic ventilation is up to par to prevent moisture trapping, and always hire a licensed, insured roofing contractor to handle the installation.

    Found this guide helpful? Share it with your friends on Facebook or Pinterest who are planning their next home improvement project! Protecting your home starts with making informed decisions.