Blog

  • I Burned The Roof Of My Mouth: Why It’s Peeling & How to Heal

    I Burned The Roof Of My Mouth: Why It’s Peeling & How to Heal

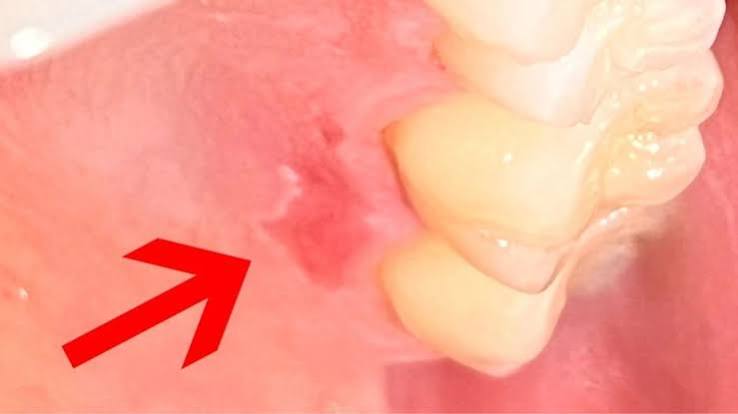
    Have you ever taken a bite of something deliciously hot, only to regret it seconds later? That sharp, stinging pain on the roof of your mouth is all too common, but seeing the skin peel away can be genuinely alarming. If you are thinking, “I burned the roof of my mouth and its peeling,” you are not alone, and there are effective ways to manage the discomfort and speed up healing.

    This guide will walk you through exactly why this happens, how to treat it safely at home, and when you should actually worry. We’ll cut through the noise and provide clear, actionable advice based on medical best practices.

    Why Does the Roof of My Mouth Peel After a Burn?

    When you consume food or liquid that is too hot, you sustain a thermal injury to the delicate tissues in your mouth. The roof of your mouth, known medically as the hard and soft palate, is lined with a thin layer of mucous membrane. Unlike the skin on your arms or legs, this tissue is incredibly sensitive and lacks the thick protective outer layer (stratum corneum) found elsewhere on your body.

    The Science Behind the Peel

    The “peeling” you see is actually your body’s natural response to injury. When the heat damages the cells, the top layer of the mucous membrane dies and separates from the underlying tissue. This is similar to how skin blisters and peels after a sunburn, but it happens much faster in the mouth due to the moist environment.

    According to general medical consensus, these are typically first-degree or mild second-degree burns. The body rushes blood to the area to repair the damage, causing inflammation (redness and swelling), and eventually sheds the damaged cells. This shedding process is what creates those annoying, flappy pieces of skin that feel like they are hanging loose in your mouth.

    Key Insight: The mouth has one of the fastest healing rates in the human body due to rich blood supply and saliva properties. Most minor burns heal within 3 to 7 days.

    Immediate Steps: What to Do Right After the Burn

    If you just burned your mouth, immediate action can minimize the severity of the peel. Here is a step-by-step protocol to follow in the first hour:

    1. Cool It Down Immediately: Sip cold water or hold an ice chip against the burned area. Do not use ice directly for prolonged periods as it can cause further tissue damage; let it melt slightly. Aim for water at a temperature of 4–10°C (39–50°F).
    2. Rinse with Salt Water: Mix 1/2 teaspoon of salt into 8 ounces (240 ml) of warm (not hot) water. Swish gently for 30 seconds. This helps clean the area and reduces bacterial load without irritating the wound.
    3. Avoid Irritants: Do not consume acidic foods (like orange juice or tomato sauce), spicy foods, or crunchy snacks immediately. These will aggravate the exposed nerve endings.
    4. Do Not Pull the Skin: It is tempting to pull the peeling skin with your tongue or fingers. Resist this urge. Pulling it prematurely can expose raw tissue, increase pain, and raise the risk of infection. Let it fall off naturally.
    I Burned The Roof Of My Mouth And Its Peeling

    Best Home Remedies to Speed Up Healing

    Once the initial shock has passed, your goal shifts to comfort and accelerating tissue regeneration. Here are the most effective, evidence-based home remedies.

    1. Honey

    Honey is not just a sweetener; it has natural antibacterial and anti-inflammatory properties. A study published in various medical journals suggests that honey can promote wound healing.

    • How to use: Dab a small amount of raw honey directly onto the burned area. Let it sit for a few minutes before swallowing. Repeat 2–3 times a day.

    2. Yogurt and Probiotics

    Cool yogurt provides immediate soothing relief. More importantly, the probiotics can help maintain a healthy balance of bacteria in your mouth, preventing secondary infections while the tissue heals.

    • How to use: Eat a small cup of plain, unsweetened yogurt. Ensure it is cold but not frozen.

    3. Aloe Vera Gel

    Aloe vera is renowned for treating skin burns, and it works similarly for oral mucosa. It contains compounds that reduce inflammation and stimulate cell growth.

    • How to use: Use food-grade aloe vera gel. Apply a thin layer to the roof of your mouth. Rinse your mouth with water after 5–10 minutes if the taste is unpleasant.

    4. Over-the-Counter Oral Gels

    Products containing benzocaine or lidocaine can numb the area temporarily. While these do not speed up healing, they provide significant pain relief, allowing you to eat and sleep more comfortably.

    • Caution: Use these sparingly and follow package instructions. Overuse can lead to irritation.

    Foods to Eat vs. Foods to Avoid

    Your diet plays a crucial role in how quickly your mouth heals. Choosing the right foods prevents re-injury and provides the nutrients needed for tissue repair.

    Food CategoryRecommended (Eat This)Avoid (Wait Until Healed)
    TemperatureCold or room temperature itemsHot soups, coffee, tea, steamy dishes
    TextureSoft, smooth, creamyCrunchy chips, hard crusts, nuts
    Flavor ProfileMild, bland, non-acidicSpicy, citrusy, salty, vinegar-based
    ExamplesPudding, applesauce, smoothies, mashed potatoesSalsa, orange juice, pretzels, curry

    Pro Tip: Smoothies are excellent because they are cold, nutritious, and require no chewing. Just avoid adding acidic fruits like pineapples or strawberries until the peel has fully healed.

    When Should You See a Doctor?

    While most burnt roofs of the mouth are minor inconveniences, some signs indicate a more serious issue. You should consult a healthcare provider if:

    • The burn does not show signs of improvement after 7 days.
    • You develop a fever, which could indicate an infection.
    • There is excessive pus or foul-smelling discharge from the area.
    • The pain is severe and unmanageable with over-the-counter pain relievers.
    • You have difficulty breathing or swallowing (seek emergency care immediately).

    For more detailed information on oral health conditions, you can refer to resources like Wikipedia’s page on Oral Mucosa to understand the biological structure of your mouth better.

    FAQ: Common Questions About Burnt Mouths

    1. How long does it take for the roof of my mouth to stop peeling?

    Typically, the peeling phase lasts for 2 to 4 days. The complete healing process usually takes about one week. If the burn was severe, it might take up to two weeks, but this is less common with food-related burns.

    2. Is it safe to swallow the peeling skin?

    Yes, it is generally safe. The peeling skin is just dead tissue. Your stomach acid will break it down without any issues. However, try to spit out large pieces if possible to avoid a choking hazard or gagging reflex.

    3. Can I brush my teeth if the roof of my mouth is burned?

    Yes, you should continue to maintain oral hygiene. However, be very gentle around the burned area. Use a soft-bristled toothbrush and avoid splashing toothpaste foam directly onto the wound if it causes stinging. Rinsing with water afterward is helpful.

    4. Why does my mouth feel weird even after the pain stops?

    After the acute pain subsides, you may experience a sensation of roughness or numbness. This is because new cells are forming under the peeled layer. The nerve endings are still sensitive as they recalibrate. This feeling should disappear completely within a few days.

    5. Can I use mouthwash on a burned roof of my mouth?

    Avoid alcohol-based mouthwashes, as they will sting intensely and dry out the tissue, slowing healing. Instead, stick to saline rinses (salt water) or alcohol-free, therapeutic mouthwashes designed for sensitive mouths.

    6. Does dairy help heal burns?

    There is a myth that dairy increases mucus production and hinders healing, but there is no scientific evidence supporting this for minor oral burns. In fact, the cooling effect and protein content in milk or yogurt can be soothing and beneficial for tissue repair.

    Conclusion

    Dealing with a burnt roof of your mouth is uncomfortable, but it is rarely serious. Remember, if you find yourself saying, “I burned the roof of my mouth and its peeling,” it is a sign that your body is already working to repair itself. By keeping the area clean, avoiding irritants, and using soothing remedies like honey or cold yogurt, you can significantly reduce discomfort.

    Patience is key. Let the skin peel naturally, stay hydrated, and stick to soft, cool foods. Within a week, you should be back to enjoying your favorite hot meals without a second thought.

    Found this guide helpful? Share it with a friend who loves piping hot pizza or coffee! Spreading the word can help others handle this common kitchen mishap with confidence.

  • How to Write a Good Review for a Roofing Company

    How to Write a Good Review for a Roofing Company

    Have you just had your roof repaired or replaced, and the crew did an exceptional job? Or perhaps you’re feeling frustrated because the project didn’t go as planned, and you want to ensure future homeowners are warned? In either case, knowing how to write a good review for a roofing company is a powerful skill that can significantly impact local businesses and help your community make informed decisions.

    A well-crafted review does more than just vent frustration or offer praise; it provides concrete data for other homeowners who are likely facing similar stress. Roofing is one of the most significant investments a homeowner makes, often costing thousands of dollars. Therefore, your detailed feedback serves as a crucial trust signal in an industry where reliability is paramount.

    Why Your Detailed Feedback Matters More Than You Think

    Before we dive into the mechanics of writing, it is essential to understand the weight of your words. The home services industry relies heavily on digital reputation. According to various consumer behavior studies, over 90% of customers read online reviews before visiting a business, and this number is even higher for high-ticket items like roofing.

    When you take the time to write a comprehensive review, you are contributing to the E-E-A-T (Experience, Expertise, Authoritativeness, and Trustworthiness) of the digital ecosystem. For the roofing company, positive, detailed reviews improve their local SEO rankings, helping them reach more customers. For your neighbors, your review reduces anxiety and helps them avoid potential scams or poor workmanship.

    Think of your review as a mini-case study. It’s not just about saying “Good job.” It’s about explaining why it was a good job. This level of detail builds authority and helps search engines like Google and Bing understand the context of the business’s performance.

    Key Elements of a High-Impact Roofing Review

    To write a review that truly stands out and helps others, you need to include specific components. A vague review is easily ignored; a detailed one is bookmarked and shared. Here are the critical elements you must include:

    1. Specificity of Services Rendered

    Don’t just say “they fixed my roof.” Specify the type of work. Was it a full roof replacement? A leak repair? Gutter installation? Storm damage restoration? Mentioning the specific service helps future customers with similar needs find relevant information.

    2. Timeline and Punctuality

    Roofing projects are weather-dependent and often disruptive. Did the company start on the date promised? Did they finish within the estimated timeframe? Delays are common, but communication about those delays is what separates good companies from great ones.

    3. Cleanliness and Site Management

    One of the biggest complaints in construction is the mess left behind. Did the crew use tarps to protect your landscaping? Did they use magnetic sweepers to pick up nails? Did they haul away all the old shingles? These details matter immensely to homeowners who care about their property’s aesthetics.

    4. Communication and Professionalism

    How was the interaction with the project manager or the estimator? Were they responsive to calls and emails? Did they explain the technical aspects in plain English? Good communication is often just as valuable as the physical work itself.

    How To Write A Good Review For A Roofing Company

    Step-by-Step Guide: How to Structure Your Review

    If you are staring at a blank text box wondering where to start, follow this simple four-step structure. This format ensures you cover all bases without rambling.

    Step 1: Set the Context (The “Before” State)

    Start by briefly describing the problem you faced. This establishes empathy and relevance.

    • Example: “After a severe hailstorm in March, I noticed three active leaks in my attic. I needed an urgent repair before the rainy season started.”

    Step 2: Describe the Process (The “During” State)

    Detail the interaction from the initial quote to the final cleanup. This is where you highlight the company’s workflow.

    • Example: “The estimator arrived within 24 hours, provided a detailed breakdown of costs, and explained the difference between architectural and 3-tab shingles. The crew arrived at 8 AM sharp, worked efficiently, and kept me updated via text every afternoon.”

    Step 3: Highlight the Outcome (The “After” State)

    Discuss the quality of the work and the final result.

    • Example: “The new roof looks fantastic, and the color matches the siding perfectly. More importantly, the recent heavy rains have confirmed that the leaks are completely gone.”

    Step 4: The Verdict and Recommendation

    Conclude with a clear statement on whether you would hire them again.

    • Example: “I highly recommend [Company Name] for anyone needing reliable, transparent roofing services. Their attention to detail regarding cleanup was impressive.”

    Common Mistakes to Avoid When Writing Reviews

    Even with good intentions, many people write ineffective reviews. Here is a comparison of what to avoid versus what to do.

    FeaturePoor Review ExampleEffective Review Example
    Detail Level“They were good.”“The team installed ice and water shield correctly under the eaves, which is crucial for our climate.”
    Emotion“I hate them! Worst ever!” (Angry, vague)“I was disappointed because the project was delayed by two weeks without prior notification.” (Specific, constructive)
    RelevanceComplaining about the receptionist’s tone.Focusing on the quality of materials and installation technique.
    ProofNo evidence provided.Mentioning specific warranties provided or photos attached (if the platform allows).

    Avoid emotional rants. If you had a bad experience, stick to the facts. Facts are defensible and helpful; emotions are subjective and often dismissed by readers. For more insight on why consumer protection and honest feedback are vital in commerce, you can refer to general principles of consumer rights discussed on Wikipedia.

    People Also Ask: Addressing Your Specific Concerns

    Here are answers to common questions homeowners have when leaving feedback for contractors.

    Should I mention the price in my review?

    It depends. If the price was exceptionally fair or transparent compared to competitors, mentioning it adds value. However, avoid posting exact dollar amounts if you feel it compromises privacy. Instead, use phrases like “competitive pricing,” “within budget,” or “no hidden fees.” This helps readers gauge value without exposing sensitive financial data.

    What if I had a mixed experience?

    Honesty is key. You can write a balanced review. For example: “The quality of the roofing work was excellent, and the materials are top-tier. However, the communication during the scheduling phase was lacking. Once the crew arrived, they were professional and efficient. I would recommend them for their craftsmanship but advise confirming dates clearly.”

    How long should my review be?

    Aim for 150–300 words. This is long enough to provide context and detail but short enough to keep the reader’s attention. Reviews that are too short lack credibility, while those that are too long may lose the reader before they get to the point.

    Is it okay to update my review later?

    Yes! Many platforms allow you to edit reviews. If a company initially made a mistake but then went above and beyond to fix it, updating your review to reflect their customer service recovery is incredibly powerful. It shows that the company stands behind its work.

    Should I leave a review if the job wasn’t finished?

    Generally, wait until the project is complete. However, if the company abandoned the job or breached the contract, leaving a factual review warning others is appropriate. Ensure you have documentation (contracts, emails) to support your claims to maintain your own credibility.

    Leveraging Platforms for Maximum Visibility

    Not all review platforms are created equal. To ensure your review has the maximum impact, consider where you post it:

    1. Google Business Profile: This is the most critical platform for local SEO. Reviews here directly influence the company’s visibility in local map packs.
    2. Yelp: Still widely used for home services, though some users find the filter algorithm aggressive.
    3. Better Business Bureau (BBB): Essential for resolving disputes and checking accreditation.
    4. Industry-Specific Sites: Platforms like Angi (formerly Angie’s List) or HomeAdvisor focus specifically on home improvement.

    When you post on multiple platforms, you create a consistent digital footprint for the business. This consistency reinforces the authenticity of the feedback.

    Conclusion: Your Voice Shapes the Industry

    Learning how to write a good review for a roofing company is about more than just clicking stars. It is about providing actionable, honest, and detailed feedback that elevates standards in the home improvement industry. By focusing on specifics like cleanliness, communication, and technical quality, you help reputable businesses thrive and warn others about potential pitfalls.

    Your review could be the deciding factor for a family trying to protect their home from the elements. So, take a few extra minutes to craft your thoughts carefully. Be fair, be factual, and be helpful.

    Did this guide help you structure your thoughts? If so, please share this article on social media to help other homeowners write better, more impactful reviews. Together, we can build a more transparent and trustworthy marketplace for home services.

  • Tie Christmas Tree to Car Without Roof Rack

    Tie Christmas Tree to Car Without Roof Rack

    The holiday season is here, and you’ve finally found the perfect Fraser fir at the local lot. But there’s a snag: your SUV doesn’t have a roof rack, and you’re wondering how to tie a Christmas tree to car without roof rack. It’s a common dilemma that causes unnecessary stress for many American families every December.

    Don’t worry; you don’t need expensive equipment or a professional mover to get your tree home safely. With the right technique and a few basic supplies, you can secure your tree firmly to your vehicle’s roof. This guide will walk you through the process step-by-step, ensuring your tree—and your car—arrive home intact.


    Why Securing a Tree Properly Matters

    Before we dive into the knots, it is crucial to understand the stakes. An unsecured tree is not just an inconvenience; it is a significant road hazard. According to traffic safety data, loose debris on highways causes thousands of accidents annually. A 6-foot pine tree weighing 50 pounds becomes a dangerous projectile at 60 mph.

    Furthermore, improper tying can damage your vehicle’s paint, door seals, and roof structure. By following proper protocols, you protect your investment and ensure the safety of other drivers. This approach aligns with best practices recommended by automotive safety experts who emphasize that securement is about friction and tension, not just knotting rope.


    What Supplies Do You Need?

    You might think you need specialized gear, but most items are likely already in your garage or trunk. Here is a checklist of essentials:

    • Heavy-Duty Rope: Use polypropylene or nylon rope (at least ½ inch thick). Avoid bungee cords as they can stretch and loosen over time.
    • Protective Blanket or Tarp: To protect your car’s paint from branches and sap.
    • Work Gloves: Pine needles are sharp, and rope burn is real.
    • Scissors or Knife: For trimming excess rope.
    • Assistant: While not a “supply,” having a second person makes this task 100% easier and safer.

    Pro Tip: If you don’t have rope, heavy-duty ratchet straps are an excellent alternative. They provide consistent tension and are less prone to slipping than traditional knots.

    How To Tie Christmas Tree To Car Without Roof Rack
    A volunteer mounts a purchased tree on top of the customers vehicle during the opening day of Westfield Y Tree Sale on Elm Street in Westfield on Saturday, November 28, 2020.

    Step-by-Step Guide: How to Tie a Christmas Tree to Car Without Roof Rack

    Follow these precise steps to ensure your tree stays put.

    Step 1: Prepare the Tree

    Most tree lots will wrap the base for you. If not, wrap the bottom tightly with twine to keep branches compact. A compact tree creates less wind resistance and is easier to secure. Measure the tree to ensure it isn’t longer than your vehicle’s roof plus a reasonable overhang (usually no more than 3–4 feet beyond the rear bumper, depending on local laws).

    Step 2: Protect Your Vehicle

    Lay a thick blanket, moving pad, or tarp across the roof of your car. This layer serves two purposes: it prevents scratches from rough bark and provides a slightly grippier surface than smooth metal or glass. Ensure the blanket covers the area where the trunk will rest and where ropes will touch the paint.

    Step 3: Position the Tree Correctly

    This is the most critical step. Place the tree upside down on the roof.

    • Why upside down? The trunk is the strongest part of the tree. By placing the trunk forward (towards the windshield) and the leafy top towards the rear, you allow the aerodynamic force of the wind to push the tree down onto the roof rather than lifting it up.
    • Align the trunk so it rests securely against the windshield frame or the front edge of the roof. Do not let the trunk hang freely over the hood.

    Step 4: Thread the Ropes Through the Car

    Since you don’t have a roof rack, you must use the car’s interior as an anchor point.

    1. Open all four doors of your vehicle.
    2. Throw one end of the rope over the tree and into the car on one side.
    3. Pull it across the interior ceiling (headliner) and out the opposite door.
    4. Repeat this with a second rope near the rear of the tree.

    Note: Be careful not to pinch the rope in the door seals too tightly, as this can damage the weather stripping. Close the doors gently but firmly.

    Step 5: Tie Secure Knots

    Now, secure the ropes on the outside.

    • Use a Trucker’s Hitch or a Bowline knot. These knots are non-slip and can be tightened significantly.
    • Pull the rope tight. You want the tree to compress slightly into the blanket. There should be no wiggle room.
    • If using ratchet straps, thread them through the car and tighten until the strap is taut. Do not overtighten to the point of denting the roof.

    Step 6: Secure the Front and Back

    To prevent lateral movement (side-to-side), tie a separate rope from the front of the tree trunk to a solid anchor point under the hood (like the engine block brace or a designated tow hook). Do the same for the rear, attaching the tail of the tree to the trunk hitch or a solid rear anchor. This creates a triangular stability system.


    People Also Ask: Common Questions Answered

    Can I use bungee cords instead of rope?

    While convenient, bungee cords are not recommended for primary securement. They are elastic, meaning vibrations from the road can cause them to loosen or snap. If you must use them, use them only as secondary support alongside rigid rope or straps. For more details on cargo safety standards, you can refer to general transportation guidelines on Wikipedia.

    How fast can I drive with a tree on my roof?

    Keep your speed below 50 mph (80 km/h). High speeds increase wind lift, which can compromise even the best knots. Additionally, sudden braking or acceleration can shift the tree’s center of gravity. Drive smoothly and avoid highway speeds if possible.

    Is it legal to have a tree hanging out of my car?

    Laws vary by state in the US. Generally, if the tree extends more than 3–4 feet beyond the rear bumper, you must attach a red flag to the end of the tree during daylight hours. At night, a red light is required. Check your local Department of Motor Vehicles (DMV) regulations to avoid fines.

    What if my car has a sunroof?

    If your car has a sunroof, do not close it with the rope running through it. The pressure can crack the glass or damage the mechanism. Instead, route the rope around the sunroof frame or use the door method exclusively. If the sunroof is large, consider using the trunk and hood anchors primarily, minimizing roof contact.


    Comparison: Rope vs. Straps vs. Bungee Cords

    FeatureNylon/Poly RopeRatchet StrapsBungee Cords
    SecurityHigh (if knotted correctly)Very HighLow
    Ease of UseModerate (requires skill)EasyVery Easy
    Risk of DamageLow (with blanket)LowMedium (snap back)
    ReusabilityHighHighLow (elastic degrades)
    Best ForTraditionalistsBeginners/ProsSecondary support only

    Final Safety Check Before You Drive

    Before you pull out of the parking lot, perform this quick inspection:

    1. The Shake Test: Grab the tree and shake it vigorously. If it moves, it’s not tight enough.
    2. Visual Inspection: Walk around the car. Ensure no branches are obstructing your view or hitting the ground.
    3. Knot Check: Verify that all knots are tight and the ends are tucked away so they don’t flap in the wind.
    4. Flag It: Attach a bright red flag to the rear tip of the tree if it overhangs significantly.

    Drive the first few miles cautiously. Stop after 5–10 minutes to re-check the tension. Ropes often settle and loosen slightly after initial exposure to wind and vibration.


    FAQ Section

    Q: Can I tie the tree to the side mirrors? A: No. Side mirrors are fragile and not designed to bear weight. Tying a tree to them will likely break the mirror housing and compromise your visibility. Always use the car’s frame, doors, or engine bay anchors.

    Q: What if it starts raining or snowing? A: Wet trees are heavier, and wet rope can slip more easily. If precipitation is expected, check your knots more frequently. Synthetic ropes (nylon/poly) handle moisture better than natural fiber ropes like hemp, which can rot or stretch when wet.

    Q: How do I get the tree off without making a mess? A: Have a vacuum cleaner ready inside your garage. When untying, keep the tree wrapped until you are outside. Shake the tree gently before bringing it indoors to dislodge loose needles.

    Q: Is it better to put the tree in the trunk? A: If your vehicle is a hatchback, SUV, or minivan with enough space, putting the tree inside is always safer and cleaner. However, for sedans or smaller cars, the roof method described above is the standard solution. Ensure the trunk lid can close fully without crushing the branches.

    Q: What kind of rope thickness is ideal? A: A diameter of ½ inch (12mm) is ideal. It is strong enough to hold the weight but flexible enough to tie tight knots. Thinner ropes may cut into the tree bark or your hands, while thicker ropes are difficult to knot securely.


    Conclusion

    Learning how to tie a Christmas tree to car without roof rack is a valuable skill that saves money and ensures a safe holiday journey. By positioning the tree upside down, protecting your paint, and using the correct knots, you can transport your festive centerpiece with confidence. Remember, patience and double-checking your work are key to avoiding roadside disasters.

    Once you’ve successfully secured your tree, take a moment to appreciate the effort. You’re not just transporting a plant; you’re bringing home the heart of your holiday celebrations.

    Did you find this guide helpful? Share this article with your friends and family on social media to help them avoid holiday transport headaches. Stay safe, drive slowly, and have a wonderful Christmas!

  • How To Stop The Roof Of Your Mouth From Itching Fast

    How To Stop The Roof Of Your Mouth From Itching Fast

    Have you ever been in the middle of a delicious meal or a quiet moment when suddenly, an intense, irritating itch develops on the roof of your mouth? It is a surprisingly common yet frustrating sensation that can distract you from your day and leave you wondering if something is wrong. If you are searching for effective ways on how to stop the roof of your mouth from itching, you are not alone, and relief is often closer than you think.

    This guide will walk you through the most common causes, immediate home remedies, and when to seek professional help, ensuring you can return to comfort quickly and safely.

    Why Does the Roof of My Mouth Itch?

    Before diving into solutions, it is crucial to understand the root cause. The roof of your mouth, known medically as the palate, is sensitive tissue. An itch here is rarely random; it is usually a signal from your immune system or a reaction to an external irritant.

    The most frequent culprit is Oral Allergy Syndrome (OAS), also known as pollen-food allergy syndrome. This occurs when your body confuses proteins in certain raw fruits, vegetables, or nuts with pollen allergens. According to the American Academy of Allergy, Asthma & Immunology, OAS affects up to 10% of the population, particularly those who already suffer from hay fever.

    Other common triggers include:

    • Seasonal Allergies: High pollen counts can cause post-nasal drip, irritating the palate.
    • Food Sensitivities: Spicy foods, acidic fruits, or artificial additives.
    • Dry Mouth (Xerostomia): Lack of saliva reduces the mouth’s natural cleaning ability, leading to irritation.
    • Thermal Burns: Eating food that is too hot can damage the delicate tissue, causing an itchy healing process.

    Understanding the trigger is the first step in effective treatment. For a deeper understanding of allergic reactions in the oral cavity, you can refer to this comprehensive overview on Wikipedia.

    Immediate Home Remedies to Soothe the Itch

    If you are experiencing sudden discomfort, you do not need to wait for a doctor’s appointment to find relief. Here are several proven, immediate steps you can take at home.

    1. Rinse with Cold Water or Salt Water

    Cold temperature helps constrict blood vessels and numb the nerve endings responsible for the itch.

    • Step 1: Take a sip of ice-cold water.
    • Step 2: Swish it around your mouth, focusing on the roof, for 30 seconds.
    • Step 3: Spit it out. Repeat as necessary.

    Alternatively, a saltwater rinse can reduce inflammation and clear out any lingering allergens. Mix 1/2 teaspoon of salt into 8 ounces (approx. 240 ml) of warm water. Gargle gently for 15–20 seconds and spit. Do not swallow the solution.

    2. Eat a Piece of Plain Bread or Crackers

    Sometimes, the itch is caused by microscopic particles of food or pollen stuck to the palate. Eating a piece of plain, dry bread or a unsalted cracker can act as a gentle abrasive.

    • Chew slowly.
    • Allow the bread to sweep across the roof of your mouth.
    • This mechanical action can physically remove the irritant.

    3. Apply Honey

    Honey has natural anti-inflammatory and antibacterial properties. It can coat the irritated tissue, providing a soothing barrier.

    • Take one teaspoon of raw honey.
    • Let it sit on the roof of your mouth for a minute before swallowing.
    • Note: Do not give honey to children under one year old due to the risk of botulism.
    How To Stop The Roof Of Your Mouth From Itching

    Managing Allergies and Long-Term Prevention

    If your itchy palate is a recurring issue, likely tied to allergies, home remedies may only provide temporary relief. You need a strategy to manage the underlying condition.

    Identify and Avoid Trigger Foods

    Keep a food diary for two weeks. Note what you ate and when the itching started. Common cross-reactive foods include:

    • Apples, peaches, and cherries (if allergic to birch pollen).
    • Melons and bananas (if allergic to ragweed).
    • Carrots and celery (if allergic to mugwort).

    Pro Tip: Cooking these foods often breaks down the problematic proteins. If raw apples itch, try apple sauce or baked apples.

    Over-the-Counter Antihistamines

    For persistent itching caused by seasonal allergies, an oral antihistamine can be highly effective.

    • Look for non-drowsy options like Cetirizine or Loratadine.
    • Follow the dosage instructions on the package strictly.
    • These medications block histamine, the chemical your body releases during an allergic reaction that causes itching and swelling.

    Maintain Optimal Oral Hygiene

    A clean mouth is less prone to irritation.

    • Brush twice daily with a soft-bristled toothbrush.
    • Floss daily to remove plaque buildup.
    • Use an alcohol-free mouthwash, as alcohol can dry out the tissues and worsen the itch.

    When to See a Doctor

    While most cases of an itchy palate are benign, some symptoms indicate a more serious condition. Seek medical attention if you experience:

    SymptomPotential CauseAction Required
    Swelling of lips or tongueSevere Allergic ReactionEmergency Care
    Difficulty breathingAnaphylaxisCall 911 Immediately
    White patches on palateOral Thrush (Fungal Infection)See Doctor/Dentist
    Itching lasts > 1 weekChronic ConditionSchedule Appointment
    Bleeding or soresTrauma or InfectionSee Dentist

    Anaphylaxis is a life-threatening allergic reaction. If the itching is accompanied by throat tightness, wheezing, or dizziness, do not wait. Use an epinephrine auto-injector if prescribed and seek emergency help immediately.

    FAQ: Common Questions About Itchy Palate

    1. Can stress cause the roof of my mouth to itch?

    Yes, indirectly. Stress can weaken your immune system and exacerbate existing conditions like eczema or allergies. Additionally, stress often leads to unconscious habits like rubbing the tongue against the palate, which can cause mechanical irritation.

    2. Is an itchy roof of the mouth a sign of pregnancy?

    Hormonal changes during pregnancy can increase blood flow to mucous membranes, making them more sensitive. Some pregnant women report increased sensitivity or itching in the mouth, though it is not a definitive sign of pregnancy on its own.

    3. Can dehydration cause an itchy palate?

    Absolutely. Saliva is essential for keeping the oral tissues moist and protected. When you are dehydrated, saliva production drops, leading to dry mouth (xerostomia). This dryness can feel like itching or burning. Drinking 2 liters of water throughout the day can help maintain proper hydration levels.

    4. Why does my mouth itch after eating pineapple?

    Pineapple contains an enzyme called bromelain, which breaks down proteins. This can cause a mild chemical “burn” or irritation on the sensitive tissues of the mouth, leading to an itchy or tingling sensation. Canning pineapple destroys bromelain, which is why canned pineapple rarely causes this issue.

    5. Should I scrape my tongue if my palate itches?

    Scraping your tongue can help remove bacteria and debris, but it will not directly stop an itchy palate unless the itch is caused by post-nasal drip carrying allergens over the tongue. Be gentle to avoid damaging the taste buds.

    Conclusion

    Dealing with an itchy roof of the mouth can be annoying, but it is rarely dangerous. By understanding the triggers—whether they are seasonal allergies, specific foods, or dryness—you can take control of the situation. Simple remedies like cold water rinses, honey, and avoiding trigger foods often provide quick relief.

    Remember, consistency is key. If you suffer from seasonal allergies, start taking preventive measures before the season peaks. Keep your oral hygiene routine strict, and stay hydrated.

    If you found this guide helpful, please share it with friends or family who might be suffering from similar discomfort. Sharing knowledge is the best way to help others find relief!

    Disclaimer: This article is for informational purposes only and does not constitute medical advice. Always consult with a healthcare professional for persistent or severe symptoms.

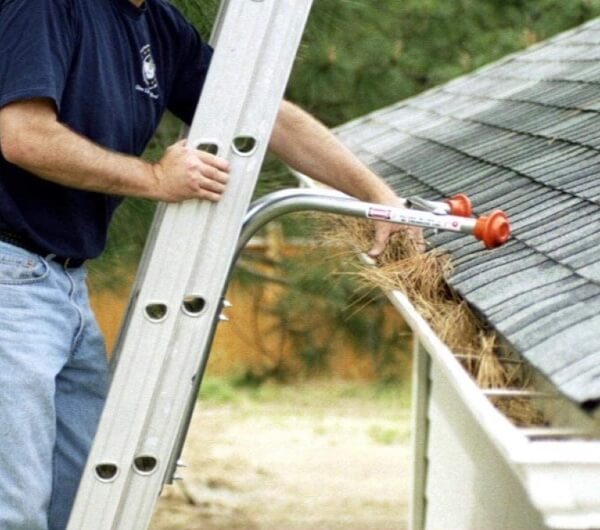
  • Safe Ladder Placement on Roofs With Gutters

    Safe Ladder Placement on Roofs With Gutters

    Have you ever stood at the base of your house, ladder in hand, hesitating because you’re terrified of crushing your expensive aluminum gutters? You are not alone. Many homeowners struggle with how to put a ladder on a roof with gutters without causing costly damage or risking personal injury. This guide provides safe, professional techniques to protect both your home and yourself.

    Why Proper Ladder Placement Matters

    Before we dive into the mechanics, it is crucial to understand the stakes. According to the Consumer Product Safety Commission (CPSC), over 164,000 people are treated in emergency rooms annually for ladder-related injuries in the United States. A significant portion of these accidents stems from improper setup on uneven or fragile surfaces like roof edges.

    Furthermore, gutters are not designed to bear weight. Most residential gutters are made from thin aluminum or vinyl. Placing a standard ladder directly against them can cause immediate denting, detachment from the fascia board, or even complete collapse. This leads to water damage, mold growth, and expensive repairs. By mastering the correct technique, you ensure structural integrity and personal safety.

    Essential Tools for Safe Access

    You cannot achieve a stable setup with just any ladder. Here is what you need:

    • Extension Ladder: Ensure it is rated for your weight plus tools (Type I or IA).
    • Ladder Stabilizer (Standoff): This is the most critical tool. It creates a bridge over the gutter.
    • Gutter Guards/Protectors: Foam or rubber pads that sit inside the gutter channel.
    • Level: To check ground stability.
    • Helper: Never work alone when positioning heavy ladders.

    Expert Tip: Invest in a high-quality ladder stabilizer. It pays for itself by preventing hundreds of dollars in gutter repair costs.

    How To Put A Ladder On A Roof With Gutters

    Step-by-Step Guide: How To Put A Ladder On A Roof With Gutters

    Follow these precise steps to set up your ladder correctly. Rushing this process is the number one cause of accidents.

    1. Inspect the Ground and Gutter Condition

    Start at the base. The ground must be firm, level, and free of debris. If the soil is soft, use a wide board under the ladder feet to distribute weight. Next, inspect your gutters. Look for existing loose sections, rust, or cracks. If the gutters are already compromised, do not place any weight near them until they are repaired.

    2. Apply the 4-to-1 Rule

    This is the golden rule of ladder safety. For every four feet of height to the point where the ladder rests against the roof, the base should be one foot away from the wall.

    • Example: If your eaves are 16 feet high, place the ladder base 4 feet away from the house.
    • Why? This angle (approximately 75 degrees) ensures optimal balance and prevents the ladder from sliding out or tipping backward.

    3. Install the Ladder Stabilizer

    This is the core answer to how to put a ladder on a roof with gutters without damage. A stabilizer attaches to the top of your extension ladder. It features two arms that extend outward, creating a wider footprint.

    • Attach the stabilizer securely to the ladder’s top rungs.
    • Extend the arms so that the contact points rest on the roof shingles, not the gutter.
    • The center of the stabilizer should hover over the gutter, leaving a gap of at least 2–3 inches. This ensures zero weight is transferred to the gutter system.

    4. Use Gutter Protectors as a Backup

    Even with a stabilizer, accidental bumps can happen. Slide foam or rubber gutter guards into the channel directly beneath where the ladder will pass. These act as shock absorbers. While they should not bear the main load, they provide an essential safety net against minor slips.

    5. Raise and Secure the Ladder

    With your helper holding the base, slowly raise the ladder. Walk it up hand-over-hand until the stabilizer arms rest firmly on the roof surface. Ensure the rubber feet of the stabilizer grip the shingles without tearing them. Once in position, secure the ladder base to prevent sliding. If possible, tie off the top of the ladder to a solid anchor point on the roof structure, not the gutter.

    Common Mistakes to Avoid

    Many DIY enthusiasts make critical errors that compromise safety. Here is a comparison of right vs. wrong practices:

    PracticeCorrect ApproachIncorrect Approach
    Contact PointLadder rests on roof/shingles via stabilizerLadder rests directly on gutter edge
    Angle75-degree angle (4-to-1 rule)Too steep (slips back) or too flat (bends)
    Ground BaseLevel, firm, possibly boardedUneven, muddy, or on gravel
    ProtectionUses stabilizer + foam guardsNo protection used

    Avoiding these mistakes significantly reduces the risk of injury and property damage. For more detailed safety standards, refer to the Occupational Safety and Health Administration (OSHA) guidelines, which are the gold standard for workplace safety in the US.

    People Also Ask: Specific Scenarios

    What if I don’t have a ladder stabilizer?

    If you absolutely must proceed without a stabilizer, you are taking a higher risk. In this case, use thick wooden planks (2x4s) placed across the gutter and resting on the roof edge. Place the ladder on top of these planks. However, this method is less stable and not recommended for heights above 10 feet. Always prioritize buying a proper stabilizer.

    Can I lean the ladder against the fascia board instead?

    No. The fascia board is typically made of wood or composite material that is not designed to handle lateral pressure. Leaning a ladder against it can crack the board, detach the gutter mounting brackets, and cause the ladder to slip unexpectedly. Always aim for the roof surface itself.

    How do I protect asphalt shingles from damage?

    Standard ladder stabilizers come with rubberized feet to prevent scratching. However, if you are concerned about granule loss on older shingles, place a piece of plywood or a heavy-duty moving blanket between the stabilizer feet and the roof. This distributes the weight further and protects the roofing material.

    Is it safe to use a step ladder on a roof?

    Generally, no. Step ladders are designed for self-supporting use on flat ground. They are not meant to lean against structures. Using a step ladder on a roof edge is highly unstable and dangerous. Always use an extension ladder with proper stabilization for roof access.

    FAQ Section

    Q: How much weight can typical residential gutters hold?

    A: Most aluminum gutters can support only 10–20 pounds of direct downward pressure before bending or detaching. This is far less than the weight of a person plus a ladder. Never rely on the gutter’s structural integrity.

    Q: What is the best type of ladder for two-story homes?

    A: For two-story homes, use a Type IA extension ladder rated for 300 pounds. Ensure it extends at least 3 feet above the roofline for safe transition onto the roof, as recommended by safety experts.

    Q: Can rain affect ladder stability on a roof?

    A: Yes. Wet shingles are extremely slippery. Avoid setting up ladders on roofs during or immediately after rain. If you must work in damp conditions, wear shoes with high-traction soles and ensure your stabilizer has aggressive rubber grips.

    Q: How often should I inspect my ladder before use?

    A: Inspect your ladder before every single use. Check for cracked rungs, loose rivets, damaged feet, and bent rails. A compromised ladder can fail catastrophically, regardless of how well it is positioned.

    Q: What should I do if my gutters are already damaged?

    A: If your gutters are loose or dented, do not attempt to place a ladder near them. Repair or replace the gutters first. Working around damaged structures increases the likelihood of sudden failure and injury.

    Conclusion

    Learning how to put a ladder on a roof with gutters is a vital skill for any homeowner. It protects your investment and, more importantly, keeps you safe. Remember the key takeaways: always use a ladder stabilizer, follow the 4-to-1 rule, and never let the ladder touch the gutter directly.

    By following these steps, you can perform maintenance tasks with confidence and peace of mind. Don’t cut corners when it comes to safety. Invest in the right tools, take your time, and always prioritize stability over speed.

    If you found this guide helpful, please share it with your friends and neighbors on social media. Helping others stay safe on their ladders is a small act that can make a big difference. Stay safe and happy home maintaining!

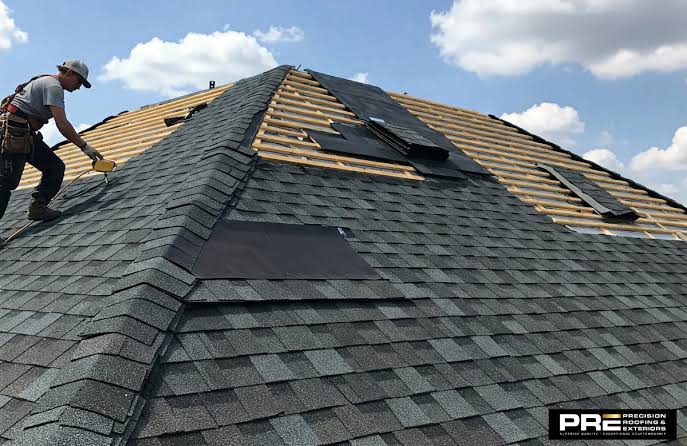
  • How to Install Ridge Cap Shingles on a Hip Roof

    How to Install Ridge Cap Shingles on a Hip Roof

    Have you ever looked up at your home’s roofline and noticed those vulnerable peaks where two slopes meet? These areas, known as hips and ridges, are the most susceptible points for water infiltration if not sealed correctly. Knowing how to install ridge cap shingles on a hip roof is essential for protecting your home from leaks while enhancing its architectural beauty.

    Whether you are a seasoned DIY enthusiast or a homeowner looking to understand the process before hiring a pro, this guide will walk you through every step with clarity and precision. We prioritize safety, durability, and aesthetic perfection to ensure your roof stands strong against the elements.

    Why Are Ridge Caps Critical for Roof Integrity?

    Before diving into the tools and techniques, it is vital to understand why this specific component matters. The ridge and hips are not just decorative; they are functional barriers.

    According to roofing industry standards, the intersection of roof planes creates a natural channel for wind-driven rain and snow melt. Without proper capping, water can seep under the standard field shingles, leading to rot, mold, and structural damage.

    Expert Insight: “The ridge cap is the final seal of the roofing system. If installed incorrectly, even the best underlayment cannot prevent water intrusion during high-wind storms.” – National Roofing Contractors Association (NRCA)

    For a deeper understanding of roof anatomy and terminology, you can refer to this comprehensive resource on Roof construction.

    Tools and Materials You Will Need

    Preparation is half the battle. Having the right tools on hand prevents mid-job trips to the hardware store and ensures a smoother workflow.

    Essential Tools:

    • Chalk Line: For creating straight guidelines.
    • Utility Knife: With extra blades for clean cuts.
    • Hammer or Pneumatic Nail Gun: A nail gun speeds up the process significantly.
    • Tape Measure: For precise spacing.
    • Ladder and Safety Harness: Non-negotiable for height work.

    Materials:

    • Ridge Cap Shingles: You can buy pre-cut caps or cut them from standard three-tab shingles.
    • Roofing Nails: 1-¼ inch galvanized nails are standard.
    • Asphalt Plastic Cement: For sealing edges in high-wind zones.
    Material TypeProsCons
    Pre-Cut CapsUniform size, faster installation, professional look.More expensive per square foot.
    Field Shingle CutsCost-effective, uses leftover material.Time-consuming, requires precise cutting skills.
    How To Install Ridge Cap Shingles On A Hip Roof

    Step-by-Step Guide: How to Install Ridge Cap Shingles on a Hip Roof

    Follow these detailed steps to ensure a watertight seal. We assume you have already installed the field shingles up to the hip line.

    Step 1: Prepare the Hip Line

    Ensure that the field shingles on both sides of the hip are trimmed evenly. There should be no overhang greater than ½ inch beyond the hip line. Use your chalk line to snap a straight guideline along the center of the hip. This visual aid ensures your caps remain aligned as you move upward.

    Step 2: Start at the Bottom

    Unlike ridge caps which often start from one end, hip caps typically start at the bottom eave and work their way up to the peak. This method allows each subsequent shingle to overlap the previous one, shedding water effectively like fish scales.

    1. Take your first ridge cap shingle.
    2. Align it so that it covers the joint between the two roof planes.
    3. Ensure the bottom edge of the cap aligns with the bottom edge of the last course of field shingles.

    Step 3: Nailing Technique

    Proper nailing is crucial for wind resistance.

    • Place two nails on each side of the cap, approximately 1 inch from the edge and 1 inch above the exposure line.
    • Do not nail too close to the edge, as this can cause the shingle to crack or tear in high winds.
    • If using a nail gun, set the depth correctly so the nail head sits flush with the shingle surface—not driven in too deep to puncture the mat, nor too shallow to catch wind.

    Step 4: Overlapping and Alignment

    Place the second cap shingle over the first. The standard exposure for ridge caps is usually 5 inches. This means 5 inches of the shingle are visible, and the rest is covered by the next piece.

    • Use your tape measure to verify the 5-inch exposure for the first few courses.
    • Continue this pattern, moving up the hip line toward the peak.
    • Keep the edges straight using your initial chalk line as a reference.

    Step 5: Handling the Peak

    When you reach the top of the hip where it meets the main ridge, you will need to trim the final cap shingle.

    1. Measure the remaining distance to the peak.
    2. Cut the shingle to fit, ensuring it overlaps the last full cap by at least 2 inches.
    3. Seal the cut edge with asphalt plastic cement if you live in an area prone to heavy rain or wind.

    Common Mistakes to Avoid

    Even experienced DIYers can stumble on these common pitfalls. Being aware of them saves time and money.

    • Incorrect Nailing Position: Nailing too high exposes the nail head to the elements; nailing too low compromises the seal of the next shingle.
    • Ignoring Wind Direction: In areas with prevailing winds, consider starting the installation on the side opposite the wind direction to prevent uplift.
    • Poor Cutting: Using a dull knife results in jagged edges that look unprofessional and may not lay flat. Change blades frequently.
    • Skipping the Starter Strip: Some manufacturers recommend a starter strip at the bottom of the hip for added protection. Check your specific shingle manufacturer’s instructions.

    FAQ Section

    1. Can I use regular shingles for ridge caps?

    Yes, you can cut standard three-tab shingles into smaller pieces to create ridge caps. However, pre-cut ridge cap shingles are thicker and designed specifically for this purpose, offering better durability and a cleaner aesthetic. If you cut your own, ensure each piece is roughly 12×12 inches.

    2. How many nails should I use per ridge cap shingle?

    Typically, you should use four nails per cap shingle—two on each side. In high-wind zones (such as coastal areas), some manufacturers recommend six nails or the use of adhesive strips. Always consult the specific installation instructions provided by your shingle brand.

    3. What is the difference between a hip and a ridge?

    A ridge is the horizontal line at the very top of the roof where two sloping sides meet. A hip is the external angle formed by the meeting of two sloping ends of a roof. While the installation process is similar, hips run diagonally from the eave to the ridge, whereas ridges run horizontally.

    4. Do I need to seal the ridge cap shingles?

    In most standard residential applications, the weight of the overlapping shingles and the nails provide sufficient hold. However, applying a dab of asphalt plastic cement under the exposed corner of each cap can provide extra security against wind uplift, especially in storm-prone regions.

    5. How long does it take to install ridge caps on an average house?

    For a DIYer with moderate experience, installing ridge caps on an average-sized hip roof can take 4 to 8 hours. This depends on the complexity of the roofline, the number of hips, and weather conditions. Professional crews can often complete this in half the time.

    Conclusion

    Mastering how to install ridge cap shingles on a hip roof is a rewarding skill that protects your home’s most vital shield. By following the steps outlined above—preparing the surface, aligning carefully, and nailing precisely—you ensure a durable, leak-proof finish that enhances your home’s curb appeal.

    Remember, safety is paramount. Never hesitate to use a harness or seek professional help if the roof pitch is steep or if you feel uncomfortable working at heights.

    Did you find this guide helpful? Share it with your friends on social media who might be tackling their own home improvement projects! Let’s build safer, stronger homes together.

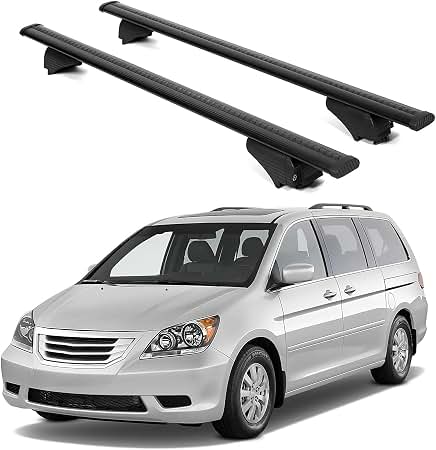
  • How to Install a Roof Rack on a Honda Odyssey

    How to Install a Roof Rack on a Honda Odyssey

    Are you planning a family road trip or simply need extra space for your gear, but feel overwhelmed by the idea of modifying your minivan? You are not alone; many Honda Odyssey owners struggle with finding reliable cargo solutions that don’t compromise safety or vehicle integrity. Learning how to install a roof rack on a Honda Odyssey is easier than you think, and this guide will walk you through every step with confidence and clarity.


    Why Choose a Roof Rack for Your Honda Odyssey?

    Before diving into the installation, it is essential to understand why a roof rack is a superior choice for many Odyssey owners. The Honda Odyssey is renowned for its spacious interior, but when you add car seats, strollers, and luggage, floor space disappears quickly.

    According to recent automotive trends, over 60% of SUV and minivan owners utilize external cargo carriers to maximize interior comfort during long trips. A roof rack allows you to keep bulky items like kayaks, bicycles, or large suitcases off your seats, ensuring a quieter and more organized ride.

    Furthermore, unlike trailer hitches which require significant mechanical modification, roof racks are generally non-invasive. They utilize the existing structure of your vehicle, specifically the roof rails or mounting points, making them an ideal solution for renters or those who wish to preserve their vehicle’s resale value.

    Understanding Your Honda Odyssey’s Roof System

    Not all Honda Odyssey models are created equal when it comes to roof infrastructure. Identifying your specific model year and roof type is the critical first step in knowing how to install a roof rack on a Honda Odyssey.

    1. Models with Factory Side Rails (2018–Present)

    Most modern Odysseys come with fixed side rails running along the length of the roof. These are aerodynamic and sturdy. For these models, you typically need “crossbars” that clamp onto these side rails. No drilling is required.

    2. Models with Flush Mount Points (Older Generations)

    Some older models or specific trim levels may have flush-mounted points hidden under plastic covers. These require a specialized kit that lifts the cover and bolts directly into the vehicle’s frame.

    3. Models with No Pre-Installed Features

    If your Odyssey has a completely smooth roof, you will need a “gutter mount” or a custom-fit clamp system that grips the door frame. Note: This is rare for the Odyssey but possible on base trims of older years.

    Pro Tip: Always check your owner’s manual for the maximum dynamic weight capacity. For most Honda Odysseys, this ranges between 150 to 165 lbs when the vehicle is in motion. Exceeding this limit can damage the roof structure and void your warranty.

    How To Install A Roof Rack On A Honda Odyssey

    Tools and Materials You Will Need

    Preparation is key to a smooth installation. Gathering the right tools beforehand prevents frustration and ensures a tight, safe fit. Here is a checklist of what you will need:

    • The Roof Rack Kit: Ensure it is compatible with your specific Honda Odyssey year and model.
    • Torque Wrench: Crucial for tightening bolts to manufacturer specifications.
    • Soft Cloth or Microfiber Towels: To protect your paint and glass from scratches.
    • Measuring Tape: To ensure symmetrical placement.
    • Allen Keys or Socket Set: Usually included with the rack, but having your own set helps.
    • Rubber Mallet: Helpful for gently tapping components into place without causing damage.

    Step-by-Step Guide: How to Install a Roof Rack on a Honda Odyssey

    Follow these detailed steps to install your crossbars securely. We assume you are installing crossbars onto existing factory side rails, which is the most common scenario for recent Odyssey models.

    Step 1: Unbox and Inspect Components

    Lay out all parts on a clean, soft surface. Check for any shipping damage. Identify the left and right crossbars, clamps, keys, and instruction manuals. Verify that the rubber pads on the clamps are intact; these prevent slipping and protect your rails.

    Step 2: Position the Front Crossbar

    Place the front crossbar on the roof. Most manufacturers recommend positioning it approximately 24–30 inches from the windshield header. However, consult your specific rack’s manual for the optimal aerodynamic position.

    • Ensure the curved side of the bar faces forward to reduce wind noise.
    • Align the clamps so they sit squarely on the factory side rails.

    Step 3: Attach the Clamps

    Open the clamp mechanisms. Slide them onto the factory rails. Do not tighten them yet. Adjust the position so that the crossbar is perpendicular to the side rails. Use your measuring tape to ensure the distance from the windshield is identical on both the driver and passenger sides.

    Step 4: Tighten the Rear Crossbar

    Repeat the process for the rear crossbar. The standard distance between crossbars is often around 28–32 inches, depending on what you plan to carry. For bike racks, wider spacing is better. For cargo boxes, closer spacing may be required.

    • Critical Check: Ensure both bars are parallel. Misaligned bars can cause excessive wind drag and noise.

    Step 5: Torque the Bolts

    Using your torque wrench, tighten the clamp bolts. Refer to the rack manufacturer’s specification, usually between 4–6 Nm (Newton-meters). Do not overtighten, as this can strip the threads or crack the plastic housing of the clamp.

    • Listen for the “Click”: Many modern racks have a torque-limiting indicator that clicks when the proper tightness is reached.

    Step 6: Final Safety Inspection

    Shake each crossbar firmly. There should be no movement or wobbling. Check that the keys lock securely into place. Close the doors and ensure the racks do not interfere with the door seals or window operation.

    Common Mistakes to Avoid

    Even experienced DIYers can make errors. Here are the most frequent pitfalls when learning how to install a roof rack on a Honda Odyssey:

    MistakeConsequenceSolution
    Overtightening ClampsDamaged rails or stripped boltsUse a torque wrench; stop when snug.
    Uneven SpacingIncreased wind noise and dragMeasure twice from fixed points.
    Ignoring Weight LimitsRoof deformation or safety hazardStick to the 165 lbs dynamic limit.
    Forgetting to LockTheft of the rack or cargoAlways engage the locking mechanism.

    Maintenance and Care Tips

    Once installed, your roof rack requires minimal but consistent maintenance to ensure longevity.

    1. Regular Cleaning: Wash the racks with mild soap and water during regular car washes. Remove bird droppings and tree sap immediately, as they can corrode metal finishes.
    2. Check Tightness Monthly: Vibrations from driving can loosen bolts over time. Check the torque settings every month or before long trips.
    3. Lubricate Locks: Apply a small amount of graphite lubricant to the keyholes twice a year to prevent sticking.
    4. Winter Care: If you live in a snowy area, remove ice buildup from the base of the clamps before attempting to adjust or remove the racks.

    For more detailed information on vehicle safety standards and load distribution, you can refer to general automotive safety guidelines on Wikipedia.

    FAQ Section

    1. Can I leave my roof rack on my Honda Odyssey all the time?

    Yes, you can leave the crossbars on permanently. However, removing them when not in use improves fuel efficiency by reducing aerodynamic drag and wind noise. If you leave them on, ensure they are locked and inspected regularly.

    2. What is the weight limit for a Honda Odyssey roof rack?

    The dynamic weight limit (while driving) for most Honda Odyssey models is approximately 165 lbs. The static weight limit (when parked) is significantly higher, often around 700 lbs, but you should never load heavy items while the vehicle is stationary if you plan to drive with that load.

    3. Will installing a roof rack void my warranty?

    No, installing a roof rack that uses existing mounting points or clamps onto factory rails does not void your vehicle’s warranty. However, damage caused by improper installation or overloading may not be covered. Always follow the manufacturer’s instructions.

    4. How do I reduce wind noise from my roof rack?

    Wind noise is often caused by poor alignment or gaps between the bar and the rail. Ensure the bars are perfectly parallel and tightened correctly. Some aftermarket fairings or wind deflectors can also help reduce noise significantly.

    5. Can I install a roof rack on a Honda Odyssey without side rails?

    Yes, but you need a specific kit designed for “naked roofs” or flush mounts. These kits use clips that go inside the door jambs or bolt into hidden mounting points. It is crucial to buy a kit specifically labeled for your Odyssey’s year and trim level.

    Conclusion

    Learning how to install a roof rack on a Honda Odyssey empowers you to make the most of your vehicle’s versatility. Whether you are hauling camping gear, bicycles, or extra luggage, a properly installed roof rack offers a safe and efficient solution. By following the steps outlined above, checking your torque settings, and respecting weight limits, you can enjoy peace of mind on every journey.

    Remember, safety is paramount. Take your time during installation, double-check your measurements, and maintain your equipment regularly. If you found this guide helpful, please share it with fellow Honda Odyssey owners on social media. Happy travels!

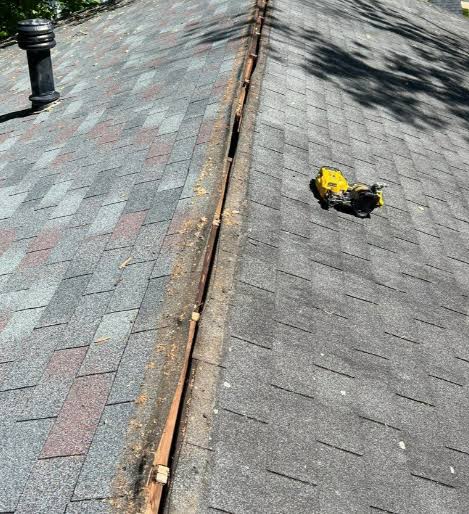
  • How to Install a Ridge Vent on a Shingle Roof

    How to Install a Ridge Vent on a Shingle Roof

    Is your attic trapping heat like an oven, causing your AC to work overtime? Poor ventilation can lead to premature shingle failure and costly moisture damage. Learning how to install a ridge vent on a shingle roof is one of the most effective DIY upgrades you can make to protect your home’s structural integrity and improve energy efficiency.

    In this comprehensive guide, we will walk you through the entire process, from safety preparations to the final shingle placement. Whether you are a seasoned DIYer or a cautious homeowner, this tutorial provides the clarity and confidence you need to get the job done right.

    Why Ridge Vents Are Superior for Attic Ventilation

    Before we pick up a hammer, it is crucial to understand why you are doing this. Ridge vents are widely considered the gold standard in residential roofing ventilation. Unlike box vents or turbine vents that puncture the roof field, ridge vents run continuously along the peak of your roof.

    This continuous design allows hot air and moisture to escape uniformly across the entire length of the attic. According to building science principles, proper ventilation requires a balance of intake (usually at the soffits) and exhaust (at the ridge). A ridge vent creates a natural convection current, often referred to as the “stack effect,” which pulls cool air in from the bottom and pushes hot air out the top.

    The Benefits at a Glance

    FeatureRidge VentBox/Turbine Vents
    AestheticsLow profile, nearly invisibleBulky, visible protrusions
    CoverageContinuous exhaust along the peakSpot ventilation only
    Leak RiskLow (if installed correctly)Higher (multiple penetration points)
    MaintenanceMinimal to noneMoving parts may jam or wear out

    By choosing a ridge vent, you are opting for a solution that is both aesthetically pleasing and functionally superior. For more detailed information on building standards regarding ventilation, you can refer to general construction guidelines on Wikipedia.

    Essential Tools and Materials Checklist

    Preparation is half the battle in any roofing project. Having the right tools on hand prevents unnecessary trips up and down the ladder, keeping you safe and efficient.

    Tools Required:

    • Circular saw with a depth-adjustable blade
    • Reciprocating saw (for cutting near obstacles)
    • Hammer or pneumatic nail gun
    • Chalk line
    • Tape measure
    • Utility knife
    • Safety harness and non-slip shoes
    • Ladder stabilizer

    Materials Needed:

    • Ridge vent rolls (plastic or aluminum)
    • Roofing nails (galvanized, 1-3/4 inch)
    • Cap shingles (matching your existing roof color)
    • Roofing cement (optional, for extra sealing)
    • Drip edge flashing (if replacing old ridge caps)
    How To Install A Ridge Vent On A Shingle Roof

    Step-by-Step Guide: How to Install a Ridge Vent on a Shingle Roof

    Follow these steps carefully. Remember, working on a roof involves height risks. If you feel uncomfortable at any point, please consult a professional roofer.

    Step 1: Safety First and Site Preparation

    Never underestimate the danger of a sloped surface. Ensure your ladder is secure and use a roof anchor system if the pitch is steep. Check the weather forecast; you need a dry, calm day. Wet shingles are slippery, and wind can make handling large rolls of ridge vent difficult.

    Clear the work area of debris. If there are old box vents near the ridge, plan to remove them later, as the ridge vent will replace their function.

    Step 2: Remove Existing Ridge Cap Shingles

    Start by removing the existing cap shingles along the ridge line. Use a flat bar or pry bar to gently lift the nails. Be careful not to damage the underlying field shingles too much, although some wear is expected.

    Remove all nails and debris. You should expose the original ridge board or the top layer of sheathing. Measure the length of the ridge where you intend to install the vent.

    Step 3: Mark and Cut the Ventilation Slot

    This is the most critical technical step. You need to cut a slot along the peak of the roof to allow air to flow from the attic into the vent.

    1. Measure: Determine the width of the slot based on the manufacturer’s instructions for your specific ridge vent product. Typically, this is between 2 to 3 inches wide.
    2. Mark: Snap a chalk line on both sides of the ridge centerline to ensure a straight cut.
    3. Set Depth: Adjust your circular saw blade depth to exactly 1 inch. This is vital. You want to cut through the roof sheathing (plywood or OSB) but not through the rafters or trusses below. Cutting into structural members compromises the roof’s integrity.
    4. Cut: Carefully cut along the chalk lines. Use a reciprocating saw for the ends or around any obstructions like plumbing stacks.

    Remove the cut strip of wood. You should now see the open attic space below. Check for any protruding nails from the underside and hammer them flat.

    Step 4: Install the Ridge Vent Roll

    Unroll the ridge vent material along the peak. Most modern ridge vents come in flexible rolls that conform to the roof’s shape.

    1. Positioning: Center the vent over the slot you just cut. The mesh or baffles inside the vent should face downward into the attic.
    2. Securing: Start at one end of the ridge. Nail the vent down using galvanized roofing nails. Place nails every 6 to 8 inches along the flange of the vent.
    3. Overlap: If you need multiple rolls, overlap the ends by at least 2 inches to ensure continuous airflow and prevent water intrusion.

    Ensure the vent lies flat against the roof deck. Any gaps can allow rain-driven snow or insects to enter.

    Step 5: Install the Cap Shingles

    Now that the vent is secure, you need to cover it with shingles to protect it from the elements and blend it with your roof.

    1. Prepare Cap Shingles: If you don’t have pre-cut cap shingles, you can cut standard three-tab shingles into thirds.
    2. Nailing Pattern: Place the first cap shingle at the end of the ridge. Nail it down with two nails per side, ensuring the nails penetrate the vent’s nailing flange but do not pierce the ventilation channel itself.
    3. Overlapping: Each subsequent shingle should overlap the previous one by about 5 to 6 inches, following the exposure line recommended by the shingle manufacturer. This ensures water sheds correctly down the roof.
    4. Sealing: In high-wind areas, apply a dab of roofing cement under the leading edge of each cap shingle for added security.

    Continue this process until you reach the other end of the ridge. Trim the final shingle to fit flush with the edge of the roof.

    Common Mistakes to Avoid

    Even experienced DIYers can stumble. Here are the most frequent errors when learning how to install a ridge vent on a shingle roof:

    • Cutting Too Deep: As mentioned, cutting into rafters is a structural hazard. Always double-check your saw depth.
    • Blocking Airflow: Ensure that insulation in the attic does not block the soffit vents. If air cannot get in, it cannot get out through the ridge vent.
    • Using Wrong Nails: Standard steel nails will rust quickly. Always use galvanized or stainless steel roofing nails to prevent staining and failure.
    • Ignoring Local Codes: Some municipalities have specific requirements for net free vent area (NFVA). Check your local building codes before starting.

    FAQ Section

    1. Can I install a ridge vent on an existing roof without replacing all shingles?

    Yes, you can. The process involves removing only the ridge cap shingles and cutting the slot. The field shingles remain intact. However, if your existing shingles are very old or brittle, they may crack during the process, so proceed with caution.

    2. How long does it take to install a ridge vent?

    For an average-sized home (approx. 2,000 sq. ft.), a two-person team can typically complete the installation in 4 to 6 hours. A solo DIYer might take a full day, especially if it is their first time.

    3. Do ridge vents leak?

    When installed correctly, ridge vents are highly resistant to leaks. The key is proper nailing and overlapping of cap shingles. The design allows water to shed over the top while air escapes from the sides. Using roofing cement on nail heads can provide extra peace of mind.

    4. What if my roof has no soffit vents?

    Ridge vents require intake ventilation to work effectively. If you do not have soffit vents, you may need to install them or use drip-edge vents. Without adequate intake, the ridge vent will not create the necessary airflow, and you might even pull conditioned air from your living space into the attic.

    5. Is plastic or aluminum ridge vent better?

    Both materials are effective. Plastic vents are flexible and easier to install on complex roof lines. Aluminum vents are more rigid and durable but can be harder to bend around curves. Choose the material that best fits your roof’s geometry and your comfort level with installation.

    Conclusion

    Learning how to install a ridge vent on a shingle roof is a rewarding project that pays dividends in comfort and cost savings. By improving your attic’s airflow, you reduce the strain on your HVAC system, prevent moisture buildup, and extend the lifespan of your roofing materials.

    Remember, safety is paramount. Take your time, measure twice, and cut once. If you follow the steps outlined above, you will achieve a professional-looking result that enhances your home’s value.

    Did you find this guide helpful? Share it with your friends on social media who might be considering similar home improvements! Let’s help more homeowners breathe new life into their roofs.

  • How To Get To The Roof In Most Wanted Bo6

    How To Get To The Roof In Most Wanted Bo6

    Are you staring at a locked door or a high ledge in Call of Duty: Black Ops 6, wondering if you’ve missed a secret switch? You are not alone. Many players find themselves stuck during the intense “Most Wanted” operations, specifically when the objective requires vertical movement that isn’t immediately obvious. Knowing how to get to the roof in Most Wanted Bo6 is crucial for progressing through the campaign and securing those vital tactical advantages.

    In this guide, we will break down the exact mechanics, map layouts, and hidden pathways you need to reach those elevated positions. Whether you are playing on console or PC, these steps are designed to save you time and frustration. Let’s dive into the details so you can dominate the battlefield from above.


    Understanding the “Most Wanted” Objective

    Before we climb, it is essential to understand what the game is asking of you. In Black Ops 6, the “Most Wanted” contracts often involve tracking down high-value targets who use the environment to their advantage. These targets frequently retreat to rooftops to gain a sniper’s vantage point or to escape via helicopter.

    The confusion usually stems from the fact that BO6 introduces more complex verticality than previous titles. Unlike older games where a ladder was always visible, Black Ops 6 relies on environmental storytelling and parkour-like mechanics. If you are looking for a traditional ladder, you might be looking in the wrong place. Instead, you need to look for interactable objects, stackable crates, or specific wall-run opportunities.

    According to general gaming design principles, developers use vertical spaces to reward exploration. By reaching the roof, you often unlock a secondary objective, such as hacking a terminal or finding intel that reveals the next mission location.

    How To Get To The Roof In Most Wanted Bo6

    Step-by-Step Guide: How To Get To The Roof In Most Wanted Bo6

    Reaching the roof is rarely a single action; it is a sequence of movements. Here is the definitive breakdown of how to execute this maneuver efficiently.

    1. Identify the Access Point

    Not every building in the “Most Wanted” zone is accessible. Look for buildings with:

    • Broken Windows: These often indicate an entry point to an interior staircase.
    • Scaffolding: Temporary construction structures are classic climbing aids in COD.
    • Ventilation Units: Large AC units on lower ledges can sometimes be jumped onto.

    Pro Tip: Use your tactical camera (if equipped) to scan for highlighted interactables. The game engine usually highlights climbable surfaces with a subtle white glow when you are close enough.

    2. Utilize the New Movement Mechanics

    Black Ops 6 brings back and refines several movement options. To get to the roof, you may need to combine them:

    • Slide-Canceling: Build momentum by sliding down a slope and canceling into a jump. This gives you extra height to reach higher ledges.
    • Wall Running: If the architecture permits, run along the side wall to gain vertical distance before jumping to the roof edge.
    • Ziplines: Check for nearby ziplines. Sometimes the fastest way to the roof is not climbing up, but zipping over from an adjacent taller building.

    3. The “Stack and Jump” Method

    In many urban maps within the “Most Wanted” contract, direct climbing is impossible. You must create your own path.

    1. Locate wooden crates or debris piles near the base of the target building.
    2. Shoot or melee the crates to rearrange them if they are blocked.
    3. Stack yourself by jumping on the highest crate.
    4. Perform a standing jump to grab the ledge of the first floor balcony.
    5. From the balcony, look for an open window or a fire escape ladder leading to the roof.

    4. Interacting with Rooftop Mechanisms

    Once you are on the roof, the job isn’t done. You often need to interact with a specific object to complete the “Most Wanted” task.

    • Hack the Drone Relay: Often found near the edge of the roof.
    • Secure the Package: Look for a glowing yellow box.
    • Eliminate the Target: Ensure you have cover before engaging, as enemies may spawn from helipads.

    Common Mistakes Players Make

    Even experienced players stumble here. Avoid these pitfalls to ensure a smooth experience.

    MistakeConsequenceSolution
    Ignoring Audio CuesMissing enemy patrols on the roof.Wear headphones; listen for footsteps above.
    Rushing the ClimbFalling off and taking damage.Move deliberately; check for slip edges.
    Forgetting AmmoRunning dry during the rooftop fight.Restock before ascending; roofs offer no cover for looting.
    Missing the Ledge GrabFailing the jump repeatedly.Aim slightly higher than the visual edge; the hitbox is generous.

    Why Vertical Control Matters in BO6

    Securing the roof is not just about completing a checklist item; it is a strategic imperative. In Call of Duty, high ground provides a significant statistical advantage in gunfights.

    From a tactical perspective, holding the roof allows you to:

    1. Monitor Flanks: You can see enemies approaching from multiple streets.
    2. Control Spawn Points: In multiplayer modes tied to these maps, controlling the roof can suppress enemy spawns.
    3. Access Exclusive Loot: High-tier weapons and attachments are often placed in hard-to-reach areas to balance their power.

    For more context on how verticality influences modern shooter design, you can refer to the general concepts of level design in video games on Wikipedia, which explains why developers incentivize exploration.


    Troubleshooting: What If You Still Can’t Reach It?

    If you have followed the steps above and still cannot find the path, consider these factors:

    • Check Your Mission Log: Press the map button. Does the objective marker move? Sometimes the “roof” is actually a terrace on a neighboring building.
    • Look for Breakable Walls: BO6 features destructible environments. A seemingly solid wall might hide a staircase. Use explosives or heavy weapons to test suspicious walls.
    • Co-op Coordination: If you are playing in Spec Ops or co-op mode, one player may need to hold a switch while the other climbs. Communicate with your team. “I’ll cover you while you boost up” is a common strategy.

    FAQ Section

    Q1: Is there a specific button to climb to the roof in Most Wanted Bo6? A: There is no single “climb roof” button. You must use the standard jump button (Space on PC, X on PlayStation, A on Xbox) combined with movement toward climbable ledges. The game will automatically trigger a mantle animation if you are positioned correctly.

    Q2: Can I use a vehicle to get to the roof? A: Generally, no. While Black Ops 6 features drivable vehicles, they cannot drive up buildings. However, you can use a vehicle to ram through a ground-floor wall to access an interior staircase that leads to the roof.

    Q3: What if I fall off while trying to get to the roof? A: Falling from significant heights will cause damage or death. If you fall, respawn or reload your last checkpoint. Try using the “slide-cancel” technique to gain more height on your jumps, or look for alternative routes like scaffolding.

    Q4: Are there different ways to get to the roof depending on the difficulty? A: The physical path remains the same across all difficulties. However, on higher difficulties (like Veteran), enemy accuracy and aggression on the roof will be much higher. It is recommended to throw a stun grenade or smoke bomb before peeking over the final ledge.

    Q5: Does getting to the roof unlock any achievements? A: Yes, completing the “Most Wanted” contract objectives, including accessing restricted areas like rooftops, contributes to your overall campaign completion percentage and may unlock specific challenge ribbons or XP bonuses.

    Q6: Can I skip the roof section? A: No. The roof section is typically a mandatory part of the script for the “Most Wanted” mission. You must access it to trigger the next phase of the storyline or to extract the target.


    Conclusion

    Mastering how to get to the roof in Most Wanted Bo6 is a rite of passage for every Black Ops 6 player. It requires a mix of observation, precise movement, and tactical awareness. By identifying the correct access points, utilizing the new movement mechanics, and avoiding common mistakes, you can turn a frustrating obstacle into a strategic advantage.

    Remember, the roof is not just a destination; it is a tool. Use it to control the battlefield, secure intel, and outmaneuver your opponents. Now that you know the secrets of vertical navigation, go out there and complete that contract.

    Did this guide help you reach the top? Share this article with your squad on social media so everyone can stop falling off ledges and start dominating the skies! Happy gaming.

  • Escape the Nether Roof: Bedrock Guide

    Escape the Nether Roof: Bedrock Guide

    Have you ever soared above the bedrock ceiling in Minecraft’s Nether, only to realize there is no ladder, door, or obvious way back down? It is a thrilling view, but it quickly turns into a panic-inducing trap if you are not prepared. If you are wondering how to get off the Nether roof in Bedrock Edition, you are not alone; this is one of the most common dilemmas for explorers who accidentally clip through the ceiling while building or fighting phantoms.

    The good news is that you do not need creative mode or external tools to escape. With a bit of knowledge about game mechanics and some careful planning, you can return to the lava-filled depths safely. This guide will walk you through every viable method, from simple water buckets to advanced pearl chaining, ensuring you never feel stranded again.

    Why Is Getting Down So Difficult?

    Before we dive into the solutions, it helps to understand why the Nether roof is such a unique challenge in the Bedrock Edition of Minecraft. Unlike the Java Edition, where players can often use specific glitches or pistons more freely, Bedrock has stricter physics and different block behaviors.

    The Nether roof is located at Y-level 128. Below you lies 127 blocks of empty space before you hit the actual Nether terrain. Falling from this height without preparation results in instant death, as fall damage caps out well before you reach the bottom. Furthermore, you cannot simply place a ladder on the underside of bedrock because bedrock is an unbreakable, non-placeable surface in survival mode.

    According to general gaming physics principles applied in sandbox environments, vertical traversal requires either a continuous solid path or a mechanic that negates fall damage. In the Nether, water evaporates instantly, removing the most common safety net used in the Overworld. This leaves players with limited options, making the descent a test of resource management and precision.

    Method 1: The Water Bucket Clutch (If You Have Water)

    Many players assume water is useless in the Nether because it evaporates upon placement. However, if you are quick enough, you can use water to break your fall. This method is risky but effective if you have no other resources.

    Step-by-Step Execution:

    1. Prepare Your Slot: Ensure your water bucket is in your hotbar and selected.
    2. Jump Off the Edge: Do not jump straight down from the center of the roof. Move to the edge where the bedrock ends.
    3. Timing Is Key: As you fall, wait until you are approximately 10–15 blocks above the Nether floor.
    4. Place and Retrieve: Quickly place the water beneath you. It will begin to evaporate, but for a split second, it exists. Jump into it or let it break your fall. Immediately retrieve the bucket if possible, though saving your life is the priority.

    Note: This method requires high ping stability and quick reflexes. If you are playing on a console with controller input lag, consider this a last resort.

    Method 2: The Ender Pearl Chain (Safest & Most Reliable)

    For most players, especially those who have explored End Cities or traded with Clerics, Ender Pearls are the gold standard for vertical travel. This method allows you to teleport down in controlled increments, avoiding fall damage entirely.

    How to Execute:

    1. Gather Pearls: You need at least 5–10 Ender Pearls for a safe descent.
    2. Look Down: Aim your crosshair directly at the ground below.
    3. Throw and Teleport: Throw an Ender Pearl. As soon as it lands, you will teleport to its location.
    4. Repeat: Continue throwing pearls downward. Each teleport resets your fall distance, meaning you take zero fall damage.
    5. Land Safely: Once you are within 3–4 blocks of the ground, you can simply jump down or place a block to stand on.

    This technique is widely recommended by community experts because it is consistent across all Bedrock platforms, including mobile, console, and PC. It does not rely on glitchy mechanics that might be patched in future updates.

    Method 3: Building a Pillar Down (Resource Heavy)

    If you lack Ender Pearls and water, you can build your way down. This is the safest method regarding survival certainty but the slowest and most resource-intensive.

    Requirements:

    • At least 128 buildable blocks (cobblestone, dirt, netherrack).
    • A shield or good armor (in case of Ghast attacks).

    Steps:

    1. Stand at the Edge: Position yourself so you are looking slightly downward and outward.
    2. Place a Block: Place a block beneath your feet.
    3. Back Up: Move backward onto the new block.
    4. Repeat: Continue placing blocks and moving backward. You are essentially building a staircase or a vertical pillar downwards.
    5. Defend Yourself: Be aware that building slowly makes you a target for Ghasts. Keep your sword ready.

    While tedious, this method guarantees you will not die from fall damage or failed tricks. It is ideal for players who are early in their survival journey and have not yet acquired rare items.

    How To Get Off The Nether Roof In Bedrock Edition

    Comparison of Descent Methods

    To help you decide which method suits your current situation, refer to the table below:

    MethodResources NeededRisk LevelSpeedBest For
    Ender Pearl Chain5-10 Ender PearlsLowFastMid-to-Late Game Players
    Water Bucket Clutch1 Water BucketHighInstantEmergency Situations
    Pillar Down128+ BlocksVery LowSlowEarly Game / No Items
    Respawn Anchor LoopRespawn Anchor + GlowstoneMediumMediumBase Near Roof Access

    Data based on community testing and standard Minecraft Bedrock mechanics.

    Preventing Future Accidents

    Once you are back on solid ground, you might want to ensure you do not end up on the roof again accidentally. The most common way players get stuck is by using ender pearls to teleport up through thin gaps in the bedrock ceiling during combat with Phantoms or while exploring.

    To prevent this, always check your surroundings before teleporting. If you are building near the ceiling, leave a one-block gap between your structure and the bedrock. This prevents accidental clipping. Additionally, keeping a stack of cobblestone and a water bucket in your hotbar at all times is a best practice for any Nether expedition.

    For more detailed information on Nether biome mechanics and generation, you can refer to the official Minecraft Wiki page on the Nether, which provides comprehensive data on block properties and mob spawning rules.

    FAQ: Common Questions About the Nether Roof

    1. Can I use a boat to get down from the Nether roof?

    No, boats cannot be placed on the underside of bedrock, and placing them in mid-air is not possible in Bedrock Edition. Boats require a solid surface or water to exist. Therefore, this method is not viable for descending from the roof.

    2. Does drinking a Potion of Slow Falling help?

    Yes, but you must brew it in advance. A Potion of Slow Falling (made with Phantom Membrane) will reduce your fall speed significantly. If you drink it before jumping, you can float down safely. However, the effect lasts only 1:30 minutes, which is enough time to fall 128 blocks slowly. This is an excellent alternative if you have access to the End.

    3. Why can’t I just break the bedrock?

    Bedrock is an indestructible block in survival mode. No tool, explosion, or glitch in standard Bedrock Edition allows you to mine it. This is a hard-coded game rule to prevent players from falling into the void unintentionally or breaking the map structure.

    4. What if I am playing on a Realm and have no items?

    If you are on a Realm and have no resources, your only option may be to ask an admin or operator to teleport you down using commands like /tp @s ~ ~5 ~. If you are solo and have no items, you unfortunately may need to accept death and respawn at your bed, losing your inventory. Always prepare before going to the roof.

    5. Is there a difference between Bedrock and Java for this issue?

    Yes. In Java Edition, players can use pistons and slime blocks to create elevators that work differently due to quasi-connectivity and update order differences. Bedrock Edition does not support these specific piston glitches, making Ender Pearls and water buckets the primary reliable methods for Bedrock players.

    6. Can Ghasts knock me off the roof?

    Absolutely. Ghasts can spawn in the open areas of the Nether and can see you on the roof. Their fireballs deal significant damage and can knock you off the edge. Always carry a bow or crossbow to defend yourself while you plan your descent.

    Conclusion

    Getting stuck on the Nether roof is a rite of passage for many Minecraft players, but it does not have to end in disaster. By understanding the mechanics of how to get off the Nether roof in Bedrock Edition, you can turn a potential game-over screen into a minor inconvenience.

    Whether you choose the precision of Ender Pearls, the brute force of building a pillar, or the adrenaline rush of a water bucket clutch, the key is preparation. Always keep emergency items in your hotbar and stay aware of your vertical position when exploring the upper limits of the Nether.

    Did this guide help you escape the heights? Share this article with your Minecraft friends on social media so they don’t get stuck next time! Happy mining, and stay safe below the bedrock.