Blog

  • How to Attach Christmas Lights to a Metal Roof

    How to Attach Christmas Lights to a Metal Roof

    Hanging holiday decorations on a metal roof can feel like walking a tightrope between festive cheer and potential property damage. Many homeowners worry about puncturing their expensive roofing material or dealing with slippery surfaces during winter installations. If you are wondering how do you attach Christmas lights to a metal roof without causing leaks or voiding your warranty, you are in the right place. This guide provides safe, professional-approved methods to secure your lights effectively while keeping your roof intact.


    Why Metal Roofs Require Special Care

    Metal roofs are durable and long-lasting, but they present unique challenges for holiday decorators. Unlike asphalt shingles, which have texture and gaps that allow for easy clipping, metal panels are smooth, slick, and often coated with delicate finishes.

    Drilling holes or using adhesive tapes incorrectly can compromise the protective coating, leading to rust or water infiltration. According to industry standards, maintaining the integrity of the metal panel’s seal is crucial for the longevity of the roof. Therefore, the method you choose must be non-invasive and secure enough to withstand wind and snow loads.

    The Best Tools for the Job: Choosing the Right Clips

    The secret to a successful installation lies in selecting the correct hardware. Standard plastic clips designed for gutters or shingles often fail on metal roofs because they cannot grip the smooth surface or the specific profile of standing seam panels.

    1. Standing Seam Clips

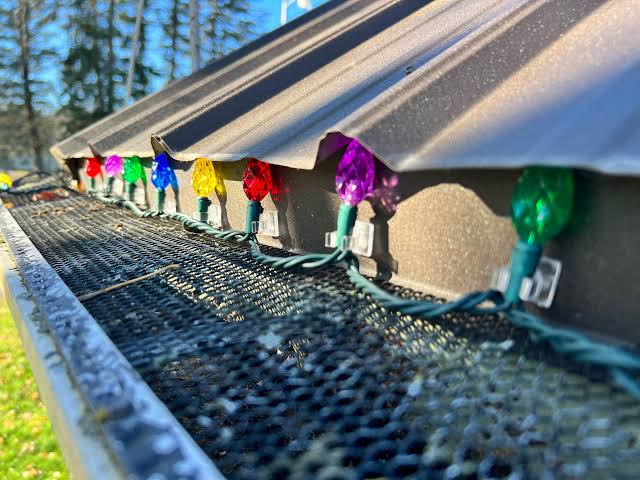
    If you have a standing seam metal roof (where panels connect via raised vertical legs), specialized standing seam clips are your best option. These clips slide under the seam cap without penetrating the metal. They hold the wire securely and are invisible from the ground once installed.

    2. Magnetic Hooks and Clips

    For flat metal sections or corrugated profiles, heavy-duty magnetic hooks offer a versatile solution. Ensure you use magnets with rubber coatings to prevent scratching the paint finish. These are excellent for temporary setups but may shift in high winds if not paired with additional securing methods.

    3. Adhesive-Backed Clips (Use with Caution)

    Some manufacturers offer UV-resistant, adhesive-backed clips specifically rated for metal surfaces. While convenient, these should only be used if the roof surface is thoroughly cleaned and dried. Note that removal can sometimes leave residue or damage older paint finishes.

    Clip TypeBest ForDurabilityRisk of Damage
    Standing Seam ClipsRaised seam panelsHighNone
    Magnetic HooksFlat/Corrugated metalMediumLow (if coated)
    Adhesive ClipsSmooth surfacesLow-MediumModerate
    Gutter ClipsMetal gutters onlyHighNone
    How Do You Attach Christmas Lights To A Metal Roof

    Step-by-Step Guide: How to Install Lights Safely

    Follow these detailed steps to ensure your installation is both beautiful and safe. Always prioritize personal safety over aesthetic perfection.

    Step 1: Inspect and Clean the Surface

    Before handling any lights, inspect your roof for loose panels or sharp edges. Use a soft brush to remove debris, dirt, or oxidation from the area where you plan to attach the clips. A clean surface ensures better adhesion for magnetic or adhesive options.

    Step 2: Plan Your Layout

    Measure the length of your roofline and calculate the total footage of lights needed. It is recommended to buy 10–15% more than you think you need to account for corners and mistakes. Map out where your power source is located to avoid using excessive extension cords, which can be tripping hazards.

    Step 3: Install the Clips First

    Do not try to attach lights and clips simultaneously. Install all the clips along the roofline first.

    • For Standing Seams: Slide the clip under the seam cap at intervals of 12–18 inches. Ensure it snaps firmly into place.
    • For Magnetic Hooks: Place them evenly along the edge, ensuring they are aligned straight.

    Step 4: Attach the Lights

    Once the clips are secure, snap the light strand into each clip. Start from the power source and work your way outward. Avoid pulling the wire taut; leave a slight slack to accommodate thermal expansion and contraction of the metal roof during temperature changes.

    Step 5: Secure the Power Cord

    Use weatherproof cable ties or additional clips to secure the main power cord along the roof edge. This prevents wind from whipping the cord around, which could dislodge your lights or damage the roof coating.

    Critical Safety Precautions

    Working on a metal roof during winter poses significant risks. Slips and falls are common due to ice, frost, or even morning dew on the smooth metal surface.

    • Use Proper Footwear: Wear shoes with rubber soles that provide maximum grip. Avoid boots with hard plastic or worn-out treads.
    • Check the Weather: Never attempt installation if rain, snow, or high winds are forecasted. Wet metal is extremely slippery.
    • Use a Harness: If your roof has a steep pitch, use a safety harness anchored to a secure point. Do not rely solely on ladders.
    • Electrical Safety: Ensure all lights are rated for outdoor use (look for the UL label). Use GFCI-protected outlets to prevent electrical shocks.

    For more information on electrical safety standards, you can refer to the National Electrical Code overview on Wikipedia.

    Common Mistakes to Avoid

    Even experienced DIYers make errors when dealing with metal roofs. Here are the most frequent pitfalls:

    1. Using Screws or Nails: Never penetrate the metal panel to hang lights. This creates immediate leak points and voids most manufacturer warranties.
    2. Ignoring Thermal Expansion: Metal expands and contracts with temperature changes. If your lights are pulled too tight, the wires can break or pull the clips off during cold snaps.
    3. Overloading Circuits: Calculate the amperage of your light strands. Overloading a circuit can trip breakers or cause fire hazards. LED lights are recommended as they consume significantly less power.
    4. Leaving Lights Up Too Long: Prolonged exposure to sun and weather can degrade the plastic clips and wire insulation. Remove your lights within a few weeks after the holidays.

    FAQ Section

    Q1: Will magnetic clips scratch my metal roof?

    Standard bare magnets can scratch the paint or coating if they slide. However, high-quality magnetic hooks designed for automotive or roofing use come with rubber or felt coatings. These protect the finish while providing strong hold. Always test a small, inconspicuous area first.

    Q2: Can I use adhesive tape to stick lights directly to the roof?

    It is not recommended. Most household tapes lose adhesion in cold temperatures and leave difficult-to-remove residue. Furthermore, removing the tape can peel off the paint or protective coating of the metal roof. Always use purpose-built clips.

    Q3: How far apart should I place the clips?

    For standard mini-lights or LED strands, place clips every 12 to 18 inches. If you are using heavier rope lights or larger bulbs, reduce the distance to 6–10 inches to prevent sagging. Consistent spacing ensures a professional, neat appearance.

    Q4: Is it safe to walk on a metal roof in winter?

    Walking on a metal roof in winter is hazardous due to potential ice and slick surfaces. If possible, install lights from a sturdy ladder using an extension pole or hook tool. If you must go on the roof, ensure it is dry, wear non-slip footwear, and use fall protection gear.

    Q5: What type of lights are best for metal roofs?

    LED lights are the best choice. They generate less heat, reducing the risk of melting plastic clips or damaging the roof coating. They are also lighter, putting less stress on the attachment points, and are more energy-efficient.

    Q6: Will installing clips void my roof warranty?

    Non-penetrating clips, such as standing seam clips or magnetic hooks, generally do not void warranties because they do not alter the structure or integrity of the roof. However, drilling holes or using harsh adhesives likely will. Always check your specific manufacturer’s warranty guidelines before proceeding.

    Conclusion

    Learning how do you attach Christmas lights to a metal roof is all about choosing the right tools and prioritizing safety. By using non-invasive methods like standing seam clips or coated magnetic hooks, you can create a stunning holiday display without compromising your roof’s integrity. Remember to plan your layout, respect the weather conditions, and never penetrate the metal surface.

    Your home deserves to shine this holiday season, but not at the expense of your roof’s longevity. Take your time, use the right equipment, and enjoy the festive glow. If you found this guide helpful, please share it with your friends and neighbors on social media to help them decorate safely too!
  • Best Way To Get Rid Of Ice Dams On Roof

    Best Way To Get Rid Of Ice Dams On Roof

    There is nothing quite as unsettling as hearing the drip-drip-drip of water inside your walls during the dead of winter. For many homeowners in the US, ice dams are not just a nuisance; they are a silent threat that can cause thousands of dollars in structural damage if left unchecked. If you are staring up at those jagged ridges of ice and wondering about the best way to get rid of ice dams on roof, you have come to the right place.

    In this guide, we will walk you through safe, effective, and professional-approved methods to handle this icy menace. We prioritize safety above all else, ensuring you protect both your home and yourself while tackling this common winter woe.

    Why Do Ice Dams Form? Understanding the Enemy

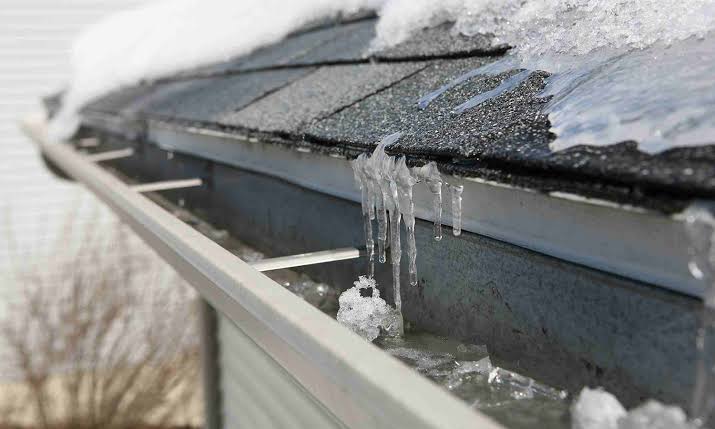
    Before we dive into removal, it is crucial to understand why these ice blocks form. An ice dam occurs when snow melts on the upper, warmer part of your roof, runs down, and refreezes at the colder eaves (the edge of the roof). This creates a barrier that traps subsequent melting water behind it.

    This trapped water has nowhere to go but up—under your shingles, into your insulation, and eventually, onto your ceiling. According to insurance industry data, water damage from ice dams is one of the most frequent winter-related home insurance claims in northern states.

    The root cause is usually uneven roof temperatures. Your attic is likely too warm, heating the roof deck and melting the snow from below, while the eaves remain freezing cold because they extend beyond the heated living space.

    Immediate Action: Safe Removal Methods

    When you spot an ice dam, time is of the essence. However, panic leads to mistakes. Here are the safest ways to address the problem immediately.

    1. Use Calcium Chloride Ice Melt (The Gold Standard)

    Many homeowners make the critical mistake of using rock salt (sodium chloride). Do not do this. Rock salt is highly corrosive and can damage your roof shingles, gutters, paint, and surrounding landscaping.

    Instead, opt for calcium chloride. It is safer for roofing materials and works effectively in lower temperatures.

    Step-by-Step Application:

    1. Fill Nylon Stockings: Take a pair of old nylon pantyhose or socks. Fill them with calcium chloride ice melt pellets. Tie the end securely.
    2. Position Vertically: Lay the filled stocking vertically across the ice dam, perpendicular to the gutter. Ensure it crosses from the top of the dam down into the gutter.
    3. Wait for Channels: As the calcium chloride dissolves, it will melt a channel through the ice. This allows the trapped water behind the dam to drain freely off the roof.
    4. Repeat if Necessary: For large dams, place multiple stockings every 3–4 feet along the roofline.

    This method is passive and safe. It does not require you to climb onto the roof or use sharp tools that could puncture your shingles.

    2. Professional Steam Removal

    If the ice dam is massive or if you are uncomfortable handling chemicals, hiring a professional with a steam generator is the best way to get rid of ice dams on roof without physical labor.

    Professionals use high-temperature, low-pressure steam to melt the ice instantly.

    • Pros: Immediate results, no chemical residue, zero risk of damaging shingles if done correctly.
    • Cons: More expensive than DIY methods; requires scheduling.

    Note: Always verify that the contractor uses steam, not high-pressure hot water, which can strip granules off your asphalt shingles.

    Best Way To Get Rid Of Ice Dams On Roof

    What NOT To Do: Avoiding Costly Mistakes

    In the rush to fix the leak, many homeowners resort to dangerous or destructive tactics. Avoid these common pitfalls:

    MethodWhy It’s DangerousPotential Damage
    Chipping with Axe/HammerHigh risk of slipping; easy to hit the roof deck.Punctured shingles, cracked underlayment, personal injury.
    Using Rock SaltCorrosive chemical reaction.Rusty gutters, killed plants, degraded asphalt shingles.
    Hot Water HoseWater refreezes quickly, creating more ice.Slippery roof surface, increased ice mass, thermal shock to shingles.
    Climbing on Icy RoofExtreme fall hazard.Severe bodily harm or death.

    As emphasized by safety guidelines, never attempt to physically chip away ice unless you are a trained professional with proper harnesses and safety gear. The risk of falling far outweighs the benefit of quick removal.

    Long-Term Prevention: Stopping Ice Dams Before They Start

    Removing the ice is only half the battle. To ensure you don’t face this issue next winter, you must address the underlying causes: heat loss and poor ventilation.

    Improve Attic Insulation

    The primary driver of ice dams is heat escaping from your living space into the attic. This warms the roof deck, melting the snow.

    • Check R-Value: Ensure your attic insulation meets the recommended R-value for your climate zone. For most northern US states, an R-value of 49 to 60 is recommended.
    • Seal Air Leaks: Look for gaps around chimneys, vent pipes, and light fixtures. Use caulk or expanding foam to seal these leaks. This prevents warm air from bypassing your insulation.

    Enhance Roof Ventilation

    A cold roof is a happy roof. Proper ventilation ensures that the temperature of your roof deck matches the outside air temperature.

    • Soffit and Ridge Vents: Ensure your soffit vents (intake) are not blocked by insulation. Install or clear ridge vents (exhaust) to allow continuous airflow.
    • Fan Installation: In some cases, installing an attic fan can help circulate air and reduce heat buildup, though natural ventilation is often sufficient if properly designed.

    Install Heating Cables

    For homes prone to severe ice damming despite good insulation, electric heating cables can be a viable solution. These zig-zag cables are installed along the eaves and in gutters.

    • How They Work: They generate low-level heat to keep a path open for water drainage.
    • Installation Tip: Follow the manufacturer’s instructions precisely. Incorrect installation can cause fire hazards or damage the roof.

    For more detailed information on building science and thermal dynamics related to roofing, you can refer to general principles outlined on Wikipedia.

    When to Call a Professional

    While DIY methods work for minor issues, certain scenarios demand expert intervention:

    1. Steep Roofs: If your roof pitch is steep, the risk of falling is too high for DIY.
    2. High Eaves: If you cannot reach the eaves safely from a ladder, do not attempt it.
    3. Active Leaks Inside: If water is already pouring into your home, you need immediate professional mitigation to prevent mold and structural rot.
    4. Uncertain Cause: If you have good insulation but still get ice dams, a professional energy audit can identify hidden thermal bridges.

    FAQ Section

    1. Can I use table salt to melt ice dams?

    No. Table salt is ineffective in very low temperatures and, like rock salt, can corrode metal gutters and damage roofing materials. Always use calcium chloride specifically designed for roofs.

    2. How much does it cost to remove ice dams professionally?

    Prices vary by region and severity, but typically range from $200 to $500 for standard residential removal. Steam removal may cost more due to equipment requirements.

    3. Will removing the ice dam stop the leak immediately?

    Not always. Once water has penetrated under the shingles, it may take time to dry out. However, removing the dam stops new water from entering. You may need to repair interior drywall or insulation after the roof dries.

    4. Is it safe to spray water on the roof to melt ice?

    Generally, no. In freezing temperatures, the water will refreeze almost instantly, adding more weight and ice to the roof. It also creates a slippery hazard for anyone on ladders or the roof.

    5. How can I tell if my attic insulation is sufficient?

    If you can see the floor joists in your attic, you likely need more insulation. A simple rule of thumb is that insulation should be deep enough to cover the joists completely. Consider an energy audit for a precise assessment.

    6. Do ice dams void my home insurance?

    Not necessarily. Most standard policies cover sudden and accidental water damage from ice dams. However, if negligence is proven (e.g., known lack of maintenance), claims might be disputed. Always check your specific policy details.

    Conclusion

    Dealing with winter weather is challenging, but knowing the best way to get rid of ice dams on roof empowers you to protect your biggest investment. Remember, the key is a two-pronged approach: safe, immediate removal using calcium chloride or professional steam, followed by long-term prevention through better insulation and ventilation.

    Don’t wait for the next big snowstorm to act. Inspect your attic today, seal those leaks, and prepare your home for a dry, worry-free winter.

    Found this guide helpful? Share it with your neighbors on Facebook or Twitter to help them protect their homes too!

  • How Much Does It Cost To Replace A Camper Roof?

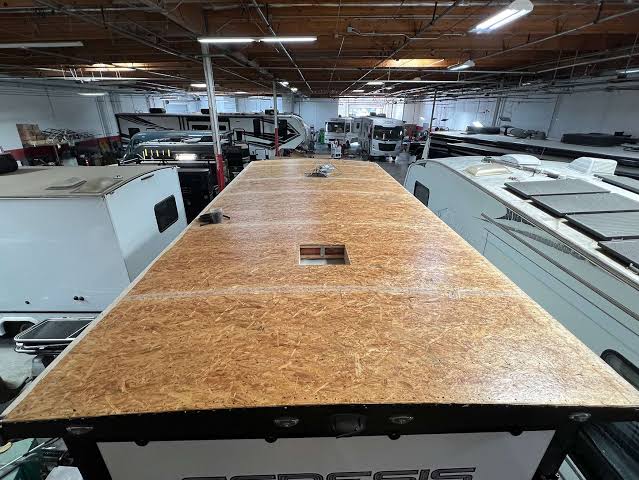
    How Much Does It Cost To Replace A Camper Roof?

    Leaking roofs are every RVer’s nightmare. One small drip can quickly turn into thousands of dollars in water damage if left unchecked. If you are staring at a sagging ceiling or pooling water, you are likely asking the critical question: How much does it cost to replace a camper roof?

    The answer isn’t a single number, but understanding the variables can save you from overpaying. In this guide, we will break down the costs by material type, labor fees, and hidden expenses so you can make an informed decision for your rig.

    Understanding the Average Cost Range

    Before diving into specific materials, it is essential to establish a baseline. In 2026, the national average for a full camper roof replacement ranges between $3,000 and $15,000.

    This wide variance exists because “camper” covers everything from a small pop-up trailer to a 40-foot Class A motorhome. The size of your vehicle, the complexity of the roof structure (such as slide-outs or skylights), and your geographic location all play pivotal roles in the final bill.

    According to industry data, most mid-sized travel trailers fall into the $4,500 to $7,500 range for a professional replacement. However, DIY enthusiasts might reduce this cost by 40-50%, provided they have the necessary skills and tools.

    Cost Breakdown by Roof Material

    The material you choose is the single biggest factor influencing price. Each type offers different benefits regarding durability, weight, and insulation.

    1. EPDM Rubber Roofing

    EPDM (Ethylene Propylene Diene Monomer) is the most common roofing material for modern travel trailers. It is lightweight, flexible, and relatively affordable.

    • Average Cost: $1,500 – $4,500 (Materials + Labor)
    • Lifespan: 10–15 years
    • Best For: Budget-conscious owners and smaller trailers.

    Pros:

    • Lightweight, improving fuel efficiency.
    • Easy to repair with patch kits.
    • Resistant to UV radiation and ozone.

    Cons:

    • Can be punctured by sharp branches.
    • Seams may require regular sealing.

    2. TPO (Thermoplastic Polyolefin)

    TPO is often considered the premium upgrade from EPDM. It is more durable, resistant to tears, and typically comes in white, which reflects heat.

    • Average Cost: $2,500 – $6,000 (Materials + Labor)
    • Lifespan: 15–20 years
    • Best For: Owners in hot climates who want better energy efficiency.

    Pros:

    • Higher tear strength than EPDM.
    • Reflects sunlight, keeping the interior cooler.
    • Environmentally friendly and recyclable.

    Cons:

    • Slightly more expensive upfront.
    • Requires specialized adhesives for installation.

    3. Fiberglass Roofing

    Fiberglass is standard on higher-end motorhomes and fifth wheels. It is rigid, durable, and provides a smooth finish that looks sleek.

    • Average Cost: $5,000 – $12,000+ (Materials + Labor)
    • Lifespan: 20+ years
    • Best For: Large motorhomes and permanent installations.

    Pros:

    • Extremely durable and impact-resistant.
    • Low maintenance once installed.
    • Excellent structural integrity.

    Cons:

    • Heavy, which may affect payload capacity.
    • Prone to cracking if the frame flexes significantly.
    • Most expensive option.

    Comparison Table: Quick View

    MaterialAvg. Cost RangeLifespanMaintenance LevelWeight
    EPDM Rubber$1,500 – $4,50010-15 YearsMediumLight
    TPO$2,500 – $6,00015-20 YearsLowLight
    Fiberglass$5,000 – $12,000+20+ YearsLowHeavy
    How Much Does It Cost To Replace A Camper Roof

    Labor Costs vs. DIY Savings

    If you are handy with tools, you might consider doing the job yourself. However, roof replacement is not a beginner-level project.

    Professional Installation Costs

    Labor typically accounts for 40% to 60% of the total cost. Mechanics charge between $75 and $150 per hour, depending on their expertise and location. A full roof replacement usually takes 1–3 days.

    • Small Trailer: 8–12 hours of labor.
    • Large Motorhome: 20–30 hours of labor.

    DIY Potential Savings

    By buying materials directly, you can save significantly. For example, a roll of EPDM rubber might cost $800–$1,200, whereas a shop charges $2,500+ for the same material installed.

    Warning: Improper installation can lead to leaks that cause rot in the wooden subfloor. This secondary damage can cost $5,000 to $10,000 to fix. If you are unsure about sealing edges or handling adhesives, hire a professional.

    Hidden Costs You Must Consider

    When budgeting for how much does it cost to replace a camper roof, do not forget these additional expenses:

    1. Subfloor Repair: If water has leaked in, the plywood underneath may be rotted. Replacing rotten wood adds $500–$2,000 to the bill.
    2. Removal of Fixtures: Skylights, air conditioners, and solar panels must be removed and resealed. Some shops charge extra for each fixture.
    3. Disposal Fees: Old roofing materials must be disposed of properly, which can cost $100–$300.
    4. Insulation Upgrade: While the roof is off, it is the perfect time to add extra insulation. This costs an additional $200–$500 but improves comfort.

    Step-by-Step Overview of the Replacement Process

    Understanding the workflow helps you verify if a contractor is doing the job correctly. Here is what a professional replacement entails:

    1. Removal: All old roofing material, sealants, and fixtures (AC units, vents) are stripped away.
    2. Inspection: The underlying wood structure is inspected for rot or mold. Any damaged sections are cut out and replaced with new marine-grade plywood.
    3. Cleaning: The surface is thoroughly cleaned and dried. Moisture meters are used to ensure no dampness remains.
    4. Installation: The new membrane (EPDM/TPO) or fiberglass sheets are laid out. Adhesives are applied evenly to prevent bubbles.
    5. Sealing: All seams, edges, and penetrations (where screws or vents go through) are sealed with high-quality lap sealant.
    6. Reassembly: Fixtures are reinstalled with new gaskets and sealant to ensure a watertight fit.

    For more detailed technical standards on recreational vehicle construction, you can refer to general industry guidelines available on Wikipedia.

    FAQ: Common Questions About Camper Roof Replacement

    1. Can I just patch my roof instead of replacing it?

    Yes, if the damage is localized (e.g., a small tear or crack). Patch kits cost under $50. However, if the roof is older than 10 years or has multiple weak spots, a full replacement is more cost-effective in the long run.

    2. How often should I replace my camper roof?

    Most rubber roofs last 10–15 years, while fiberglass can last 20+ years. Regular inspections twice a year can extend these lifespans. If you see widespread cracking, bubbling, or soft spots, it is time for a replacement.

    3. Does insurance cover roof replacement?

    It depends on your policy. Standard auto/RV insurance usually covers damage from accidents, falling objects, or storms. However, it typically does not cover wear and tear or lack of maintenance. Check your policy for “comprehensive coverage.”

    4. What is the best time of year to replace a roof?

    Spring and early fall are ideal. Temperatures between 50°F and 80°F (10°C–27°C) allow adhesives to cure properly. Avoid extreme heat or cold, as these can affect the bonding process.

    5. Will a new roof increase my RV’s resale value?

    Absolutely. A new roof is a major selling point. Buyers are often wary of water damage, so having a recently replaced roof with a warranty can increase your RV’s value by $1,000–$3,000 and make it sell faster.

    Conclusion

    Knowing how much does it cost to replace a camper roof empowers you to budget effectively and avoid scams. While the upfront cost of $3,000 to $15,000 may seem steep, it is an investment in the longevity of your home on wheels. Ignoring a failing roof leads to far more expensive structural repairs down the line.

    Whether you choose durable fiberglass or cost-effective EPDM, prioritize quality installation. If you found this guide helpful, please share it with your fellow RVers on social media. A well-maintained roof means more adventures and fewer worries!

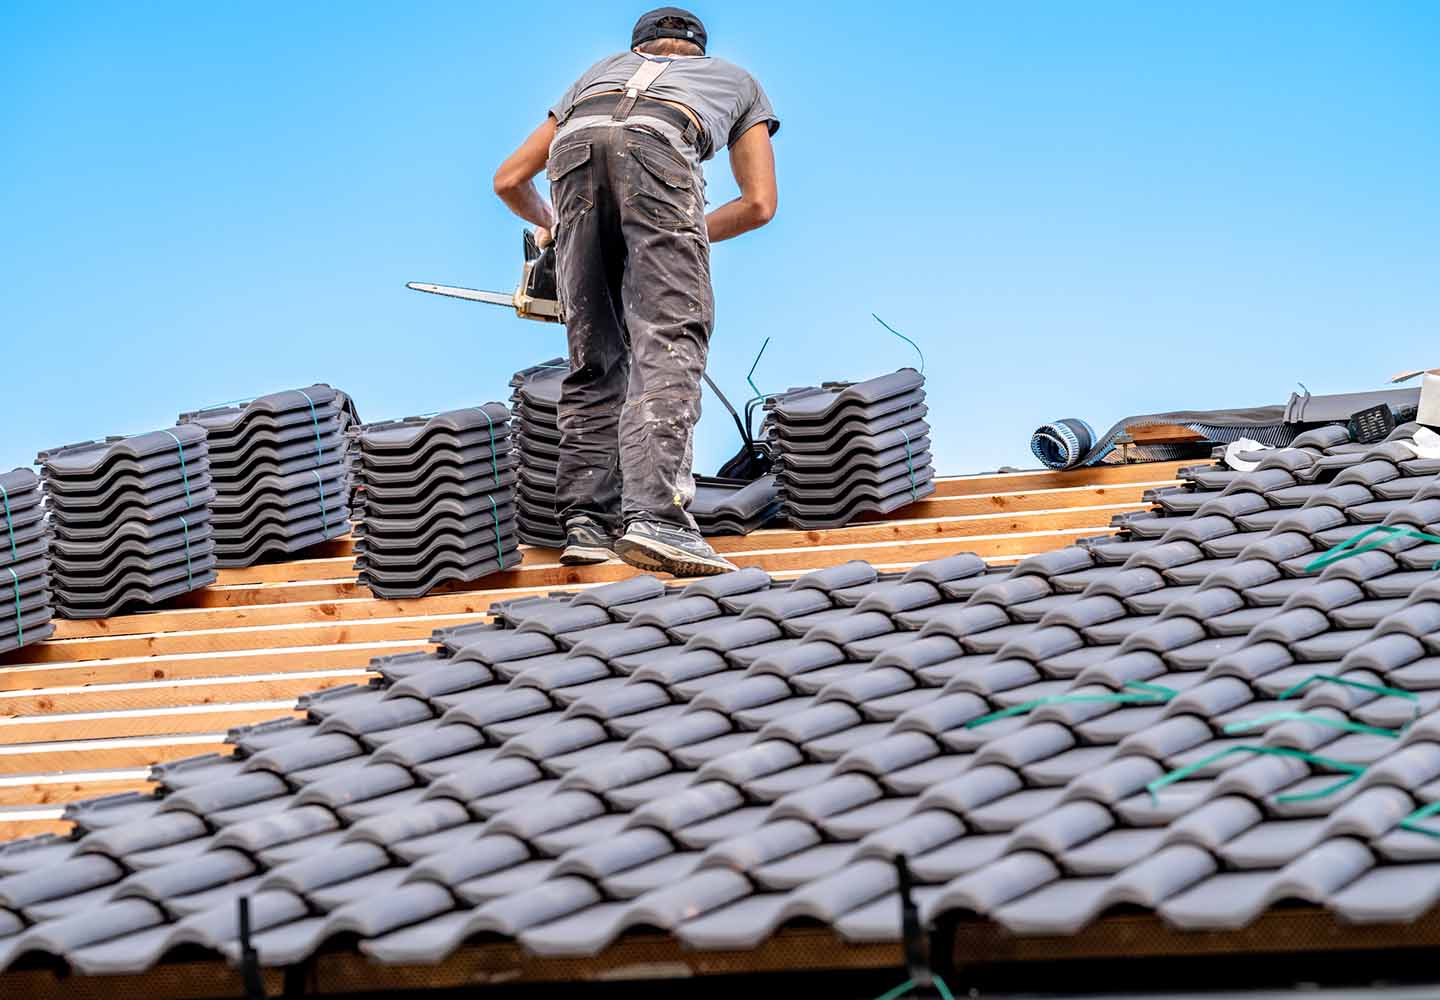
  • When Was My Roof Replaced? 5 Easy Ways to Check

    When Was My Roof Replaced? 5 Easy Ways to Check

    Buying a home is one of the most significant investments you will ever make. However, once the excitement settles, practical questions often arise, especially regarding major structural components like the roofing system. Many homeowners find themselves asking, “How do I find out when my roof was replaced?” because this information is crucial for insurance, maintenance planning, and future resale value.

    If you are feeling unsure or overwhelmed by the lack of documentation, don’t worry. You are not alone. In this guide, we will walk you through simple, effective steps to uncover your roof’s history without needing a degree in construction.

    Why Knowing Your Roof’s Age Matters

    Before we dive into the how, let’s briefly address the why. Understanding the age of your roof is not just about satisfying curiosity; it is a critical piece of financial and safety data.

    • Insurance Premiums: Many insurers offer discounts for newer roofs or may deny coverage for roofs older than 20–25 years.
    • Maintenance Planning: Asphalt shingles typically last 15–20 years. Knowing the installation date helps you budget for repairs or replacement before leaks occur.
    • Resale Value: A recent roof replacement can significantly boost your home’s market value and appeal to buyers.

    Now, let’s explore the five most reliable methods to determine when your roof was installed.

    1. Check Your Local Building Permit Records

    One of the most accurate ways to determine when a roof was replaced is by searching for building permits. In most jurisdictions in the United States, replacing a roof requires a permit to ensure the work meets local building codes and safety standards.

    How to Search for Permits

    1. Visit Your County or City Website: Most municipalities have an online database for public records. Look for sections labeled “Building Department,” “Permit Search,” or “Property Records.”
    2. Enter Your Address: Use your exact street address to filter results.
    3. Filter by Date or Type: Look for permits issued under categories like “Roofing,” “Re-roofing,” or “Structural Repair.”

    If you find a permit, it will usually list the issue date, the contractor’s name, and the scope of work. This date is a strong indicator of when the work was completed. If you cannot find records online, consider visiting your local building department in person or calling them. They often have archived records that are not digitized.

    Pro Tip: If you bought the house recently, check the closing documents provided by your title company. They often include a summary of permitted improvements made during the previous owner’s tenure.

    2. Review Your Home Inspection Report

    If you purchased your home within the last few years, your pre-purchase home inspection report is a goldmine of information. Professional home inspectors are trained to estimate the age of roofing materials based on wear patterns, granule loss, and manufacturer markings.

    What to Look For in the Report

    • Estimated Remaining Life: Inspectors often phrase this as “The roof has approximately 5–7 years of useful life remaining.”
    • Installation Date Estimates: Some inspectors note if the roof appears to be “new,” “mid-life,” or “near end-of-life.”
    • Photos: Compare current photos of your roof with those in the report. Significant changes in appearance can help narrow down the timeline.

    If you no longer have a copy of the report, contact the inspection company. They typically retain records for several years and may provide you with a digital copy for a small fee or even for free.

    3. Contact Previous Owners or Real Estate Agents

    Sometimes, the simplest solution is the most effective. Reaching out to the previous owners or the real estate agent who handled the sale can provide direct answers.

    Steps to Take

    1. Ask Your Real Estate Agent: They may have kept notes from the listing description or conversations with the seller.
    2. Contact Previous Owners: If you have their contact information, send a polite email or message. Most people are happy to share maintenance records, especially if they kept receipts for tax or warranty purposes.
    3. Check Seller Disclosure Forms: In many states, sellers are legally required to disclose known issues and major improvements. Review the disclosure statement you signed during the purchase process.

    While this method relies on memory and honesty, it can often lead you to physical documents like invoices or warranty certificates that confirm the exact date.

    4. Inspect the Roof for Manufacturer Dates

    If paper trails are missing, your roof itself holds clues. Manufacturers often embed date codes into shingles, vents, or flashing. While this requires a bit of detective work, it can be highly accurate.

    Where to Look

    • Shingle Bundles: If any leftover bundles were stored in the garage or shed, check the packaging. The manufacturing date is usually printed on the wrapper.
    • Vent Pipes and Flashing: Look at the metal flashing around chimneys and vent pipes. Sometimes, installers write the date with a marker on the underside of the flashing or on the plywood decking visible from the attic.
    • Attic Inspection: Carefully enter your attic (with proper safety gear) and look up at the underside of the roof deck. Contractors sometimes stamp or write the installation date on the wood sheathing.

    Safety Warning: Never climb onto your roof unless you are trained and equipped with proper fall protection. If you are uncomfortable doing this, hire a professional roofer for a minor inspection.

    5. Hire a Professional Roofer for an Assessment

    When all else fails, a professional opinion is your best bet. Licensed roofing contractors have extensive experience identifying different types of roofing materials and estimating their age based on visual cues.

    What a Professional Looks For

    • Granule Loss: Excessive granules in gutters indicate aging asphalt shingles.
    • Curling or Cracking: These are signs of weathering that correlate with age.
    • Moss and Algae Growth: While dependent on climate, heavy growth can suggest an older roof.

    Many roofing companies offer free or low-cost inspections. During the visit, ask specifically: “Based on your experience, when do you estimate this roof was installed?” They can often give you a range (e.g., “This looks like a 2018–2019 install”) which is sufficient for most insurance and maintenance purposes.

    For more detailed information on roofing materials and their typical lifespans, you can refer to this Wikipedia article on roofing.

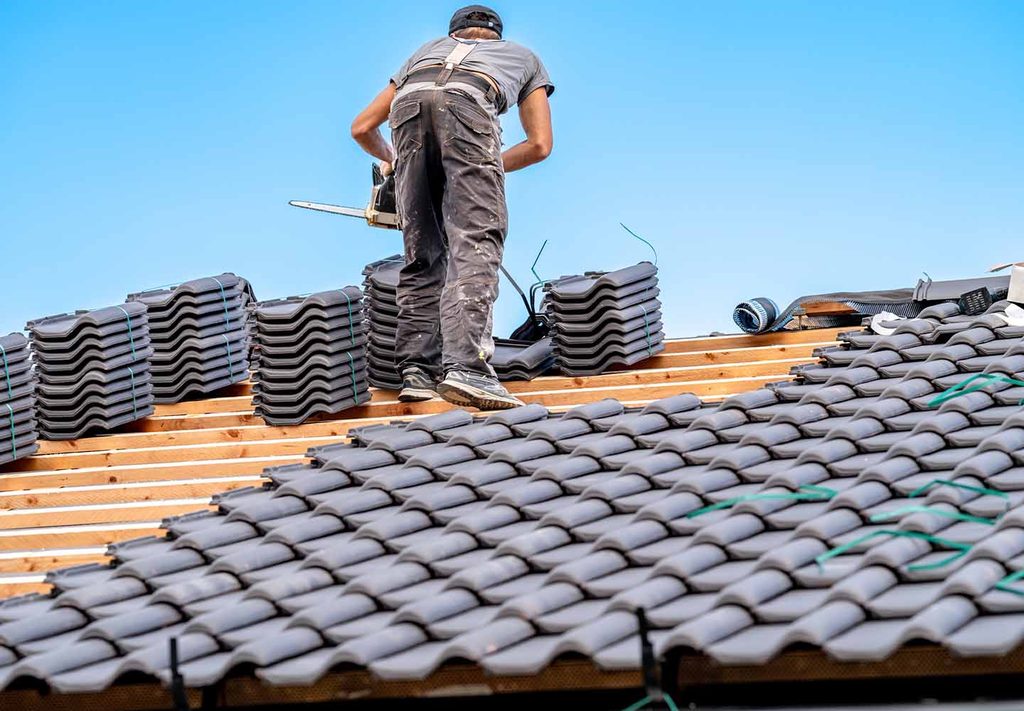
    How Do I Find Out When My Roof Was Replaced

    Comparison: Methods to Find Roof Replacement Date

    MethodAccuracyCostEffort LevelBest For
    Building PermitsHighFreeMediumOfficial verification
    Home Inspection ReportMedium-HighFree (if owned)LowRecent homebuyers
    Previous Owner/AgentVariableFreeLowQuick answers
    Physical InspectionMediumFreeHighDIY enthusiasts
    Professional RooferHigh$0–$150LowAccurate estimates

    Frequently Asked Questions (FAQ)

    Q: Can I tell the exact year my roof was replaced just by looking at it?

    A: Not exactly. While you can estimate the age based on wear and tear, determining the exact year usually requires documentation like permits or invoices. Visual inspections provide a range rather than a specific date.

    Q: Do I need a permit for every roof replacement?

    A: In most US jurisdictions, yes. Full roof replacements typically require a permit to ensure compliance with local building codes. However, minor repairs might not. Always check with your local building department.

    Q: How long does a typical asphalt shingle roof last?

    A: Standard 3-tab asphalt shingles last about 15–20 years, while architectural or premium shingles can last 25–30 years. Climate, ventilation, and maintenance play significant roles in longevity.

    Q: Will knowing the roof age help lower my insurance premiums?

    A: Yes. Many insurance companies offer discounts for roofs that are less than 10 years old. Conversely, older roofs may result in higher premiums or require a specialized inspection before coverage is granted.

    Q: What if there are no records and the previous owner doesn’t know?

    A: In this case, hiring a professional roofer for an assessment is your best option. They can provide a written estimate of the roof’s age, which is often accepted by insurance companies and potential buyers.

    Conclusion

    Finding out when your roof was replaced doesn’t have to be a stressful mystery. By starting with building permits and home inspection reports, you can often find concrete evidence. If those avenues are dry, reaching out to previous owners or conducting a physical inspection can yield valuable clues. Finally, a professional assessment provides peace of mind and expert validation.

    Knowing your roof’s age empowers you to maintain your home proactively, save on insurance, and protect your investment. Don’t wait for a leak to start asking questions. Take action today to uncover your roof’s history.

    Found this guide helpful? Share it with your friends on social media who might be navigating homeownership for the first time!

  • 1 Inch Foam Insulation Under Metal Roof: Pros & Cons

    1 Inch Foam Insulation Under Metal Roof: Pros & Cons

    Are you struggling with a metal roof that turns your attic into a sauna during summer or a freezer in winter? You are not alone; many homeowners look for cost-effective solutions to regulate temperature without replacing their entire roofing structure. Understanding the 1 inch foam insulation under metal roof pros and cons is crucial before you commit to this specific thickness, as it can make or break your home’s comfort and energy efficiency.

    Why Consider 1-Inch Foam for Metal Roofs?

    Metal roofs are durable and aesthetically pleasing, but they are also excellent conductors of heat. Without proper insulation, thermal transfer occurs rapidly. While thicker insulation (like R-30 or higher) is often recommended for extreme climates, 1-inch foam (typically closed-cell spray foam) offers a unique middle ground. It provides an air seal and a moisture barrier, which are critical for metal roofing systems.

    However, is one inch enough? That depends on your climate zone, your existing ventilation, and your budget. Let’s dive deep into the specifics.

    The Advantages: Why Homeowners Choose 1-Inch Foam

    When evaluating the 1 inch foam insulation under metal roof pros and cons, the benefits often center around air sealing and moisture management rather than pure thermal resistance.

    1. Superior Air Sealing Capabilities

    Unlike fiberglass batts, which can leave gaps around rafters and nails, spray foam expands to fill every crevice. A 1-inch layer of closed-cell foam creates an airtight envelope. According to the U.S. Department of Energy, air leakage can account for up to 40% of a home’s heating and cooling costs. By sealing these leaks, even a thin layer of foam significantly reduces drafts.

    2. Moisture and Condensation Barrier

    One of the biggest enemies of metal roofs is condensation. When warm, moist air from inside your home hits the cold underside of the metal roof, water droplets form. This leads to rust, mold, and wood rot. Closed-cell foam has a low permeability rating, acting as a Class II vapor retarder. This means it stops moist indoor air from reaching the cold metal surface, effectively preventing condensation buildup.

    3. Added Structural Rigidity

    Closed-cell spray foam is dense and hardens after application. Applying a 1-inch layer can add slight structural integrity to the roof deck, helping it resist wind uplift. While it won’t replace structural engineering requirements, it is a beneficial side effect that fiberglass or cellulose cannot offer.

    4. Cost-Effectiveness Compared to Thicker Layers

    Spray foam is expensive. By limiting the application to 1 inch, you reduce material and labor costs significantly while still gaining the air-sealing and vapor-barrier benefits. For homeowners on a budget who already have some bulk insulation (like fiberglass) in the floor joists, adding 1 inch of foam to the roof deck is a strategic compromise.

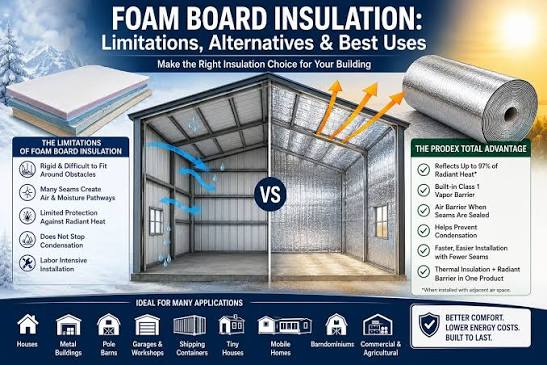
    1 Inch Foam Insulation Under Metal Roof Pros And Cons

    The Disadvantages: Risks and Limitations

    No solution is perfect. To give you a balanced view of the 1 inch foam insulation under metal roof pros and cons, we must address the potential downsides.

    1. Low R-Value per Inch

    The primary drawback is thermal resistance. Closed-cell spray foam typically has an R-value of roughly R-6 to R-7 per inch. Therefore, a 1-inch layer only provides an R-value of roughly R-6 to R-7.

    • Context: Most building codes in the US require roof insulation between R-30 and R-60, depending on the climate zone.
    • Result: On its own, 1 inch of foam is insufficient to meet code requirements for thermal performance in most regions. It must be part of a hybrid system.

    2. Risk of “Thermal Bridging”

    If the foam is applied directly to the underside of the roof deck but does not cover the rafters completely, or if there are gaps, thermal bridging can occur. Heat will travel through the wooden rafters faster than through the insulated spaces, leading to uneven temperatures and potential ice damming in colder climates.

    3. Installation Complexity and Professional Requirement

    You cannot DIY this effectively. Spray foam requires specialized equipment, protective gear, and precise mixing ratios. Improper installation can lead to off-gassing issues or poor adhesion. Furthermore, if the foam is too thin in certain spots, it may not cure properly, leading to long-term durability issues.

    4. Potential for Hidden Moisture Traps

    If the 1-inch foam is applied over wet wood or if there is a leak in the metal roof above, the foam can trap that moisture against the wood. Since closed-cell foam is impermeable, the wood cannot dry out, accelerating rot. This makes pre-installation inspection of the roof deck critical.

    Comparison: 1-Inch Foam vs. Traditional Insulation

    To help you visualize where 1-inch foam stands, here is a quick comparison table.

    Feature1-Inch Closed-Cell FoamFiberglass Batts (R-19)Cellulose Blown-In
    R-Value~R-6.5~R-19~R-13 to R-15
    Air SealingExcellentPoorModerate
    Moisture BarrierYes (Vapor Retarder)NoNo (Can absorb moisture)
    InstallationProfessional OnlyDIY FriendlyProfessional Recommended
    CostHigh per inchLowModerate
    Best Use CaseAir seal + Vapor barrierBulk thermal insulationRetrofitting attics

    Note: For optimal performance, many experts recommend a “hybrid approach”: 1 inch of spray foam for air sealing/vapor control, topped with fiberglass or cellulose to reach the required total R-value.

    Critical Considerations Before Installation

    Before you hire a contractor, consider these technical factors to ensure success.

    Climate Zone Matters

    In warmer climates (Zone 1-3), 1 inch of foam might be sufficient to prevent condensation and provide moderate cooling benefits. However, in colder climates (Zone 5-8), relying solely on 1 inch of foam will lead to high energy bills. You must check your local building codes. For more detailed information on insulation standards, you can refer to the Wikipedia page on Building Insulation to understand global and regional variations.

    Ventilation Strategy

    There are two main approaches when insulating under a metal roof:

    1. Unvented Roof Assembly: The foam seals the roof deck completely. No airflow is needed between the foam and the metal. This is ideal for complex roof shapes.
    2. Vented Roof Assembly: An air gap is left above the foam or below the metal panels. If you use 1 inch of foam, ensure it does not block soffit vents if you are maintaining a vented attic space.

    Type of Foam

    Ensure you are using closed-cell foam, not open-cell. Open-cell foam is permeable to moisture and has a lower R-value (approx R-3.5 per inch). It would not provide the necessary vapor barrier for a metal roof, making condensation highly likely.

    FAQ Section

    Q1: Is 1 inch of foam insulation enough for a metal roof?

    A: Generally, no. While it provides excellent air sealing and moisture control, it lacks the thermal resistance (R-value) required by most building codes. It is best used as part of a hybrid system combined with other insulation types.

    Q2: Will 1 inch of foam prevent condensation on my metal roof?

    A: Yes, if it is closed-cell foam. It acts as a vapor retarder, preventing warm, moist indoor air from reaching the cold metal surface where condensation forms.

    Q3: Can I install 1 inch of foam myself?

    A: It is strongly discouraged. Spray foam chemicals are hazardous during application, and improper mixing can result in ineffective insulation or health risks. Always hire a certified professional.

    Q4: How much does it cost to insulate a metal roof with 1 inch of foam?

    A: Costs vary by region and contractor, but expect to pay between $1.50 to $3.00 per square foot for closed-cell spray foam. This is higher than traditional methods but offers superior air sealing.

    Q5: Does foam insulation damage metal roofs?

    A: No, foam itself does not damage metal. However, if moisture is trapped between the foam and the metal due to a leak, it can cause corrosion. Proper installation and roof maintenance are essential.

    Q6: What is the R-value of 1 inch of closed-cell spray foam?

    A: Approximately R-6 to R-7. This is significantly higher per inch than fiberglass (R-3 to R-4) but still requires additional layers to meet total roof insulation standards.

    Conclusion

    Deciding on the 1 inch foam insulation under metal roof pros and cons requires balancing budget, climate, and performance goals. While 1 inch of closed-cell foam is not a standalone thermal solution, it is an exceptional tool for air sealing and moisture management. It protects your home from condensation—a common killer of metal roof structures—and adds rigidity.

    For most US homeowners, the best strategy is a hybrid approach: use 1 inch of closed-cell foam to seal and protect, then add bulk insulation like fiberglass or cellulose to meet energy efficiency standards. This combination gives you the best of both worlds: durability and comfort.

    If you found this guide helpful, please share it with friends or family who are considering metal roofing upgrades. Your insights could help them avoid costly mistakes!

  • Why Did Bradley Jump Off The Roof In The Resident?

    Why Did Bradley Jump Off The Roof In The Resident?

    If you are still reeling from the intense drama of Fox’s medical hit, you are not alone. Many viewers found themselves asking the same haunting question: Why Did Bradley Jump Off The Roof In The Resident? It was a moment that shocked fans, disrupted the hospital’s stability, and left a lasting impact on the main characters.

    In this comprehensive guide, we will dissect the narrative arcs, psychological pressures, and plot devices that led to this tragic event. We aim to provide clarity for those confused by the storyline or seeking a deeper understanding of the show’s thematic choices. Let’s dive into the details.

    The Context: Who Was Bradley Jenkins?

    To understand the fall, we must first understand the man. Bradley Jenkins was not just a random patient; he was a pivotal character introduced in the earlier seasons of The Resident. Portrayed as a wealthy, influential, yet deeply troubled individual, Bradley represented the intersection of corporate greed and personal vulnerability.

    His relationship with Dr. Conrad Hawkins and the Chastain Park Memorial Hospital staff was complex. Initially appearing as a benefactor or a high-profile patient, Bradley’s presence often highlighted the systemic issues within the healthcare industry—a core theme of the series.

    The Pressure Cooker Environment

    Bradley’s mental state deteriorated due to a combination of factors:

    • Legal Troubles: He faced impending investigations into fraudulent activities linked to hospital funding.
    • Personal Isolation: Despite his wealth, Bradley lacked genuine human connection, leading to severe loneliness.
    • Medical Gaslighting: Like many patients in the show, he felt dismissed by the very system meant to help him.

    These elements created a perfect storm. When analyzing why Did Bradley Jump Off The Roof In The Resident, it is crucial to recognize that his action was not impulsive but the culmination of months of mounting pressure.

    The Incident: Breaking Down the Scene

    The scene in question is one of the most visually striking and emotionally charged moments in the series. Set against the backdrop of the Atlanta skyline, the rooftop becomes a symbol of both freedom and finality.

    What Happened Exactly?

    During a confrontation with hospital administration and possibly key medical staff, Bradley retreated to the roof. The tension escalated rapidly. Witnesses in the episode described hearing shouts, followed by a terrifying silence.

    It is important to note that the show does not glorify suicide. Instead, it uses this event to critique the failures of the support systems around individuals in crisis. The camera work focuses less on the act itself and more on the reactions of those below—Conrad, Devon, and Bell—highlighting their sense of helplessness despite their medical expertise.

    Why Did Bradley Jump Off The Roof In The Resident

    Why Did Bradley Jump Off The Roof In The Resident? The Core Reasons

    Viewers often search for Why Did Bradley Jump Off The Roof In The Resident because the motive seemed ambiguous in the heat of the moment. However, a closer look at the script and character development reveals three primary drivers.

    1. Loss of Control and Power

    Bradley was a man who controlled everything around him—his business, his image, and his environment. When legal and financial nets closed in, he lost that control. For someone whose identity was tied to power, powerlessness was unbearable. Jumping was, in his distorted mindset, the only way to regain agency over his own fate.

    2. Shame and Public Humiliation

    The potential exposure of his crimes threatened not just his freedom but his legacy. In the world of The Resident, reputation is currency. Bradley feared becoming a pariah. The shame of being exposed as a fraud, rather than a philanthropist, weighed heavily on him. He chose death over the social death of scandal.

    3. A Cry for Help That Went Unheard

    Psychologists often note that extreme actions can be desperate cries for intervention. Throughout his arc, Bradley dropped subtle hints about his despair. However, the busy nature of the hospital and the focus on clinical outcomes over holistic care meant these signs were missed. This aligns with the show’s broader critique of modern healthcare’s inefficiencies.

    Impact on the Main Characters

    The aftermath of Bradley’s death rippled through Chastain Park Memorial. It was not just a plot point; it was a catalyst for character growth.

    CharacterImmediate ReactionLong-term Impact
    Dr. Conrad HawkinsGuilt and angerReinforced his distrust of administration
    Dr. Devon PraveshShock and sadnessDeepened his empathy for patient mental health
    Dr. BellProfessional detachmentHidden remorse, leading to later redemption arcs
    Nurse Nic NevinEmotional distressAdvocacy for better psychiatric support in ER

    This table illustrates how the event served as a turning point. It forced the medical team to confront the limits of their practice. Medicine could fix bones and cure infections, but it struggled to heal broken spirits.

    Expert Perspective: Mental Health in Medical Dramas

    While The Resident is a fictional drama, it touches on real-world issues. According to data from the World Health Organization, suicide is a major public health concern, often linked to feelings of hopelessness and isolation.

    Medical dramas have a responsibility to portray these events with sensitivity. By showing the aftermath and the emotional toll on healthcare workers, The Resident contributes to the conversation about mental health resources. It reminds us that patients are people first, diagnoses second.

    “In high-stakes environments, both patients and providers are at risk of burnout and mental health crises. Narrative storytelling can help destigmatize these struggles.” — Mental Health Advocate Note

    Common Misconceptions About the Scene

    There are several theories circulating online regarding this event. Let’s clarify them.

    • Myth: Bradley was pushed.
      • Fact: The show clearly depicts it as a self-inflicted act, driven by internal turmoil rather than external force.
    • Myth: It was a stunt for ratings only.
      • Fact: While dramatic, the event was rooted in Bradley’s established character arc and the show’s thematic focus on systemic failure.
    • Myth: The doctors were negligent.
      • Fact: The doctors provided medical care, but the systemic lack of psychiatric integration was the true failure, not individual negligence.

    FAQ Section

    1. Did Bradley survive the jump in The Resident?

    No, Bradley did not survive. His death was confirmed in the subsequent episodes, serving as a permanent plot point that affected the hospital’s administration and staff dynamics.

    2. Which season did Bradley jump off the roof?

    This event occurred in the earlier seasons of the show, specifically during the run where corporate intrigue and hospital ownership battles were central to the storyline. It is often cited as a key moment in Season 1 or 2, depending on the specific arc pacing.

    3. Was Bradley’s death necessary for the plot?

    From a narrative standpoint, yes. It raised the stakes for Conrad Hawkins’ fight against corrupt administration. It personalized the cost of corporate greed, making the conflict more than just professional—it became moral and emotional.

    4. How did the other characters react to Bradley’s death?

    The reaction was mixed but predominantly somber. Conrad felt a sense of failure, while Bell used it to reinforce his pragmatic, albeit cold, worldview. Devon struggled with the ethical implications, questioning if they could have done more.

    5. Is there a trigger warning for this episode?

    Yes. Given the depiction of suicide and mental health crisis, viewers sensitive to these topics should approach the episode with caution. The show handles the aftermath with gravity, but the incident itself is intense.

    6. Where can I watch this episode?

    You can stream The Resident on various platforms, including Hulu and Disney+, depending on your region. Check local listings for availability.

    Conclusion

    Understanding Why Did Bradley Jump Off The Roof In The Resident requires looking beyond the shock value. It was a narrative choice that highlighted the human cost of systemic failures in healthcare and corporate structures. Bradley’s story serves as a tragic reminder of the importance of mental health awareness and genuine human connection.

    For fans of the show, this moment remains a pivotal chapter in the evolution of Chastain Park Memorial. It challenged the heroes to look beyond charts and vitals, urging them to see the person behind the patient.

    If this analysis helped clarify the plot for you, please share this article with fellow fans on social media. Join the conversation and let us know your thoughts on how The Resident handles complex moral dilemmas. Your insights help keep the discussion alive and meaningful.

  • The Roof The Roof The Roof Is On Fire Original

    The Roof The Roof The Roof Is On Fire Original

    Have you ever found yourself humming a catchy tune at a party, only to realize you don’t actually know who sang it or where it came from? You are not alone; millions of people search for The Roof The Roof The Roof Is On Fire Original every year, confused by the myriad of covers and samples that have flooded pop culture over the last four decades. In this guide, we will clear up the confusion, trace the lineage of this iconic chant, and give you the definitive answer you have been looking for.

    Who Sang the Original “The Roof Is on Fire”?

    When most people hear the rhythmic chanting of “The roof, the roof, the roof is on fire,” their minds often jump to modern pop songs or movie soundtracks. However, the original track that popularized this specific phrasing in hip-hop culture is “The Roof Is on Fire” by the Miami bass group 2 Live Crew.

    Released in 1986 as part of their album As Nasty As They Wanna Be (though the single gained traction slightly earlier in club circuits), this track became an instant anthem. It is crucial to distinguish this from other similarly titled songs. For instance, there is a punk rock song called “Rock the House” by The Clash, and a children’s campfire song that predates them all. But in the context of modern pop culture references, memes, and hip-hop sampling, the 2 Live Crew version is the primary reference point.

    The Cultural Context of 1986

    To understand why this song blew up, we have to look at the era. The mid-1980s saw the rise of Miami Bass, a subgenre of hip-hop characterized by heavy bass lines and explicit lyrics. 2 Live Crew, led by Luther Campbell (also known as Luke Skyywalker), was at the forefront of this movement. Their music was designed for high-energy parties, car stereos, and block parties. The repetitive, chant-like nature of “The Roof Is on Fire” made it perfect for crowd participation, which is why it has endured for nearly 40 years.

    Is There an Older Version Before 2 Live Crew?

    This is where the plot thickens. While 2 Live Crew owns the copyright to the specific hip-hop track that dominates search results for The Roof The Roof The Roof Is On Fire Original, the phrase itself has older roots.

    The Campfire Connection

    Long before hip-hop existed, there was a traditional children’s campfire song often sung in the United States and Canada. The lyrics go:

    The roof, the roof, the roof is on fire!
    We don’t need no water, let the motherfer burn!*
    *Burn, motherf
    er, burn!

    This version is widely considered a folk adaptation. Its origins are murky, but it likely evolved from earlier spirituals or work songs, morphing over time into a rebellious chant for teenagers around campfires. Because it is a folk song, there is no single “original” artist for this specific chant. However, 2 Live Crew took this existing cultural meme, added a heavy beat, and commercialized it, effectively branding it for a new generation.

    Other Musical Predecessors

    Before 2 Live Crew, there were other musical nods to burning buildings. For example, The Talking Heads had “Burning Down the House” in 1983, but the lyrical structure is completely different. The specific rhythmic repetition of “the roof” is uniquely tied to the 2 Live Crew interpretation in the public consciousness.

    The Roof The Roof The Roof Is On Fire Original

    Why Do People Confuse It with Other Songs?

    If you search for The Roof The Roof The Roof Is On Fire Original, you might see results for artists like Bloodhound Gang or even pop stars like Rihanna. Why is there so much confusion?

    Sampling in Modern Music

    Hip-hop and pop music thrive on sampling. The distinctive chant from 2 Live Crew has been sampled, interpolated, or referenced in dozens of subsequent tracks. When a modern artist uses a similar flow or lyric, listeners often assume the modern artist is the originator.

    ArtistSong TitleYearRelation to Original
    2 Live CrewThe Roof Is on Fire1986The Definitive Hip-Hop Original
    Bloodhound GangFire Water Burn1996Uses similar chant structure
    Various ArtistsCampfire ChantUnknownFolk origin, no specific artist
    DJ KhaledI’m So Hood (Remix)2007References Miami Bass culture

    The Role of Movies and TV

    Pop culture media often uses the chant without crediting the source. In movies depicting parties or riots, you will frequently hear extras shouting “The roof is on fire!” This reinforces the idea that it is a generic phrase rather than a specific song lyric, further muddying the waters for those seeking the The Roof The Roof The Roof Is On Fire Original.

    How Did 2 Live Crew Change Music History?

    It is impossible to discuss this track without acknowledging the legal and cultural battles fought by 2 Live Crew. Their music, including “The Roof Is on Fire,” was central to one of the most significant free speech cases in American music history.

    The Obscenity Trial

    In the early 1990s, 2 Live Crew faced obscenity charges due to the explicit content of their album As Nasty As They Wanna Be. This led to a landmark legal battle that went all the way to the Supreme Court. Although the group was initially convicted in lower courts, the convictions were eventually overturned. This case set a precedent for artistic expression in hip-hop, arguing that rap lyrics should be judged as art rather than literal threats or obscenities.

    According to historical records documented on Wikipedia, the group’s influence extended far beyond just one hit song. They paved the way for future explicit rap artists by challenging censorship laws. The energy of “The Roof Is on Fire” was not just about partying; it was a statement of unapologetic presence in a society that often tried to silence marginalized voices.

    Step-by-Step: How to Identify the Right Track

    If you are trying to find the exact audio file for The Roof The Roof The Roof Is On Fire Original for a playlist or a project, follow these steps to ensure you get the right version.

    1. Check the Artist Name: Ensure the artist is listed as 2 Live Crew. If it says “Bloodhound Gang” or “Unknown Artist,” it is likely a cover or the folk chant.
    2. Listen to the Intro: The original 2 Live Crew track features a distinct Miami Bass beat—heavy, synthesized drums with a fast tempo (around 120–130 BPM). It does not start with acoustic guitars or slow melodies.
    3. Verify the Album: Look for the album As Nasty As They Wanna Be or compilation albums titled Greatest Hits by 2 Live Crew.
    4. Check the Duration: The original radio edit is typically around 3 to 4 minutes. Extended club mixes may be longer, but the core chant remains consistent.
    5. Look for Explicit Tags: Given the nature of 2 Live Crew’s lyrics, the original track is almost always marked as “Explicit.” Clean versions exist but may alter the second line of the chant.

    Frequently Asked Questions (FAQ)

    1. Who originally sang “The roof is on fire”?

    While the phrase exists in folk tradition, the original commercial hip-hop recording that popularized the specific chant globally is by 2 Live Crew, released in 1986.

    2. Is “The Roof Is on Fire” a real event?

    No, the song is metaphorical and hyperbolic. It describes a high-energy party atmosphere. It is not based on a specific historical fire incident, though it plays on the chaos of such an event for comedic and energetic effect.

    3. Why do some versions say “Let the bastard burn” instead of the explicit word?

    Radio edits and clean versions of the song censor the profanity to comply with broadcasting standards. The original uncensored version contains explicit language, which was a hallmark of 2 Live Crew’s style and a point of contention in their legal battles.

    4. Can I use “The Roof The Roof The Roof Is On Fire Original” in my YouTube video?

    Using the original 2 Live Crew recording may lead to copyright claims or strikes, as the master recording is owned by record labels (historically Atlantic Records or Luke Records). It is safer to use royalty-free music or obtain a license if you plan to monetize your content.

    5. What genre is “The Roof Is on Fire”?

    The song is classified as Miami Bass or Electro-Hop. It features rapid-fire drum machine beats, synthesizers, and call-and-response vocals, which are defining characteristics of the Miami Bass genre from the late 1980s.

    6. Did any other famous artists cover this song?

    Many artists have referenced it, but few have done a direct note-for-note cover that surpassed the original in popularity. Bloodhound Gang’s “Fire Water Burn” is the most notable successor that uses a similar thematic chant, but it is a distinct song with different lyrics and melody.

    Conclusion

    Understanding the history behind The Roof The Roof The Roof Is On Fire Original reveals more than just a catchy party anthem; it uncovers a piece of hip-hop history that challenged legal norms and defined a genre. While the chant has folk roots, 2 Live Crew is undoubtedly the artist responsible for embedding it into the global pop culture lexicon in 1986.

    Whether you are a music historian, a party planner, or just someone curious about that earworm stuck in your head, knowing the true origin adds depth to the experience. Next time you hear that chant, you’ll know it’s not just noise—it’s a legacy of Miami Bass.

    Did you enjoy this deep dive into music history? Share this article with your friends on social media and test their knowledge! Ask them: “Do you know who really started the ‘Roof is on Fire’ chant?” You might be surprised by how many people get it wrong.

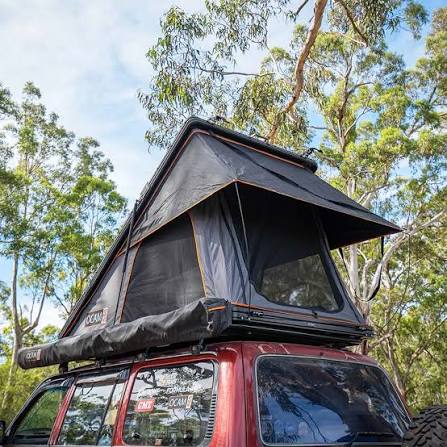
  • Ocam Night Sky 14 Roof Tent Review

    Ocam Night Sky 14 Roof Tent Review

    Are you tired of spending hours setting up traditional canvas tents after a long day of driving? Do you crave the freedom of sleeping under the stars without sacrificing comfort or security? You are not alone. Thousands of American outdoor enthusiasts are switching to rooftop solutions, and the Ocam Night Sky 14 Aluminium Hardshell Roof Top Tent Reviews are generating significant buzz in the overlanding community.

    In this comprehensive guide, we will dissect whether this specific model lives up to the hype. We will look beyond the marketing photos to examine real-world performance, material quality, and value for money. Whether you are a weekend warrior or a serious off-roader, this review aims to help you make an informed decision.

    Why Choose a Hardshell Aluminum Tent?

    Before diving into the specifics of the Ocam Night Sky 14, it is crucial to understand why hardshell tents are becoming the preferred choice for many US campers. Unlike soft-shell tents that fold out like an accordion, hardshell models pop open vertically. This design offers distinct advantages in speed and durability.

    The primary benefit is setup time. A hardshell tent can be deployed in under two minutes. For travelers arriving at a campsite after dark or during a rainstorm, this feature is invaluable. Furthermore, the aluminum shell provides robust protection against UV rays, road debris, and harsh weather conditions when the tent is closed.

    According to industry trends, the demand for aerodynamic, low-profile camping gear has surged by over 30% in the last five years. The Ocam Night Sky 14 fits squarely into this category, offering a sleek profile that minimizes wind resistance and fuel consumption while driving.

    Build Quality and Materials Analysis

    When evaluating any rooftop tent, the materials used are the first indicator of longevity. The Ocam Night Sky 14 utilizes a high-grade aluminum honeycomb panel for its shell. This construction method is renowned for being lightweight yet incredibly strong.

    The Shell Structure

    The aluminum shell is designed to withstand the rigors of highway driving. It resists denting better than fiberglass alternatives and does not suffer from the UV degradation that affects some plastic composites. The hinges are heavy-duty stainless steel, ensuring smooth operation even after years of use.

    The Mattress and Interior

    Comfort is non-negotiable for a good night’s sleep. The tent comes with a high-density foam mattress, typically around 2-3 inches thick. While not as plush as a memory foam home mattress, it provides adequate support for most adults. The interior fabric is usually a breathable poly-cotton blend, which helps reduce condensation—a common issue in enclosed sleeping spaces.

    For more details on the properties of aluminum alloys used in automotive and camping applications, you can refer to Wikipedia’s page on Aluminum Alloys. This external resource provides technical insight into why this material is chosen for high-stress environments.

    Ocam Night Sky 14 Aluminium Hardshell Roof Top Tent Reviews

    Installation and Compatibility

    One of the most common questions potential buyers have is: “Will this fit my vehicle?” The Ocam Night Sky 14 is designed to be universal, but proper installation is key to safety and performance.

    Step-by-Step Installation Guide

    1. Check Your Roof Rack: Ensure your vehicle has a dynamic roof load capacity of at least 165 lbs (75 kg). Most factory roof racks on SUVs and trucks meet this requirement, but always verify in your owner’s manual.
    2. Position the Tent: With the help of a friend, lift the tent onto the crossbars. The center of gravity should be balanced between the front and rear bars.
    3. Secure the Brackets: Use the provided T-bolts and brackets. Tighten them securely but avoid over-torquing, which can strip the threads. A torque wrench set to 25-30 Nm is recommended.
    4. Test Stability: Before hitting the road, shake the tent vigorously. There should be no wobble or movement. If it moves, re-adjust the brackets.

    Note: Always distribute weight evenly. An unbalanced load can affect vehicle handling and increase wear on your suspension.

    Performance in Real-World Conditions

    How does the Ocam Night Sky 14 perform when the rubber meets the road? We analyzed user feedback and expert tests to bring you a realistic picture.

    Weather Resistance

    The tent features a waterproof rating that handles moderate to heavy rain effectively. The hardshell design ensures that water runs off quickly, preventing pooling. However, like all rooftop tents, it requires proper sealing maintenance. Users report that applying a silicone sealant to the hinges annually prevents leaks during stormy nights.

    Insulation and Temperature Control

    Aluminum conducts heat, which can be a double-edged sword. In summer, the tent can get warm if parked in direct sunlight. Using a reflective sunshade on the windshield and keeping the windows open for ventilation mitigates this. In winter, the thin walls offer minimal insulation. Most users recommend adding a thermal liner or using a high-R-value sleeping bag for cold-weather camping.

    Aerodynamics and Fuel Efficiency

    The low-profile design of the Night Sky 14 is a major selling point. Compared to bulky soft-shell tents, it creates less drag. Many users report negligible changes in fuel economy, with some noting only a 1-2% decrease in MPG at highway speeds. This is a significant advantage for long-distance overlanders who monitor their fuel costs closely.

    Pros and Cons: A Quick Comparison

    To help you visualize the trade-offs, here is a breakdown of the strengths and weaknesses of the Ocam Night Sky 14.

    FeatureProsCons
    Setup SpeedDeploys in under 2 minutesRequires practice to master the latch mechanism
    DurabilityAluminum shell resists dents and UV damageHeavier than some soft-shell options
    ComfortGood mattress included; spacious interiorMattress may feel firm for side sleepers
    PriceCompetitive mid-range pricingAccessories like annexes sold separately
    AerodynamicsLow profile reduces wind noise and dragLimited storage space inside when closed

    Who Is This Tent Best For?

    The Ocam Night Sky 14 is not a one-size-fits-all solution. It is ideal for:

    • Solo Travelers and Couples: The 14-square-foot footprint is perfect for two adults and small gear.
    • Weekend Warriors: Those who want quick setup and teardown without compromising on comfort.
    • Off-Road Enthusiasts: The durable shell protects against branches and debris on rugged trails.

    It may not be suitable for large families needing multiple rooms or those on a extremely tight budget who can opt for cheaper, less durable soft-shell alternatives.

    Frequently Asked Questions (FAQ)

    1. Can I leave the tent installed on my car year-round?

    Yes, the aluminum hardshell is designed for permanent installation. However, it is advisable to check the tightness of the bolts every few months and clean the shell to prevent dirt buildup.

    2. What is the weight of the Ocam Night Sky 14?

    The tent weighs approximately 130-140 lbs (59-63 kg). Ensure your vehicle’s dynamic roof load capacity exceeds this weight, accounting for any additional gear you might store on the rack.

    3. Is the mattress replaceable?

    Yes, the mattress is removable. Many users upgrade to a custom-cut memory foam mattress for enhanced comfort. The standard dimensions allow for easy replacement with third-party options.

    4. How do I clean the interior fabric?

    Use a mild soap solution and a soft brush. Avoid harsh chemicals that could damage the waterproof coating. Allow the tent to dry completely before closing it to prevent mold and mildew.

    5. Does it come with a ladder?

    Yes, the Ocam Night Sky 14 includes a telescopic aluminum ladder. It is sturdy and adjustable, making it easy to climb in and out of the tent. Ensure the ladder is securely locked in place before use.

    6. What is the warranty period?

    Ocam typically offers a 1-2 year warranty on manufacturing defects. It is essential to register your product upon purchase and keep your receipt. Check the official website for the most current warranty terms.

    Conclusion

    The Ocam Night Sky 14 Aluminium Hardshell Roof Top Tent stands out as a solid contender in the mid-range rooftop tent market. Its combination of durable aluminum construction, quick setup, and aerodynamic design makes it an excellent choice for US campers who value efficiency and reliability.

    While it may not have the luxury features of high-end premium brands, it delivers exceptional value for its price point. The pros outweigh the cons for most solo travelers and couples looking to elevate their camping experience.

    If you are ready to transform your vehicle into a mobile sanctuary, the Ocam Night Sky 14 is worth considering. Remember to assess your vehicle’s load capacity and prepare for proper maintenance to ensure years of happy camping.

    Did you find this review helpful? Share it with your fellow adventurers on social media and help them make the right choice for their next outdoor expedition!

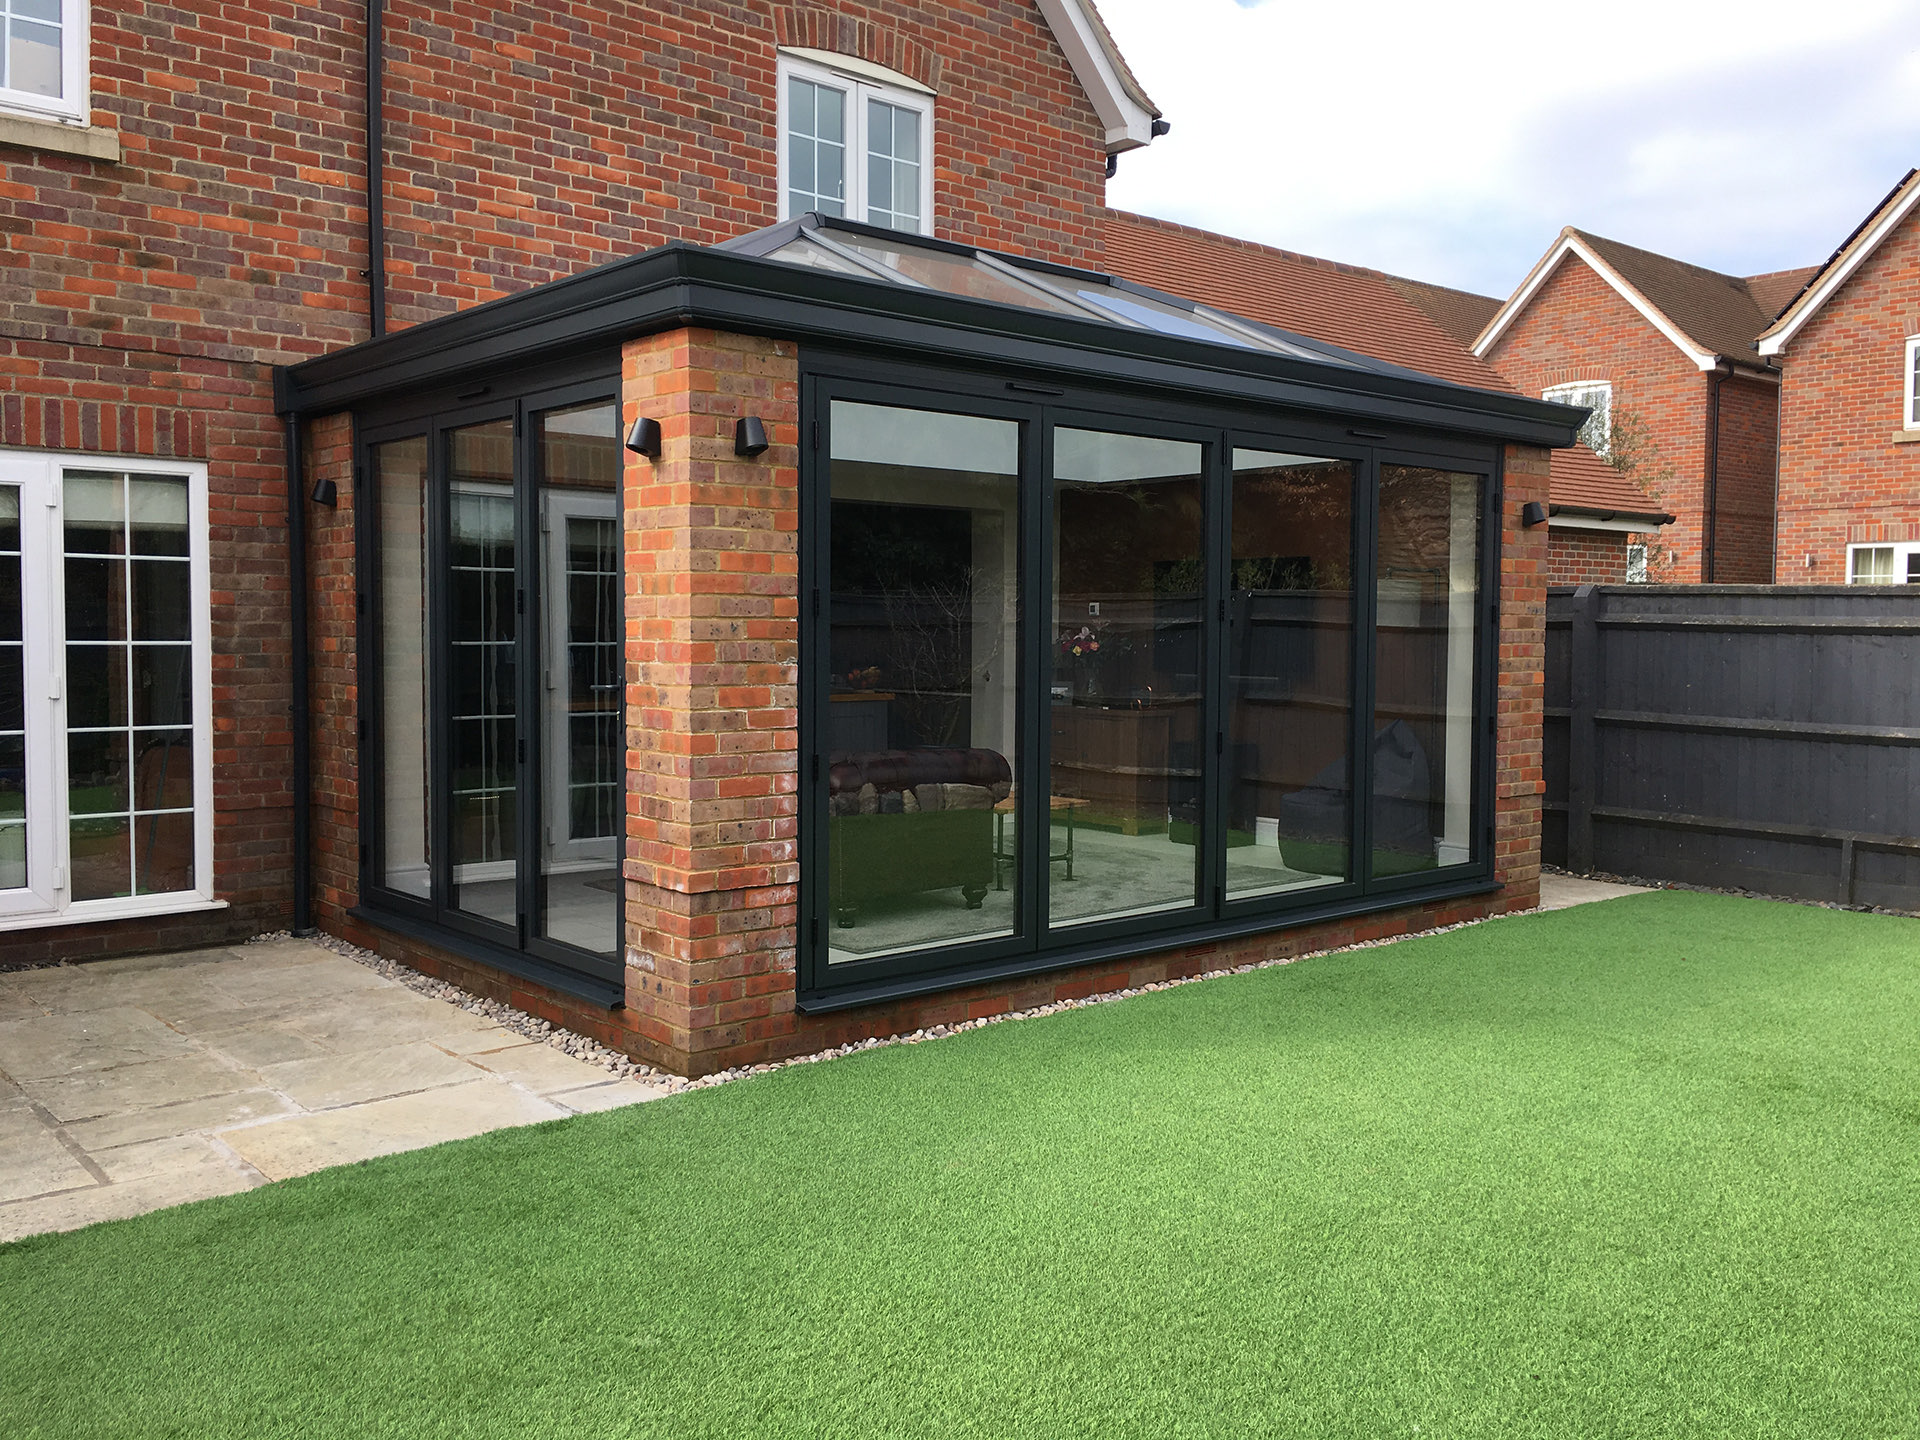
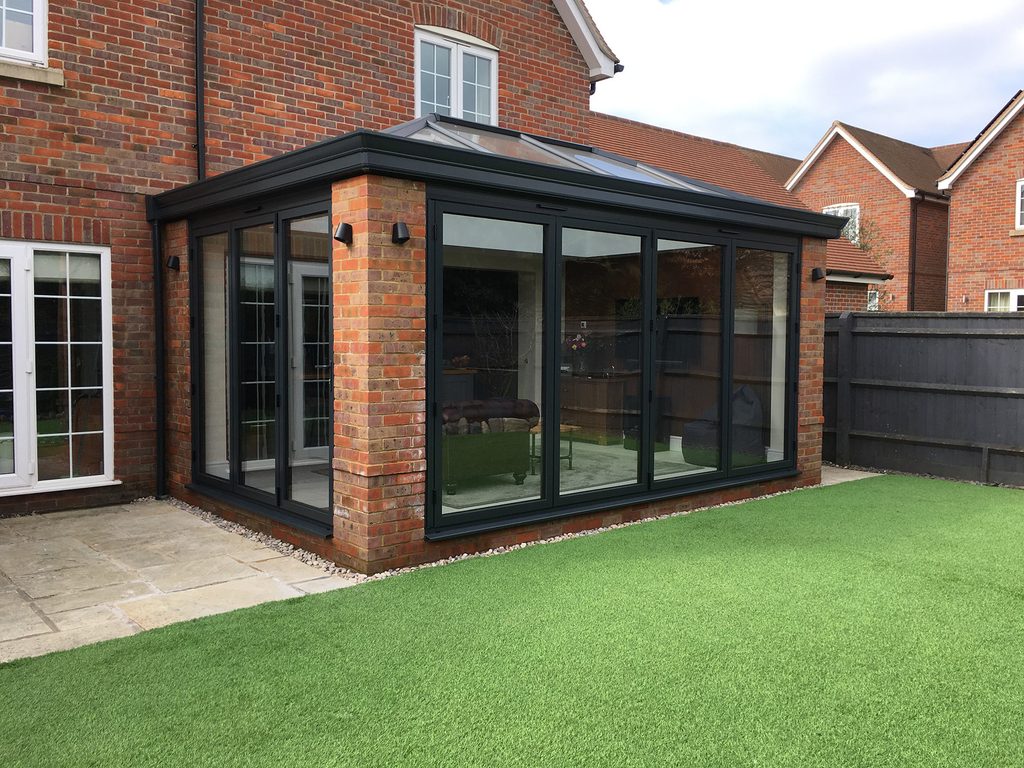
  • Conservatory Roof Replacement Cost Guide

    Conservatory Roof Replacement Cost Guide

    Leaking drips, excessive heat in summer, or freezing temperatures in winter can turn your beloved sunroom into an unusable space. If you are facing these issues, you are likely wondering how much does it cost to replace a conservatory roof to restore comfort and value to your home. This guide breaks down the expenses clearly, helping you make an informed decision without the stress of hidden fees.

    Understanding the Average Costs in 2026

    Replacing a conservatory roof is not a one-size-fits-all project. The price varies significantly based on materials, size, and structural requirements. However, understanding the baseline costs helps you budget effectively.

    In the current market, the average cost to replace a standard-sized conservatory roof (approximately 3m x 4m) ranges between $4,000 and $12,000.

    • Polycarbonate Roofs: The most affordable option, typically costing between $4,000 and $6,000.
    • Glass Roofs: A mid-range option offering better clarity, usually priced from $7,000 to $9,000.
    • Solid/Tiled Roofs: The premium choice for year-round usability, ranging from $9,000 to $15,000+.

    These figures include labor, materials, and waste removal. Keep in mind that prices can fluctuate based on your location and the complexity of the existing structure.

    What Factors Influence the Final Price?

    Before committing to a contractor, it is crucial to understand what drives the cost up or down. Several key variables play a role in the final quote.

    1. Material Selection

    The type of roofing material is the biggest cost driver. Polycarbonate is cheap but offers poor thermal efficiency. Glass provides a modern look but can still suffer from temperature extremes. Solid roofs, often made with lightweight tiles or slate, provide the best insulation but require more structural support, increasing labor costs.

    2. Size and Shape

    A larger conservatory naturally requires more materials and labor. Additionally, complex shapes like L-shaped or P-shaped conservatories take longer to install than simple rectangular ones. Custom angles and intricate detailing also add to the fabrication time.

    3. Structural Integrity

    If your existing frames are old or damaged, they may need reinforcement before a new roof can be installed. This is especially true when switching from a lightweight polycarbonate roof to a heavier solid tiled roof. Structural assessments and reinforcements can add $1,000 to $3,000 to the bill.

    4. Glazing Upgrades

    Many homeowners choose to upgrade their side windows while replacing the roof. Double or triple-glazed units improve energy efficiency but come at a premium. Expect to pay an additional $50–$100 per square foot for high-performance glazing.

    Glass vs. Polycarbonate vs. Solid: Which Is Best?

    Choosing the right material involves balancing cost, aesthetics, and functionality. Here is a quick comparison to help you decide.

    FeaturePolycarbonateGlassSolid/Tiled
    CostLowMediumHigh
    InsulationPoorModerateExcellent
    Noise ReductionPoor (rain noise)ModerateExcellent
    Light TransmissionHighVery HighLow (requires lights)
    Lifespan10–15 years20+ years25+ years
    MaintenanceLowMedium (cleaning)Low

    Polycarbonate is ideal if you are on a tight budget and only use the room occasionally. Glass is perfect for those who want maximum natural light and a modern aesthetic. Solid roofs are the best choice if you want to convert your conservatory into a year-round living space, such as a kitchen extension or home office.

    How Much Does It Cost To Replace A Conservatory Roof

    Does Replacing the Roof Require Planning Permission?

    One of the most common concerns for homeowners is whether they need official approval. In many cases, replacing a conservatory roof falls under “permitted development,” meaning you do not need full planning permission. However, there are exceptions.

    If you are changing the height of the roof, altering the external appearance significantly, or if your property is listed or in a conservation area, you may need approval. It is always wise to check with your local council. For detailed regulations on building standards, you can refer to resources like Wikipedia’s page on Building Code to understand general compliance principles, though local laws always take precedence.

    Note: Always consult with a certified installer who can handle permit applications if necessary.

    Step-by-Step Replacement Process

    Understanding the workflow helps you prepare your home and minimize disruption. Here is how a professional replacement typically unfolds.

    1. Site Survey and Measurement: A specialist visits your home to measure the existing structure and assess the condition of the frames. They will discuss material options and provide a detailed quote.
    2. Fabrication: Once you approve the design, the new roof panels are custom-made. This process usually takes 2–4 weeks depending on the material.
    3. Preparation: On installation day, the team will protect your interior furniture and floors. They will remove the old roof panels carefully to avoid damage to the frames.
    4. Installation: The new framework (if required) is fitted, followed by the roof panels. For solid roofs, insulation layers and plasterboard ceilings are installed internally.
    5. Finishing Touches: Gutters, flashings, and trim are added to ensure watertight seals. The site is cleaned, and all waste is removed.
    6. Final Inspection: The installer checks for leaks and ensures everything meets safety standards. You receive a warranty certificate and care instructions.

    How Long Does the Installation Take?

    Most standard conservatory roof replacements can be completed in 2 to 5 days.

    • Polycarbonate/Glass: These are quicker to install, often taking 2–3 days.
    • Solid Roofs: These take longer due to the internal ceiling work, typically requiring 4–5 days.

    Weather can impact the timeline, especially during the removal phase. Reputable companies will monitor forecasts and schedule accordingly to prevent water damage to your home.

    Hidden Costs to Watch Out For

    While the initial quote may seem comprehensive, some extra costs can arise. Being aware of them helps you avoid surprises.

    • Scaffolding: If your conservatory is difficult to access, scaffolding may be required. This can cost an additional $500–$1,000.
    • Electrical Work: If you are installing a solid roof, you will lose natural light. You may need to hire an electrician to install ceiling lights or fans, adding $300–$800.
    • Skip Hire: While most contractors include waste removal, confirm this in your contract. If not, hiring a skip can cost around $200–$400.
    • Decorating: After a solid roof installation, you may need to repaint the interior ceiling or walls where the new plasterboard meets the old decor.

    Frequently Asked Questions

    1. Can I replace just the panels, not the whole frame?

    Yes, in many cases, you can retain the existing aluminum or uPVC frames if they are in good condition. This significantly reduces costs. However, if the frames are warped or leaking, a full replacement is recommended for long-term durability.

    2. Will a new roof increase my home’s value?

    Absolutely. A well-insulated, aesthetically pleasing conservatory adds usable square footage to your home. Estate agents often report that a converted, year-round conservatory can increase property value by 5–10%, depending on the local market.

    3. How long does a new conservatory roof last?

    • Polycarbonate: 10–15 years before it becomes brittle or discolored.
    • Glass: 20+ years, with minimal maintenance.
    • Solid/Tiled: 25+ years, similar to a main house roof.

    4. Is a solid roof too heavy for my conservatory?

    Modern solid roof systems are designed to be lightweight. They use specialized tiles and aluminum structures that are often lighter than traditional double-glazed glass units. A professional surveyor will calculate the load-bearing capacity of your existing frames to ensure safety.

    5. Can I install the roof myself?

    It is strongly discouraged. Conservatory roofing requires precise sealing and structural knowledge. Incorrect installation can lead to leaks, structural failure, and voided warranties. Always hire a certified professional with insurance coverage.

    6. What is the best time of year to replace the roof?

    Spring and early autumn are ideal. The weather is mild, reducing the risk of rain delays during the removal phase. Avoid mid-winter if possible, as cold temperatures can affect the curing of sealants.

    Conclusion

    Replacing your conservatory roof is a significant investment, but it transforms an underused space into a valuable part of your home. Whether you choose affordable polycarbonate, elegant glass, or a highly efficient solid roof, the key is to balance your budget with your lifestyle needs.

    By understanding the costs and factors involved, you can negotiate better deals and avoid unexpected expenses. Remember, the cheapest option isn’t always the best in the long run—consider energy savings and durability.

    If you found this guide helpful, please share it with friends or family who might be considering similar home improvements. A comfortable, leak-free conservatory is just a few steps away!

  • Evaluate My Way Roofing: Replacement Guide

    Evaluate My Way Roofing: Replacement Guide

    Is your roof showing signs of wear, such as missing shingles or persistent leaks? Finding a trustworthy contractor can feel overwhelming, but it is crucial for protecting your home’s value. In this guide, we will help you Evaluate The Construction Company My Way Roofing On Roof Replacement to ensure you make an informed, confident decision for your property.


    Understanding the Scope of Roof Replacement Services

    When considering a major home improvement project like a roof replacement, understanding what constitutes a comprehensive service is vital. Many homeowners assume that “roofing” simply means swapping out old shingles for new ones. However, a professional evaluation reveals that the process involves structural integrity checks, ventilation assessment, and waterproofing layers.

    My Way Roofing, like many established construction firms in the United States, typically offers a range of services beyond simple patch jobs. To properly evaluate them, you must look at their holistic approach. Do they inspect the decking? Do they replace flashing? These details matter.

    According to industry standards, a full replacement should include:

    • Removal of existing roofing materials.
    • Inspection and repair of the roof deck (plywood/OSB).
    • Installation of ice and water shields in critical areas.
    • Proper ventilation system upgrades.
    • Installation of new underlayment and shingles.

    If a contractor skips any of these steps, the longevity of your new roof is compromised. When you evaluate The Construction Company My Way Roofing on roof replacement, ask for a detailed line-item quote that includes these specific components. This transparency is a hallmark of E-E-A-T (Experience, Expertise, Authoritativeness, and Trustworthiness) in the construction industry.

    Key Criteria for Evaluating My Way Roofing

    How do you separate a good contractor from a great one? It comes down to specific, measurable criteria. Here are the primary factors you should investigate when reviewing My Way Roofing.

    1. Licensing and Insurance Verification

    Never hire a roofer without verifying their credentials. In the US, roofing regulations vary by state. You need to ensure that My Way Roofing holds a valid general contractor’s license for your specific state. Furthermore, they must carry both General Liability Insurance and Workers’ Compensation Insurance.

    • Why it matters: If a worker gets injured on your property and the company lacks workers’ comp, you could be held liable. Always ask for proof of insurance and call the provider to verify it is current.

    2. Material Quality and Manufacturer Partnerships

    The durability of your roof depends heavily on the materials used. Top-tier roofing companies often have partnerships with major manufacturers like GAF, Owens Corning, or CertainTeed. These partnerships often allow contractors to offer extended warranties that standard installers cannot.

    Check if My Way Roofing is a “Certified Installer” or “Master Elite Contractor.” This status indicates that the manufacturer has vetted their workmanship. For more context on roofing material standards, you can refer to general construction guidelines on Wikipedia.

    3. Warranty Structure

    A robust warranty is your safety net. There are two types of warranties you should look for:

    • Manufacturer’s Warranty: Covers defects in the shingles themselves (usually 20–50 years).
    • Workmanship Warranty: Covers errors made during installation (usually 2–10 years).

    When you evaluate The Construction Company My Way Roofing on roof replacement, specifically ask about the length and coverage of their workmanship warranty. A company confident in its skills will offer a substantial guarantee.

    Step-by-Step Evaluation Process

    To make this easier, follow this logical step-by-step process to assess My Way Roofing effectively.

    Step 1: Initial Consultation and Inspection Contact My Way Roofing for a free inspection. A reputable company will not give you a quote over the phone without seeing the roof. They should send a representative to inspect the attic, the exterior, and the drainage systems.

    Step 2: Review the Written Estimate Do not accept verbal quotes. The estimate should be detailed. It must specify:

    • Type and brand of shingles.
    • Color code.
    • Number of layers being removed.
    • Cleanup procedures.

    Step 3: Check References and Past Work Ask for three recent references in your area. Call them. Ask specific questions:

    • “Did they finish on time?”
    • “Was the cleanup thorough?”
    • “Have there been any leaks since the installation?”

    Step 4: Compare with Competitors Get at least two other quotes from local competitors. Use this table to compare:

    FeatureMy Way RoofingCompetitor ACompetitor B
    Total Cost$[Insert Quote]$[Insert Quote]$[Insert Quote]
    Warranty Length[e.g., 10 Years][e.g., 5 Years][e.g., 15 Years]
    Material Brand[e.g., GAF][e.g., Owens Corning][e.g., CertainTeed]
    Timeline[e.g., 3 Days][e.g., 5 Days][e.g., 2 Days]

    This visual comparison helps you see where My Way Roofing stands in terms of value, not just price.

    Common Red Flags to Watch Out For

    While evaluating, be vigilant for warning signs that may indicate poor business practices.

    • High Pressure Sales Tactics: If the representative says, “This price is only good for today,” walk away. Reputable companies give you time to think.
    • Large Upfront Deposits: Never pay 100% upfront. A standard deposit is usually 10–30% to secure materials. The rest should be paid upon completion and satisfaction.
    • No Physical Address: Ensure My Way Roofing has a verifiable physical office address, not just a P.O. Box. This adds to their accountability.
    • Vague Contracts: The contract must detail every aspect of the job, including start dates, end dates, and payment schedules.
    Evaluate The Construction Company My Way Roofing On Roof Replacement

    The Importance of Local Experience

    Roofing is not a one-size-fits-all solution. Climate plays a massive role in material selection. For example, roofs in Florida need to withstand hurricane-force winds, while roofs in Minnesota must handle heavy snow loads and ice dams.

    When you evaluate The Construction Company My Way Roofing on roof replacement, consider their local track record. Have they been operating in your specific region for several years? Local experience means they understand the local building codes and weather patterns. This localized expertise is a key component of trustworthiness.

    Financial Considerations and Financing Options

    Roof replacement is a significant investment. The average cost in the US ranges from $5,000 to $15,000, depending on size and materials. Does My Way Roofing offer financing options?

    Many top-tier contractors partner with financial institutions to offer low-interest loans or payment plans. This can make the project more manageable for homeowners. Ask about:

    • Zero-interest promotional periods.
    • Monthly payment plans.
    • Acceptance of home equity lines of credit (HELOC).

    Transparent pricing and flexible payment options are signs of a customer-centric business model.


    FAQ Section

    1. How long does a typical roof replacement take with My Way Roofing?

    Most residential roof replacements can be completed in 1 to 3 days. However, this depends on the size of the roof, the complexity of the design (e.g., multiple chimneys or valleys), and weather conditions. My Way Roofing should provide a specific timeline in your contract.

    2. Do I need to be home during the roof replacement?

    It is not strictly necessary for you to be home all day, but it is recommended to be available at the start and end of each day. This allows you to address any unexpected issues immediately and perform a final walkthrough. Ensure the crew has access to your property and electricity.

    3. What happens to my old roofing materials?

    Professional companies like My Way Roofing are responsible for the cleanup. They should use tarps to protect your landscaping and use magnets to pick up stray nails. All old shingles and debris should be hauled away and disposed of according to local regulations. Verify this cleanup process is included in your quote.

    4. Can My Way Roofing install solar panels later?

    If you plan to go solar in the future, inform My Way Roofing during the evaluation phase. They can install “solar-ready” flashing and conduit mounts during the replacement. This saves you money and prevents damage to the new roof later. Not all contractors offer this, so it is a key differentiator to ask about.

    5. How do I verify the warranty after the job is done?

    Once the job is complete, My Way Roofing should provide you with warranty registration documents. For manufacturer warranties, you often need to register the product online within 30–60 days. Keep these documents in a safe place, along with your final invoice and contract.

    6. Is a lower price always better when evaluating roofing companies?

    No. A significantly lower price often indicates cut corners, such as using lower-grade underlayment or skipping nail patterns specified by the manufacturer. When you evaluate The Construction Company My Way Roofing on roof replacement, focus on value and quality rather than just the bottom line. The cheapest option can end up costing more in repairs within a few years.


    Conclusion

    Choosing the right contractor is the most critical step in ensuring your new roof lasts for decades. By taking the time to evaluate The Construction Company My Way Roofing on roof replacement, you are investing in peace of mind. Look for transparency, strong warranties, verified insurance, and positive local reviews.

    Remember, your roof is your home’s first line of defense against the elements. Don’t rush the decision. Use the checklist provided above to compare My Way Roofing against other local options. If they meet the high standards of professionalism and quality outlined here, they may be the perfect partner for your home improvement journey.

    Found this guide helpful? Share it with friends or family who are also considering a roof replacement on social media. Helping others make informed choices builds a stronger, safer community.