Tag: Mobile Home Renovation

  • How to Install a Metal Roof on a Mobile Home

    How to Install a Metal Roof on a Mobile Home

    Replacing the roof on a manufactured home is one of the most critical maintenance tasks you can undertake. Many older mobile homes suffer from leaks due to deteriorating rubber or asphalt shingles that simply weren’t designed to last decades. If you are tired of patching leaks every spring, learning how to install a metal roof on a mobile home can be the permanent solution you need. This guide will walk you through the process with clarity, safety, and precision.

    Why Choose Metal for Your Mobile Home?

    Before diving into the tools and screws, it is vital to understand why metal is superior for manufactured housing. Unlike site-built homes, mobile homes have unique structural considerations. They are lighter, and their frames are designed to flex slightly during transport and settling.

    Traditional asphalt shingles add significant weight and can crack when the home shifts. Metal roofing, particularly aluminum or light-gauge steel, is incredibly lightweight—often weighing less than 1.5 pounds per square foot. This reduces stress on the trusses while providing a lifespan of 40 to 70 years. According to industry data, metal roofs reflect solar radiant heat, which can reduce cooling costs by 10–25%, a massive benefit for mobile homes that often struggle with insulation efficiency.

    Can You Put a Metal Roof Over an Existing Mobile Home Roof?

    This is the most common question homeowners ask. The short answer is: It depends, but usually no.

    While “roof-over” methods are popular for site-built houses, mobile homes present specific risks. Most manufactured homes built before 1980 have low-slope roofs (sometimes as low as 1:12 pitch). Metal roofing generally requires a minimum pitch of 3:12 for water to shed properly without specialized sealing systems.

    Furthermore, adding a second layer traps moisture between the old and new roofs. In a mobile home, where ventilation is already a challenge, this trapped humidity can rot the wooden decking and corrode the steel frame beneath. For long-term integrity, it is highly recommended to remove the old roofing material down to the deck. This allows you to inspect the structural integrity of the plywood or OSB sheathing and repair any soft spots caused by previous leaks.

    Essential Tools and Materials Checklist

    Preparation is half the battle. Having the right tools prevents mid-project delays and ensures a professional finish. Do not skimp on quality here; your roof is your primary defense against the elements.

    Required Tools:

    • Drill/Impact Driver: With a clutch setting to prevent over-driving screws.
    • Metal Snips or Electric Shear: For cutting panels to size. Avoid abrasive saws if possible, as they create hot edges that burn off galvanization.
    • Chalk Line: For ensuring straight panel alignment.
    • Safety Gear: Harness, non-slip boots, gloves, and eye protection. Never work on a roof alone.
    • Sealant Gun: For applying butyl tape and urethane sealant.

    Materials Needed:

    • Metal Panels: Standing seam or corrugated panels (Aluminum is best for coastal areas; Galvalume steel is cost-effective for inland).
    • Screws: Self-tapping metal roofing screws with EPDM washers. Ensure they are long enough to penetrate the purlins or rafters, not just the decking.
    • Closure Strips: Foam strips that fit under the ribs of the metal to block wind and pests.
    • Trim Pieces: Eave trim, gable trim, and ridge caps.
    • Underlayment: A synthetic, breathable roof underlayment is superior to felt paper for moisture management.
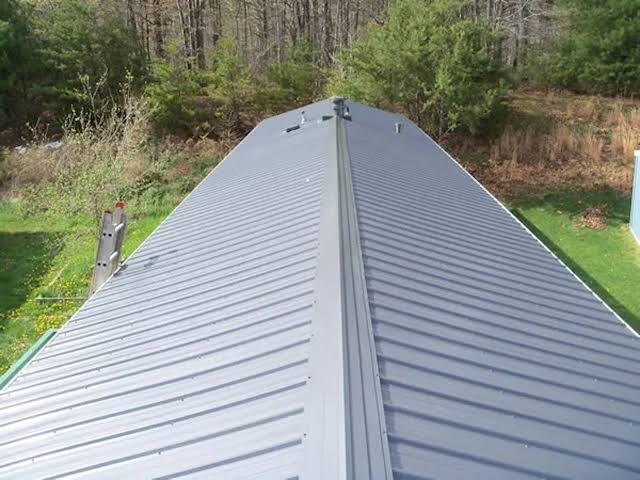
    How To Install A Metal Roof On A Mobile Home

    Step-by-Step Installation Guide

    Installing a metal roof requires precision. Follow these steps methodically to ensure a watertight seal.

    Step 1: Remove Old Roofing and Inspect Decking

    Strip away all existing shingles, rubber membranes, or vent pipes. Once exposed, inspect the wood decking. Any board that feels soft or shows signs of rot must be replaced. Use exterior-grade plywood of the same thickness as the existing deck. Nail it securely to the rafters.

    Step 2: Install Drip Edge and Underlayment

    Start at the eaves (the bottom edge). Install a metal drip edge along the eaves to direct water away from the fascia. Next, roll out your synthetic underlayment. Start from the bottom and work your way up, overlapping each row by at least 6 inches. Secure it with roofing nails or staples every 12–18 inches. This layer acts as a secondary barrier against wind-driven rain.

    Step 3: Install Closure Strips and Eave Trim

    If you are using corrugated or ribbed panels, install foam closure strips along the eave. These fill the gaps between the metal ribs and the roof deck, preventing birds, insects, and wind from entering. Snap the eave trim over the closure strip and secure it with screws every 12 inches.

    Step 4: Lay the First Panel

    This is the most critical step. If the first panel is crooked, the entire roof will be crooked. Measure carefully to ensure the panel overhangs the drip edge by about 1–2 inches. Use a chalk line to mark your screw lines. Drill pilot holes if necessary, then drive your screws through the flat part of the panel (not the high rib, unless specified by the manufacturer) into the structural framing below.

    Pro Tip: Do not overtighten screws. The EPDM washer should compress slightly to form a seal, but if you crush it, it will fail. Stop when you feel resistance.

    Step 5: Install Subsequent Panels

    Overlap the next panel according to the manufacturer’s specifications (usually one rib overlap). Check alignment every three panels. Consistency is key. Continue this process until you reach the opposite side of the roof.

    Step 6: Add Ridge Cap and Flashing

    Once the field panels are complete, install the ridge cap along the peak of the roof. Apply a bead of urethane sealant under the ridge cap before screwing it down. This prevents water from penetrating the highest point of your roof. Install gable trim on the sides to finish the edges cleanly.

    For detailed standards on roofing materials and safety, you can refer to general construction guidelines provided by Wikipedia.

    Cost Breakdown: DIY vs. Professional

    Understanding the financial aspect helps you plan better. Here is a realistic comparison for a standard 1,500 sq. ft. mobile home.

    ItemDIY Cost EstimateProfessional Cost Estimate
    Materials$3,000 – $5,000$3,000 – $5,000
    Labor$0 (Your time)$4,000 – $7,000
    Disposal Fees$100 – $300Included
    Total$3,100 – $5,300$7,000 – $12,000

    Note: Prices vary by region and metal type. Aluminum is typically 20% more expensive than steel but offers better corrosion resistance.

    Common Mistakes to Avoid

    Even experienced DIYers make errors. Here are the top pitfalls to watch out for:

    1. Walking on the Ribs: Never step on the high ribs of the metal panels. Always step on the flat areas where the screws are located, or use a plank to distribute your weight. Stepping on ribs can dent the metal and break the seal.
    2. Ignoring Thermal Expansion: Metal expands and contracts with temperature changes. If you screw panels too tightly without allowing for slight movement, the oil-canning effect (popping noises) may occur, and screws can back out over time.
    3. Mixing Metals: Do not use copper flashing with aluminum or steel roofing. The galvanic reaction will cause rapid corrosion. Stick to compatible metals or use isolated barriers.

    Frequently Asked Questions (FAQ)

    1. What is the best type of metal for a mobile home roof?

    Aluminum is often the best choice for mobile homes. It is lightweight, rust-proof, and easy to cut. However, Galvalume steel is a strong, cost-effective alternative if you live in an area without salt air. Avoid heavy copper or zinc unless you have verified your home’s structural capacity.

    2. Do I need a permit to install a metal roof on my mobile home?

    In most jurisdictions, yes. Roofing is considered a structural change. Check with your local county building department. Additionally, if you live in a mobile home park, you must get approval from the park management, as they often have aesthetic guidelines.

    3. How long does it take to install a metal roof on a mobile home?

    For a DIY team of two people, expect the project to take 3 to 5 days. This includes removal of the old roof, repairs, and installation. Professionals can typically complete the job in 1–2 days.

    4. Will a metal roof make my mobile home hotter?

    No, actually the opposite. Metal roofs reflect solar radiation. When installed with proper ventilation and an air gap (if using standing seam), they can significantly keep your home cooler in summer compared to dark asphalt shingles that absorb heat.

    5. Can I install solar panels on a metal mobile home roof?

    Yes, and it is easier than on shingle roofs. You can use clamps that attach directly to the metal seams without drilling holes, preserving the warranty and waterproofing of your roof. Ensure your roof structure can support the additional load.

    Conclusion

    Learning how to install a metal roof on a mobile home is a rewarding project that adds value, durability, and peace of mind to your living space. By removing the old material, preparing the deck correctly, and following precise installation steps, you can achieve a professional-grade result. Remember, safety is paramount—never rush the process, and always double-check your measurements.

    If you found this guide helpful, please share it on social media to help other mobile homeowners tackle their renovation projects with confidence. Have questions or tips of your own? Leave a comment below!
  • Metal Roof Cost for Mobile Homes: 2026 Price Guide

    Metal Roof Cost for Mobile Homes: 2026 Price Guide

    Replacing the roof on your mobile home is one of the most significant investments you can make to protect your asset. It is not just about aesthetics; it is about security, energy efficiency, and peace of mind during storm season. If you are currently researching how much is a metal roof on a mobile home, you are likely looking for a durable solution that won’t break the bank but will last for decades.

    Many mobile home owners struggle with aging asphalt shingles that crack under heat or leak during heavy rains. Metal roofing offers a superior alternative, but the upfront cost can seem daunting without a clear breakdown. In this guide, we will demystify the pricing, explain the hidden factors that affect your final bill, and help you decide if this upgrade is right for your budget.

    What Is the Average Cost of a Metal Roof on a Mobile Home?

    When asking how much is a metal roof on a mobile home, the answer varies based on size, material type, and labor rates in your area. However, we can provide a reliable national average for 2026.

    Generally, homeowners can expect to pay between $7,500 and $15,000 for a complete metal roof replacement on a standard single-wide or double-wide mobile home. This translates to approximately $9 to $14 per square foot installed.

    To give you a clearer picture, here is a breakdown by home size:

    Mobile Home SizeApproximate Square FootageEstimated Low-End CostEstimated High-End Cost
    Single-Wide (14×70)~980 sq. ft.$7,500$11,500
    Double-Wide (28×40)~1,120 sq. ft.$9,000$13,500
    Large Double-Wide~1,400+ sq. ft.$11,000$16,000+

    Note: These prices include materials and professional labor. DIY projects will significantly reduce costs but require advanced skills.

    The price fluctuation depends heavily on the type of metal chosen. Galvanized steel is the most affordable option, while aluminum and copper command higher prices due to their corrosion resistance and aesthetic appeal. For mobile homes, steel panels with a Kynar 500 finish are the industry standard because they balance durability with cost-effectiveness.

    Why Choose Metal Over Traditional Shingles?

    Before diving deeper into costs, it is crucial to understand why so many experts recommend metal for manufactured housing. Mobile homes have unique structural considerations compared to site-built houses. They are lighter, and their roof trusses may not support the heavy weight of concrete tiles or multiple layers of old shingles.

    Weight and Structural Integrity

    Metal roofing is incredibly lightweight. A typical metal panel weighs only 1 to 1.5 pounds per square foot, whereas asphalt shingles can weigh up to 3 pounds per square foot, especially when wet. This reduced load places less stress on the mobile home’s frame, reducing the risk of structural sagging over time.

    Longevity and Durability

    While asphalt shingles typically last 15–20 years, a properly installed metal roof can last 40 to 70 years. This means you might never need to replace your roof again. According to industry data, metal roofs also offer superior resistance to high winds, which is critical for mobile homes often located in open areas or storm-prone regions.

    Energy Efficiency

    One of the biggest complaints from mobile home owners is temperature regulation. Metal roofs reflect solar radiant heat, which can reduce cooling costs by 10–25%. In hot US states like Texas, Arizona, and Florida, this energy savings can partially offset the initial installation cost within a few years.

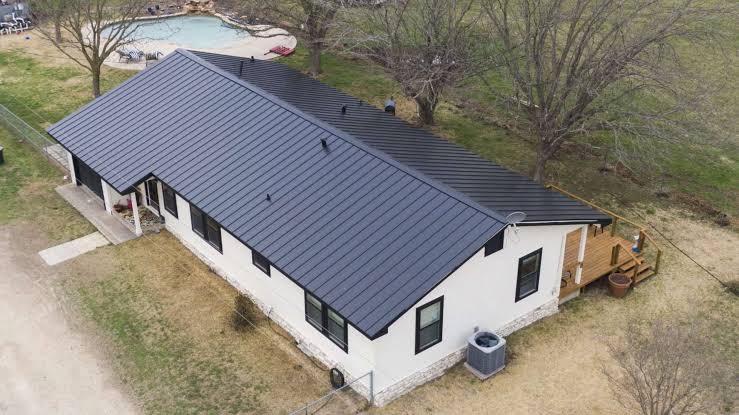
    How Much Is A Metal Roof On A Mobile Home

    Factors That Influence Your Final Quote

    Understanding how much is a metal roof on a mobile home requires looking beyond the base material price. Several variables can cause your quote to swing by thousands of dollars.

    1. Roof Complexity and Pitch

    Mobile homes usually have low-slope roofs. While this makes installation slightly easier in terms of safety, it requires specific sealing techniques to prevent water pooling. If your home has dormers, skylights, or complex angles, labor costs will increase because the installer must cut and seal more panels.

    2. Removal of Old Roofing

    Does your current roof need to be torn off? Most contractors will charge an additional $1,000 to $2,500 for removal and disposal of old shingles. Some metal roofs can be installed over existing asphalt if the structure is sound, which saves money. However, you must check local building codes and ensure there is no trapped moisture or mold underneath.

    3. Insulation Upgrades

    Since you are already investing in a new roof, it is the perfect time to upgrade insulation. Adding rigid foam board or spray foam under the metal panels can dramatically improve comfort. Expect to add $1.50 to $3.00 per square foot for high-quality insulation materials.

    4. Geographic Location

    Labor rates vary significantly across the US. Installing a roof in rural Midwest areas may cost less than in coastal cities like Seattle or Miami due to differences in union rates, insurance costs for contractors, and general cost of living.

    Step-by-Step Installation Overview

    If you are hiring a professional, knowing the process helps you verify that the job is done correctly. If you are considering a DIY approach, please note that roofing a mobile home is complex and dangerous. Here is how professionals typically handle it:

    1. Inspection and Measurement: The contractor measures the exact square footage and inspects the roof deck for rot or damage. Any soft spots must be repaired before proceeding.
    2. Preparation: If removing old shingles, the crew tears them off and hauls them away. The roof deck is cleaned thoroughly.
    3. Underlayment Installation: A synthetic underlayment or ice-and-water shield is rolled out. This layer acts as a secondary barrier against leaks. This step is critical for mobile homes.
    4. Flashing and Trim: Drip edges and valley flashing are installed. Proper flashing prevents water from seeping under the panels at the edges.
    5. Panel Installation: Metal panels are laid starting from the eave (bottom) and working up to the ridge. Screws with rubber washers are used to secure the panels. Crucial: Screws must not be over-tightened, or the washers will fail.
    6. Ridge Cap Installation: The final piece is the ridge cap, which seals the peak of the roof. Sealant is applied generously here.

    For more technical details on roofing standards, you can refer to general construction guidelines on Wikipedia.

    Pros and Cons of Metal Roofing for Mobile Homes

    To help you make an informed decision, let’s look at the trade-offs.

    Pros:

    • Long Lifespan: Lasts 2–3 times longer than shingles.
    • Low Maintenance: Requires occasional cleaning but no frequent repairs.
    • Fire Resistant: Metal is non-combustible, potentially lowering insurance premiums.
    • Eco-Friendly: Most metal roofs contain recycled material and are 100% recyclable at the end of their life.

    Cons:

    • Higher Upfront Cost: Initial investment is significantly higher than asphalt.
    • Noise: Rain and hail can be louder without proper insulation.
    • Expansion/Contraction: Metal expands and contracts with temperature changes, requiring specialized fasteners to avoid loosening over time.

    Frequently Asked Questions (FAQ)

    1. Can I install a metal roof over my existing shingles?

    Yes, in many cases, you can install metal over one layer of existing asphalt shingles. This saves on disposal fees and labor. However, you must ensure the roof deck is structurally sound and that local building codes permit it. Never install metal over two or more layers of shingles.

    2. Does a metal roof void my mobile home warranty?

    Generally, no. In fact, many manufacturers view metal roofing as an upgrade. However, you should always check with your specific home manufacturer or warranty provider. Ensure the installer uses non-penetrating clips where possible to avoid damaging the original structure.

    3. How long does the installation take?

    For a standard single-wide or double-wide mobile home, a professional crew can typically complete the installation in 1 to 3 days. Weather conditions and the complexity of the roof will affect this timeline.

    4. Will a metal roof increase my home’s resale value?

    Absolutely. A new metal roof is a major selling point. It signals to buyers that the home has been well-maintained and that they will not face immediate roofing expenses. Appraisers often recognize the added value of durable, energy-efficient materials.

    5. What is the best type of metal for a mobile home?

    Galvalume steel or aluminum are the top choices. Steel is stronger and cheaper, while aluminum is lighter and naturally rust-resistant, making it ideal for coastal areas. Avoid copper unless budget is no object, as it is excessively expensive for mobile home applications.

    Conclusion

    So, how much is a metal roof on a mobile home? While the initial price tag of $7,500 to $15,000 may seem steep, it is an investment in longevity, safety, and energy efficiency. When you consider that you may never need to replace your roof again, the cost-per-year value is unbeatable compared to traditional shingles.

    By choosing metal, you are protecting your home from the elements while potentially lowering your monthly energy bills. It transforms a vulnerable part of your home into its strongest asset.

    If you found this guide helpful, please share it with other mobile home owners on Facebook or Twitter who might be struggling with their roofing decisions. Have questions or experiences to share? Leave a comment below!