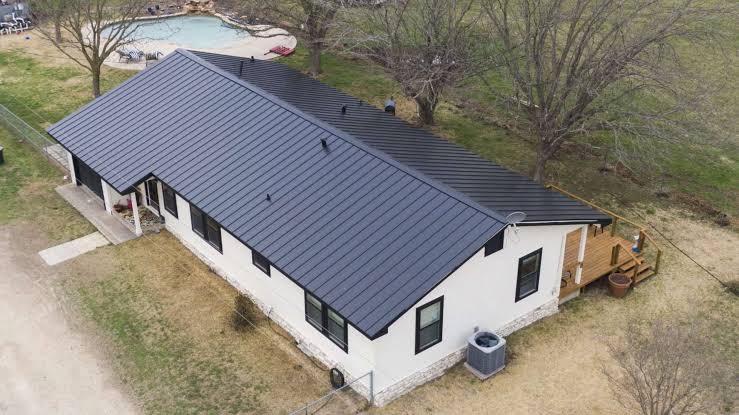
Tag: Metal Roof Installation

  • Metal Roof Furring Strip Spacing Guide

    Metal Roof Furring Strip Spacing Guide

    Installing a metal roof is one of the best investments you can make for your home’s longevity and energy efficiency. However, the difference between a roof that lasts 50 years and one that fails prematurely often comes down to the hidden framework beneath the panels. If you are wondering how far apart should furring strips be for metal roof, you are asking the right question to ensure structural integrity and proper drainage.

    Getting this spacing wrong can lead to noisy roofs, oil-canning (visible waviness in the metal), or even structural failure during heavy snow loads. In this guide, we will break down the industry standards, explain why spacing matters, and provide a step-by-step approach to installing your substructure correctly. Whether you are a seasoned DIYer or hiring a contractor, understanding these fundamentals is crucial for a professional-grade finish.

    What Is the Standard Spacing for Furring Strips?

    When planning your metal roof installation, the most common question is about the distance between supports. For the vast majority of residential and light commercial applications, the standard spacing for furring strips (also known as purlins or battens) is 24 inches on center.

    However, “on center” (OC) is the key phrase here. This means you measure 24 inches from the center of one strip to the center of the next. This spacing aligns perfectly with standard lumber dimensions and provides adequate support for most 26-gauge and 24-gauge metal roofing panels.

    When to Use 16 Inches On Center

    While 24 inches is the standard, there are specific scenarios where you must tighten the spacing to 16 inches on center:

    • Heavy Snow Loads: If you live in an area with significant annual snowfall, closer spacing prevents the metal from sagging under weight.
    • Thinner Gauge Metal: If you are using lighter gauge metal (such as 29-gauge), it requires more frequent support to prevent flexing.
    • Wide Panel Profiles: Some standing seam profiles with wider flat areas may require closer support to maintain aesthetic straightness.
    • High Wind Zones: In coastal areas or regions prone to hurricanes, tighter spacing adds rigidity against uplift forces.

    Always check your local building codes. In many US jurisdictions, the International Residential Code (IRC) dictates minimum requirements based on your specific geographic load zones.

    Why Does Furring Strip Spacing Matter?

    You might think that as long as the screws hit wood, the spacing doesn’t matter much. However, improper spacing leads to three major issues that can compromise your roof.

    1. Prevention of Oil-Canning

    Oil-canning is a phenomenon where the flat areas of the metal panel appear wavy or distorted. This happens when the metal expands and contracts with temperature changes but lacks sufficient backing to remain flat. Properly spaced furring strips provide the necessary tension and support to keep the panels looking sleek and professional.

    2. Structural Integrity Under Load

    Metal roofs are strong, but they are not structural beams themselves. They transfer the load (snow, rain, workers walking on the roof) to the furring strips, which then transfer it to the rafters. If the strips are too far apart, they can bow or break, leading to leaks or collapse.

    3. Noise Reduction

    A common complaint about metal roofs is noise during rain or hail. Properly secured furring strips create a solid base that dampens vibration. If strips are spaced too widely, the metal acts like a drumhead, amplifying sound rather than absorbing it.
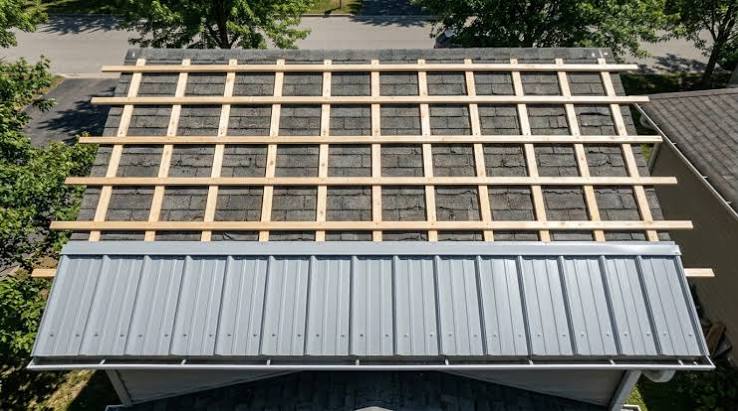
    How Far Apart Should Furring Strips Be For Metal Roof

    Furring Strips vs. Solid Sheathing: A Comparison

    Before you buy lumber, you need to decide between using furring strips over open rafters or installing them over solid sheathing (plywood/OSB). Here is a quick comparison to help you decide.

    FeatureFurring Strips Only (Open Rafter)Furring Strips Over Sheathing
    CostLower (less material)Higher (requires plywood/OSB)
    VentilationExcellent natural airflowRequires ridge/soffit vents
    InsulationHarder to insulate effectivelyEasier to add rigid foam or batts
    WalkabilityDangerous (steps only on strips)Safer (solid surface)
    Best ForBarns, sheds, patiosResidential homes, conditioned spaces

    For most residential homes in the US, building codes require solid sheathing underneath the metal for fire rating and wind uplift resistance. In these cases, the furring strips are installed on top of the sheathing to create a ventilation gap.

    Step-by-Step Installation Guide

    Proper installation is just as important as the spacing. Follow these steps to ensure your furring strips are aligned and secure.

    Step 1: Prepare the Surface

    Ensure your rafters or sheathing are clean, dry, and free of debris. If you are installing over existing shingles, check local codes to see if this is permitted. Usually, removing old roofing is recommended to inspect the deck.

    Step 2: Install Drip Edge and Underlayment

    Before laying any wood, install your drip edge along the eaves. Then, roll out your synthetic underlayment. This layer acts as a secondary water barrier. Secure it with cap nails or staples according to the manufacturer’s instructions.

    Step 3: Mark Your Layout

    Do not guess the spacing. Use a chalk line to mark every 24 inches (or 16 inches, depending on your plan) from the eave up to the ridge.

    • Tip: Start measuring from the bottom edge of the fascia board to ensure your first strip is perfectly aligned.

    Step 4: Install the First Strip

    Place the first furring strip (usually a 1×4 or 2×4 pressure-treated lumber) along the eave line. Ensure it is straight. Secure it into the rafters or sheathing using corrosion-resistant screws.

    • Screw Type: Use #10 or #12 hex-head structural screws. Do not use standard drywall screws; they lack the shear strength needed for roofing.

    Step 5: Continue Up the Roof

    Install subsequent strips along your chalk lines. Check for straightness every few rows. If a strip is bowed, replace it. A crooked furring strip will result in a crooked metal roof.

    Step 6: Handle the Ridge

    The final strip at the ridge may need to be cut to fit. Ensure there is enough room for your ridge cap ventilation system.

    Material Selection: What Wood to Use?

    Not all wood is created equal for roofing applications. Since this layer is trapped between the metal and the house, it needs to resist moisture and rot.

    • Pressure-Treated Lumber: This is the gold standard for furring strips. Look for lumber treated with ACQ (Alkaline Copper Quaternary) or similar preservatives. It resists rot and insect damage.
    • Cedar or Redwood: These naturally rot-resistant woods are excellent alternatives if you want to avoid chemicals, though they are more expensive.
    • Avoid Untreated Pine: Standard white pine or spruce will rot quickly when condensation forms under the metal panels, leading to premature failure.

    According to Wikipedia’s entry on Roofing, proper substrate preparation is critical for the longevity of any roofing material, especially metal which interacts dynamically with thermal changes.

    FAQ Section

    How thick should furring strips be for a metal roof?

    The standard thickness is 1 inch nominal (which is actually 3/4 inch thick). Common sizes are 1×4 or 2×4. The 2×4 is often preferred because it provides a deeper cavity for better ventilation and allows for thicker insulation if needed.

    Can I install metal roofing directly to plywood without furring strips?

    Yes, you can, but it is not recommended for most climates. Installing directly to plywood traps heat and moisture, leading to condensation issues inside the attic. Furring strips create an air gap that allows moisture to escape and reduces heat transfer, improving energy efficiency.

    Do furring strips need to be vented?

    The strips themselves do not need vents, but the space they create does. You must ensure there is intake ventilation at the eaves (soffits) and exhaust ventilation at the ridge. This airflow carries away warm, moist air that accumulates under the metal.

    What screws should I use to attach furring strips?

    Use structural wood screws or lag screws that are rated for exterior use. Galvanized or stainless steel is best to prevent rust. Ensure the screws are long enough to penetrate at least 1.5 inches into the roof rafters or trusses.

    How do I calculate how many furring strips I need?

    Measure the length of your roof from eave to ridge. Divide this number by your spacing interval (e.g., 2 feet for 24″ OC). Add one extra strip for the starting eave strip. For example, if your roof is 20 feet long: 20 / 2 = 10 spaces + 1 start strip = 11 strips per bay width. Multiply by the number of bays across the house.

    Conclusion

    Knowing how far apart should furring strips be for metal roof is the foundation of a successful roofing project. For most homeowners, sticking to 24 inches on center with pressure-treated 1×4 or 2×4 lumber will provide the perfect balance of support, ventilation, and cost-efficiency. However, always adjust to 16 inches if you are dealing with heavy snow loads or thinner metal gauges.

    By following these guidelines, you ensure your roof remains quiet, dry, and structurally sound for decades. Don’t cut corners on the substructure; it is the unsung hero of your metal roof system.

    Did you find this guide helpful? Share it with your friends on Facebook or Pinterest who are planning their own roofing projects! If you have questions about your specific roof setup, leave a comment below—we love helping fellow DIYers succeed.
  • Metal Roof Over Shingles: Yes or No?

    Metal Roof Over Shingles: Yes or No?

    Have you ever looked up at your aging asphalt shingle roof and wondered if it’s time for an upgrade? Many homeowners are drawn to the durability and aesthetic appeal of metal roofing, but the installation process raises a critical question: Should You Remove Old Shingles Before Installing A Metal Roof? It is not just a matter of preference; it involves structural integrity, warranty validity, and long-term performance.

    Making the wrong choice here can lead to costly repairs down the line. In this guide, we will explore the technical realities, building codes, and expert recommendations to help you make an informed decision that protects your home and your investment.

    The Case for Removing Old Shingles

    While installing a new roof over an existing one (often called a “roof-over”) might seem like a quick money-saver, most professional roofers and manufacturers strongly recommend a complete tear-off. Here is why starting with a clean deck is often the superior choice.

    1. Inspecting the Roof Deck for Damage

    When you leave old shingles in place, you are essentially blind to the condition of the wood decking beneath. Asphalt shingles can hide rot, water damage, or soft spots caused by years of leakage.

    If you install metal panels over compromised decking, the screws may not hold securely. This can lead to panel loosening during high winds. By removing the old layers, you gain the opportunity to:

    • Replace rotted plywood or OSB sheathing.
    • Reinforce weak rafters.
    • Ensure a flat, solid surface for the new metal panels.

    2. Weight Load Considerations

    A common misconception is that metal roofs are always lighter than shingles. While true per square foot, adding a second layer adds significant cumulative weight.

    • Asphalt Shingles: Approx. 2–3 lbs per square foot.
    • Metal Roofing: Approx. 1–1.5 lbs per square foot.
    • Combined Load: If you keep the shingles, your roof structure must support both.

    Older homes, particularly those built before 1980, may not have been engineered to handle double the roofing load. According to general engineering principles found in resources like Wikipedia’s entry on Roofing, structural failure due to excessive dead load is a rare but serious risk when multiple layers accumulate without proper assessment.

    3. Warranty Validity

    This is a crucial point often overlooked by DIY enthusiasts. Most major metal roofing manufacturers will void their warranty if their product is installed over more than one layer of existing roofing. They require a solid, single-layer substrate to guarantee the performance of their fasteners and panels. If you plan to stay in your home for decades, protecting your warranty is essential.

    When Is It Acceptable to Keep Old Shingles?

    There are specific scenarios where leaving the old shingles might be permissible, though it is rarely the best option.

    • Single Layer Only: Most local building codes allow a maximum of two layers of roofing material. If you already have two layers, you must tear them off. If you have only one layer, a roof-over might be code-compliant.
    • Budget Constraints: Removing shingles is labor-intensive and increases disposal fees. Keeping them can save 15–20% on initial installation costs.
    • Time Sensitivity: A tear-off exposes your home to the elements. If rain is forecasted and you cannot get the metal installed immediately, keeping the old layer provides temporary weather protection during the transition.

    However, even in these cases, you must address the uneven surface issue.

    Should You Remove Old Shingles Before Installing A Metal Roof

    The Hidden Risks of “Roof-Over” Installations

    Installing metal directly over shingles introduces several technical challenges that can compromise the lifespan of your new roof.

    Uneven Surface and Oil Canning

    Asphalt shingles are not perfectly flat. They have tabs, granules, and overlaps. When you screw metal panels over this uneven texture, the metal may not sit flush. This can lead to:

    • Oil Canning: A visual waviness in the metal panels caused by stress from uneven fastening.
    • Loose Fasteners: Screws driven into the high points of shingles may back out over time as the shingles compress or degrade.

    Trapped Moisture and Ventilation Issues

    One of the biggest enemies of a roof is trapped moisture. Old shingles may retain dampness. If you seal them under a metal roof without proper ventilation, you create a greenhouse effect.

    • Heat builds up under the metal.
    • Moisture evaporates from the old shingles but has nowhere to go.
    • This leads to condensation on the underside of the metal panels, causing rust and rotting the deck from the inside out.

    To mitigate this, you must install a high-quality synthetic underlayment and ensure adequate attic ventilation. However, this is a band-aid solution compared to starting with a dry, clean deck.

    Difficulty in Future Repairs

    Imagine you have a leak ten years from now. If the metal is installed over shingles, locating the source of the leak becomes a detective game. You cannot easily inspect the deck or flashings without removing the metal panels first. With a tear-off, any future issues are easier to diagnose because the system is transparent and accessible.

    Step-by-Step: The Proper Installation Process

    If you decide to proceed with a metal roof, here is the industry-standard approach for a durable installation. Note that this assumes a full tear-off, which is highly recommended.

    1. Tear Off Existing Material: Remove all old shingles, nails, and flashing. Dispose of debris according to local regulations.
    2. Inspect and Repair Decking: Walk the roof deck. Replace any soft, rotted, or damaged plywood. Secure any loose boards with ring-shank nails.
    3. Install Drip Edge: Attach metal drip edge along the eaves and rakes to direct water away from the fascia.
    4. Apply Underlayment: Roll out a high-quality synthetic underlayment (not just felt paper). Overlap seams by at least 6 inches and tape them if required by the manufacturer. This acts as your secondary water barrier.
    5. Install Flashing: Put in step flashing around chimneys, valleys, and walls before the main panels go up.
    6. Mount Metal Panels: Start at the eave. Use screws with neoprene washers designed for metal roofing. Do not overtighten, as this can distort the washer and cause leaks.
    7. Add Ridge Cap: Install the ridge cap last to seal the peak of the roof.

    Comparison: Tear-Off vs. Roof-Over

    To help you visualize the trade-offs, here is a quick comparison table.

    FeatureFull Tear-OffRoof-Over (Keep Shingles)
    CostHigher (labor + disposal)Lower (saves labor/disposal)
    Deck InspectionFull visibility and repairBlind installation
    WarrantyUsually validOften voided or limited
    LifespanMaximizes metal roof lifeMay reduce longevity
    Surface QualityFlat, secure baseUneven, potential for noise
    Weight LoadStandard loadIncreased structural load

    Frequently Asked Questions (FAQ)

    1. Will a metal roof be noisy if installed over shingles?

    Yes, it can be. Without a solid deck connection, rain and hail can create more drumming noise. However, using a solid sheathing base (after tear-off) and proper insulation significantly reduces sound transmission.

    2. Can I install metal roofing over two layers of shingles?

    In most jurisdictions, no. Building codes typically prohibit more than two layers of roofing material. If you already have two layers, you must remove them all before installing metal.

    3. Does keeping old shingles affect the R-value (insulation)?

    Marginally. Asphalt shingles offer negligible insulation value. The primary thermal benefit comes from the air gap and reflective properties of the metal, not the old shingles underneath.

    4. How much does it cost to remove old shingles?

    Costs vary by region and roof size, but expect to pay between $1.00 and $3.00 per square foot for tear-off and disposal. While this adds to the upfront cost, it prevents expensive structural repairs later.

    5. What type of underlayment should I use?

    Always use a synthetic underlayment rather than traditional asphalt felt. Synthetic options are more tear-resistant, breathable, and provide better slip resistance for installers.

    6. Will my homeowner’s insurance cover a roof-over?

    Some insurers may increase premiums or deny coverage for roof-overs due to the increased risk of hidden damage and fire spread. Always check with your provider before proceeding.

    Conclusion

    So, should you remove old shingles before installing a metal roof? In the vast majority of cases, yes.

    While keeping the old shingles might save you money upfront, it introduces risks regarding structural integrity, warranty coverage, and moisture management. A full tear-off allows you to inspect and repair the roof deck, ensuring a flat, solid foundation for your new metal roof. This approach maximizes the lifespan of your investment and keeps your home safe from hidden decay.

    Think of your roof as the shield of your home. You wouldn’t patch a hole in a shield with another weak layer; you would replace it properly. The same logic applies here.

    Did you find this guide helpful? Share it with friends who are considering a roofing upgrade, or leave a comment below with your own roofing questions!

  • Can You Put A Metal Roof On A Mobile Home?

    Can You Put A Metal Roof On A Mobile Home?

    Have you noticed your current shingle roof leaking or deteriorating faster than expected? Many manufactured housing owners face this dilemma, leading them to ask: Can you put a metal roof on a mobile home? The short answer is yes, and it is often one of the smartest investments you can make for your property’s longevity and energy efficiency.

    Unlike traditional site-built houses, mobile homes have unique structural considerations. However, with the right approach, a metal roof can transform your living space, offering superior protection against harsh weather while significantly boosting curb appeal. In this guide, we will break down everything you need to know, from structural integrity to cost analysis, ensuring you make an informed decision.

    Is It Structurally Safe to Install Metal on a Mobile Home?

    The primary concern for any homeowner considering this upgrade is safety. Mobile homes, also known as manufactured homes, are built on a steel chassis and designed to be lightweight. This leads many to worry that the added weight of metal panels might overwhelm the structure.

    Fortunately, modern standing-seam metal roofing is surprisingly lightweight. In fact, it often weighs less than traditional asphalt shingles. A typical square (100 square feet) of asphalt shingles can weigh between 200 to 350 pounds, whereas a square of metal roofing typically weighs only 50 to 150 pounds, depending on the gauge and type.

    However, “lightweight” does not mean “no preparation needed.” Before installation, a professional must inspect the existing roof trusses and decking. Older mobile homes may have weakened wood due to moisture intrusion. If the underlying structure is compromised, it must be repaired before any new roofing material is applied. According to general construction standards, the roof must be able to support not just the static weight of the metal, but also dynamic loads like snow and wind uplift.

    For peace of mind, always consult with a structural engineer or a certified roofing contractor who specializes in manufactured housing. They can verify that your specific home model can handle the transition without requiring extensive reinforcement.

    What Are the Benefits of Choosing Metal Over Shingles?

    Why are so many mobile home owners making the switch? The advantages go beyond just aesthetics. Here is a breakdown of why metal is becoming the preferred choice for manufactured homes.

    1. Exceptional Durability and Lifespan

    Asphalt shingles on mobile homes often last only 10–15 years due to the flexible nature of the structure and exposure to elements. In contrast, a properly installed metal roof can last 40 to 70 years. It resists cracking, shrinking, and eroding, making it ideal for long-term residency.

    2. Energy Efficiency

    Mobile homes are notorious for poor insulation. Metal roofs reflect solar radiant heat, which can reduce cooling costs by 10–25%. This is particularly beneficial in hotter climates where air conditioning bills can skyrocket during summer months.

    3. Weather Resistance

    Manufactured homes are often located in areas prone to high winds or heavy rain. Metal roofing systems, especially those with standing seams, offer superior resistance to wind uplift (often rated for winds up to 140 mph) and shed snow and rain effectively, preventing water pooling and leaks.

    4. Low Maintenance

    Unlike shingles that require periodic inspection for missing granules or curling edges, metal roofs require minimal maintenance. An occasional rinse with a garden hose is usually sufficient to keep them looking new.

    Metal Roof vs. Asphalt Shingles: A Quick Comparison

    To help you visualize the differences, here is a comparative table of the two most common roofing materials for mobile homes.

    FeatureMetal RoofingAsphalt Shingles
    Lifespan40–70+ Years10–20 Years
    WeightLight (50–150 lbs/sq)Heavy (200–350 lbs/sq)
    Cost (Initial)Higher ($9–$14 per sq. ft.)Lower ($3–$5 per sq. ft.)
    MaintenanceVery LowModerate to High
    Energy EfficiencyHigh (Reflective)Low (Absorbs Heat)
    Resale ValueIncreases SignificantlyMinimal Impact

    Note: Costs are estimates and vary by region and material quality.

    Can You Put A Metal Roof On A Mobile Home

    How Much Does It Cost to Put a Metal Roof on a Mobile Home?

    Budgeting is a critical part of the decision-making process. While the upfront cost of metal roofing is higher than asphalt, the long-term savings often justify the investment.

    On average, installing a metal roof on a single-wide mobile home (approximately 1,000–1,200 square feet) can range from $9,000 to $14,000. For a double-wide home (1,500–2,000 square feet), expect to pay between $13,500 and $28,000.

    Several factors influence this price:

    • Material Type: Galvanized steel is more affordable, while aluminum or copper commands a premium.
    • Roof Complexity: A simple gable roof is cheaper to install than a hip roof with multiple valleys.
    • Removal of Old Roof: If the existing shingles must be torn off, add $1,000–$3,000 to the total cost.
    • Labor Rates: Prices vary significantly by location and contractor availability.

    Despite the higher initial price tag, consider the Return on Investment (ROI). A metal roof can increase your home’s resale value and eliminate the need for replacement every 15 years. Over a 30-year period, you might replace asphalt shingles twice, whereas the metal roof remains intact.

    Step-by-Step Installation Guide

    If you are hiring a professional, understanding the process helps you monitor quality. If you are a skilled DIYer, these steps outline the general procedure. Note: Always check local building codes and warranty requirements before proceeding.

    1. Inspection and Permitting: Obtain necessary permits from your local municipality. Inspect the existing roof deck for rot or damage. Replace any compromised plywood or OSB sheathing.
    2. Preparation of the Surface: Clean the existing roof thoroughly. If installing over existing shingles (check local codes first), ensure they are flat and secure. Install a high-quality synthetic underlayment to provide a secondary water barrier.
    3. Installing Drip Edge and Flashing: Attach drip edges along the eaves and rakes. Install step flashing around any chimneys, vents, or skylights. This is crucial for preventing leaks.
    4. Panel Installation: Start at the bottom edge of the roof. Align the first metal panel carefully, ensuring it overhangs the drip edge by about 1–2 inches. Secure panels using screws with rubber washers to prevent water intrusion.
    5. Seaming and Overlapping: Overlap subsequent panels according to the manufacturer’s specifications (usually 1–2 inches). Use sealant tape or butyl rubber between laps for extra waterproofing.
    6. Ridge Cap Installation: Once all field panels are in place, install the ridge cap along the peak of the roof. This covers the gap between the two sides and allows for ventilation if using a vented ridge system.
    7. Final Inspection: Check all screws for tightness. Ensure no metal shavings are left on the roof, as they can rust and stain the finish.

    For more detailed technical specifications on roofing materials, you can refer to resources like Wikipedia’s entry on Metal Roofing to understand the different alloys and coatings available.

    Frequently Asked Questions (FAQ)

    1. Do I need to remove my old shingles before installing metal?

    Not always. Many metal roofs can be installed directly over existing asphalt shingles, provided the old roof is in good condition and local building codes allow it. This saves on disposal costs and labor. However, if the old roof is uneven or damaged, removal is recommended to ensure a flat, stable surface.

    2. Will a metal roof make my mobile home hotter in the summer?

    No, quite the opposite. Metal roofs reflect solar radiation rather than absorbing it. When paired with proper attic ventilation and insulation, a metal roof can keep your home cooler than traditional shingles, reducing air conditioning loads.

    3. Is it noisy when it rains on a metal roof?

    This is a common myth. Modern metal roofing is installed over solid sheathing and underlayment, which acts as a sound buffer. Most homeowners report that the noise level is comparable to, or even quieter than, asphalt shingles during rainstorms.

    4. Can I walk on a metal roof for maintenance?

    Yes, but with caution. You should wear soft-soled shoes and walk on the lower parts of the panels where they are supported by the decking. Avoid walking on the ribs or high points, as this can dent the metal. Always use proper safety harnesses if the pitch is steep.

    5. What is the best type of metal for a mobile home?

    Galvalume (a zinc-aluminum coated steel) is highly recommended for its balance of cost, durability, and corrosion resistance. Aluminum is also excellent, especially in coastal areas prone to salt air, as it does not rust.

    Conclusion

    So, can you put a metal roof on a mobile home? Absolutely. Not only is it possible, but it is also a highly beneficial upgrade that enhances durability, energy efficiency, and property value. While the initial investment is higher than asphalt, the long-term savings and peace of mind make it a worthwhile consideration for any manufactured home owner.

    By choosing metal, you are investing in a roof that protects your home for decades, not just years. Whether you are dealing with frequent leaks or simply want to modernize your home’s appearance, metal roofing offers a robust solution tailored to the unique needs of mobile homes.

    Found this guide helpful? Share it with your friends on social media who might be considering a roof upgrade! Let’s help more mobile home owners make smarter, safer choices for their habitats.

  • Is A 2/12 Roof Pitch Ok For Metal Roof?

    Is A 2/12 Roof Pitch Ok For Metal Roof?

    Have you ever looked at your home’s sleek, modern lines and wondered if that gentle slope is strong enough to handle heavy rain or snow? Many homeowners face this exact dilemma when choosing materials, often asking themselves, is a 2/12 roof pitch ok for metal roof installations? It is a valid concern because water drainage behaves very differently on shallow slopes compared to steep ones.

    The short answer is yes, but with significant caveats. A 2/12 pitch is considered a “low slope,” and while metal is an excellent material for this application, it requires specific profiles and meticulous installation techniques to prevent leaks. In this guide, we will break down exactly how to make it work safely and effectively.

    Understanding the 2/12 Pitch Challenge

    To understand why this question is so common, we first need to define what a 2/12 pitch actually means. In roofing terminology, pitch refers to the vertical rise of the roof for every 12 inches of horizontal run. Therefore, a 2/12 pitch rises only two inches for every foot of length.

    This is a very shallow angle. On such a low slope, gravity does not help water shed off the roof as quickly as it does on steeper roofs. Instead of rushing off, water tends to move slowly. If there are any imperfections in the roofing material, seams, or fasteners, water has more time to find its way inside.

    According to general building standards, anything below a 3/12 pitch is often categorized as a low-slope roof. This classification triggers different building code requirements and manufacturer warranties. Ignoring these distinctions can lead to premature roof failure, voided warranties, and costly interior water damage.

    Can You Install Metal on a 2/12 Pitch?

    Yes, you can install metal roofing on a 2/12 pitch, but you cannot use just any type of metal panel. The profile of the metal panel is the single most important factor in determining success.

    Standing Seam vs. Corrugated Panels

    Not all metal roofs are created equal. Here is a comparison of the two most common types regarding low-slope applications:

    FeatureStanding Seam Metal RoofCorrugated/Exposed Fastener Metal
    Minimum PitchOften approved for 1/12 or 2/12Typically requires 3/12 or higher
    Leak ResistanceHigh (hidden clips, no penetrations)Lower (screw holes are potential leak points)
    CostHigher initial investmentMore affordable
    Installation ComplexityRequires specialized contractorsDIY-friendly but risky on low slopes

    For a 2/12 pitch, standing seam metal roofing is the gold standard. Because the fasteners are hidden beneath the panels and clipped to the structure, there are no thousands of screw holes penetrating the weather barrier. This significantly reduces the risk of leaks caused by thermal expansion and contraction, which is critical on low slopes where water pools slightly longer.

    If you attempt to use corrugated metal with exposed fasteners on a 2/12 pitch, you are taking a substantial risk. Most manufacturers will explicitly void their warranty for this application. The gaskets around the screws can degrade over time, and on a low slope, even a minor seal failure can allow water to wick uphill under the panel overlap.

    Is A 2 12 Roof Pitch Ok For Metal Roof

    Critical Installation Requirements for Low Slopes

    Installing metal on a 2/12 pitch is not a job for amateurs. The margin for error is virtually non-existent. To ensure longevity, you must adhere to strict installation protocols.

    1. Use a Solid Decking Surface

    Unlike steeper roofs where battens or open purlins might be used, a 2/12 metal roof typically requires solid sheathing (plywood or OSB). This provides a continuous, rigid surface that supports the metal panels evenly. Any unevenness in the deck can cause “oil canning” (visible waviness) in the metal, which can compromise the seams.

    2. Implement a Double-Layer Underlayment

    Water management is key. On a low slope, you should not rely solely on the metal panels to keep water out. Think of the underlayment as your secondary line of defense.

    • Primary Layer: Start with a high-quality synthetic underlayment or self-adhering ice and water shield.
    • Secondary Layer: For extra protection, many experts recommend a second layer of modified bitumen or a specialized low-slope underlayment system.

    This dual-layer approach ensures that if wind-driven rain manages to get past the metal seams, it hits a waterproof barrier rather than the wood decking.

    3. Seal All Seams Properly

    On standing seam roofs, the vertical legs of the panels are folded together. For a 2/12 pitch, many manufacturers require the use of sealant tape or liquid sealant within the seams. This creates a watertight bond that prevents capillary action—the phenomenon where water climbs up between two closely spaced surfaces against gravity.

    4. Manage Thermal Movement

    Metal expands and contracts with temperature changes. On a low slope, if the panels are not allowed to move freely via sliding clips, they can buckle or tear at the fastener points. Ensure your contractor uses a clip system designed for thermal movement, especially in regions with high temperature variance.

    Why Experts Recommend Standing Seam for 2/12

    The consensus among roofing professionals is clear: if you have a 2/12 pitch, invest in standing seam. But why is it so much better?

    The primary reason is the absence of penetrations. In an exposed fastener system, every screw is a potential leak. Over ten years, a typical roof might have thousands of screws. Each one relies on a rubber washer to stay sealed. These washers dry out, crack, and fail.

    In contrast, standing seam systems use clips that attach to the deck, while the panels snap or fold onto these clips. There are no screws going through the flat part of the panel where water flows. This design is inherently more watertight. Furthermore, standing seam panels often have taller legs (1.5 to 3 inches), which provides a higher barrier against water backup during heavy storms or ice damming.

    For more detailed technical definitions on roofing slopes and standards, you can refer to resources like Wikipedia’s entry on Roof Pitch, which outlines the geometric principles governing roof design.

    Common Mistakes to Avoid

    Even with the right materials, errors in execution can ruin a low-slope metal roof. Here are the most frequent pitfalls:

    • Ignoring Local Building Codes: Some municipalities have strict minimum pitch requirements for certain materials. Always check with your local building department before starting.
    • Poor Flashing Details: The roof edges, valleys, and penetrations (like chimneys or vents) are where most leaks occur. On a 2/12 pitch, flashings must be oversized and sealed meticulously.
    • Using the Wrong Screws: If you must use exposed fasteners (not recommended), use screws with EPDM washers designed for metal roofing, not standard wood screws.
    • Insufficient Overlap: Panel end laps (where one panel ends and the next begins) must be sealed with butyl tape or sealant. On low slopes, water can easily flow backward under a simple lap joint.

    FAQ Section

    Is a 2/12 pitch too flat for metal roofing?

    No, it is not too flat, provided you use the correct system. A 2/12 pitch is acceptable for standing seam metal roofs with proper sealing. However, it is generally too flat for corrugated or exposed fastener metal panels, which usually require a minimum of 3/12 or 4/12 pitch to ensure proper water shedding.

    What is the minimum pitch for a metal roof?

    The minimum pitch varies by profile. Standing seam systems can often go as low as 1/12 or 0.5/12 with special seals. Corrugated and R-panel styles typically require a minimum of 3/12. Always consult the specific manufacturer’s installation manual for the product you choose, as warranties depend on adhering to these specs.

    Will a 2/12 metal roof leak?

    It can leak if installed incorrectly. The risk of leaking is higher on a 2/12 pitch than on a steeper roof because water drains slower. However, if installed with a standing seam profile, solid decking, double underlayment, and sealed seams, it can be just as watertight as a steeper roof. Proper installation is the deciding factor.

    Do I need special permits for a 2/12 metal roof?

    Likely, yes. Because 2/12 is considered a low slope, it may fall under different building code categories than standard residential roofs. Your local building department may require engineered drawings, specific underlayment ratings, or proof that the chosen metal system is rated for such a low pitch. Always pull the necessary permits to ensure safety and insurance validity.

    How much does it cost to install metal on a 2/12 pitch?

    Expect to pay a premium compared to standard asphalt shingles. Standing seam metal roofing typically costs between $12 and $20 per square foot installed, depending on your location and the complexity of the roof. The higher cost reflects the specialized labor, higher-grade materials, and additional underlayment required for low-slope applications.

    Conclusion

    So, is a 2/12 roof pitch ok for metal roof projects? Absolutely, but only if you approach it with respect for the physics of water drainage. By choosing a standing seam profile, investing in robust underlayment, and hiring experienced professionals who understand low-slope nuances, you can enjoy the durability and aesthetic appeal of metal roofing for decades.

    Don’t cut corners on a low-slope roof. The savings from using cheaper materials or less experienced labor are rarely worth the cost of future repairs. If you found this guide helpful, please share it with friends or family who are considering a similar roofing project. Knowledge is the best tool we have for protecting our homes!

  • How To Put A Metal Roof On A Mobile Home

    How To Put A Metal Roof On A Mobile Home

    Is your mobile home’s current roof leaking, sagging, or simply showing its age? You are not alone; many homeowners face the stress of deteriorating roofs that threaten the integrity of their living space. Learning how to put a metal roof on a mobile home can seem daunting, but with the right preparation and guidance, it is a manageable project that offers long-term durability and energy efficiency. This guide will walk you through the process with empathy and clarity, ensuring you feel confident in every step.


    Why Choose Metal for Your Mobile Home?

    Before diving into the tools and nails, it is crucial to understand why metal is often the superior choice for manufactured housing. Unlike traditional asphalt shingles, which can crack under the slight flexing of a mobile home structure, metal roofing panels are lightweight yet incredibly resilient.

    According to industry data, metal roofs can last 40 to 70 years, significantly outlasting asphalt shingles which typically need replacement every 15–20 years. For mobile homes, which often have lighter structural framing, the weight reduction is also a critical safety factor. Metal roofing weighs approximately 1.5 pounds per square foot, compared to 2.5–3.5 pounds for asphalt shingles. This reduces the load on your home’s trusses, minimizing the risk of structural strain.

    Furthermore, metal reflects solar radiant heat, which can reduce cooling costs by 10–25%. For mobile home owners looking to improve energy efficiency without replacing windows or insulation, this is a significant benefit.


    Essential Tools and Materials Checklist

    Preparation is half the battle. Having everything ready before you climb the ladder ensures safety and efficiency. Do not start this project if you are missing key components.

    Tools Required:

    • Drill/Impact Driver: With screwdriver bits specifically designed for roofing screws.
    • Tin Snips or Electric Shears: For cutting metal panels to size.
    • Chalk Line: To ensure straight lines for panel alignment.
    • Measuring Tape: At least 25 feet long.
    • Safety Gear: Non-slip boots, gloves, safety glasses, and a harness if the pitch is steep.
    • Ladder: Sturdy and extended properly beyond the roof edge.

    Materials Needed:

    • Metal Panels: Corrugated or R-panel styles are common. Ensure they are rated for residential use.
    • Underlayment: Synthetic roofing underlayment is preferred over felt for better moisture protection.
    • Roofing Screws: Self-tapping screws with rubber washers (neoprene) to prevent leaks. Note: Use screws specifically labeled for metal roofing.
    • Trim and Flashing: Ridge caps, drip edges, and gable trim.
    • Sealant: High-quality polyurethane roof sealant for extra waterproofing at seams.
    How To Put A Metal Roof On A Mobile Home

    Step 1: Assessing and Preparing the Existing Roof

    You cannot install a new roof over a compromised structure. The first step in learning how to put a metal roof on a mobile home is a thorough inspection.

    Walk the roof carefully. Look for soft spots, rot, or significant water damage in the existing decking. If the underlying wood is spongy, it must be replaced. Mobile homes often use thin plywood or OSB (Oriented Strand Board); if more than 15% of the deck is damaged, consider a full tear-off. However, if the existing roof is sound, you can often install metal directly over it, saving time and disposal costs.

    Critical Check: Ensure the existing roof is clean. Remove any loose shingles, moss, or debris. A smooth surface is vital for the metal panels to lay flat. If there are protruding vents or pipes, note their locations as you will need to flash around them later.


    Step 2: Installing the Underlayment

    The underlayment acts as a secondary barrier against water infiltration. Even though metal is waterproof, condensation can form underneath, and wind-driven rain can penetrate screw holes if not properly sealed.

    1. Roll Out the Underlayment: Start at the bottom edge of the roof (the eave). Roll the synthetic underlayment horizontally across the roof.
    2. Overlap Correctly: Each subsequent row should overlap the previous one by at least 6 inches. This ensures water flows down and off the roof, not under the layers.
    3. Secure It: Use roofing nails or staples to secure the underlayment. Place fasteners every 12–18 inches along the edges and in the field. Avoid creating wrinkles; a smooth underlayment prevents bumps in your metal panels.

    For more detailed information on roofing materials and their properties, you can refer to Wikipedia’s entry on Roofing.


    Step 3: Measuring and Cutting Metal Panels

    Accuracy here prevents headaches later. Measure the length of your roof from the ridge to the eave. Add 1–2 inches to this measurement to allow for an overhang at the eave. This overhang helps direct water away from the fascia and into the gutters.

    Cutting Tips:

    • Use electric shears for long cuts to maintain the protective coating of the metal.
    • If using tin snips, cut slowly to avoid jagged edges.
    • Always wear gloves when handling cut metal, as edges are extremely sharp.
    • Clean any metal shavings immediately. Leftover shavings can rust and stain your new roof within weeks.

    Step 4: Installing the First Panel

    The first panel sets the tone for the entire roof. If it is crooked, every subsequent panel will be crooked.

    1. Start at the Corner: Begin at the bottom corner of the roof, opposite the prevailing wind direction if possible.
    2. Align Carefully: Ensure the panel overhangs the eave by the predetermined amount (usually 1–1.5 inches). Use a chalk line to mark a straight vertical line up the roof to guide your placement.
    3. Square It: Check that the panel is square with the edge of the roof. Use the Pythagorean theorem (measure diagonals) if necessary to ensure perfect alignment.

    Step 5: Fastening the Panels

    This is where many DIYers make mistakes. Over-driving or under-driving screws can lead to leaks.

    • Screw Placement: Drive screws through the flat part of the panel, not the high ribs, unless the manufacturer specifies otherwise. Screwing into the rib can cause the metal to distort.
    • Tightness: Tighten the screw until the rubber washer is compressed and just begins to bulge slightly. Do not overtighten. If the washer is squashed flat or the metal dimples deeply, you have gone too far, which compromises the seal.
    • Spacing: Typically, place screws every 12–24 inches along the purlins (roof supports). Consult your specific panel’s installation guide for exact spacing.

    Step 6: Overlapping and Subsequent Panels

    Most metal panels have a designated “overlap” side. Slide the next panel’s edge under or over the previous panel’s edge, depending on the profile design.

    • Use Sealant Tape: For added security, apply butyl tape or sealant along the overlap seam before laying the next panel. This creates a watertight bond between sheets.
    • Check Alignment: After every third panel, step back and check your lines. Adjust slightly if needed before continuing.

    Step 7: Installing Trim and Flashing

    The edges and peaks are the most vulnerable areas for leaks. Proper flashing is non-negotiable.

    • Drip Edge: Install at the eaves before the panels if not already done. If installing over existing shingles, ensure the metal panels extend over the drip edge.
    • Ridge Cap: Once all panels are installed, cover the peak with a ridge cap. Secure it with screws on both sides, ensuring it overlaps correctly with the wind direction.
    • Vents and Pipes: Use rubber boot flashings for plumbing vents. Cut the metal panel to fit around the vent, slide the boot over, and seal the base with polyurethane sealant.

    Pros and Cons of Metal Roofing on Mobile Homes

    FeatureMetal RoofingAsphalt Shingles
    Lifespan40–70 Years15–20 Years
    WeightLightweight (1.5 lbs/sq ft)Heavier (2.5–3.5 lbs/sq ft)
    CostHigher upfront costLower upfront cost
    MaintenanceLowModerate to High
    Energy EfficiencyHigh (Reflective)Low (Absorbs Heat)
    NoiseCan be noisy during rainQuiet

    Note: Noise can be mitigated with proper insulation and solid decking.


    FAQ Section

    Q1: Can I install a metal roof over my existing shingles? Yes, in most cases, you can install metal roofing over one layer of existing asphalt shingles. This saves on disposal fees and labor. However, ensure the existing roof is structurally sound and free of major leaks. Check local building codes, as some areas restrict multiple layers.

    Q2: Do I need a permit to replace my mobile home roof? Regulations vary by county and state. Most jurisdictions require a permit for roofing replacements, especially if you are changing the material type. Contact your local building department before starting. Failure to obtain a permit can affect your home insurance and resale value.

    Q3: Will a metal roof void my mobile home warranty? If your home is new, check with the manufacturer. Generally, adding a approved roofing system does not void warranties, but improper installation might. Using certified installers or following strict DIY guidelines is essential.

    Q4: How do I prevent condensation under the metal roof? Condensation occurs when warm, moist air from inside the home meets the cold metal surface. To prevent this, ensure you have adequate attic ventilation (soffit and ridge vents) and use a breathable synthetic underlayment. In colder climates, consider adding a vapor barrier.

    Q5: What is the biggest mistake people make when installing metal roofs? The most common mistake is overtightening the screws, which damages the rubber washers and leads to leaks. Another frequent error is failing to square the first panel, resulting in a misaligned roof that looks unprofessional and may leak at the edges.


    Conclusion

    Learning how to put a metal roof on a mobile home is a rewarding project that enhances your home’s value, durability, and energy efficiency. By following these steps—preparing the surface, installing quality underlayment, aligning panels precisely, and sealing flashes correctly—you can achieve a professional-grade result. Remember, patience and attention to detail are your best tools.

    If you found this guide helpful, please share it with fellow mobile home owners on social media. Your experience could help someone else protect their home from the elements! Stay safe, and enjoy your new, durable roof.

  • Metal Roof Cost for Mobile Homes: 2026 Price Guide

    Metal Roof Cost for Mobile Homes: 2026 Price Guide

    Replacing the roof on your mobile home is one of the most significant investments you can make to protect your asset. It is not just about aesthetics; it is about security, energy efficiency, and peace of mind during storm season. If you are currently researching how much is a metal roof on a mobile home, you are likely looking for a durable solution that won’t break the bank but will last for decades.

    Many mobile home owners struggle with aging asphalt shingles that crack under heat or leak during heavy rains. Metal roofing offers a superior alternative, but the upfront cost can seem daunting without a clear breakdown. In this guide, we will demystify the pricing, explain the hidden factors that affect your final bill, and help you decide if this upgrade is right for your budget.

    What Is the Average Cost of a Metal Roof on a Mobile Home?

    When asking how much is a metal roof on a mobile home, the answer varies based on size, material type, and labor rates in your area. However, we can provide a reliable national average for 2026.

    Generally, homeowners can expect to pay between $7,500 and $15,000 for a complete metal roof replacement on a standard single-wide or double-wide mobile home. This translates to approximately $9 to $14 per square foot installed.

    To give you a clearer picture, here is a breakdown by home size:

    Mobile Home SizeApproximate Square FootageEstimated Low-End CostEstimated High-End Cost
    Single-Wide (14×70)~980 sq. ft.$7,500$11,500
    Double-Wide (28×40)~1,120 sq. ft.$9,000$13,500
    Large Double-Wide~1,400+ sq. ft.$11,000$16,000+

    Note: These prices include materials and professional labor. DIY projects will significantly reduce costs but require advanced skills.

    The price fluctuation depends heavily on the type of metal chosen. Galvanized steel is the most affordable option, while aluminum and copper command higher prices due to their corrosion resistance and aesthetic appeal. For mobile homes, steel panels with a Kynar 500 finish are the industry standard because they balance durability with cost-effectiveness.

    Why Choose Metal Over Traditional Shingles?

    Before diving deeper into costs, it is crucial to understand why so many experts recommend metal for manufactured housing. Mobile homes have unique structural considerations compared to site-built houses. They are lighter, and their roof trusses may not support the heavy weight of concrete tiles or multiple layers of old shingles.

    Weight and Structural Integrity

    Metal roofing is incredibly lightweight. A typical metal panel weighs only 1 to 1.5 pounds per square foot, whereas asphalt shingles can weigh up to 3 pounds per square foot, especially when wet. This reduced load places less stress on the mobile home’s frame, reducing the risk of structural sagging over time.

    Longevity and Durability

    While asphalt shingles typically last 15–20 years, a properly installed metal roof can last 40 to 70 years. This means you might never need to replace your roof again. According to industry data, metal roofs also offer superior resistance to high winds, which is critical for mobile homes often located in open areas or storm-prone regions.

    Energy Efficiency

    One of the biggest complaints from mobile home owners is temperature regulation. Metal roofs reflect solar radiant heat, which can reduce cooling costs by 10–25%. In hot US states like Texas, Arizona, and Florida, this energy savings can partially offset the initial installation cost within a few years.

    How Much Is A Metal Roof On A Mobile Home

    Factors That Influence Your Final Quote

    Understanding how much is a metal roof on a mobile home requires looking beyond the base material price. Several variables can cause your quote to swing by thousands of dollars.

    1. Roof Complexity and Pitch

    Mobile homes usually have low-slope roofs. While this makes installation slightly easier in terms of safety, it requires specific sealing techniques to prevent water pooling. If your home has dormers, skylights, or complex angles, labor costs will increase because the installer must cut and seal more panels.

    2. Removal of Old Roofing

    Does your current roof need to be torn off? Most contractors will charge an additional $1,000 to $2,500 for removal and disposal of old shingles. Some metal roofs can be installed over existing asphalt if the structure is sound, which saves money. However, you must check local building codes and ensure there is no trapped moisture or mold underneath.

    3. Insulation Upgrades

    Since you are already investing in a new roof, it is the perfect time to upgrade insulation. Adding rigid foam board or spray foam under the metal panels can dramatically improve comfort. Expect to add $1.50 to $3.00 per square foot for high-quality insulation materials.

    4. Geographic Location

    Labor rates vary significantly across the US. Installing a roof in rural Midwest areas may cost less than in coastal cities like Seattle or Miami due to differences in union rates, insurance costs for contractors, and general cost of living.

    Step-by-Step Installation Overview

    If you are hiring a professional, knowing the process helps you verify that the job is done correctly. If you are considering a DIY approach, please note that roofing a mobile home is complex and dangerous. Here is how professionals typically handle it:

    1. Inspection and Measurement: The contractor measures the exact square footage and inspects the roof deck for rot or damage. Any soft spots must be repaired before proceeding.
    2. Preparation: If removing old shingles, the crew tears them off and hauls them away. The roof deck is cleaned thoroughly.
    3. Underlayment Installation: A synthetic underlayment or ice-and-water shield is rolled out. This layer acts as a secondary barrier against leaks. This step is critical for mobile homes.
    4. Flashing and Trim: Drip edges and valley flashing are installed. Proper flashing prevents water from seeping under the panels at the edges.
    5. Panel Installation: Metal panels are laid starting from the eave (bottom) and working up to the ridge. Screws with rubber washers are used to secure the panels. Crucial: Screws must not be over-tightened, or the washers will fail.
    6. Ridge Cap Installation: The final piece is the ridge cap, which seals the peak of the roof. Sealant is applied generously here.

    For more technical details on roofing standards, you can refer to general construction guidelines on Wikipedia.

    Pros and Cons of Metal Roofing for Mobile Homes

    To help you make an informed decision, let’s look at the trade-offs.

    Pros:

    • Long Lifespan: Lasts 2–3 times longer than shingles.
    • Low Maintenance: Requires occasional cleaning but no frequent repairs.
    • Fire Resistant: Metal is non-combustible, potentially lowering insurance premiums.
    • Eco-Friendly: Most metal roofs contain recycled material and are 100% recyclable at the end of their life.

    Cons:

    • Higher Upfront Cost: Initial investment is significantly higher than asphalt.
    • Noise: Rain and hail can be louder without proper insulation.
    • Expansion/Contraction: Metal expands and contracts with temperature changes, requiring specialized fasteners to avoid loosening over time.

    Frequently Asked Questions (FAQ)

    1. Can I install a metal roof over my existing shingles?

    Yes, in many cases, you can install metal over one layer of existing asphalt shingles. This saves on disposal fees and labor. However, you must ensure the roof deck is structurally sound and that local building codes permit it. Never install metal over two or more layers of shingles.

    2. Does a metal roof void my mobile home warranty?

    Generally, no. In fact, many manufacturers view metal roofing as an upgrade. However, you should always check with your specific home manufacturer or warranty provider. Ensure the installer uses non-penetrating clips where possible to avoid damaging the original structure.

    3. How long does the installation take?

    For a standard single-wide or double-wide mobile home, a professional crew can typically complete the installation in 1 to 3 days. Weather conditions and the complexity of the roof will affect this timeline.

    4. Will a metal roof increase my home’s resale value?

    Absolutely. A new metal roof is a major selling point. It signals to buyers that the home has been well-maintained and that they will not face immediate roofing expenses. Appraisers often recognize the added value of durable, energy-efficient materials.

    5. What is the best type of metal for a mobile home?

    Galvalume steel or aluminum are the top choices. Steel is stronger and cheaper, while aluminum is lighter and naturally rust-resistant, making it ideal for coastal areas. Avoid copper unless budget is no object, as it is excessively expensive for mobile home applications.

    Conclusion

    So, how much is a metal roof on a mobile home? While the initial price tag of $7,500 to $15,000 may seem steep, it is an investment in longevity, safety, and energy efficiency. When you consider that you may never need to replace your roof again, the cost-per-year value is unbeatable compared to traditional shingles.

    By choosing metal, you are protecting your home from the elements while potentially lowering your monthly energy bills. It transforms a vulnerable part of your home into its strongest asset.

    If you found this guide helpful, please share it with other mobile home owners on Facebook or Twitter who might be struggling with their roofing decisions. Have questions or experiences to share? Leave a comment below!