Tag: Flat Roof Maintenance

  • Why Gravel on Flat Roofs? Key Benefits Explained

    Why Gravel on Flat Roofs? Key Benefits Explained

    Have you ever looked at a commercial building or an older home and wondered why its flat roof is covered in small stones? It might look like a simple landscaping choice, but there is serious engineering behind it. If you are a property owner or manager trying to understand what is the purpose of gravel on a flat roof, you are asking the right question. This layer of stone is not just decorative; it is a critical component that protects your investment from harsh weather and costly repairs.

    In this guide, we will break down exactly why gravel is used, how it works, and whether it is the right choice for your property. We will move beyond the basics to provide you with actionable insights backed by industry standards.

    The Primary Function: Protection Against UV Rays

    The most significant threat to any flat roofing system is not rain, but the sun. Ultraviolet (UV) radiation is relentless. Over time, UV rays break down the chemical bonds in roofing materials, particularly asphalt-based membranes. This process, known as photodegradation, causes the roof to become brittle, crack, and eventually fail.

    Gravel acts as a physical shield. By covering the sensitive bitumen or tar layer, the stones absorb and reflect UV radiation before it can penetrate the waterproof membrane. According to industry data, a properly installed gravel layer can extend the lifespan of a built-up roof (BUR) by 10 to 15 years compared to an exposed membrane.

    Think of it like sunscreen for your house. Without it, the “skin” of your roof burns and ages prematurely. With it, the underlying structure remains cool and intact. This is why what is the purpose of gravel on a flat roof often starts with the answer: UV protection.

    Ballast: Keeping the Roof in Place

    Flat roofs are susceptible to wind uplift. When high winds sweep across a flat surface, they create pressure differences that can try to lift the roofing material off the deck. This is especially true for single-ply membranes or loose-laid systems.

    Gravel serves as ballast. The weight of the stones holds the roofing layers firmly against the structural deck. This mechanical anchoring is crucial in areas prone to storms or high winds.

    • Wind Resistance: A standard layer of gravel can withstand wind speeds of up to 90–120 mph, depending on the size and density of the stone.
    • Stability: It prevents shifting and wrinkling of the membrane, which can lead to tears over time.

    For buildings in coastal regions or open plains, this ballasting effect is not optional—it is a necessity for structural integrity.

    Fire Resistance and Safety Standards

    Safety is a non-negotiable aspect of commercial construction. Asphalt and tar are combustible materials. If left exposed, they can contribute to the spread of fire, especially from external sources like nearby wildfires or sparks from adjacent buildings.

    Gravel is naturally fire-resistant. Most roofing gravel consists of crushed stone, such as granite or limestone, which does not burn. By covering the combustible bitumen, the gravel layer creates a fire barrier. This helps buildings meet strict fire codes, such as those set by the National Fire Protection Association (NFPA).

    In many jurisdictions, a gravel-surfaced roof can achieve a Class A fire rating, the highest level of fire resistance. This can also lead to lower insurance premiums for property owners, adding a financial benefit to the safety feature.

    Drainage and Water Management

    While flat roofs are not perfectly flat—they have a slight pitch for drainage—water pooling is still a common issue. Standing water adds immense weight and accelerates wear.

    Gravel improves drainage in two ways:

    1. Surface Texture: The irregular shape of the stones creates tiny channels that allow water to flow more freely toward drains and scuppers.
    2. Preventing Debris Clogs: While gravel can trap some debris, it also prevents larger leaves and branches from sticking directly to the sticky membrane. This makes it easier for wind to blow lighter debris off the roof or for maintenance crews to clean it.

    However, it is important to note that gravel must be installed correctly. If the layer is too thick or uneven, it can actually hinder drainage. Proper installation ensures that water moves efficiently off the roof surface.

    Gravel vs. Other Surfacing Options

    Is gravel the only option? No. Let’s compare it to other common flat roof surfacing methods to see where it stands.

    FeatureGravel SurfaceWhite Coating (Elastomeric)Green Roof
    UV ProtectionExcellent (Physical block)Good (Reflective)Excellent (Vegetation)
    WeightHeavy (Requires strong structure)LightVery Heavy (Soil + Plants)
    MaintenanceLow (Occasional cleaning)Medium (Re-coating every 5-10 yrs)High (Gardening/ Irrigation)
    CostModerateLow to ModerateHigh
    Lifespan20–30 Years10–20 Years20+ Years

    As shown in the table, gravel offers a robust, low-maintenance solution with a long lifespan. However, its weight is a consideration. Not all building structures can support the additional load of several tons of stone. Always consult a structural engineer before adding gravel to an existing roof.
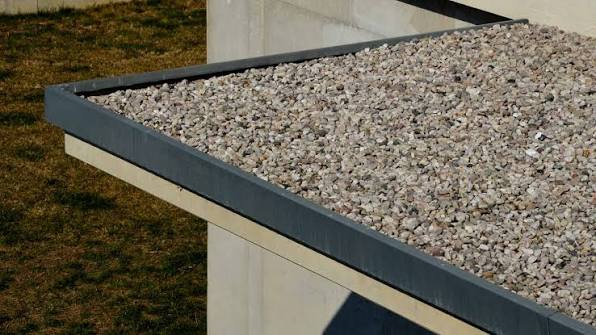
    What Is The Purpose Of Gravel On A Flat Roof

    How Gravel Is Installed: A Step-by-Step Overview

    Understanding the installation process helps clarify why professional application is vital. Here is a simplified overview of how gravel is applied to a built-up roof:

    1. Base Layer Preparation: The roof deck is cleaned and inspected for damage. Any existing leaks are repaired.
    2. Bitumen Application: A hot layer of asphalt or coal tar bitumen is mopped onto the roof. This acts as the adhesive.
    3. Ply Sheets: Multiple layers of roofing felt (ply sheets) are embedded into the hot bitumen. This creates the waterproof membrane.
    4. Flood Coat: A final, thick layer of hot bitumen is applied over the top ply. This is called the flood coat.
    5. Gravel Embedment: While the flood coat is still hot and liquid, gravel is evenly spread across the surface. The stones sink slightly into the bitumen, locking them in place.
    6. Cooling and Setting: The roof is allowed to cool. The bitumen hardens, permanently bonding the gravel to the roof.

    This process requires specialized equipment and skilled labor. DIY attempts are highly discouraged due to the dangers of handling hot bitumen and the precision required for even distribution.

    Common Misconceptions About Roofing Gravel

    Many people believe that gravel damages the roof or causes leaks. Let’s debunk these myths.

    • Myth: Gravel punctures the membrane.
      • Fact: When installed correctly, the gravel is embedded in the bitumen, not resting loosely on top. The rounded edges of river rock or crushed stone are designed to minimize puncture risk.
    • Myth: Gravel makes leaks harder to find.
      • Fact: While it can obscure the exact leak source, experienced roofers use moisture meters and thermal imaging to locate issues without removing large sections of gravel.
    • Myth: All gravel is the same.
      • Fact: Roofing gravel is specifically sized (usually 3/8 to 3/4 inch) and washed to remove dust. Using construction gravel can clog drains and fail to adhere properly.

    For more detailed information on roofing materials and standards, you can refer to Wikipedia’s article on Built-up Roofing, which provides a comprehensive historical and technical overview.

    FAQ Section

    1. Can I remove the gravel from my flat roof?

    Removing gravel is possible but not recommended. It exposes the underlying bitumen to UV rays, which will cause rapid deterioration. If you want to change the surface, it is better to install a new membrane over the existing one or consult a professional for a complete replacement.

    2. How much does gravel weigh on a roof?

    A standard layer of gravel weighs approximately 10–15 pounds per square foot. For a 1,000-square-foot roof, this adds 10,000–15,000 pounds of weight. Ensure your building’s structure can handle this load.

    3. Does gravel help with insulation?

    Gravel itself has minimal insulating value (R-value). Its primary role is protection, not thermal insulation. However, by keeping the roof cooler in summer, it can indirectly reduce cooling costs. For true insulation, rigid foam boards are installed beneath the membrane.

    4. How often should I clean the gravel on my roof?

    Inspect and clean your gravel roof at least twice a year, ideally in spring and fall. Remove debris, leaves, and any standing water. Check for areas where gravel has washed away and replenish it to maintain uniform coverage.

    5. What type of gravel is best for flat roofs?

    Crushed stone or river rock is commonly used. The stones should be clean, dry, and uniformly sized. Avoid using gravel with sharp edges or excessive dust, as these can compromise the adhesion and drainage.

    6. Is a gravel roof better than a white coated roof?

    It depends on your priorities. Gravel offers superior durability and fire resistance. White coatings offer better energy efficiency by reflecting heat. Consider your climate, budget, and structural capacity when choosing between the two.

    Conclusion

    So, what is the purpose of gravel on a flat roof? It is a multifaceted solution that provides UV protection, wind ballast, fire resistance, and improved drainage. While it may seem like an old-fashioned technique, it remains one of the most reliable and cost-effective methods for protecting flat roofing systems.

    By understanding the benefits and maintenance requirements, you can make informed decisions about your property’s roofing needs. Whether you are managing a commercial complex or a residential building, gravel offers a durable shield against the elements.

    If you found this guide helpful, please share it with your network on social media. Helping others understand their roofing systems can save them from costly repairs and extend the life of their buildings. Stay informed, stay protected, and keep your roof in top shape!
  • Which Roof Slope Qualifies As Low Slope?

    Which Roof Slope Qualifies As Low Slope?

    Have you ever stood in a hardware store or spoken with a contractor, feeling completely lost when they started talking about “pitch” and “rise over run”? You are not alone. Many homeowners and property managers struggle to distinguish between different roof types, leading to costly mistakes in material selection and maintenance. Understanding which of the following roof slope qualifies as low slope is the first step toward protecting your investment and ensuring your building remains watertight for decades.

    In this guide, we will break down the technical definitions into plain English, helping you make informed decisions for your home or business.

    What Exactly Is a Low-Slope Roof?

    To answer the question directly: In the construction and roofing industry, a low-slope roof is generally defined as any roof with a pitch of 3:12 or less.

    This means that for every 12 horizontal inches (the run), the roof rises vertically no more than 3 inches (the rise). However, the definition can vary slightly depending on the context—whether you are talking about residential building codes, commercial standards, or specific manufacturer warranties.

    The “Flat” Roof Misconception

    It is crucial to note that very few roofs are truly “flat.” Even roofs that appear flat to the naked eye have a slight pitch to allow water to drain toward scuppers or gutters. If a roof were perfectly level, water would pool, leading to structural damage and leaks. Therefore, when professionals discuss low-slope roofing, they are usually referring to roofs that rely on specialized membrane systems rather than traditional shingles.

    How Is Roof Slope Measured and Classified?

    Understanding the measurement system is key to identifying your roof type. Roof slope is expressed as a ratio of vertical rise to horizontal run.

    The Standard Ratio System

    The most common way to express this in the United States is using the “X:12” format. Here is how the classifications typically break down:

    • Flat/Low Slope: 0:12 to 3:12
    • Conventional Slope: 4:12 to 9:12
    • Steep Slope: 10:12 and above

    For a roof to qualify as low slope, it must fall within that bottom tier. If you are looking at a blueprint or listening to a roofer, a 2:12 pitch is a classic example of a low-slope roof. It has enough angle to shed water slowly but not enough to support standard asphalt shingles effectively.

    Why Does This Classification Matter?

    The slope determines gravity’s ability to move water off the surface. On a steep roof, gravity does most of the work. On a low-slope roof, water moves slowly, increasing the risk of backup under shingles or through seams. This is why the materials used for low-slope roofs are fundamentally different from those used on steep roofs.

    Which Materials Are Best for Low-Slope Roofs?

    Once you have confirmed which of the following roof slope qualifies as low slope, the next critical decision is material selection. You cannot simply slap standard three-tab asphalt shingles on a 2:12 roof; it will leak, and your warranty will be void.

    Here are the top-tier materials designed specifically for low-slope applications:

    Material TypeBest ForLifespanKey Benefit
    EPDM (Rubber)Residential & Commercial20–30 YearsExcellent durability and weather resistance.
    TPO (Thermoplastic)Commercial Buildings20–25 YearsReflects UV rays, improving energy efficiency.
    PVC (Vinyl)Chemical Exposure Areas20+ YearsResistant to oils, fats, and chemicals.
    Modified BitumenHigh Traffic Areas15–20 YearsTough, layered protection similar to rolled asphalt.
    Built-Up Roofing (BUR)Historic/Traditional15–20 YearsMultiple layers of tar and gravel provide mass.

    Expert Insight

    According to industry standards, single-ply membranes like TPO and EPDM have become the gold standard for low-slope roofing in the last two decades. They offer seamless installation options (via heat welding or adhesive) that significantly reduce the number of potential leak points compared to older methods.

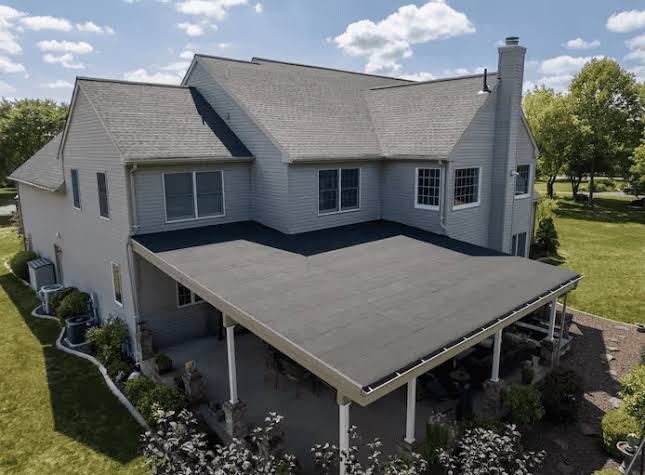
    Which Of The Following Roof Slope Qualifies As Low Slope

    What Are the Common Problems with Low-Slope Roofs?

    While low-slope roofs are cost-effective and easier to install on large commercial buildings, they come with unique challenges. Being aware of these issues helps in proactive maintenance.

    1. Water Pooling (Ponding)

    This is the number one enemy of low-slope roofs. If the drainage system is clogged or the roof deck settles unevenly, water can sit in puddles. Over time, this standing water can degrade the roofing membrane, promote algae growth, and add excessive weight to the structure.

    2. Debris Accumulation

    Because the wind doesn’t sweep debris off a low-slope roof as easily as it does a steep roof, leaves, branches, and dirt tend to accumulate. This debris can block drains and retain moisture against the roof surface.

    3. Membrane Shrinkage

    Some older rubber-based materials can shrink over time, pulling away from flashings and edges. This creates gaps where water can enter the building envelope. Regular inspections are vital to catch this early.

    How Do Building Codes Define Low Slope?

    Building codes can vary by municipality, but most in the US follow guidelines set by the International Building Code (IBC) or reference standards from organizations like ASTM.

    Generally, the IBC considers any roof with a slope less than 2:12 to require specific waterproofing measures distinct from standard shingle roofing. However, many manufacturers will not warrant their shingle products unless the pitch is at least 4:12.

    For a deeper understanding of historical roofing standards and material evolution, you can refer to general construction principles outlined on Wikipedia’s Roofing page. This external resource provides a broad overview of how roofing technologies have evolved to meet different slope requirements.

    Step-by-Step: How to Determine Your Roof’s Slope

    If you are unsure whether your roof qualifies as low slope, you can measure it yourself safely from the ground or inside an attic. Do not climb onto a roof unless you are trained and equipped with proper safety gear.

    1. Gather Tools: You will need a level (at least 12 inches long), a tape measure, and a pencil.
    2. Access the Attic: Go into your attic and locate a rafter or the underside of the roof deck.
    3. Place the Level: Hold the level horizontally against the rafter. Ensure the bubble is centered, indicating it is perfectly level.
    4. Measure the Rise: At the 12-inch mark on your level, use the tape measure to determine the vertical distance from the bottom of the level to the underside of the rafter.
    5. Calculate the Ratio: If the vertical distance is 3 inches or less, you have a low-slope roof. For example, if it measures 2 inches, your pitch is 2:12.

    FAQ Section

    Q: Can I put asphalt shingles on a low-slope roof?

    A: Generally, no. Most asphalt shingle manufacturers require a minimum pitch of 4:12. Installing them on a lower slope can lead to water infiltration beneath the shingles. If you must use shingles on a low slope, special underlayment and sealing techniques are required, but a membrane system is always recommended.

    Q: Is a 3:12 roof considered flat or low slope?

    A: A 3:12 roof is considered low slope, not flat. While it is on the border, it still has enough pitch to shed water relatively well. However, it is still too low for standard shingle installation without specific precautions.

    Q: How often should I inspect a low-slope roof?

    A: You should inspect a low-slope roof at least twice a year—once in the spring and once in the fall. Additionally, check it after any major storm. Look for ponding water, debris buildup, and signs of membrane tearing.

    Q: What is the cheapest option for a low-slope roof?

    A: Modified bitumen or basic EPDM rubber roofing tends to be the most cost-effective initial investment. However, consider the lifecycle cost; TPO might cost slightly more upfront but offers better energy savings due to its reflective white surface.

    Q: Does snow slide off low-slope roofs?

    A: No, snow tends to accumulate on low-slope roofs. This adds significant weight load to the structure. If you live in a heavy snowfall area, ensure your roof structure is engineered to handle the extra load, and consider installing heating cables to prevent ice dams at the edges.

    Conclusion

    Determining which of the following roof slope qualifies as low slope is more than just a trivia question; it is a fundamental aspect of building maintenance and safety. Remember, if your roof has a pitch of 3:12 or less, it falls into the low-slope category. This classification dictates that you must use specialized waterproofing membranes like EPDM, TPO, or PVC rather than traditional shingles.

    By understanding your roof’s slope, you can choose the right materials, anticipate maintenance needs, and avoid costly leaks. Don’t let water pooling or debris buildup compromise your property. Take action today by scheduling a professional inspection if you suspect your roof is low-slope.

    Found this guide helpful? Share it with your friends on social media or send it to your property manager to ensure everyone is on the same page about roof health!